Doll
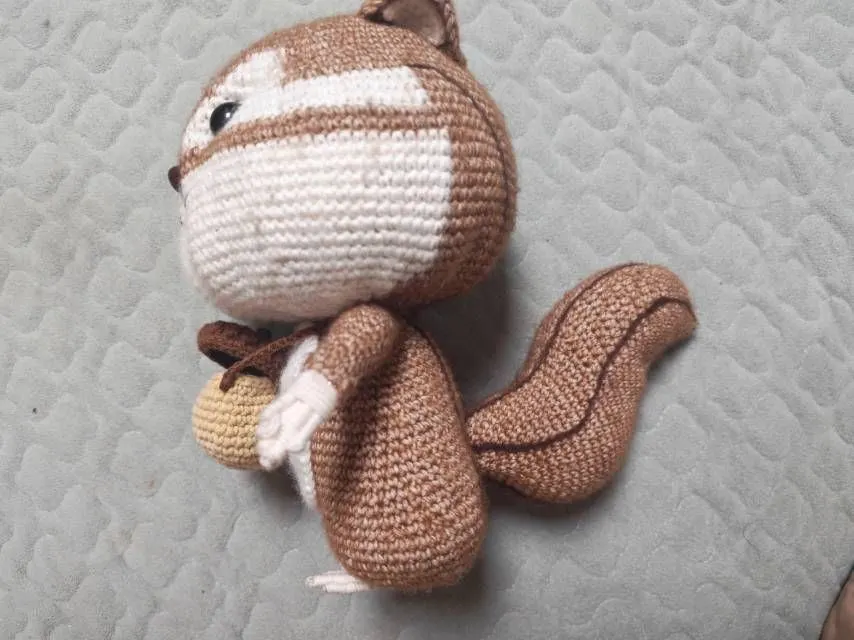
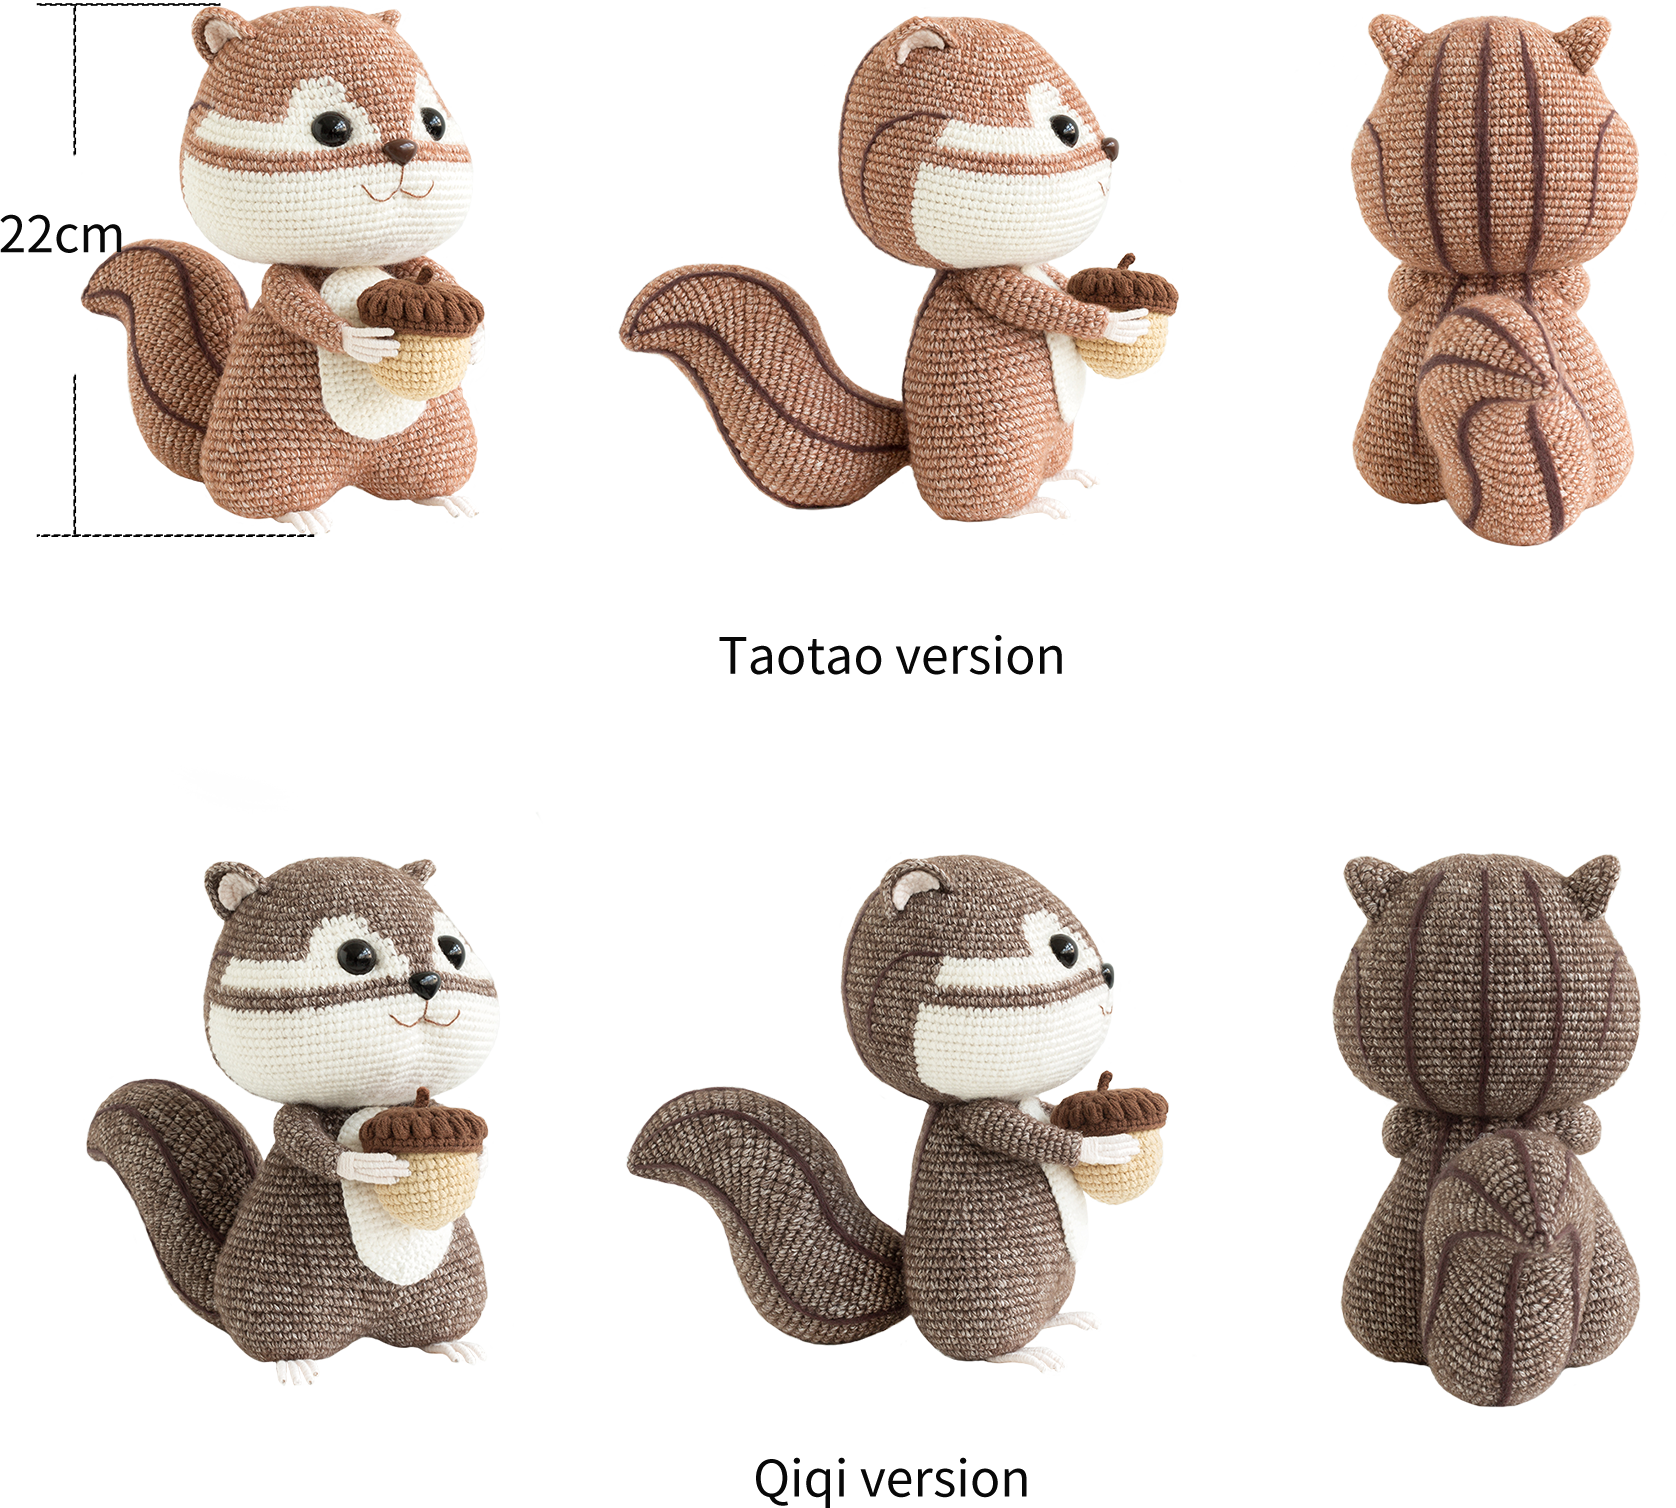
Chipmunk Toy
Project preview
See the finished project
Pattern format
Instructions
Watch and follow
Video tutorial
This toy consists of three parts: the main body, the facial features, and the decorations. First, complete the main body. Then, make the remaining parts.
Note: When crocheting in rounds, unless otherwise specified, when starting with a single crochet, chain 1 as the turning chain. At the end, join with a slip stitch and pull tight. The turning chain for the single crochet and the slip stitch join do not count as a stitch.
ABBREVIATIONS
MRadjustable magic ring
RRound
HRow
Dao2start in 2nd CH from the hook
turnturn the piece
CHchain
Xsingle crochet
V = sc2-in-12 single crochets into the same stitch
Thalf double crochet
Sslip stitch
A = sc2togsingle crochet 2 stitches together
M = sc3togsingle crochet 3 stitches together
FV = dc2-in-12 double crochets into the same stitch
TA = hdc2toghalf double crochet 2 stitches together
W = sc3-in-13 single crochets into the same stitch
[...]in the same stitch
Kskip
The handcrafted measurements may have an error of 1 to 2 cm. Due to variations in individual tension, the size of the sample is for reference only.
Materials: Susan's FamilyImpression Misty Feather
4-Ply Combed Cotton & Acrylic Fibre Hand Knitting Yarn
Hook: 2.00mm / 5#crochet hook

Chart Key

Note:
1. This pattern is making in Chinese crochet pattern terms, and the stitch name is written using American terminology. All measurements in charts are in cm.
2. Working in joined round
When crocheting in rounds without further guidance, working in closed rounds, start each round with a set number of beginning chains and close with a slip stitch. The beginning chain preceding a single crochet and the slip stitch used for joining rounds are not included in the total stitches.
Part 1 Main bodyA
The main body includes the hands, legs, body, tail, and head.
Step 1 HandsA1 00' 48'' (Part 1)
The method for making both hands is the same. Start by crocheting the arms. After completing them, use shaping wire to form the hands. The arms are all started with a chain ring. Crochet in rounds counterclockwise from the foundation chain. Please refer to the video demonstrations for more details.
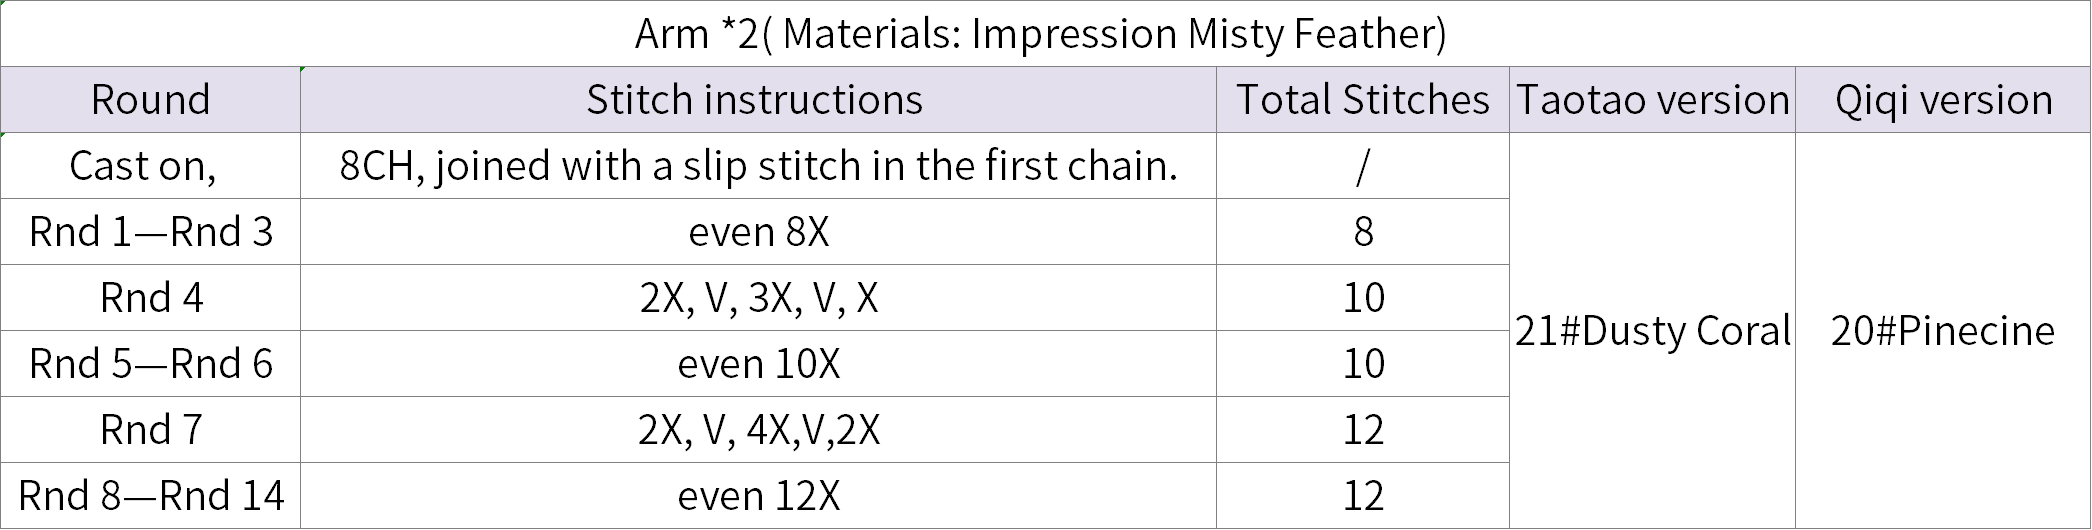
Note: 4 shaping wires for each hand. 2 shaping wires with 20cm long, and 2 shaping wires with 10cm long. Using 07#Sheer Pink of 4-Ply Combed Cotton to wrap.
Step 2 LegsA2 16' 29'' (Part 1)
Started by crocheting the legs, then make the feet. Both legs start with a chain ring. Crochet in rounds counterclockwise from the chain ring. After completing one leg, fasten off the yarn. Don’t cut the yarn for the other leg. Then connect the two legs. Please refer to the video demonstrations for more details.
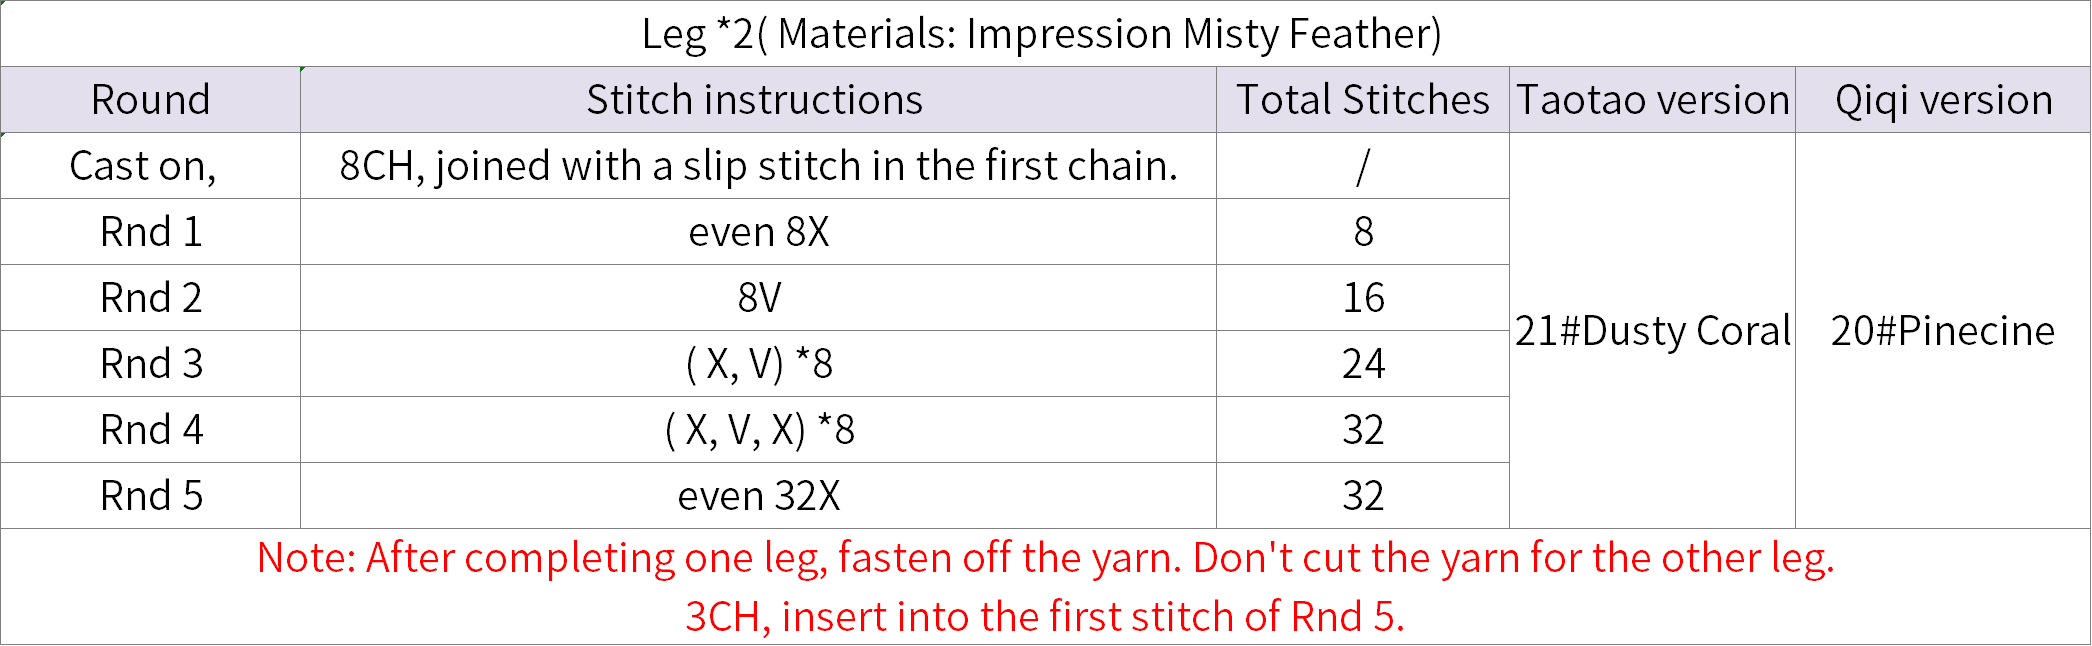
Note: 4 shaping wires for each foot. 2 shaping wires with 13cm long, and 2 shaping wires with 25cm long. Using 07#Sheer Pink of 4-Ply Combed Cotton to wrap.
Step 3 BodyA3 22' 39'' (Part 1)
Continue crocheting upwards from the two legs. During the process, you need to add stuffing. And connect the two arms. Please refer to the video demonstrations for more details.
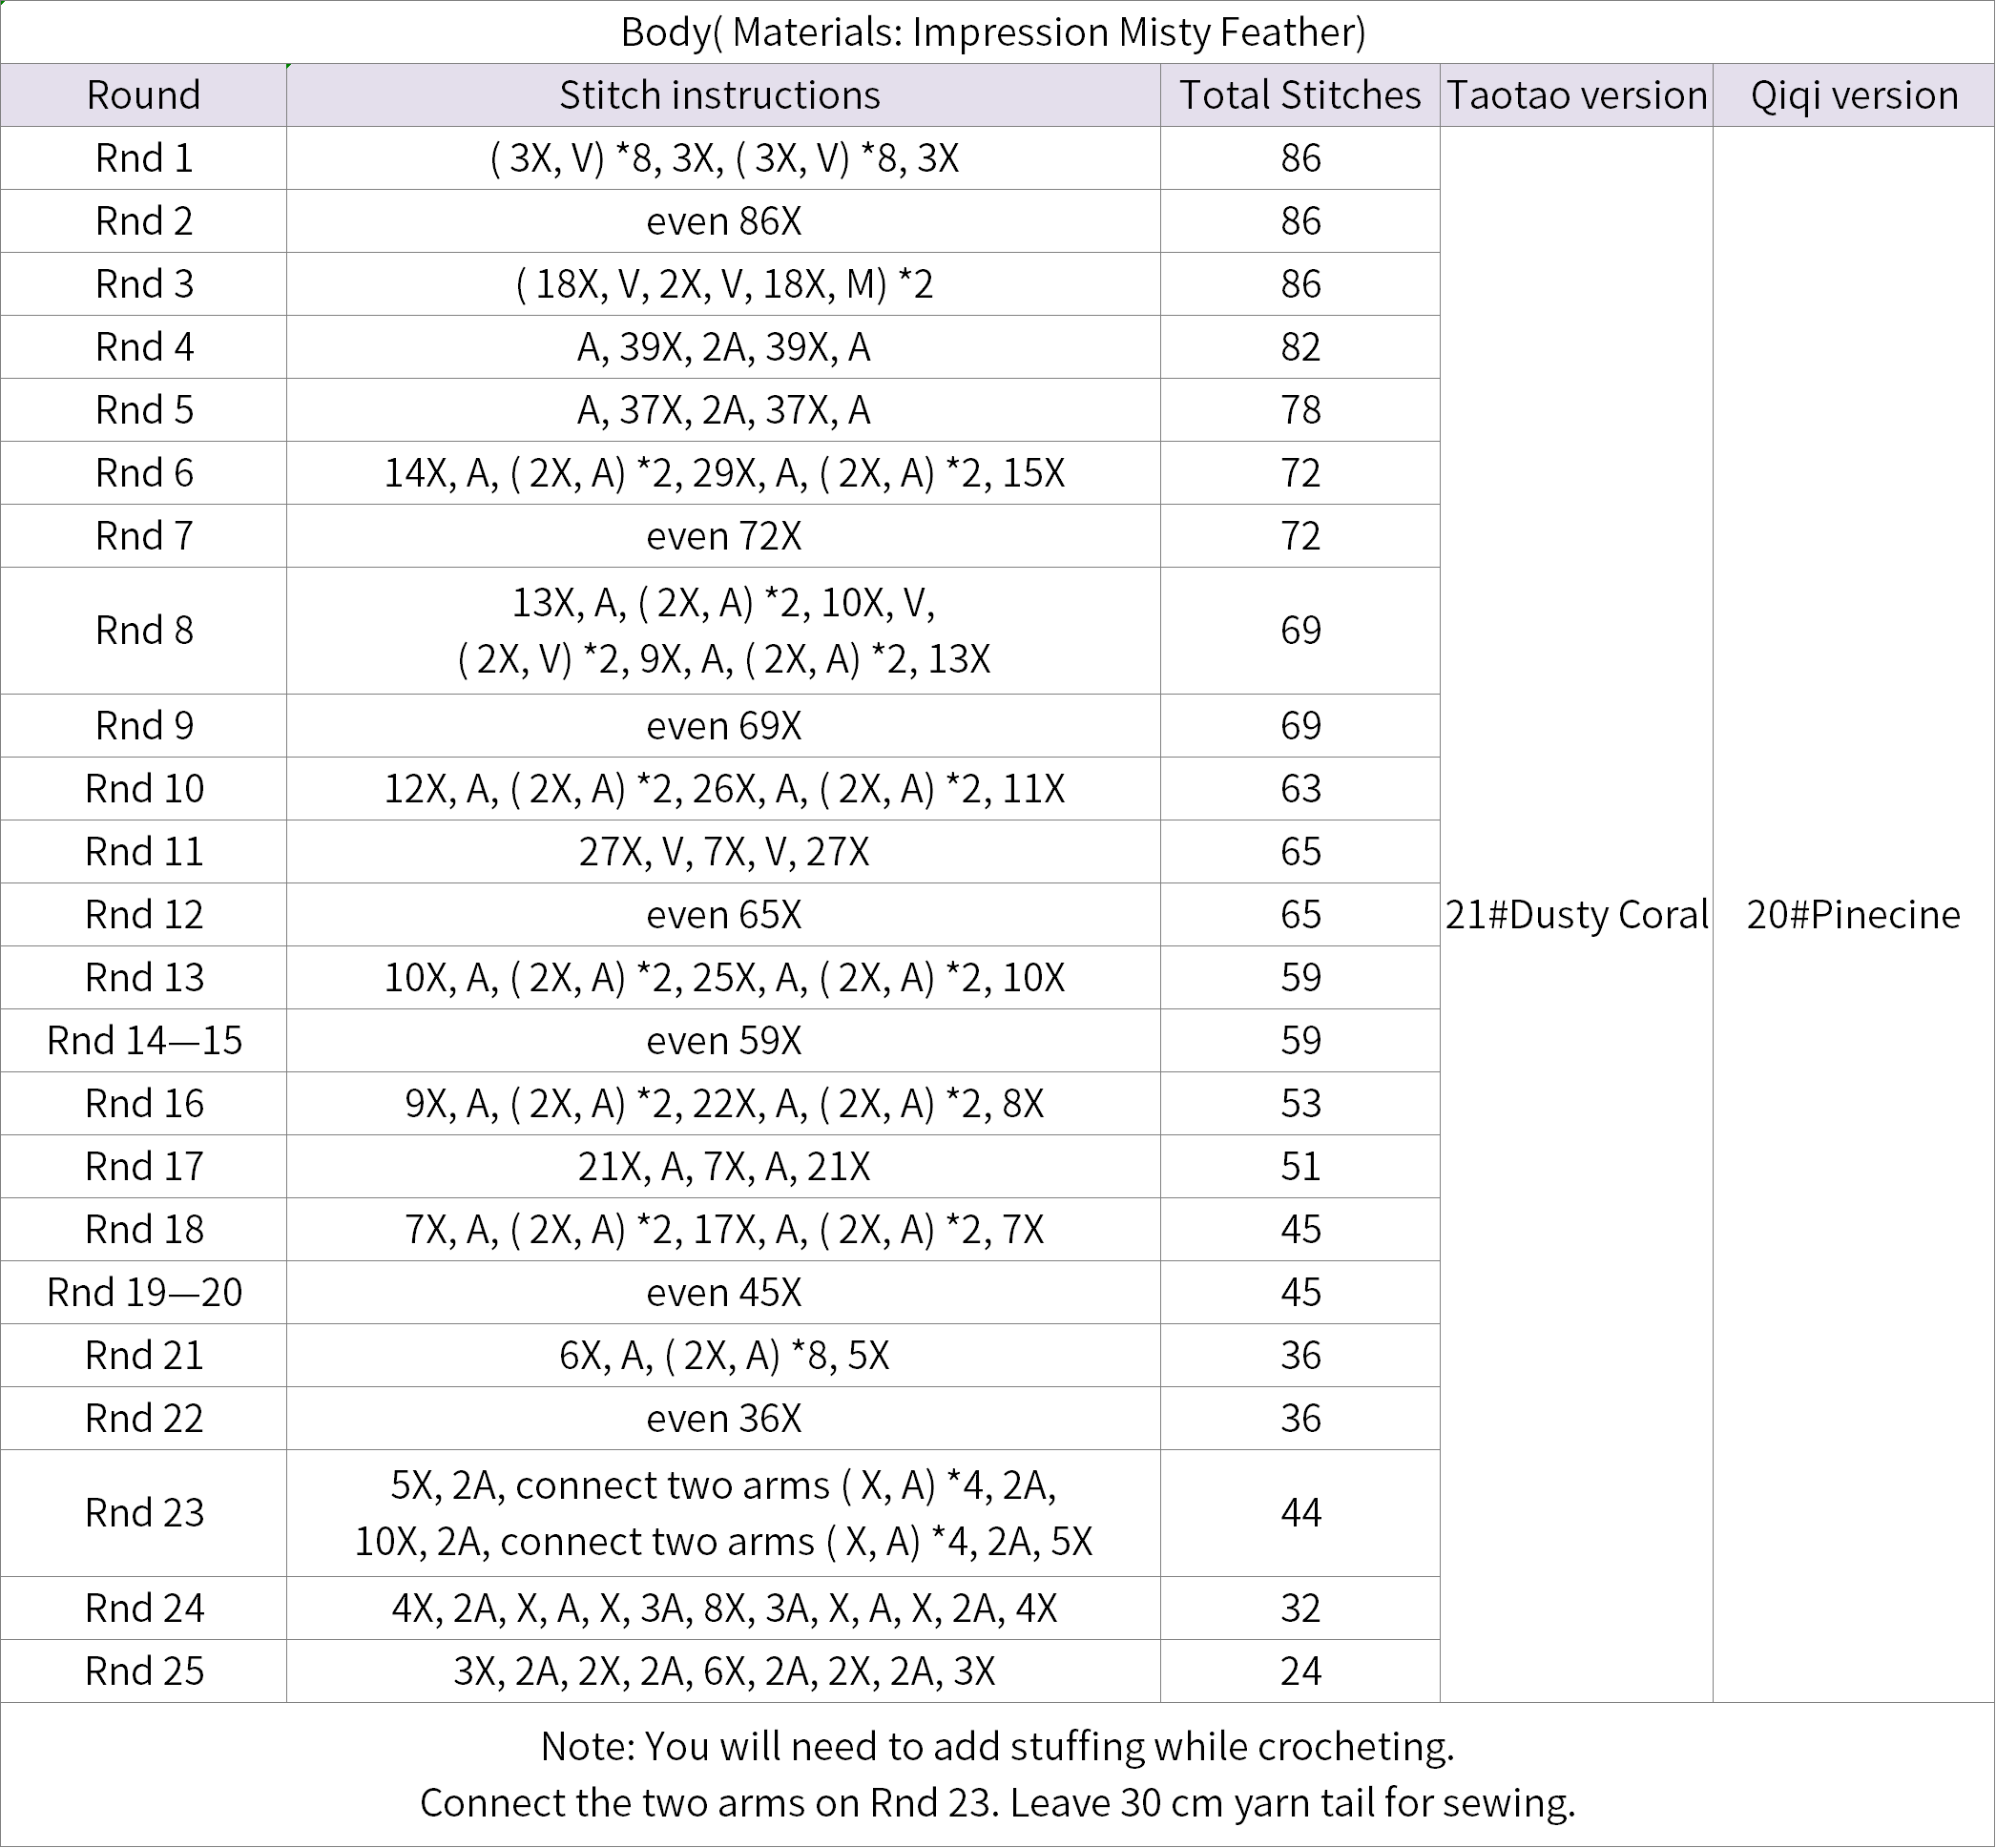
Step 4 TailA4 36' 14'' (Part 1)
The tail starts with a magic ring. Crochet in rounds counterclockwise from the ring. During the process, add some stuffing and a shaping wire. Once completed, attach it to the back of the body. Please refer to the video demonstrations for more details.
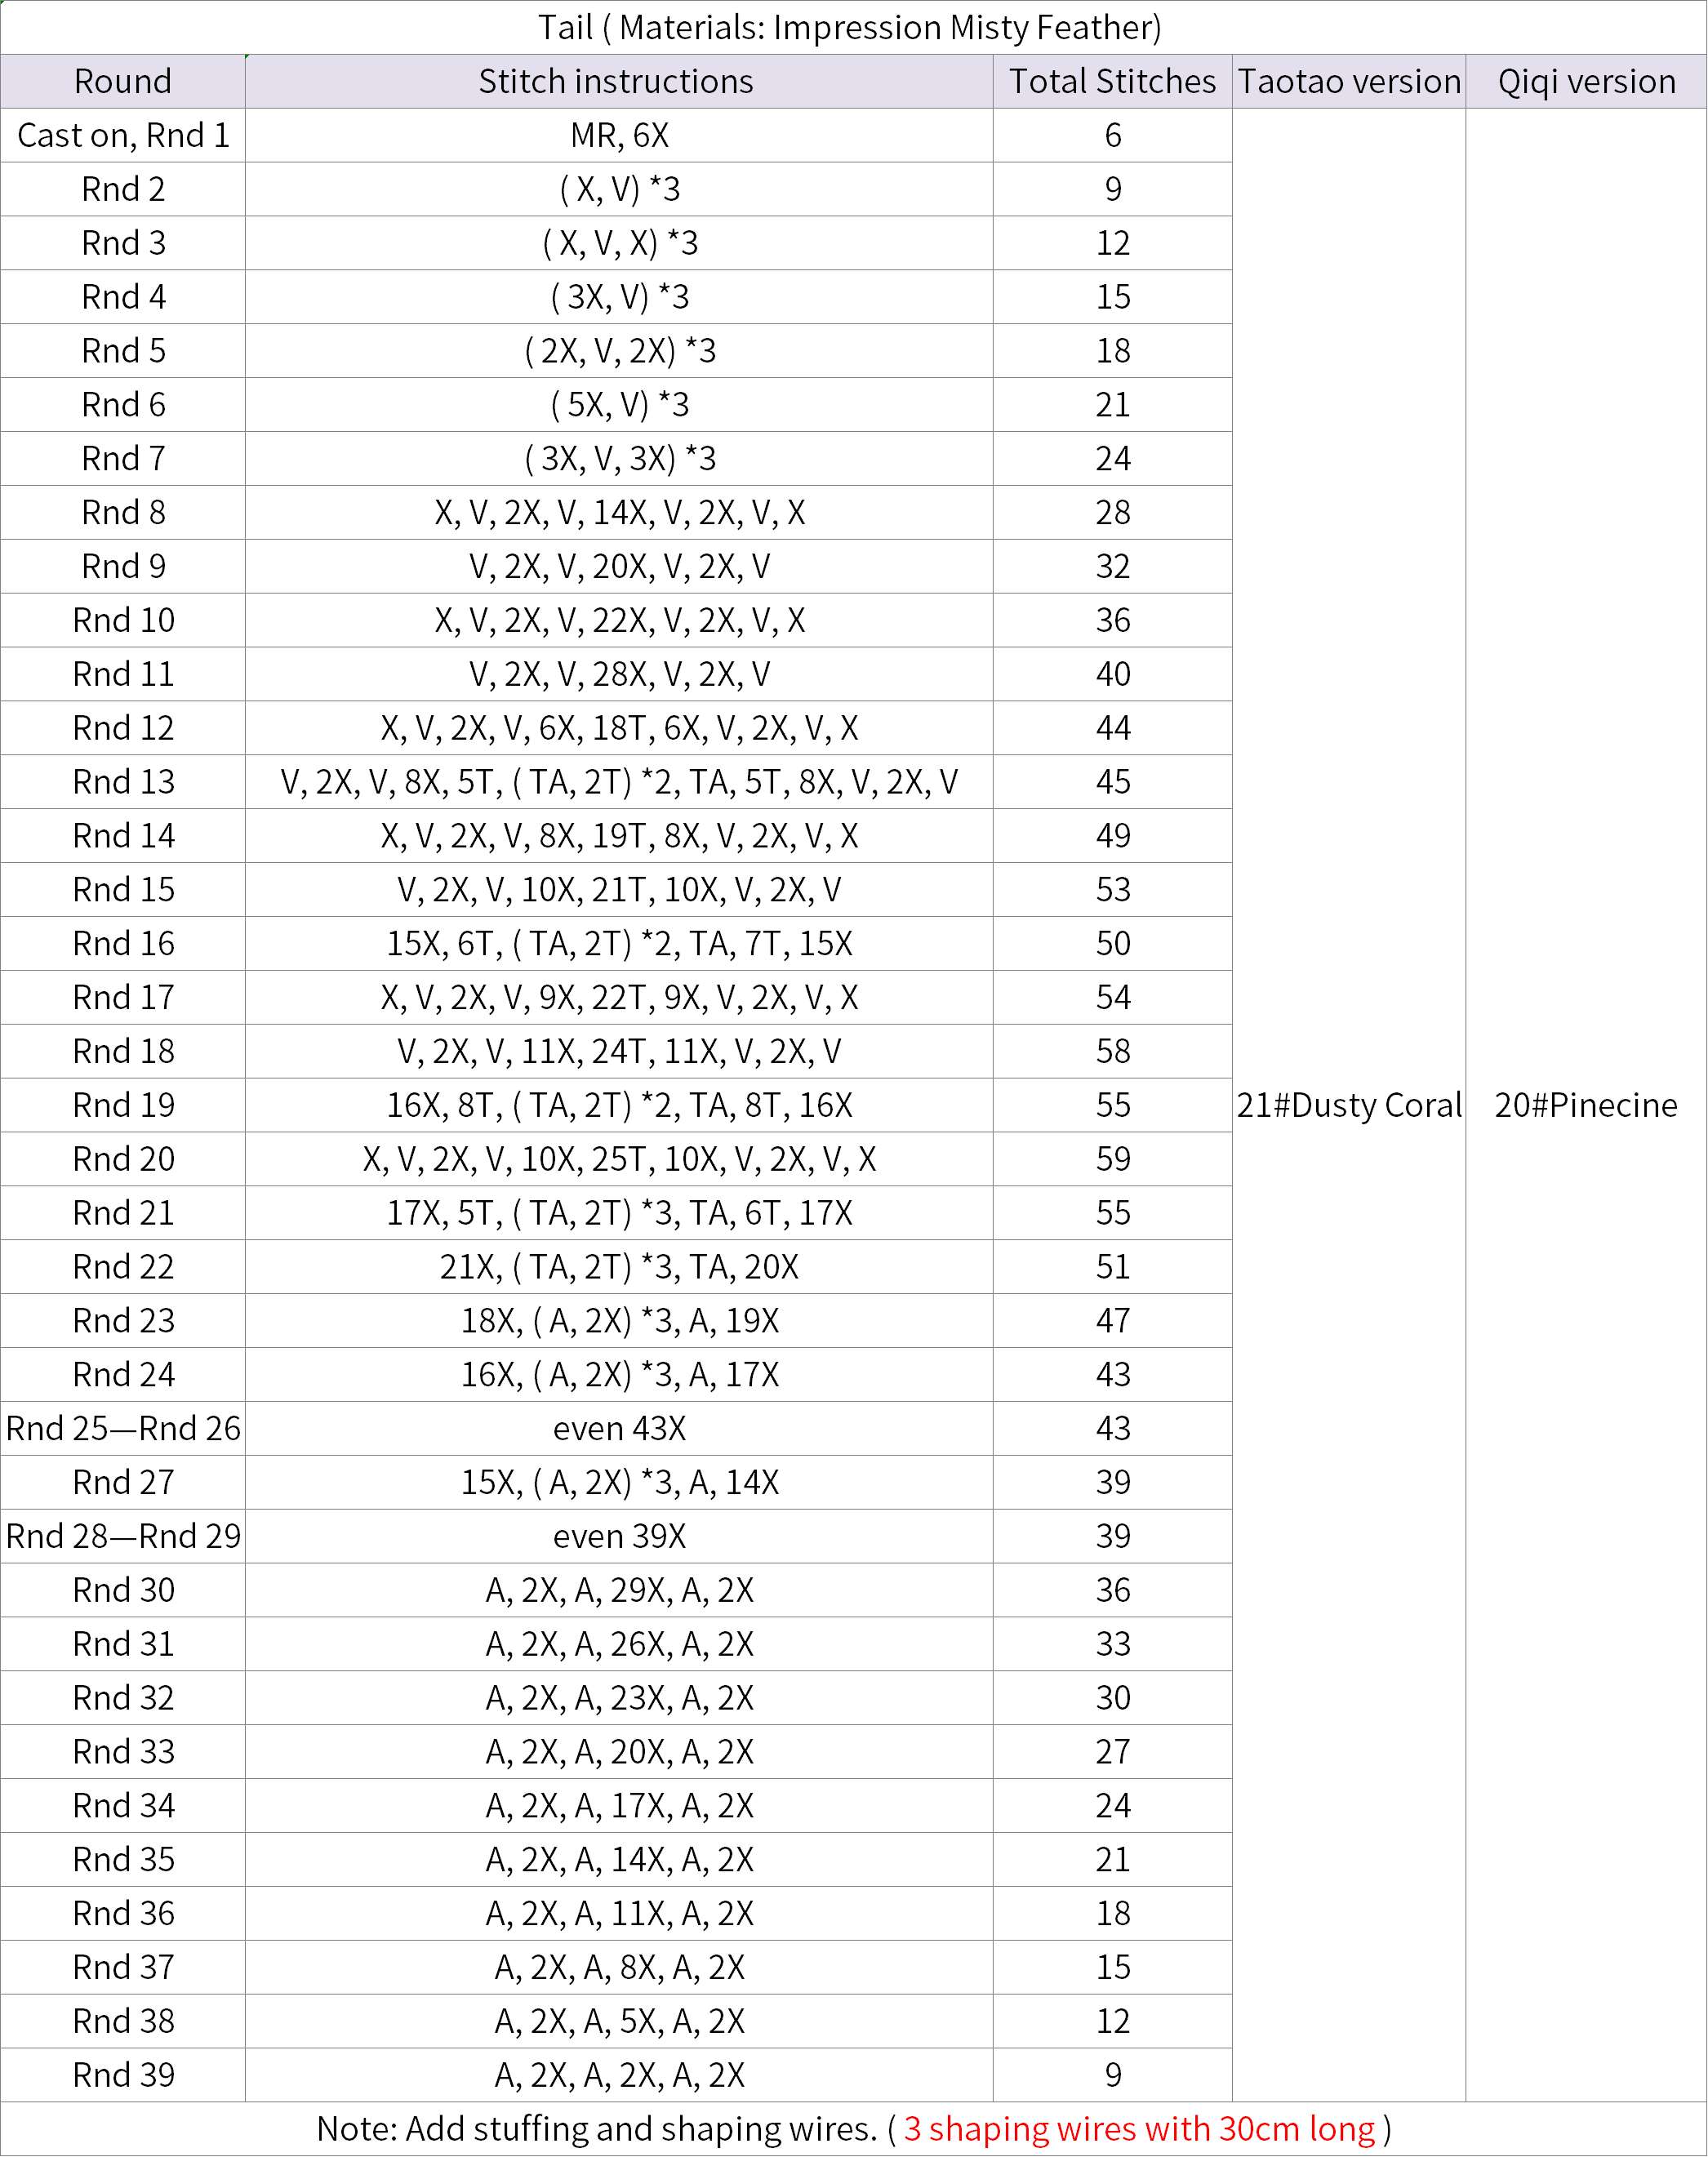
Step 5 HeadA5 46' 47'' (Part 1)
We will start from the chain ring, and crochet in rounds counterclockwise. During the process, you need to change colors and add stuffing. After completion, sew it to the body. Please refer to the video demonstrations for more details.
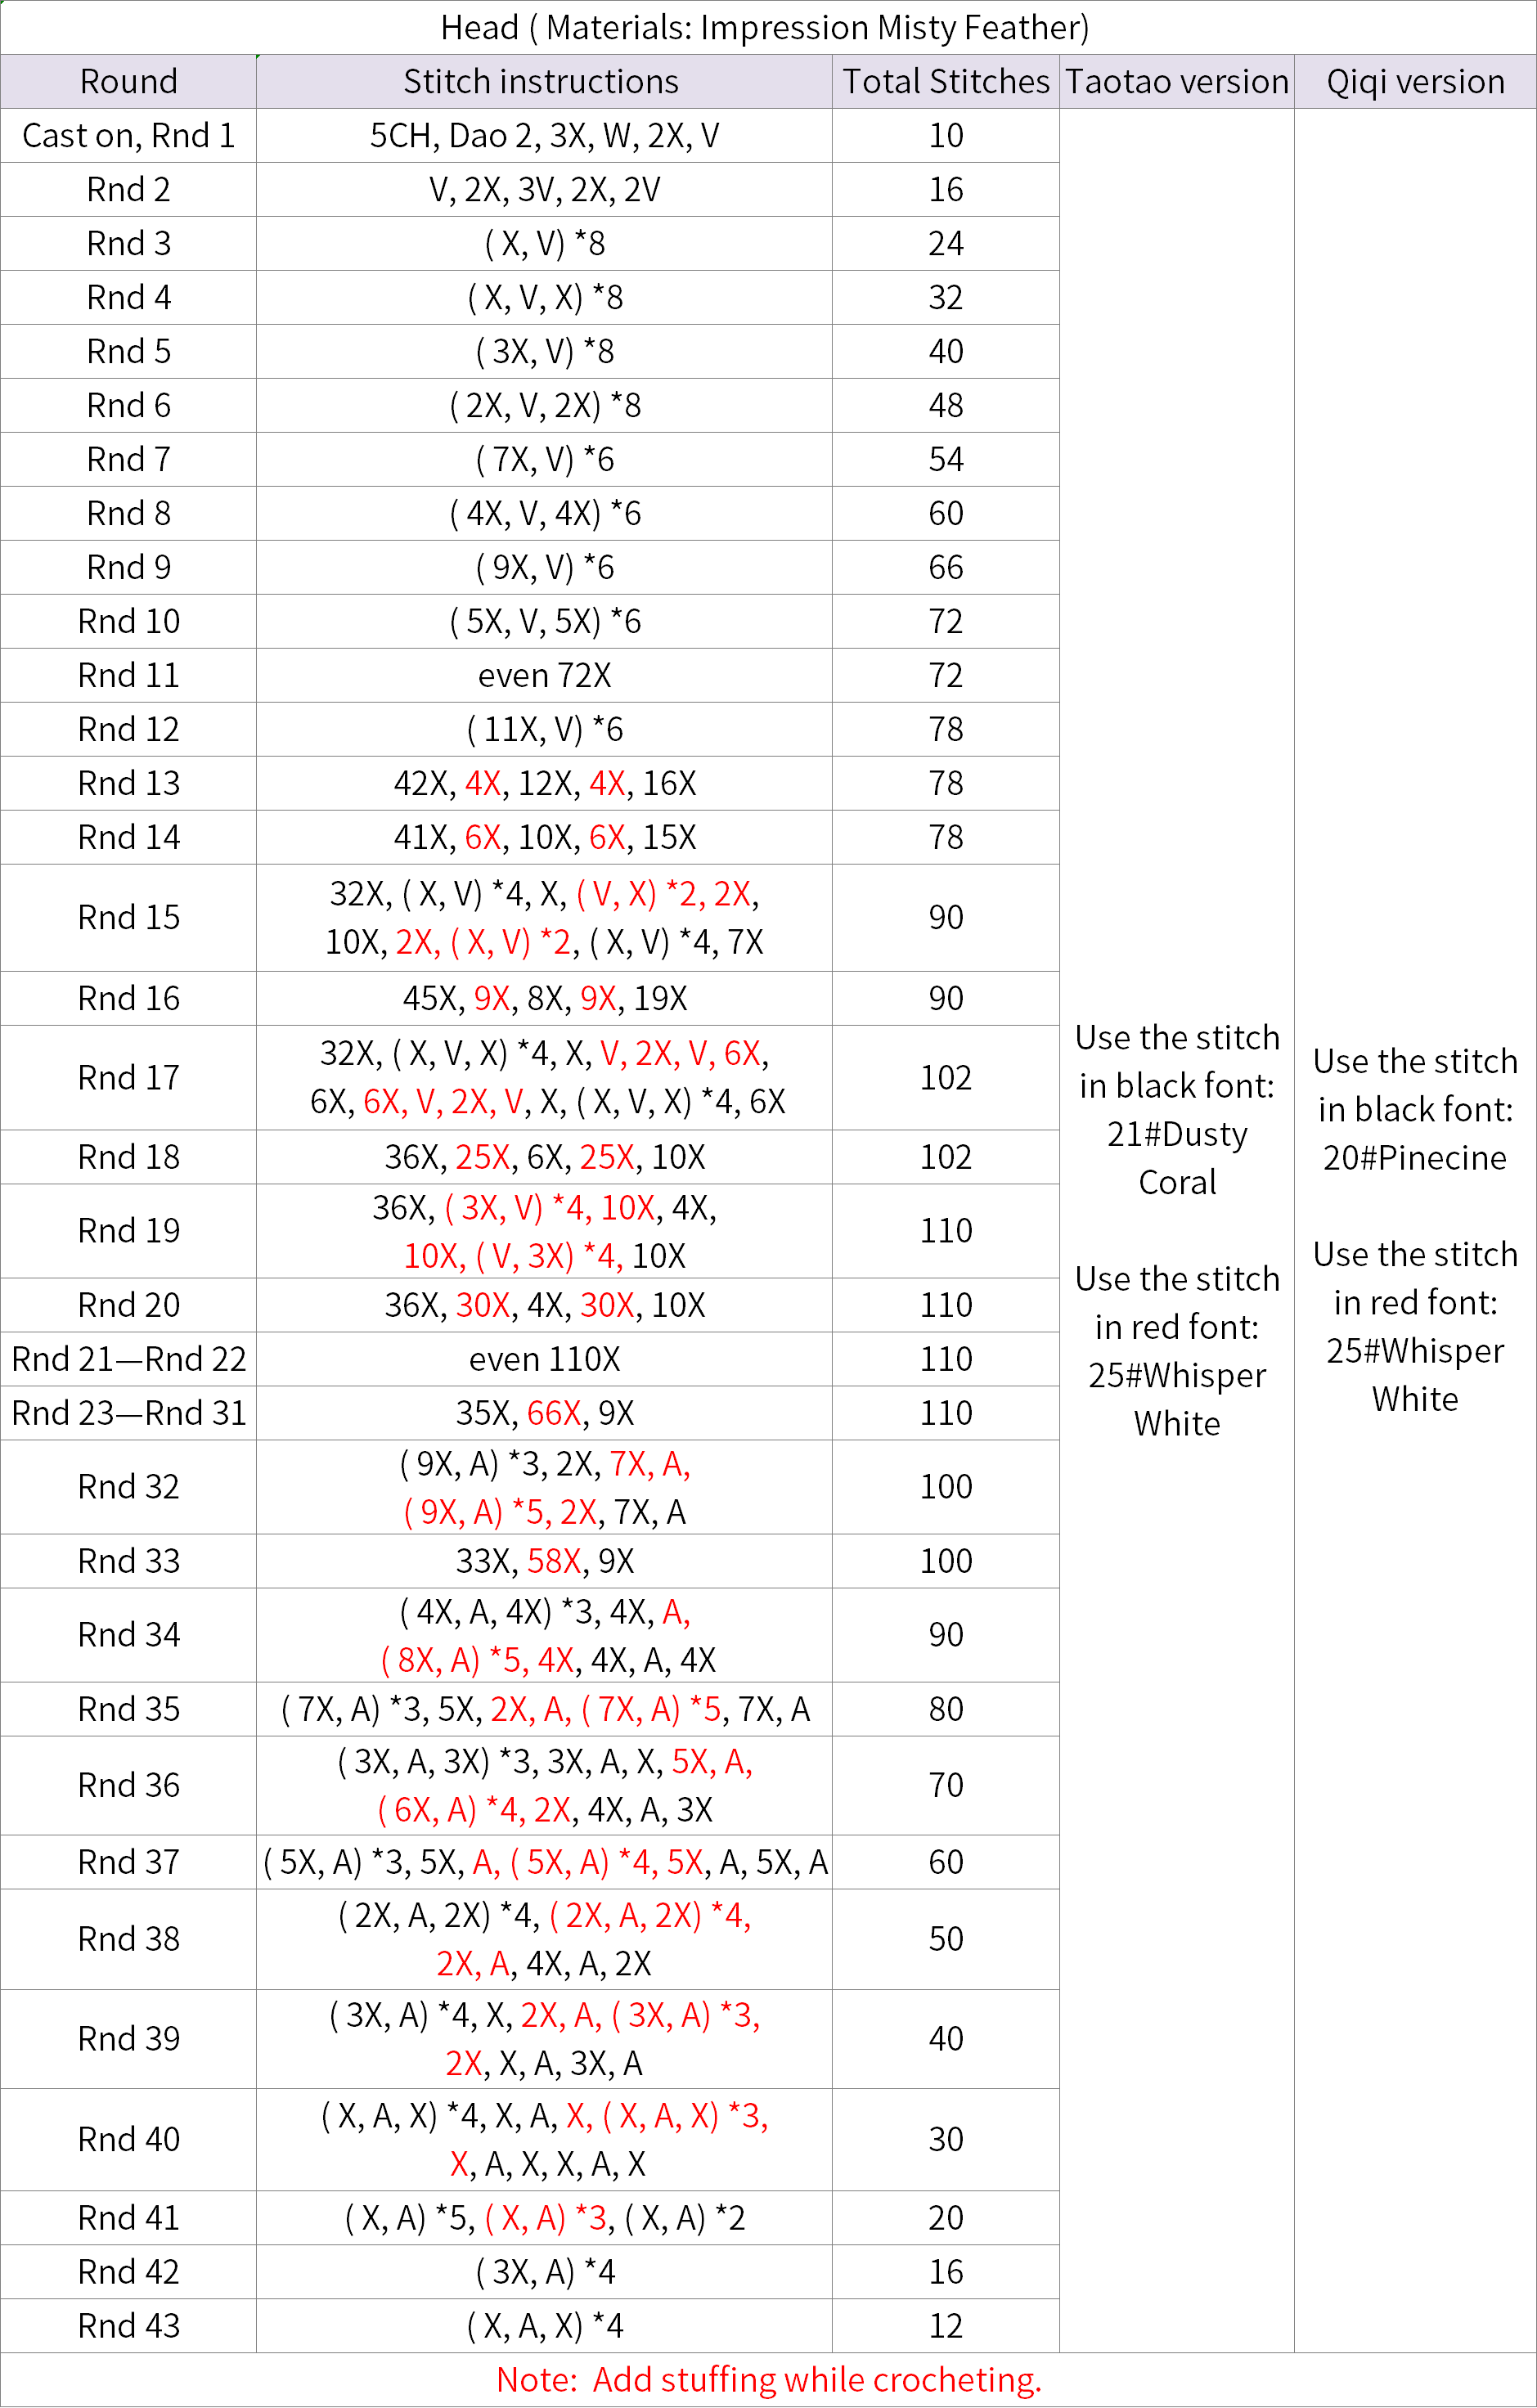
Part 2 Facial featuresB
They include the eyes, mouth, nose, and ears.
Step 1 EyesB1 00' 35'' (Part 2)
The eyes need to be set into eye sockets first with 25#Whisper White of Impression Misty Feather. Then, glue them into place in the eye sockets. Please refer to the video demonstrations for more details.
Step 2 Mouth and noseB2 06' 31'' (Part 2)
The mouth is embroidered with 34#Toffee of 4-Ply Combed Cotton. Before embroidering, you also need to create an indentation with 25#Whisper White of Impression Misty Feather. The nose is a pre-made piece. Simply secure it with glue. Please refer to the video demonstrations for more details.
Step 3 EarsB3 15' 56'' (Part 2)
They include both the part 1 and the part 2. Both are started with an adjustable magic ring. Work back and forth. Then, attch them on the body. Please refer to the video demonstrations for more details.
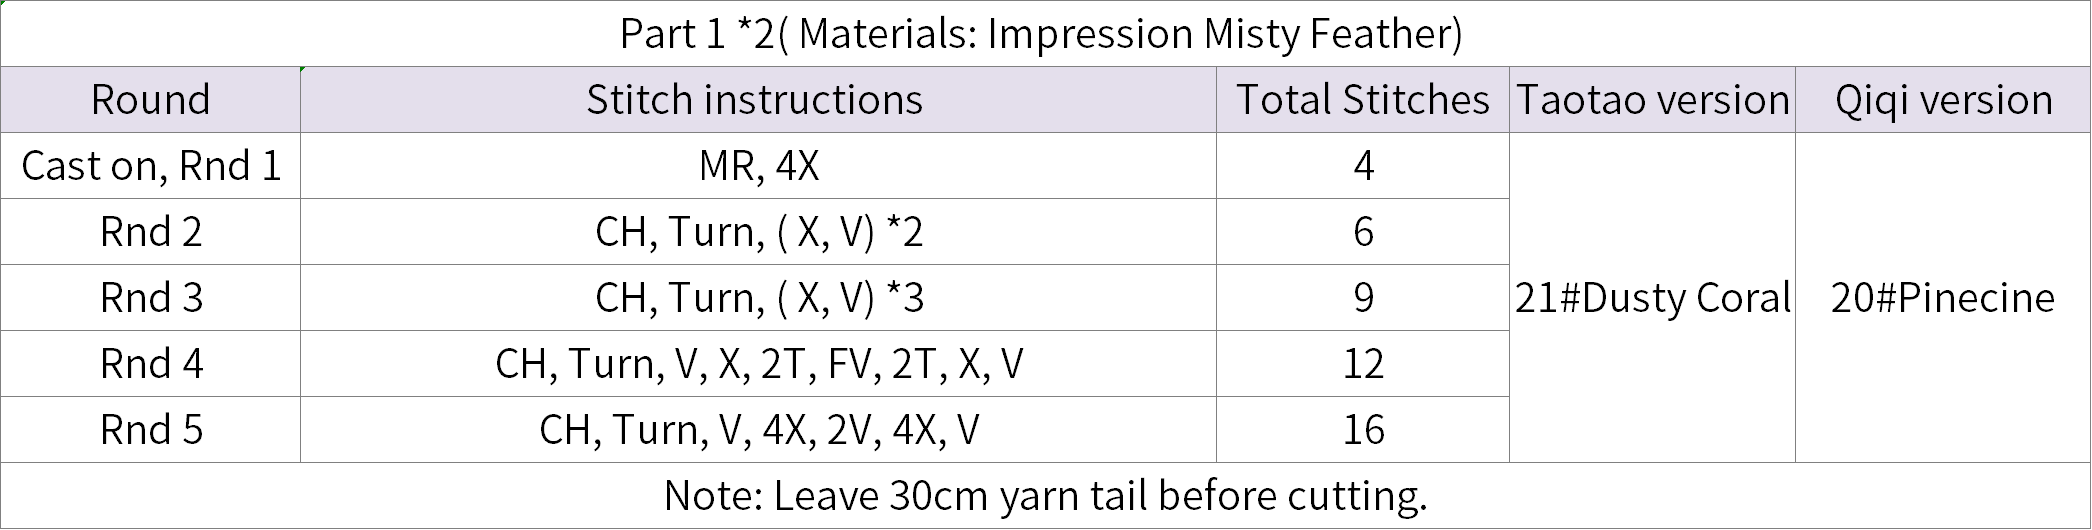

Part 3 DecorationsC
These include the belly, acorn bag, and patterns.
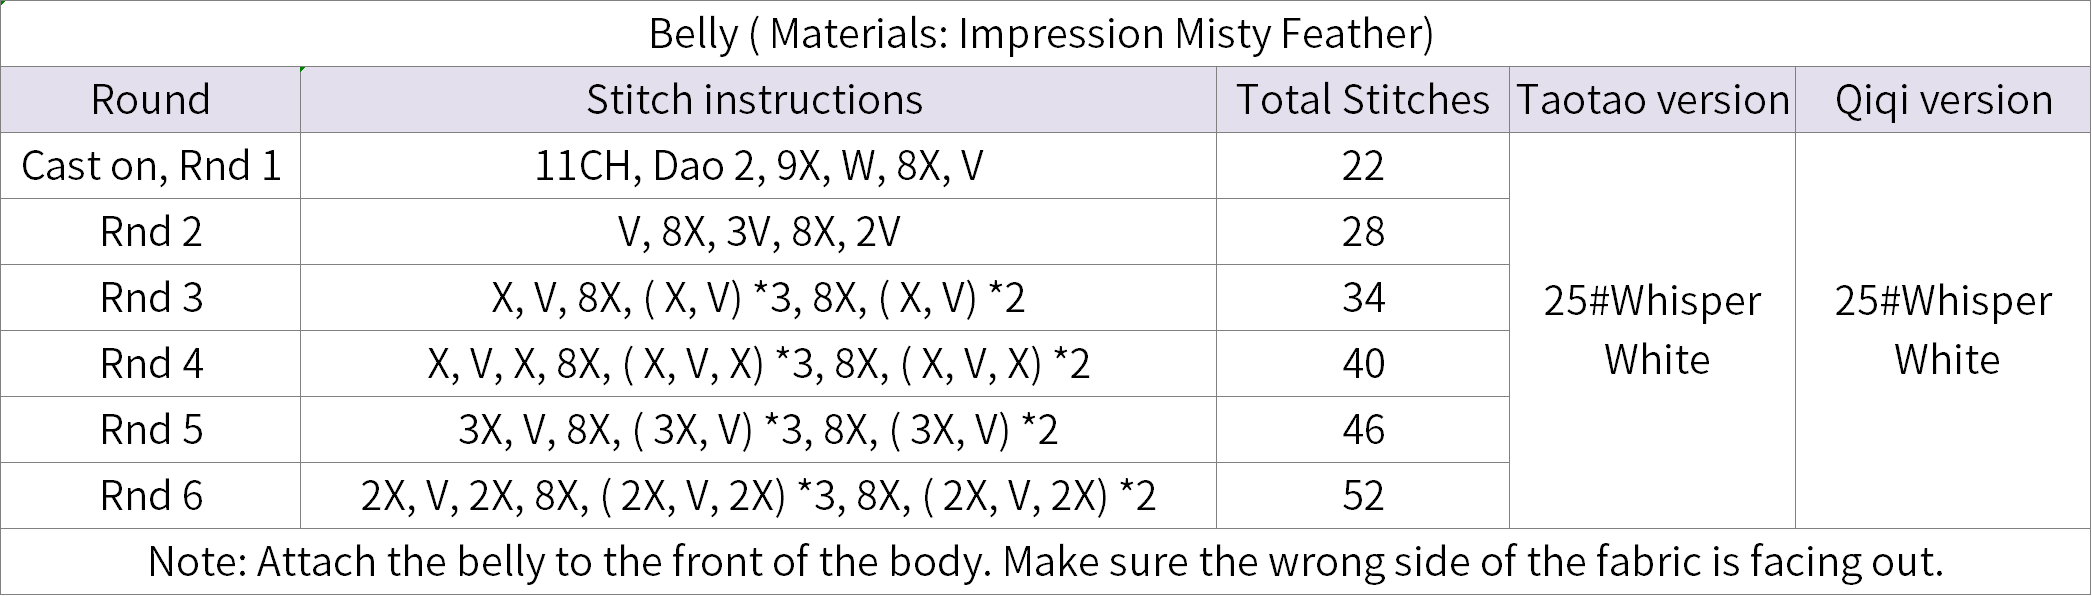
Step 1 BellyC1 25' 03'' (Part 2)
The starting method for the belly is the same as the head. Refer to the chart to complete the belly. Then, attach the belly to the front of the body. Please refer to the video demonstrations for more details.
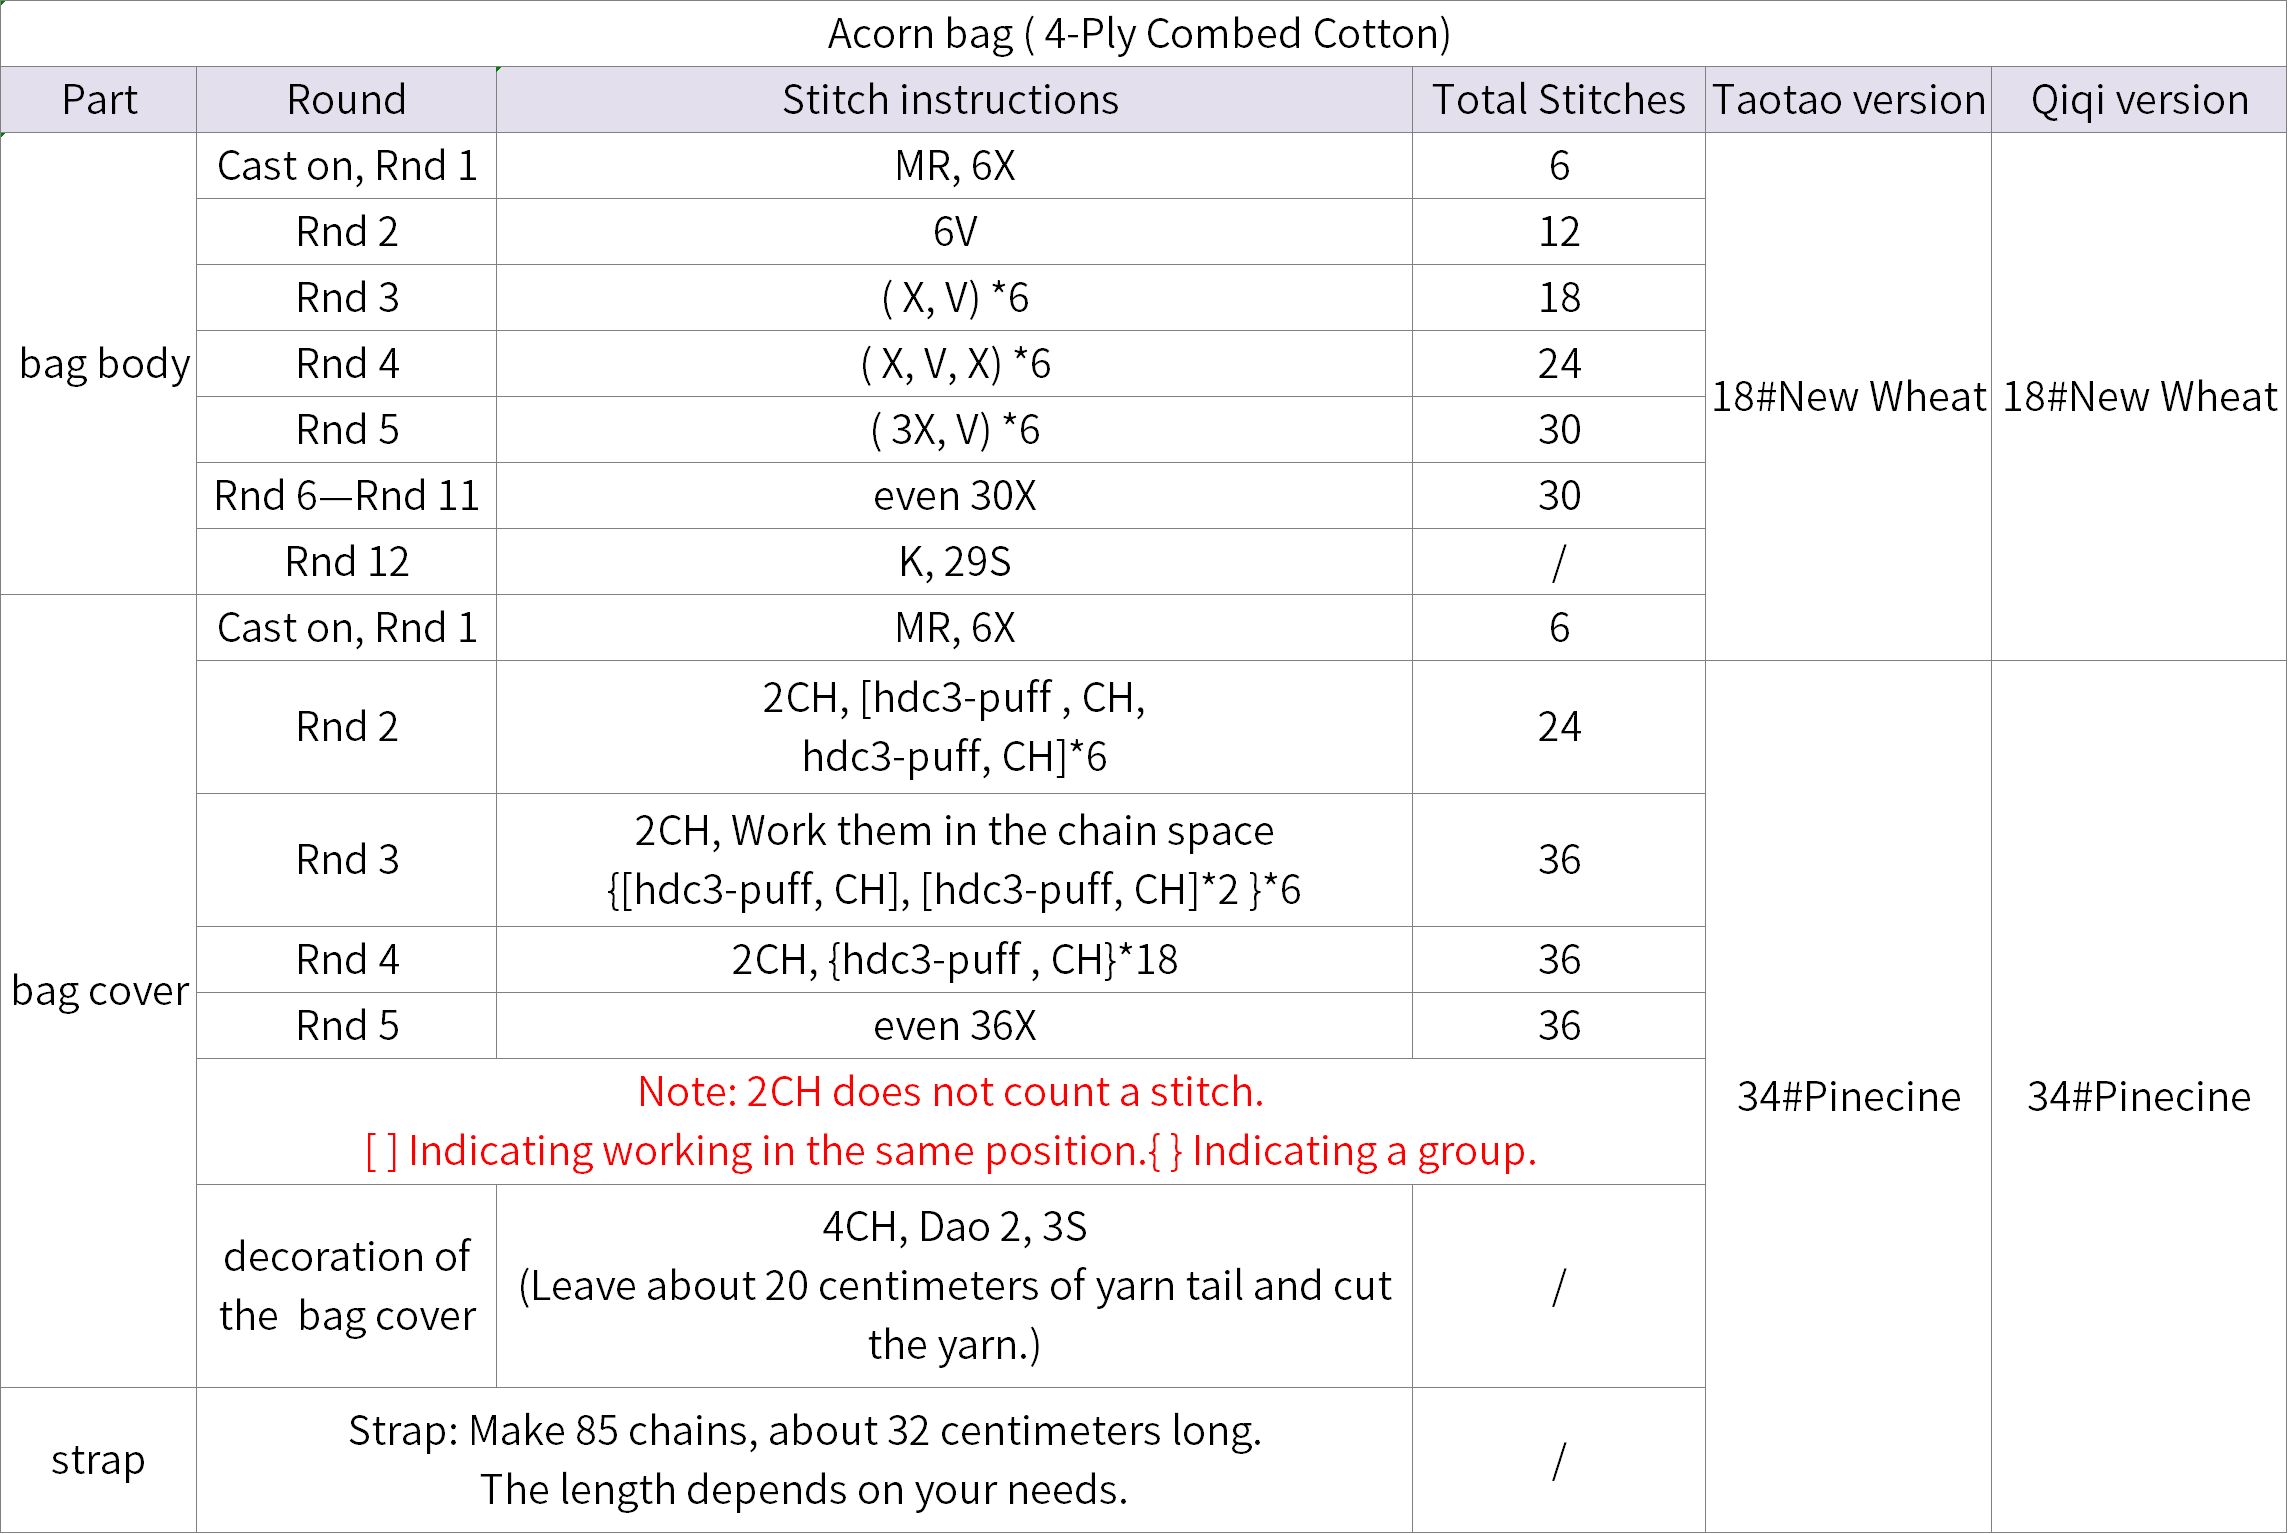
Step 2 Acorn bagC2 25' 58'' (Part 2)
This includes the bag body, the bag cover, and the strap. Both the body and the cover are started with a magic ring. The strap made up by chain stitches and sewn onto the body of the bag. Please refer to the video demonstrations for more details.
Step 3 PatternC3 43' 53'' (Part 2)
Make them on the back of the head and body, as well as on the tail. Poking the patterns with felted wool. Please refer to the video demonstrations for more details.
Made by the community