Home / Container
Christmas Tree Storage Box
Project preview
See the finished project
Pattern format
Instructions
Watch and follow
Video tutorial
This storage box consists of three parts: the box body, the lid, and the decorations.
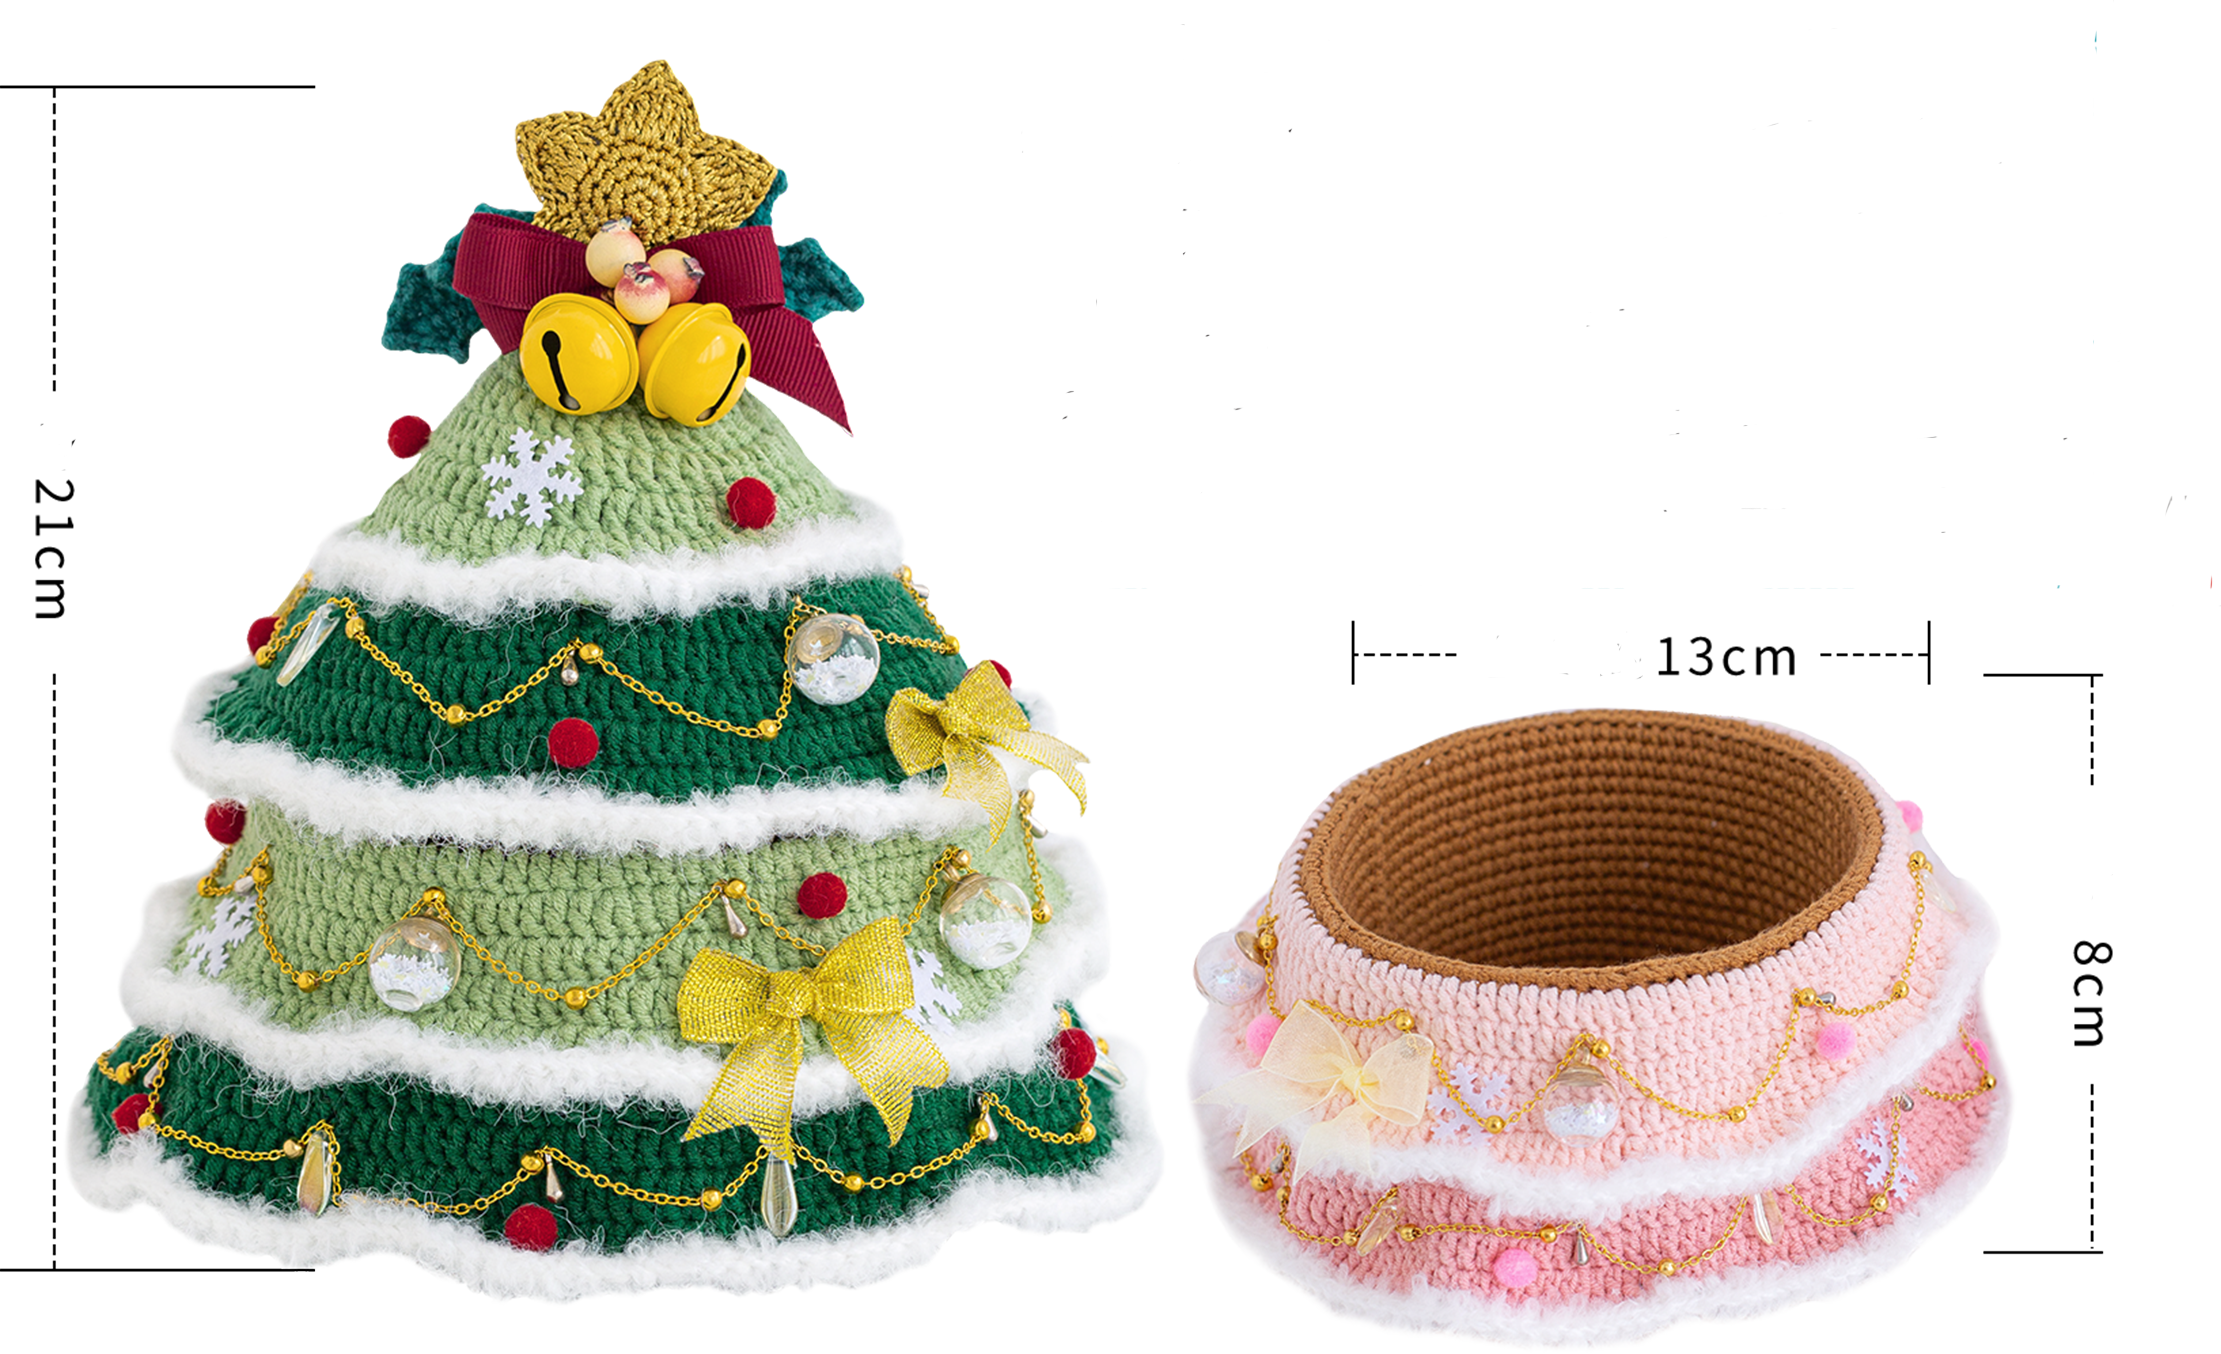
The handcrafted measurements may have an error of 1 to 2 cm. Due to variations in individual tension, the size of the sample is for reference only.
Materials: 4-Ply Combed Cotton & Acrylic Fibre Hand Knitting Yarn, Susan's Family Sheep Curly & Susan's Family Dimond Thread Wool
Hook: 2.00 mm crochet hook

ABBREVIATIONS
MRadjustable magic ring
Dao2start in 2nd CH from the hook
turnturn the piece
FLOfront loop only
CHchain
Thalf double crochet
V = sc2-in-12 single crochets into the same stitch
A = sc2toginvisible single crochet 2 stitches together
[...]in the same stitch
(...)×6crochet item in the parentheses six times
TV = hdc2-in-12 half double crochets into the same stitch
Xsingle crochet
BLOback loop only
SLslip stitch
Etreble crochet
EV = tr2-in-12 treble crochets into the same stitch
Fdouble crochet
FV = dc2-in-12 double crochets into the same stitch
Note:
1. This pattern is making in Chinese crochet pattern terms, and the stitch name is written using American terminology. All measurements in charts are in cm.
2. Working in joined round
When crocheting in rounds without further guidance, working in closed rounds, start each round with a set number of beginning chains and close with a slip stitch. The beginning chain preceding a single crochet and the slip stitch used for joining rounds are not included in the total stitches.

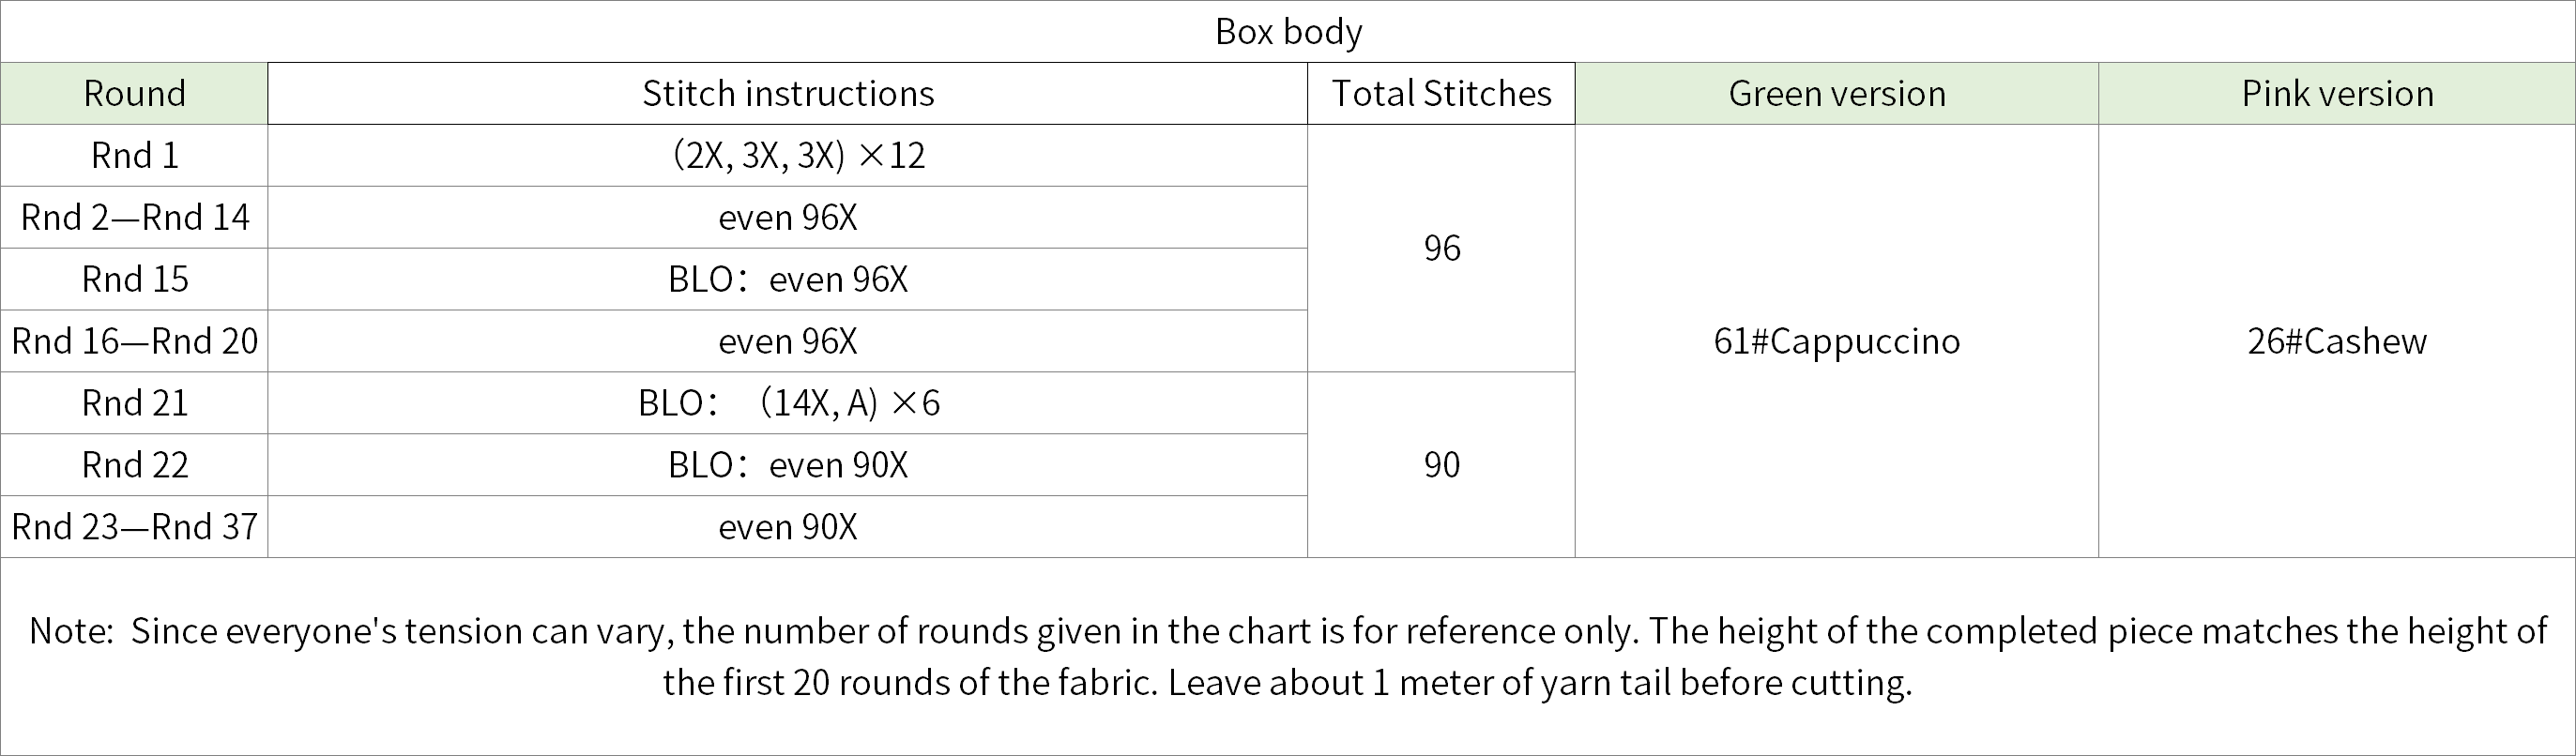
Part 1 Box bodyA
It includes an acrylic board, the box body fabric piece, a mesh board, and leaves.
Step 1 Box body fabric pieceA1 01' 24'' (Part 1)
The box body fabric piece is worked by joining the yarn in the holes of the acrylic board. Then, work in rounds upwards. After completing it, attach the mesh board. Please refer to the video demonstration for more details.
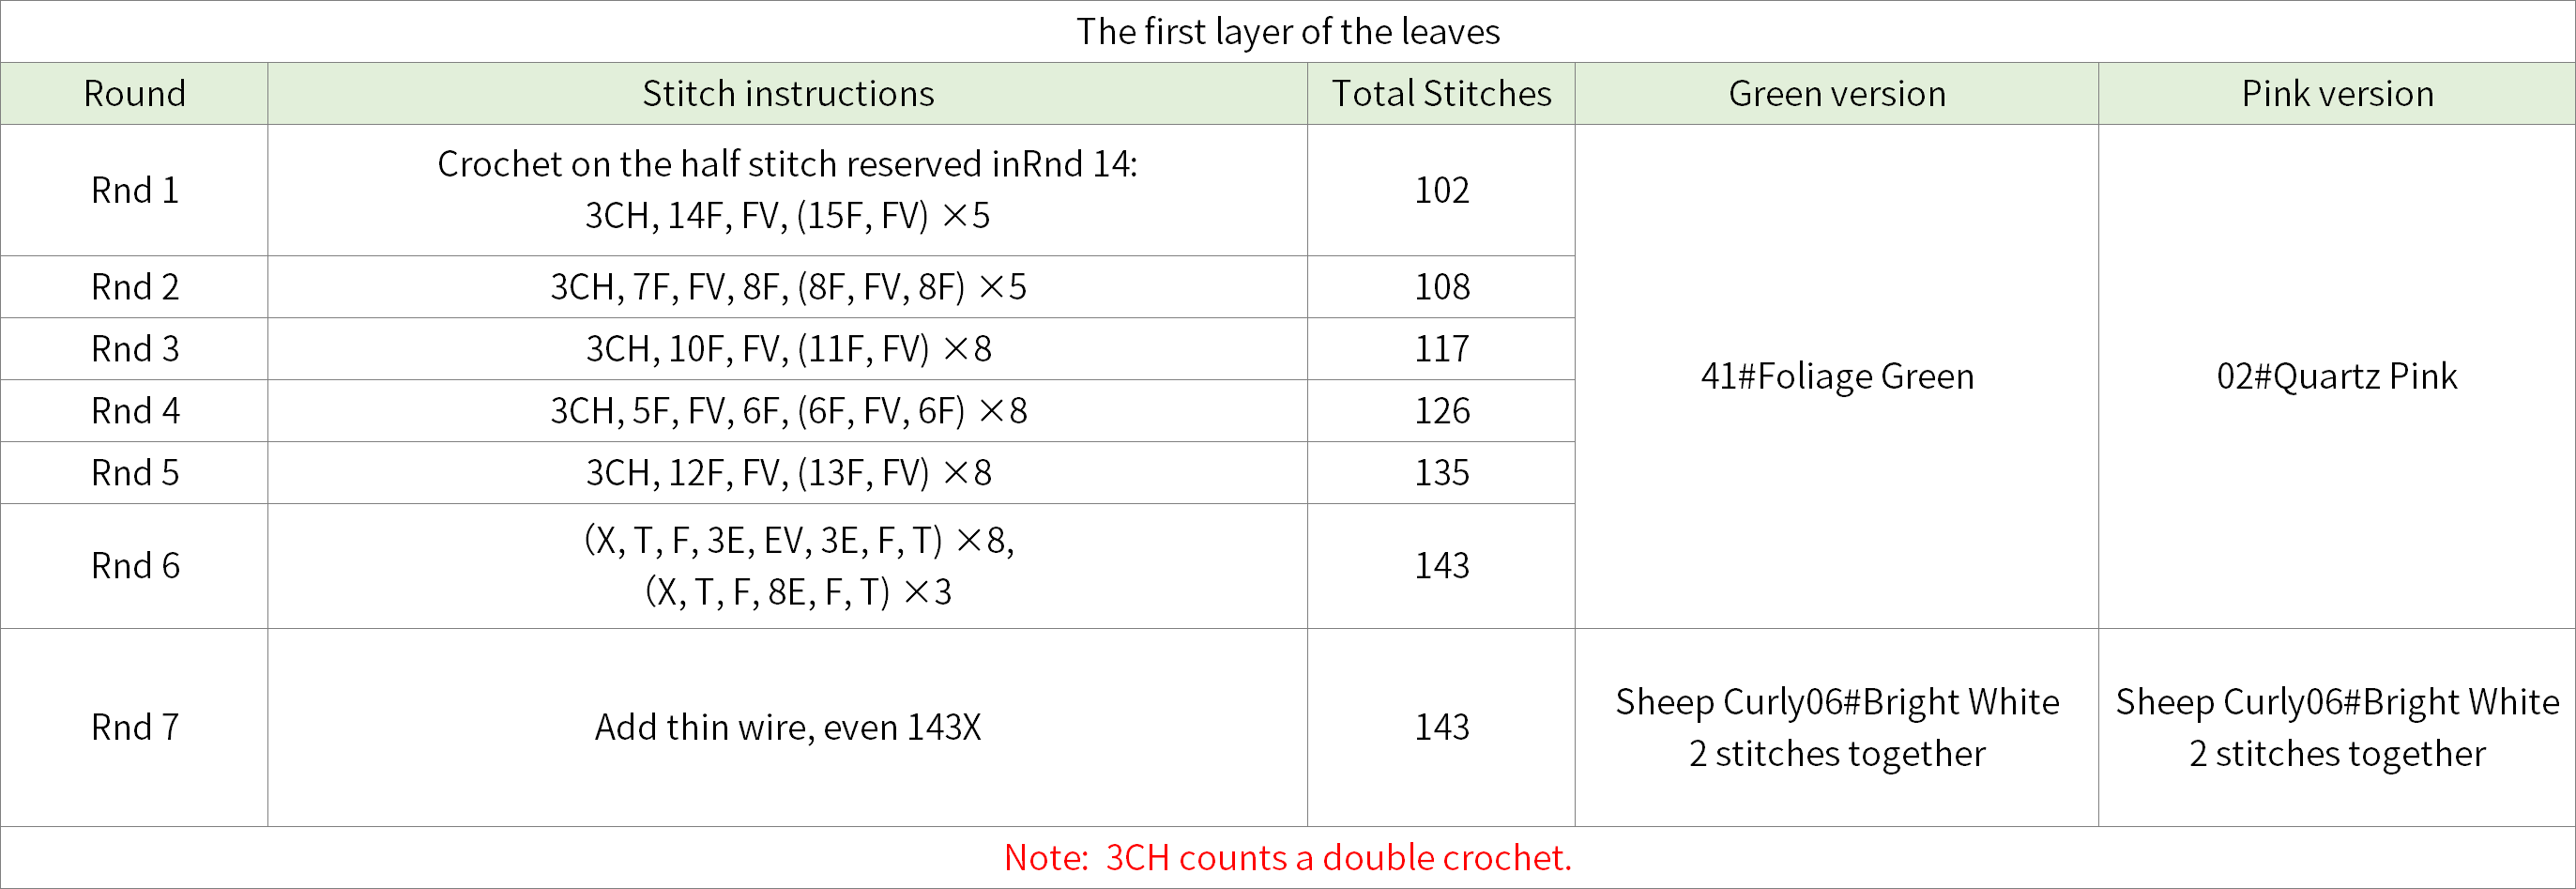
Step 2 LeavesA2 26' 18'' (Part 1)
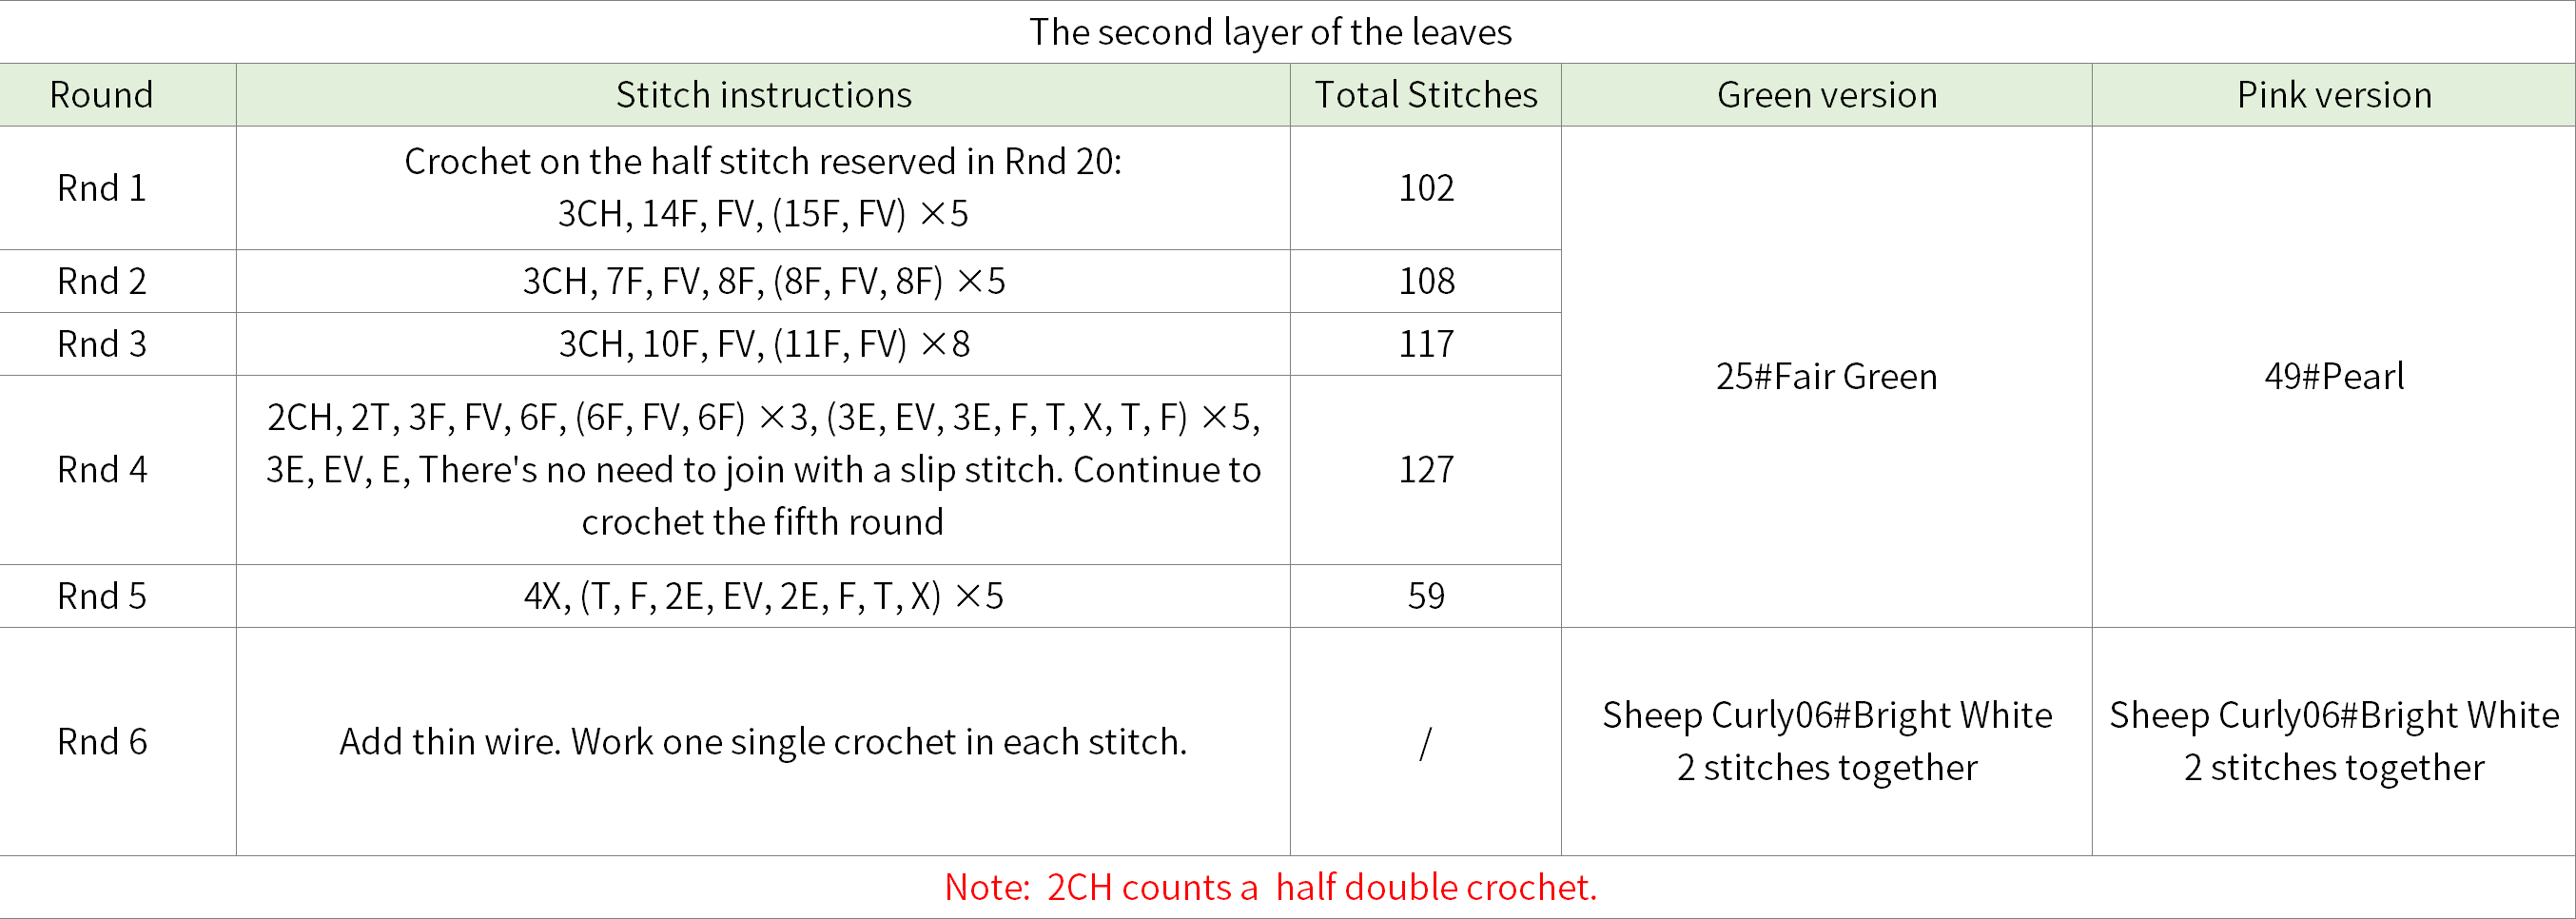
They are divided into the first layer and the second layer. Each layer will be crocheted on the corresponding rounds of the box fabric piece. Crochet in rounds. When crocheting, you need to switch colors and add thin wire. Please refer to the video demonstration for more details.
Part 2 LidB
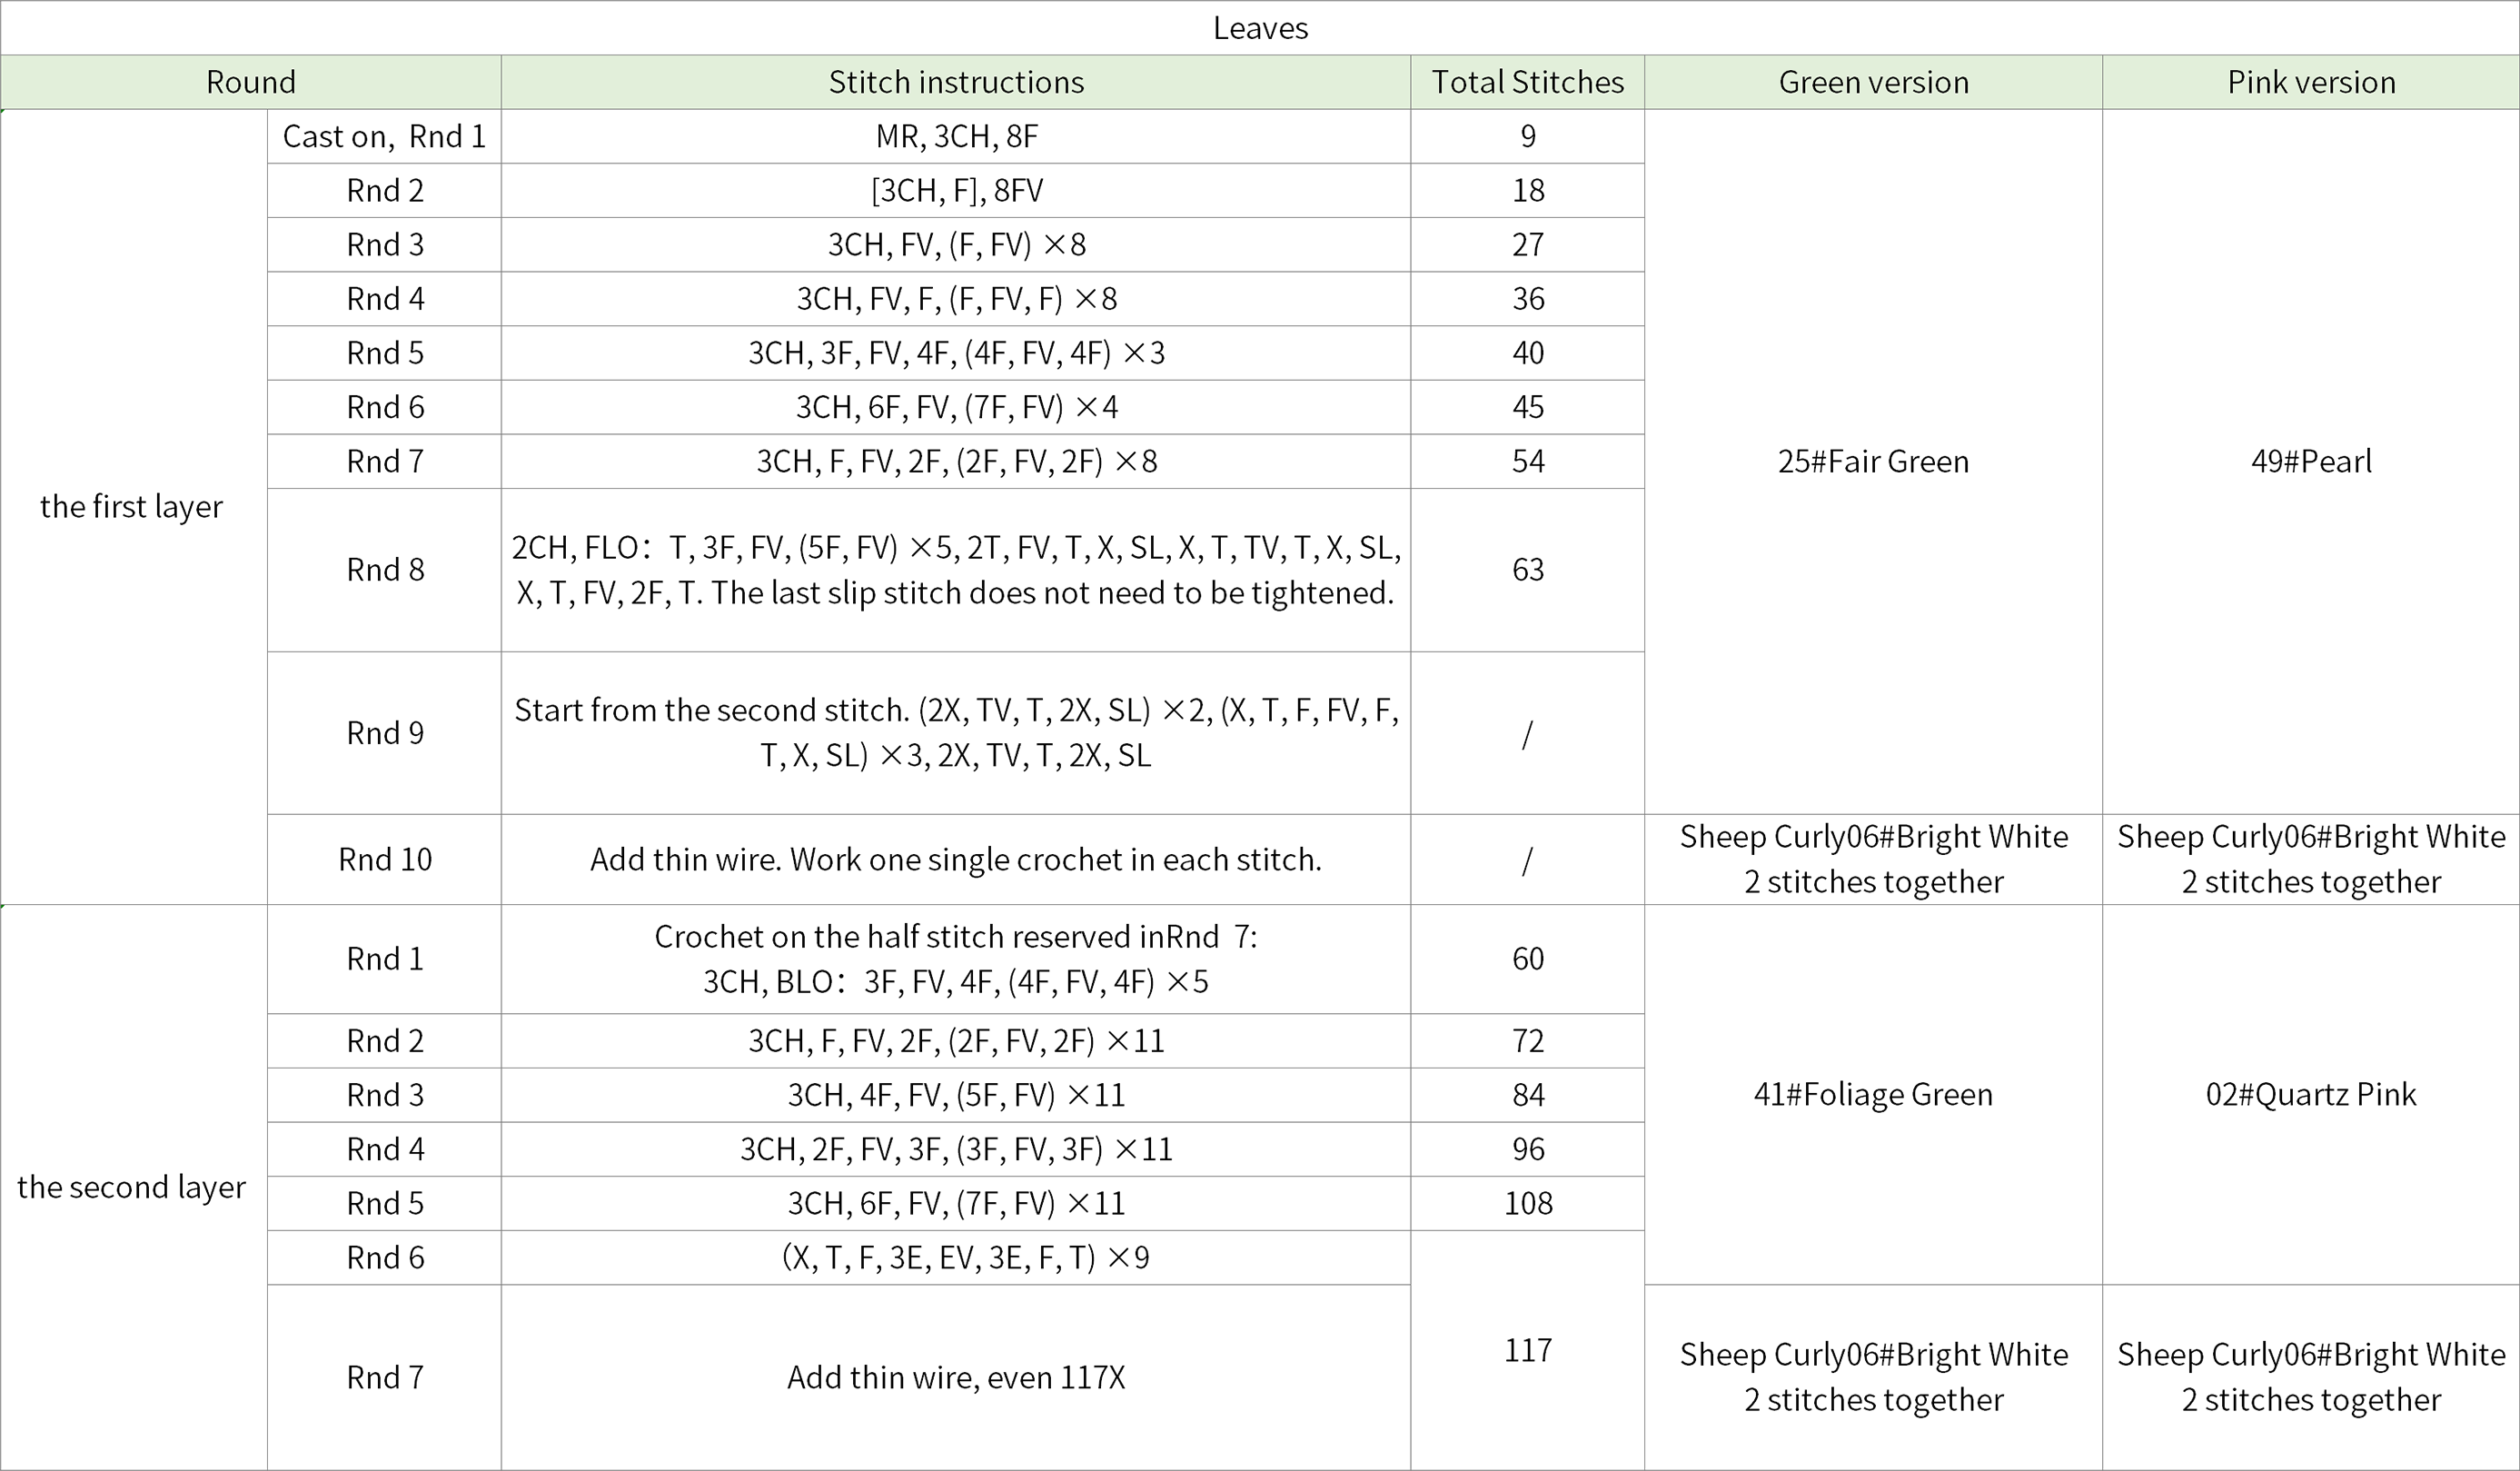
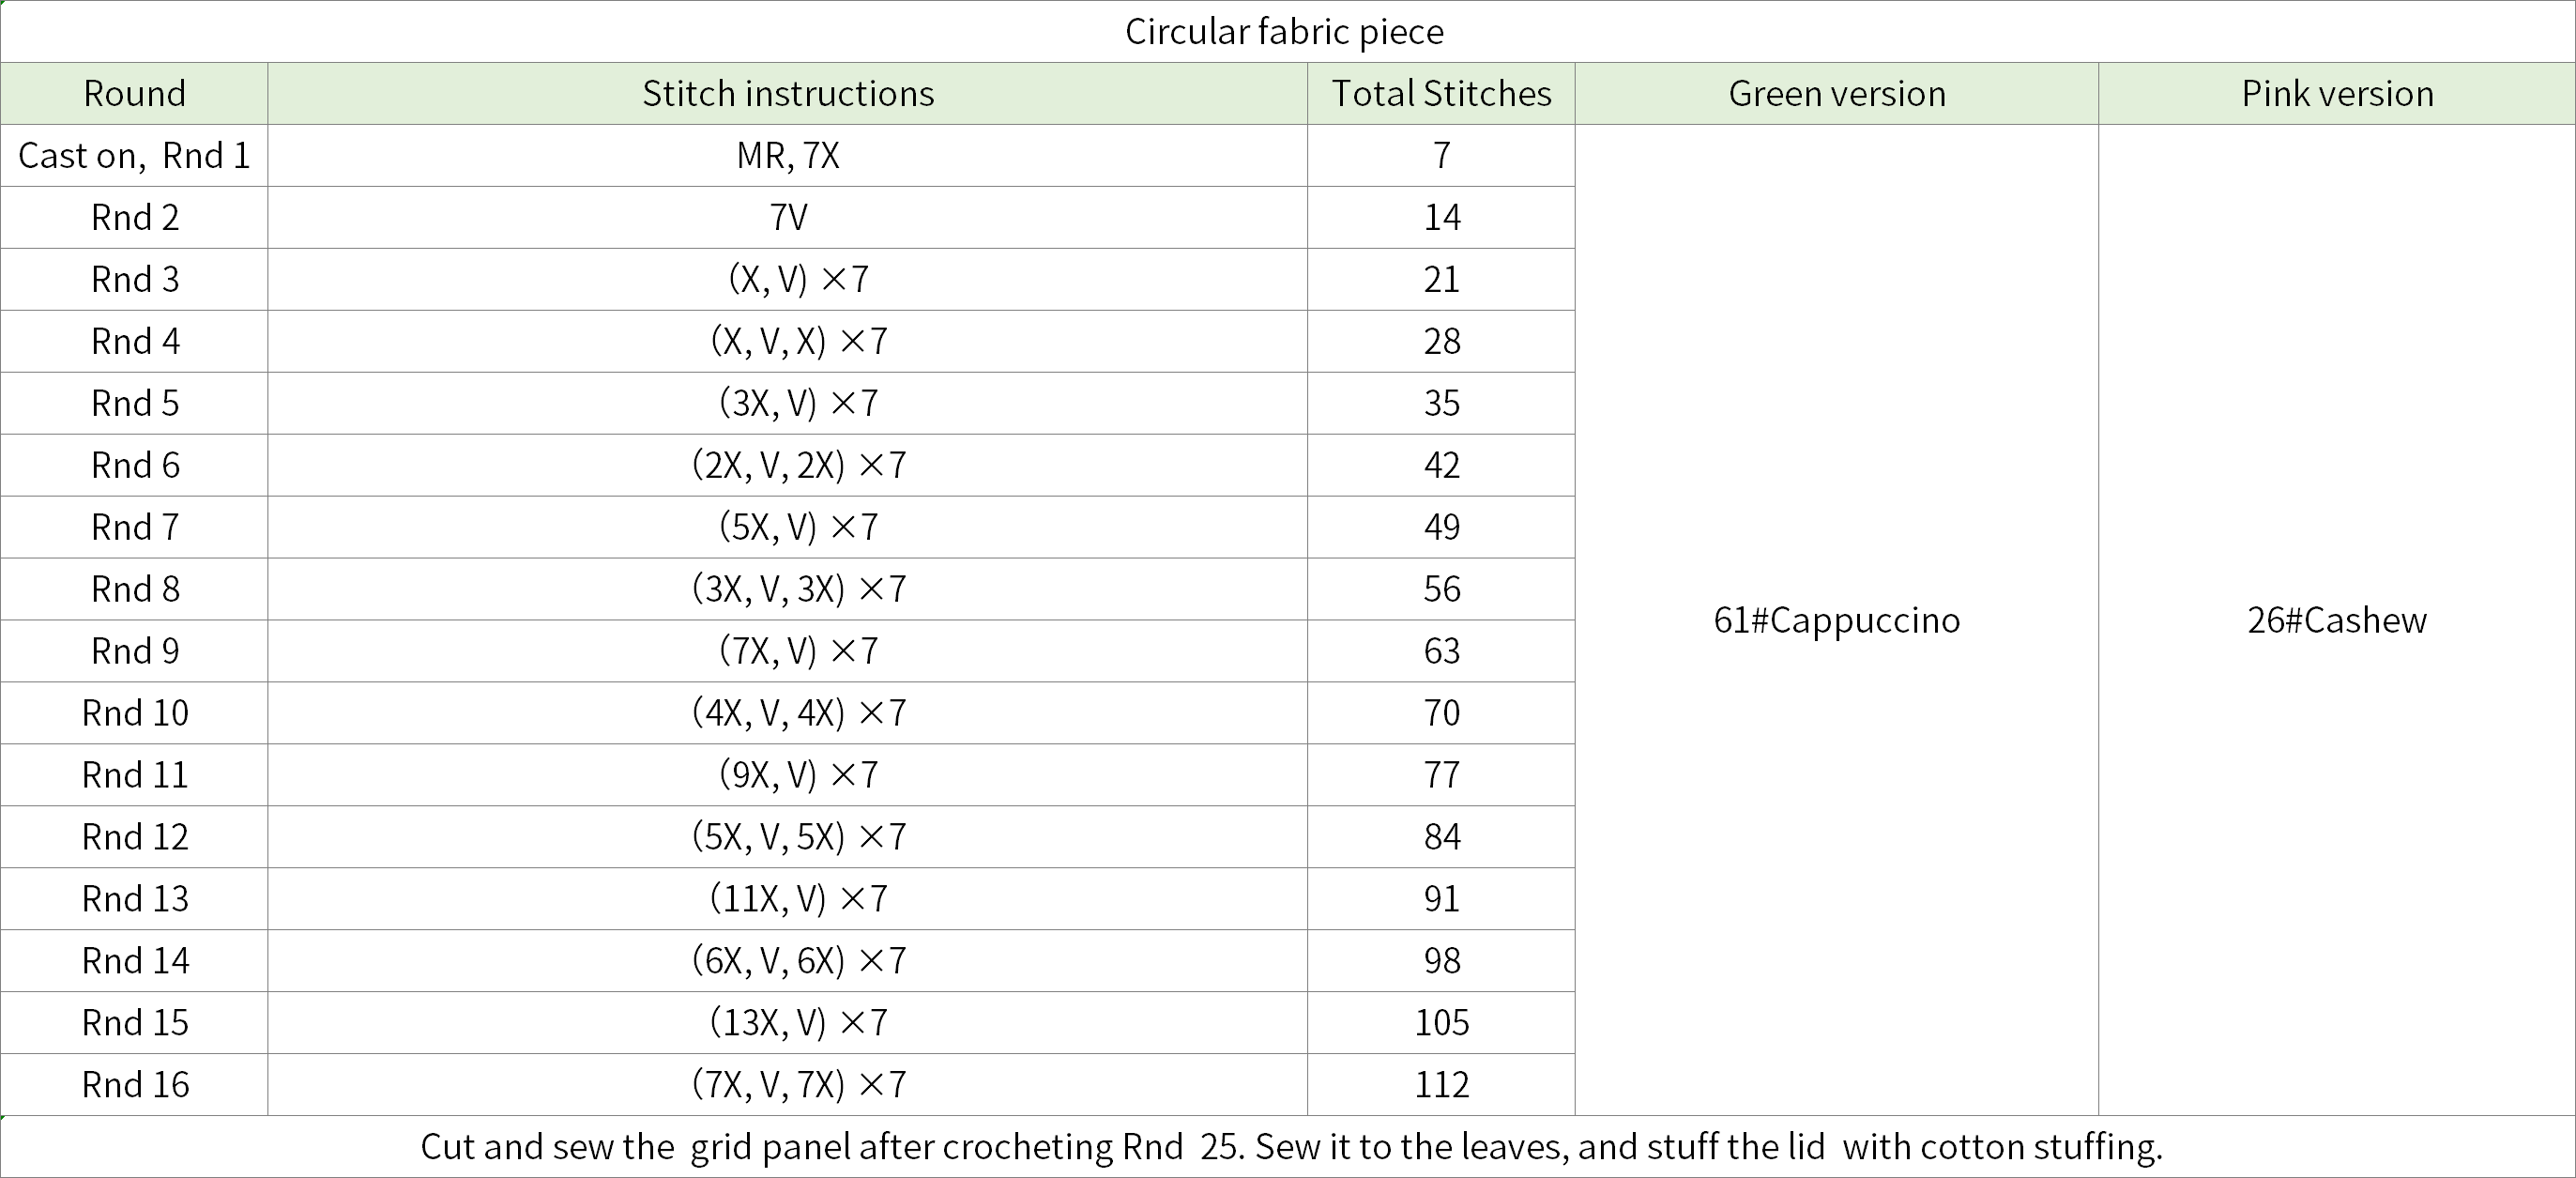
It consists of leaves, a circular fabric piece, and a grid panel. First, crochet the leaves and the circular motif separately. After completing them, sew the grid panel onto the circular motif. Then secure the leaves in place. During the securing process, add an appropriate amount of stuffing.
Step 1 LeavesB1 00' 38'' (Part 2)
It is divided into the first layer and the second layer. Use the magic ring method. Crochet in rounds counterclockwise. When crocheting, switch colors and add thin wire. Please refer to the video demonstration for more details.
Step 2 Circular fabric piece B2 10' 54'' (Part 2)
Start with a magic ring and rochet in rounds counterclockwise. While crocheting, you need to sew on the grid plate and sew it together with the leaves. While sewing, you need to stuff in an amount of filling cotton. Please refer to the video demonstration for more details.
Part 3 AttachingC 21' 15'' (Part 2)
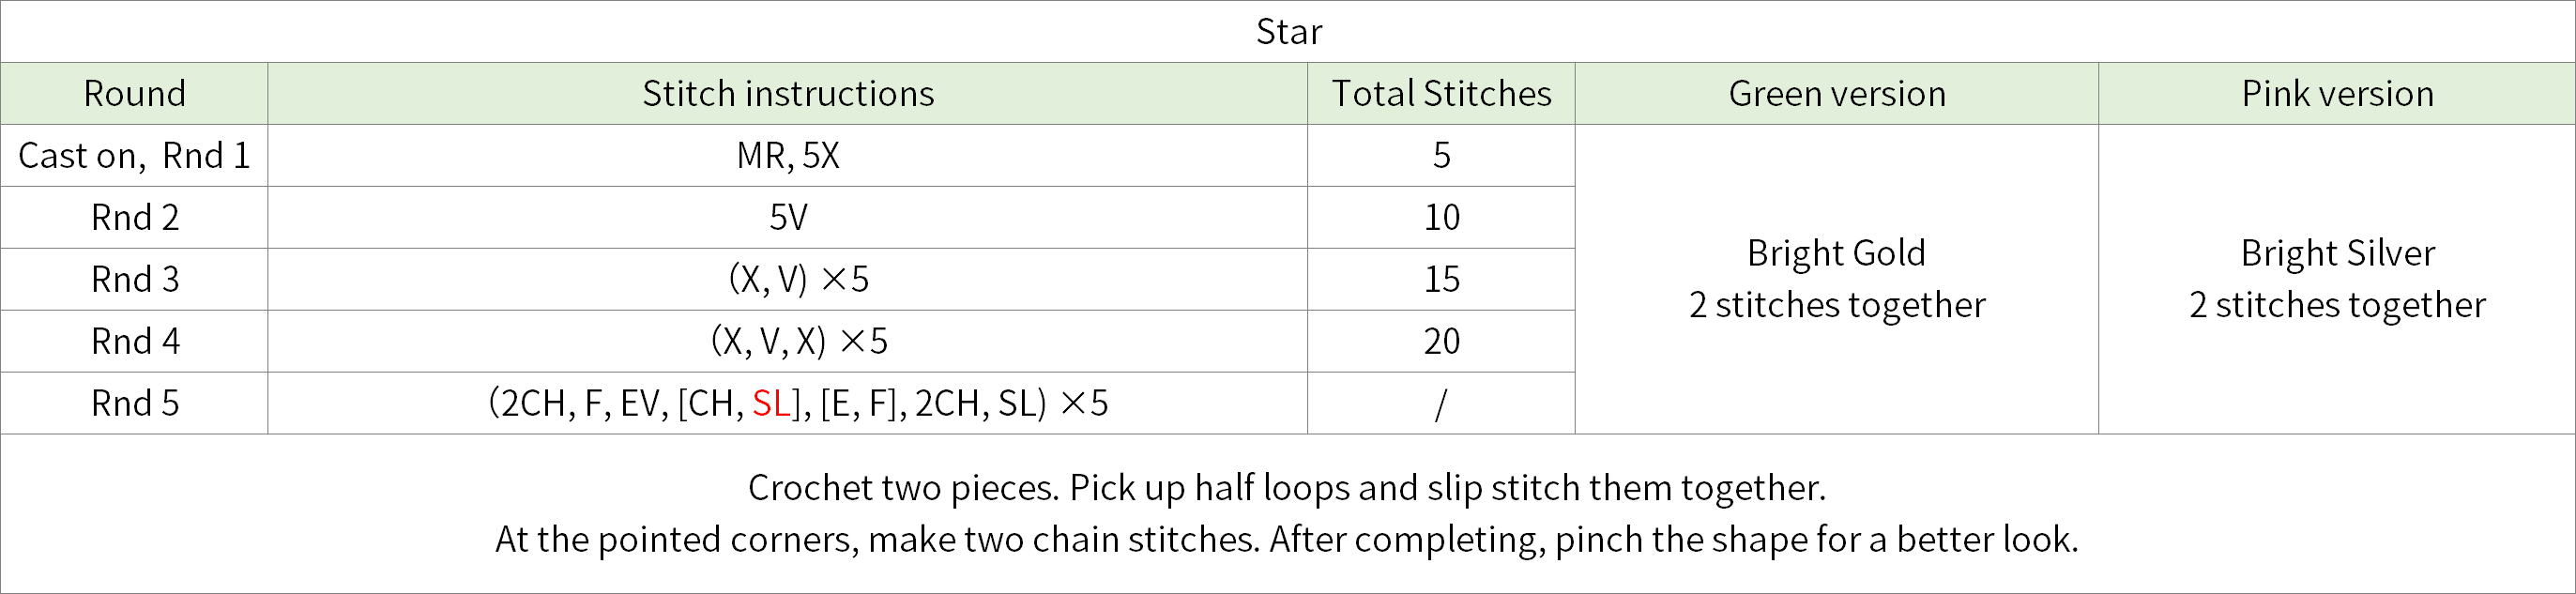
It includes stars, leaves, bells, berries, bows, tassel chains, teardrop pendants, glass balls, snowflake patches and pom-poms. The stars and leaves need to be crocheted. First, crochet them separately and complete them. Then attach them. Please refer to the video demonstration for more details.
Note: The red SL in the chart indicates a special crochet method. Please refer to the video demonstration for more details. Use the same color thread as the stars to secure the bow, berries, and bells.


Made by the community