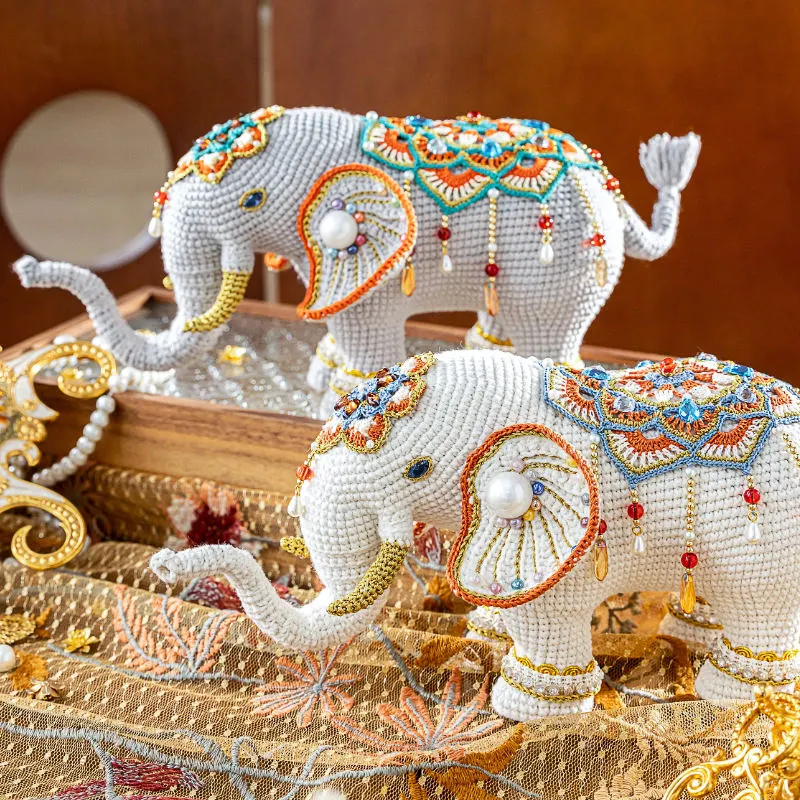
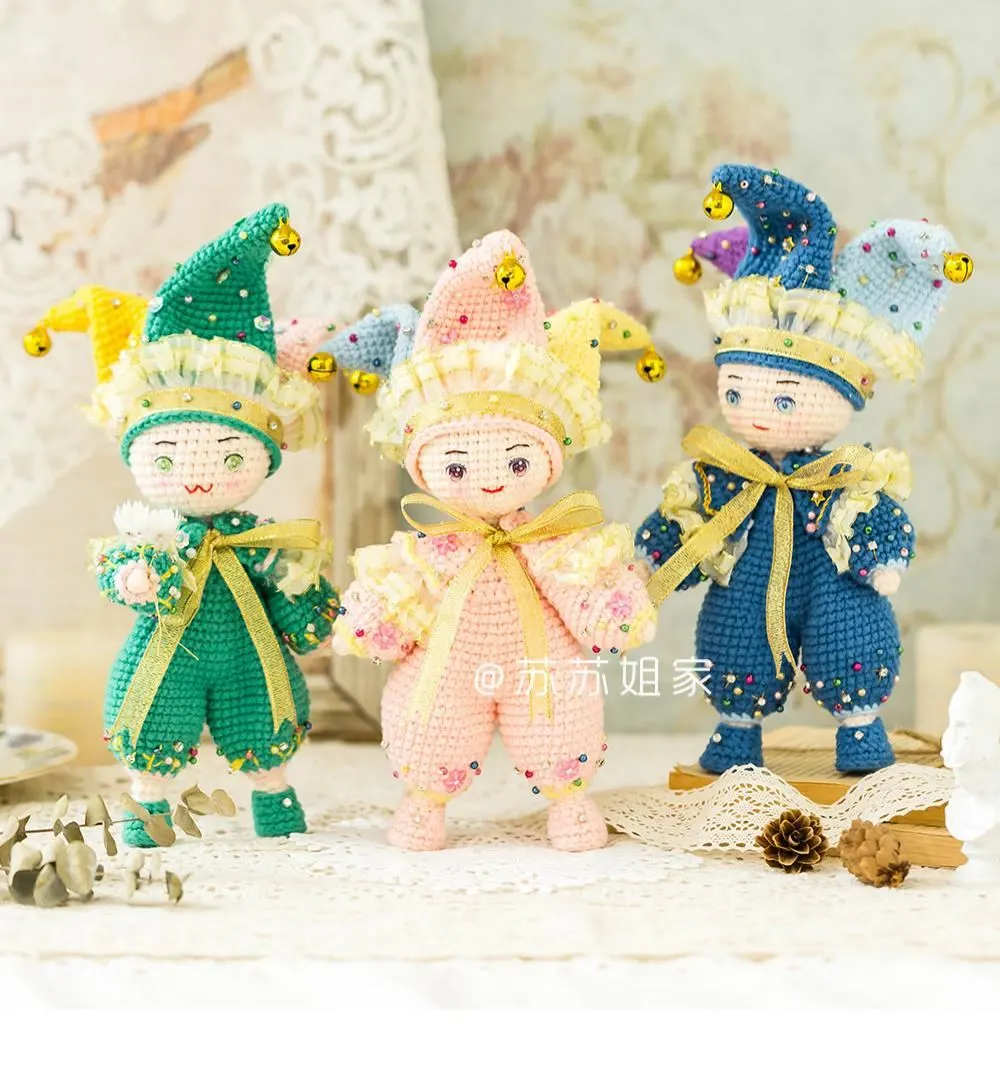
Doll
Constant Cuddle Buddy
Project preview
See the finished project
Pattern format
Instructions
Watch and follow
Video tutorial
| Style | Yarn | Color |
|---|---|---|
| 晚安鸭 | Handcrafted No.2 Knit Thread |  15#Aspen Gold x 2 15#Aspen Gold x 2 |
| 4-Ply Combed Cotton & Acrylic Fibre Hand Knitting Yarn | 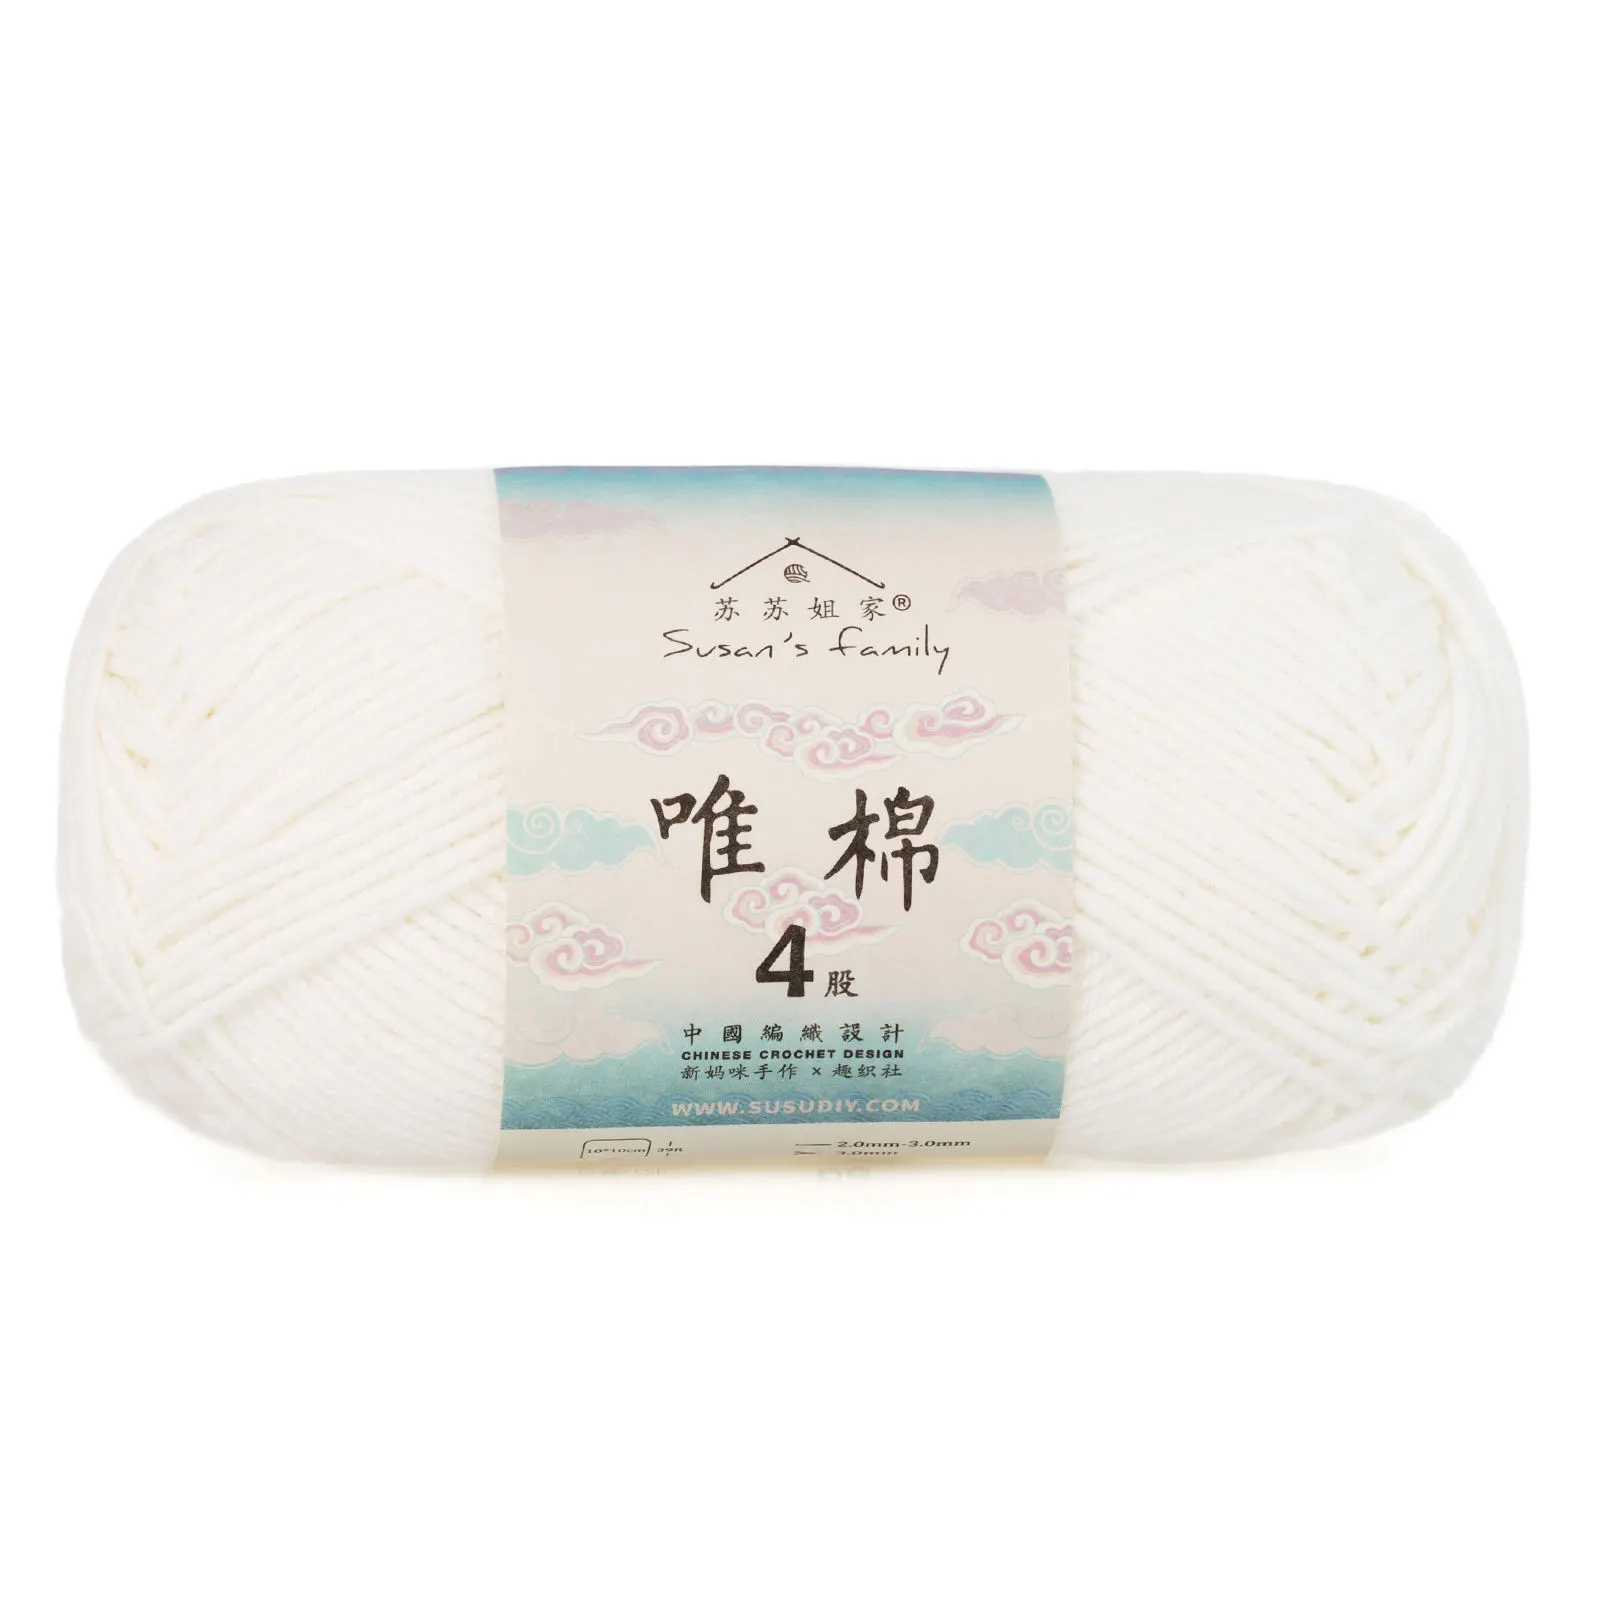 06#Bright White x 1 06#Bright White x 1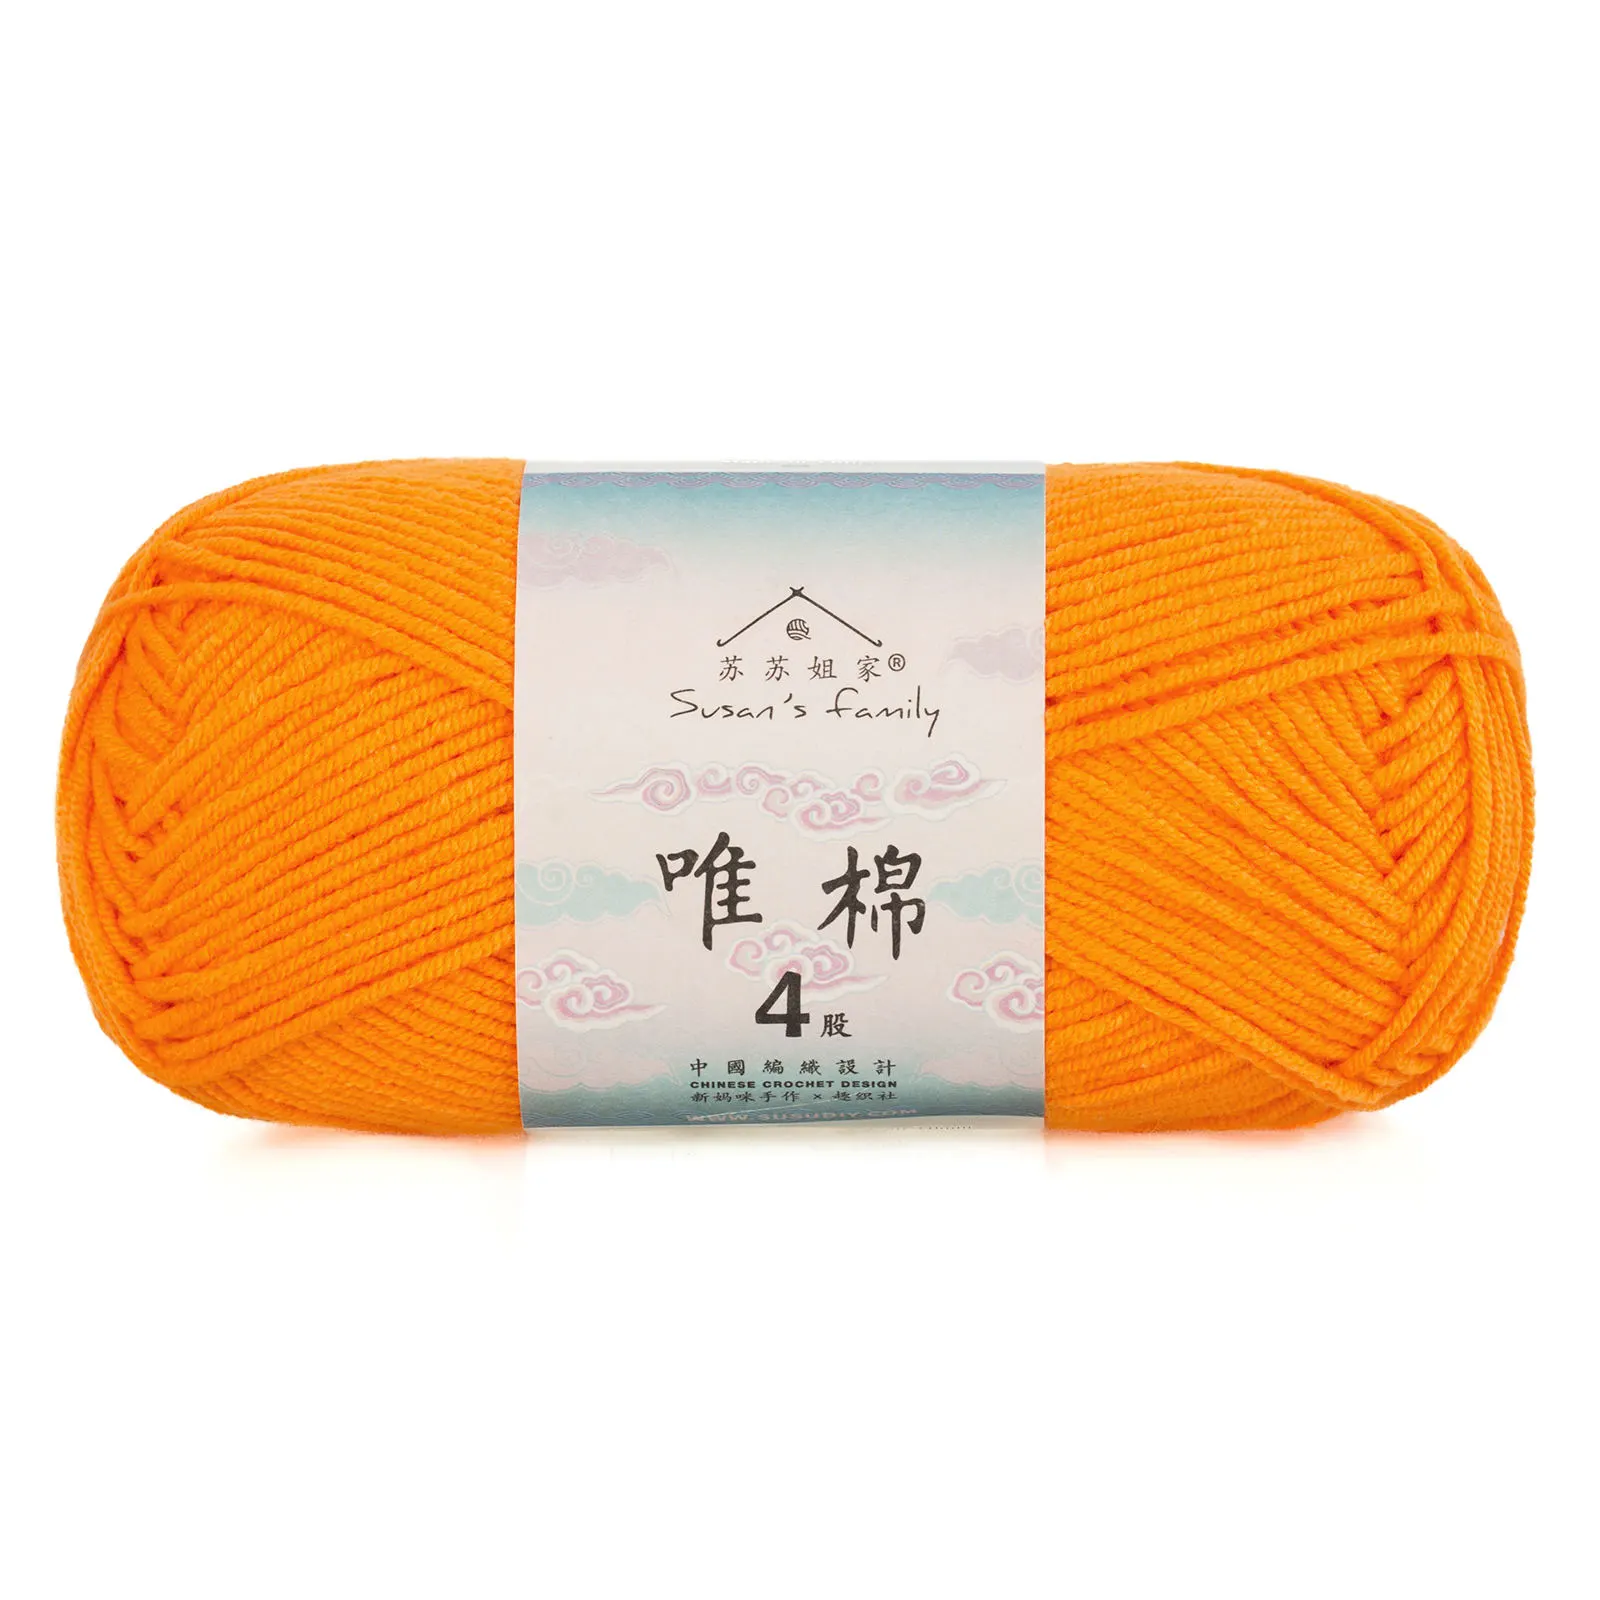 30#Zinnia x 1 30#Zinnia x 1 54#Baby Blue x 1 54#Baby Blue x 1 55#French Blue x 1 55#French Blue x 1 |
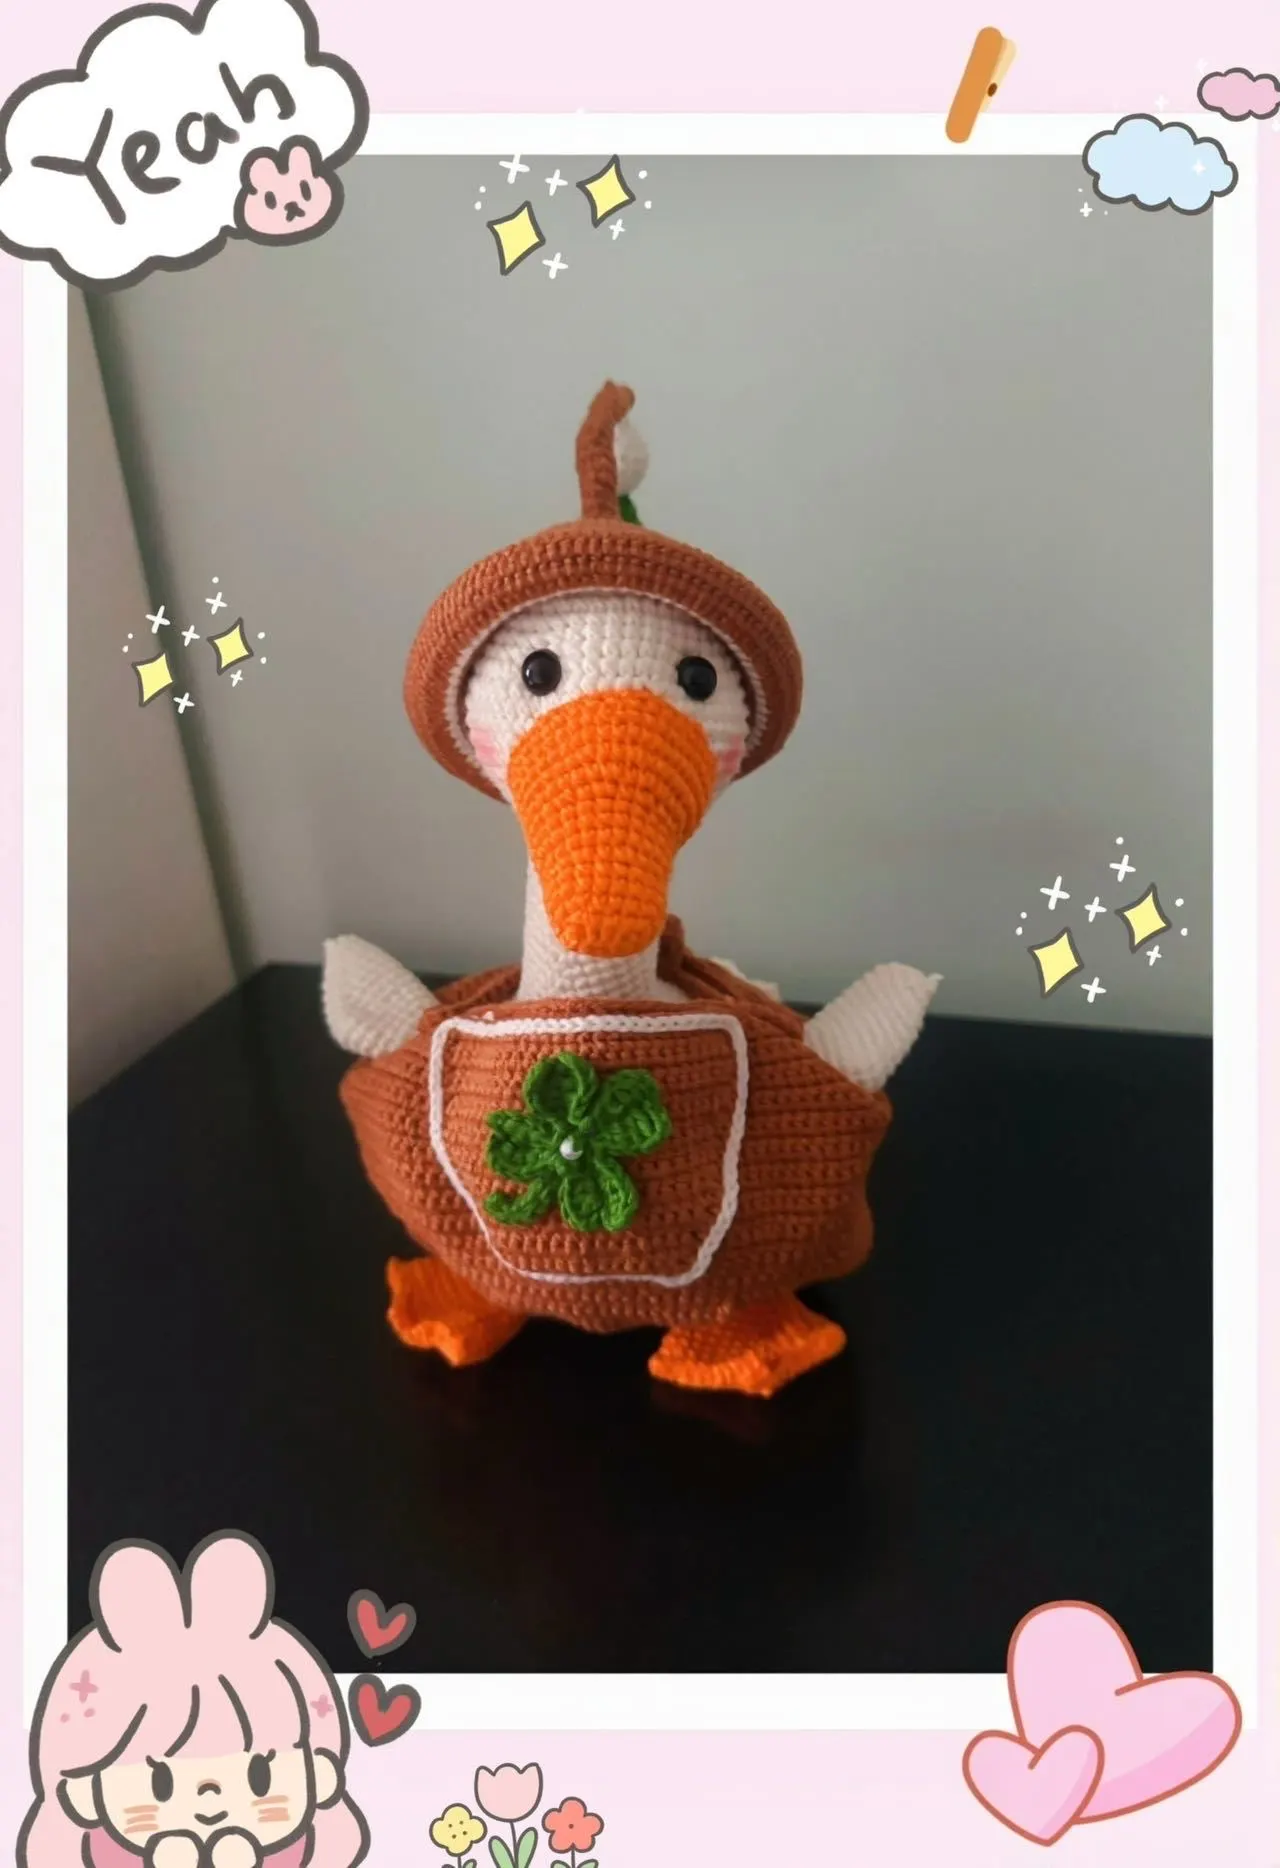
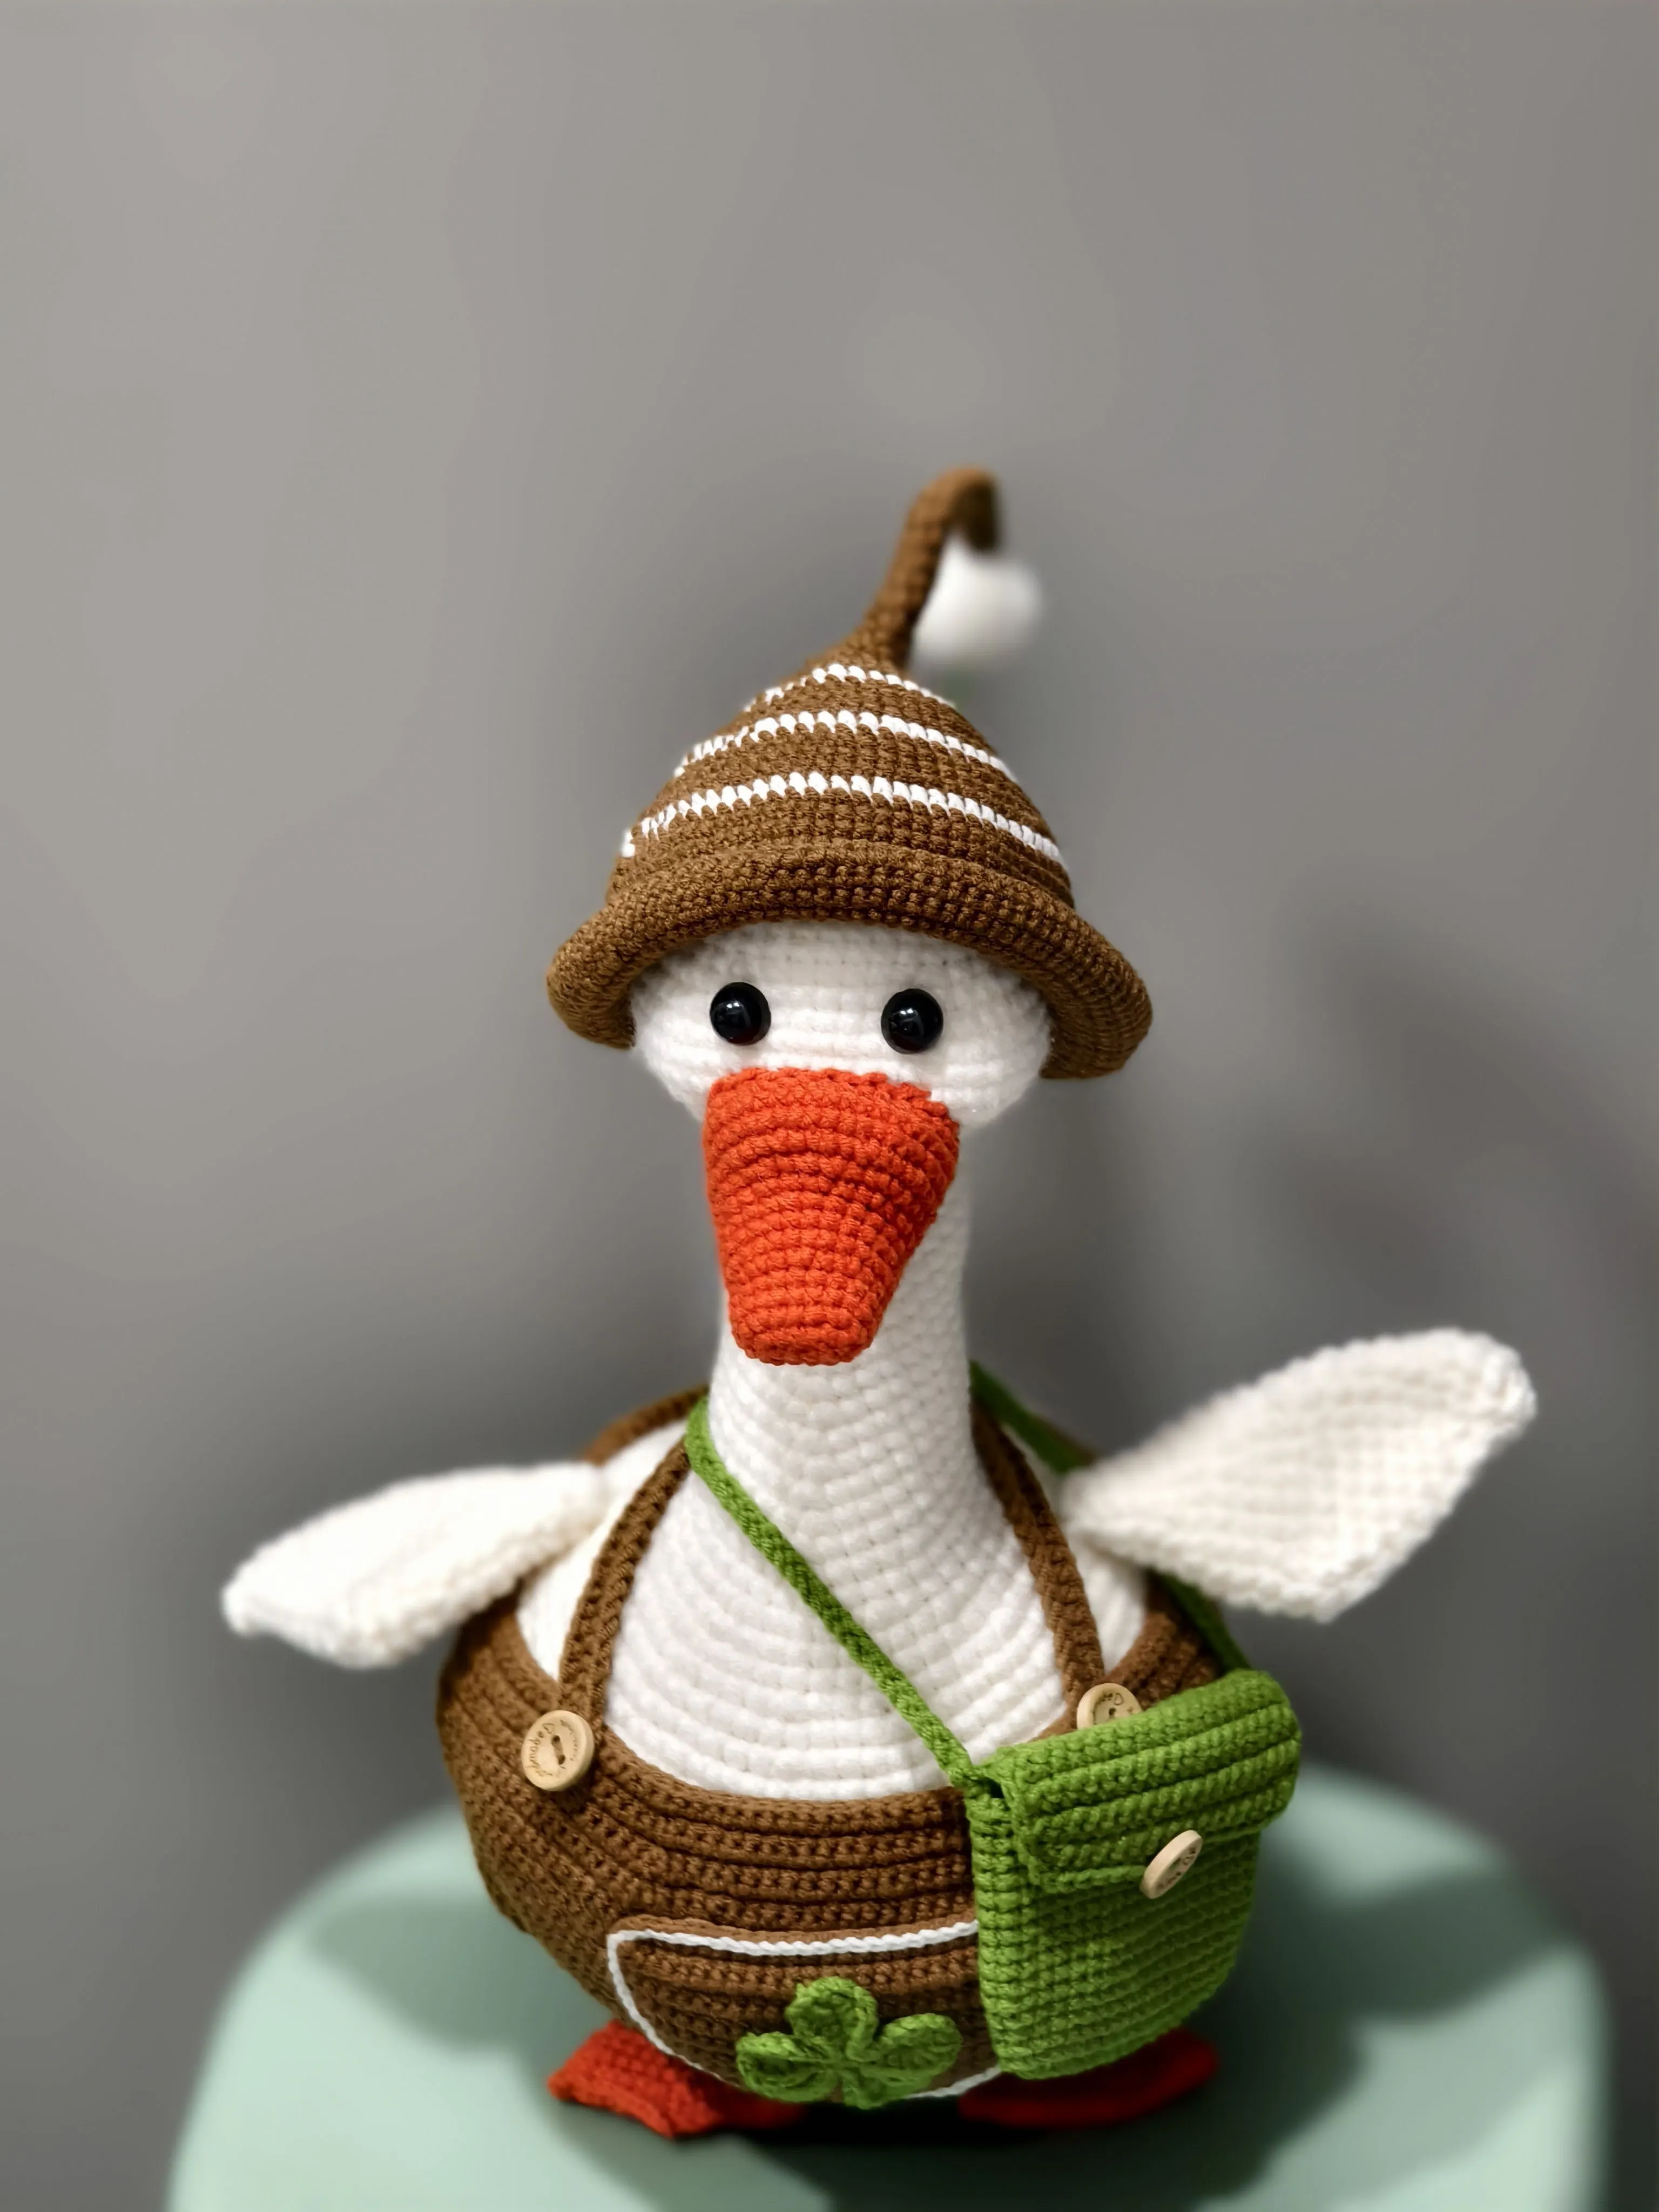
This toy consists of the main body, the other body parts and its outfit. We'll start with the main body, then move on to the other body parts, and finally, crochet the outfit.
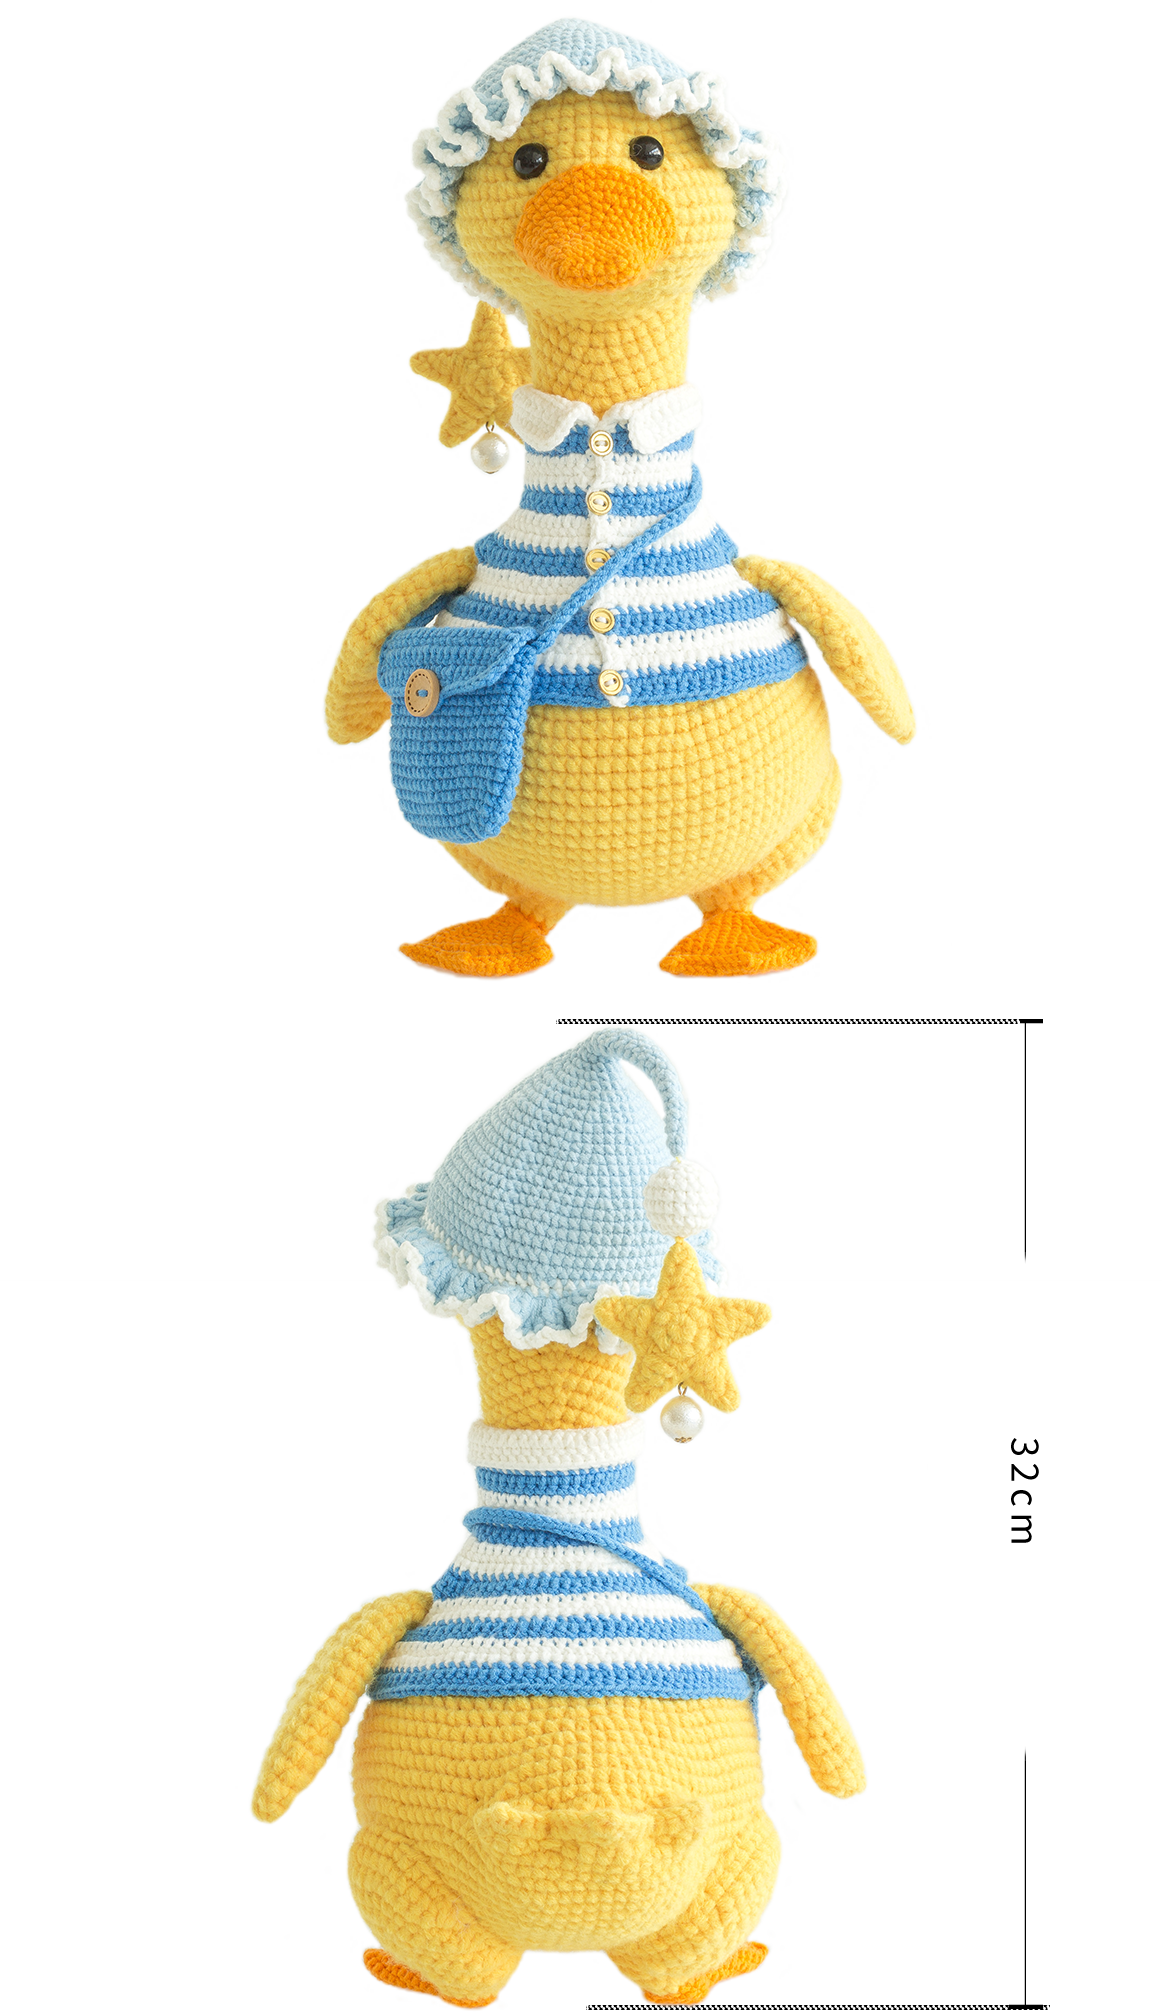
The handcrafted measurements may have an error of 1 to 2 cm. Due to variations in individual tension, the size of the sample is for reference only.
Materials: Susan's Family Handcrafted No.2 Knit Thread,
4-Ply Combed Cotton & Acrylic Fibre Hand Knitting Yarn
Hook: 3.00 mm crochet hook (No.2 Knit Thread),
2.00 mm crochet hook (4-Ply Combed Cotton)

ABBREVIATIONS
Note:
1.This pattern is making in Chinese crochet pattern terms, and the stitch name is written using American terminology. All measurements in charts are in cm.
2.Working in spiral round
When crocheting in spiral rounds, each round working without beginning chain and slip stitch to joining the rounds. instead, work directly into the next stitch.

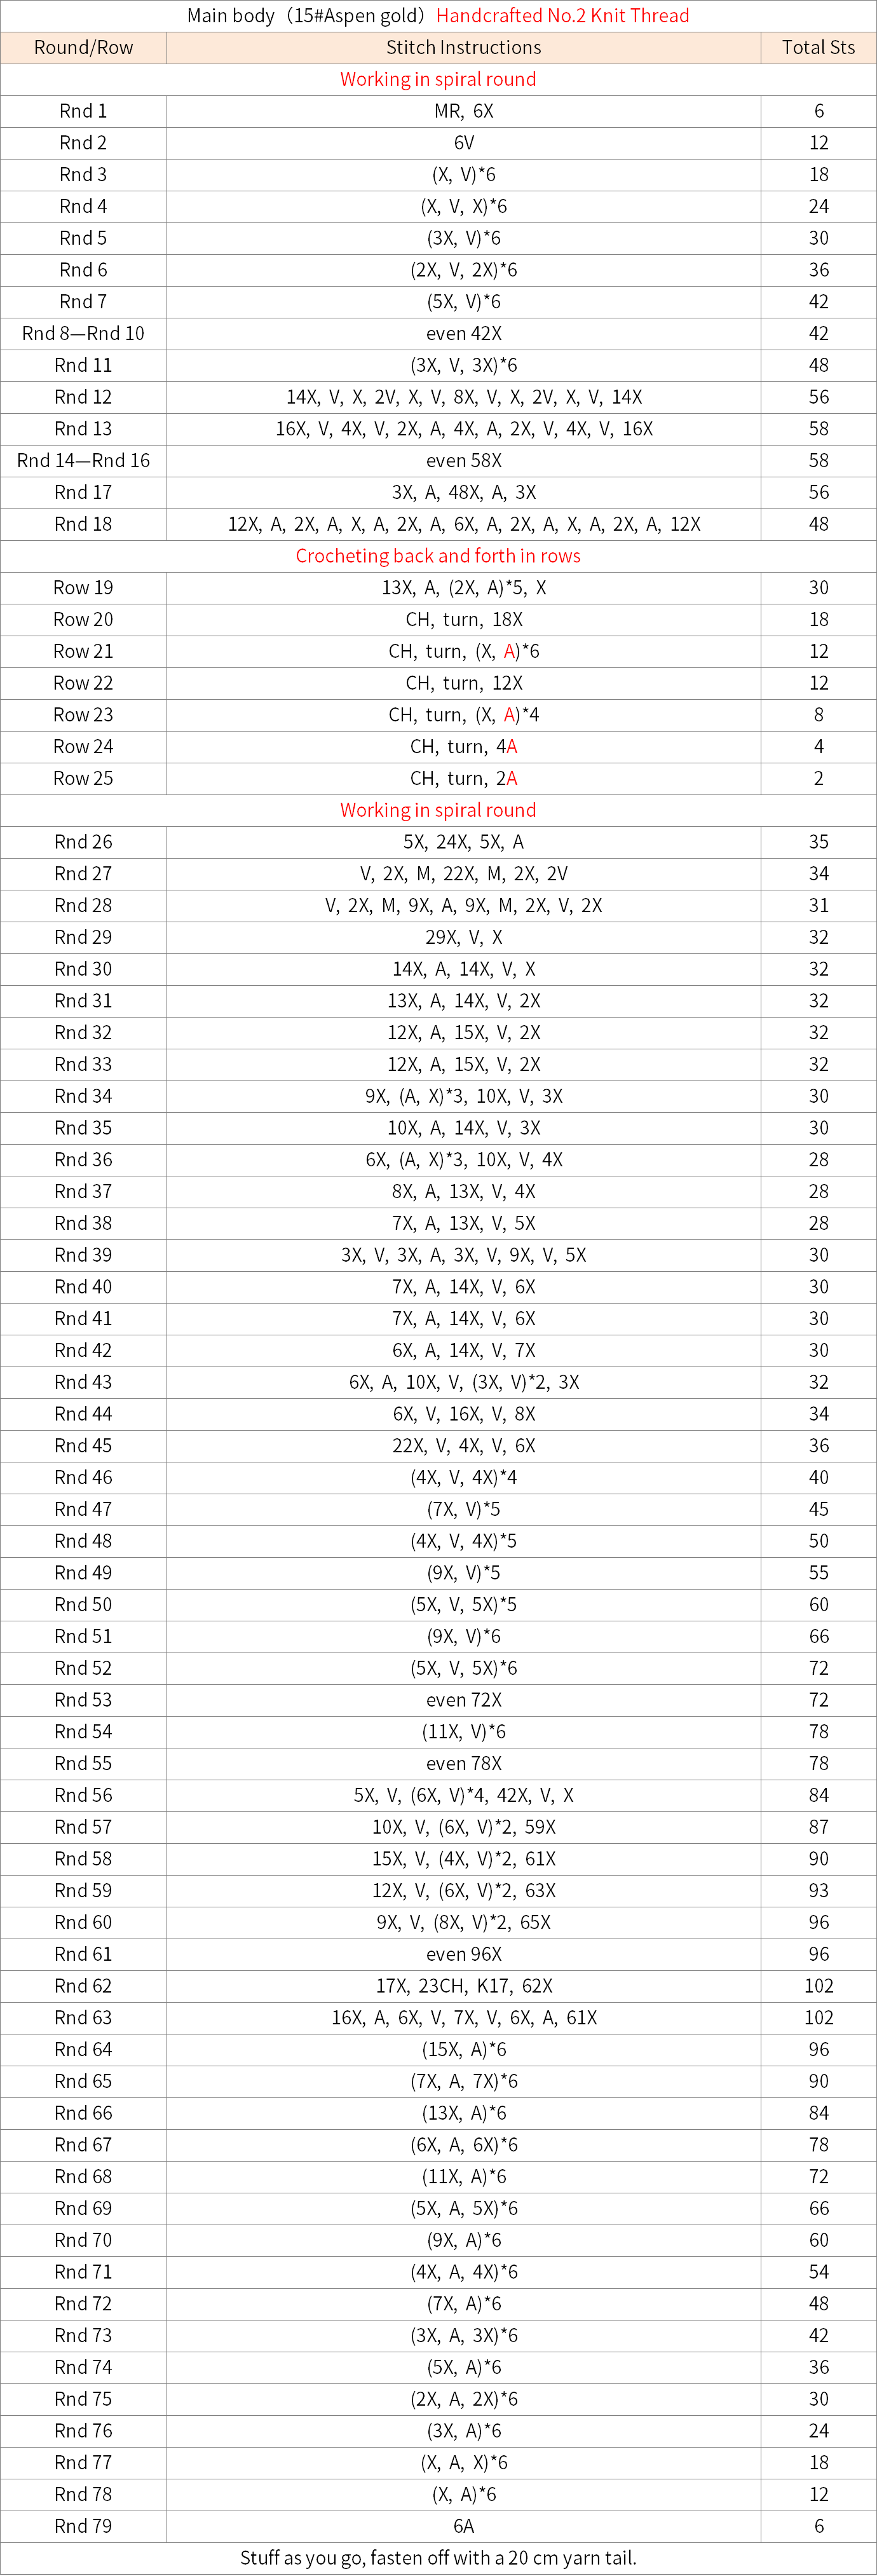
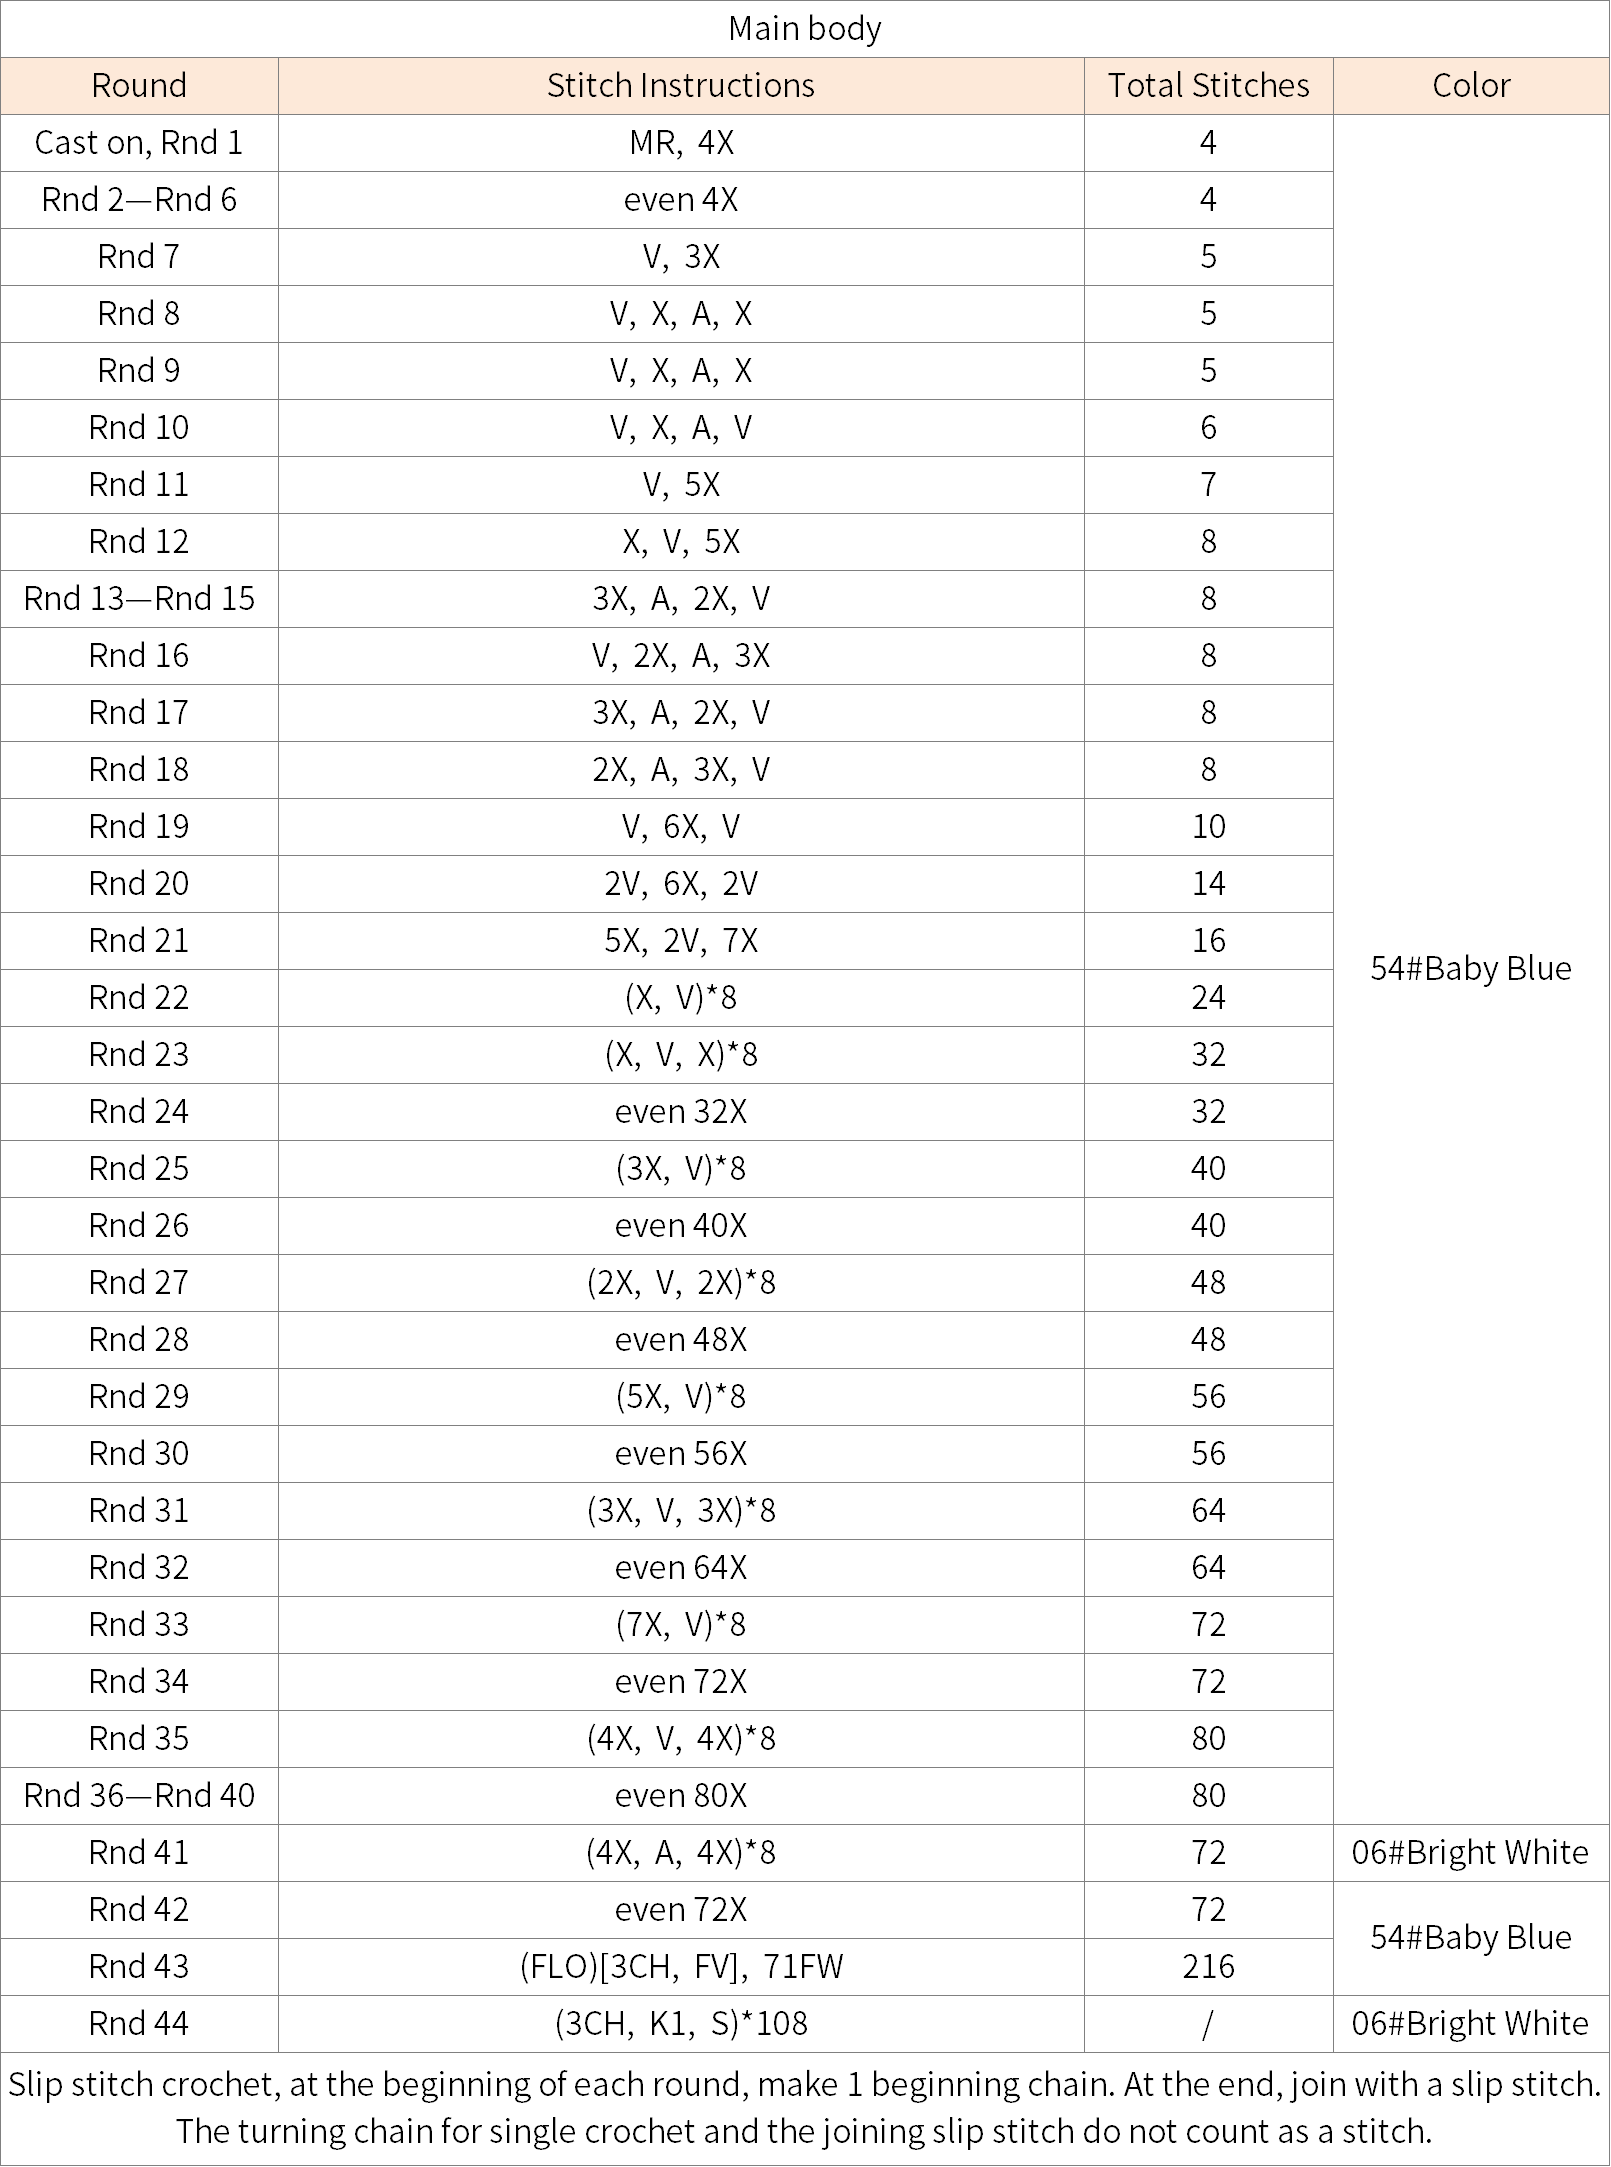
Part 1 Main bodyA 00' 37'' (Part 1)
The main body start with the magic ring, crocheting in spirals counterclockwise, and stuffing as you go. Please refer to the video demonstration for more details.
Part 2 The other body sectionsB
Other body parts include tail, wings, feet, legs, eyes and mouth.
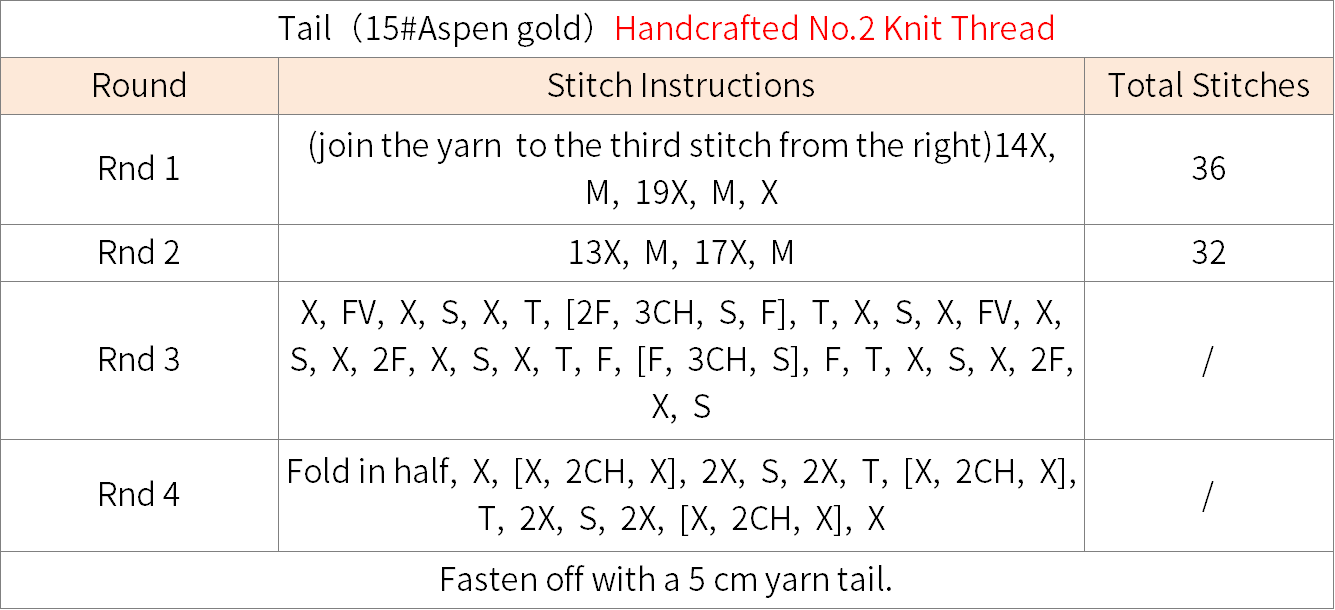
Step 1 TailB1 43' 40'' (Part 1)
The tail is worked along the opening of the main body. Crochet in spiral counterclockwise. Please refer to the video demonstration for more details.
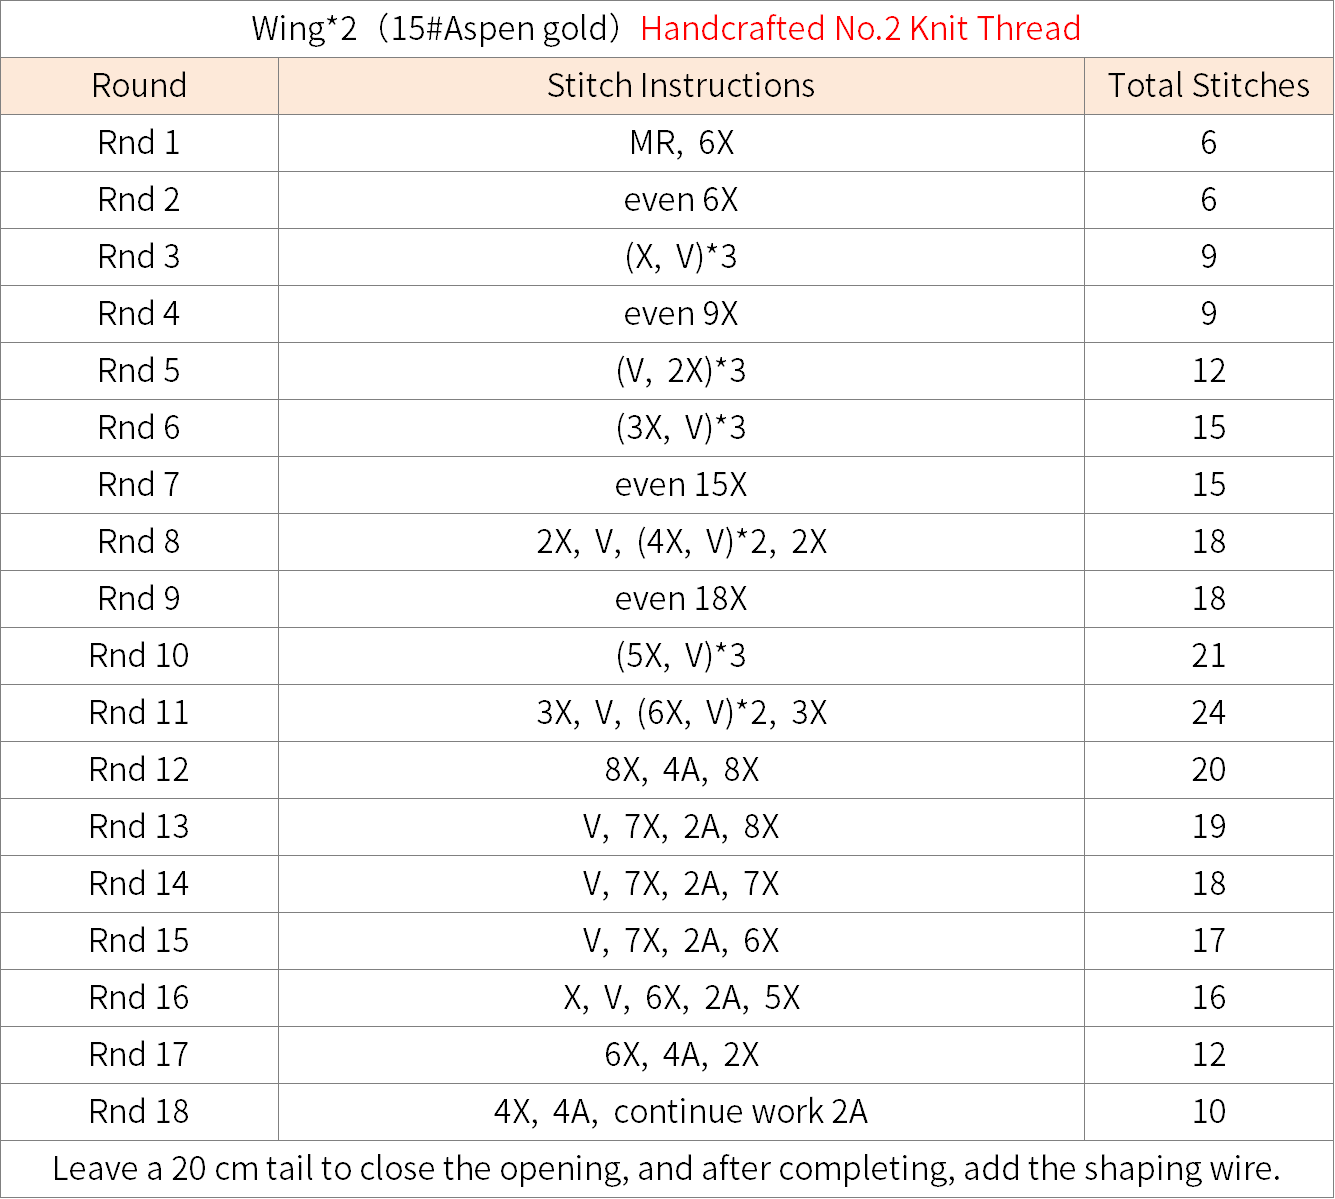
Step 2 WingsB2 66' 57'' (Part 1)
There are two wings in total. The crochet method is the same. Both start with a Magic Ring. Work in spiral counterclockwise. When done, join the shaping wire. Finally, sew them onto the corresponding placements of the main body. Please refer to the video demonstration for more details.
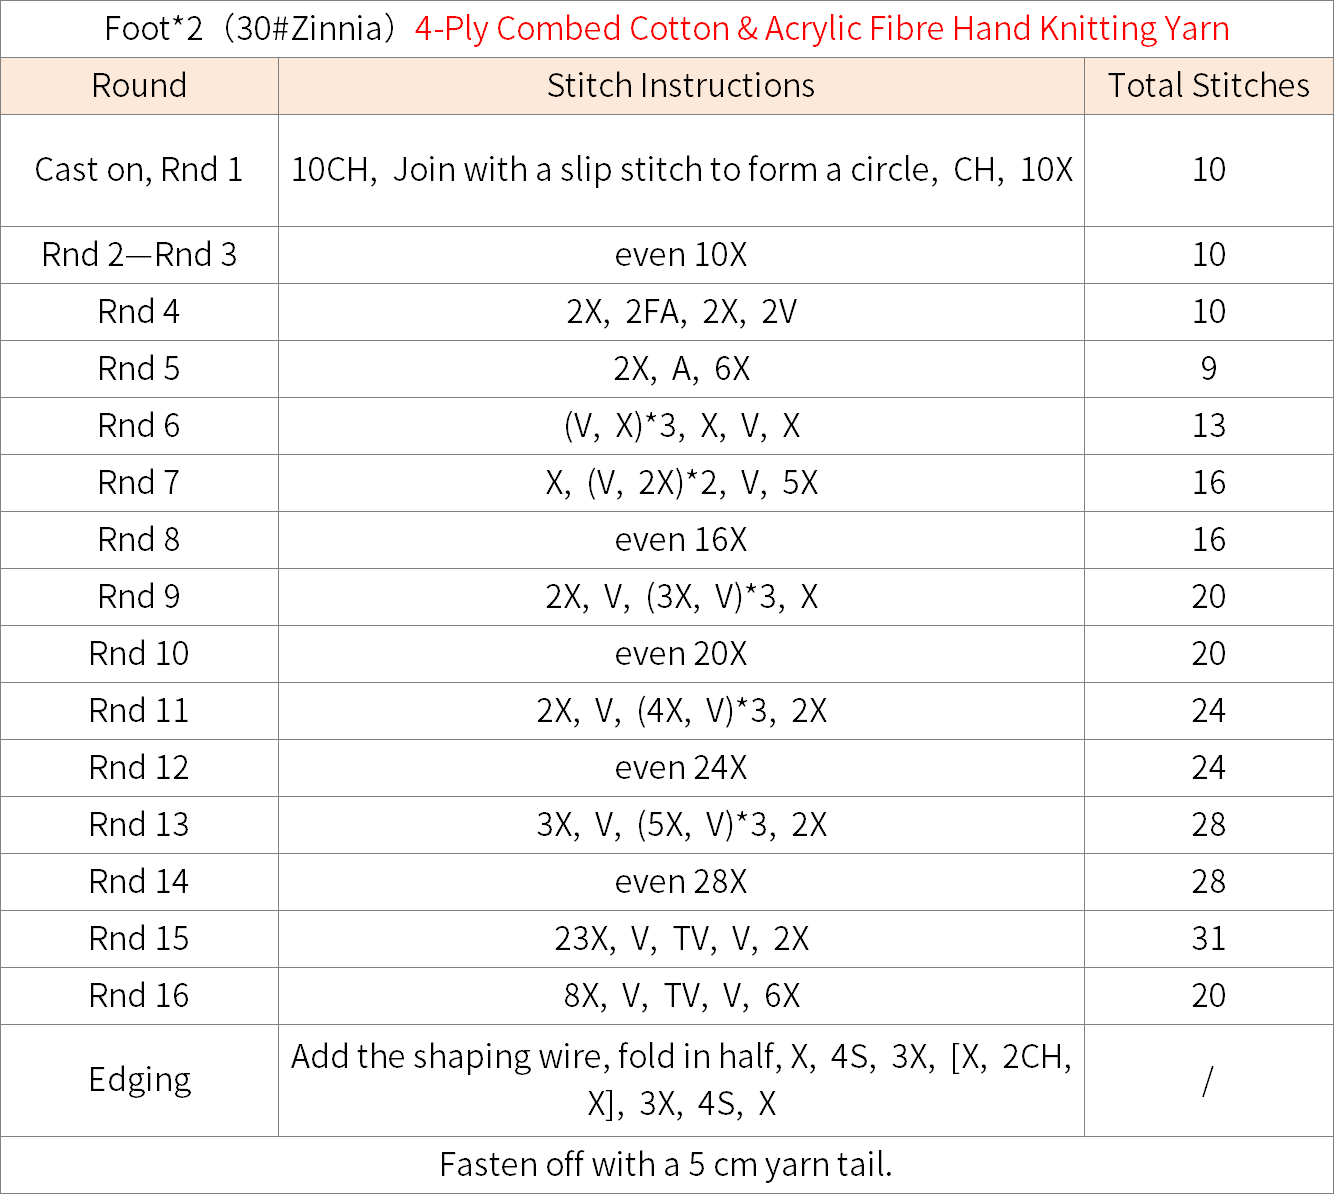
Step 3 FeetB3 78' 06'' (Part 1)
There are two feet in total. They're crocheted using the same method. Both begin with the chain ring. Crochet in a spiral counterclockwise, and join the shaping wire as you work. Please refer to the video demonstration for more details.
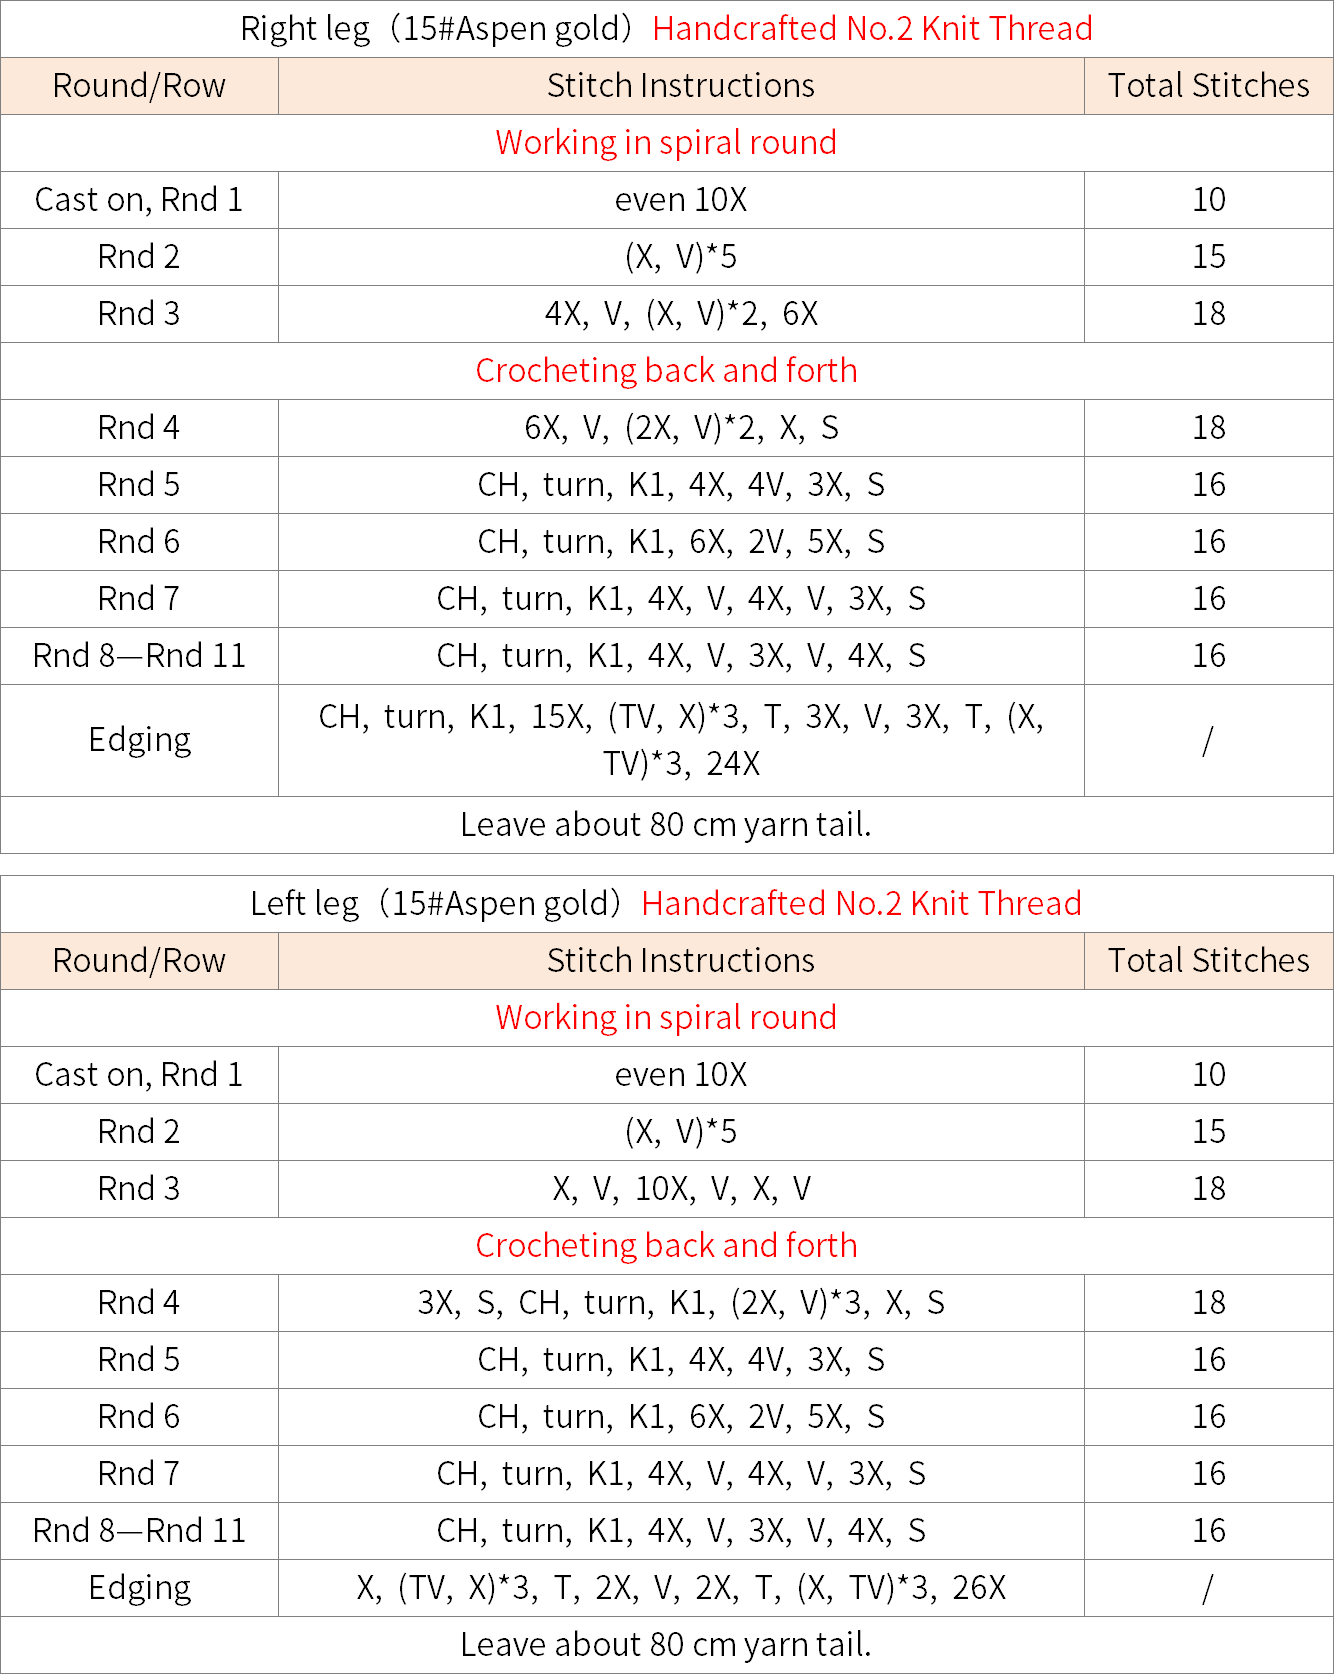
Step 4 LegsB4 00' 12'' (Part 2)
The legs consist of a left leg and a right leg. Here the left and right refers to the left and right of the toy. Both start by working on the opposite side from where you begin the foot. First, crochet in spiral counterclockwise. Then, work back and forth in rows. Please refer to the video demonstration for more details.
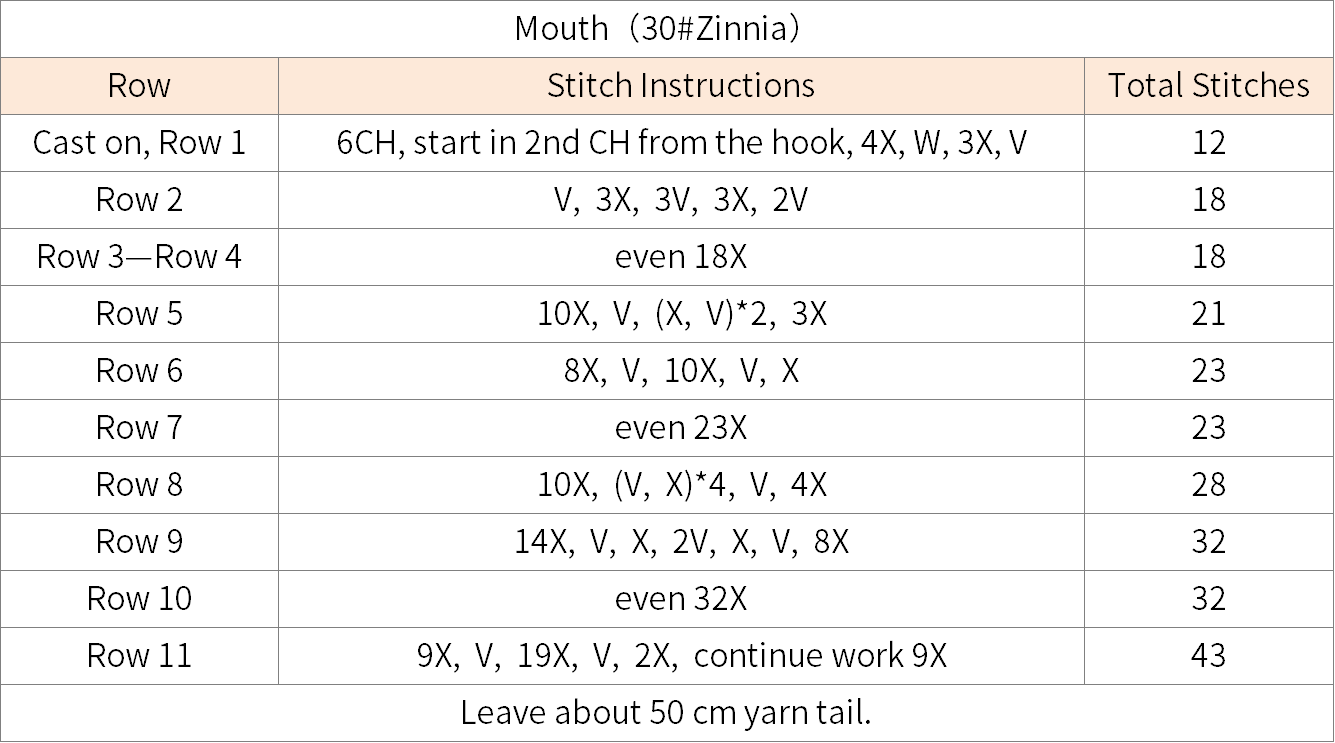
Step 5 Eyes B5, mouthB6 28' 03'' (Part 2)
First, mark the eye sockets on the main part and add the eyes. For the mouth, start with a chain stitch and crochet in spirals counter clockwise. After completing it, add stuffing and sew it onto the main part. Please refer to the video demonstration for more details.
Part 3 OutfitC
Outfit includes clothing, hat and bag.
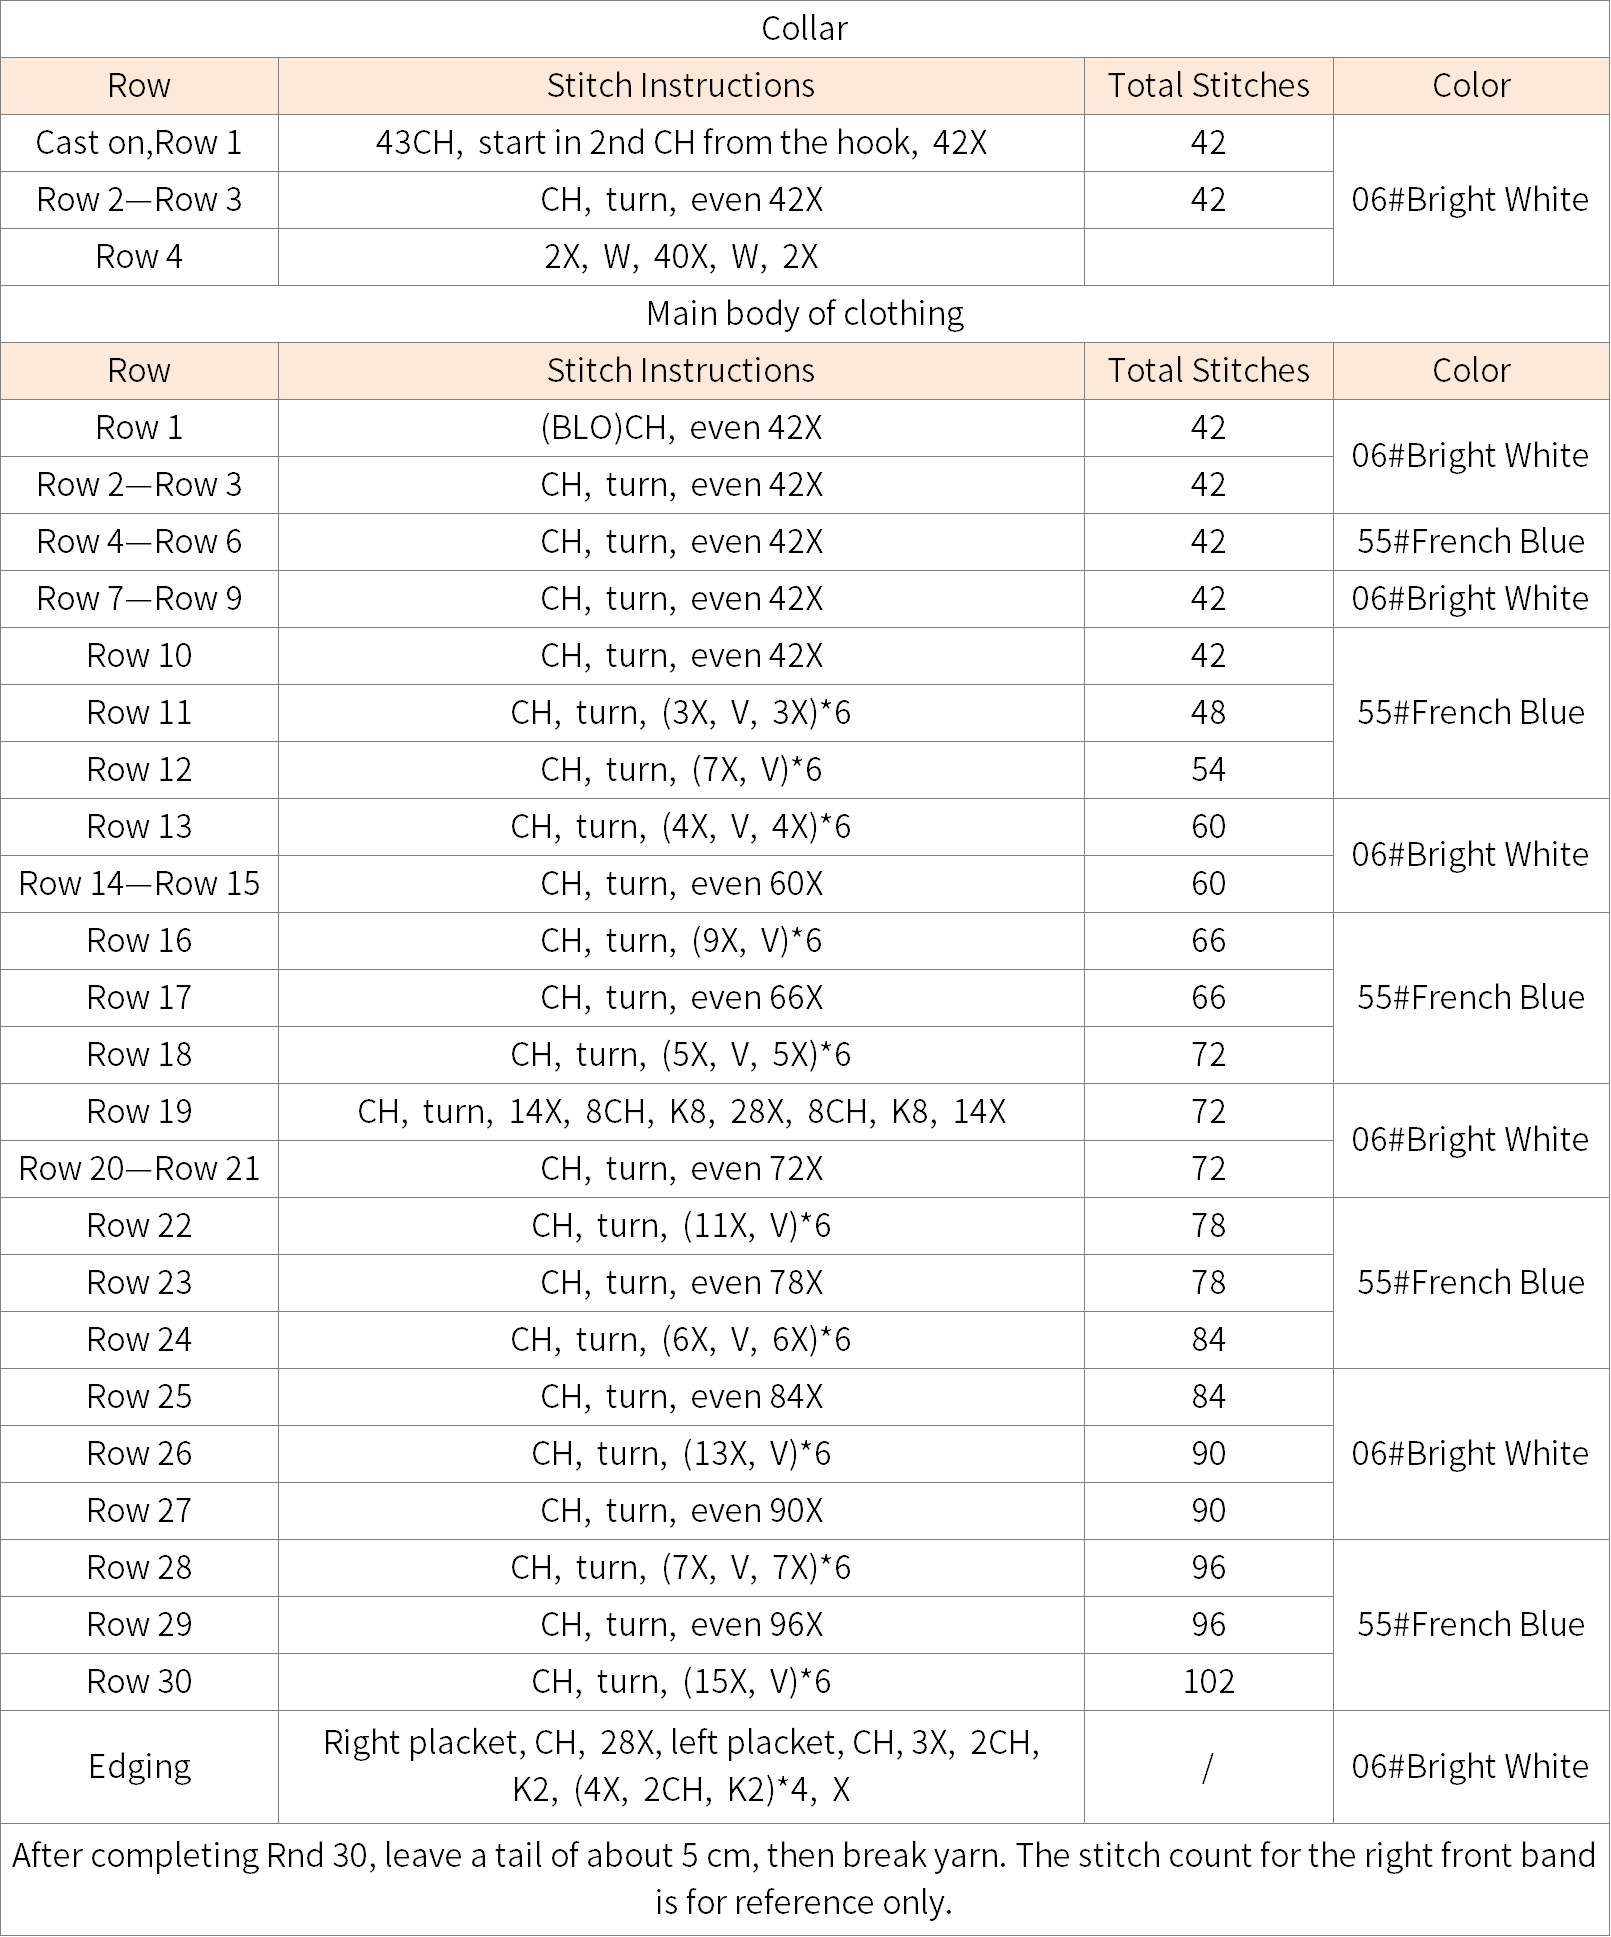
Step 1 ClothingC1 43' 36'' (Part 2)
The clothing begins with chains. Work back and forth along the chains for the collar. Then, work back and forth for the main body of clothing. Finally, add buttons. Please refer to the video demonstration for more details.
Step 2 HatC2 62' 46'' (Part 2)
The hat starts with a magic ring. Crochet the main body of the hat counterclockwise. Color changes are needed during the process. After completion, add the pom-pom and the star. Please refer to the video demonstration for more details.
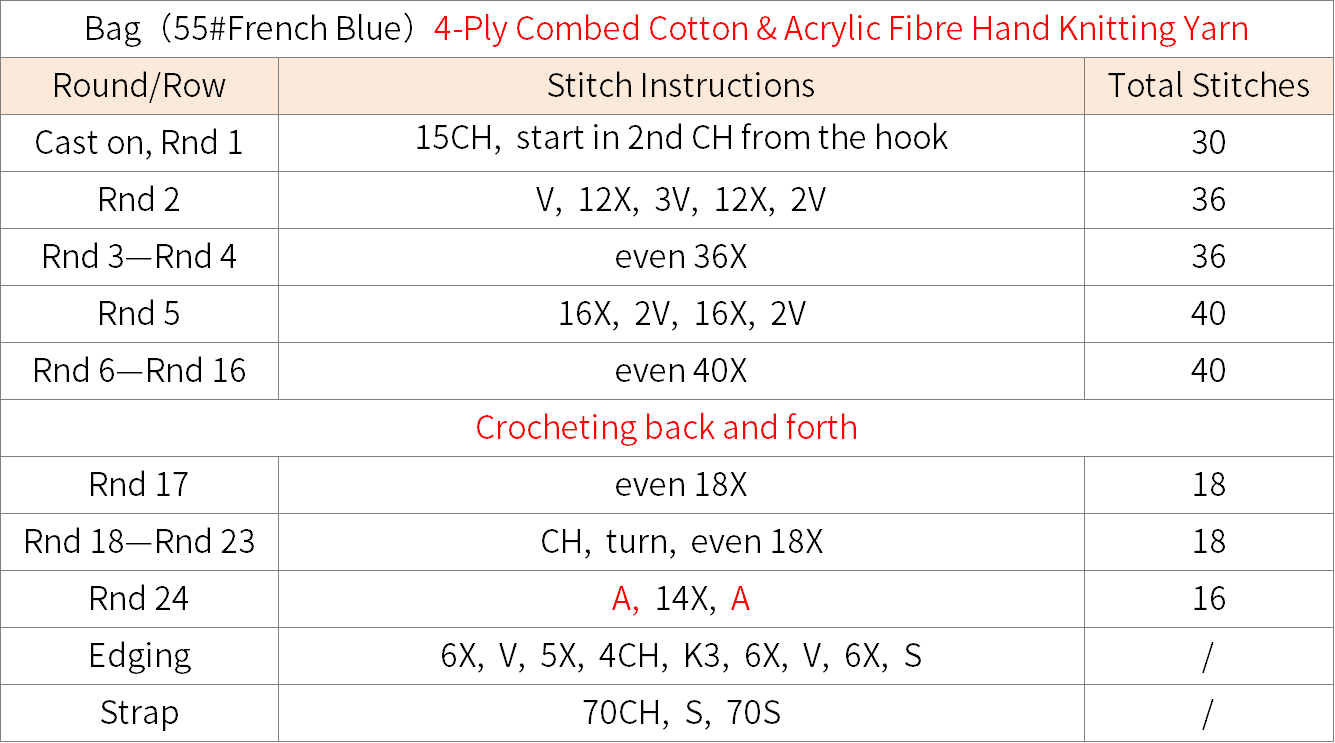
Step 3 BagC3 88' 53'' (Part 2)
The bag will begin with chains. Crochet in rounds counterclockwise along the beginning chains. Work back and forth for the final rows. After that, edging the border. Then, crochet the strap. Finally, attach the button. Please refer to the video demonstration for more details.
Made by the community