Doll
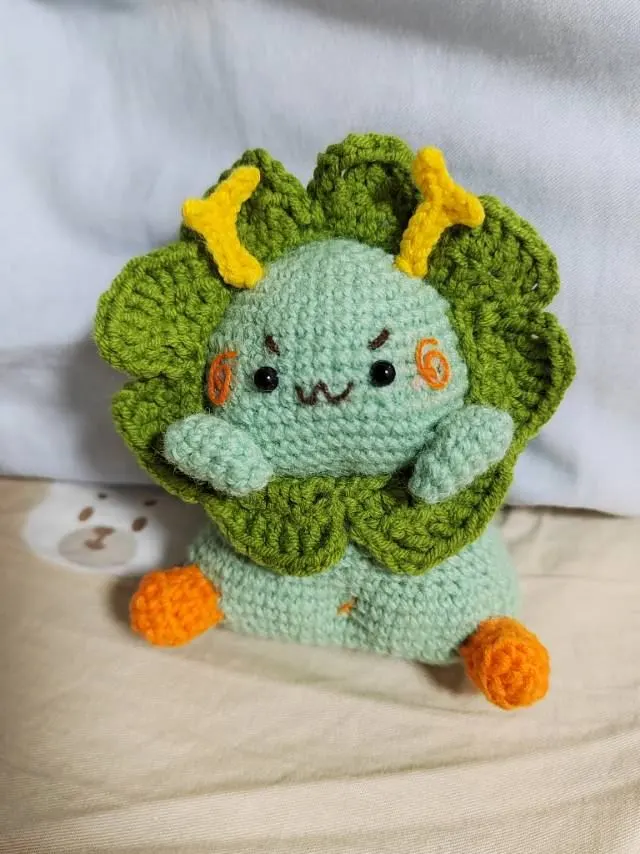
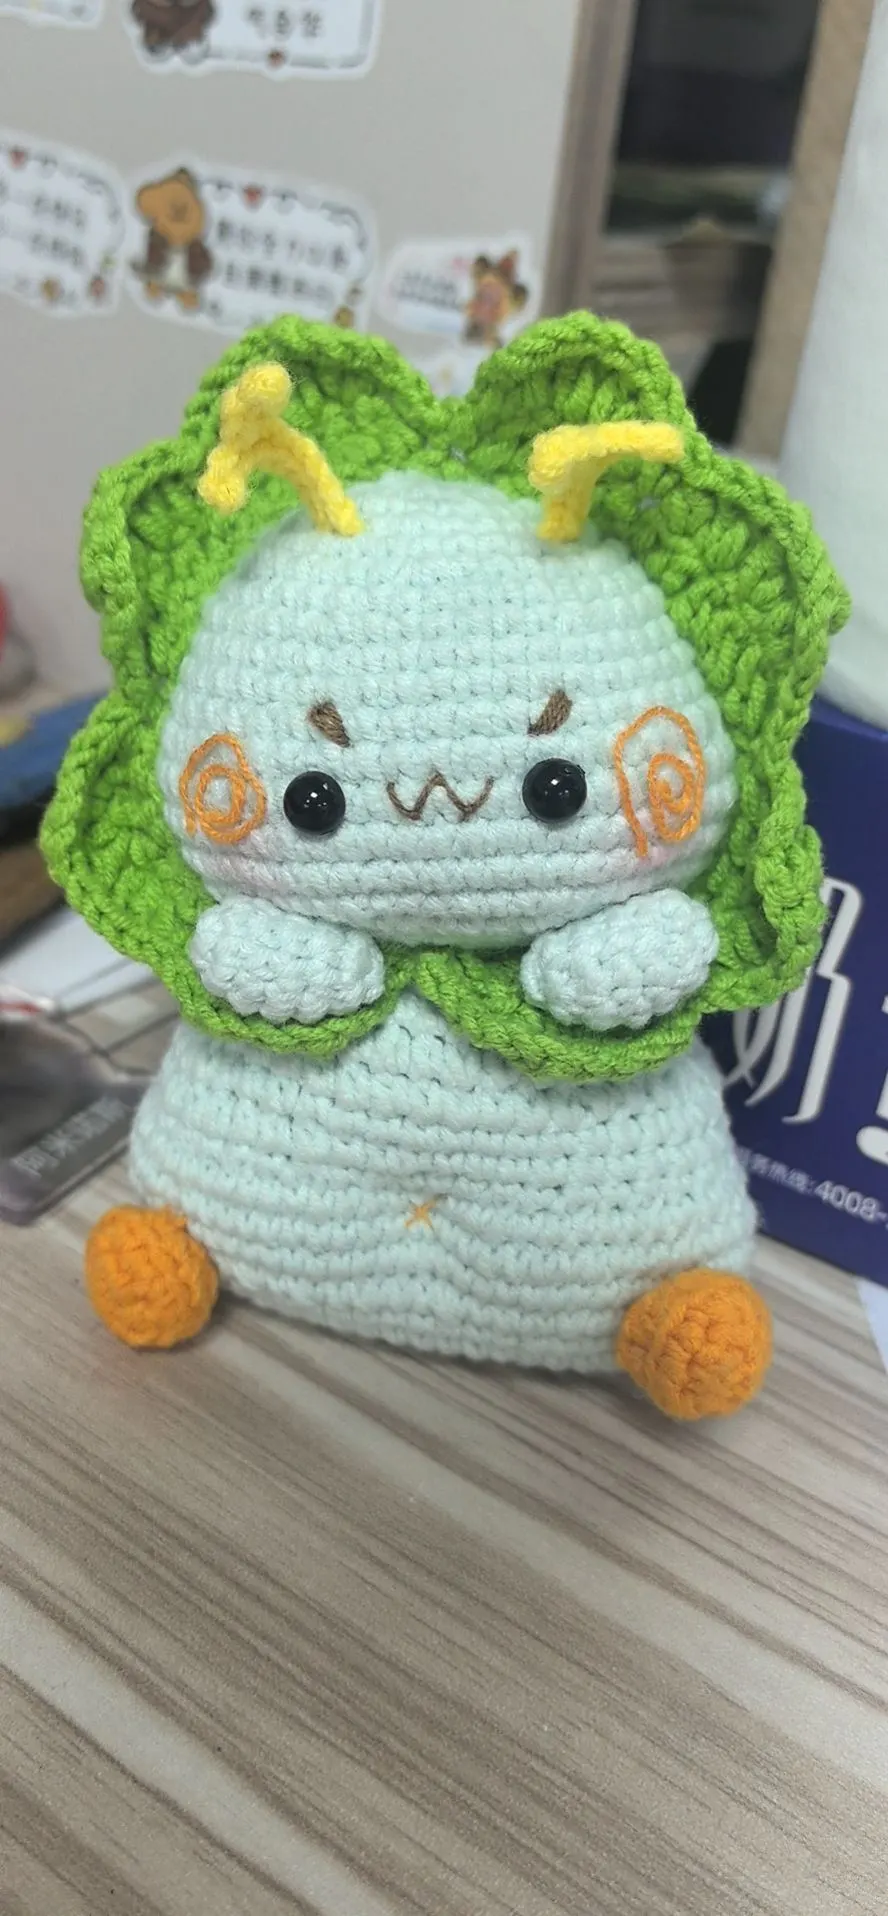
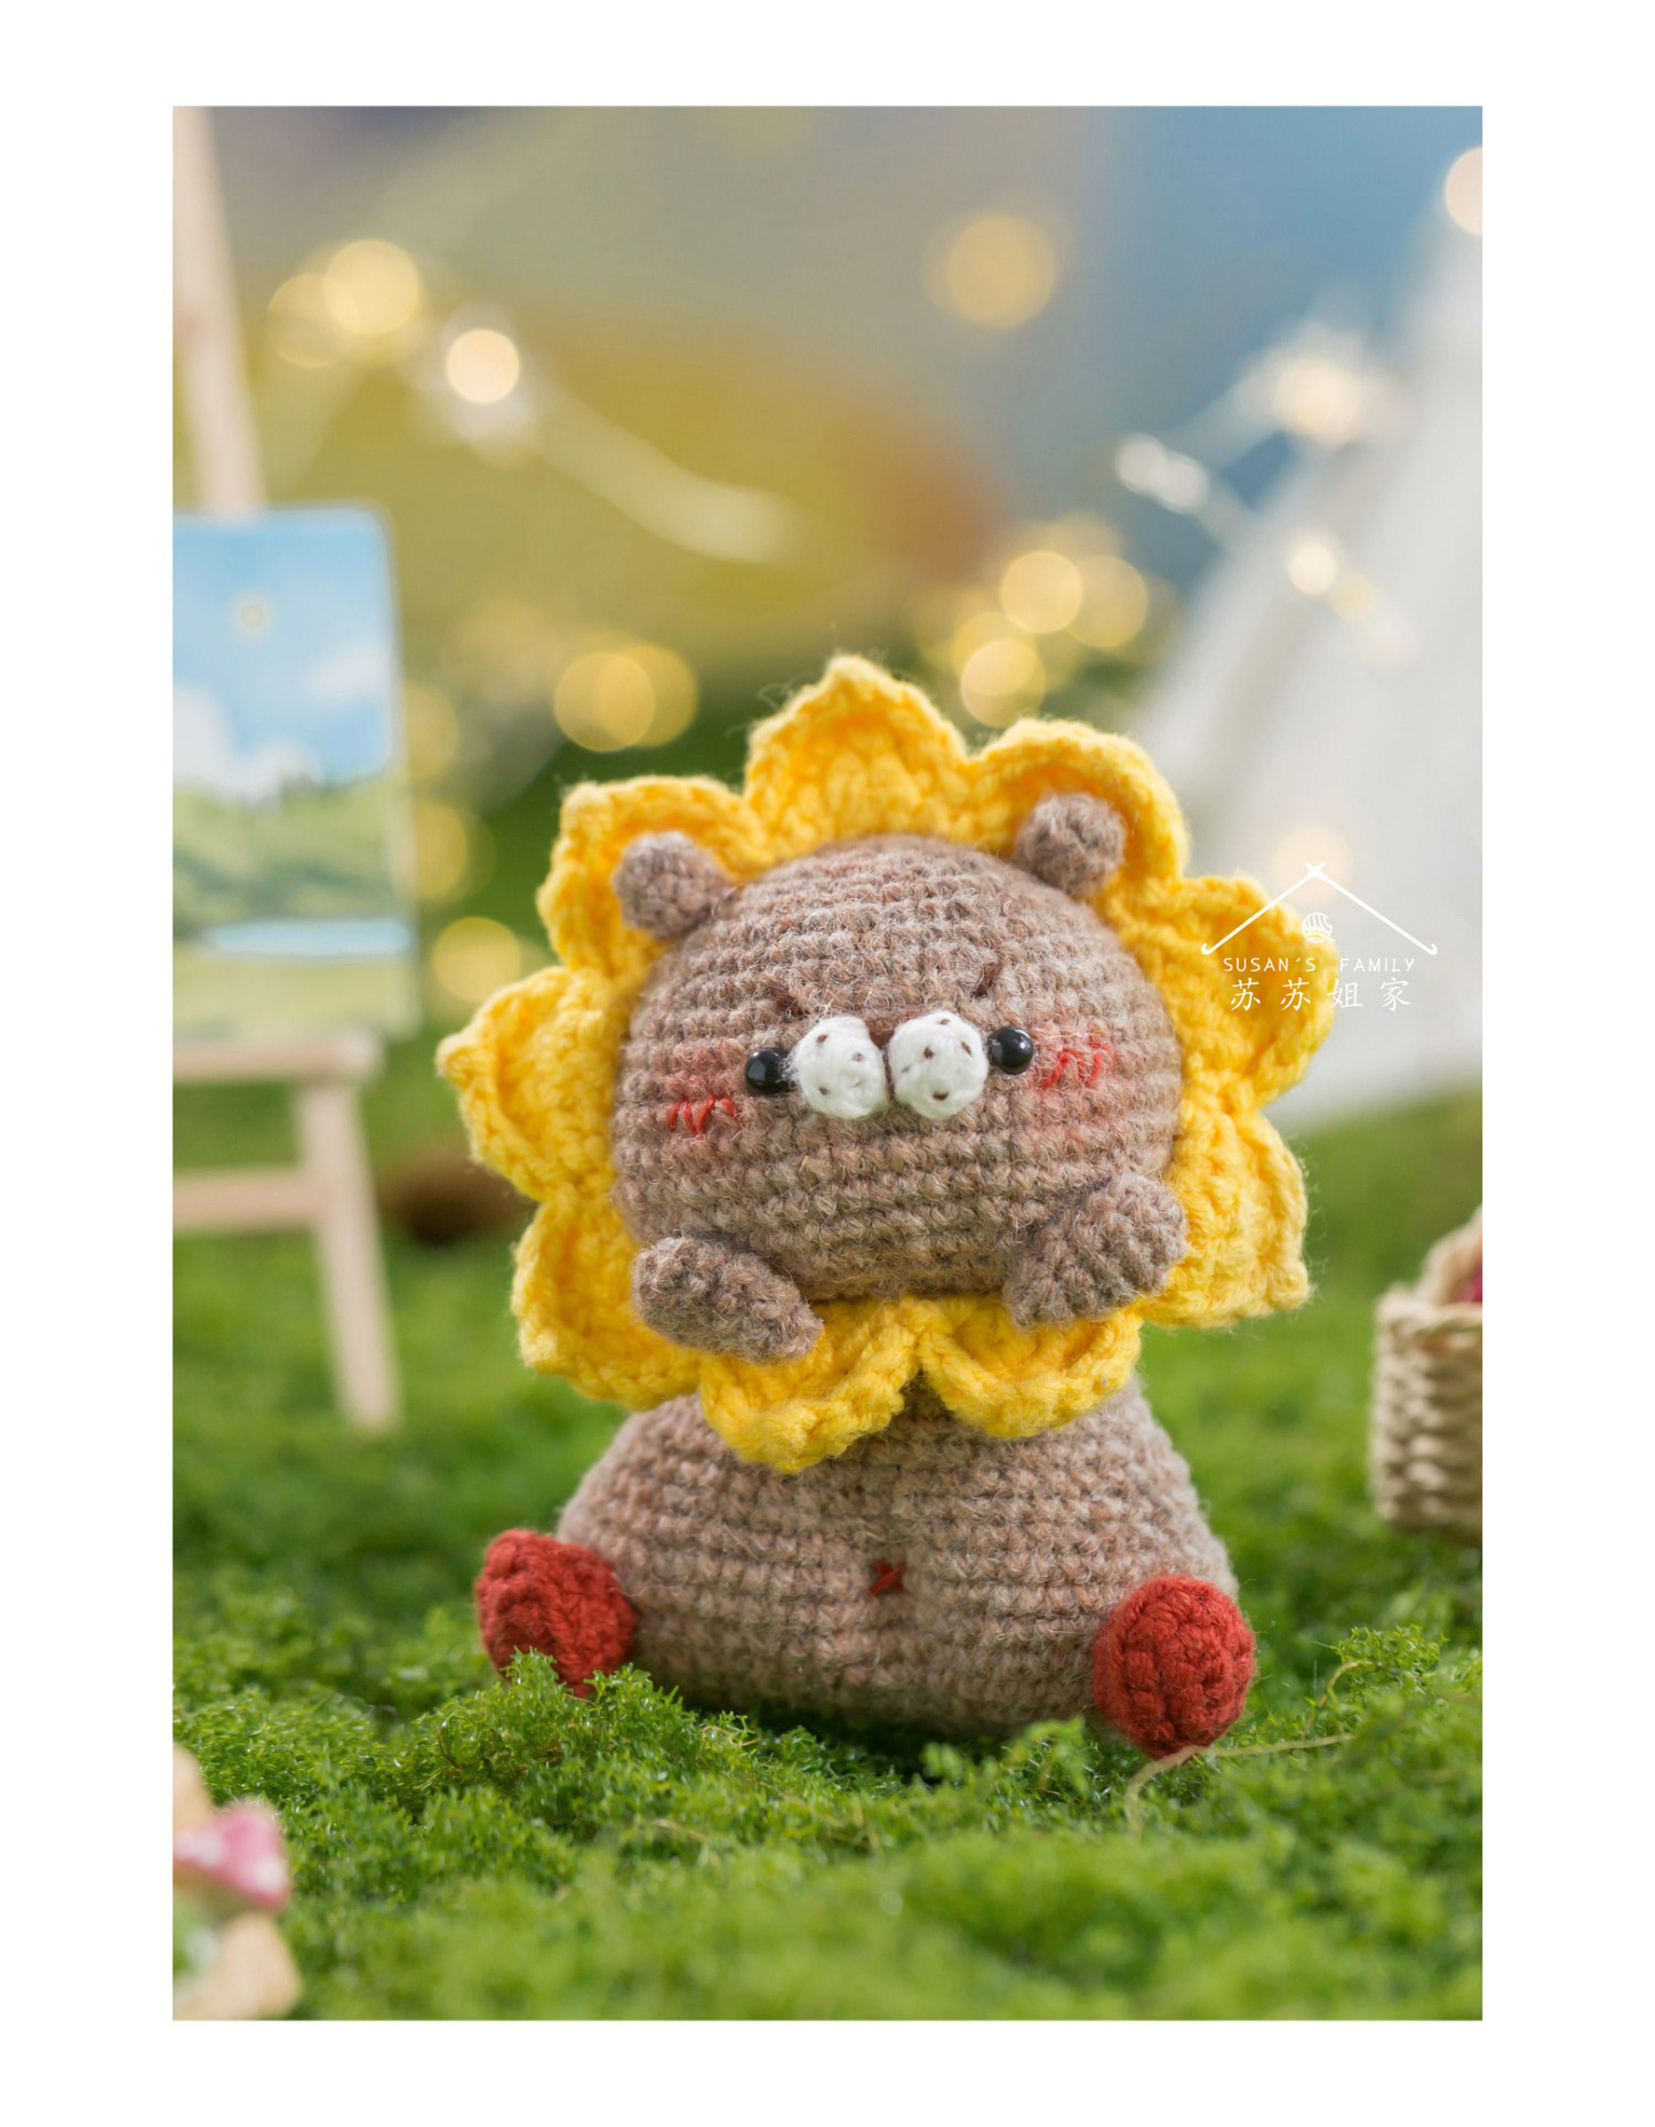
Crooked Little Head doll
Project preview
See the finished project
Pattern format
Instructions
Watch and follow
Video tutorial
This doll consists of the head, body, limbs, facial features, headpiece and the tail.
Materials:4-Ply Combed Cotton & Acrylic Fibre Hand Knitting Yarn, Susan's Family Shetland
Hook:1.5mm crochet hook
Note:
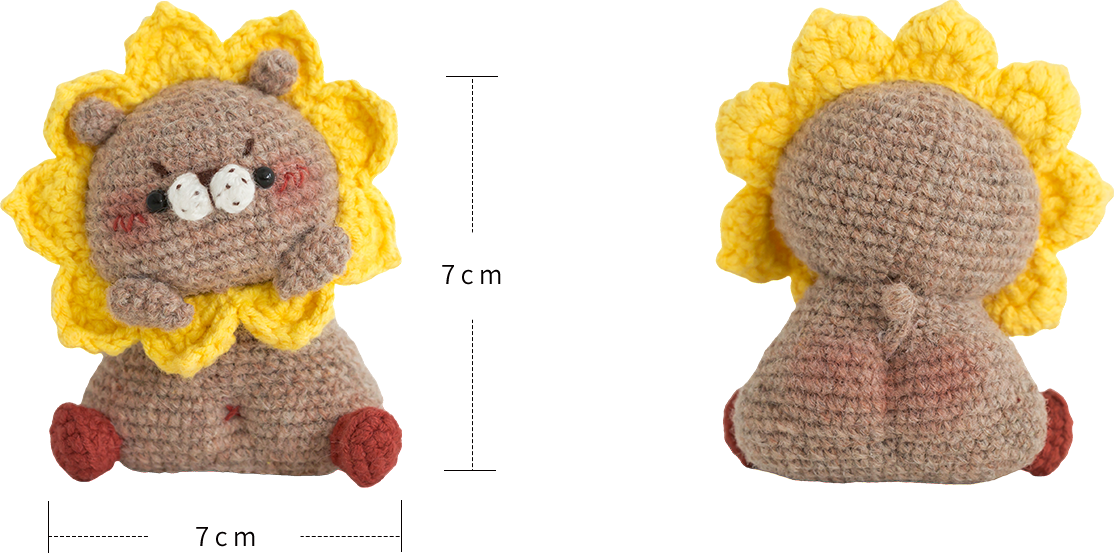
The handcrafted measurements may have an error of 1 to 2cm. Due to variations in individual tension, the size of the sample is for reference only.
Chart Key








ABBREVIATIONS
MRadjustable magic ring
CHchain
XX stitch single crochet
A = sc2toginvisible single crochet 2 stitches together
V = sc2-in-12 single crochets into the same stitch
W = sc3-in-13 single crochets into the same stitch
BLOback loop only
[...]in the same stitch
(...)×6crochet item in the parentheses six times

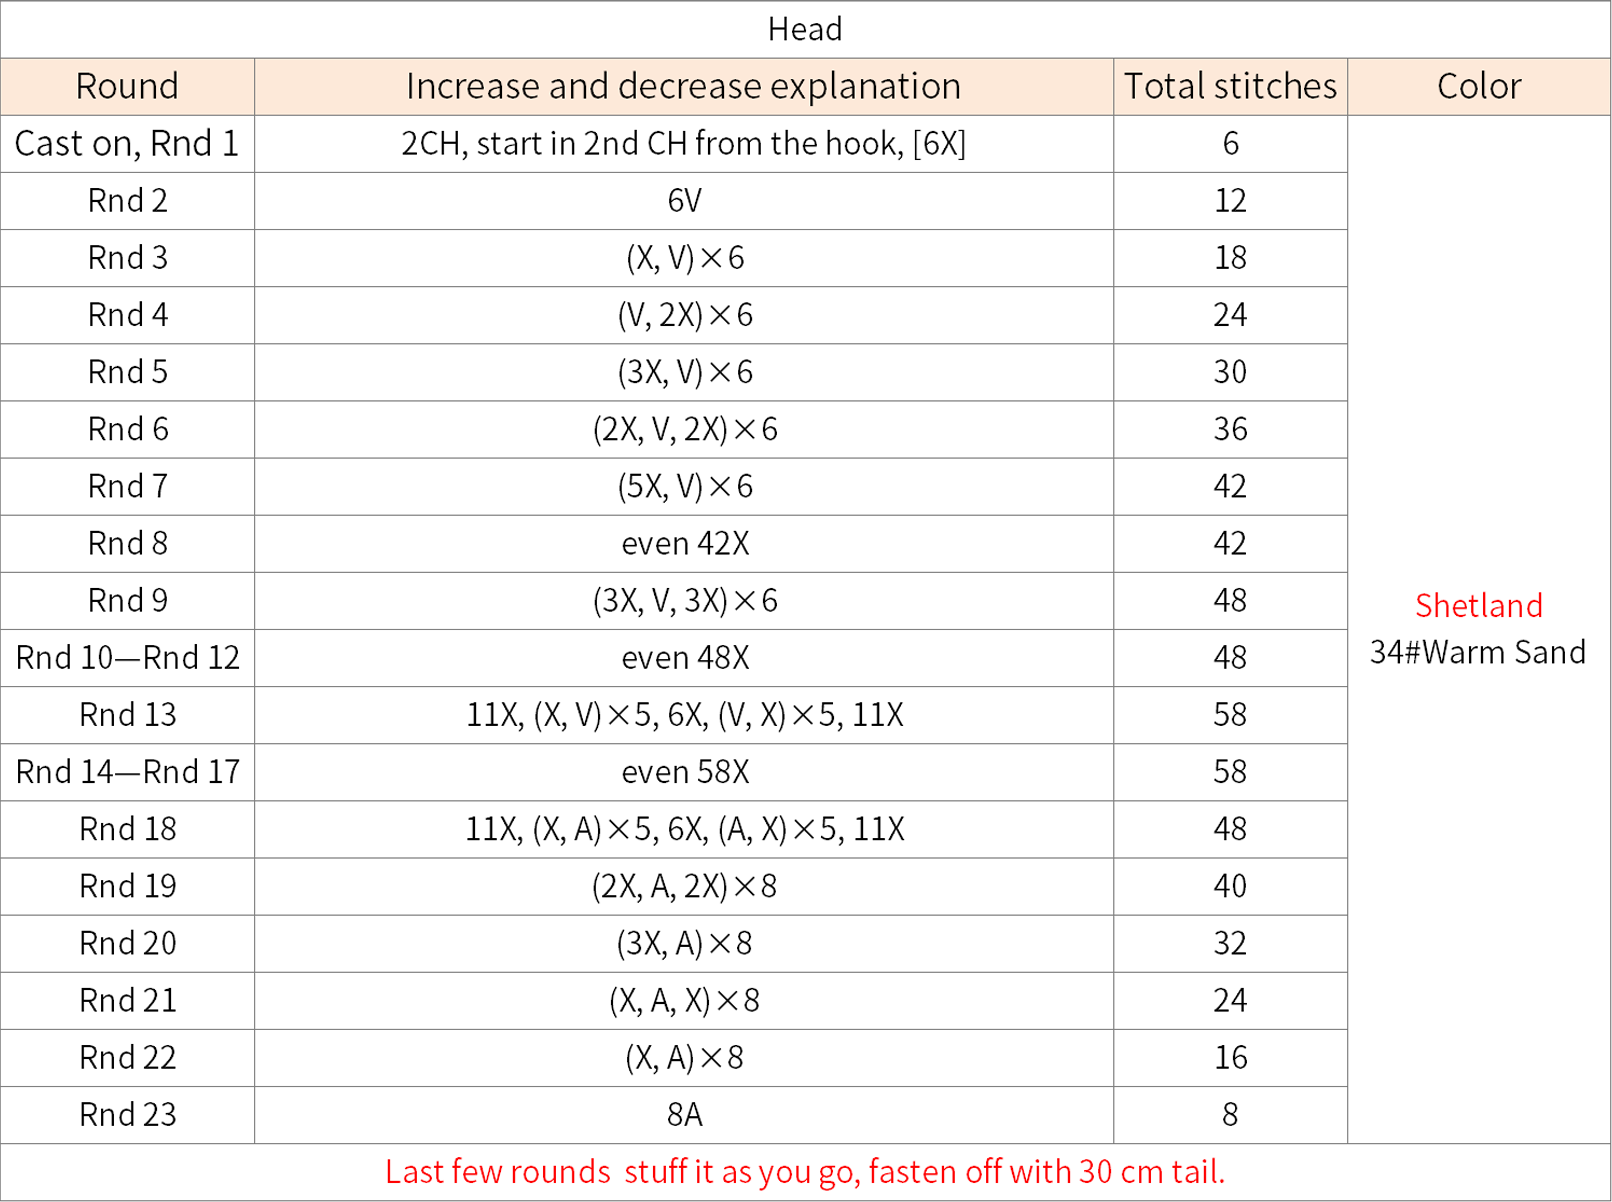
Part 1 HeadA 00' 38''
The head is started with a foundation chain. Crochet in rounds counterclockwise. In the last few rounds, stuff it as you go. Please refer to the video demonstration for more details.
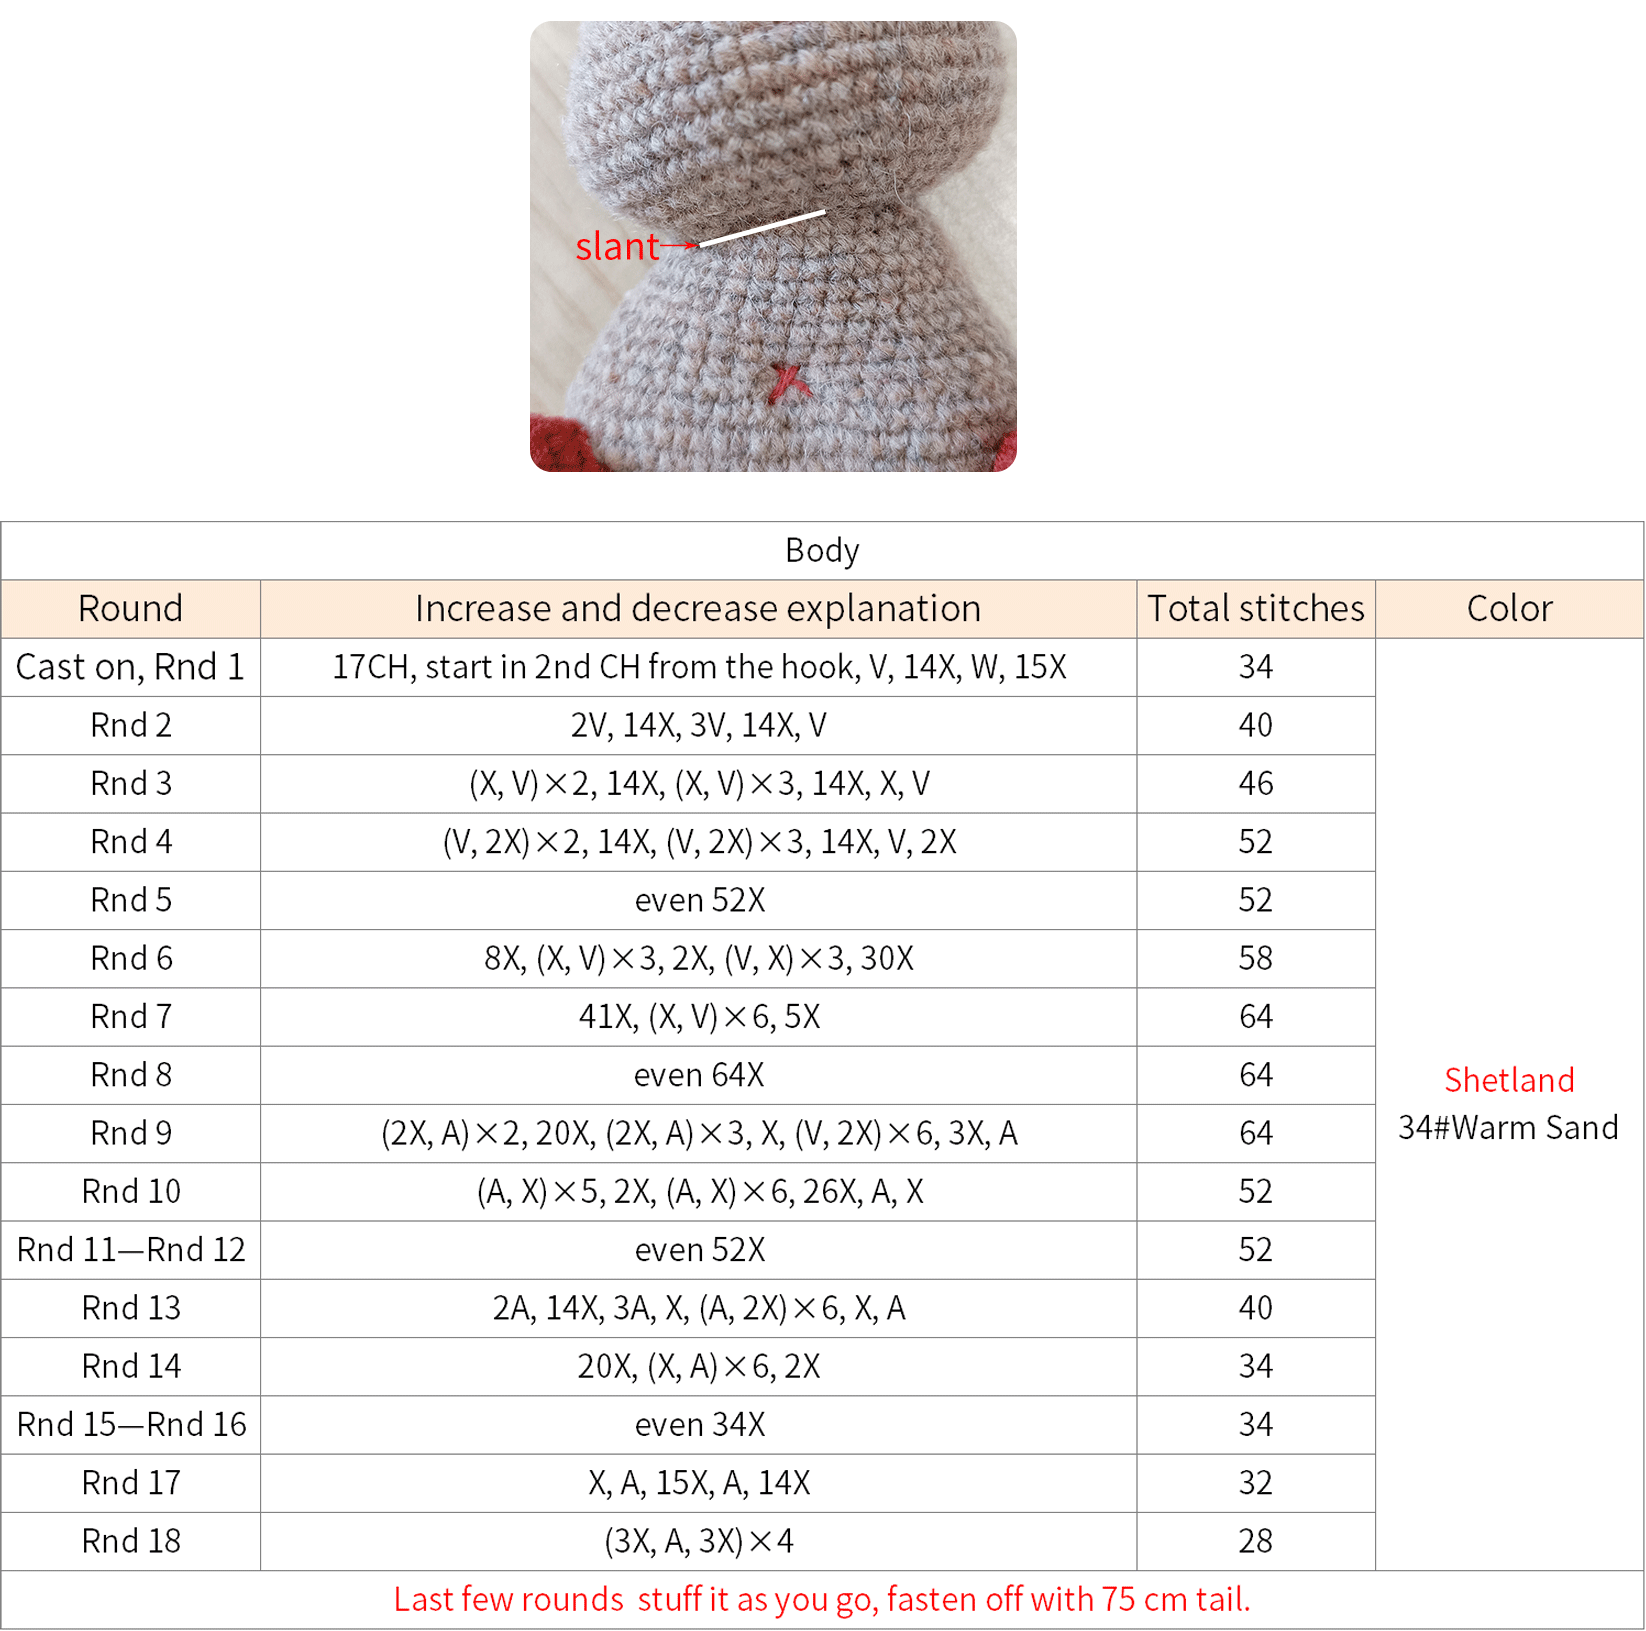
Part 2 BodyB 13' 29''
The body is started with a foundation chain. Crochet in rounds counter-clockwise along the foundation chain. Finally, attach the head onto the body. When sewing together, create a slant on one side (as shown in the diagram). Please refer to the video demonstration for more details.
Part 3 LimbsC
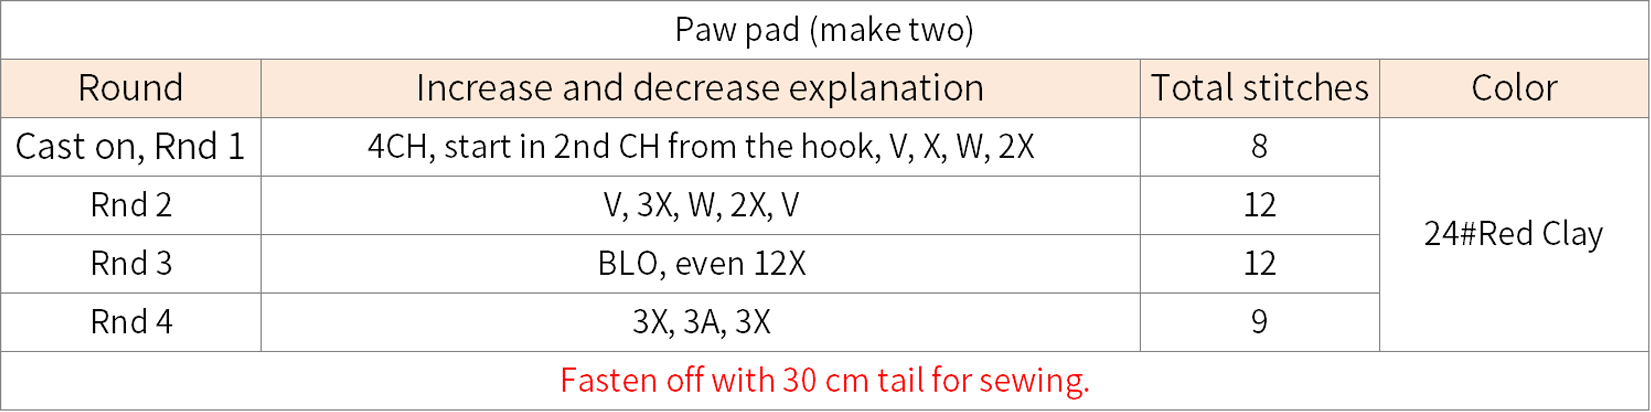
STEP 1 Paw padsC1 24' 03''
The two paw pads both start with a foundation chain. Crochet in rounds counter-clockwise. Lastly, stuff them with an appropriate amount of fiberfill and sew them onto the body. Please refer to the video demonstration for more details.
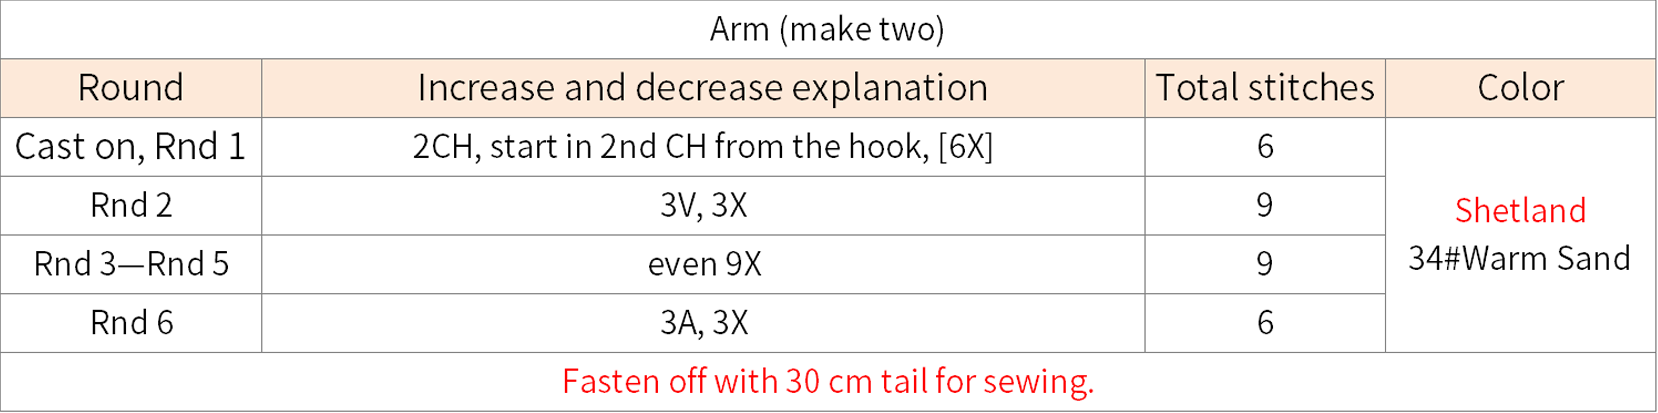
STEP 2 ArmsC2 26' 25''
The arms start with a foundation chain. Crochet in rounds counter-clockwise. Then, sew it onto the head. Please refer to the video demonstration for more details.
Part 4 Facial featuresD 27' 26''
The face features consists of the eyes, eyebrows, blush, and ears. The nose piece begin with a magic ring. Crochet in rounds counter-clockwise. Please refer to the video demonstration for more details.
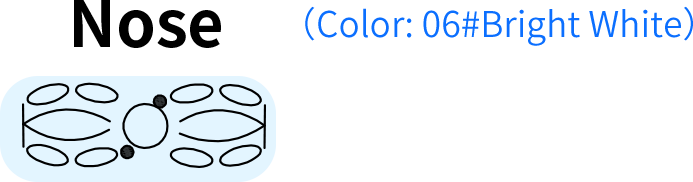
Note:
- Use 1 strand of 61#Cappuccino to embroider the tip and whiskers.
- Eyes are attached with half-eyelet..
- Use 1 strand of 24#Red Clay to embroider the belly button.
- After completing the facial features, apply blush to the sides of the face.
Part 5 HeadpieceE 36' 54''
The headpiece start with a foundation chain. Work back and forth in rows. Then, sew it onto the head. Please refer to the video demonstration for more details.
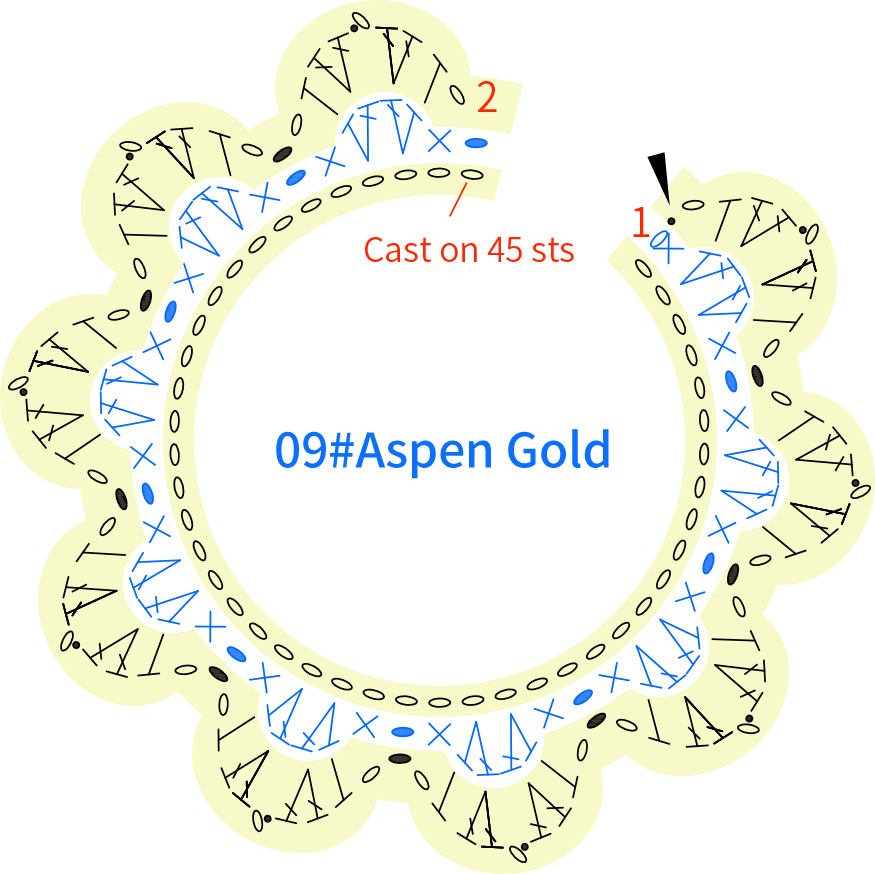
Fasten off with 30 cm tail for sewing.
Part 6 TailF 44' 27''
The tail start with a foundation chain. Work back and forth in rows. In the middle of the body, sew on the belly button and the indentation for the bottom separately using 1 strand of 24#Red Clay. Finally, attach the tail to its corresponding position on the body. Please refer to the video demonstration for more details.
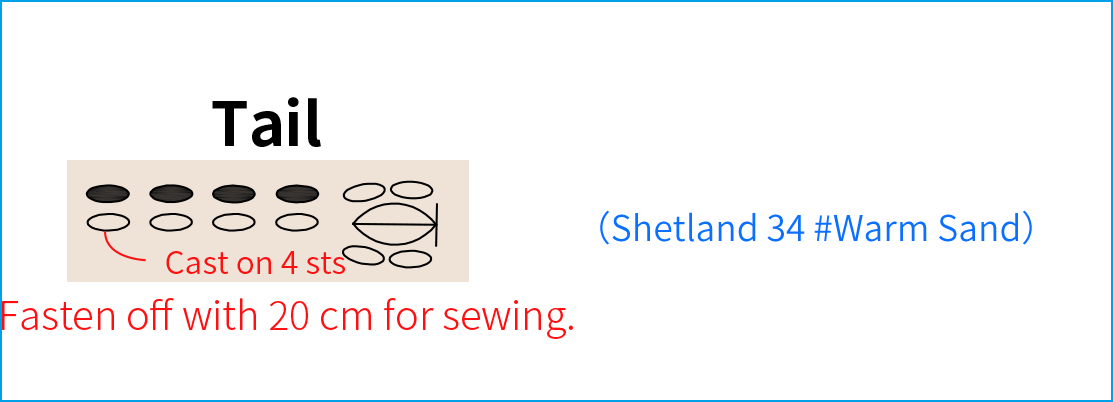
Note:
After completing the tail, apply blush to the butt.

Made by the community