Clothes
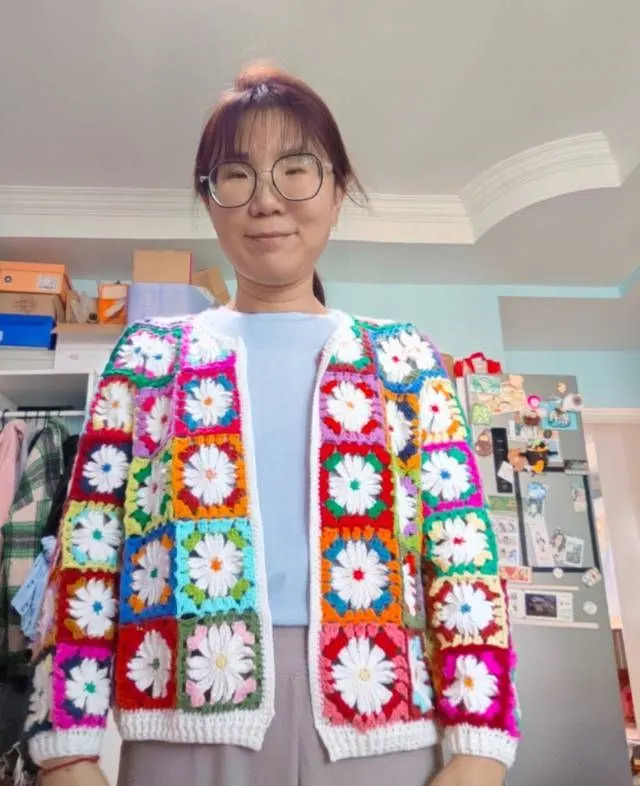
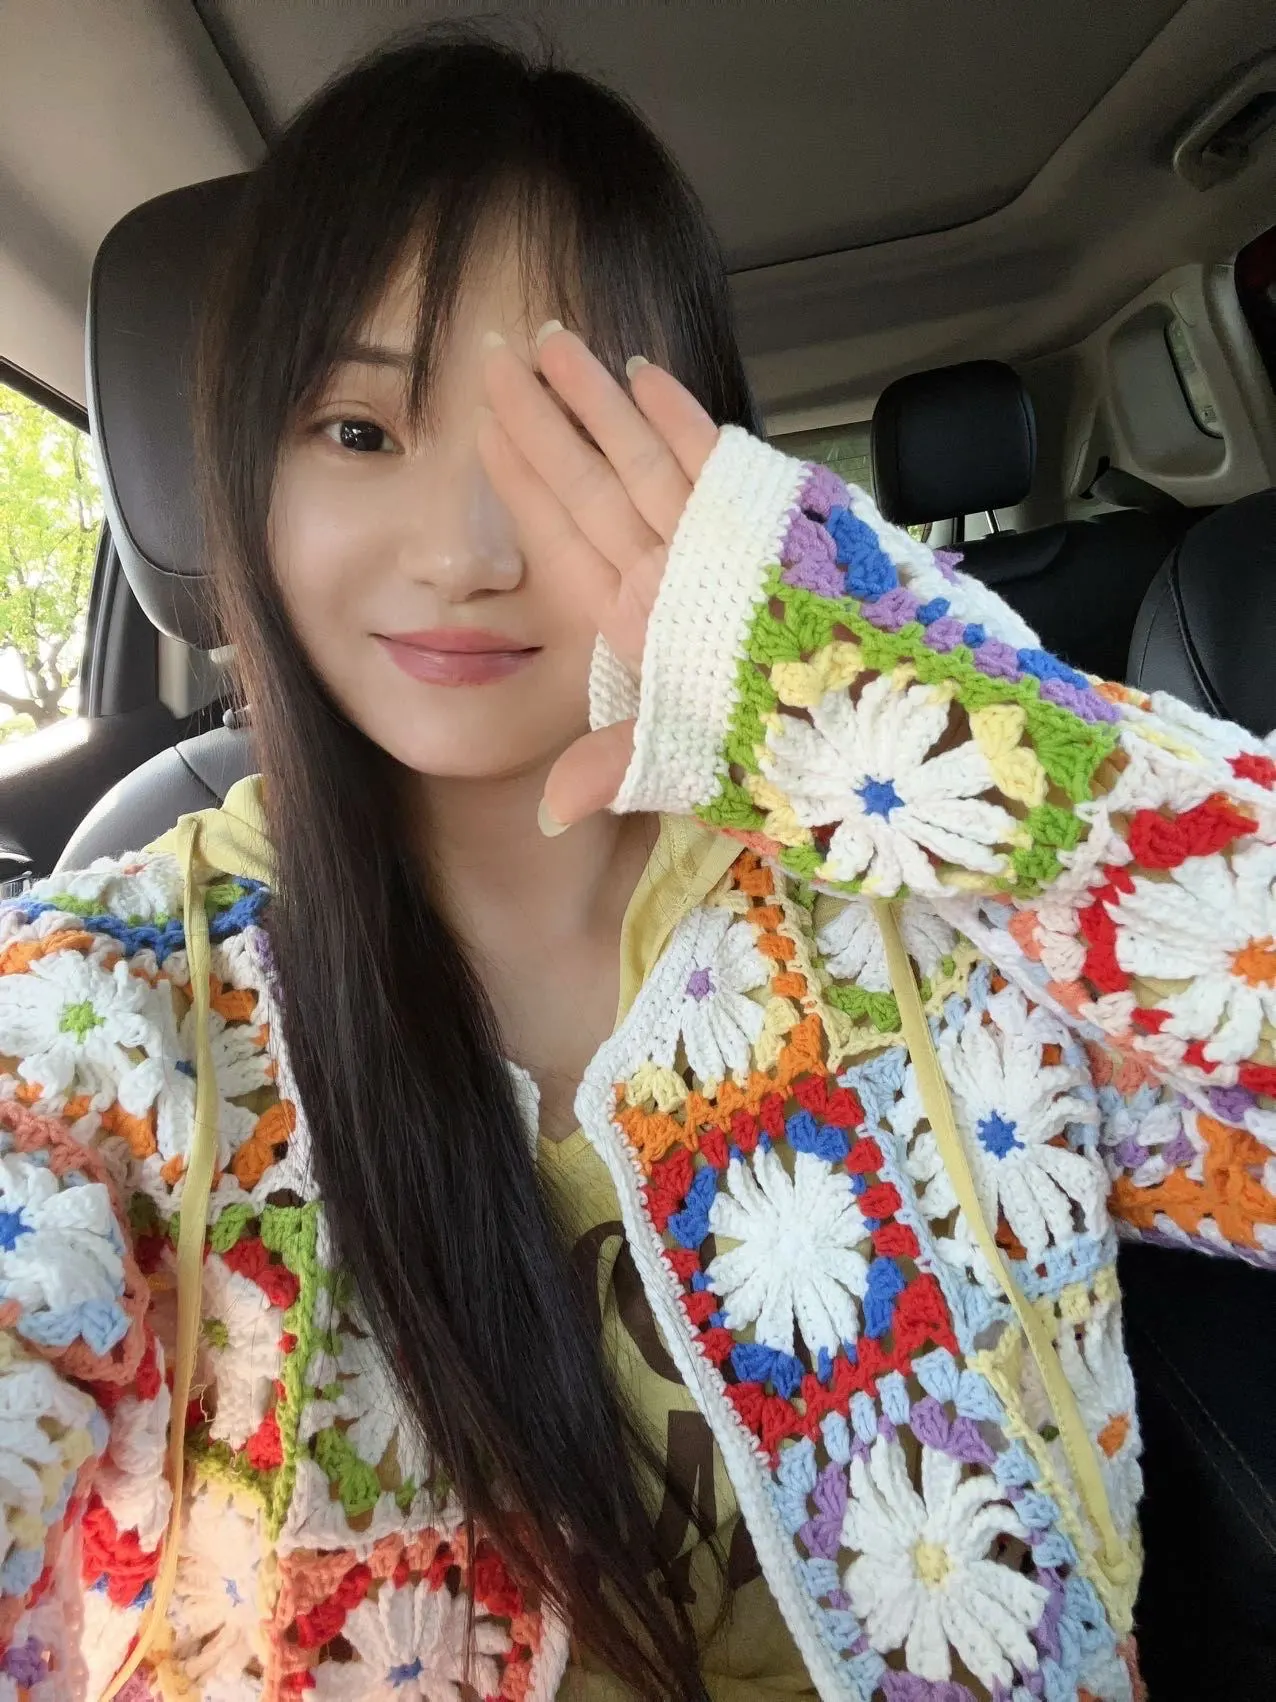
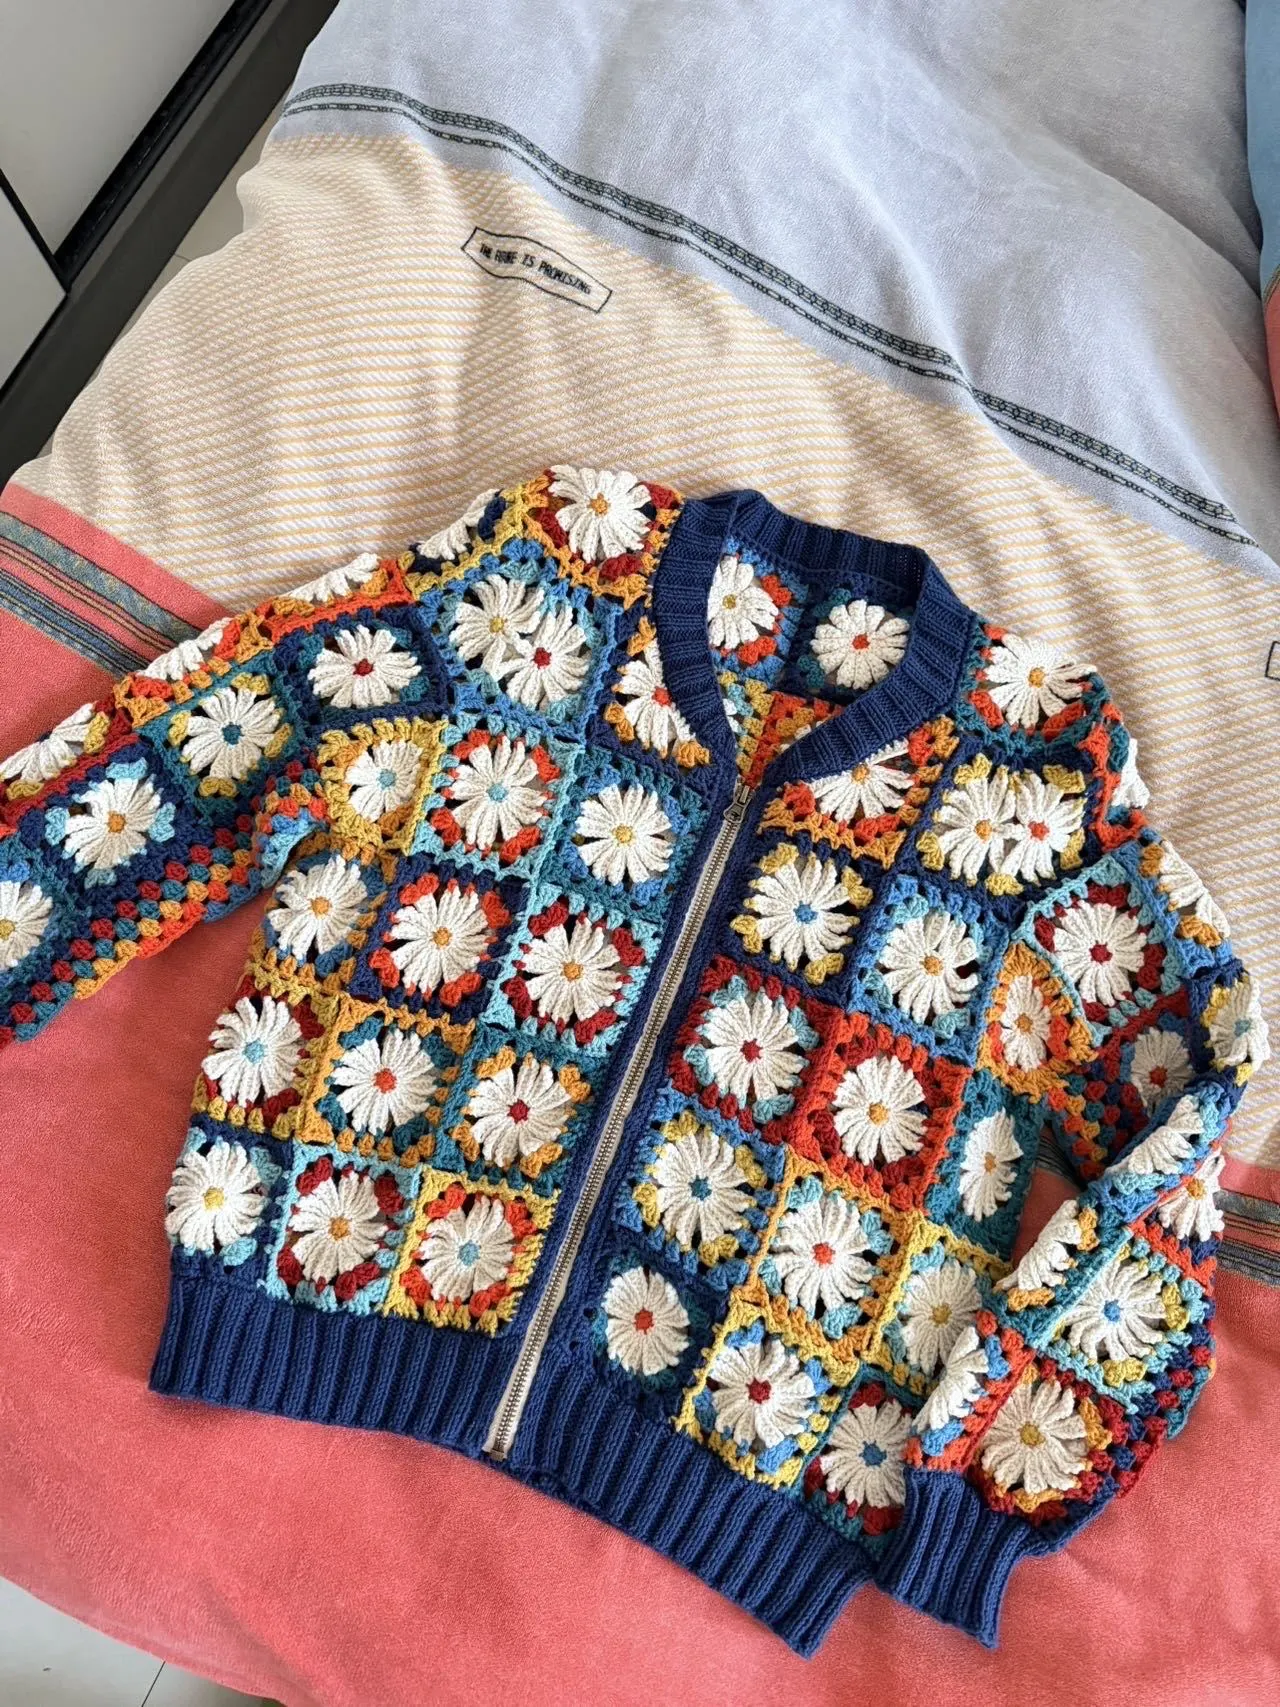
Daisy Contrasting color Cardigan
Project preview
See the finished project
Pattern format
Instructions
Watch and follow
Video tutorial
| Style | Yarn | Color |
|---|---|---|
| Milky Rainbow Daisy Style | 4-Ply Combed Cotton & Acrylic Fibre Hand Knitting Yarn | 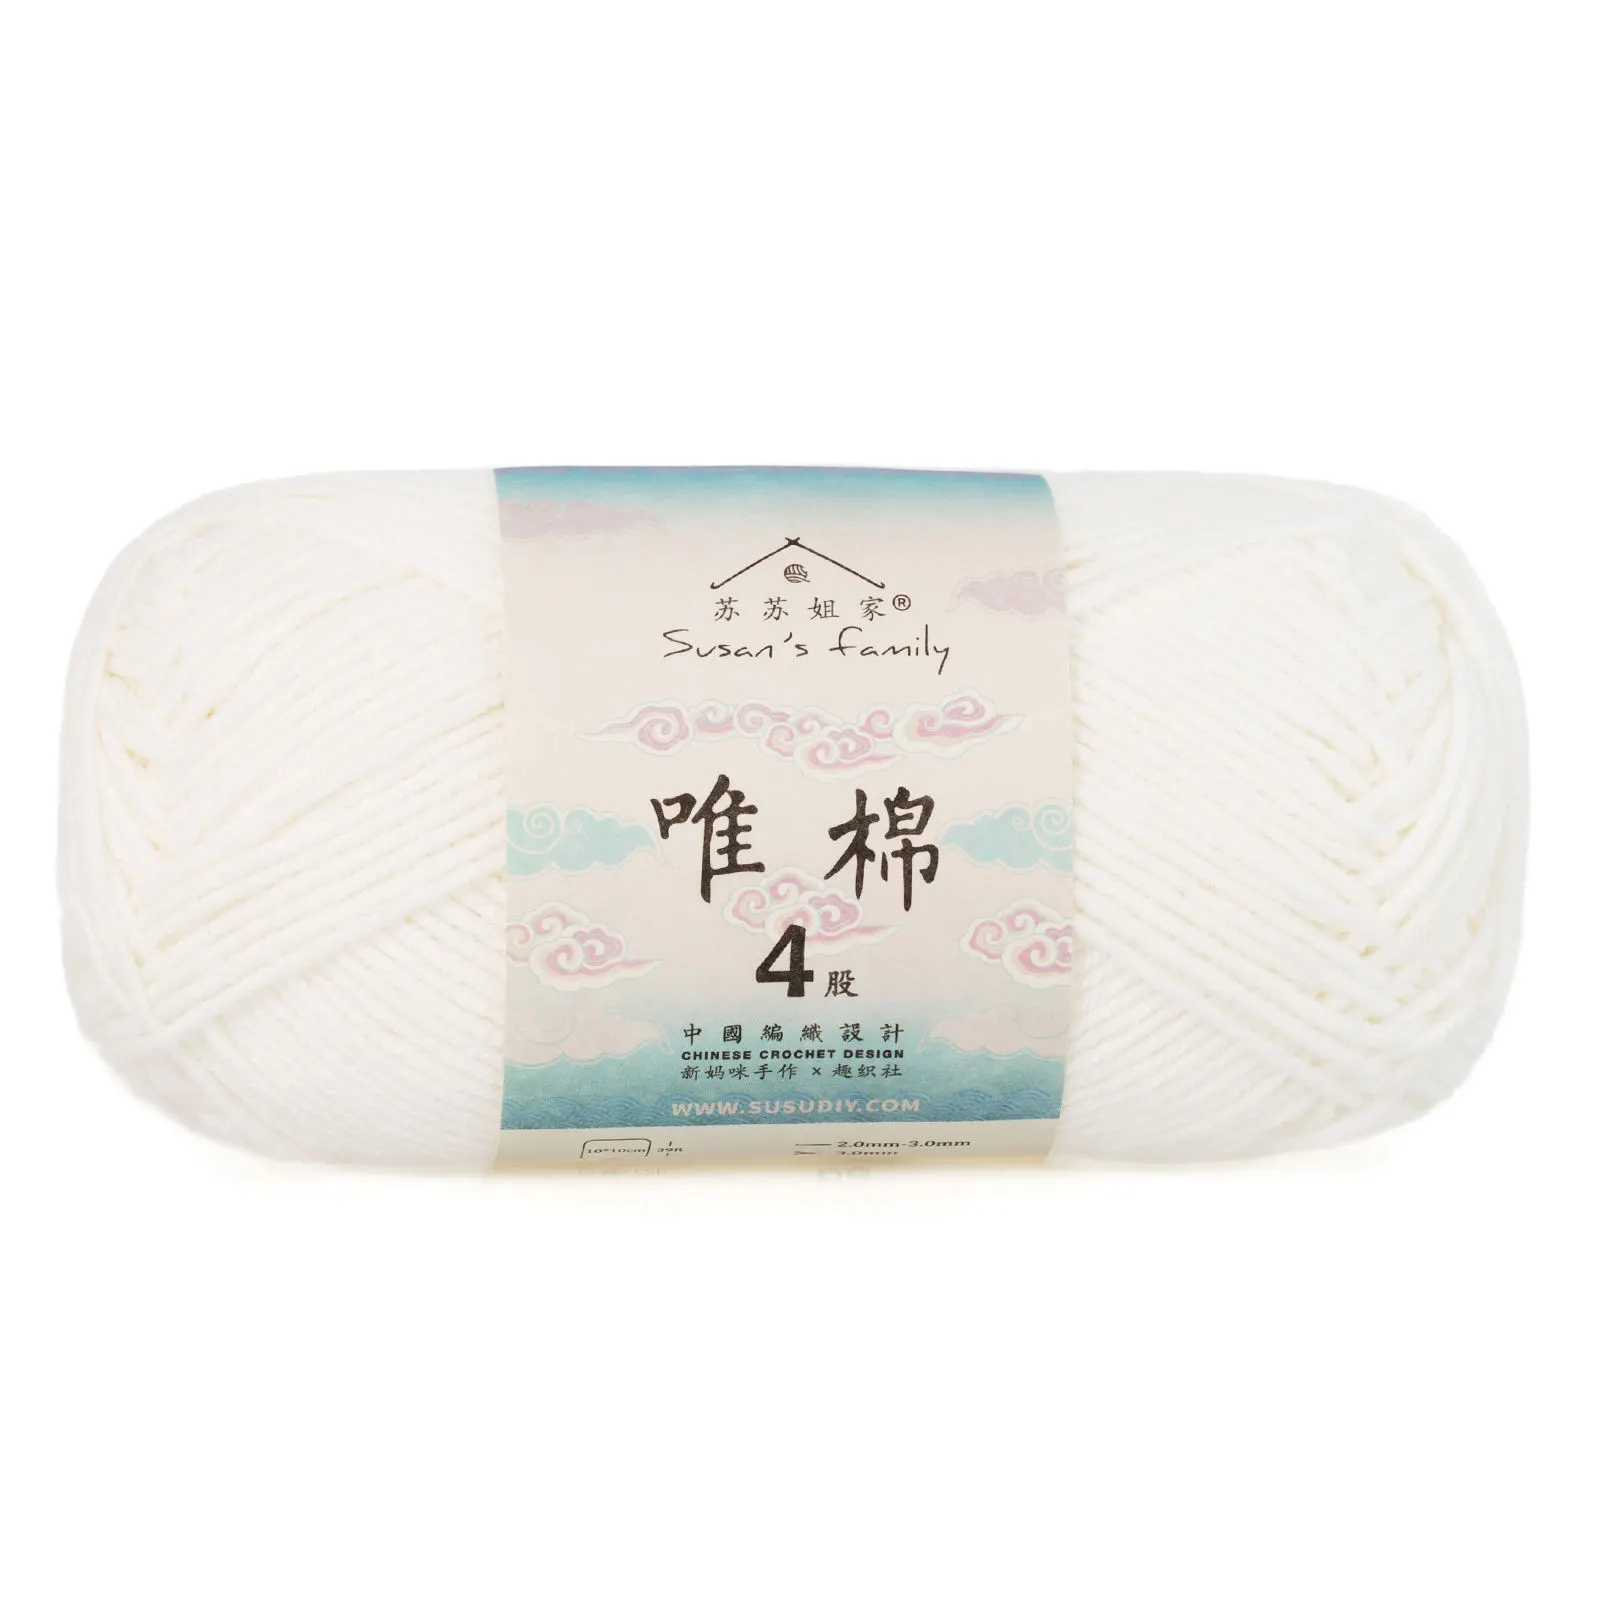 06#Bright White x 10 06#Bright White x 10 09#Aspen Gold x 1 09#Aspen Gold x 1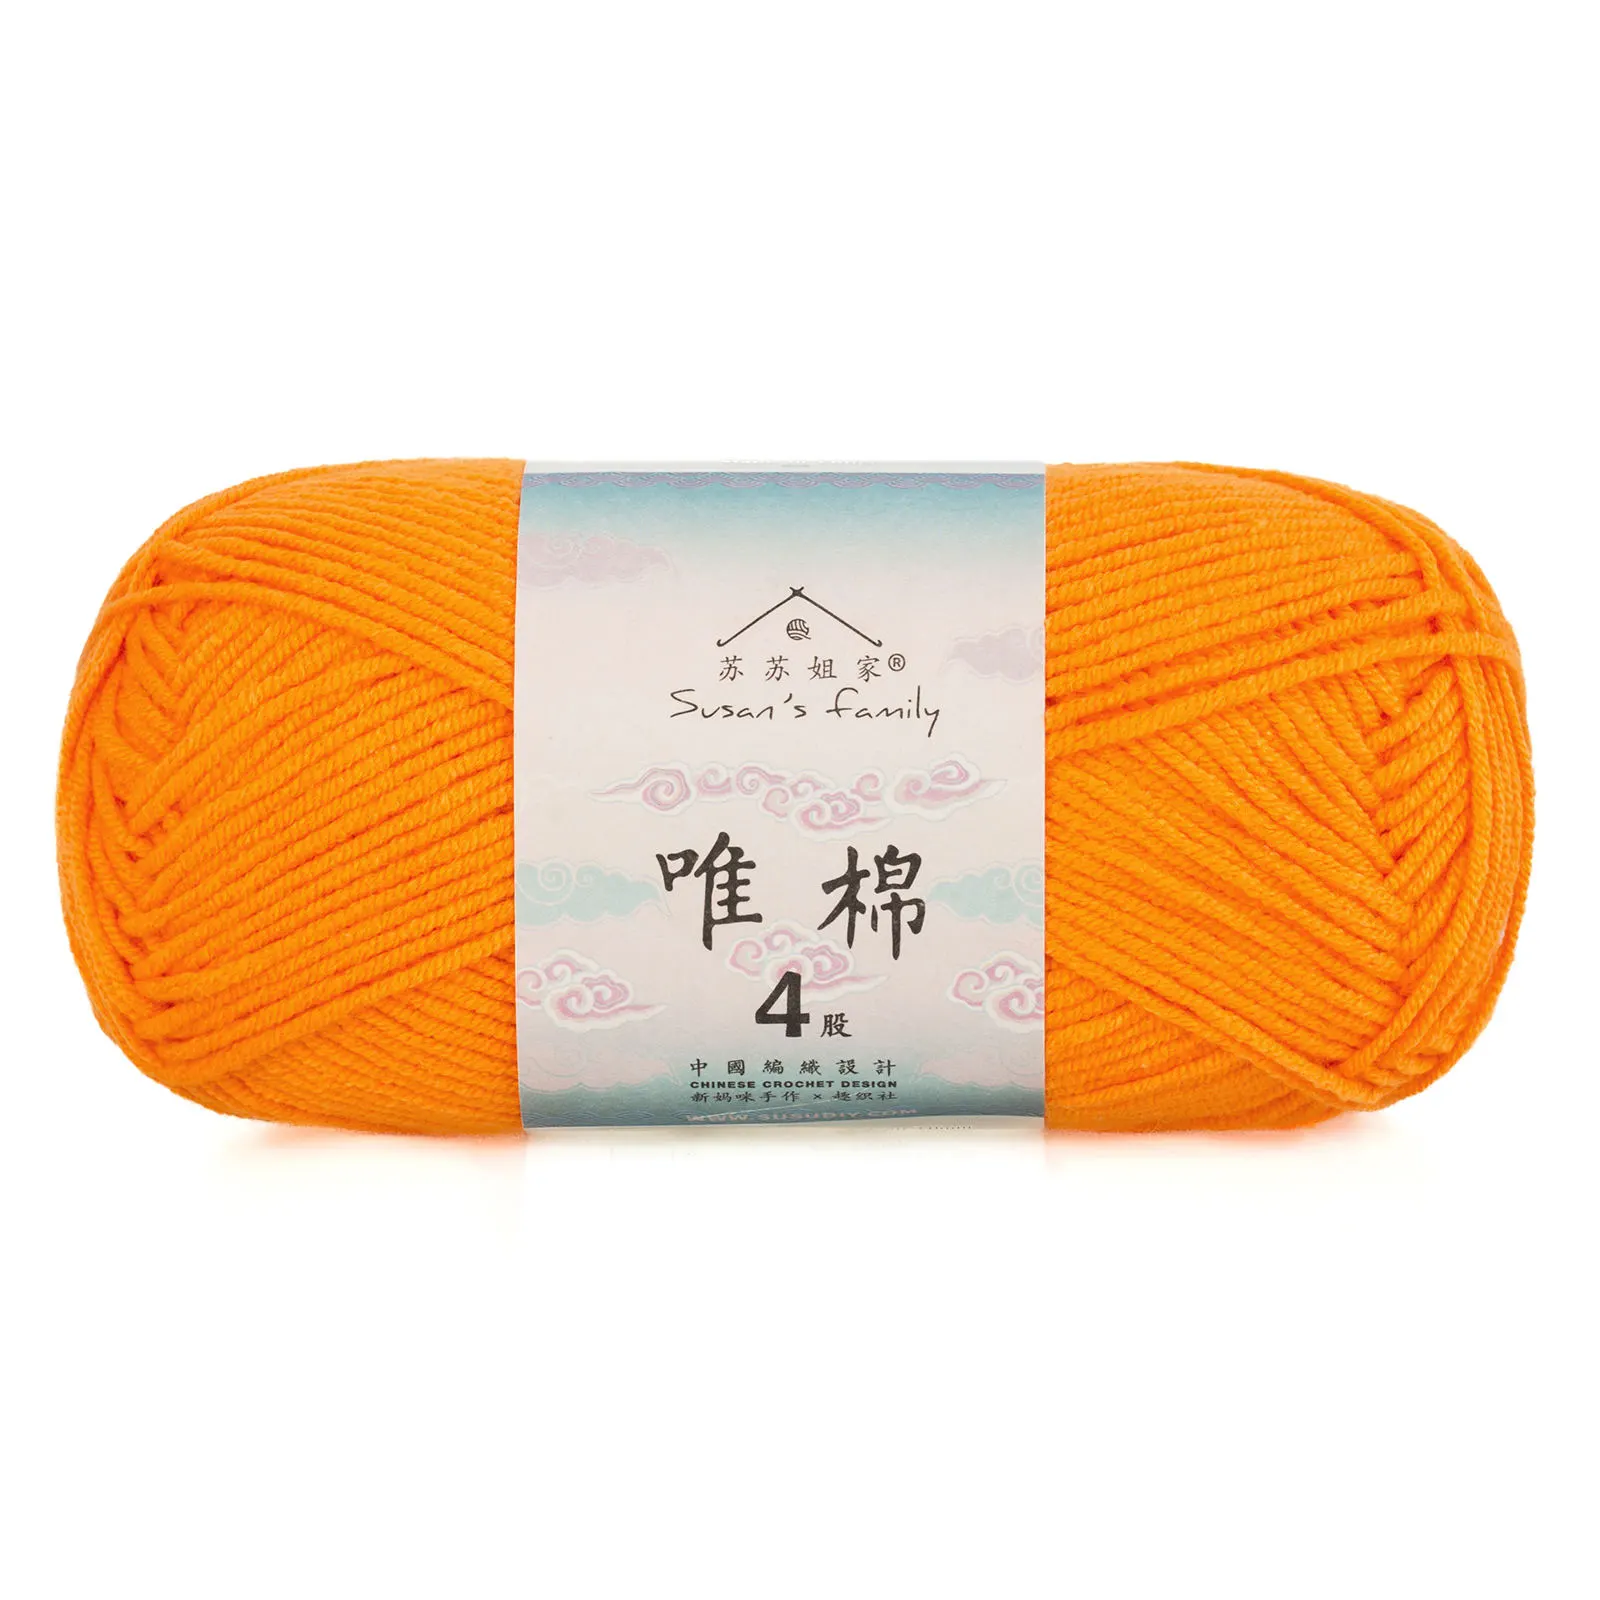 30#Zinnia x 1 30#Zinnia x 1 42#Blue Moon x 1 42#Blue Moon x 1 45#Orangeade x 1 45#Orangeade x 1 47#Blue Radiance x 1 47#Blue Radiance x 1 59#Spectra Green x 1 59#Spectra Green x 1 |
| Milky Daisy Style | 4-Ply Combed Cotton & Acrylic Fibre Hand Knitting Yarn | 06#Bright White x 8 13#Sunny Lime x 130#Zinnia x 1 13#Sunny Lime x 130#Zinnia x 1 31#Cayenne x 1 31#Cayenne x 1 38#Pink Carnation x 142#Blue Moon x 147#Blue Radiance x 1 38#Pink Carnation x 142#Blue Moon x 147#Blue Radiance x 1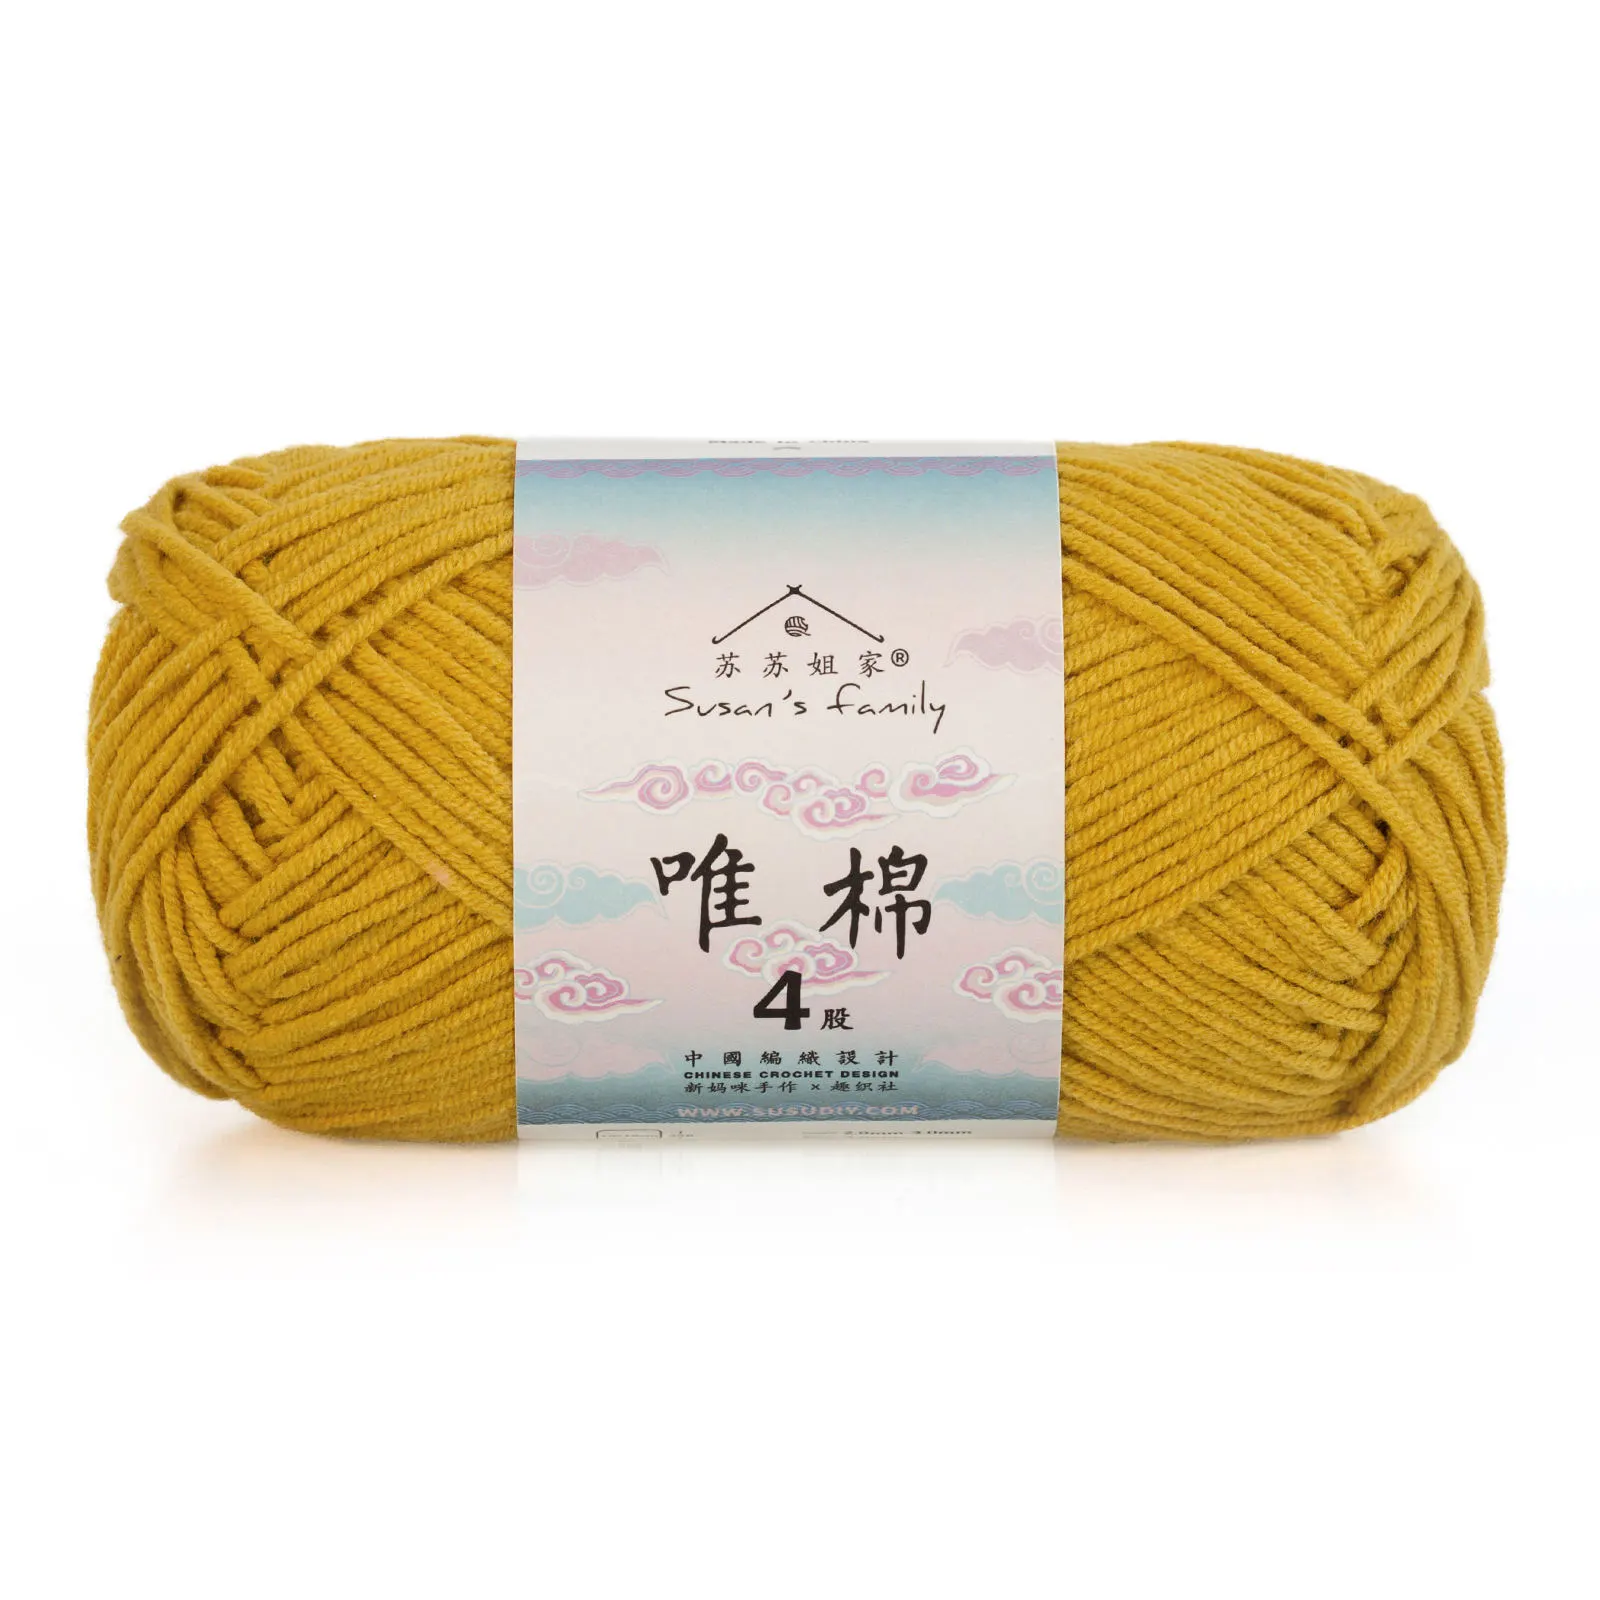 56#Golden Yellow x 159#Spectra Green x 1 56#Golden Yellow x 159#Spectra Green x 1 |
| Blue Ashes Daisy Style | 4-Ply Combed Cotton & Acrylic Fibre Hand Knitting Yarn |  01#Bamboo Yellow x 1 01#Bamboo Yellow x 1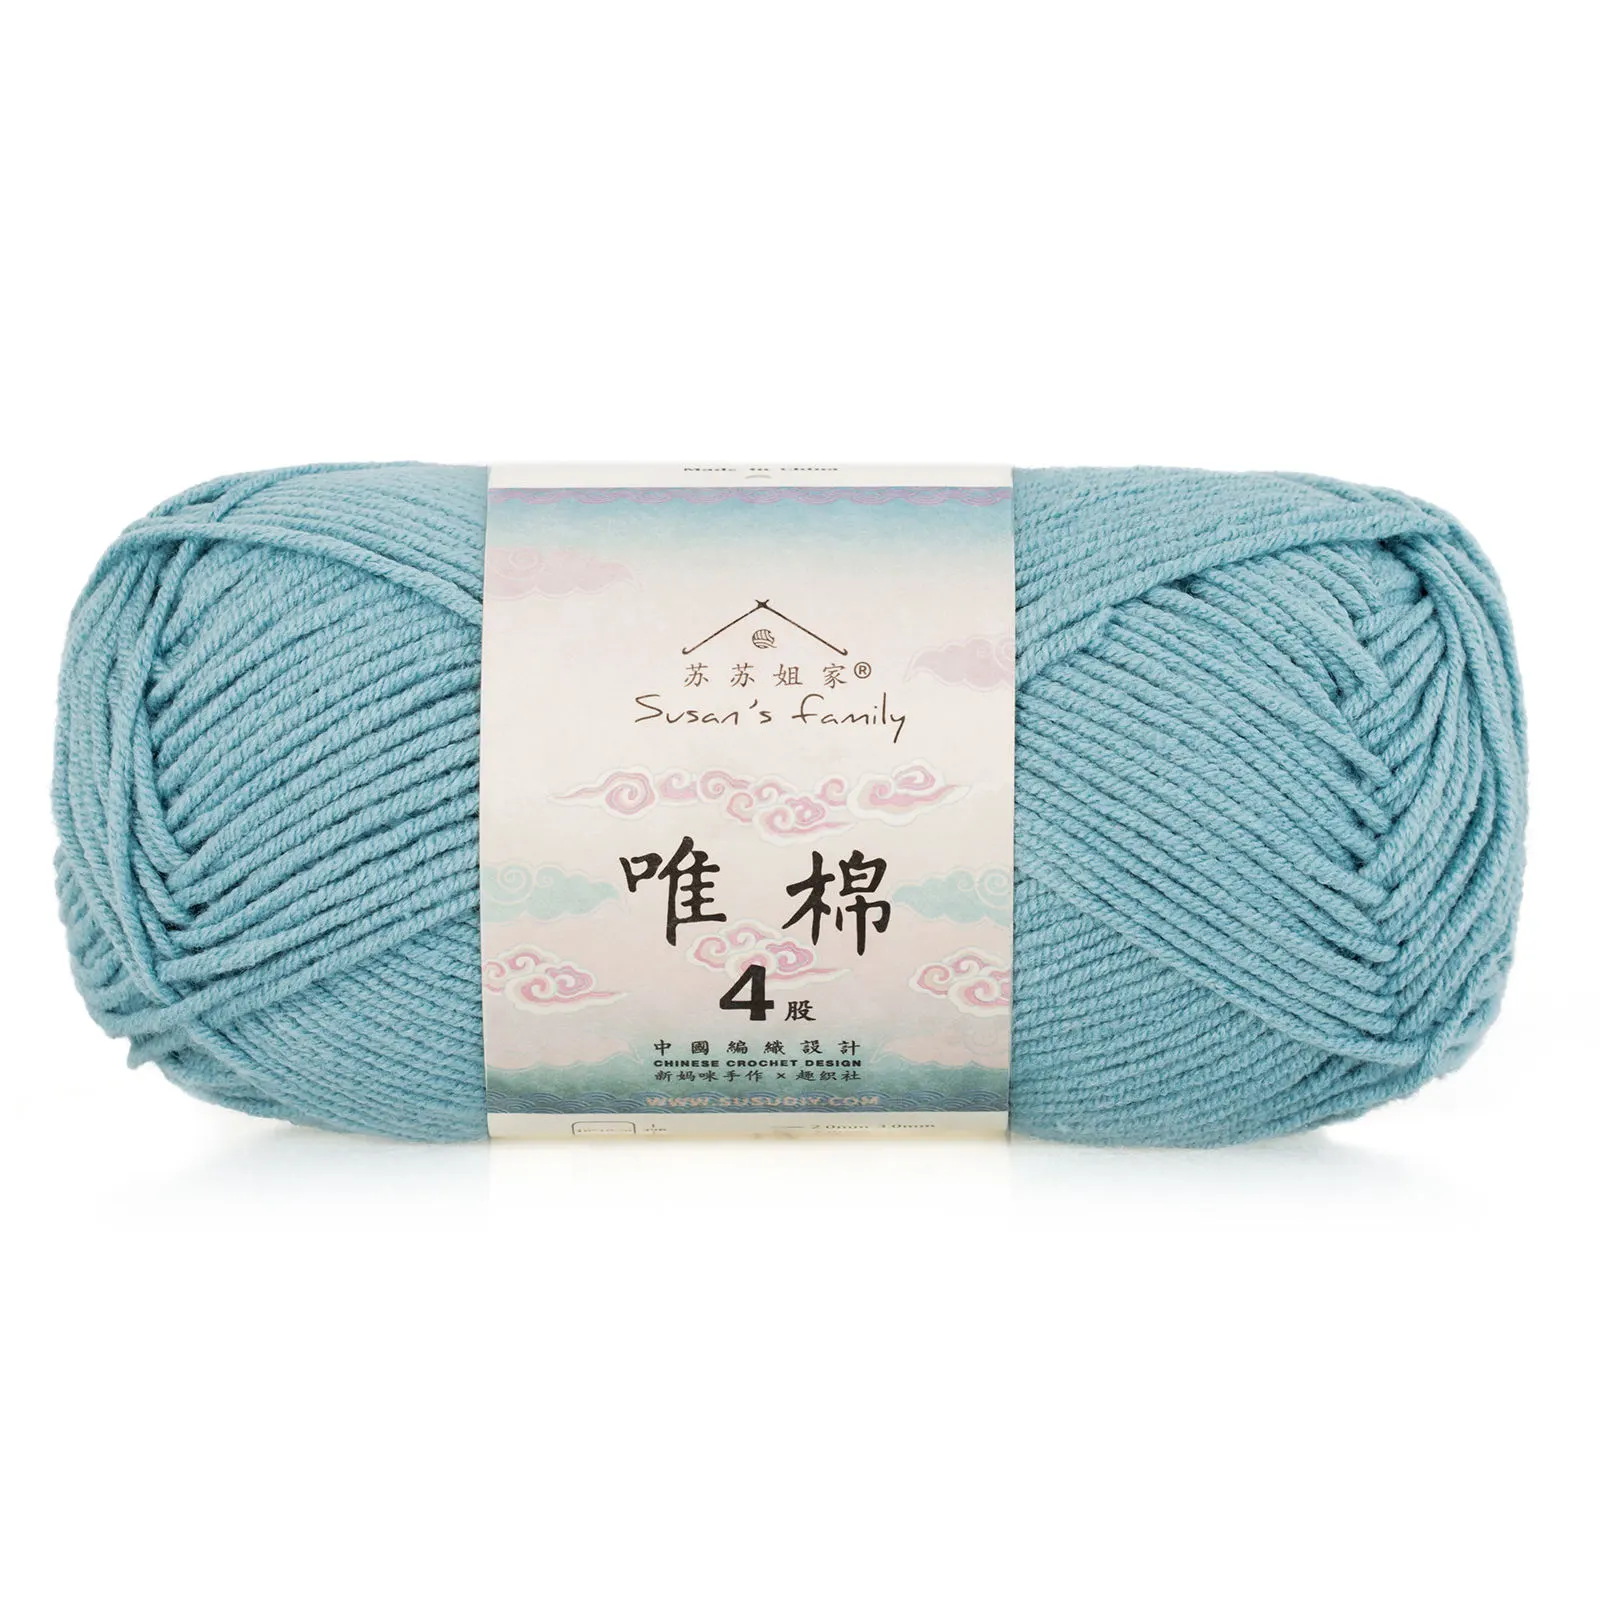 17#Marine Blue x 1 17#Marine Blue x 1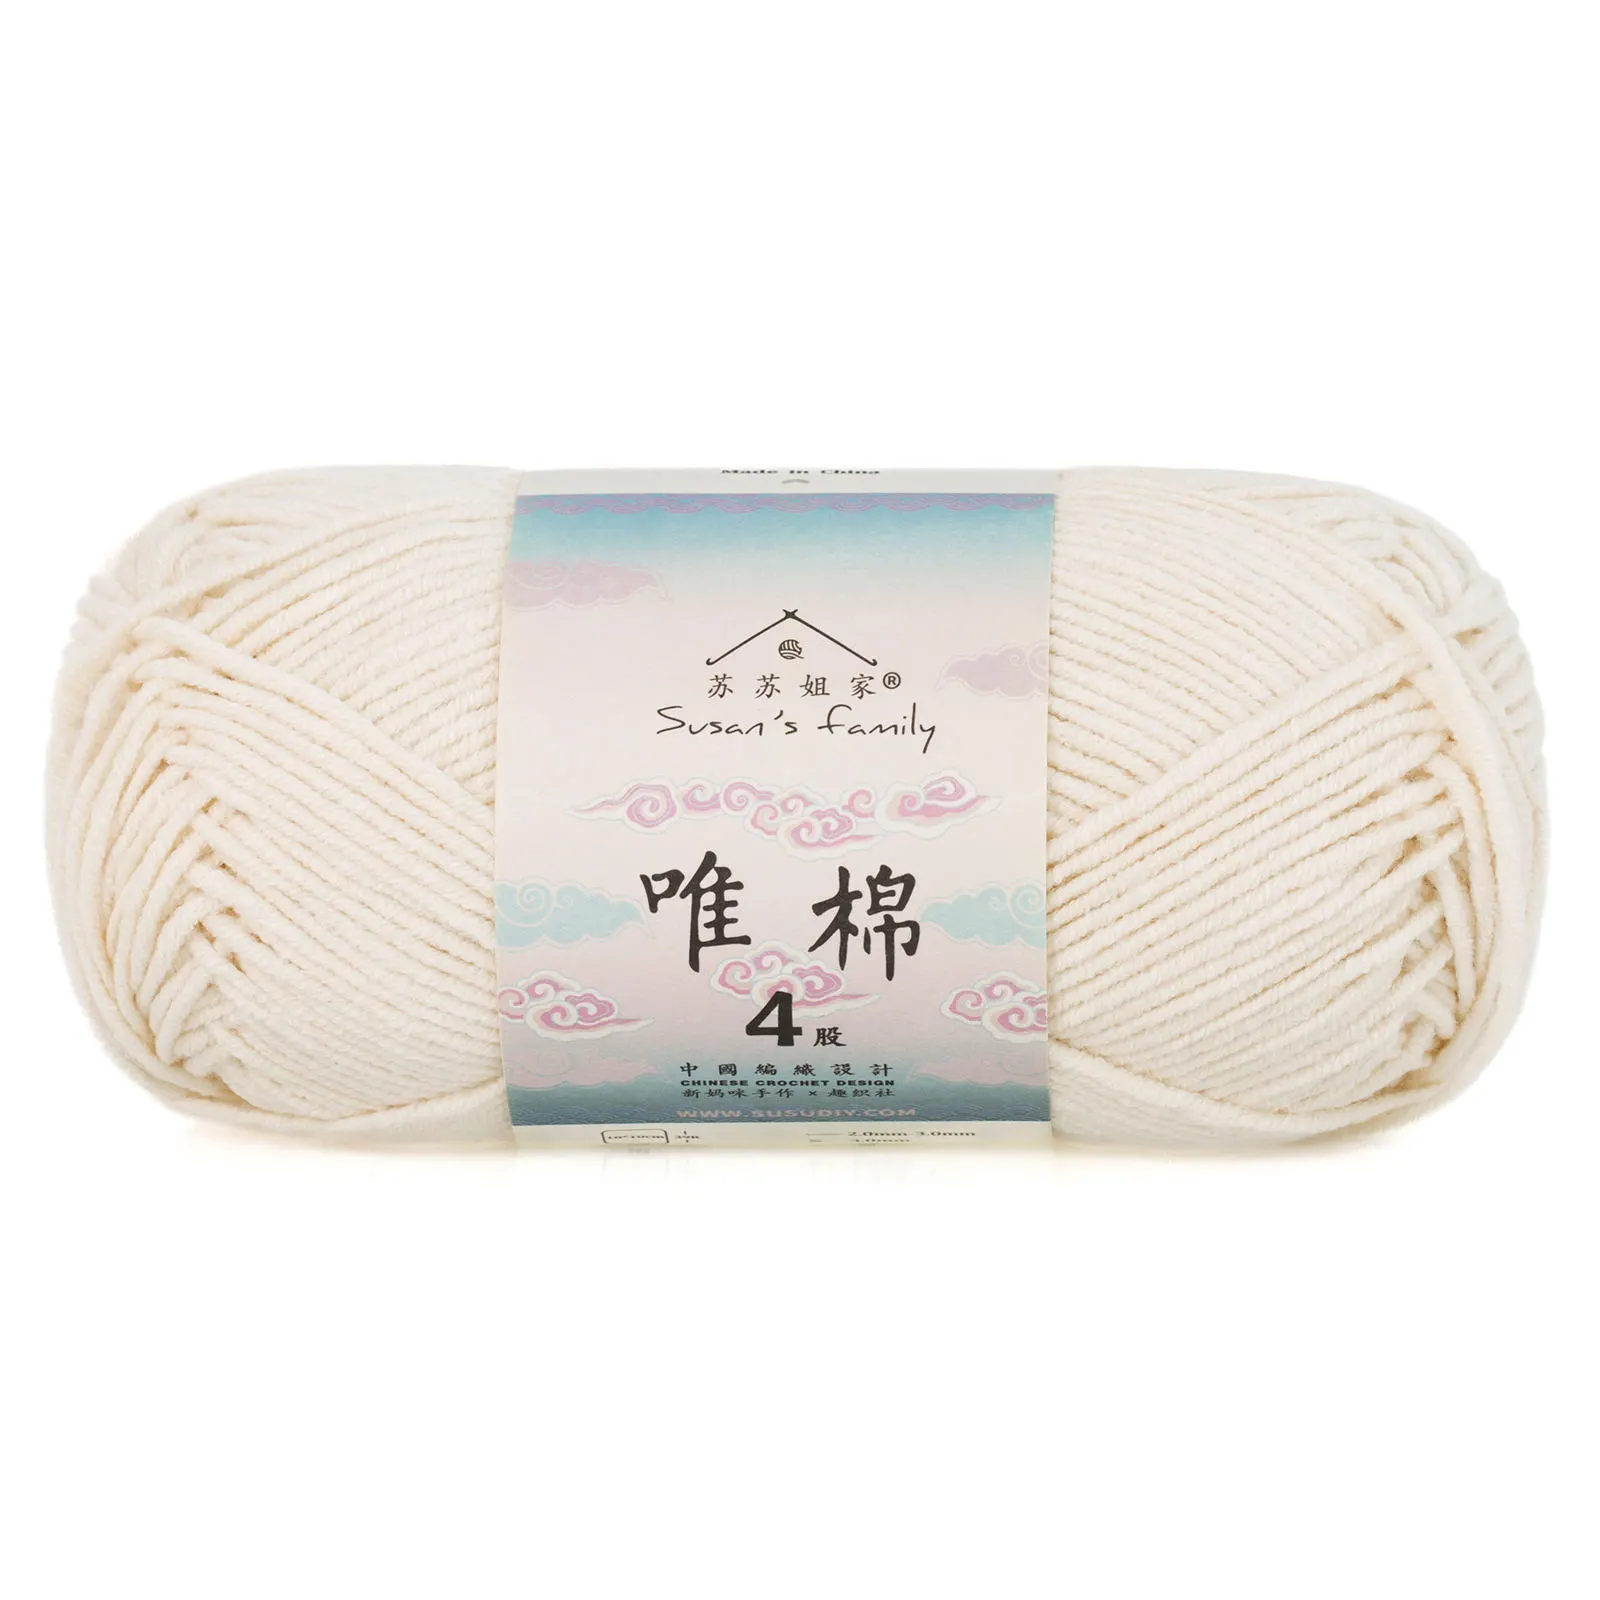 19#Whisper White x 6 19#Whisper White x 6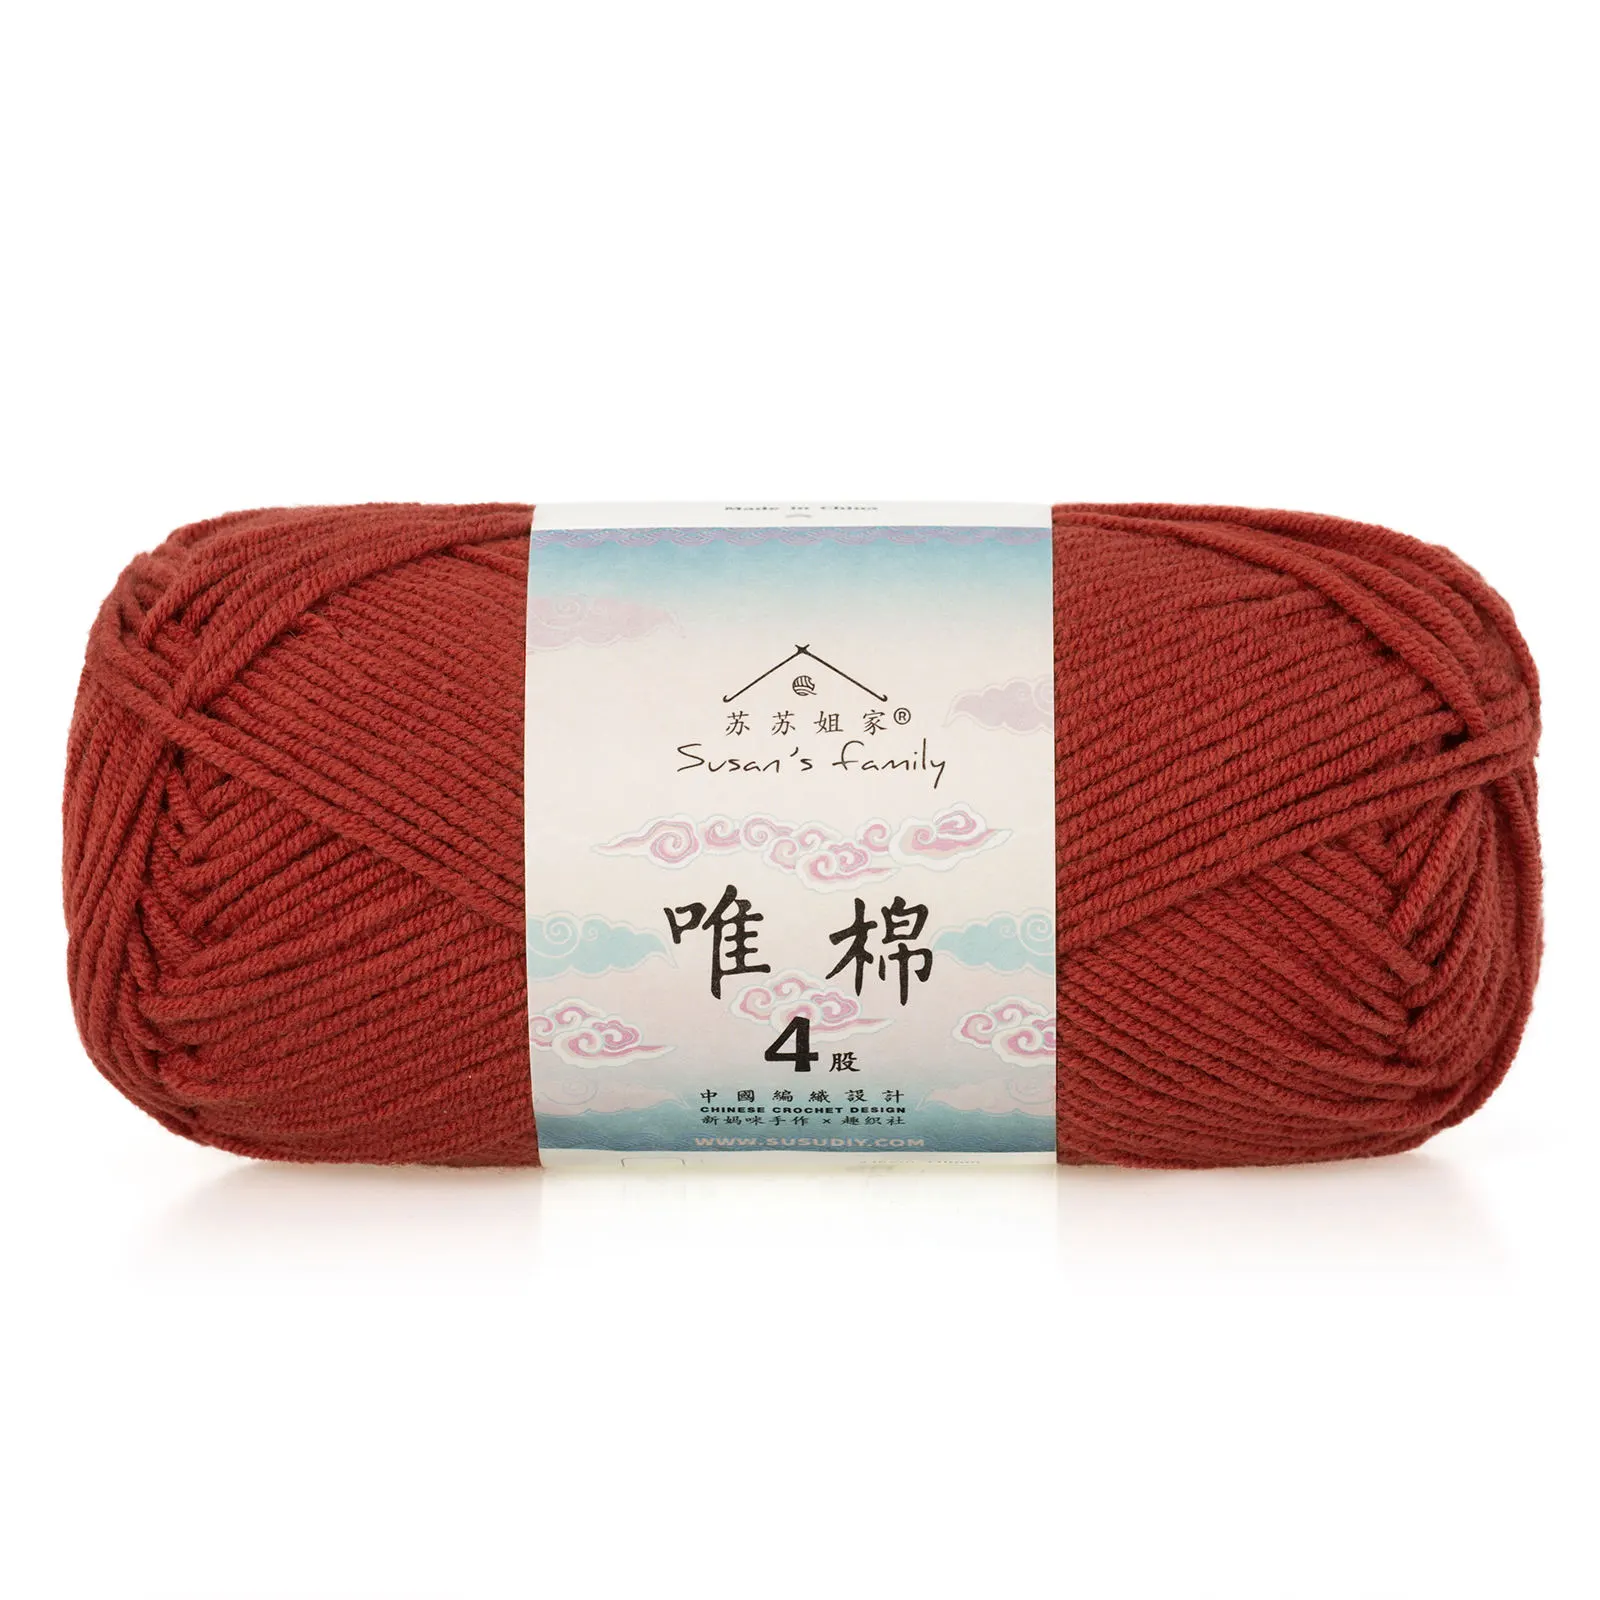 29#Aurora Red x 1 29#Aurora Red x 1 33#Teal Green x 1 33#Teal Green x 1 40#Golden Rod x 142#Blue Moon x 1 40#Golden Rod x 142#Blue Moon x 1 44#Blue Ashes x 345#Orangeade x 1 44#Blue Ashes x 345#Orangeade x 1 |
Milky Rainbow Daisy Style
Milky Daisy Style
Blue Ashes Daisy Style
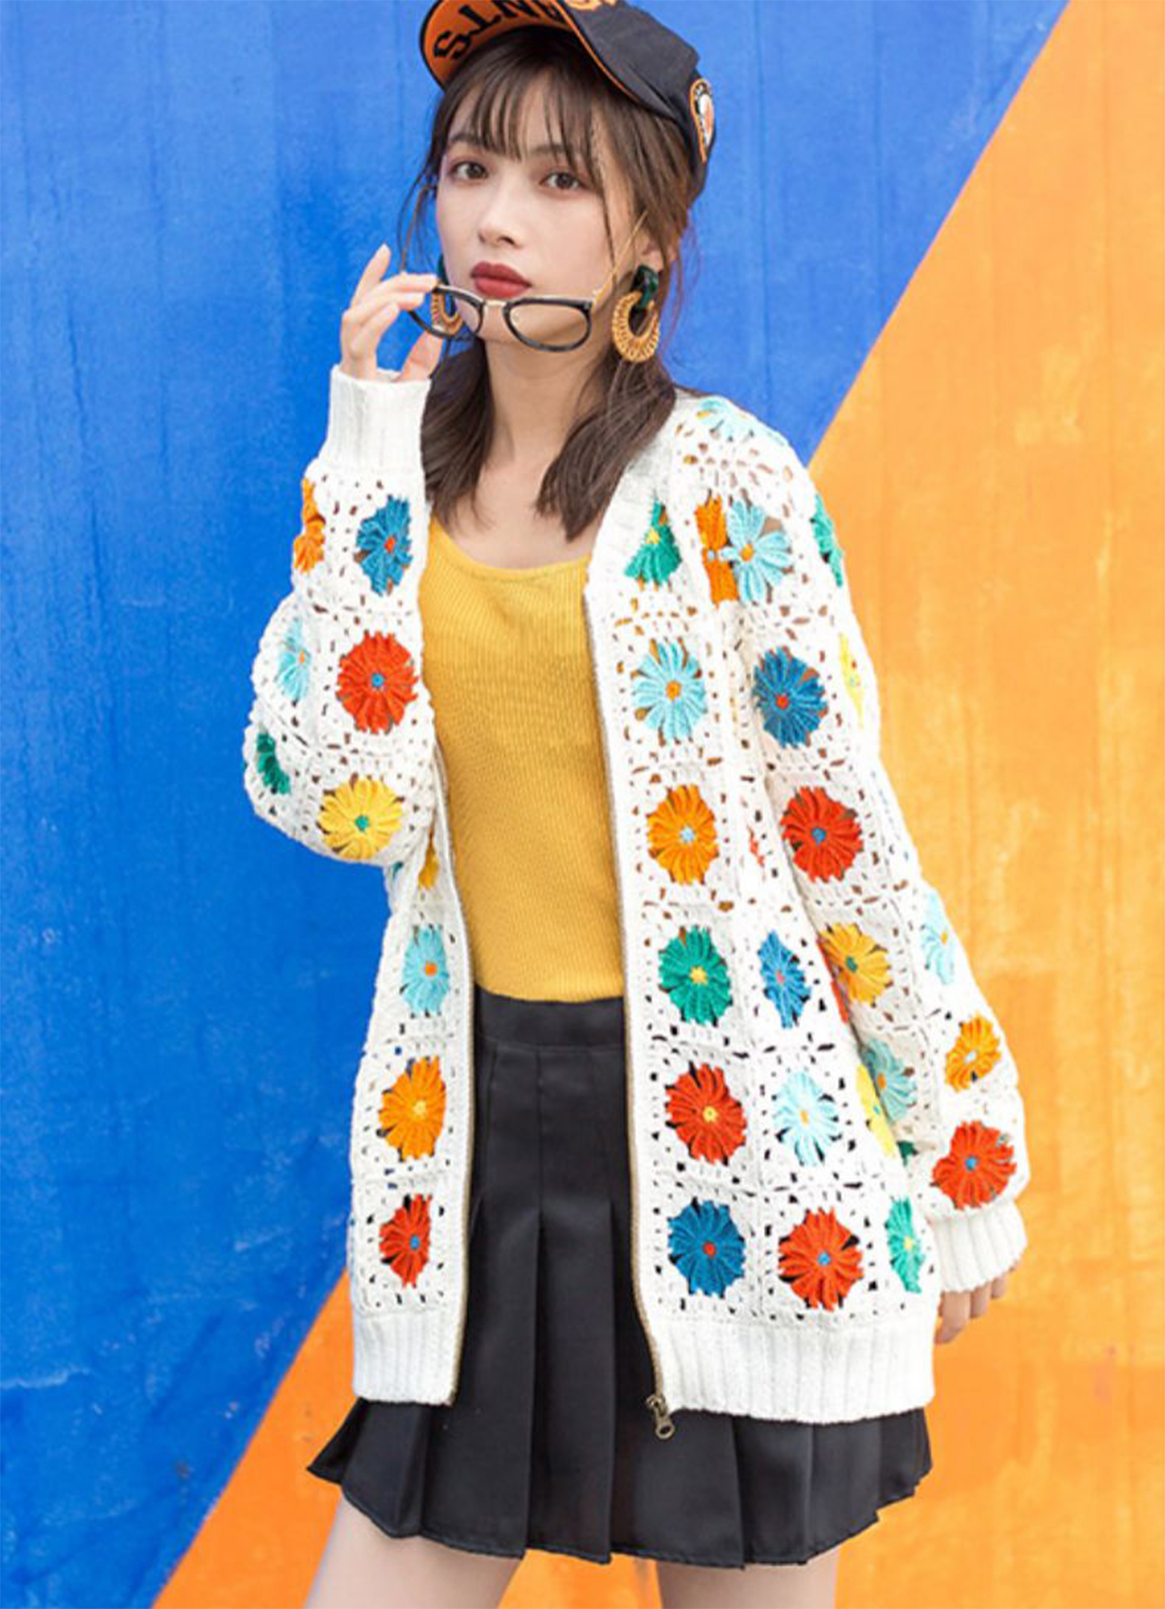
This jacket consists of the body, the chest piece, the sleeves, the front band, the hem, the collar and attach the zipper.
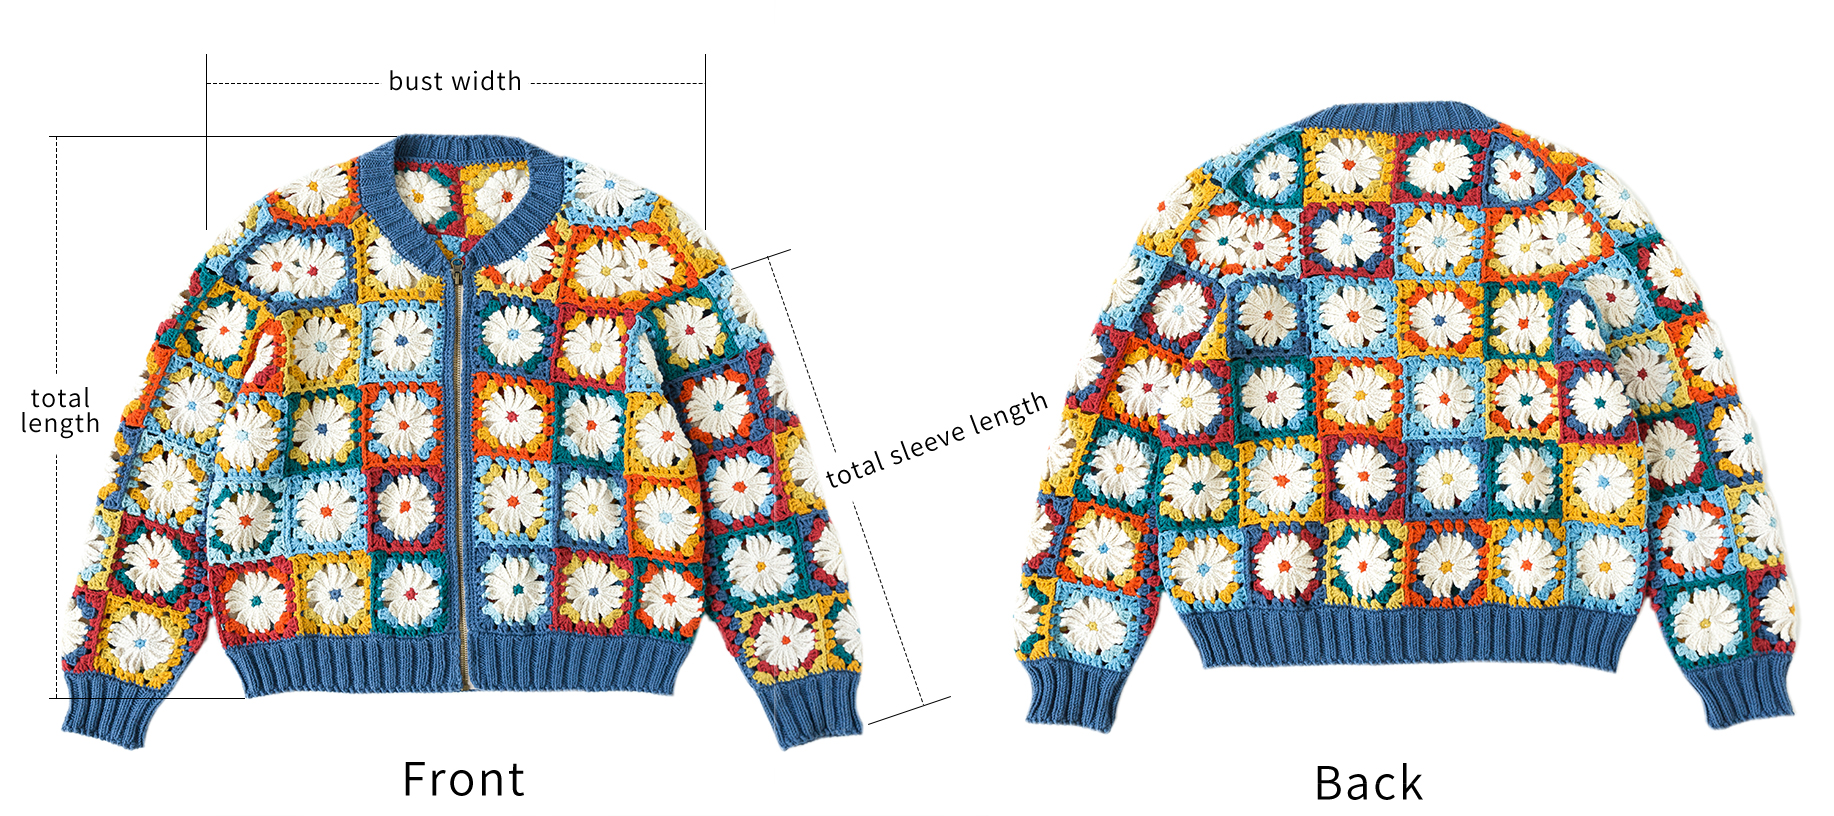
The handcrafted measurements may have an error of 1 to 2cm. Due to variations in individual tension, the size of the sample is for reference only.
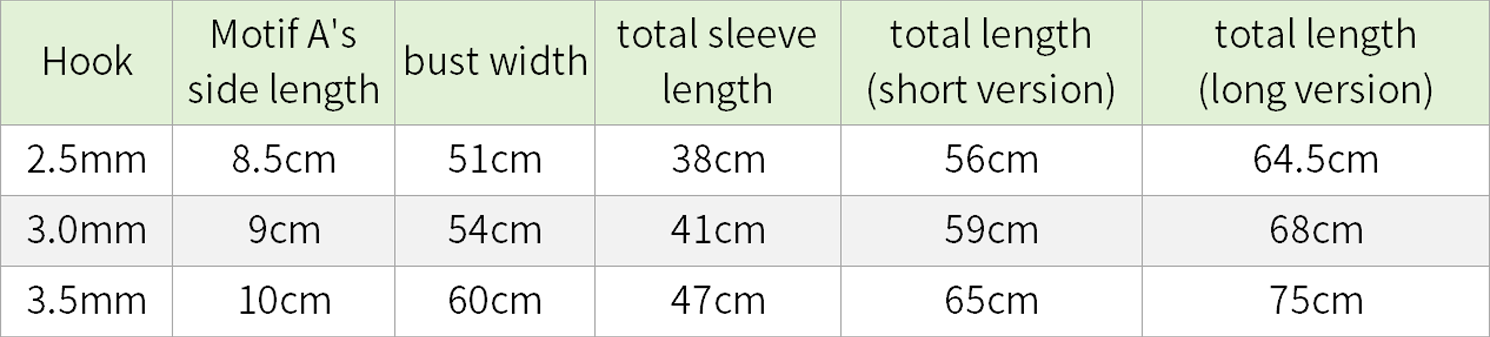
Chart Key







Note:This pattern is making in Chinese crochet pattern terms, and the stitch name is written using American terminology. All measurements in charts are in cm.
Material: 4-Ply Combed Cotton & Acrylic Fibre Hand Knitting Yarn
Hook: 2.5mm/3.00mm/3.5mm (crochet hook)
Needles: 3.2mm circular needle (60 cm),3.2mm straight needles (25cm*4)
Different hook sizes correspond to different sizes. Please refer to the table on the left for specifics.
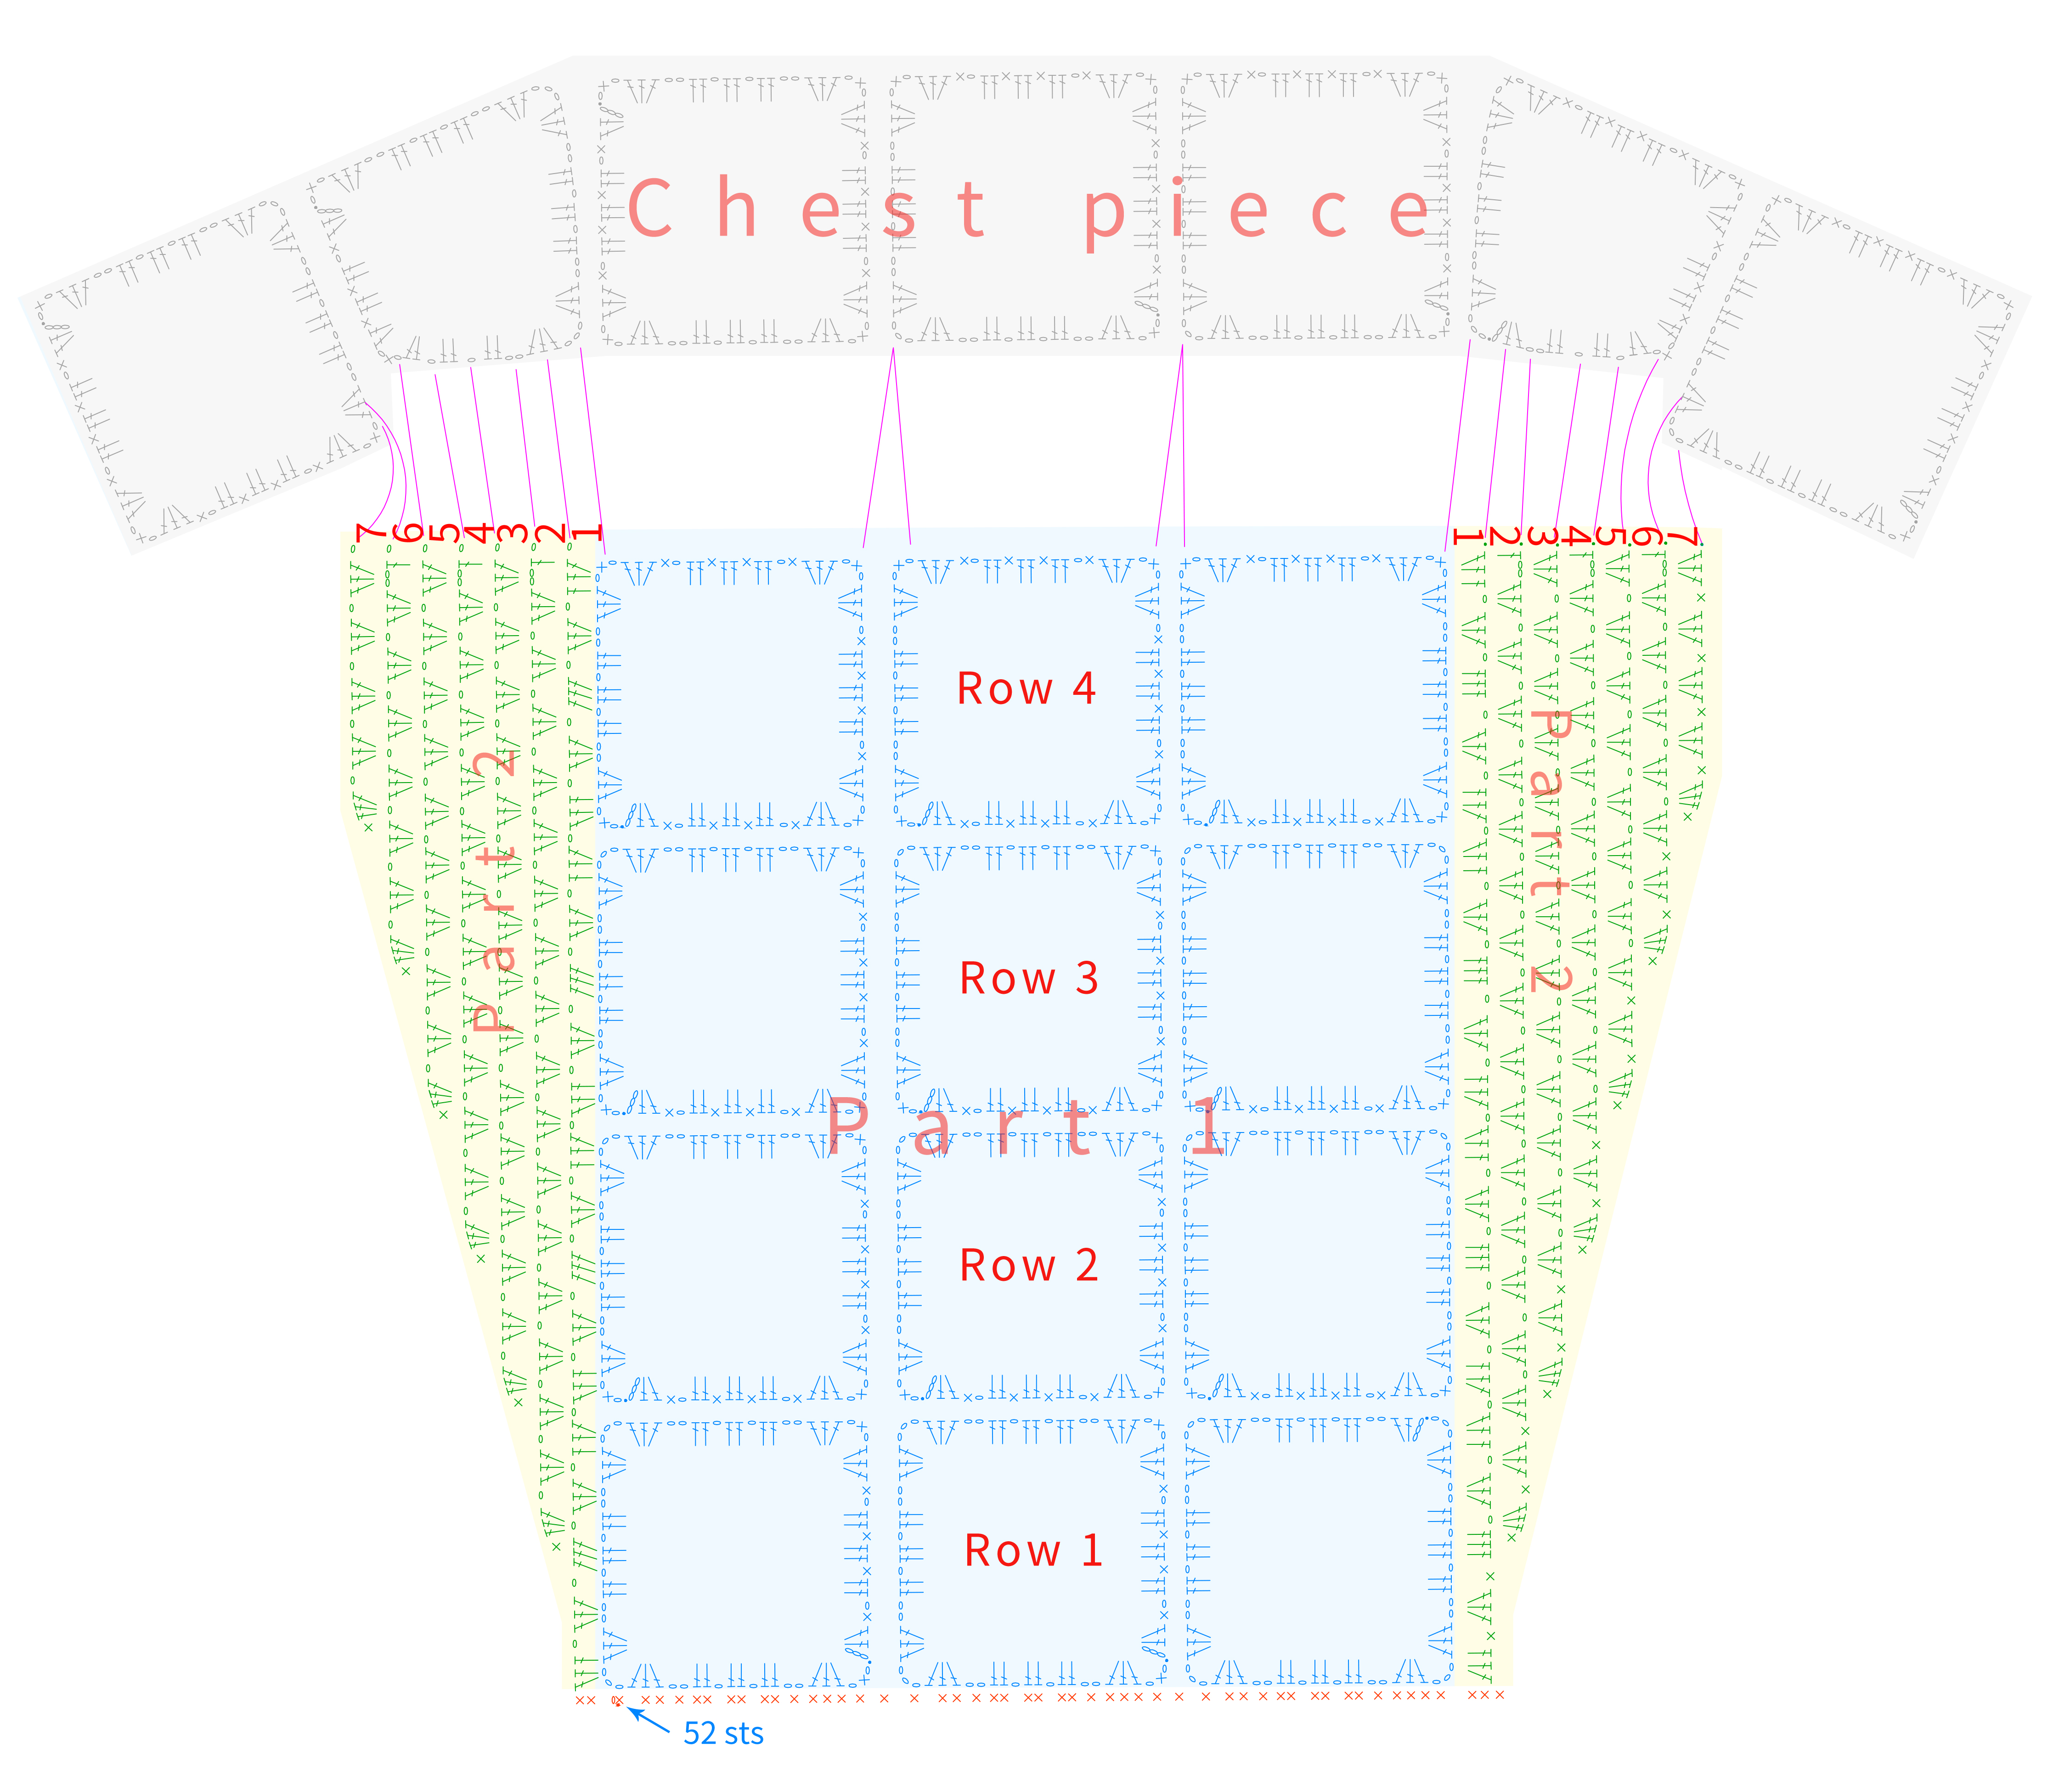
Part 1 BodyA 00' 41''

The body is constructed with a certain number of Motifs A. They are joined together to form the piece. Notice that only the first motif is completed separately. The other motifs will be joined while crocheting the last round. Continuous Join as you go. Each row of motifs is joined from right to left. Please refer to the video demonstration for more details.
Milky Rainbow Daisy Style/ Milky Daisy Style (Main color): 06#Bright White Blue Ashes Daisy Style (Main color): 44#Blue Ashes
Blue Ashes Daisy Style: For the Rnd 2, use 19#Whisper White, for the remaining 3 rounds, use the leftover colors as you like.
Milky Daisy Style: For the Rnd 2, use main color, for the remaining 3 rounds, use the leftover colors as you like.
Milky Rainbow Daisy Style: For the first 2 rounds, use contrasting colors of your choice. Then, finish off with the main color for the last 2 rounds.
Note to leave about 2 skeins of the main color yarn for finishing the hem, front bands, cuffs, and collar.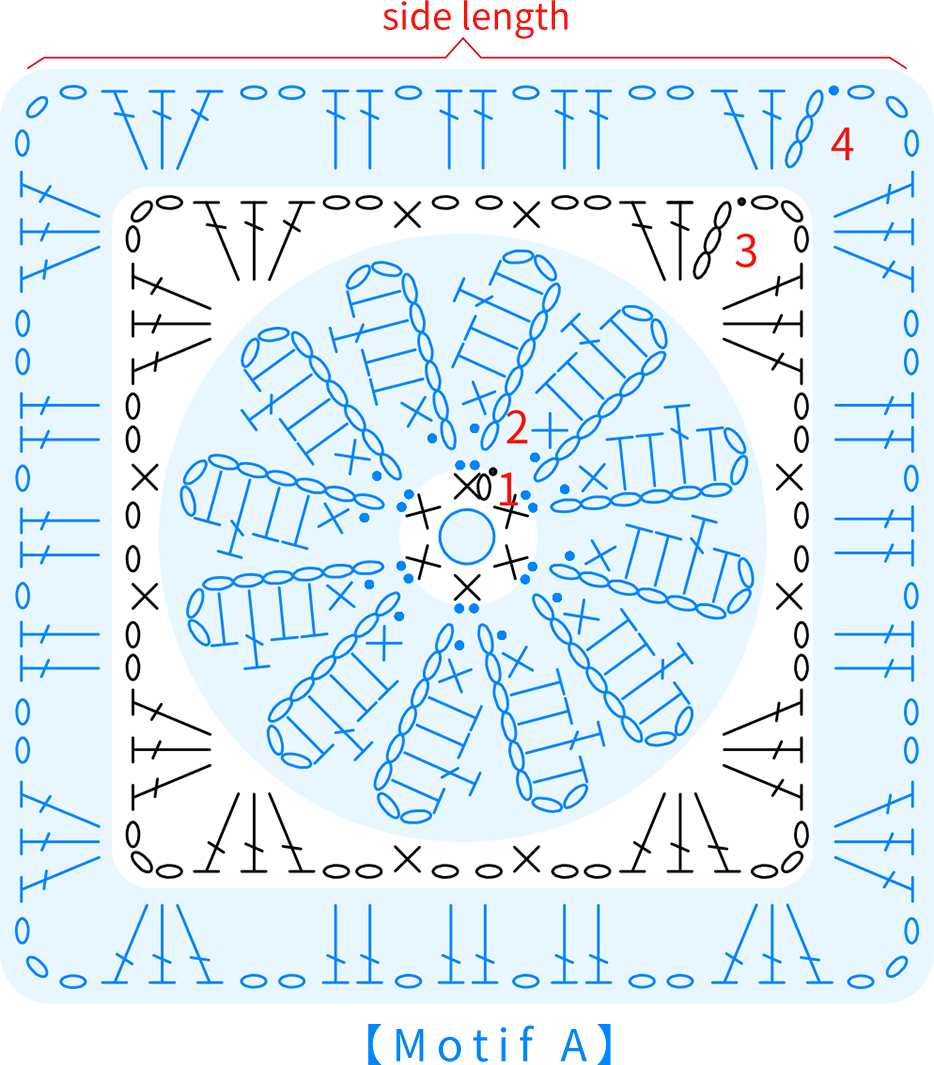
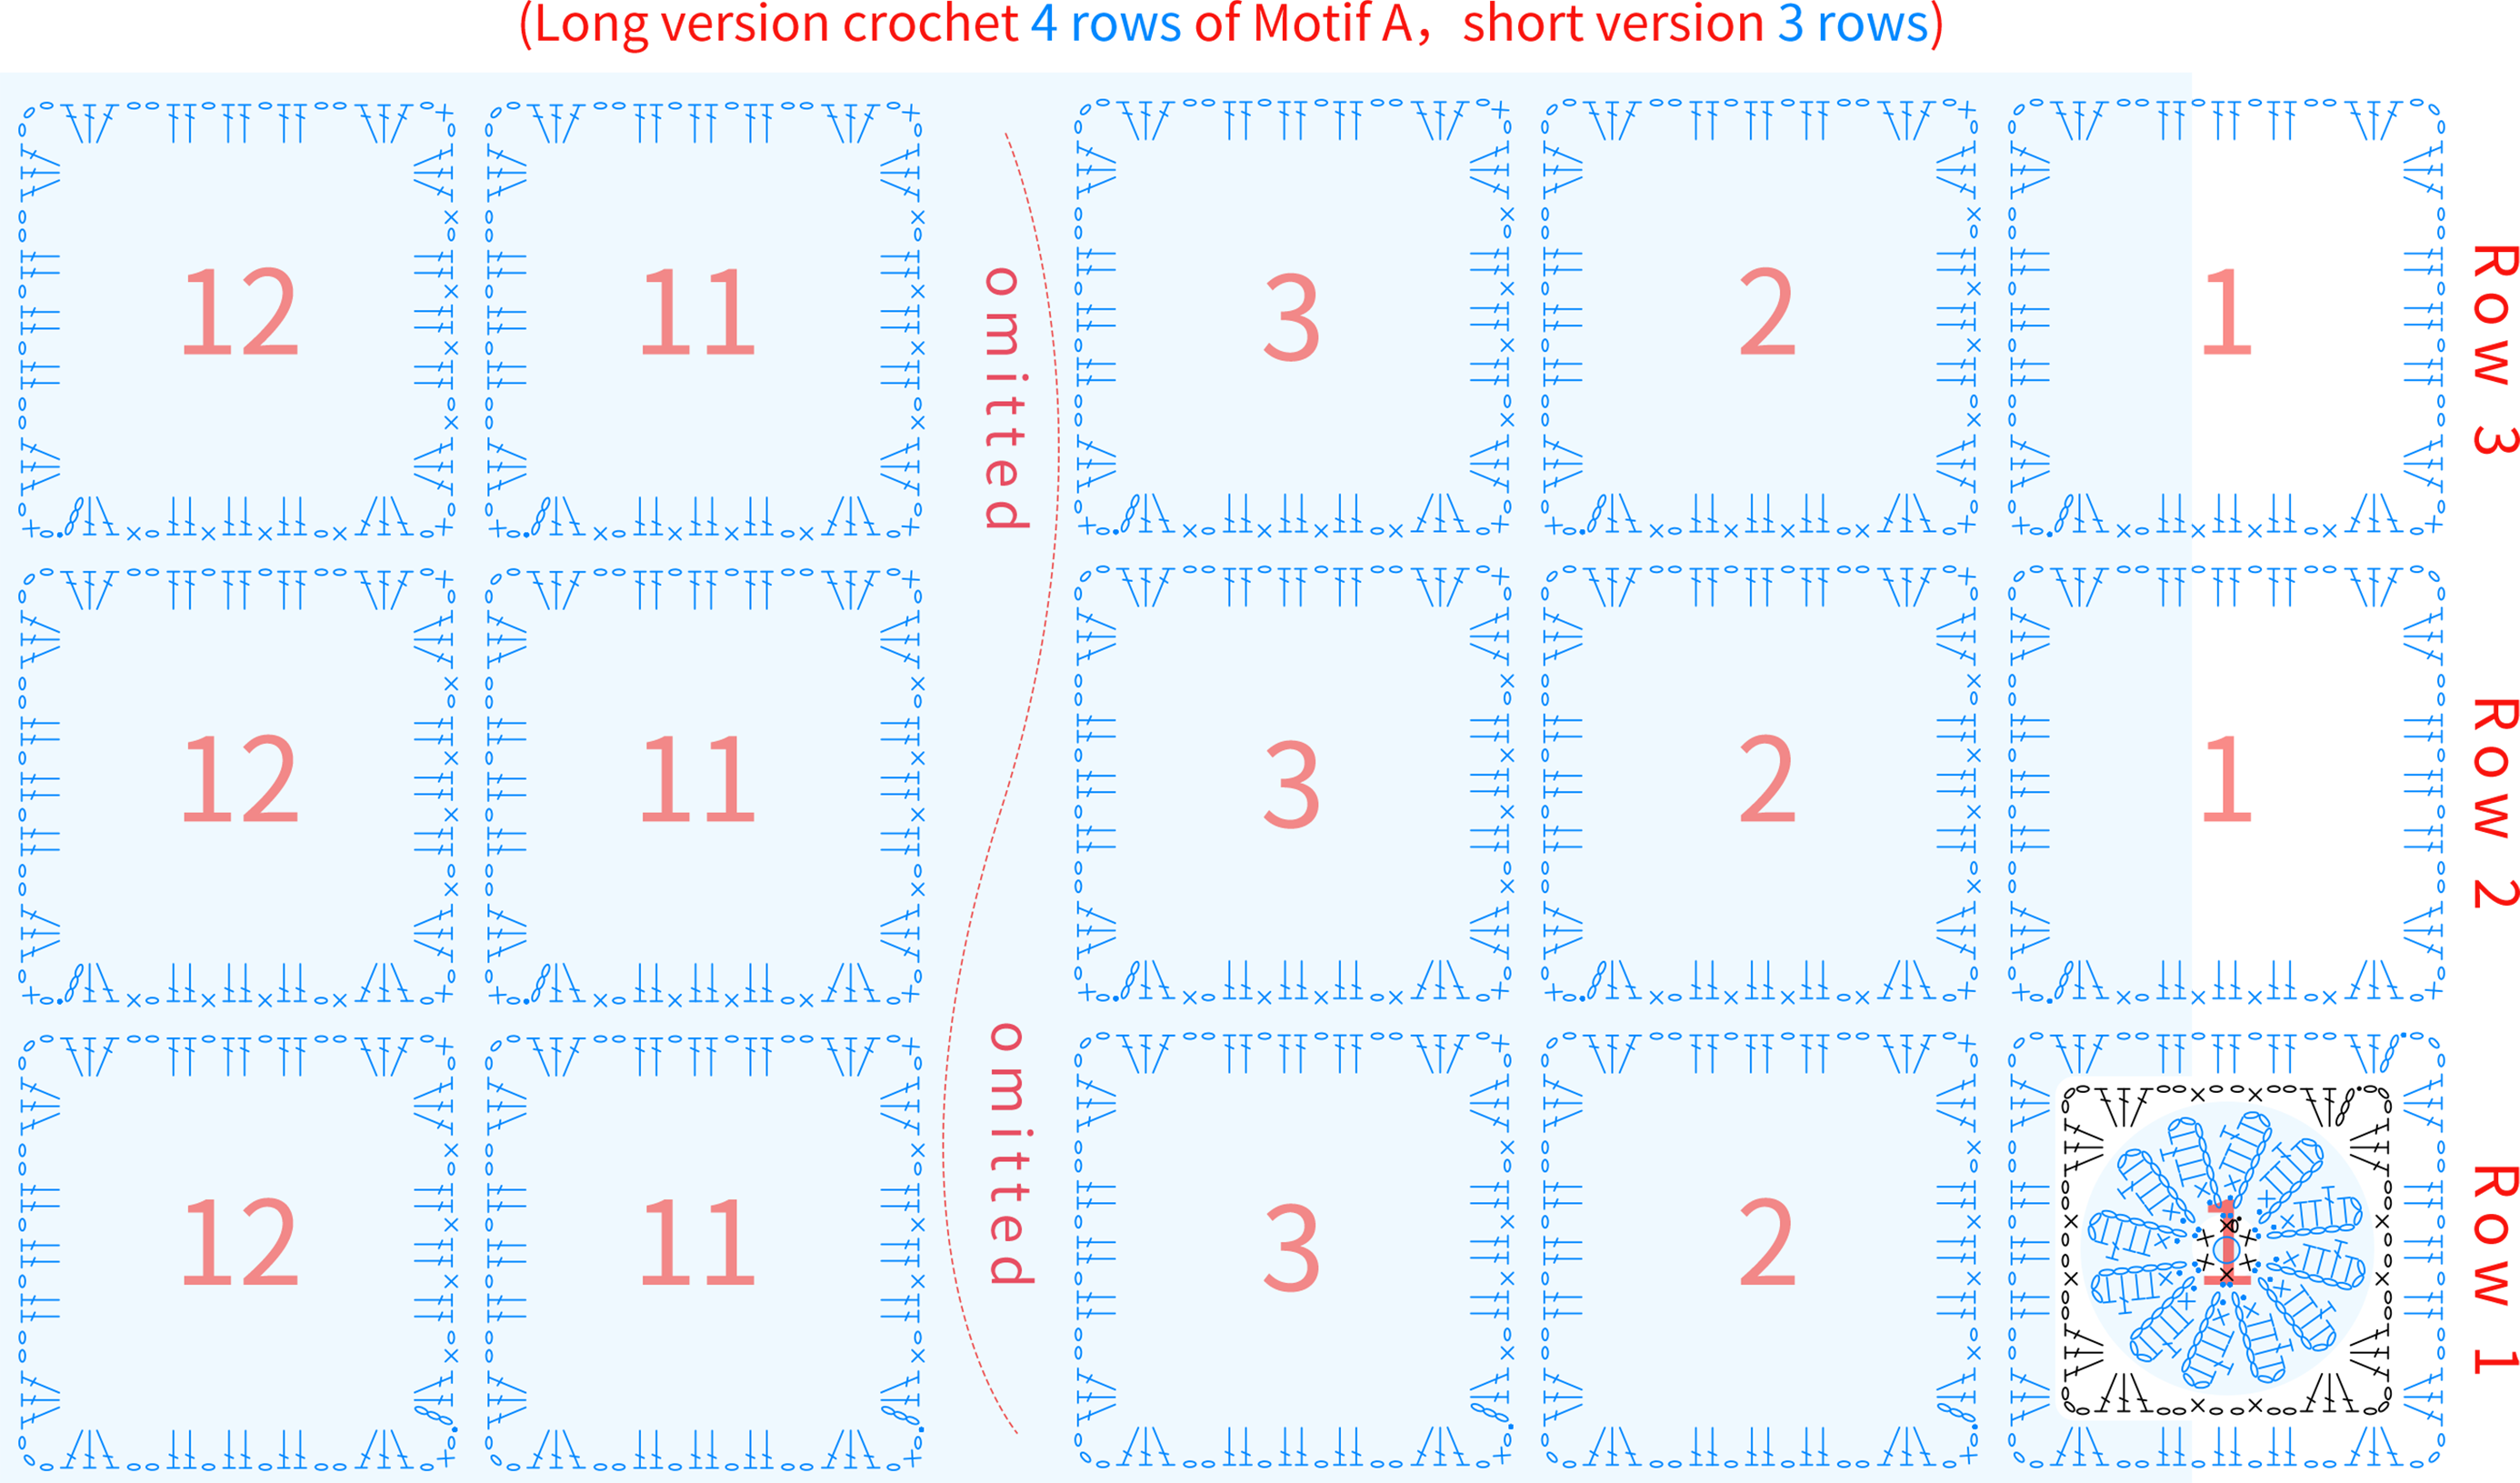
Part 2 Chest piece
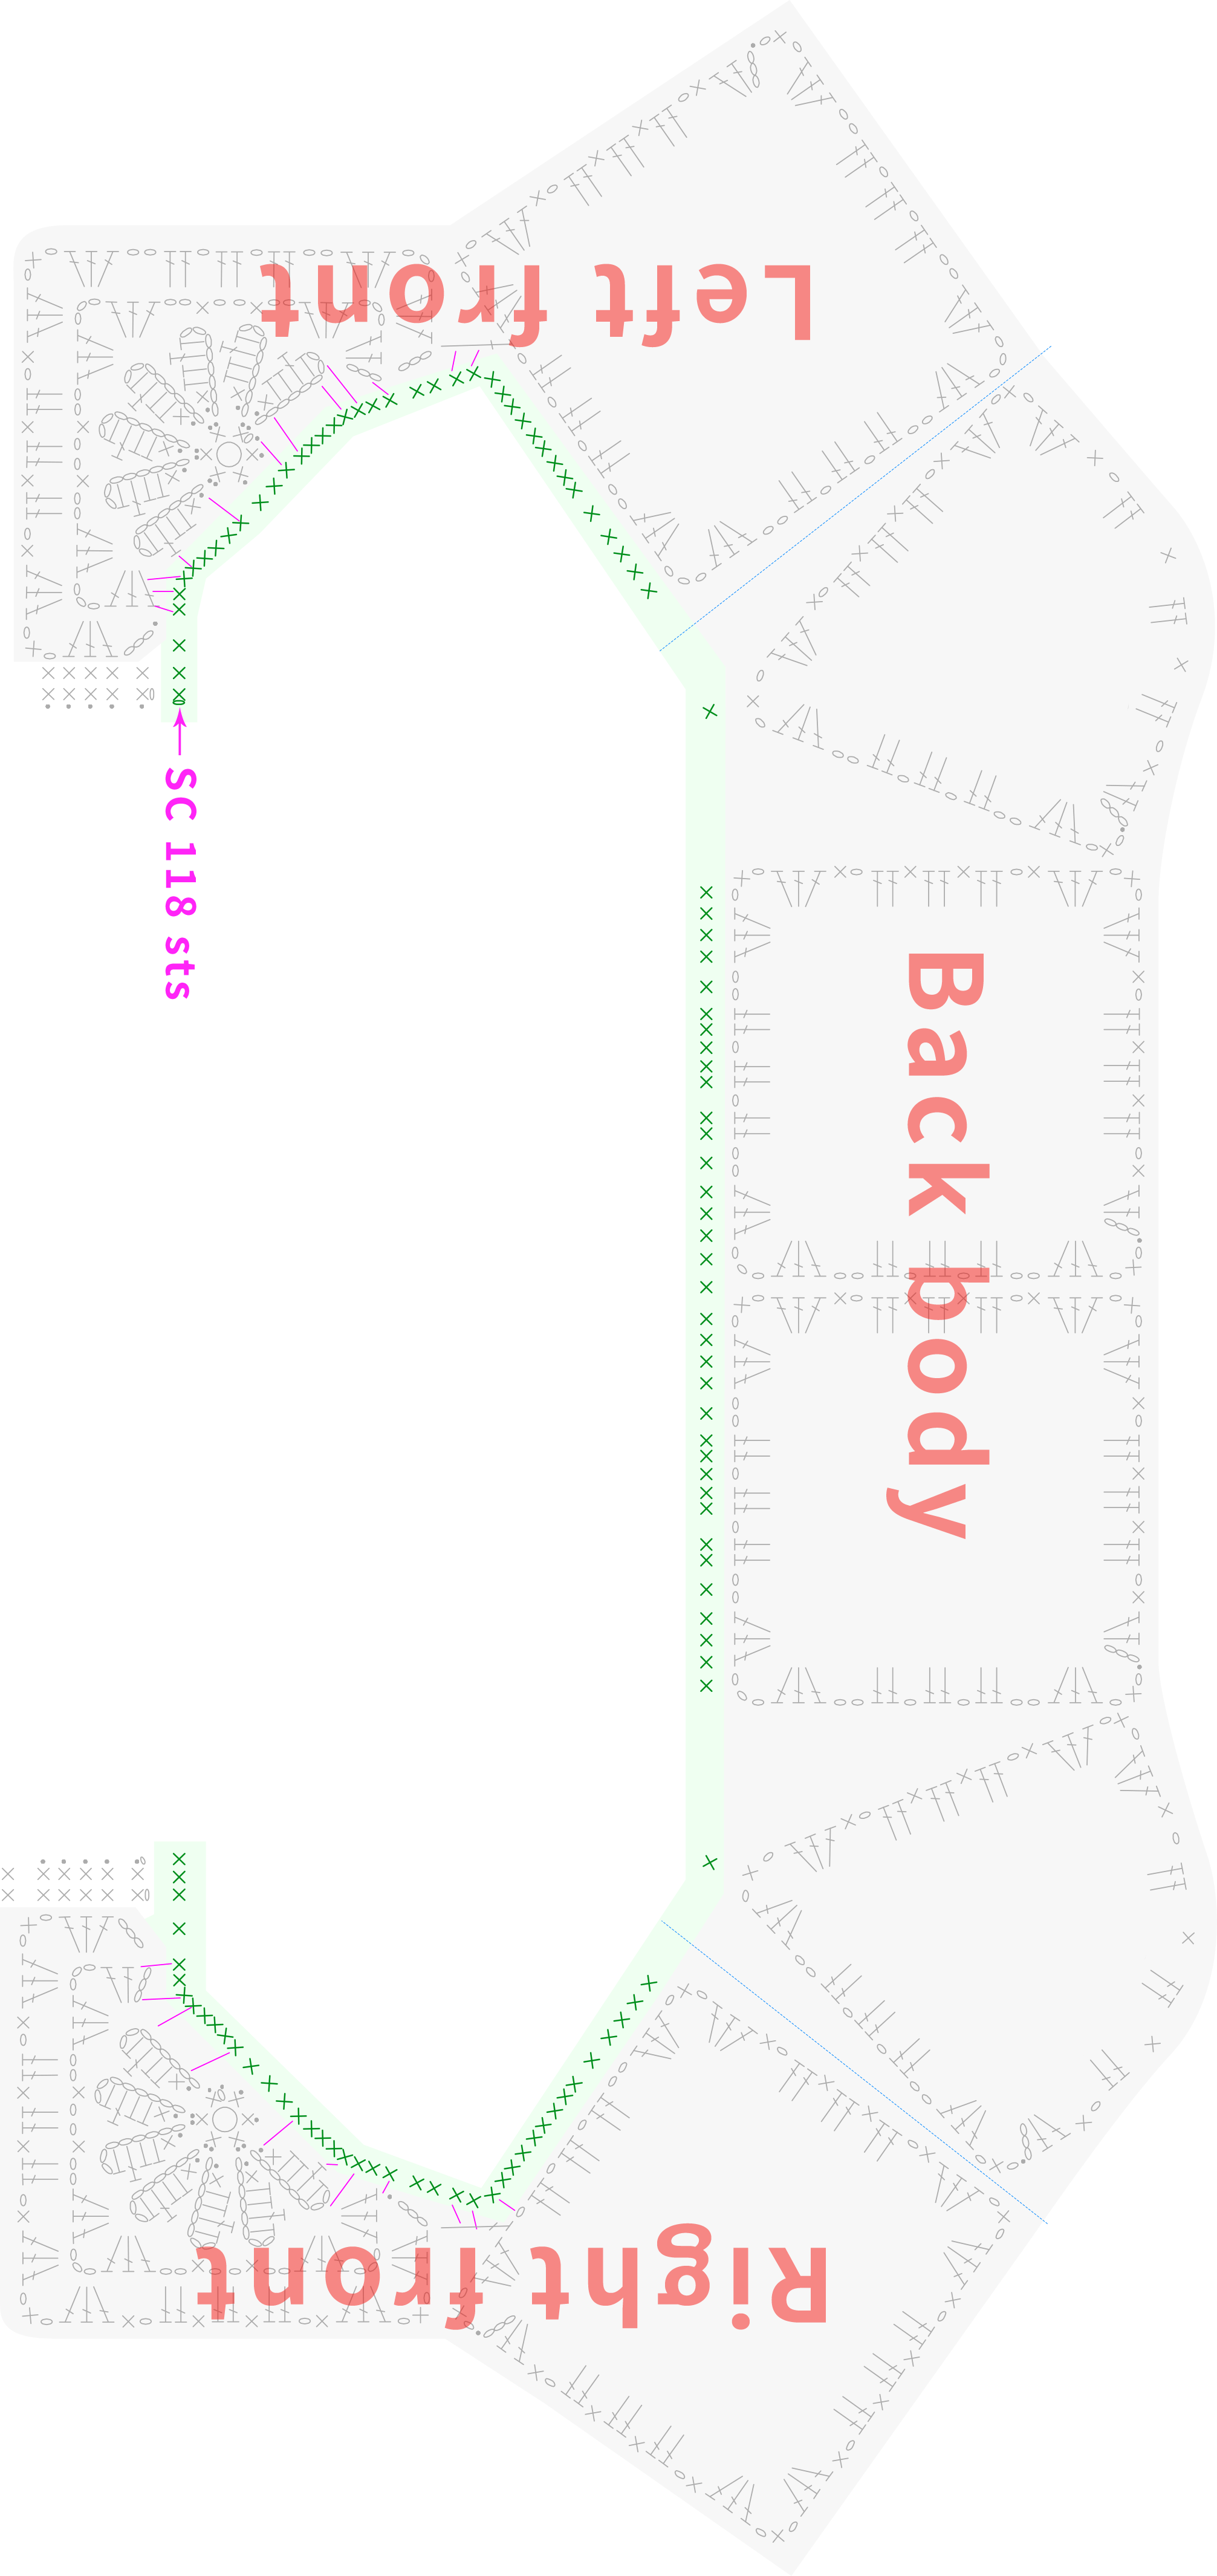
Continue working upwards from the body part. It consists of the left front, right front and the back (face to the front body of the jacket to distinguish left and righ).
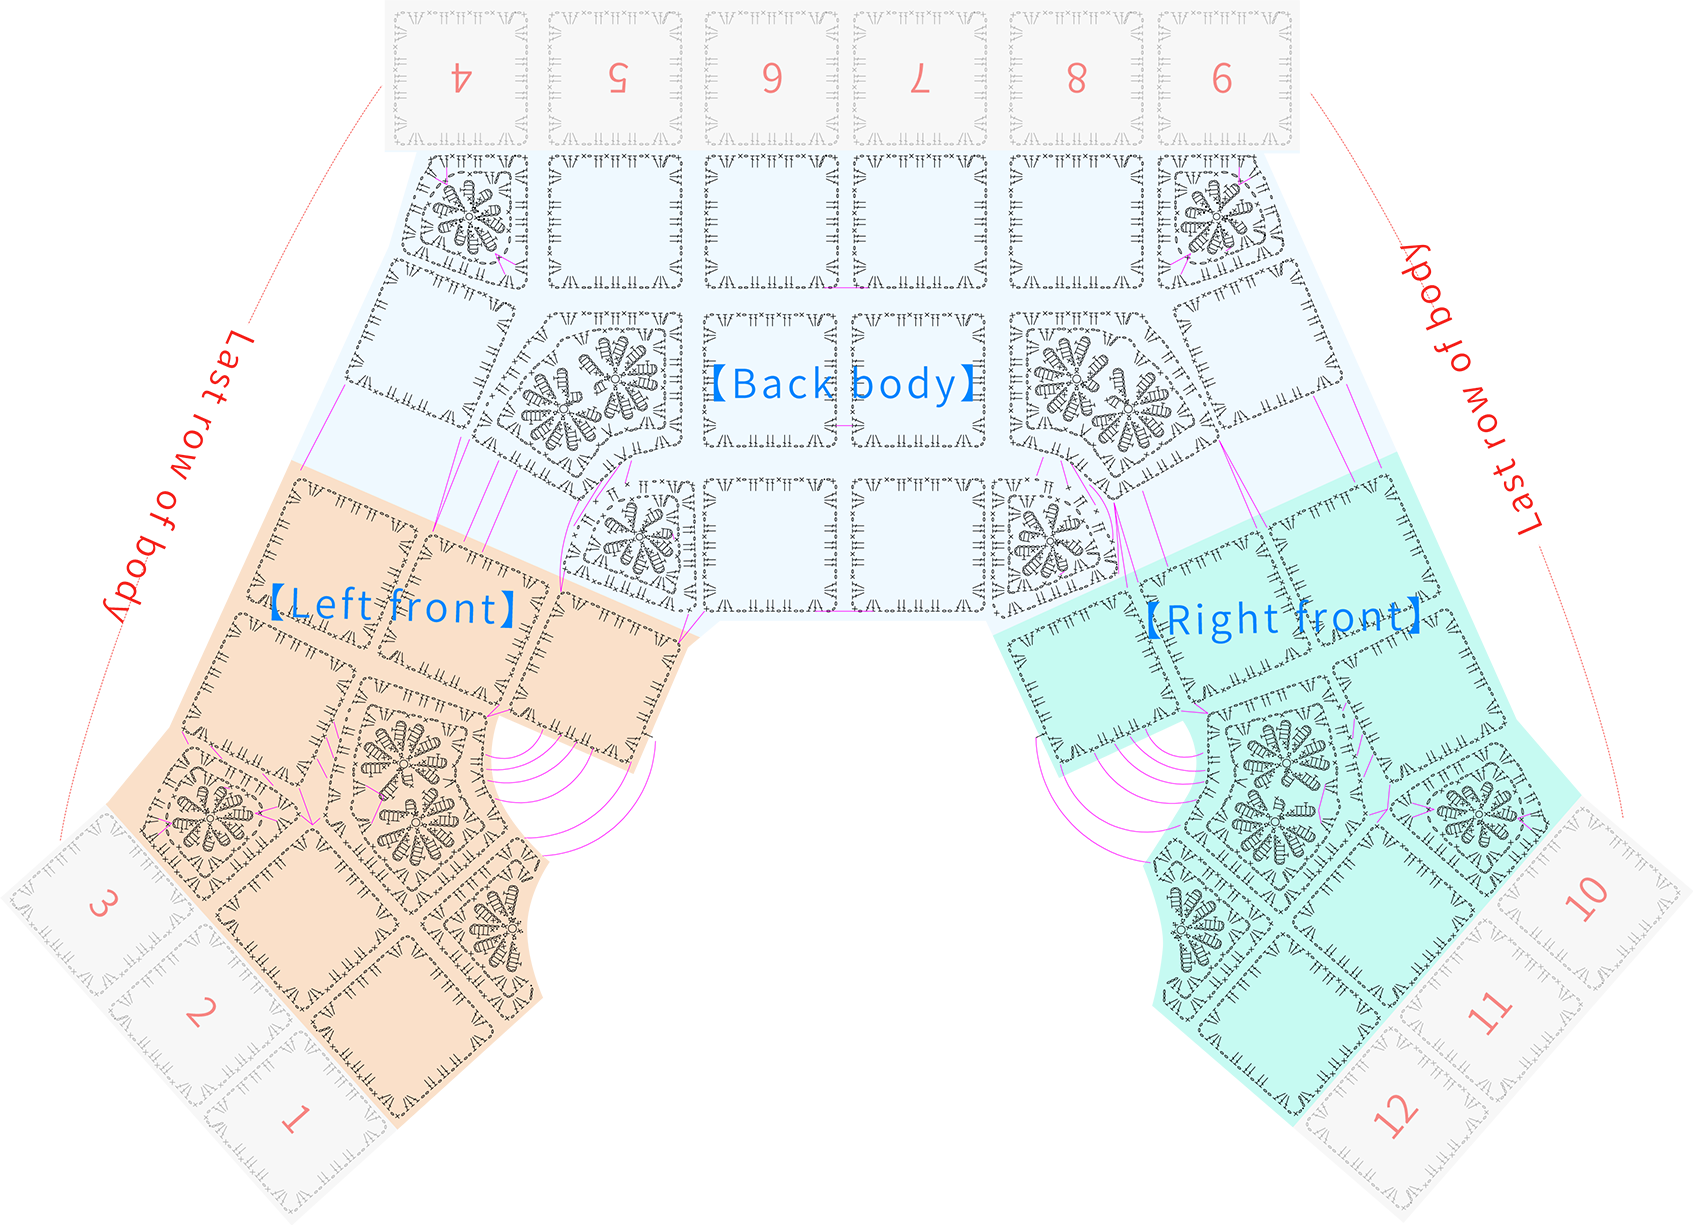
Step 1 Left frontB1 31' 56''
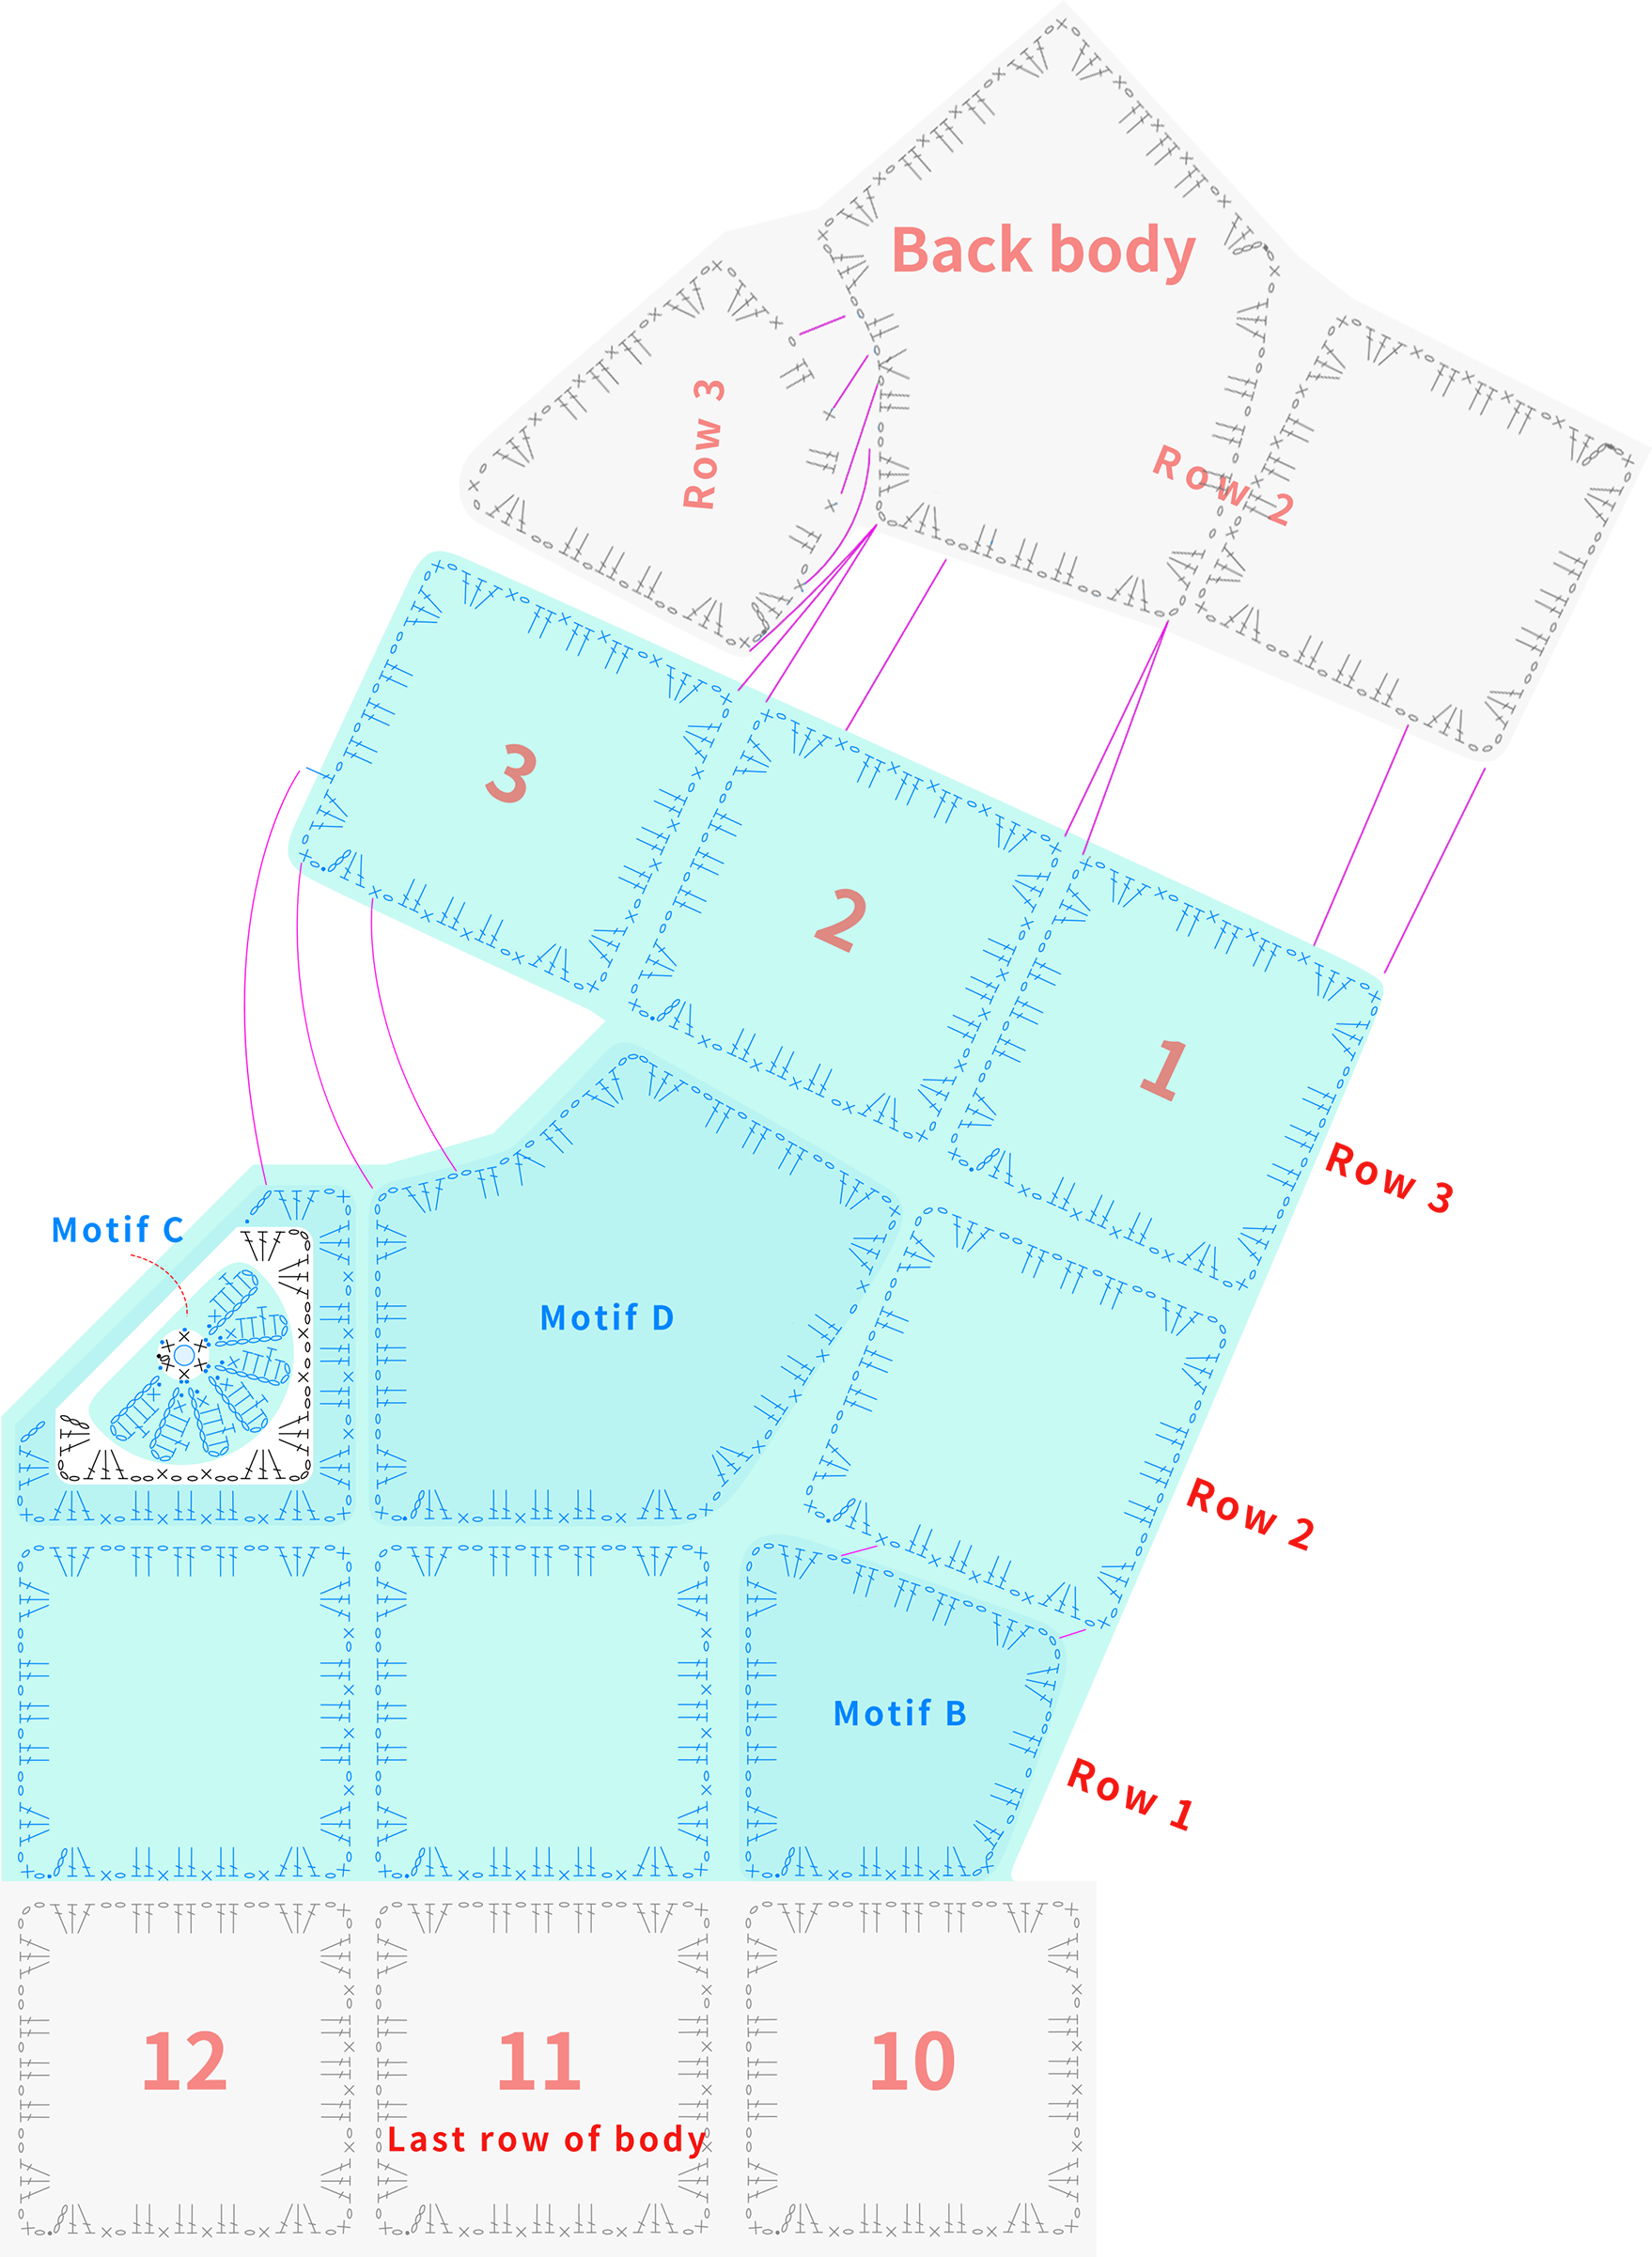
The left front piece has 3 rows in total, including 4 different kinds of motifs. Motif A, Motif B, Motif C and Motif D. Please refer to the video demonstration for more details.
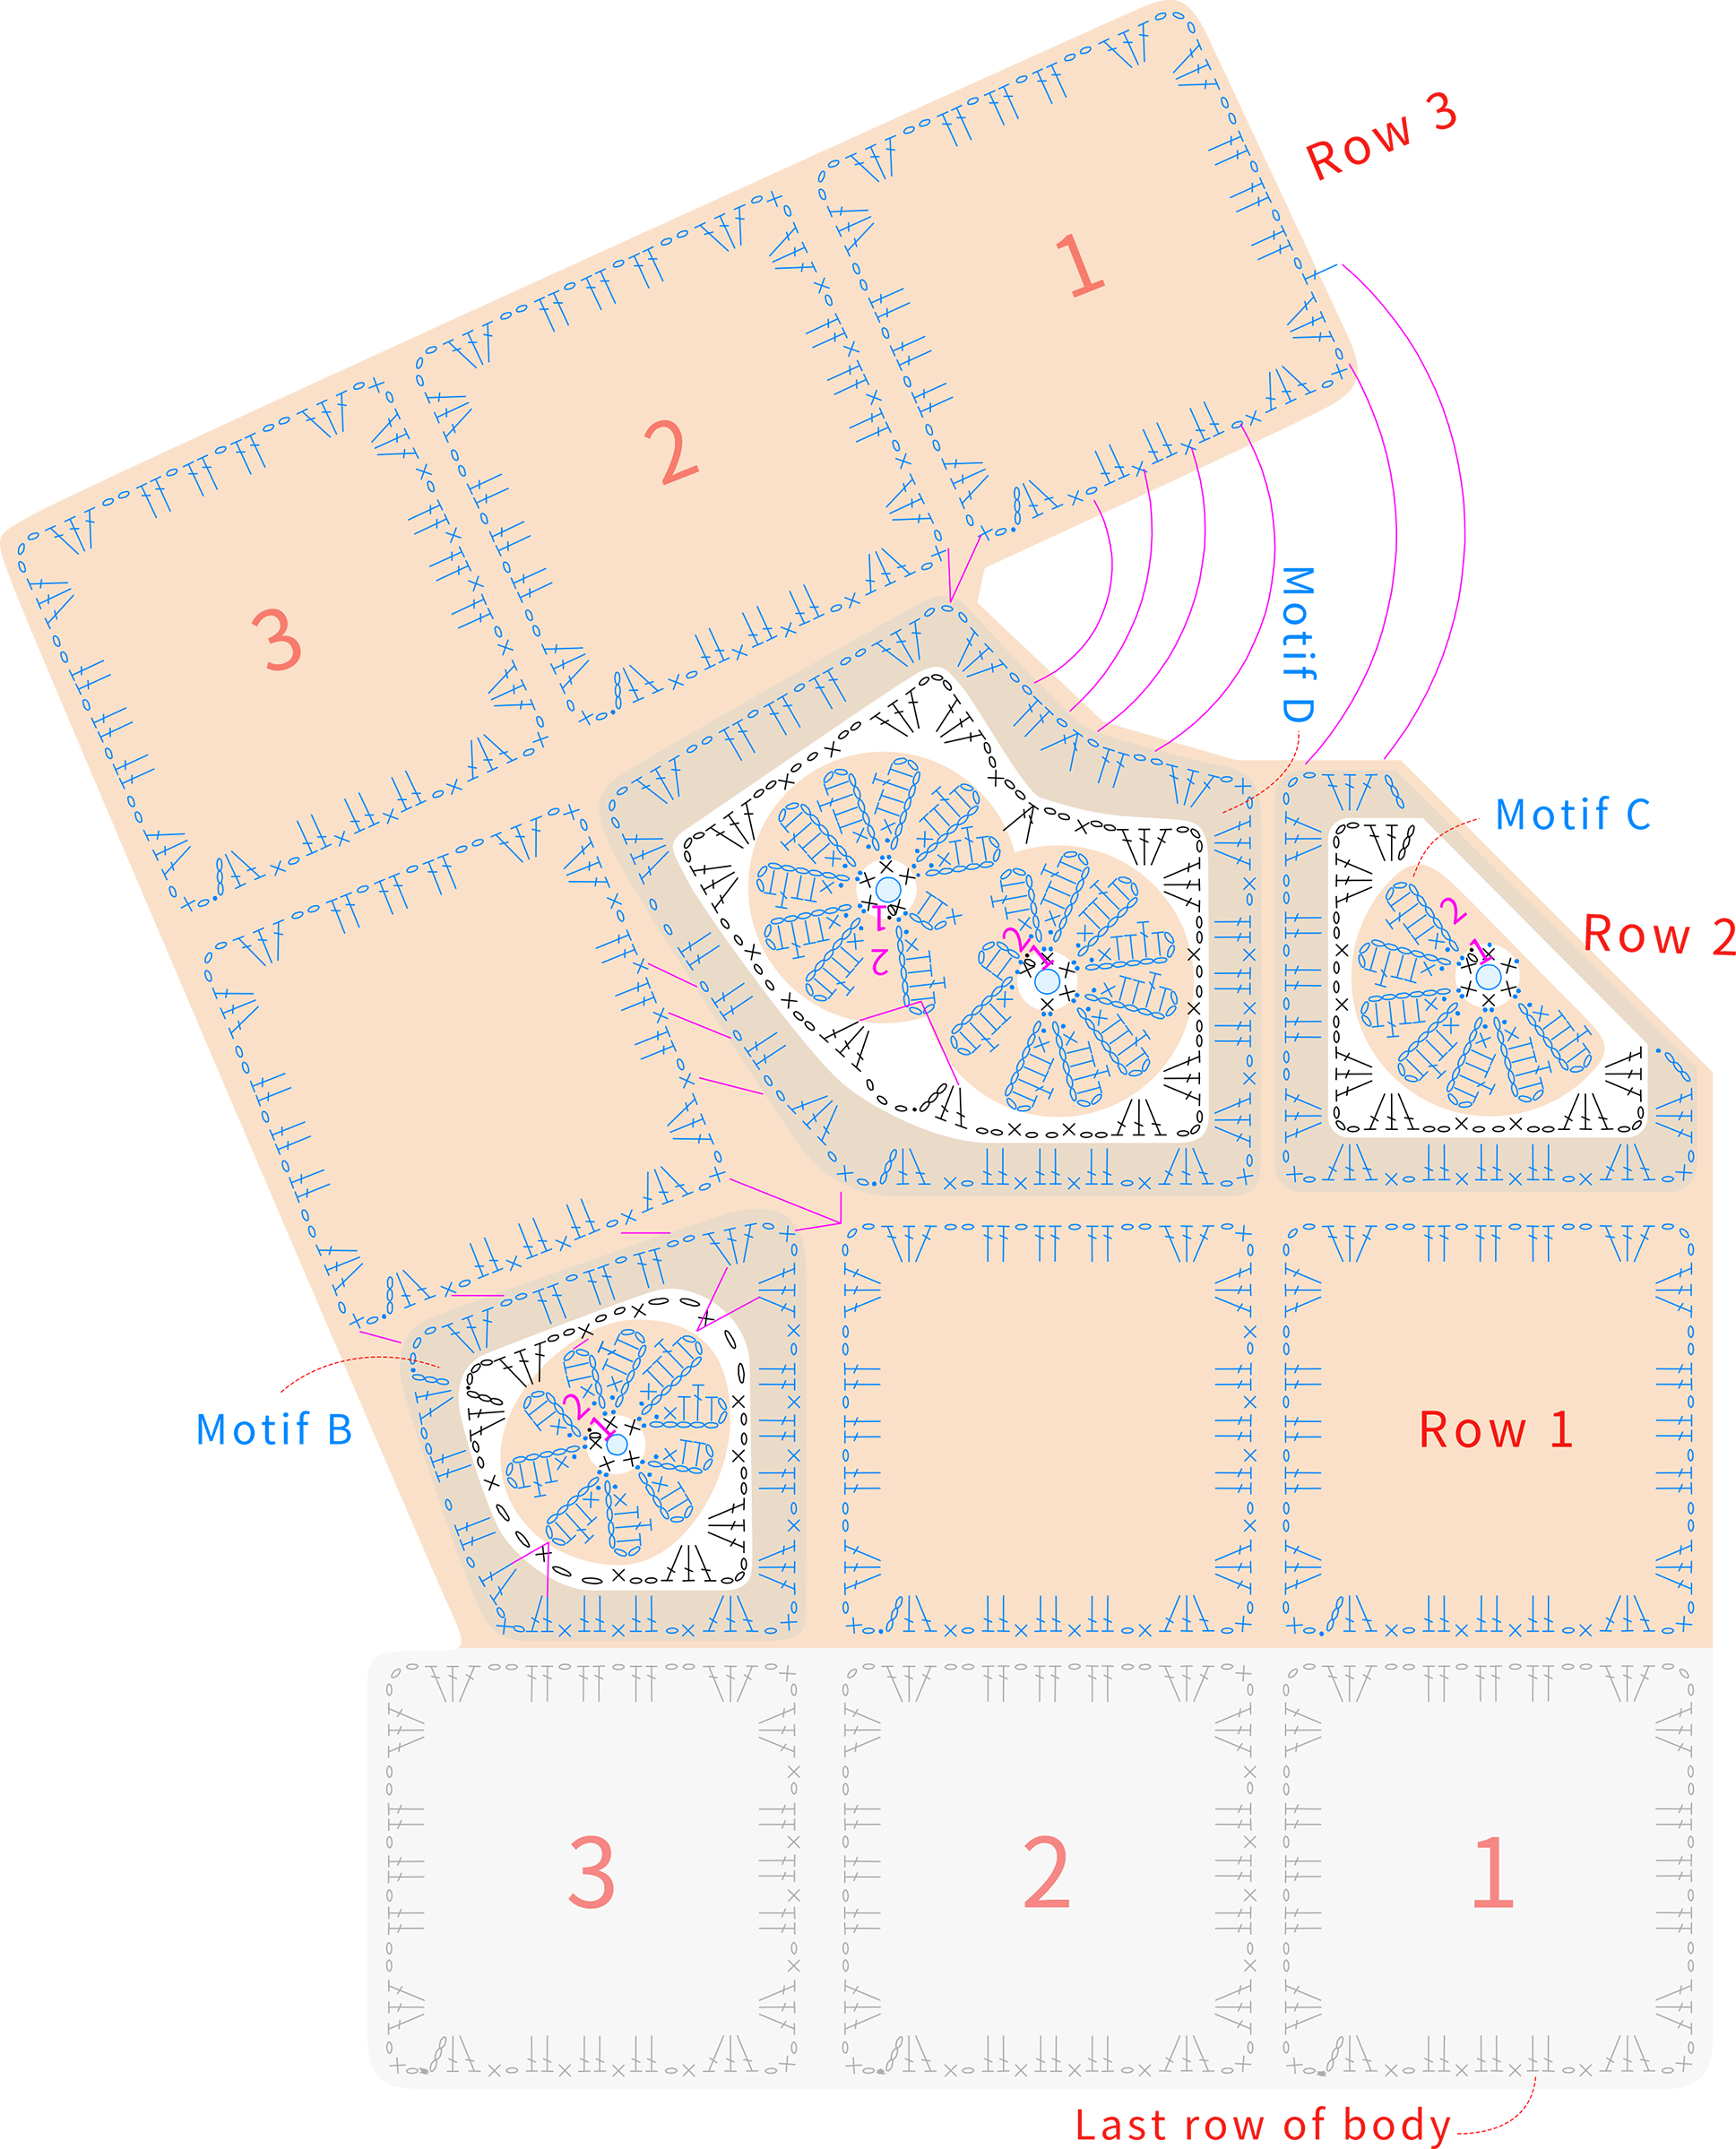
Step 2 Back bodyB2 53' 09''
For the Back Body, you'll complete three rows of motifs, including four different types of motifs. Please refer to the video demonstration for more details.
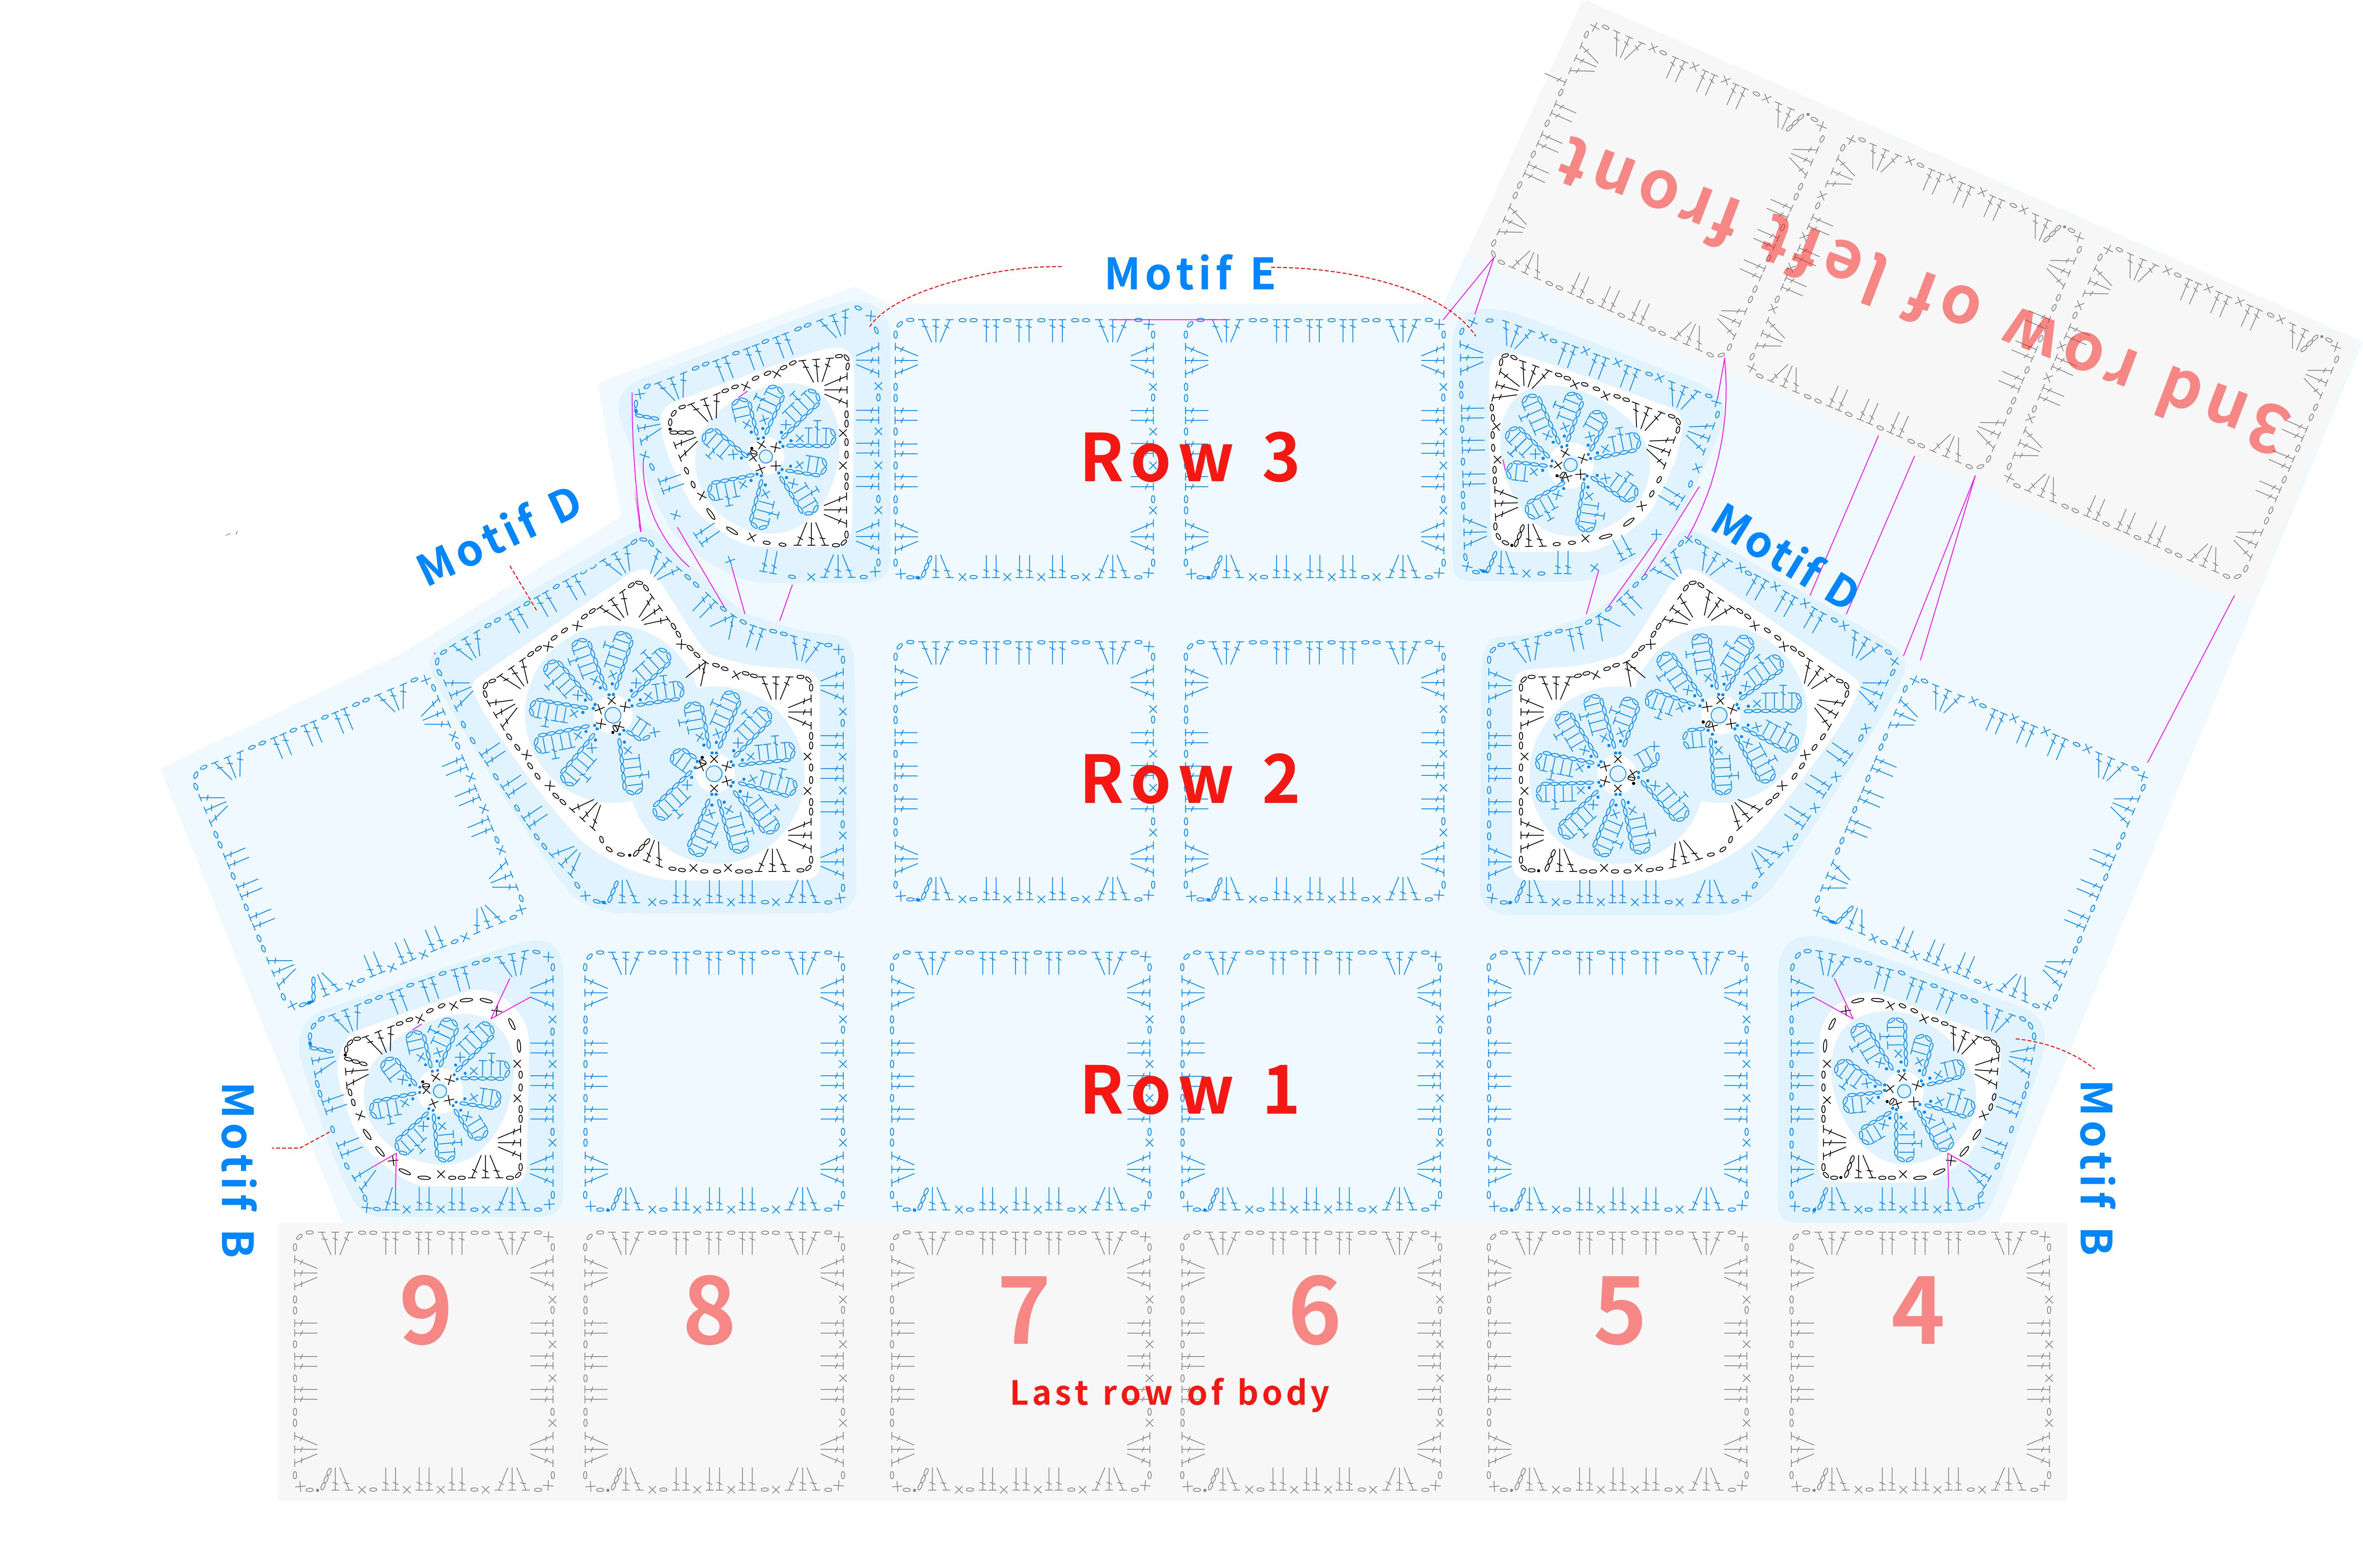
Step 3 Right frontB3 55' 34''
The right front is also consist of 3 rows of motifs. When making the last row, remember to join not only the corresponding motif in the previous row of right front, but also the motifs in the back body. Please refer to the video demonstration for more details.
Part 3 SleevesC
The sleeve consists of the cuff and the sleeve body.
Step 1 Sleeve bodyC1 56' 23''
The sleeve body is divided into two parts. The first part consists of a certain number of Motif A. When making the motifs in the last row, in addition to join the sleeve body, you'll also join it to the remaining 3 Motif A of the chest part. After finishing the first part, Move on to the second part along the side of last row. Please refer to the video demonstration for more details.
Part 2 of sleeve body:
Milky Rainbow Daisy Style: crocheted with the main color yarn.
Milky Daisy Style: crocheted with contrasting color.
Blue Ashes Daisy Style: free to match colors, making sure that adjacent rows are staggered to create a color-block effect.
Step 2 CuffsC2 70' 37''
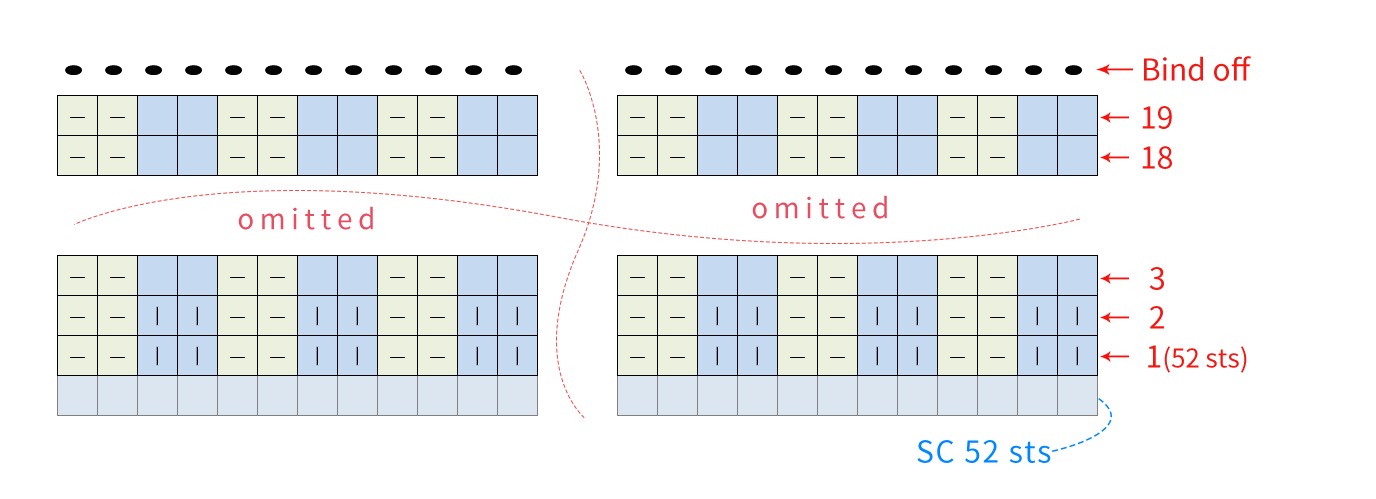
Knit in rounds along the bottom edge of the sleeve. Begin with a round of single crochets, then pich up the stitches use 2 by 2 rib for the cuff in rounds. Please refer to the video demonstration for more details.
Part 4 Front band D, hem E 86' 42''
Both front bands are worked in the same way. They're both crocheted along the edge of the body and the chest piece. Work in rows with single crochets and slip stitches. After finfshing the front bands, make the hem. First, make a row of single crochets along the bottom edge. Then, pick up stitches and work in 2 by 2 rib. Please refer to the video demonstration for more details.
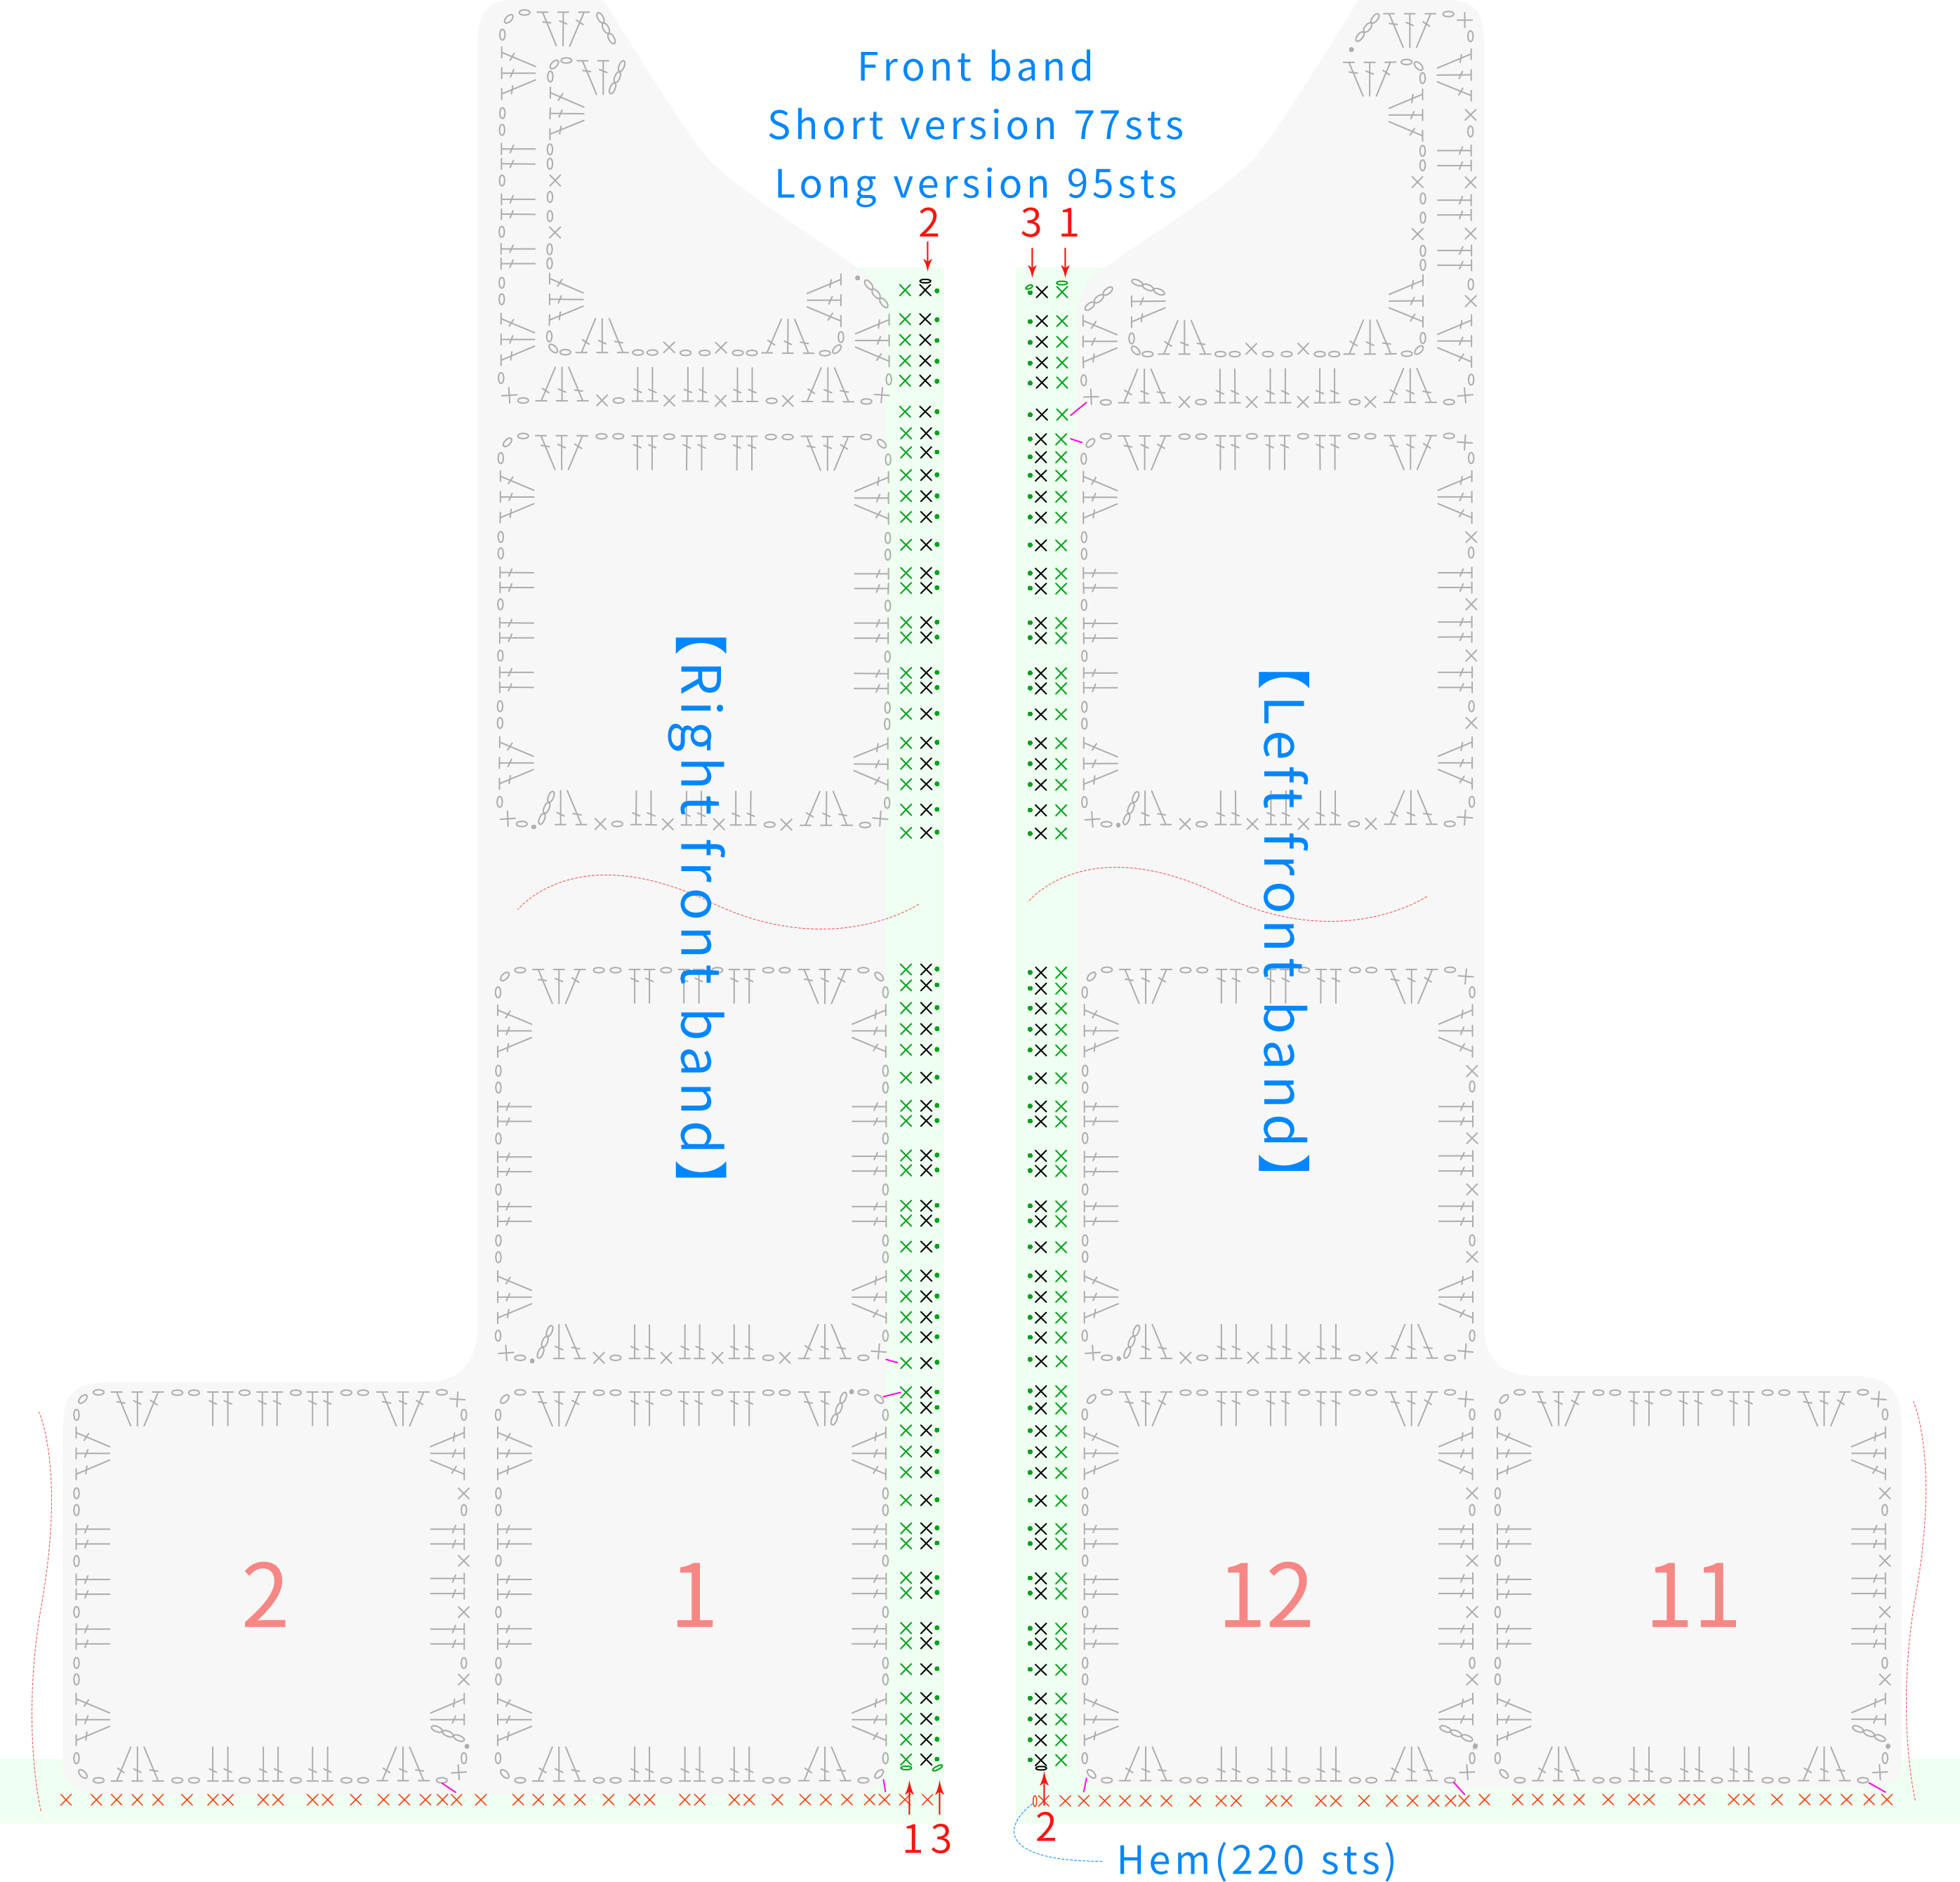
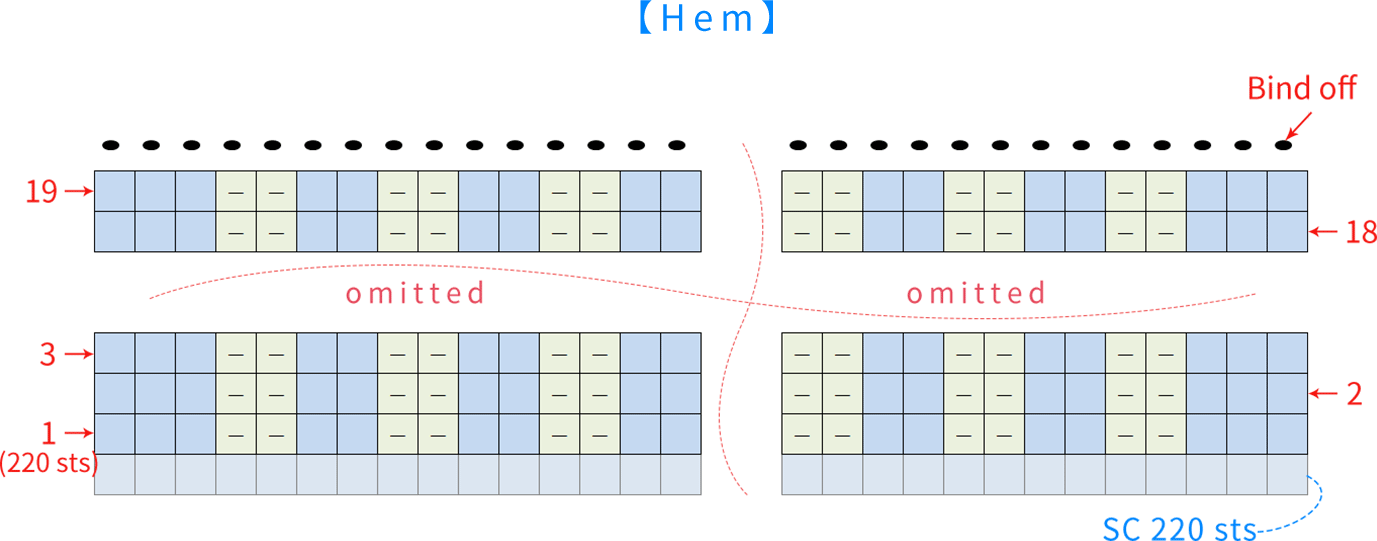
The chart represent the right side of fabric, so check the key to see how to work a certain symbol on the right side and on the wrong side.
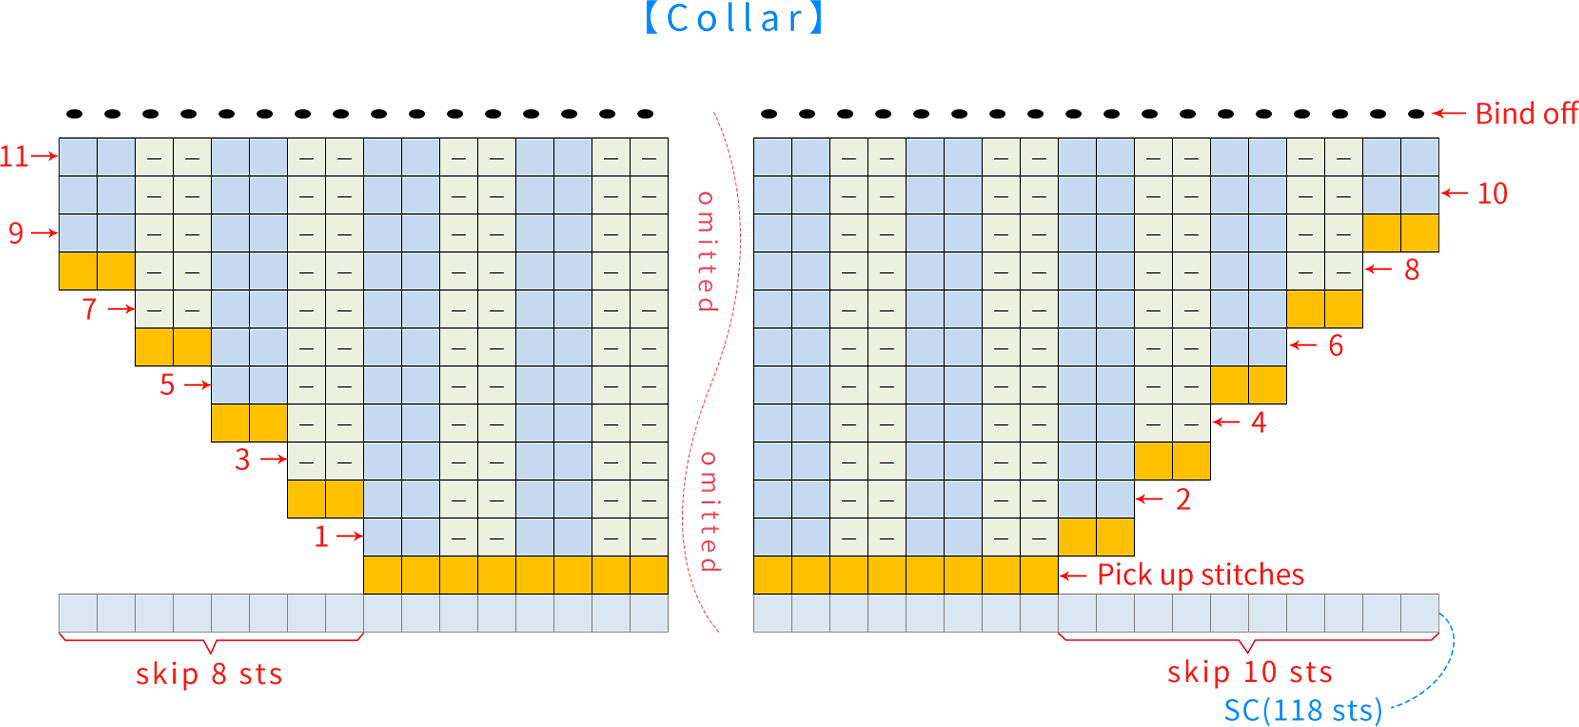
Part 5 Collar F, attach the zipper G 95' 49''
The collar also start with a row of single crochets, then, pick up the stitches, work the 2 by 2 rib back and forth in rows. Finally, attach the zipper on the fron band. Please refer to the video demonstration for more details.
Made by the community