Clothes
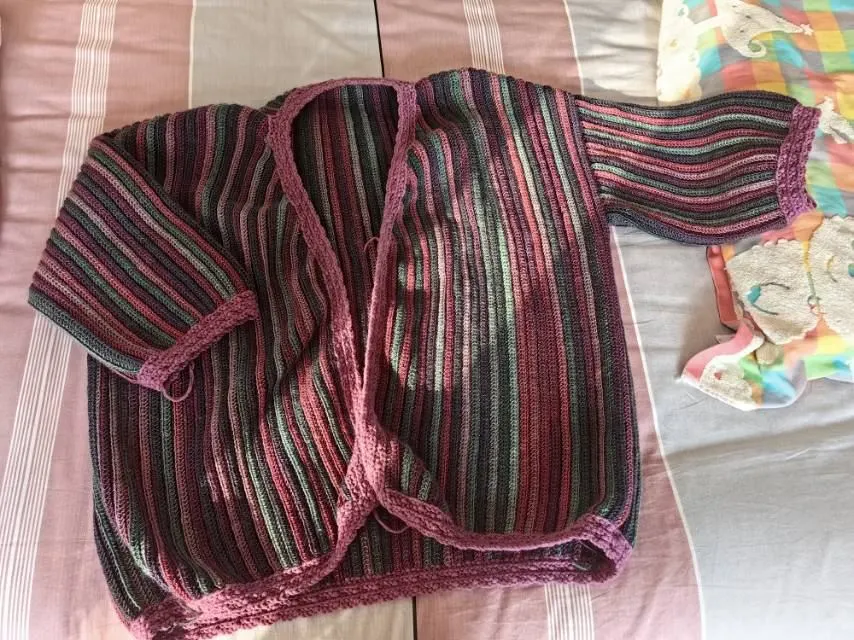
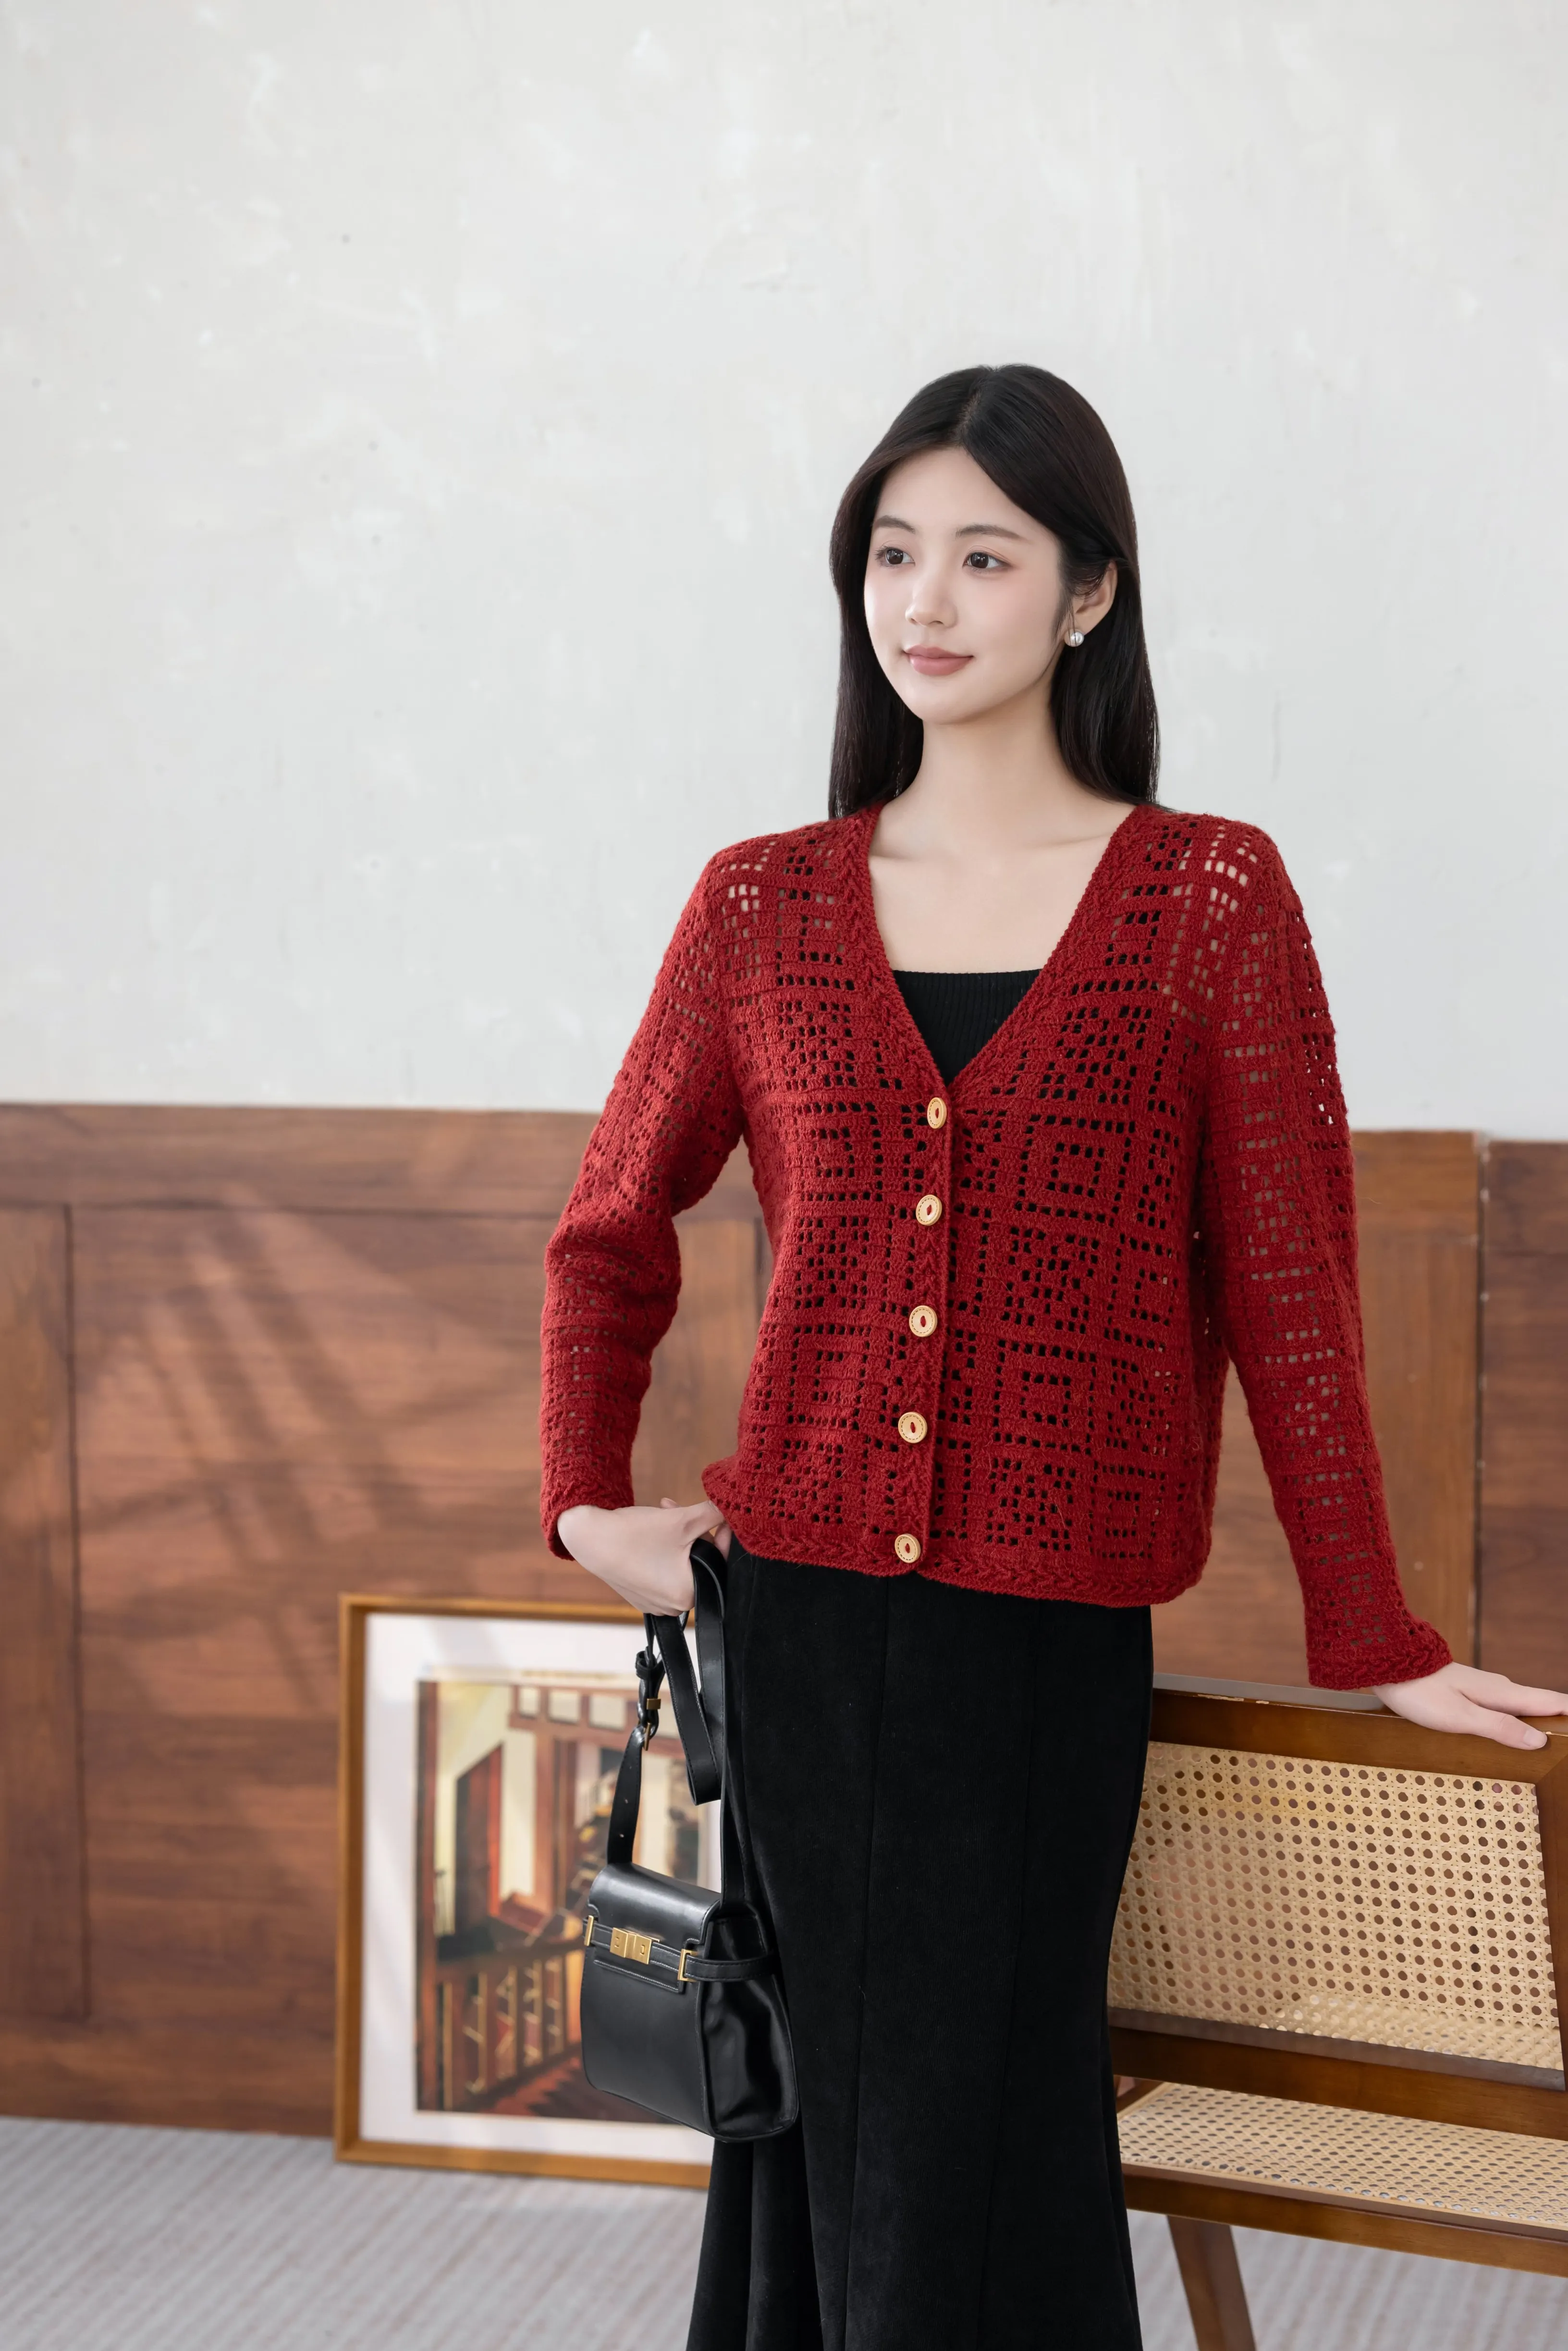
Dawn Hibiscus Cardigan
Project preview
See the finished project
Pattern format
Instructions
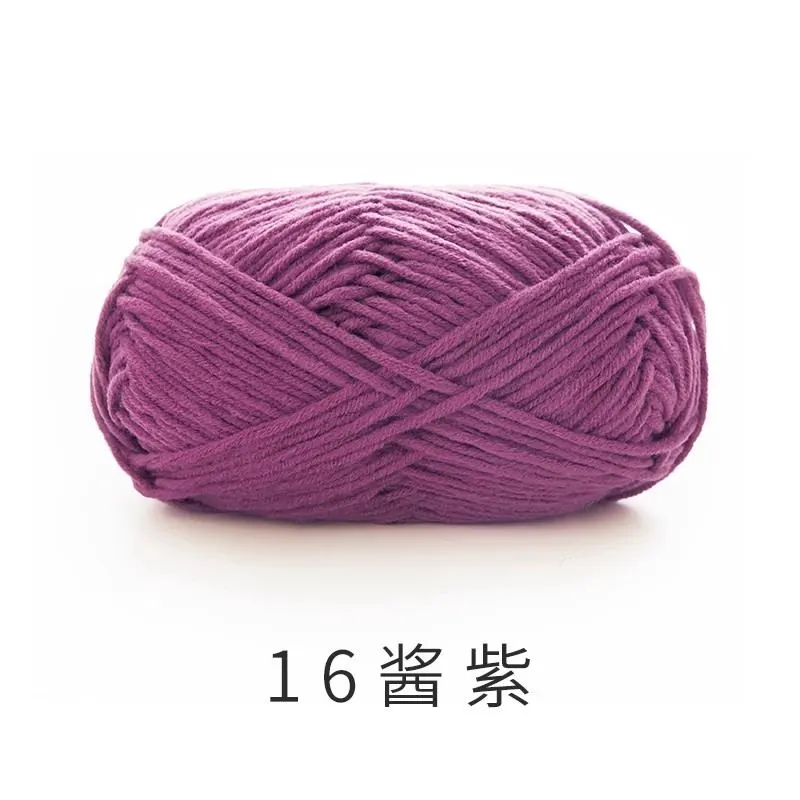
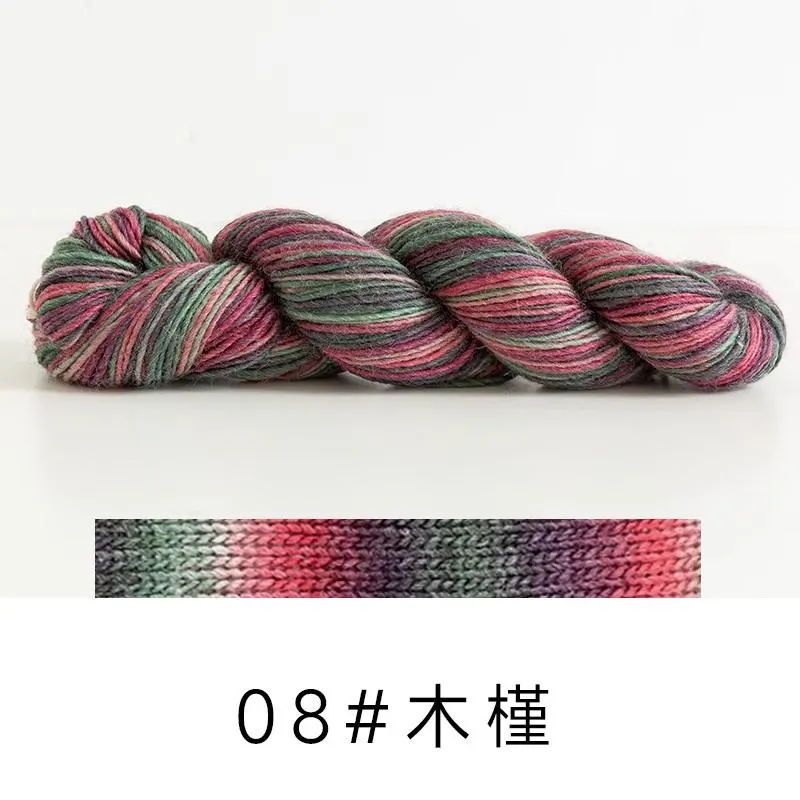
The cardigan consists of the front piece, back piece, sleeves, connections, edging, and buttons. Make each piece separately, then sew them together. After that, crochet the front band and cuffs, finally sew on the buttons and make buttonholes.
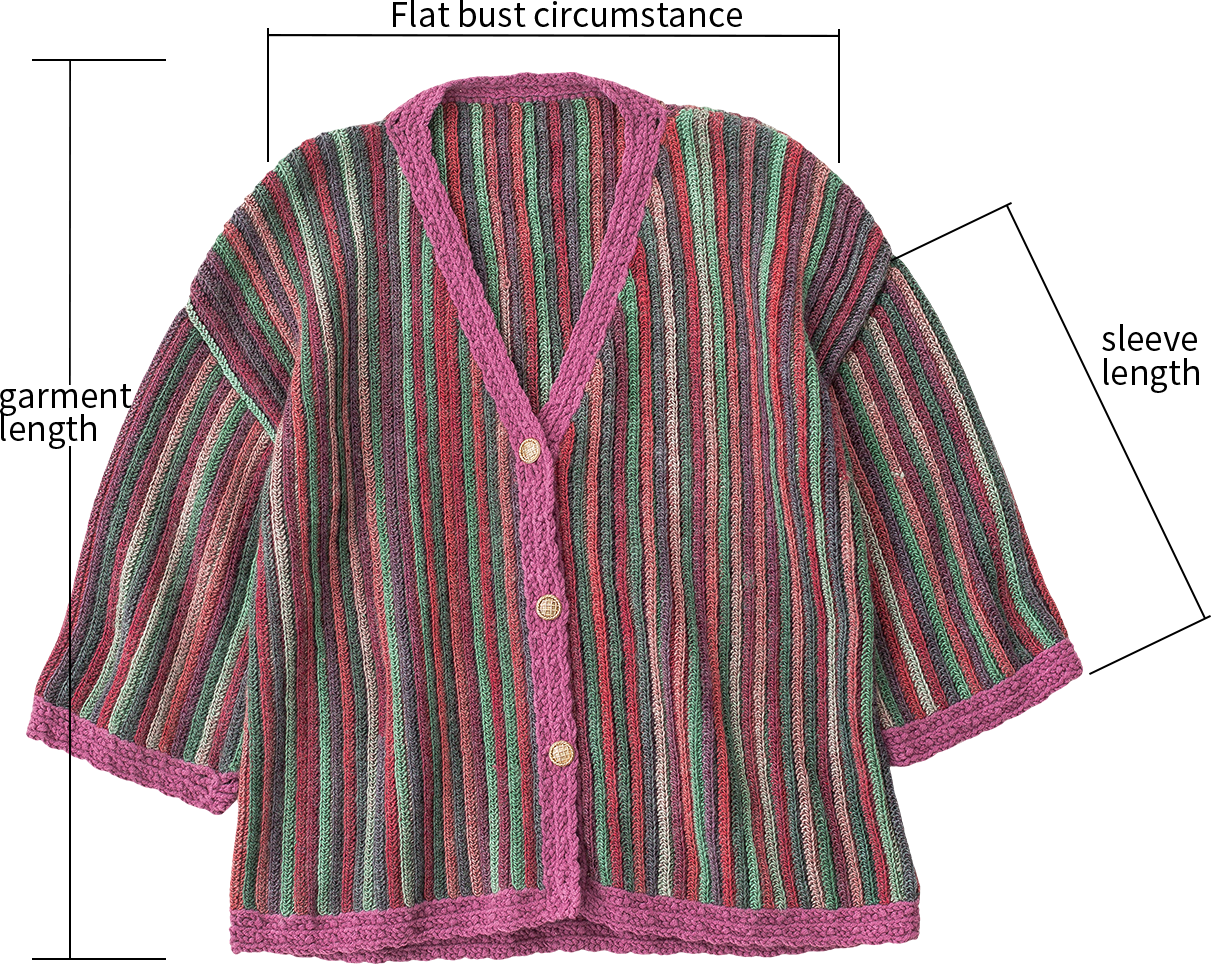
| Flat bust circumstance | Garment length | Sleeve length |
| 56cm | 68cm | 35cm |
Due to variations in individual tension, the size of the sample is for reference only.
Materials: Monet Impression & Handcrafted No.2 Knit Thread
Crochet Hook: 3.00 mm & 4.00 mm Crochet Hook

Chart Key




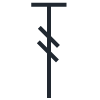



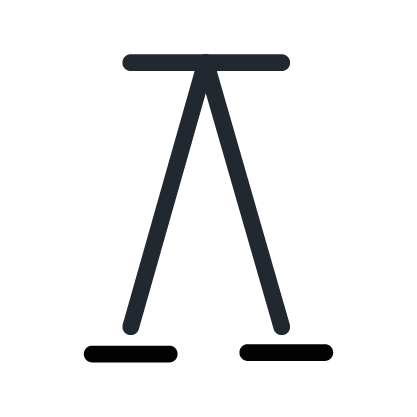
Note: This pattern is making in Chinese crochet pattern terms, and the stitch name is written using American terminology. All measurements in charts are in cm.

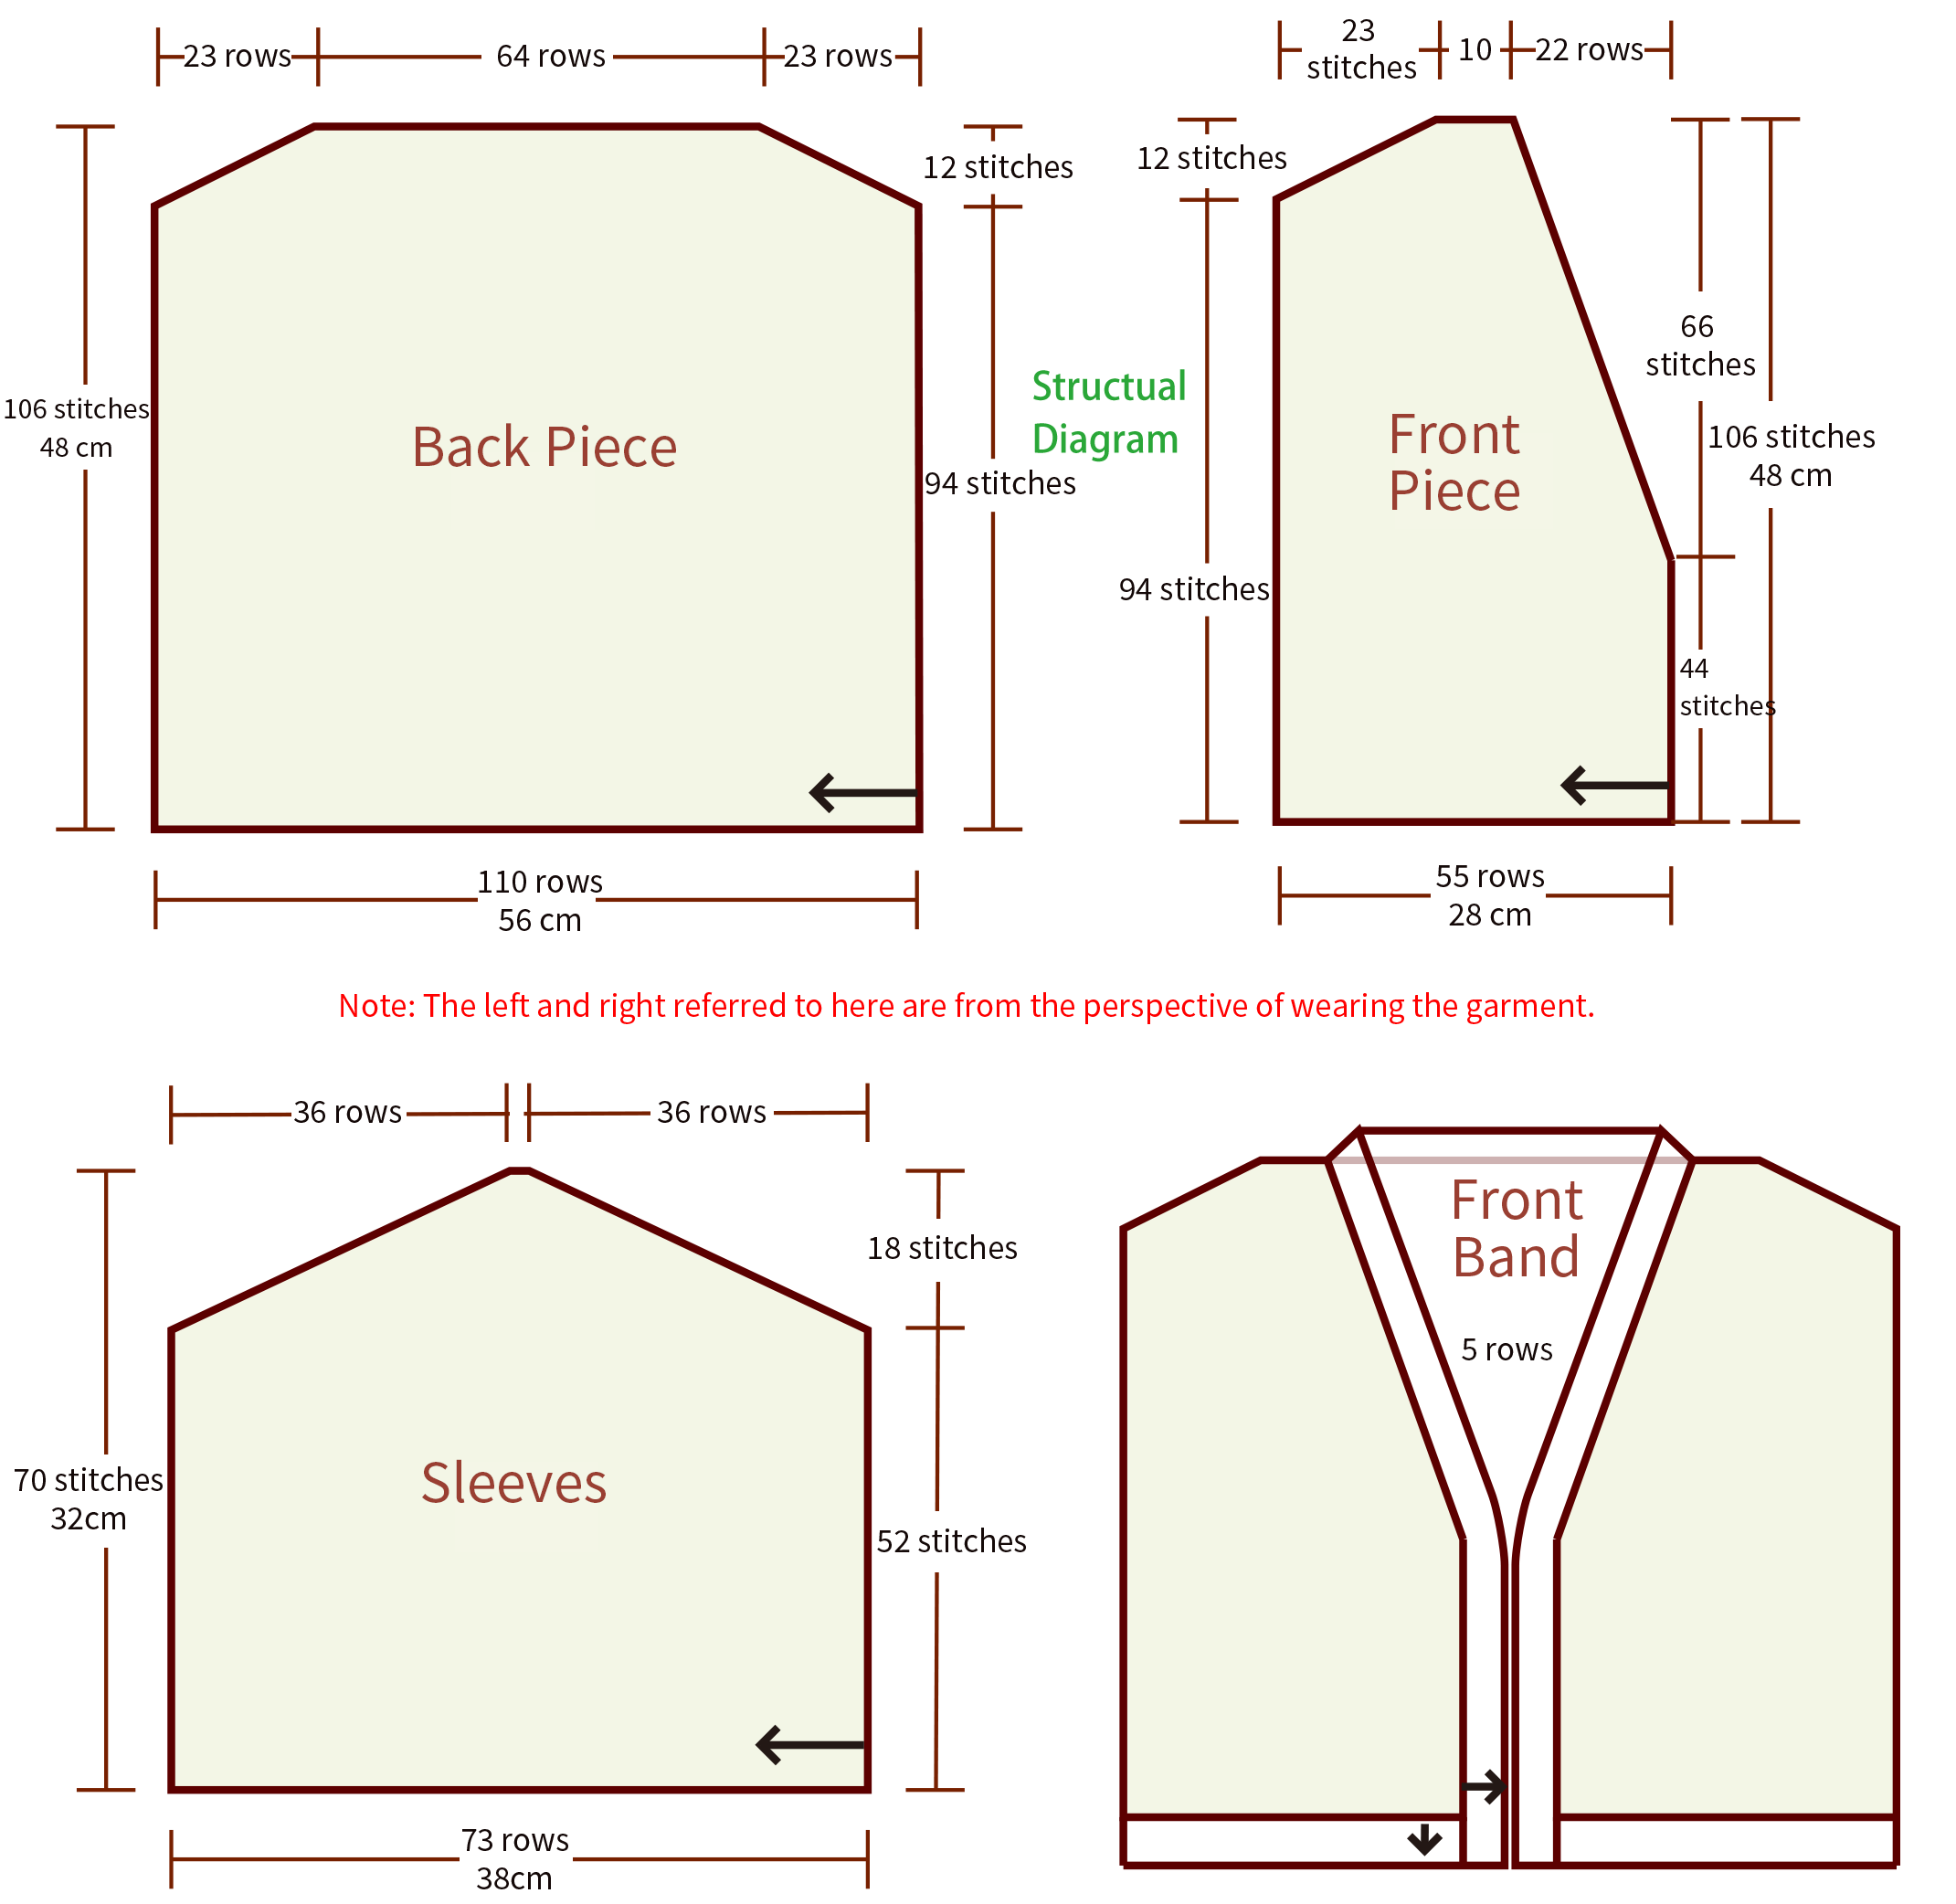
Part 1 Front Pieces
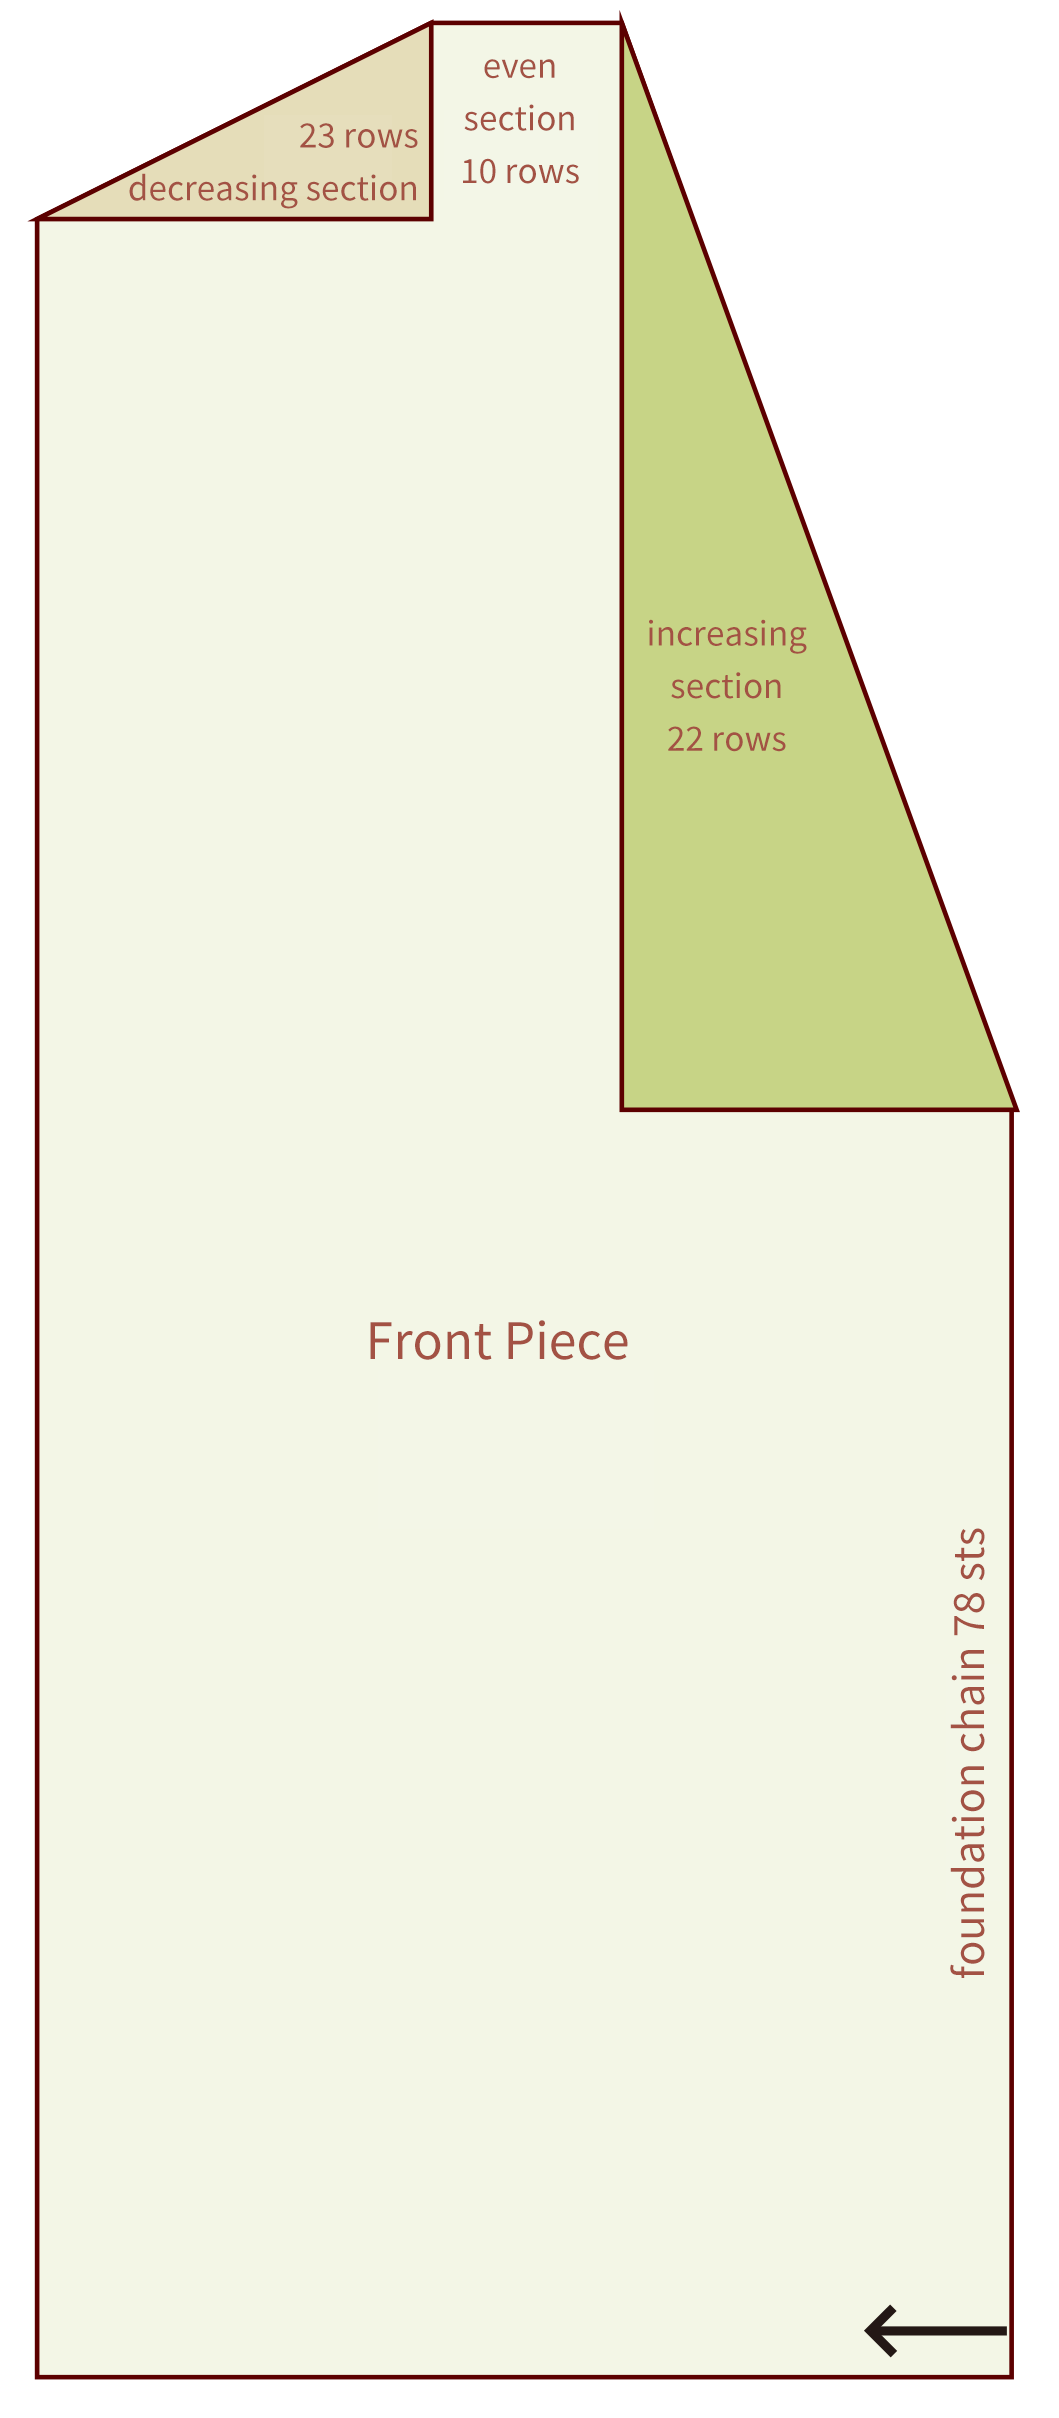
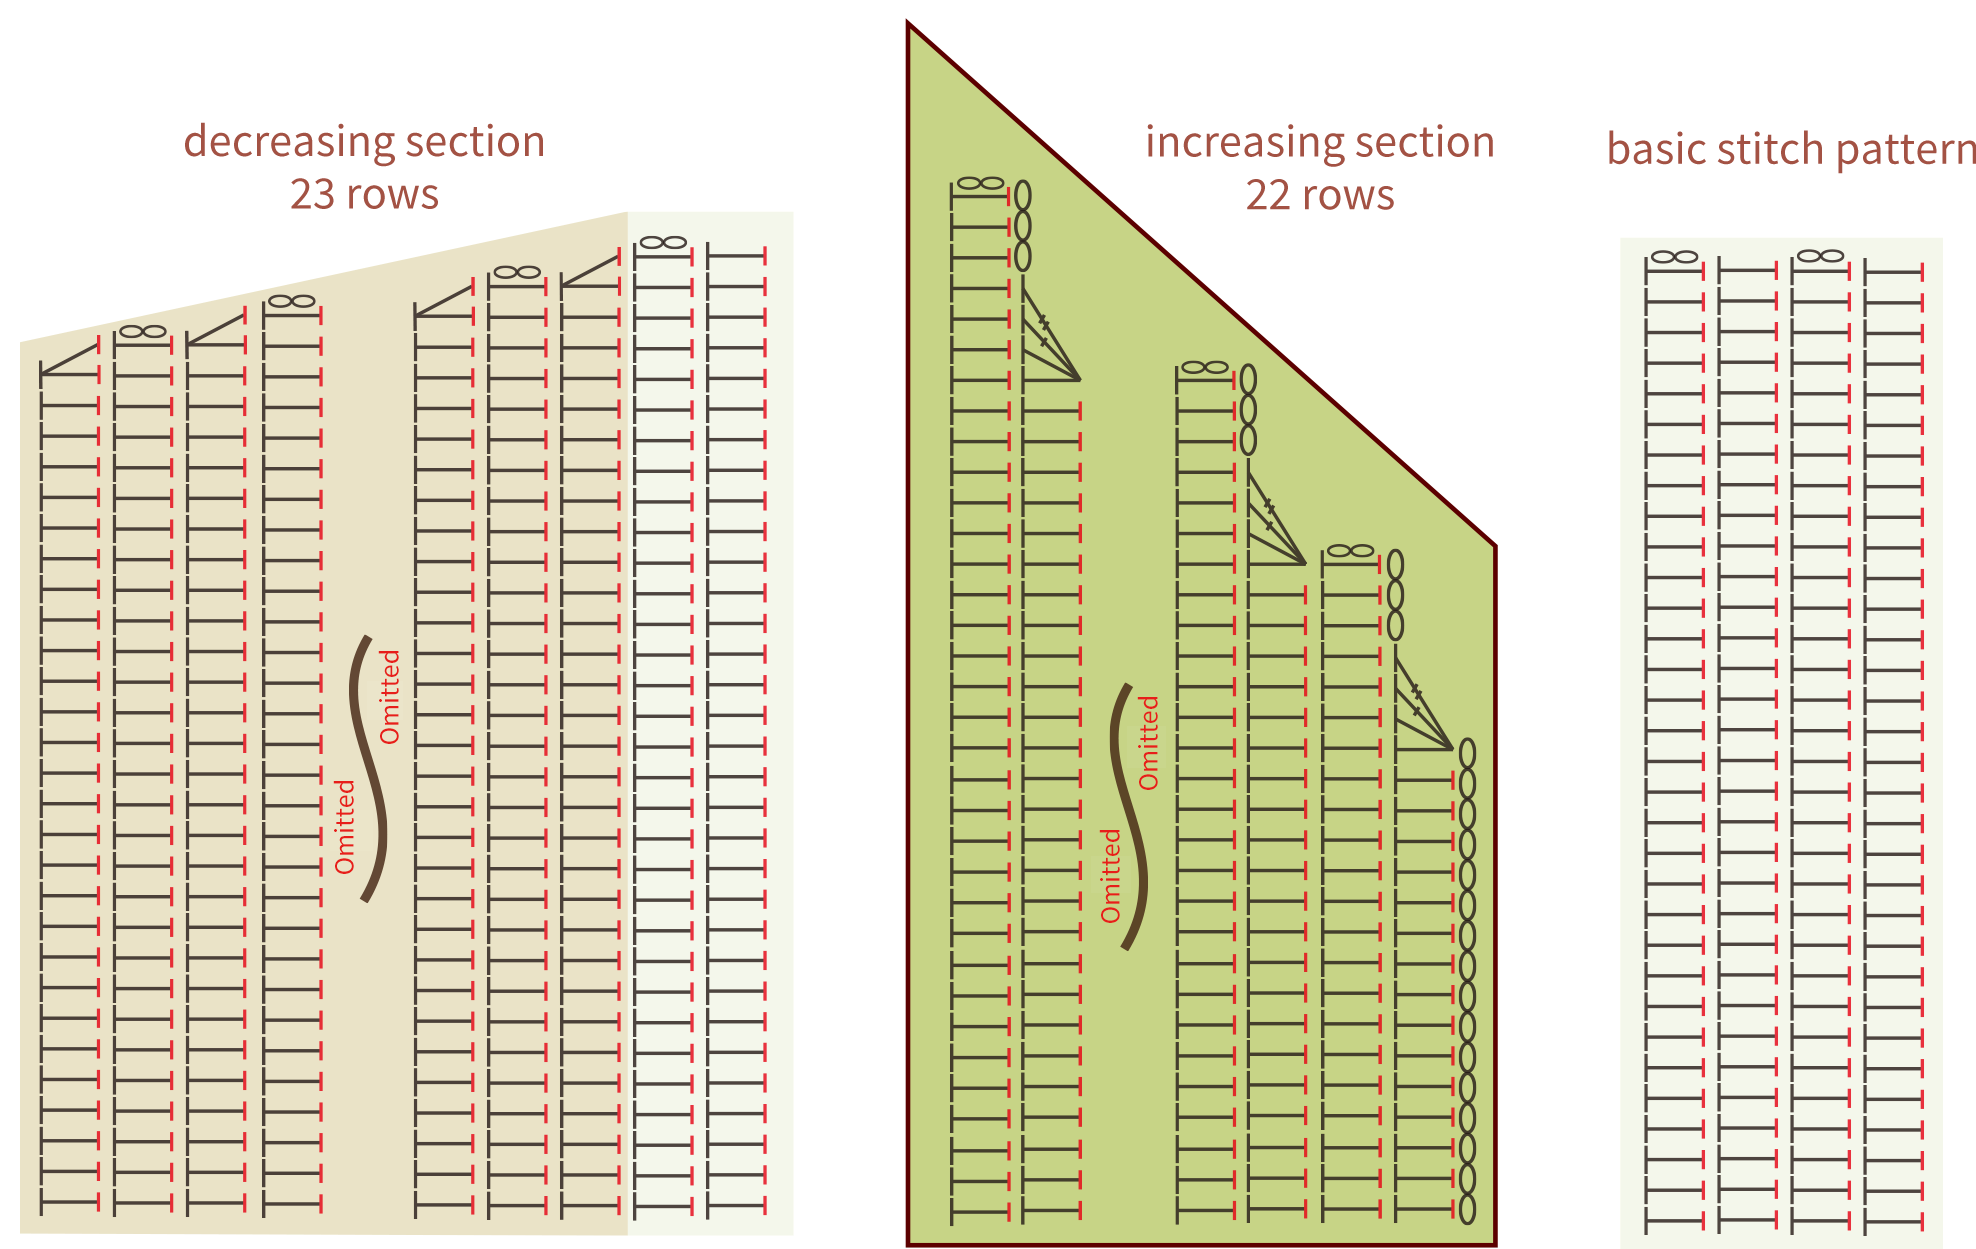
The front body consists of two pieces, both worked using the same crocheting method. Start with the foundation chain and work back and forth following the pattern. In the increasing section, add 3 stitches per row, and in the decreasing section, decrease 1 stitch every 2 rows. Please refer to the video demonstration for specifics.
Part 2 Back Piece
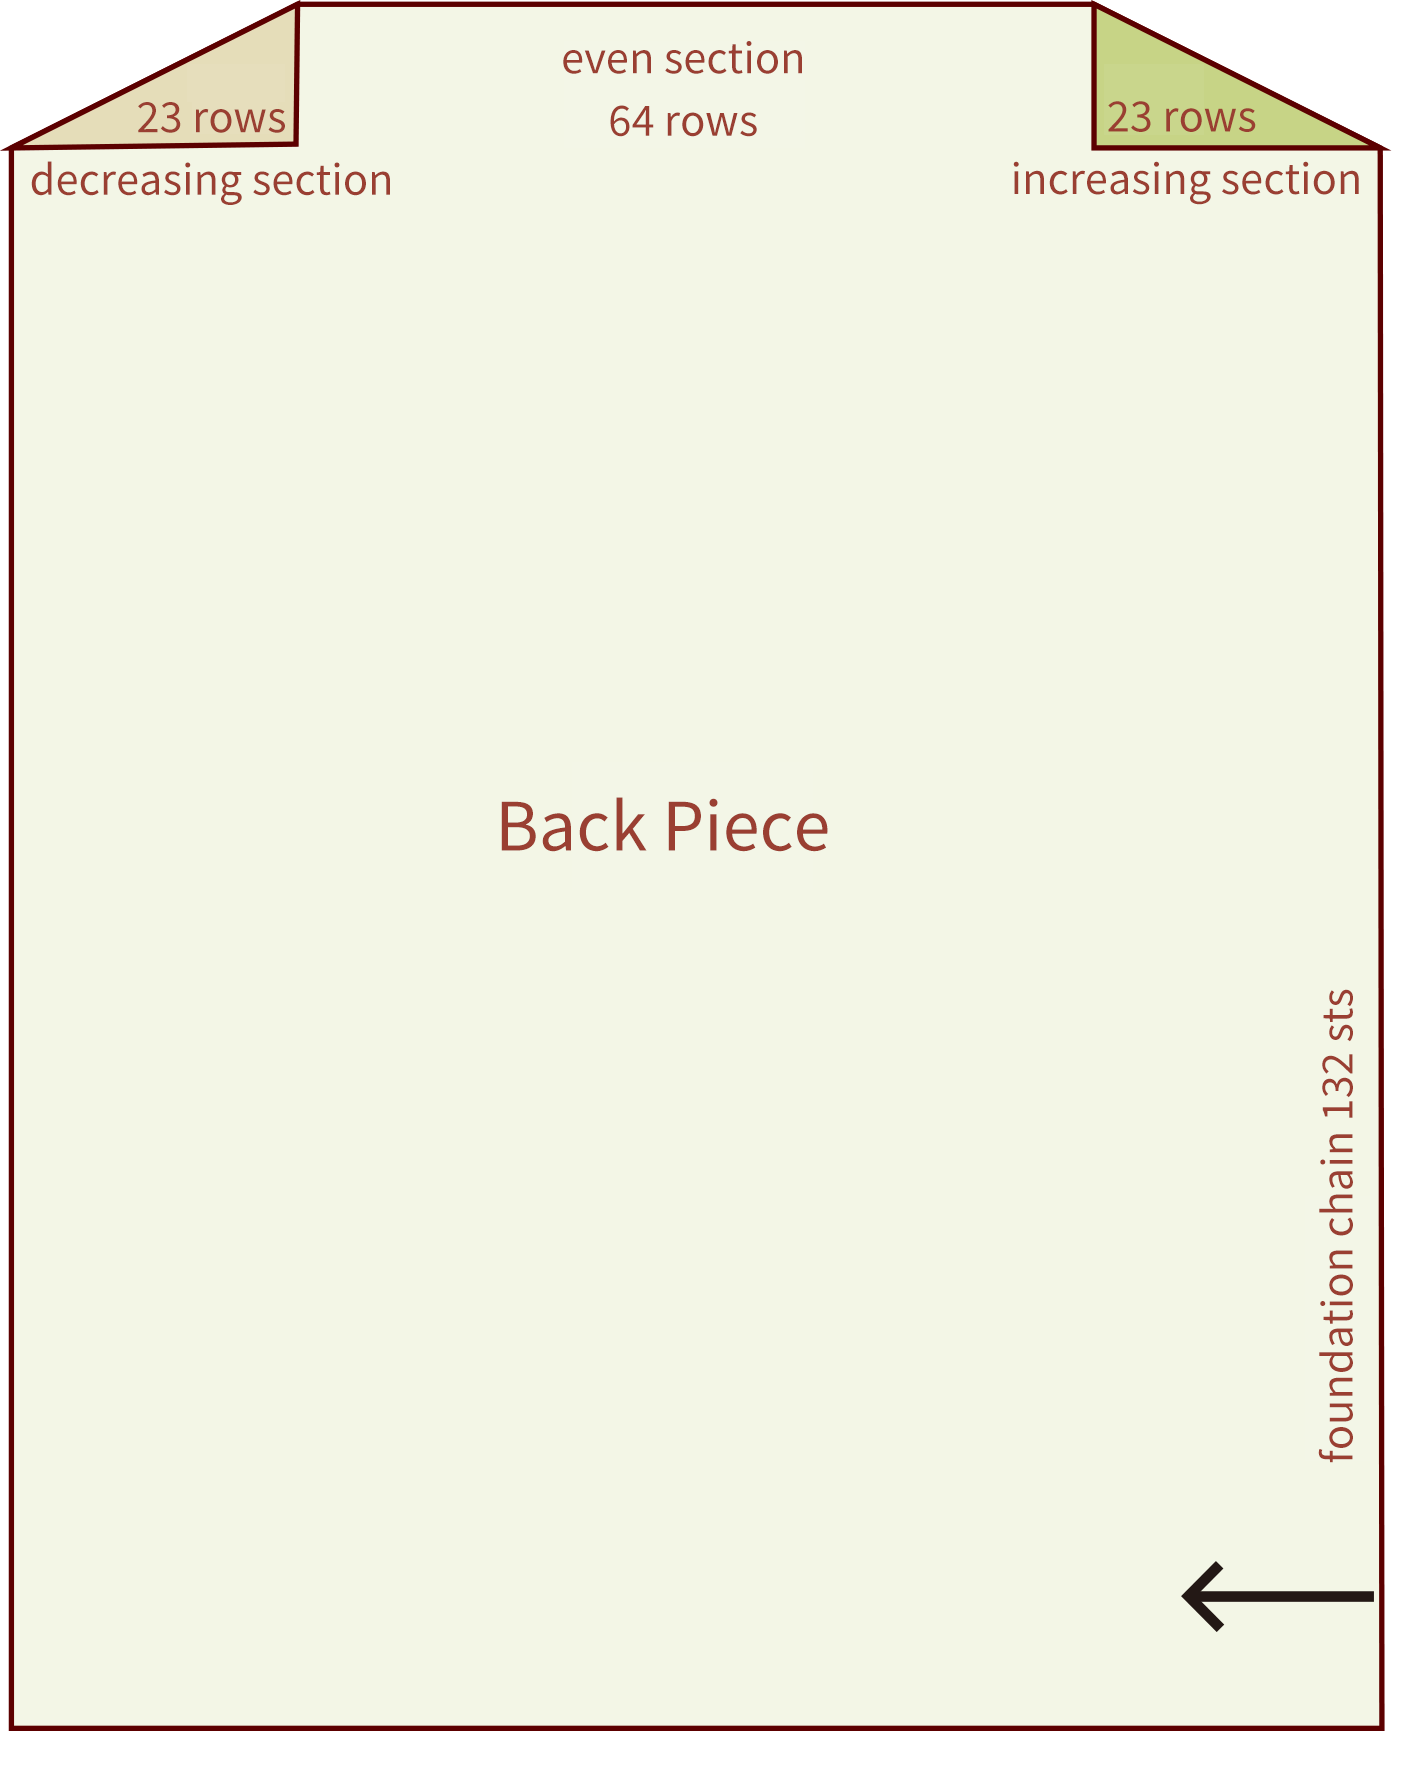
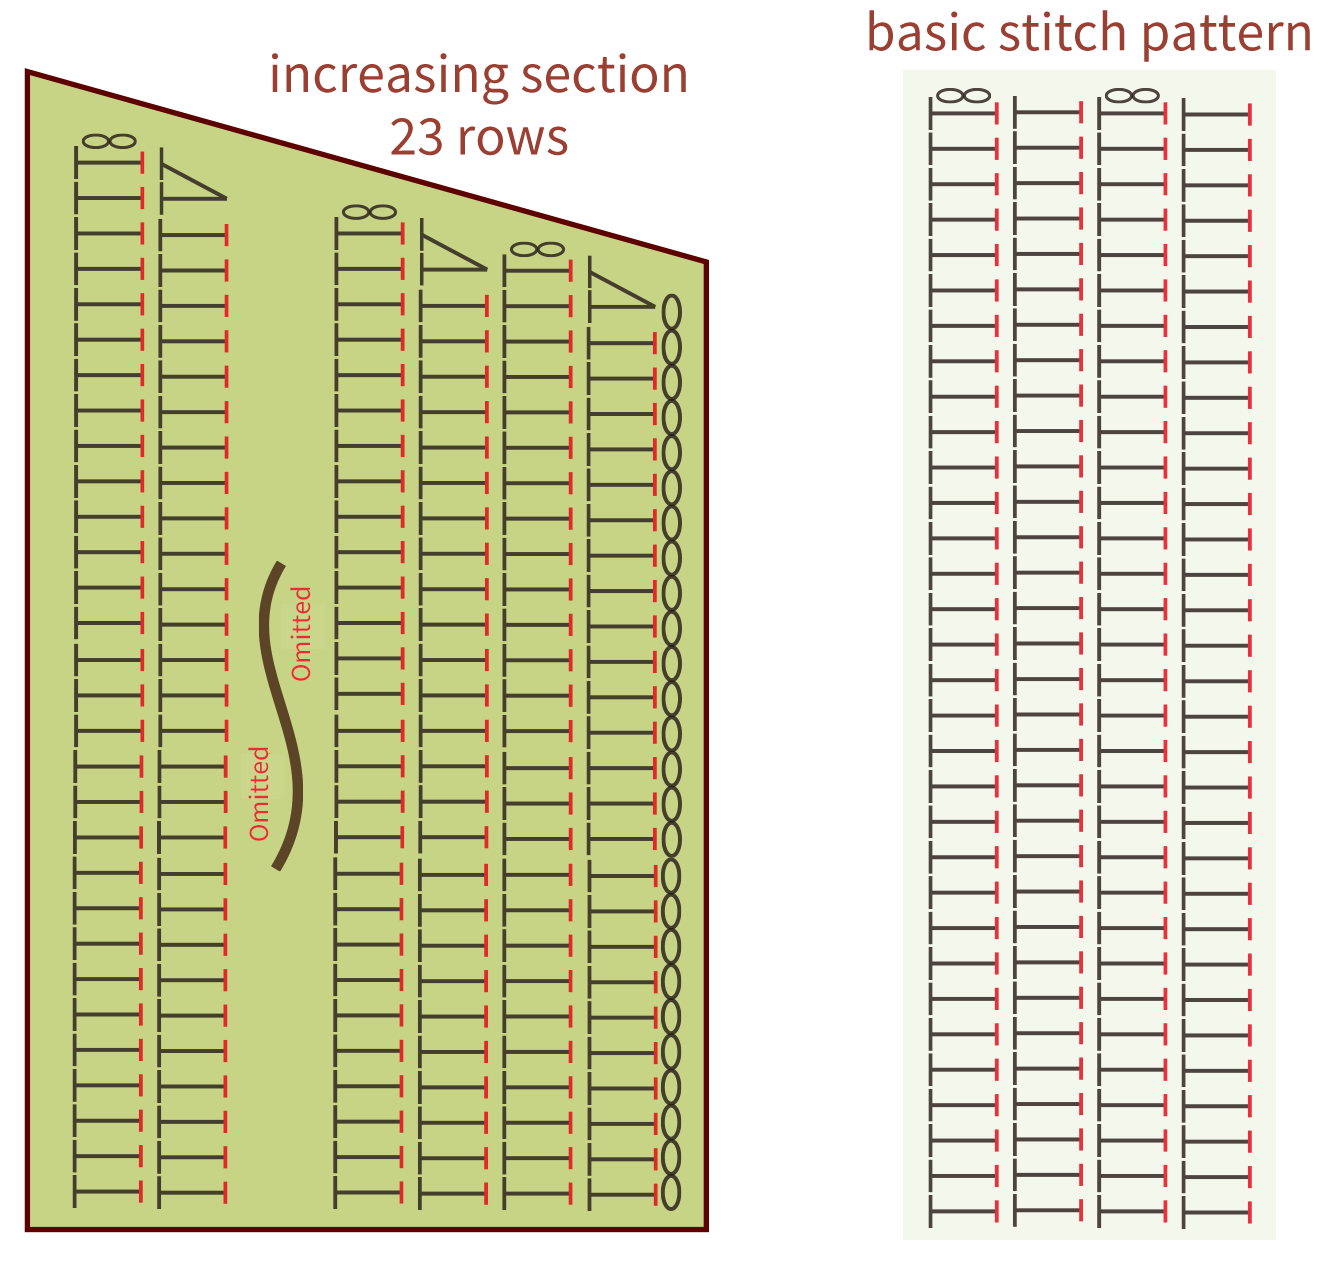
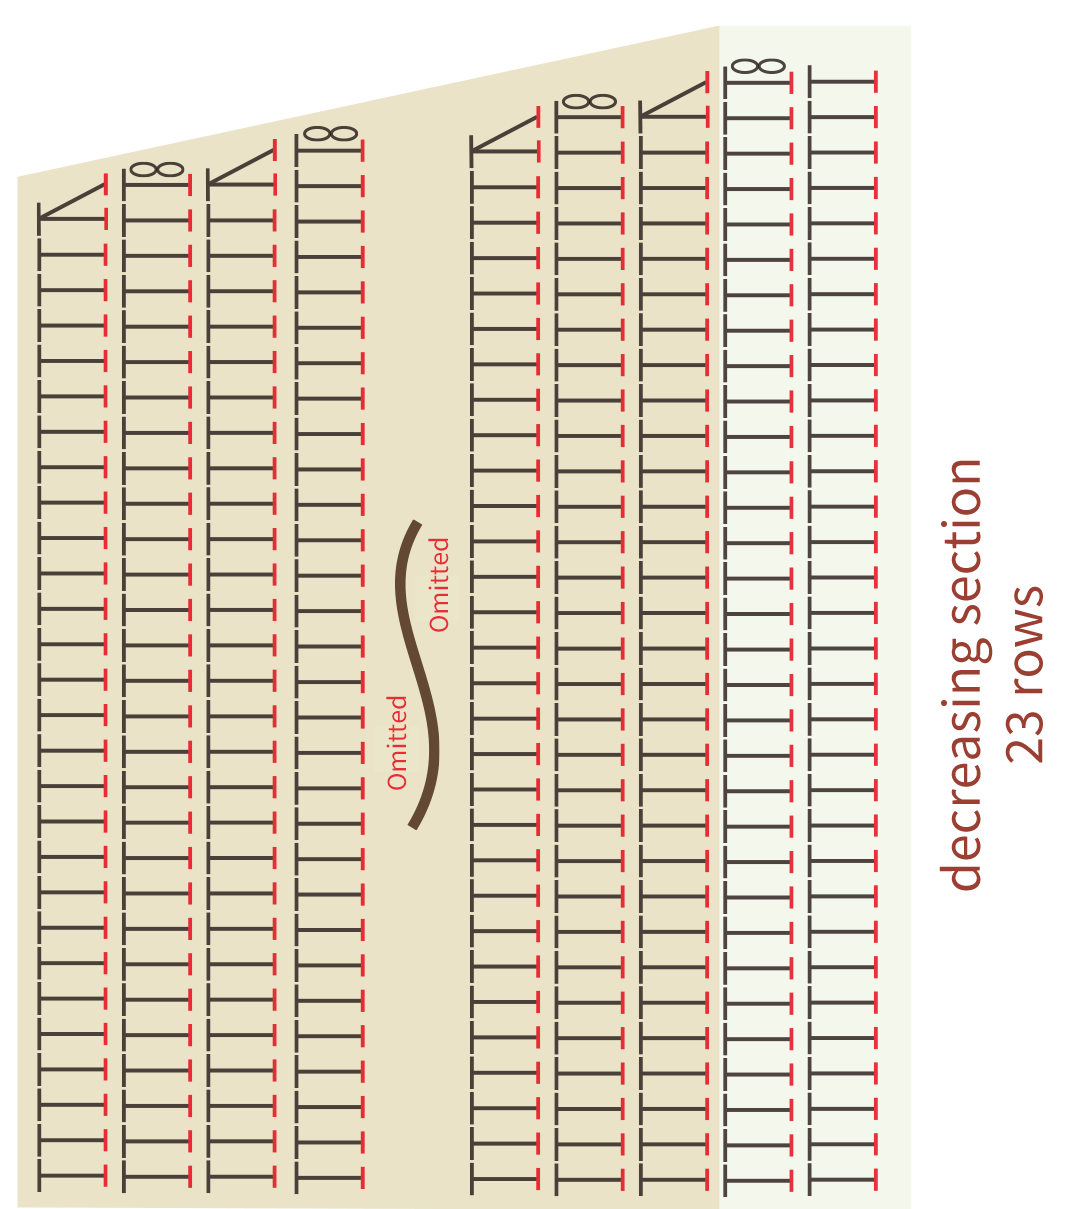
Cast on with the foundation chain, work back and forth following the pattern. In the increasing section, increase 1 stitch every 2 rows; in the decreasing section, decrease 1 stitch every 2 rows. Please refer to the video demonstration for specifics.
Part 3 Sleeves
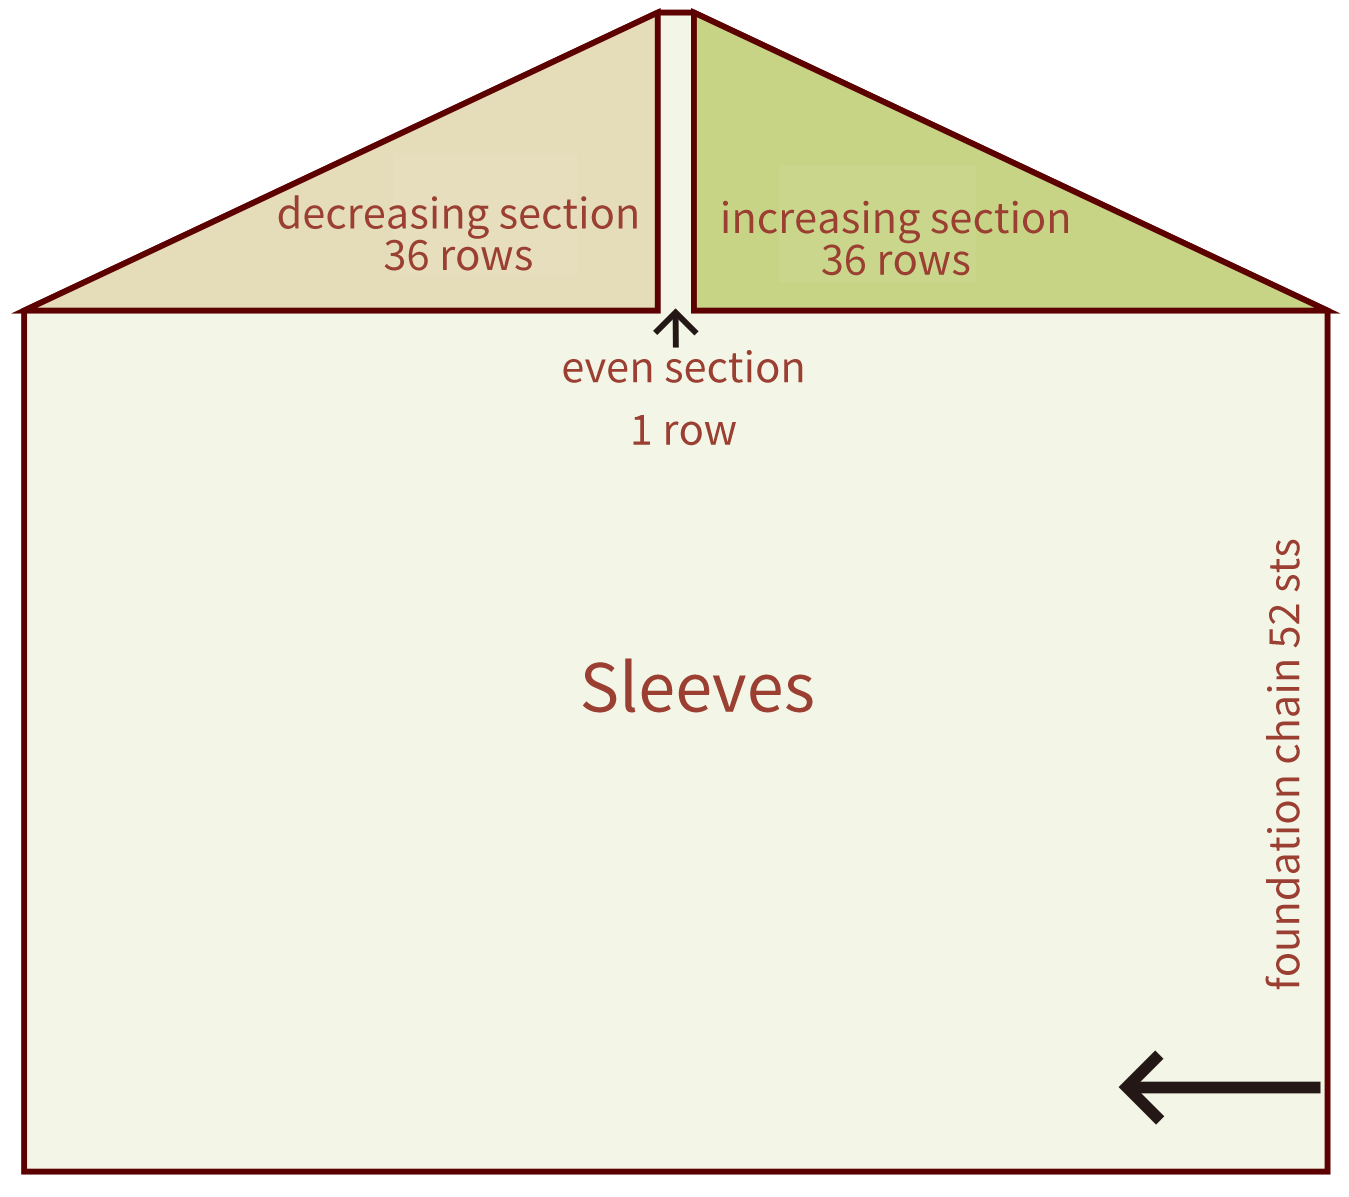
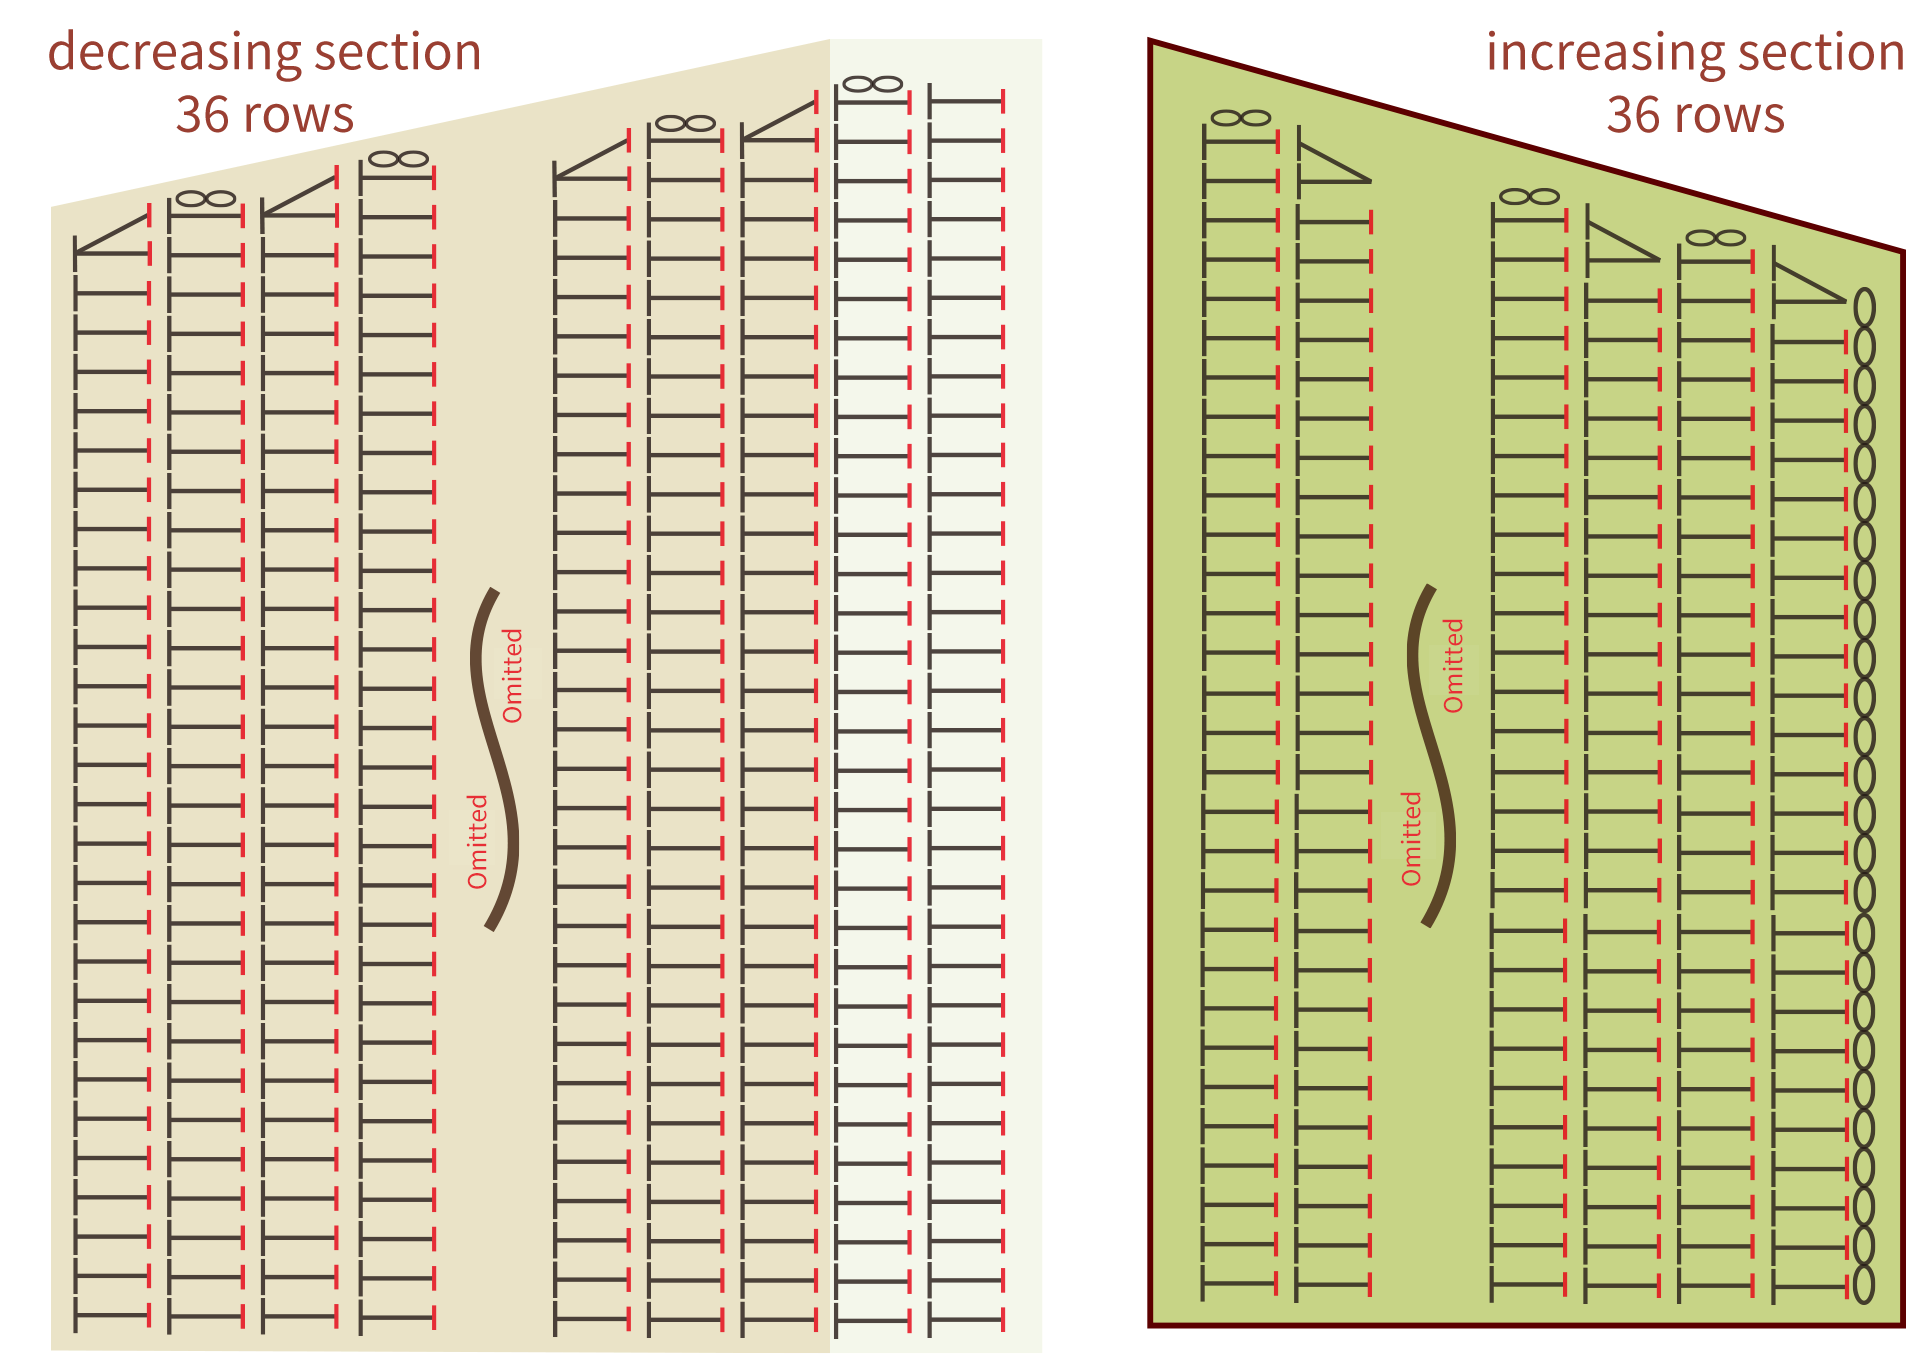
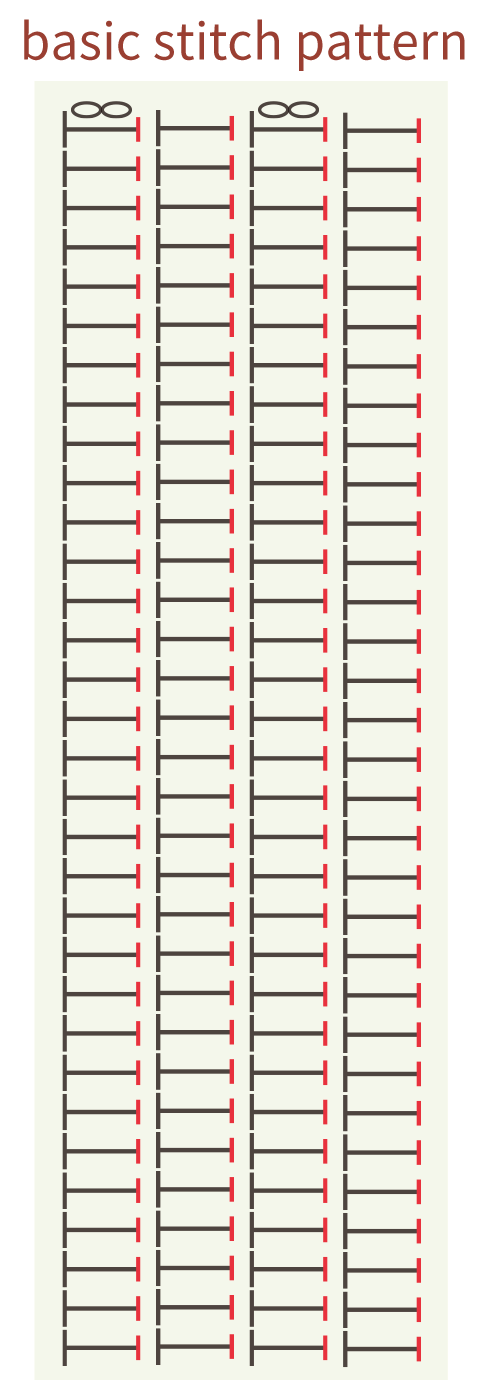
Cast on with the foundation chain, work back and forth according to the pattern. In the increasing section, increase 1 row every 2 rows; in the decreasing section, decrease 1 stitch every 2 rows. After finishing, fold the sleeve in half and connect directly. Please refer to the video demonstration for specifics.
Part 4 Connection
All connections are made on the wrong side of the pieces. First, connect the right and left front pieces to the back piece at the shoulders. Then, connect the sleeves at the armpits. Finally, connect the sections below the sleeves between the front and back pieces. You can use your preferred method of joining. The video demonstrates the slip stitch join method. Please refer to the video demonstration for specifics.
Part 5 Edging
Step 1 Edging for hem
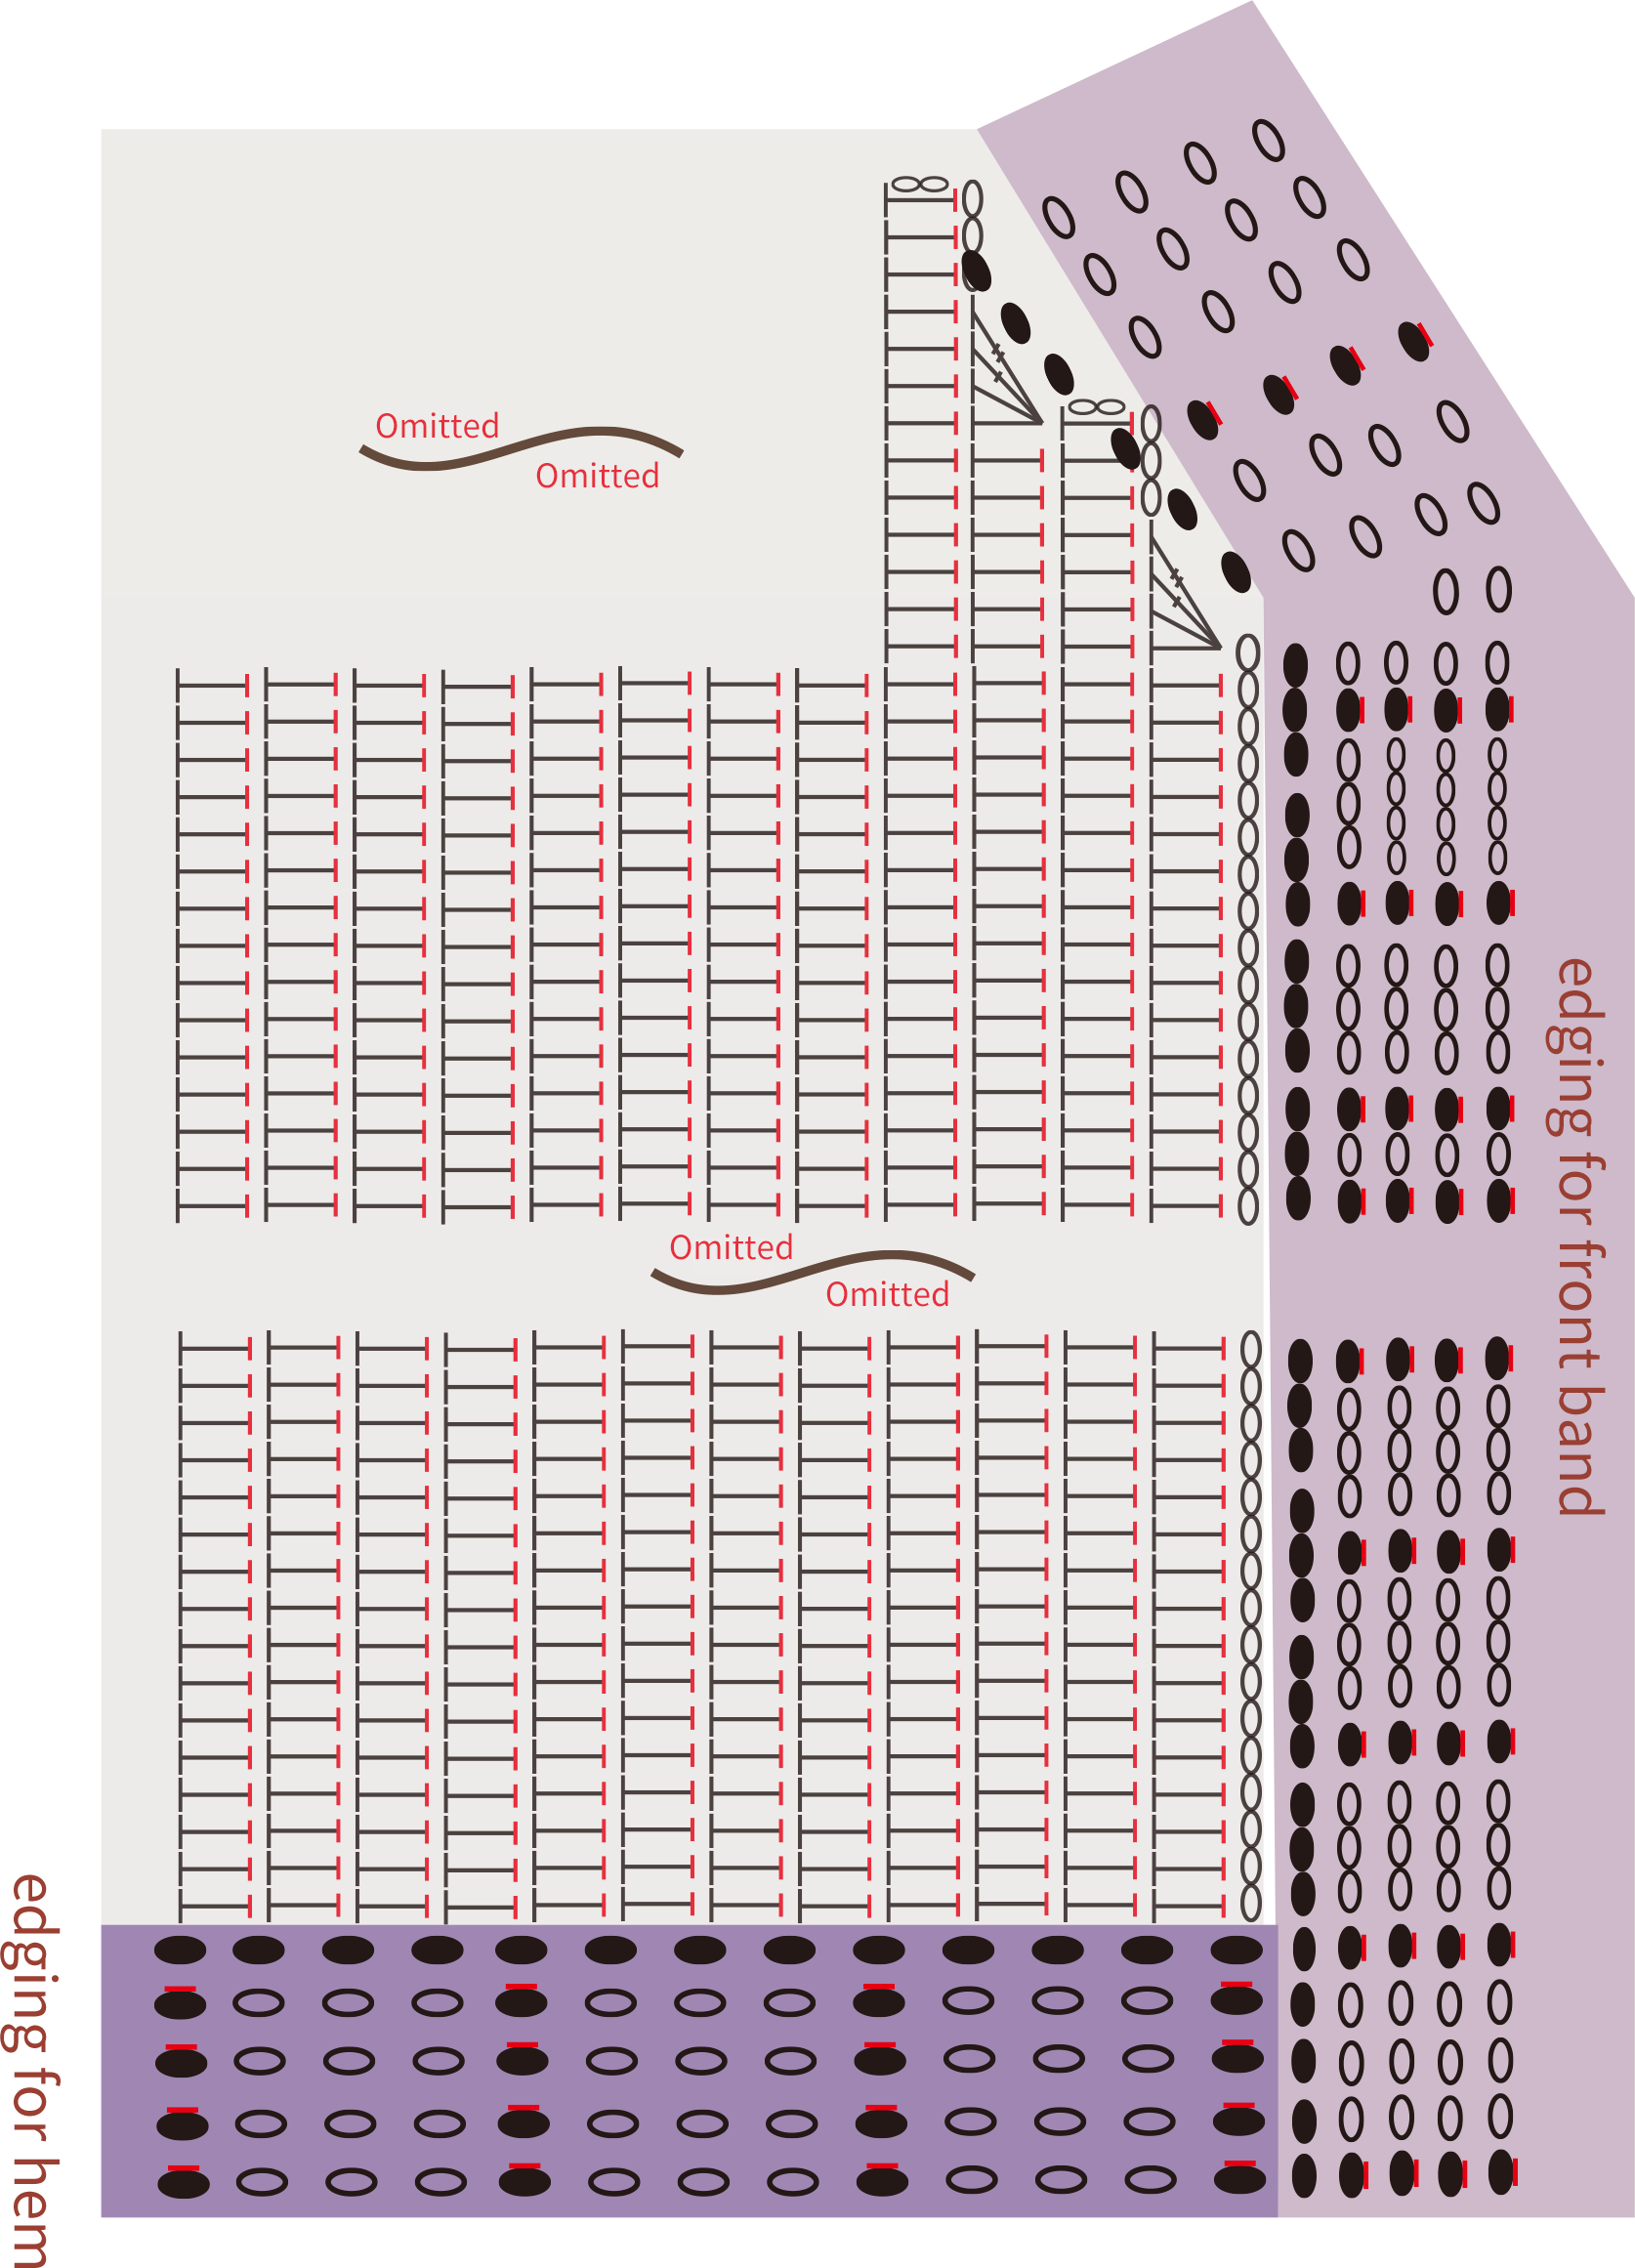
Start from the hem of the front piece. In the first row, crochet slip stitches along the hem, inserting the hook at the boundary between rows, with each row corresponding to one slip stitch. Starting from the second row, work 1 stitch slip stitch into the back loop + 3 chain stitches in sequence. Rows 3 to 5 are crocheted in the same way as row 2.
Step 2 Edging for front band
After completing the edging of the hem, start crocheting the front band. In the first row, crochet slip stitches; match 5 rows of the hem with 5 slip stitches, every 4 stitches of the front band correspond to 3 slip stitches, and each row of the diagonal neckline corresponds to 2 slip stitches; for the back neckline, every 4 stitches correspond to 3 slip stitches. Starting from the second row, work 1 stitch slip stitch into the back loop + 3 chain stitches in sequence. Rows 3 to 5 are crocheted in the same way as row 2.
Step 3 Edging for cuffs
The crocheting method for the cuffs and front band is identical. In the first row, crochet slip stitches, with every 4 stitches corresponding to 3 slip stitches. Starting from the second row, work 1 stitch slip stitch into the back loop + 3 chain stitches in sequence. Rows 3 to 5 are crocheted in the same way as row 2. Please refer to the video demonstration for specifics.
Part 6 Buttons
Sew the buttons on the left front piece. The first button goes in the space of the first pattern below the corner of the front band. The third button is placed in the space of the sixth pattern counting up from the hem. The second button is placed between these two, with an interval of four pattern holes from both the upper and lower buttons. Please refer to the video demonstration for specifics.
Made by the community