Susan's Family
Tutorials&PatternsTutorialsCommunity

Search tutorials and patterns

Tutorials & Patterns/Essential Cashmere Sweater No. 8

Clothes

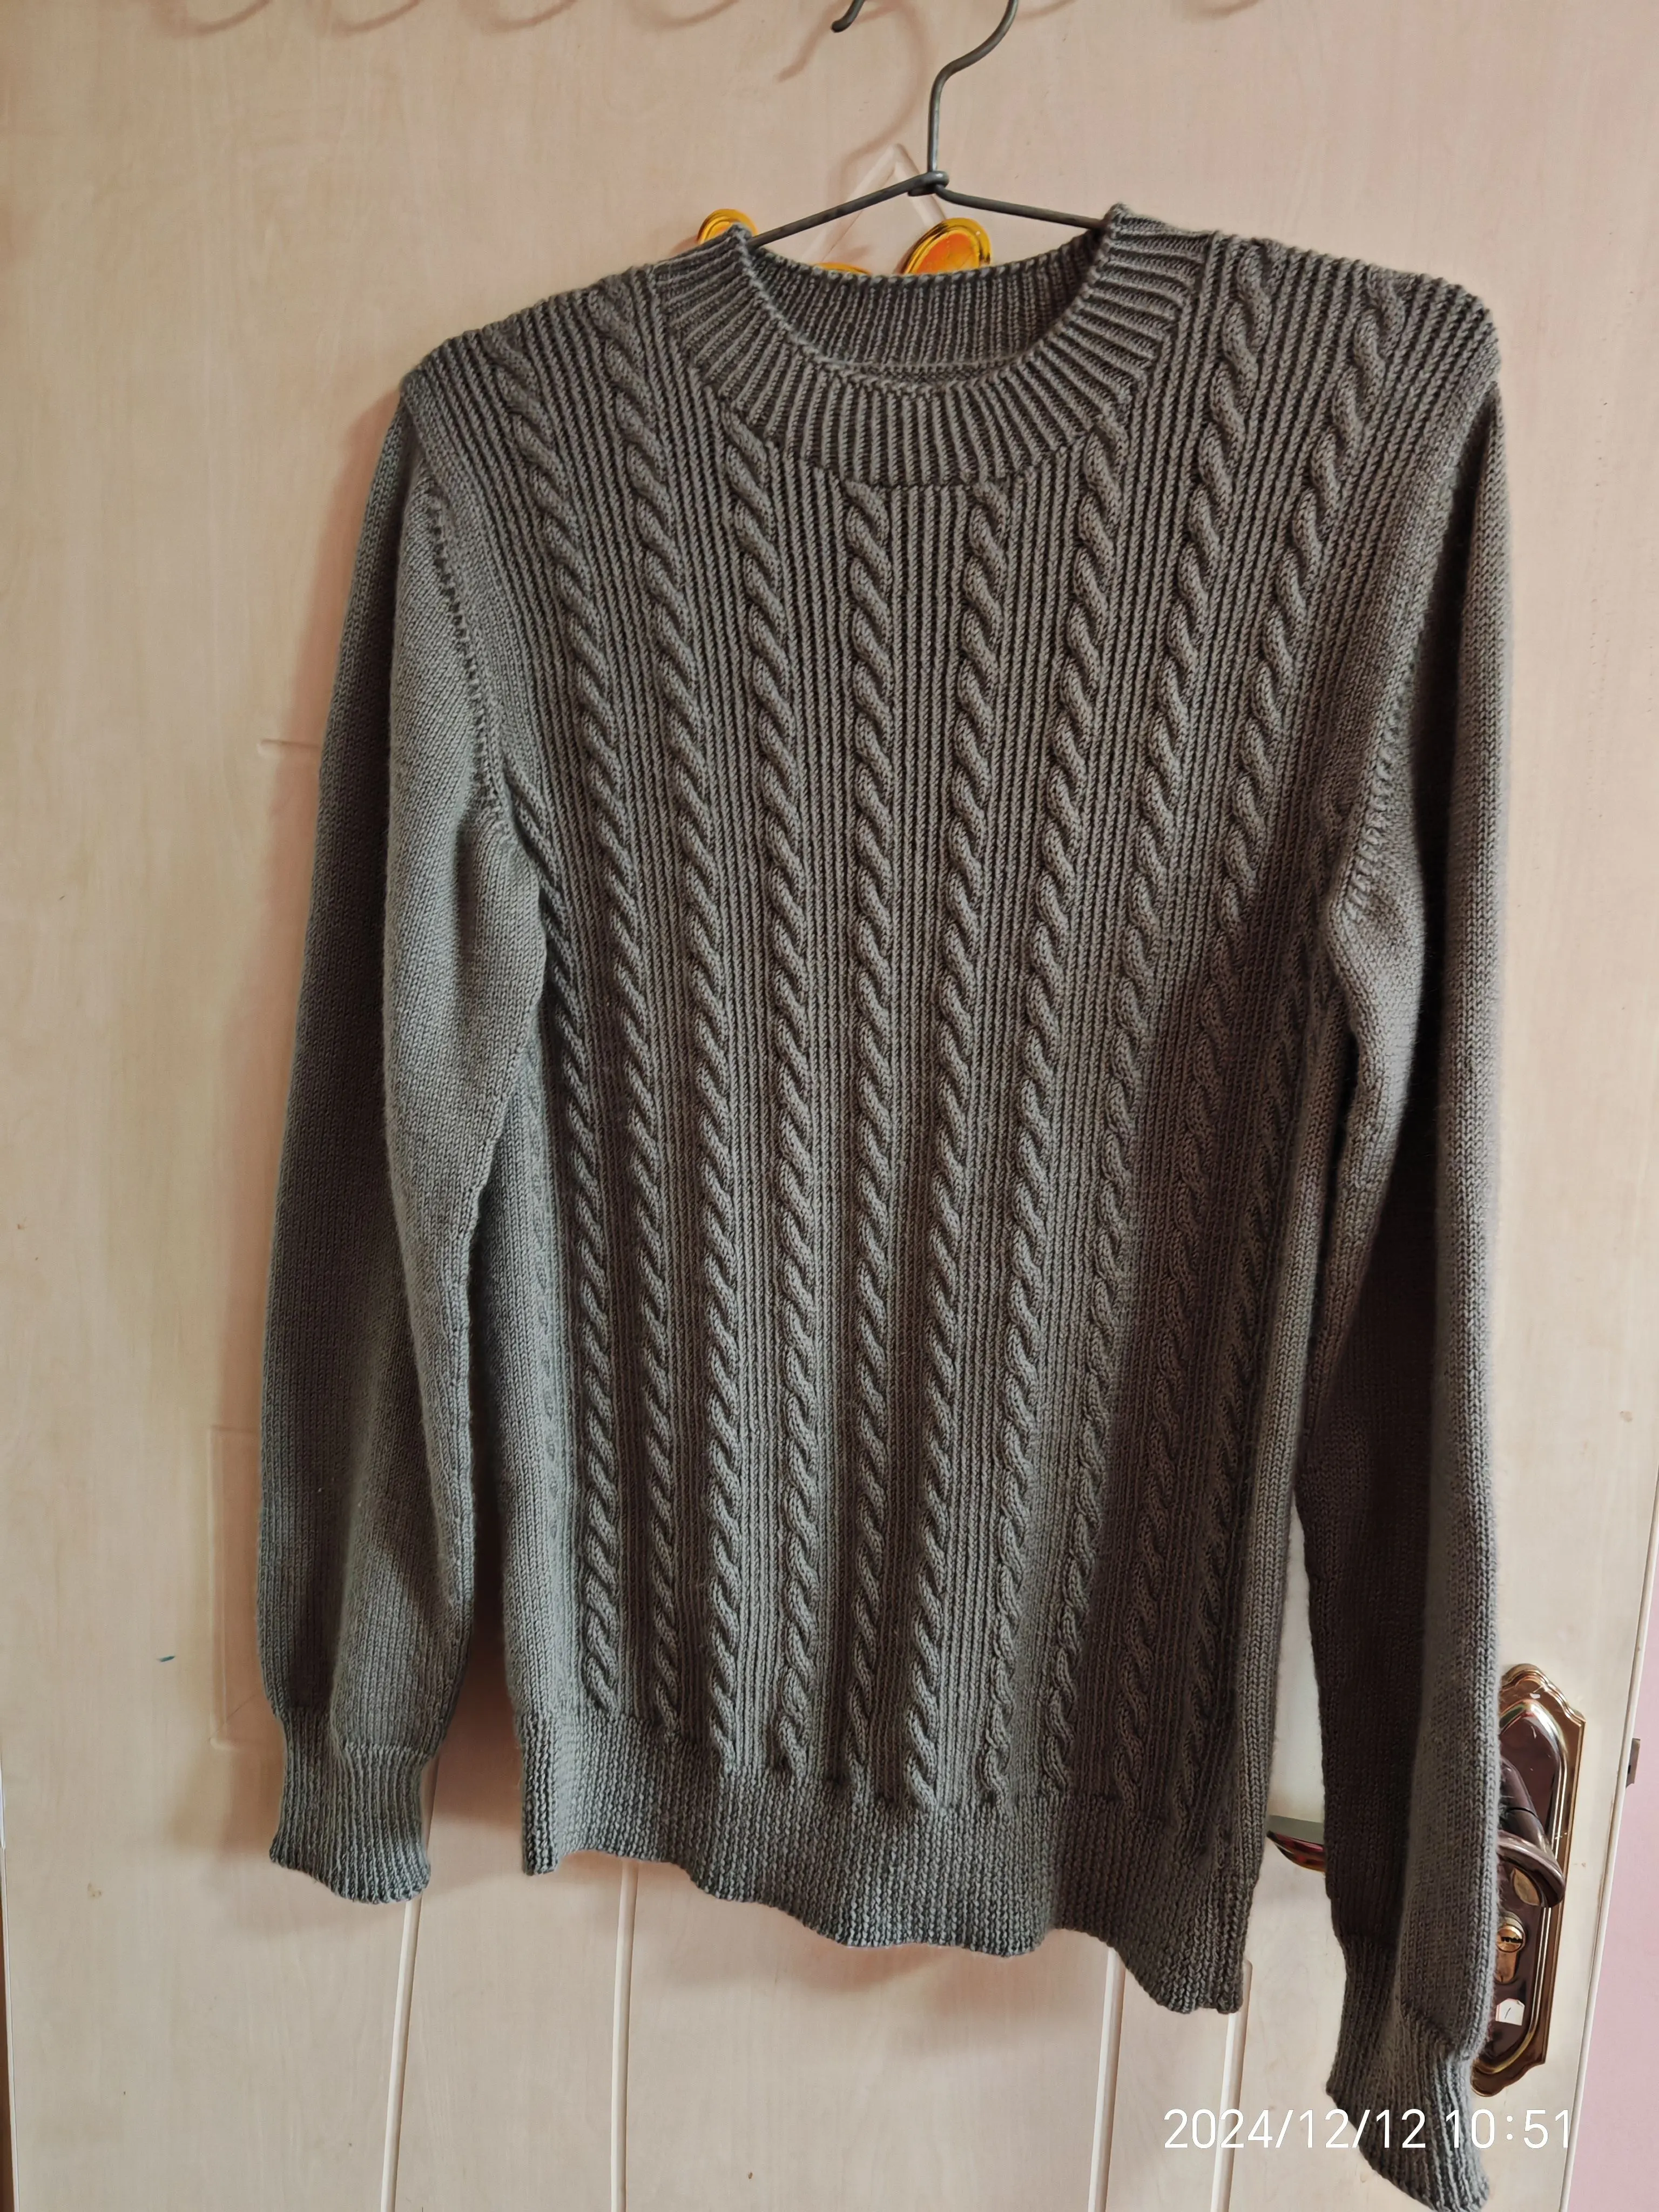
Essential Cashmere Sweater No. 8

Susan's Family2026-11-19148 views
Project gallery

Project preview

See the finished project

9 images

Tutorial details

3-Ply 30% Cashmere Hand Knitting YarnAutumnKnittingWinter

Shop this project

Choose a store to view the available kit, yarn, or digital pattern.

Susan's Family ShopEssential Cashmere Sweater No. 8 PatternSusan's Family ShopEssential Cashmere Sweater No. 8 Kit
Susan's Family

Thoughtful crochet tutorials, original patterns, yarn, and kits.

Explore

TutorialsCommunity ProjectsCrochet Patterns

Shop

YarnCrochet KitsFree & Fast Shipping

Support

HelpTerms of ServicePrivacy PolicyContact

Follow

InstagramTikTokYouTube
© 2026 Susan's Family
HomeMy

Made by the community

Projects from this tutorial

Explore all projects
暖意绒绒5, a crochet project shared by 朵

暖意绒绒5

朵4
2个月完工, a crochet project shared by 橘柚

2个月完工

橘柚80
Community projects

More crochet tutorials

Light Dusk crochet tutorial

Light Dusk

Susan's Family0
ChangLe Braid Sweater crochet tutorialFree

ChangLe Braid Sweater

Susan's Family7
Whispering White crochet tutorial

Whispering White

Susan's Family0
Sugarstar Cardigan crochet tutorial

Sugarstar Cardigan

Susan's Family0
More tutorials
Available versions
4
Language
English
Instructions

Pattern format

Instructions

Small sizeMiddle sizeLarge sizeExtra Large size

Watch and follow

Video tutorial

Open video

It is composed of the front piece, back piece,joining, sleeves, and collar edge. First, knit the front and back pieces separately. Then, joining  the corresponding areas of the front and back pieces. After completing that, make the sleeves and attach them. Finally, pick up stitches around the neckline to knit the collar edge.
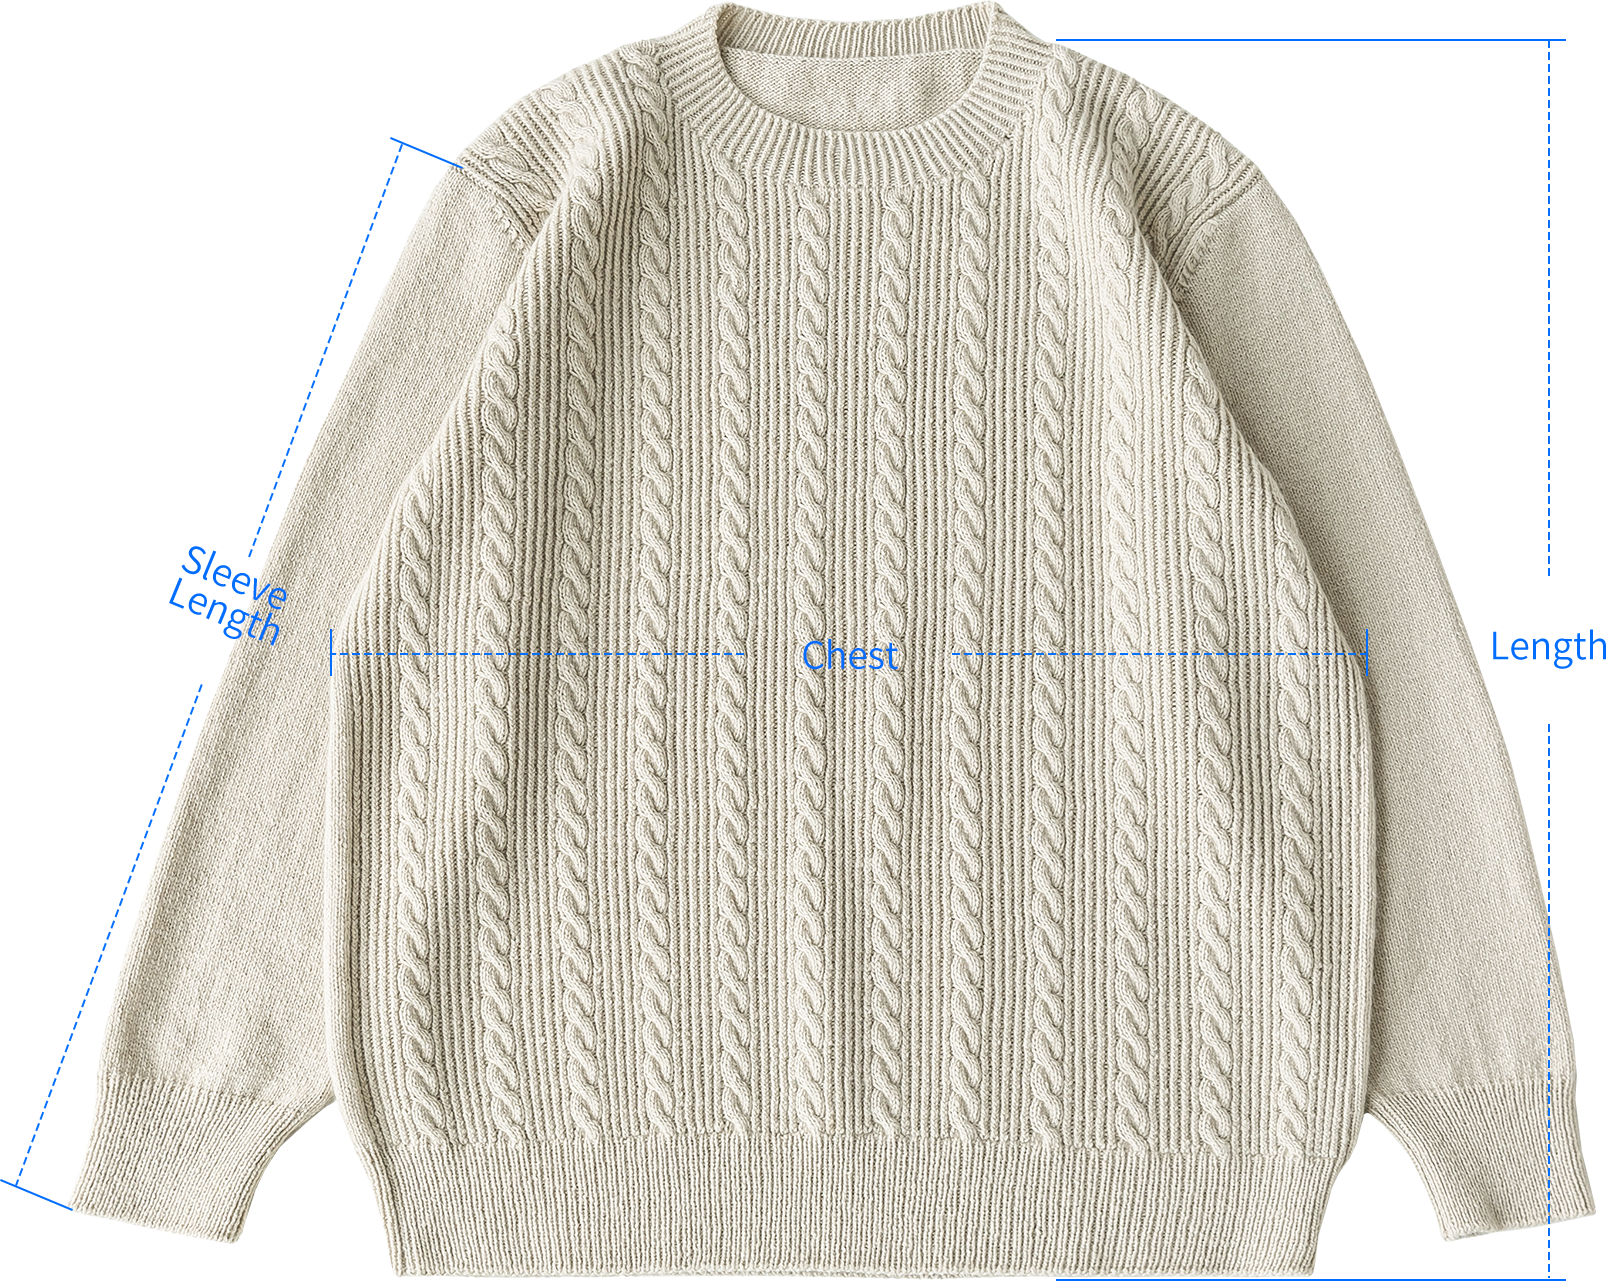
Unit:cmLengthChestSleeve Length
Small645058

The handcrafted measurements may have an error, the size of the sample is for reference only.
Materials: 3-Ply 30% Cashmere Hand Knitting Yarn

Tool: 2.75 mm circular needle (Only for hem, cuff, and collar edges.), 3.00 mm circular needle.
Gauge: 10cm x 10cm = 31s x 42 r

Chart Key


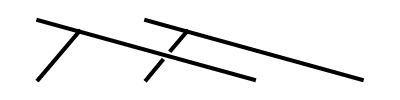
K on RS, P on WS: knit on right side, purl on wrong side

P on RS, K on WS: purl on right side, knit on wrong side

k2tog: knit 2 stitches together on right side, purl 2 stitches together on wrong side

skp(o): on right side, slip 1 stitch knitwise, knit next stitch, pass slipped stitch over; on wrong side, change the place of first 2 loops, purl 2 stitches together

M1L: make 1 left leaning increase through the strand between last stitch knitted and first stitch on left needle

p2tog: purl 2 stitches together on right side, knit 2 stitches together on wrong side

CPP: on right side, change the place of first 2 loops, purl 2 stitches together; on wrong side, slip 1 stitch knitwise, knit next stitch, pass slipped stitch over.


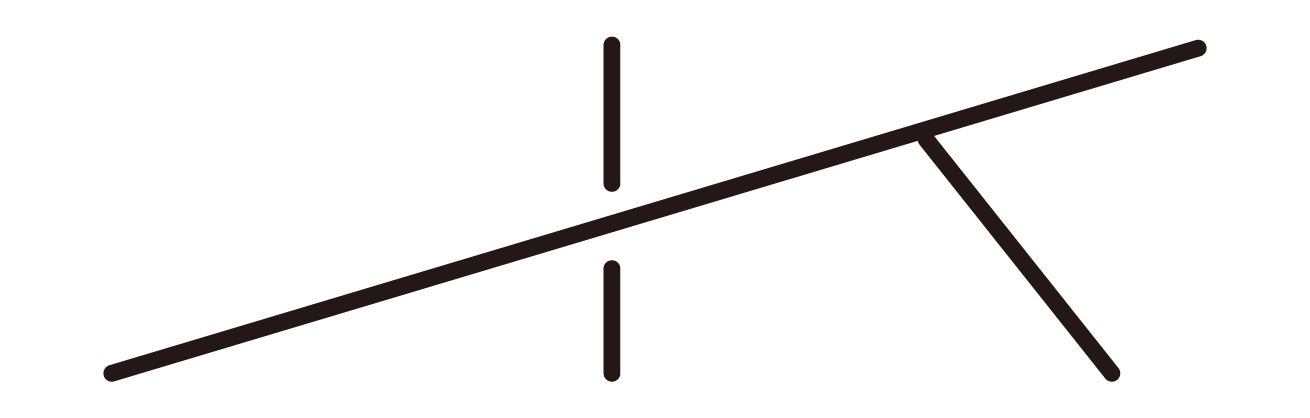
1-st RCD: 1 stitches right crossed decrease


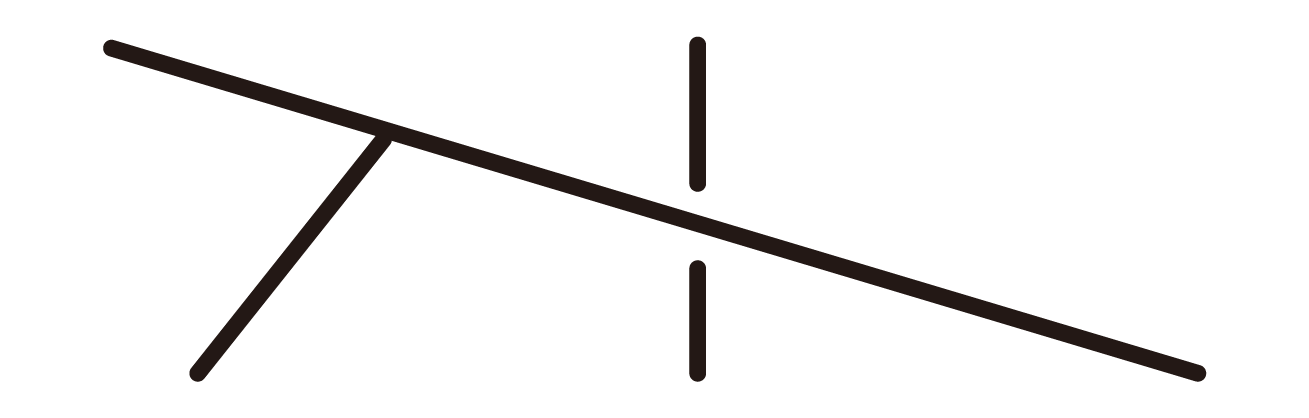
1-st LCD: 1 stitches left crossed decrease


2-st RCD: 2 stitches right crossed decrease


2-st LCD: 2 stitches left crossed decrease

double stitch: double legs slip stitch, slip the stitch purlwise and bring the yarn to the back and pull it tightly, so that both legs of the stitch in the row below are on the needle


3/3 LC: slip 3 sts onto cn, hold in front, k3, k3 from cn

Note:
1. This pattern is making in Chinese crochet pattern terms, and the stitch name is written using American terminology. All measurements in charts are in cm. 
2. The left and right on the charts refer to the actual wearing position.
3. The chart represent the right side of fabric, so check the key to see how to work a certain symbol on the right side and on the wrong side.

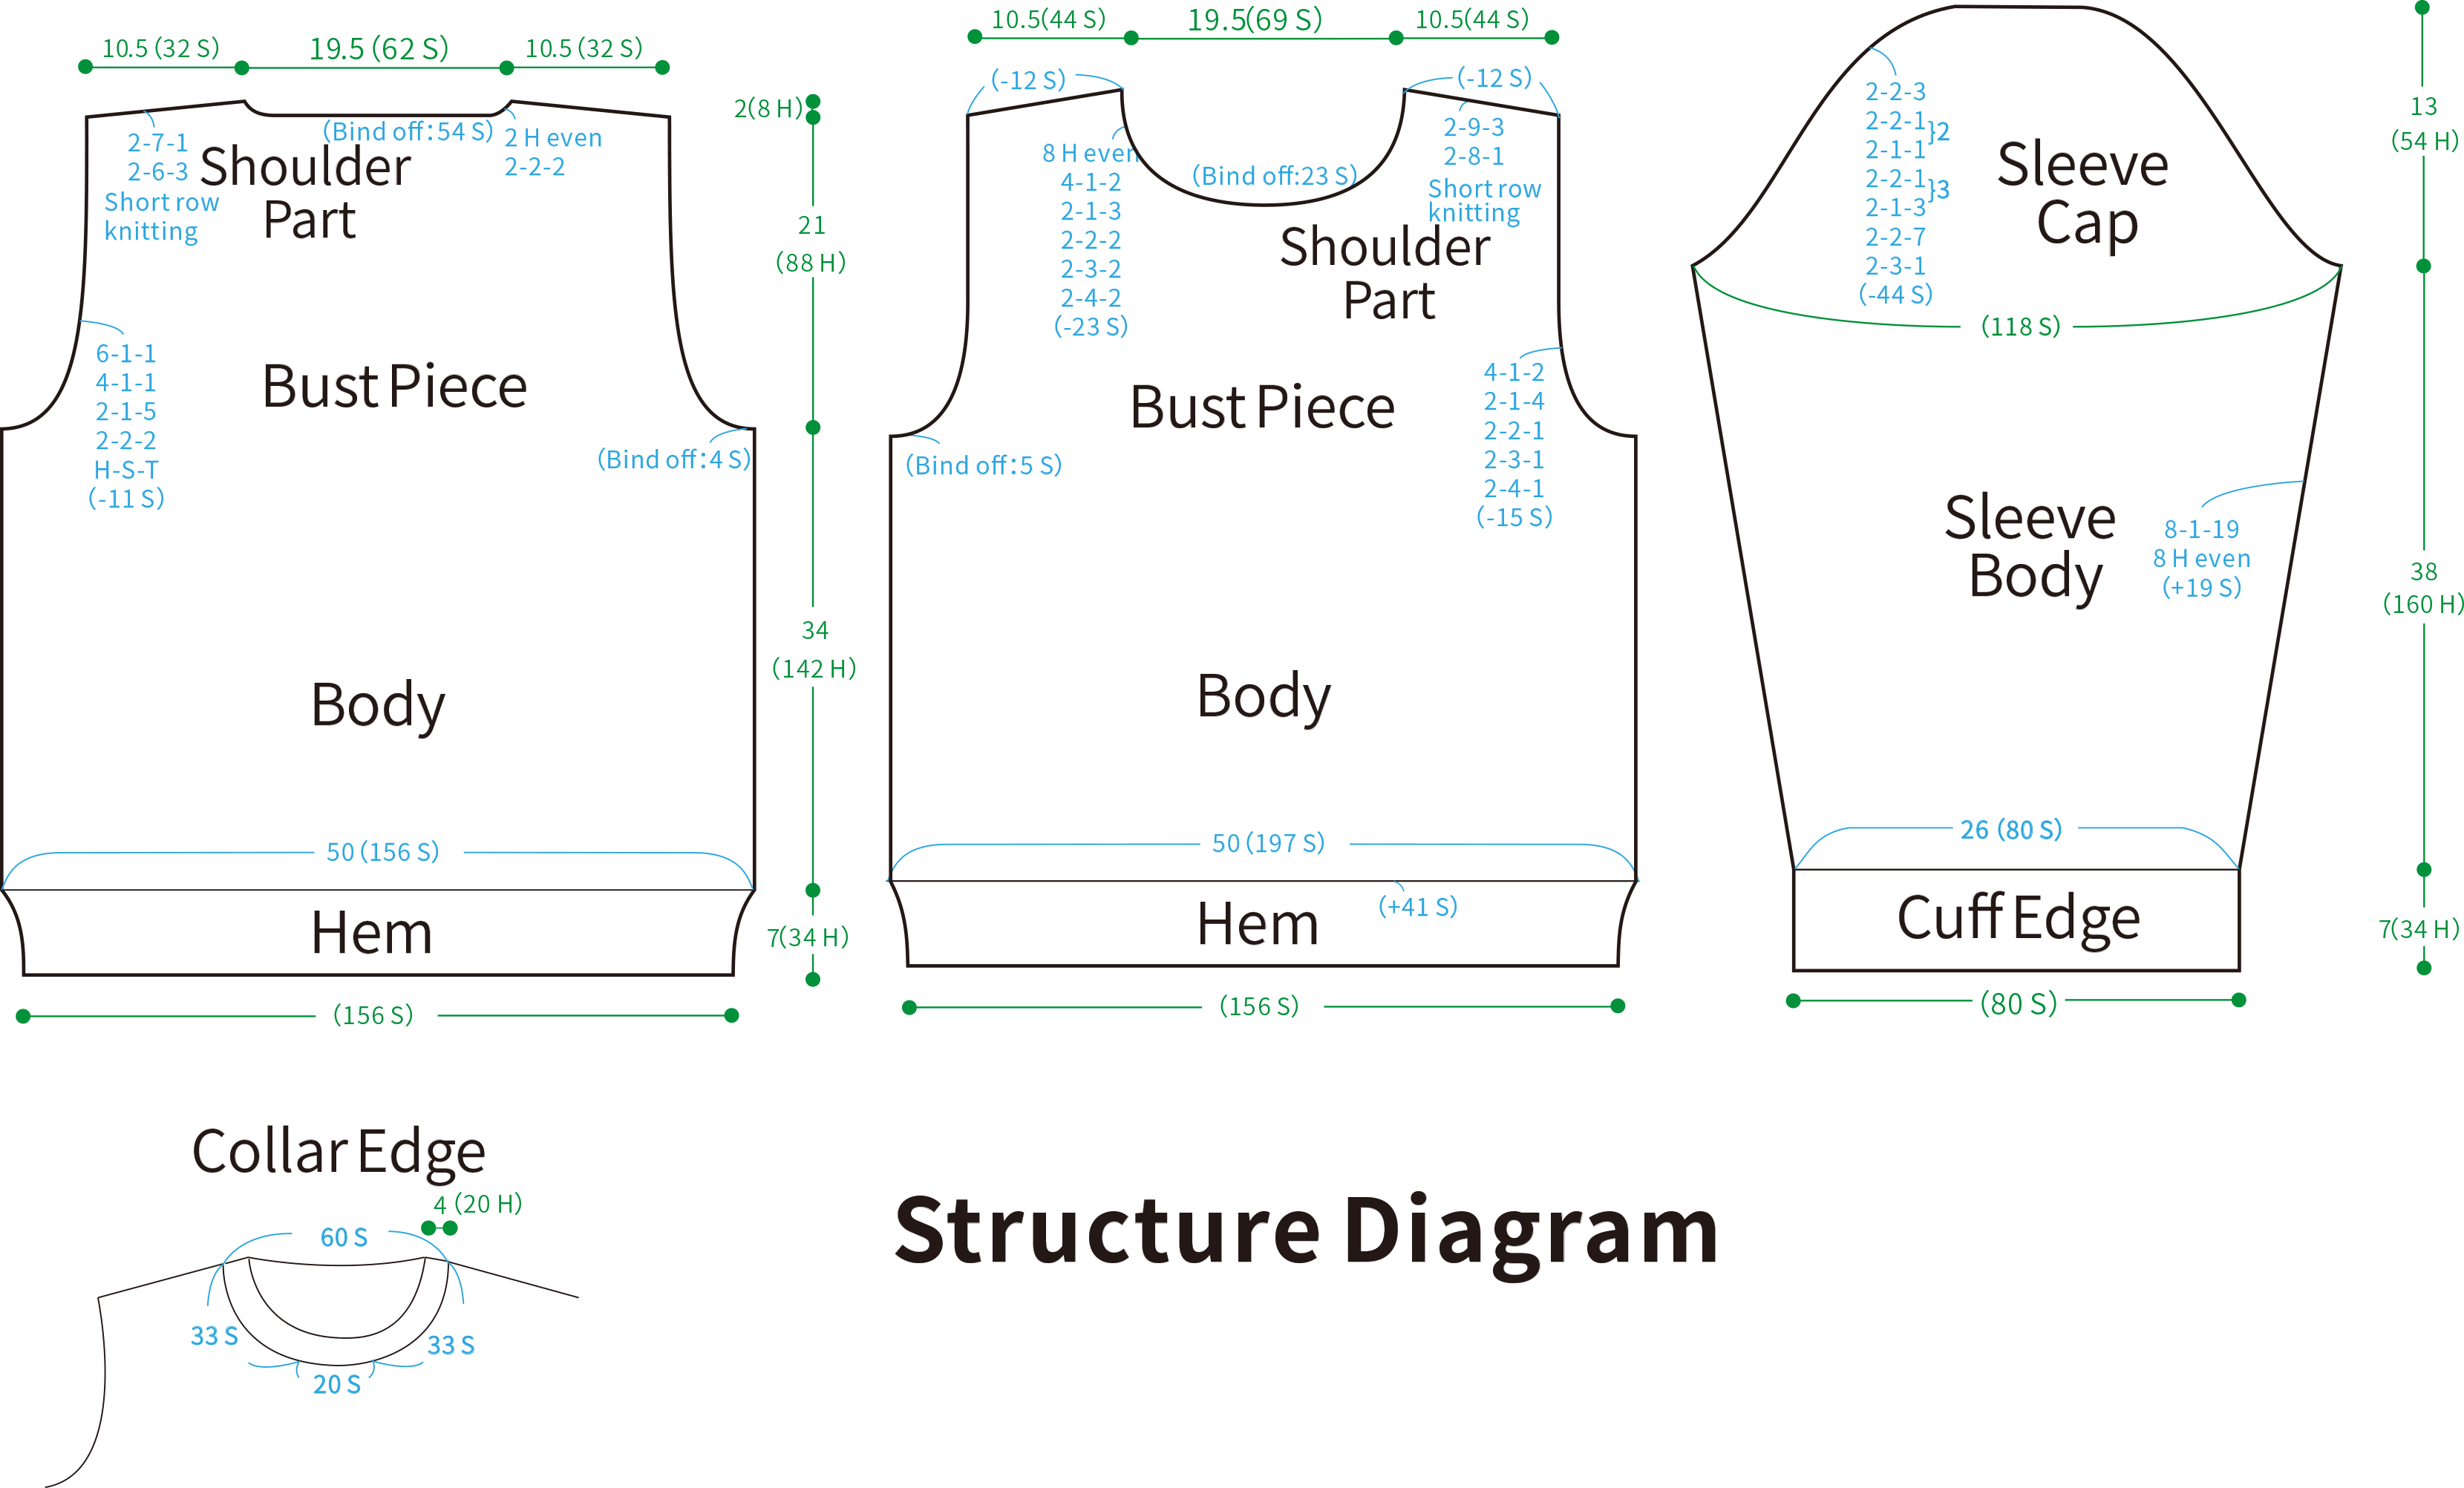

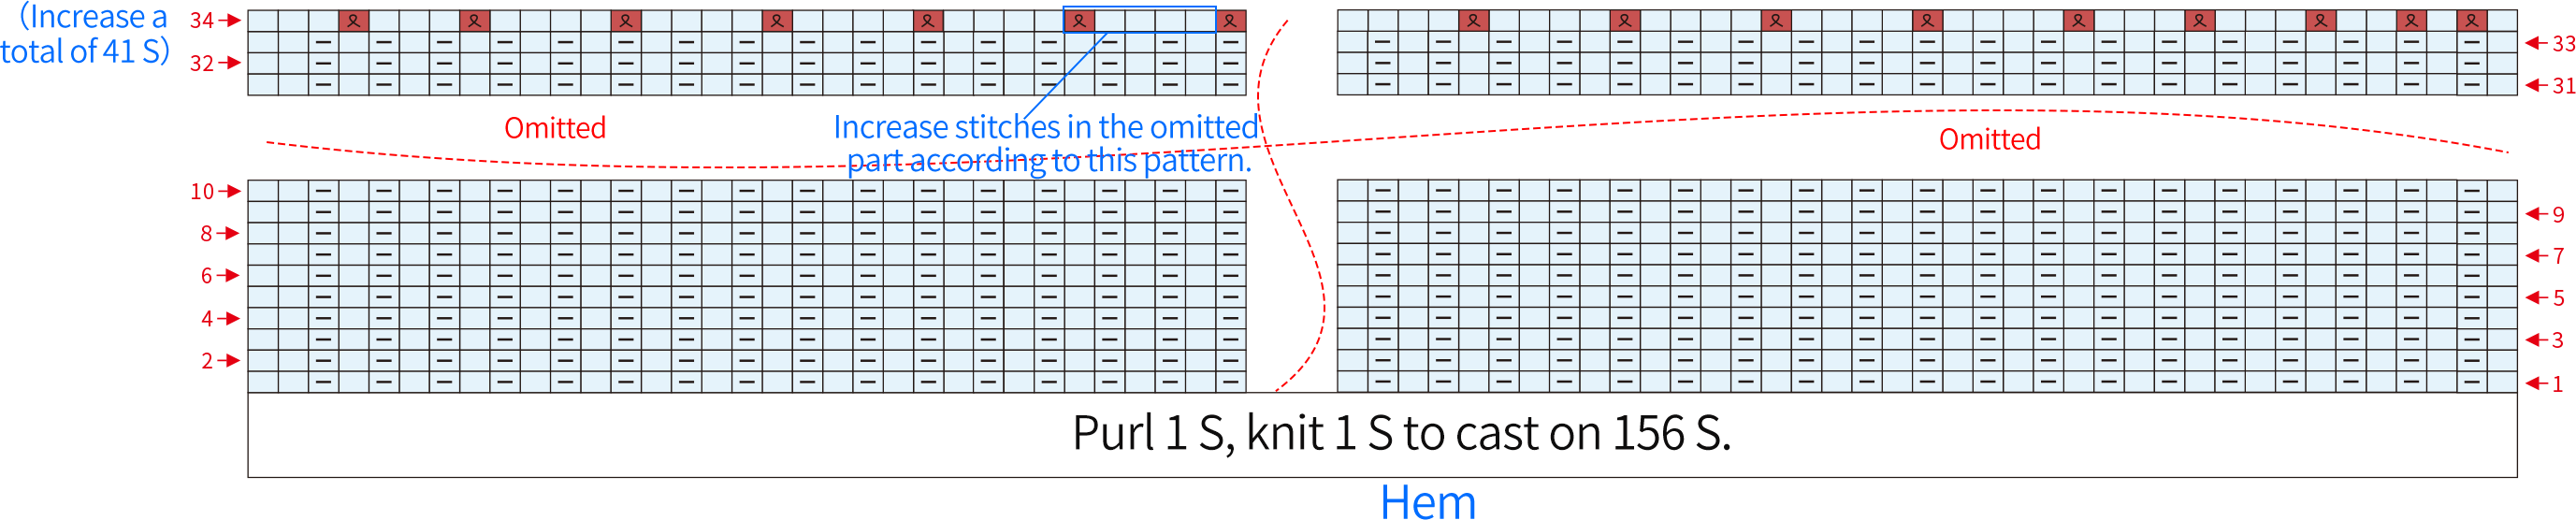
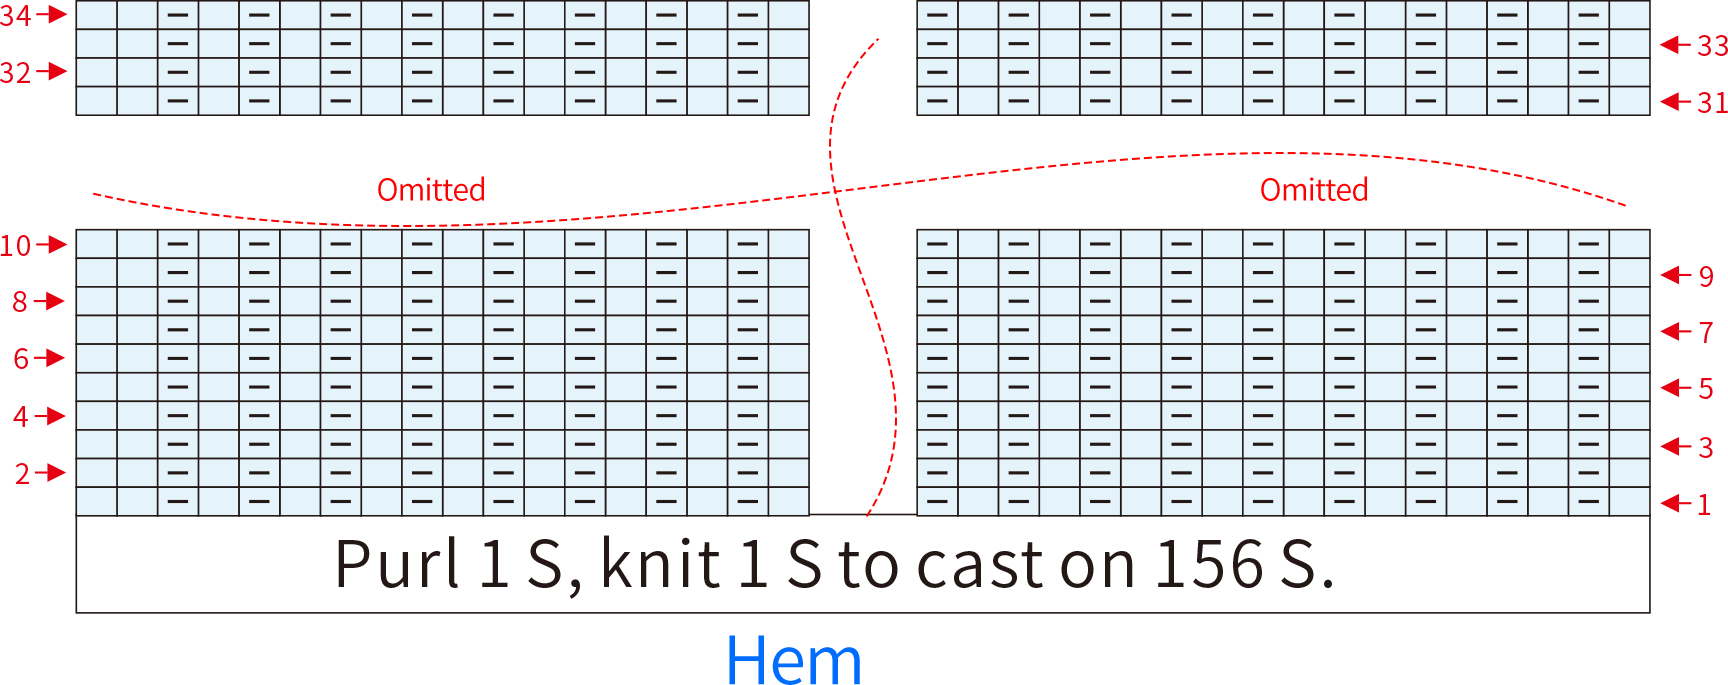
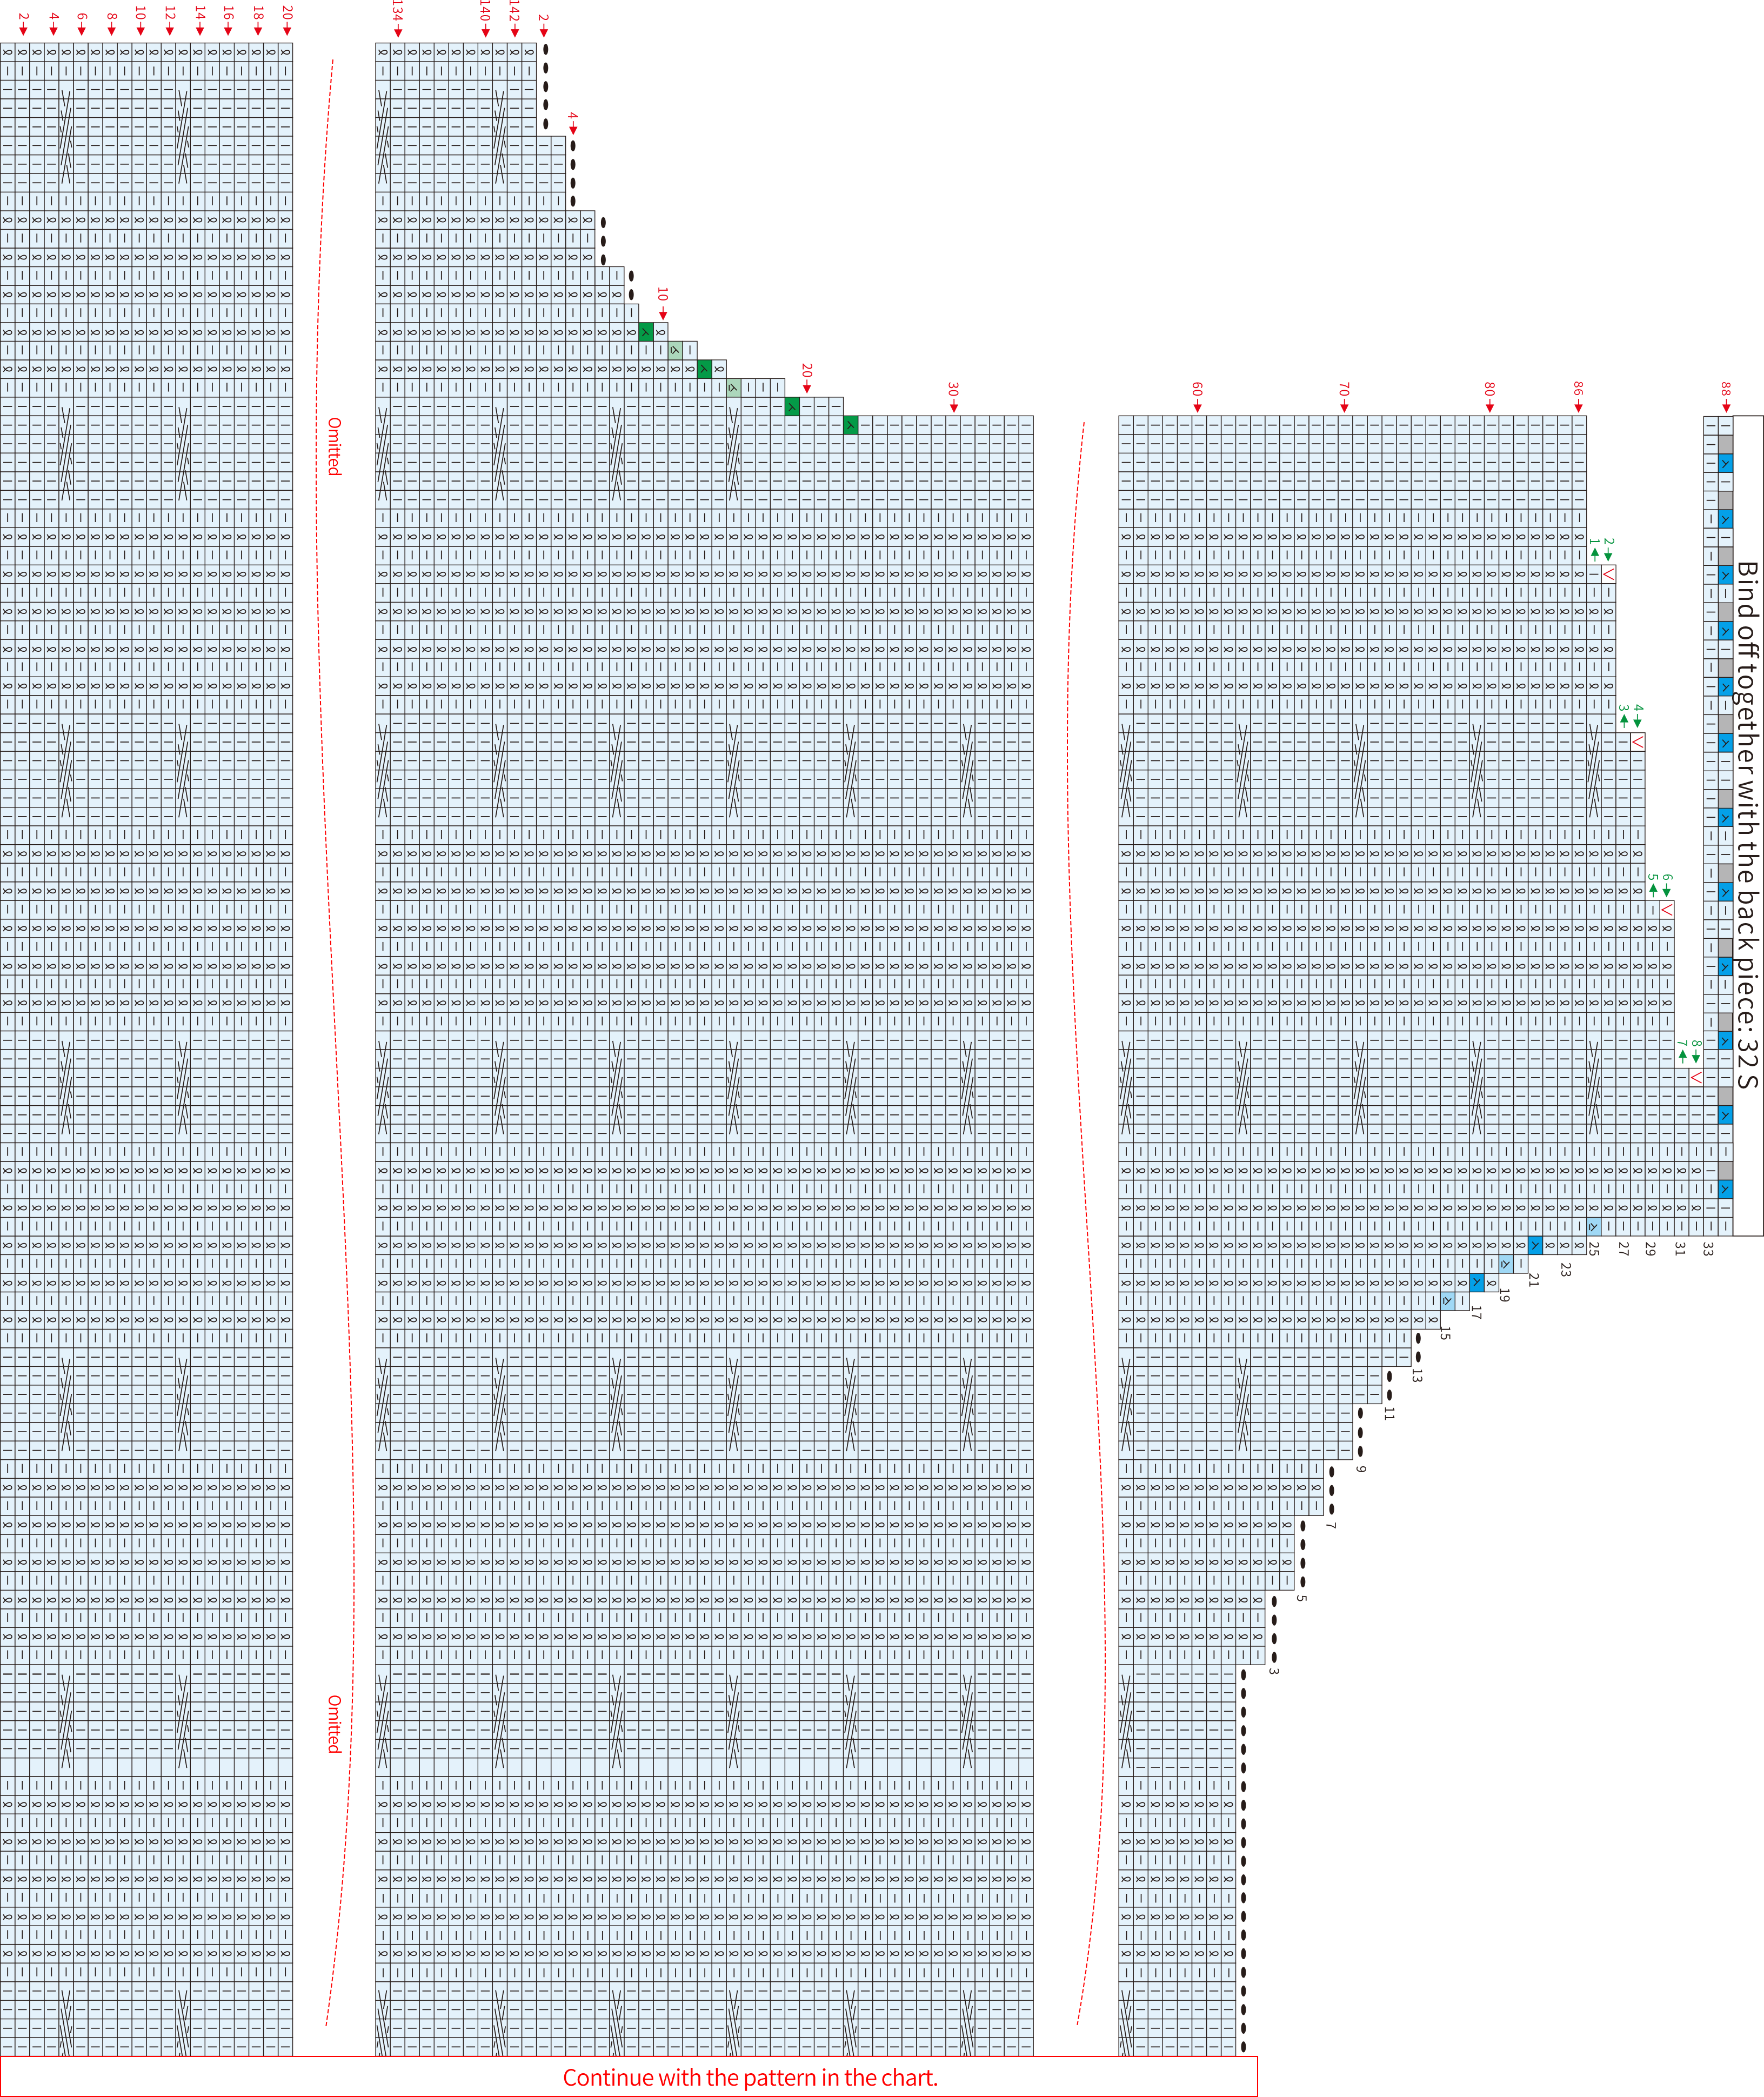
Part 1 Back Piece A​ 11' 21'' (Part1) 

Divide into four areas: hem, body, bust piece, and shoulder-parts. Crochet each area upwards sequentially from the bottom. For specifics, please refer to the video demonstration.
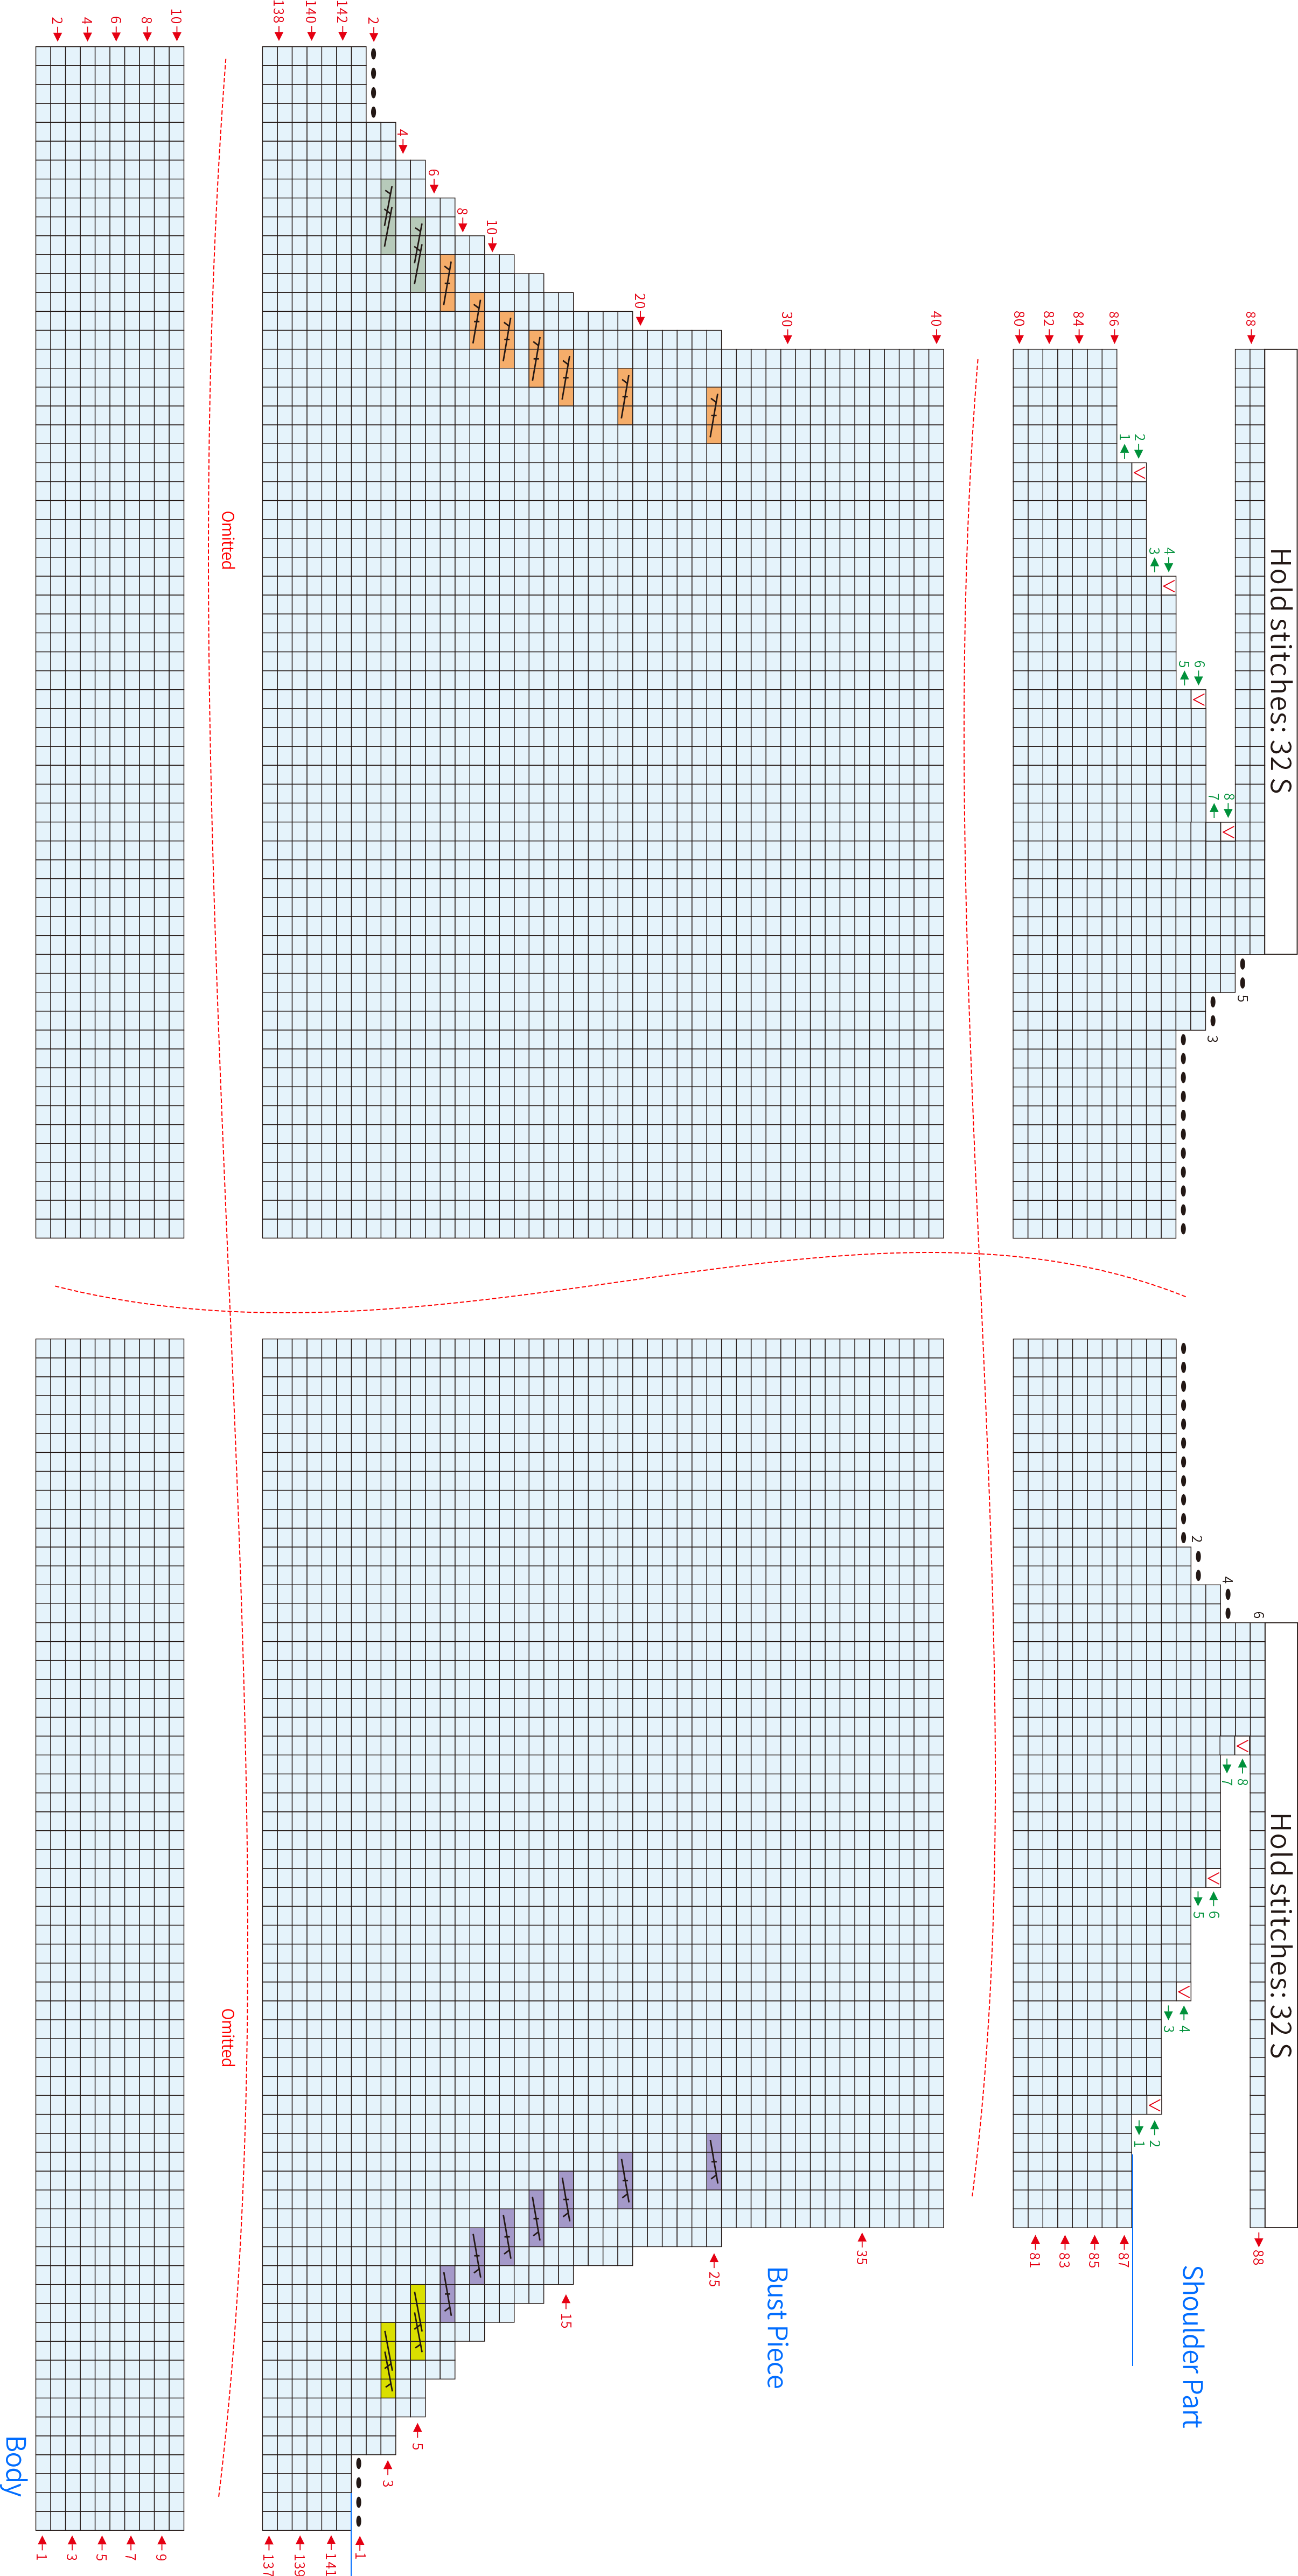
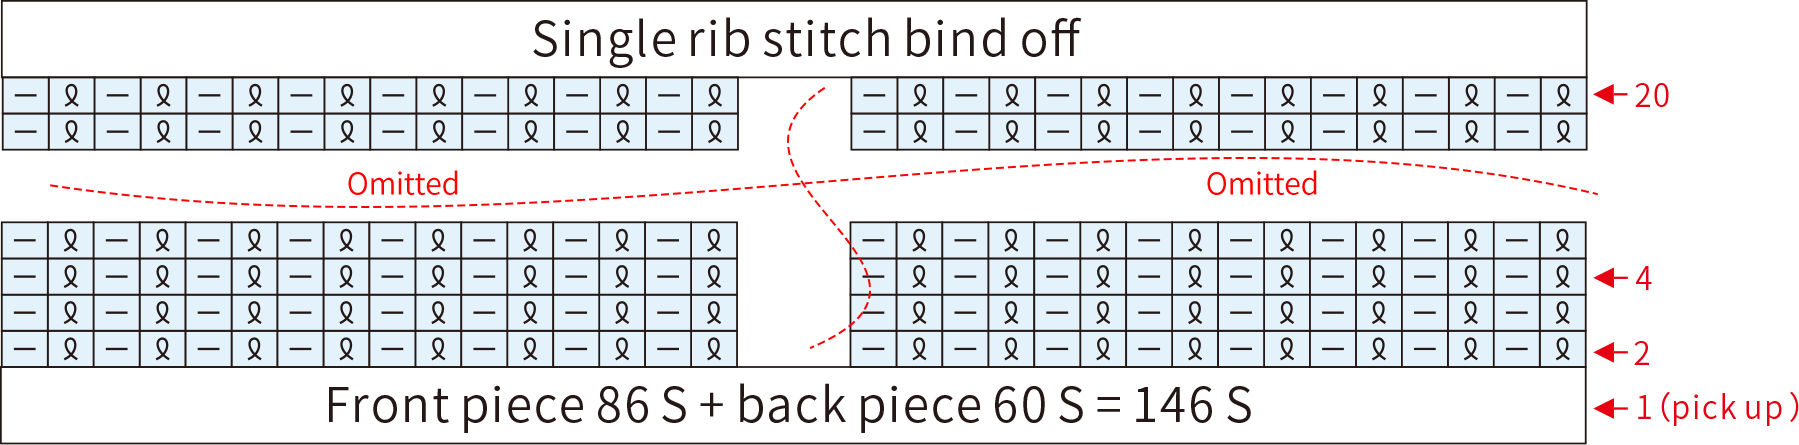
Part 2  Front pieces and Joining B​ 00' 08'' (Part2) ​

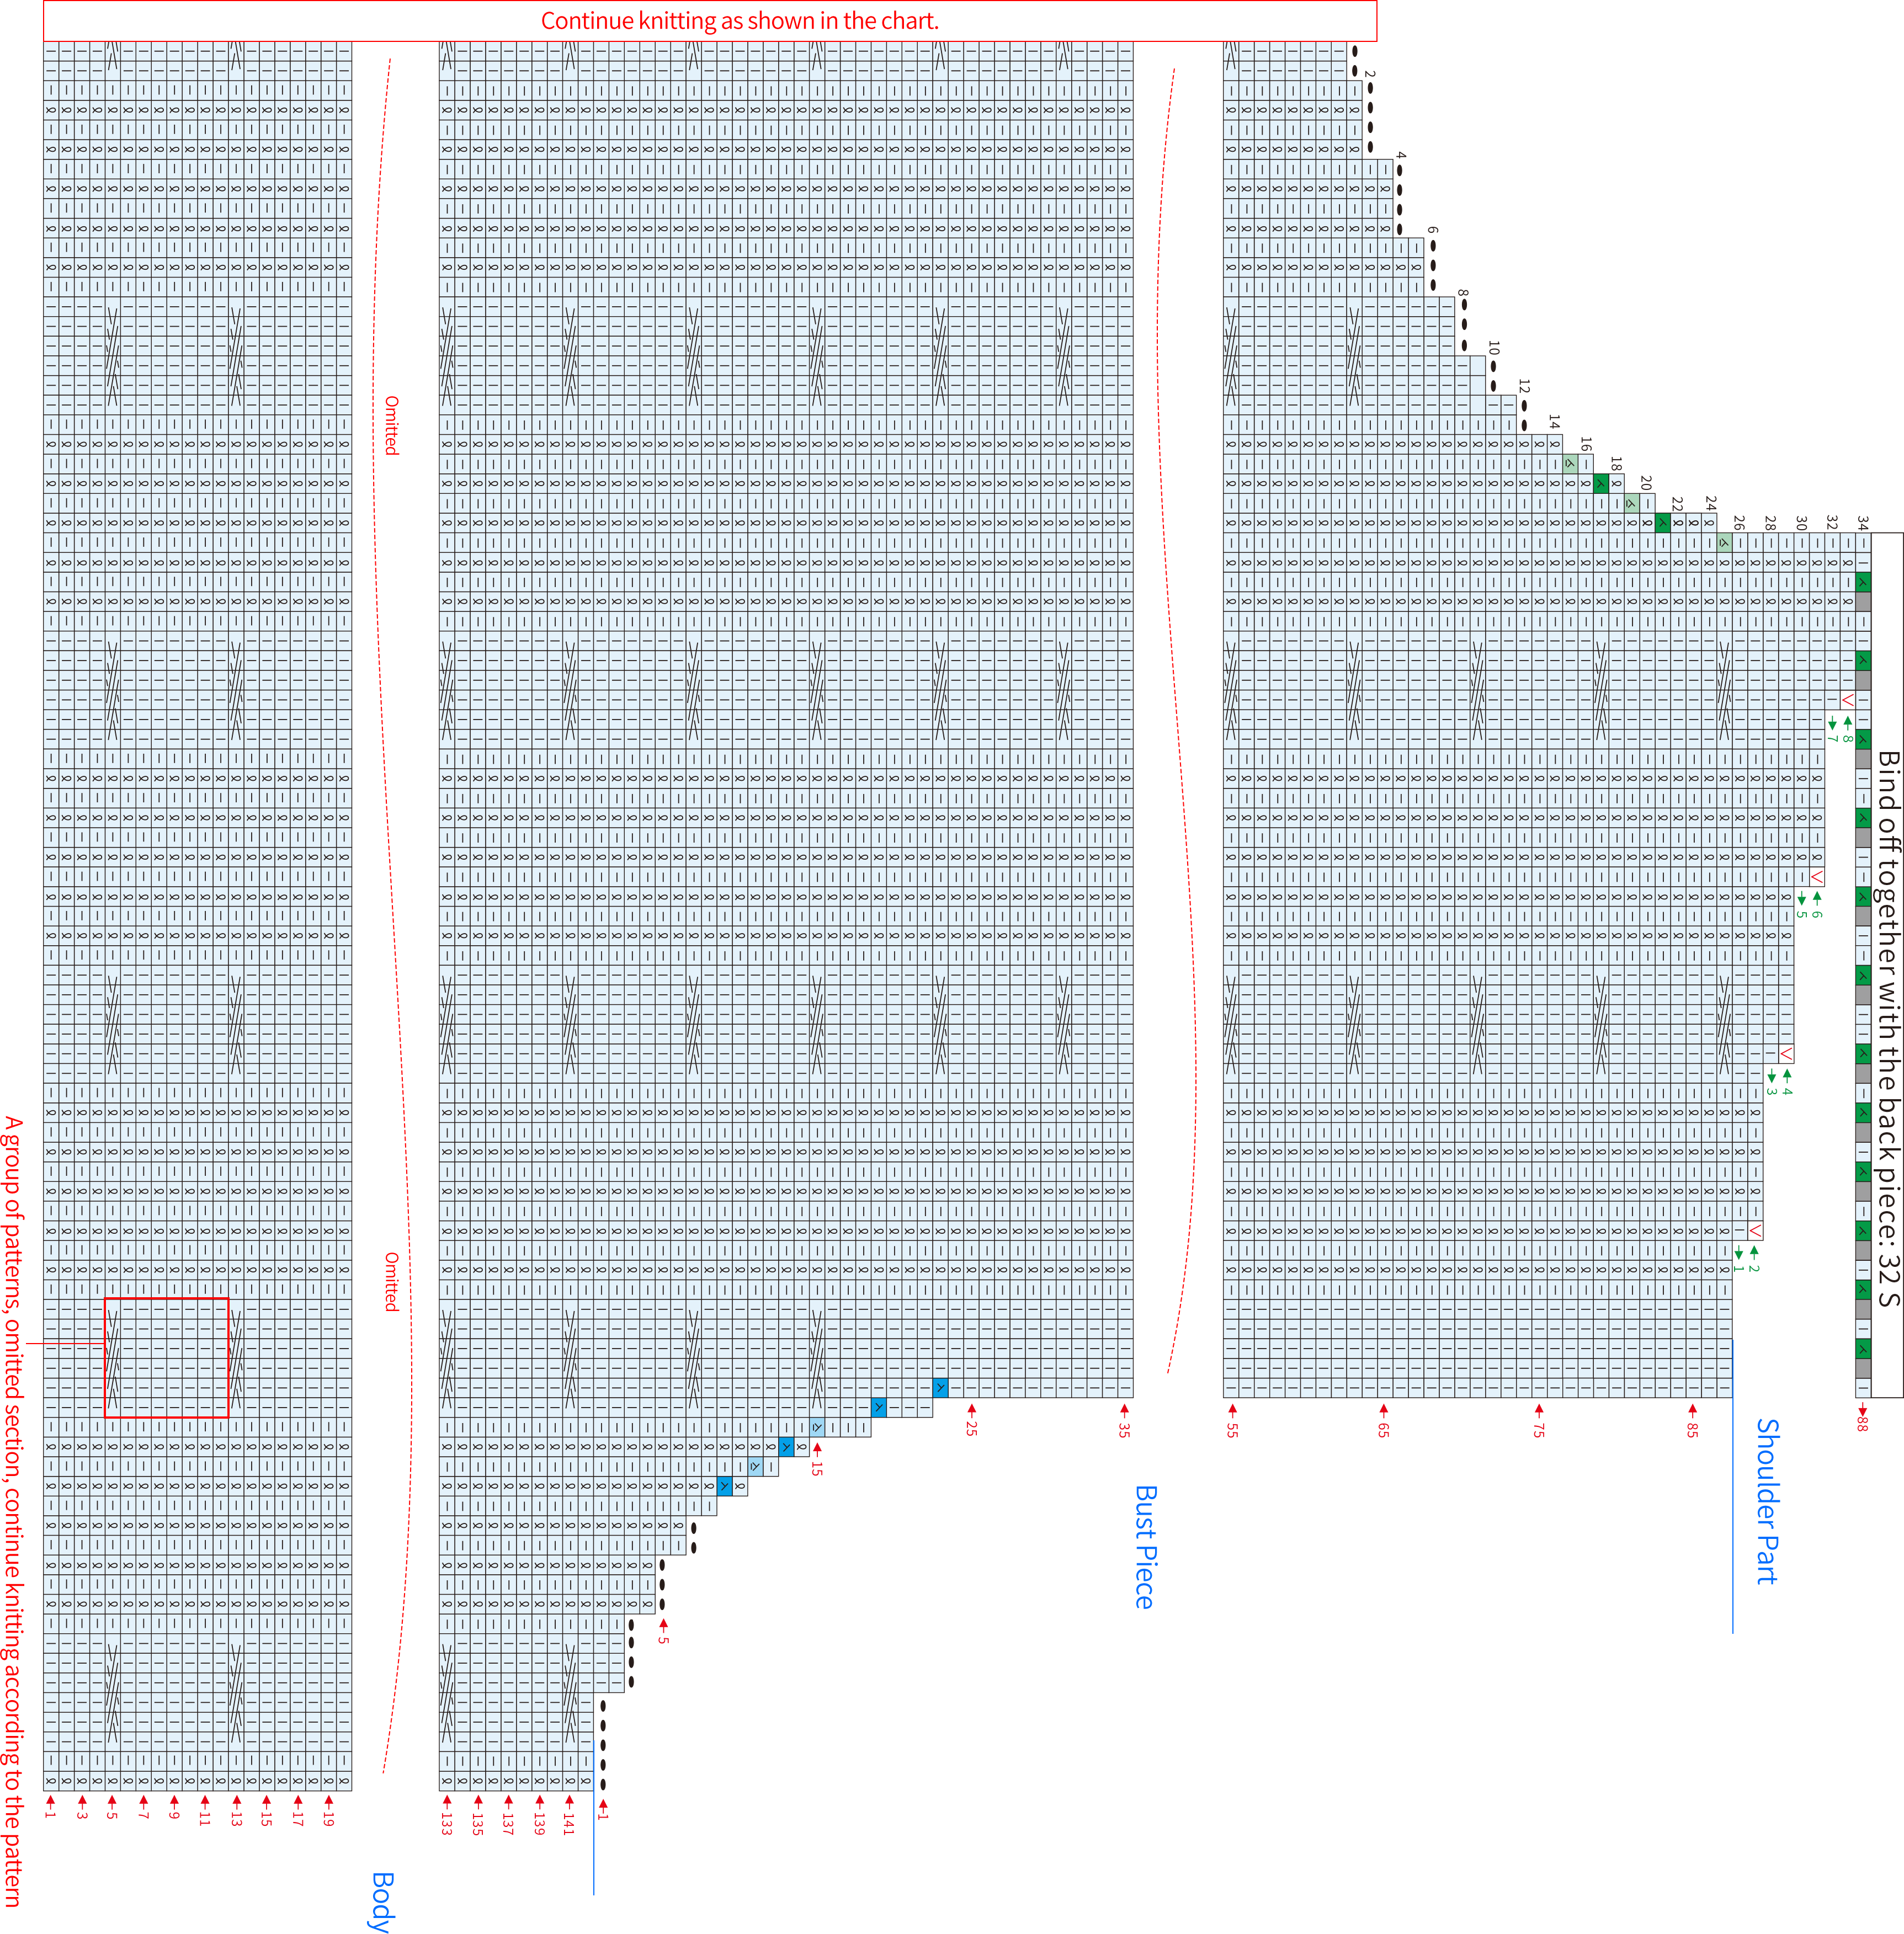
The front piece is also divided into four areas: the hem, body, bust, and shoulder-parts. You knit these areas in order from bottom to top. After completing one side of the shoulder-parts, you join it with the back piece shoulder-part and bind off, which simultaneously completes the shoulder connection. Finally, sew together the hem and body sections. Please refer to the video demonstration for specifics.
Part 3 Sleeve C​ 34' 24'' (Part2) ​

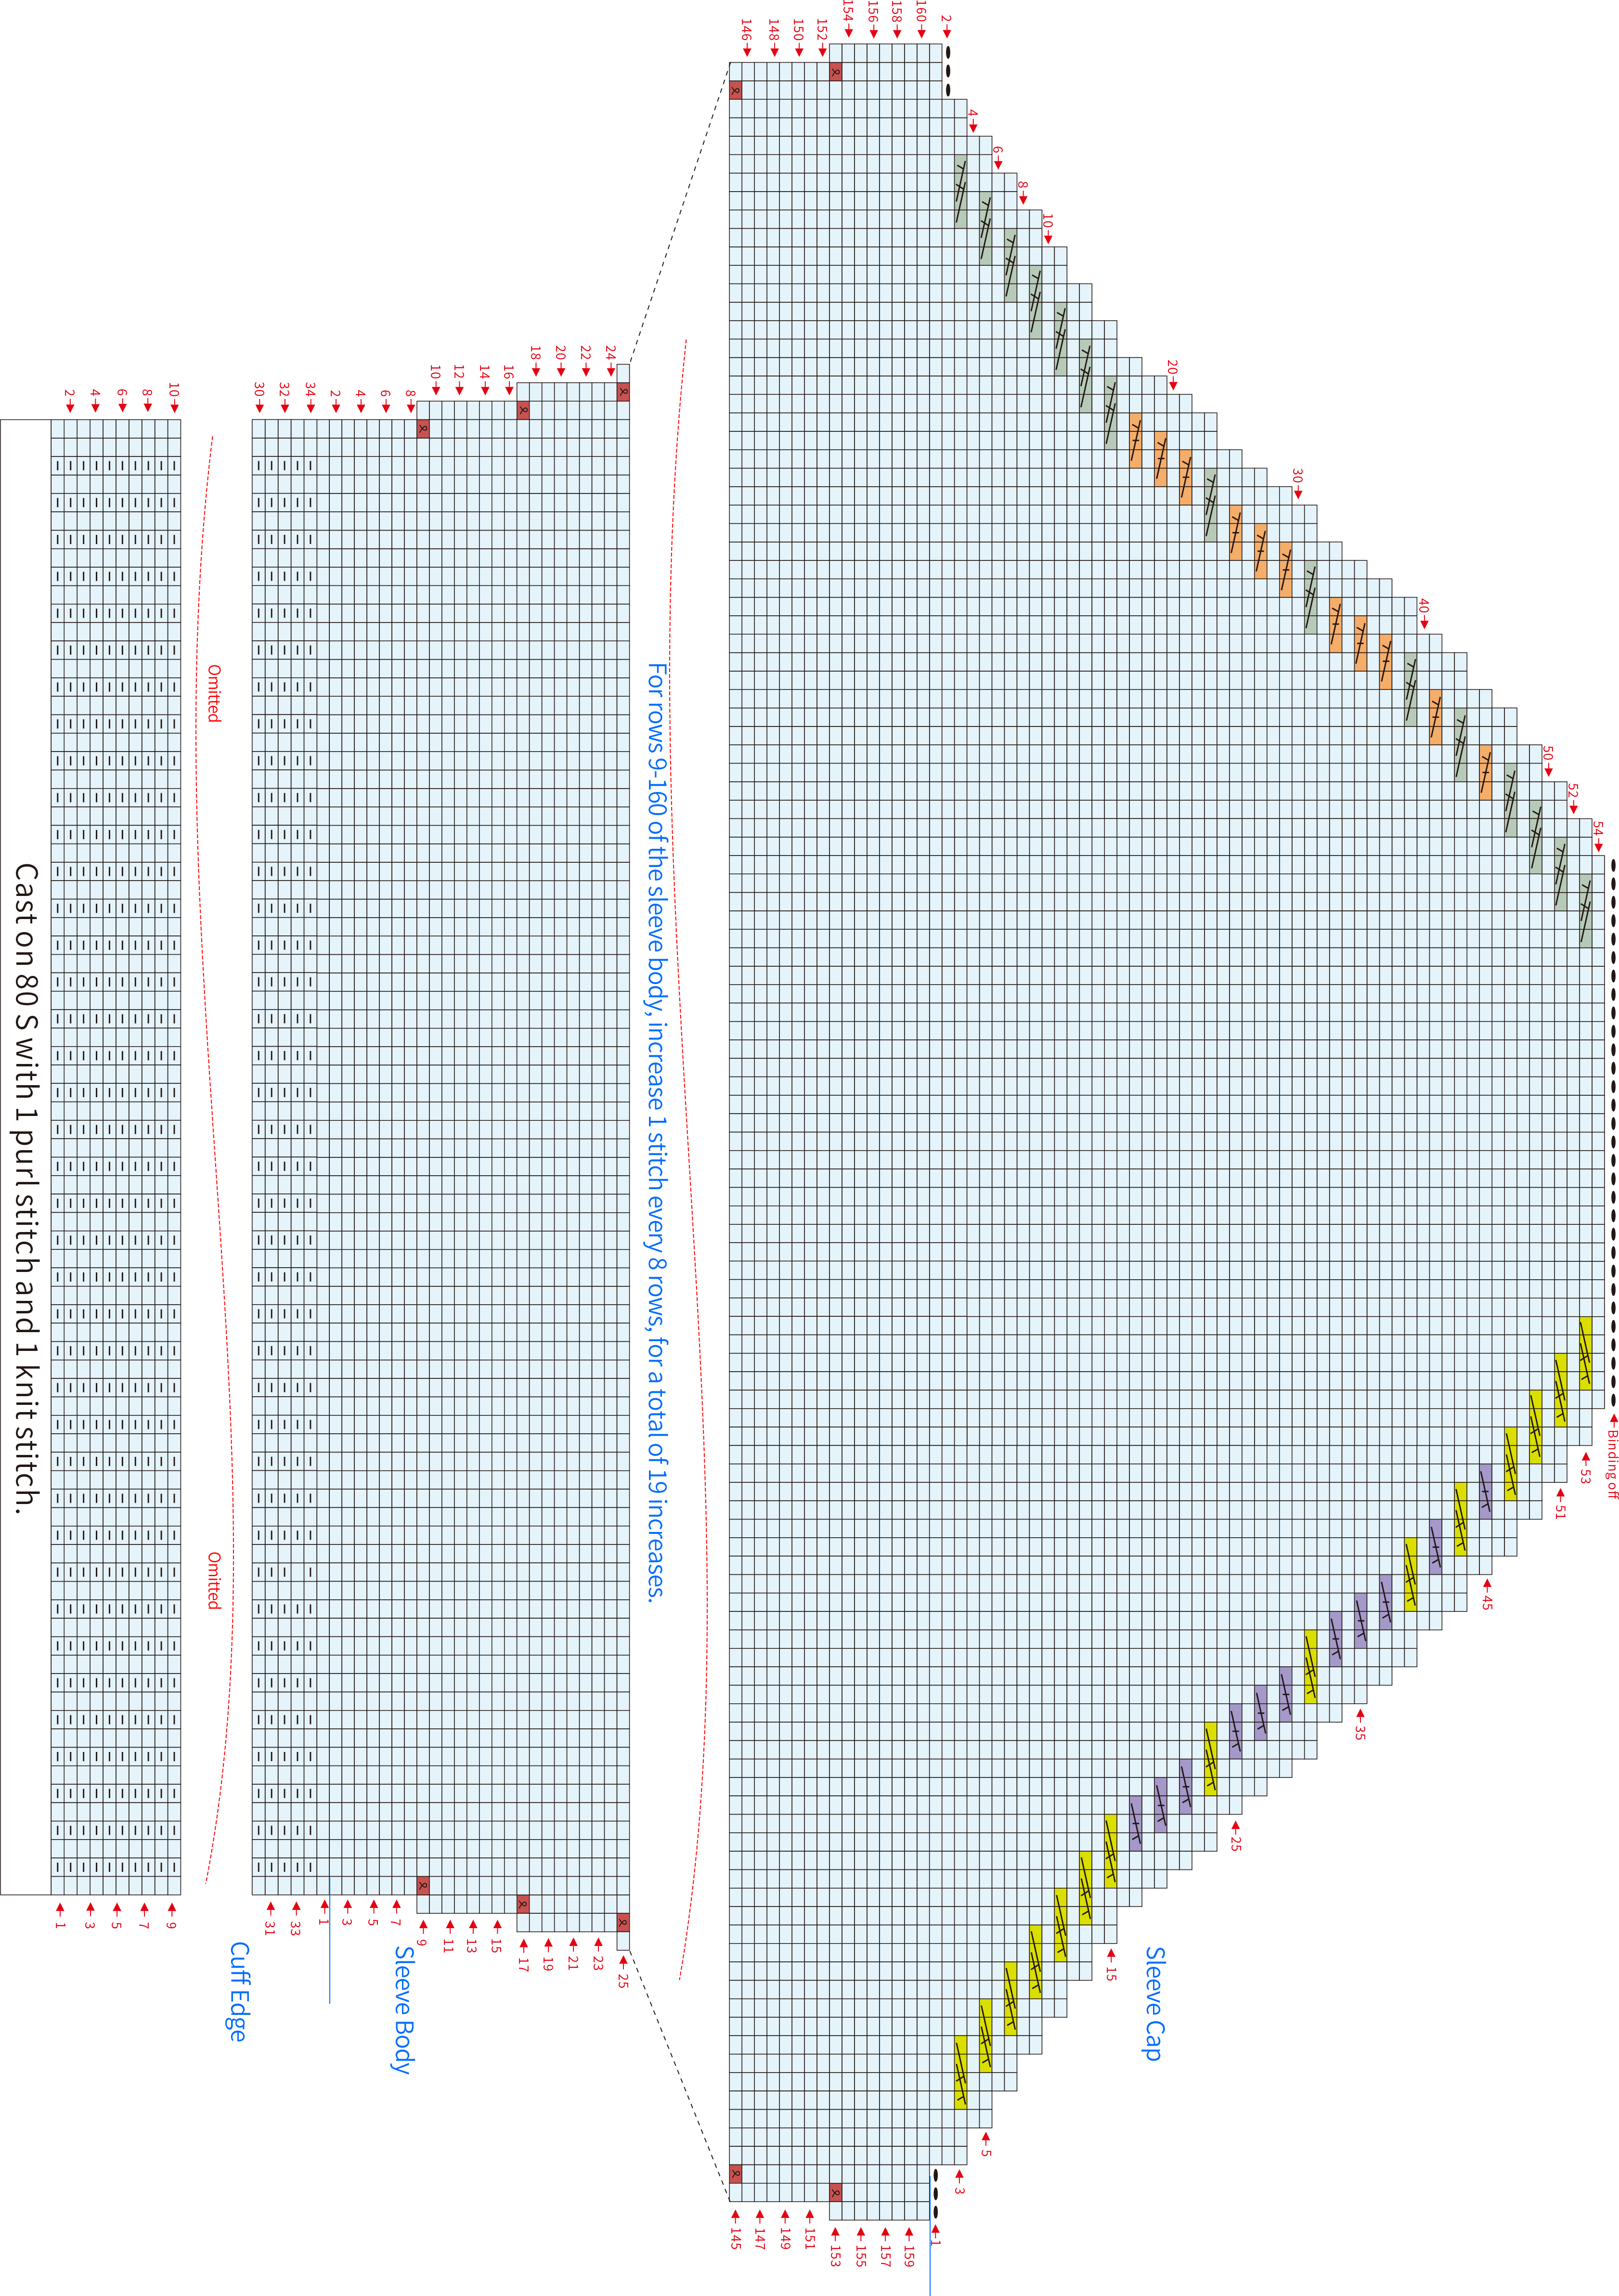
A single sleeve is divided into the cuff, sleeve body, and sleeve cap. First, knit each section from bottom-up in sequence. After completion, sew together the beginning and ending of the cuff and sleeve body, then attach the sleeve cap to the armhole position. For specifics, please refer to the video demonstration.
Part 4 Collar Edge D​ 44' 45'' (Part2) ​

Yarn and color guide
StyleYarnColor
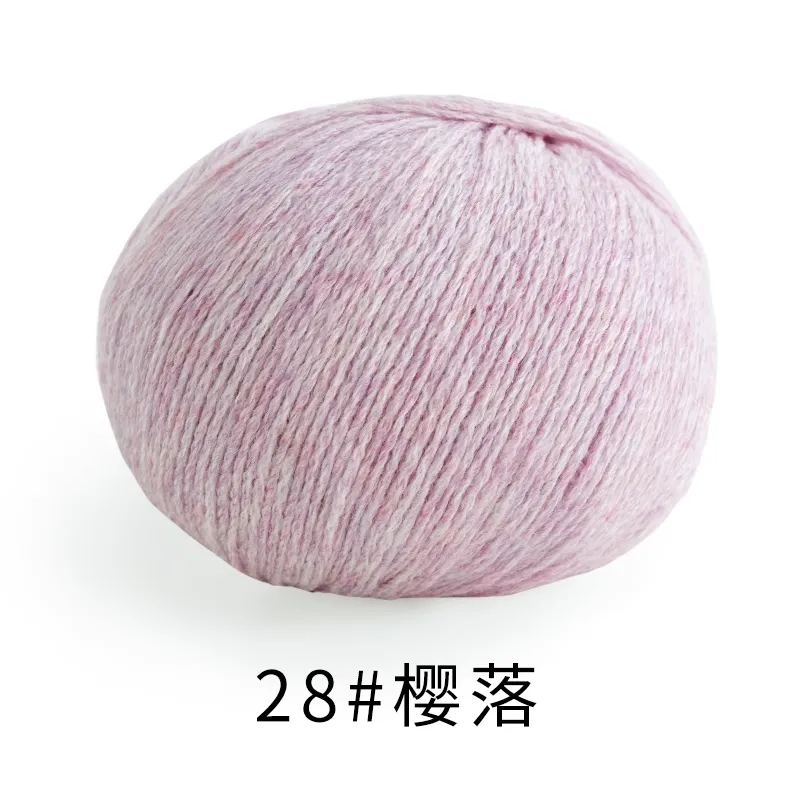
Cradle Pink Style3-Ply 30% Cashmere Hand Knitting Yarn
28#Cradle Pink  yarn color28#Cradle Pink x 9
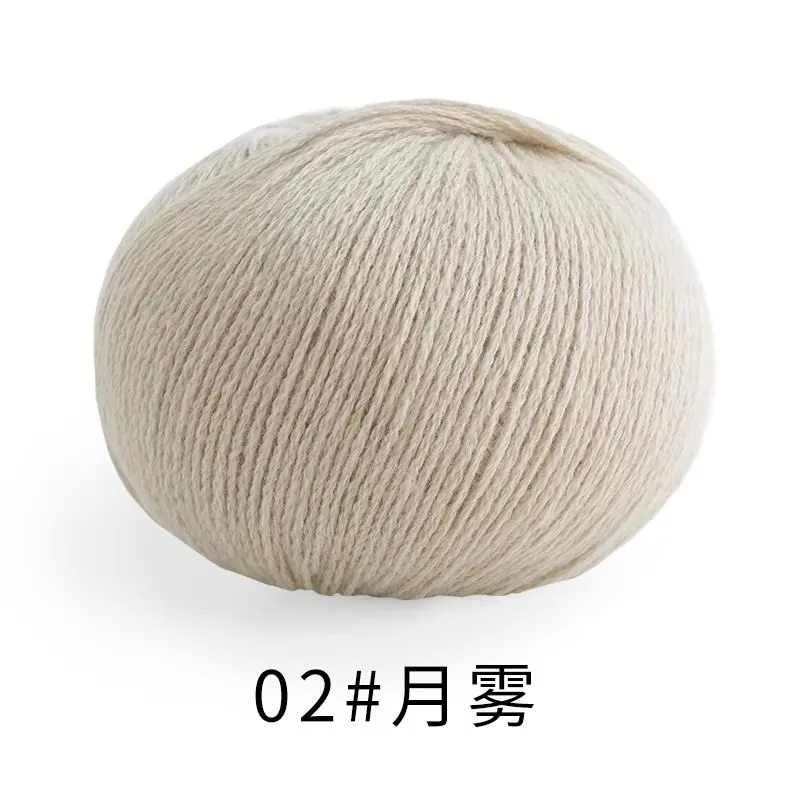
Seedpearl Style3-Ply 30% Cashmere Hand Knitting Yarn
02#Seed Pearl yarn color02#Seed Pearl x 9
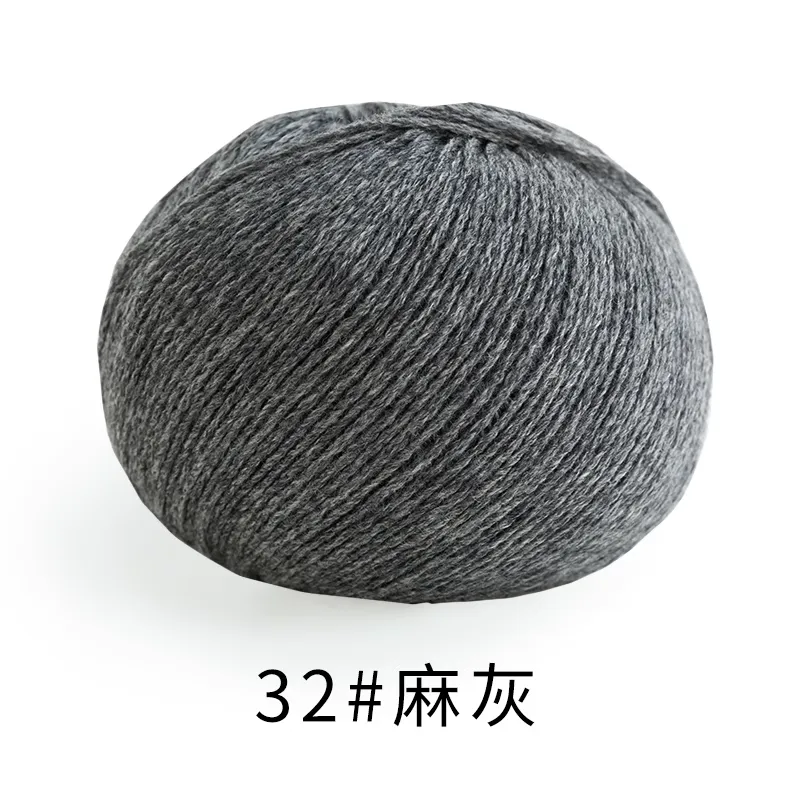
Gunmetal Gray Style3-Ply 30% Cashmere Hand Knitting Yarn
32#Gunmetal Gray yarn color32#Gunmetal Gray x 9

Cradle Pink Style

3-Ply 30% Cashmere Hand Knitting Yarn
28#Cradle Pink  yarn color28#Cradle Pink x 9

Seedpearl Style

3-Ply 30% Cashmere Hand Knitting Yarn
02#Seed Pearl yarn color02#Seed Pearl x 9

Gunmetal Gray Style

3-Ply 30% Cashmere Hand Knitting Yarn
32#Gunmetal Gray yarn color32#Gunmetal Gray x 9
Yarn