Clothes
Fanwu
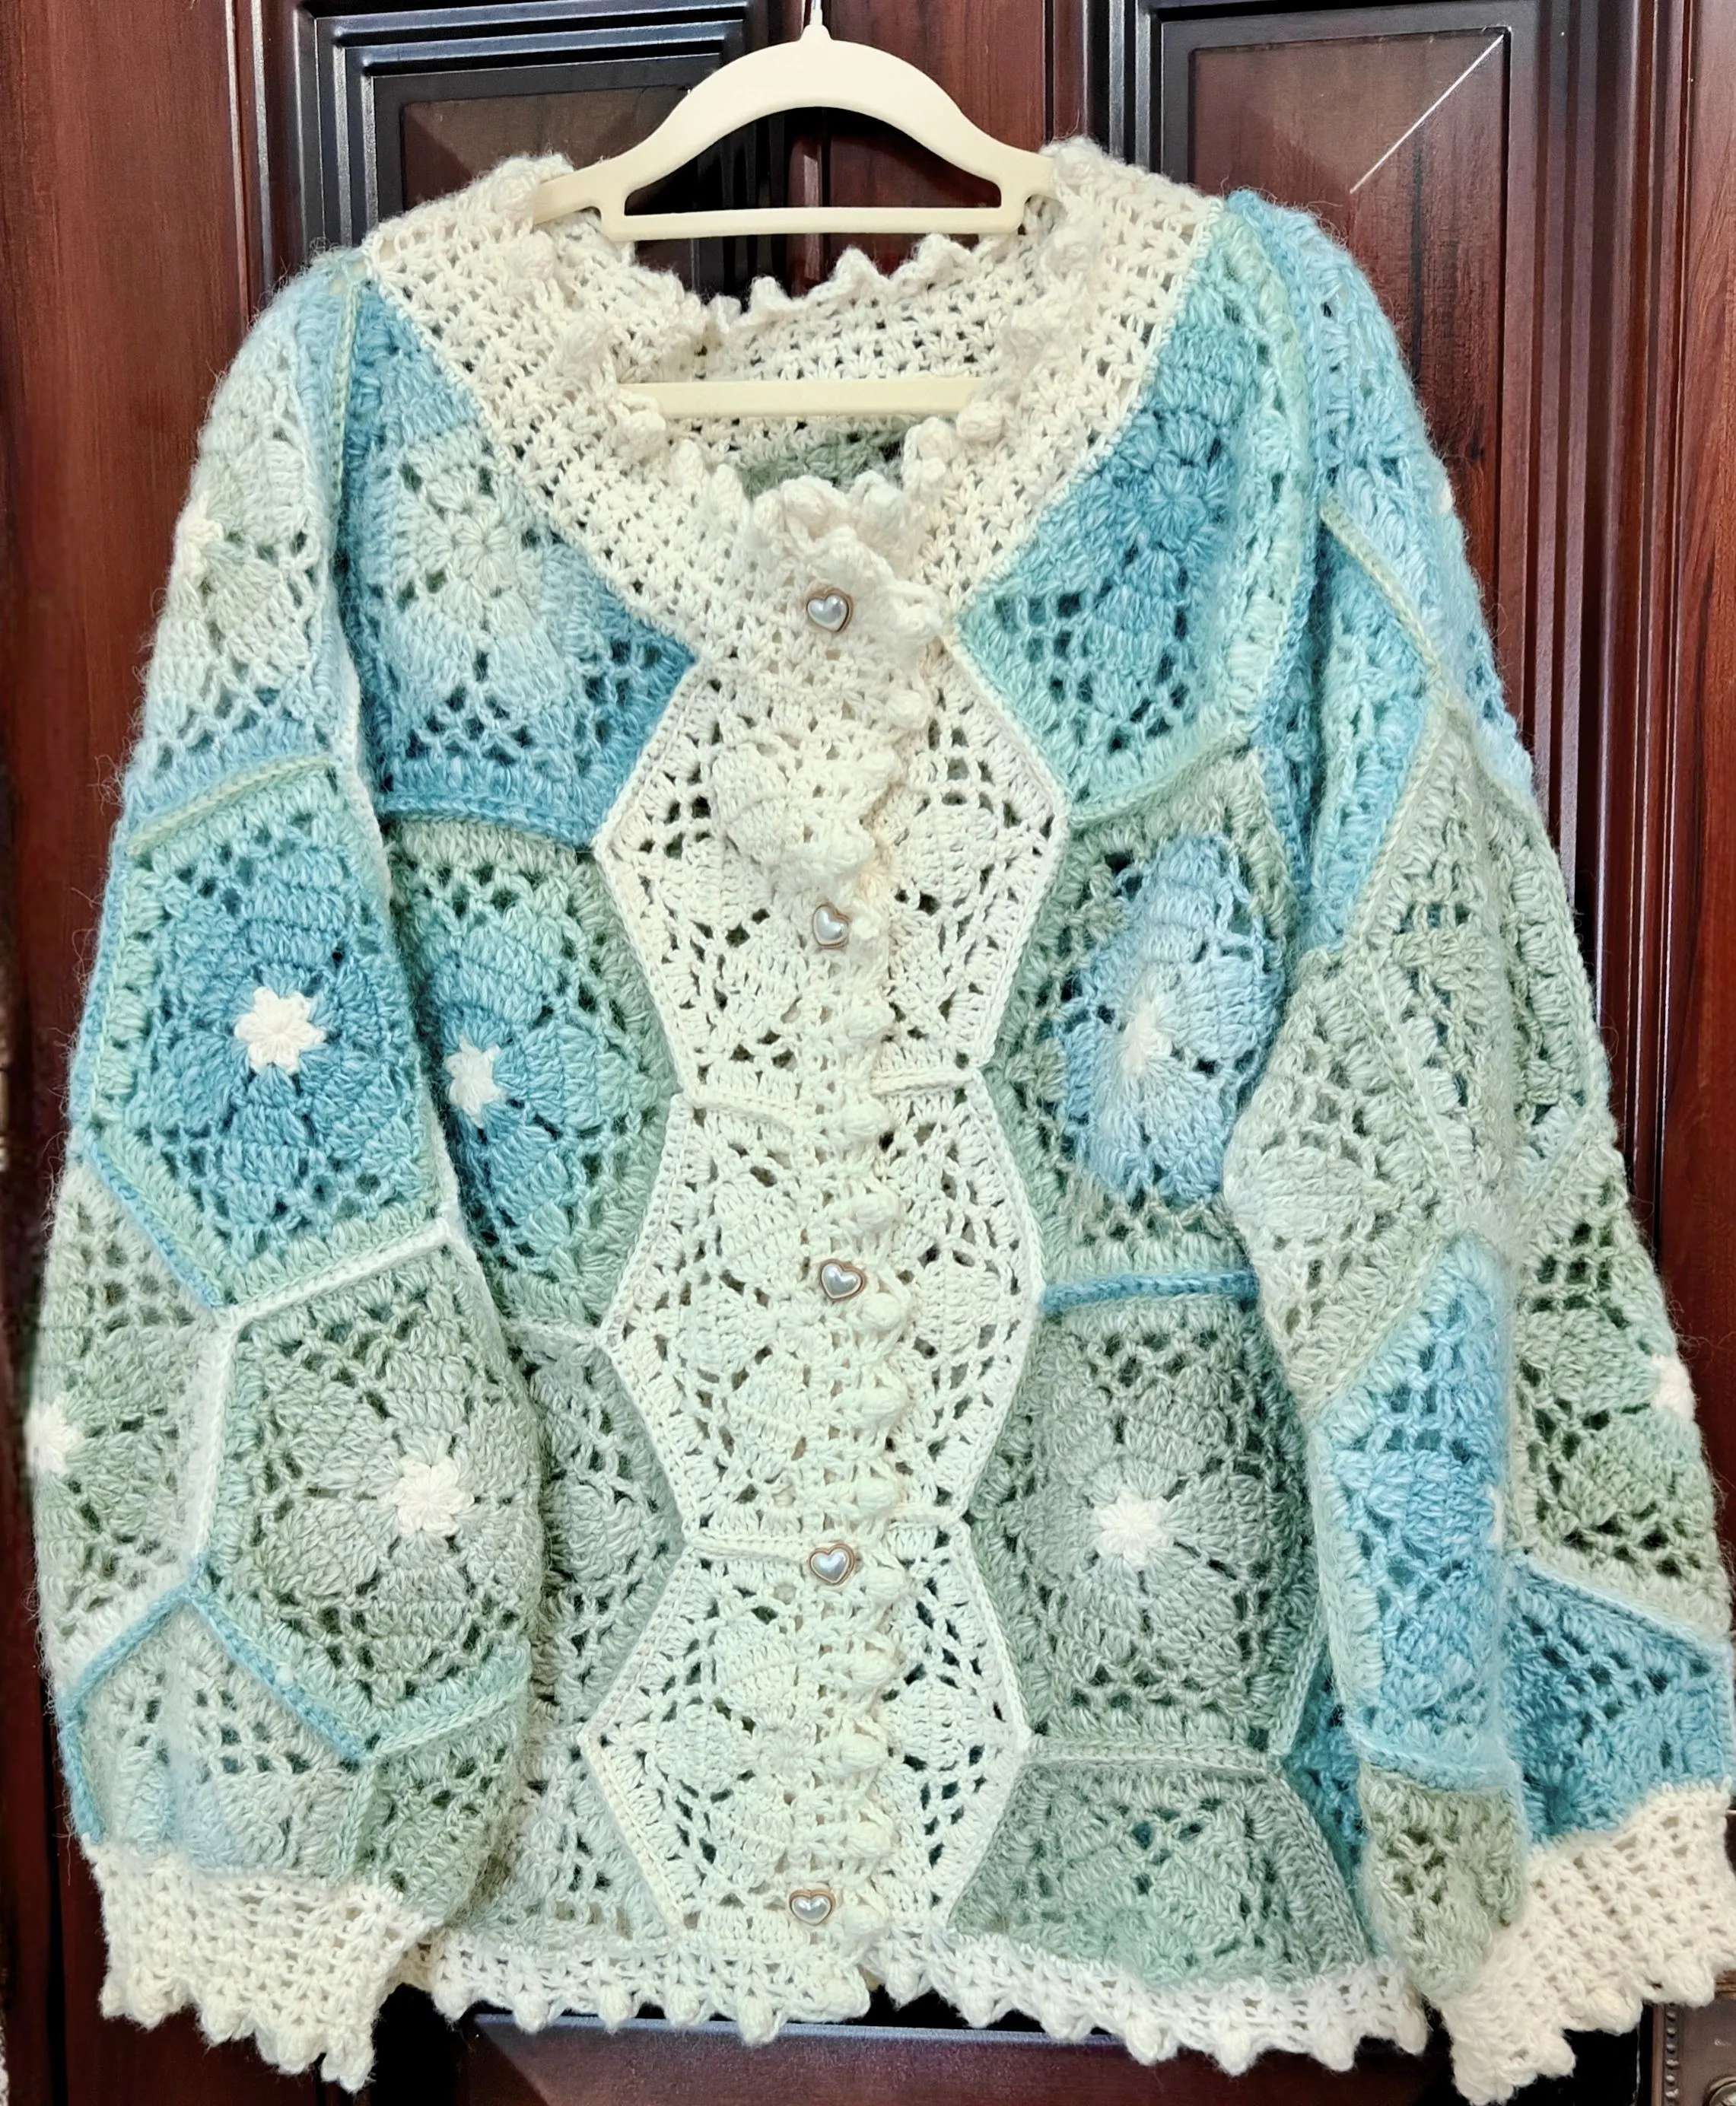
Project preview
See the finished project
Pattern format
Instructions
Watch and follow
Video tutorial
| Style | Yarn | Color |
|---|---|---|
| Rainbow Version - Small Size | Dawn Impression |  22#Rainbow x 4 22#Rainbow x 4 |
| Impression Misty Feather |  01#Light Khaki x 2 01#Light Khaki x 2 | |
| Rainbow Version - Large Size | Dawn Impression | 22#Rainbow x 4 |
| Impression Misty Feather | 01#Light Khaki x 2 | |
| Pine Cone Version - Small Size | Dawn Impression |  39#Pine Cone x 4 39#Pine Cone x 4 |
| Impression Misty Feather |  16#Pastel Yellow x 2 16#Pastel Yellow x 2 | |
| Pine Cone Version - Large Size | Dawn Impression | 39#Pine Cone x 4 |
| Impression Misty Feather | 16#Pastel Yellow x 2 | |
| Fragments Version - Small Size | Dawn Impression |  05#Fragments x 4 05#Fragments x 4 |
| Impression Misty Feather |  20#Pinecine x 2 20#Pinecine x 2 | |
| Fragments Version - Large Size | Dawn Impression | 05#Fragments x 4 |
| Impression Misty Feather | 20#Pinecine x 2 | |
| Ripple Version - Small Size | Dawn Impression |  34#Ripple x 4 34#Ripple x 4 |
| Impression Misty Feather |  25#Whisper White x 2 25#Whisper White x 2 | |
| Ripple Version - Large Size | Dawn Impression | 34#Ripple x 4 |
| Impression Misty Feather | 25#Whisper White x 2 |
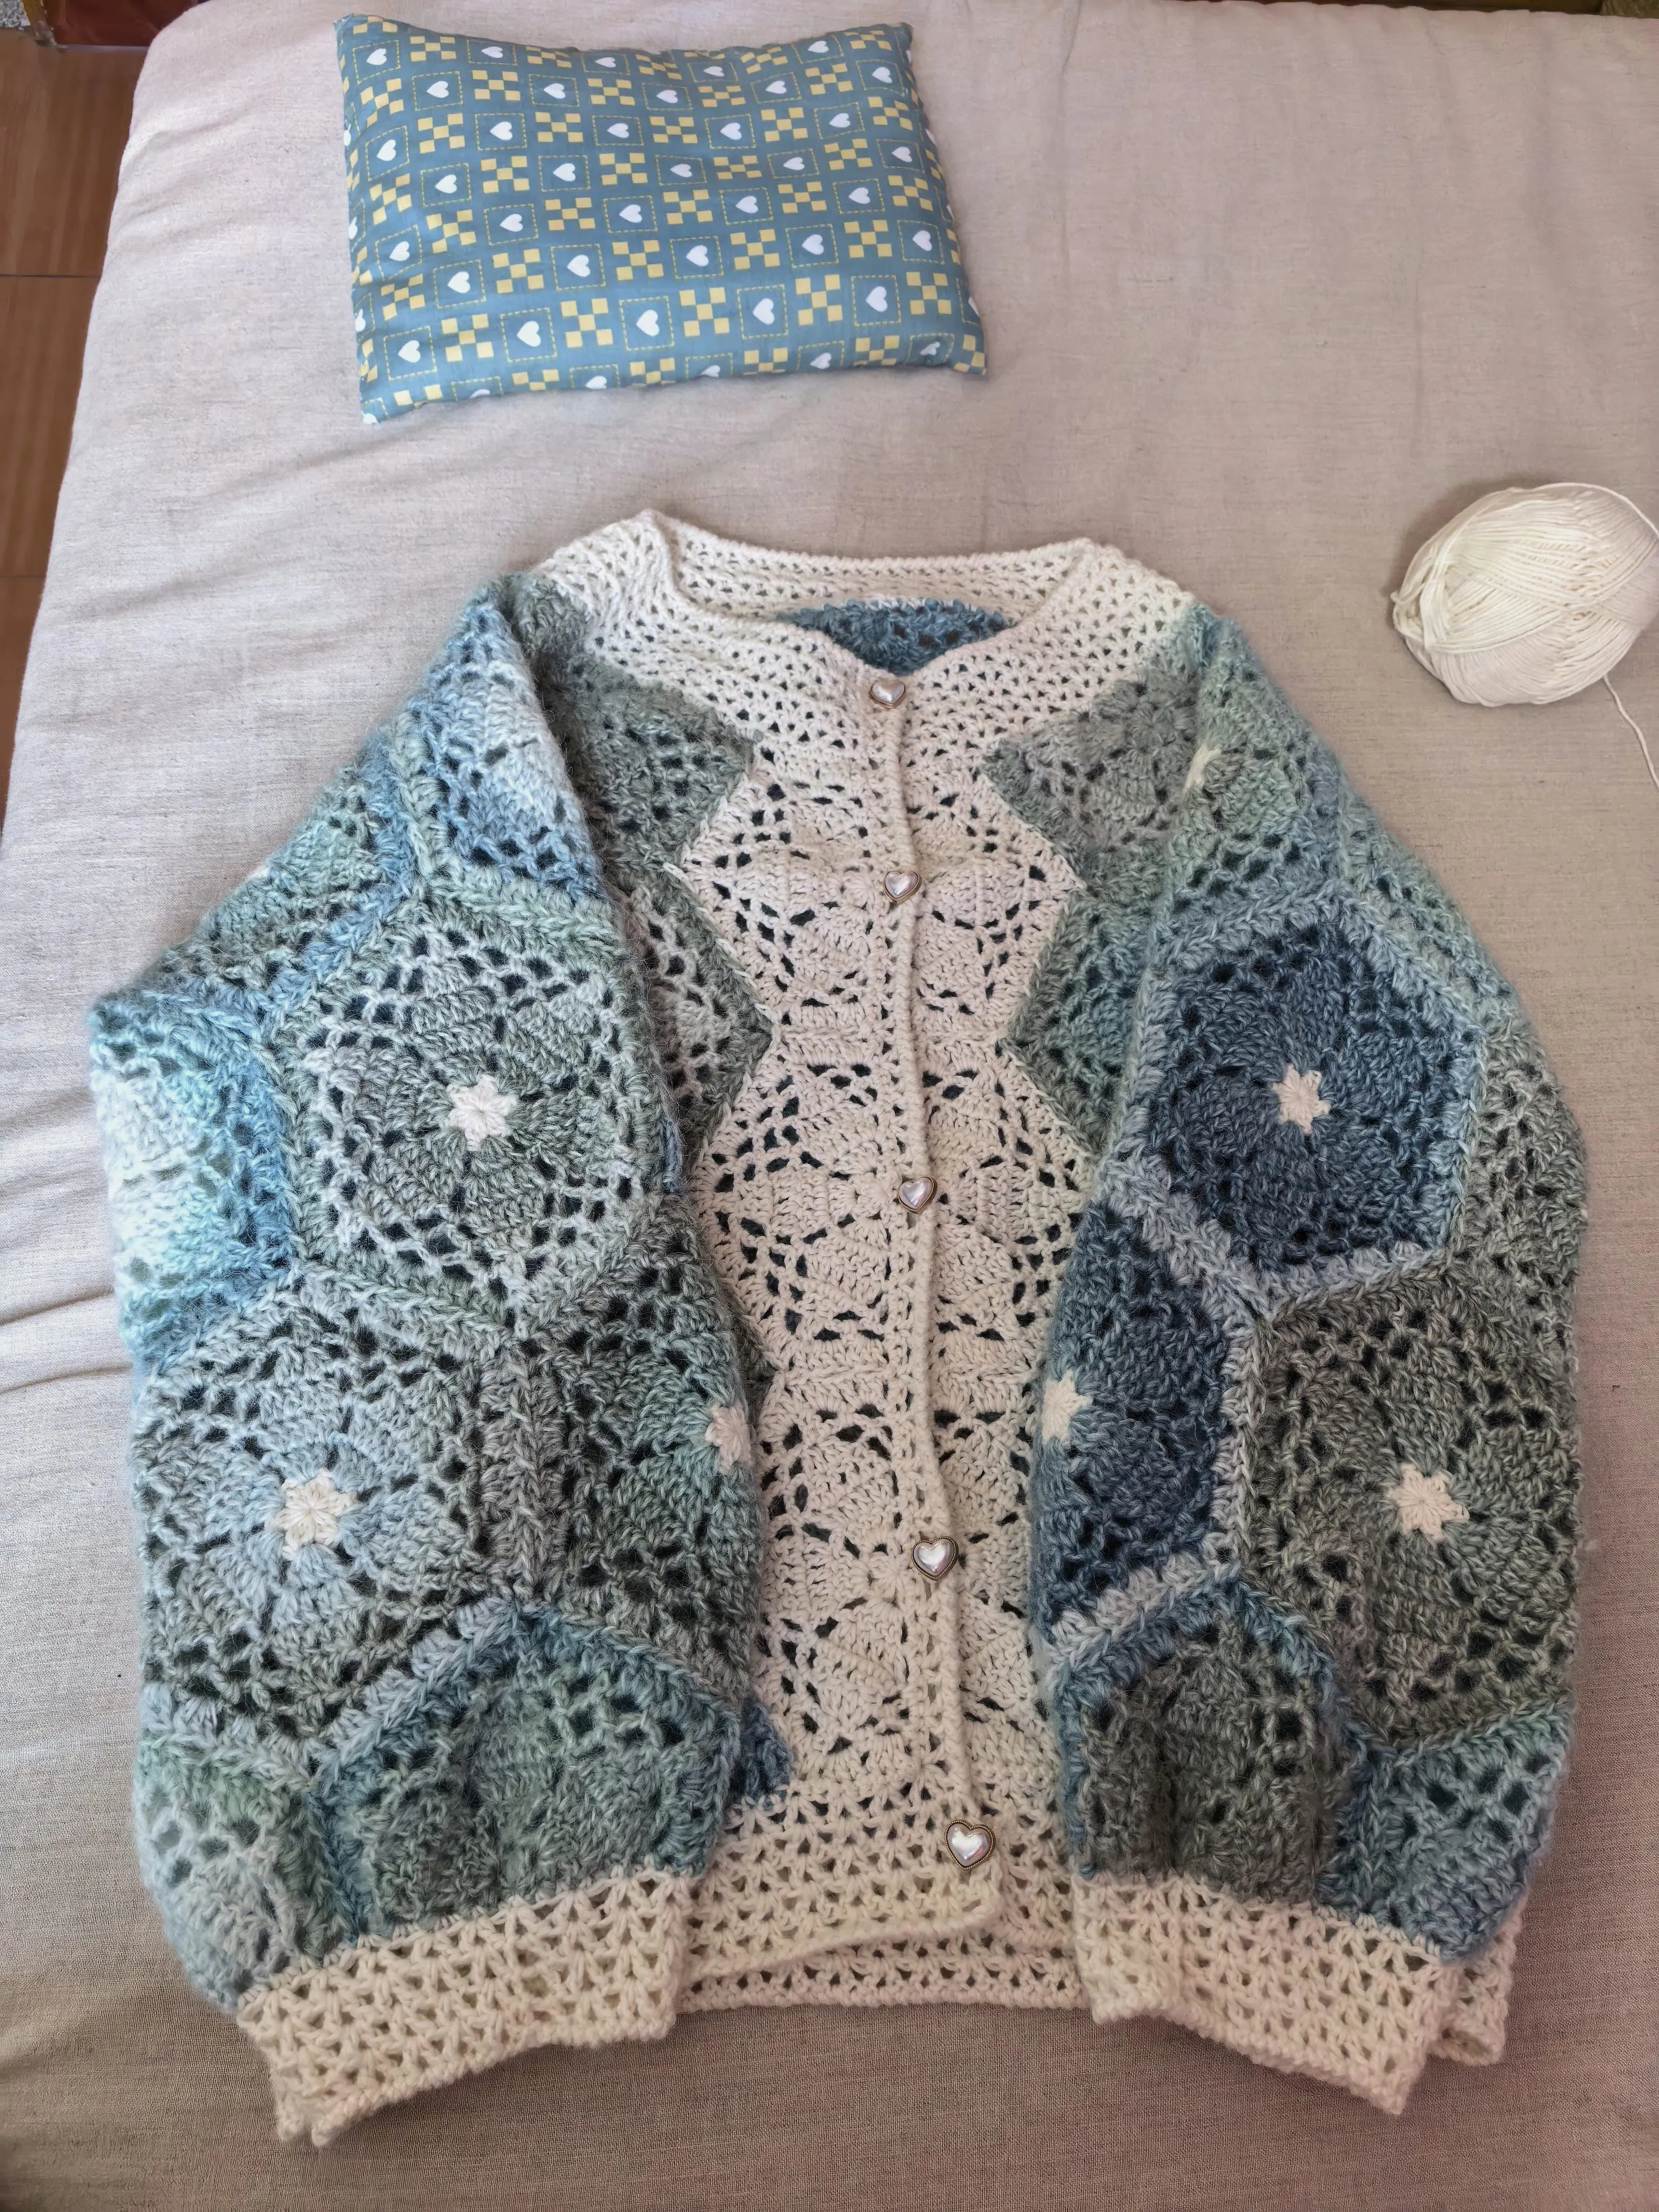
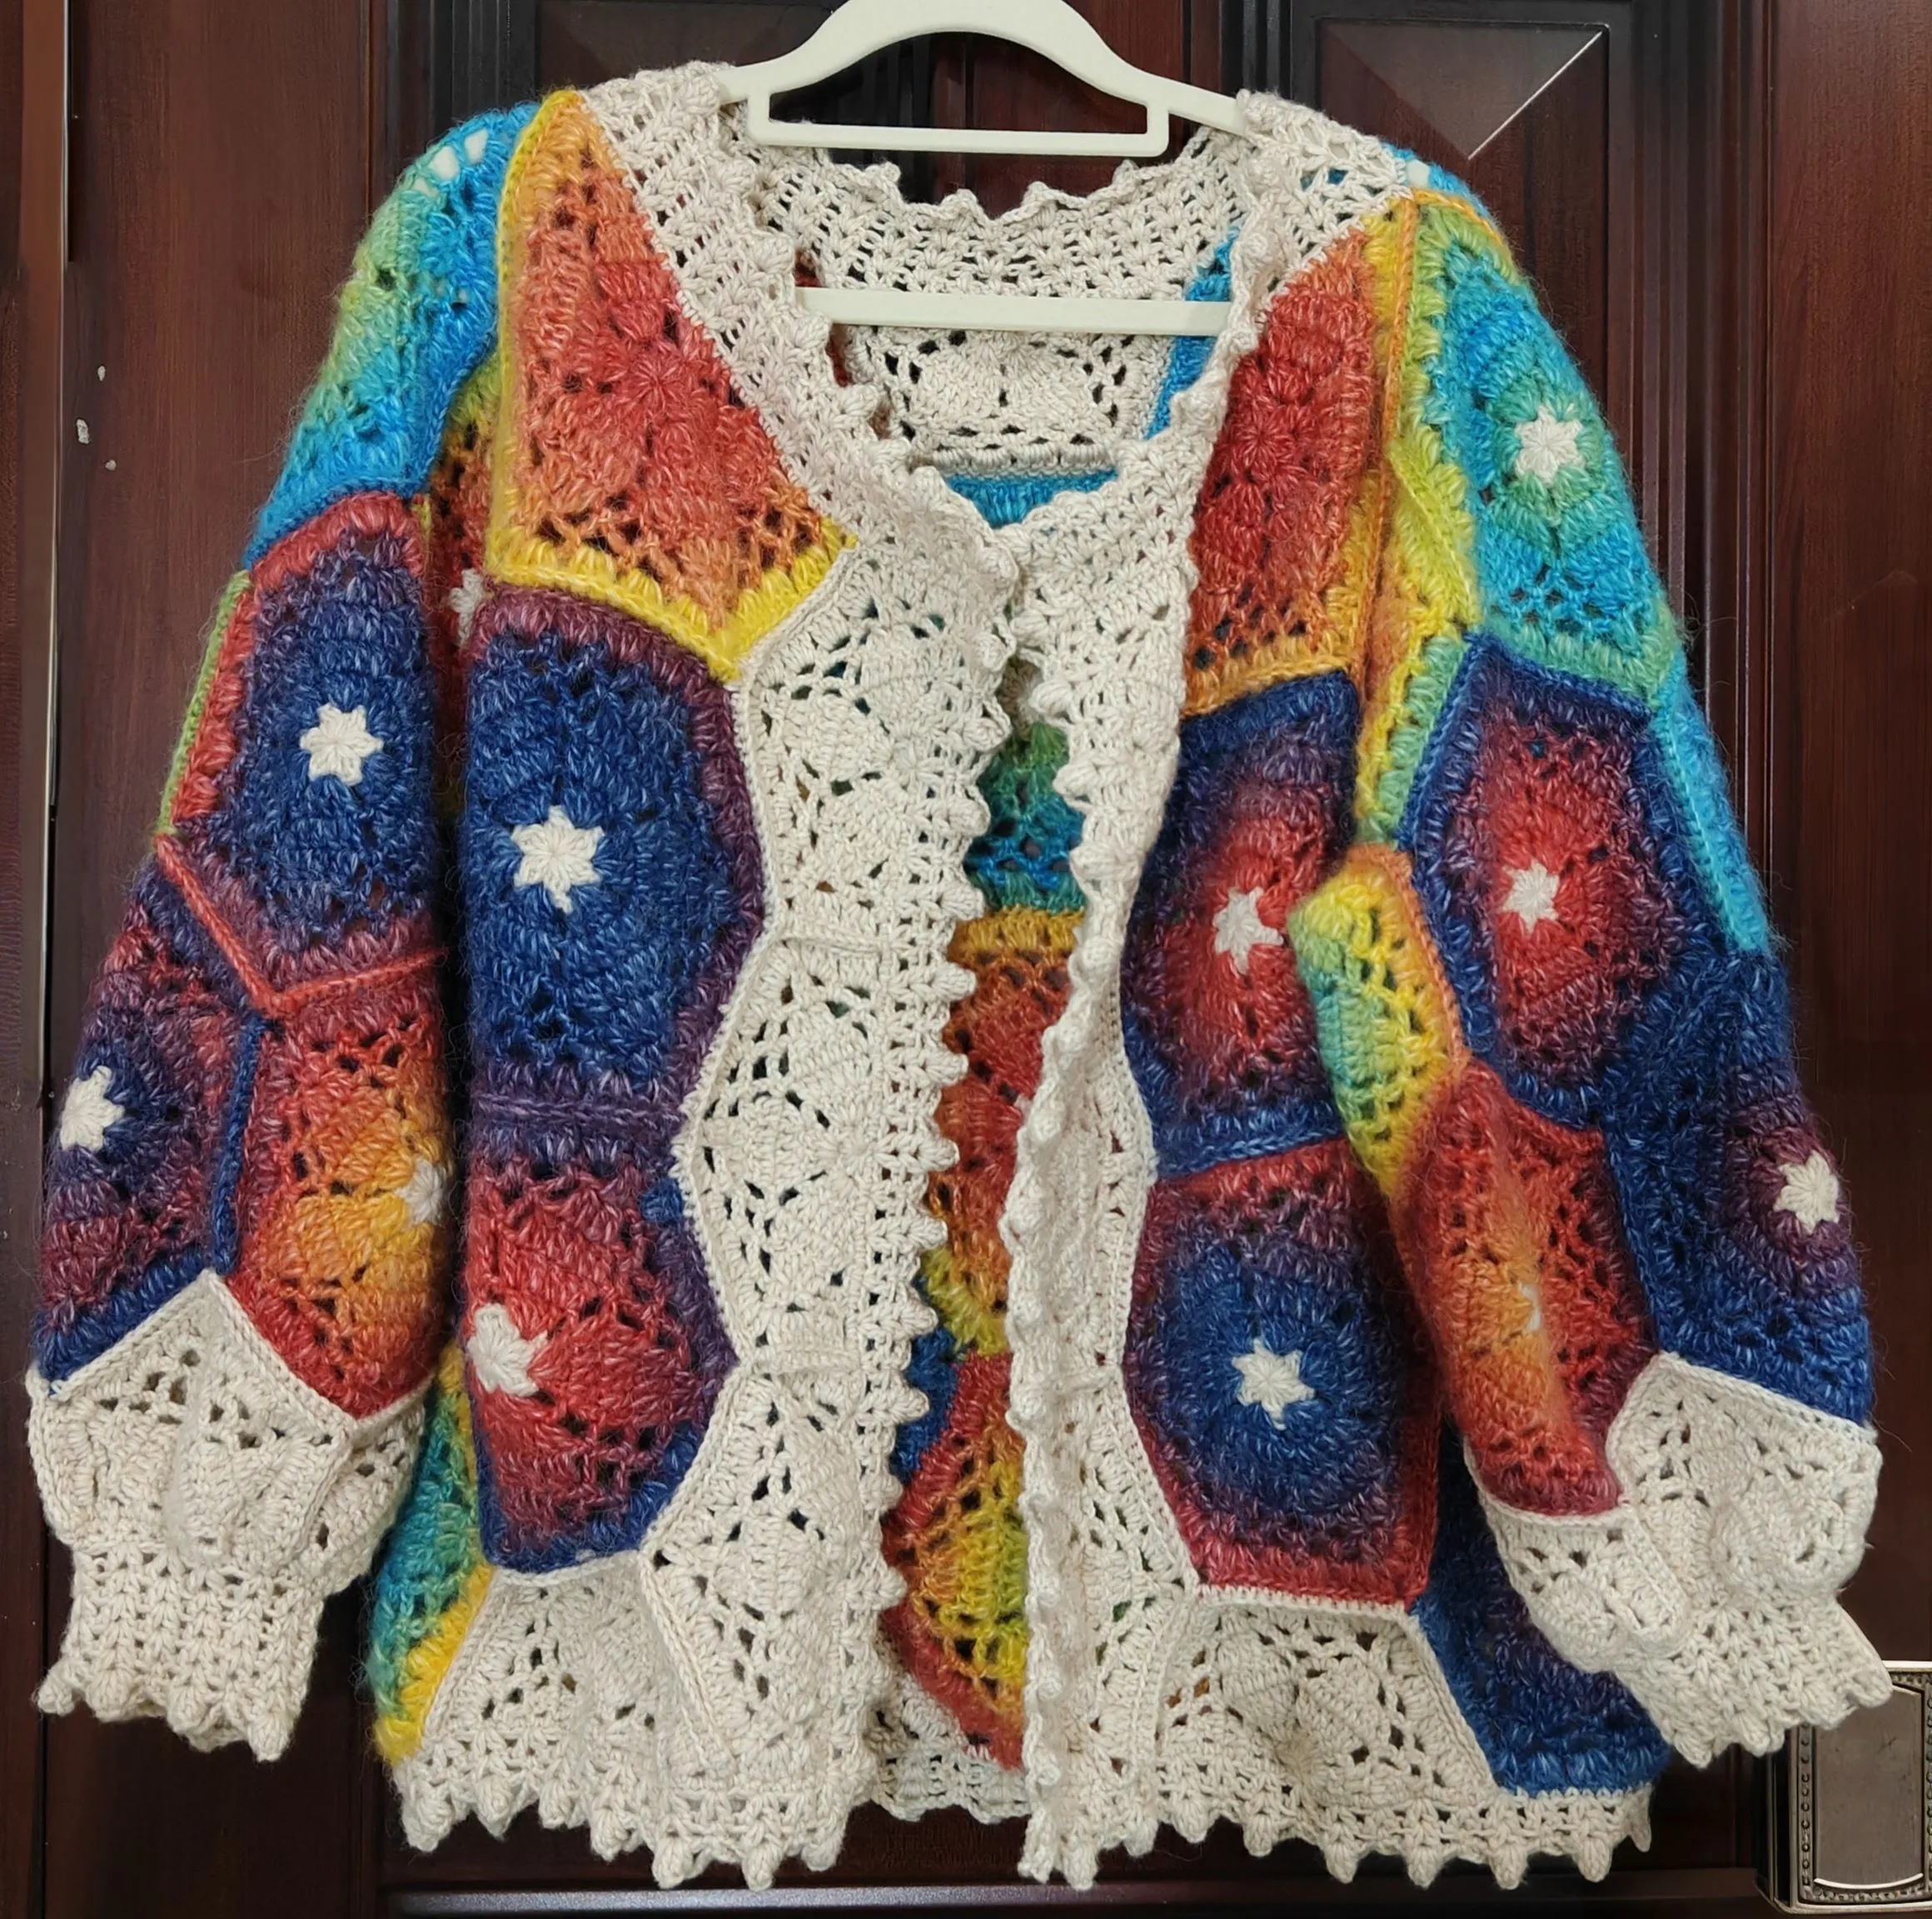
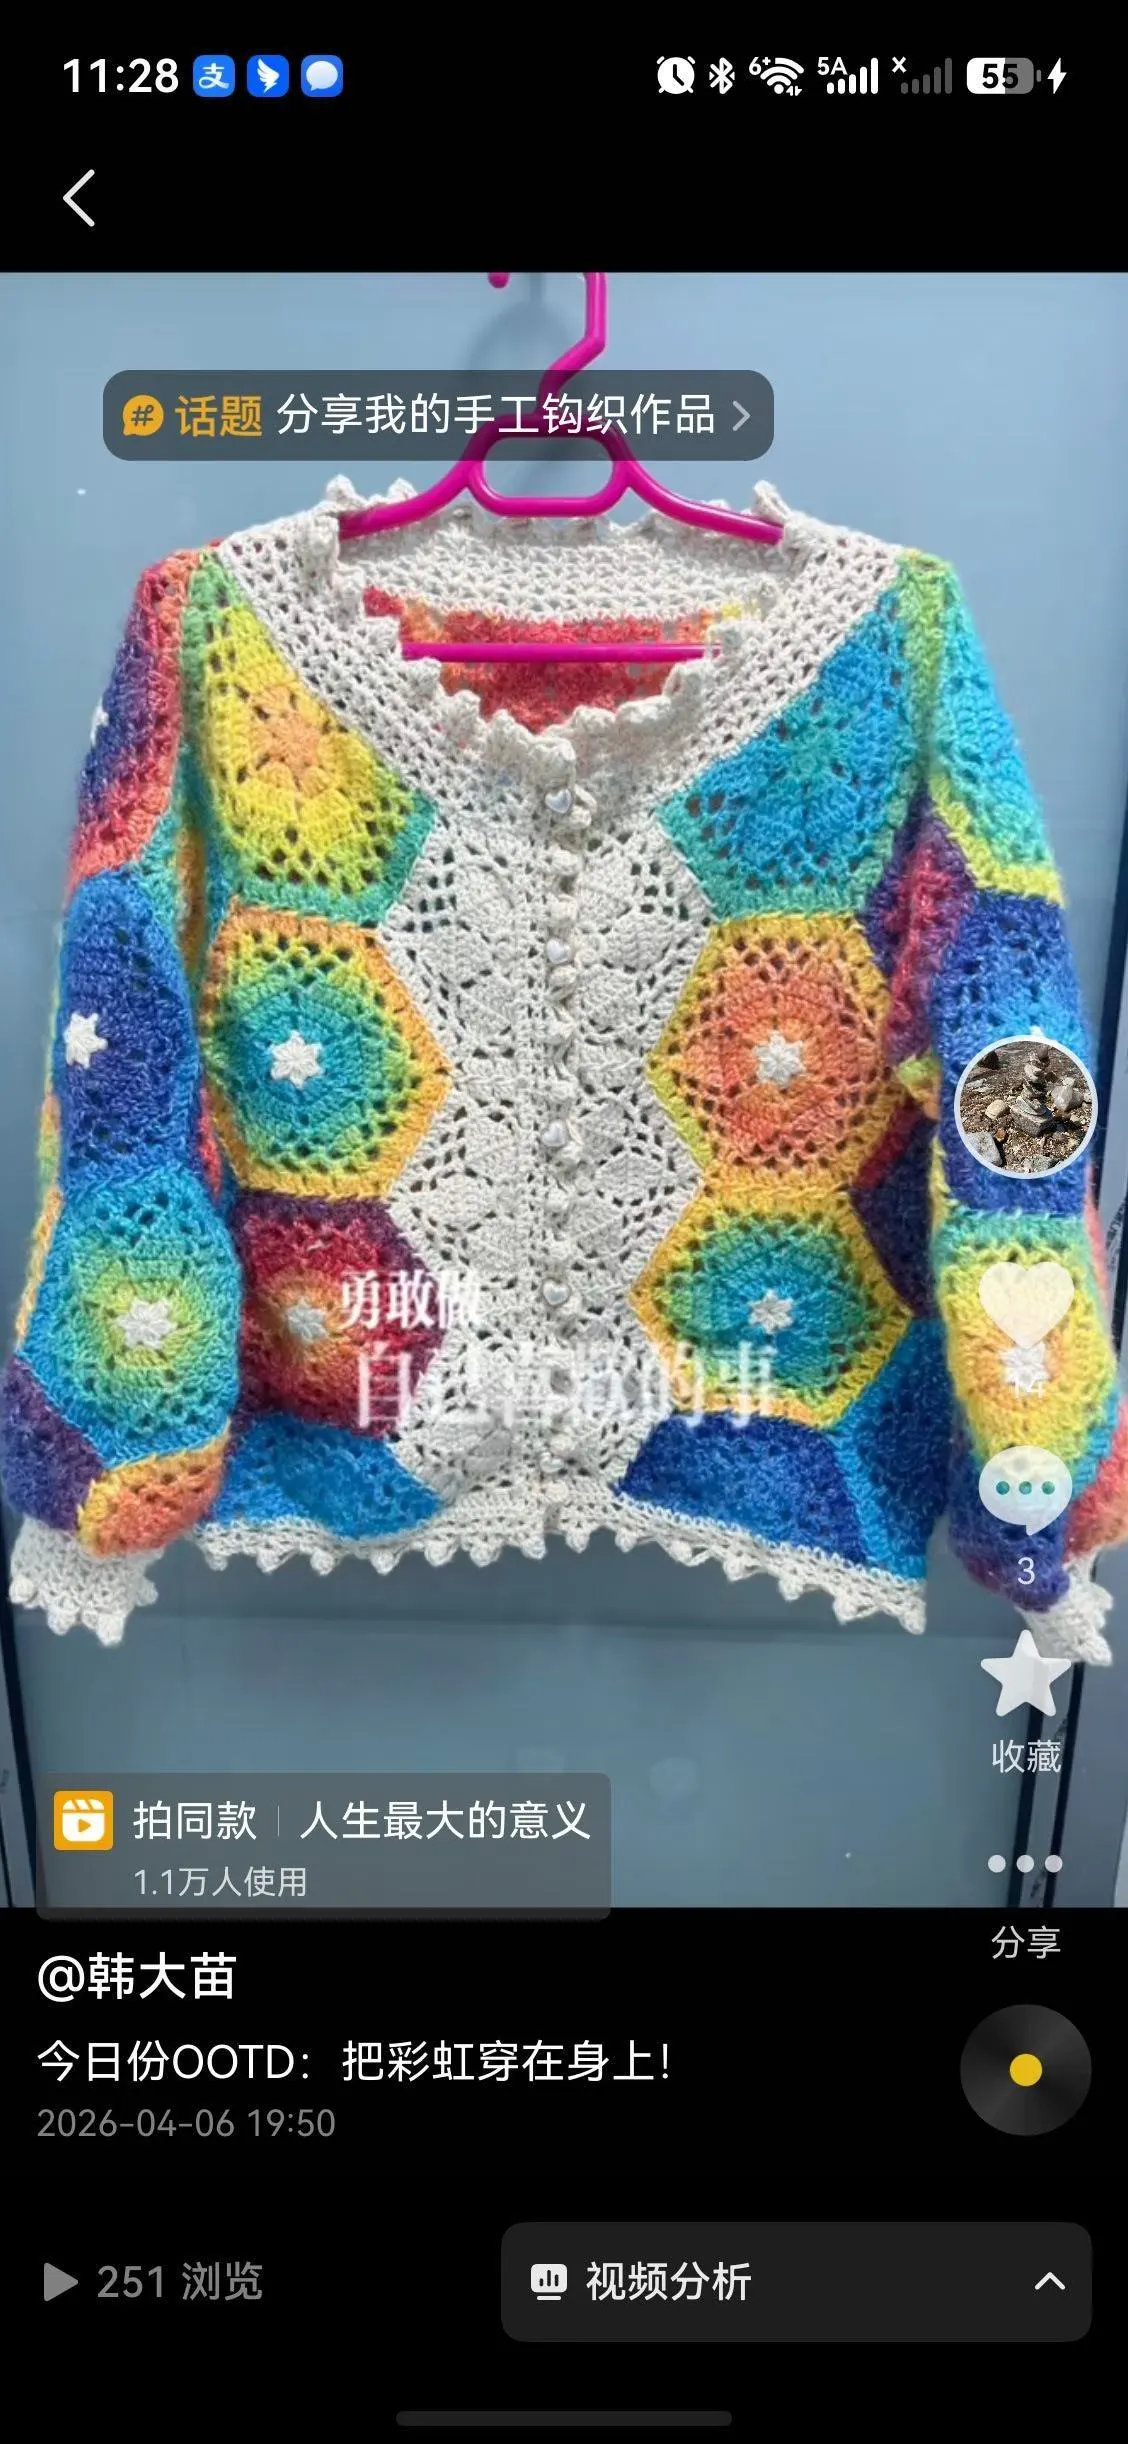
Rainbow Version - Small Size
Rainbow Version - Large Size
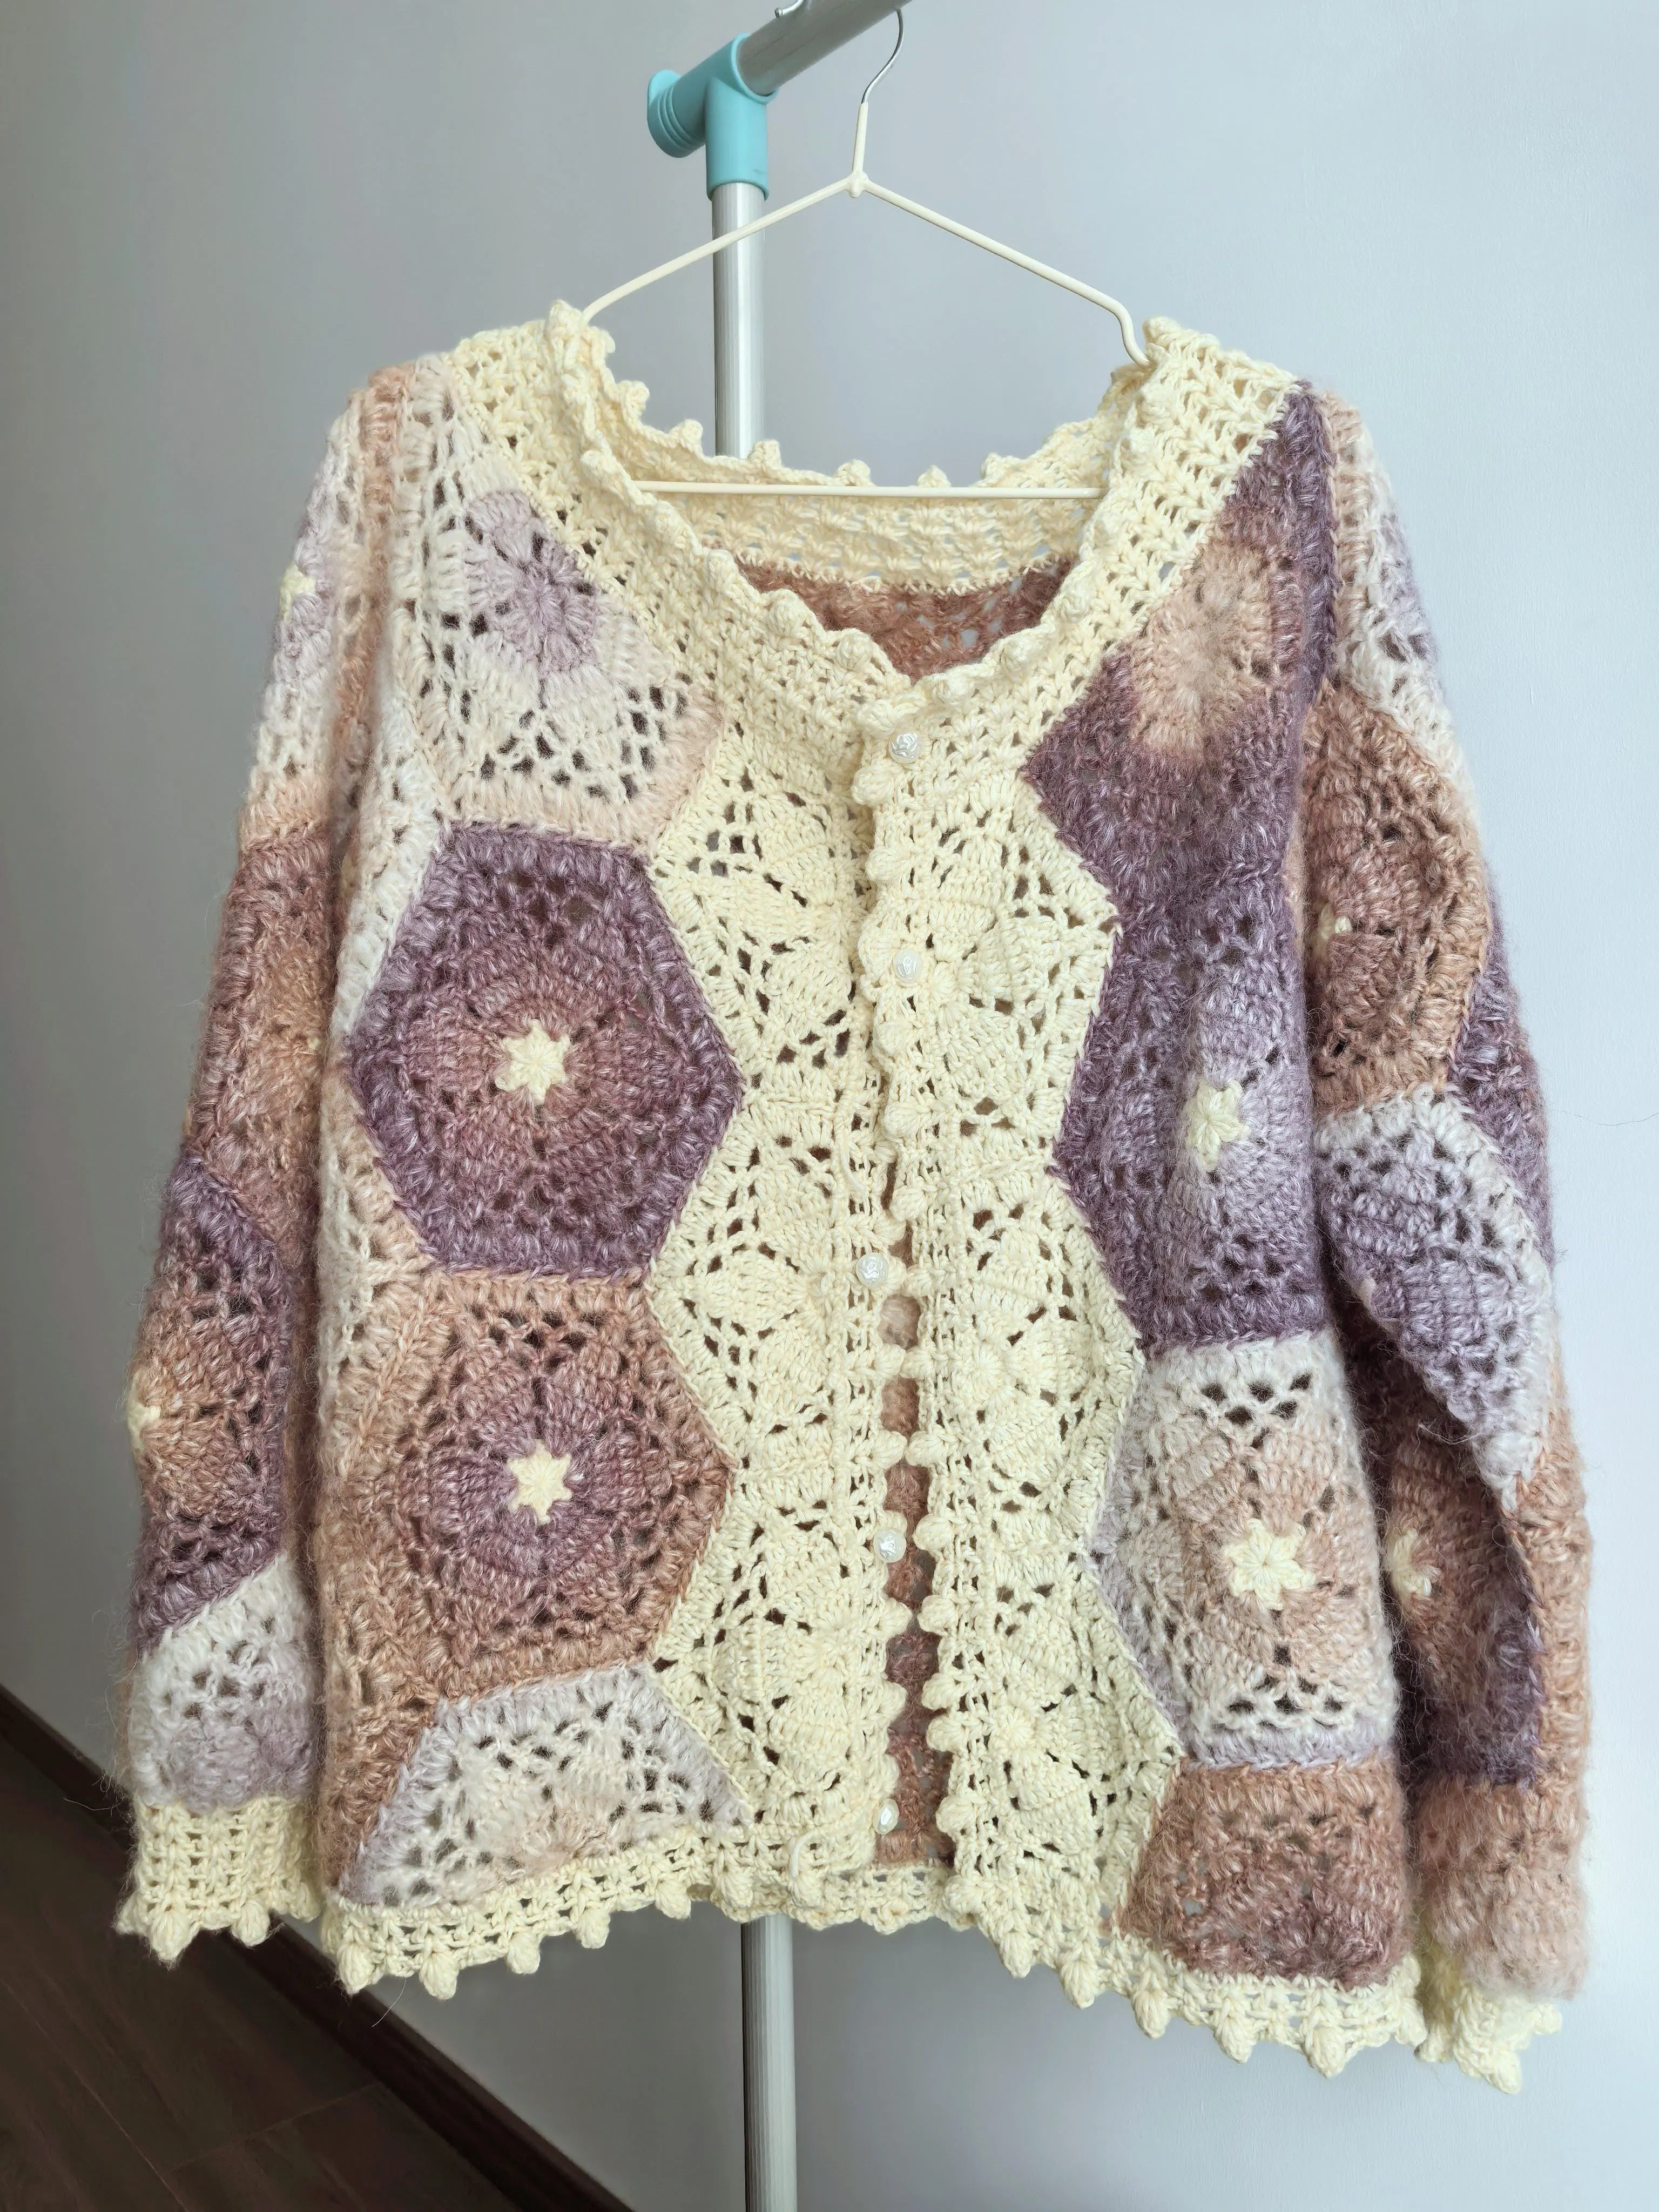
Pine Cone Version - Small Size
Pine Cone Version - Large Size
Fragments Version - Small Size
Fragments Version - Large Size
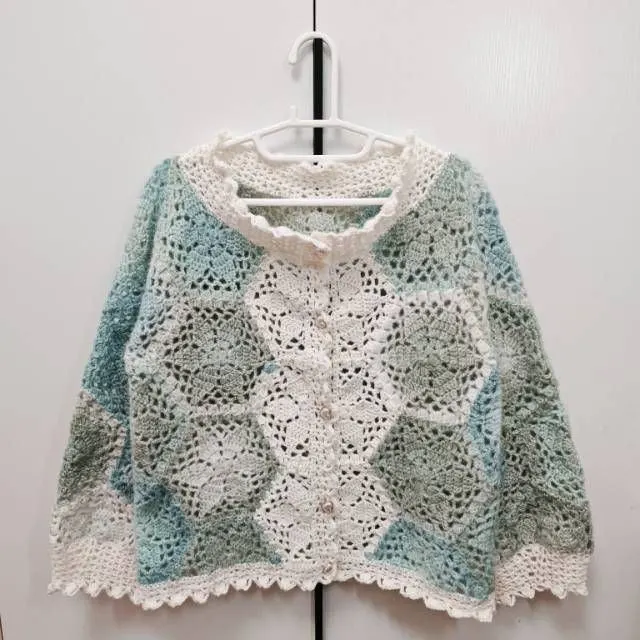
Ripple Version - Small Size
Ripple Version - Large Size
This cardigan consists of the main part, edging, and buttons. Work them separately in order and assemble.
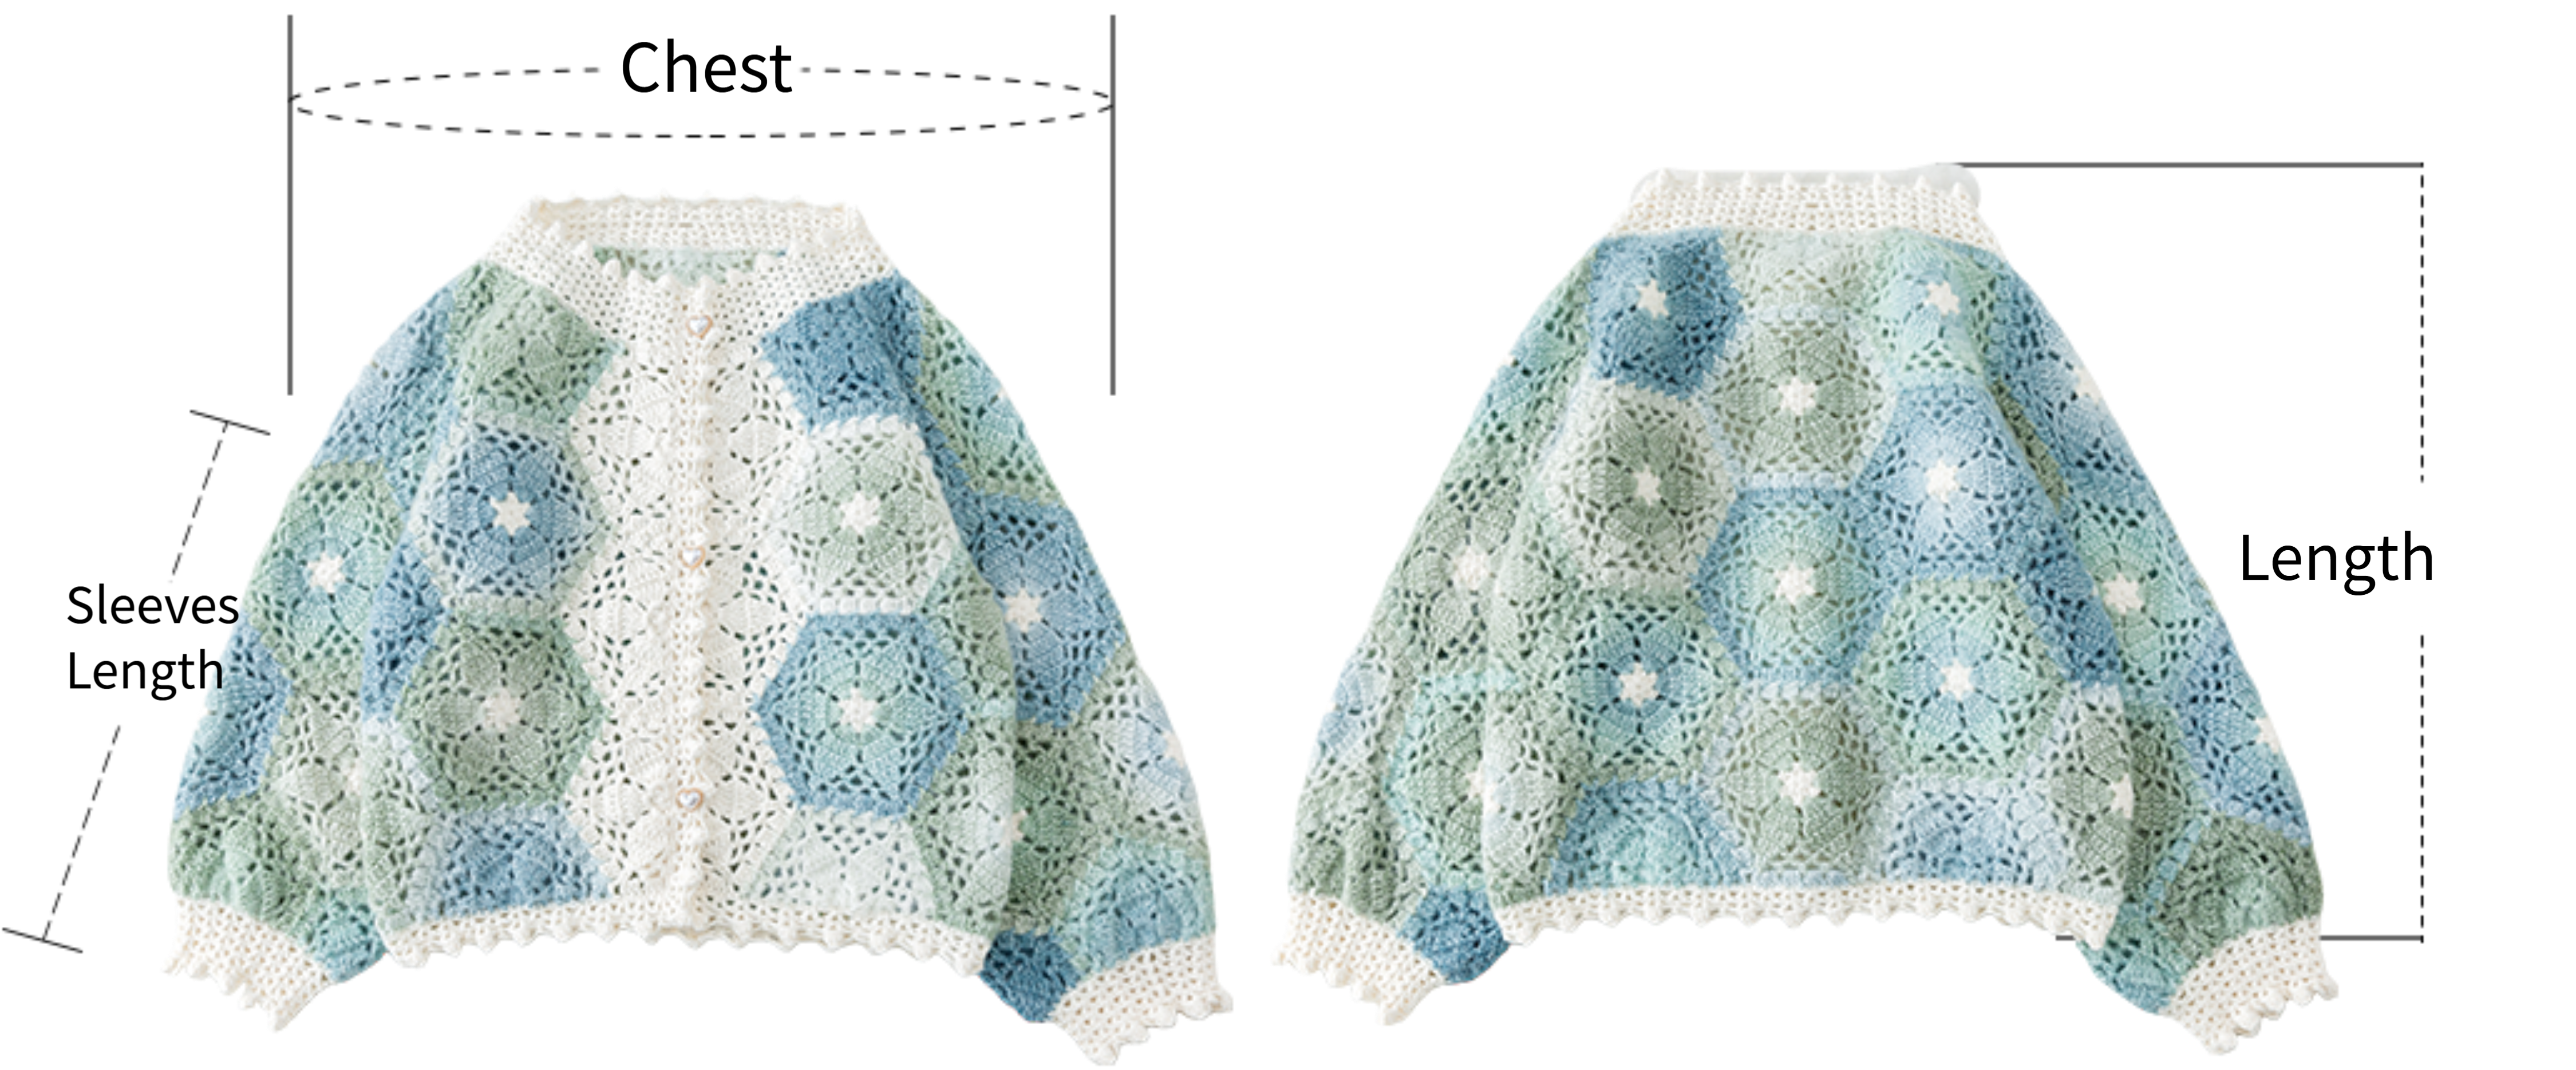
Note: Hand-measured, with a margin of error of 1-2 cm. Since everyone's tension varies, the sample size is for reference only.
Yarn : Dawn Impression, Impression Misty Feather.
Tools : Use a regular 3.5 mm crochet hook for small size, or Susu's 3.6 mm hook; use 4.0 mm hook for large size.
Note: 1. The small size and large size only differ in crochet hook size; the crocheting method is the same. 2. Some parts use variegated yarn, so the color sequence at the starting tail may vary, resulting in different appearances.

Chart Key










Note:
1. This pattern is making in Chinese crochet pattern terms, and the stitch name is written using American terminology. All measurements in charts are in cm.

| Color Chart | |||||
| Part | Rounds/Rows | Rainbow Version | Pine Cone Version | Fragments Version | Ripple Version |
| Motif 1 | R 1 | Impression Misty Feather:01#Light Khaki | Impression Misty Feather:16#Pastel Yellow | Impression Misty Feather:20#Pinecine | Impression Misty Feather:25#Whisper White |
| Remaining Rounds | Dawn Impression:22#Rainbow | Dawn Impression:39#Pine Cone | Dawn Impression:05#Fragments | Dawn Impression:34#Ripple | |
| Motif 2 Color 1 | / | ||||
| Motif 2 Color 2 | Impression Misty Feather:01#Light Khaki | Impression Misty Feather:16#Pastel Yellow | Impression Misty Feather:20#Pinecine | Impression Misty Feather:25#Whisper White | |
| Motif 3 | Dawn Impression:22#Rainbow | Dawn Impression:39#Pine Cone | Dawn Impression:05#Fragments | Dawn Impression:34#Ripple | |
| Motif 4 | |||||
| Edging | Impression Misty Feather:01#Light Khaki | Impression Misty Feather:16#Pastel Yellow | Impression Misty Feather:20#Pinecine | Impression Misty Feather:25#Whisper White | |
| Sewing | |||||
PART 1 The Main Part A 00' 58''
The main part consists of motifs 1 to 4. Start by crocheting motif 1, then proceed to the other motifs. Except for the first motif 1, all other motifs should be joined while crocheting the edging round. Please refer to the video demonstration for more details.
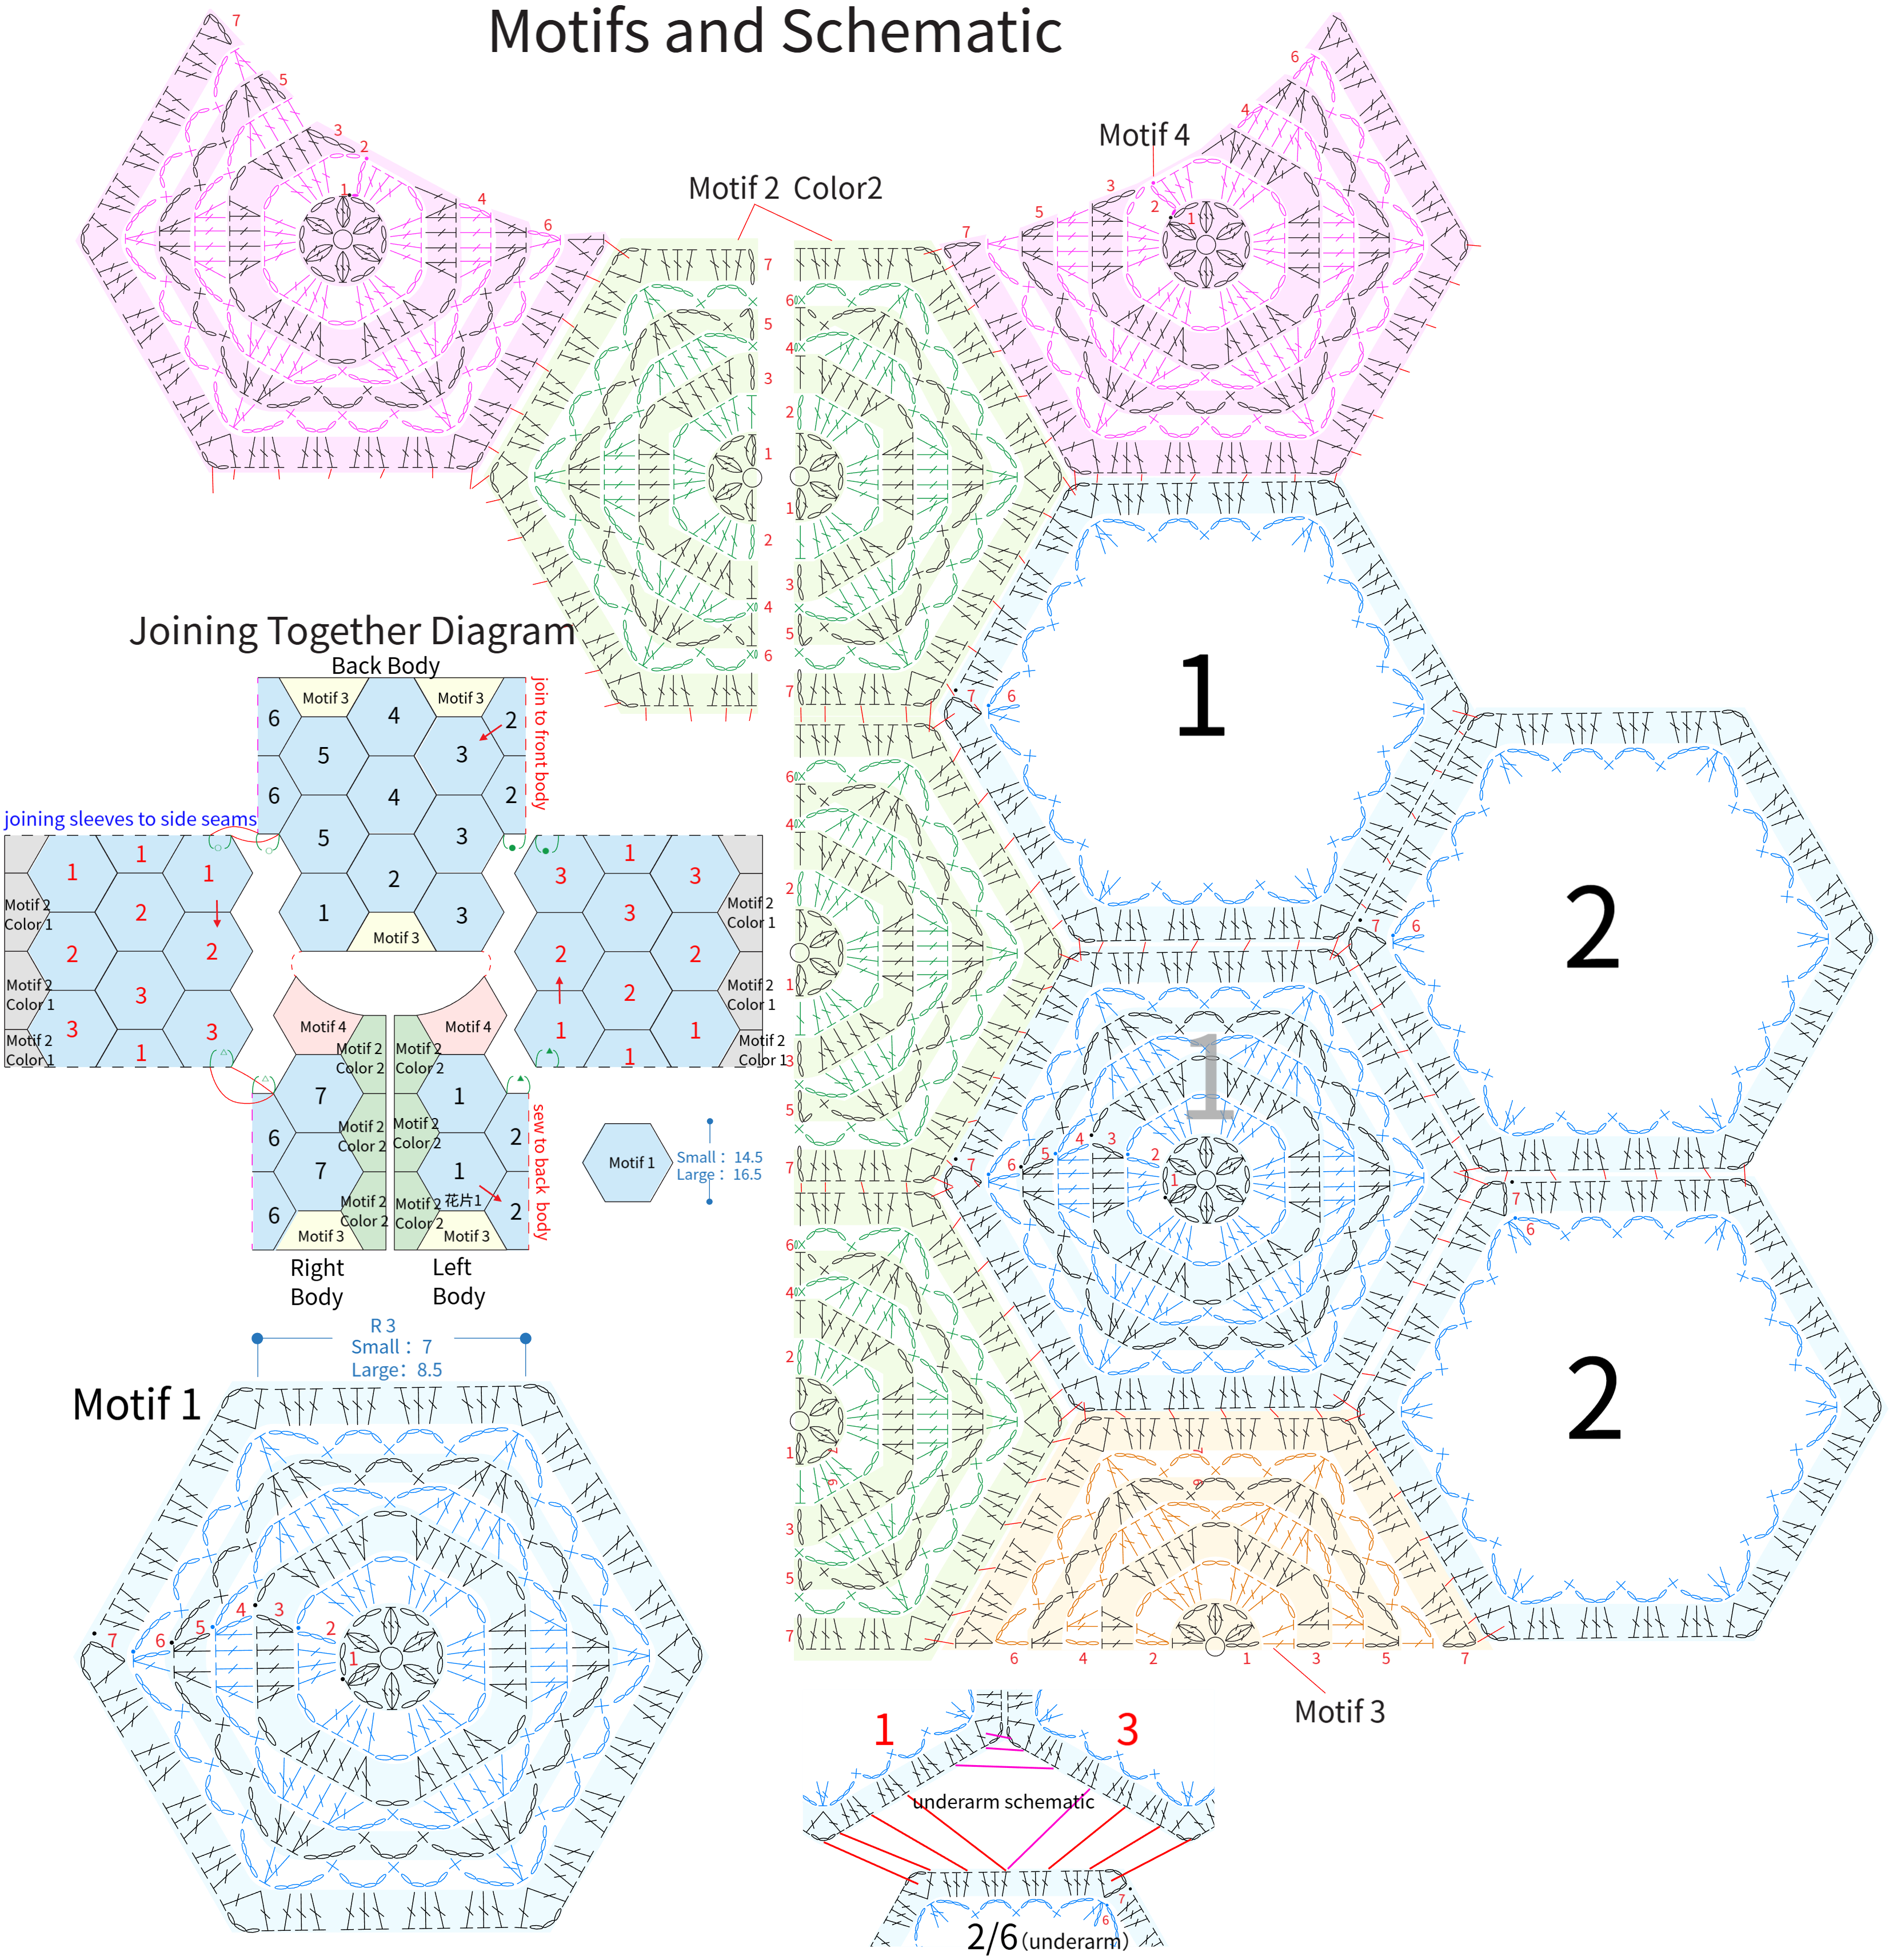
Note: 1. Left and right refer to the actual wearing sides.
2. The chart only shows the motif crochet and joining methods. For specific number and placement of motifs, please refer to the assembly diagram and color chart. The assembly diagram follows the chart.
PART 2 Edging B 31' 11''
The edging consists of the sleeve edging and the main part edging. First, crochet the sleeve edging, then crochet the main part edging at the corresponding position. Please refer to the video demonstration for more details.
STEP 1 Cuff
Join yarn on motif 2 at the sleeve cuff, and crochet in rounds counterclockwise. Please refer to the video demonstration for more details.
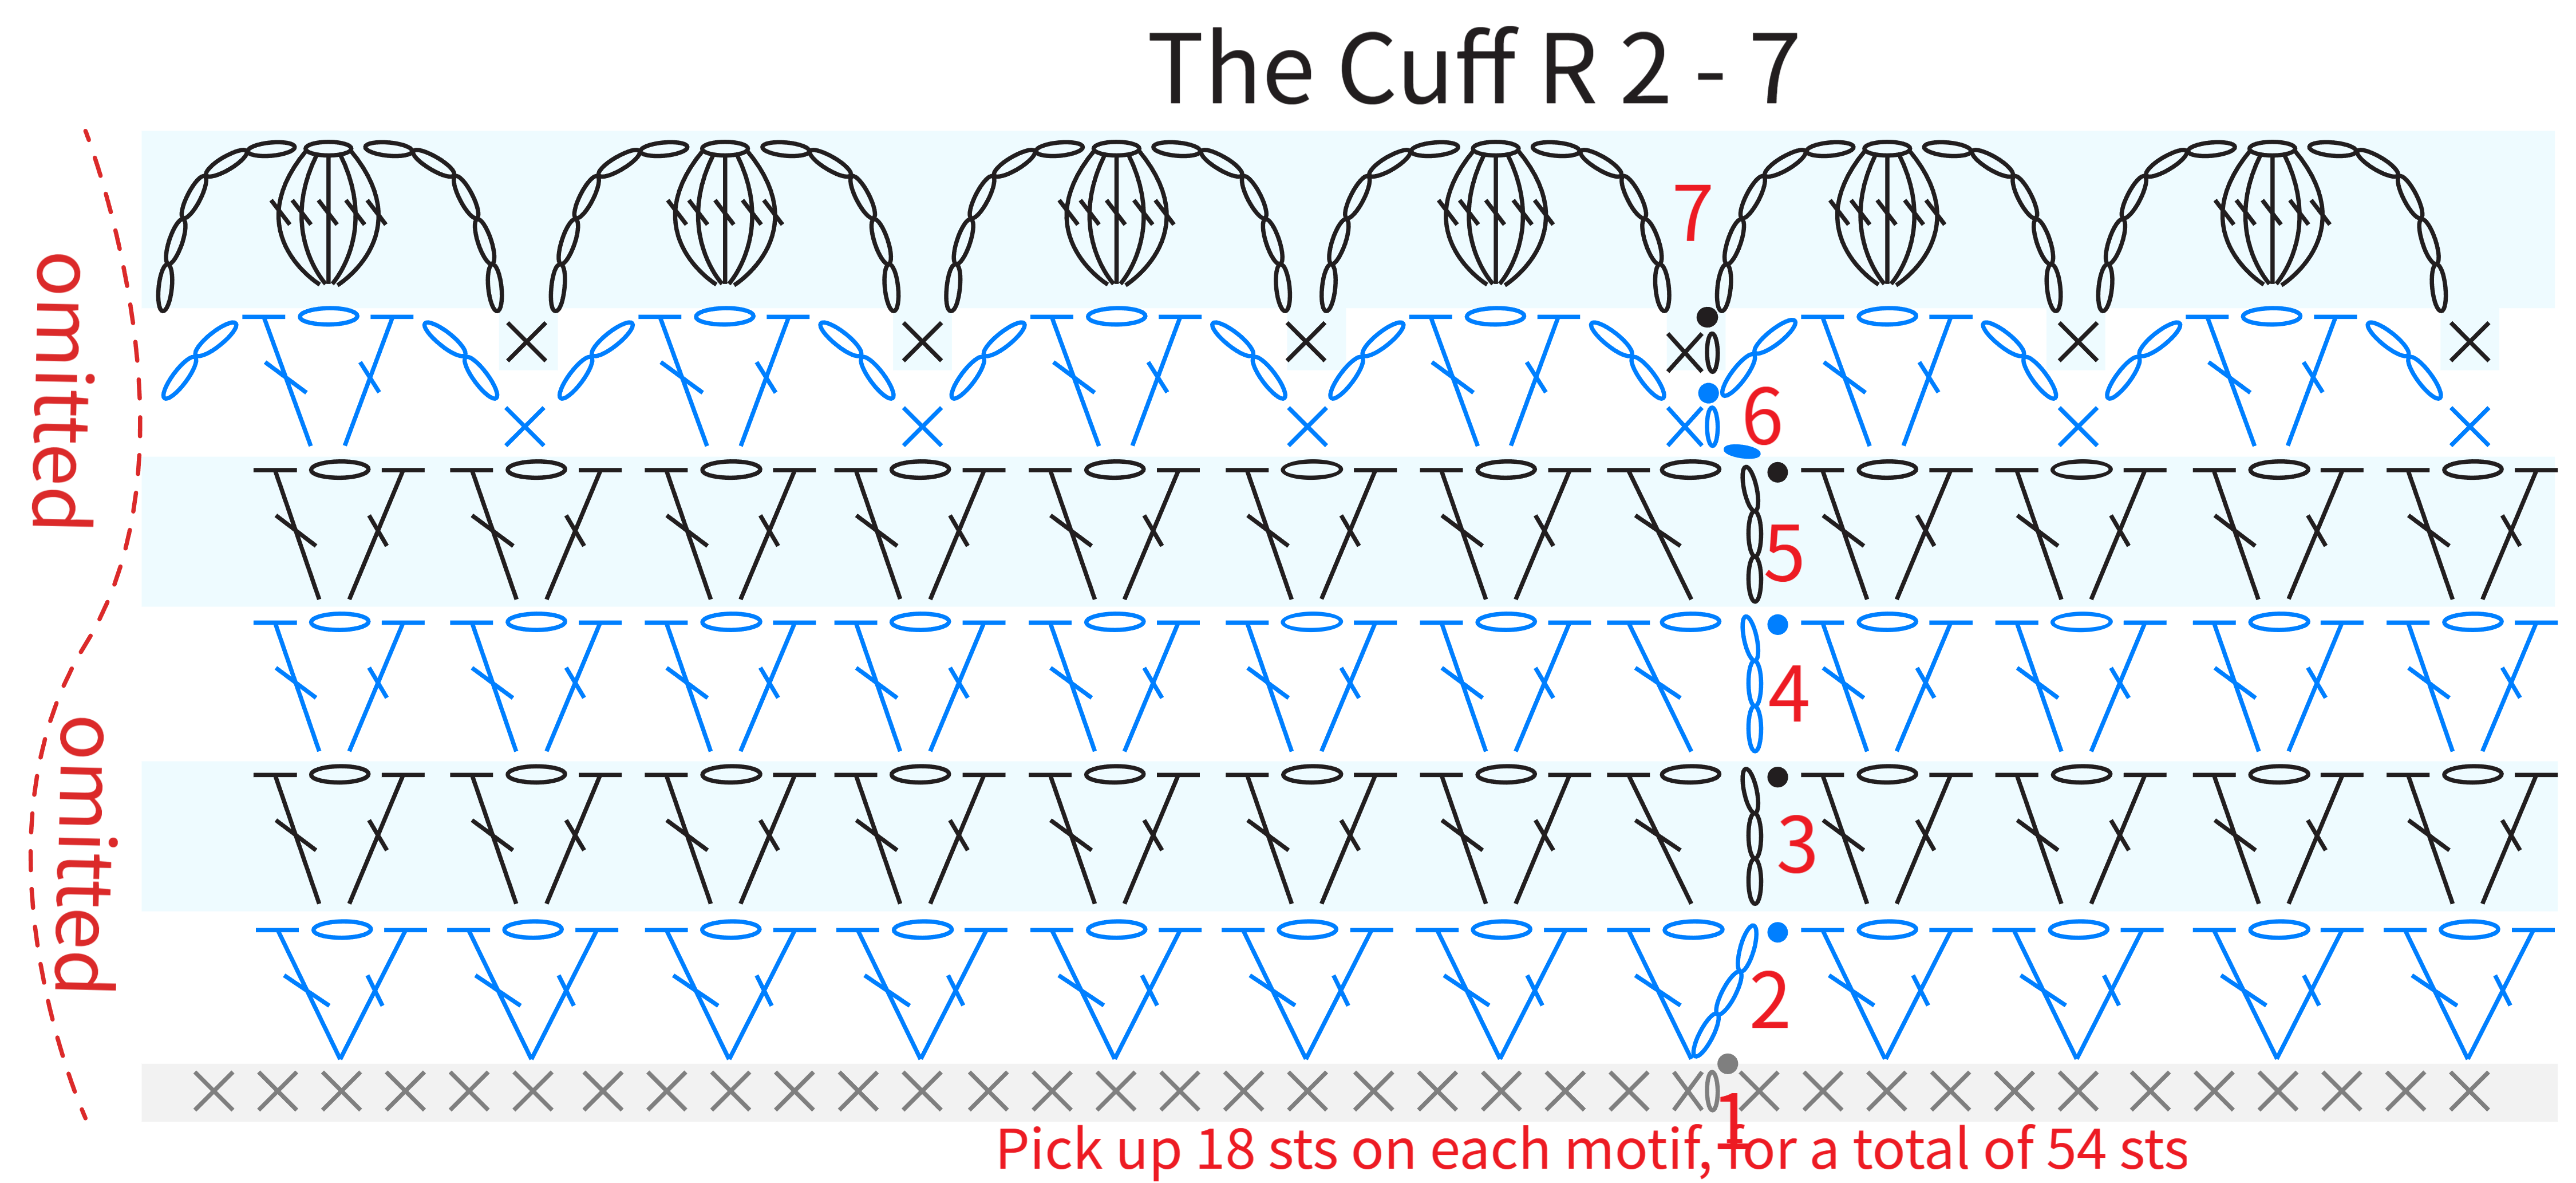
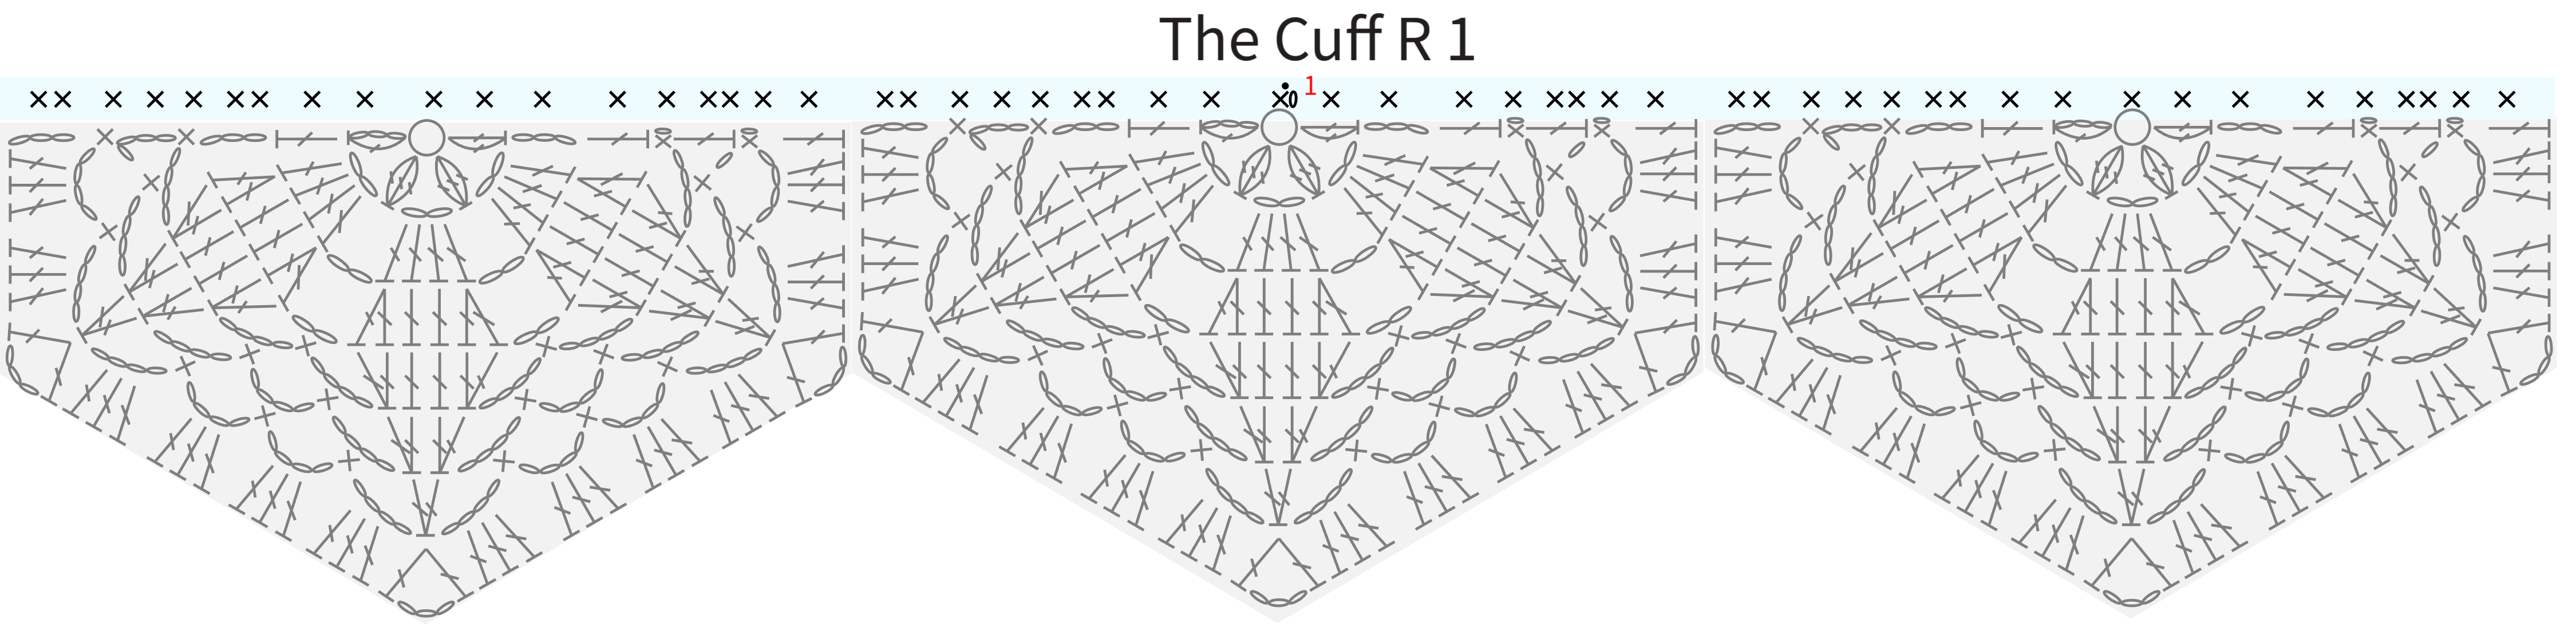
PART 2 STEP 2 Crochet the Edging For The Main Part
Work the first 4 rows of the edging back and forth at the neckline, work row 5 along the sides of the first 4 rows as well as the front placket and bottom edge, then work rounds 6-8 in counterclockwise rounds around rows 4 and 5. Please refer to the video demonstration for more details.
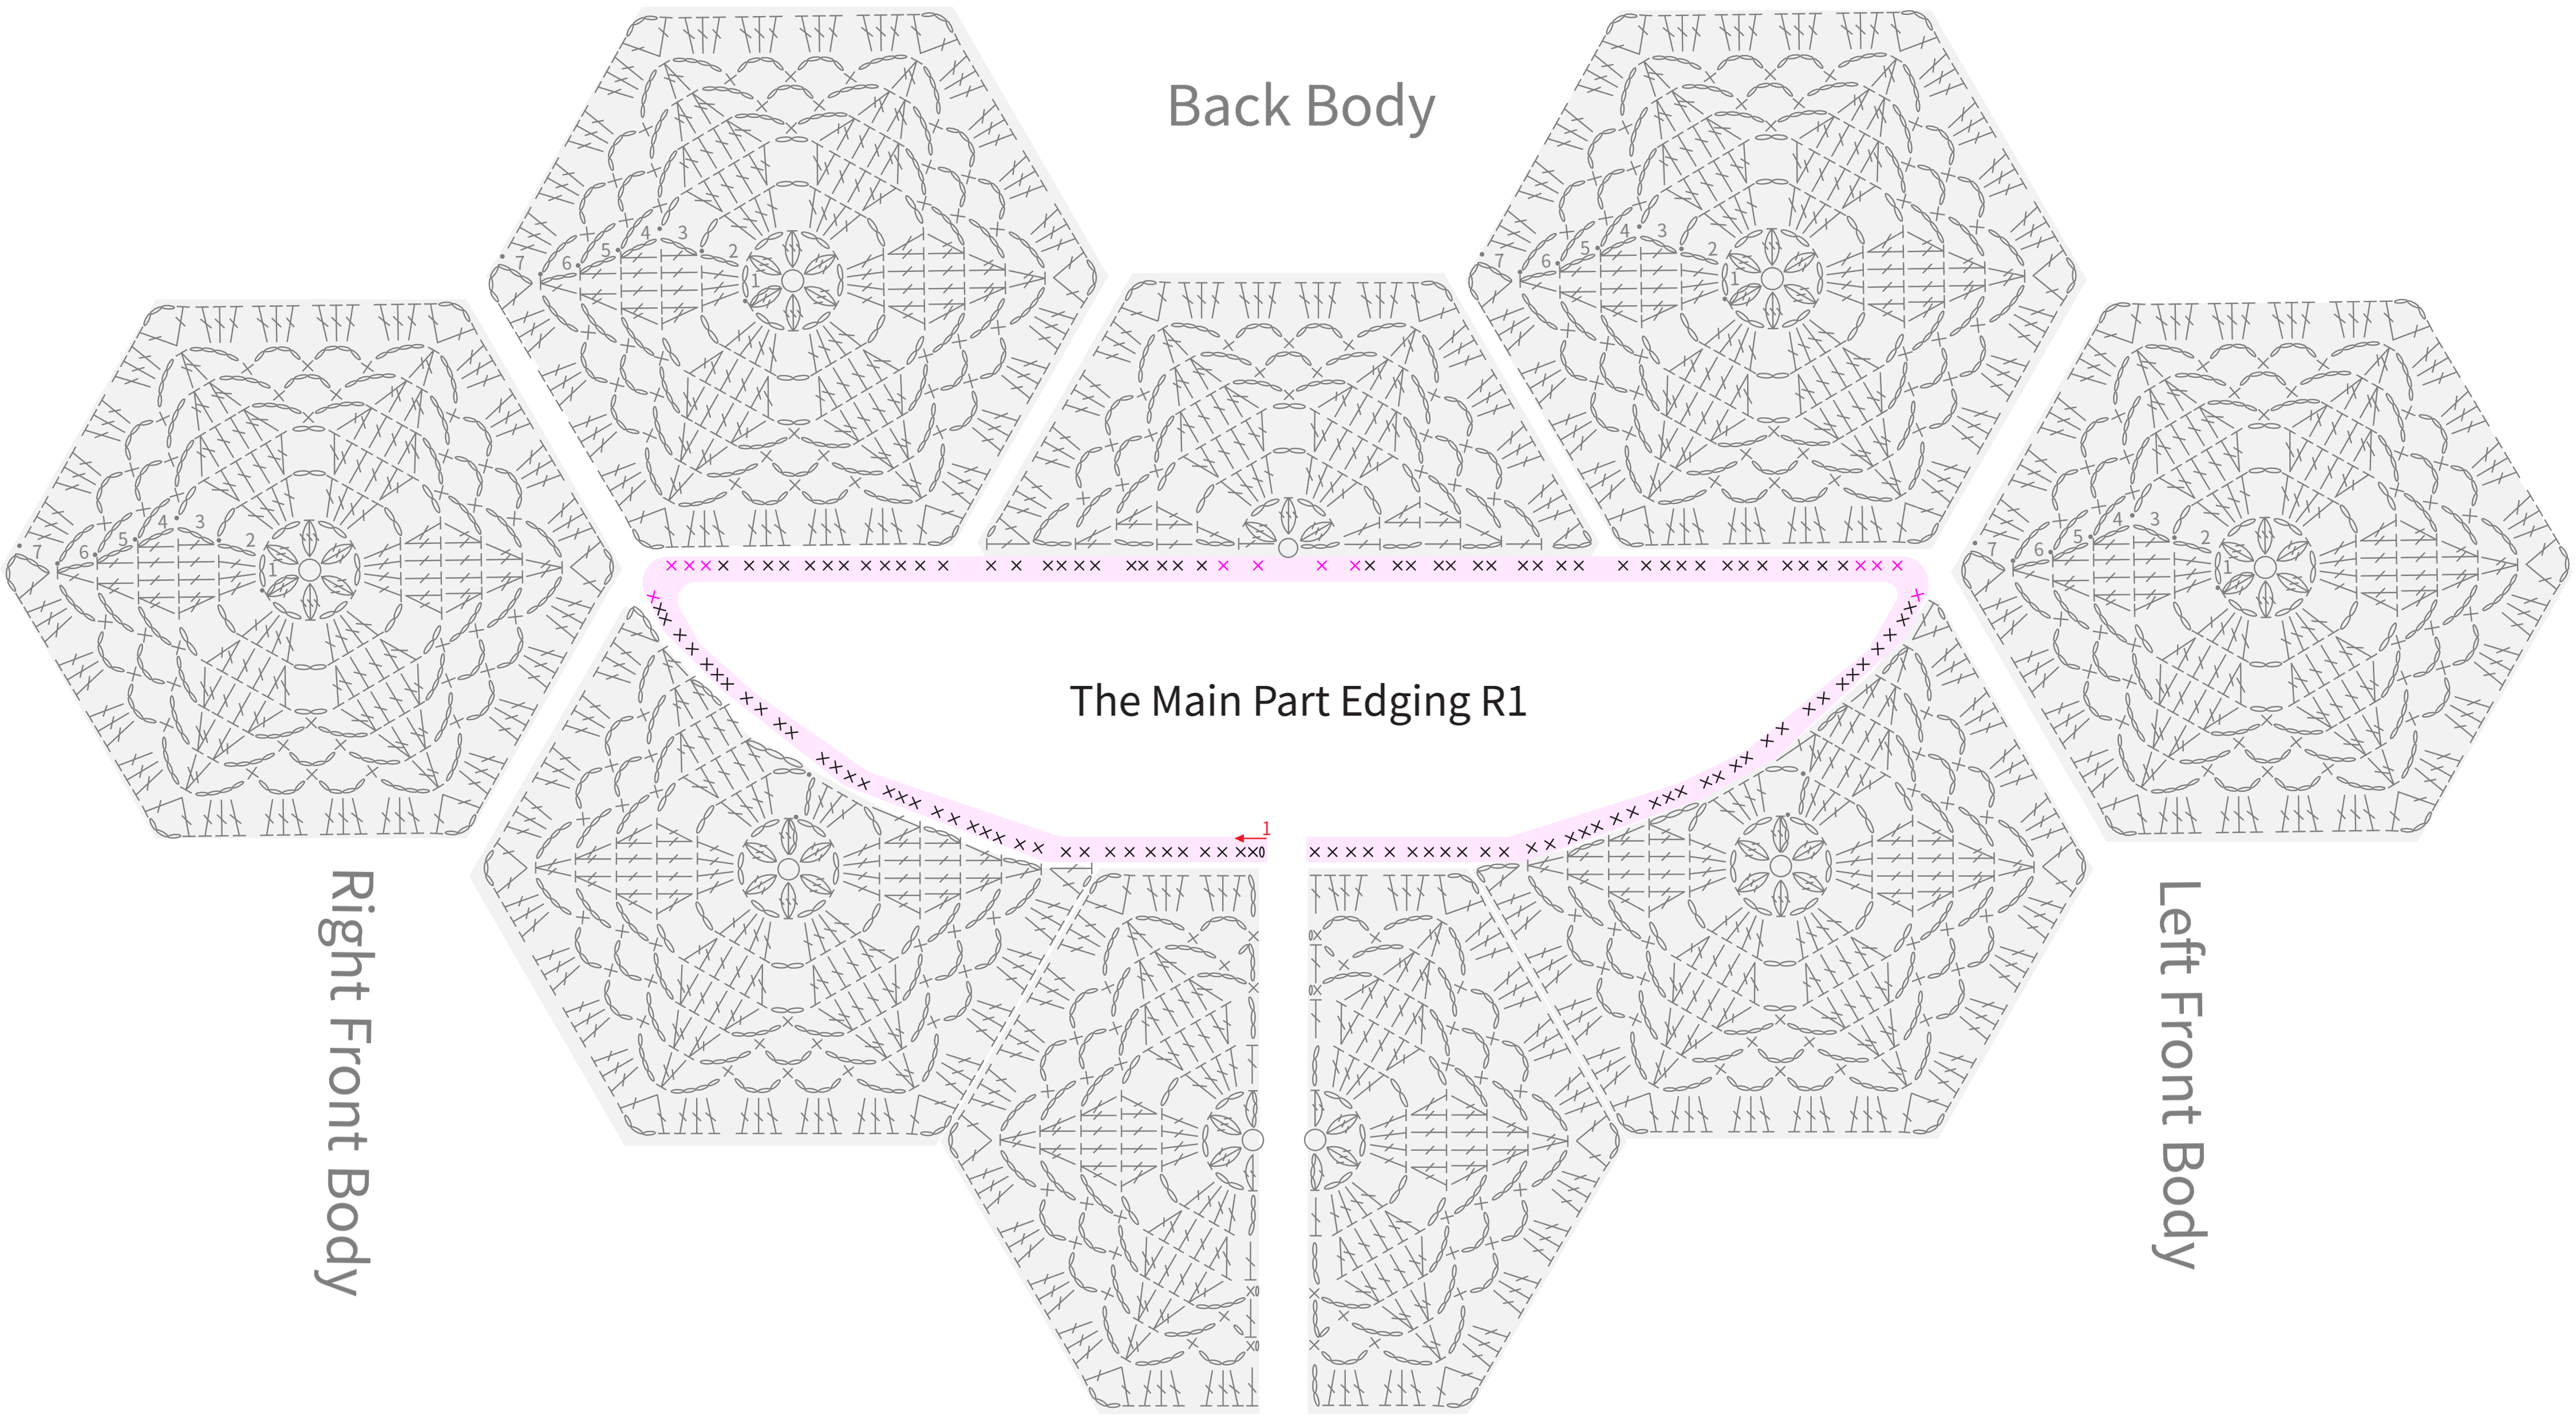

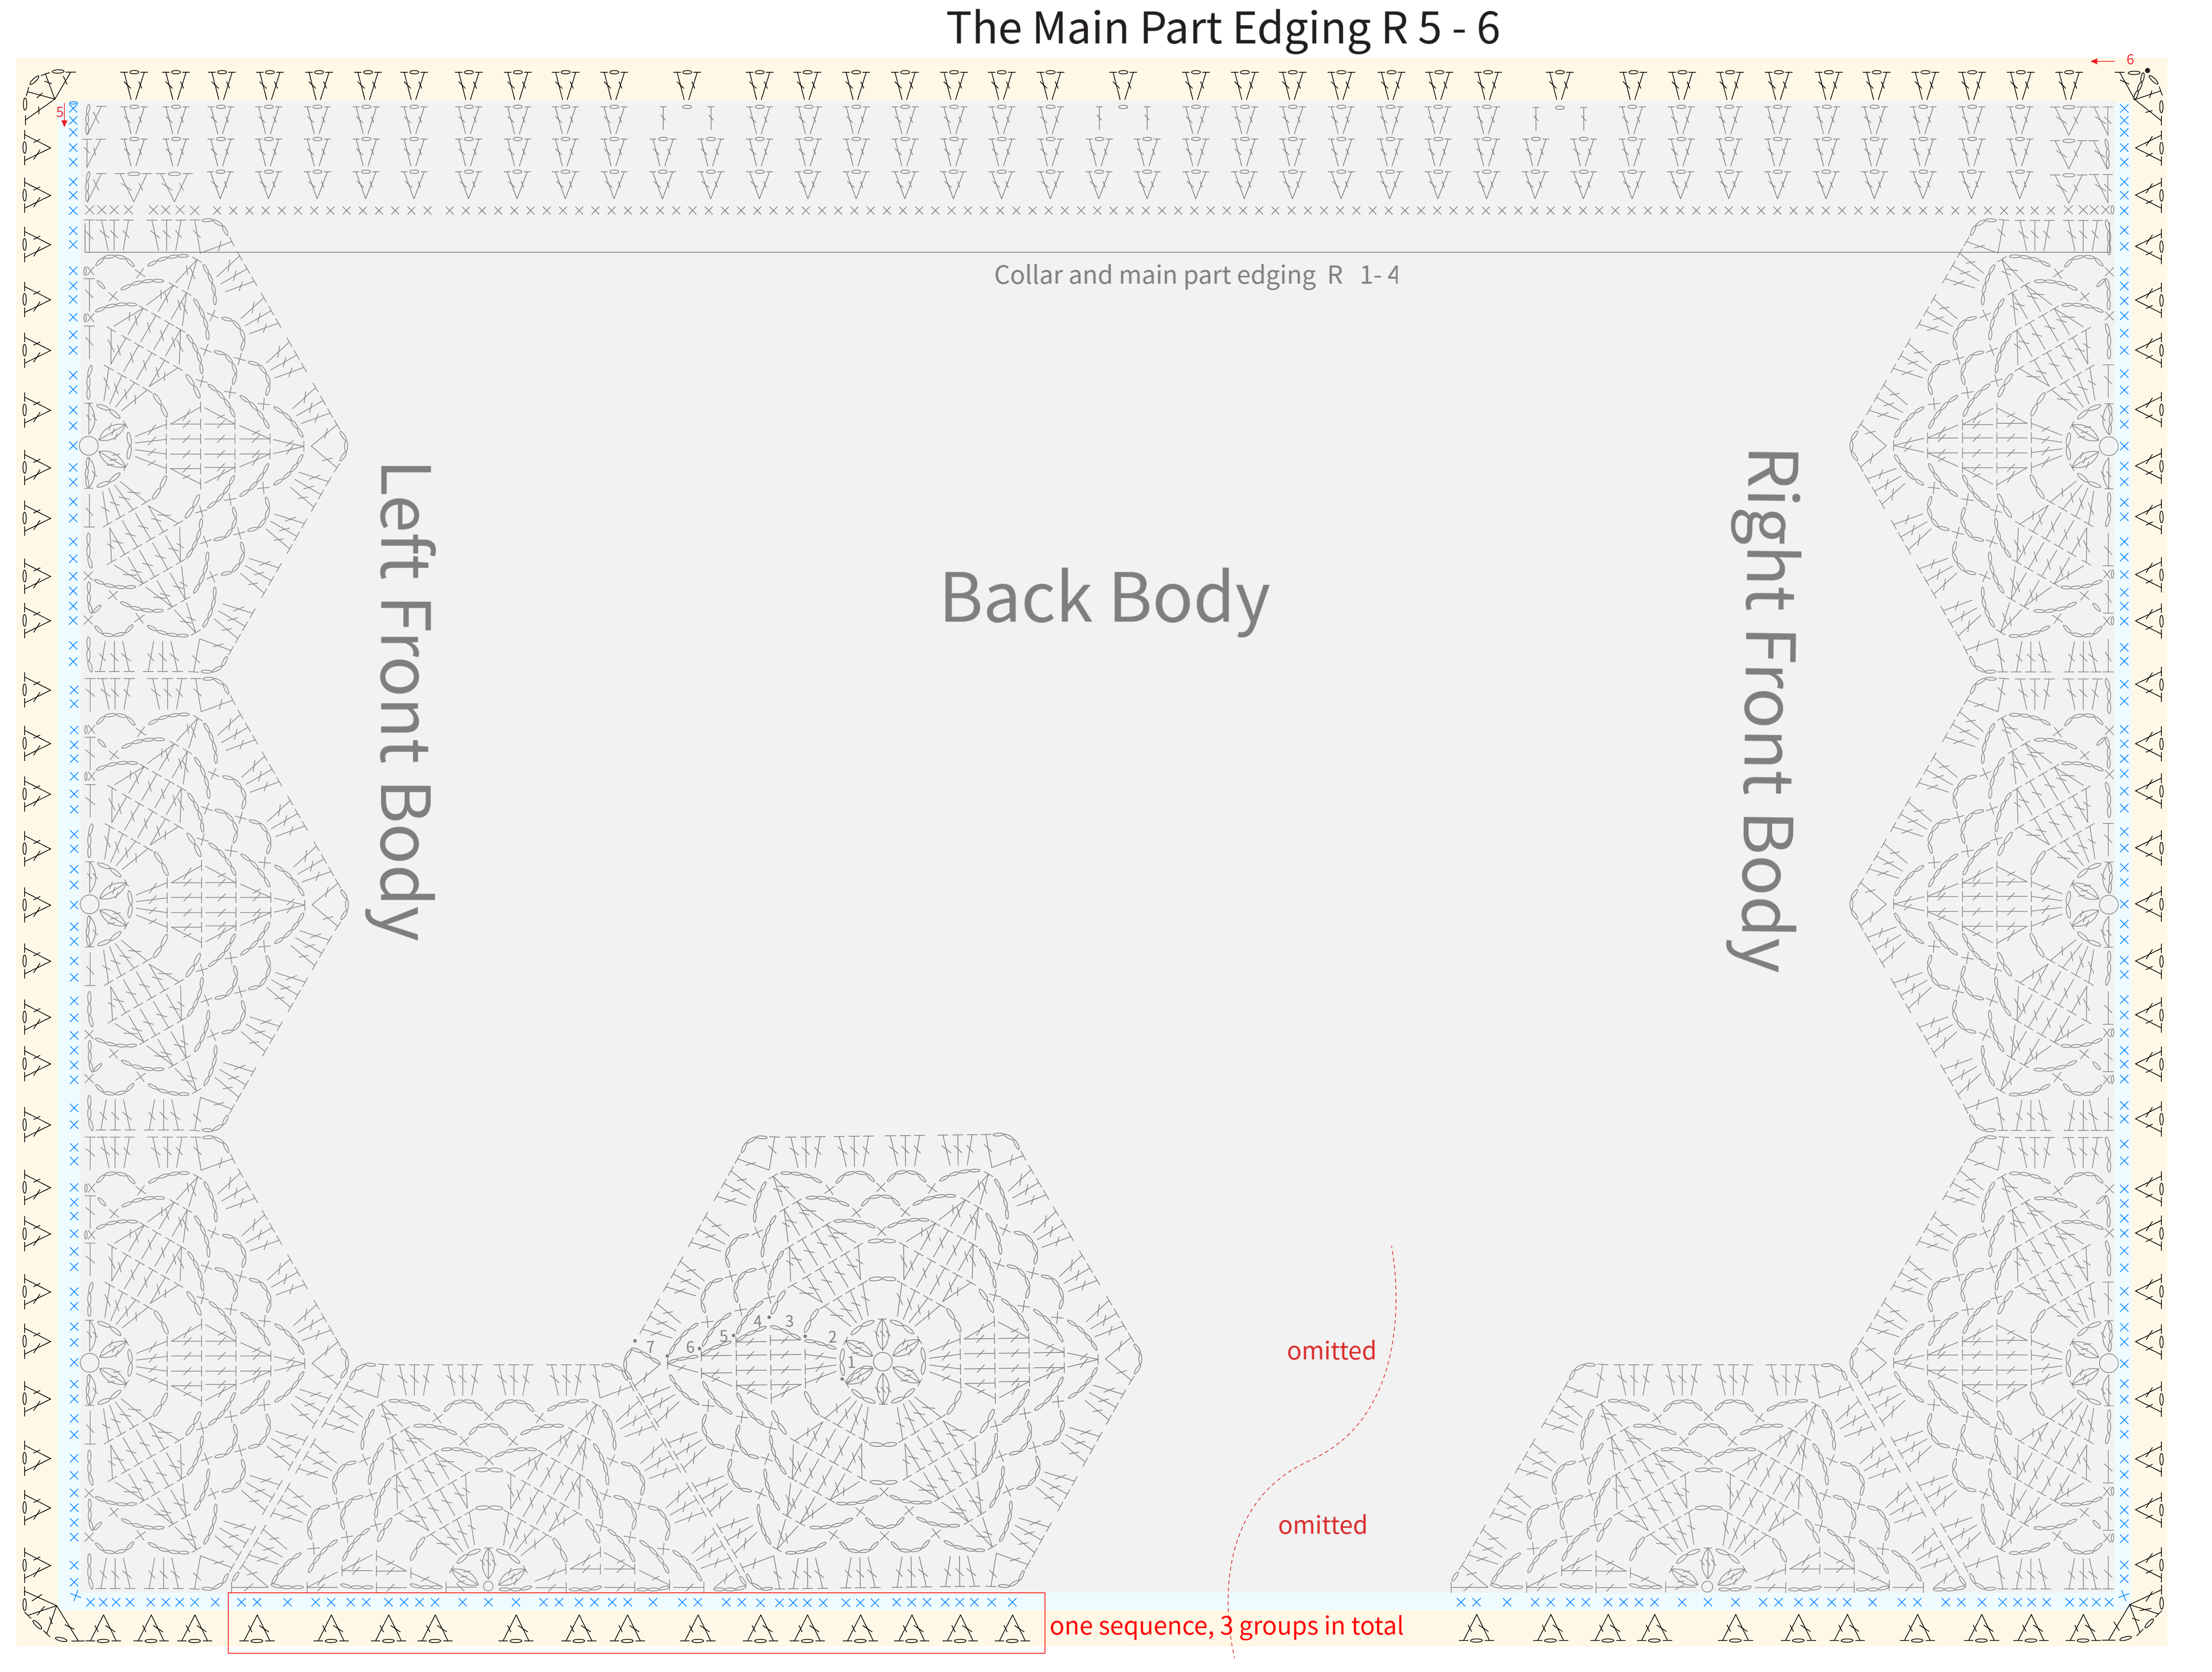
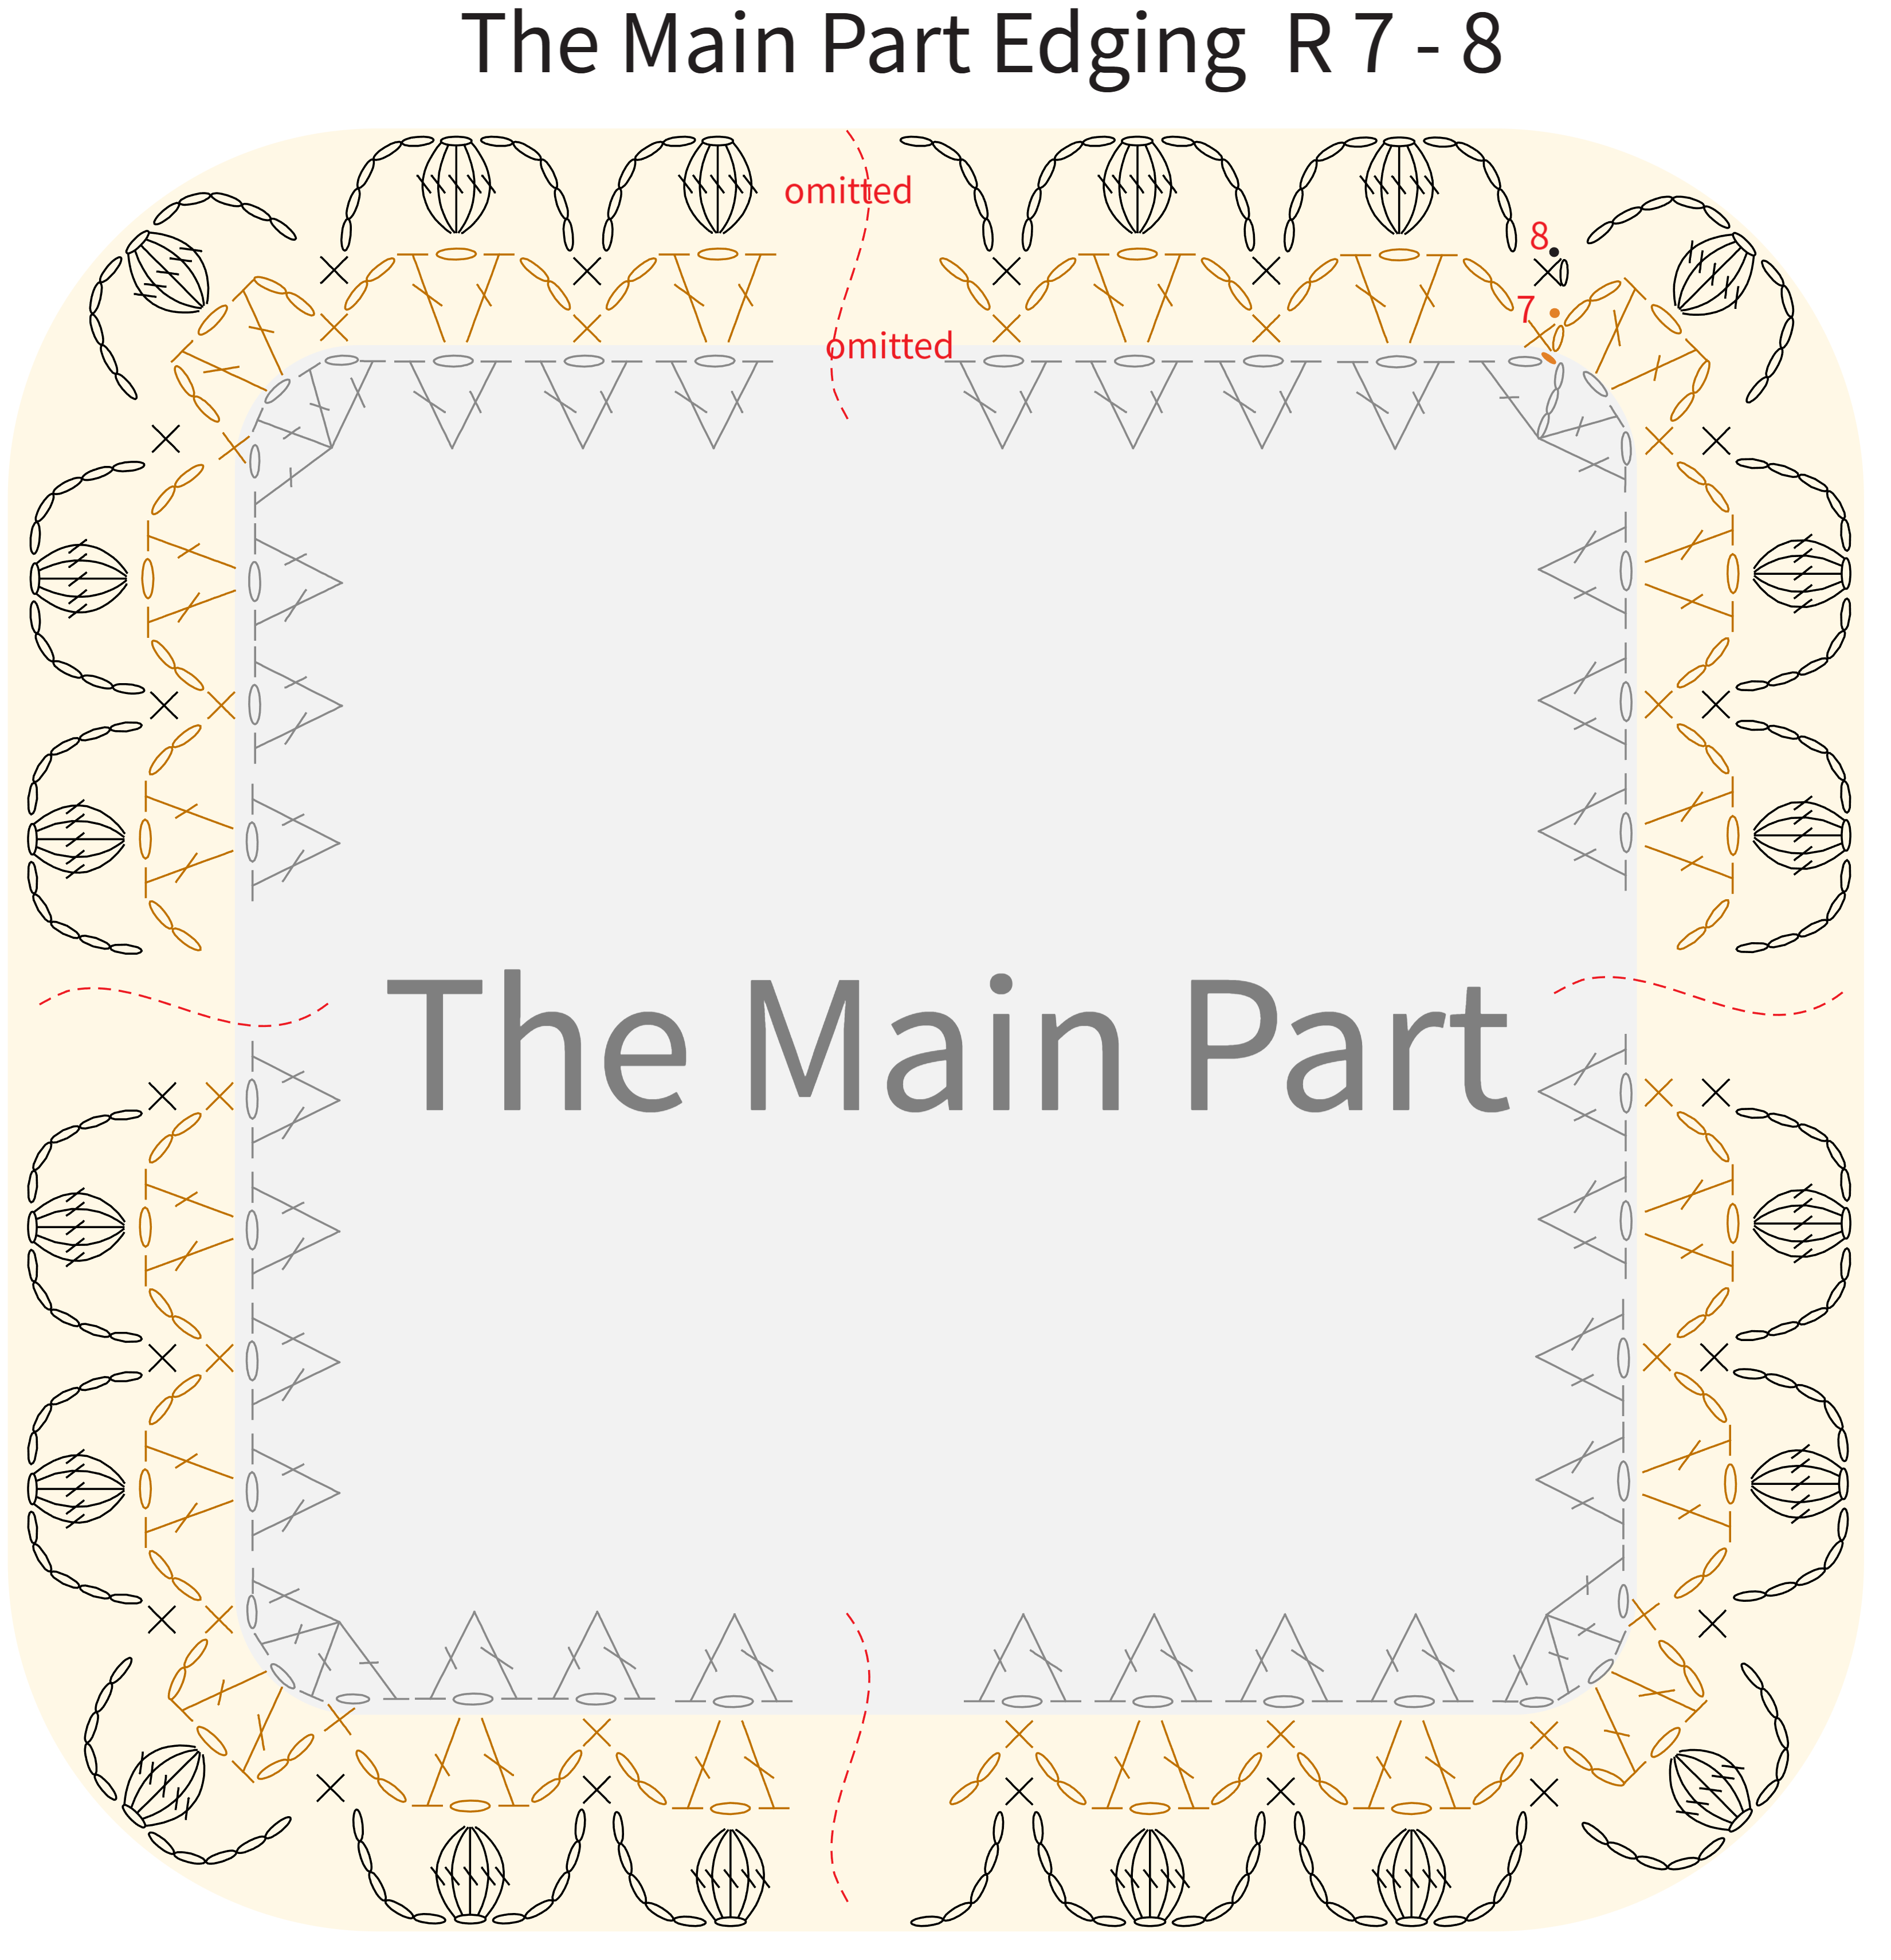
Note: The 5th row and 6th round of the main part edging chart can be found on P4-4.
PART 3 Buttons C 45' 19''
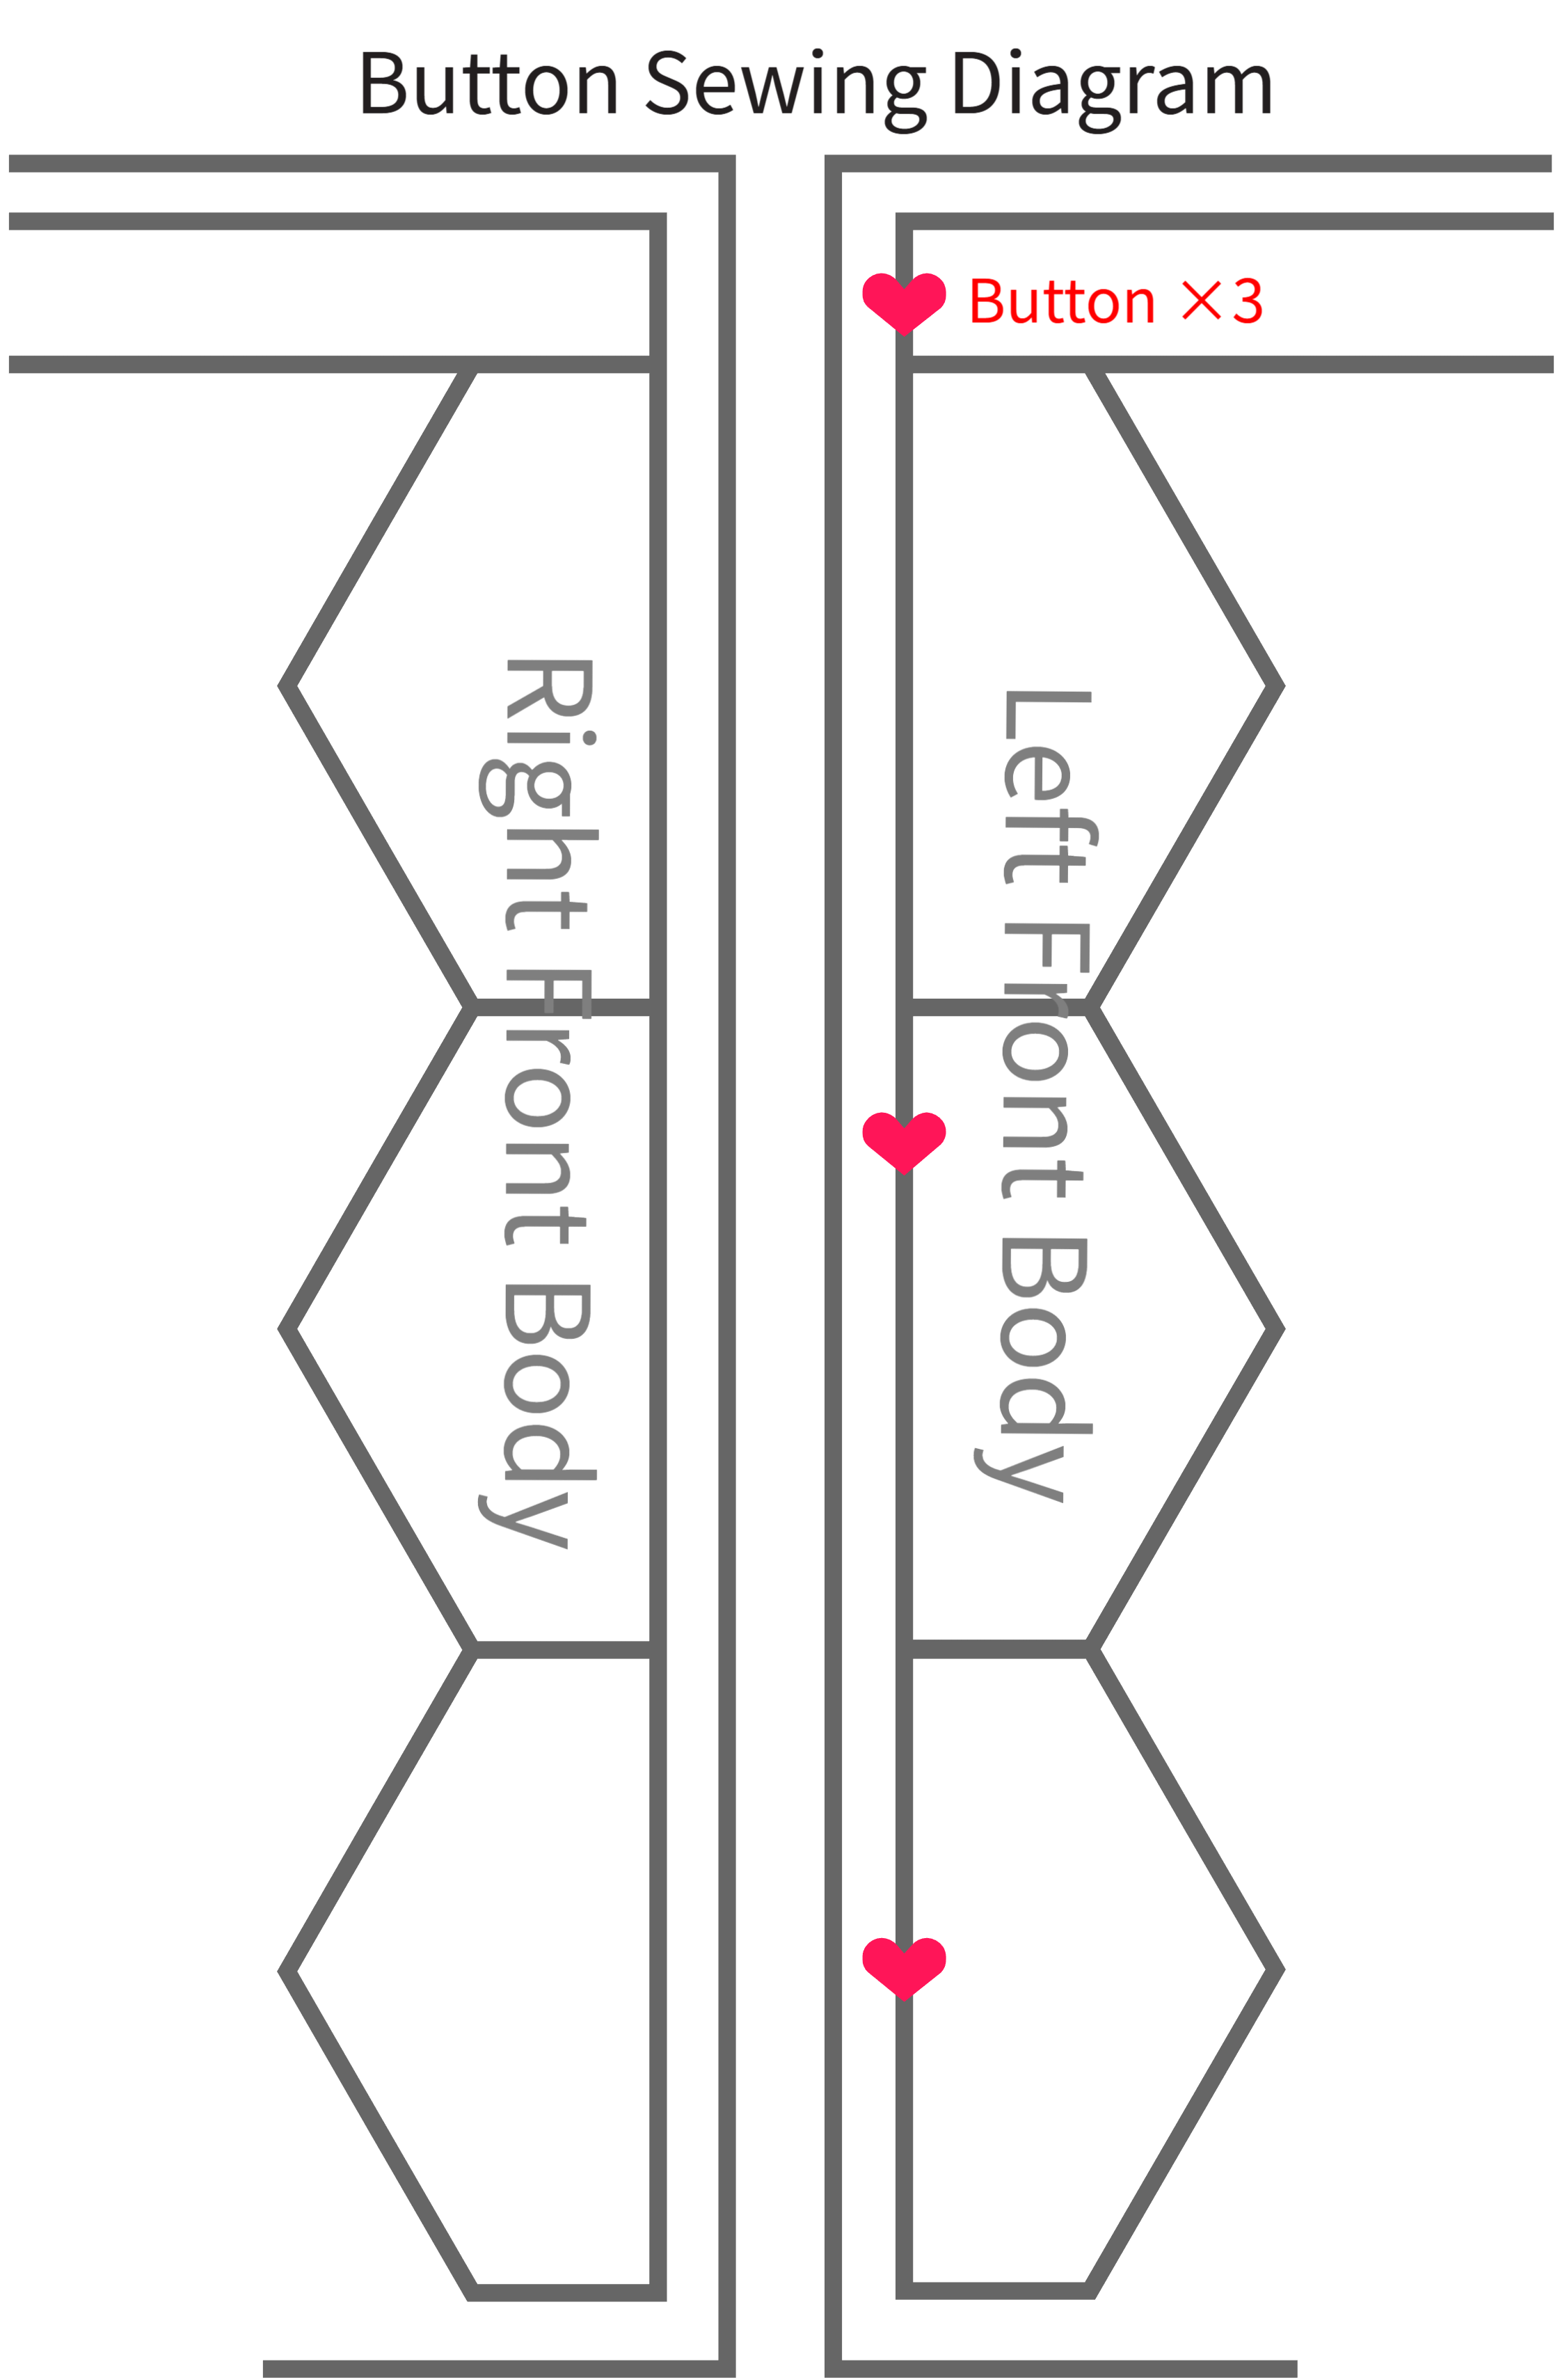
Finally, sew the button at the junction where the left front panel's main part meets the flower piece. Please refer to the video demonstration for more details.
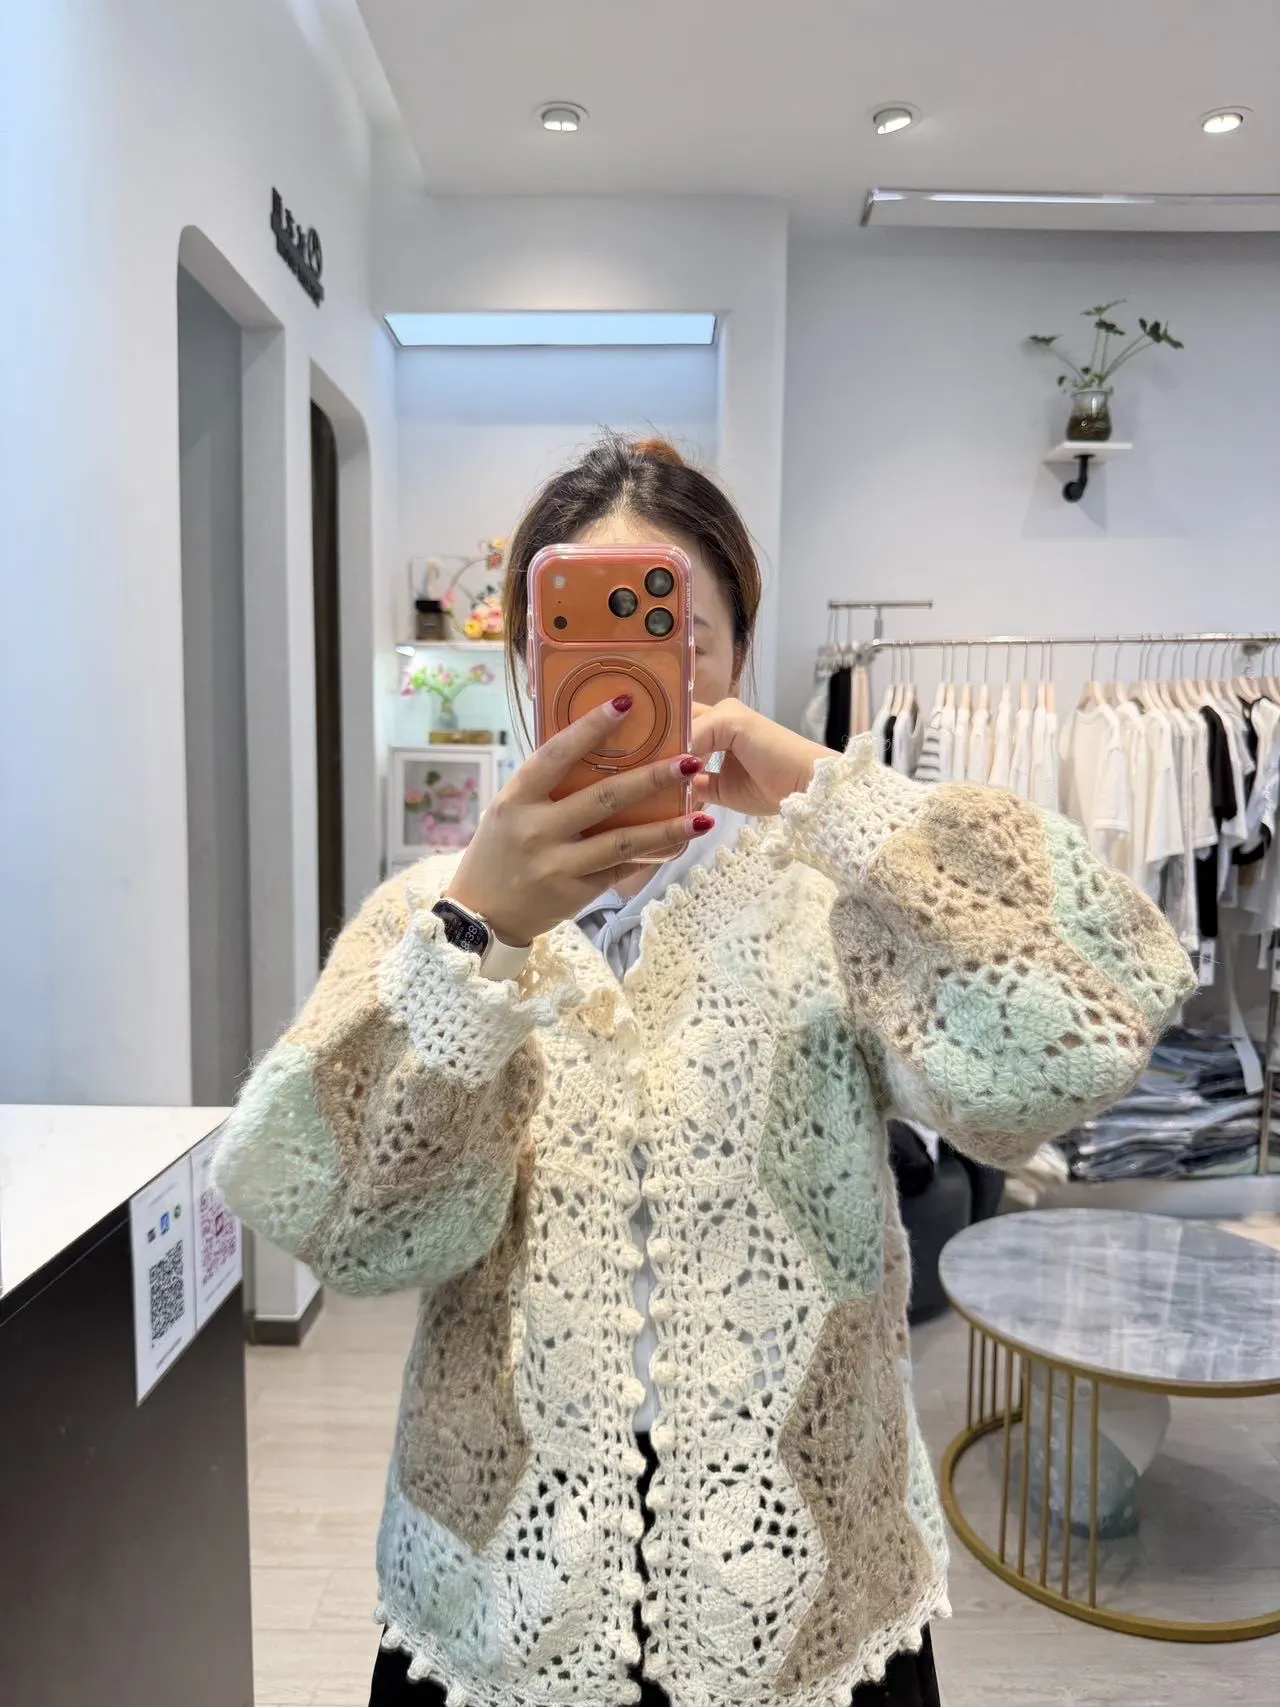
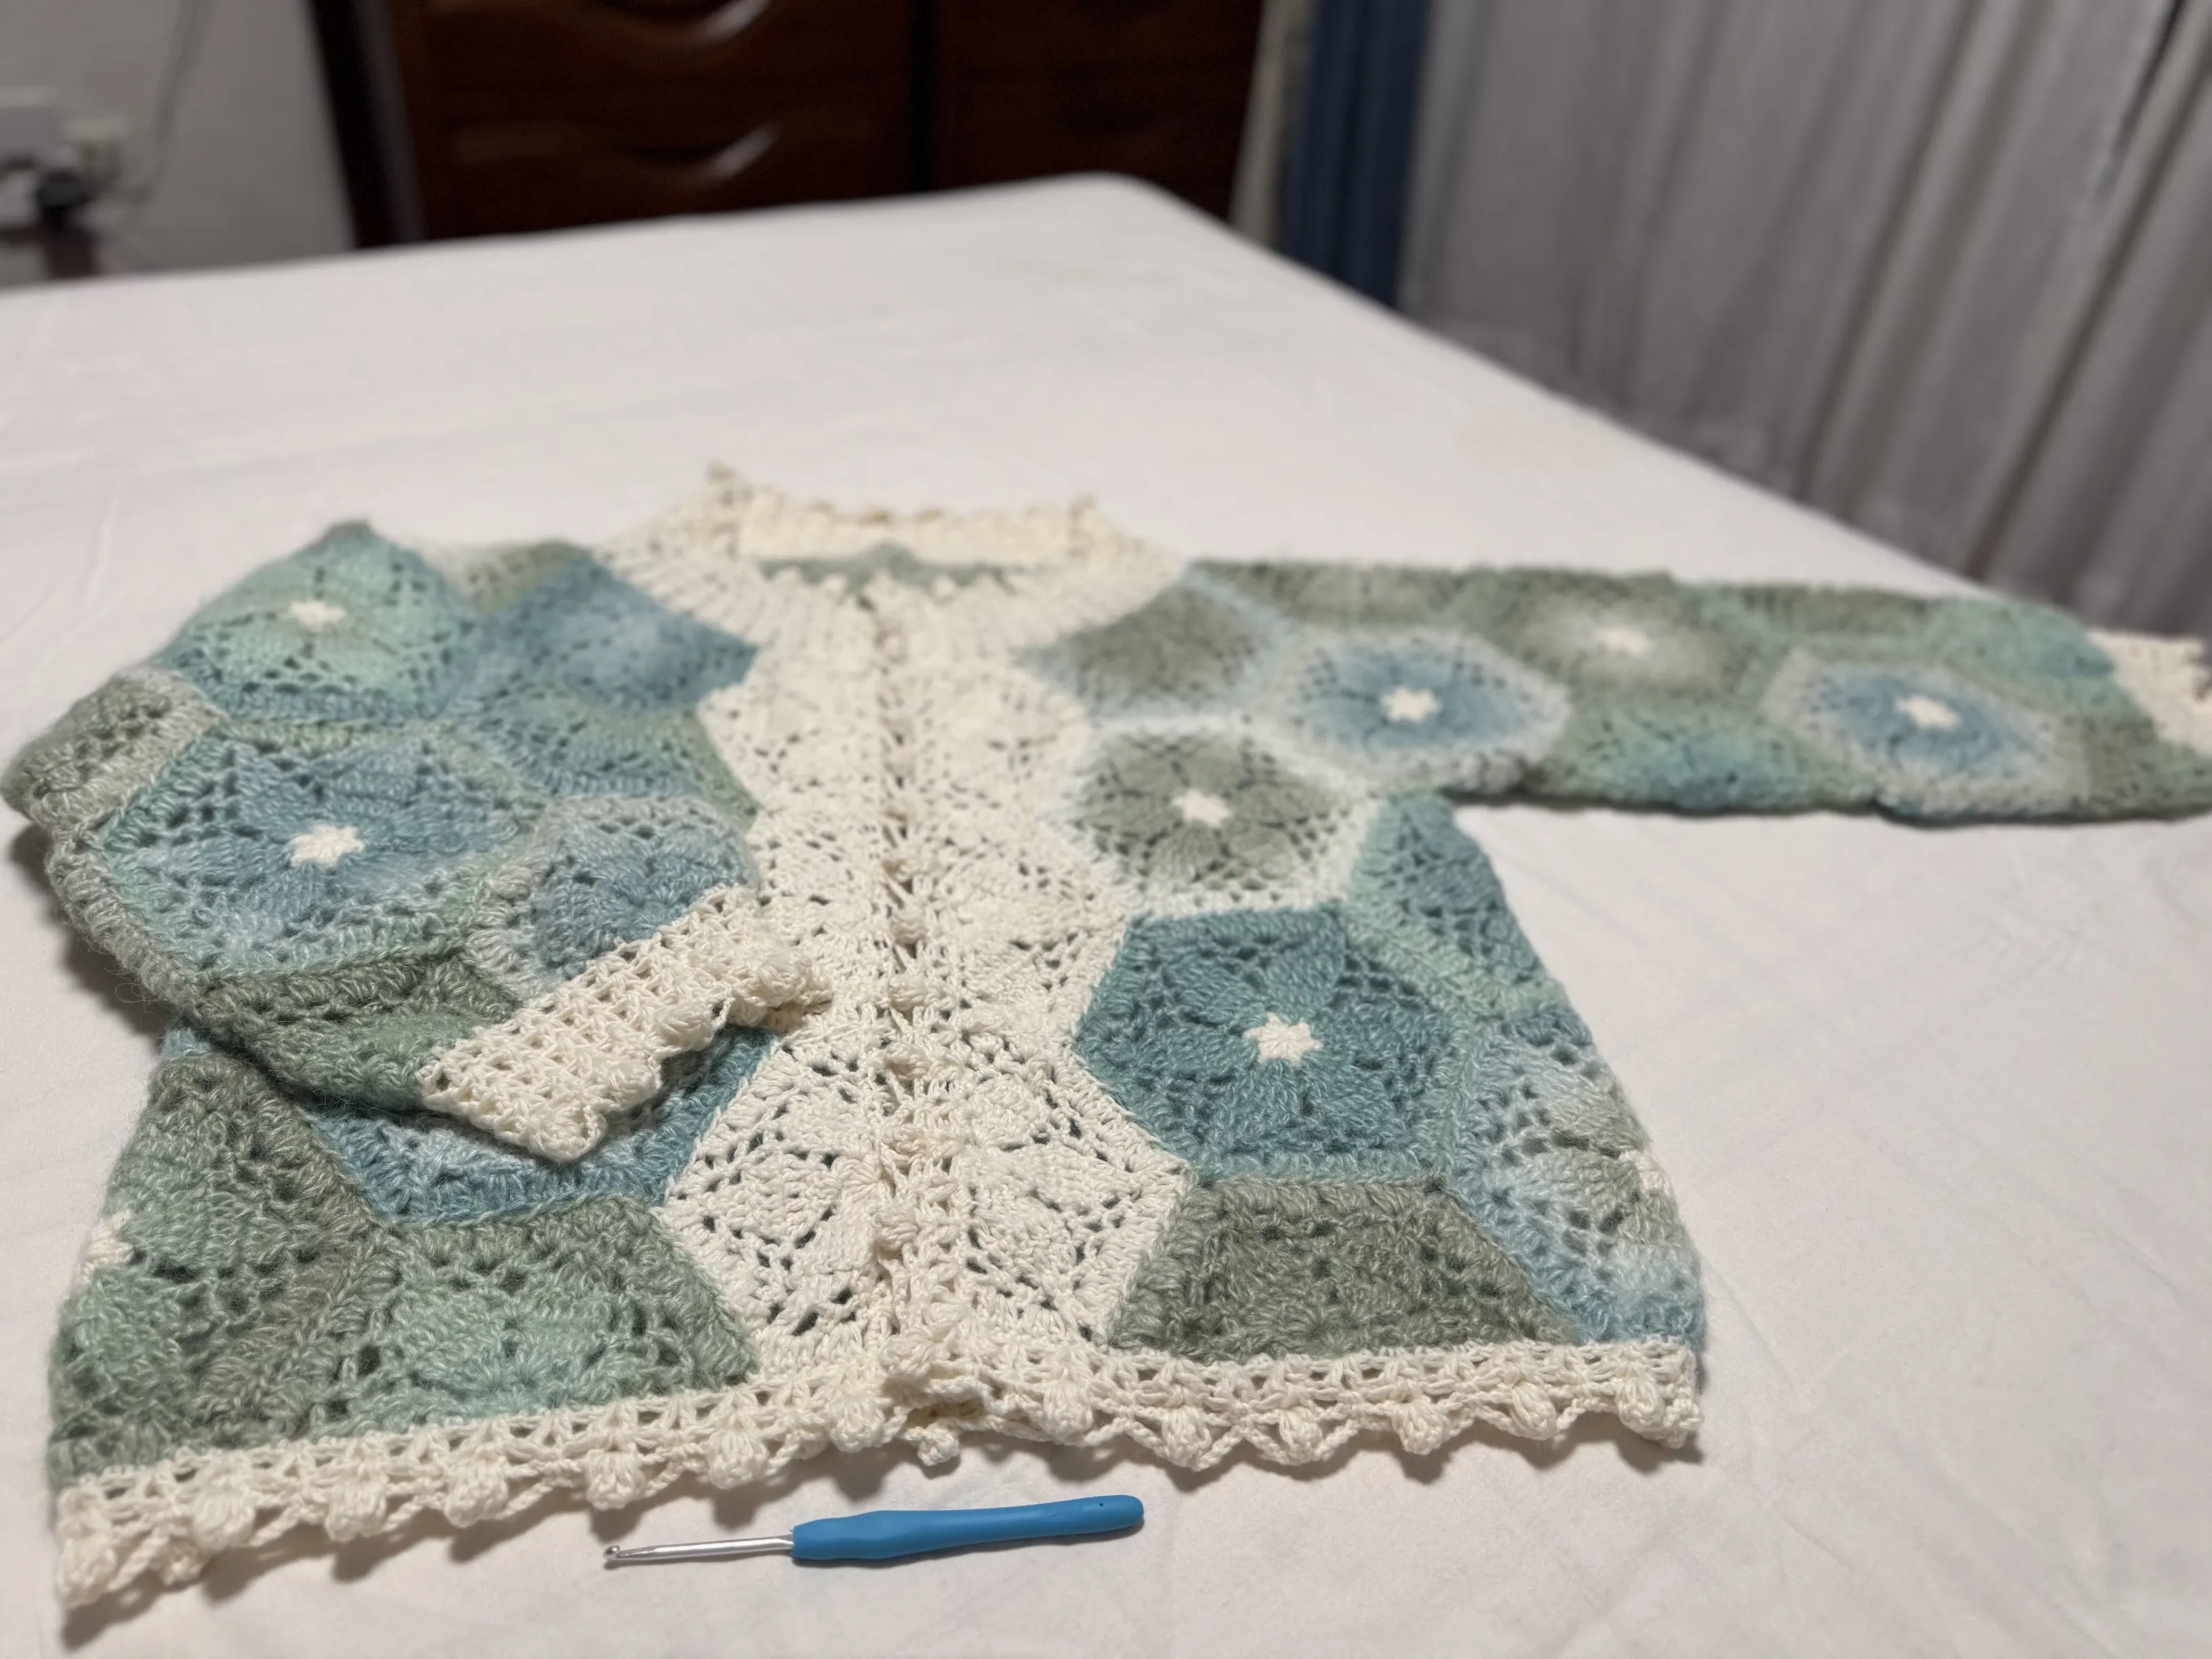
Made by the community