Home / Hanging
Feather Butterfly Dreamcatcher
Project preview
See the finished project
Pattern format
Instructions
Watch and follow
Video tutorial
| Style | Yarn | Color |
|---|---|---|
| Blossom Style | Fancy Dyed Lace |  205#Blossom x 1 205#Blossom x 1 |
| Combed 3# Lace | 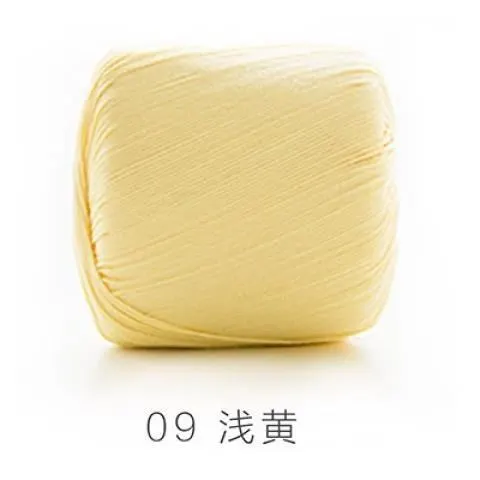 09#Pale Banana x 1 09#Pale Banana x 1 26#Blue Atoll x 1 26#Blue Atoll x 1 27#Lime Green x 1 27#Lime Green x 1 40#Quartz Pink x 1 40#Quartz Pink x 1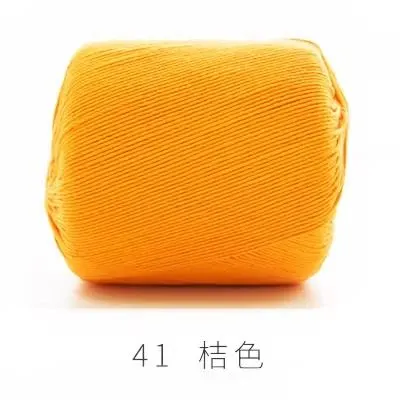 41#Blazing Orange x 1 41#Blazing Orange x 1 | |
| Jade Style | Fancy Dyed Lace |  208#Jade x 1 208#Jade x 1 |
| Combed 3# Lace |  10#Aspen Gold x 1 10#Aspen Gold x 1 13#Sheer Lilac x 1 13#Sheer Lilac x 1 15#Sky Blue x 1 15#Sky Blue x 1 35#Fair Green x 1 35#Fair Green x 1 44#Candy Pink x 1 44#Candy Pink x 1 |
The dreamcatcher consists of the main part, decorations and assembly. Complete the main part and the decorations first, and then assemble them in the end. The dreamcatcher has two designs: the Blossom Style and the Jade Style. Both of them share the same crochet method.
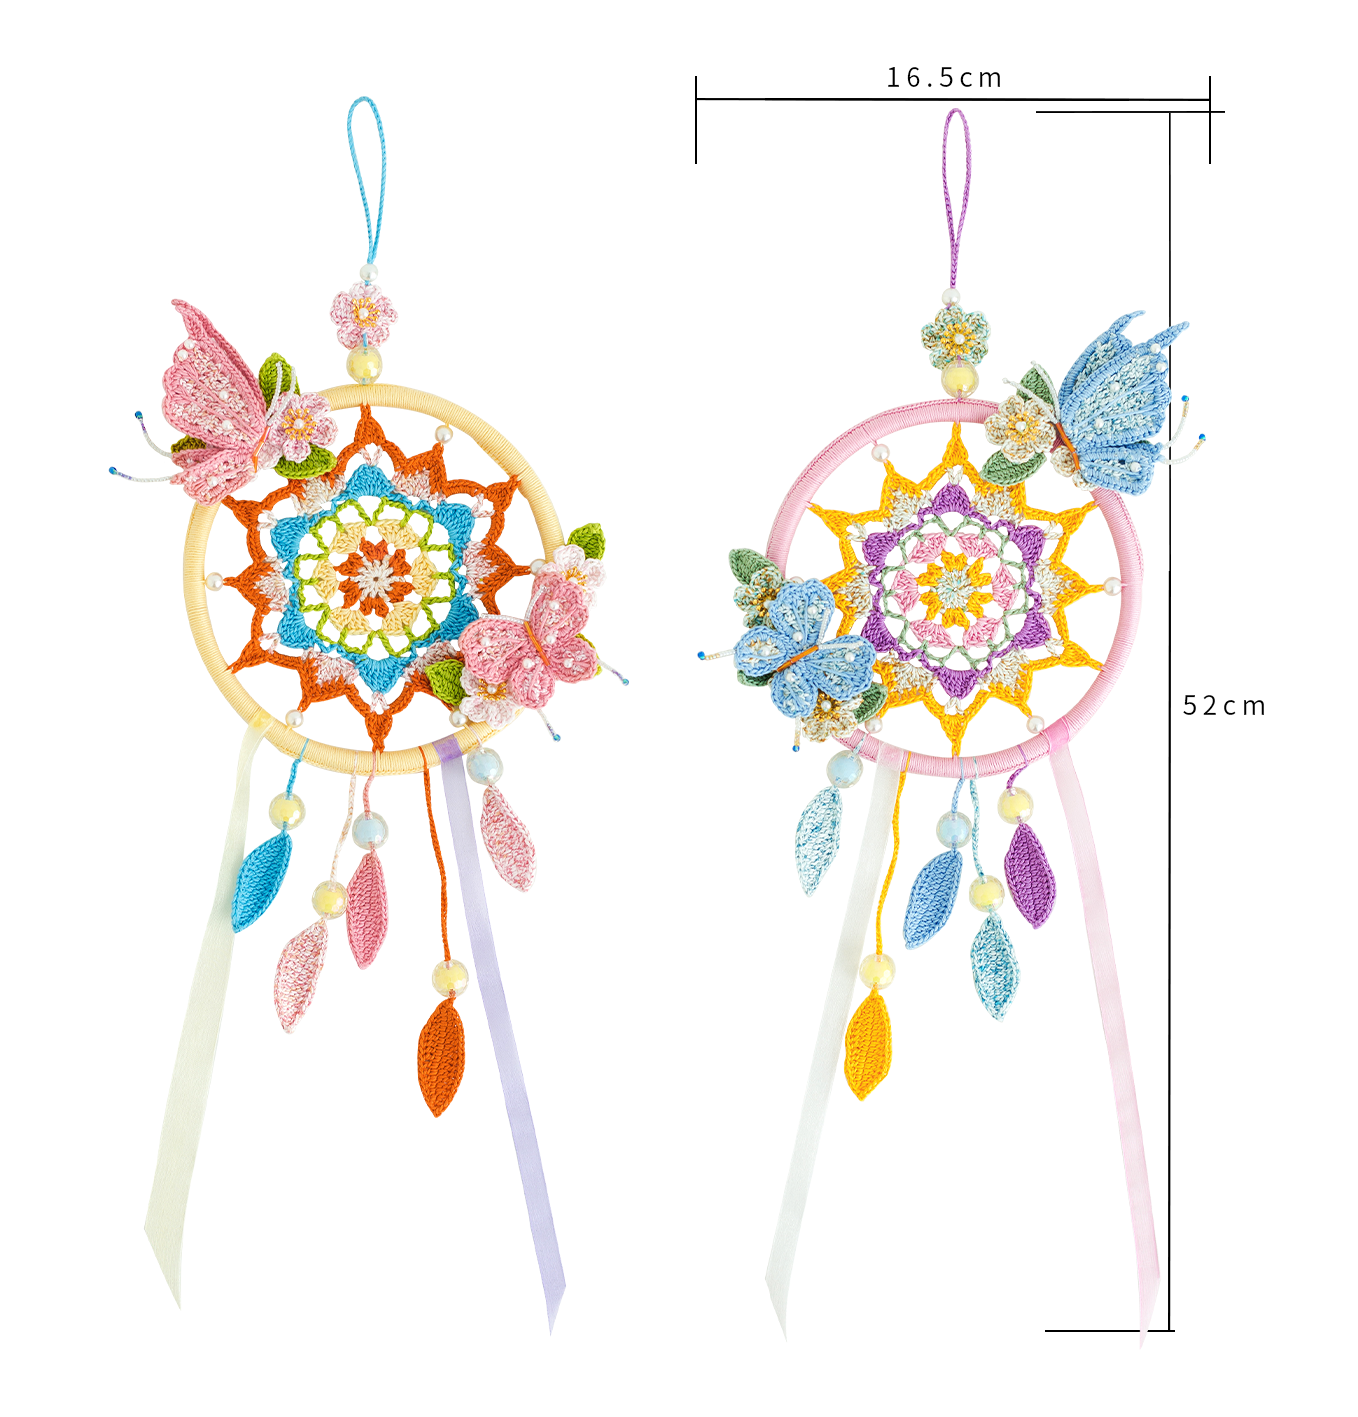
The handcrafted measurements may have an error of 1 to 2 cm. Due to variations in individual tension, the size of the sample is for reference only.
Materials: Susan's Family Fancy Dyed Lace, Susan's Family Combed 3 Ply Lace
Hook: 2.00mm crochet hook

Chart Key










Note:
1.This pattern is making in Chinese crochet pattern terms, and the stitch name is written using American terminology. All measurements in charts are in cm.
2.When crocheting in rounds without further guidance, working in closed rounds, start each round with a set number of beginning chains and close with a slip stitch. The beginning chain preceding a single crochet and the slip stitch used for joining rounds are not included in the total stitches.

PART1 Main PartA 00' 34''
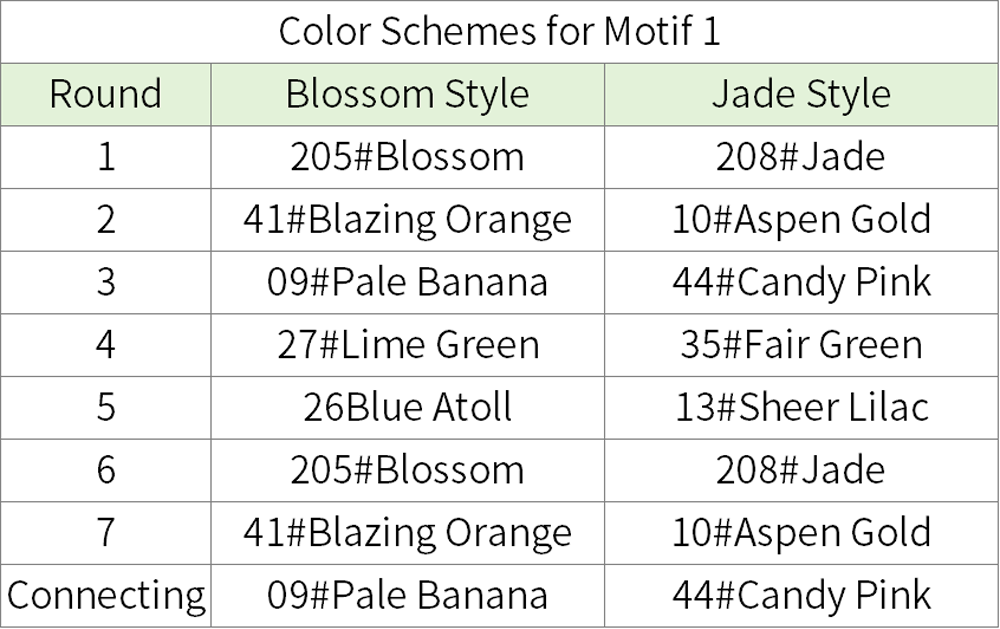
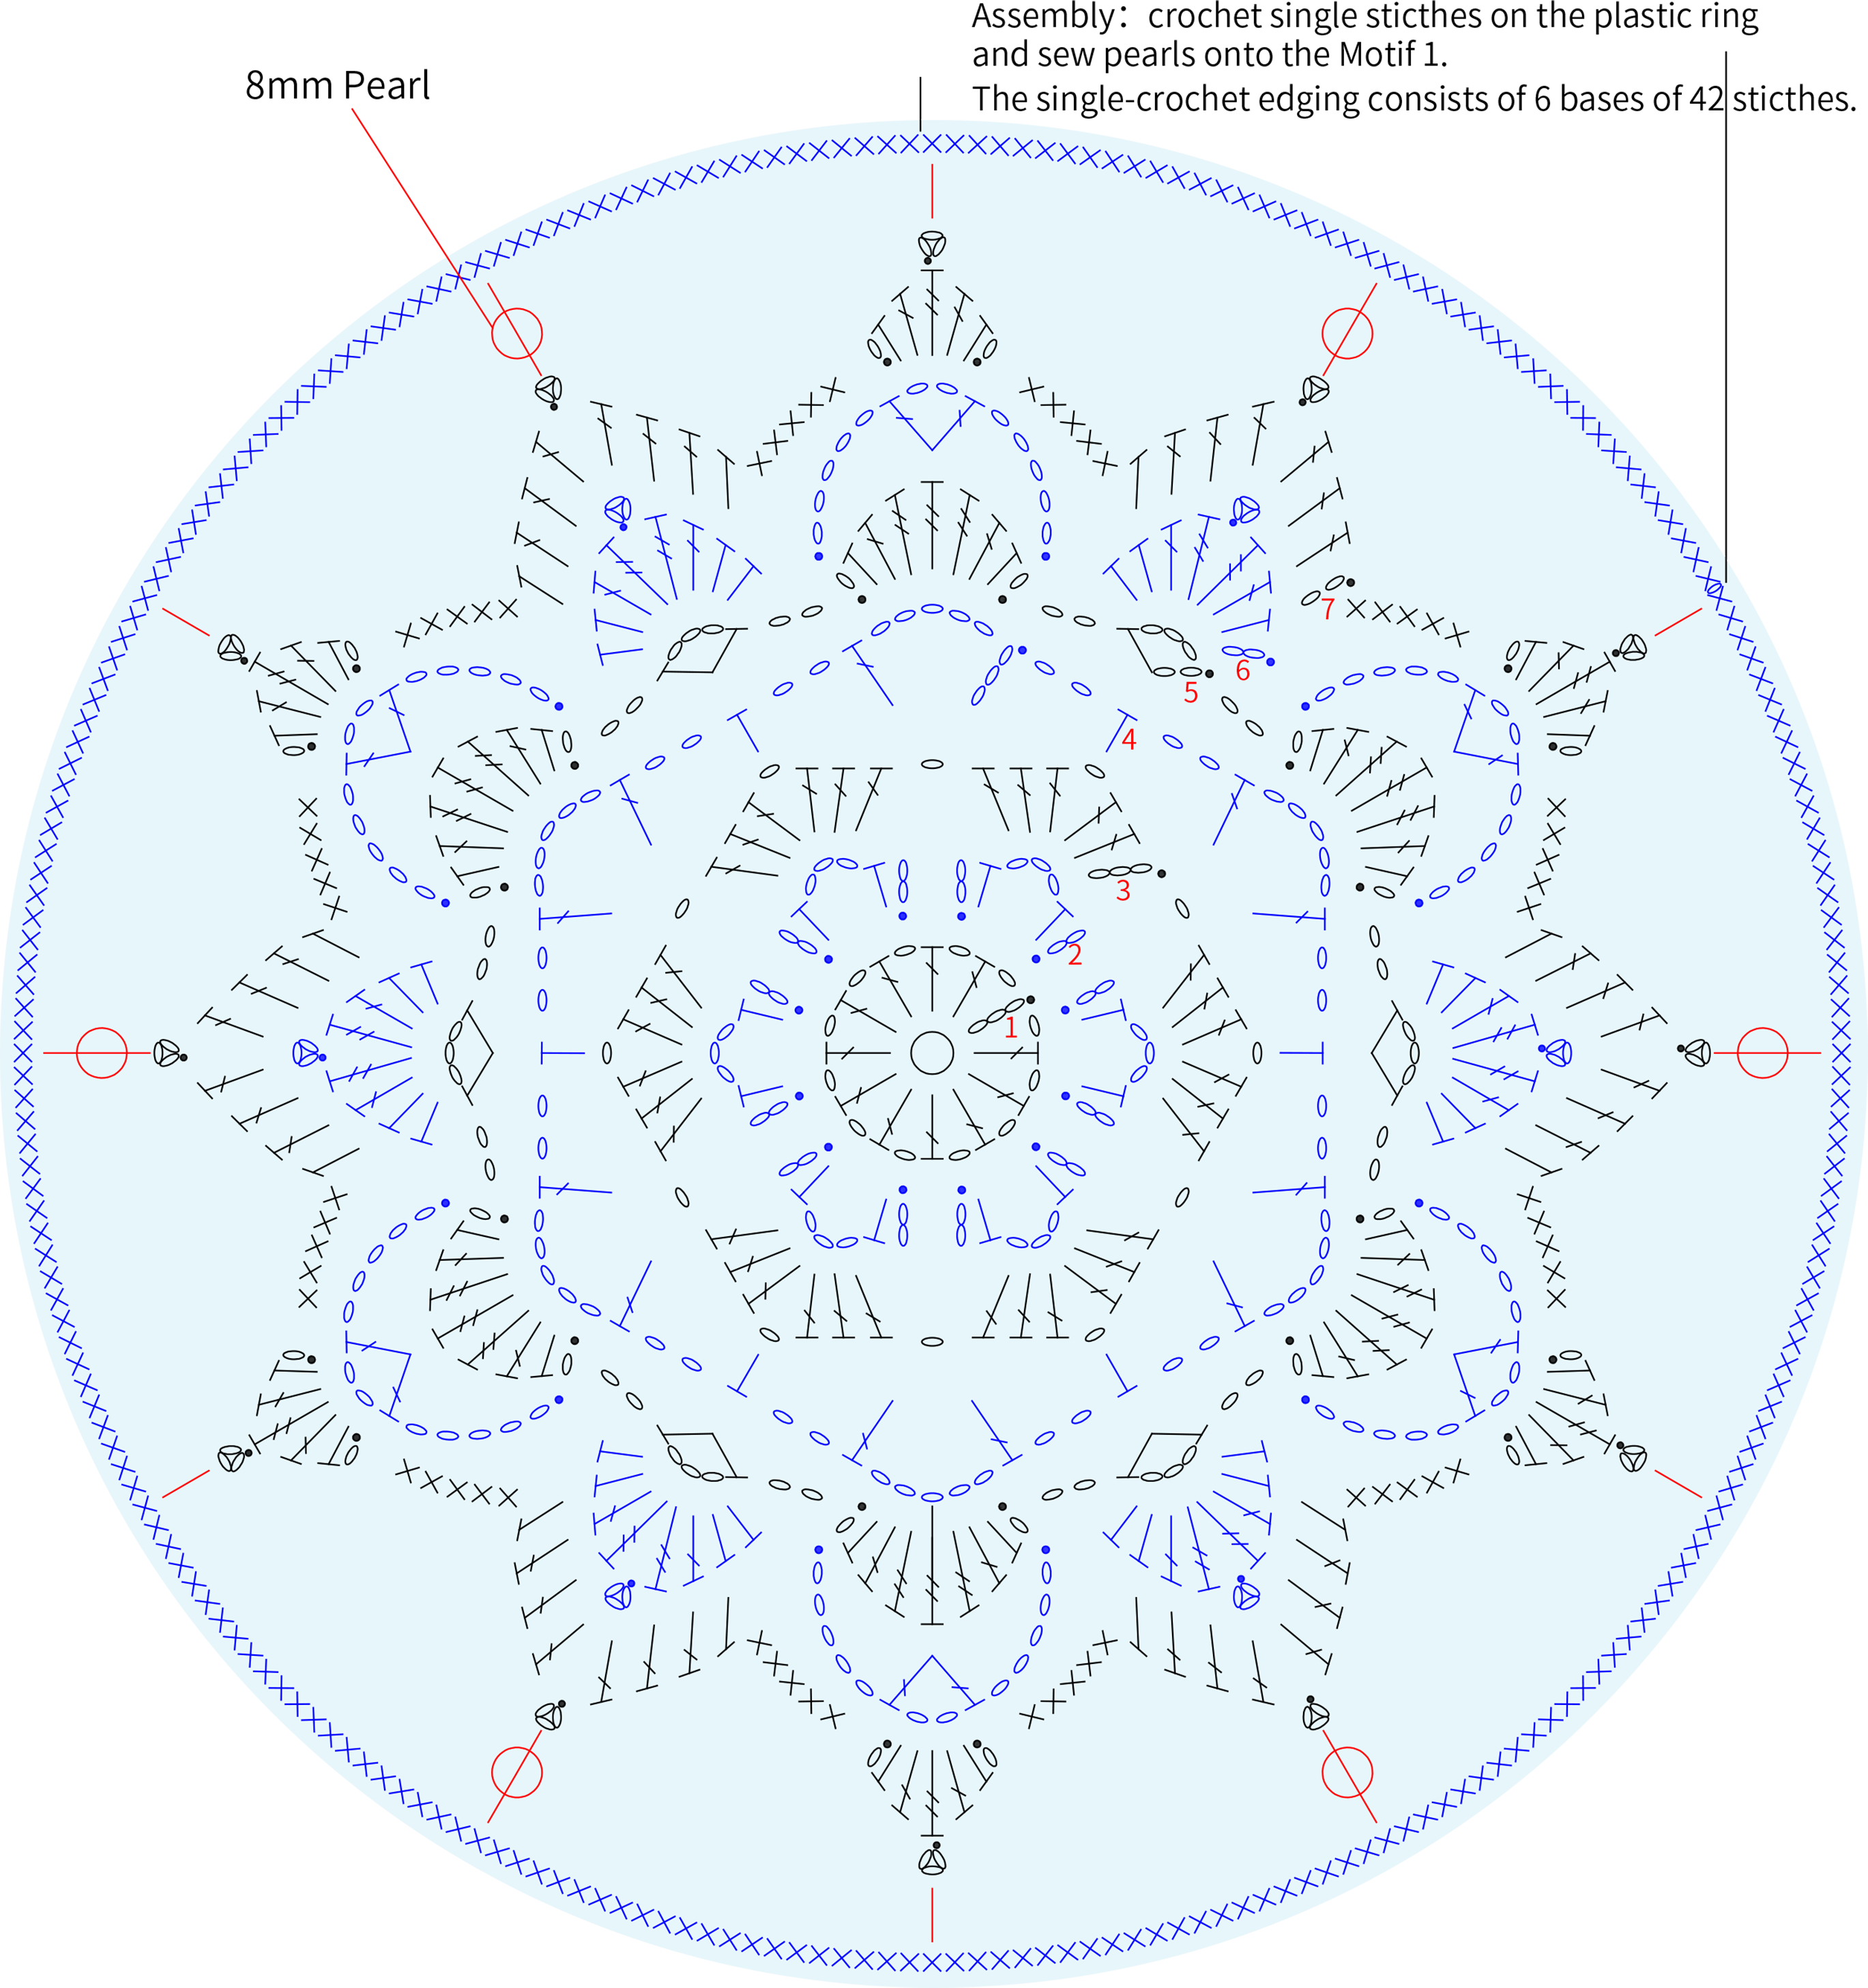
The main part involves Motif 1 and assembly. Finish Motif 1 and assmble pearls, the plastic ring, and Motif 1 together. Please refer to the video demonstration for more details.
PART2 DecorationsB 25' 47''
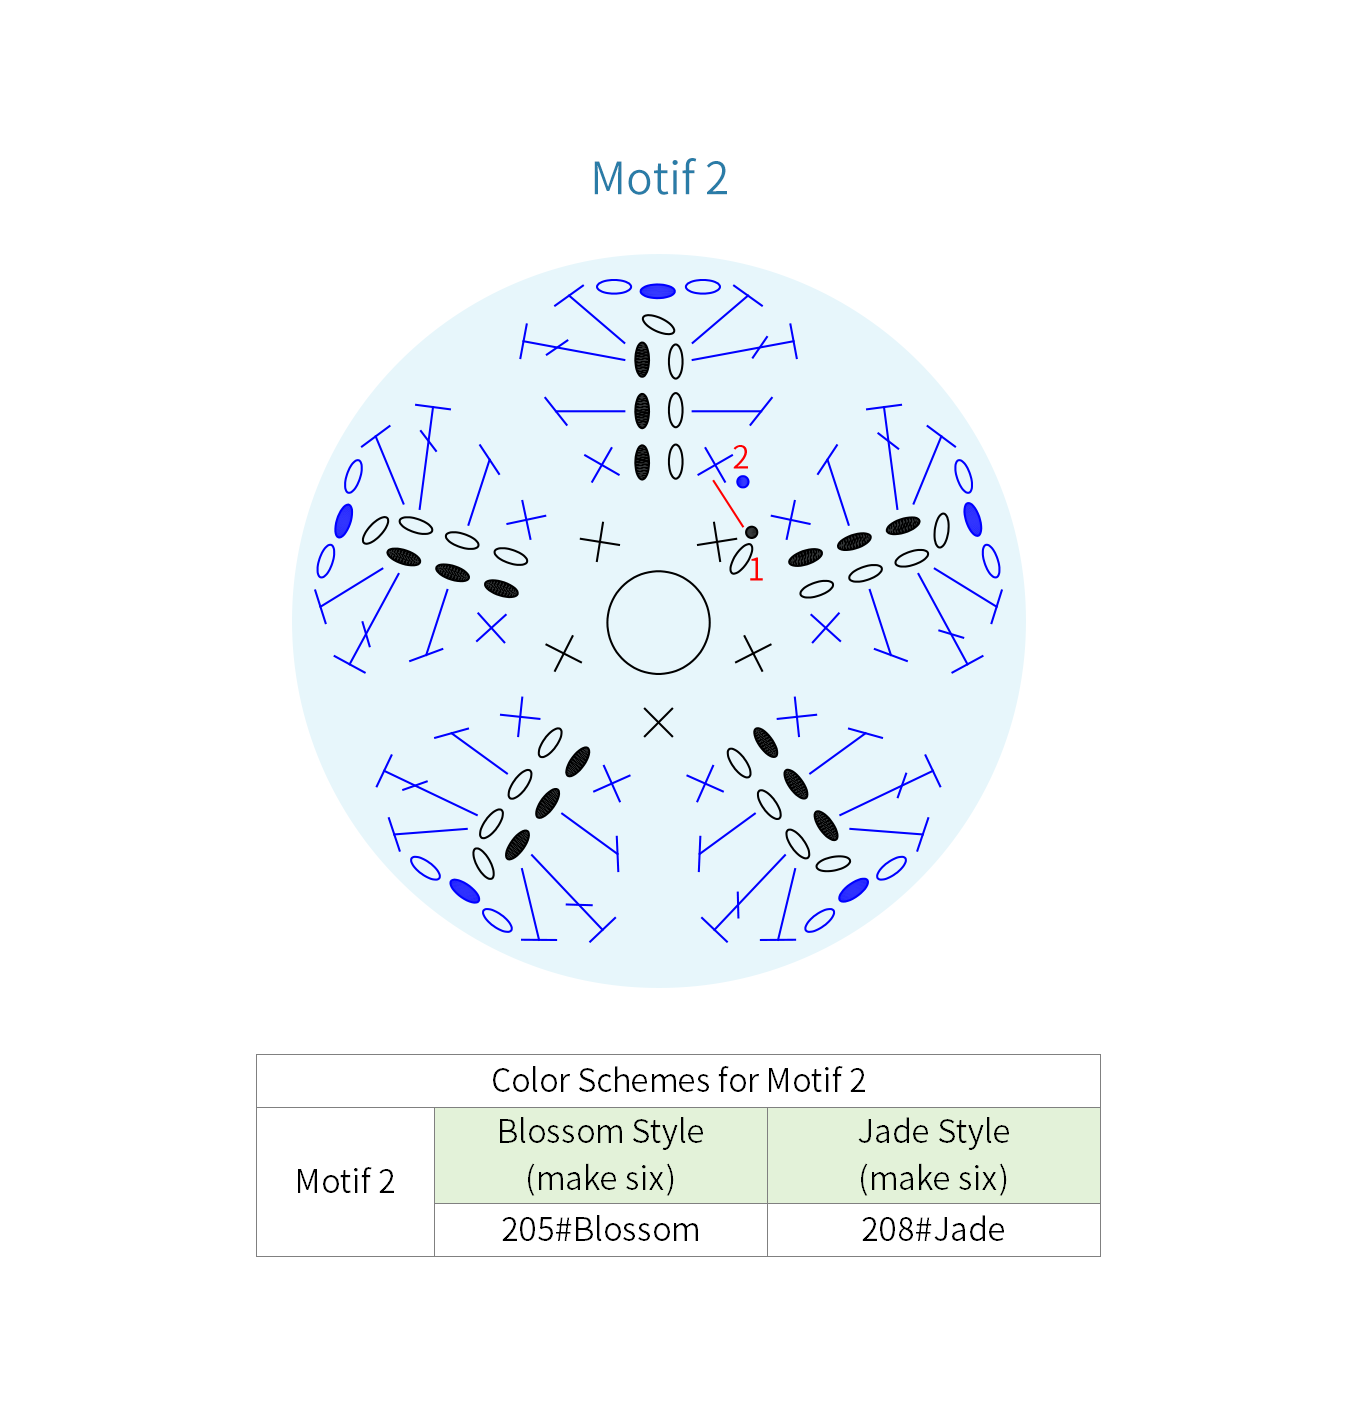
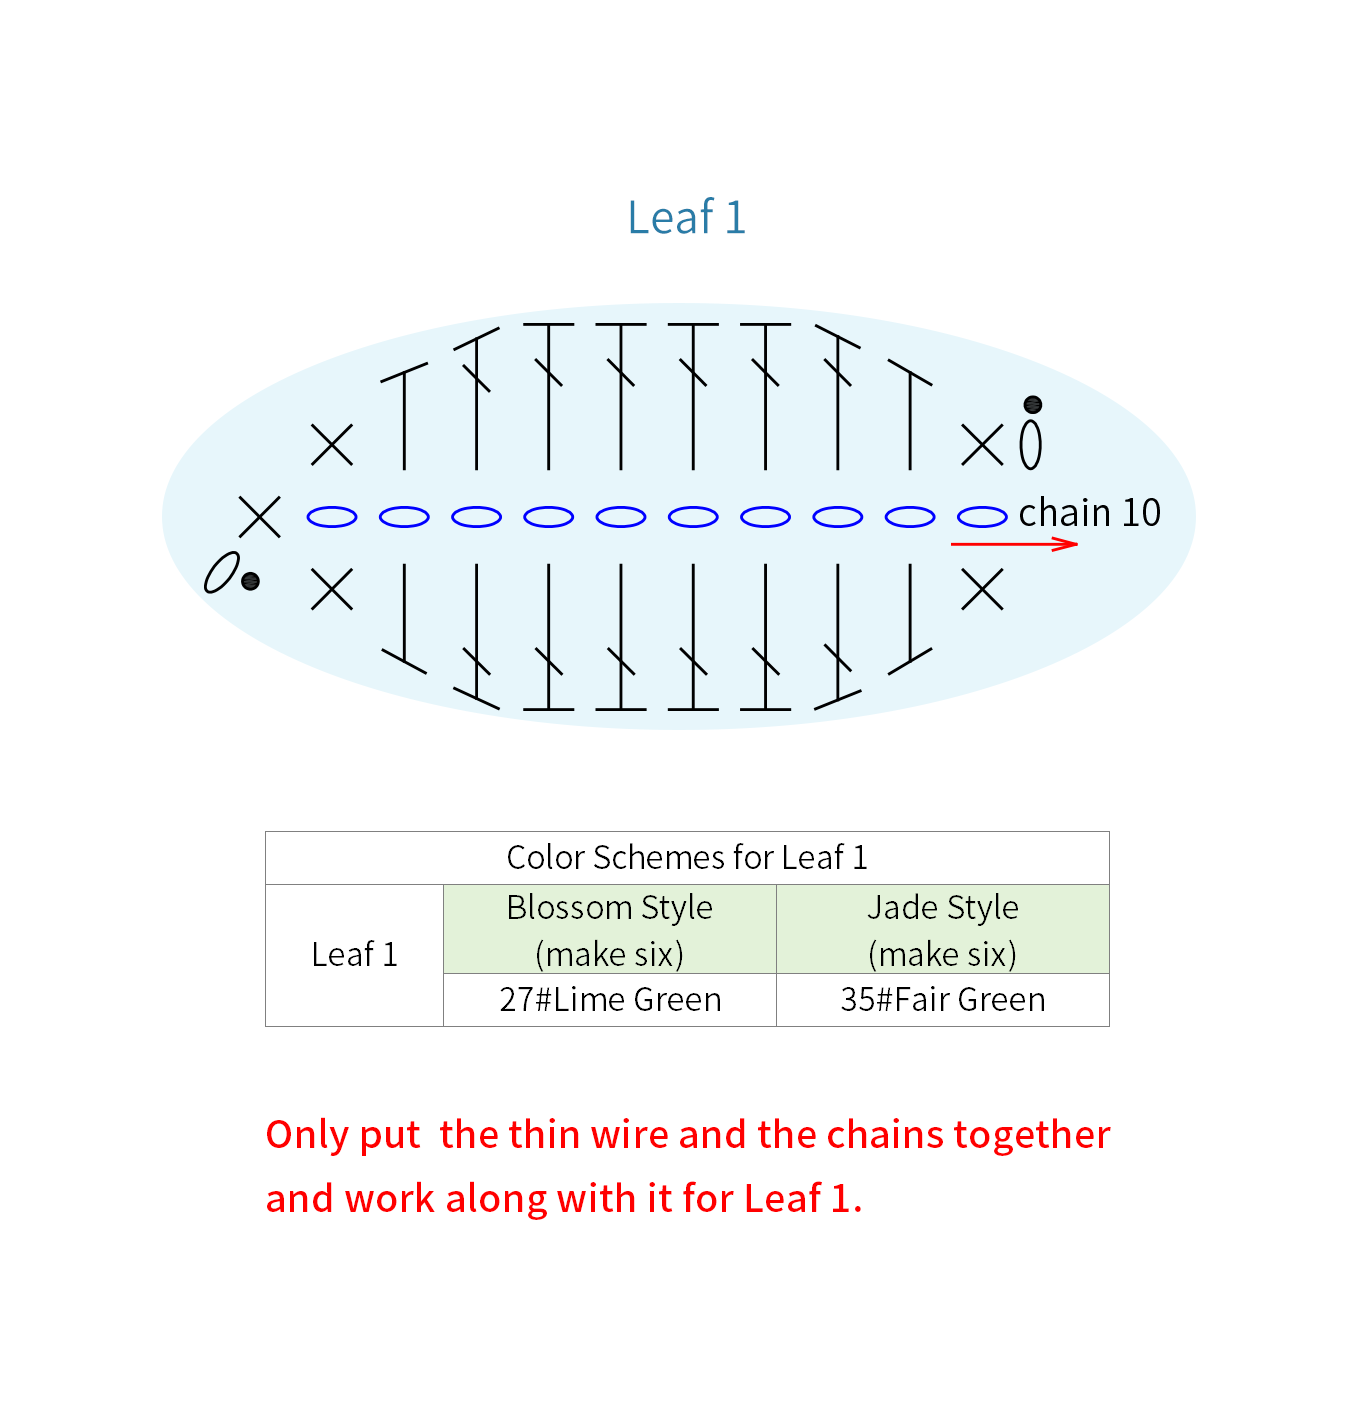
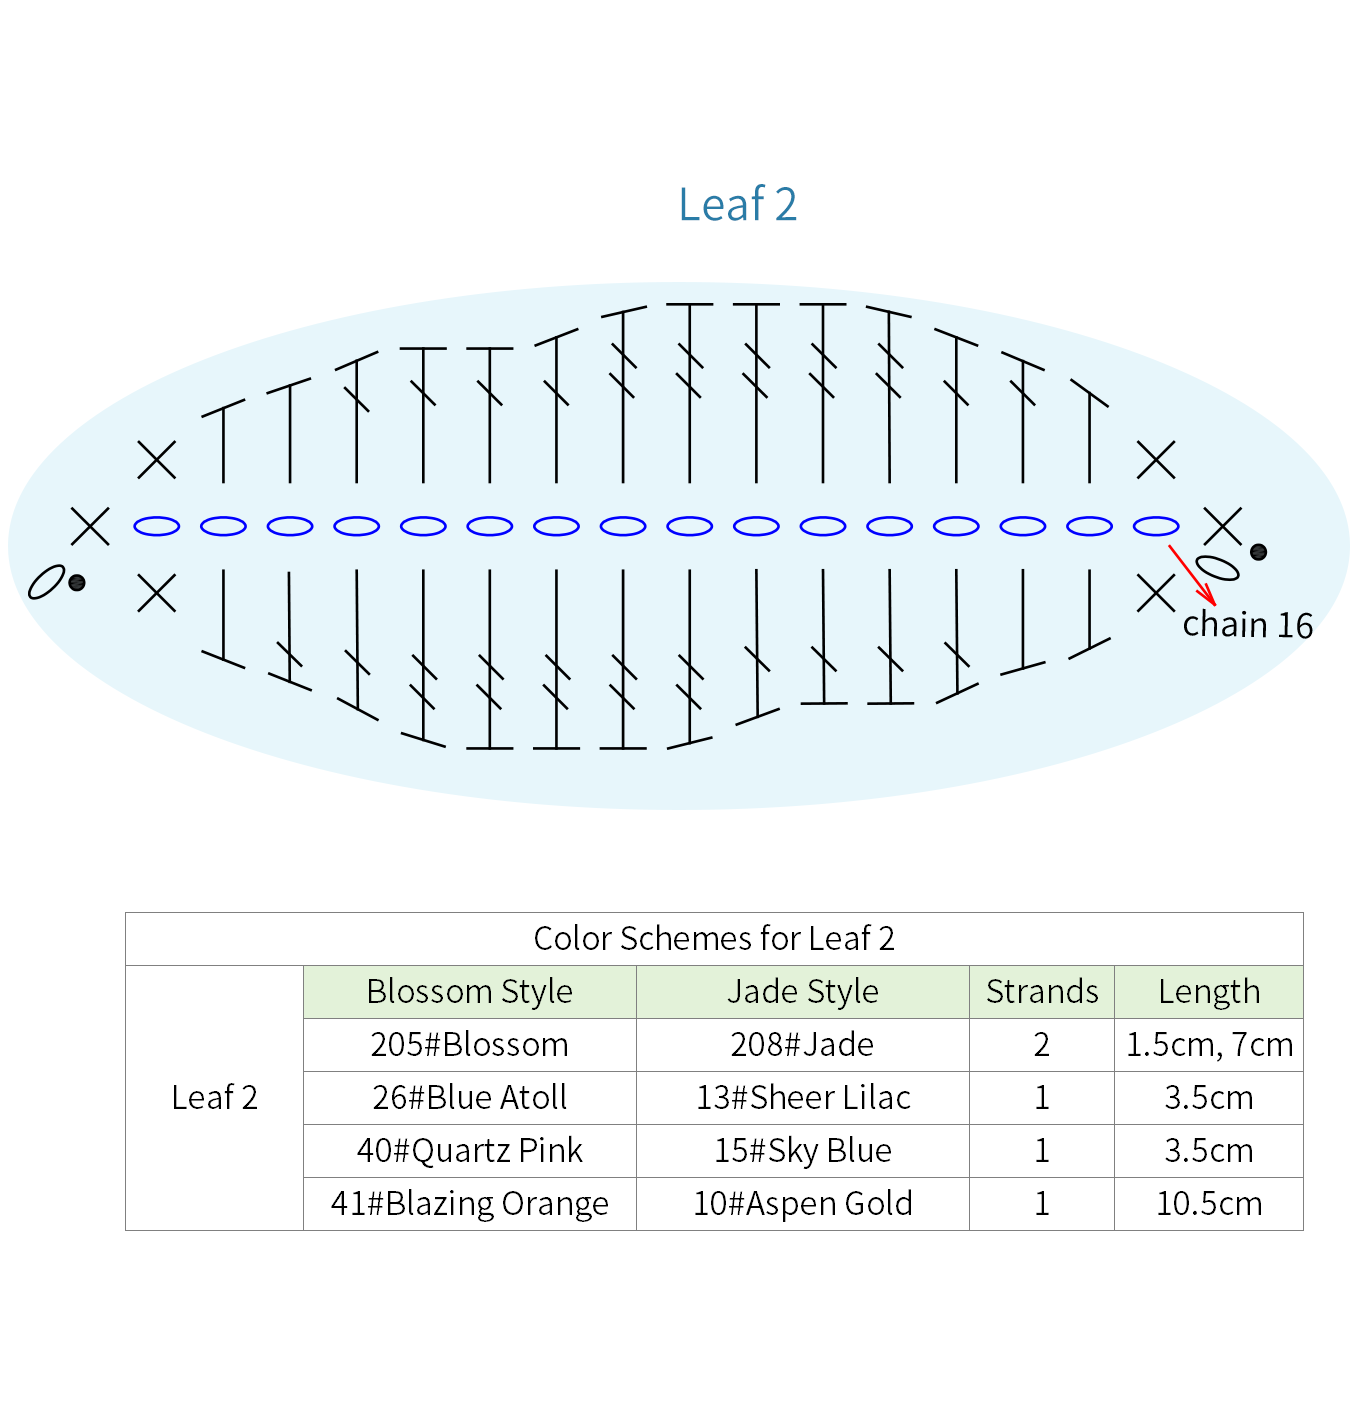
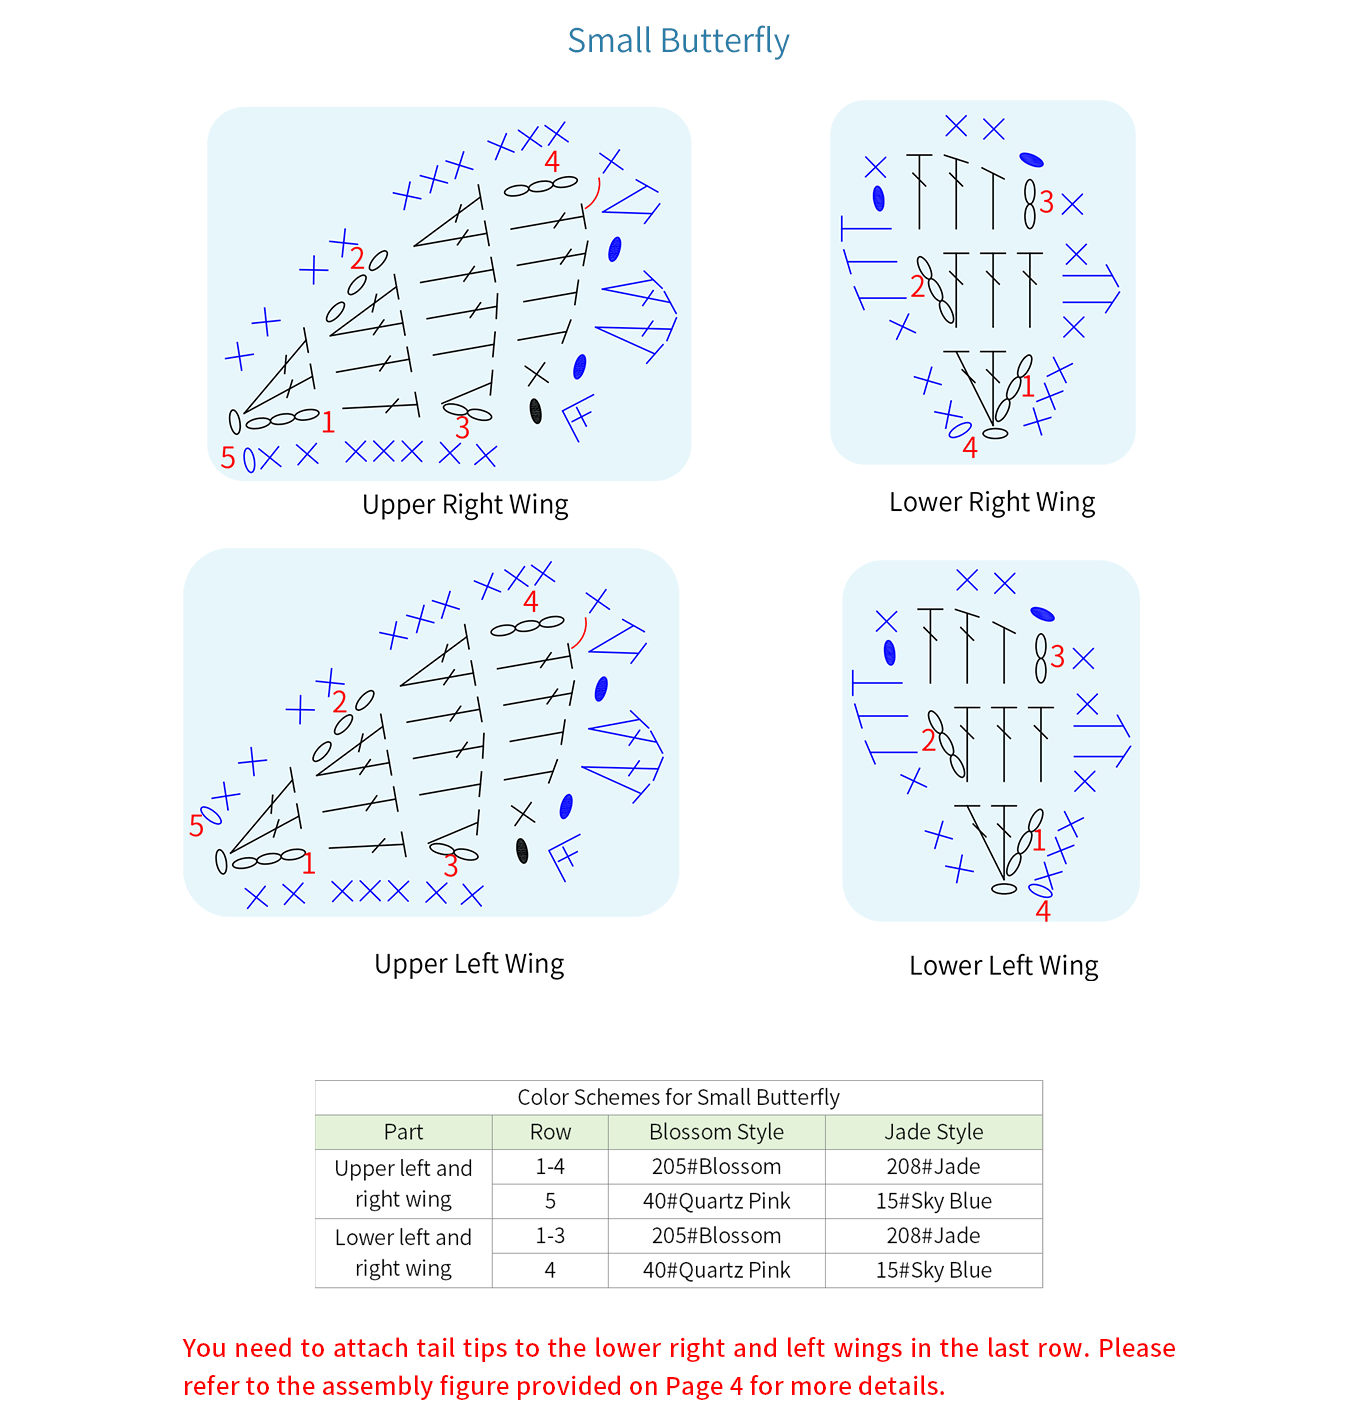
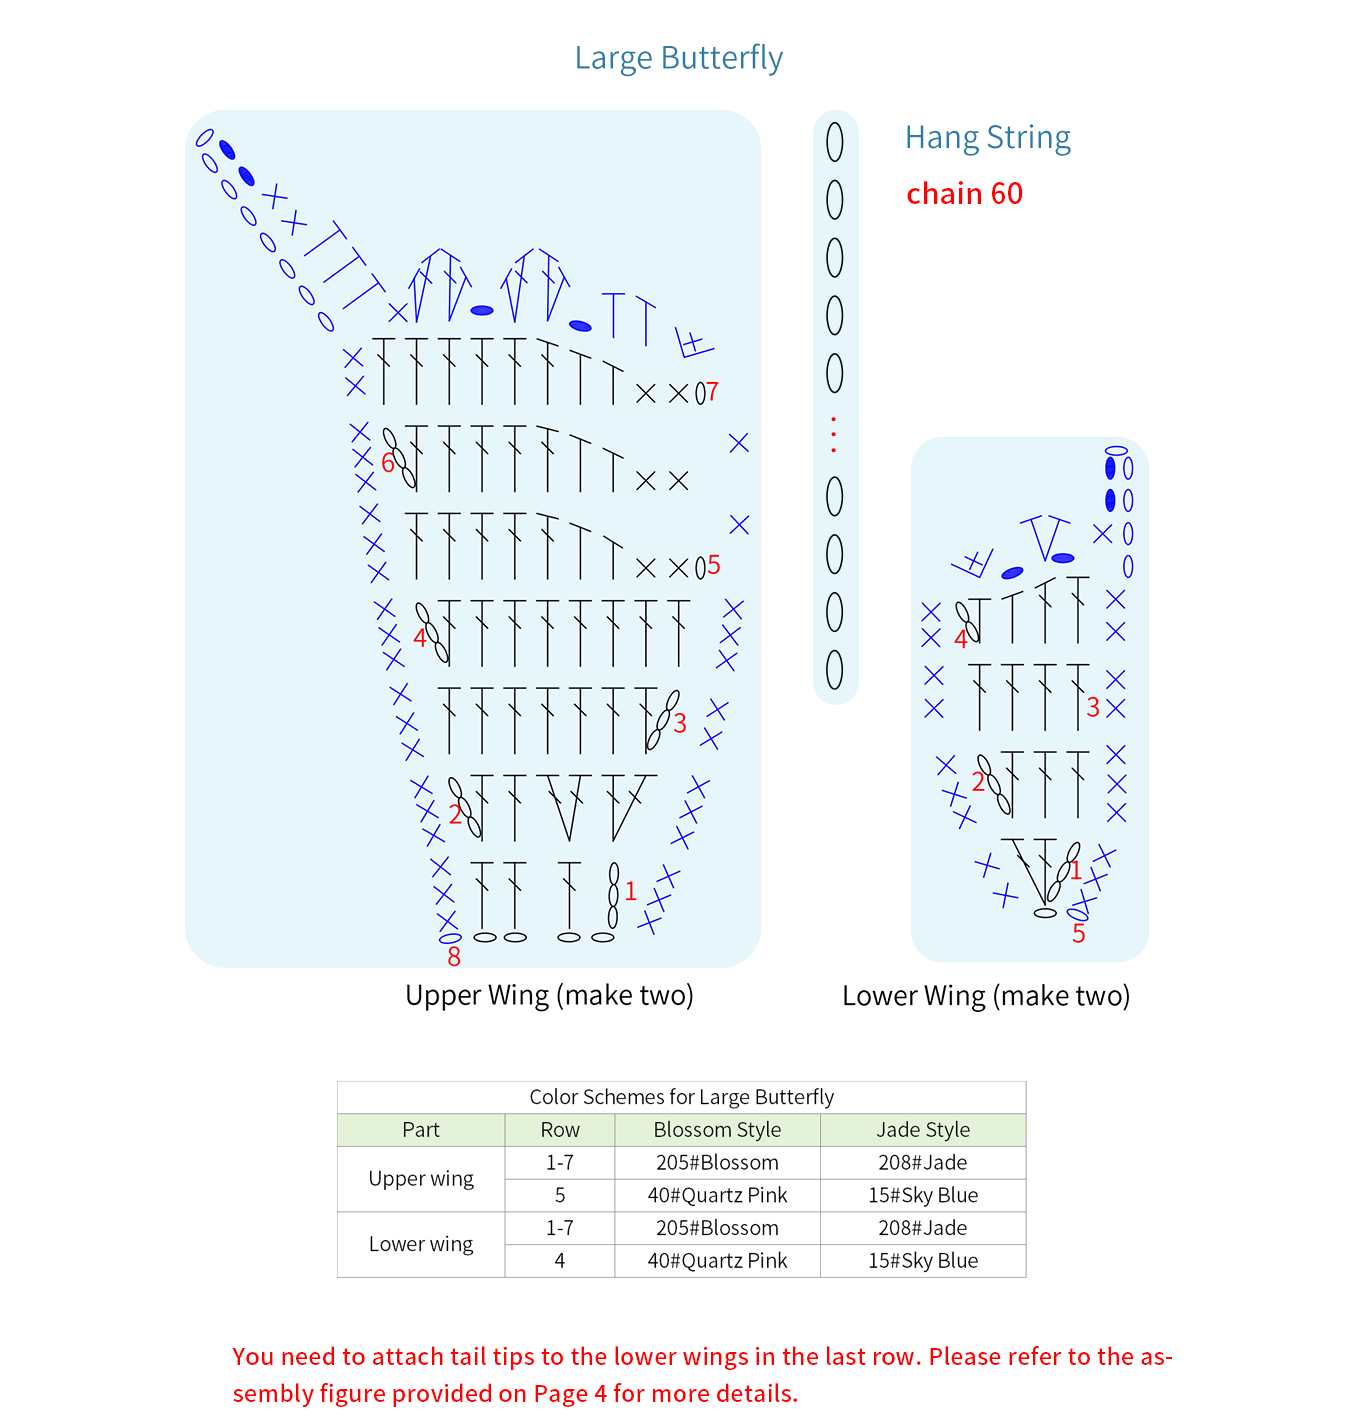
The decorations include motif 2, leaf 1, leaf 2, small butterfly. large butterfly and hanging string. The small butterfly is divided into the upper left wing, the upper right wing, the lower left wing, the lower right wing and assembly. The large butterfly consists of the upper wing, the lower wing and assembly. Please refer to the video demonstration for more details.
PART3 AssemblyC 49' 31''
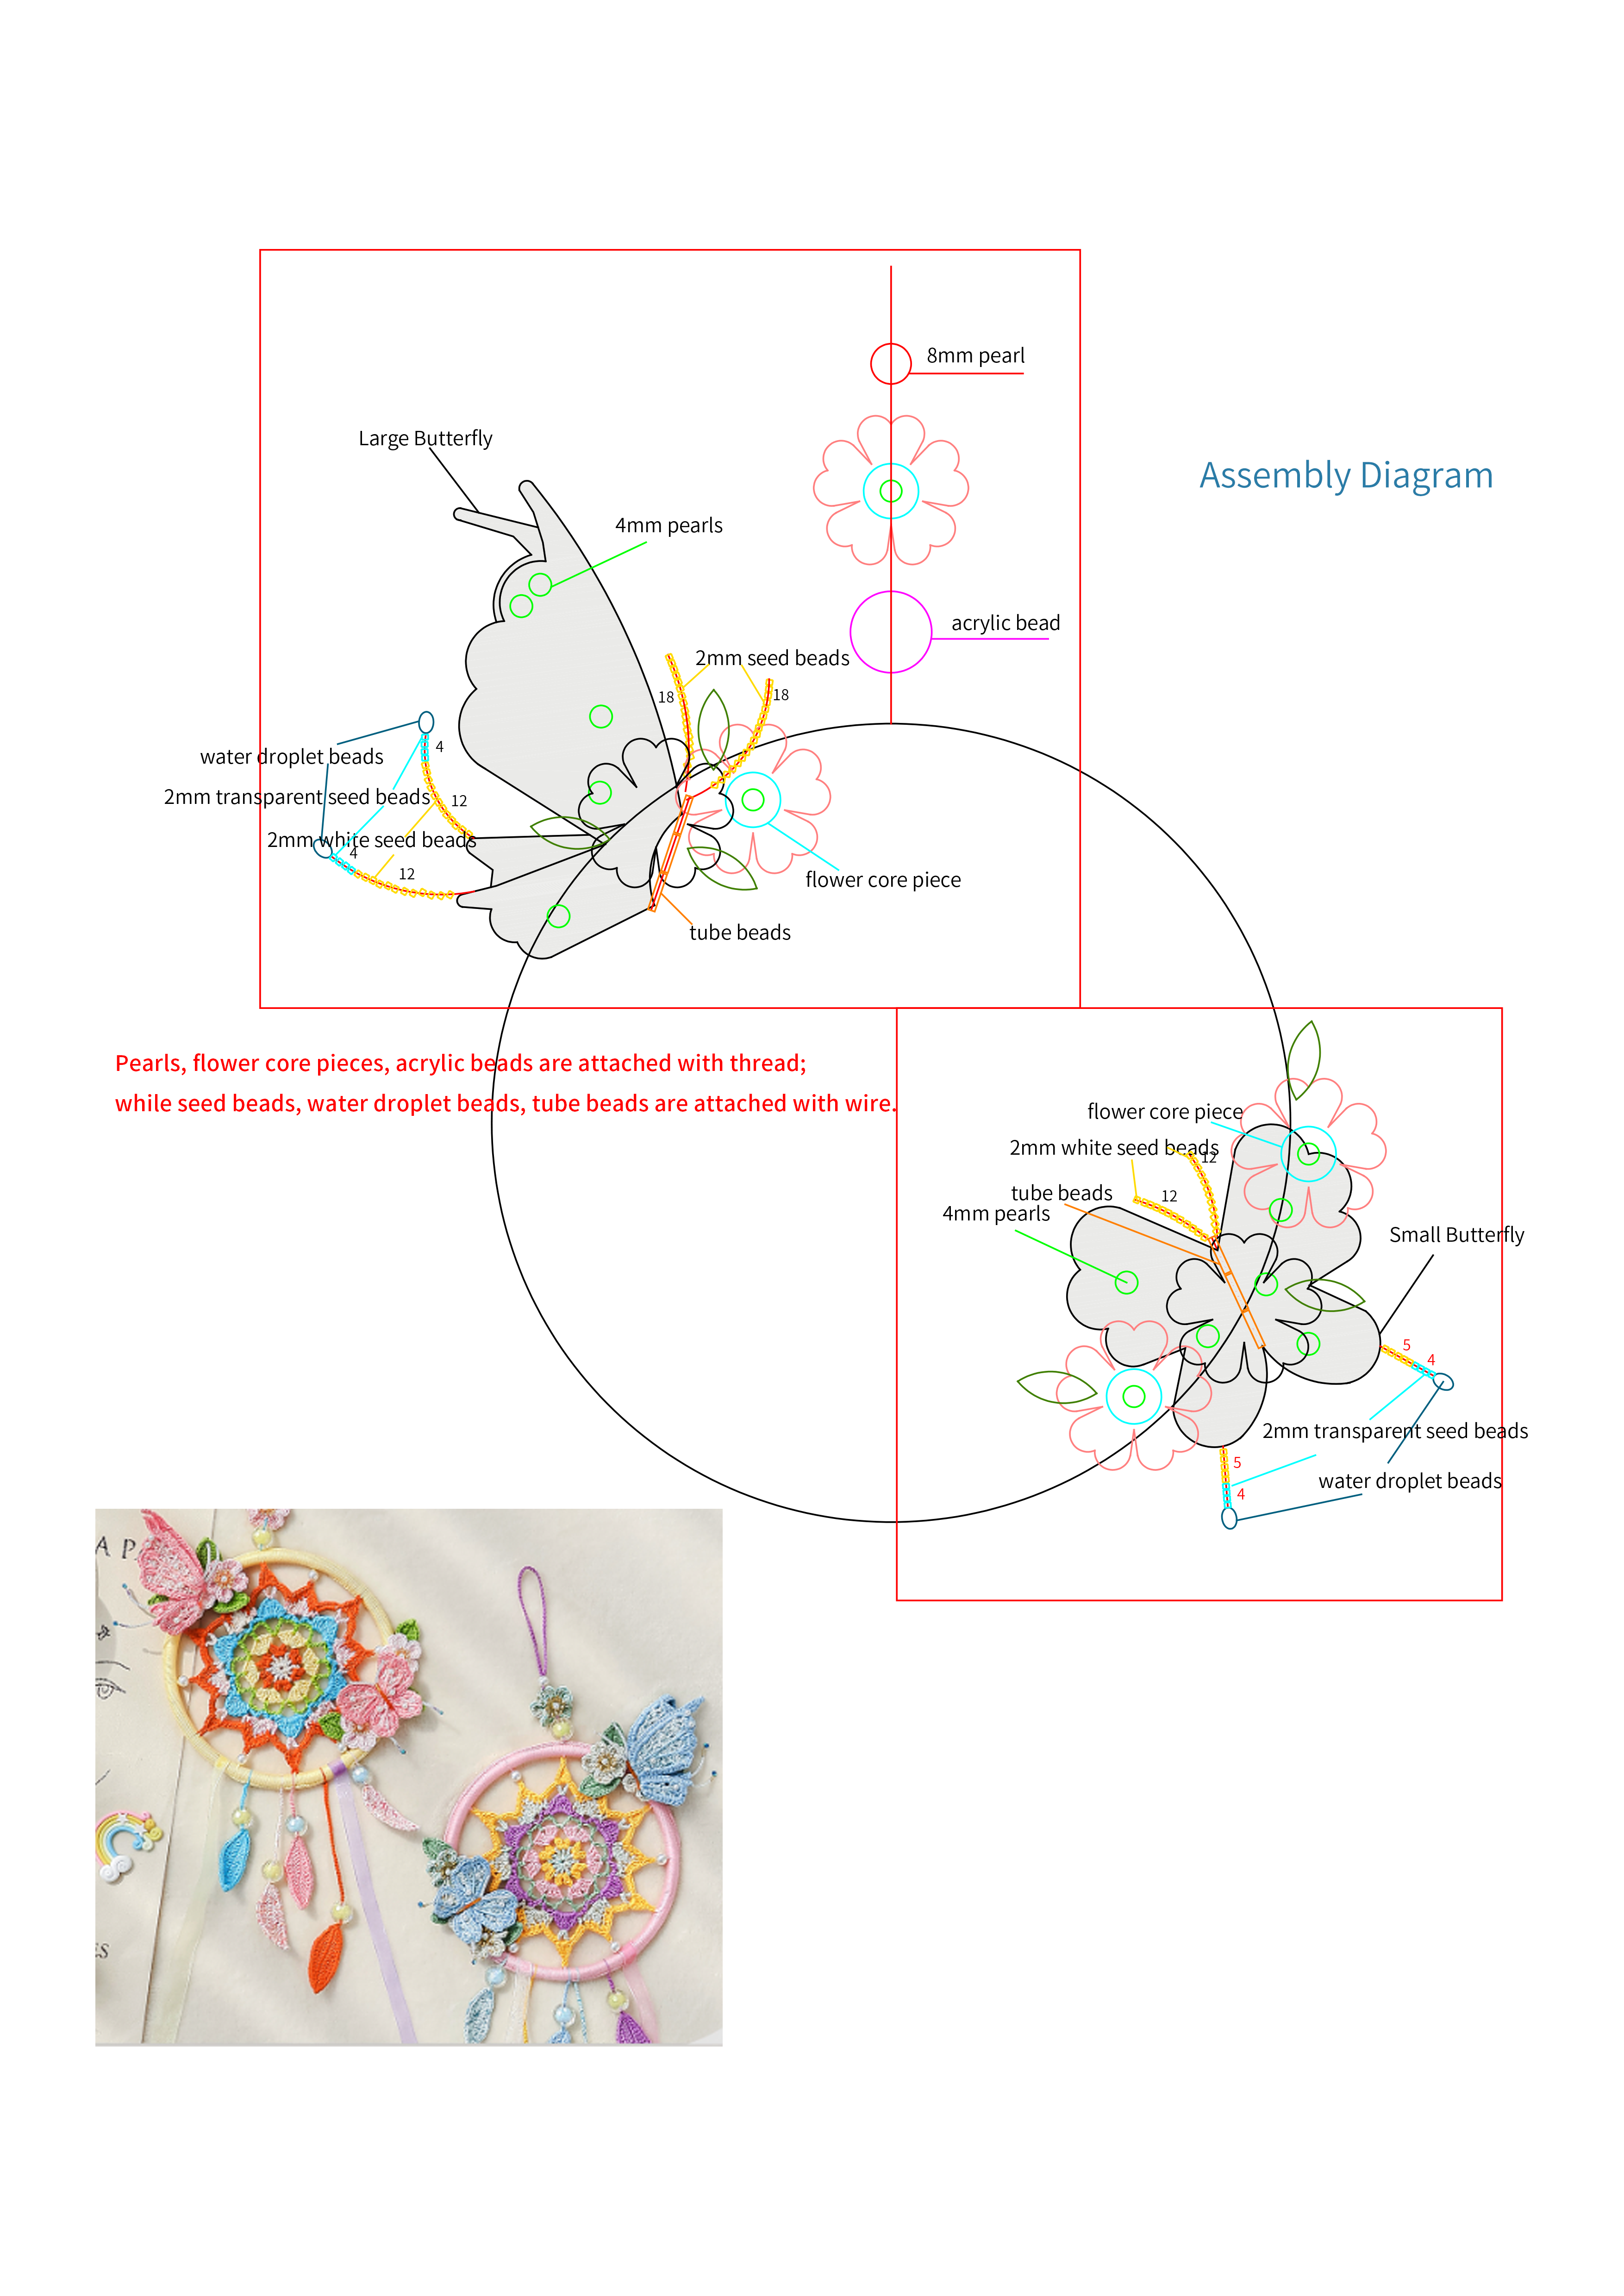
Attach finished decorations onto the main part. For the specific positions to attach, please refer to the assembly diagram or adjust to your preferences. Please refer to the video demonstration for more details.
Made by the community