Flowers
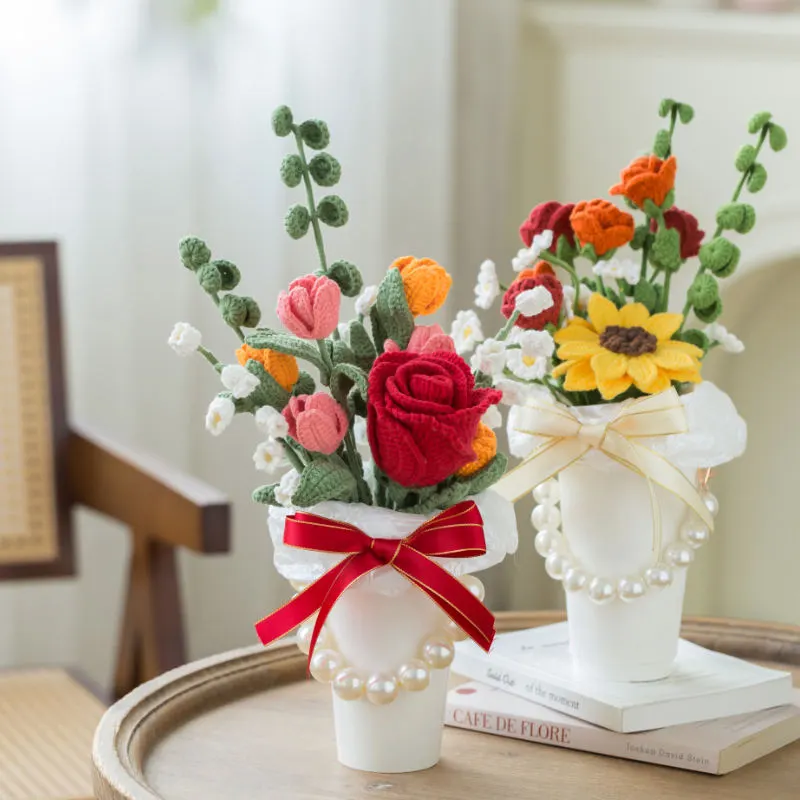
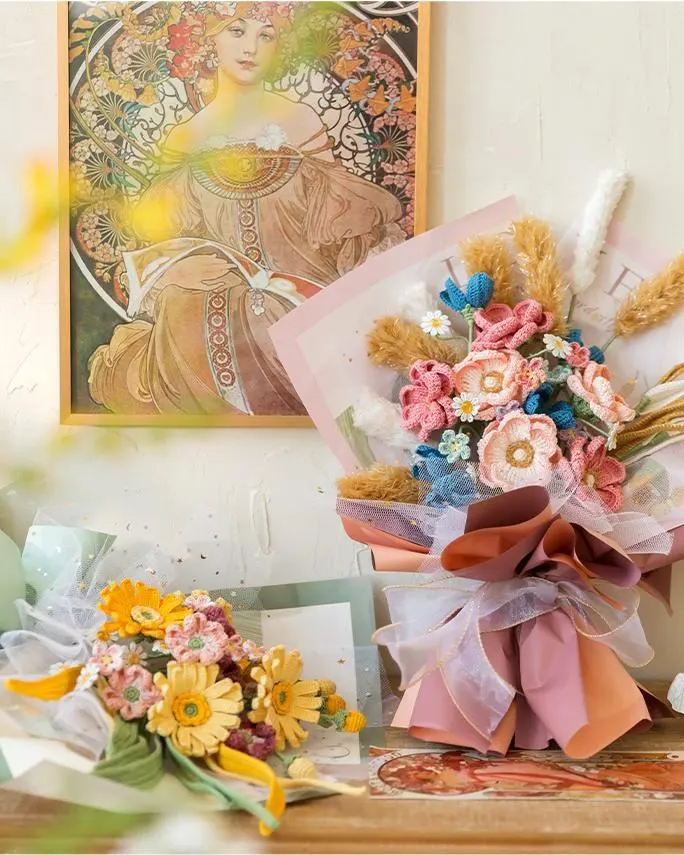
Floral Reverie Bouquet
Project preview
See the finished project
Pattern format
Instructions
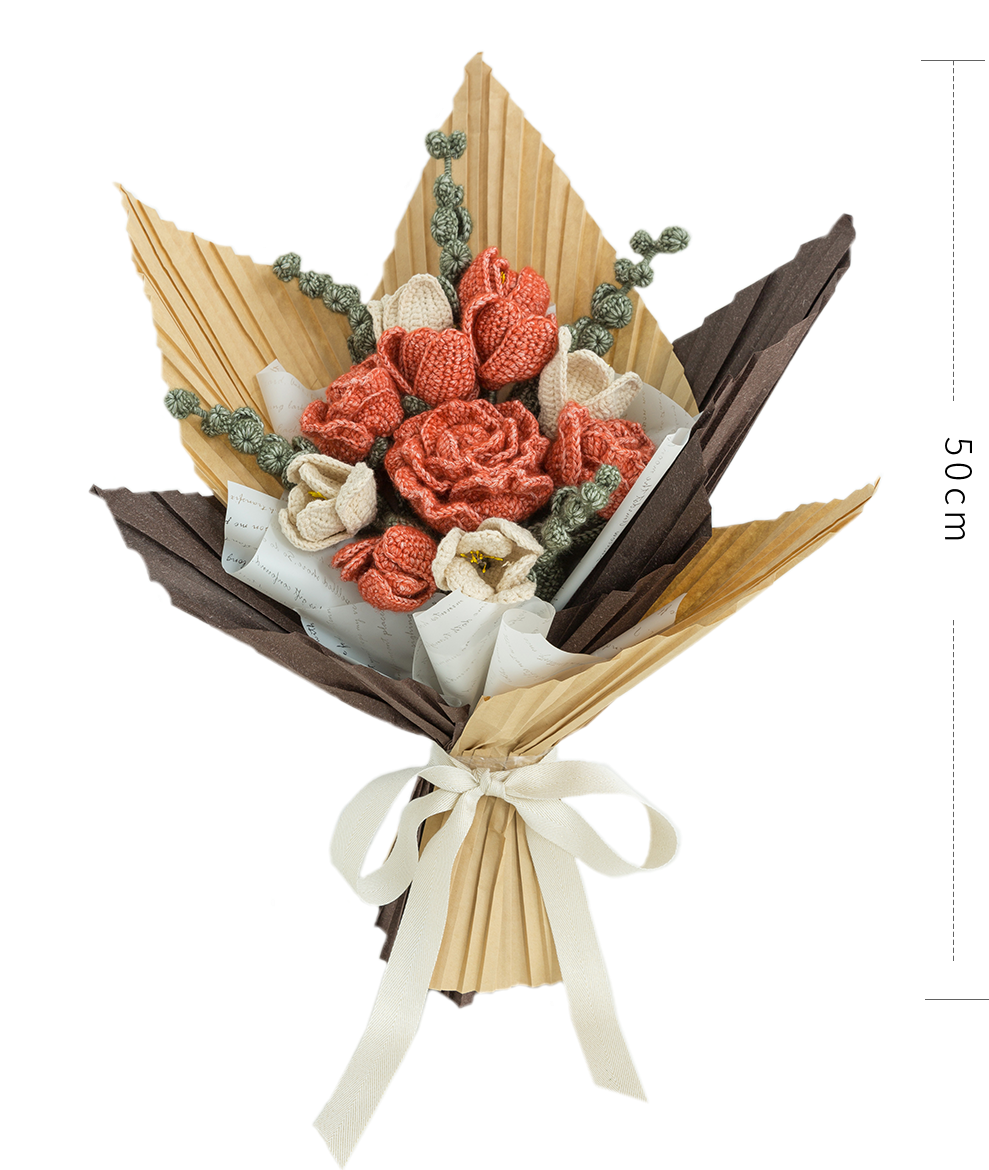
The Handcrafted measurements may have an error of 1 to 2 cm.
Due to variations in individual tension, the size of the sample is for reference only.
Materials: 4-Ply Combed Cotton & Acrylic Fibre Hand Knitting Yarn/ Impression Misty Feather
Hook: 2.50 mm crochet hook

Chart Key














Note: This pattern is making in Chinese crochet pattern terms, and the stitch name is written using American terminology. All measurements in charts are in cm.
Roses
The rose branch includes leaves, calyx, flowers, and branch assembly. Complete the crocheting of each part first, and then assemble them last.
| Rose Branch | |||
| Part | Materials | Color Scheme | Quantity |
| Large flowers | Impression Misty Feather | 18#Tigerlily | 1 |
| Smaller flowers | 2 | ||
| Leaf | 24#Elm Green | 4 | |
| Calyx | 3 | ||
Step1 Leaf
The leaves start from a foundation chain and are crocheted in rounds counter clockwise, with thin wire added during the process.
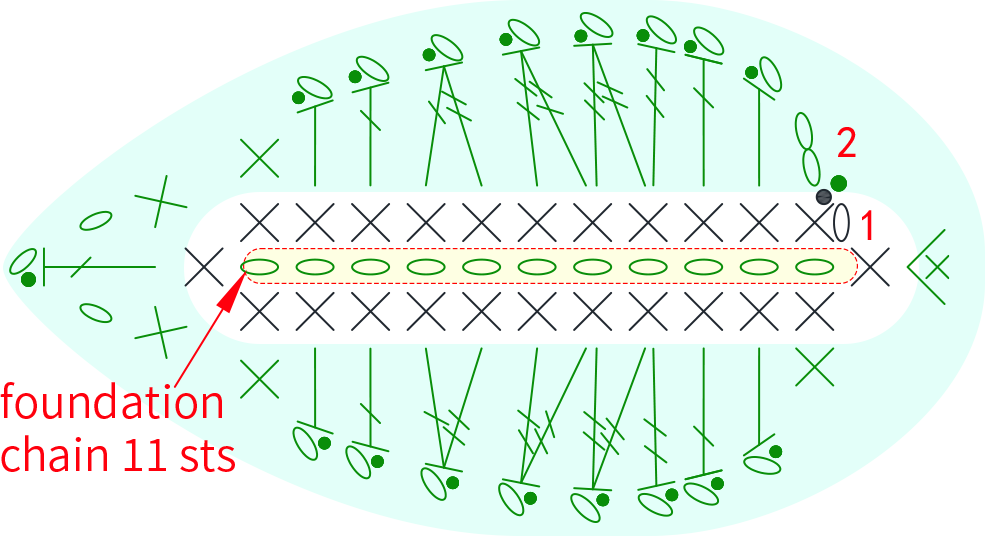
Note: When working the first round, weave in the thin wire, with a length of about 30cm.
Step2 Calyx
The calyx is worked using the magic ring method, crocheting in rounds counterclockwise from the starting point.
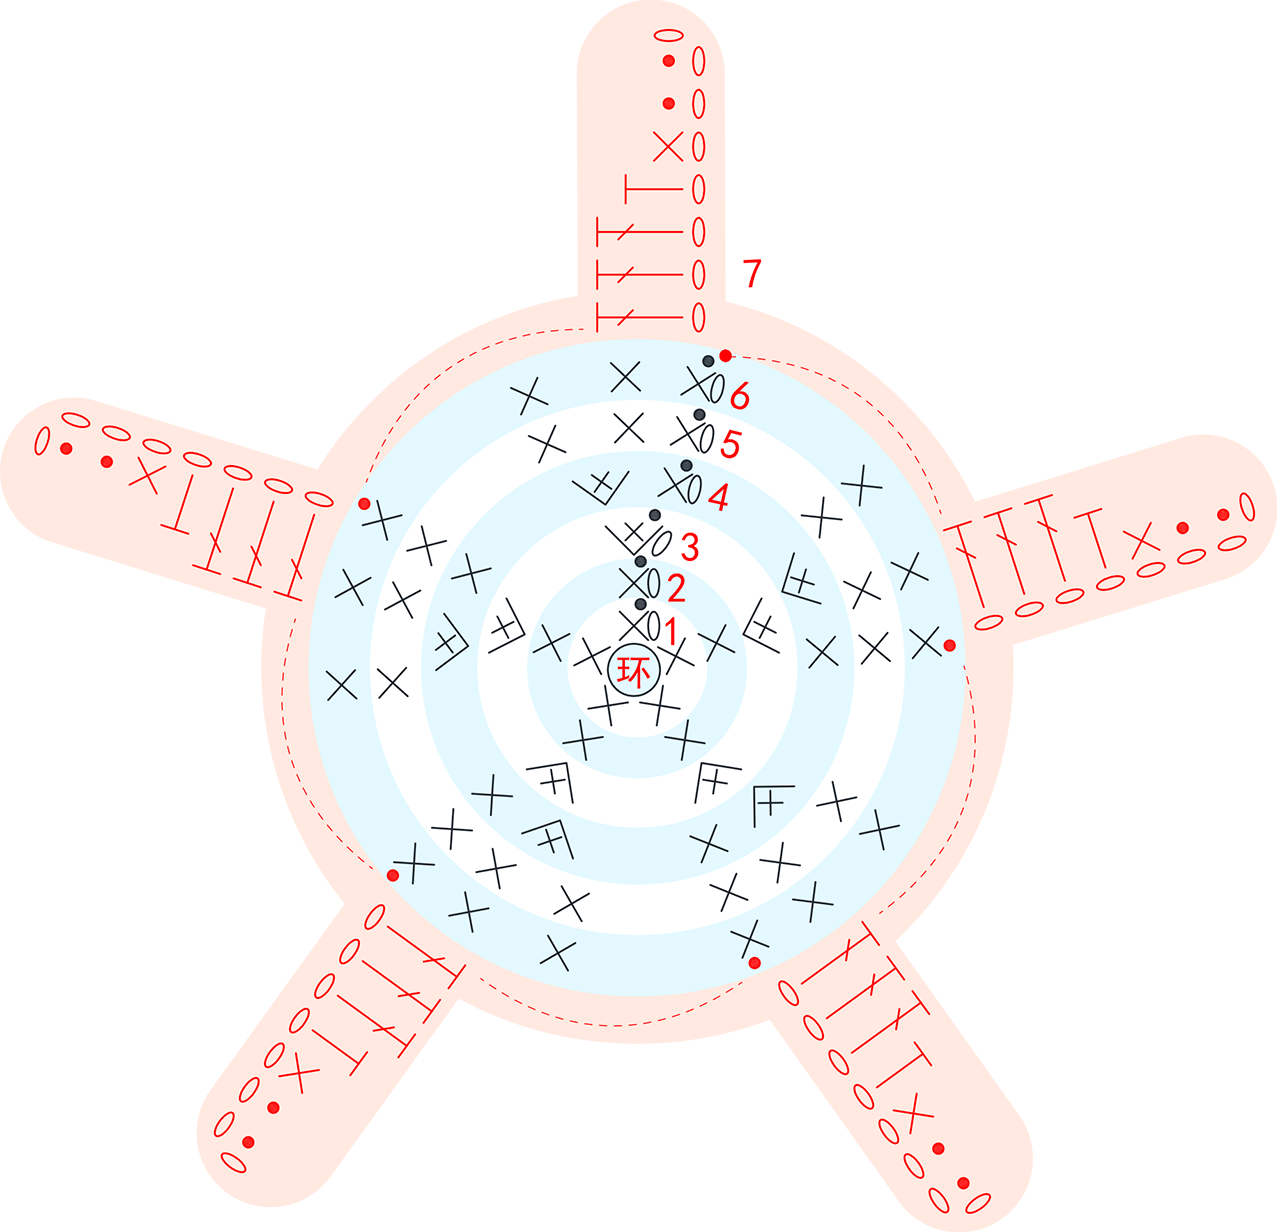
Note: After completing the crocheting, leave a yarn tail of about 20cm.
Step3 Flower
The flower starts with a foundation chain, works back and forth along the starting chain, then crochets the petals separately. Once completed, roll it up and sew it together to form the shape of a flower.
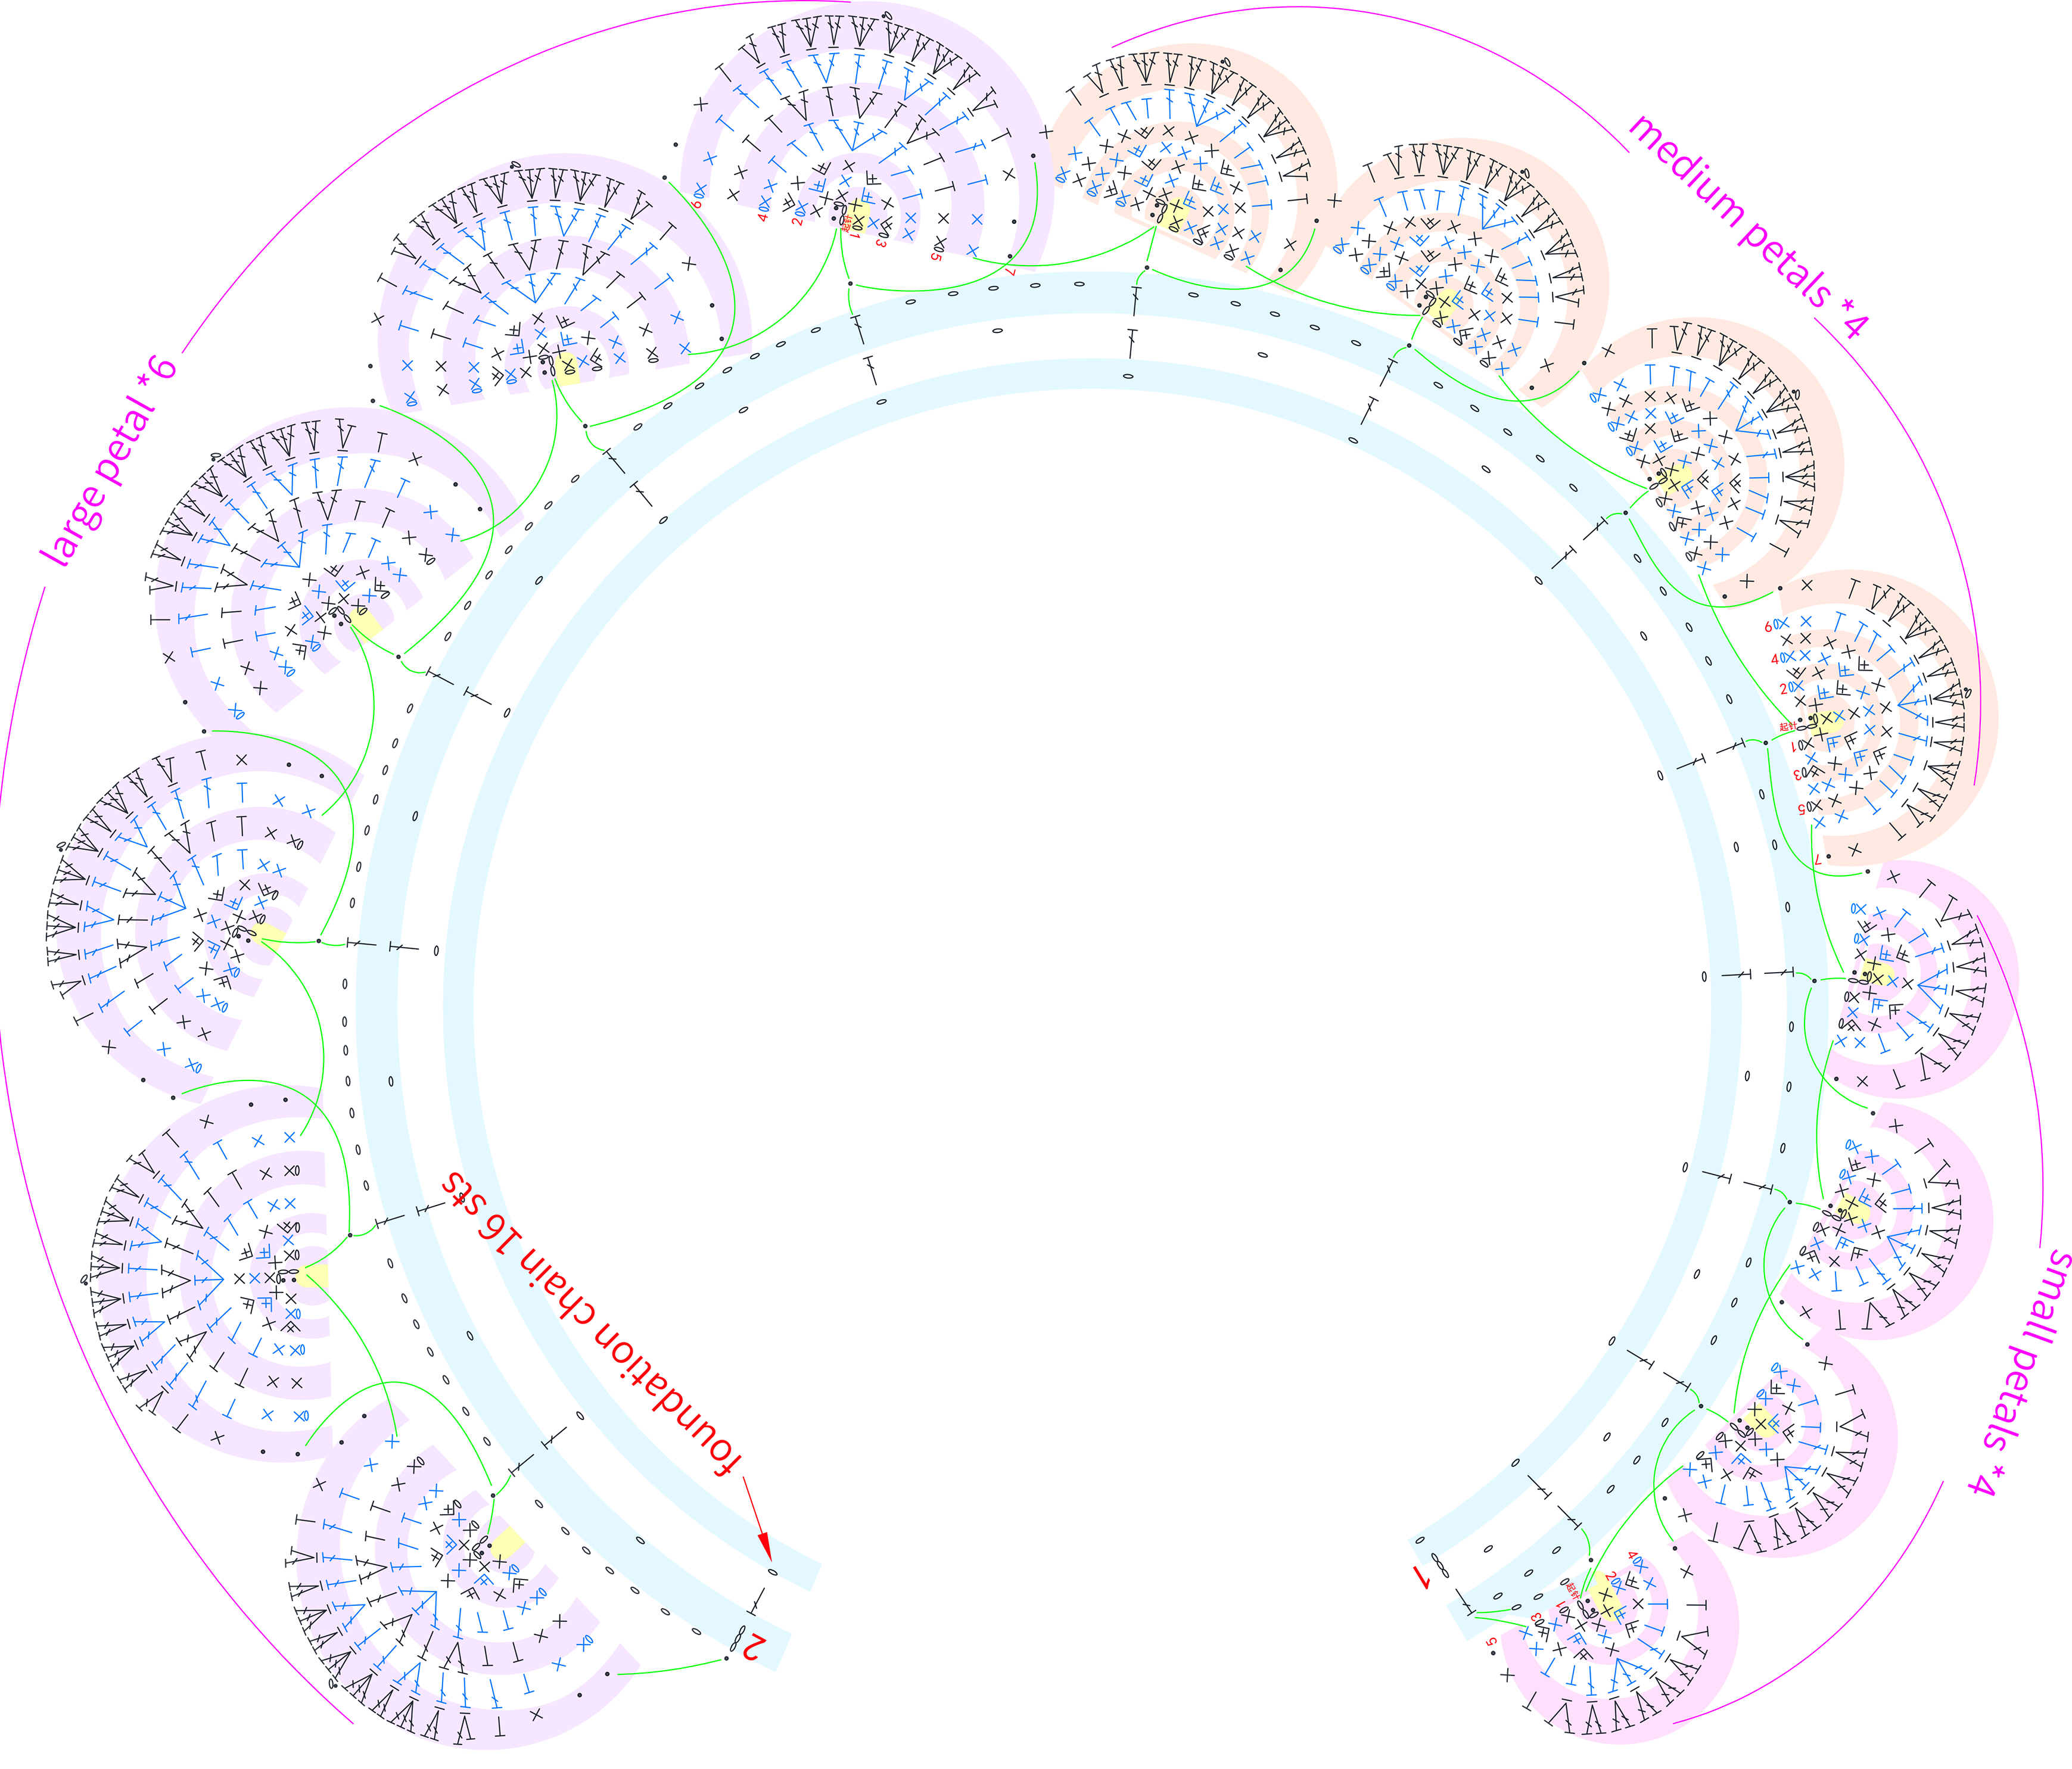
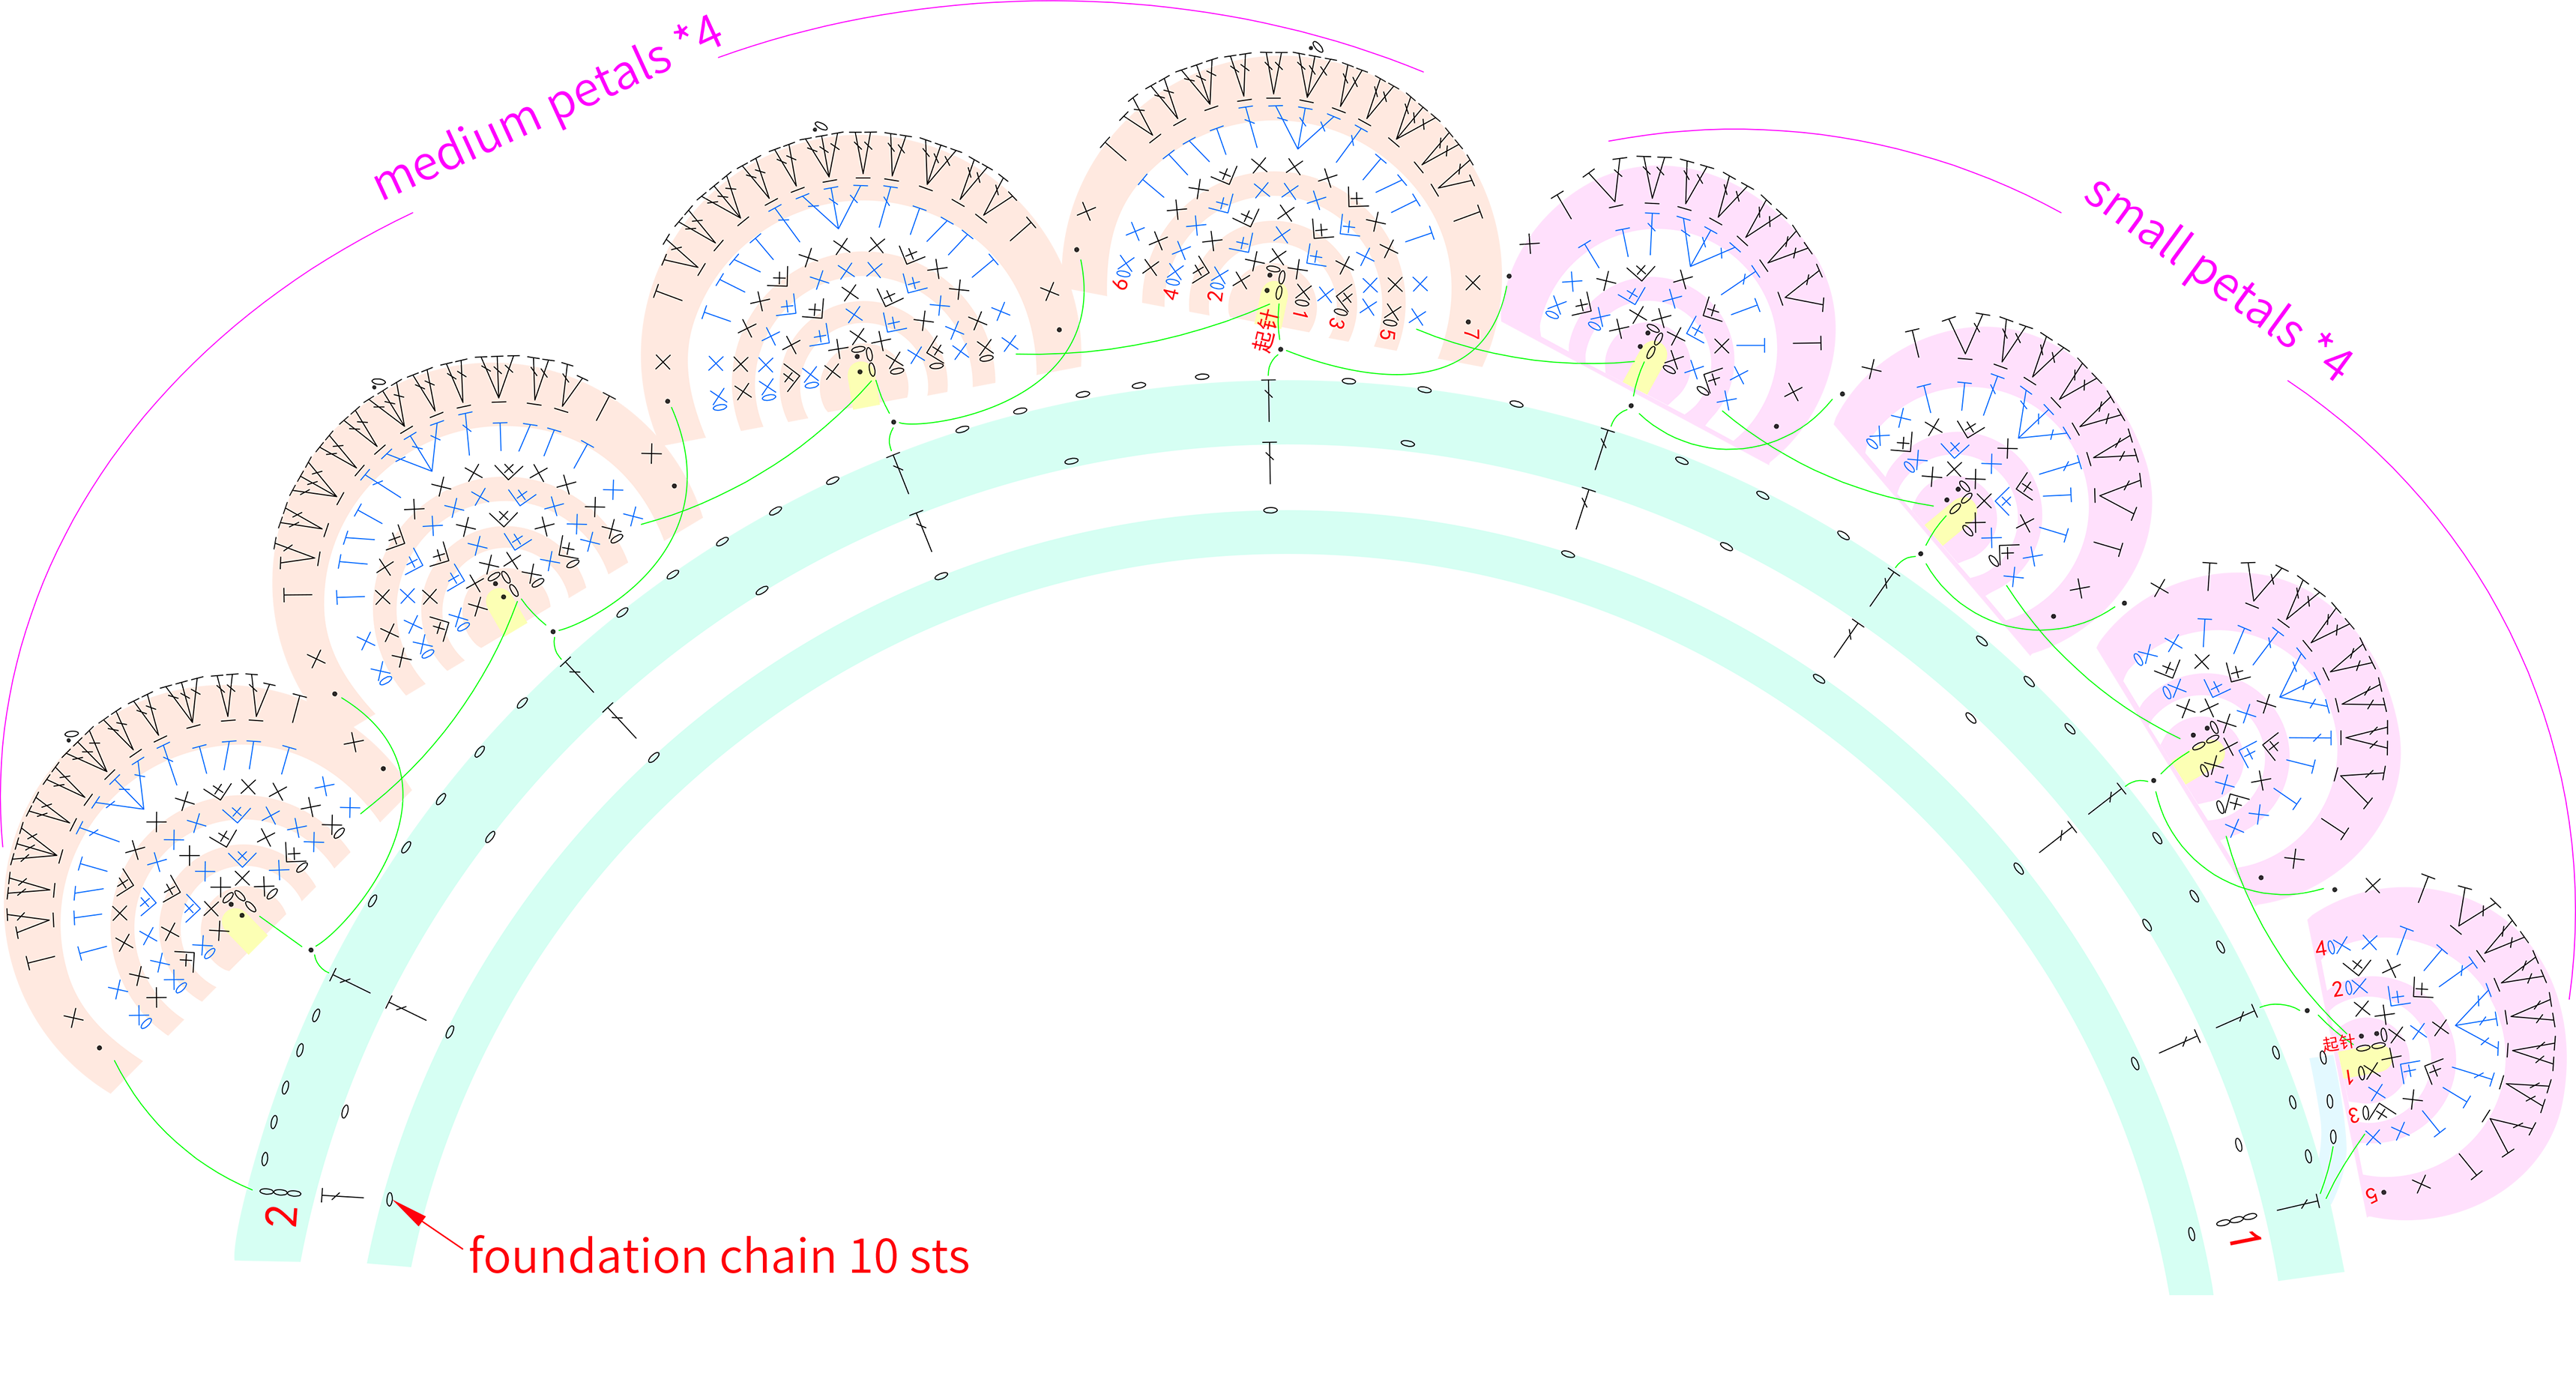
Note: After completing the crocheting, leave a yarn tail of about 25cm.
Step4 Assembly of flower branches
Assemble the flower branches after completing all the crocheting.
| Assembly of flower branches | ||||
| Quantity | Accessories | |||
| Branch 1 x3 | Large flower x1、Calyx x1、Leaf x2 | |||
| Branch 2 x3 | smaller flower x1、Calyx x1、Leaf x1 | |||
Eucalyptus
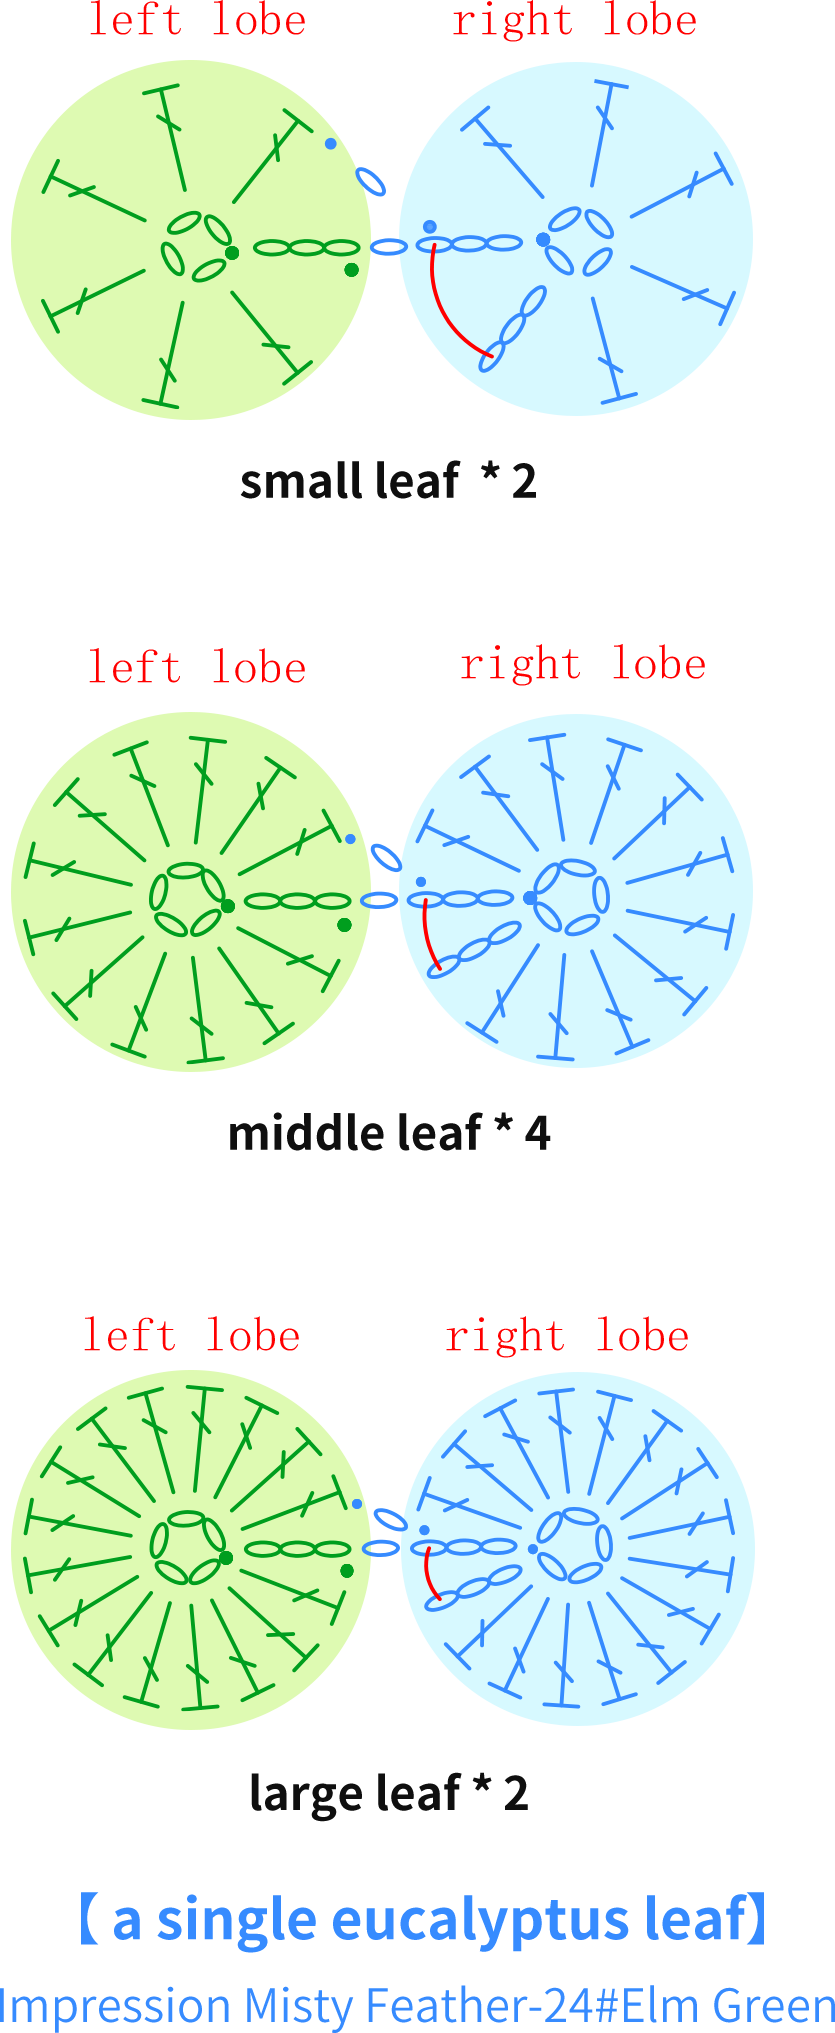
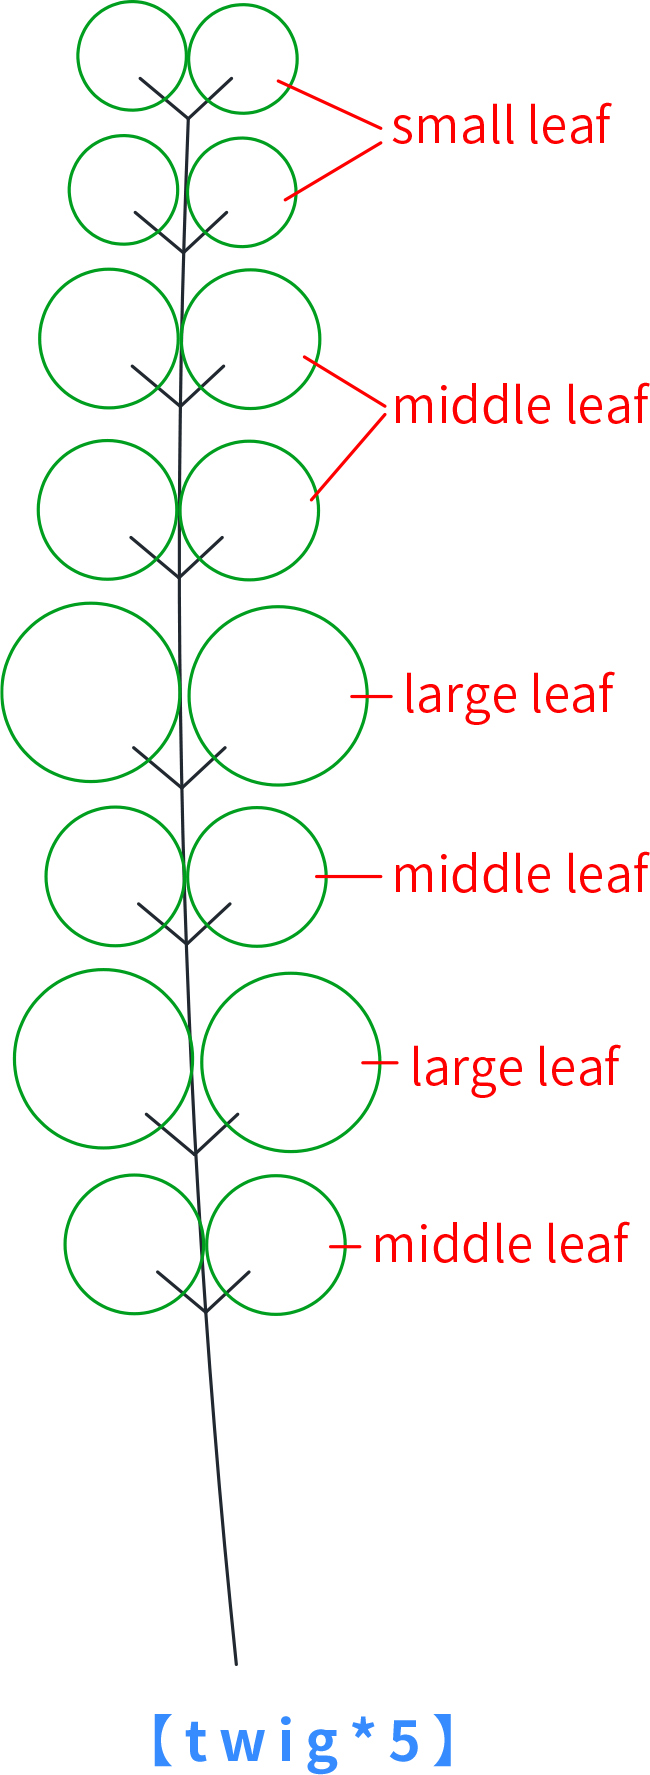
Composed of small leaves, medium leaves, and large leaves, each type of leaf is crocheted similarly, all using the magic ring method. First, crochet the left lobe, then the right lobe. After completing all of them, assemble them into branches.
Tulip
Step1 Petal
The petals consist of an inner layer and an outer layer. Both layers of petals are crocheted separately, starting with a magic ring and working in rounds along the ring.
| Tulip Branches x9 | ||
| Part | 53#Cloud Cream ( 4-Ply Combed Cotton ) | 18#Tigerlily (Impression Misty Feather) |
| inner petal | 4 | 5 |
| outer petal | 4 | 5 |
| Leaf | 24#Elm Green x7 | |
| Note: For the two styles of tulip branches, any two do not need to have their leaves fixed. | ||
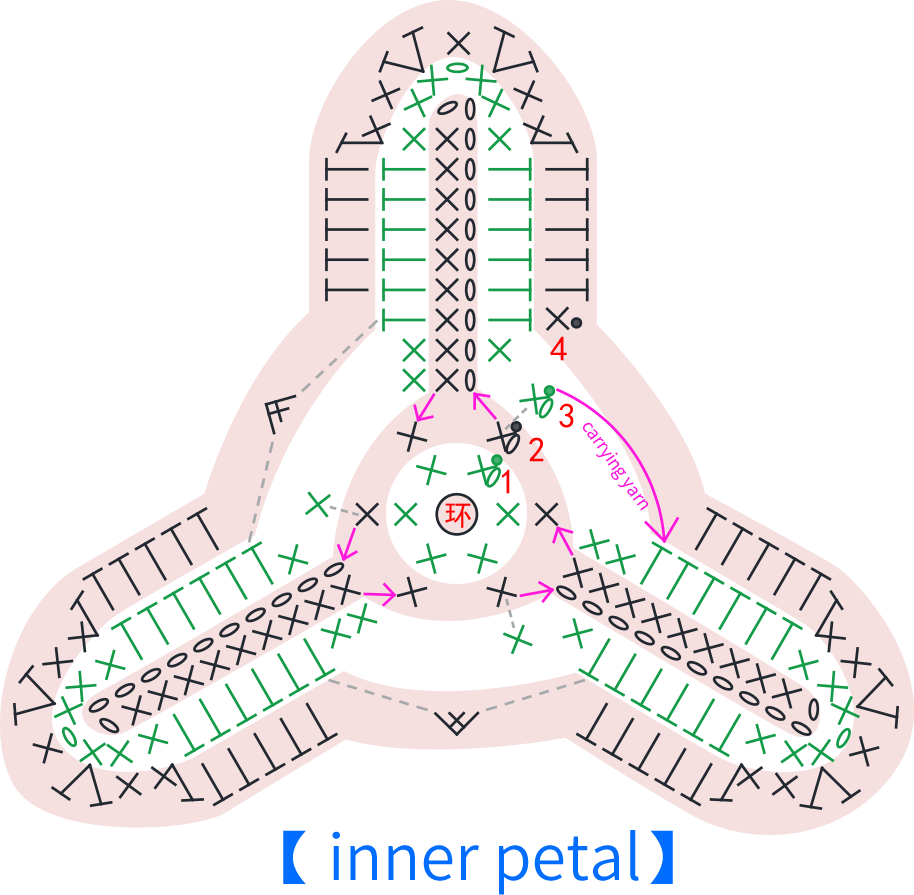
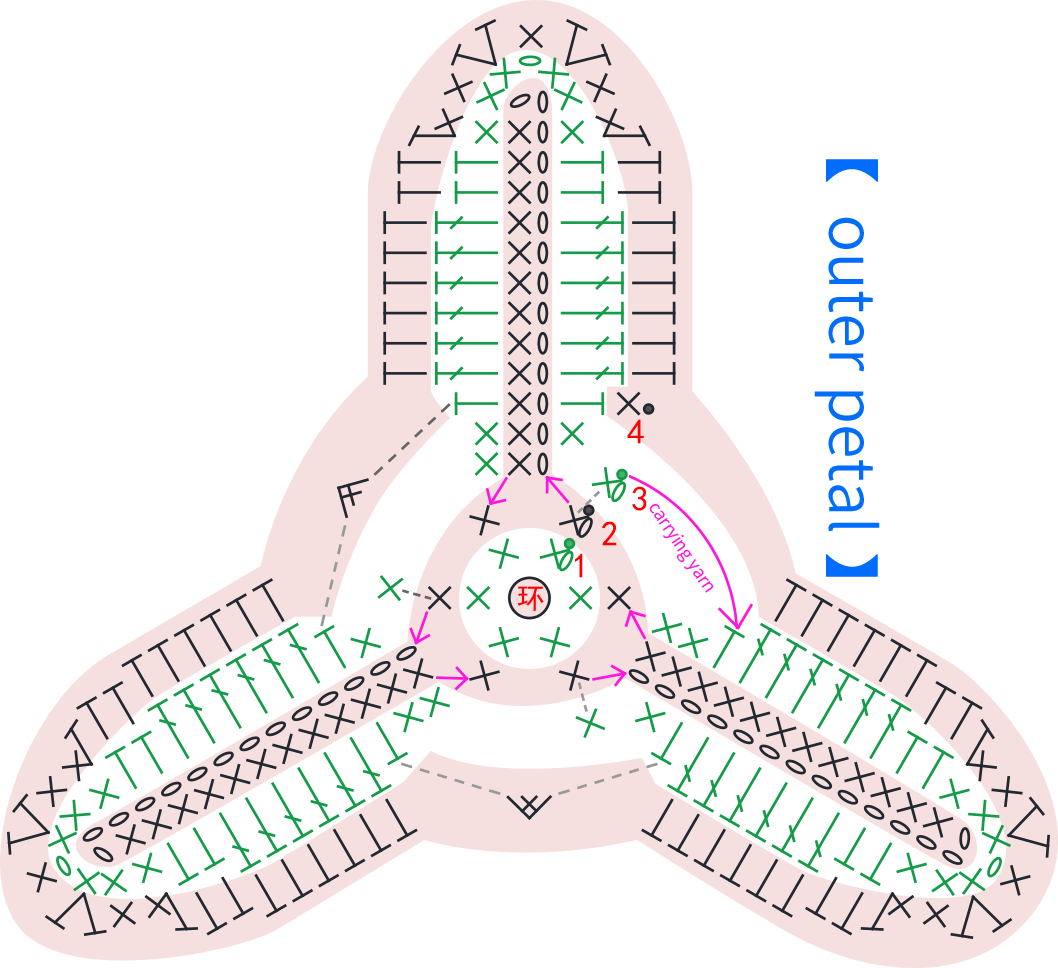
Note: Do not tighten the starting loops for the petals yet, as it will make assembly more convenient later.
Step2 Leaf
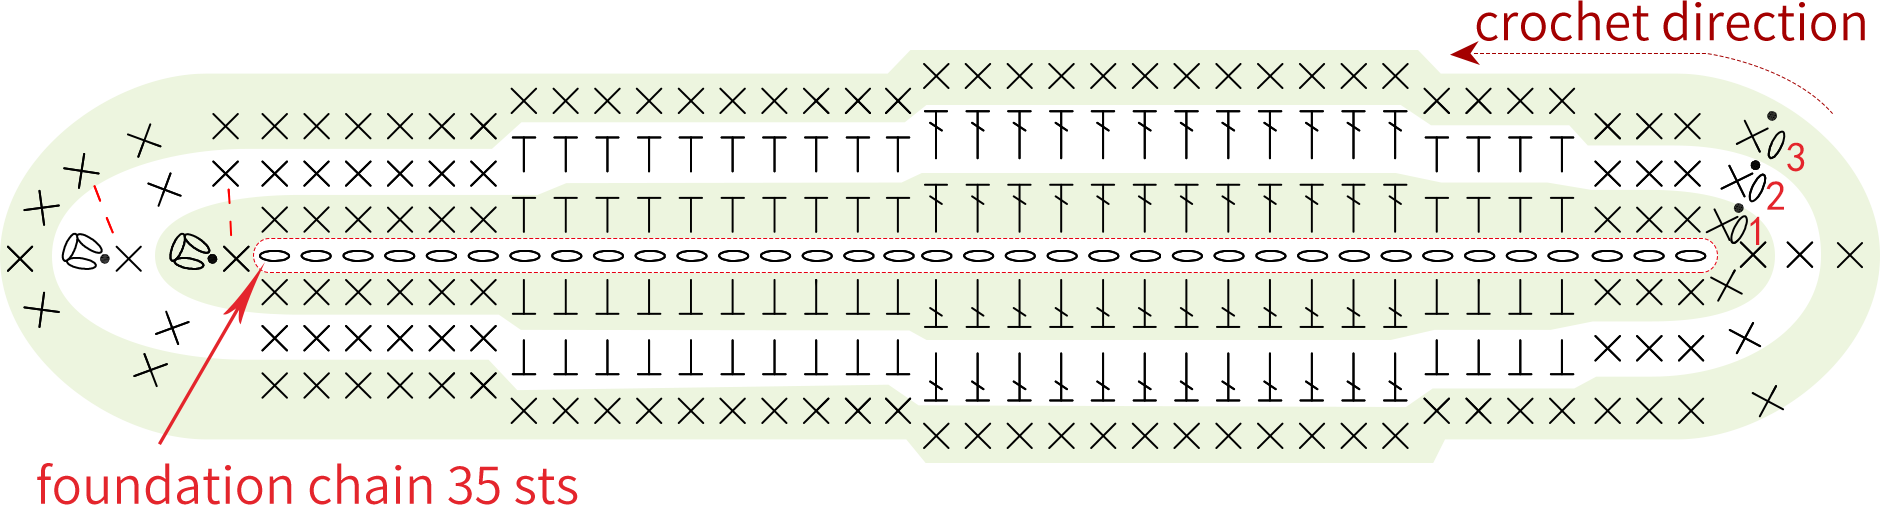
The leaf starts with a foundation chain, and is worked in rounds along the foundation chain. In the last round, crochet the edging while weaving in thin wire.
Step3 Assemble
After all the petals and leaves are crocheted, you need to assemble them into a complete flower. The position of the leaves is random.
Packaging
Once the crocheting is finished, packaging it in the way you like.