Home / Lamp
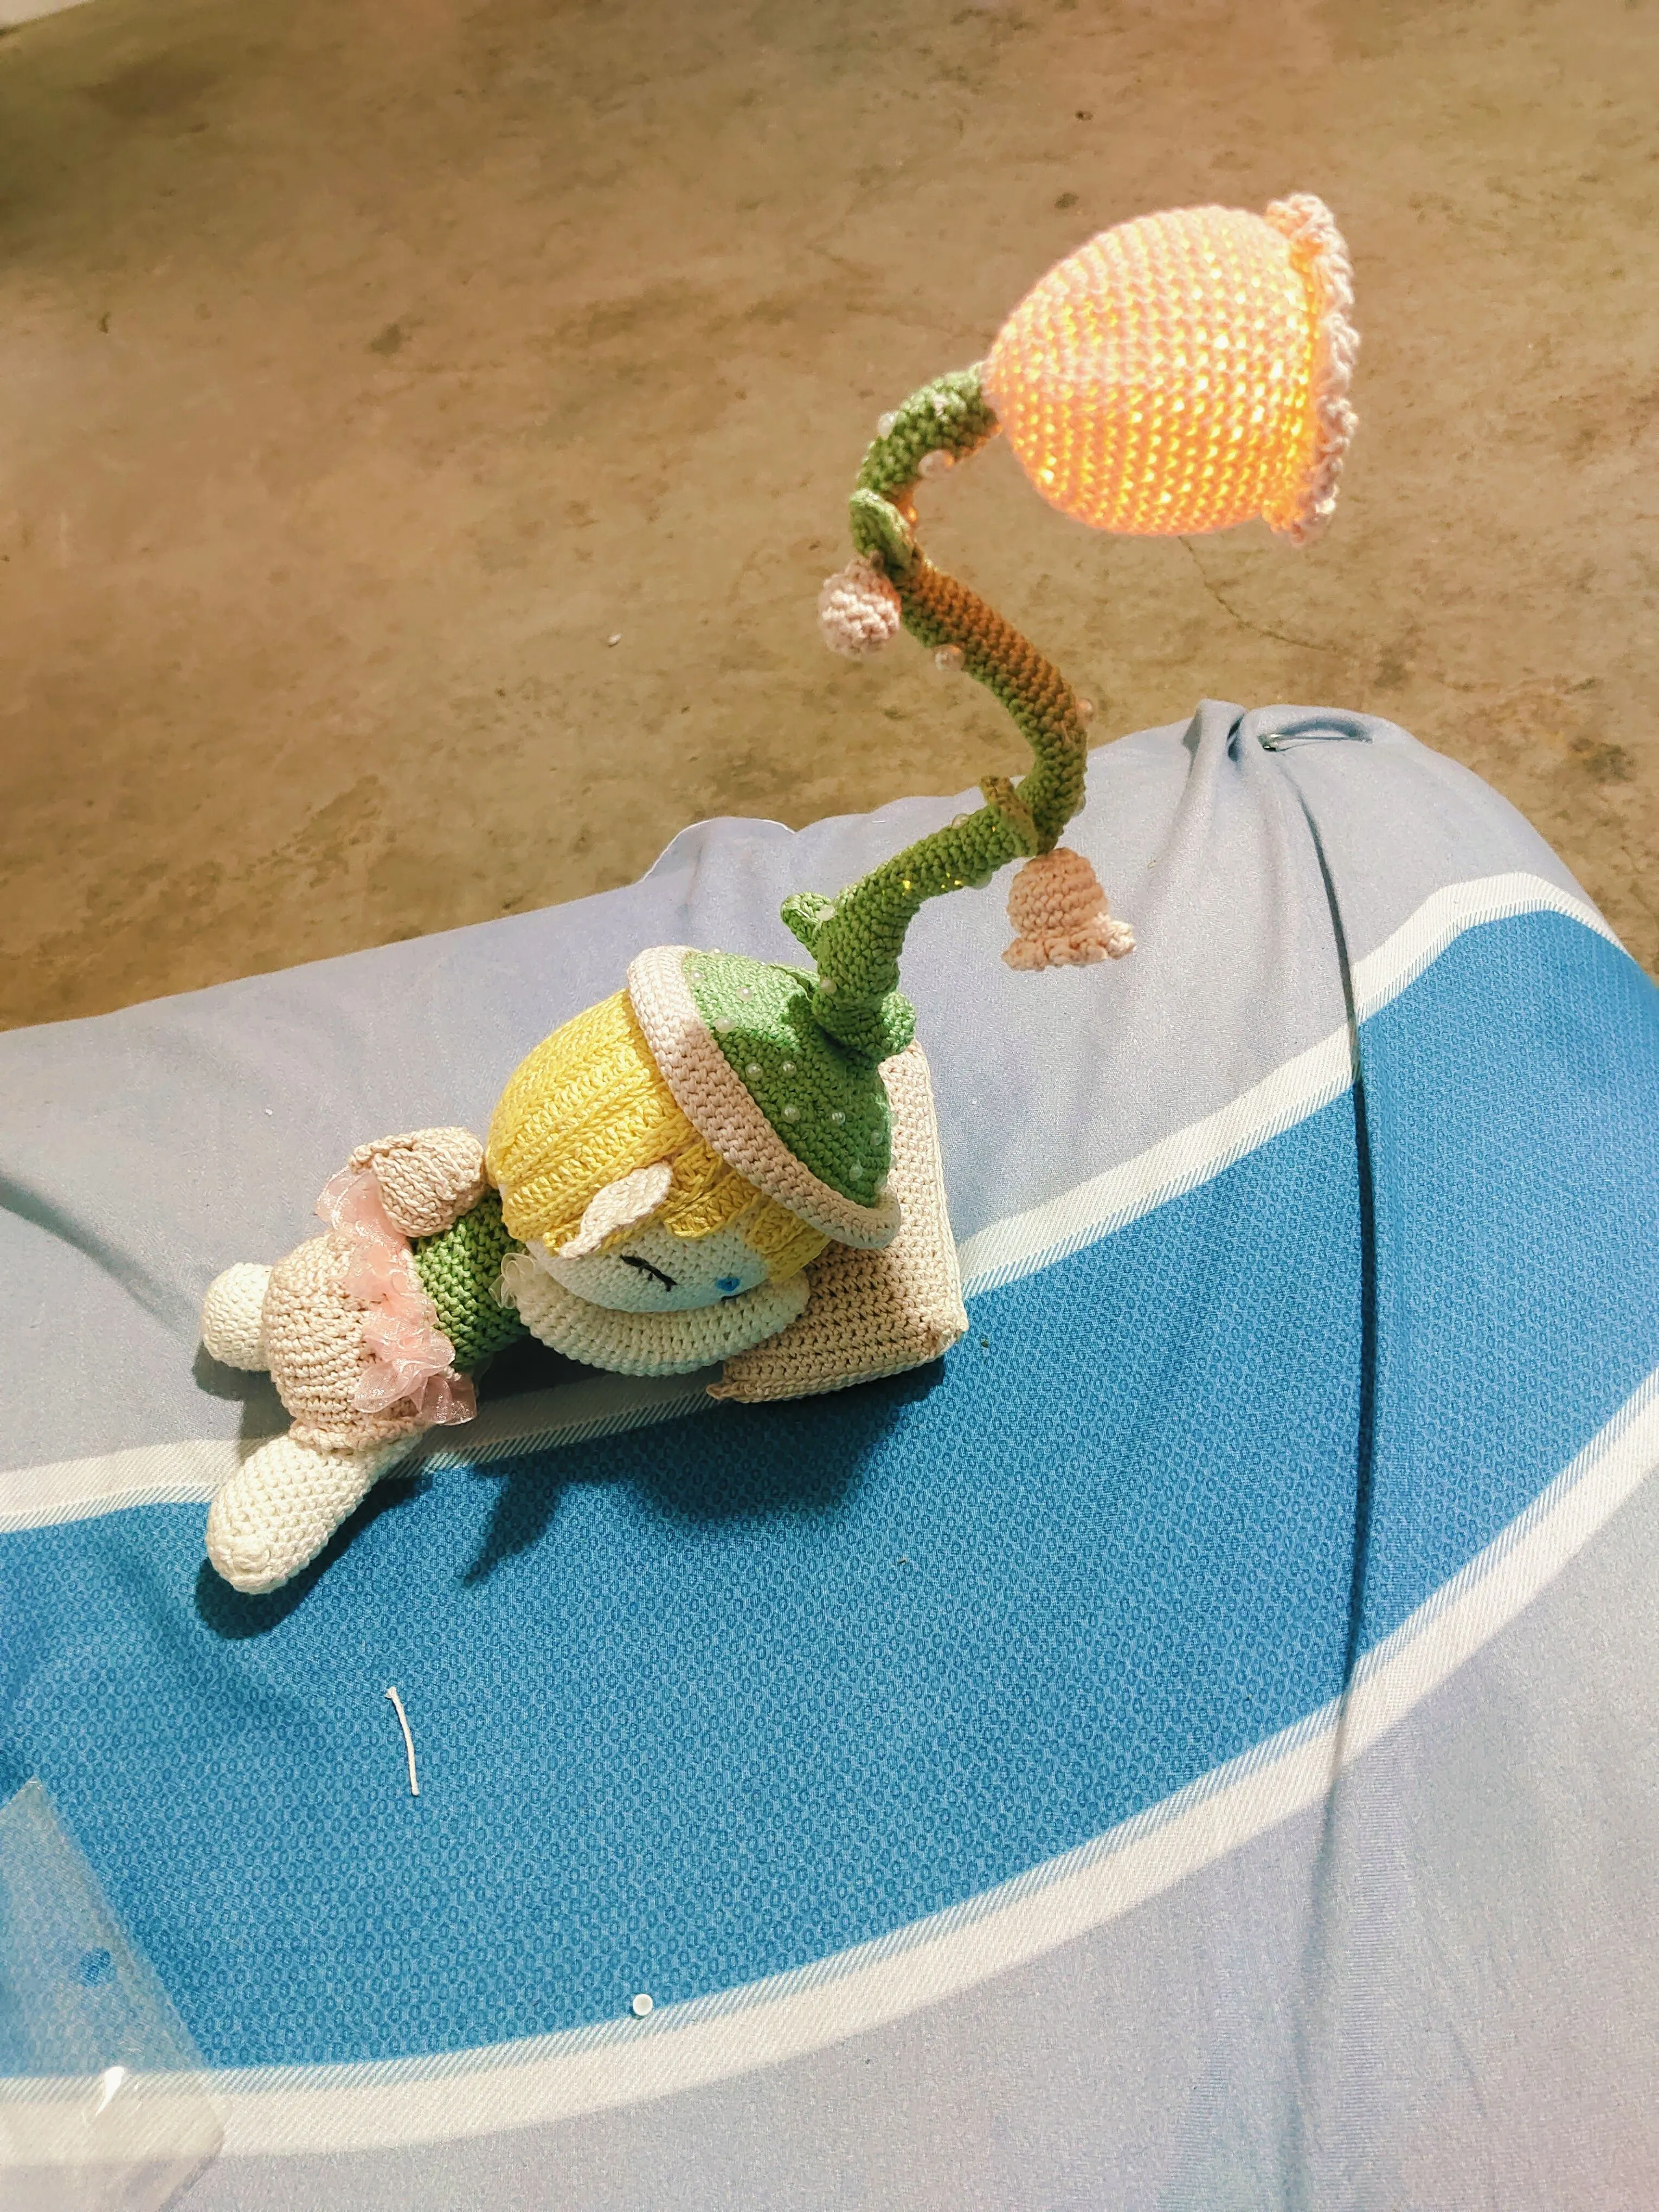
Flower Fairy Night Lamp
Project preview
See the finished project
Pattern format
Instructions
Watch and follow
Video tutorial
| Style | Yarn | Color |
|---|---|---|
| Rose Fairy | Combed 3# Lace | 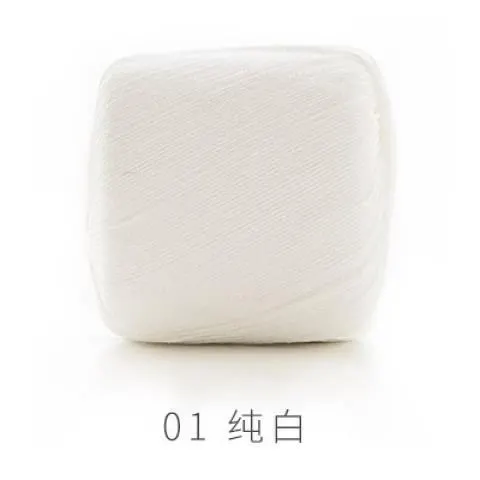 01#Brilliant White x 1 01#Brilliant White x 1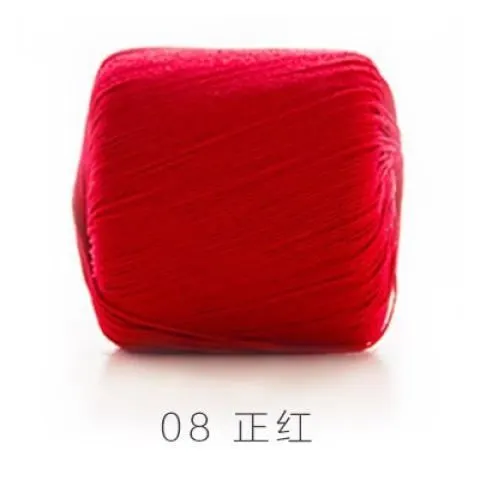 08#High Risk Red x 1 08#High Risk Red x 1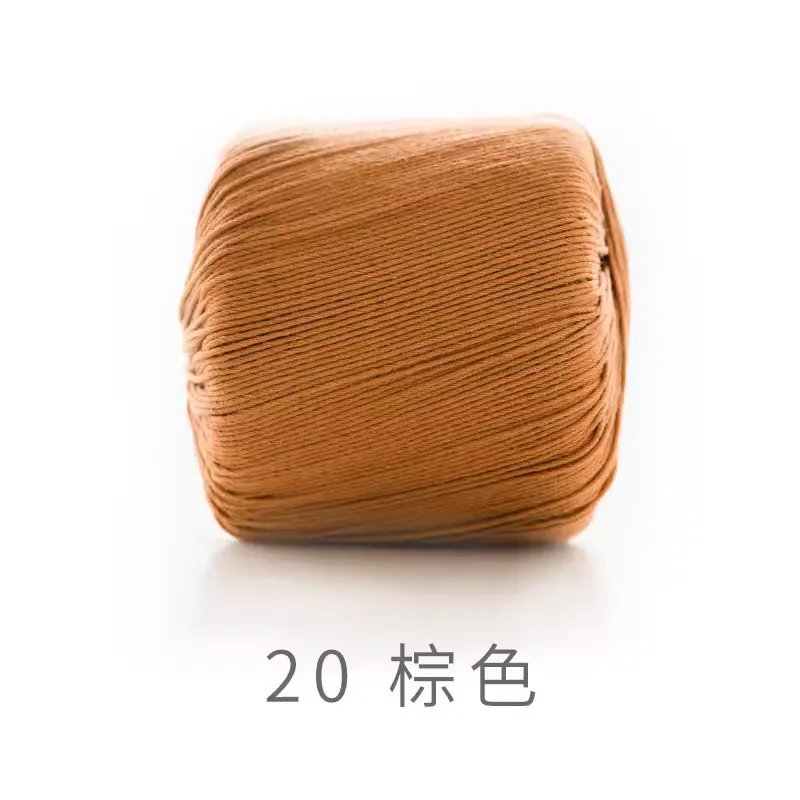 20#Peach Caramel x 1 20#Peach Caramel x 1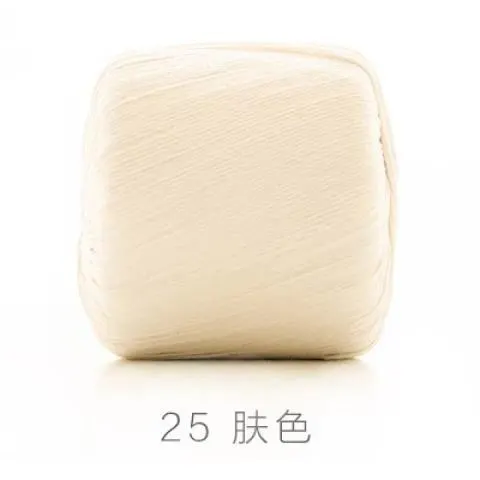 25#Sheer Pink x 1 25#Sheer Pink x 1 28#Peacock Green x 1 28#Peacock Green x 1 |
| 4-Ply Combed Cotton & Acrylic Fibre Hand Knitting Yarn | 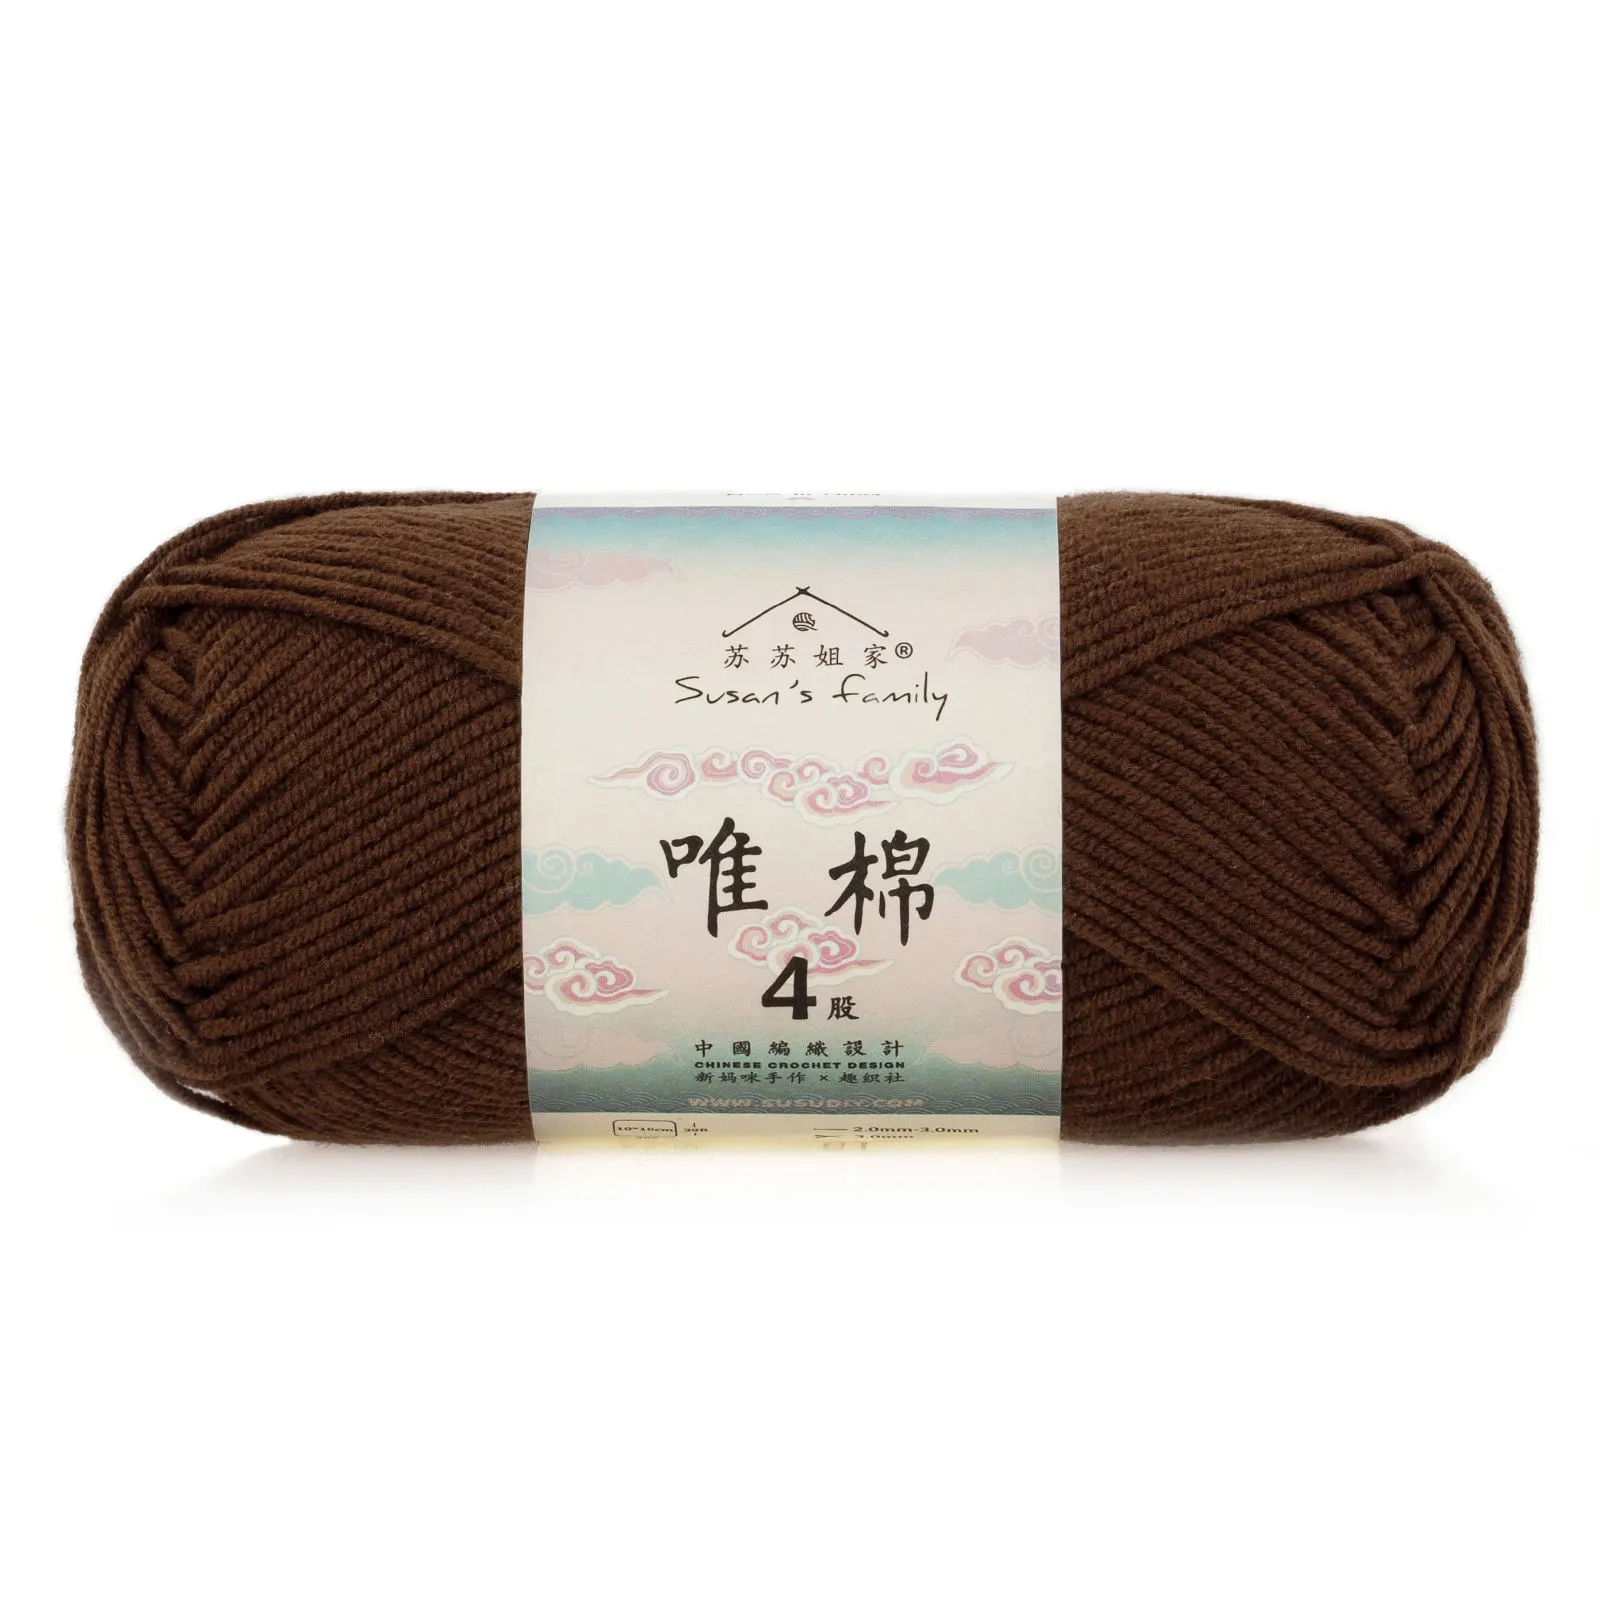 61#Cappuccino x 1 61#Cappuccino x 1 |
This Night Lamp consists of two parts: the main body and the accessories. Start with the main body first, Then work and attach all the accessories.
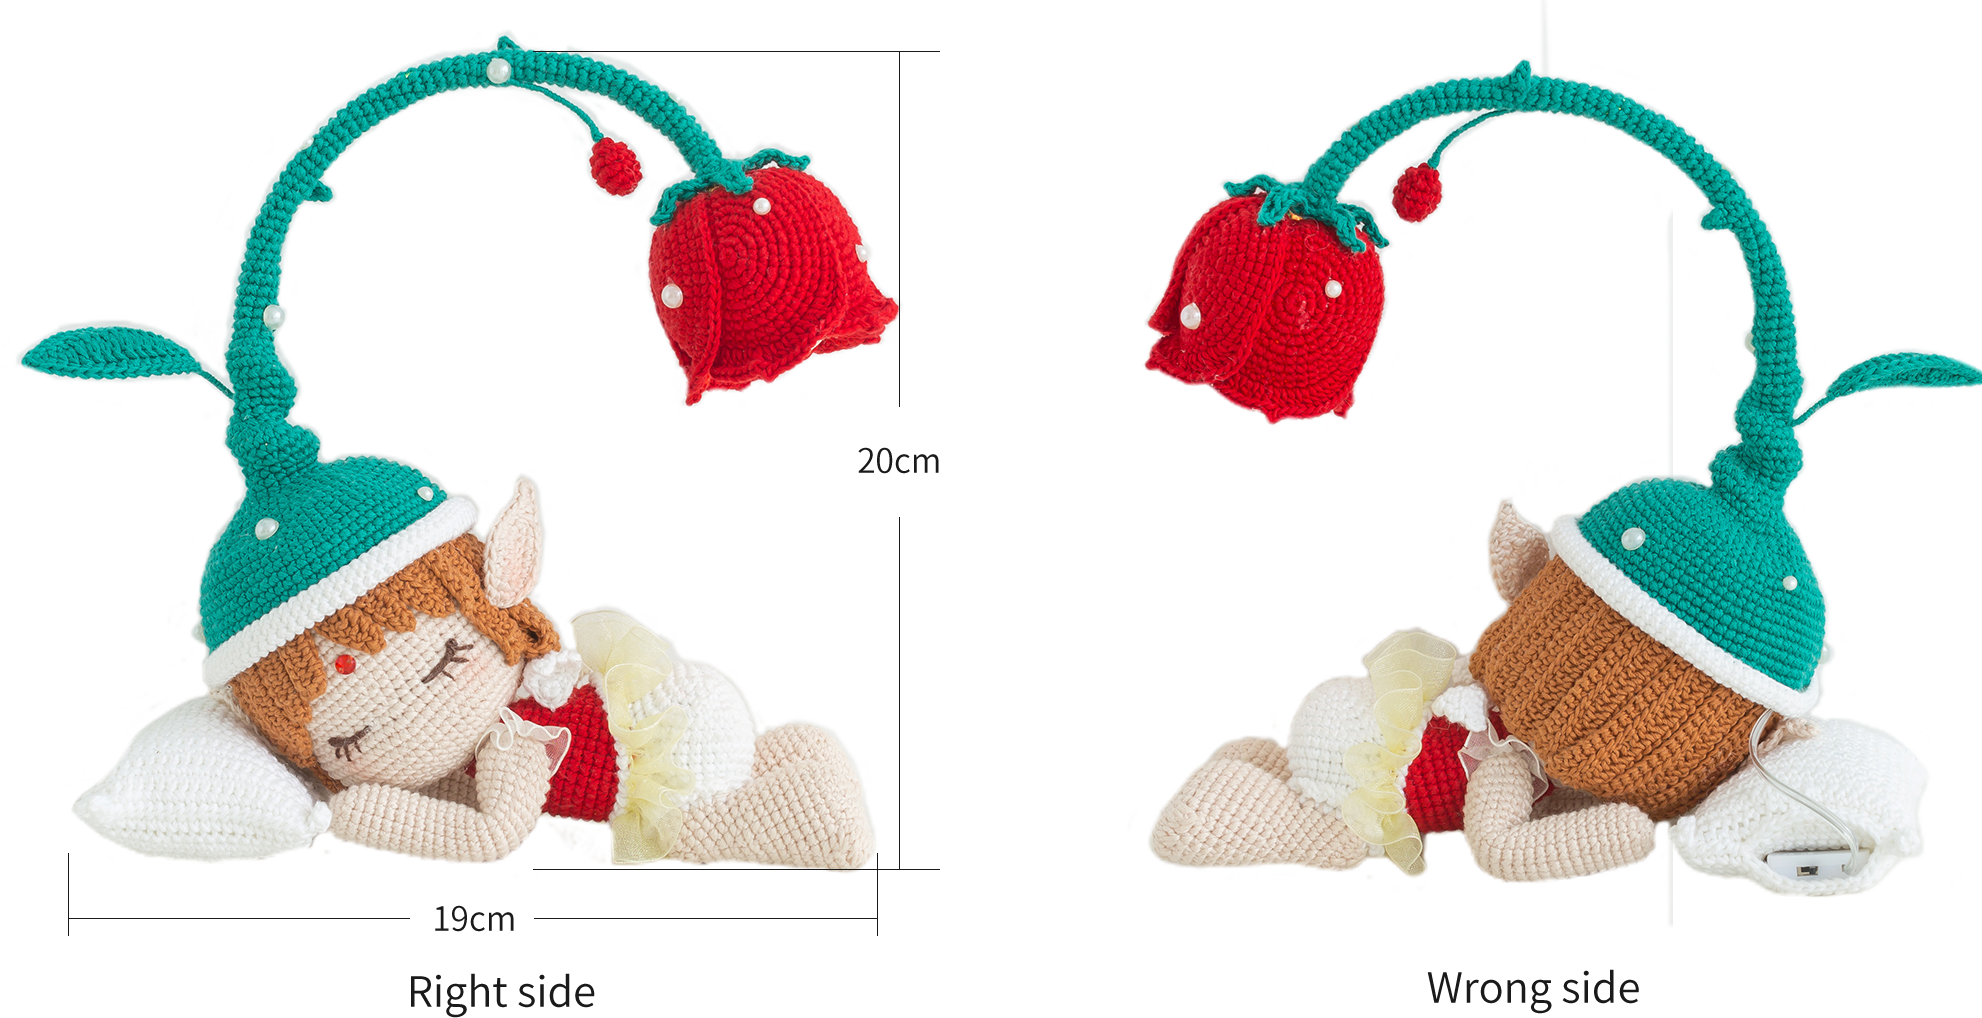
The handcrafted measurements may have an error of 1 to 2 cm. Due to variations in individual tension, the size of the sample is for reference only.
Materials: Susan's Family Combed 3# Lace
Hook: 1.75mm crochet hook

ABBREVIATIONS
Note:
1. This pattern is written using American terminology and is worked in rows. All measurements in charts are in cm.
2. When crocheting in rounds without further guidance, working in closed rounds, start each round with a set number of beginning chains and close with a slip stitch. The beginning chain preceding a single crochet and the slip stitch used for joining rounds are not included in the total stitches.
3. The "left and right" in chart refers to the left and right of the doll itself.

Part 1 Main BodyA
The main body includes head, arms, body, feet and pants.
Step 1 HeadA1 01' 00'' (Part 1)
The head is started with a magic ring, then crocheted in rounds counterclockwise. Stuffing is needed during the crocheting process. Please refer to the video demonstration for specifics.
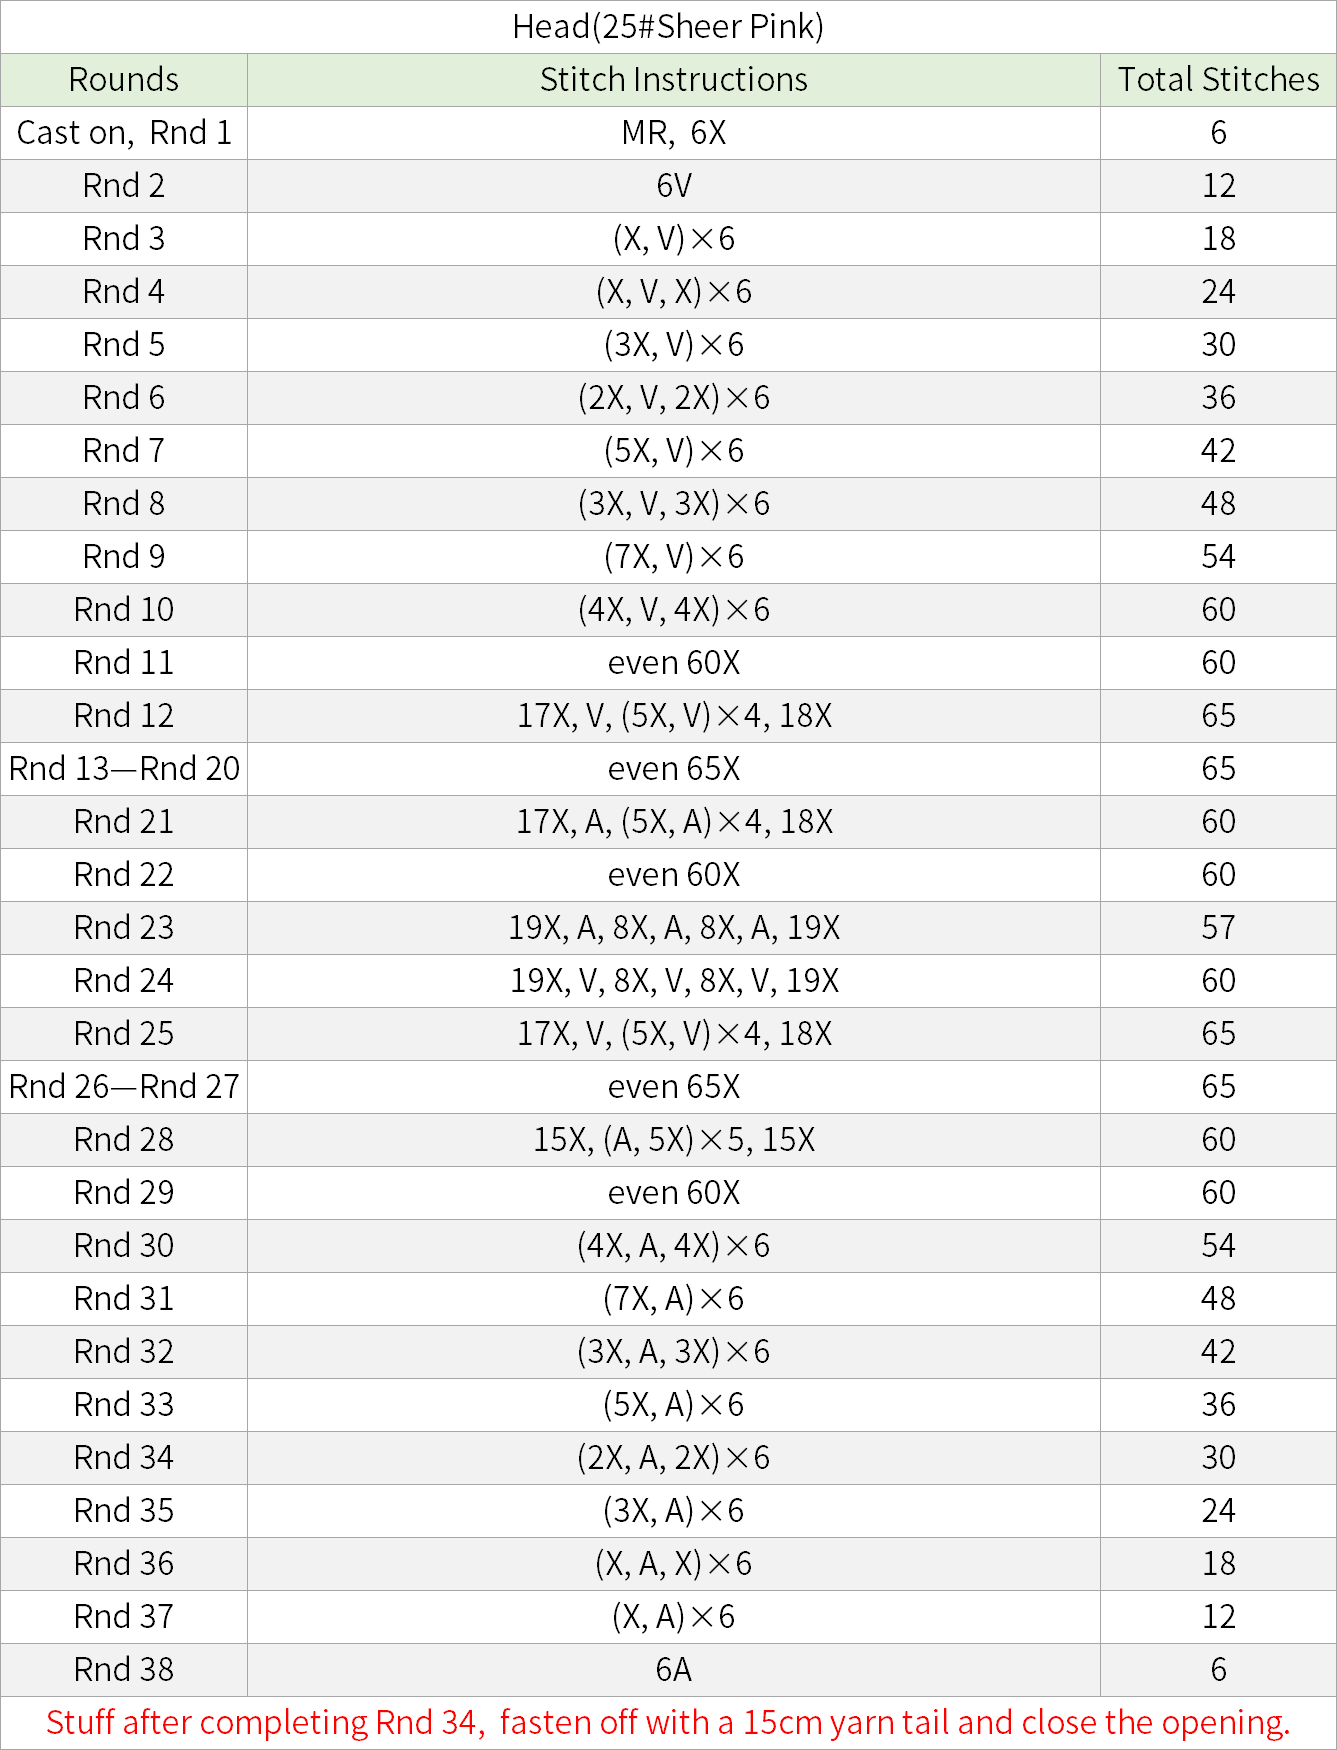
Step 2 ArmsA2 16' 41'' (Part 1)
The arms are 2 in total, both started with a foundation chain, and then crocheted in rounds counter-clockwise. Stuffing and shaping wire need to be added during the crocheting process. Please refer to the video demonstration for specifics.
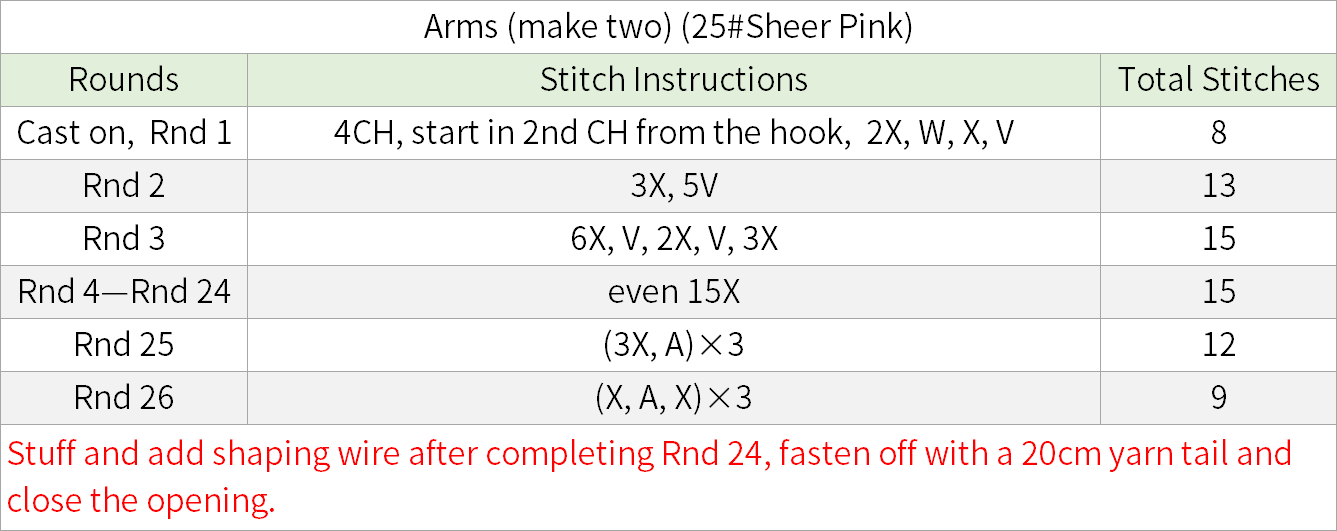
Step 3 BodyA3 22' 51'' (Part 1)
The body is started with a chain ring, then crocheted in rounds counterclockwise. During the crocheting process, you'll need to switch colors. Please refer to the video demonstration for specifics.
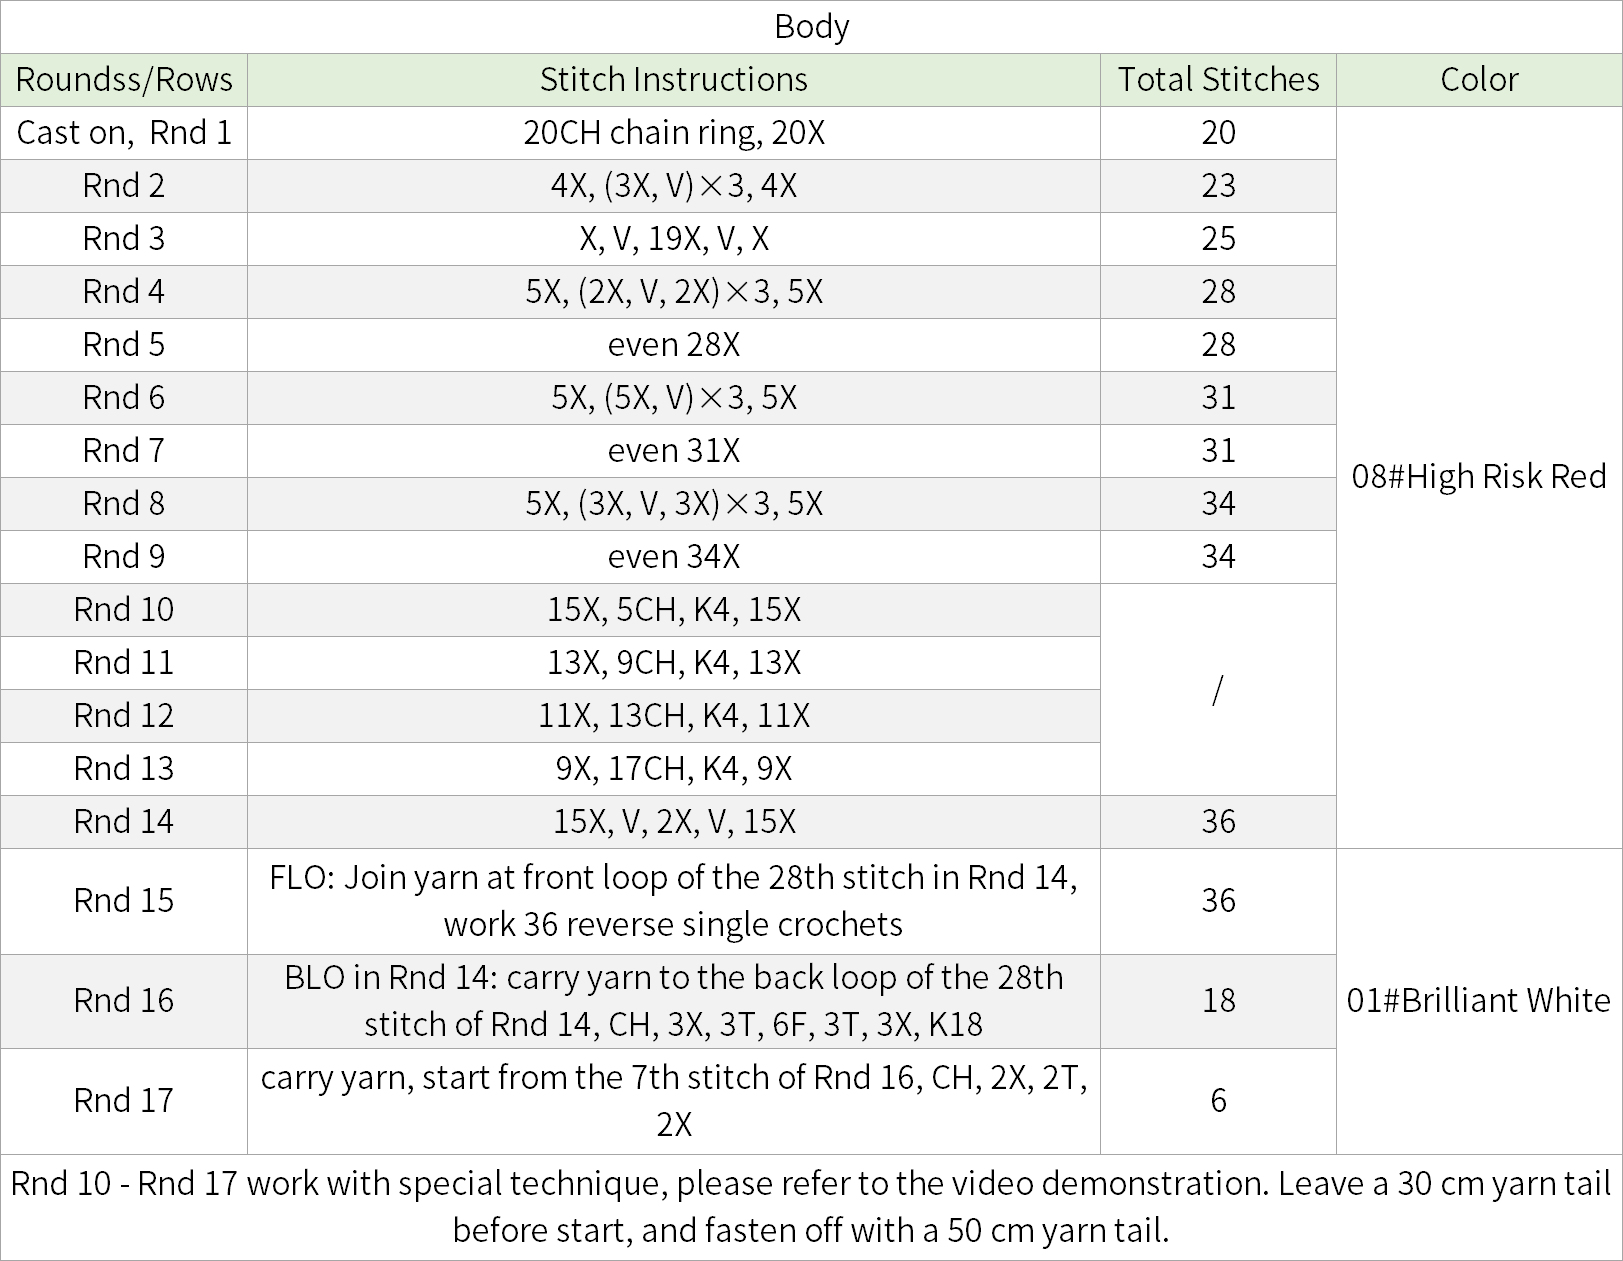
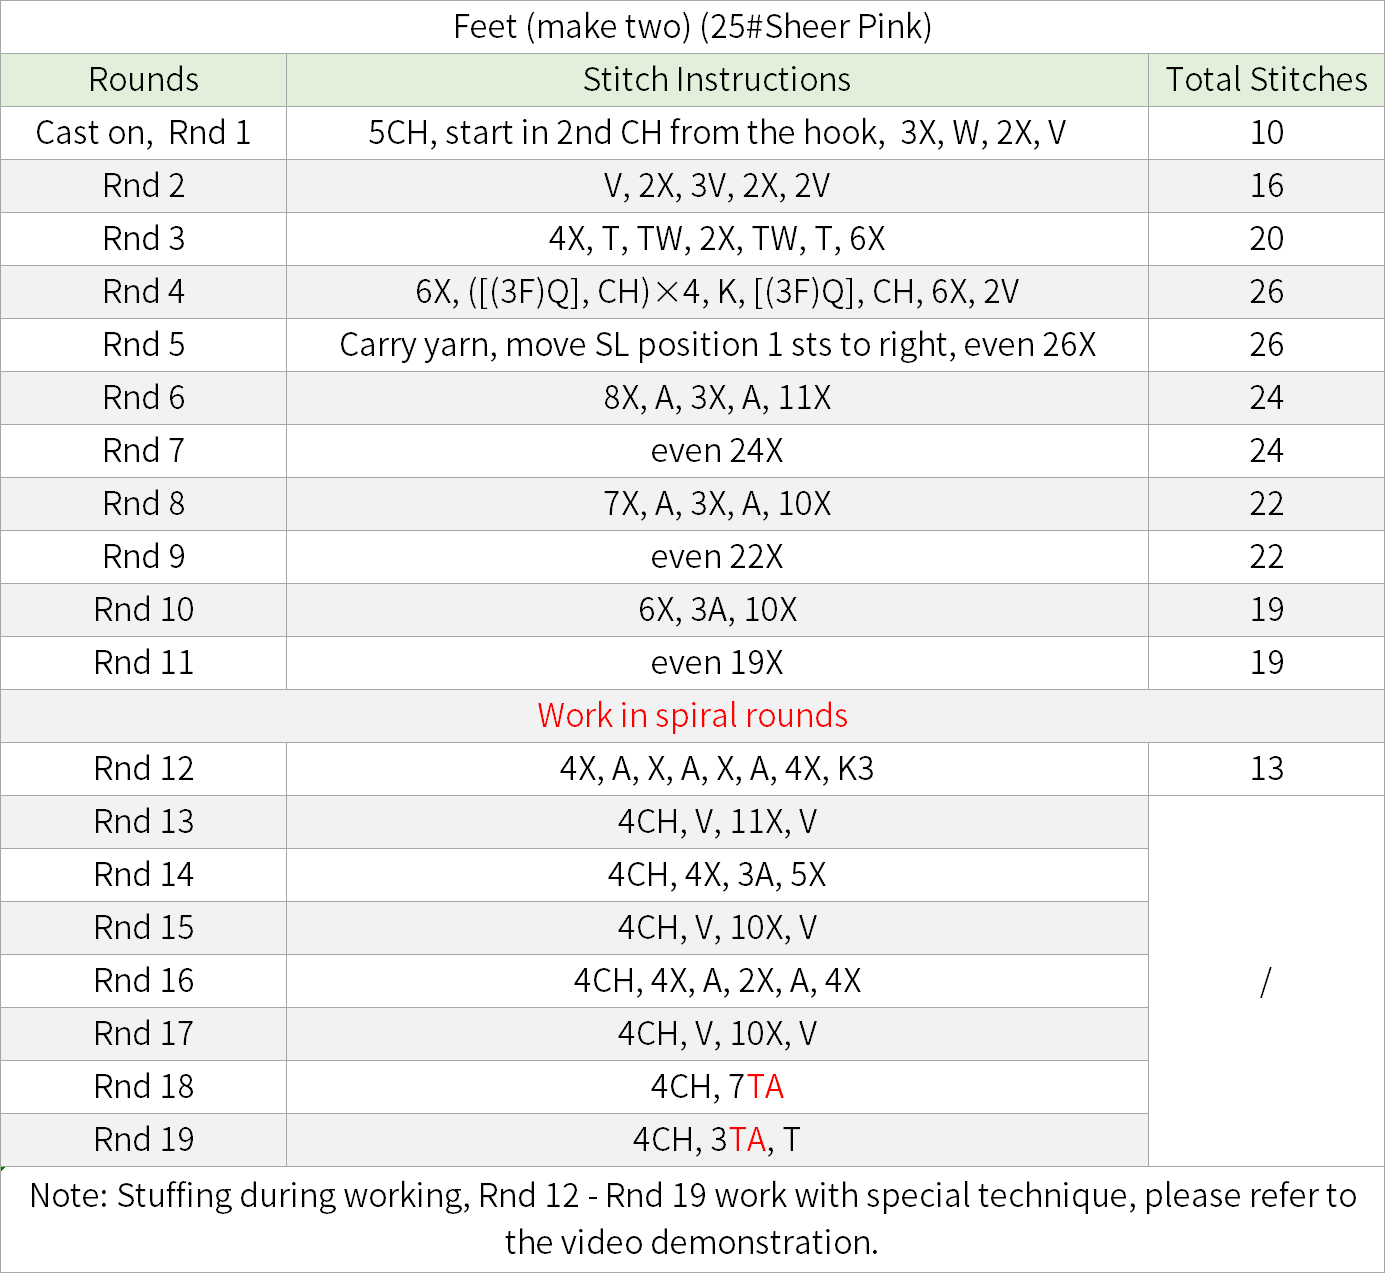
Step 4 FeetA4 38' 39'' (Part 1)
The feet are 2 in total, both started with a foundation chain and work in rounds counterclockwise. Stuffing is needed during the crocheting process. Please refer to the video demonstration for specifics.
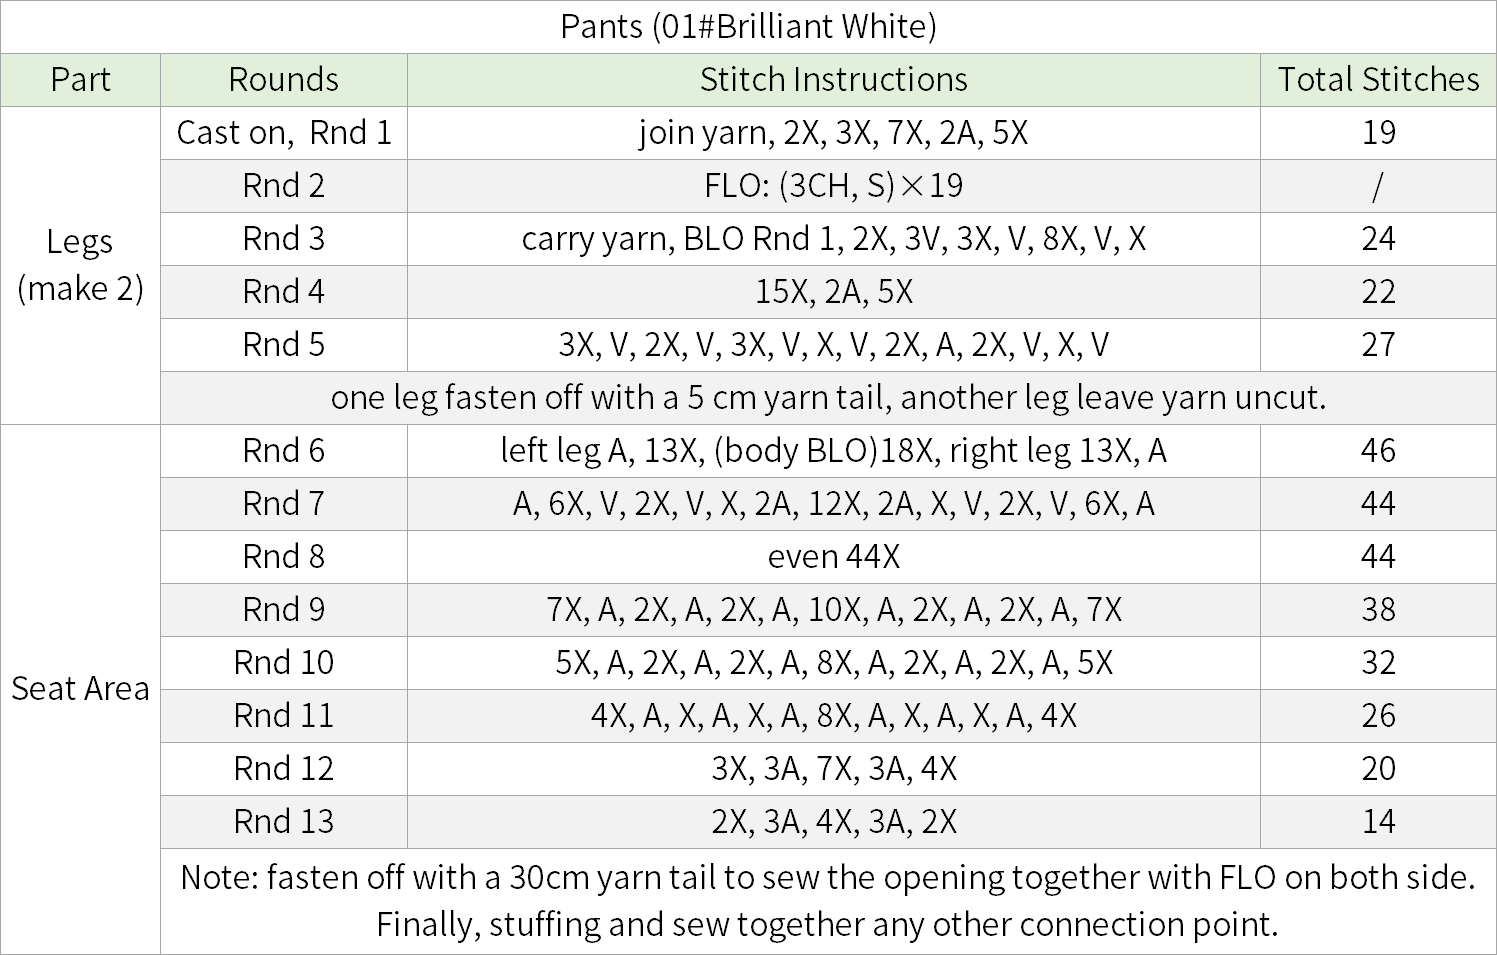
Step 5 PantsA5 51' 09'' (Part 1)
Work the pants by making 2 legs first, then combine them to make the seat area, and join it to the body. Please refer to the video demonstration for specifics.
Part 2 AccessoriesB
Accessories include facial features, hair, wings, ruffle edge, main body assembly, pillow and hat.
Step 1 Facial FeaturesB1 73' 28'' (Part 1)
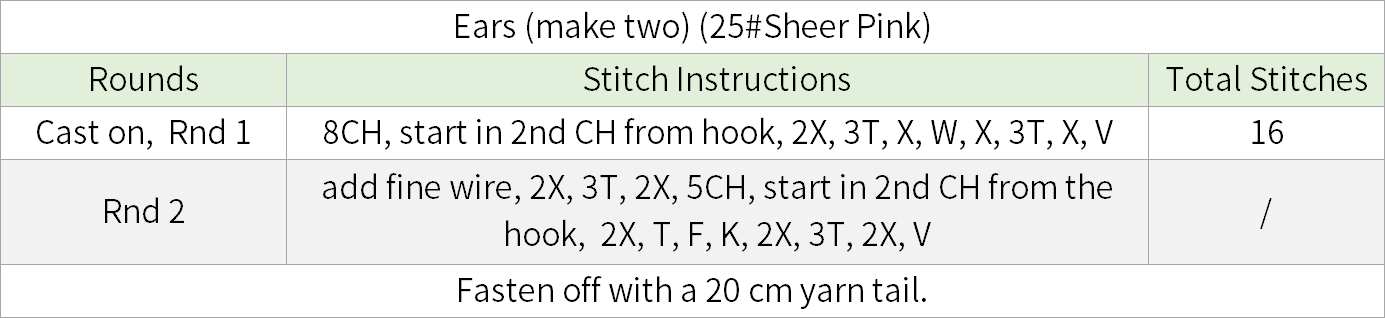
The facial features include the eyes, forehead decorations, blush, and ears. There are 2 ears, both started with a foundation chain, and work in round. During crocheting, incorporate fine wire. Once done, sew them onto the head and add the blush. Please refer to the video demonstration for specifics.
Step 2 HairB2 00' 11'' (Part 2)
The hair includes the scalp and the strands. The scalp is started with a magic ring, then crocheted in rounds counterclockwise. After completing the scalp, crochet the strands along the outer edge, and finally secure it to the head. Please refer to the video demonstration for specifics.

Step 3 WingsB3
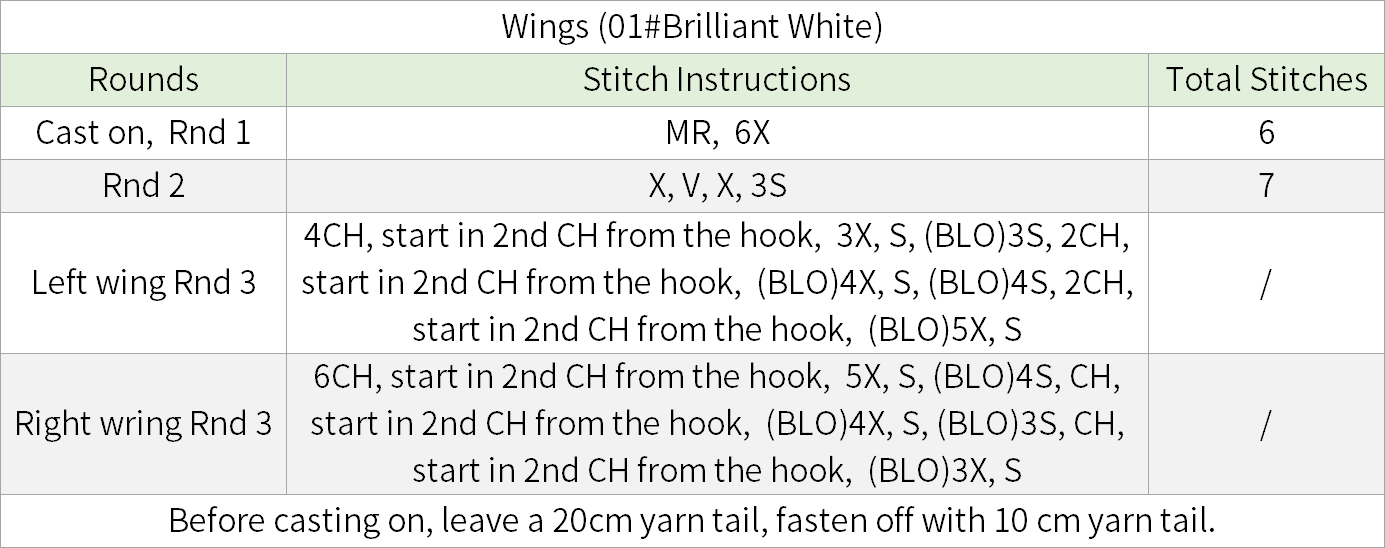
The wings are divided into left and right sides, both are started with a magic ring, then working in rounds counterclockwise. After completing, sew them onto the corresponding position on the body. Please refer to the video demonstration for specifics.
Step 4 Ruffle edgeB4 and Assemble main bodyB5 25' 32'' (Part 2)
Then make the ruffle edge and assemble the main body, sewing together the head, arms, and body. Refer to the video demonstration for specifics.
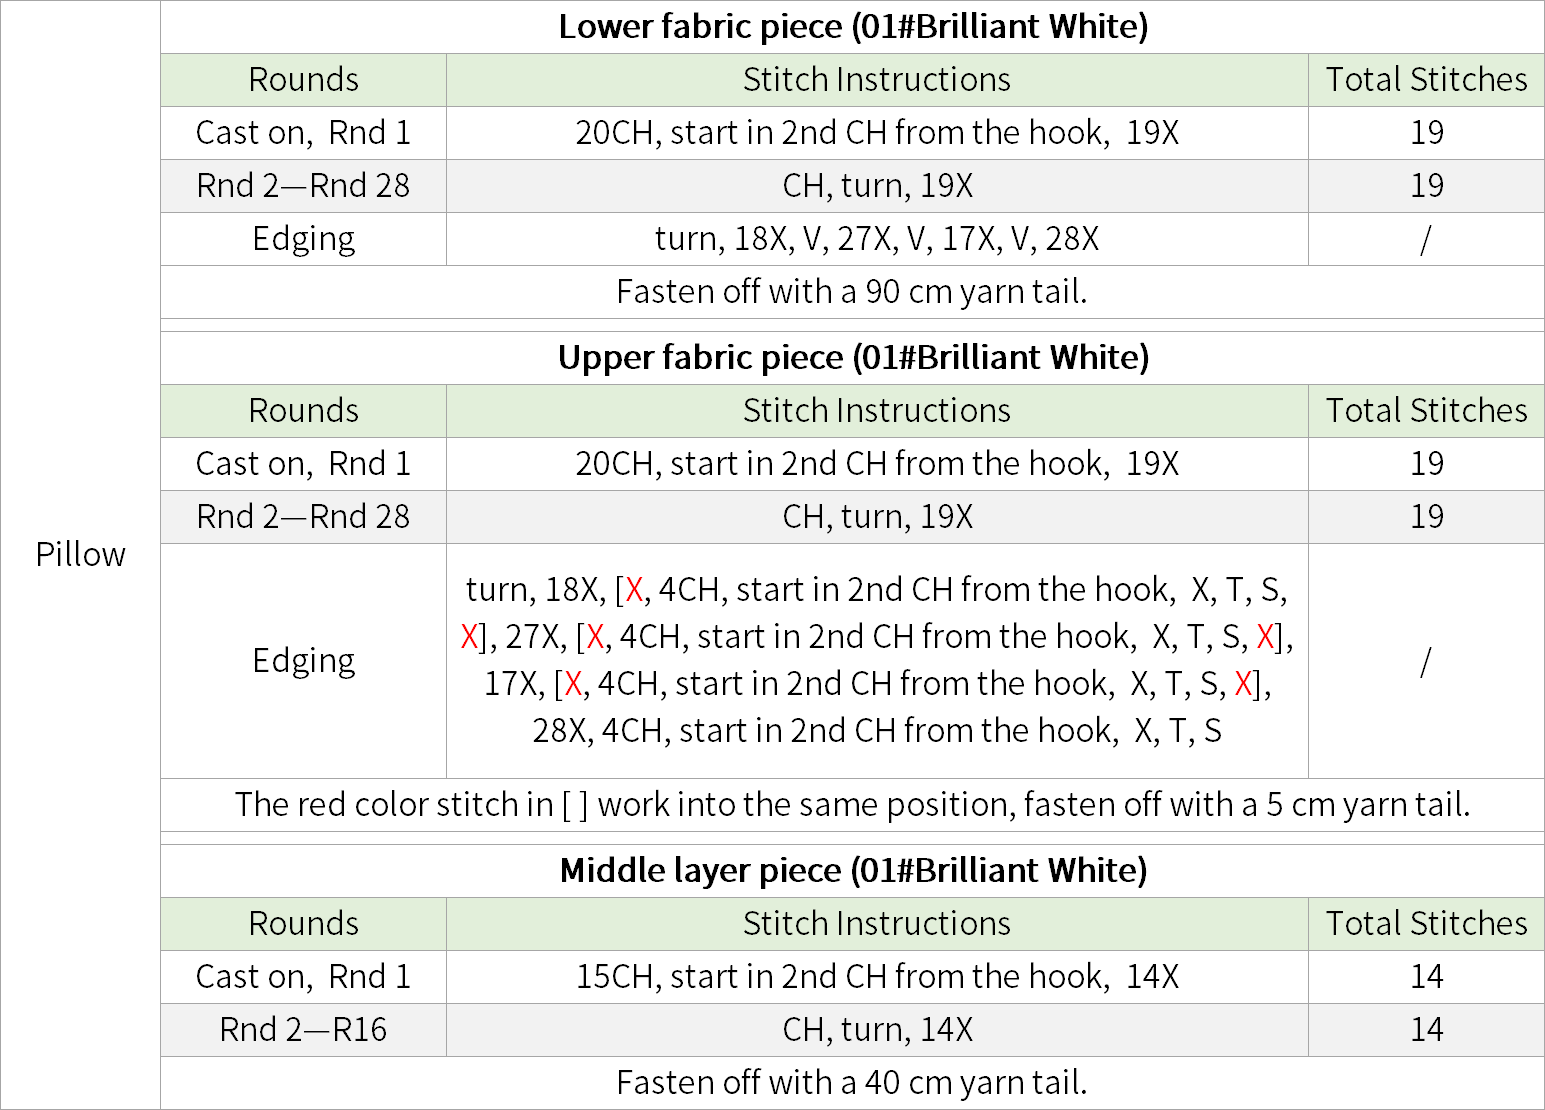
Step 5 PillowB6 39' 53'' (Part 2)
The pillow is divided into the lower fabric piece, upper fabric piece, and middle layer piece, all started with a foundation chain. Work back and forth along the chain. The top and bottom pieces also need to be edged, and finally sewn together with stuffing. Refer to the video demonstration for specifics.
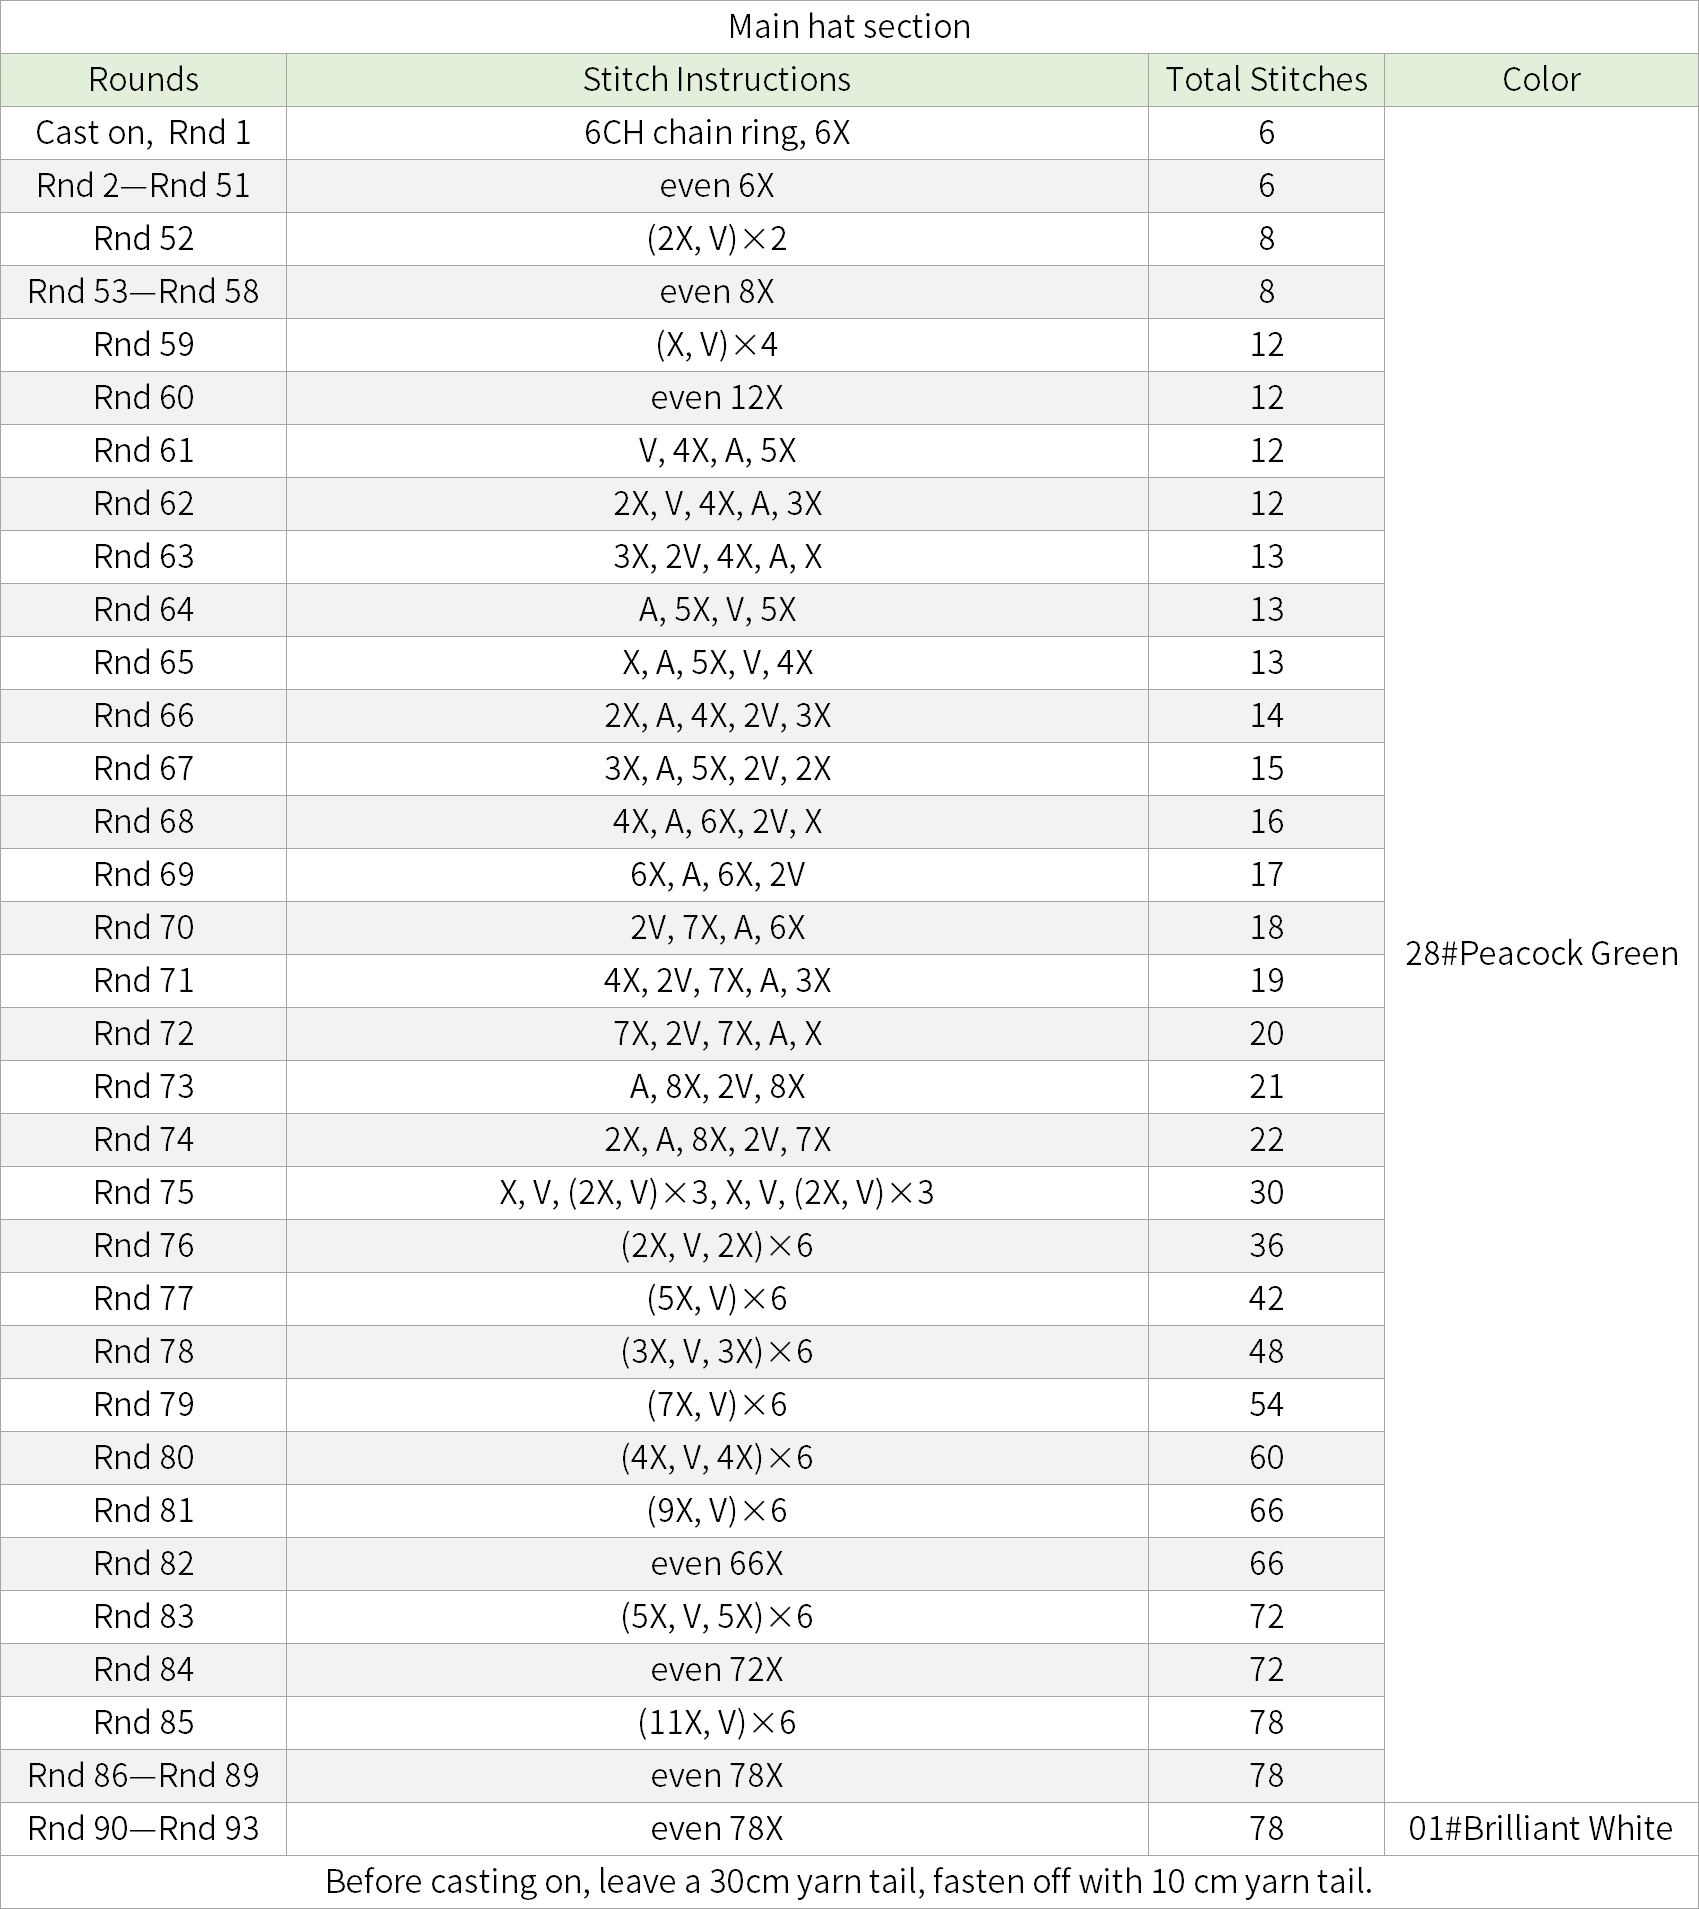
Step 6 HatB7 54' 33'' (Part 2)
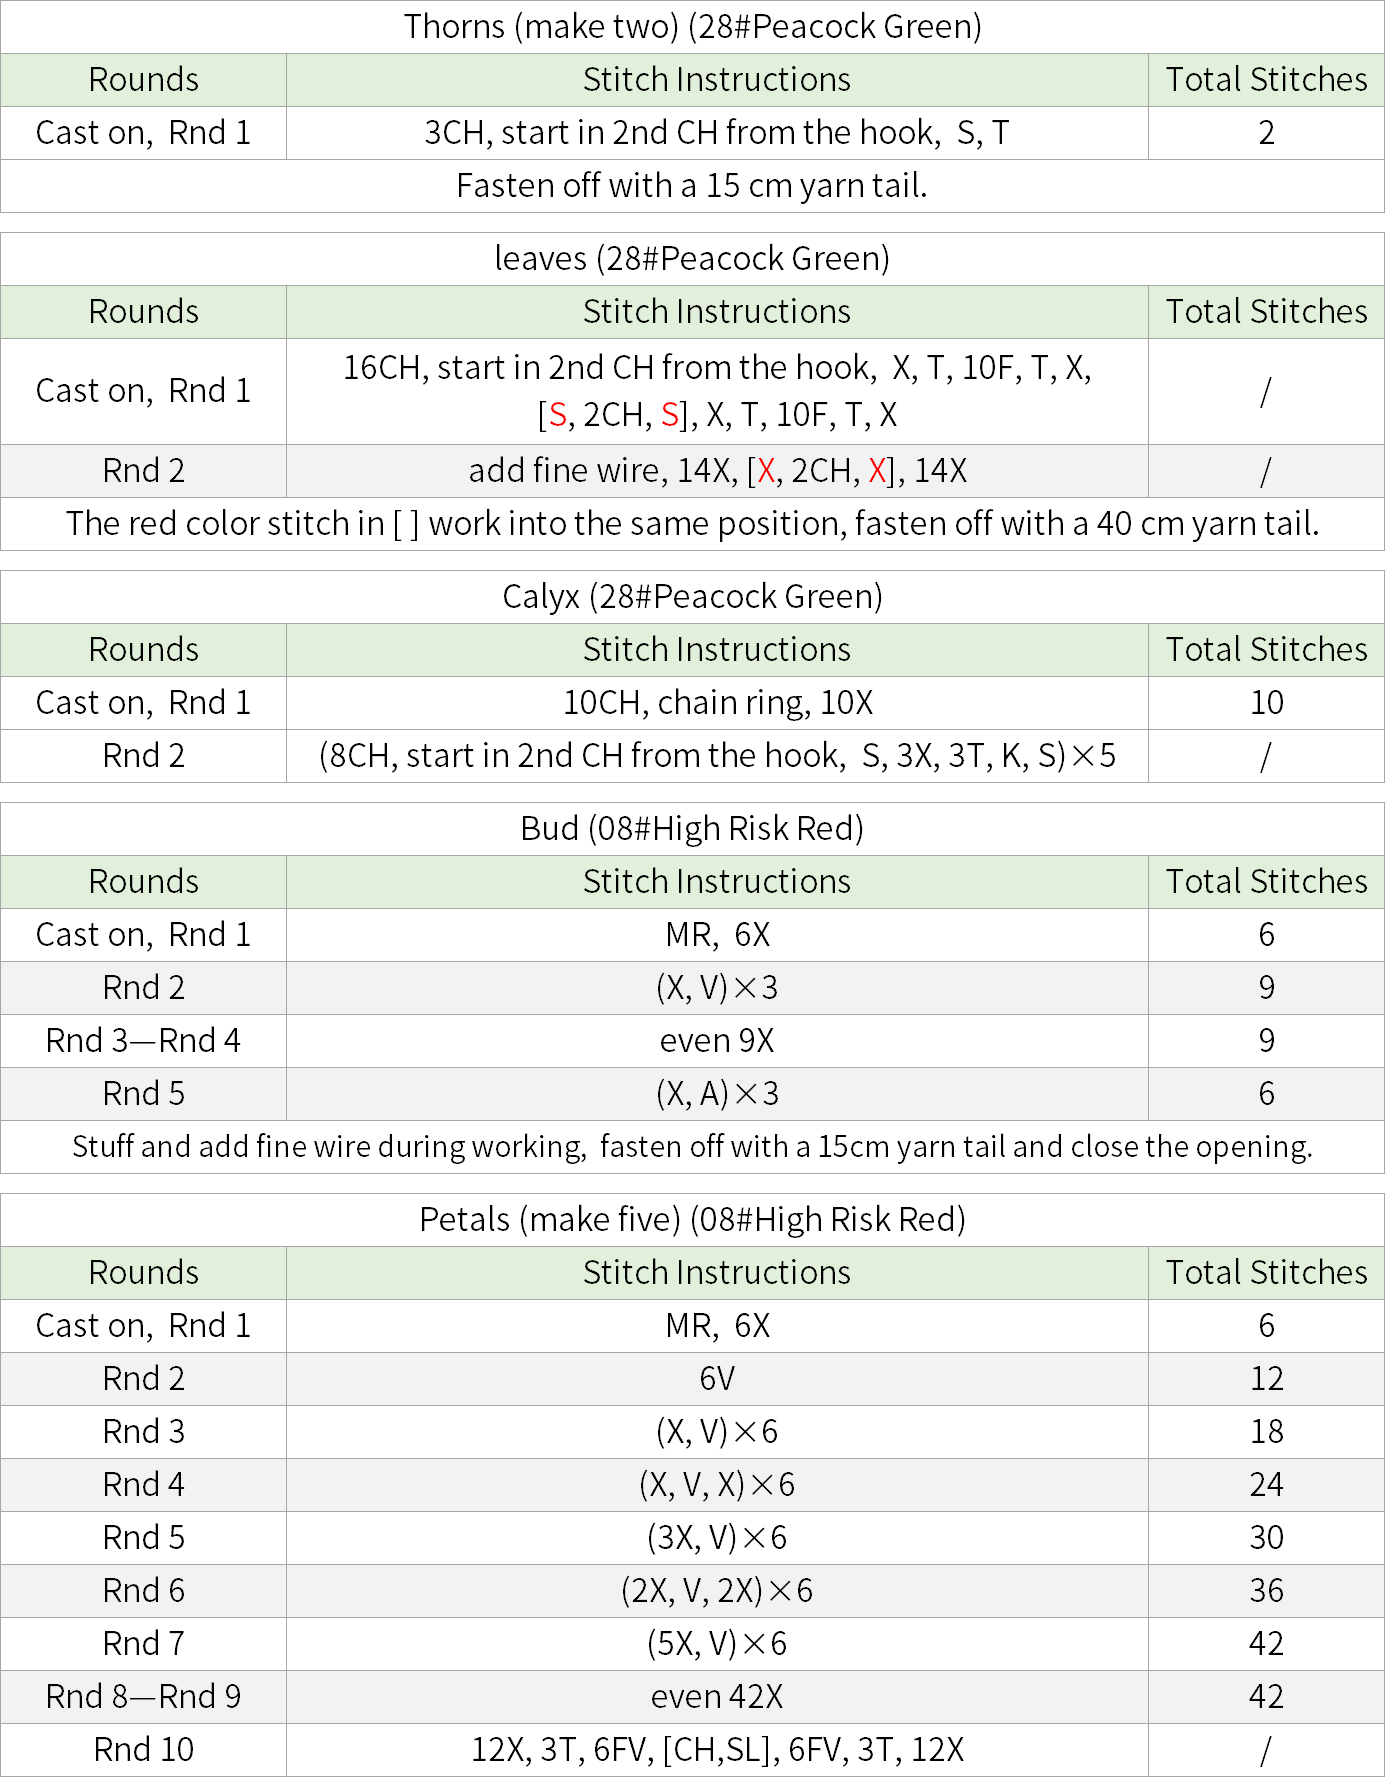
The hat is divided into the main hat section, thorns, leaves, calyx, buds, petals, and assembly. After each part is crocheted, they are assembled with a hollow ball, string of lights, and the head. Please refer to the video demonstration for specifics.
Made by the community