Home / Lamp
Rabbit Lantern
Project preview
See the finished project
Pattern format
Instructions
Watch and follow
Video tutorial
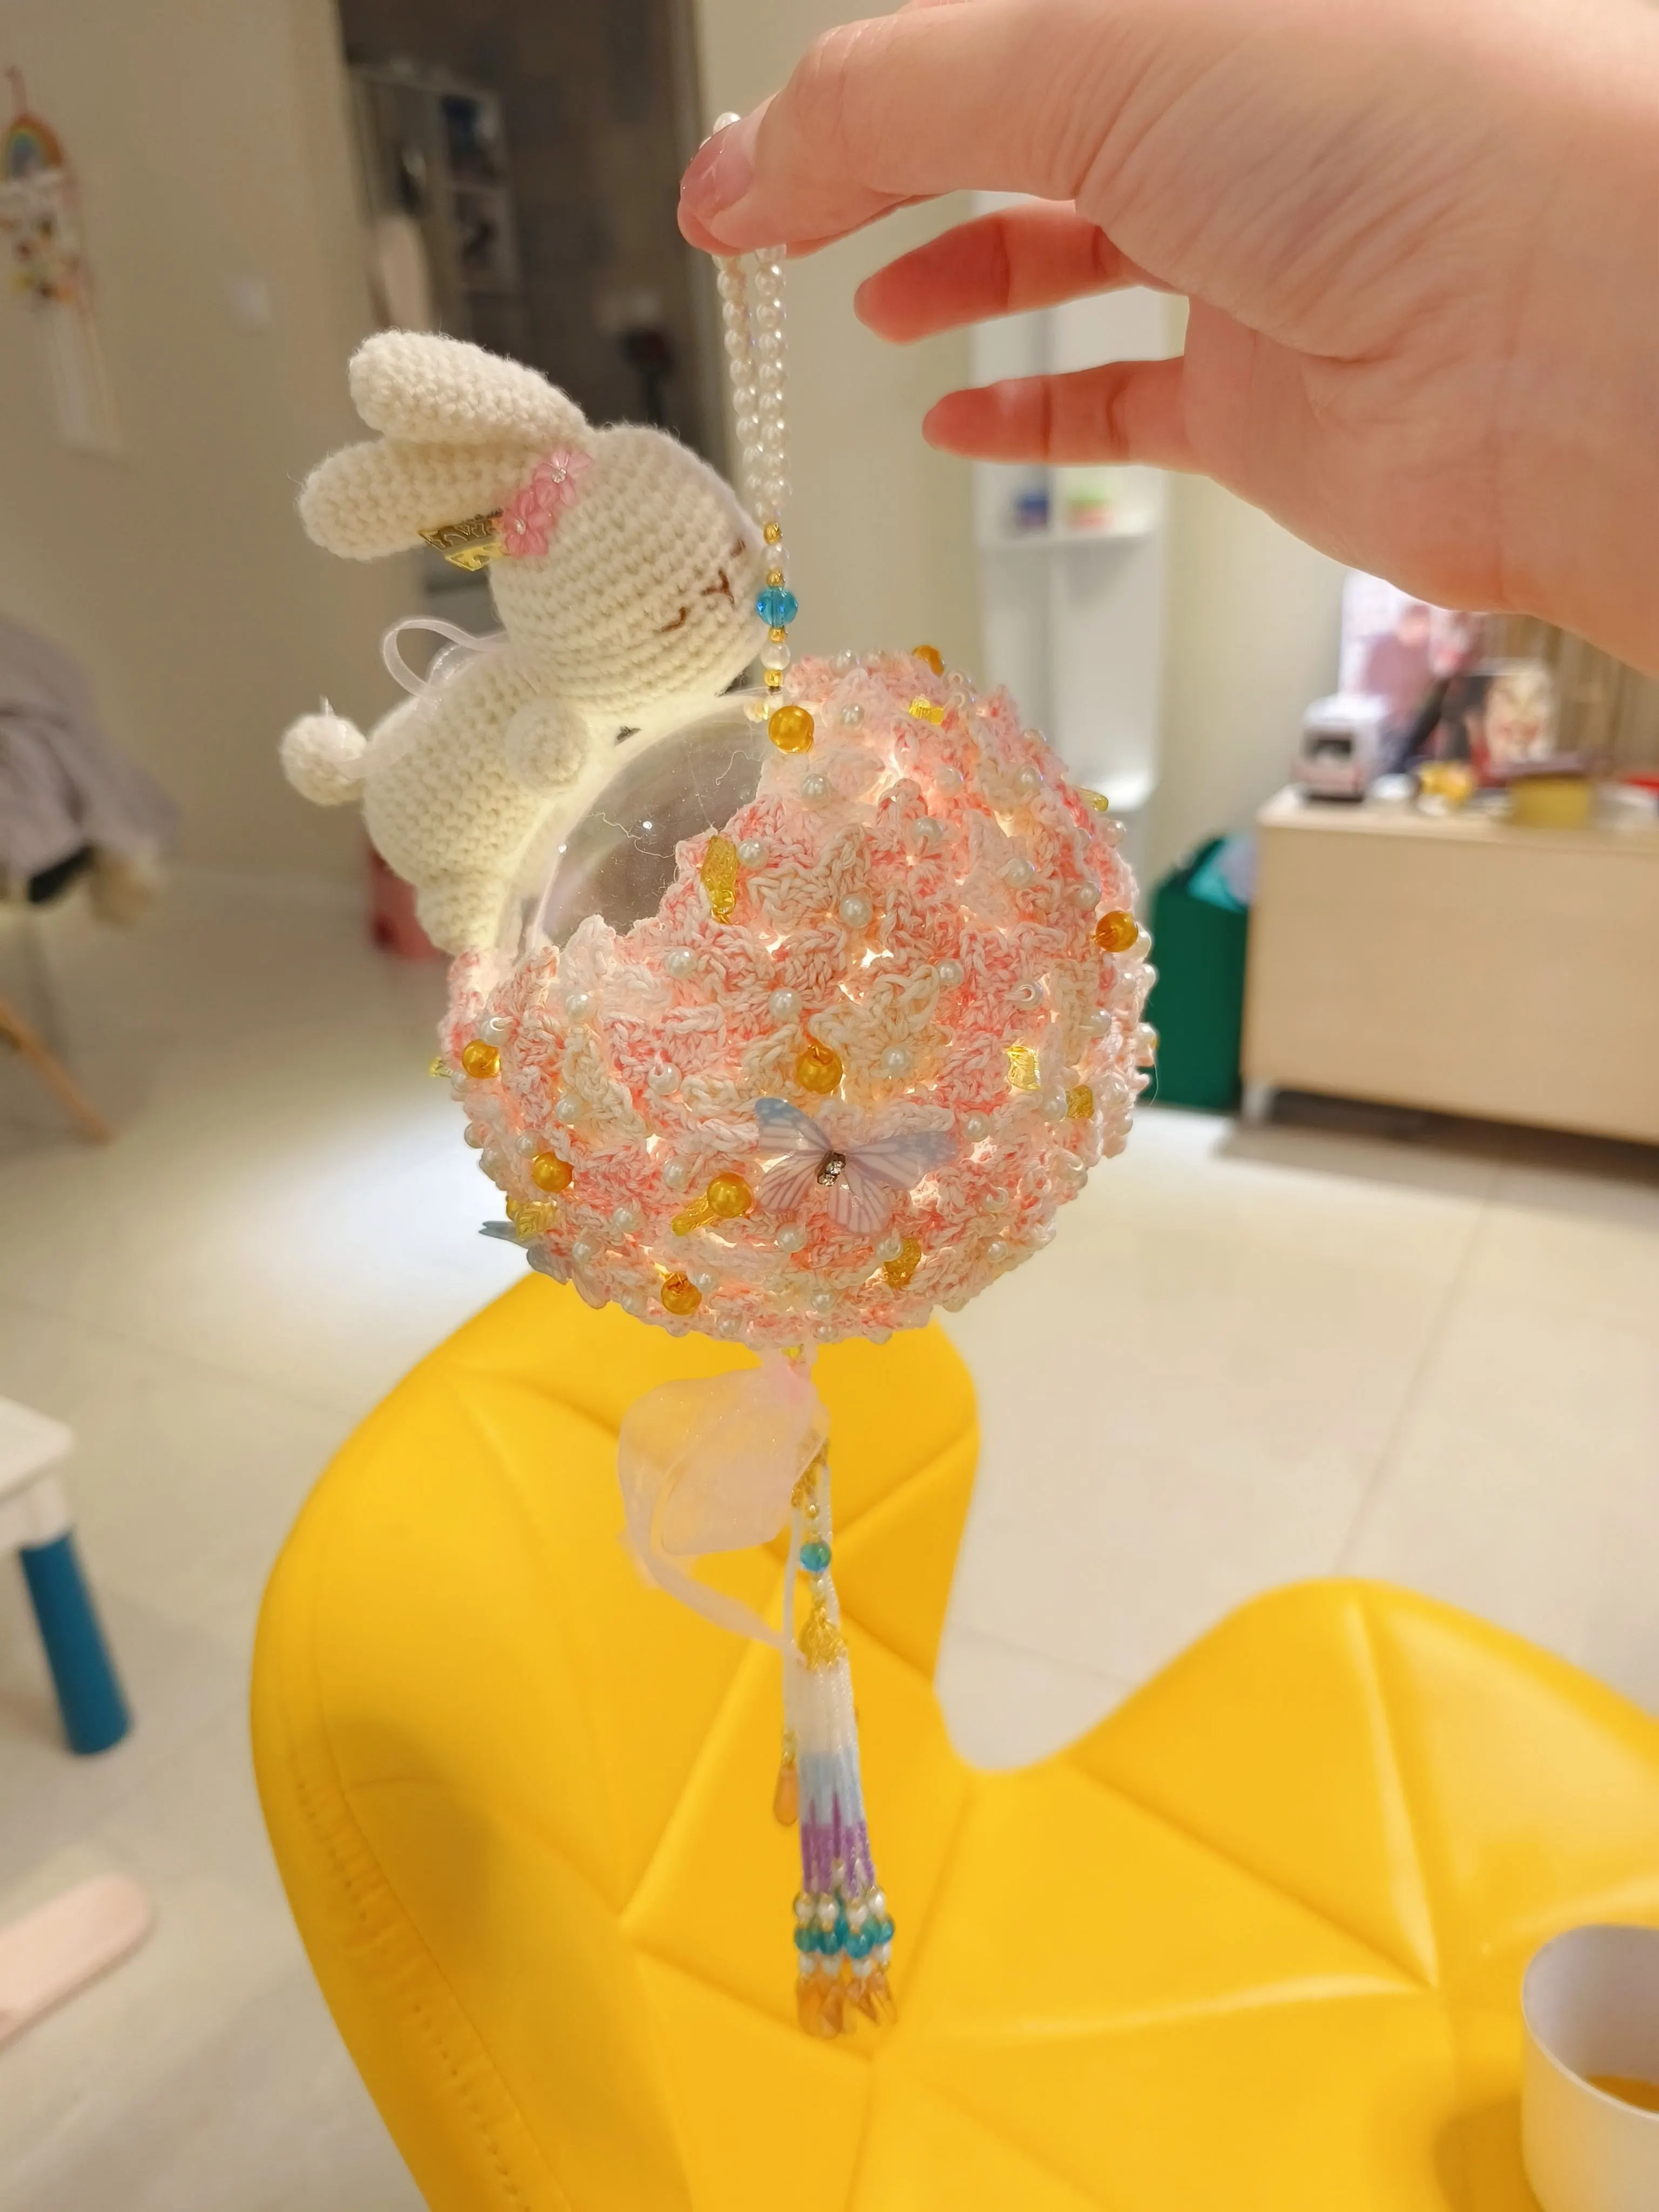
This lantern comes in two versions: the osmanthus and the hydrangea. They are crocheted with similar techniques, only differing in color schemes and flowers. Both are composed of two parts: the toy and the accessories. We’ll crochet the toy first, then make and attach the accessories.
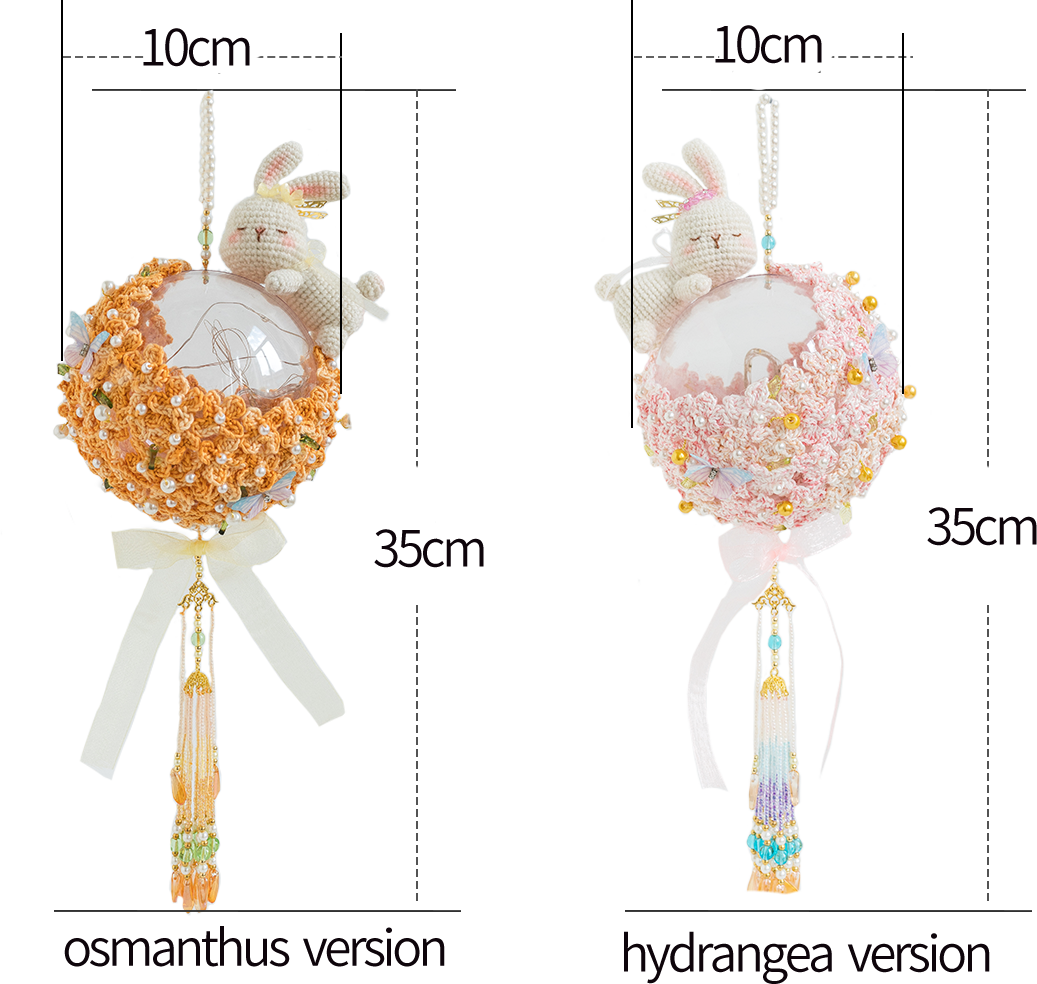
The handcrafted measurements may have an error of 1 to 2 cm. Due to variations in individual tension, the size of the sample is for reference only.
Materials: Susan's Family Fancy Dyed Lace & Susan's Family Shetland & Susan's Family Acrylic Fibre Hand Knitting Yarn
Hook: 1.75 mm crochet hook

ABBREVIATIONS
MRadjustable magic ring
CHchain
XX stitch single crochet
Fdouble crochet
V = sc2-in-12 single crochets into the same stitch
W3 single crochets into the same stitch
turnturn the piece
(...)×6crochet item in the parentheses six times
[...]in the same stitch
Dao2start in 2nd CH from the hook
Etreble crochet
A = sc2togsingle crochet 2 stitches together
[CH, SL]CH1-picot:chain 1, and then join with one slip stitch into both the front loop of the previous stitch and the front leg strand of the previous stitch.
Note:
1. This pattern is making in Chinese crochet pattern terms, and the stitch name is written using American terminology. All measurements in charts are in cm.
2. Working in spiral round
When crocheting in spiral rounds, each round working without beginning chain and slip stitch to joining the rounds. instead, work directly into the next stitch.
3. Working in joined round
When crocheting in rounds without further guidance, working in closed rounds, start each round with a set number of beginning chains and close with a slip stitch. The beginning chain preceding a single crochet and the slip stitch used for joining rounds are not included in the total stitches.

Part 1 ToyA
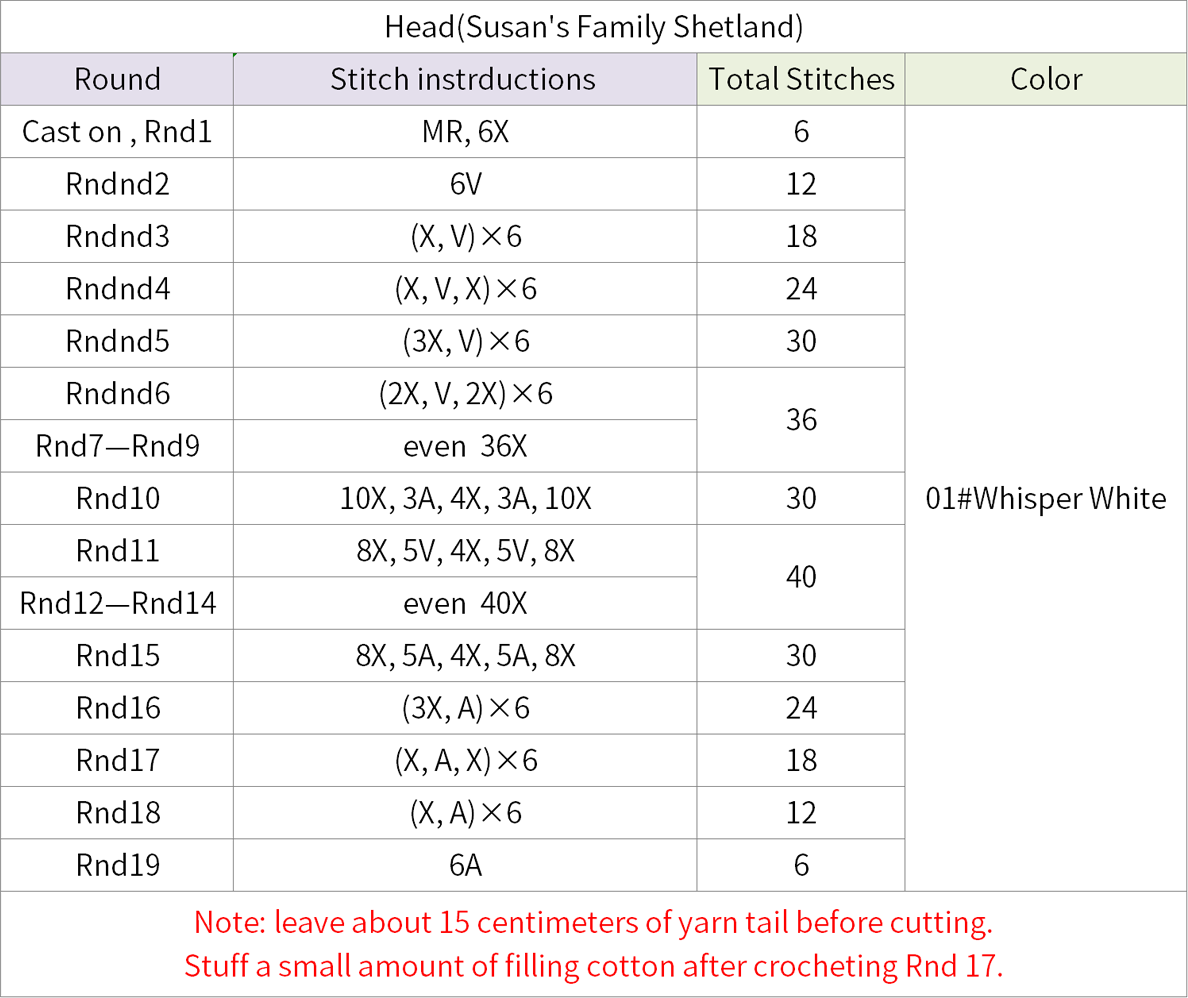
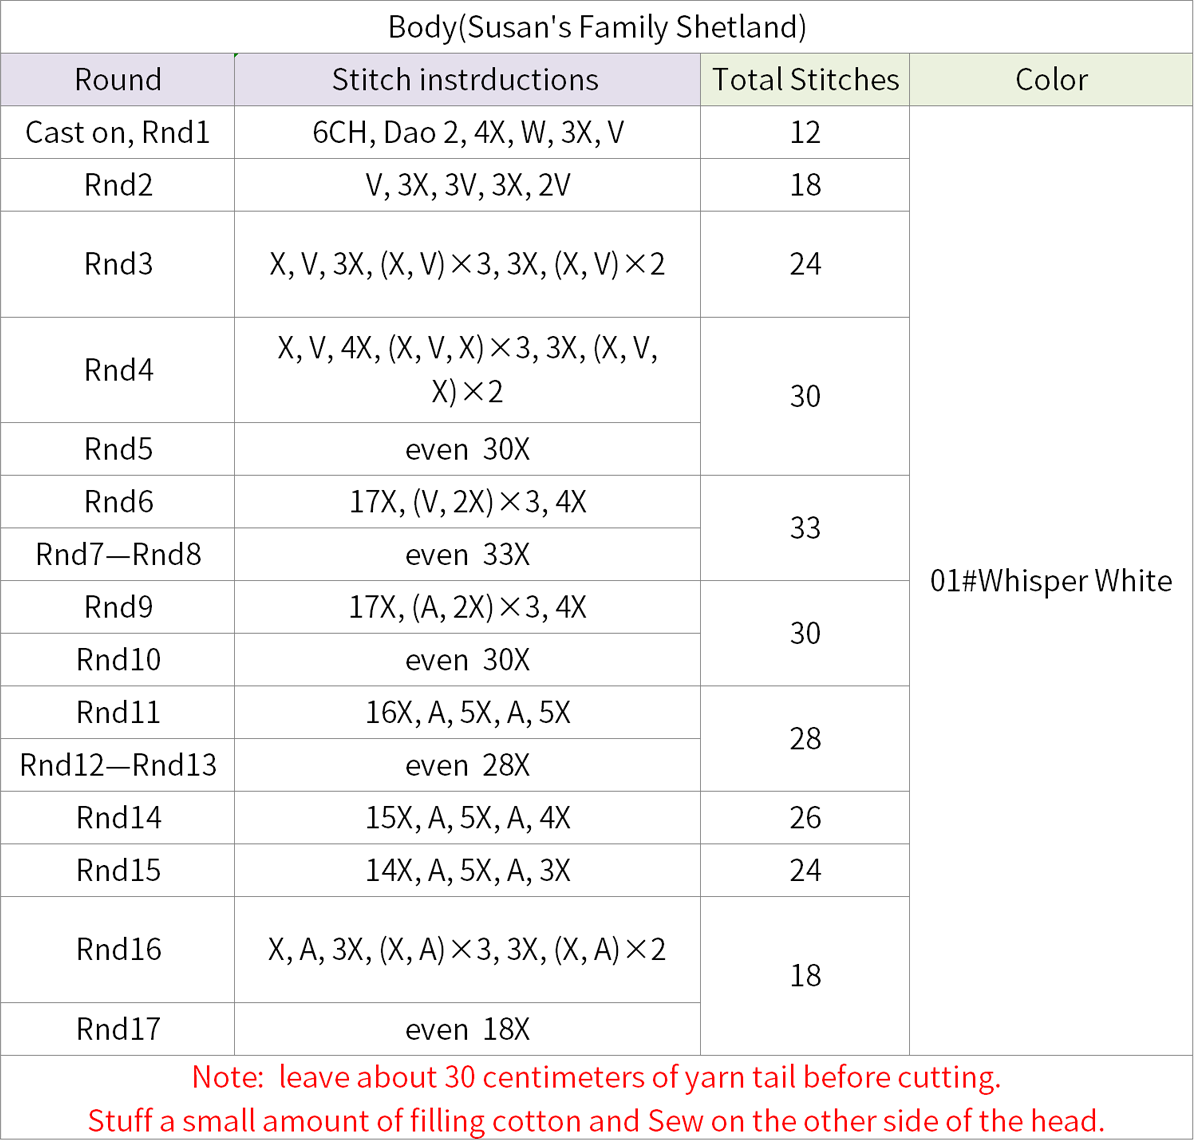
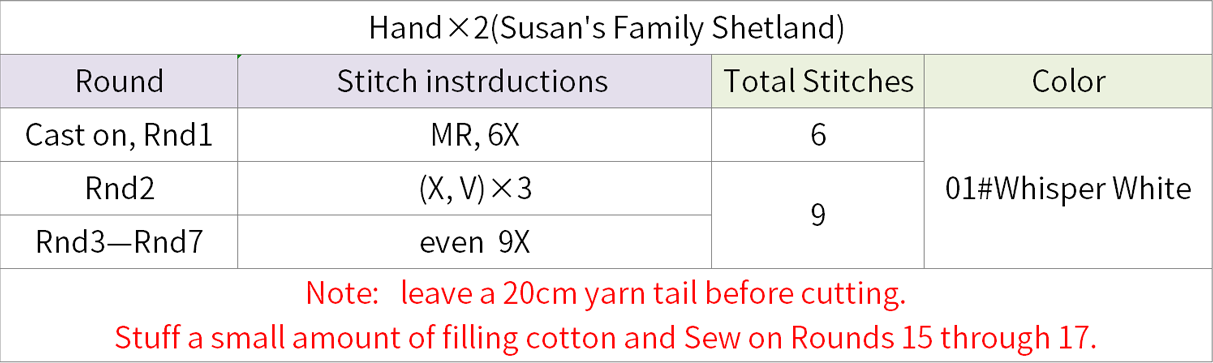
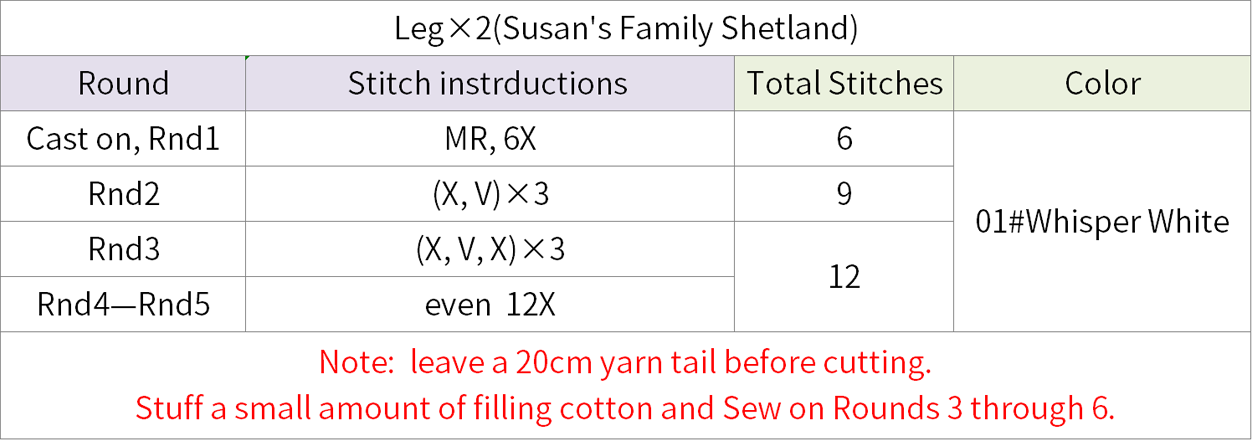
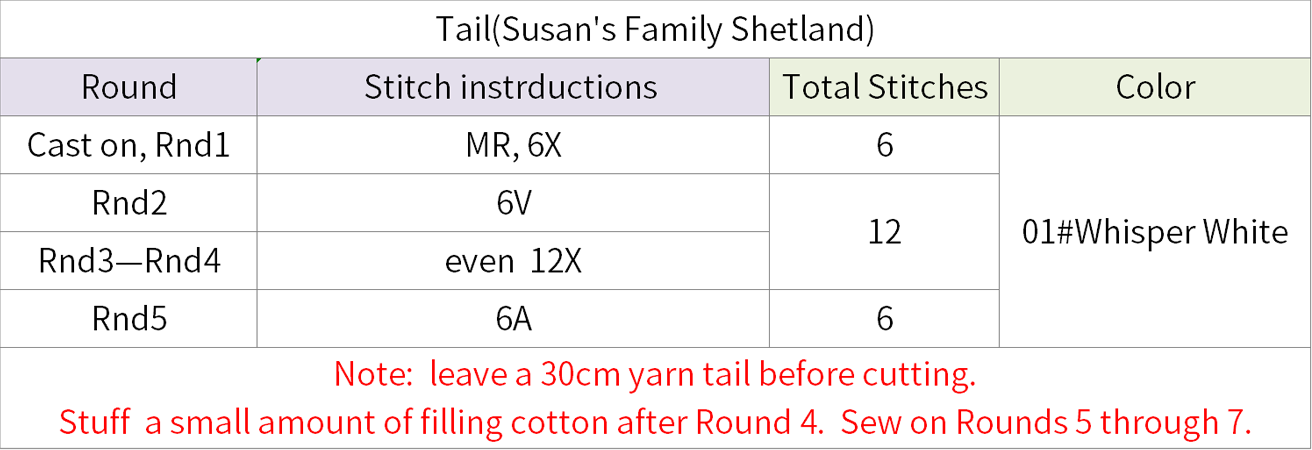
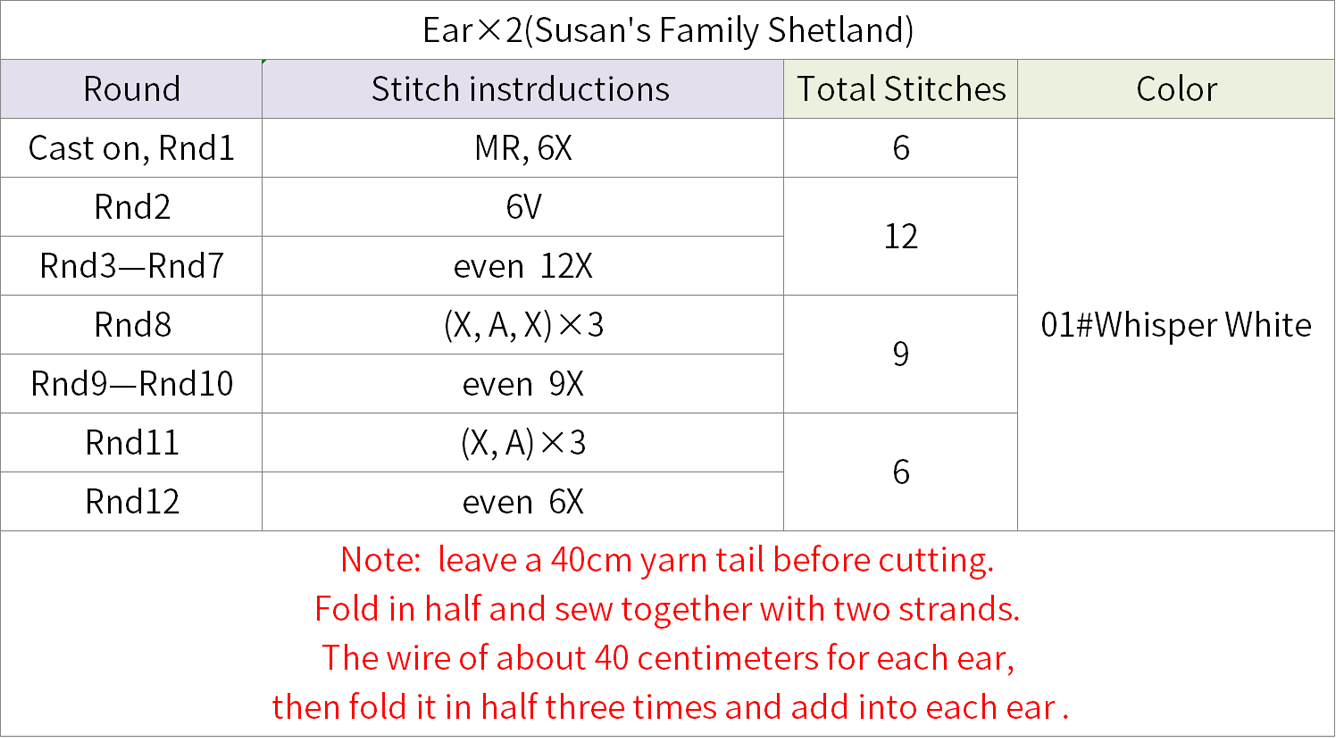
The steps include crocheting the head, the body, the legs, the tail, assembling and decorating. First, crochet separately, then assemble, and finally add the decorations. Please refer to the video demonstration for details.
Step 1 HeadA1 01' 10''
Step 2 BodyA2 16' 51''
Step 3 Hands, Legs and TailA3 21' 40''
Step 4 Assembling and DecoratingA4 23' 05''
After crocheting the head, body, hands, feet, and tail, assemble them. Then, make the decorations. Decorations include facial features, head accessories, and ribbon. The facial features includes eyes, mouth, nose, blushes, and ears. Please refer to the video demonstration for more details.
Yarn for eyes, mouth and nose: a strand of 34#Toffee 4-Ply Combed Cotton & Acrylic Fibre Hand Knitting Yarn
Part 2 AccessoriesB
Accessories include flowers, battery cover, strap, as well as tassel, and we’ll assembly them at last.
Step 1 FlowersB1 48' 15''
For different versions, the flowers vary in color, but the crochet method is similar. They all begin with a magic ring, and are crocheted in rounds counter clockwise. You need to string small pearls before crocheting. After completing, add leaves and large pearls to some of the flowers. Please refer to the video demonstration for more details.


Step 2 Battery coverB2 60' 02''
We will start with a foundation chain. Then crochet in rounds counter clockwise. Please refer to the video demonstration for more details.

Step 3 Strap, TasselB3, and AssemblyingB4 60' 06''
Next, we'll make the strap and the tassel. for these 2 versions, their accessories are the same except the colors of beads. Then, we'll assemble the lantern. Start with the hollow ball. Then glue the flowers. Attach the strap and the tassel. Tie the ribbon next. Glue the butterflies and the toy. Finally, set the string light. Please refer to the video demonstration for more details.
Note: Yarn for strap and tassel
osmanthus version: 104#Late Fall Separate
hydrangea version: 205#Blossom Separate
Made by the community