Home / Container
Flowerpot Pen Holder
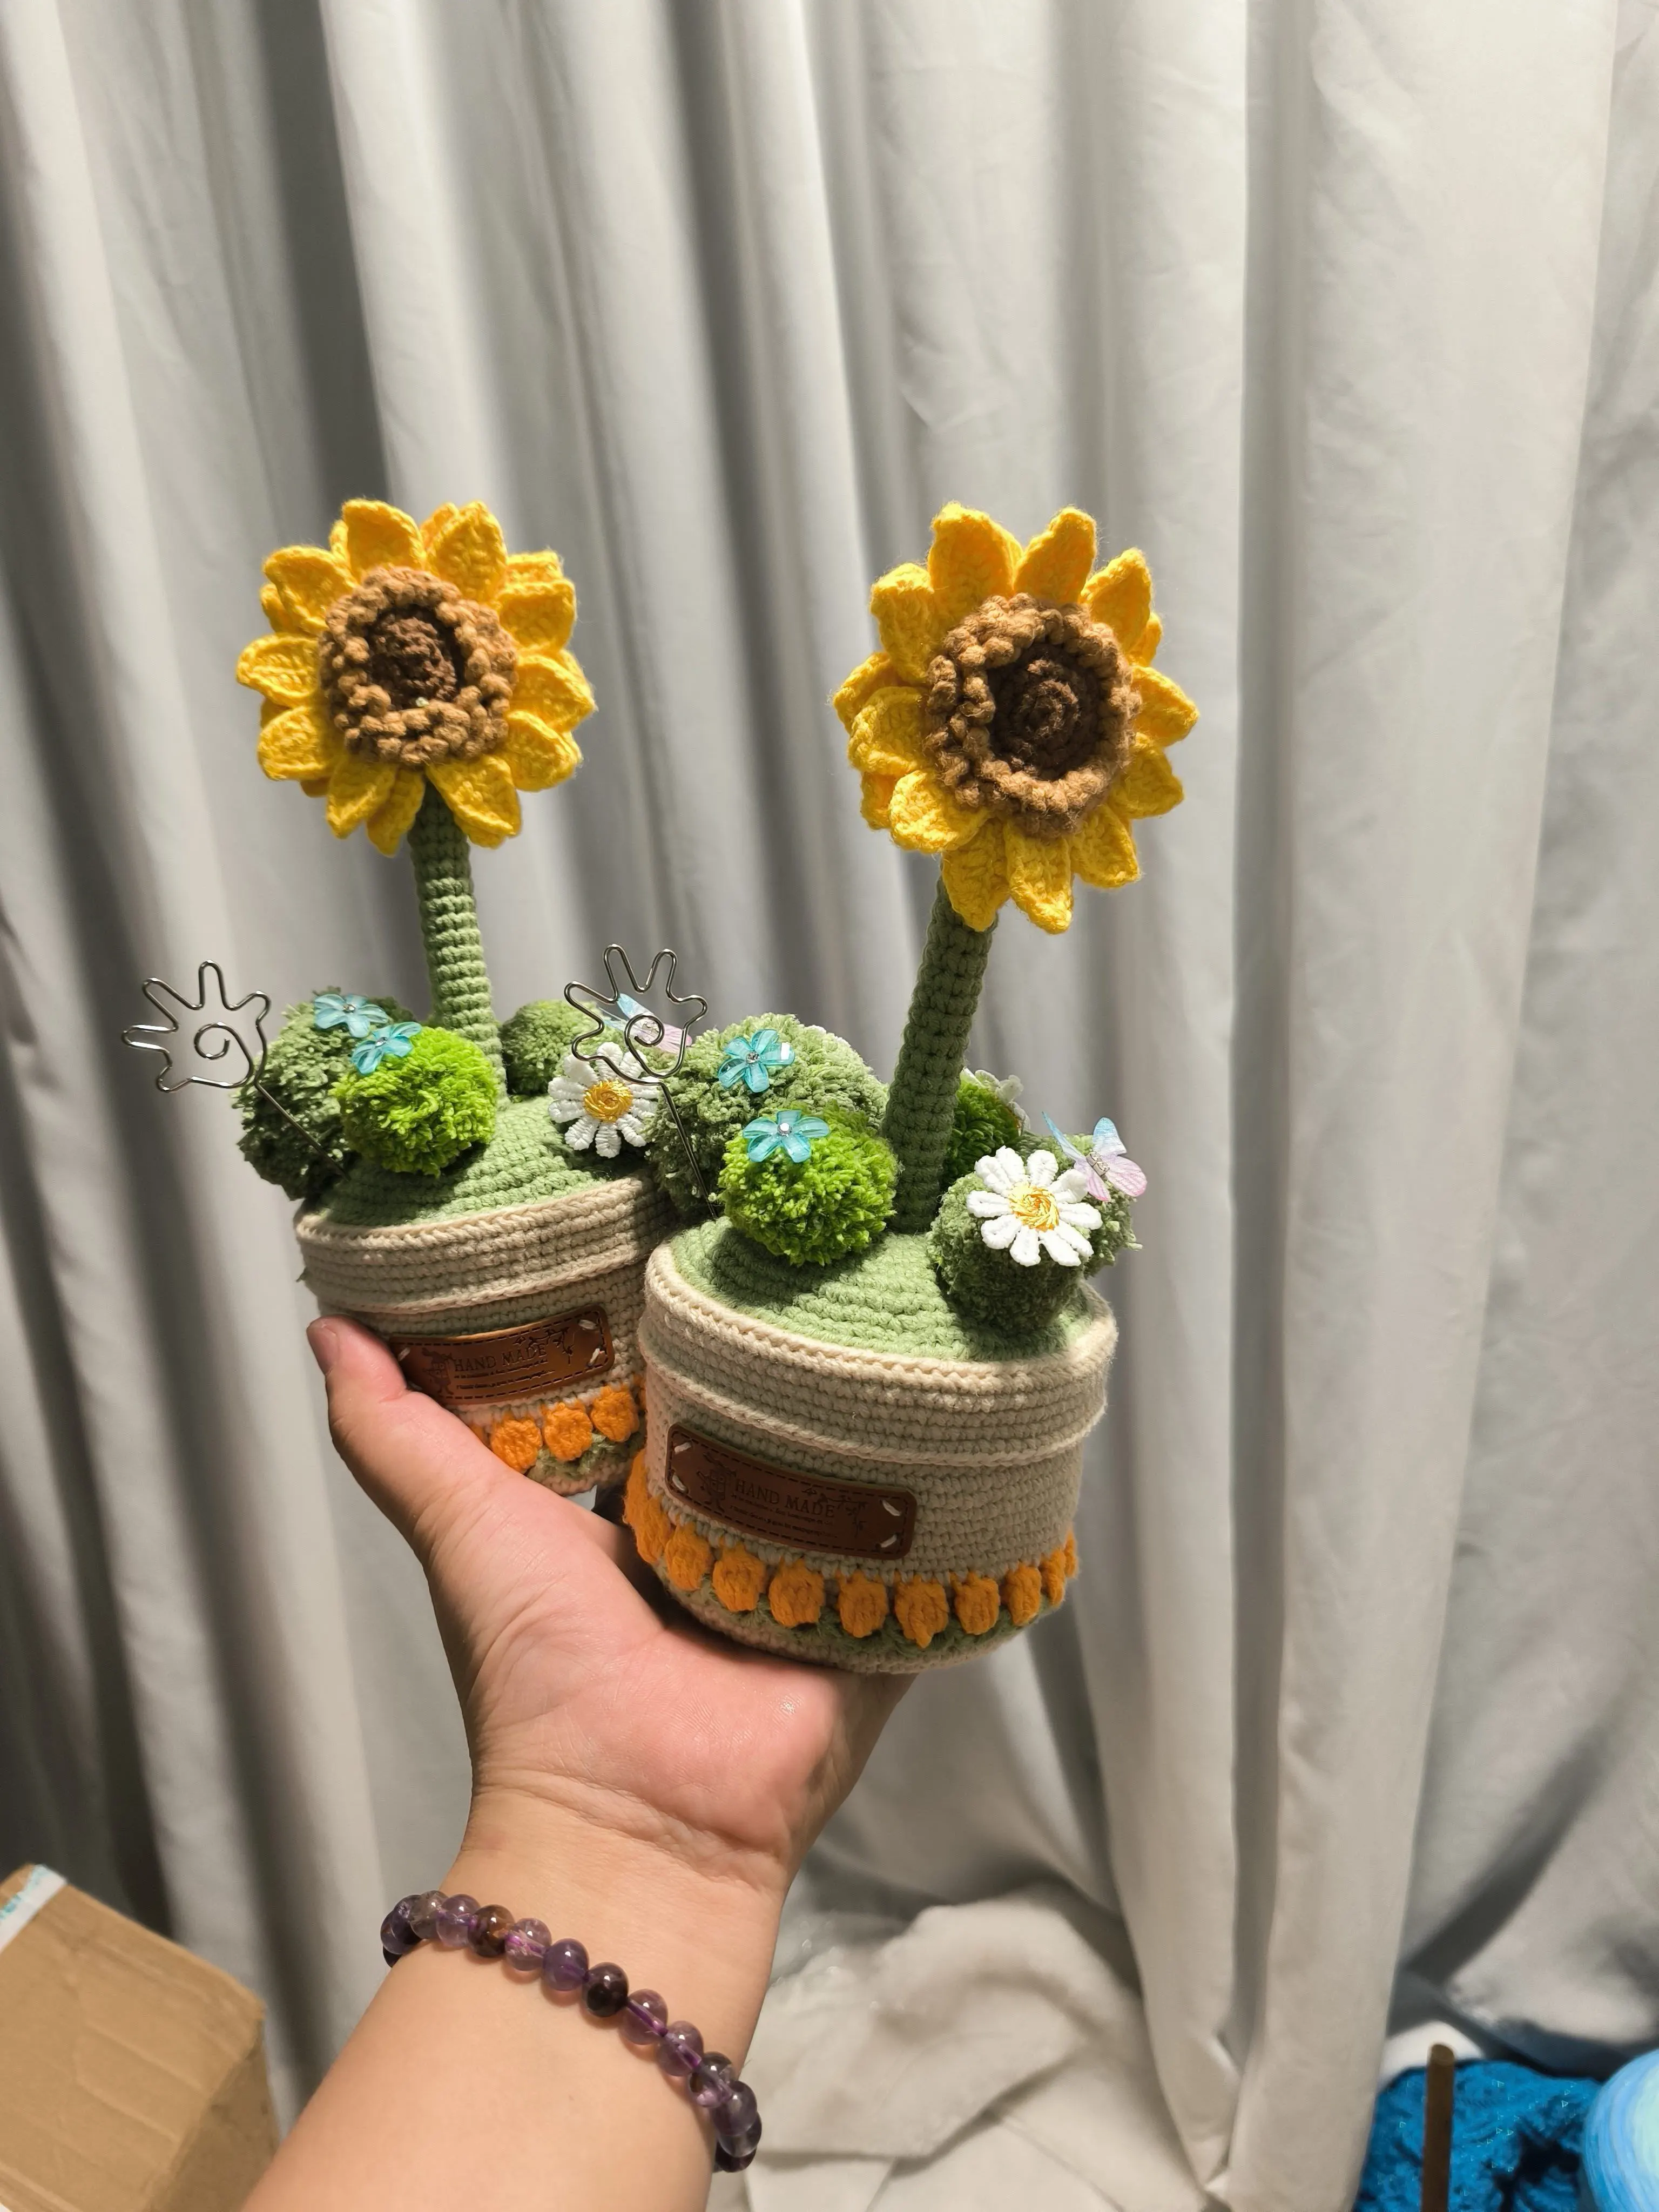
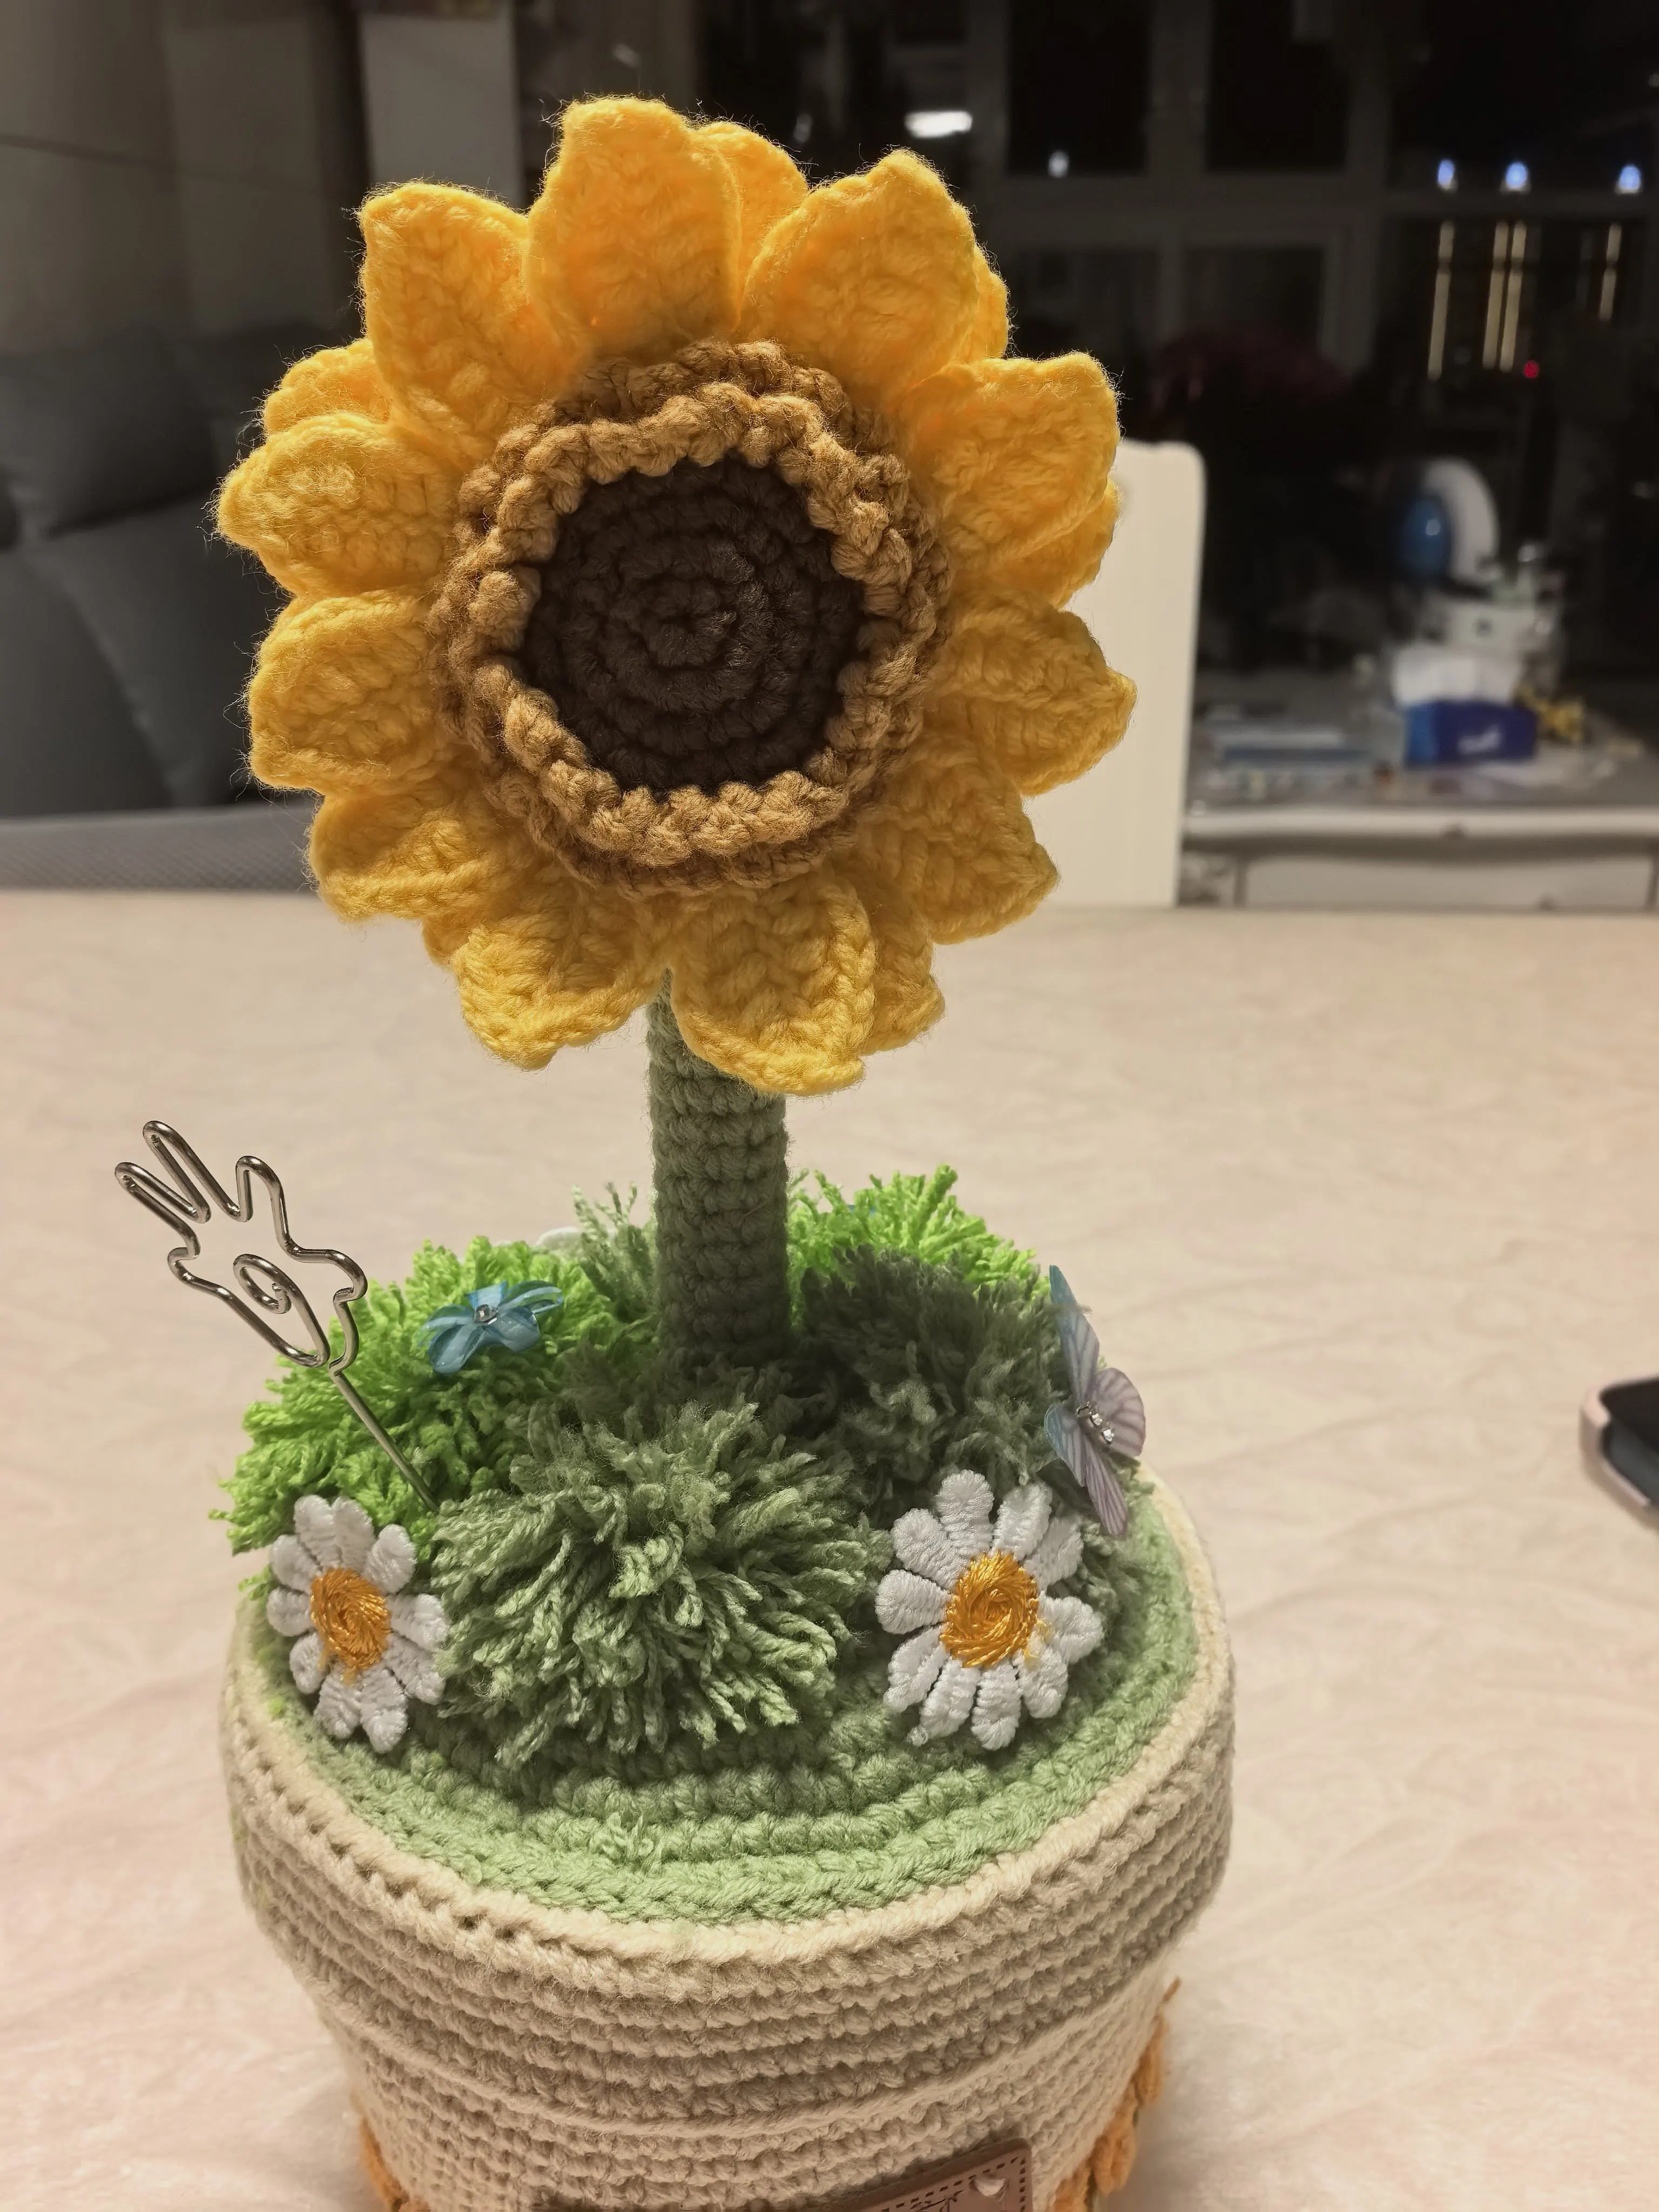
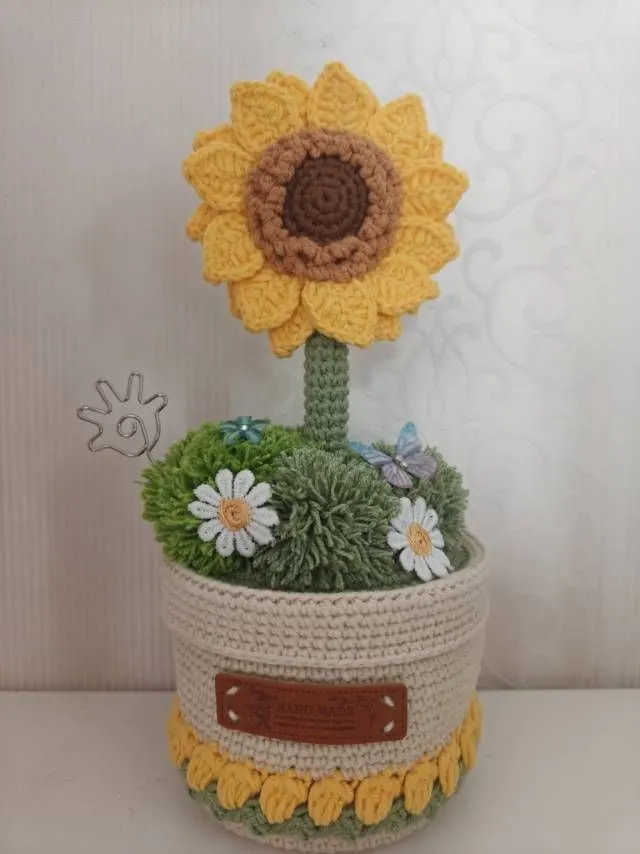
Project preview
See the finished project
Pattern format
Instructions
Watch and follow
Video tutorial
| Style | Yarn | Color |
|---|---|---|
| Sunflower Style-Cloudlet | Cloudlet | 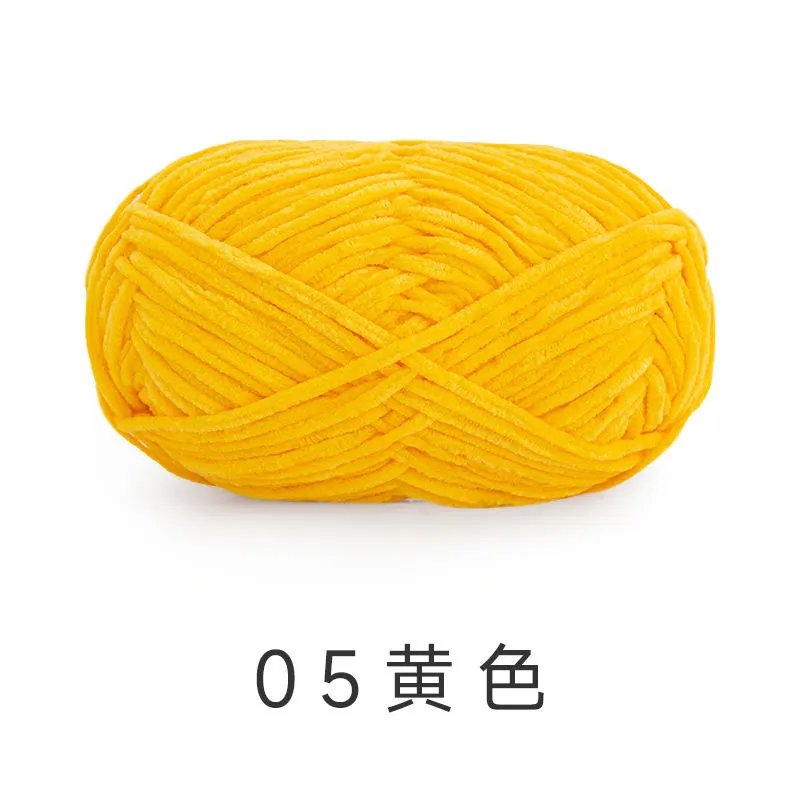 05#Spectra Yellow x 1 05#Spectra Yellow x 1 16#Stone Green x 1 16#Stone Green x 1 17#Green Oasis x 1 17#Green Oasis x 1 19# Light Khaki x 1 19# Light Khaki x 1 20# Khaki x 1 20# Khaki x 1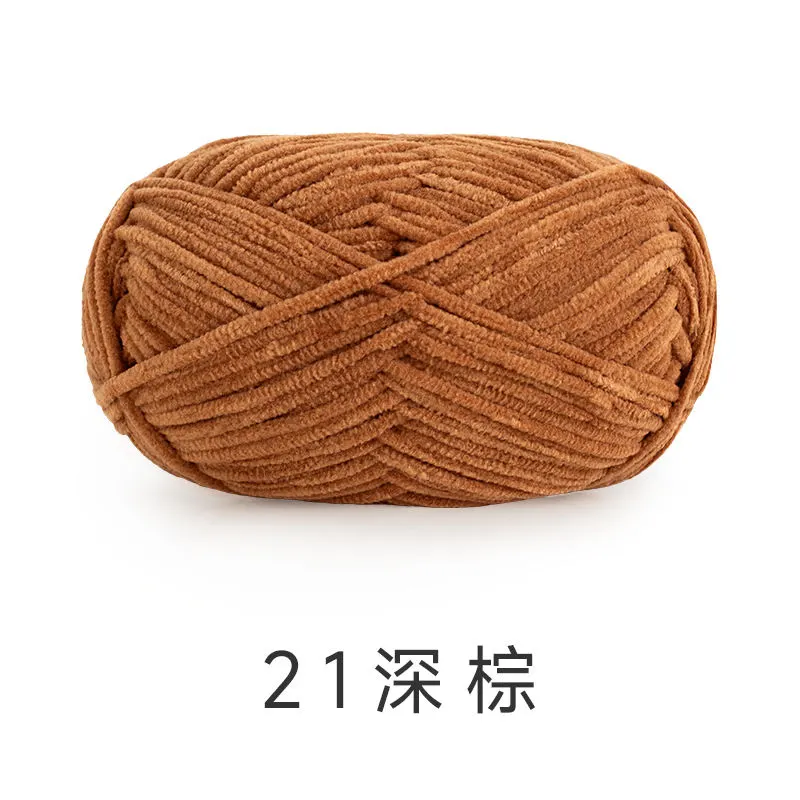 21#Pecan Brown x 1 21#Pecan Brown x 1 |
This decorative piece consists of a flower pot, floral foam, pen holder, flowers, and decorations.
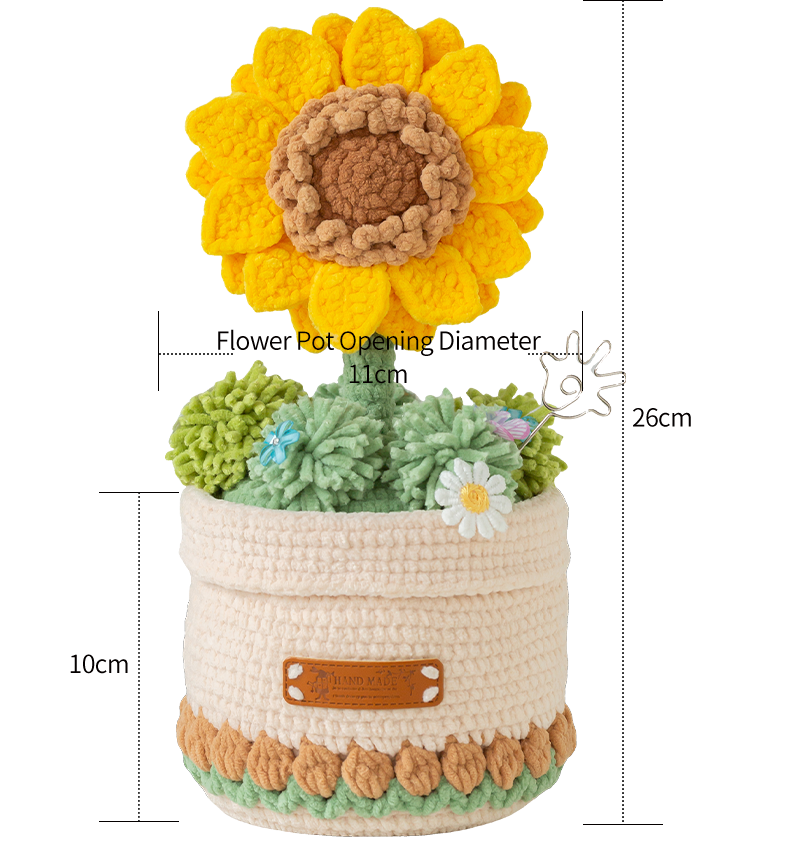
The handcrafted measurements may have an error, the size of the sample is for reference only.
Materials: Cloudlet
Tool: 2.50 mm Crochet Hook









Note:
1. This pattern is making in Chinese crochet pattern terms, and the stitch name is written using American terminology. All measurements in charts are in cm.
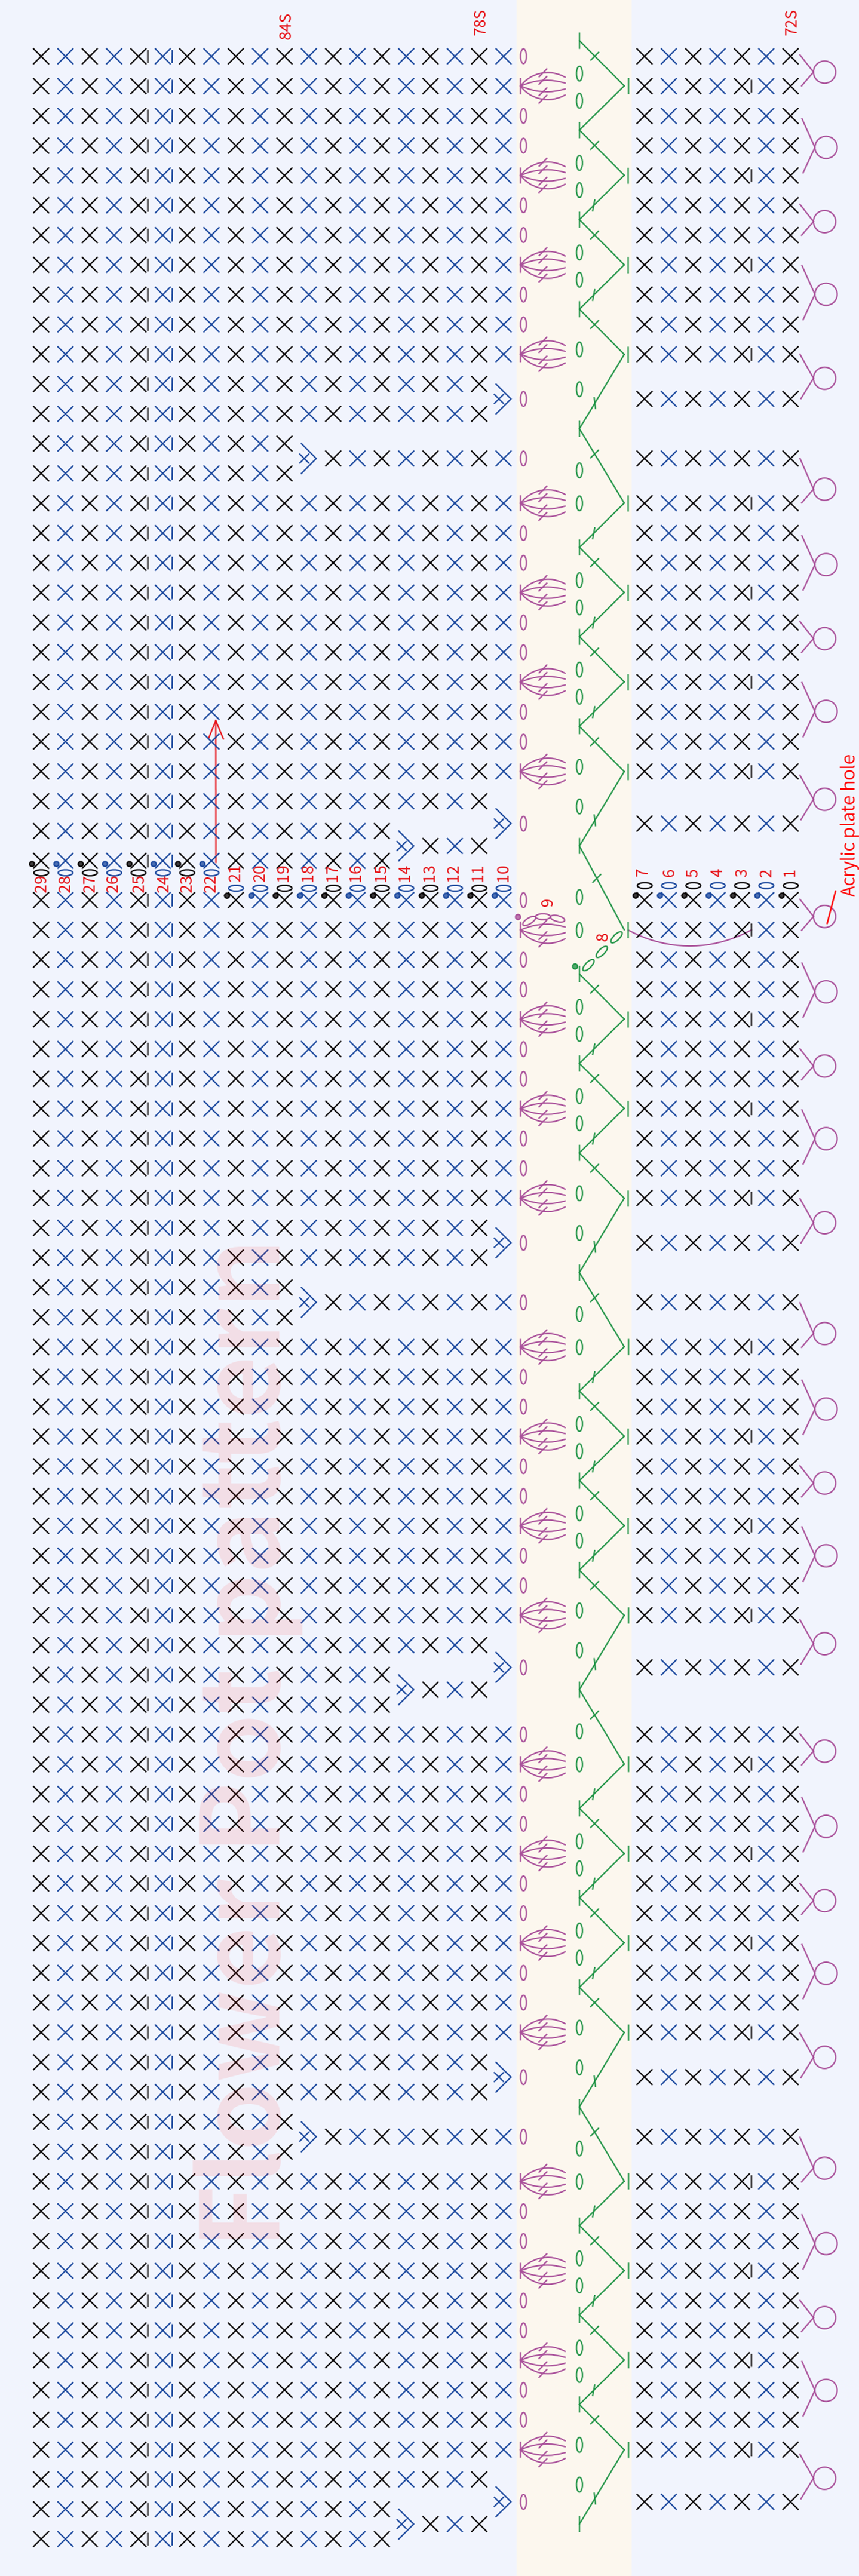
Part 1 Flower Pot A 00' 26''
The flower pot is crocheted in the round on an acrylic sheet, requiring yarn color changes during the process, with a leather label attached upon completion. Please refer to the video demonstration for details.
Notes:
1.R3: Work into back loops of R2;
2.R8: Work into remaining loops of R2;
3.R10: Join R9 and R7 during crocheting;
4.R22: Begin working from wrong side;
5.R24-25: Work into back loops of previous round;
6.Reserve 10cm thread end, cut yarn and fasten off;
7.Sew leather label onto R13-R16 of flower pot after completion.
| Flower Pot Color | |
| Rounds | Color |
| R1 —R7 | 19# Light Khaki |
| R8 | 16#Stone Green |
| R9 | 20# Khaki |
| R10 —R29 | 19# Light Khaki |
| Leather Label Sewing | 19# Light Khaki |
Part 2 Floral Foam B 24' 33''
Floral Foam is worked using the magic ring method, crocheted in rounds counterclockwise. After completing, stuff it and sew into the Flower Pot. For details, please refer to the video demonstration.
| Floral Foam | |||
| Rounds | Stitch Instructions | Total Sts | Color |
| CO and R1 | MR,6X | 6 | 16#Stone Green |
| R2 | 6V | 12 | |
| R3 | (3X,V)×3 | 15 | |
| R4—R17 | Even 15X | 15 | |
| R18 | (2X,V,2X)×3 | 18 | |
| R19 | BLO:(X,V,X)×6 | 24 | |
| R20 | (3X,V)×6 | 30 | |
| R21 | (2X,V,2X)×6 | 36 | |
| R22 | (5X,V)×6 | 42 | |
| R23 | (5X,V)×7 | 49 | |
| R24 | (3X,V,3X)×7 | 56 | |
| R25 | (7X,V)×7 | 63 | |
| R26 | (4X,V,4X)×7 | 70 | |
| R27 | (9X,V)×7 | 77 | |
| R28 | (5X,V,5X)×7 | 84 | |
| Note: Work R1-R19 with the wrong side facing out; Reserve a 1.2 m thread end at completion; Place weighted beads (without opening the packaging bags, one bag on each side) and granulated cotton inside the Flower Pot; Finally, sew the Floral Foam to the stitch markers of R22 on the Flower Pot. | |||
Part 3 Pen Holder C 35' 44''
Pen Holder starts with a magic ring method, crochet in rounds counterclockwise. For details, please refer to the video demonstration.
| Pen Holder | |||
| Rounds | Stitch Instructions | Total Sts | Color |
| CO and R1 | MR,6X | 6 | 16#Stone Green |
| R2 | (X,V)×3 | 9 | |
| R3—R30 | Even 9X | 9 | |
| Note: Adjust rounds as needed, hook until reaching the pen cap edge; Reserve a 10 cm thread end for finishing stitches. Apply a small amount of glue to secure the Pen Holder with the pen. The pen cap should be fixed to the Floral Foam. | |||
Part 4 Flower D 39' 09''
The flower is divided into the flower core, petals, and calyx. Crochet each part first, then assemble them together.
Step 1 Flower Core
The flower core is started with the magic ring technique, then crocheted in rounds counterclockwise. You'll need to switch colors during the process. For details, please refer to the video demonstration.
| Sunflower Core | |||
| Rounds | Stitch Instructions | Total Sts | Color |
| CO and R1 | MR,6X | 6 | 21#Pecan Brown |
| R2 | 6V | 12 | |
| R3 | (X,V)×6 | 18 | |
| R4 | (X,V,X)×6 | 24 | |
| R5 | BLO:(3X,V)×6 | 30 | |
| R6 | BLO:Even 30X | ||
| R7 | Work on the front loops of R4 (3CH,SL)×24 | / | 20# Khaki |
| R8 | Work on the front loops of R5 (3CH,SL)×30 | ||
| Note: Reserve a 10 cm thread end at the conclusion for sewing the seam. | |||
Step 2 Petals
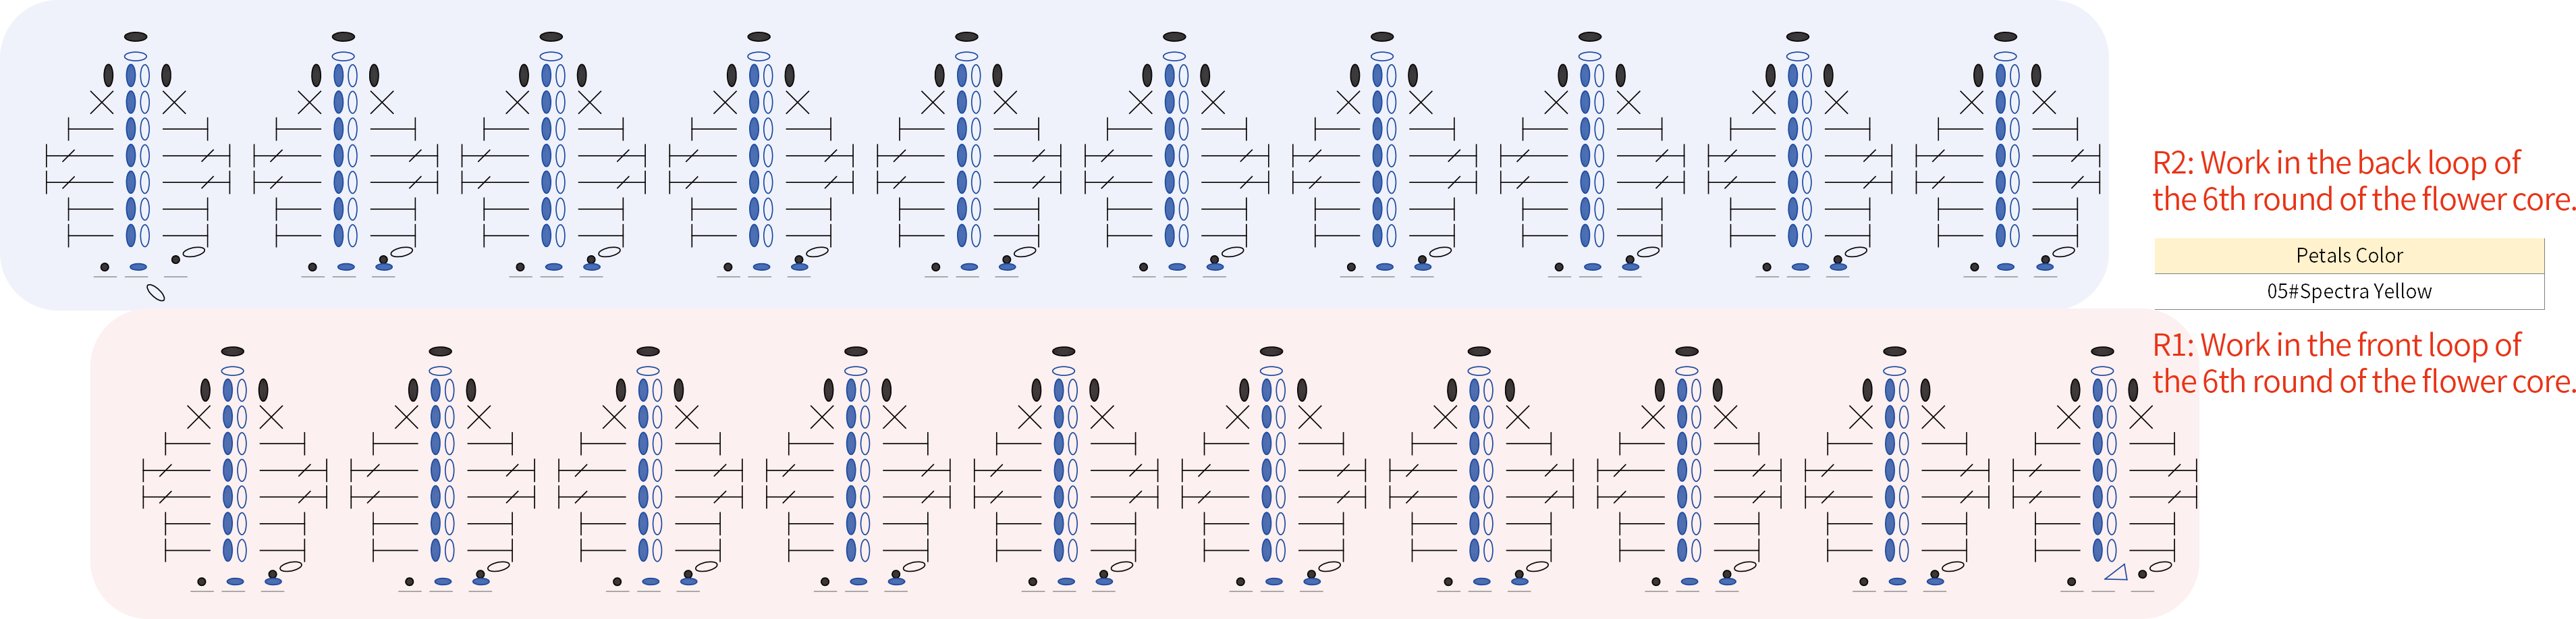
The petals consist of 2 rounds, both crocheted directly onto the flower core. During the crochet process, you'll need to incorporate thin wire. For details, please refer to the video demonstration.
Step 3 Calyx
The calyx is worked using the magic ring method, crocheted in rounds counterclockwise. Once completed, it is assembled with the flower core and pen cover, then stuffed. For details, please refer to the video demonstration.
| Sunflower Calyx | |||
| Rounds | Stitch Instructions | Total Sts | Color |
| CO and R1 | MR,6X | 6 | 16#Stone Green |
| R2 | 6V | 12 | |
| R3 | (X,V)×6 | 18 | |
| R4 | (X,V,X)×6 | 24 | |
| R5 | (3X,V)×6 | 30 | |
| R6 | (5CH,Dao2,SL,X,T,F,Skip 2 sts SL)×10 | / | |
| Note: Reserve a 50 cm thread end; Sew onto the back side of the Sunflower Core, ensuring the pen is sandwiched in the middle, and fill both sides of the pen with a small amount of granulated cotton. | |||
Part 5 Decorations E 65' 43''
Finally, make the decorations, including Large Pom-pom, Small Pom-pom, daisy flowers, acrylic flowers, butterflies, and a clothespin. For details, please refer to the video demonstration.
Pom-pom making: Take the Cloudlet loop, press it flat, then fold it into thirds.
Large pom-pom: Wrap a single strand of yarn around the loop 200 times, then trim it into a pom-pom with about 4 cm in diameter.
Small pom-pom: Wrap a single strand of yarn around the loop 100 times, then trim it into a pom-pom with 3 cm–3.5 cm in diameter.
Feel free to adjust the size and number of pom-poms based on your preference.
| Pom-pom | Color |
| Large Pom-pom | 17#Green Oasis×1 |
| Small Pom-pom | 16#Stone Green×3,17#Green Oasis×1 |
Made by the community