Bag
Forbidden City Seasons Phone Pouch
Project preview
See the finished project
Pattern format
Instructions
Watch and follow
Video tutorial
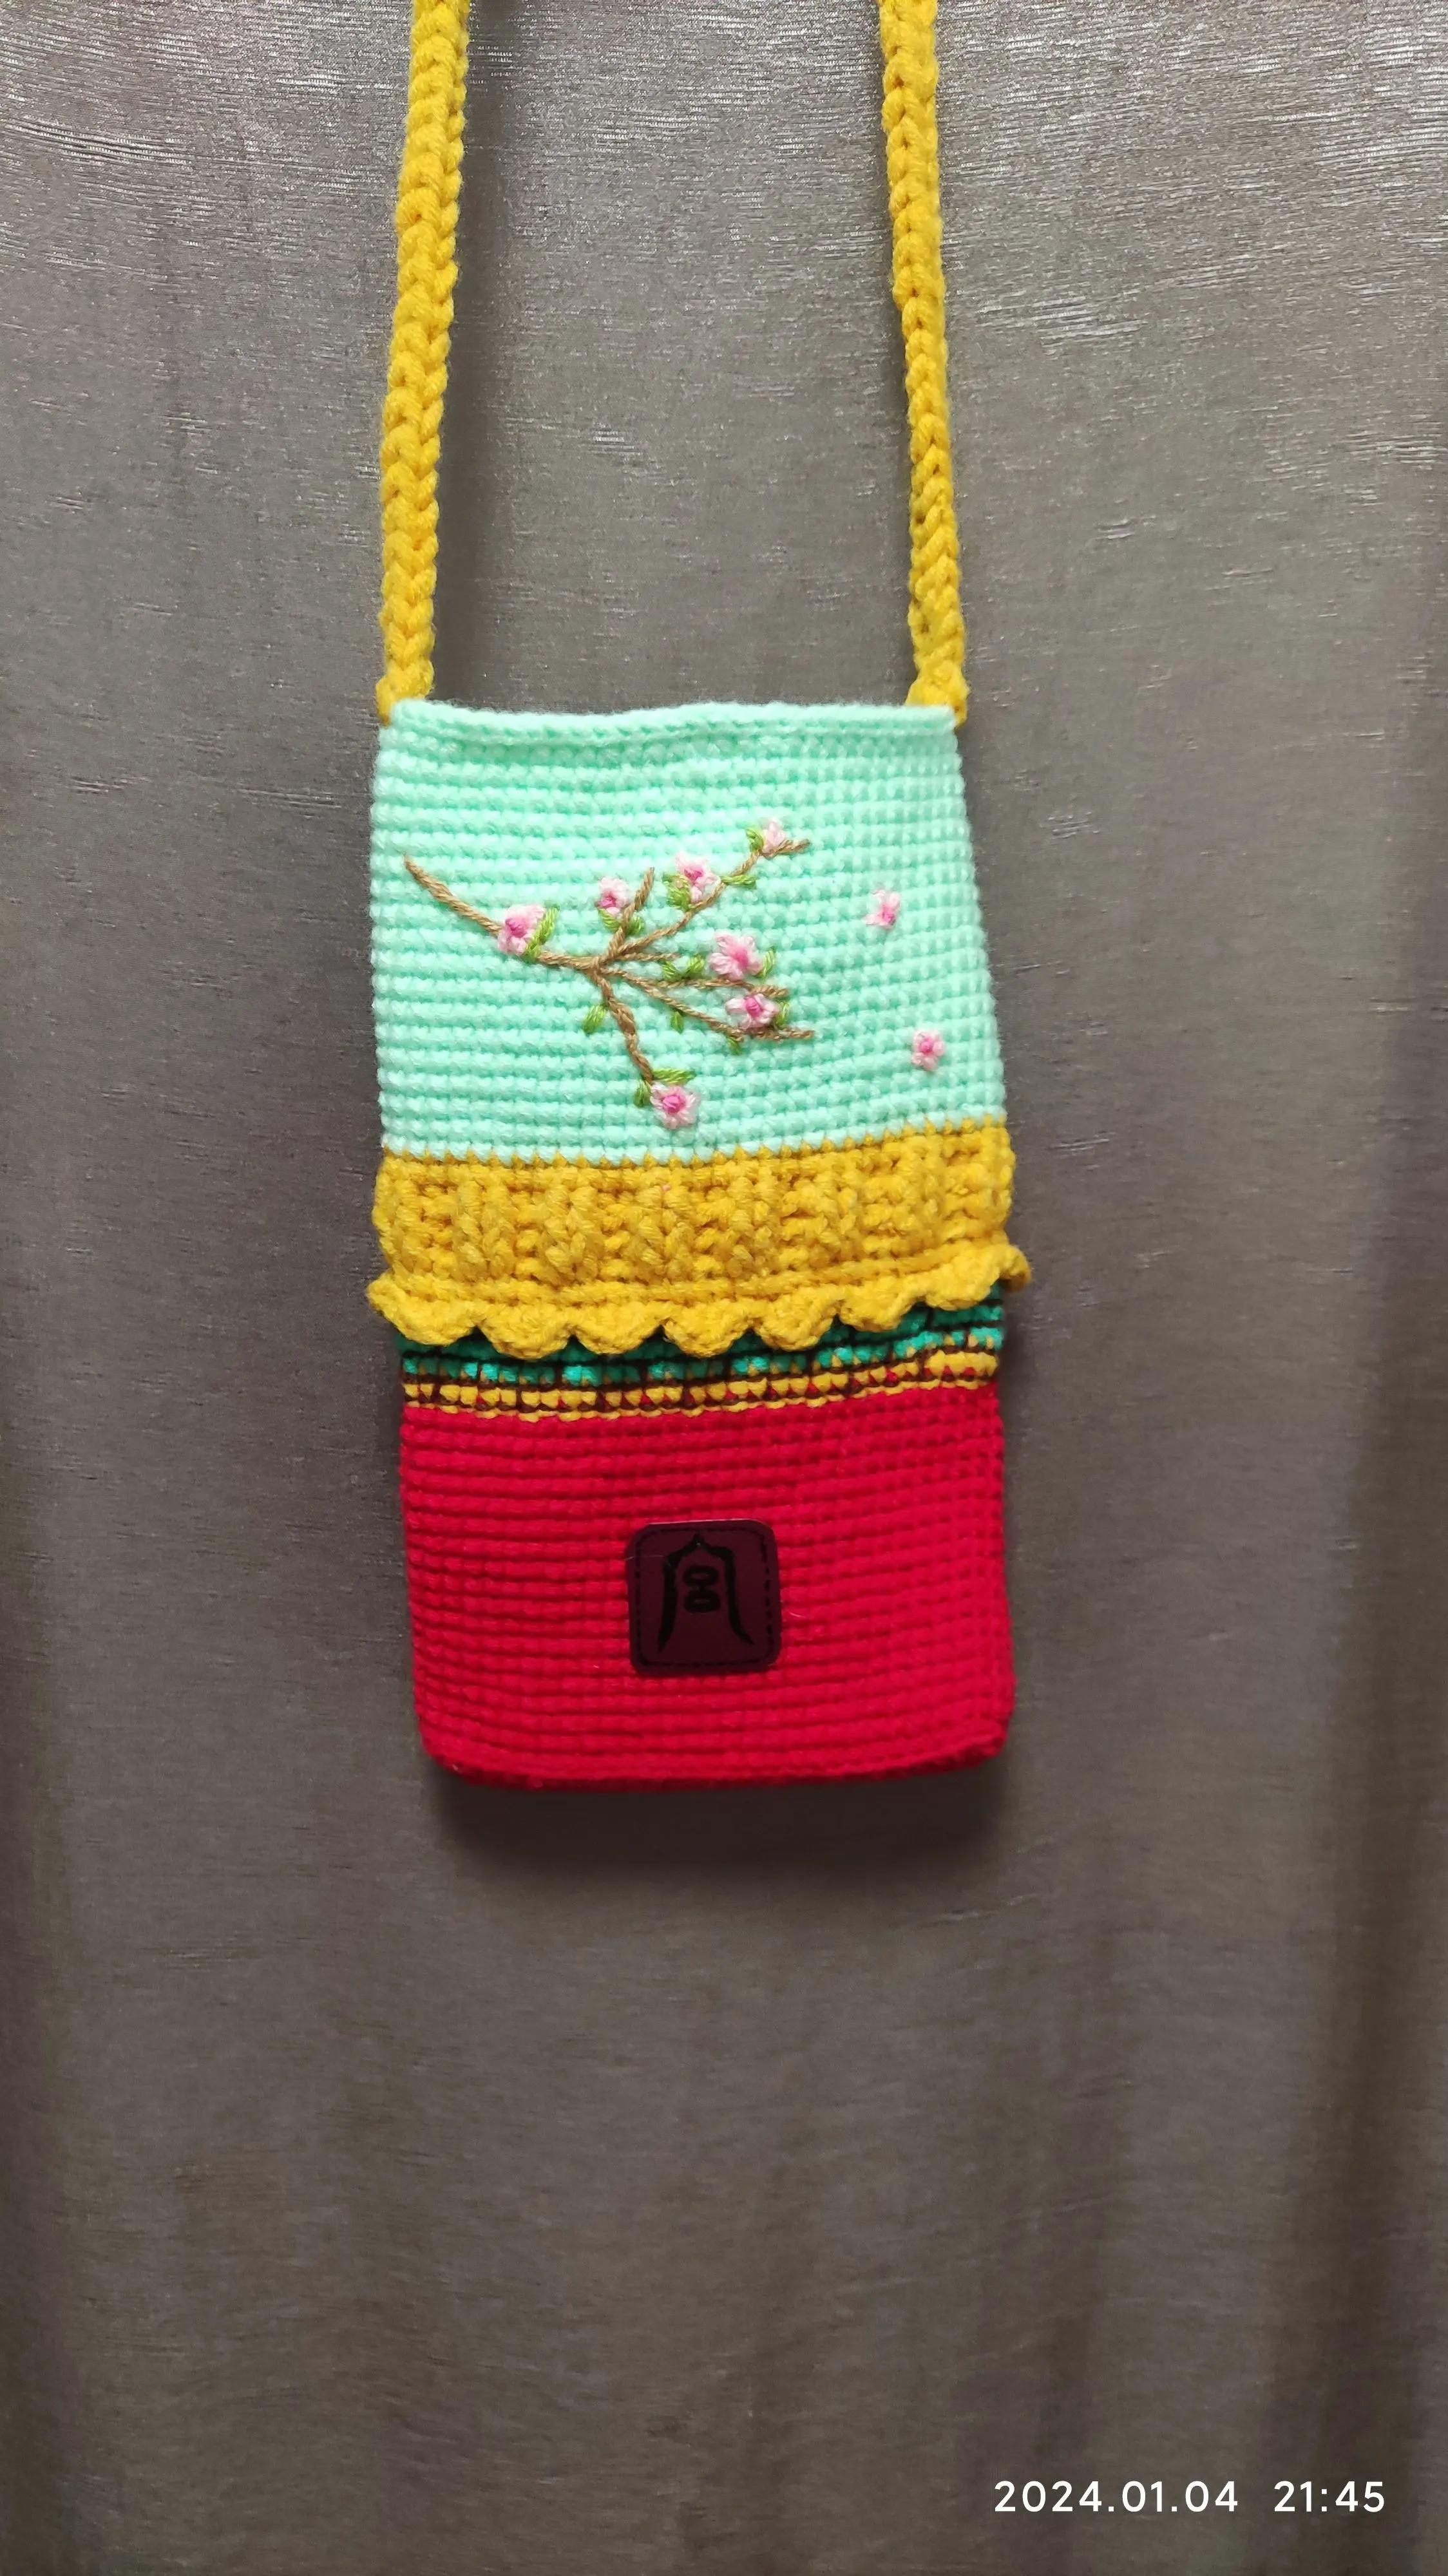
This phone pouch comes in four designs: Spring, Summer, Autumn, and Winter. All four are made by the same method but differ from their flowers. The pouch includes body, strap, and accessories. Start by making the body and embroidering the flowers. Then, make the strap, and attach the accessories in the last.
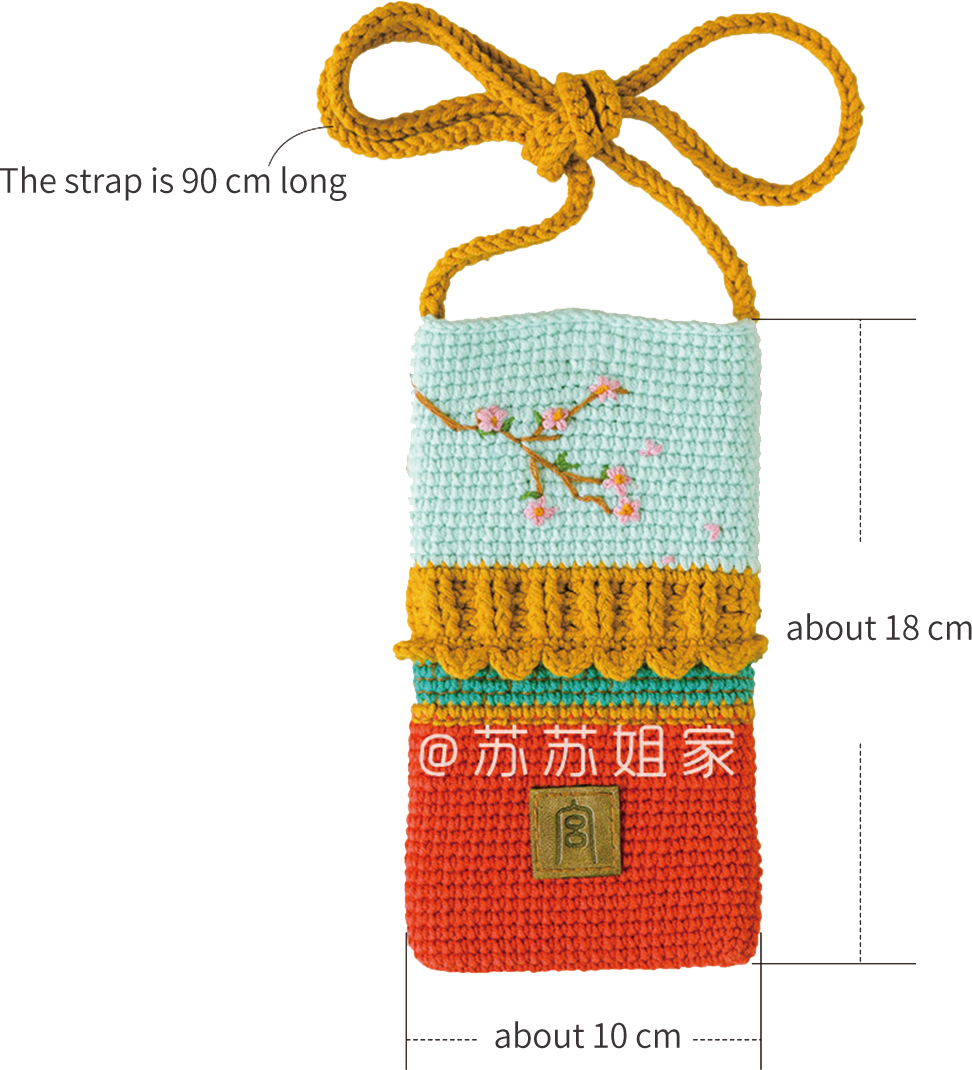
The handcrafted measurements may have an error of 1 to 2 cm. Due to variations in individual tension, the size of the sample is for reference only.
Materials: 4-Ply Combed Cotton & Acrylic Fibre Hand Knitting Yarn
Hook: 2.00mm crochet hook

Chart Key






Note: This pattern is making in Chinese crochet pattern terms, and the stitch name is written using American terminology. All measurements in charts are in cm.
Part 1 Pouch Body
It can be divided into five color areas, switching colors during working.
Step 1 Area 1, 2 and 3 02' 07''
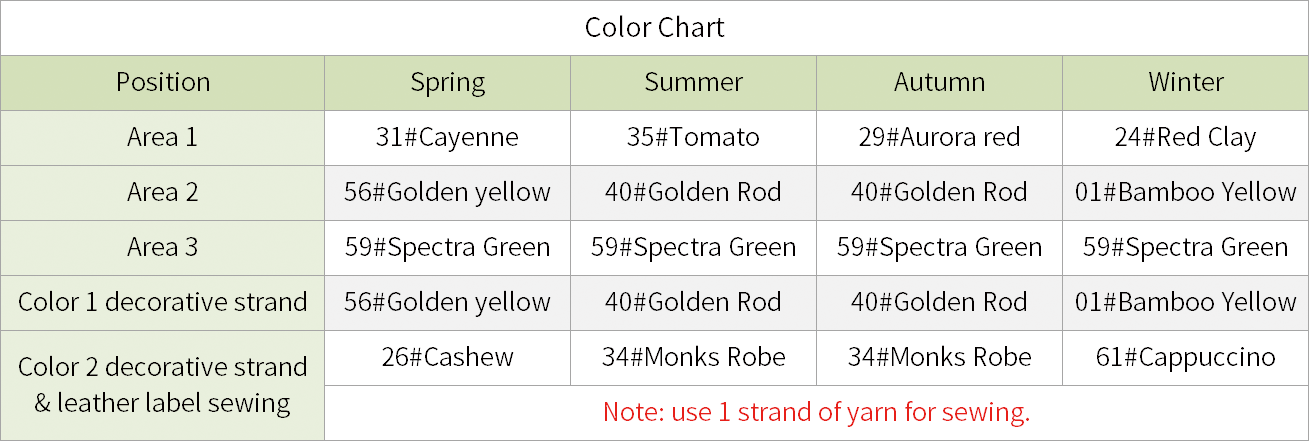
Start with a foundation chain and work in rounds counter clockwise. For Area 1, sew a leather label after complete working; for Area 2, join a new yarn to work, and fasten off with a 1 m yarn tail when finish to sew decorative strands; for Area 3, join a new yarn to work, then sew the decorative strands after complete. Please refer to the video demonstration for specifics.
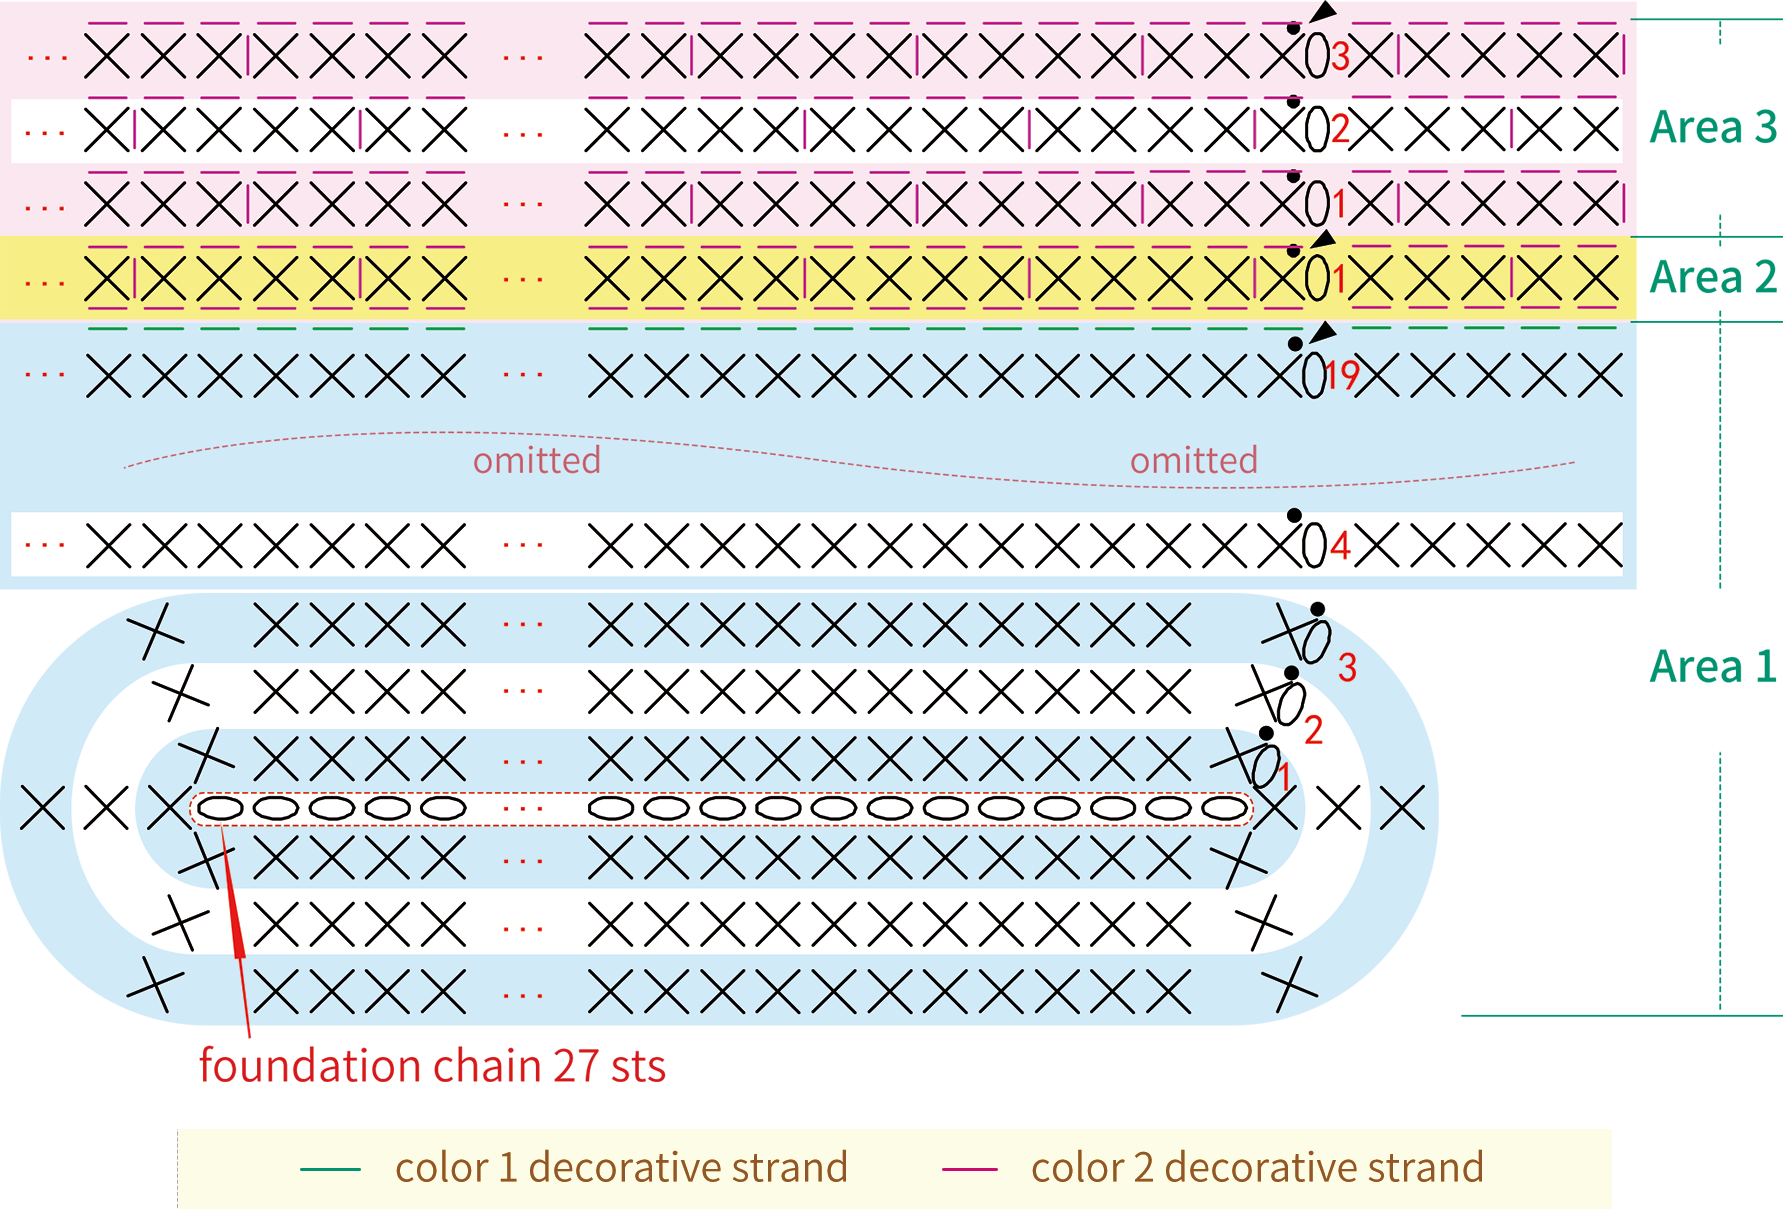
Note:
Step 2 Area 4 & Area 5 29' 57''
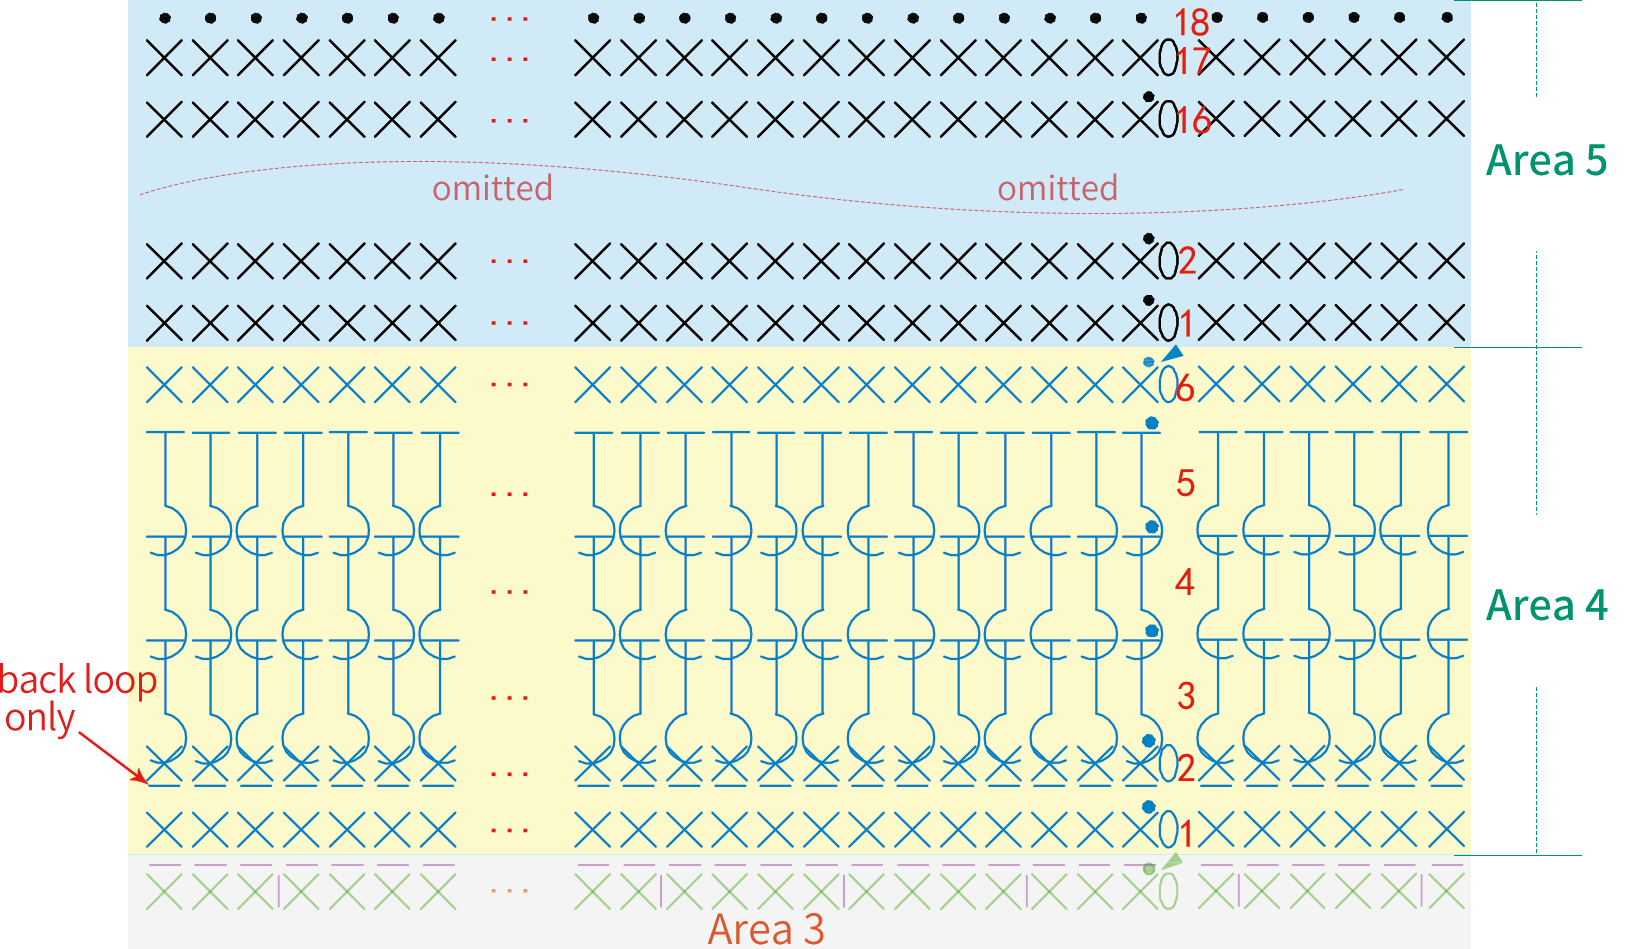
For Area 4, join a new yarn to work, and fasten off after finished Round 6, then join a new yarn for make the Eave, Refer to the video demonstration for the specific starting position. For Area 5, join a new yarn to work, and embroider the flowers after finished. Refer to the video demonstration for details.
Eave:
Turn the fabric upside down, work on the remaining loops from the Round 1 of Area 4.
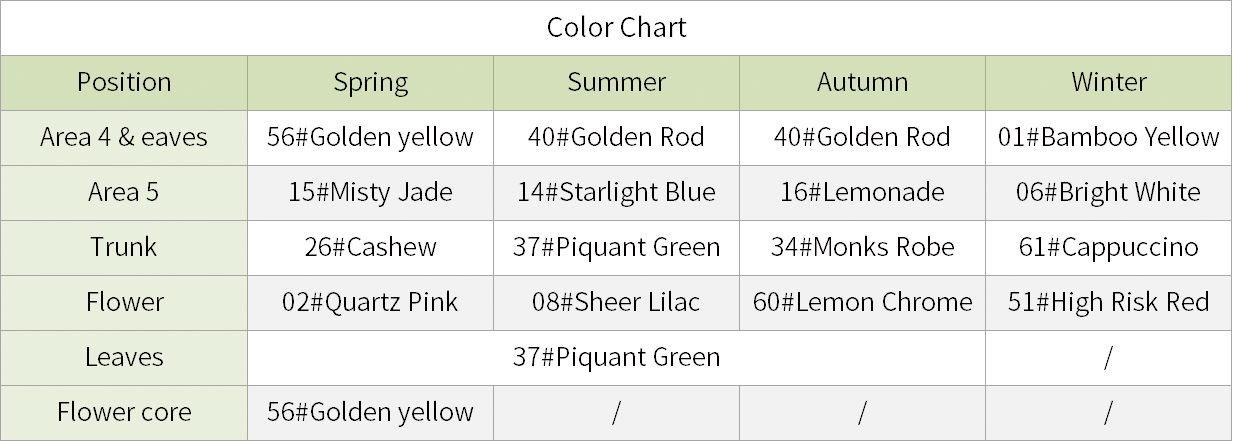
Area 5 Flowers Part Actual Project Reference Image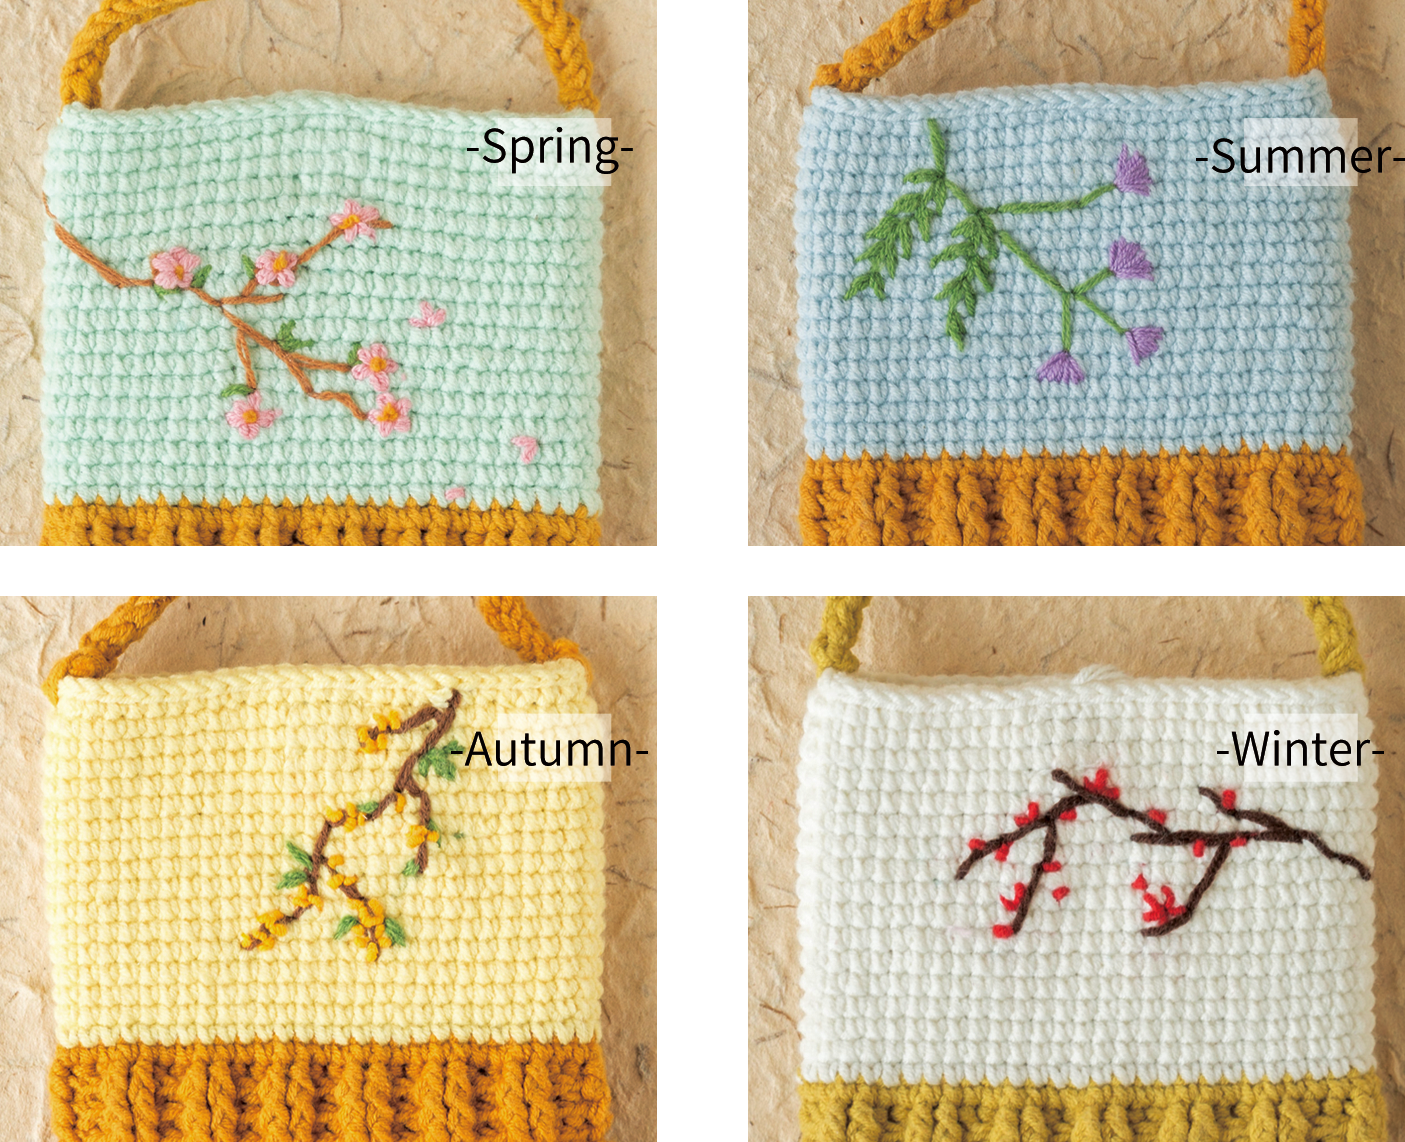
Note: Refer to the actual project or adjust according to your preference.
Part 2 The Strap 80' 21''
First, take a 18 m long yarn, fold it in half for working. The length of strap can be adjusted as you like. Once you're done, sew the strap onto both sides of the pouch. For specifics, please refer to the video demonstration.

Part 3 Accessories 87' 30''
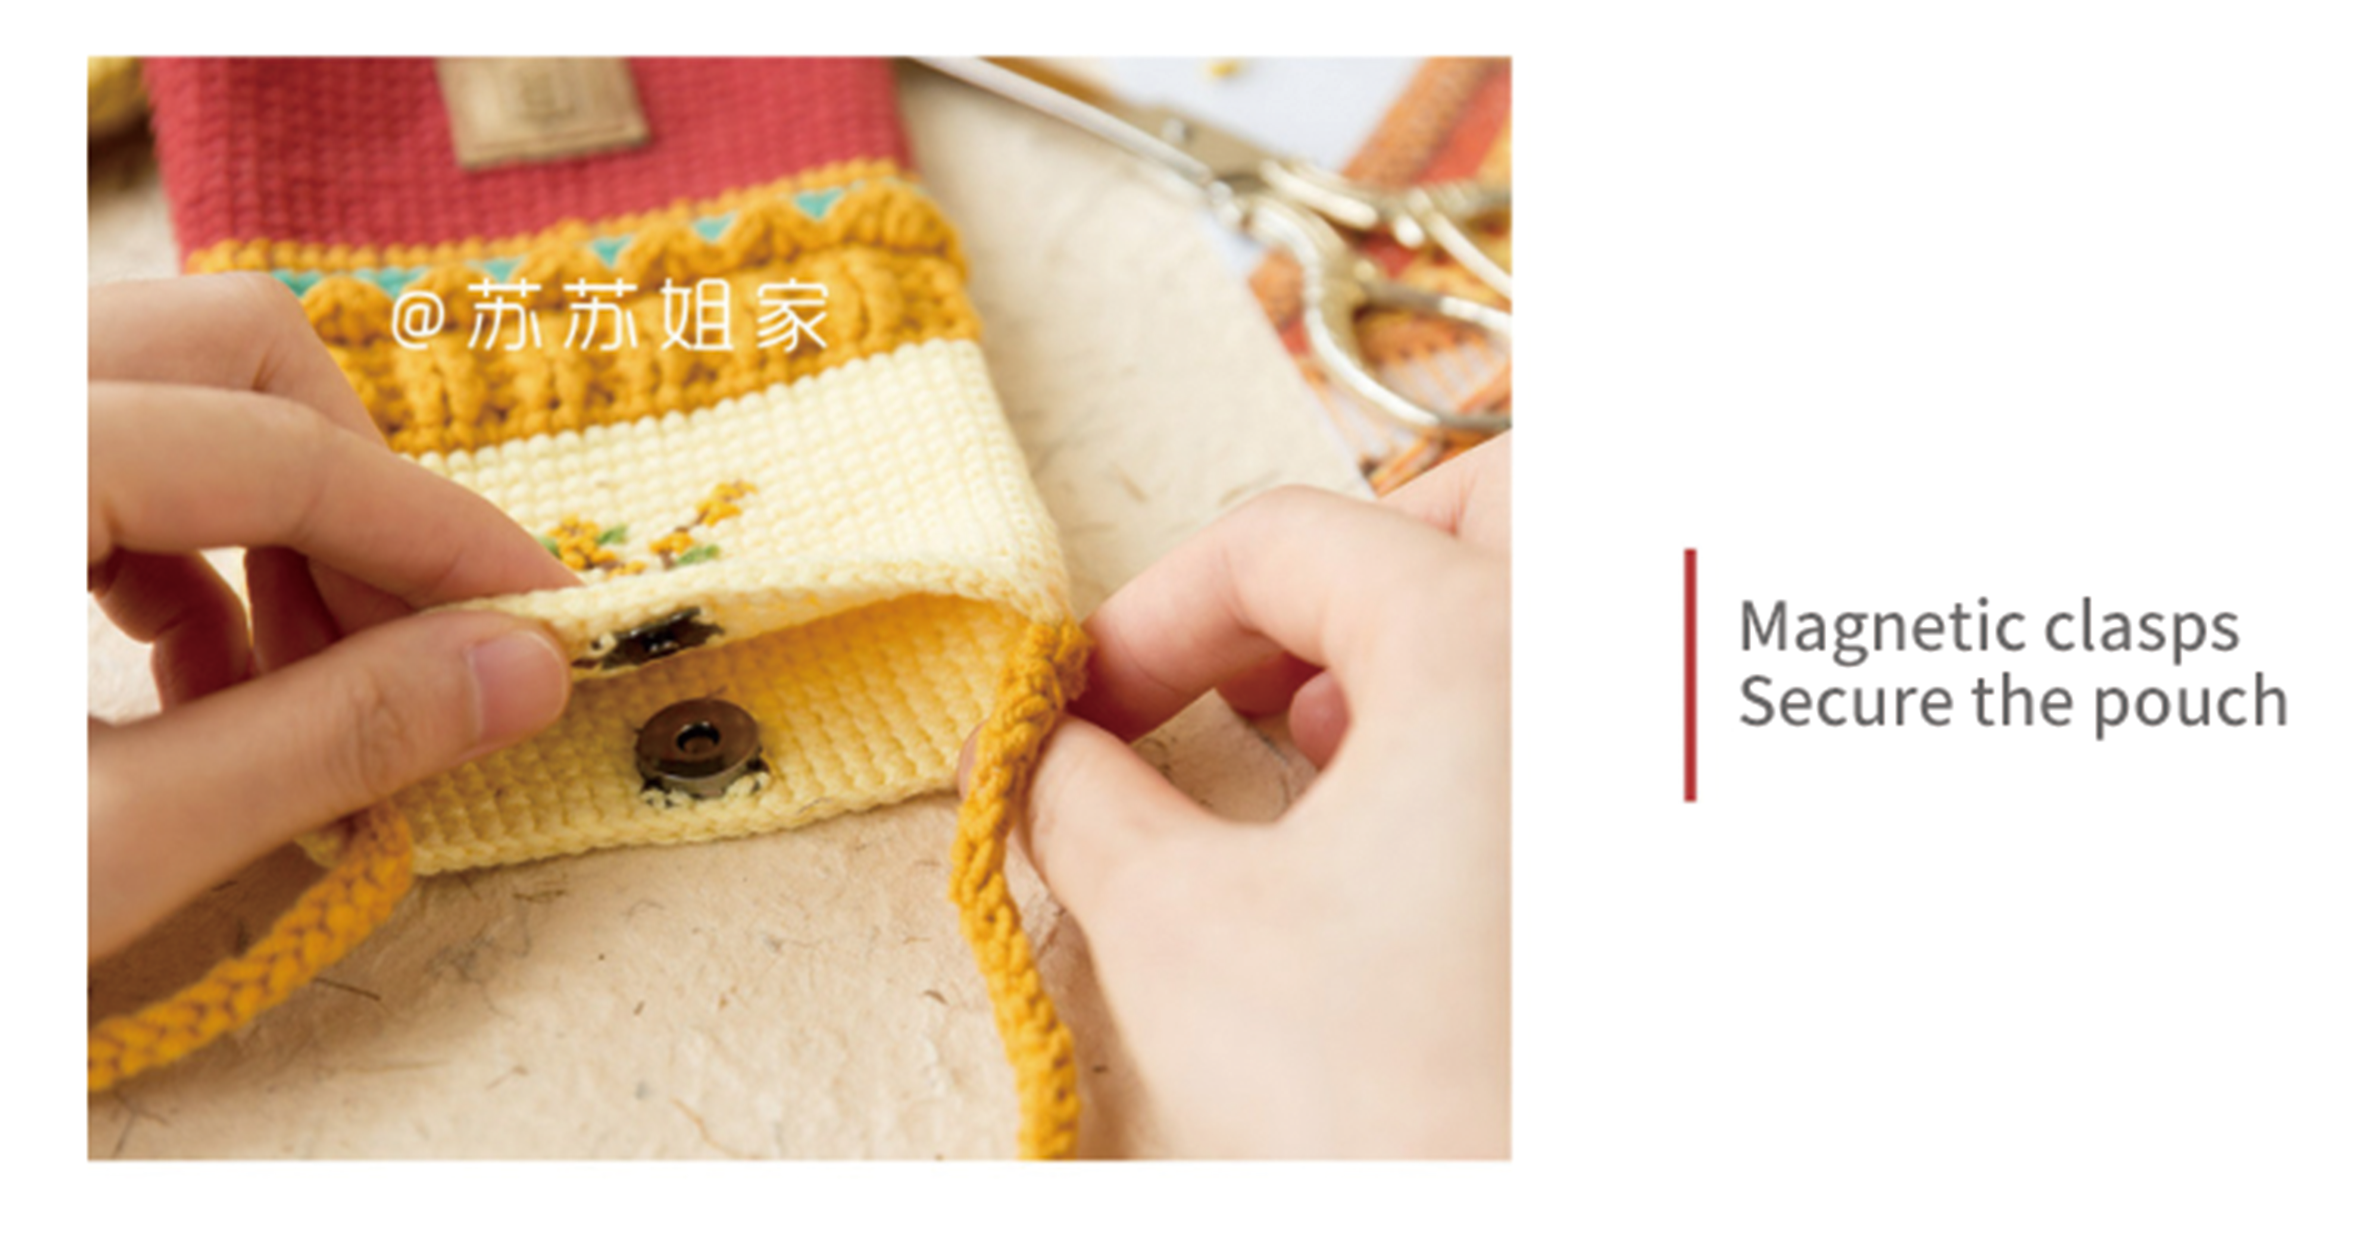
The accessories are magnetic clasps, and they should be sewn onto the wrong side, right in the middle of the opening. Please refer to the video demonstration for specifics.

Made by the community