
Home / Blanket
"Fu" Patchwork Blanket
Project preview
See the finished project
Pattern format
Instructions
Watch and follow
Video tutorial
This blanket is made up of Motif One, Motif Two, sewing, and crocheting the edging. First, complete Motif One and Motif Two separately, then sew them together, and crochet the edging around all sides.
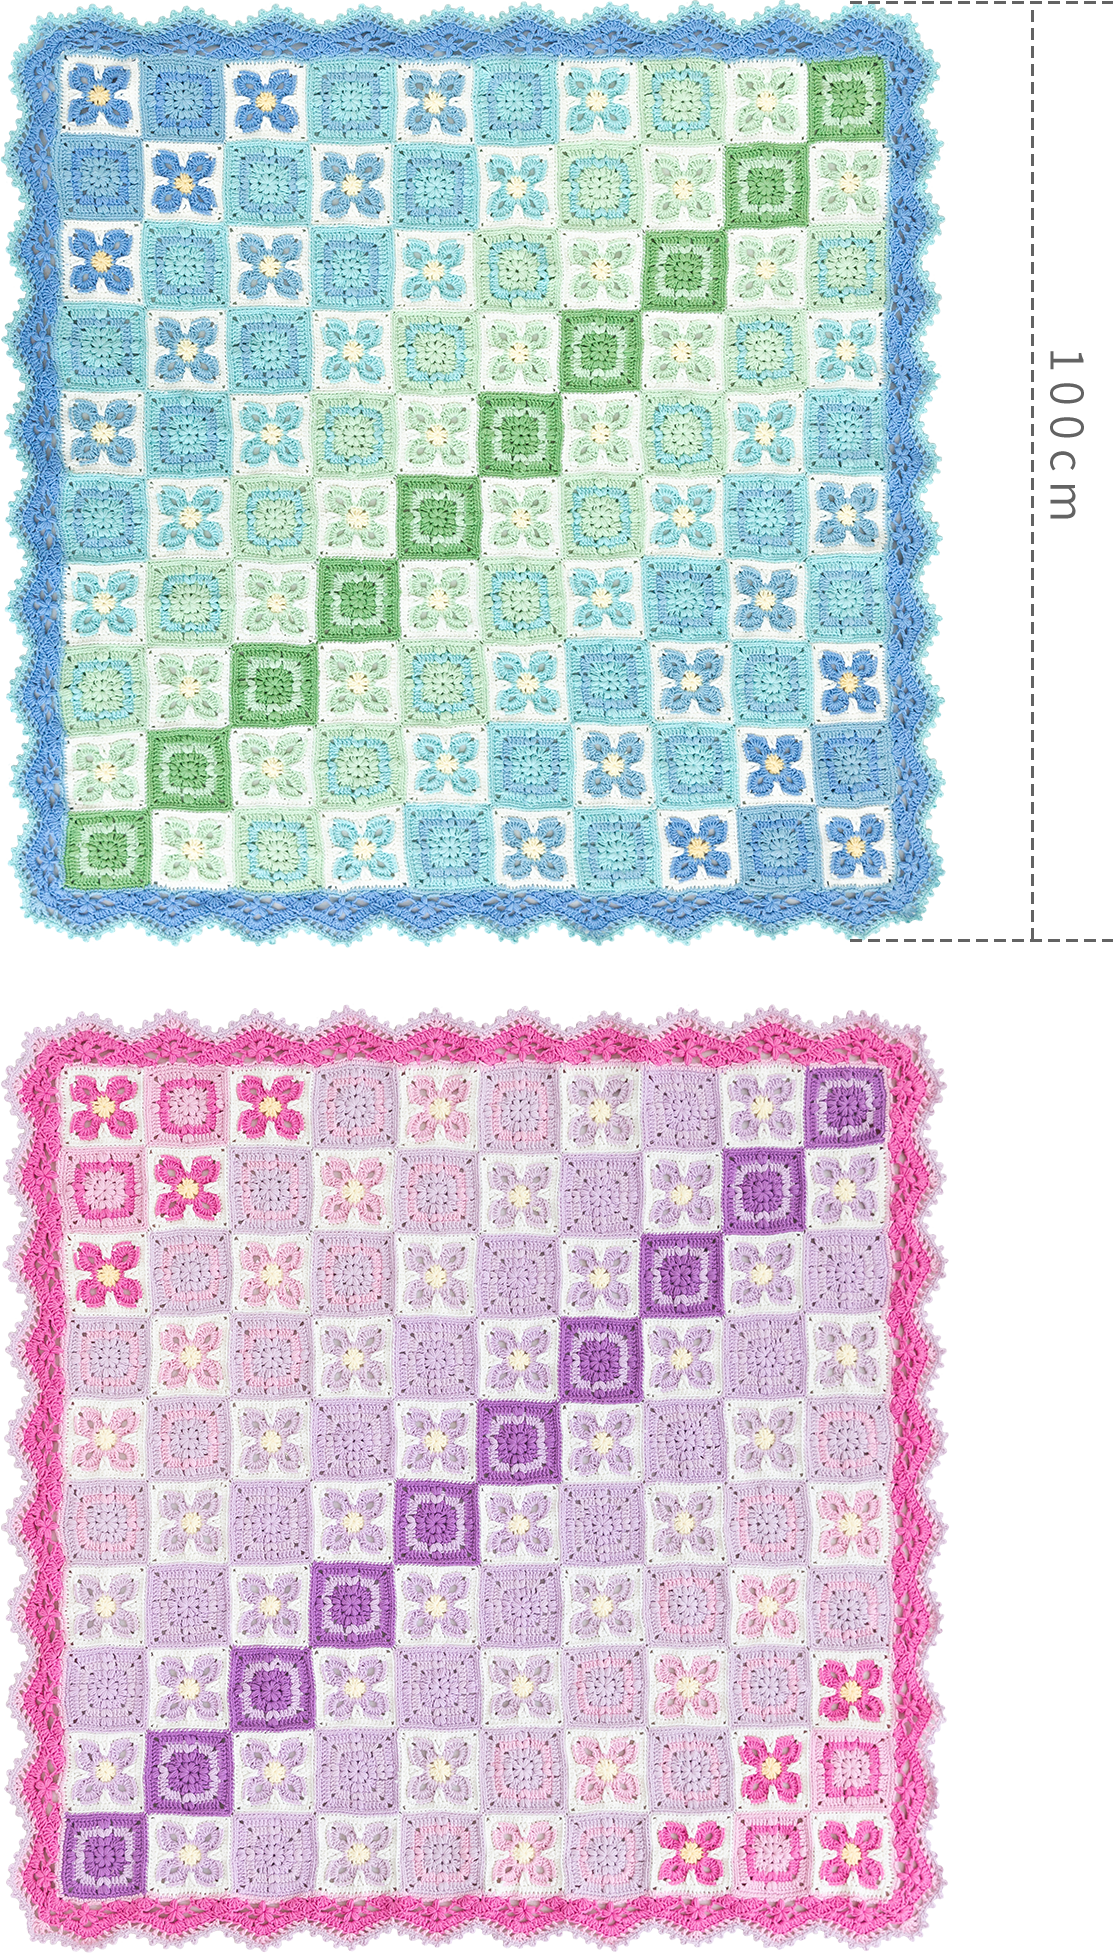
The handcrafted measurements may have an error of 1 to 2 cm. Due to variations in individual tension, the size of the sample is for reference only.
Materials: Susan's Family 4-ply cotton.
Hook: Susan's Family #11 - 3.00mm crochet hook, or regular 3.00mm crochet hook.

Chart Key











Note: This pattern is making in Chinese crochet pattern terms, and the stitch name is written using American terminology. All measurements in charts are in cm. 

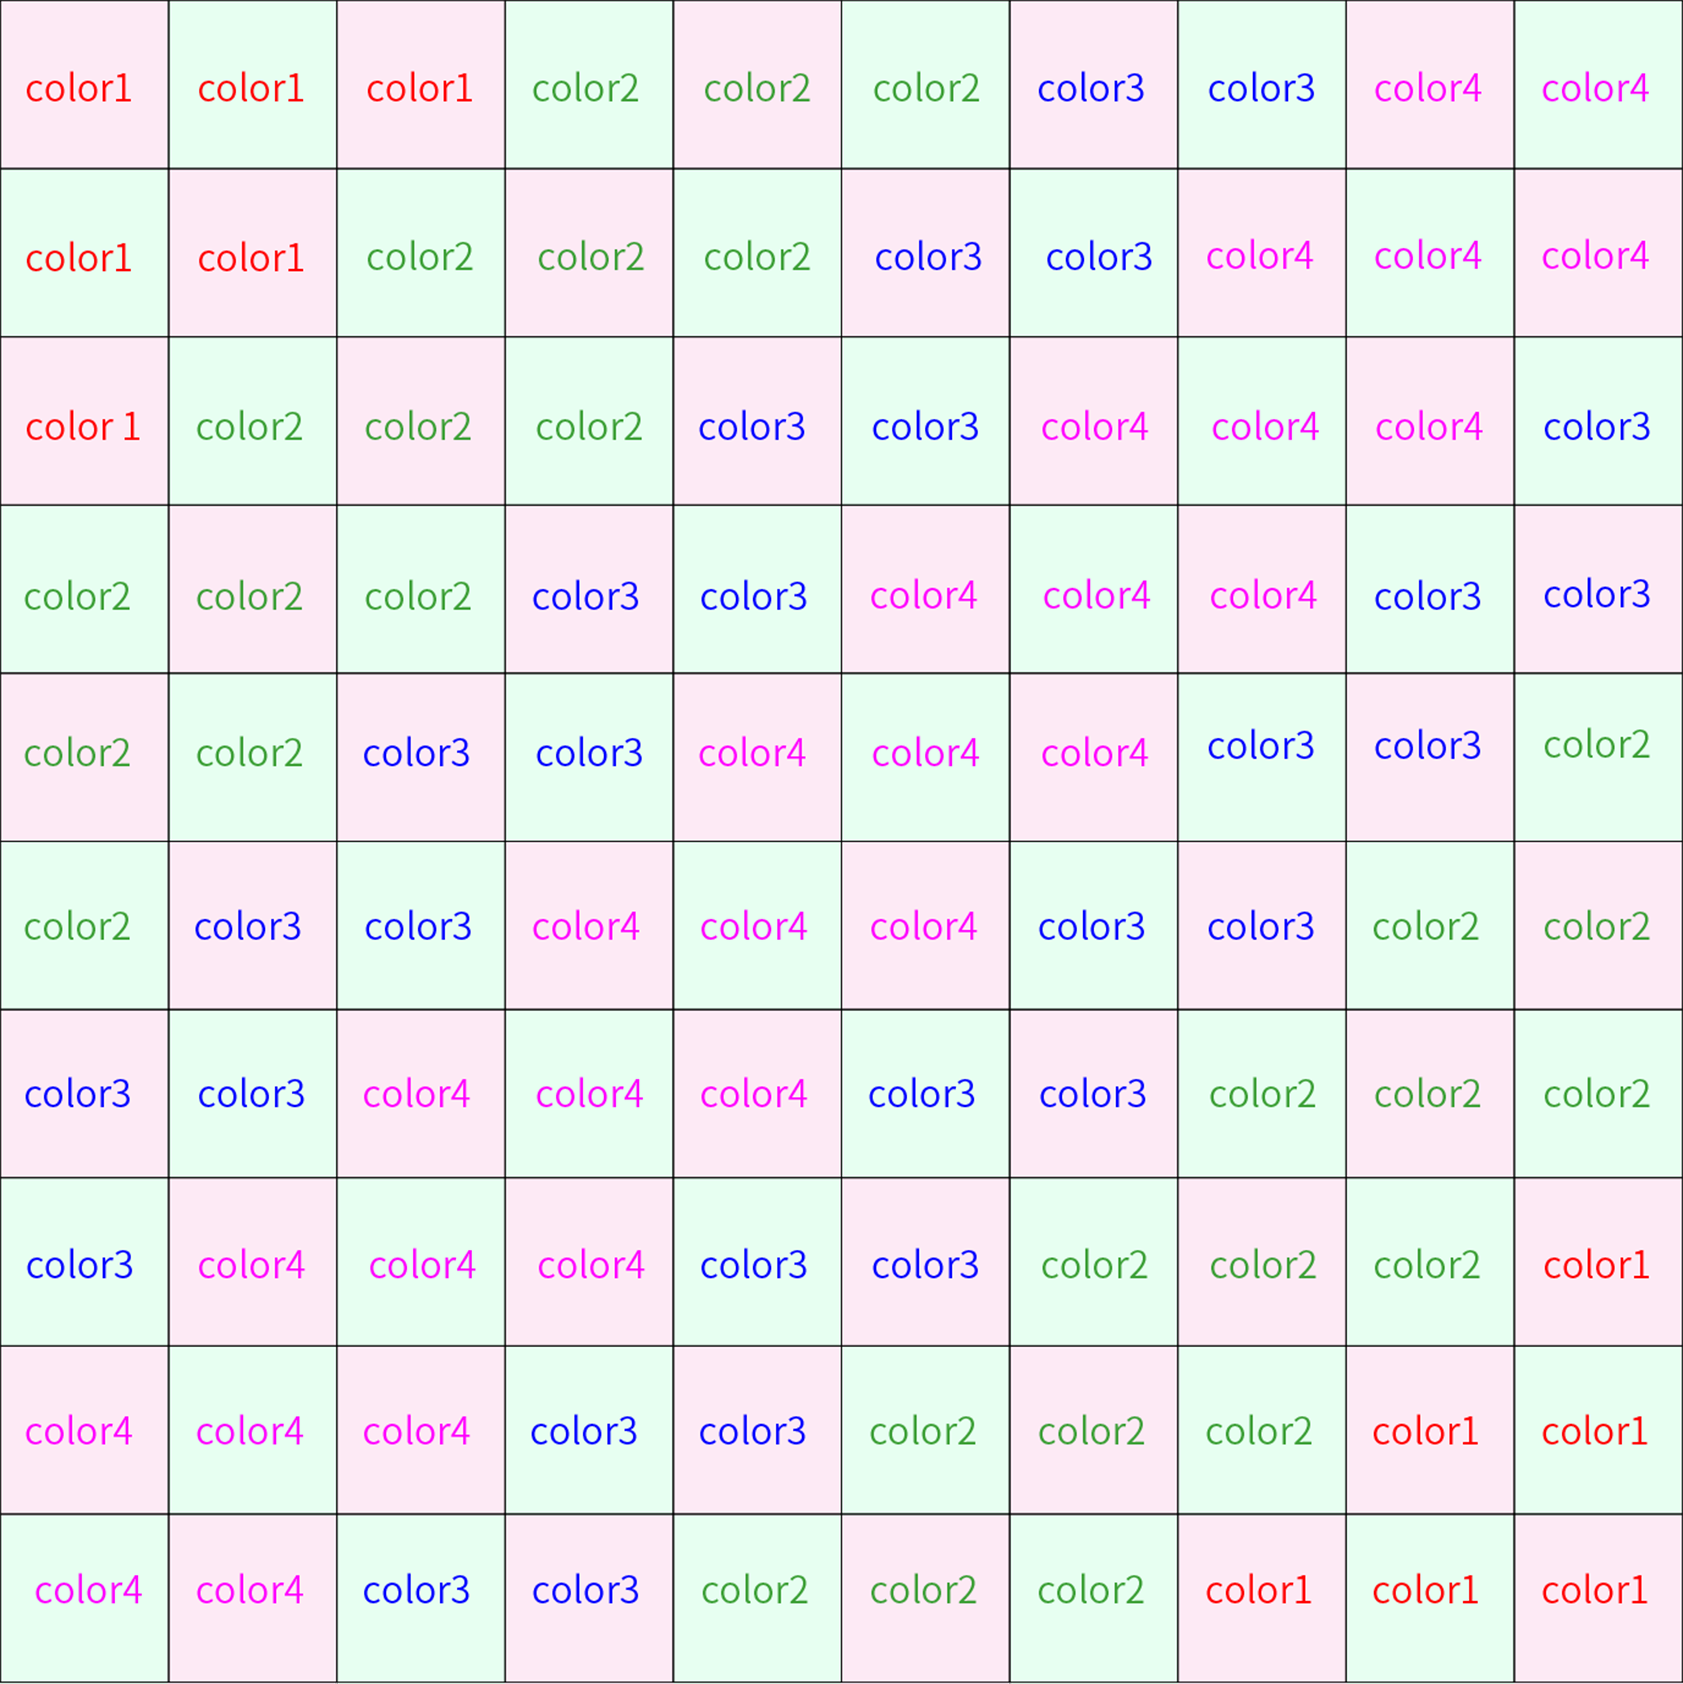
Note: Different motifs are represented by different color blocks.
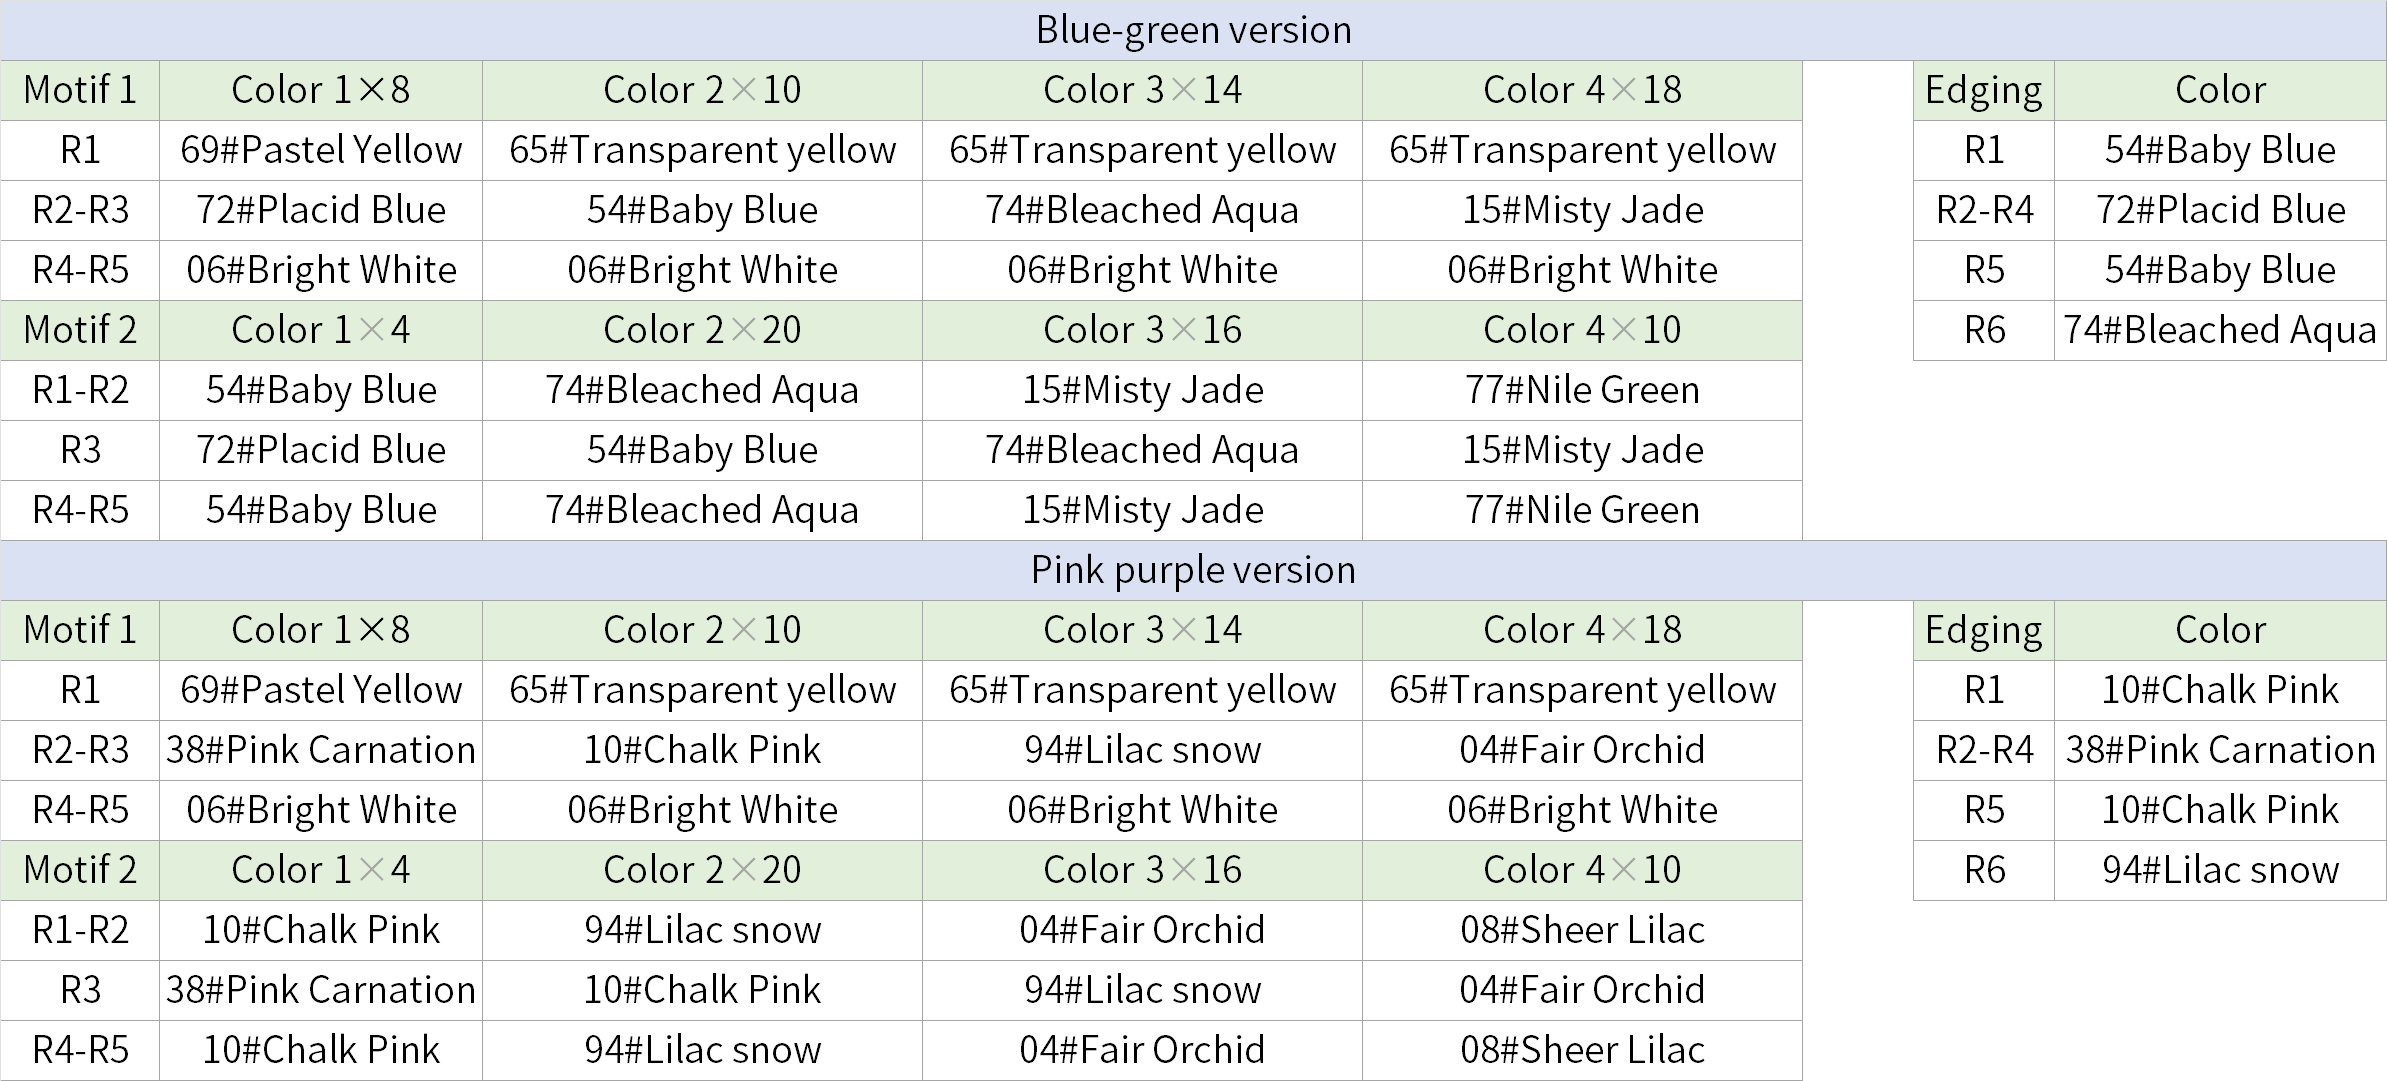
Part 1 Motif One, Motif TwoA 00' 27''
Motif One and Motif Two both start with a magic ring and are crocheted in rounds counterclockwise. Motif Two should leave a yarn tail 2-3 times longer than usual for sewing, while Motif One does not need to leave a yarn tail. Please refer to the video demonstration for more details.
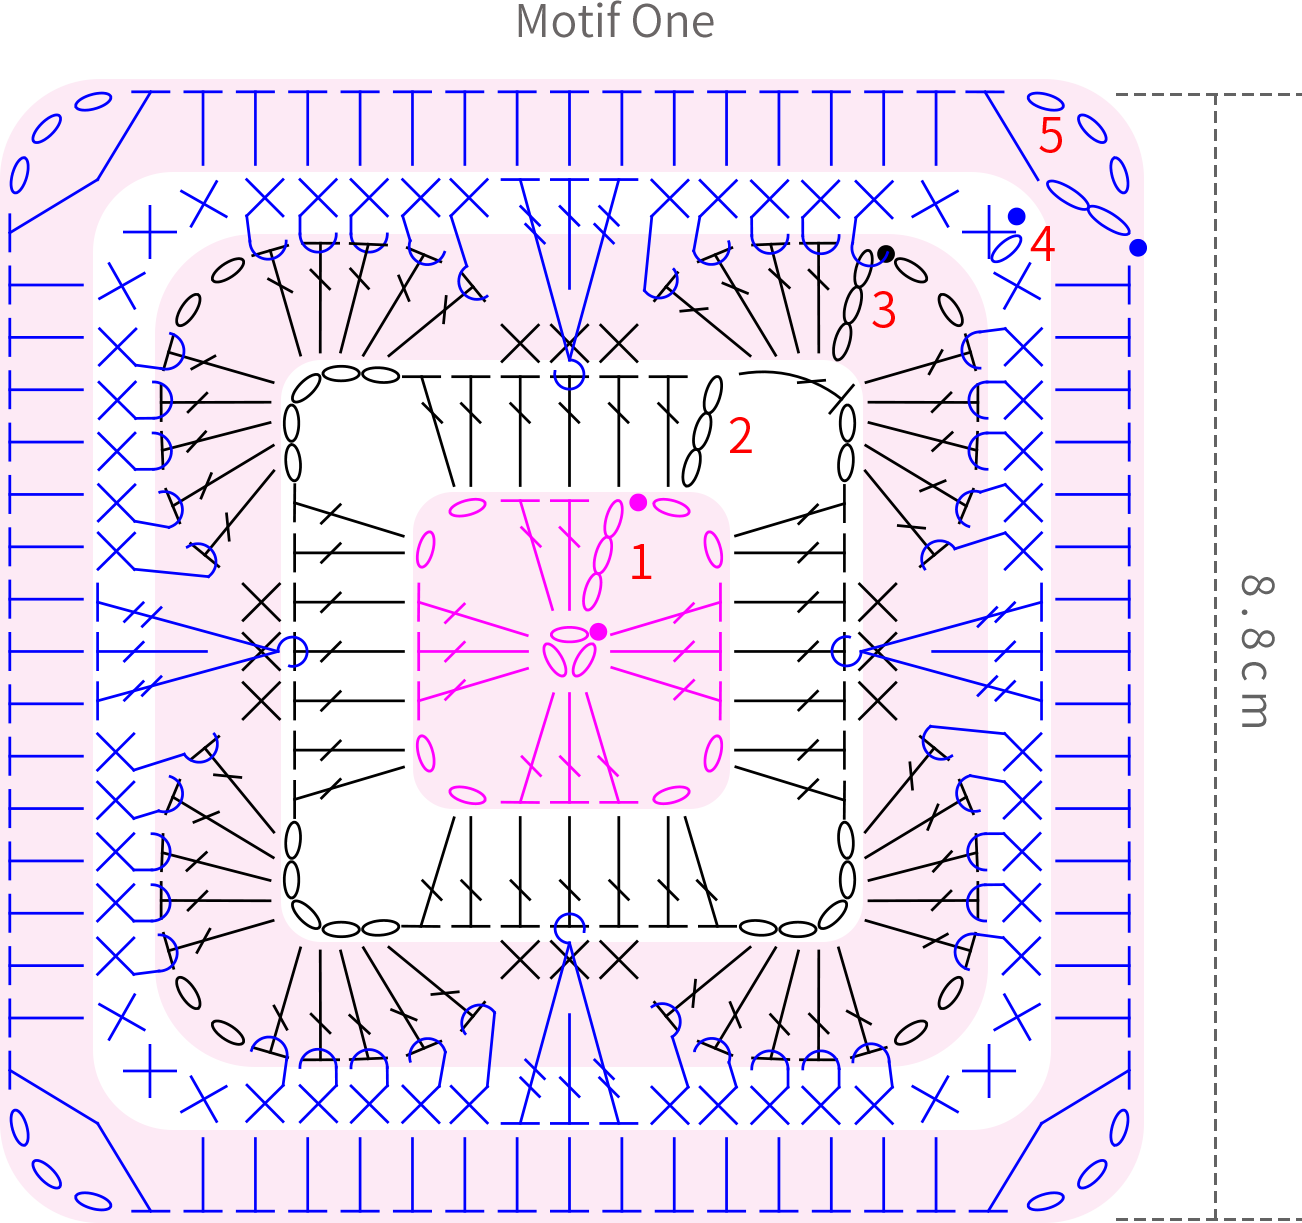
Note: In the fourth round, work the back post single crochet on the stitches.
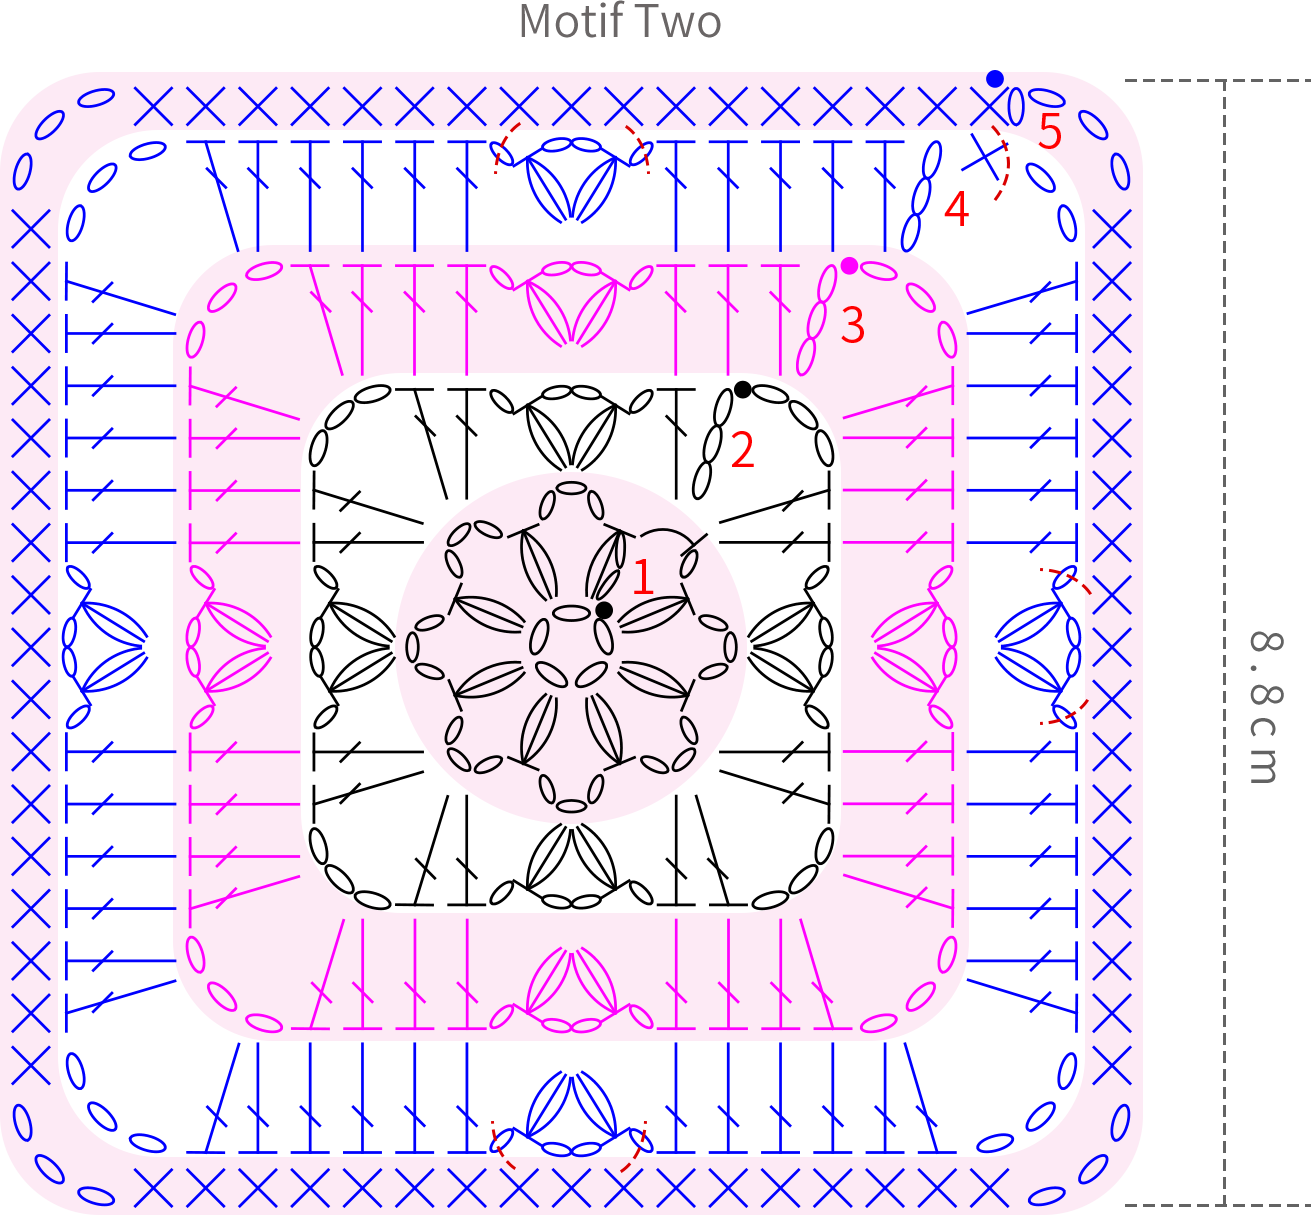
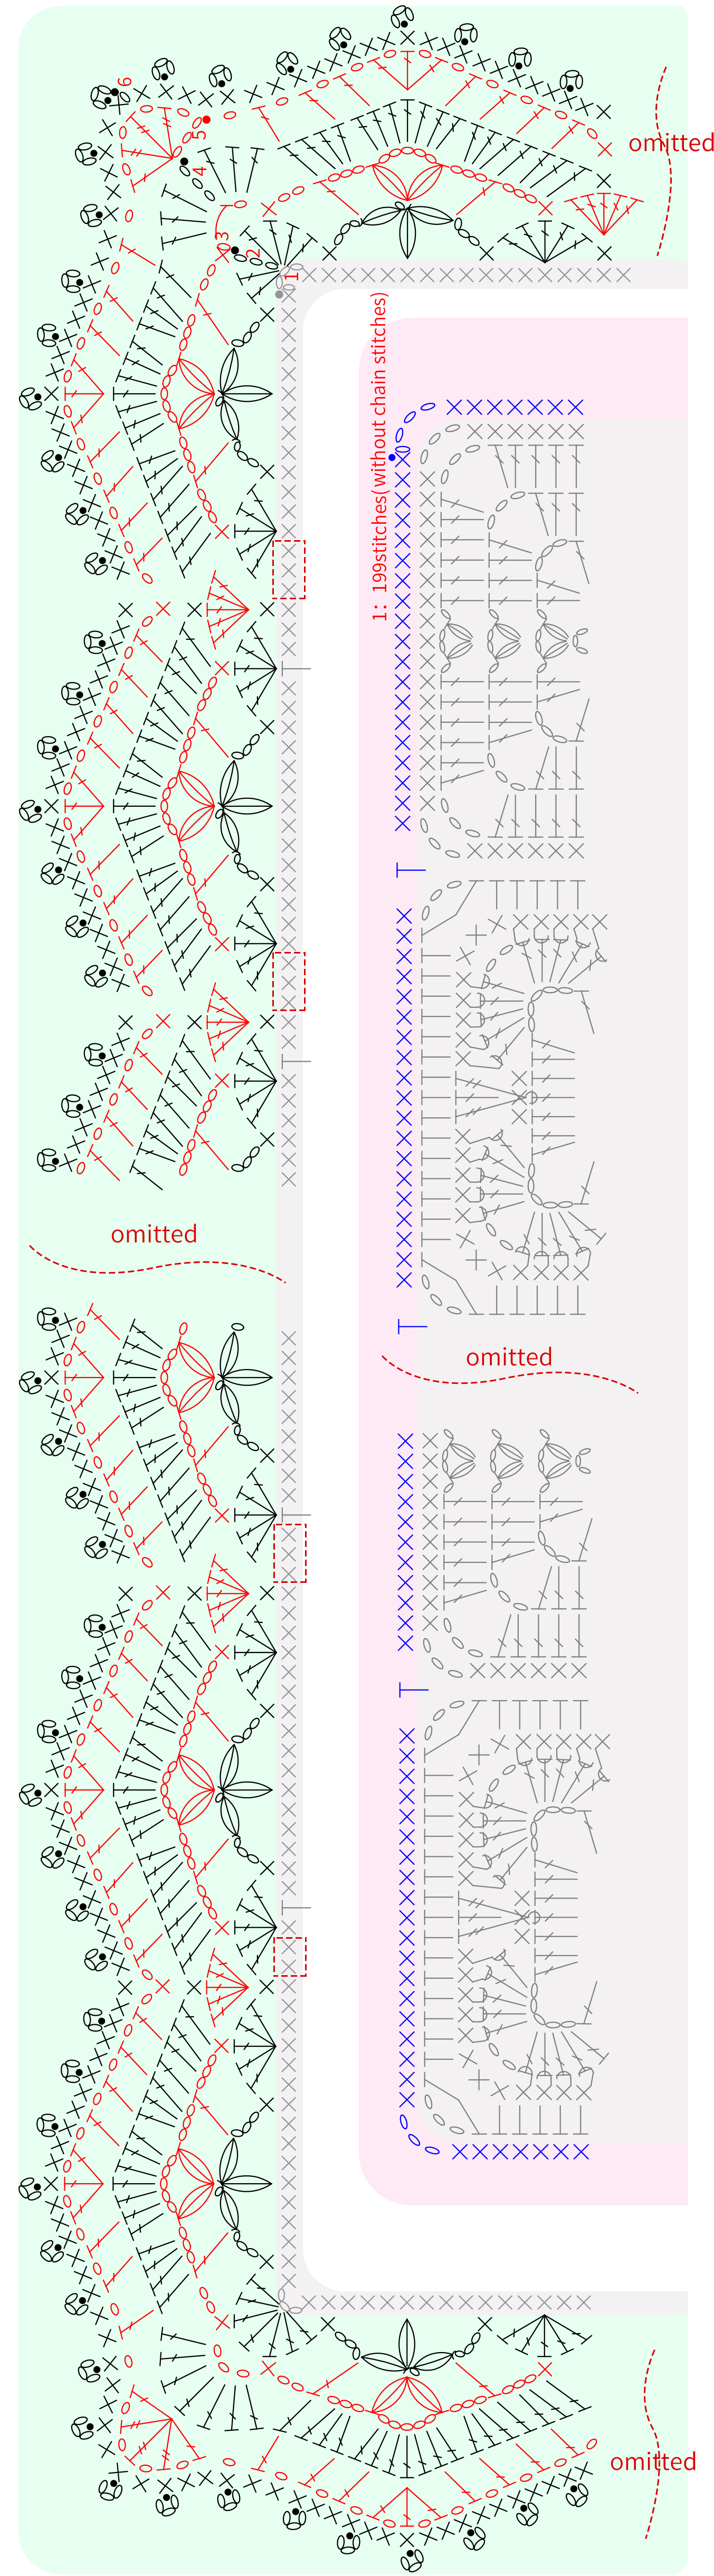
Part 2 Sewing and crocheting the edgingB 24' 24''
After completing both Motif One and Motif Two, position them according to the joining diagram. Motif One and Motif Two should be placed in a staggered arrangement. The edging is crocheted in rounds around the outer edge of the motifs after they are joined together. Please refer to the video demonstration for specifics.
Made by the community




