Doll
Funky Chicky (in Handcrafted No.2
Project preview
See the finished project
Pattern format
Instructions
Watch and follow
Video tutorial


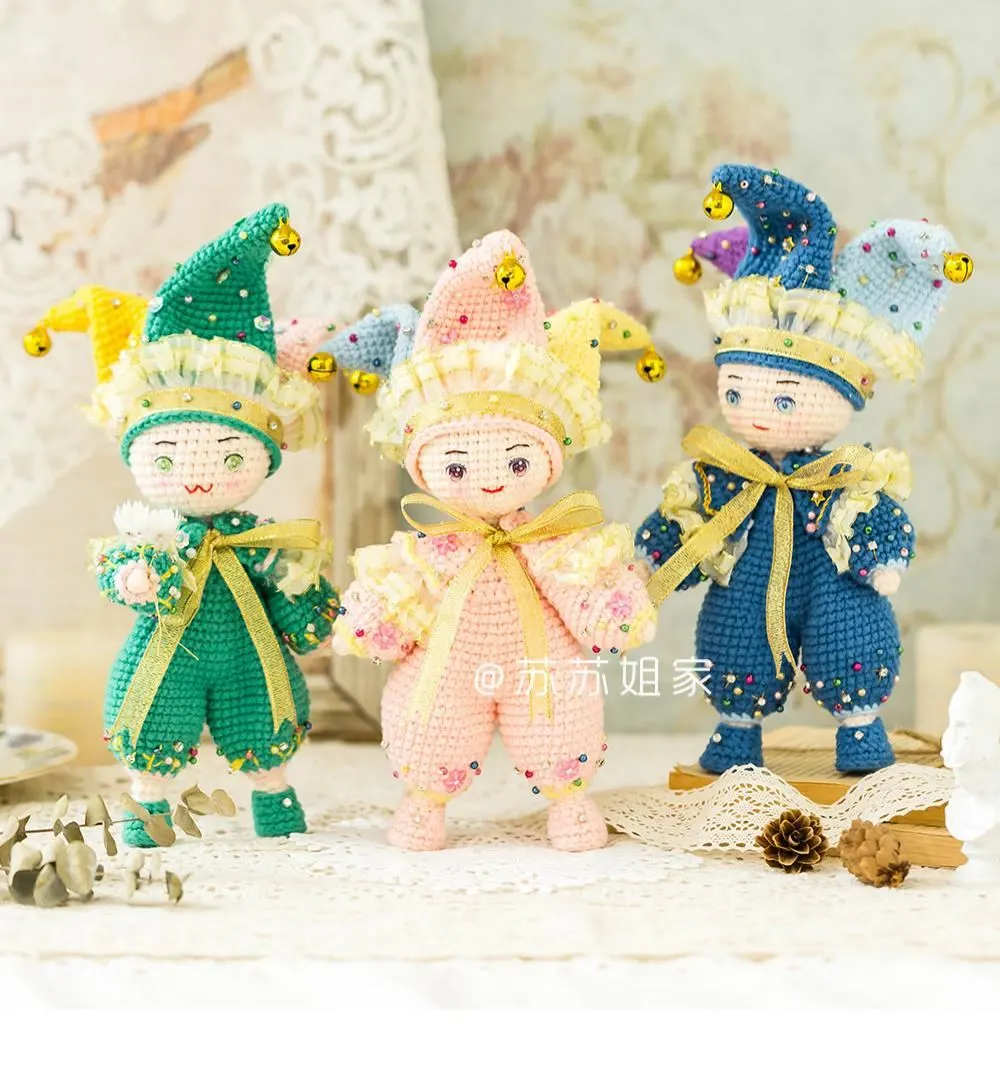
This pillow is made up of the body, the limbs, the facial features, the hat and the tail.
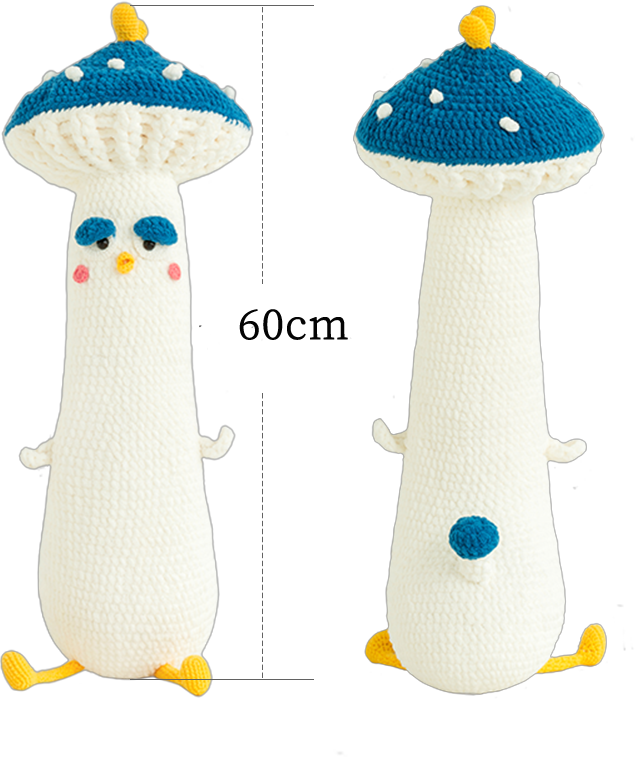
The handcrafted measurements may have an error of 1 to 2 cm. Due to variations in individual tension, the size of the sample is for reference only.
Materials: Susan's Family Handcrafted No.2 Knit Thread(2 strands hold together, 4.50 mm crochet hook. Don't crochet too loosely.)
4-ply Combed Cotton & Acrylic Fibre Hand Yarn (1 strand, 2.00 mm crochet hook)

ABBREVIATIONS
MRadjustable magic ring
Dao2start in 2nd CH from the hook
turnturn the piece
CHchain
Thalf double crochet
V = sc2-in-12 single crochets into the same stitch
A = sc2toginvisible single crochet 2 stitches together
(...)×6crochet item in the parentheses six times
SLslip stitch
HRow
RRound
Kskip
[...]in the same stitch
Xsingle crochet
W = sc3-in-13 single crochets into the same stitch
FV = dc2-in-12 double crochets into the same stitch
TV = hdc2-in-12 half double crochets into the same stitch
BLOback loop only
TA = hdc2toghalf double crochet 2 stitches together
EV = tr2-in-12 treble crochets into the same stitch
WFfront post double crochet
NFback post double crochet
WFV2 front post double crochets into the same stitch
NFV2 back post double crochets into the same stitch
Fdouble crochet
Pay attention to the stuffing: The sample is filled evenly and loosely, so don't stuff it too tightly.
Note:
1. This pattern is making in Chinese crochet pattern terms, and the stitch name is written using American terminology. All measurements in charts are in cm.
2. Working in joined round
When crocheting in rounds without further guidance, working in closed rounds, start each round with a set number of beginning chains and close with a slip stitch. The beginning chain preceding a single crochet and the slip stitch used for joining rounds are not included in the total stitches.
3.Working in spiral round
When crocheting in spiral rounds, each round working without beginning chain and slip stitch to joining the rounds. instead, work directly into the next stitch.
In the pattern chart, if there is no special notation for crocheting in rounds, it defaults to crocheting in rounds with a slip stitch join.

Part 1 Main bodyA 00' 47''
We'll start with a magic ring. And crochet in joined round counterclockwise. As you work, stuff the pillow with filling cotton. Please refer to the video demonstrations for more details.
| Main body | |||
| Round | Stitch instructions | Total stitches | Color |
| Cast on, R 1 | MR, 8X | 8 | Handcrafted No.2 Knit Thread 01#Whisper White |
| R 2 | 8V | 16 | |
| R 3 | ( X, V) ×8 | 24 | |
| R 4 | ( V, 2X) ×8 | 32 | |
| R 5 | ( 3X, V) ×8 | 40 | |
| R 6 | ( 2X, V, 2X) ×8 | 48 | |
| R 7 | ( 5X, V) ×8 | 56 | |
| R 8 | ( 3X, V, 3X) ×8 | 64 | |
| R 9—R 10 | even 64X | 64 | |
| R 11 | ( 7X, V) ×4, 32X | 68 | |
| R 12 | ( 4X, V, 4X) ×4, 32X | 72 | |
| R 13 | ( 9X, V) ×4, ( 6X, A) ×4 | 72 | |
| R 14—R 17 | even 72X | 72 | |
| R 18 | 44X, ( 5X, A) ×4 | 68 | |
| R 19 | 44X, ( 2X, A, 2X) ×4 | 64 | |
| R 20 | 44X, ( 3X, A) ×4 | 60 | |
| R 21 | even 60X | 60 | |
| R 22 | 44X, ( A, 2X) ×4 | 56 | |
| R 23—R 25 | even 56X | 56 | |
| R 26 | 44X, ( A, X) ×4 | 52 | |
| R 27—R 32 | even 52X | 52 | |
| R 33 | ( 24X, A) ×2 | 50 | |
| R 34—R 37 | even 50X | 50 | |
| R 38 | ( 23X, A) ×2 | 48 | |
| R 39—R 42 | even 48X | 48 | |
| R 43 | ( 11X, A, 11X) ×2 | 46 | |
| R 44—R 47 | even 46X | 46 | |
| R 48 | ( 21X, A) ×2 | 44 | |
| R 49—R 52 | even 44X | 44 | |
| R 53 | ( 10X, A, 10X) ×2 | 42 | |
| R 54—R 57 | even 42X | 42 | |
| R 58 | ( 19X, A) ×2 | 40 | |
| R 59 | even 40X | 40 | |
| R 60 | ( 3X, A) ×8 | 32 | |
| R 61—R 62 | even 32X | 32 | |
| R 63 | ( A, 2X) ×8 | 24 | |
| R 64 | ( X, A) ×8 | 16 | |
| R 65 | 8A | 8 | |
| Note: Don't crochet R 1 too tight to prevent difficulty when closing the ring. After completing R 32, stuff the bottom loosely. When you have a few rounds left, stuff the remaining part. For the last few rounds, stuff as you go. Finally, leave a 15cm yarn tail for closing the opening. |
|||
Part 2 LimbsB 21' 55''
The limbs are divided into wings B1and legs B2. Start by the wings first, There are 2 of them. Both are started with a chain ring. And crocheted counterclockwise in joined round. Once done, sew them onto the corresponding position of the body. There are two legs. Both are started by a foundation chain, And crocheted counterclockwise in joined round. Stuff the legs as you go. Once done, sew them onto the corresponding position on the body. Please refer to the video demonstrations for more details.
| Wing×2 | |||
| Round | Stitch instructions | Total stitches | Color |
| Cast on, R 1 | 4CH, Dao2, V, F, [9F], F, X | 14 | Handcrafted No.2 Knit Thread 01#Whisper White |
| Leave a 20cm yarn tail for sewing. | |||
| Leg×2 | |||
| Round | Stitch instructions | Total stitches | Color |
| Cast on, R 1 | 8CH, Dao2, V, 5X, W, 6X | 16 | 4-Ply Combed Cotton 09#Aspen Gold |
| R 2 | 2V, 5X, 3V, 5X, V | 22 | |
| R 3 | ( X, V) ×2, 5X, ( X, V) ×3, 6X, V | 28 | |
| R 4 | even 28X | 28 | |
| R 5 | 5X, ( T, TA) ×7, 2X | 21 | |
| R 6 | 5X, 7TA, 2X | 14 | |
| R 7 | 5X, 4TA, X | 10 | |
| R 8—R 16 | 3CH, 9F | 10 | |
| Stuff after crocheting R 7. No more stuffing required for the following crochet. Leave a 20cm yarn tail for sewing. |
|||
Part 3 Facial feturesC 43' 07''
It consists of the beakC1, the eyes C2and blushesC3. The beak comes first. We will start it by a foundation chain. And work back and forth. After that, sew it onto the front of the body. We’ll have bases, the eyelid, and the eyeball. We crochet them separately, and glue to the body. There are 2 blushes. They are all started by a magic ring, and crocheted in rounds counterclockwise. After completing, glue them onto the body. Please refer to the video demonstrations for more details.
| Mouth | |||
| Row | Stitch instructions | Total stitches | Color |
| Cast on, H1 | 10CH, Dao2, X, [T, F], EV, [F, T], SL, [T, F], EV, [F, T], X | 15 | 4-Ply Combed Cotton 09#Aspen Gold |
| Leave a 30cm yarn tail for sewing. | |||
| Eye base×2 | |||
| Round | Stitch instructions | Total stitches | Color |
| Cast on, R 1 | MR, 8X | 8 | 4-Ply Combed Cotton 06#Bright White |
| R 2 | 8V | 16 | |
| R 3 | ( X, V) ×8 | 24 | |
| R 4 | ( V, 2X) ×8 | 32 | |
| Leave a 10 centimeters tail before cutting the yarn. | |||
| Eyelid×2 | |||
| Round | Stitch instructions | Color | |
| Cast on, R 1 | 5CH, Dao2, X, 2T, [X, 2CH, X], 2T, X, 2CH | Handcrafted No.2 Knit Thread 25#Deep Water |
|
| Leave a 10 centimeters tail before cutting the yarn. | |||
| Blush×2 | |||
| Round | Stitch instructions | Total stitches | Color |
| Cast on, R 1 | MR, 2CH, 11T | 12 | 4-Ply Combed Cotton 12#Shell Pink |
| Do not slip stitch at the end. Leave a 10 centimeters tail before cutting the yarn. | |||
Part 4 HatD
A hat consists of the crown, the brim, the comb, and assembly.
Step 1 CrownD1 61' 40''
We'll start the crown with a magic ring, and crochet in joined rounds counterclockwise. and add some dots on it when finished. ( Handcrafted No.2 01#Whisper White ) Please refer to the video demonstrations for more details.
| Crown | |||
| Round | Stitch instructions | Total stitches | Color |
| Cast on, R 1 | MR, 8X | 8 | Handcrafted No.2 Knit Thread 25#Deep Water |
| R 2 | 8V | 16 | |
| R 3 | ( X, V) ×8 | 24 | |
| R 4 | even 24X | 24 | |
| R 5 | ( V, 2X) ×8 | 32 | |
| R 6 | ( 3X, V) ×8 | 40 | |
| R 7 | ( 2X, V, 2X) ×8 | 48 | |
| R 8 | even 48X | 48 | |
| R 9 | ( 5X, V) ×8 | 56 | |
| R 10 | ( 3X, V, 3X) ×8 | 64 | |
| R 11 | 3CH, 2F, FV, ( 3F, FV) ×15 | 80 | |
| R 12 | 3CH, F, FV, 2F, ( 2F, FV, 2F) ×15 | 96 | |
| R 13 | even 96X | 96 | |
| Leave a 10 centimeters tail before cutting the yarn. | |||
Step 2 BrimD2 69' 41''
The brim is started by a magic ring, and worked in joined round counterclockwise. Please refer to the video demonstrations for more details.
| Brim | |||
| Round | Stitch instructions | Total stitches | Color |
| Cast on, R 1 | 32CH, a chain ring of 32 chains to start, 32X | 32 | Handcrafted No.2 Knit Thread 01#Whisper White |
| R 2 | [3CH, NF], WF, ( NFV, WF) ×15 | 48 | |
| R 3 | 3CH, NF, WFV, ( 2NF, WFV) ×15 | 64 | |
| R 4 | 3CH, NFV, 2WF, ( NF, NFV, 2WF) ×15 | 80 | |
| R 5 | [3CH, NF], 2NF, 2WF, ( NFV, 2NF, 2WF) ×15 | 96 | |
| R 6 | 3CH, 3NF, 2WF, ( 4NF, 2WF) ×15 | 96 | |
| Before casting on and at the end, leave a 1m yarn tail for sewing. When the yarn tail is used up, take another piece of yarn to continue sewing. |
|||
Step 3 CombD3 and assemblyD4 86' 11''
The comb is divided into section 1, 2, and 3. The first two sections are started by a magic ring, and crocheted in spirals round counterclockwise. After that, combine them and crochet section 3. Finally, stuff the comb. Finally, assemble with other parts. Please refer to the video demonstrations for more details.
| Comb( crocheted in spiral round) | |||
| Round | Stitch instructions | Total stitches | Color |
| section 1 | 4-Ply Combed Cotton 09#Aspen Gold |
||
| Cast on, R 1 | MR, CH, 6X | 6 | |
| R 2 | 6V | 12 | |
| R 3 | ( X, V) ×6 | 18 | |
| R 4—R 6 | even 18X, Leave a 15 centimeters tail before cutting . | 18 | |
| section 2 | |||
| Cast on, R 1 | MR, CH, 6X | 6 | |
| R 2 | 6V | 12 | |
| R 3 | ( X, V) ×6 | 18 | |
| R 4—R 5 | even 18X. Do not cut the yarn. | 18 | |
| section 3 | |||
| R 1 | Combine section 1 and section 2, section 2: 18X, section 1: 18X |
36 | |
| R 2 | ( 4X, A) ×6 | 30 | |
| R 3 | ( A, 3X) ×6 | 24 | |
| R 4 | ( 2X, A) ×6 | 18 | |
| R 5 | even 18X, continue crocheting SL | 19 | |
| Stuff and leave a 20 centimeters yarn tail for sewing. | |||
Part 5 TailE 93' 37''
The tail is made of the mushroom top, the handle and the assembly. Let’s crochet the mushroom top first. Make a magic ring, And work in joined rounds counterclockwise. After that, stuff it. Next, let's make the handle. Start by a chain ring. And crochet in joined rounds counterclockwise. Assemble them with other parts after crocheting. Please refer to the video demonstrations for more details.
| Mushroom top | |||
| Round | Stitch instructions | Total stitches | Color |
| Cast on, R 1 | MR, 8X | 8 | Handcrafted No.2 Knit Thread 25#Deep Water |
| R 2 | 8V | 16 | |
| R 3 | even 16X | 16 | |
| R 4 | BLO, 8A | 8 | |
| Stuff a few cottons inside. | |||
| Handle | |||
| Round | Stitch instructions | Total stitches | Color |
| Cast on, R 1 | 8CH, Join with the first slip stitch to form a circle. 8X | 8 | Handcrafted No.2 Knit Thread 01#Whisper White |
| R 2 | ( 2X, A) ×2 | 6 | |
| R 3 | even 6X | 6 | |
| At the beginning, leave a 20 centimeters tail. After the final round, leave a 20 centimeters tail and cut the yarn. |
|||
Made by the community