Doll
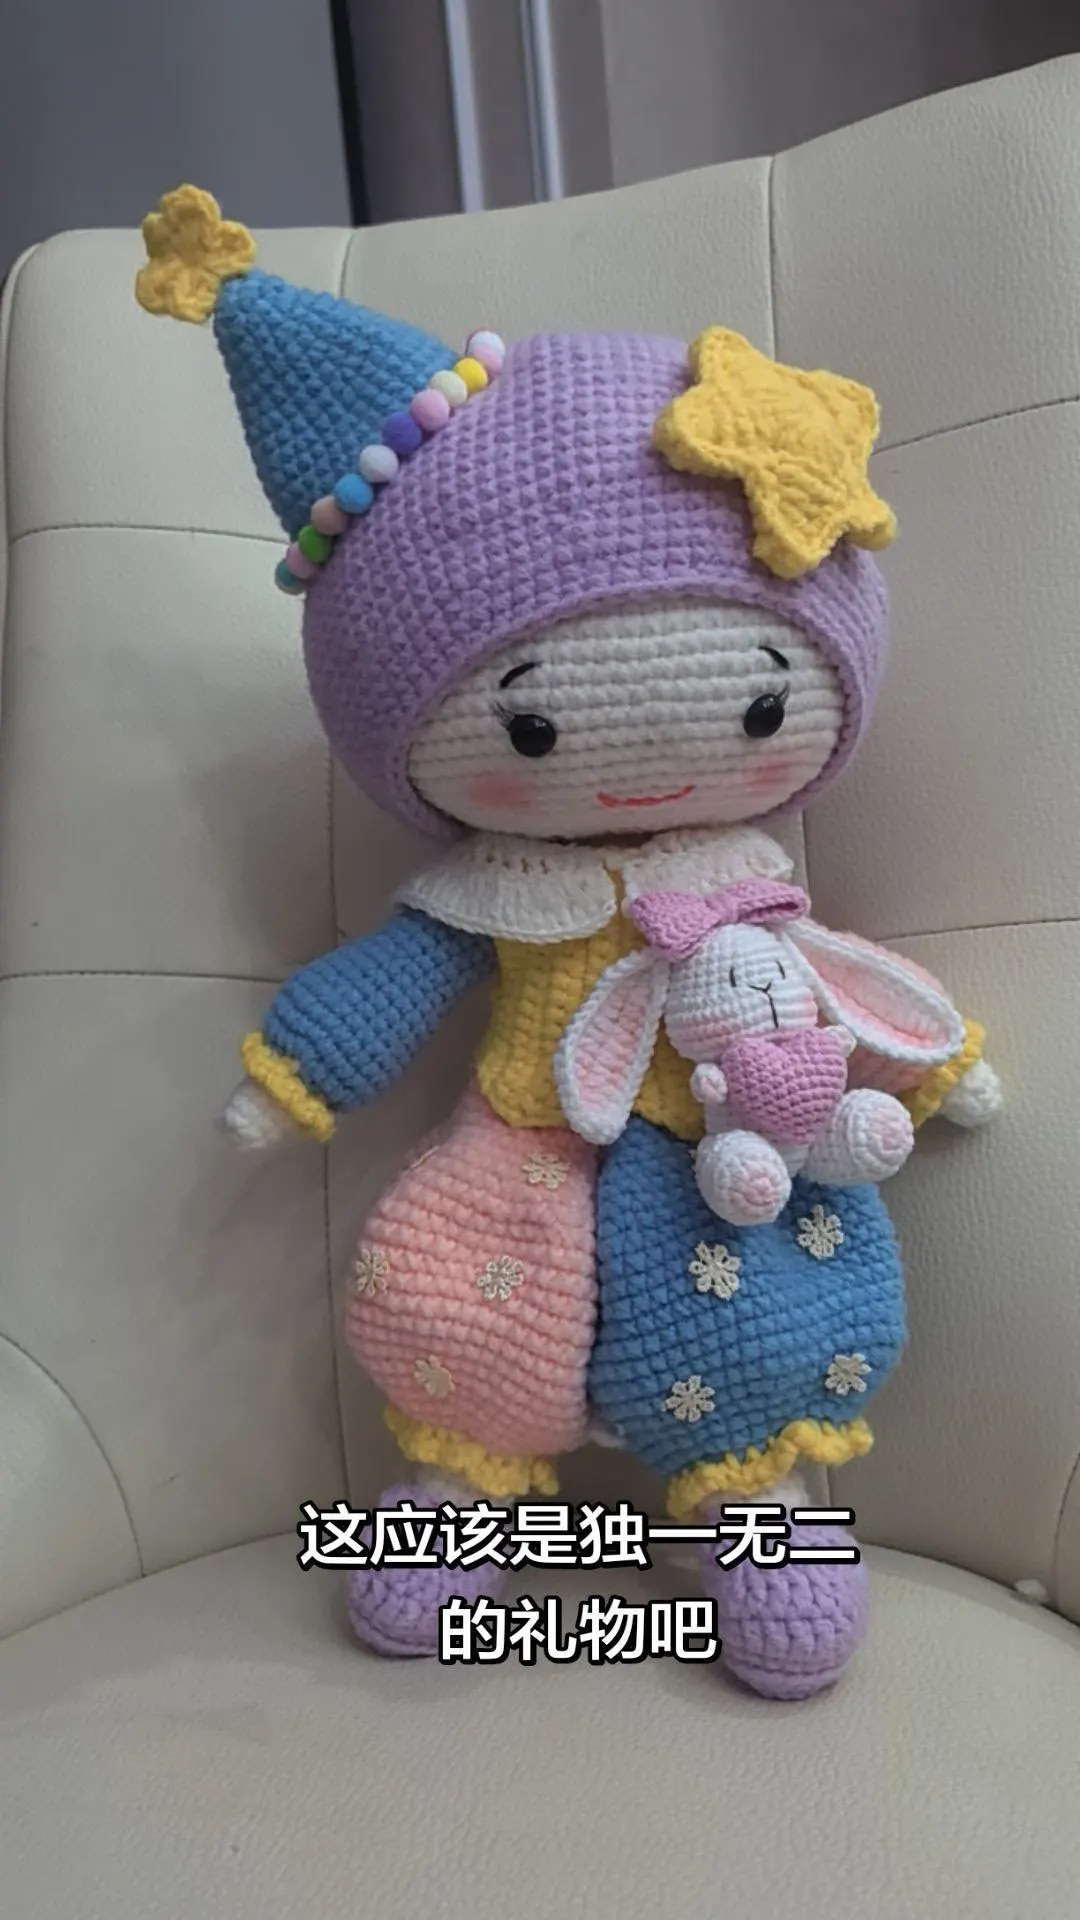
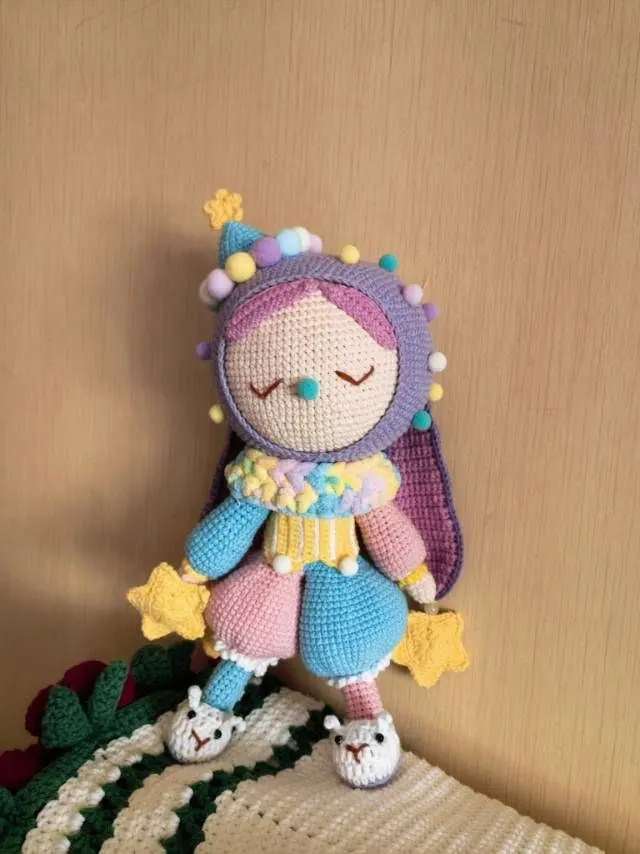
Goodnight Bunny Doll
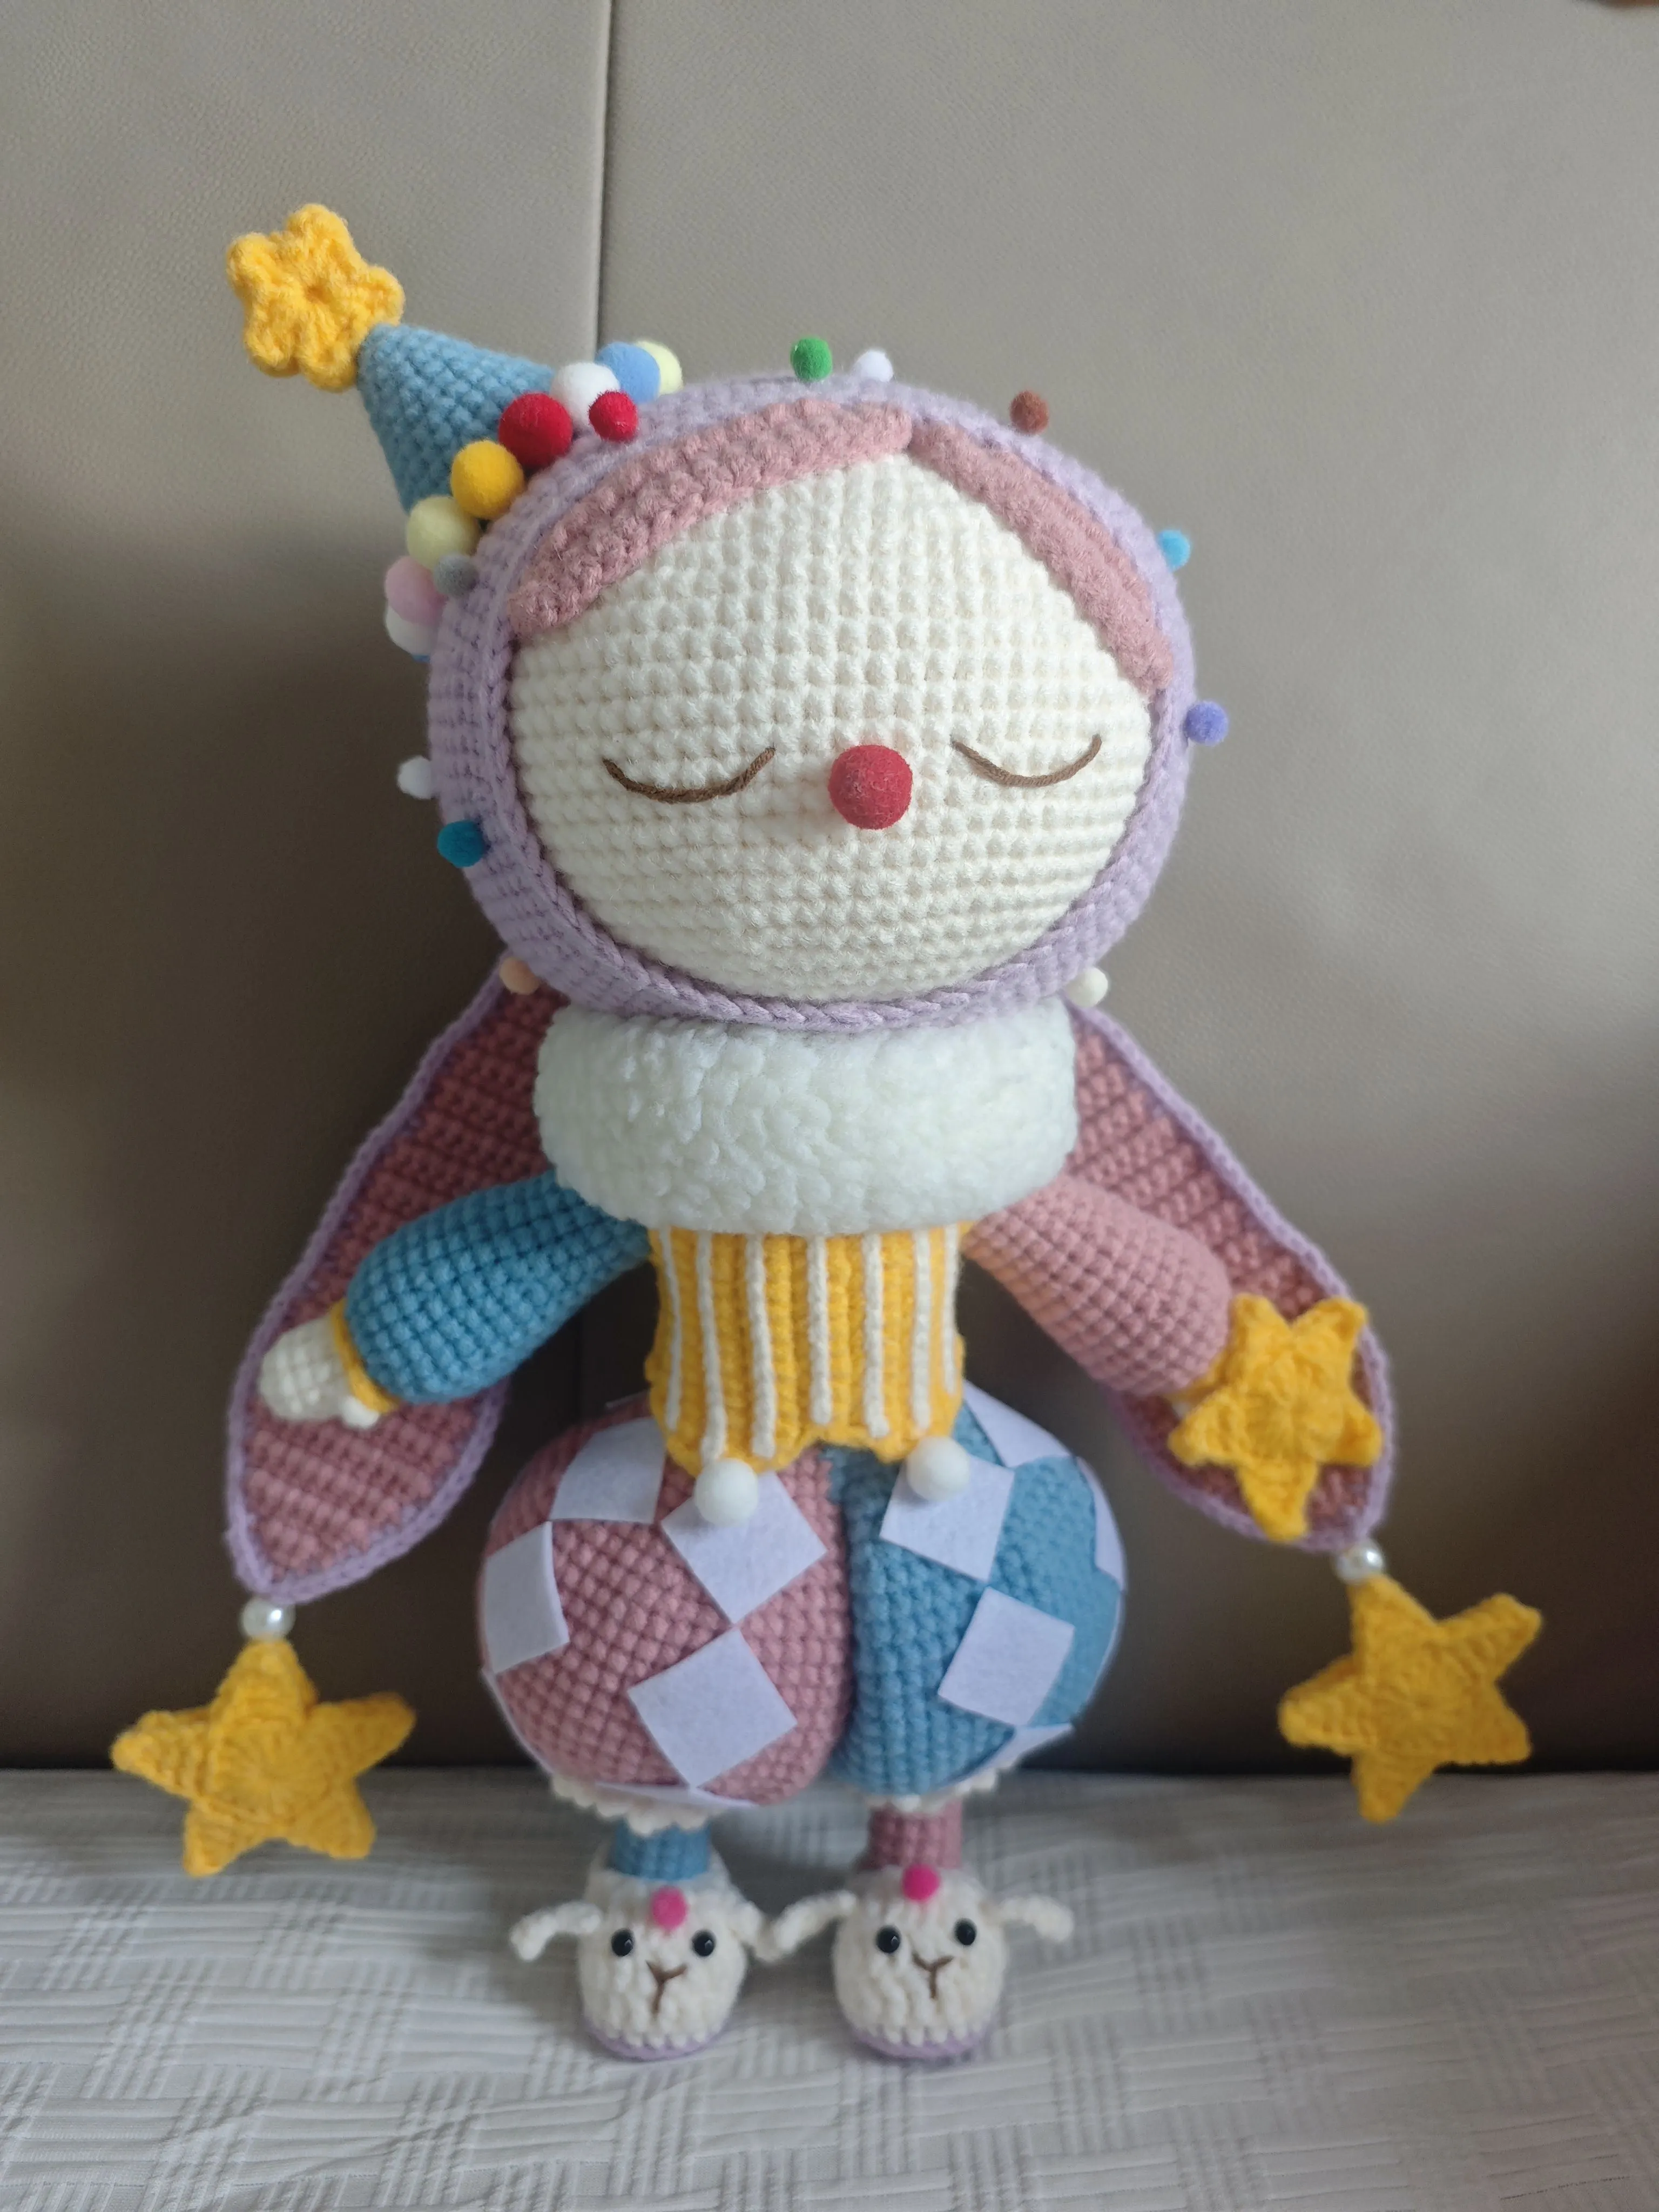
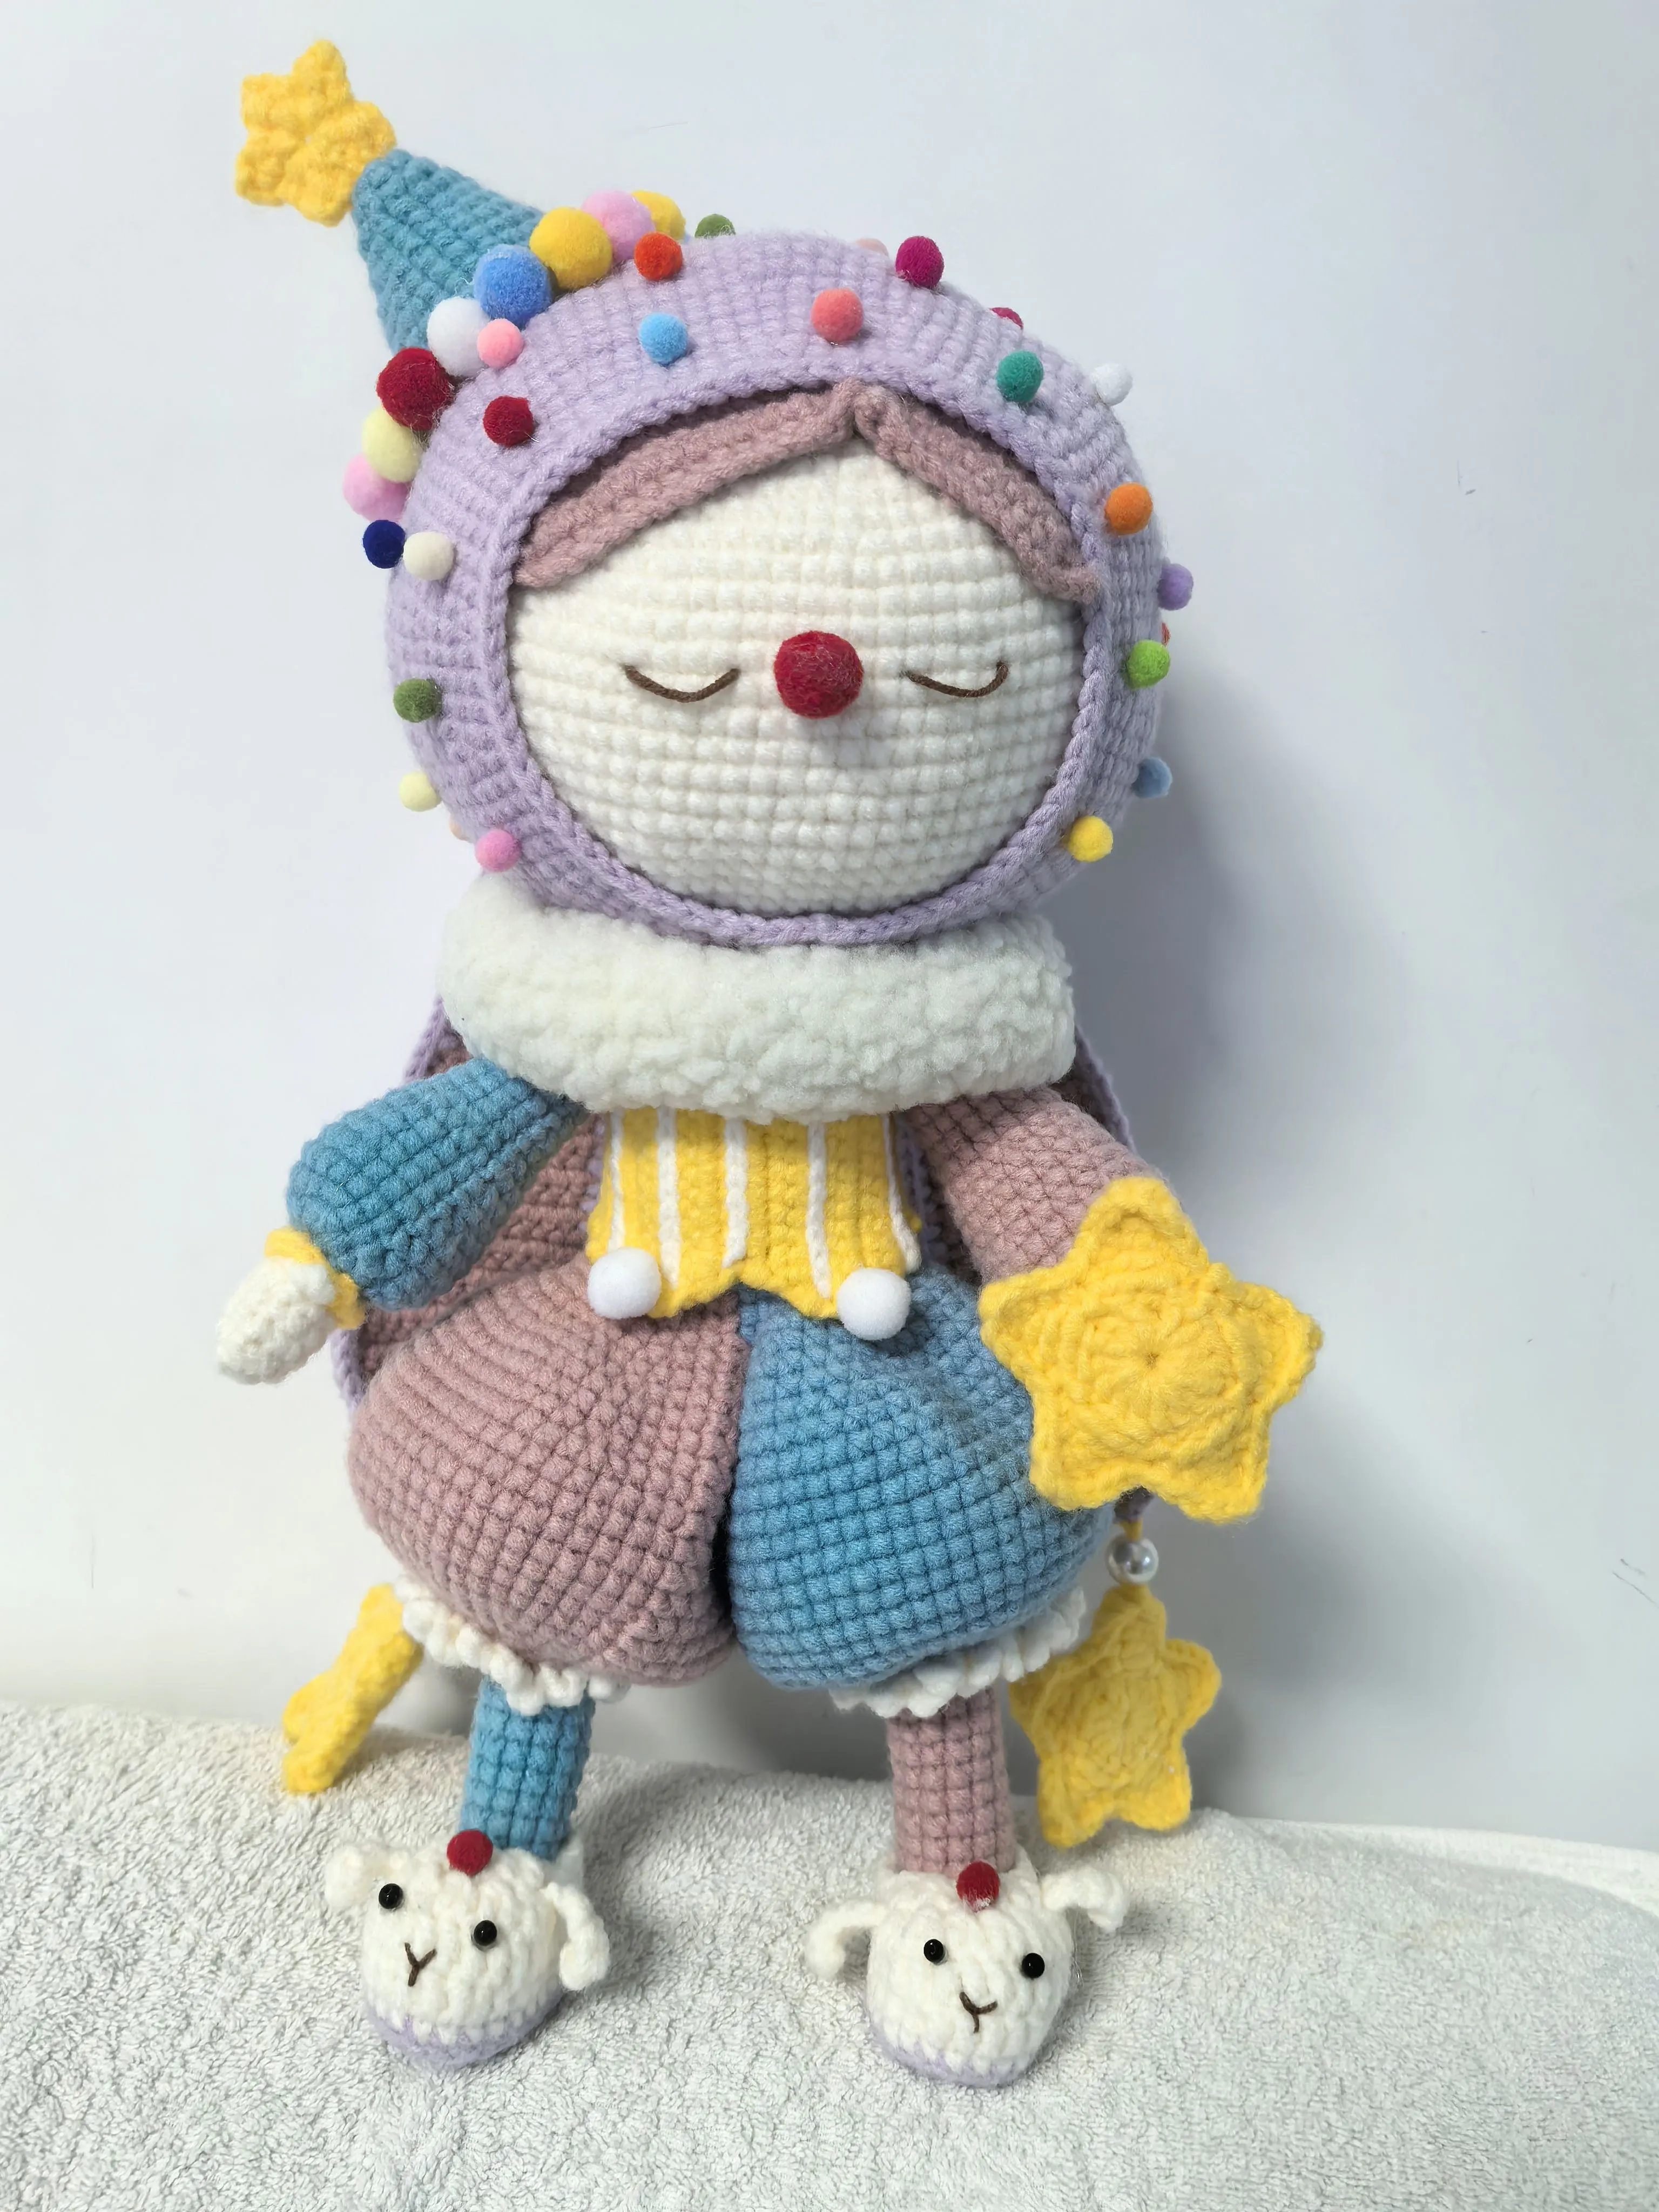
Project preview
See the finished project
Pattern format
Instructions
Watch and follow
Video tutorial
This doll is divided into two parts: the main body and accessories. First, crochet the main body, then make the accessory section.
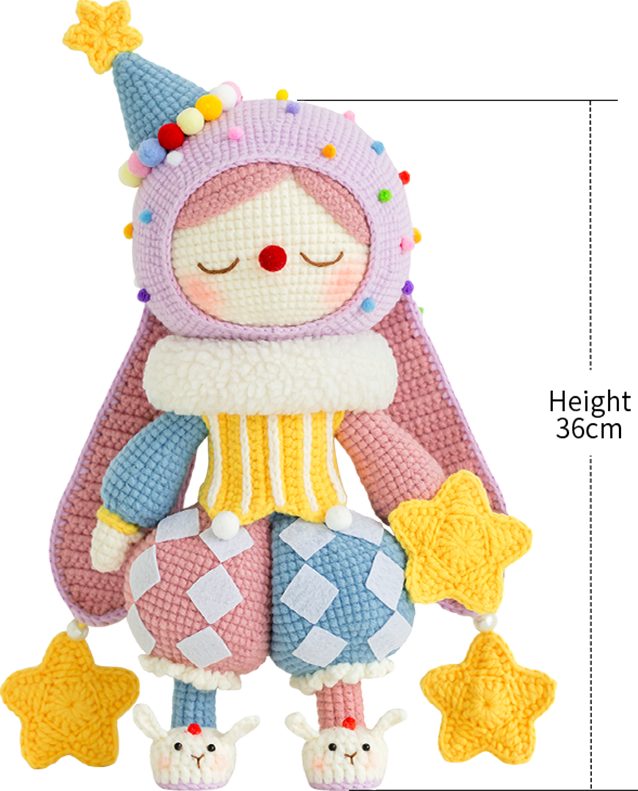
The handcrafted measurements may have an error of 1 to 2 cm. Due to variations in individual tension, the size of the sample is for reference only.
Materials: Susan's Family Handcrafted No.2 Knit Thread
Hook: 3.00 mm crochet hook

ABBREVIATIONS
Note:
1. This pattern is making in Chinese crochet pattern terms, and the stitch name is written using American terminology. All measurements in charts are in cm.
2. Working in joined round
When crocheting in rounds without further guidance, working in closed rounds, start each round with a set number of beginning chains and close with a slip stitch. The beginning chain preceding a single crochet and the slip stitch used for joining rounds are not included in the total stitches.
3. The left and right of the garment refer to the left and right when worn; you can put it against the doll's body while crocheting.
Part 1 Main bodyA
The Main body includes: the head, arms, and body.
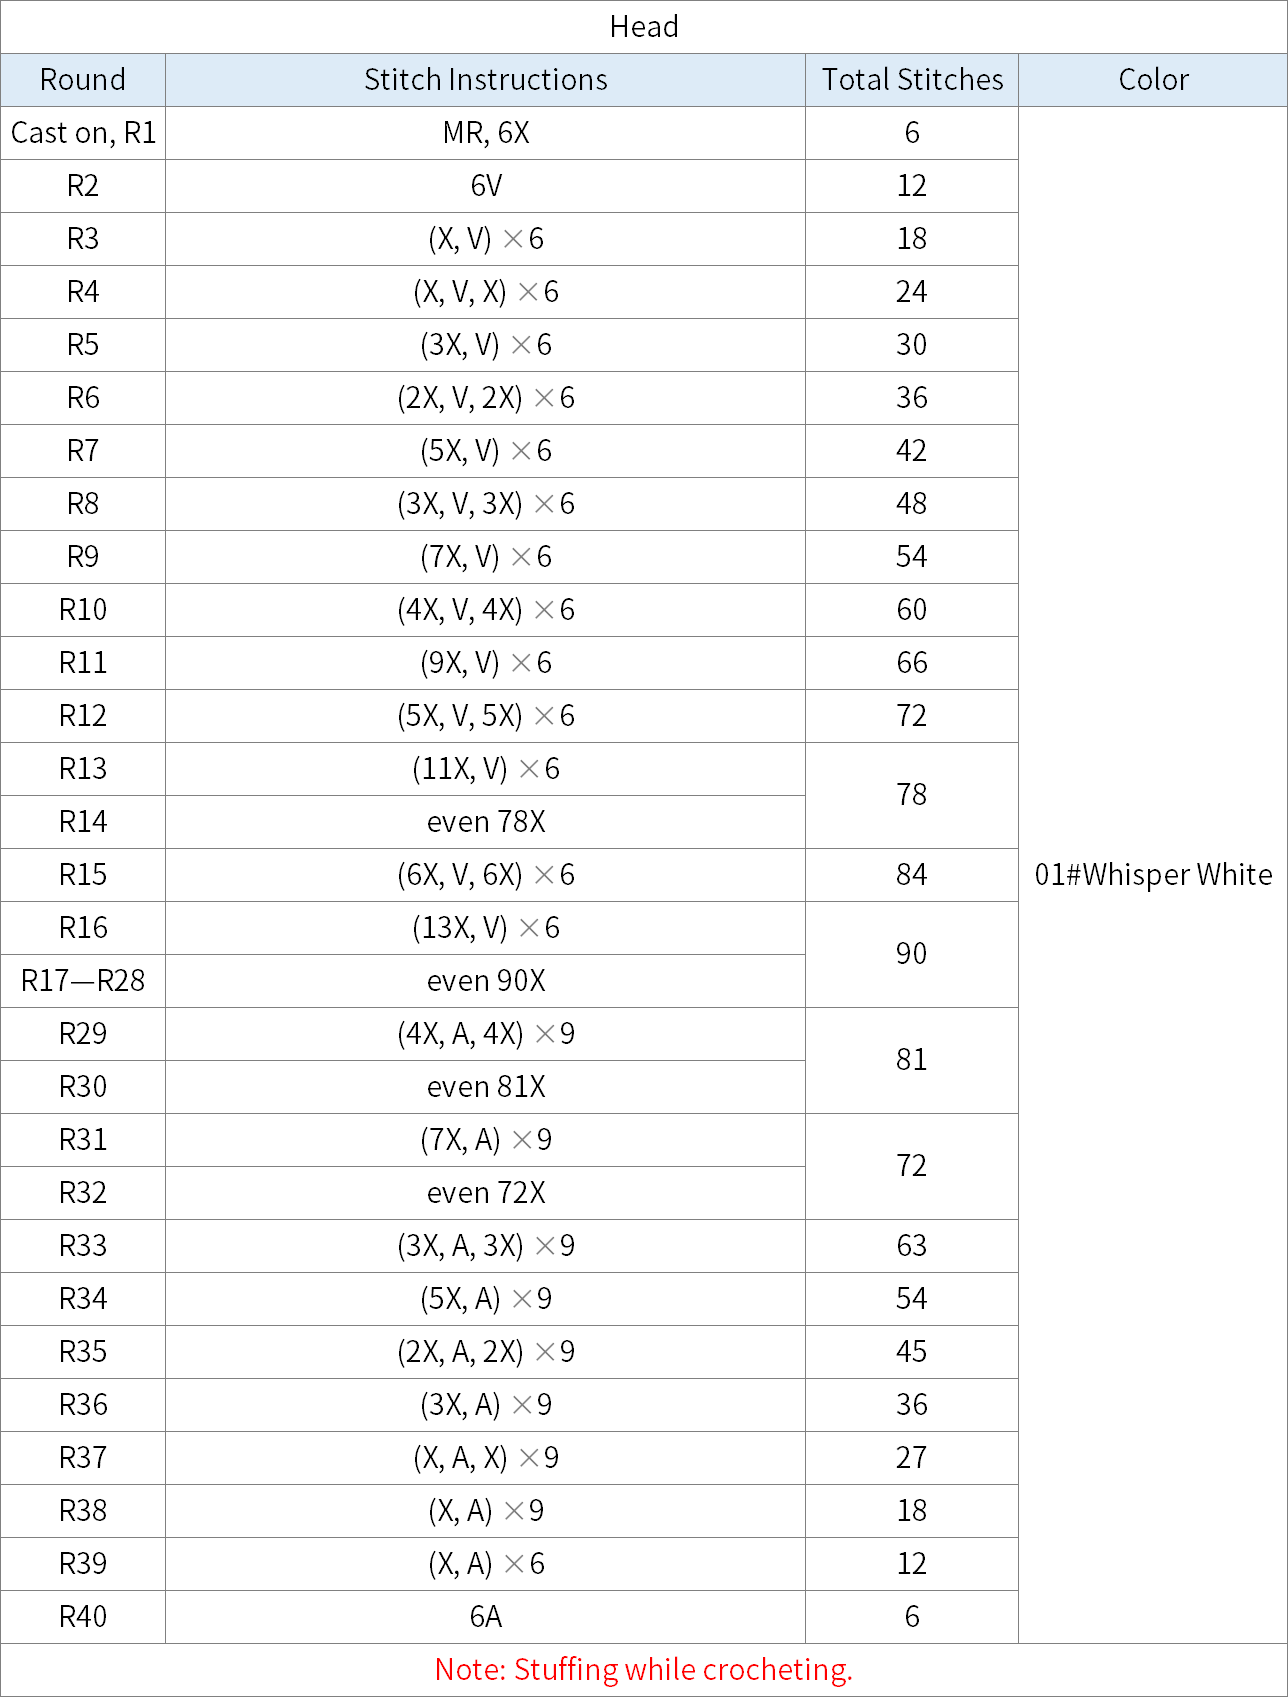
Step 1 HeadA1 00' 46''
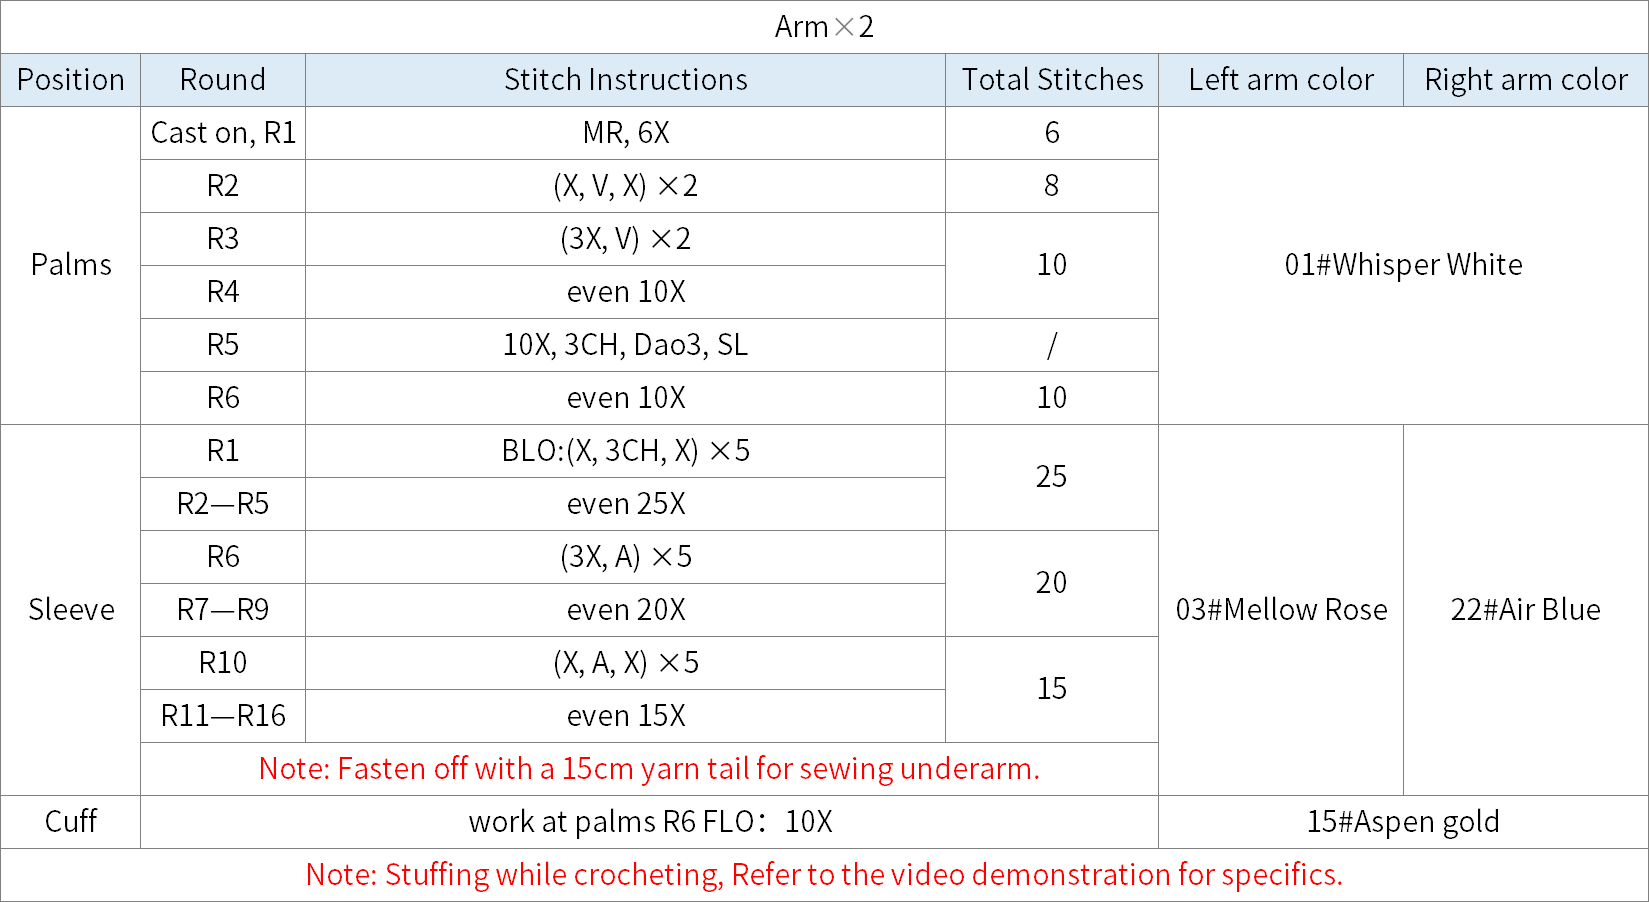
Step 2 ArmsA2 09' 40''
The arm is made up of the palm, sleeve, and cuffs. The crochet technique for both arms is the same, just the colors are different. Please refer to the video demonstration for specifics.
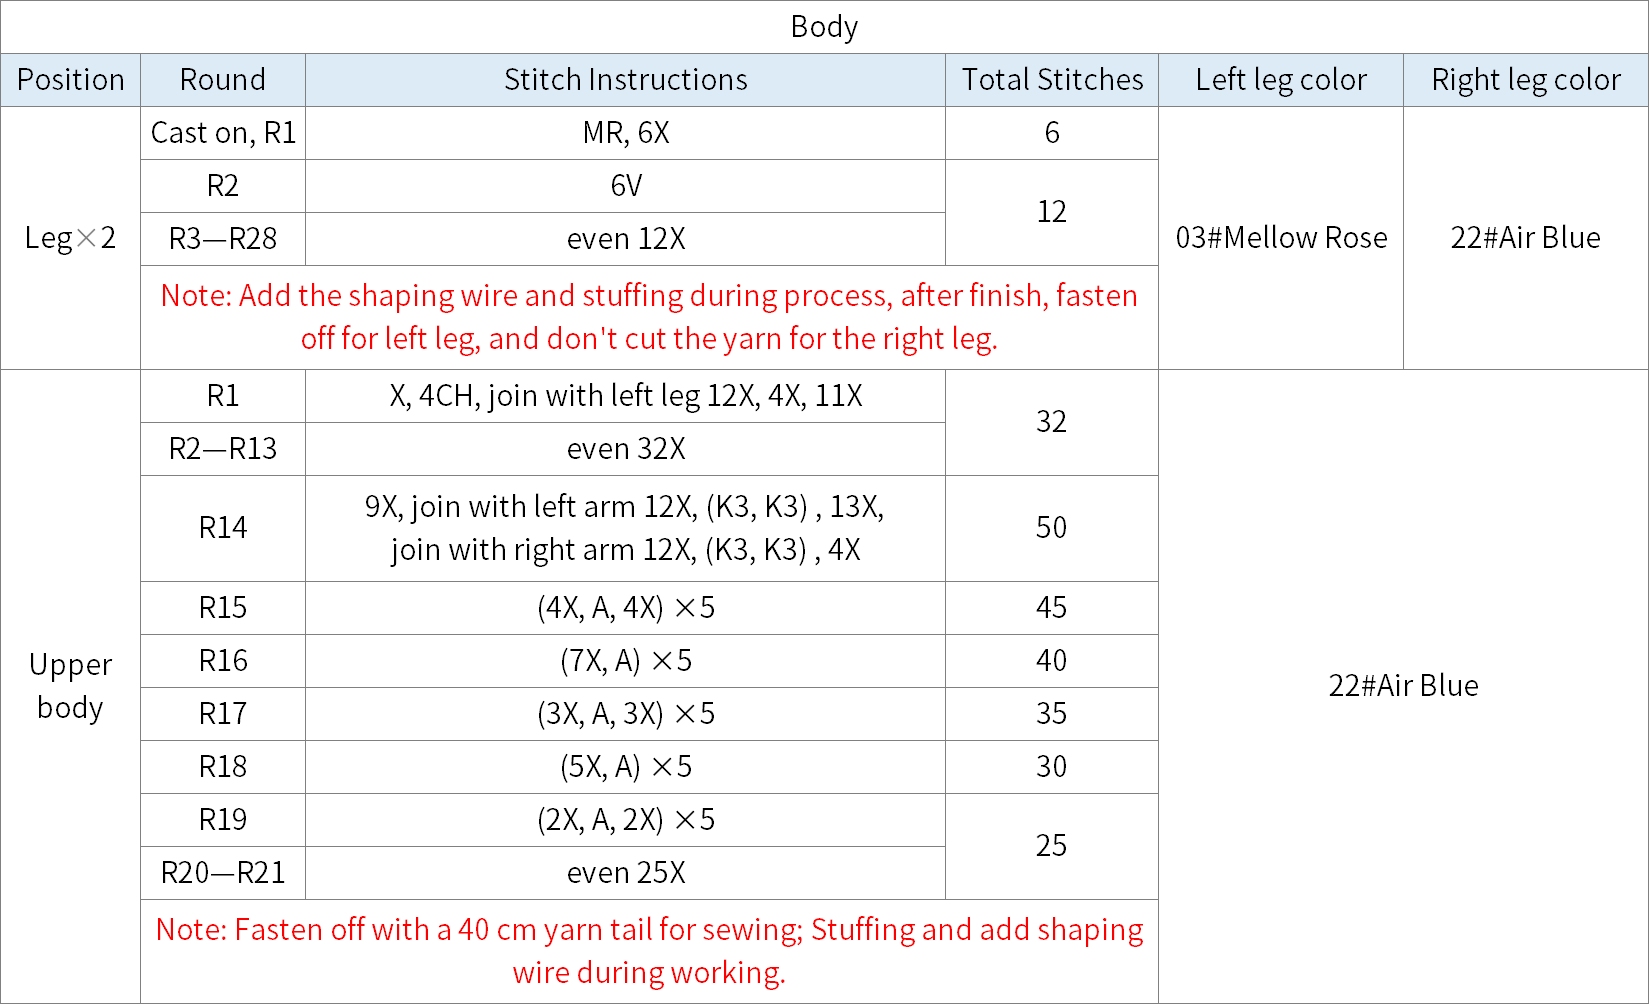
Step 3 BodyA3 18' 08''
The body is divided into the legs and the upper body. Work the two legs together upwards, attaching the arms during the process. The body and arms need to be stuffed and have shaping wires added.
Part 2 AccessoriesB
The accessories include: pants, shoes, a top, a headpiece, hair, ears, stars, and a hat.
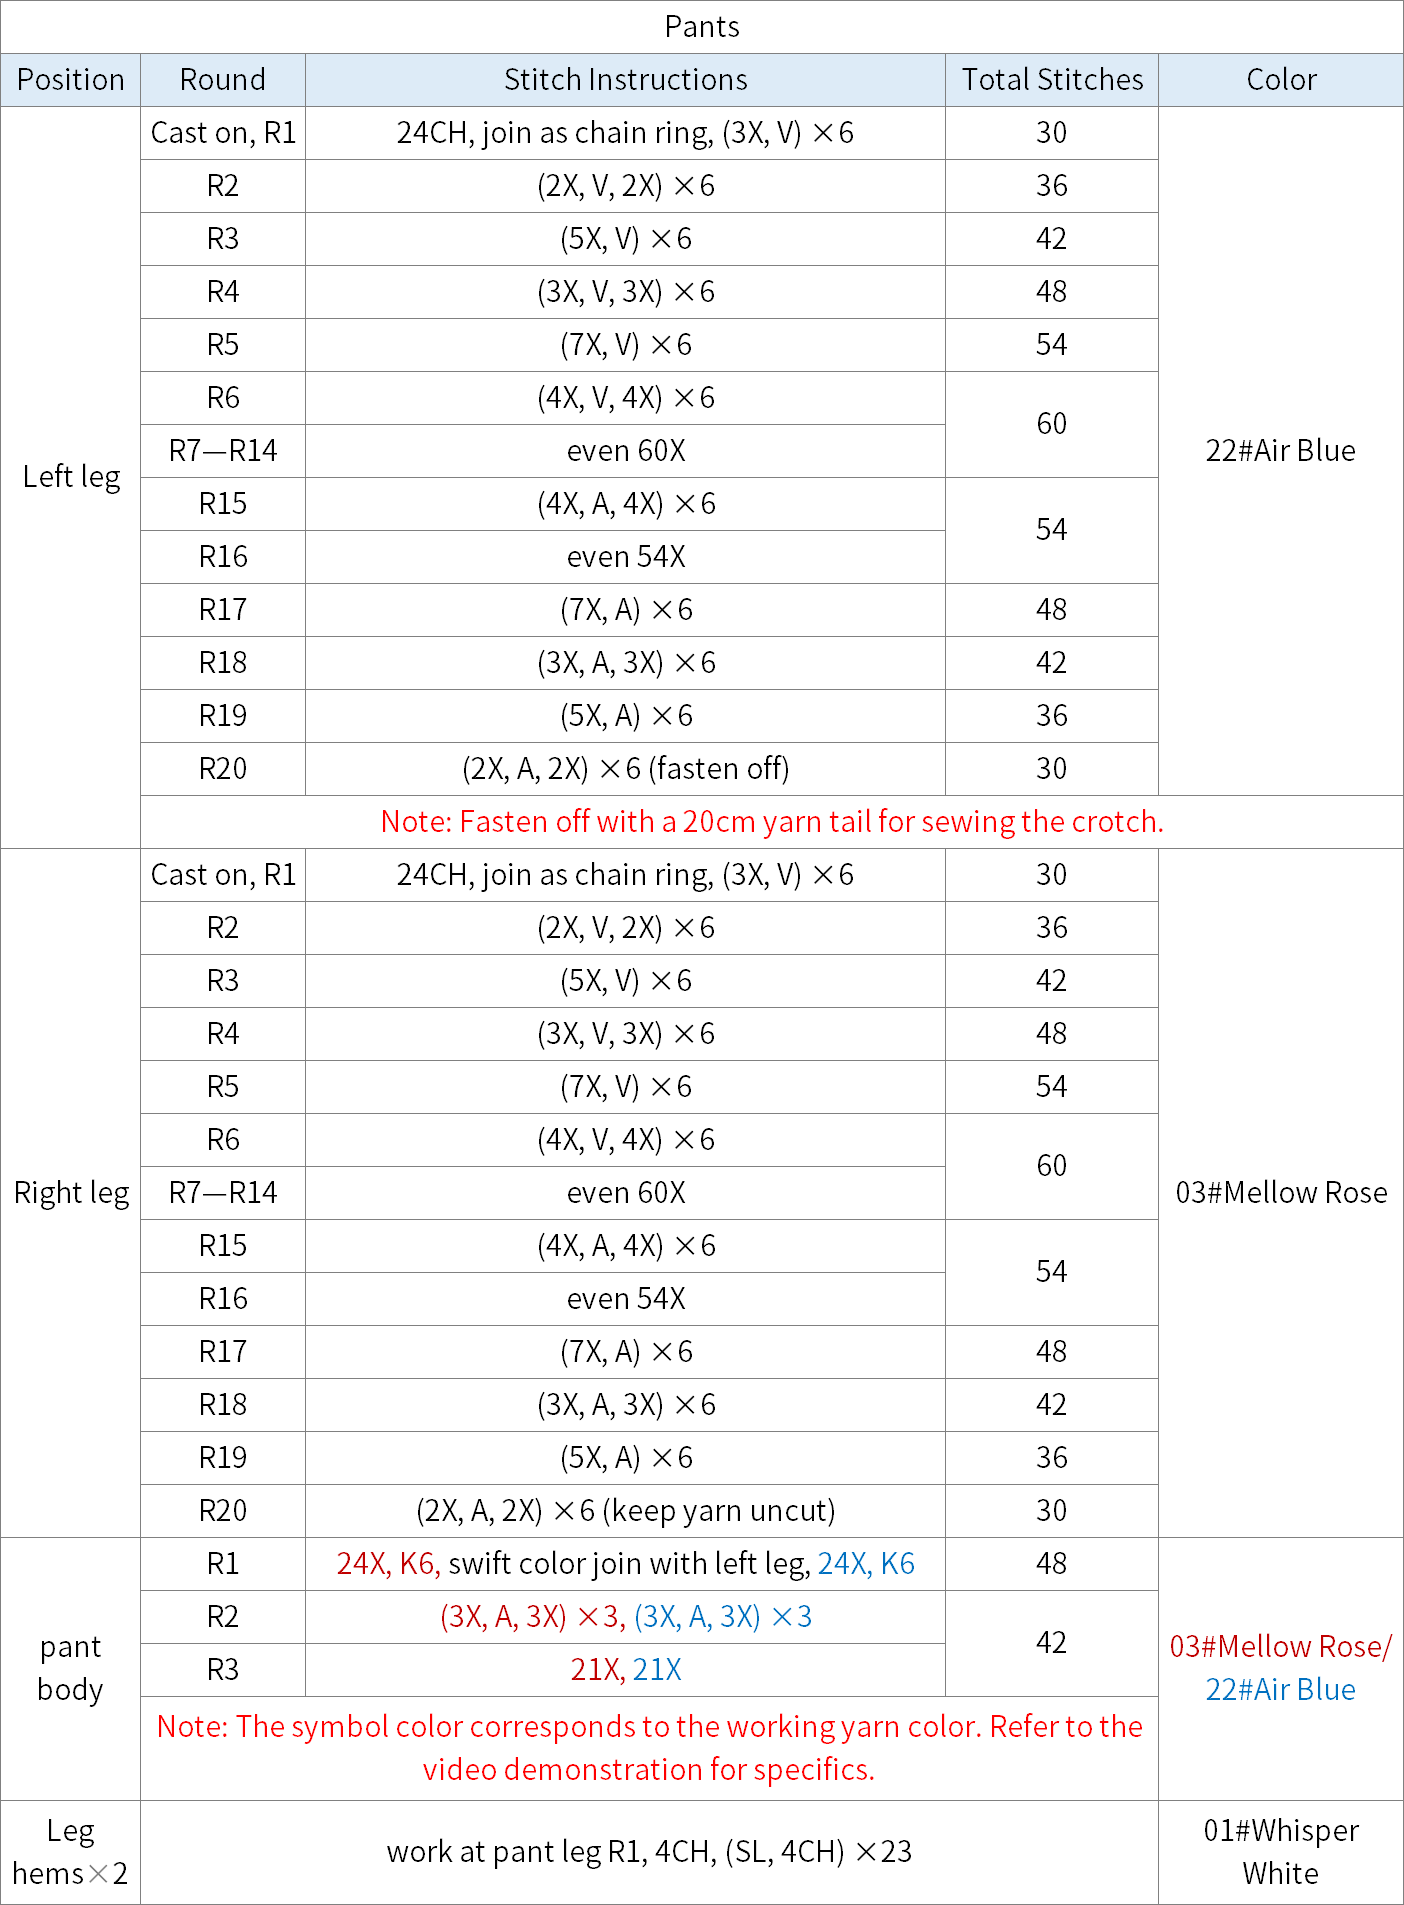
Step 1 PantsB1 26' 13''
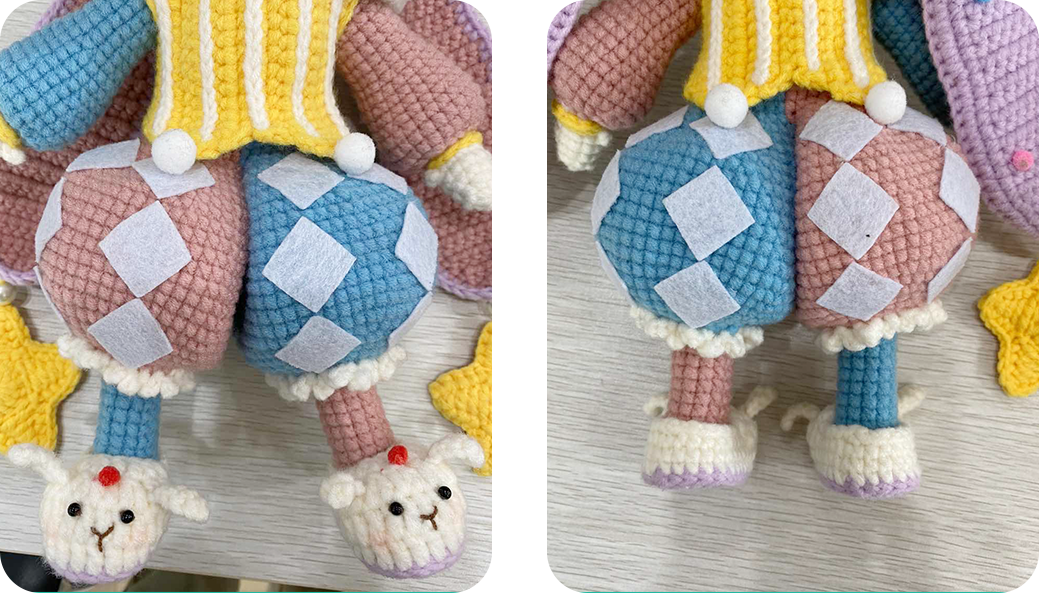
The pants are divided into left and right legs, the body of the pants, and the edges. The left and right legs are different colors. Join the two legs together and crochet the body from the bottom up, then work the edges, and finally add surface decorations. Please refer to the video demonstration and diagram for details.
Step 2 ShoesB2 41' 33''
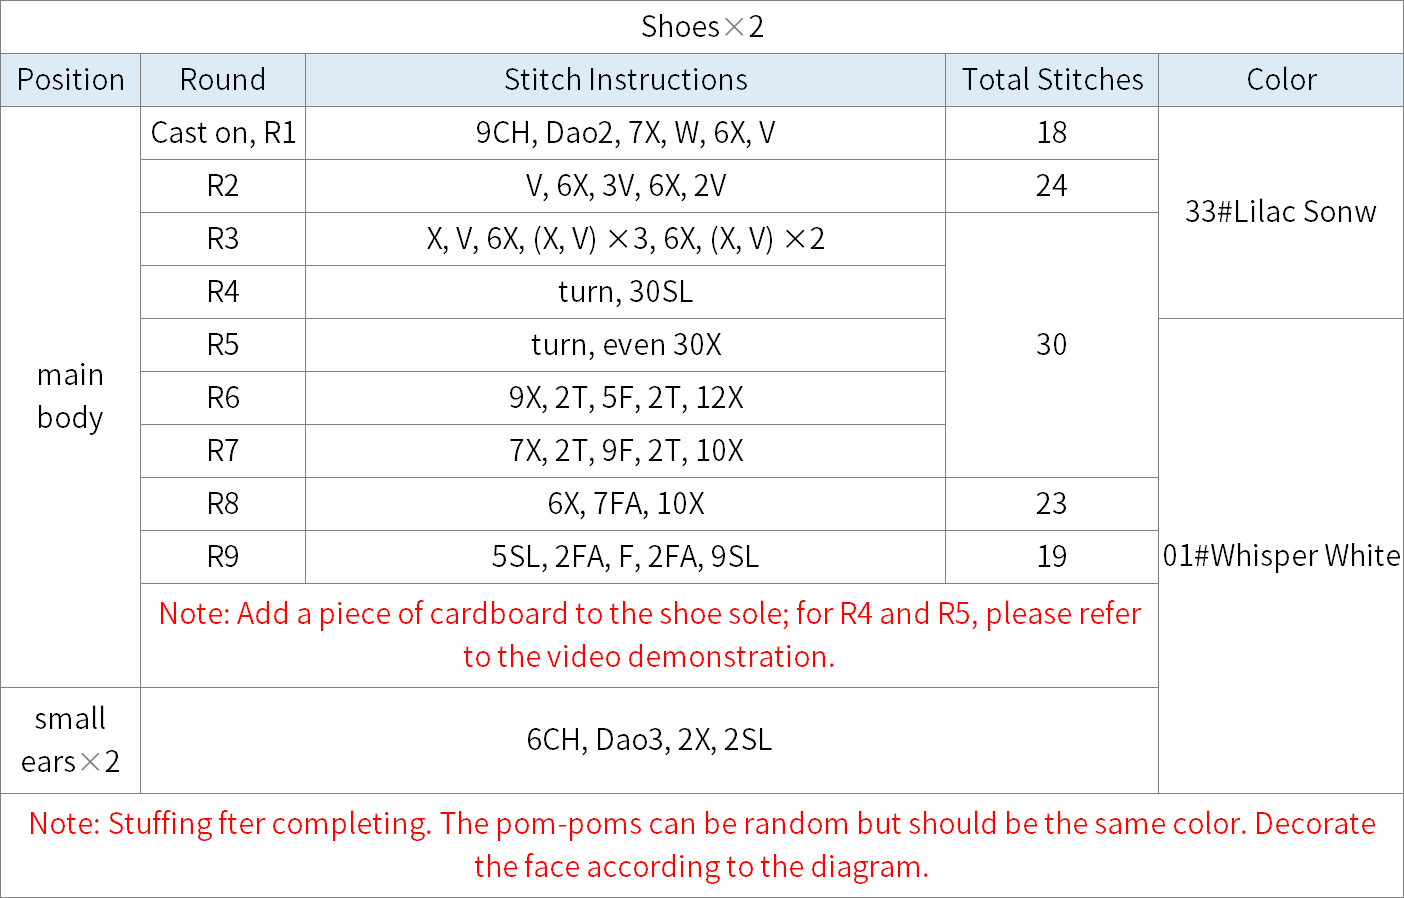
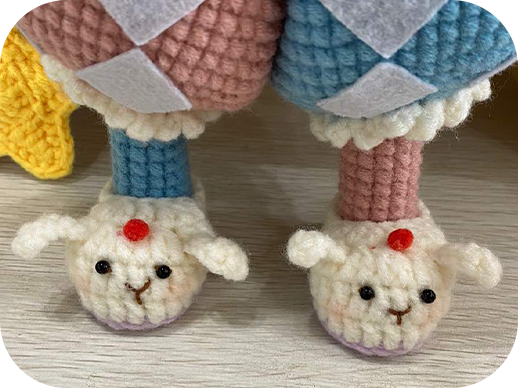
The shoe sole needs to include a piece of cardboard and some filling cotton. After completing the crocheting, decorations need to be added. Please refer to the video demonstration and diagram for specifics.
Step 3 TopB3 50' 17''
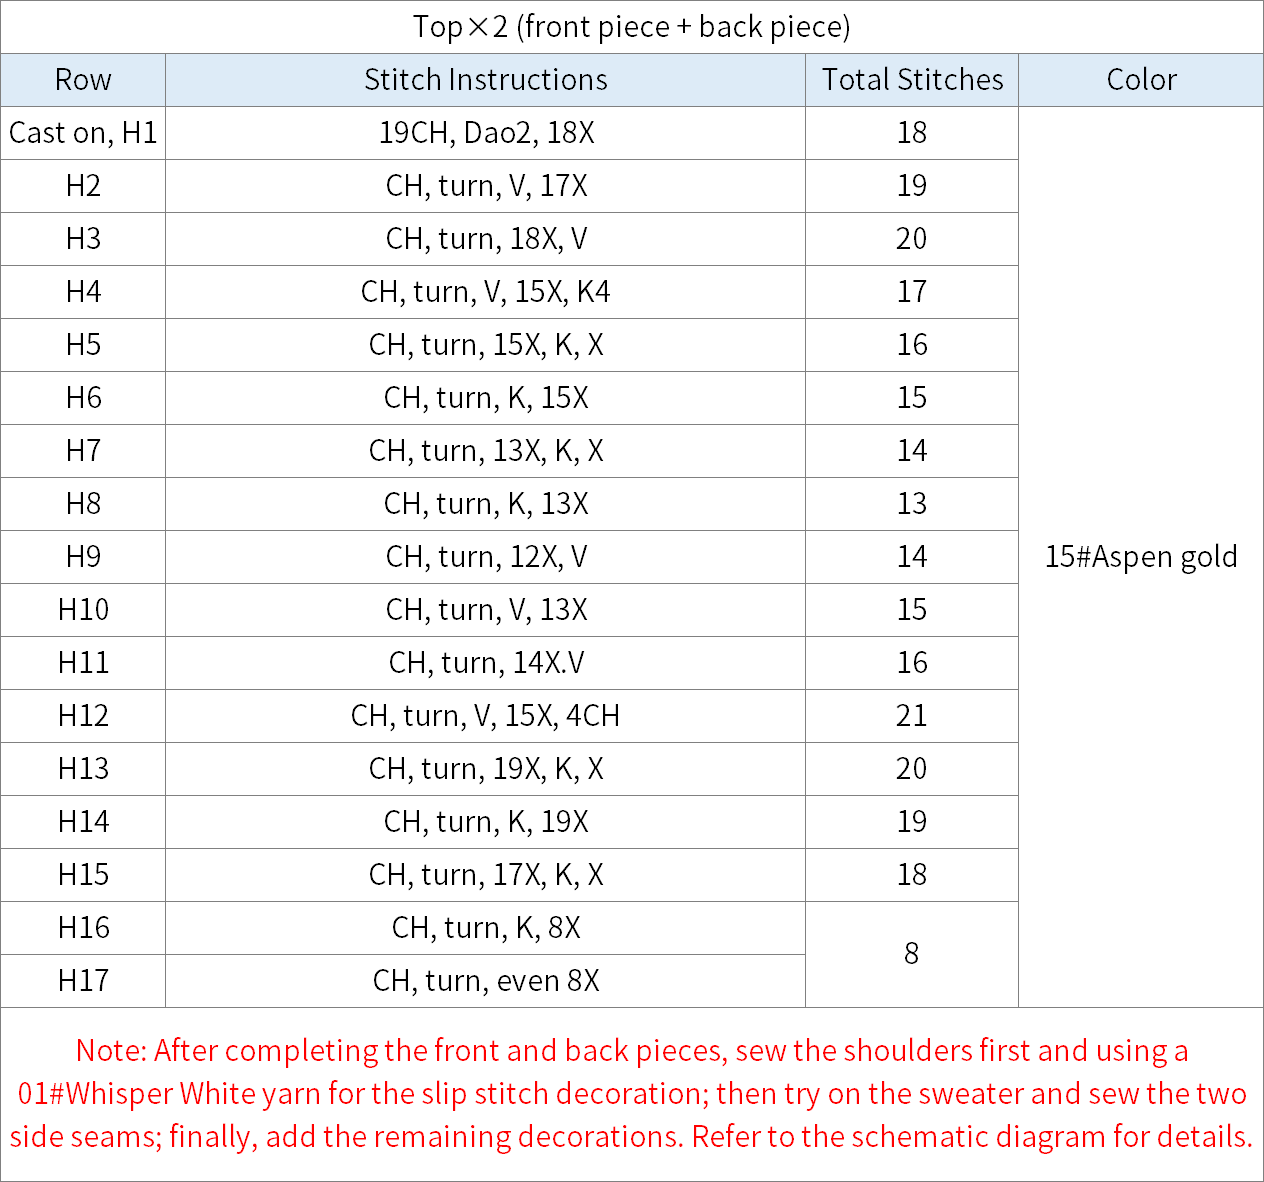
The top includes the front and back pieces. After completing both, sew them together and use a slip stitch for the remaining decorations. Refer to the schematic diagram for specifics.
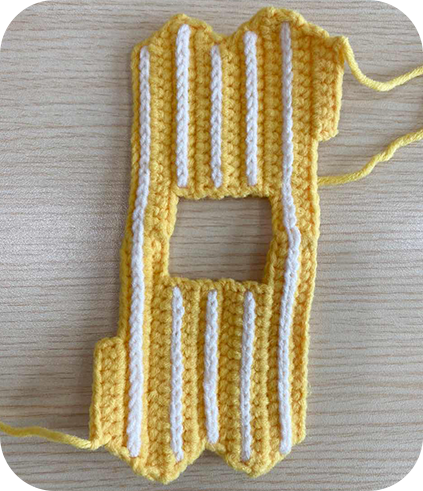
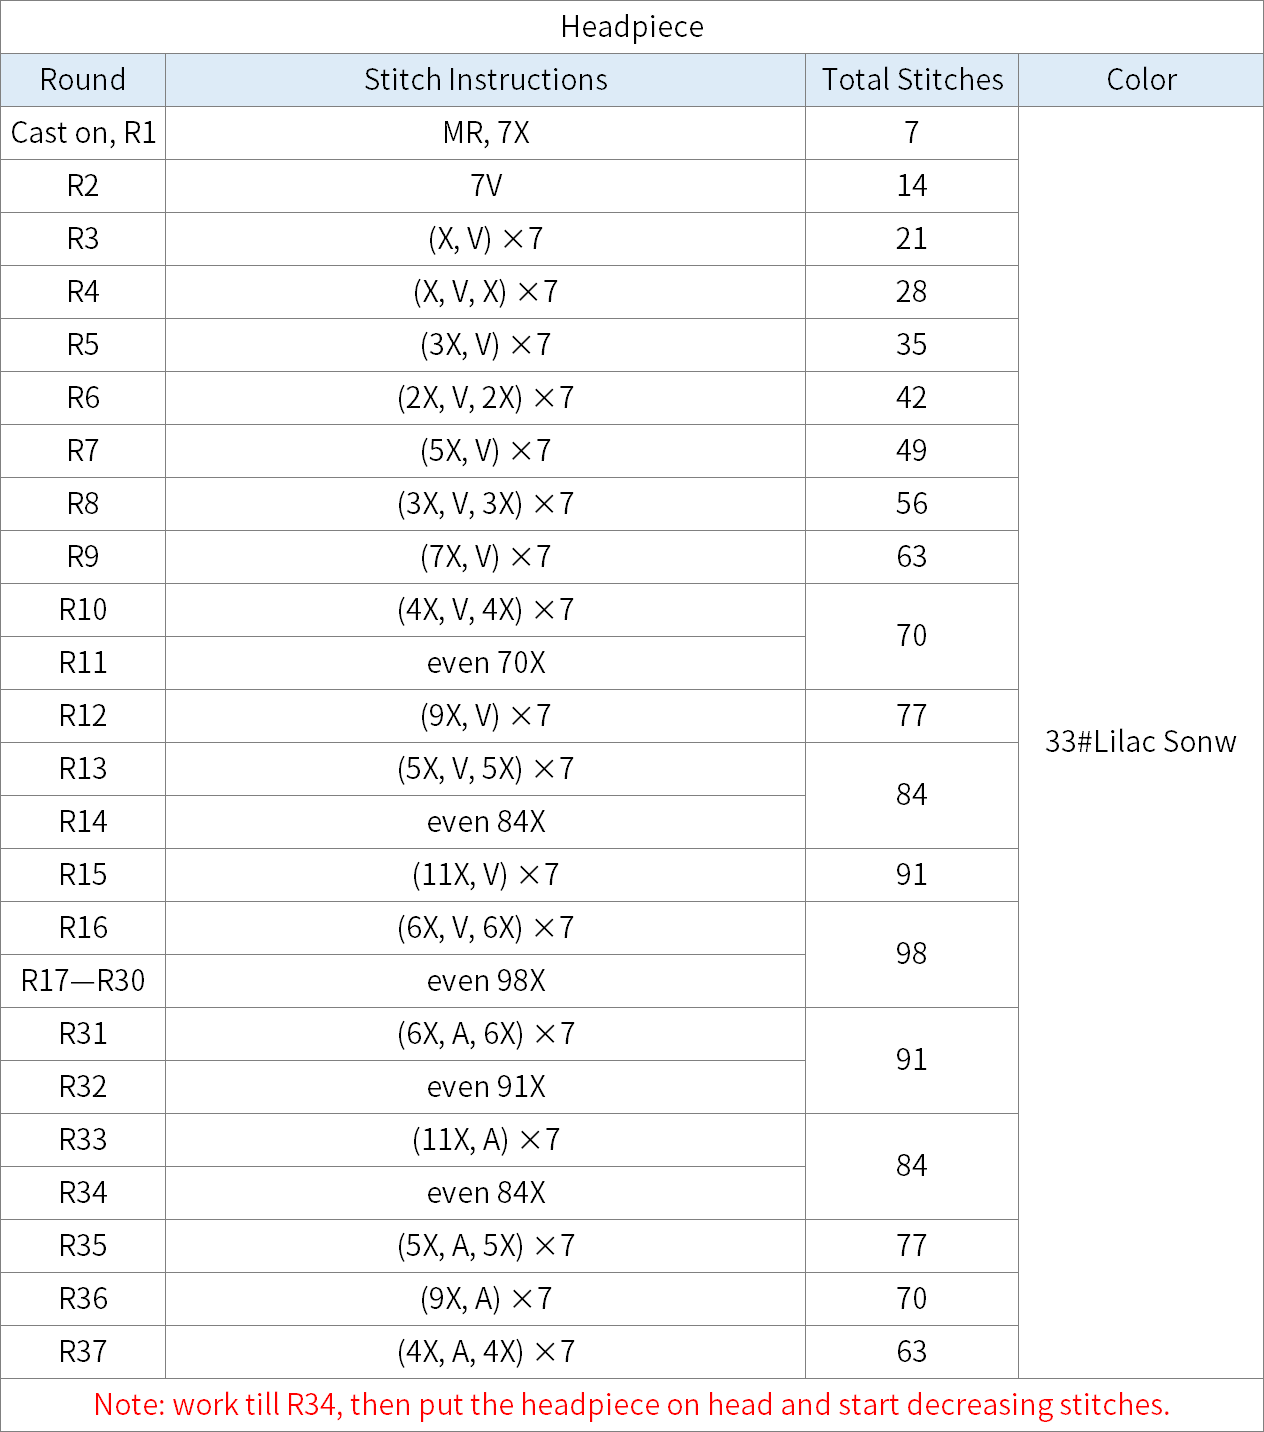
Step 4 HeadpieceB4 50' 57''
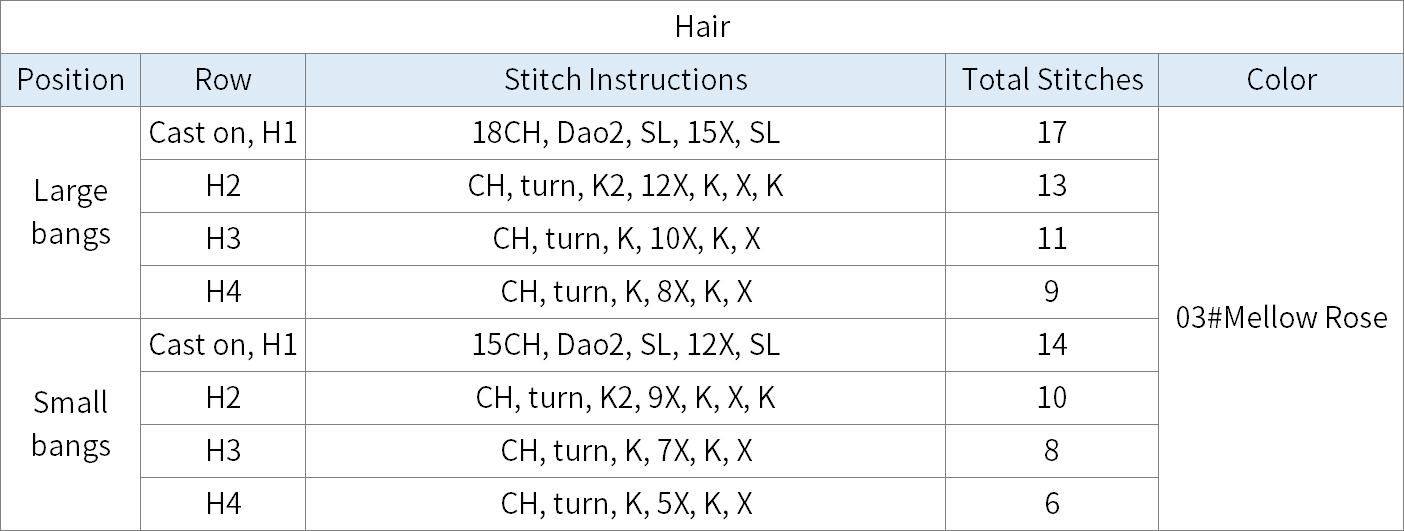
Step 5 HairB5 51' 14''
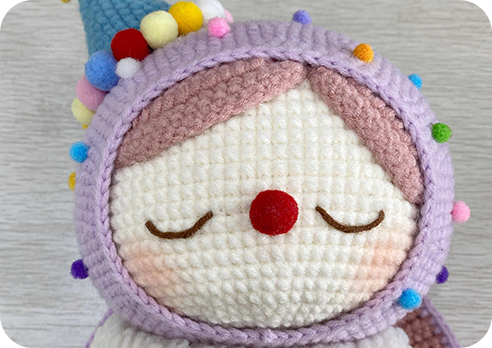
Divide the hair into two sections: larger bangs and smaller bangs. After completing them, attach them to the corresponding positions on the head. Refer to the diagram for specifics.
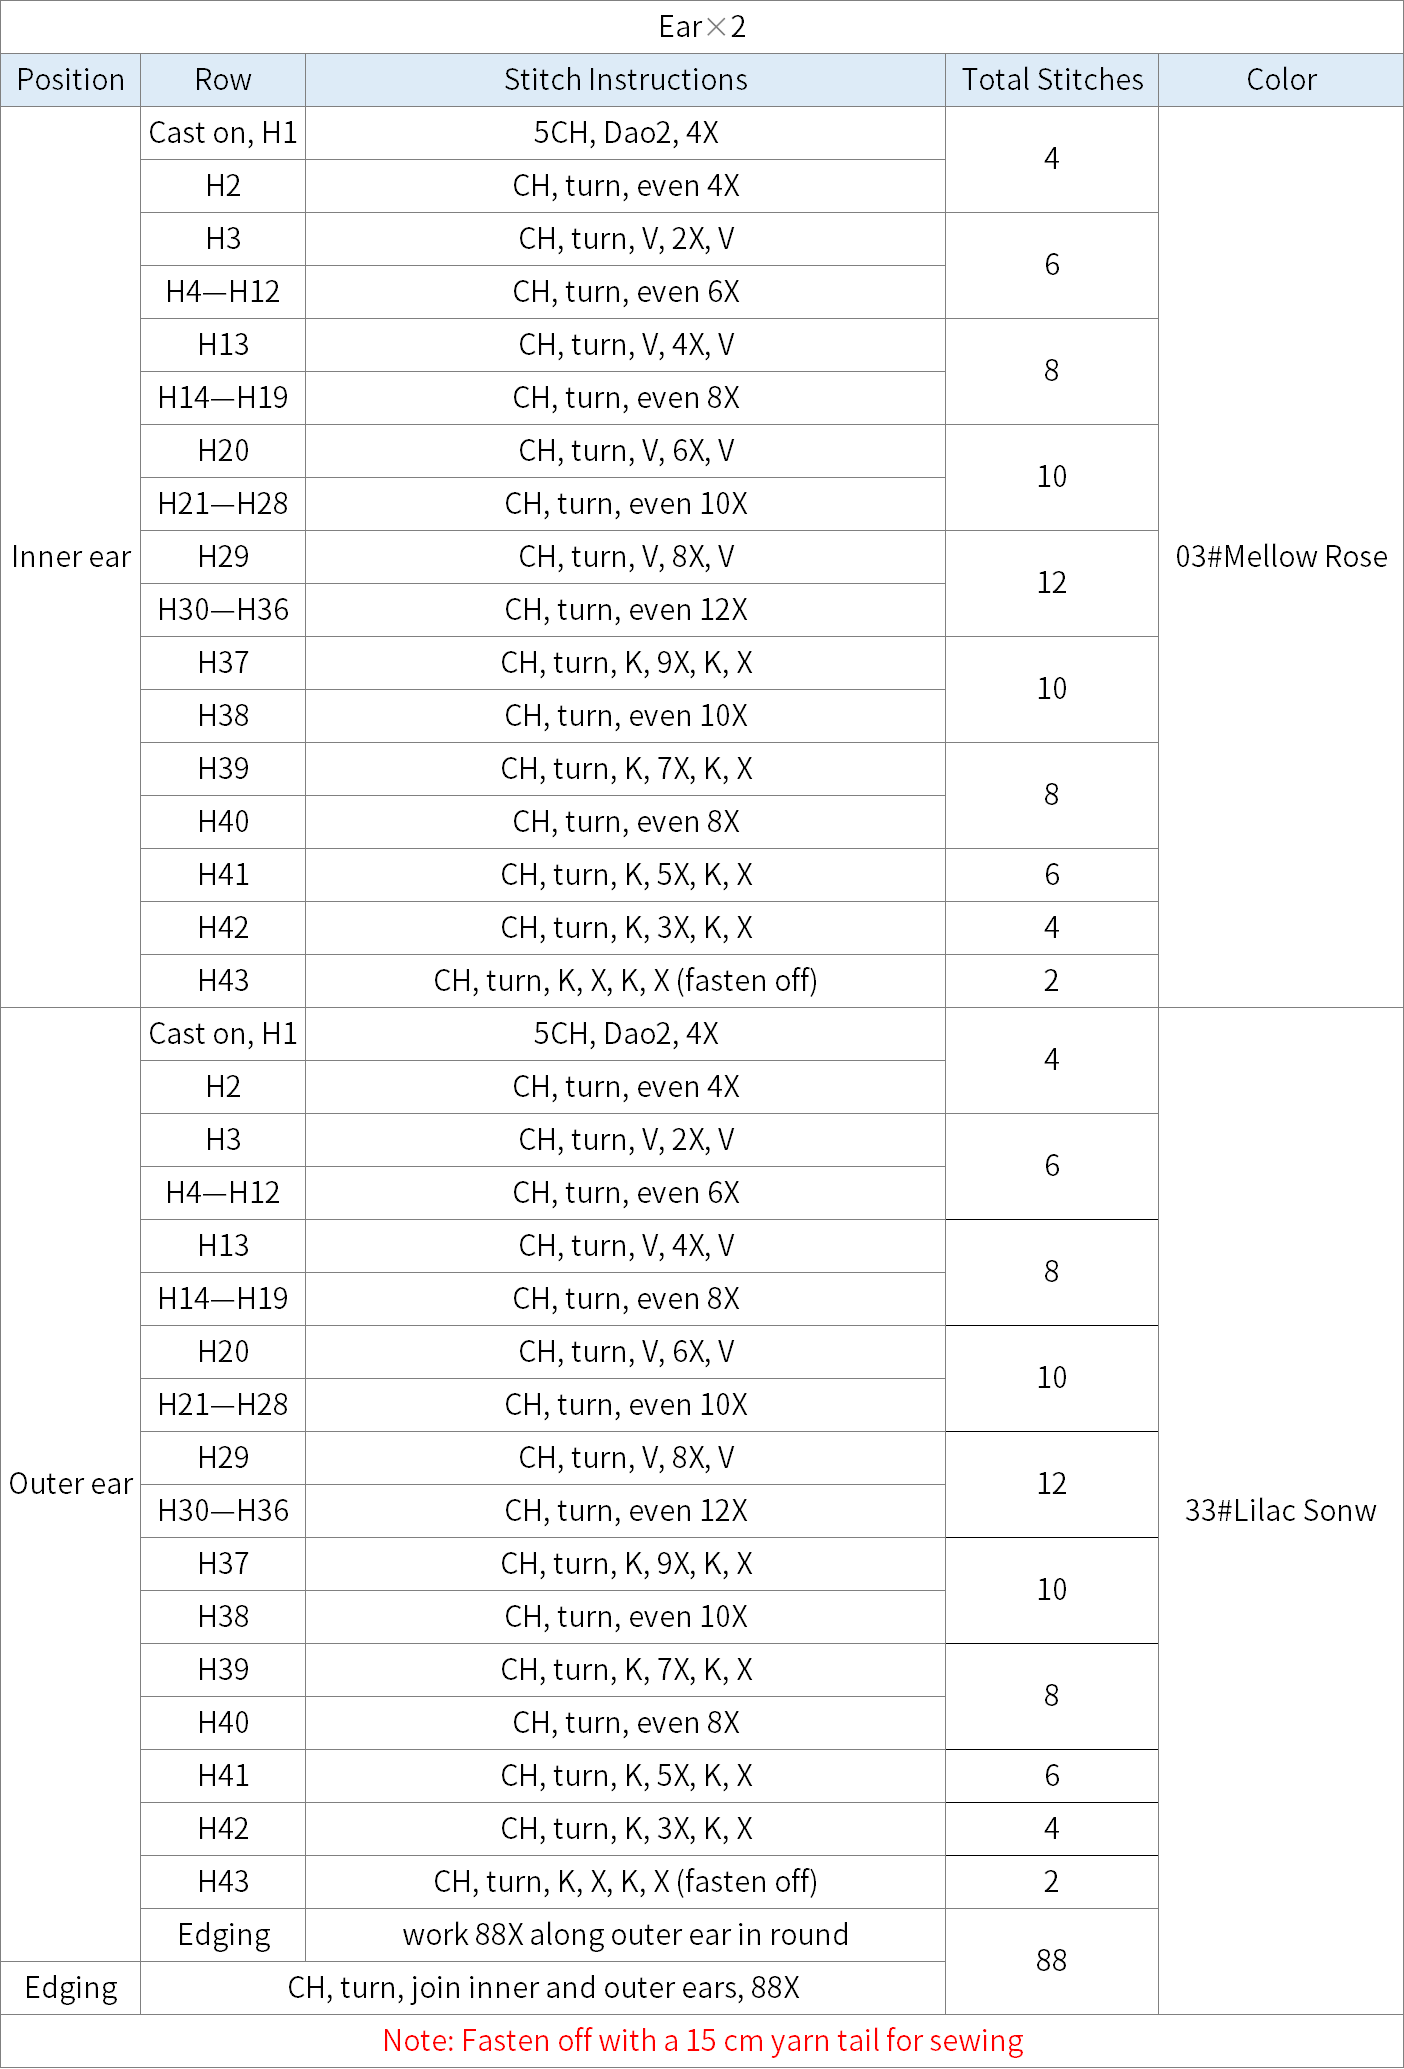
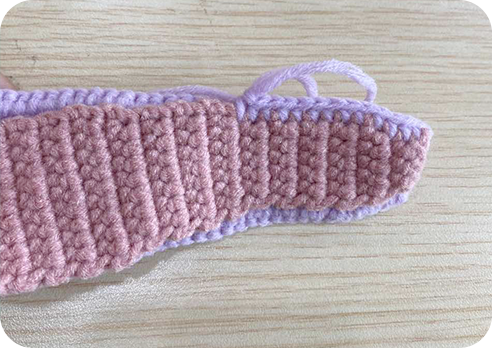
Step 6 EarsB6 51' 44''
The ears include the inner ear, outer ear, and edging. The inner and outer ears are different colors, with the outer ear having an extra round of edging. Finally, join the two pieces and crochet one more round of edging. Refer to the diagram for details.
Step 7 StarsB7 52' 26''
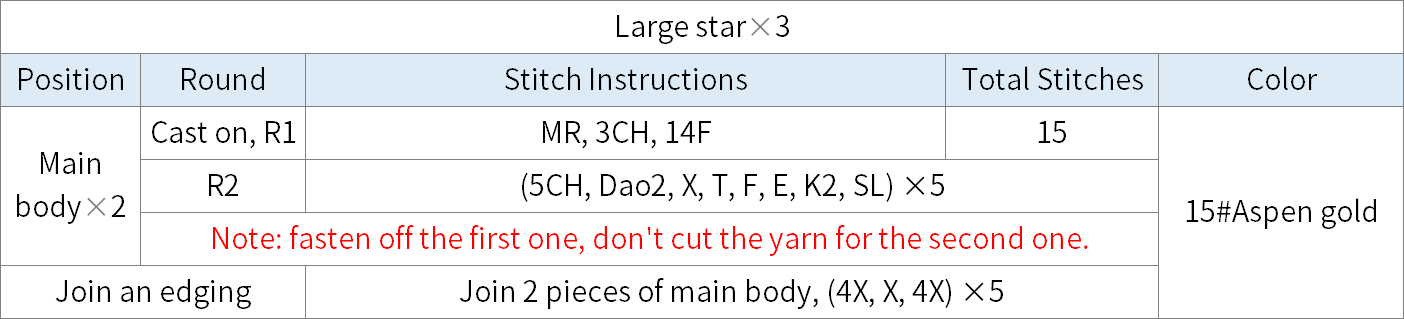
There are three large stars; two of them are hanging from the ears, and one is held in the hand. Please refer to the diagram for details.
Step 8 Hat, scarf and facial features decorationsB8 54' 18''
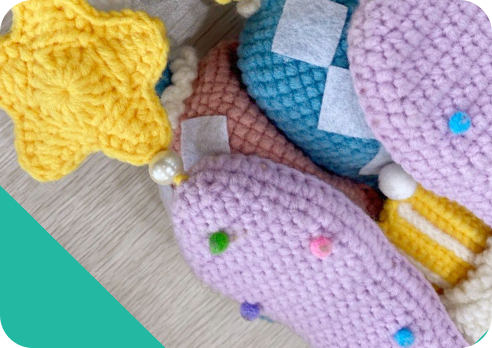
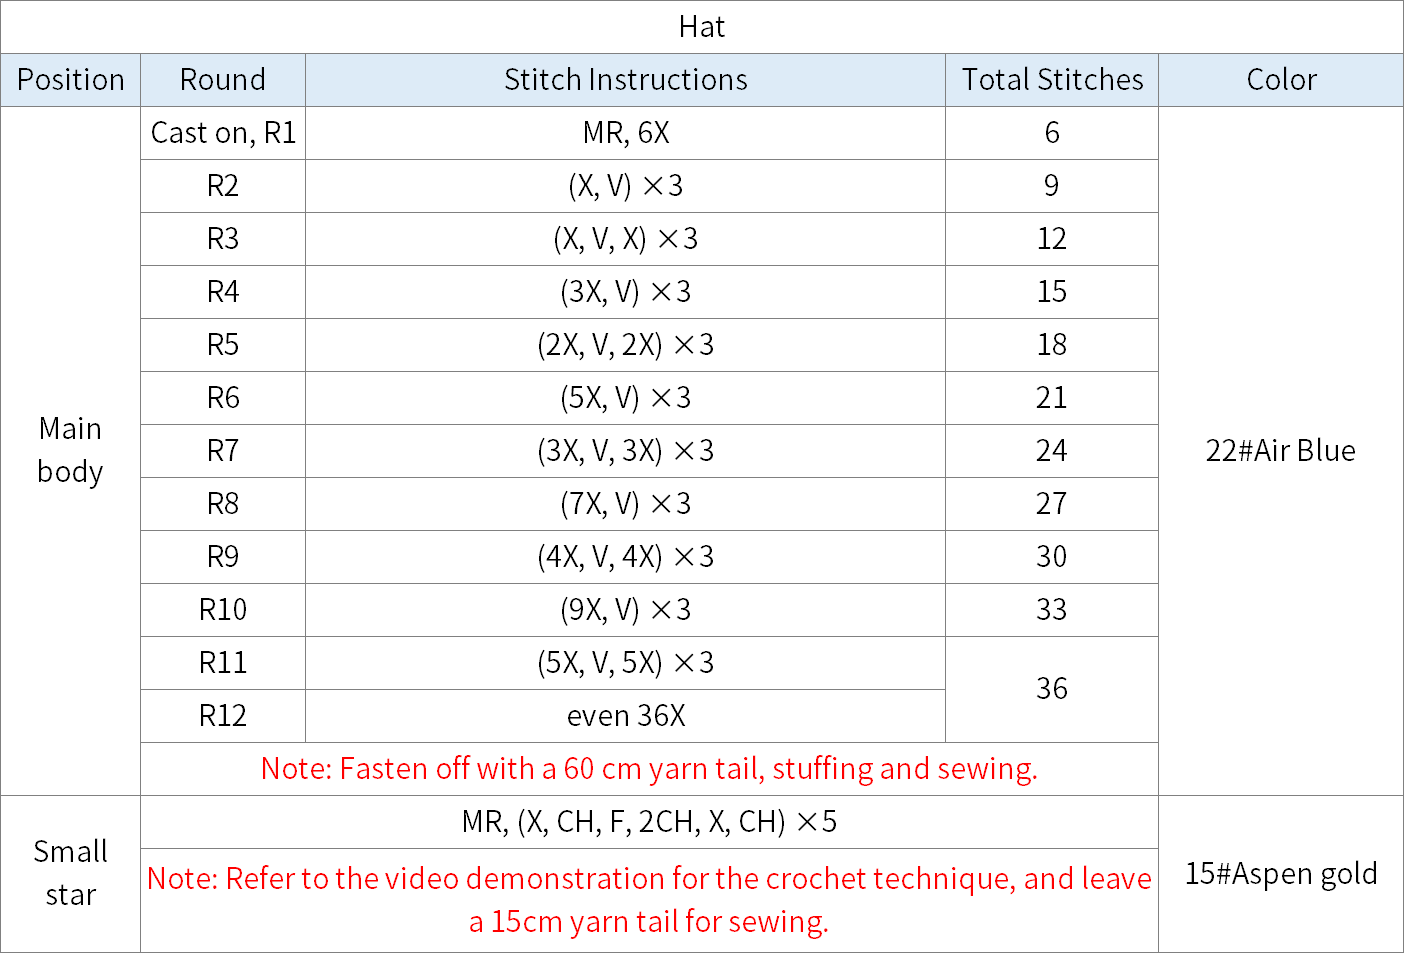
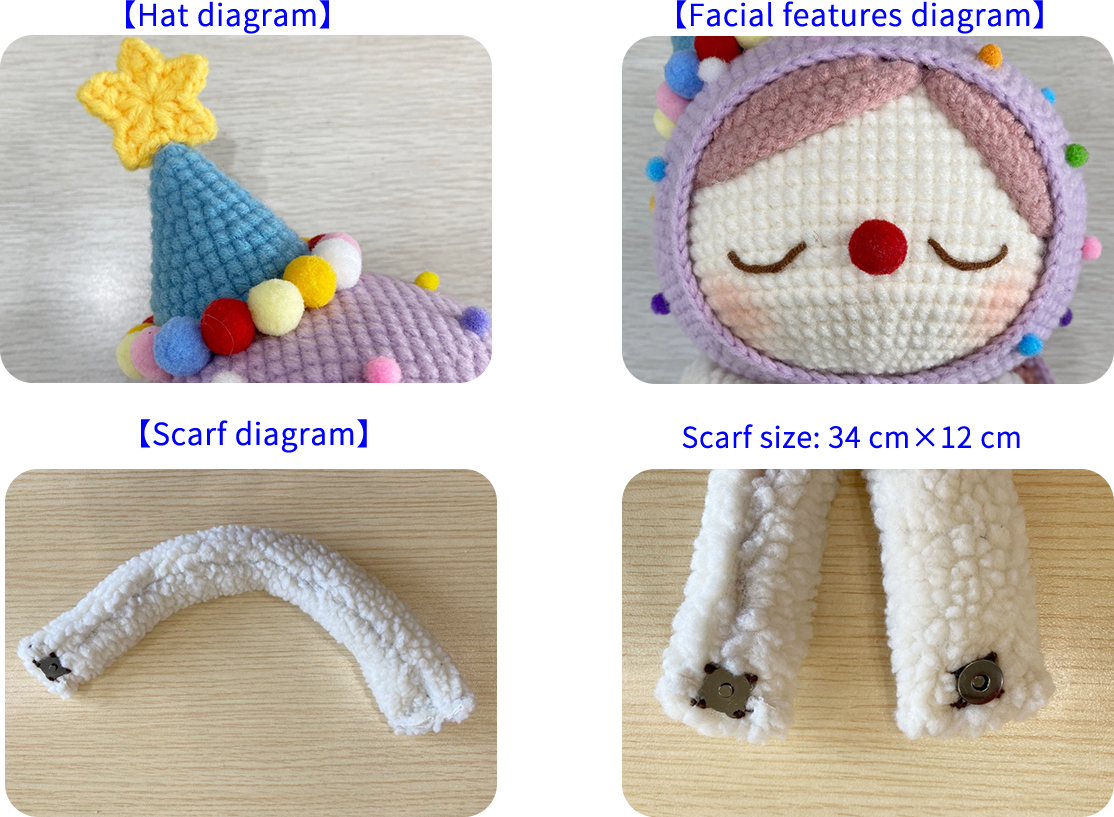
The hat includes the main body and little stars. The crocheting method for the little stars can be referenced from the video demonstration. Decorations should follow the schematic diagram. The scarf is sewn together using fabric and magnetic clasps, and the facial features decoration should also refer to the schematic diagram.
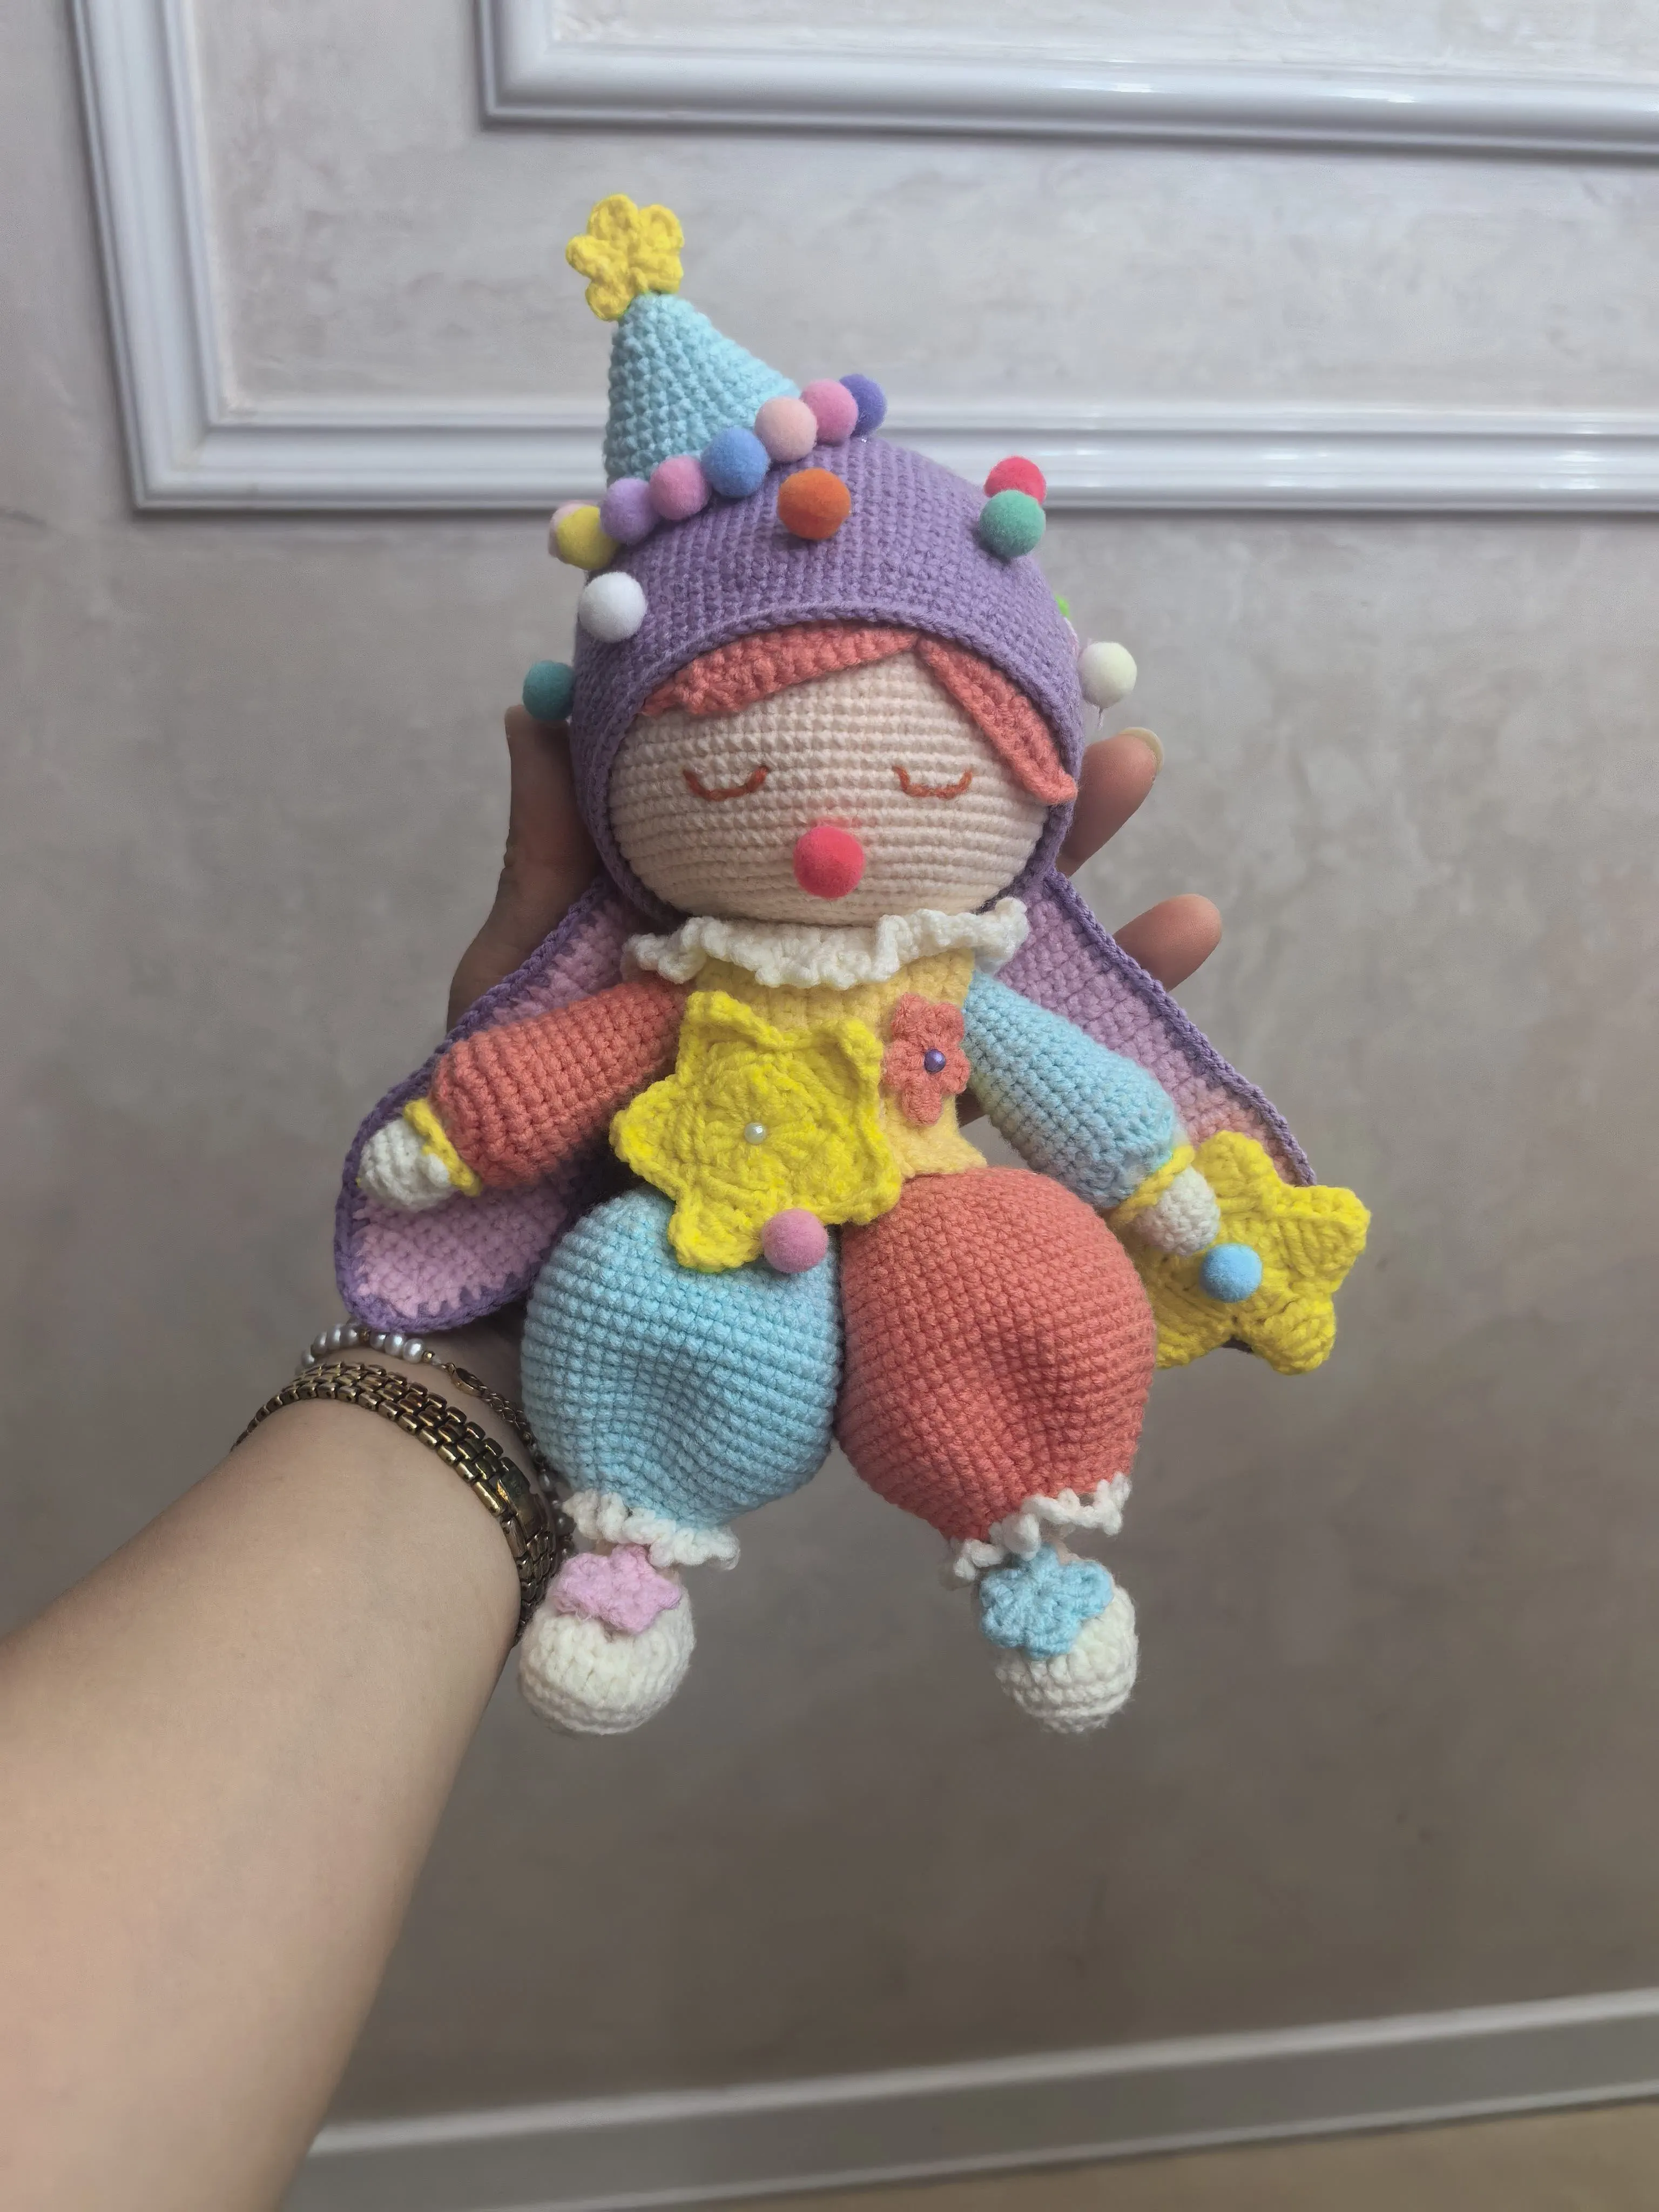
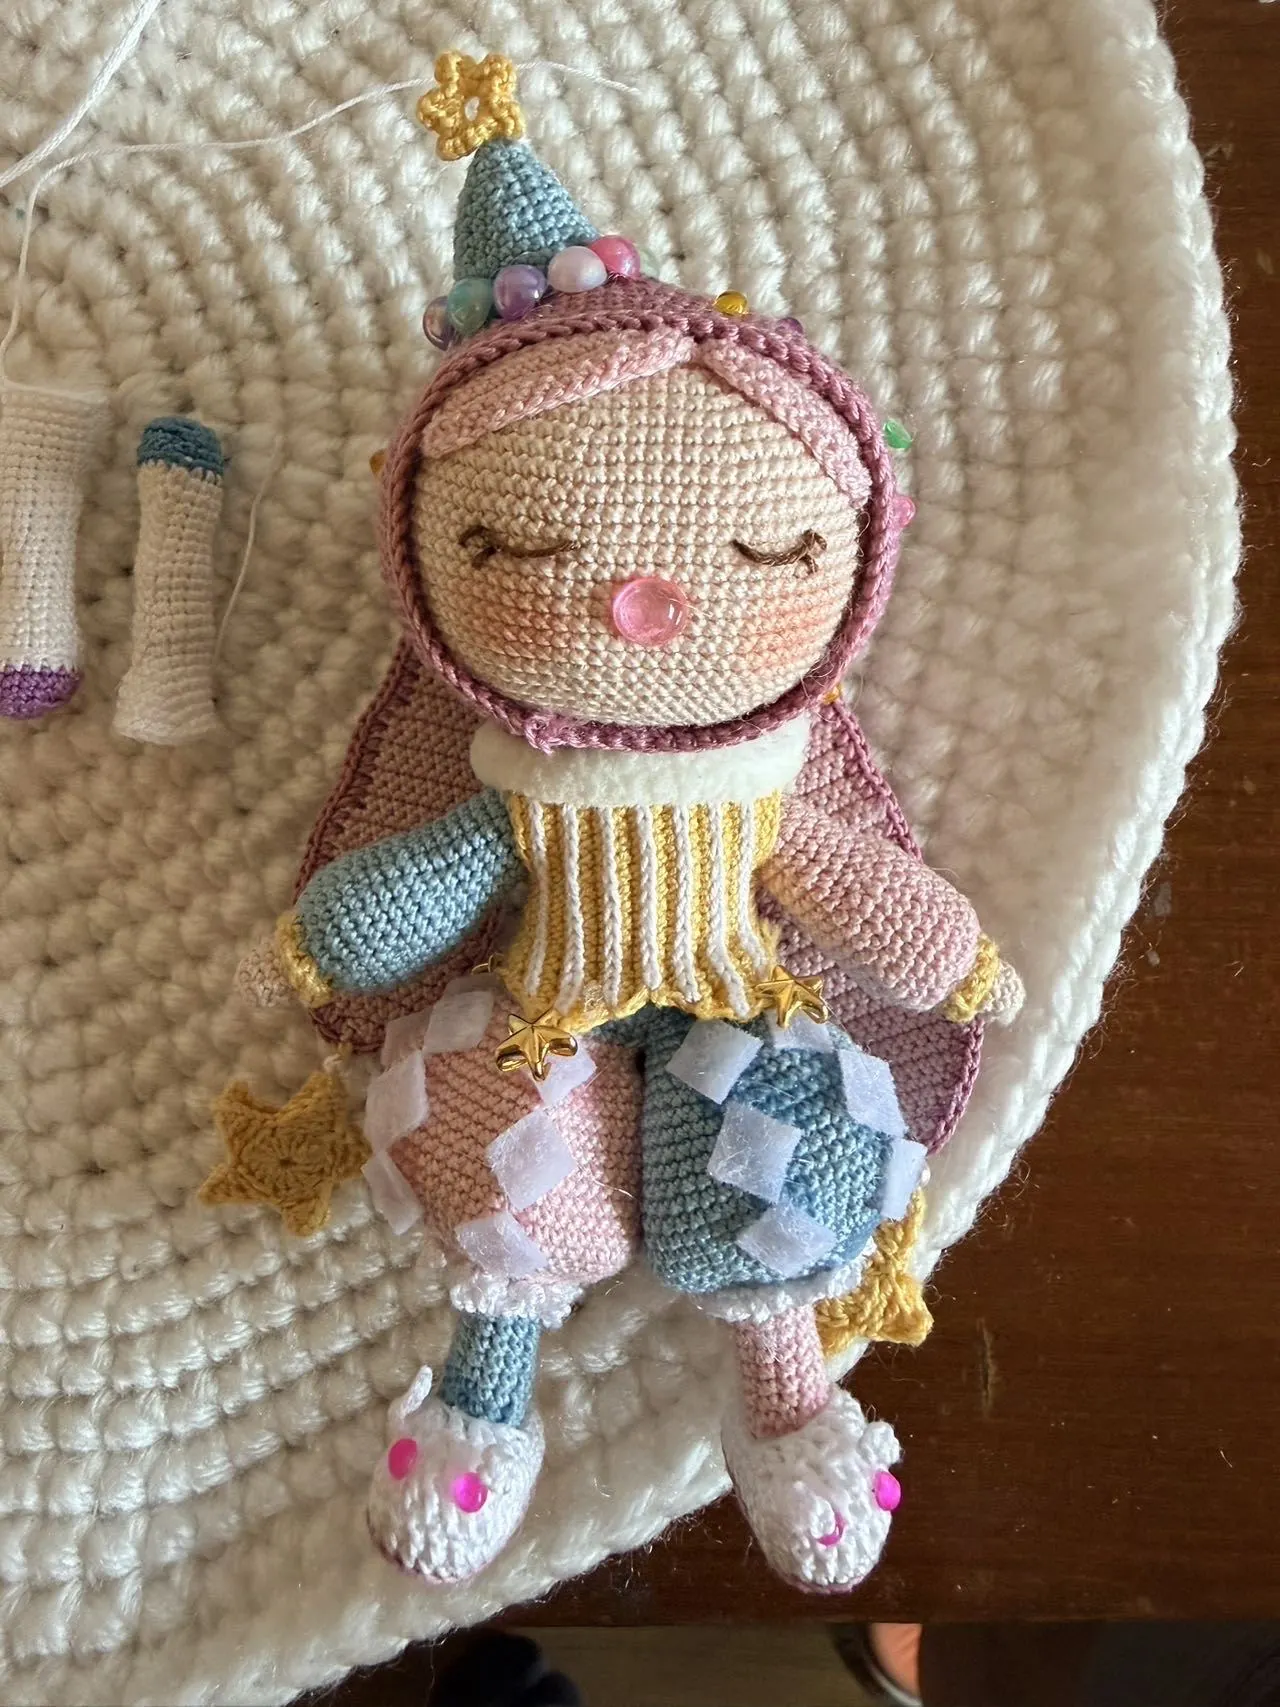
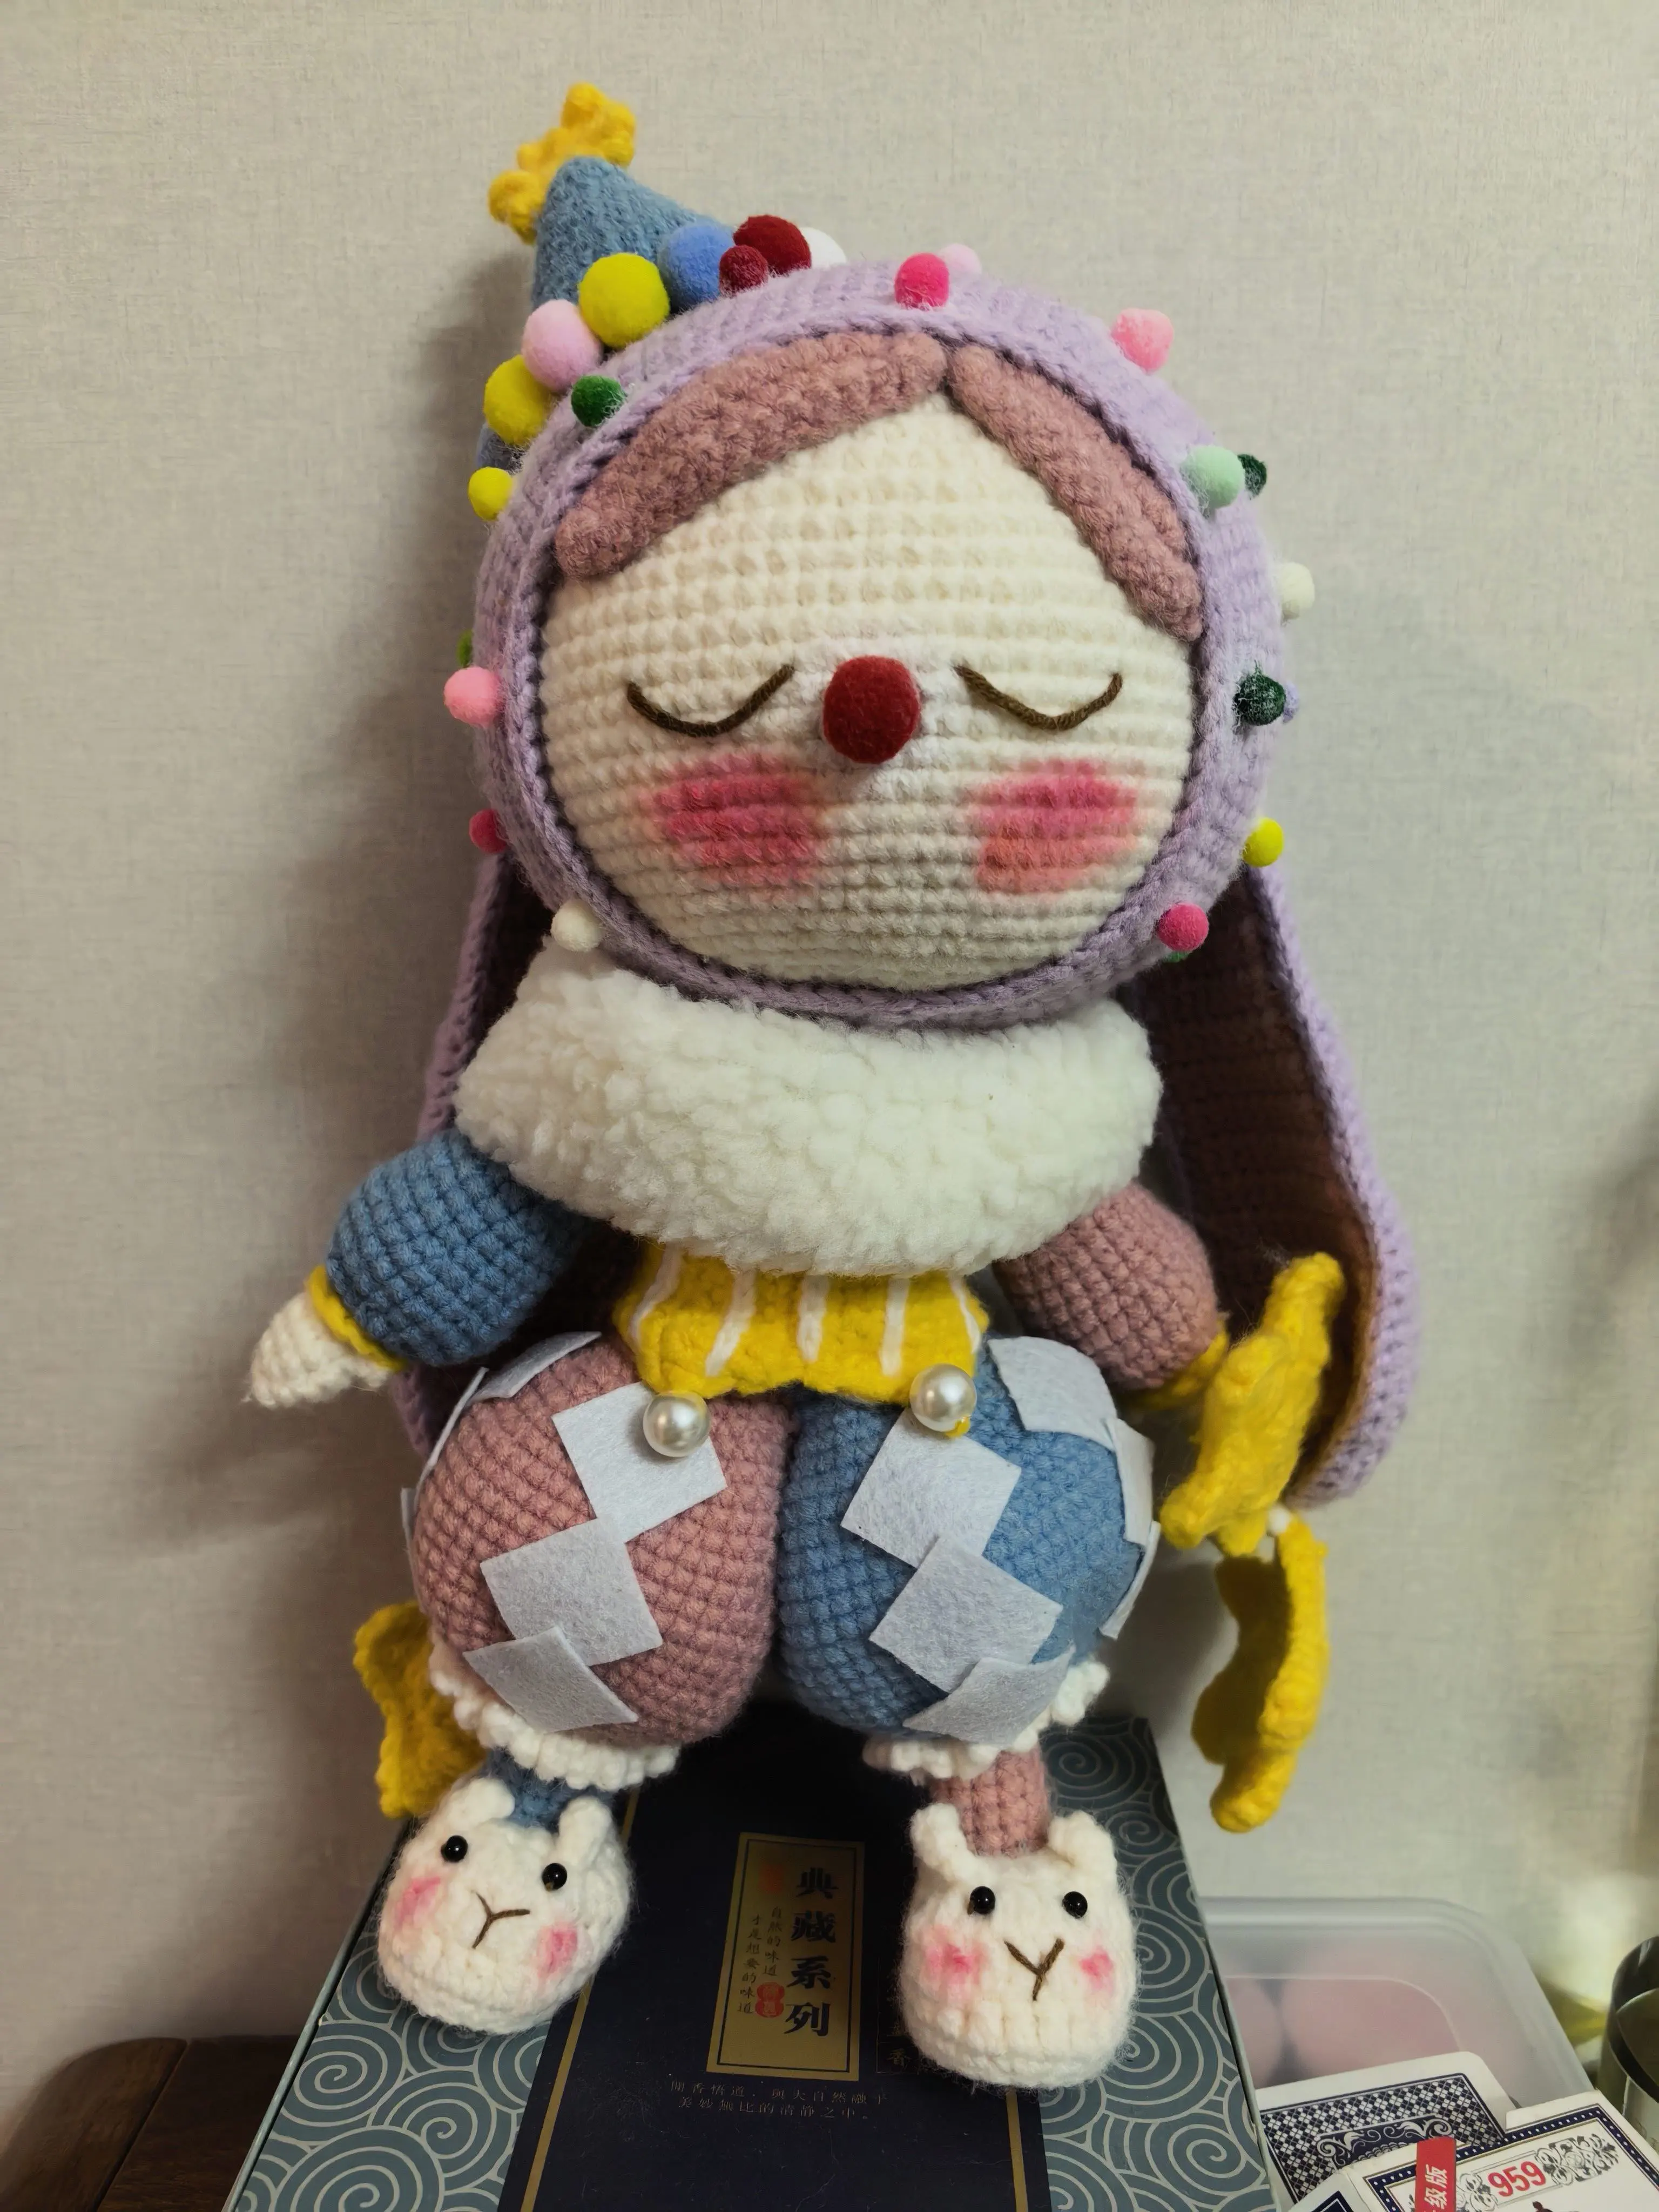
Made by the community