Clothes
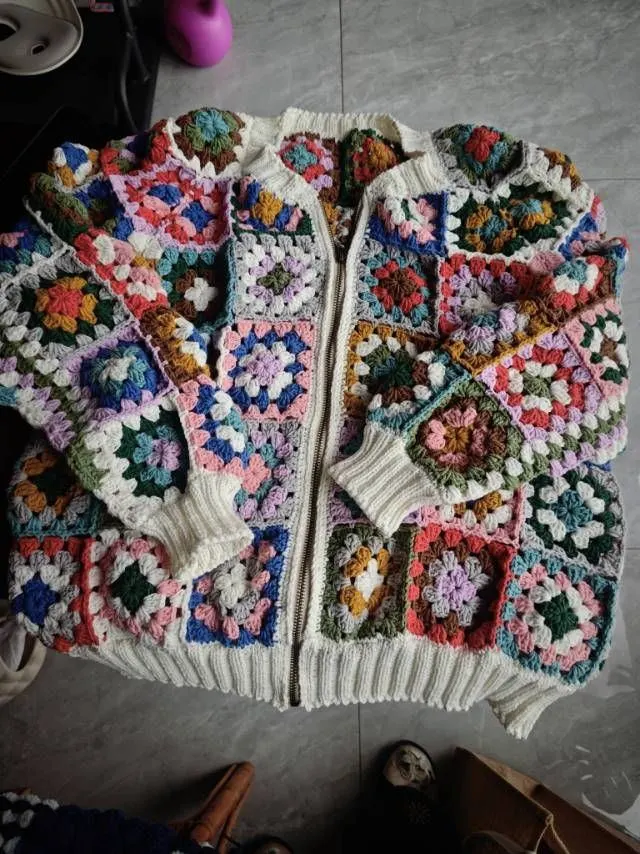
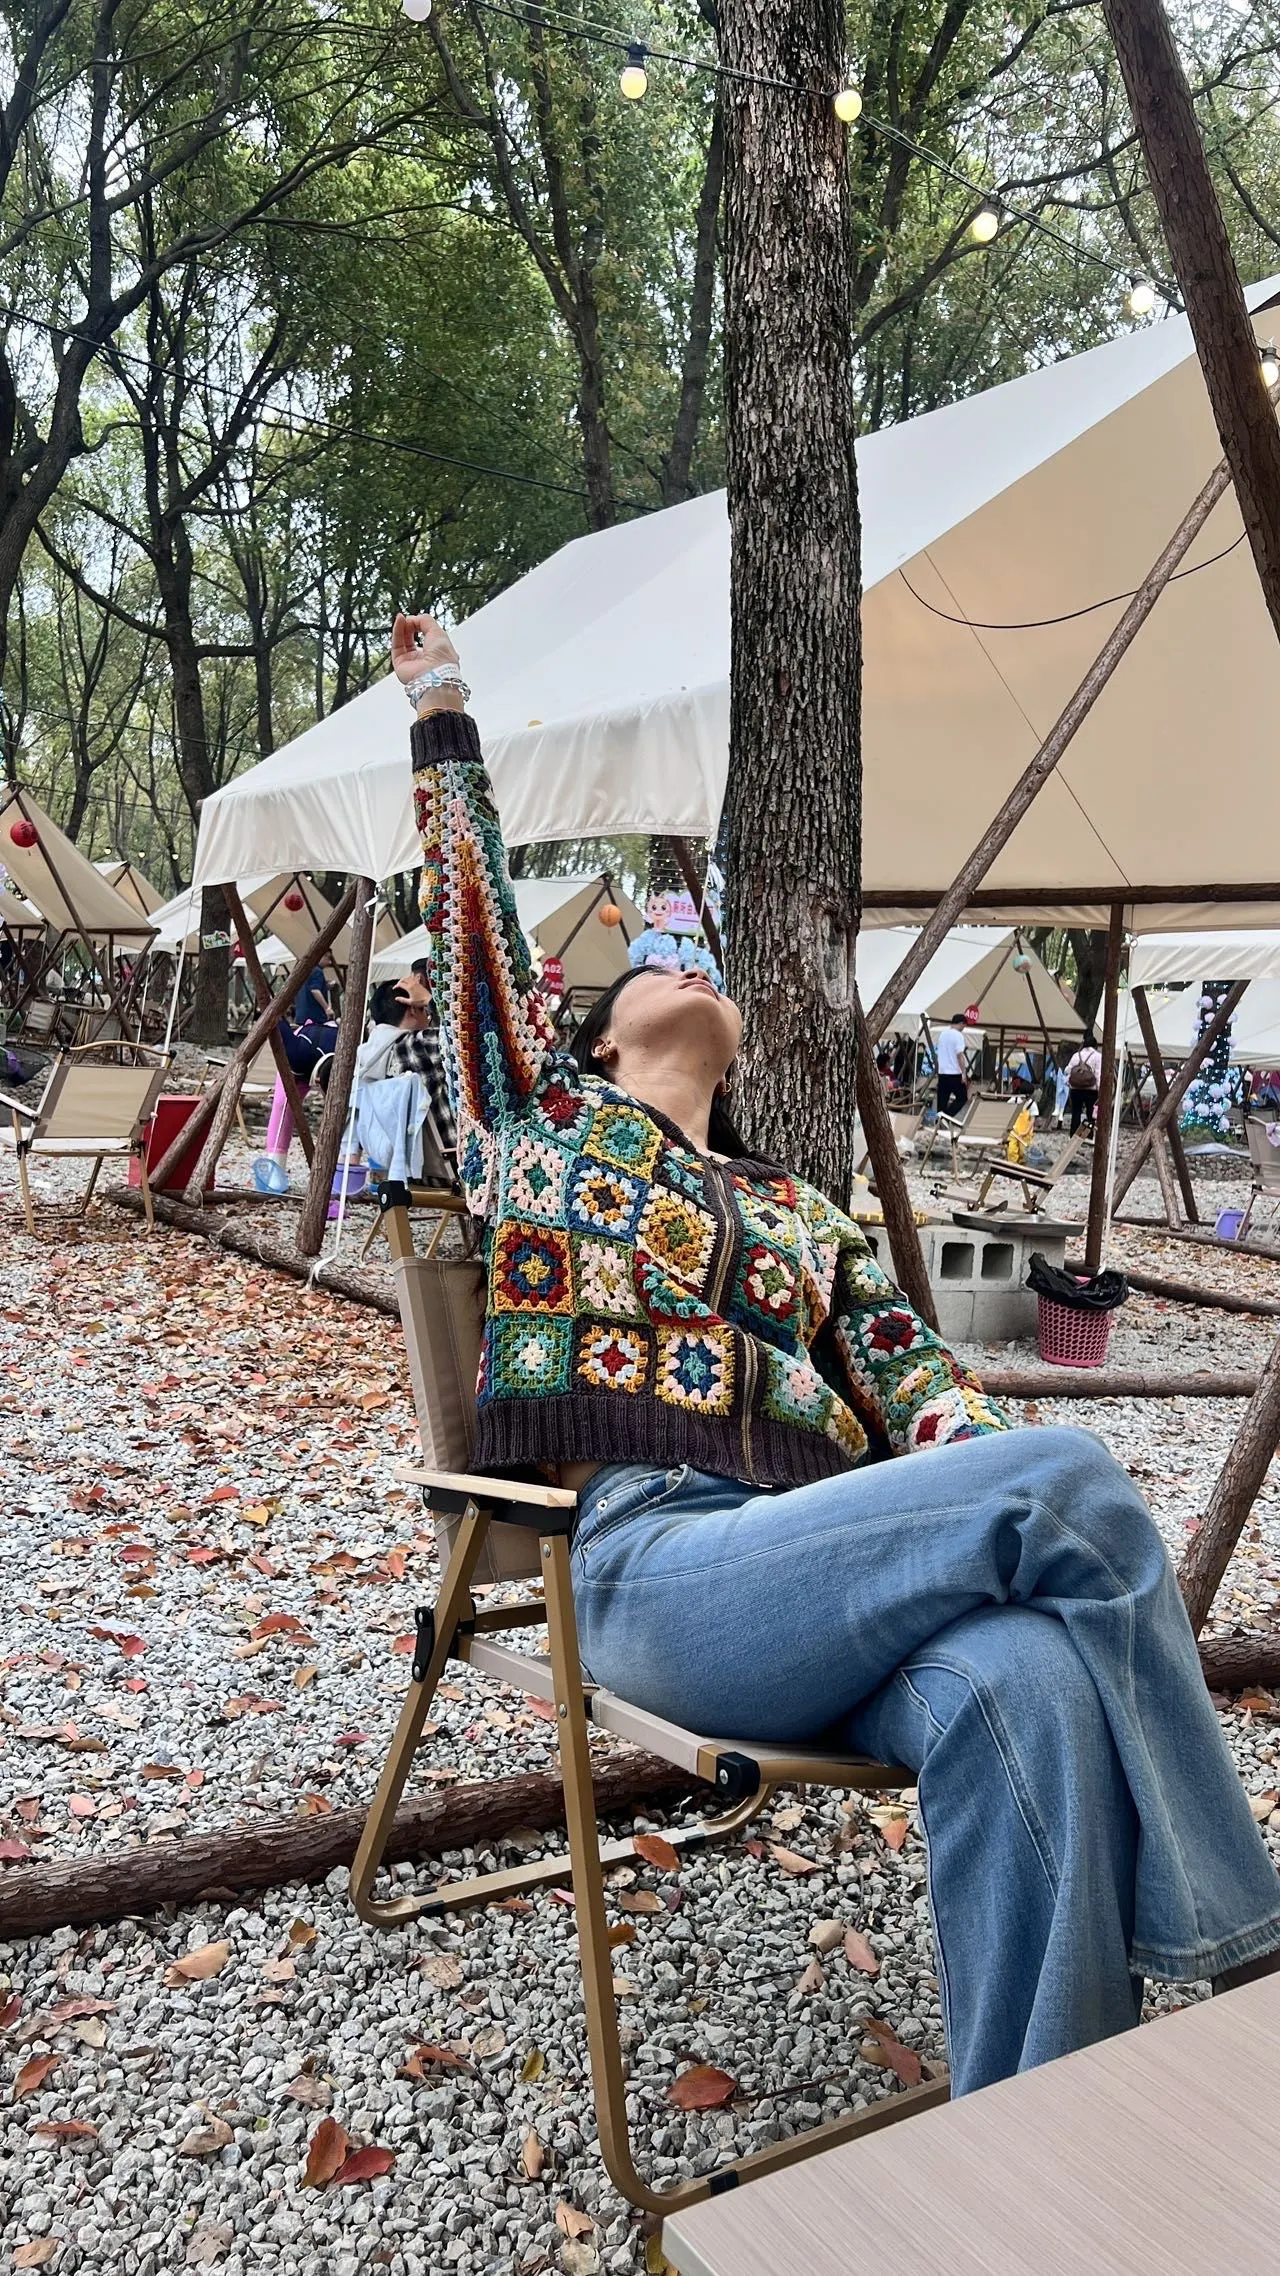
Granny Square Jacket
Project preview
See the finished project
Pattern format
Instructions
Watch and follow
Video tutorial
| Style | Yarn | Color |
|---|---|---|
| Bright White Version | 4-Ply Combed Cotton & Acrylic Fibre Hand Knitting Yarn |  02#Quartz Pink x 1 02#Quartz Pink x 1 04#Fair Orchid x 1 04#Fair Orchid x 1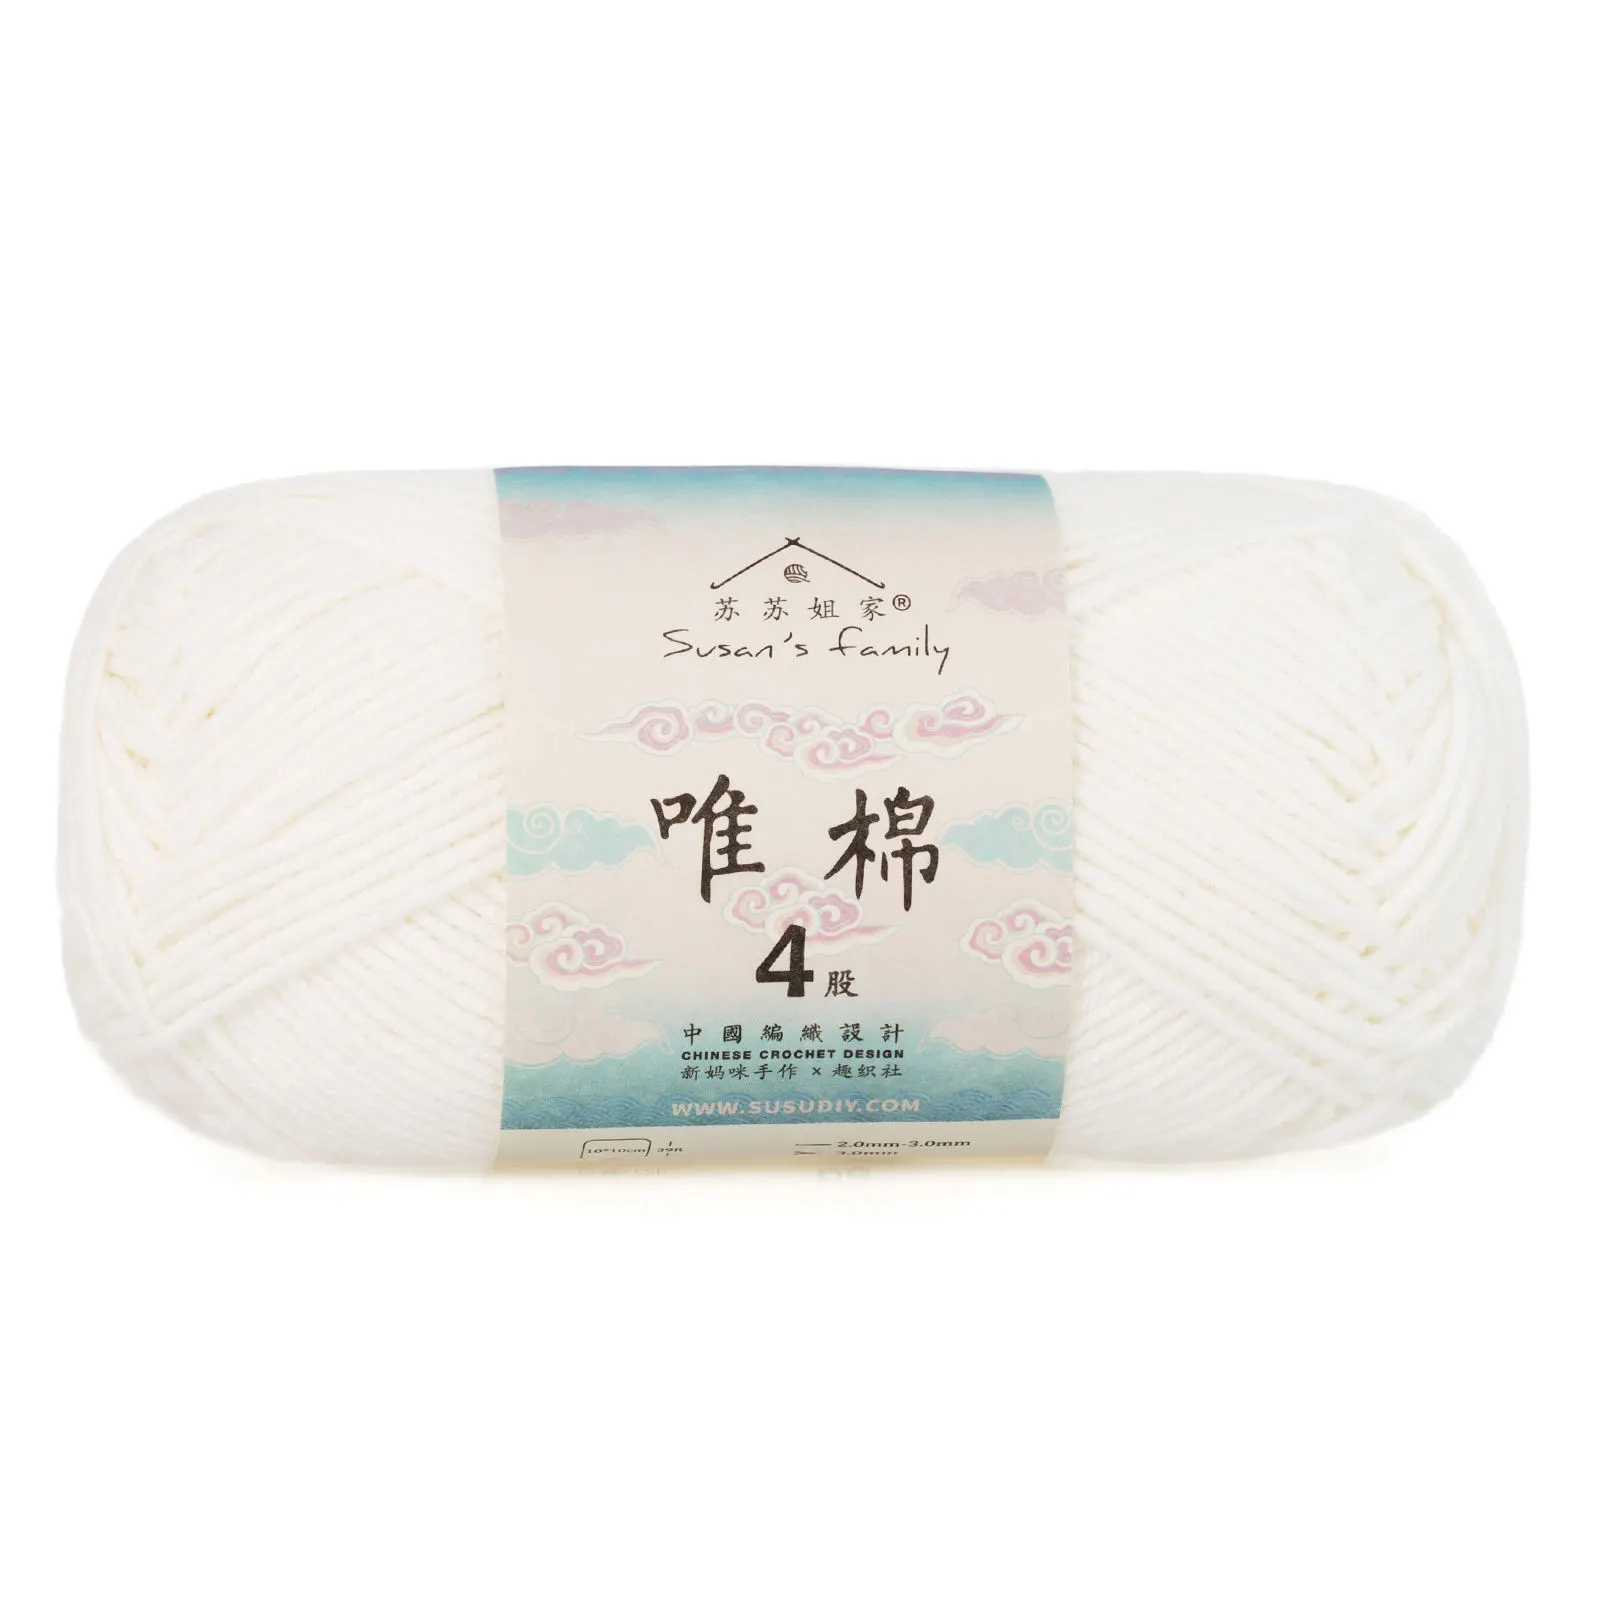 06#Bright White x 4 06#Bright White x 4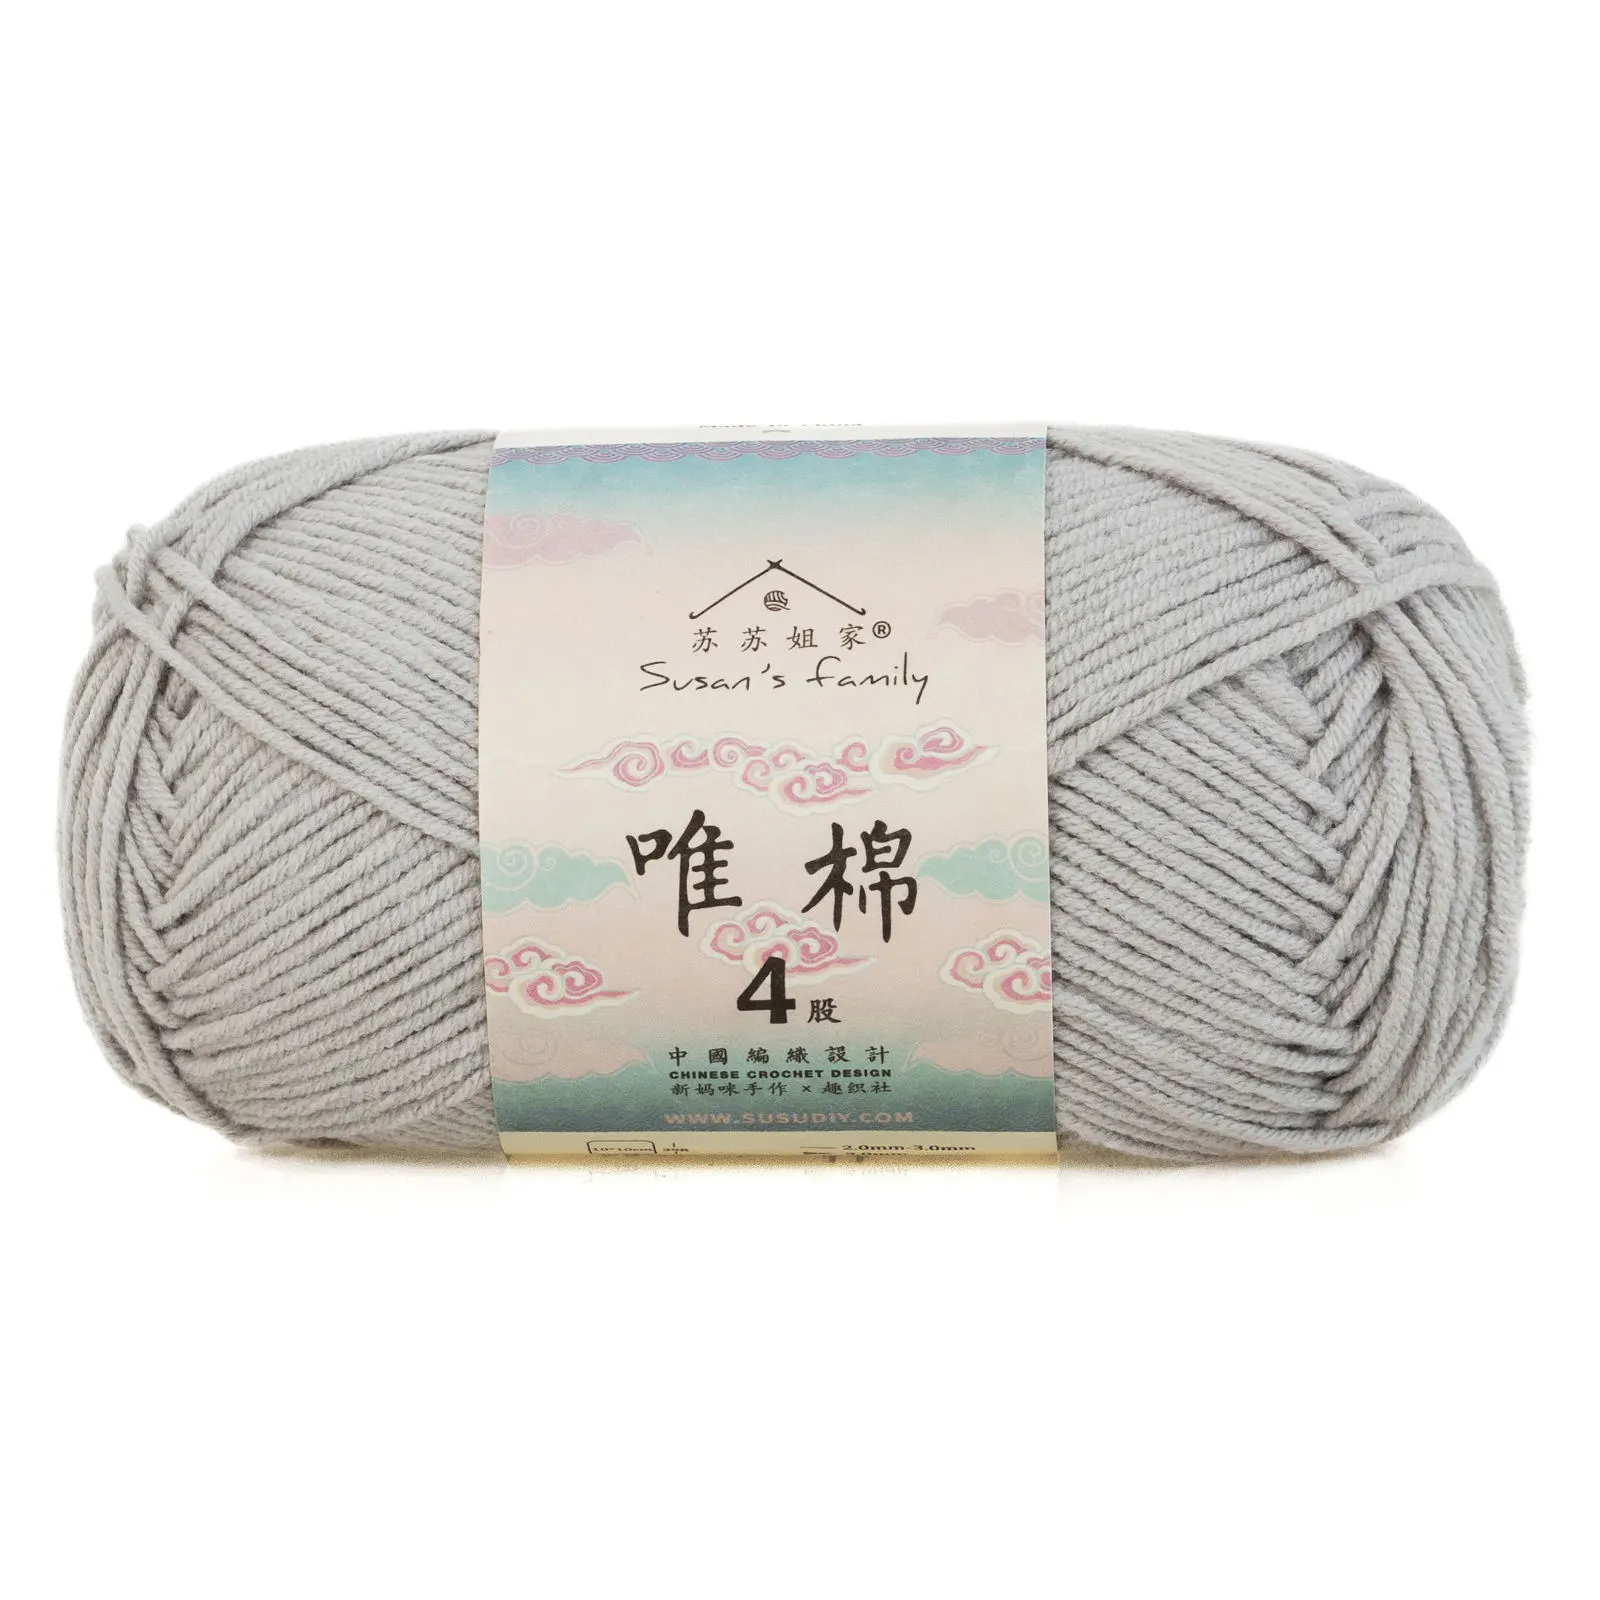 11#Quiet Gray x 1 11#Quiet Gray x 1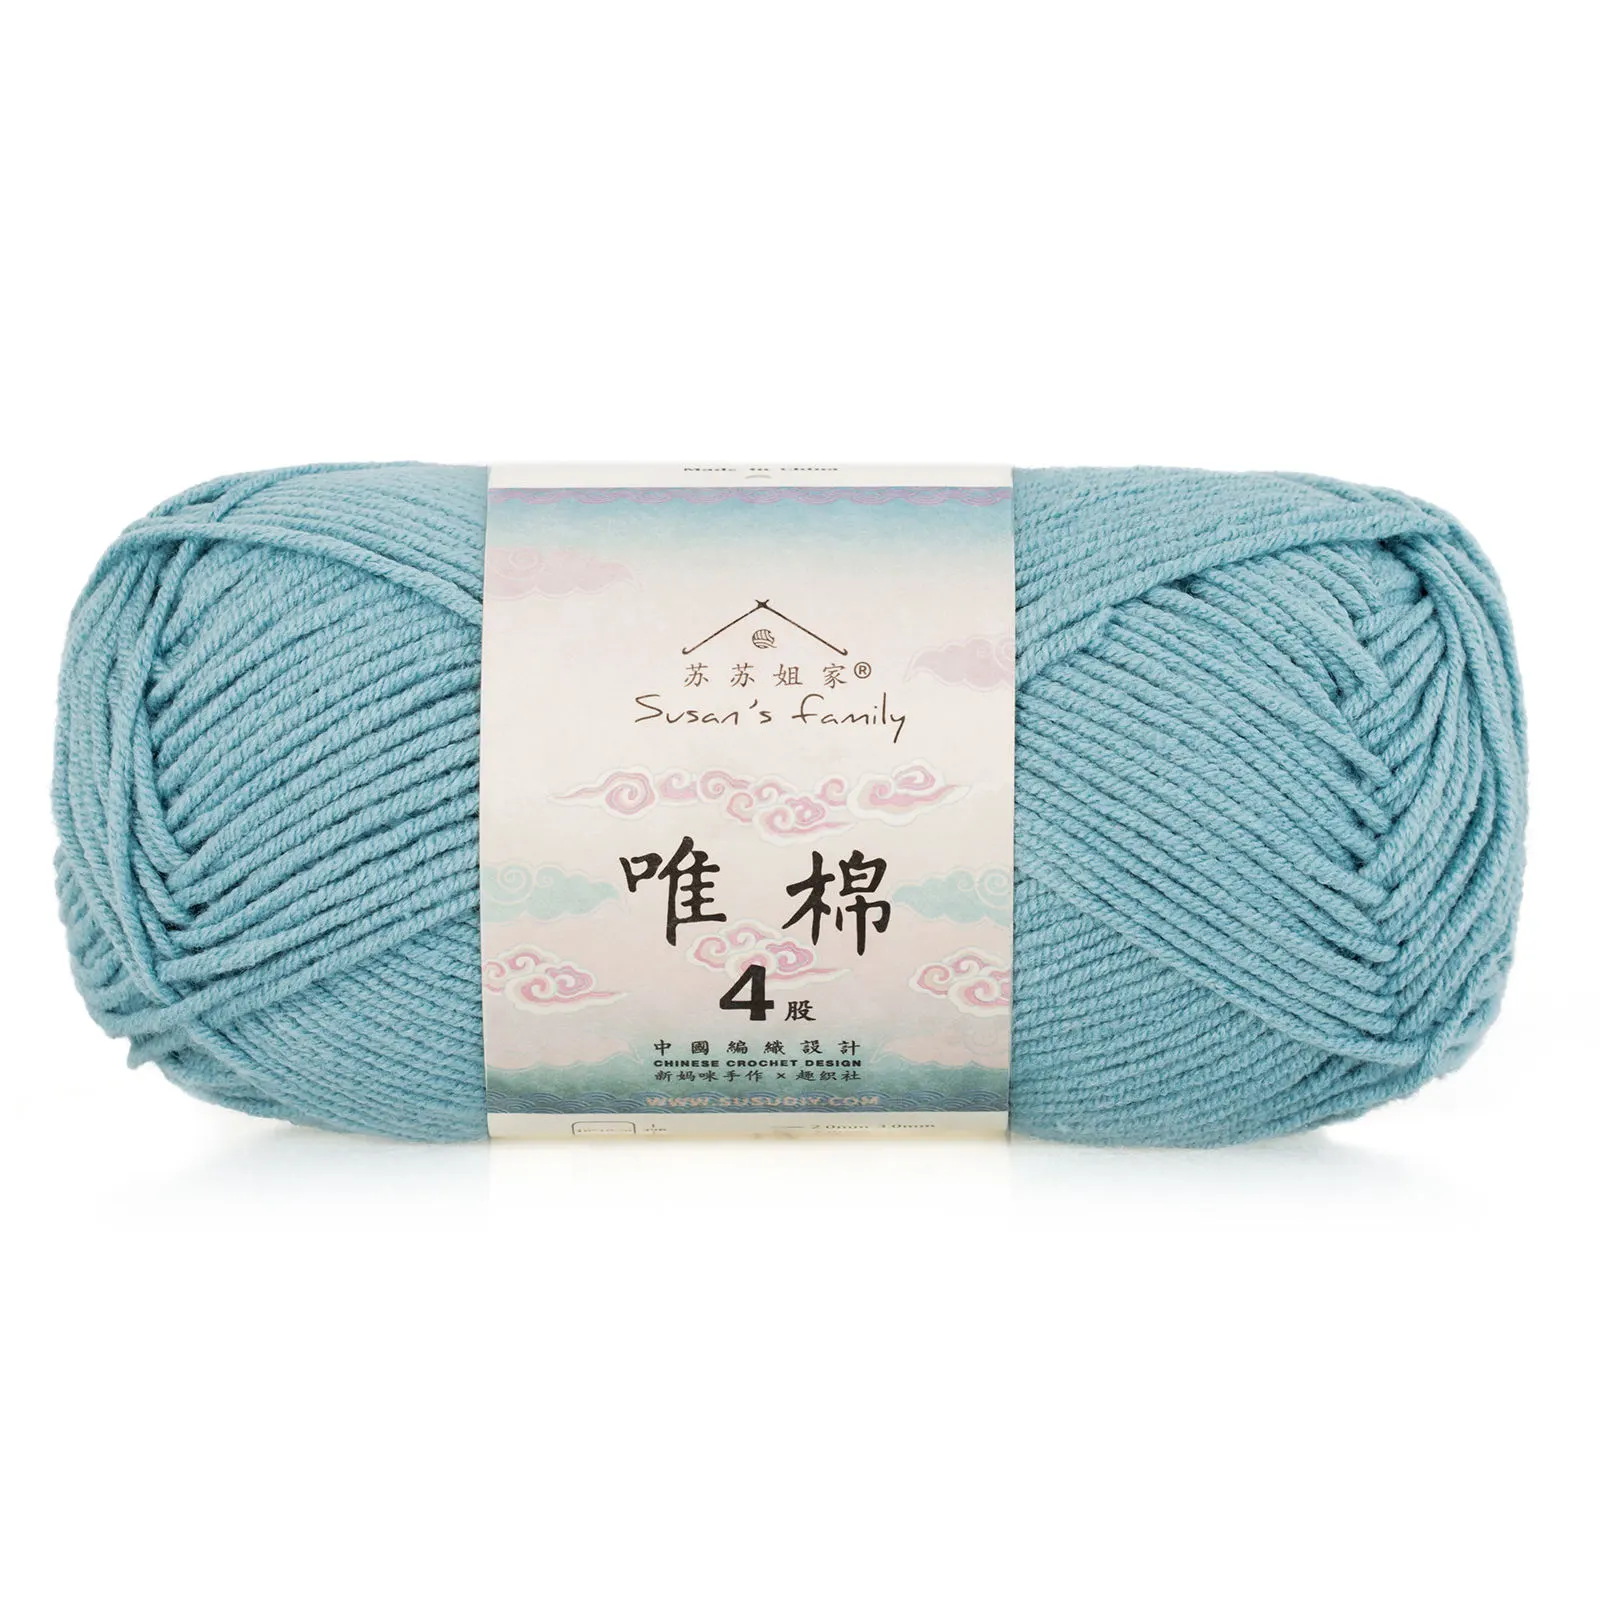 17#Marine Blue x 1 17#Marine Blue x 1 31#Cayenne x 1 31#Cayenne x 1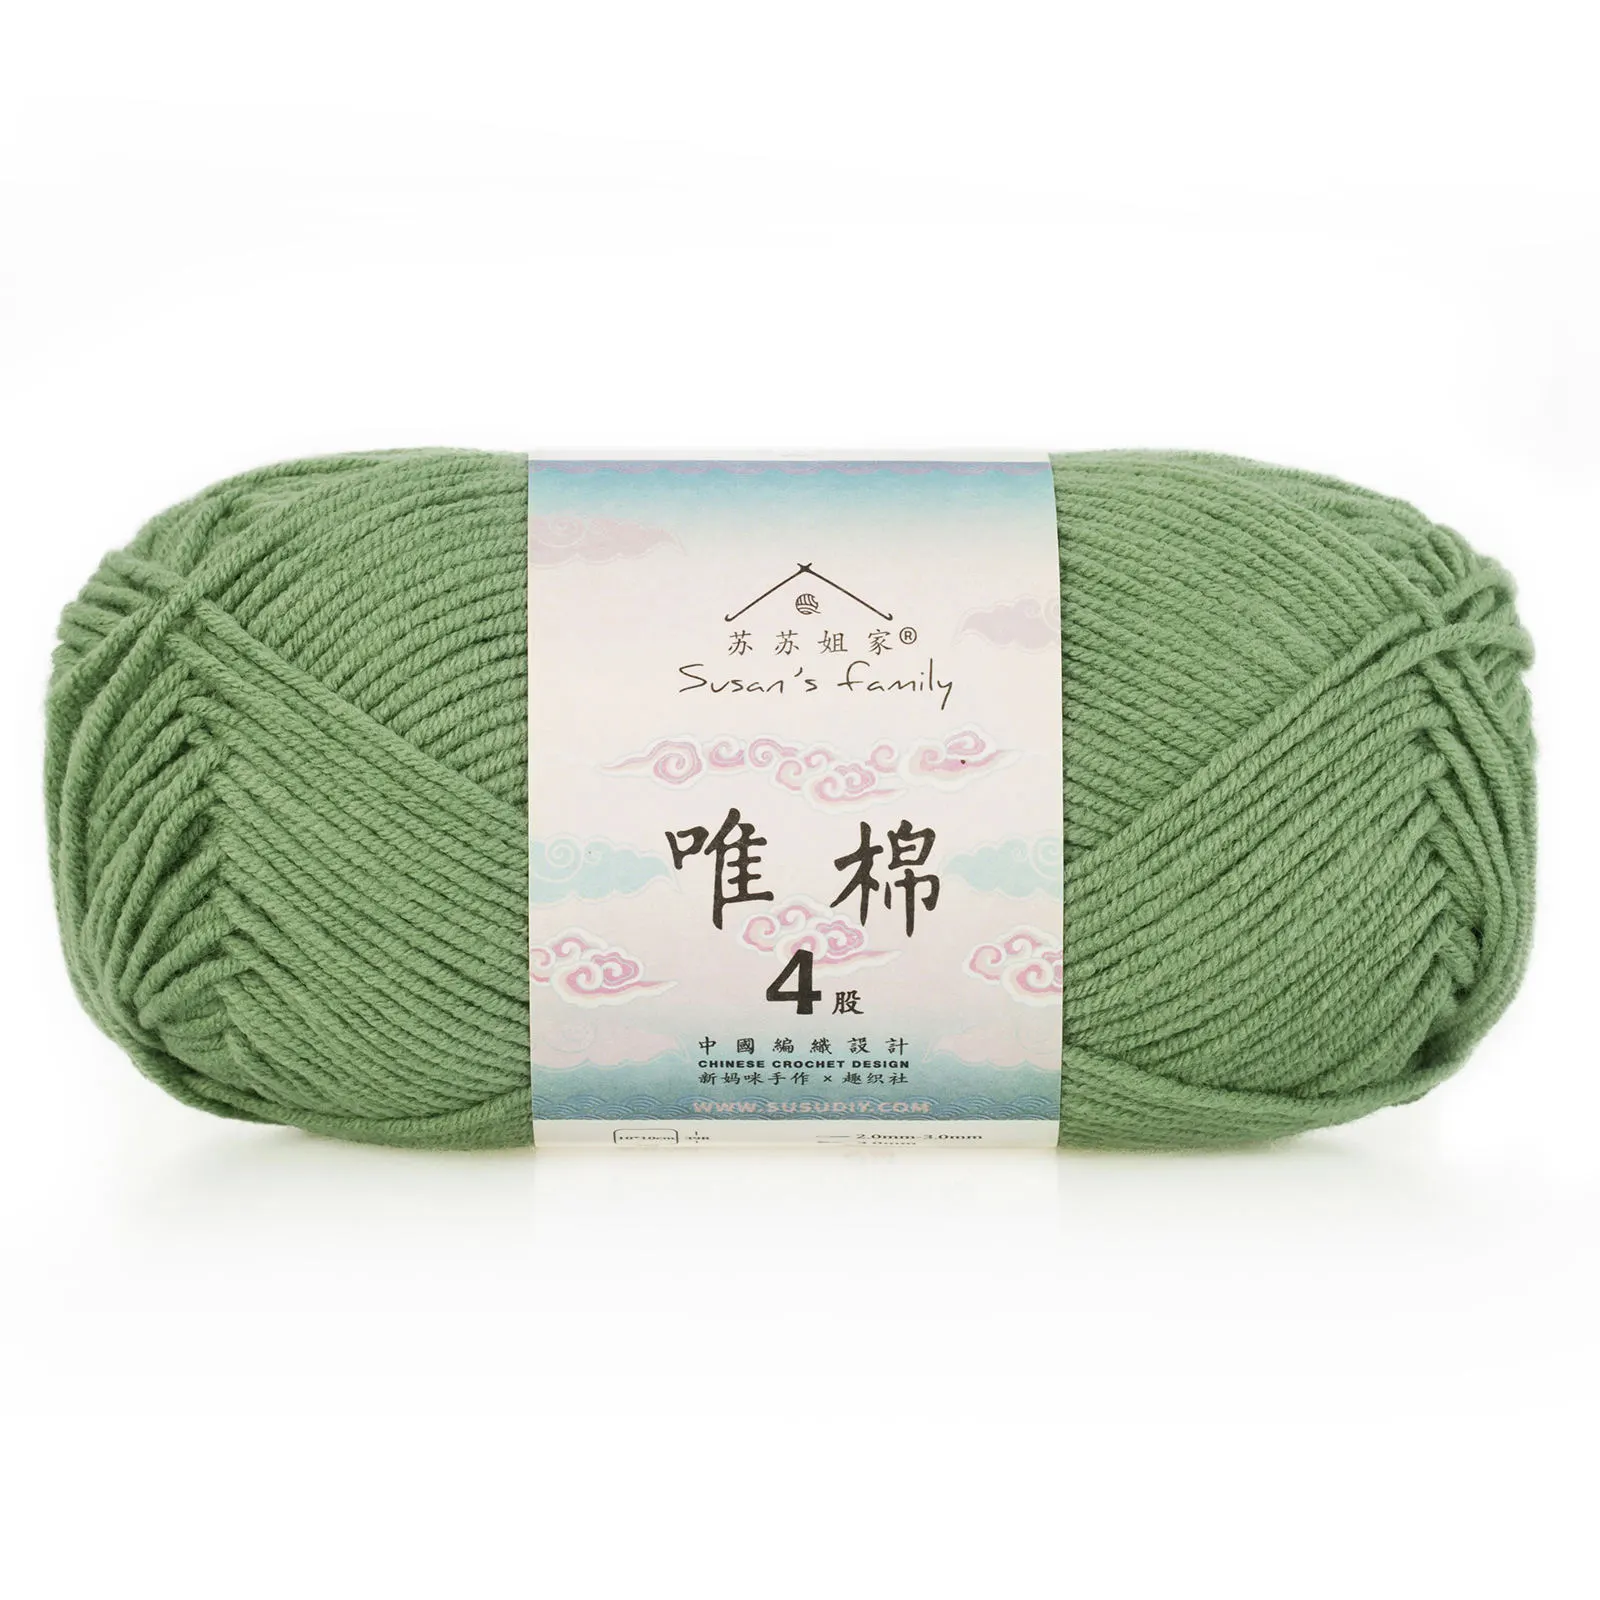 32#Aspen Green x 1 32#Aspen Green x 1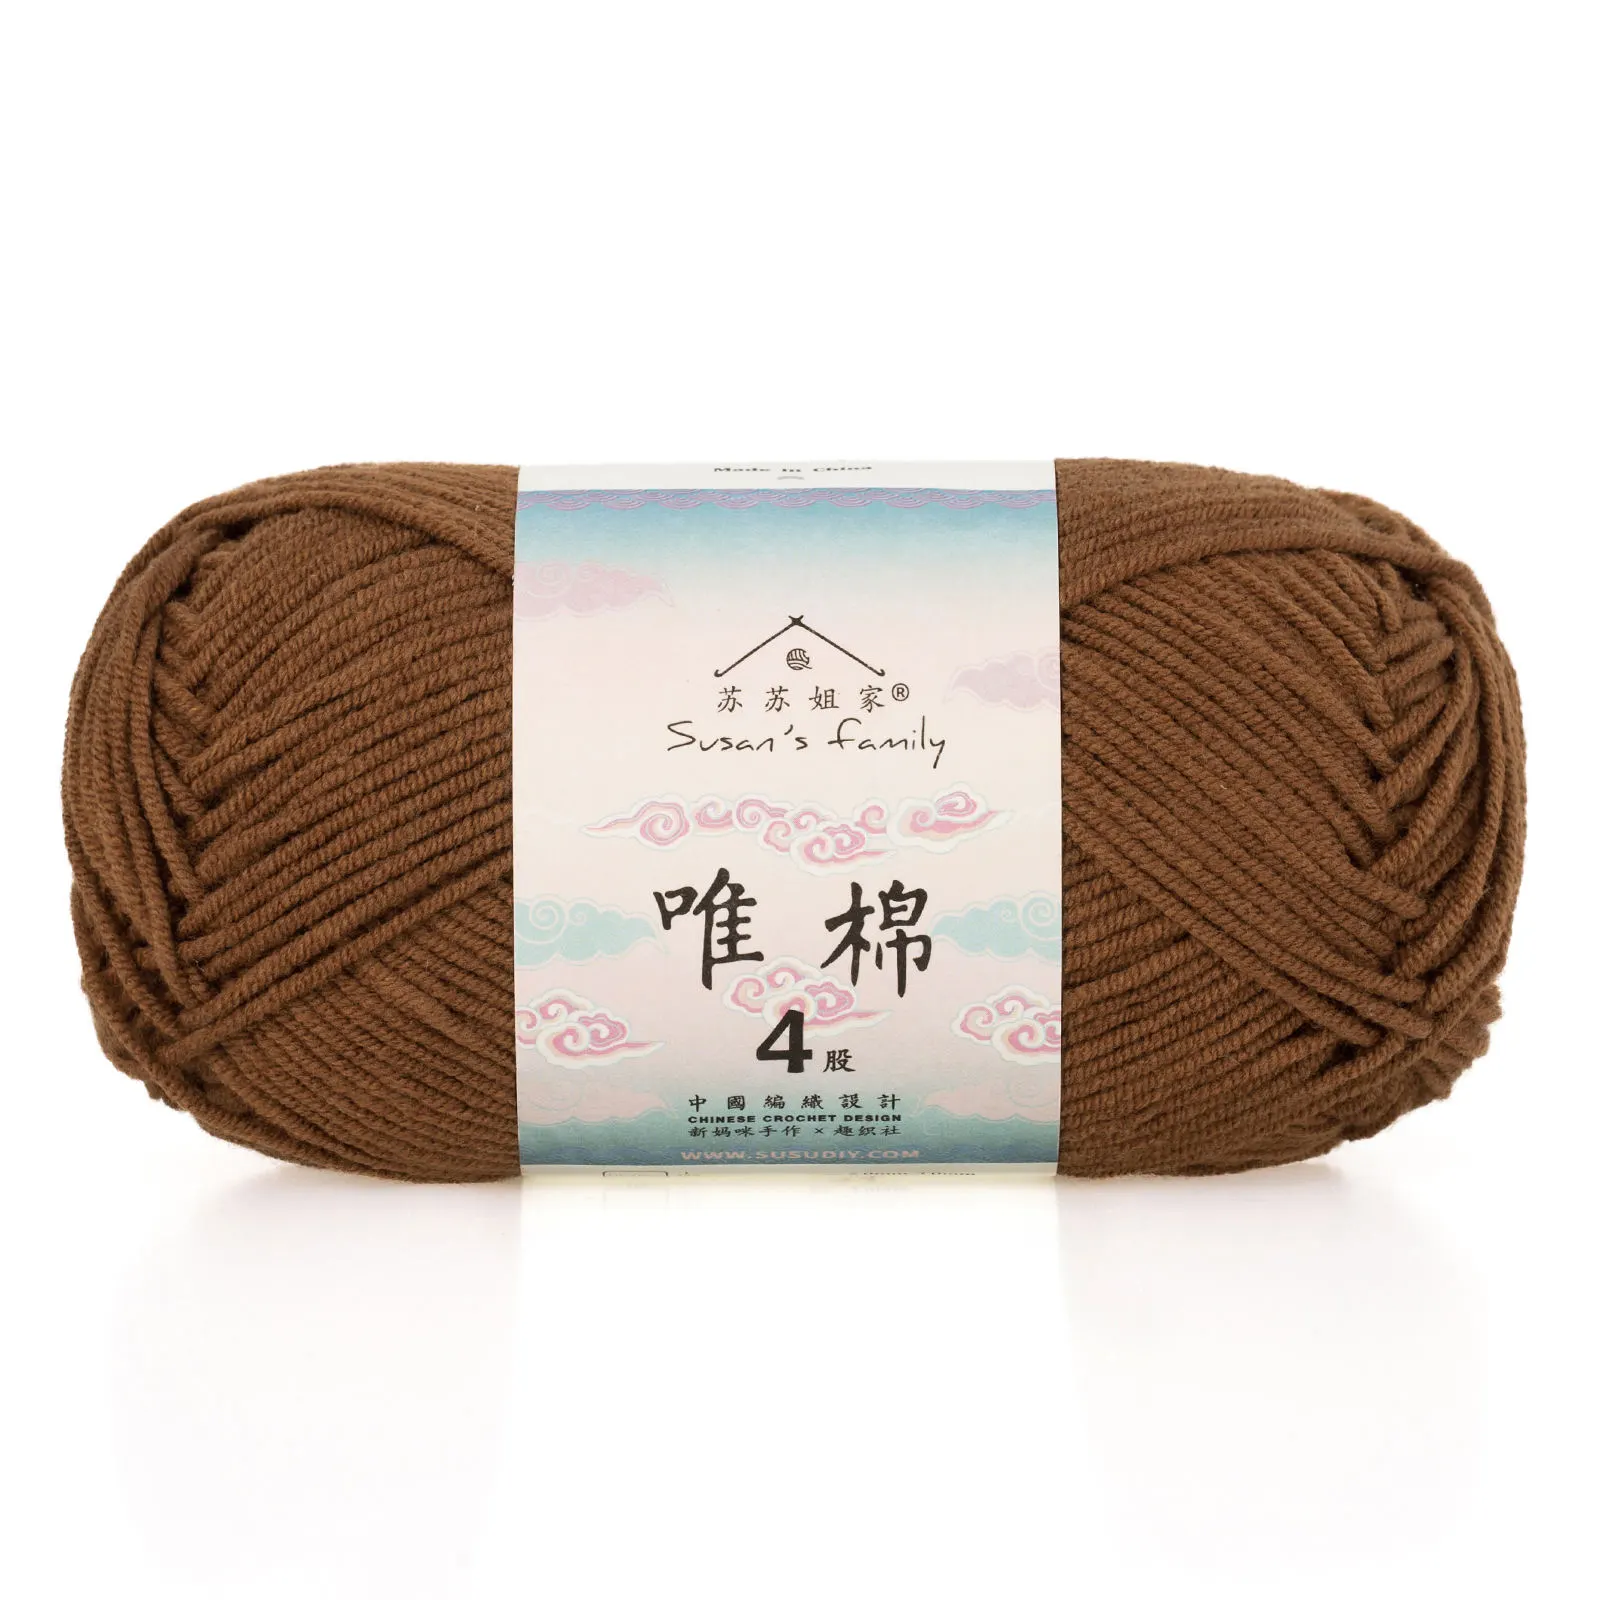 34#Toffee x 1 34#Toffee x 1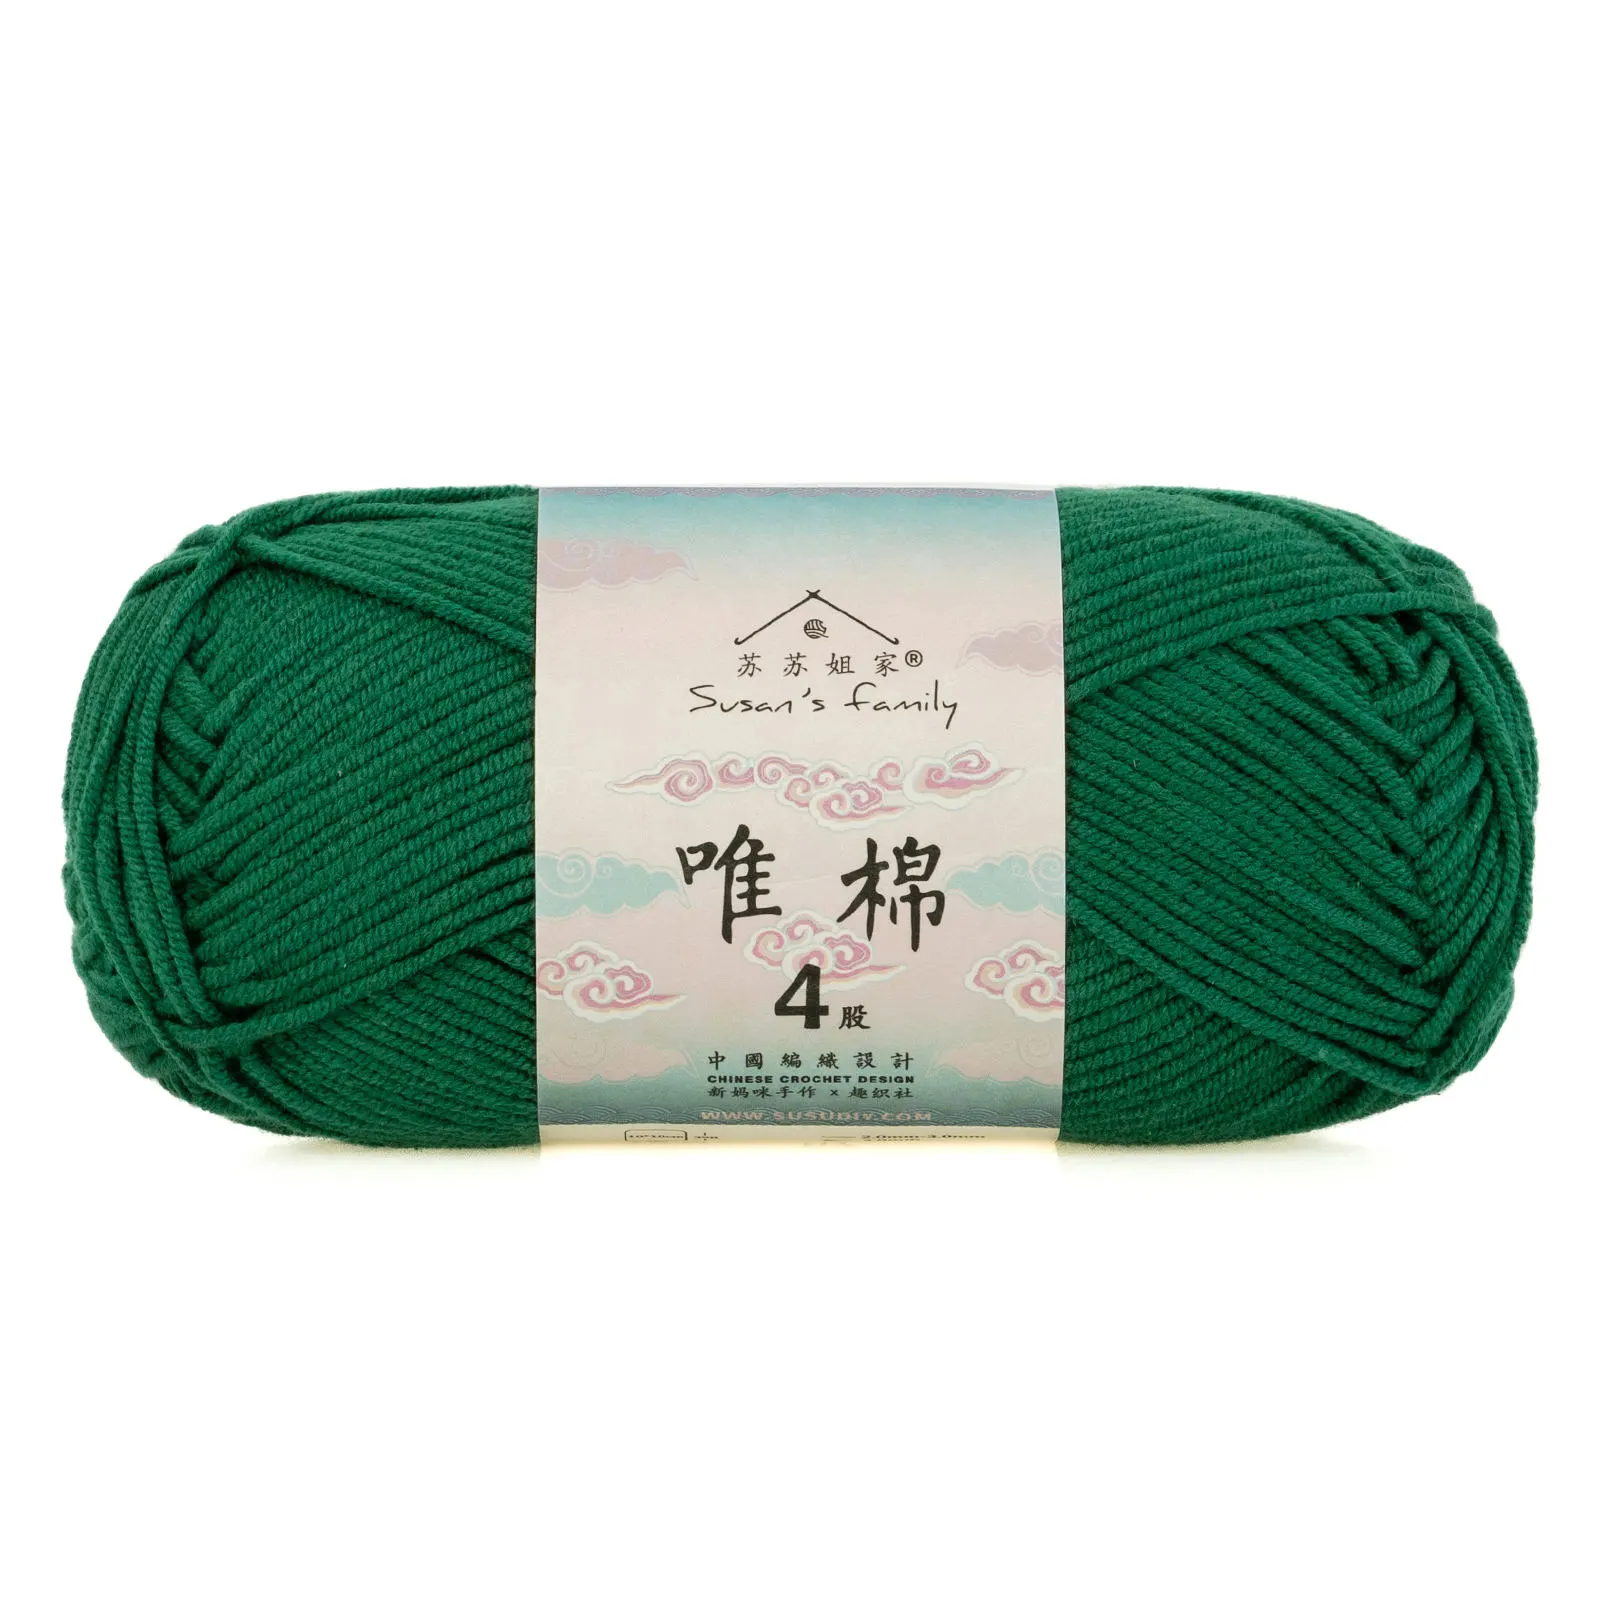 41#Foliage Green x 1 41#Foliage Green x 1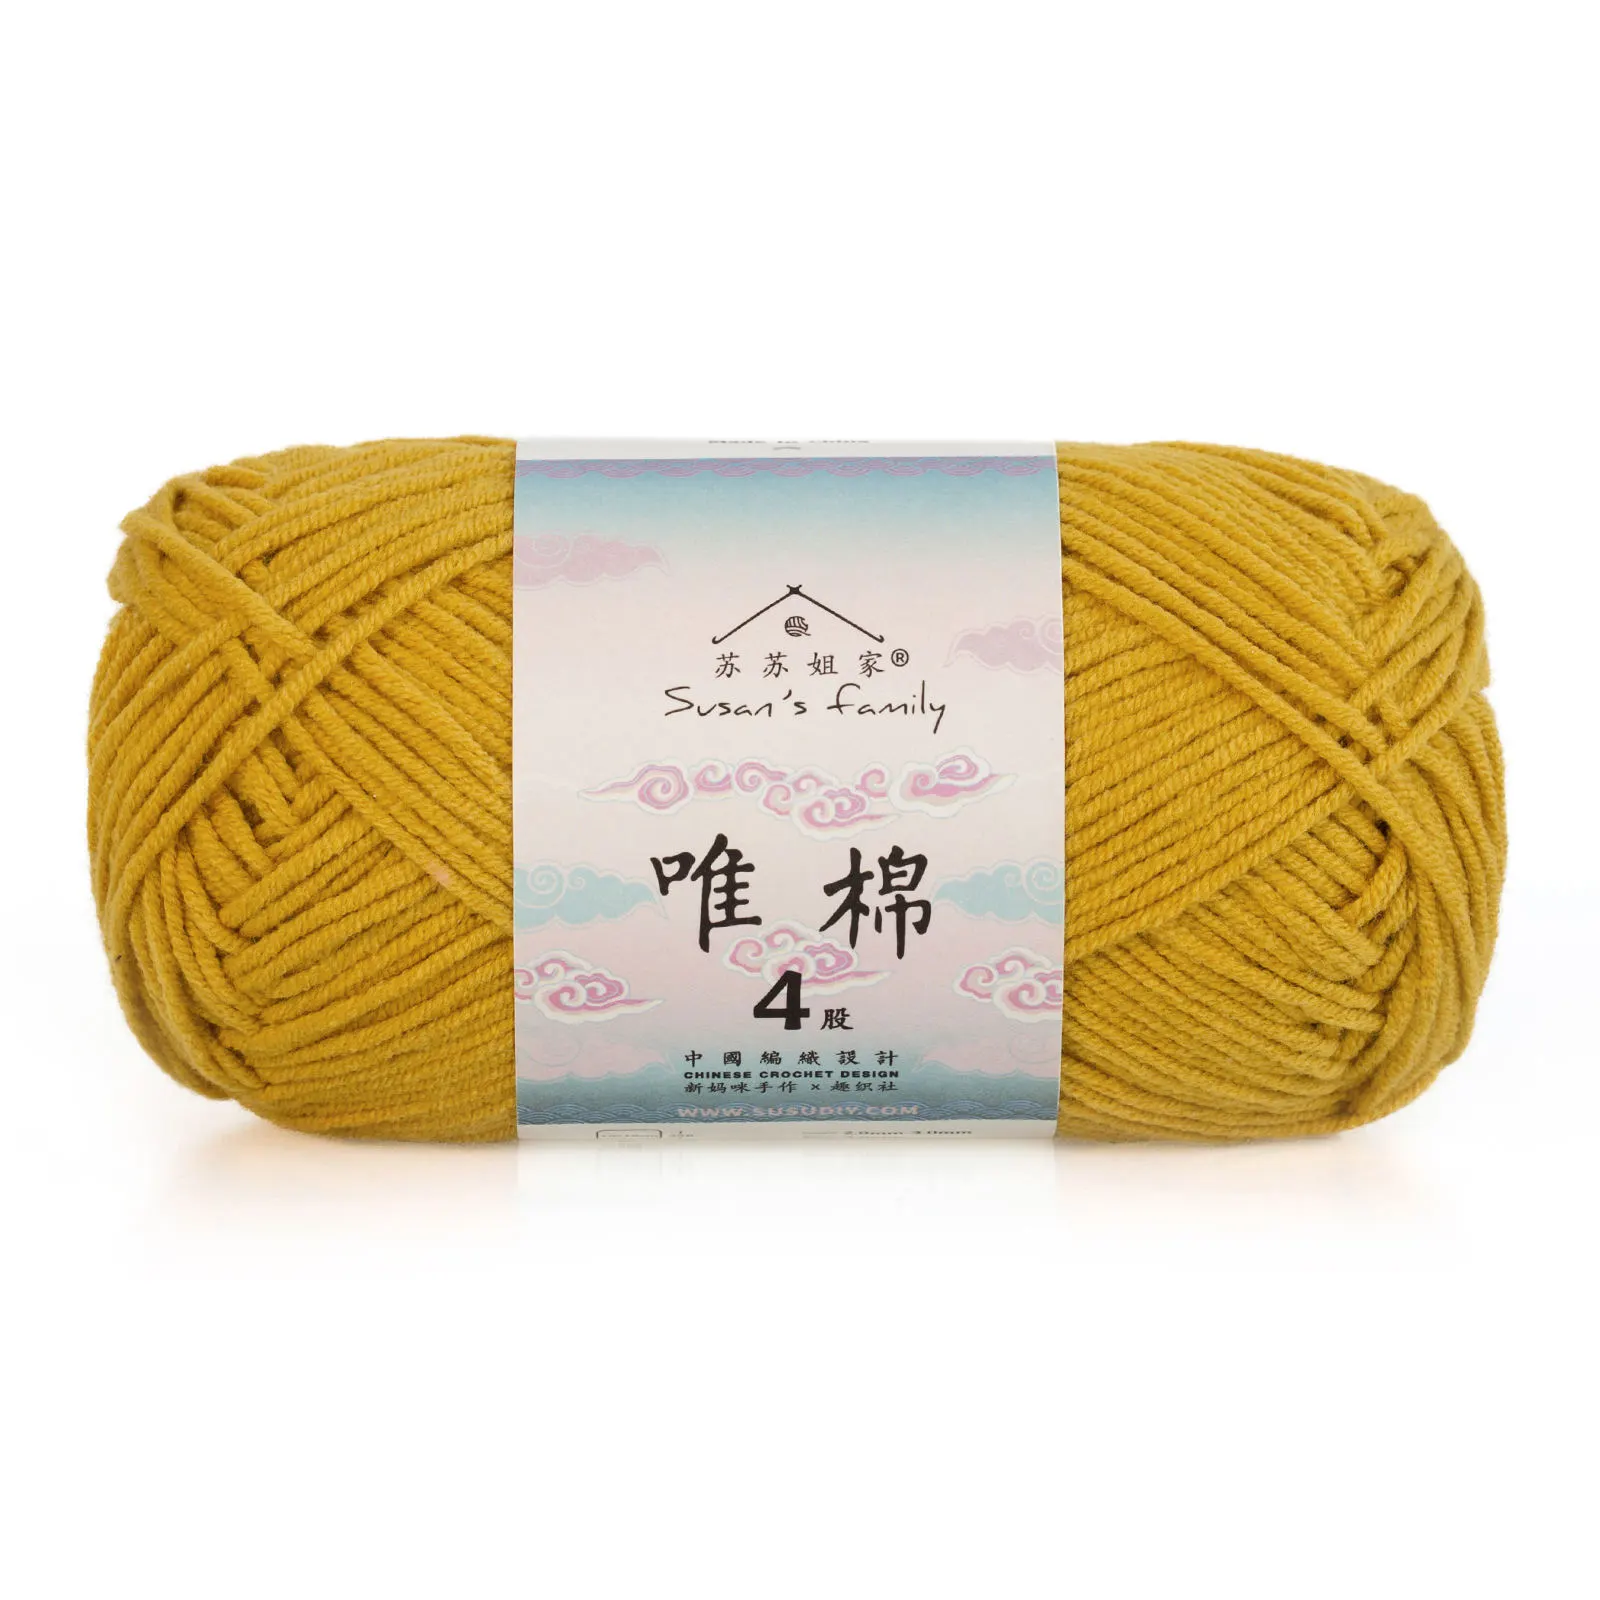 56#Golden Yellow x 1 56#Golden Yellow x 1 57#Victoria Blue x 1 57#Victoria Blue x 1 |
| Blackened Pearl Version | 4-Ply Combed Cotton & Acrylic Fibre Hand Knitting Yarn |  01#Bamboo Yellow x 1 01#Bamboo Yellow x 1 14#Starlight Blue x 1 14#Starlight Blue x 1 22#Viridis x 1 22#Viridis x 1 28#Turquoise x 1 28#Turquoise x 1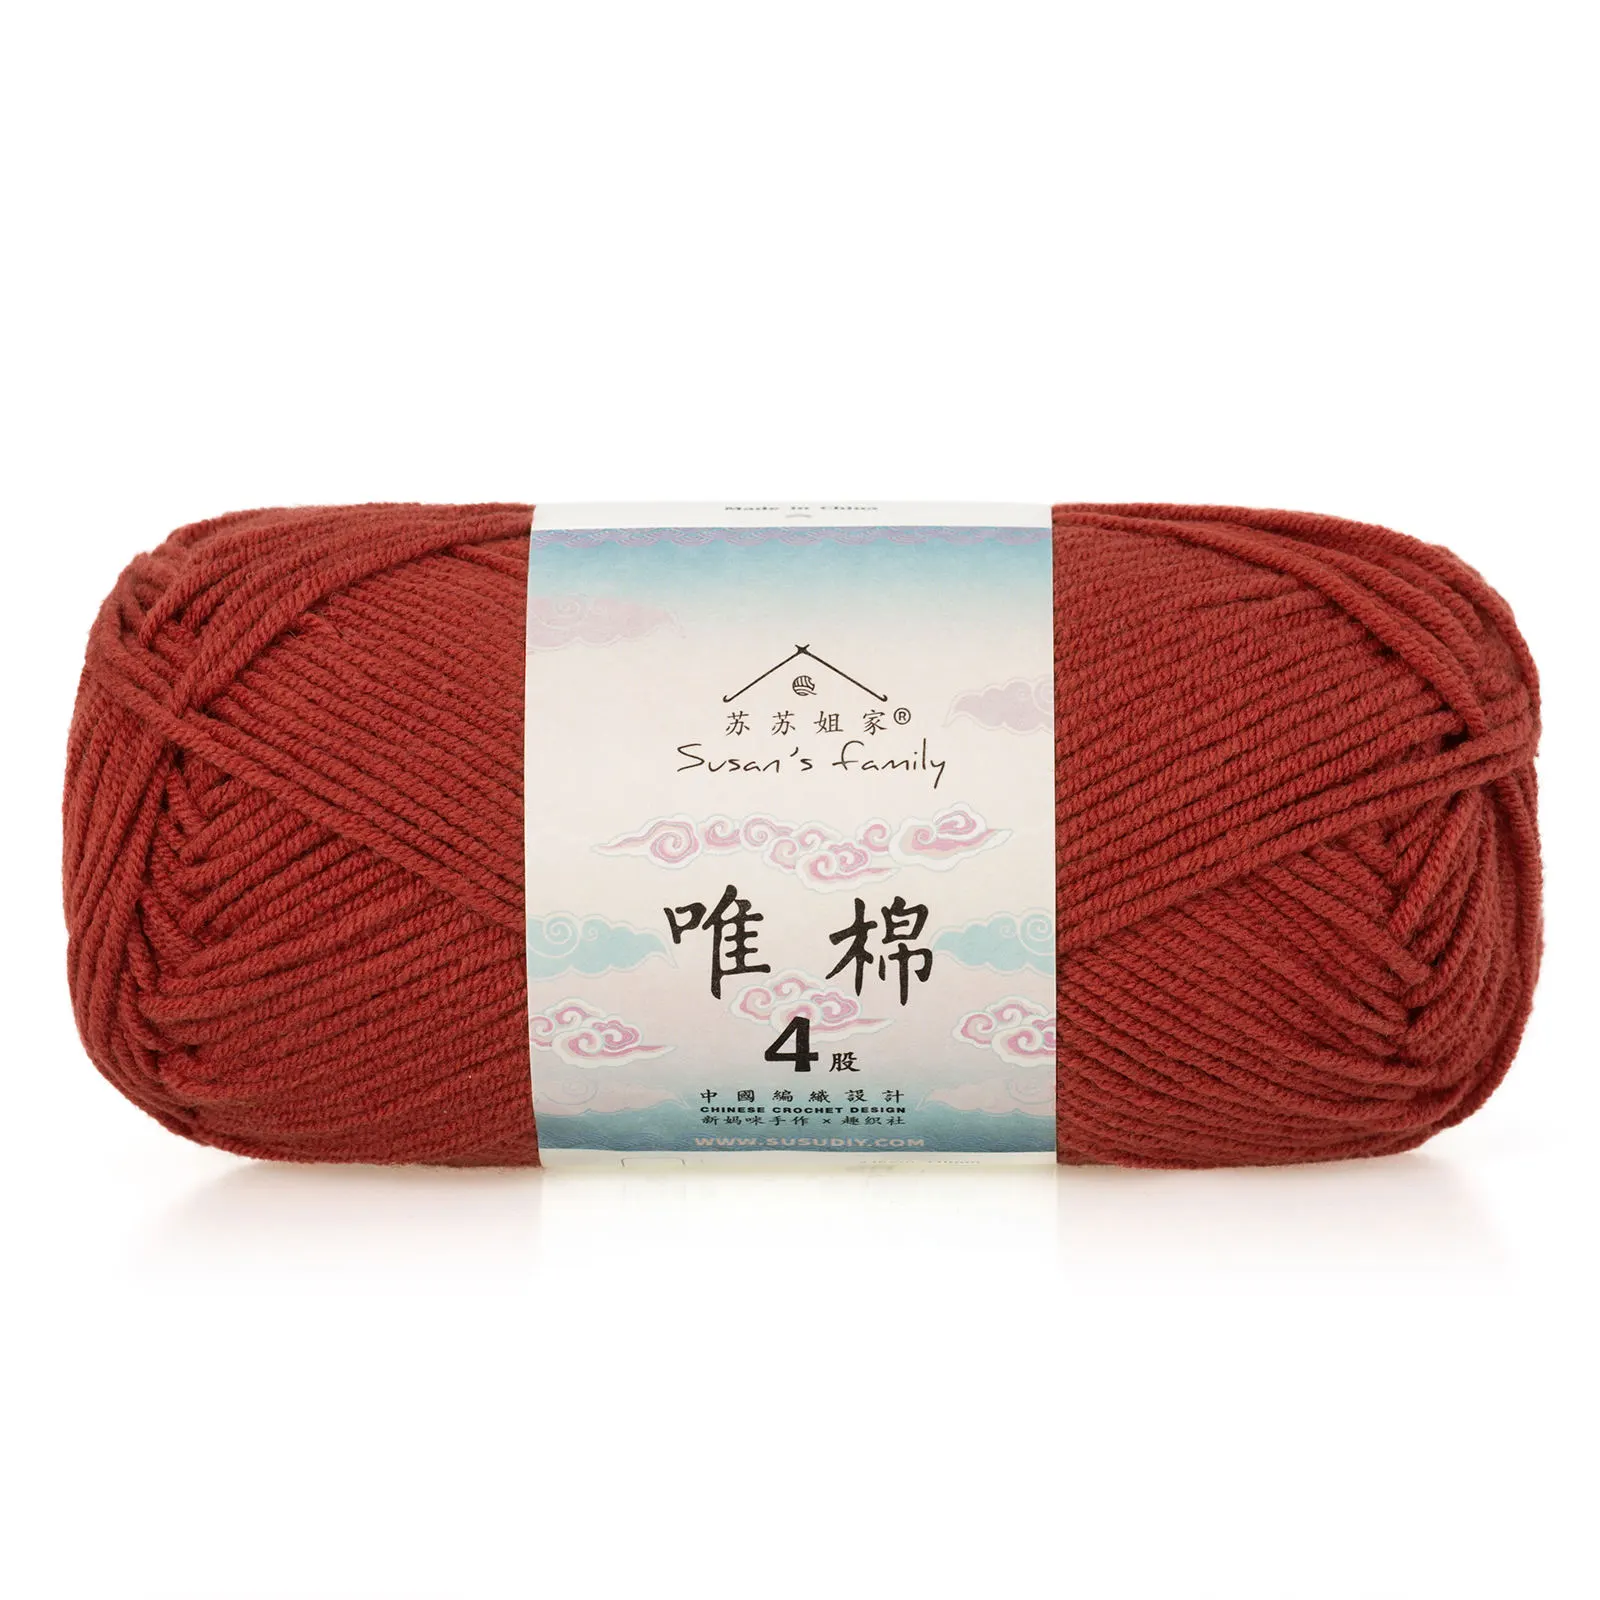 29#Aurora Red x 1 29#Aurora Red x 1 37#Piquant Green x 1 37#Piquant Green x 1 40#Golden Rod x 1 40#Golden Rod x 1 46#Lyons Blue x 1 46#Lyons Blue x 1 49#Pearl x 1 49#Pearl x 1 52#Blackened Pearl x 4 52#Blackened Pearl x 4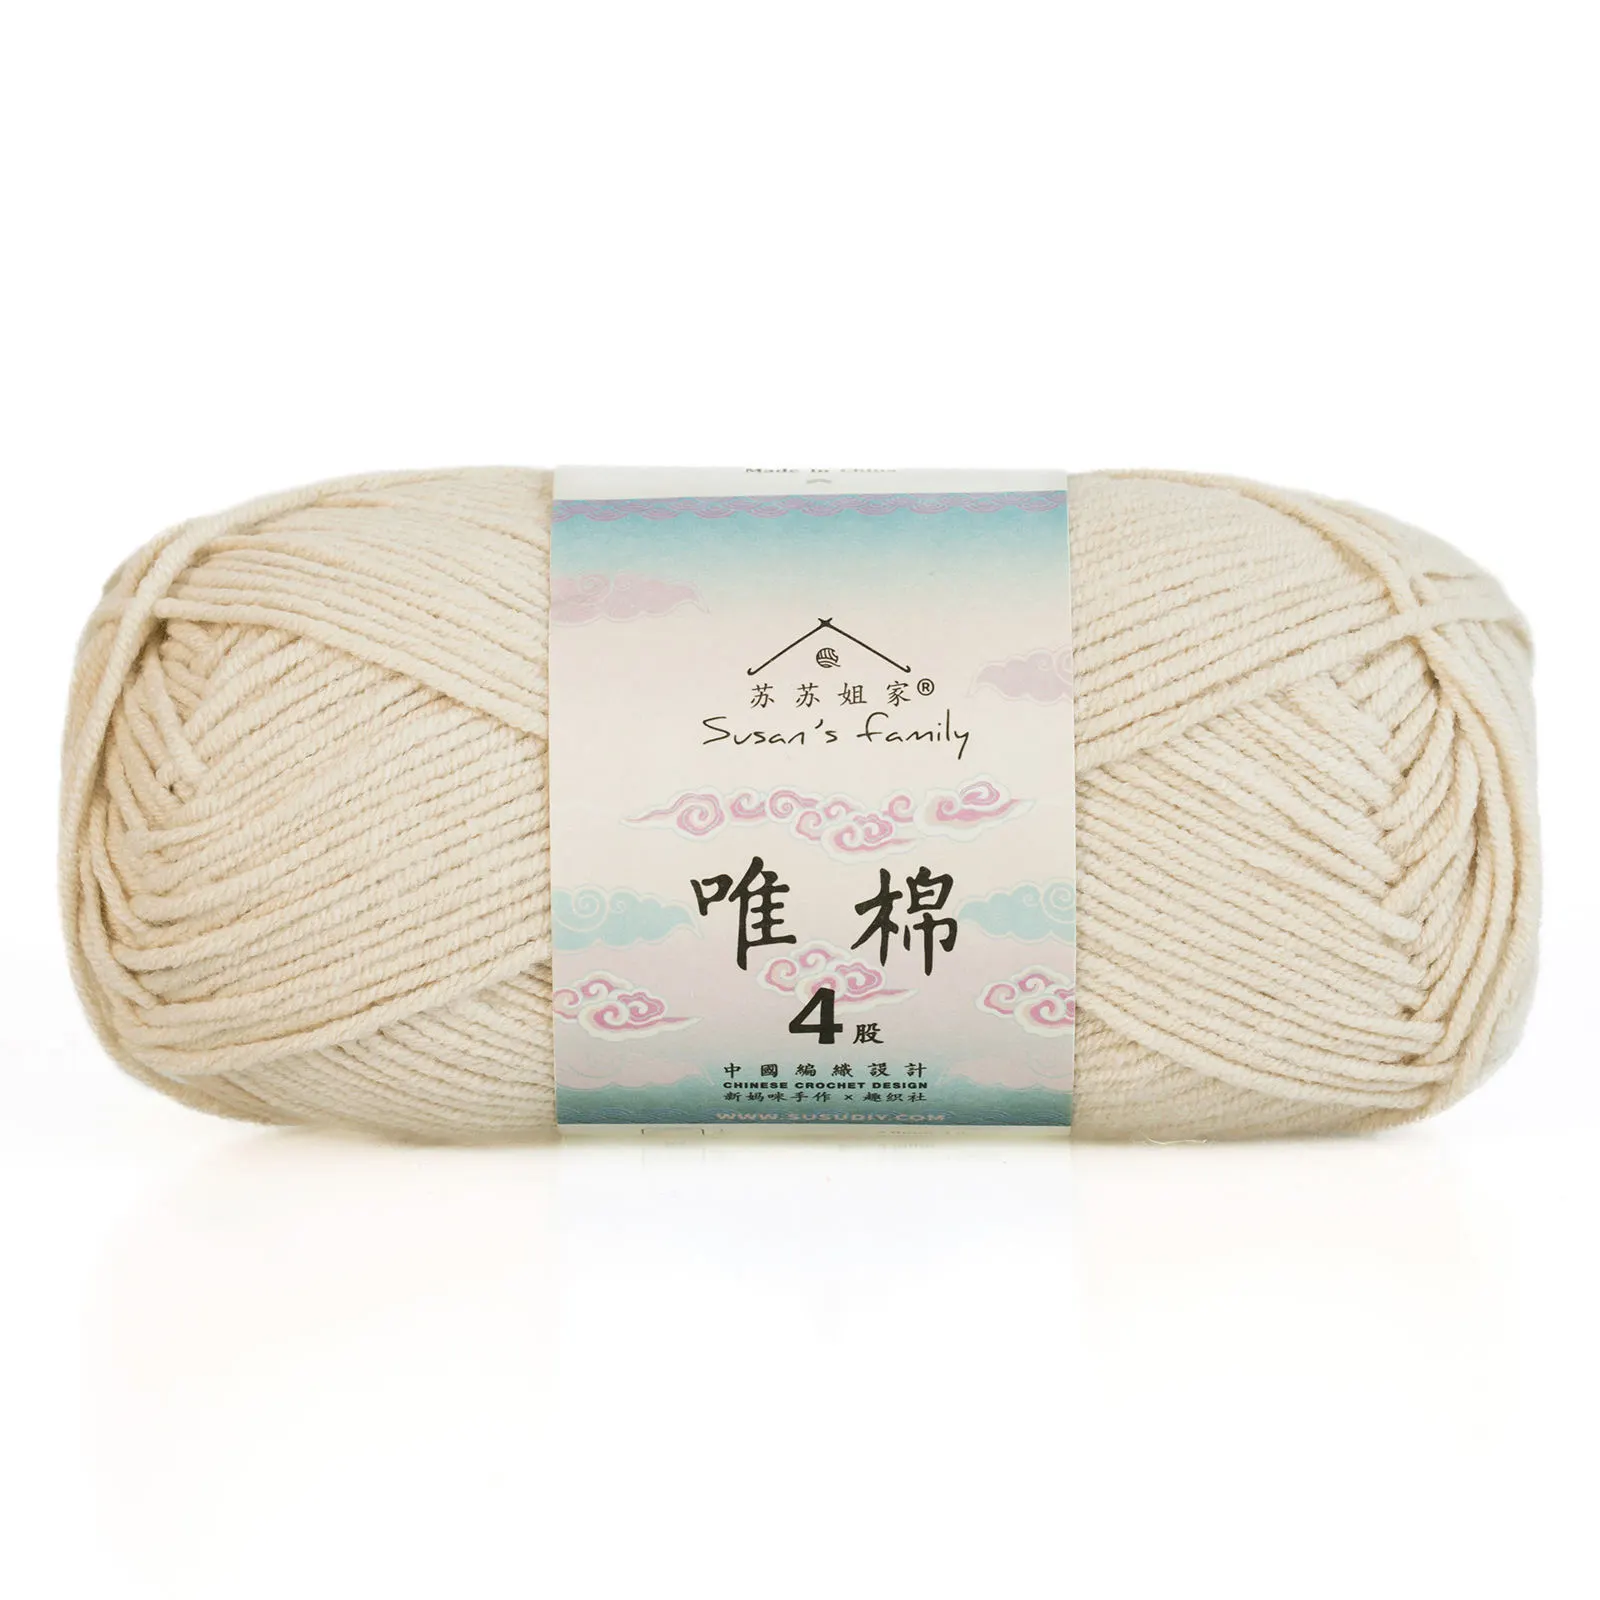 53#Cloud Cream x 1 53#Cloud Cream x 1 |
| Blue Ashes Version | 4-Ply Combed Cotton & Acrylic Fibre Hand Knitting Yarn | 06#Bright White x 1 09#Aspen Gold x 111#Quiet Gray x 114#Starlight Blue x 1 09#Aspen Gold x 111#Quiet Gray x 114#Starlight Blue x 1 16#Lemonade x 1 16#Lemonade x 1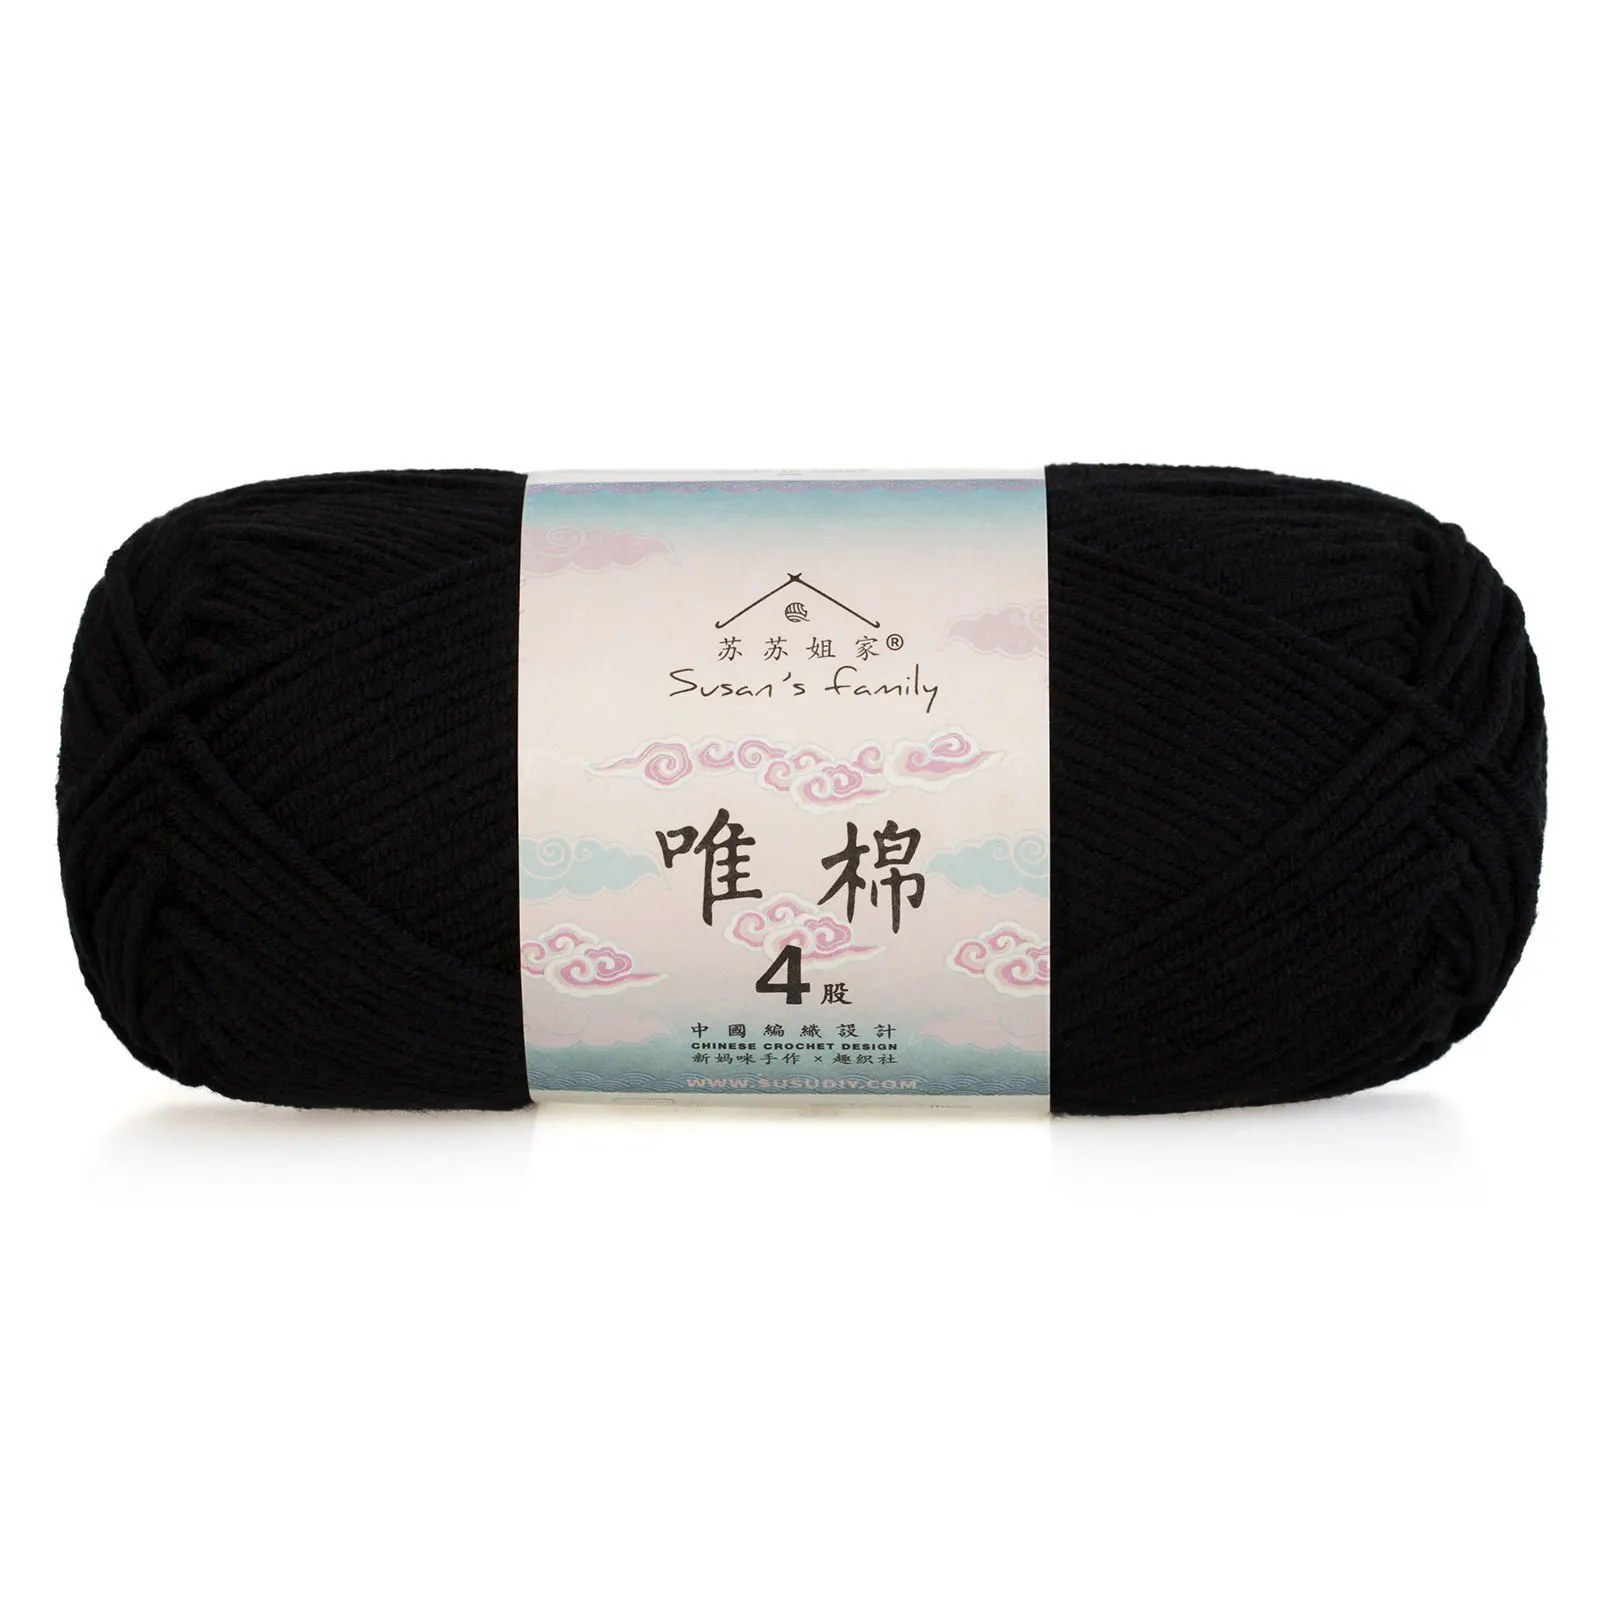 21#Black Beauty x 1 21#Black Beauty x 1 36#Steeple Gray x 140#Golden Rod x 1 36#Steeple Gray x 140#Golden Rod x 1 42#Blue Moon x 1 42#Blue Moon x 1 44#Blue Ashes x 452#Blackened Pearl x 1 44#Blue Ashes x 452#Blackened Pearl x 1 |
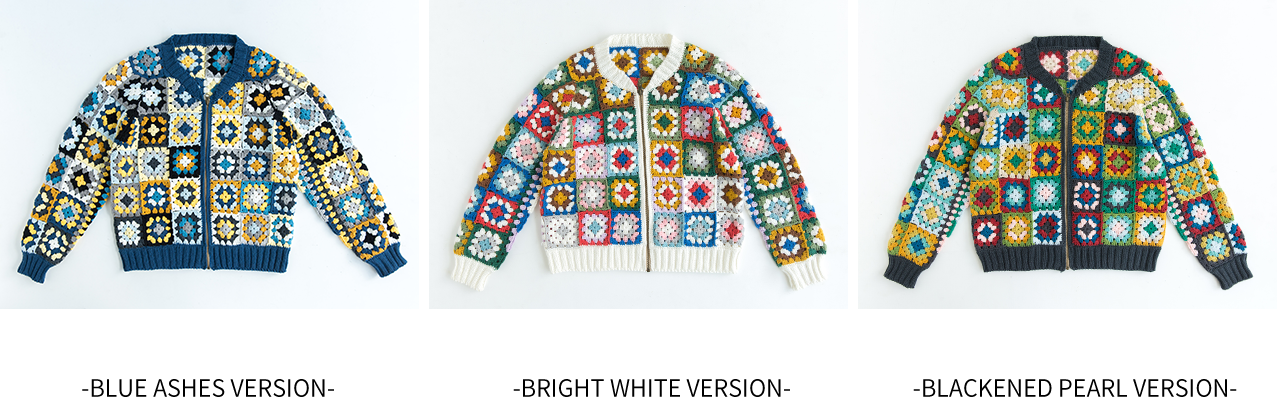
Bright White Version
Blackened Pearl Version
Blue Ashes Version
Note: Hand-measured, with a margin of error of 1-2 cm. Due to differences in individual tension, the sample size is for reference only.
Yarn : 4-Ply Combed Cotton & Acrylic Fibre Hand Knitting Yarn.
Tools : 2.5 mm crochet hook for small size , 3.00 mm crochet hook for larger size.
| Size | Chest | Length | Sleeves Length | Neckline Width |
| Small | 47 cm | 52 cm | 59 cm | 15 cm |
| Larger | 51 cm | 58 cm | 66 cm | 18 cm |

You can choose any color scheme for the motifs, but remember to save about 2 skeins of main color yarn for the hem, front band, cuffs, and collar.







Note:
1. This pattern is making in Chinese crochet pattern terms, and the stitch name is written using American terminology. All measurements in charts are in cm.

PART 1 Body A 00' 56'' (Part 1)
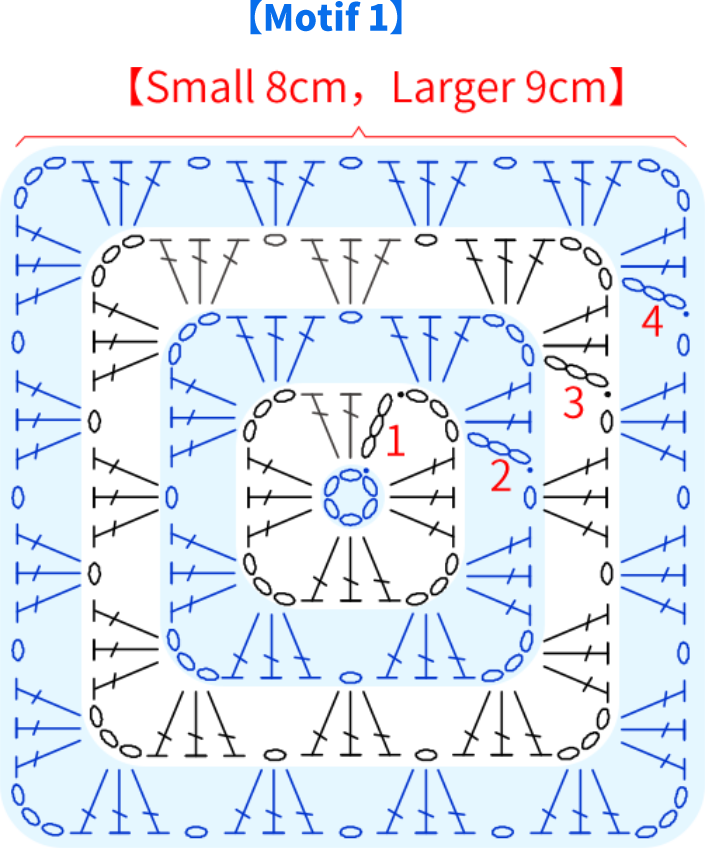
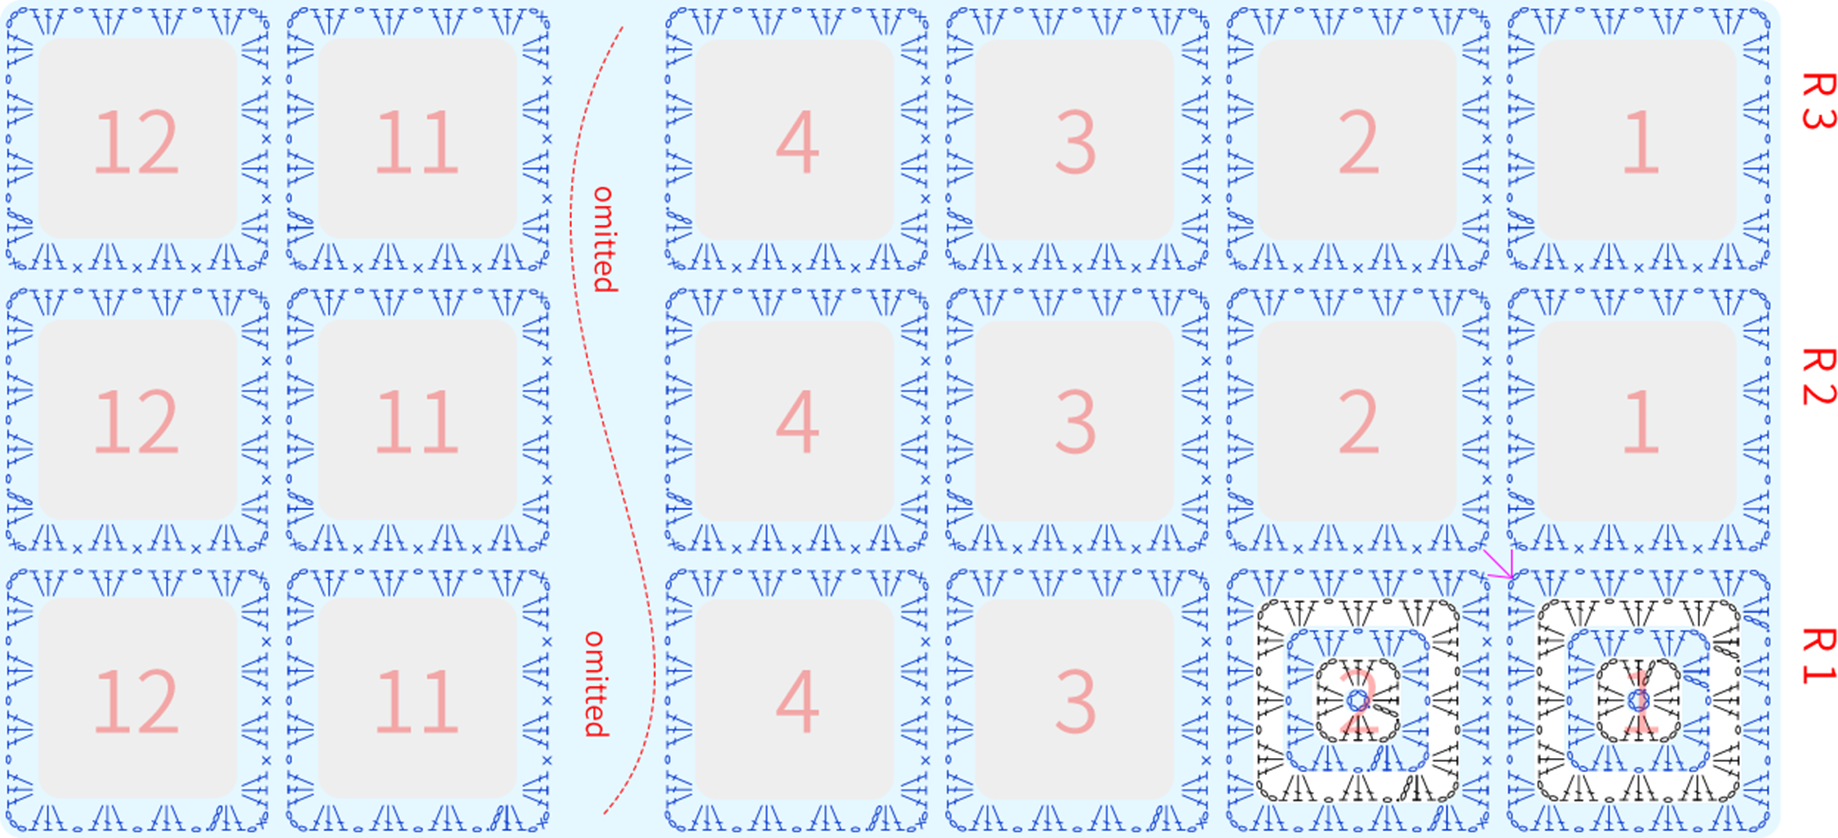
The body is made by joining a certain number of Motif One pieces together. Note that only the first Motif One is completed separately; all the other motifs are worked and joined as you go while crocheting the last round. Each row of motifs is connected from right to left. Please refer to the video demonstration for more details.
Note: Change colors every round of each motif, with random colors. For the overall effect, it's recommended that adjacent motifs have different colors on the last round.
Bright White Version main color yarn 06#Bright White\Blackened Pearl Version main color yarn 52#Blackened Pearl\Blue Ashes Version main color yarn 44#Blue Ashes
Part 2 Chest Piece 28' 42'' (Part 1)
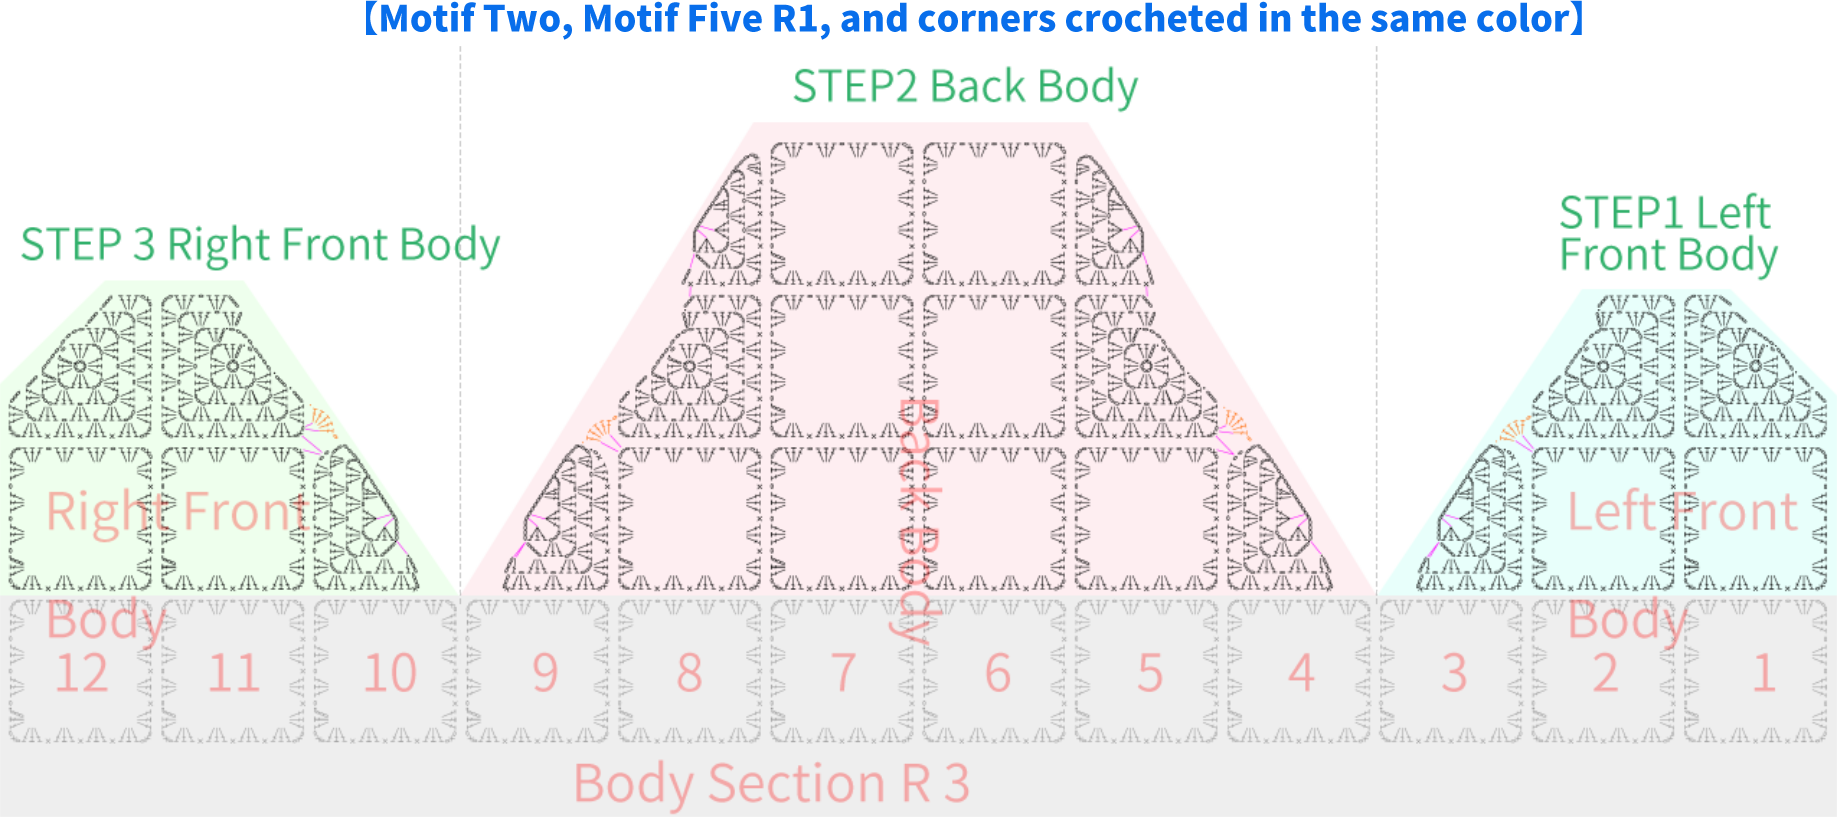
Continue crocheting upwards along the body, divide into three sections: left front body , back body, and right front body. Please refer to the video demonstration for more details.
Step 1 Left Front Body 28' 57'' (Part 1)
The left front body has a total of 2 rows, using 4 motifs: Motif 1, Motif 2, Motif 3, and Motif 4. After joining them, you'll need to crochet corner triangles.Please refer to the video demonstration for more details.
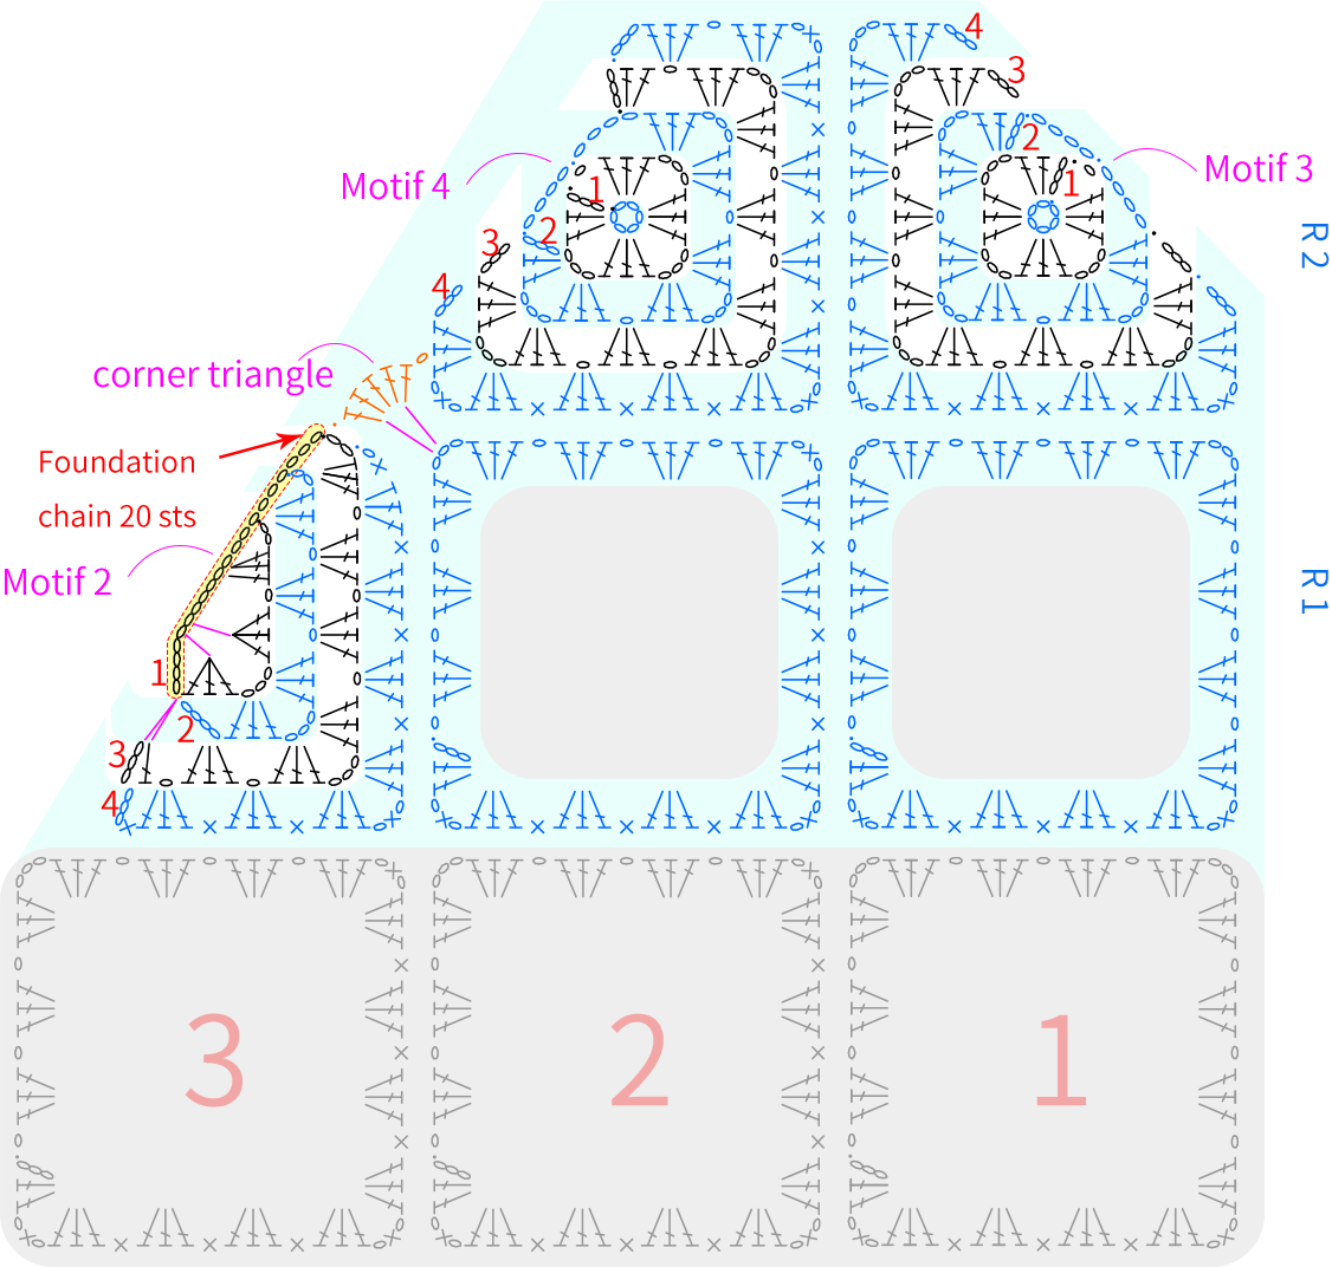
Step 2 Back Body 51' 39'' (Part 1)
The back body has a total of 3 rows, using 7 motifs.Please refer to the video demonstration for more details.
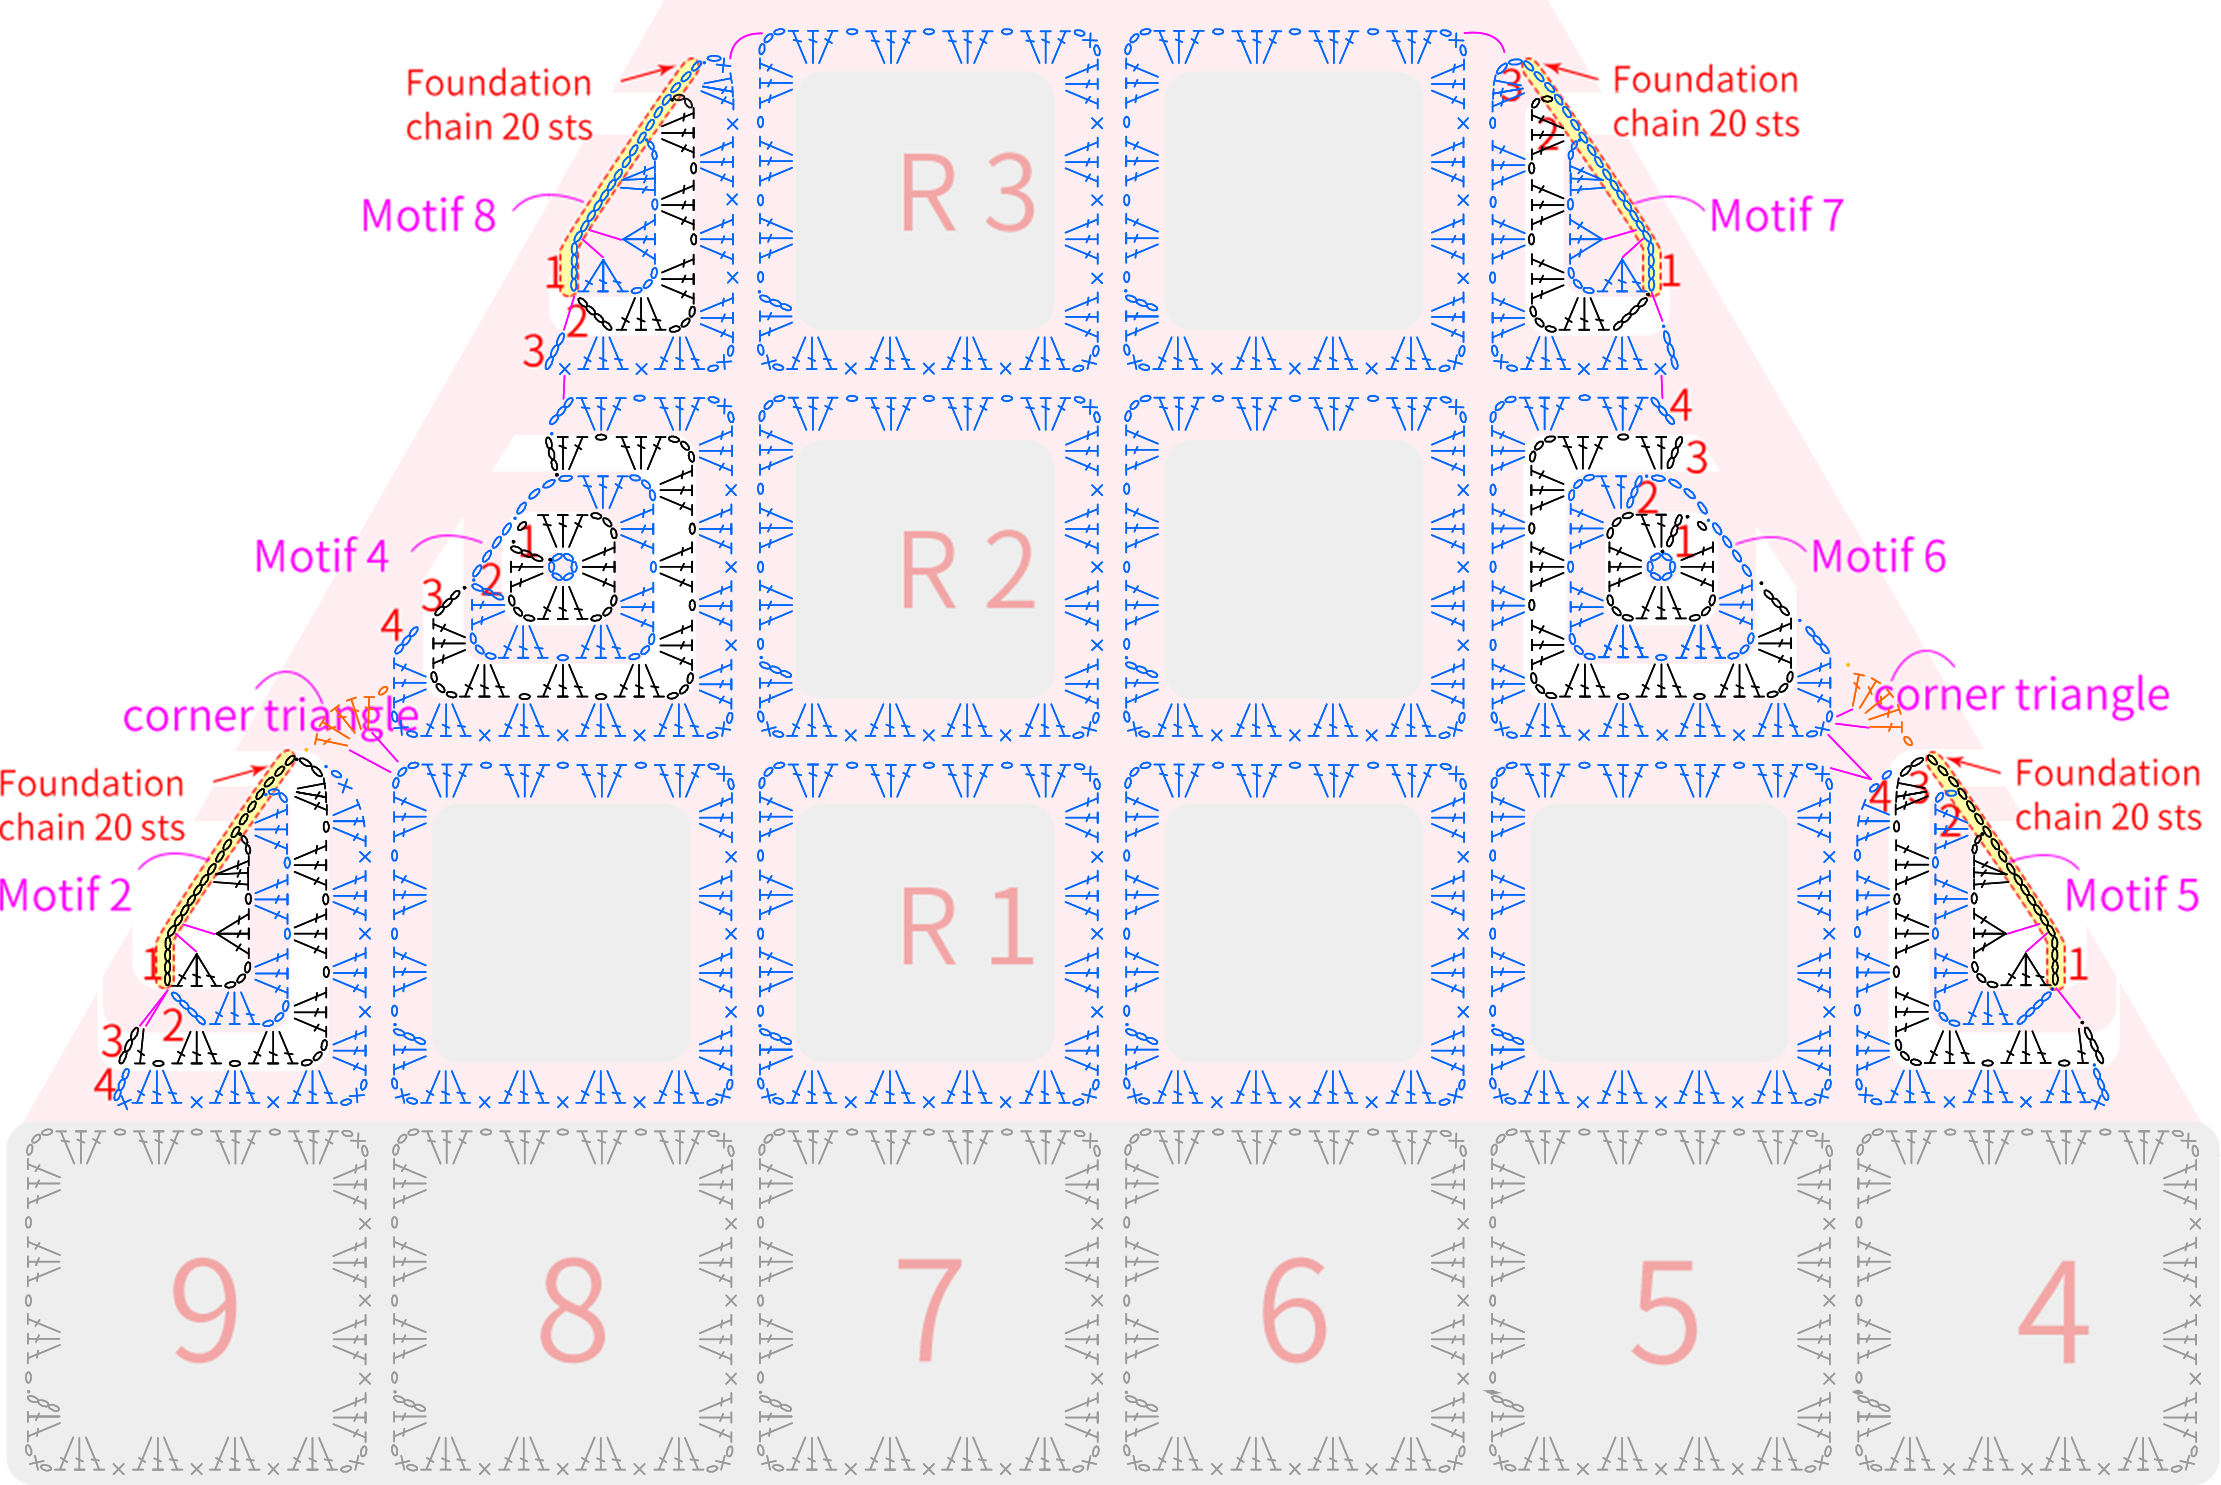
Step 3 Right Front Body 60' 31'' (Part 1)
The right front body is made up of 2 rows of motifs, and a corner triangle is crocheted on the right side.Please refer to the video demonstration for more details.
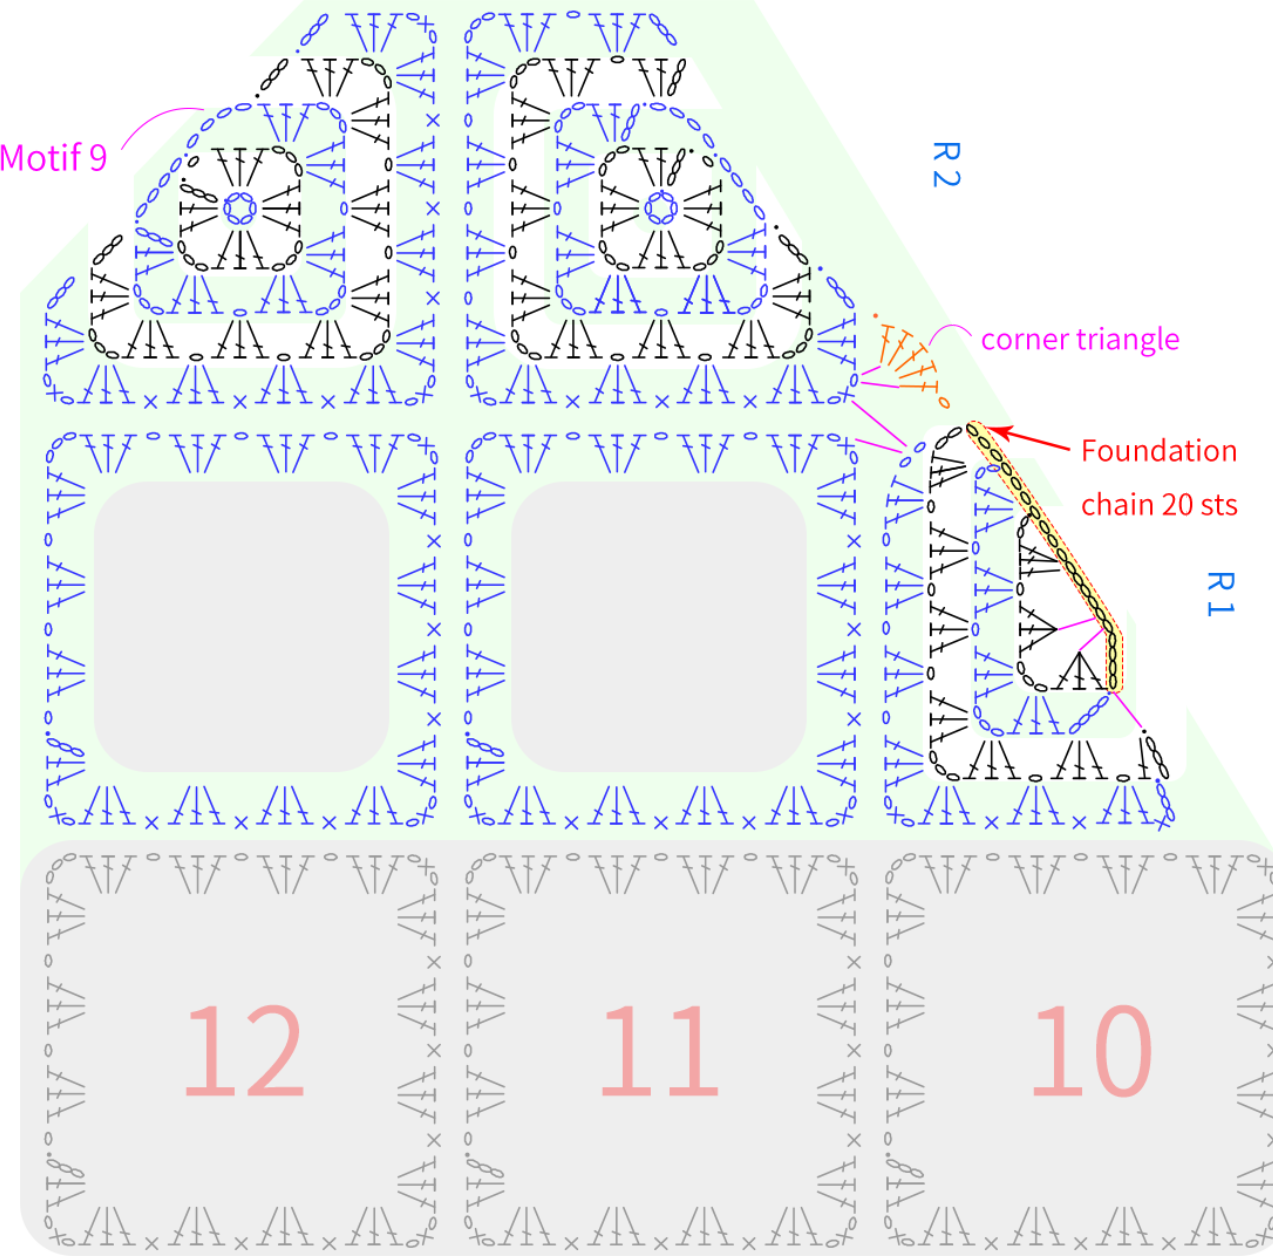
Part 3 Sleeves
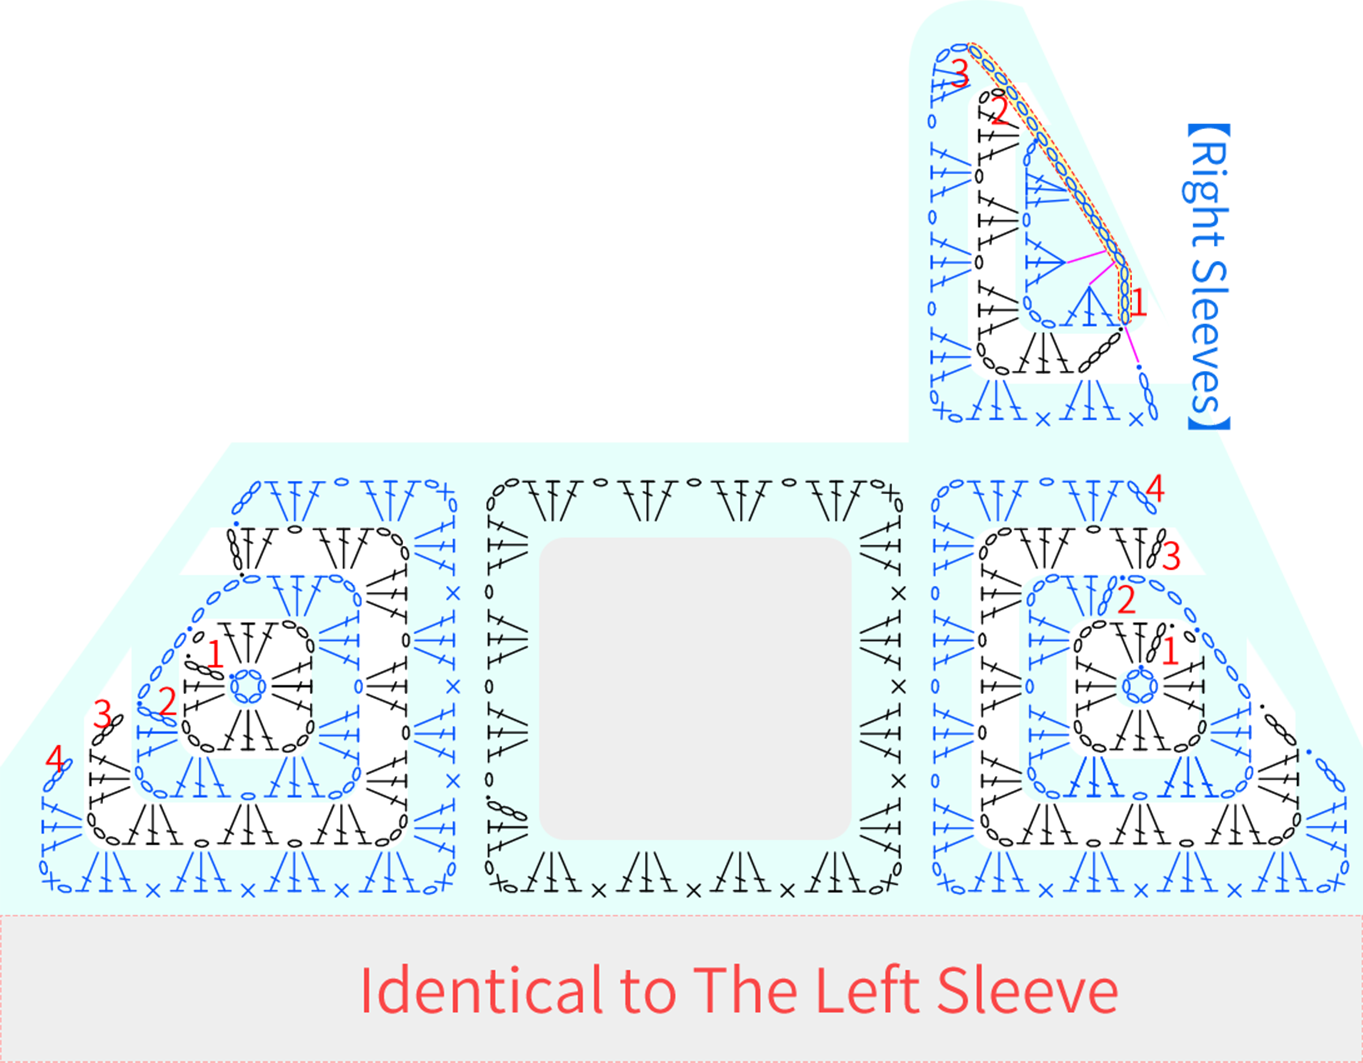
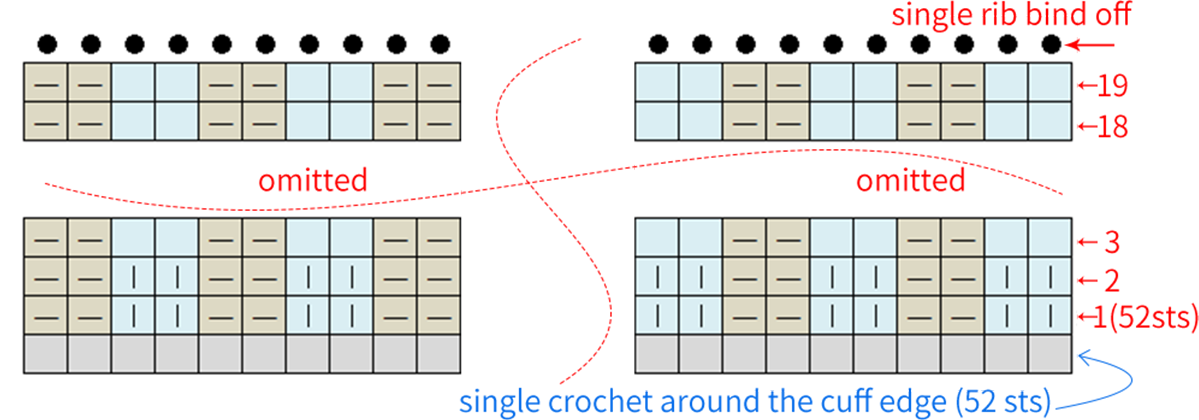
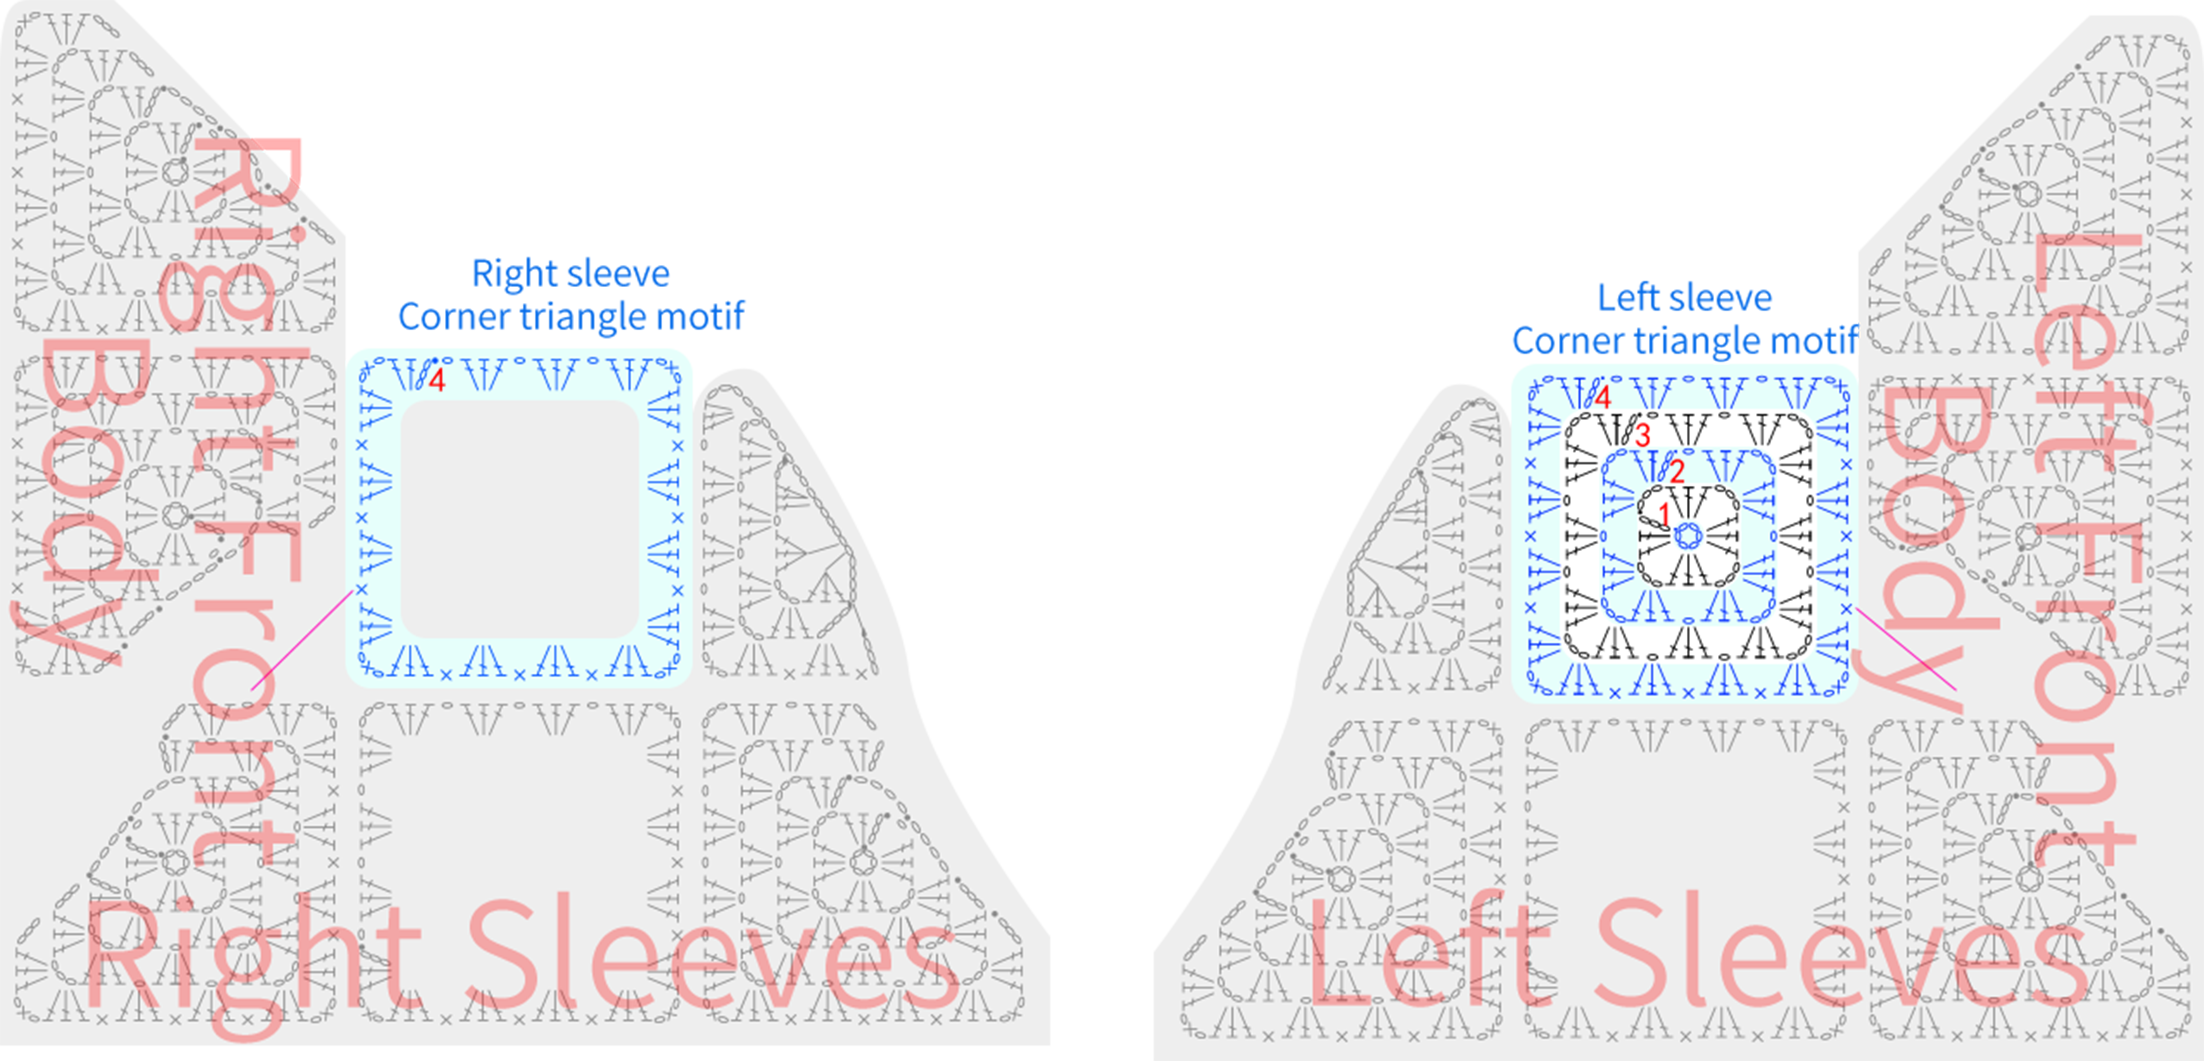
The sleeve is divided into 3 parts: cuff, sleeve body, and sleeve cap. First, crochet the left and right sleeve bodies and sleeve caps, then work on the cuff. At the sleeve opening, work a round of single crochets, then pick up stitches and crochet in rounds with 2 by 2 ribbing. Once the sleeve is complete, attach it to the reserved sleeve openings of the front and back bodies using slip stitches and chain stitches. Finally, join the corner triangle motifs.
Note: 1. For the left and right sleeves, the color scheme of the motif along the sleeve cap edge must match the corresponding motif on the front and back body edges.
2. For the left and right sleeves, the color scheme of the second section of the sleeve body must be identical.
Step 1 Sleeve Body, Sleeve Cap 61' 05'' (Part 1)
The crocheting methods for the left and right sleeves are slightly different; Please refer to the video demonstration for more details.
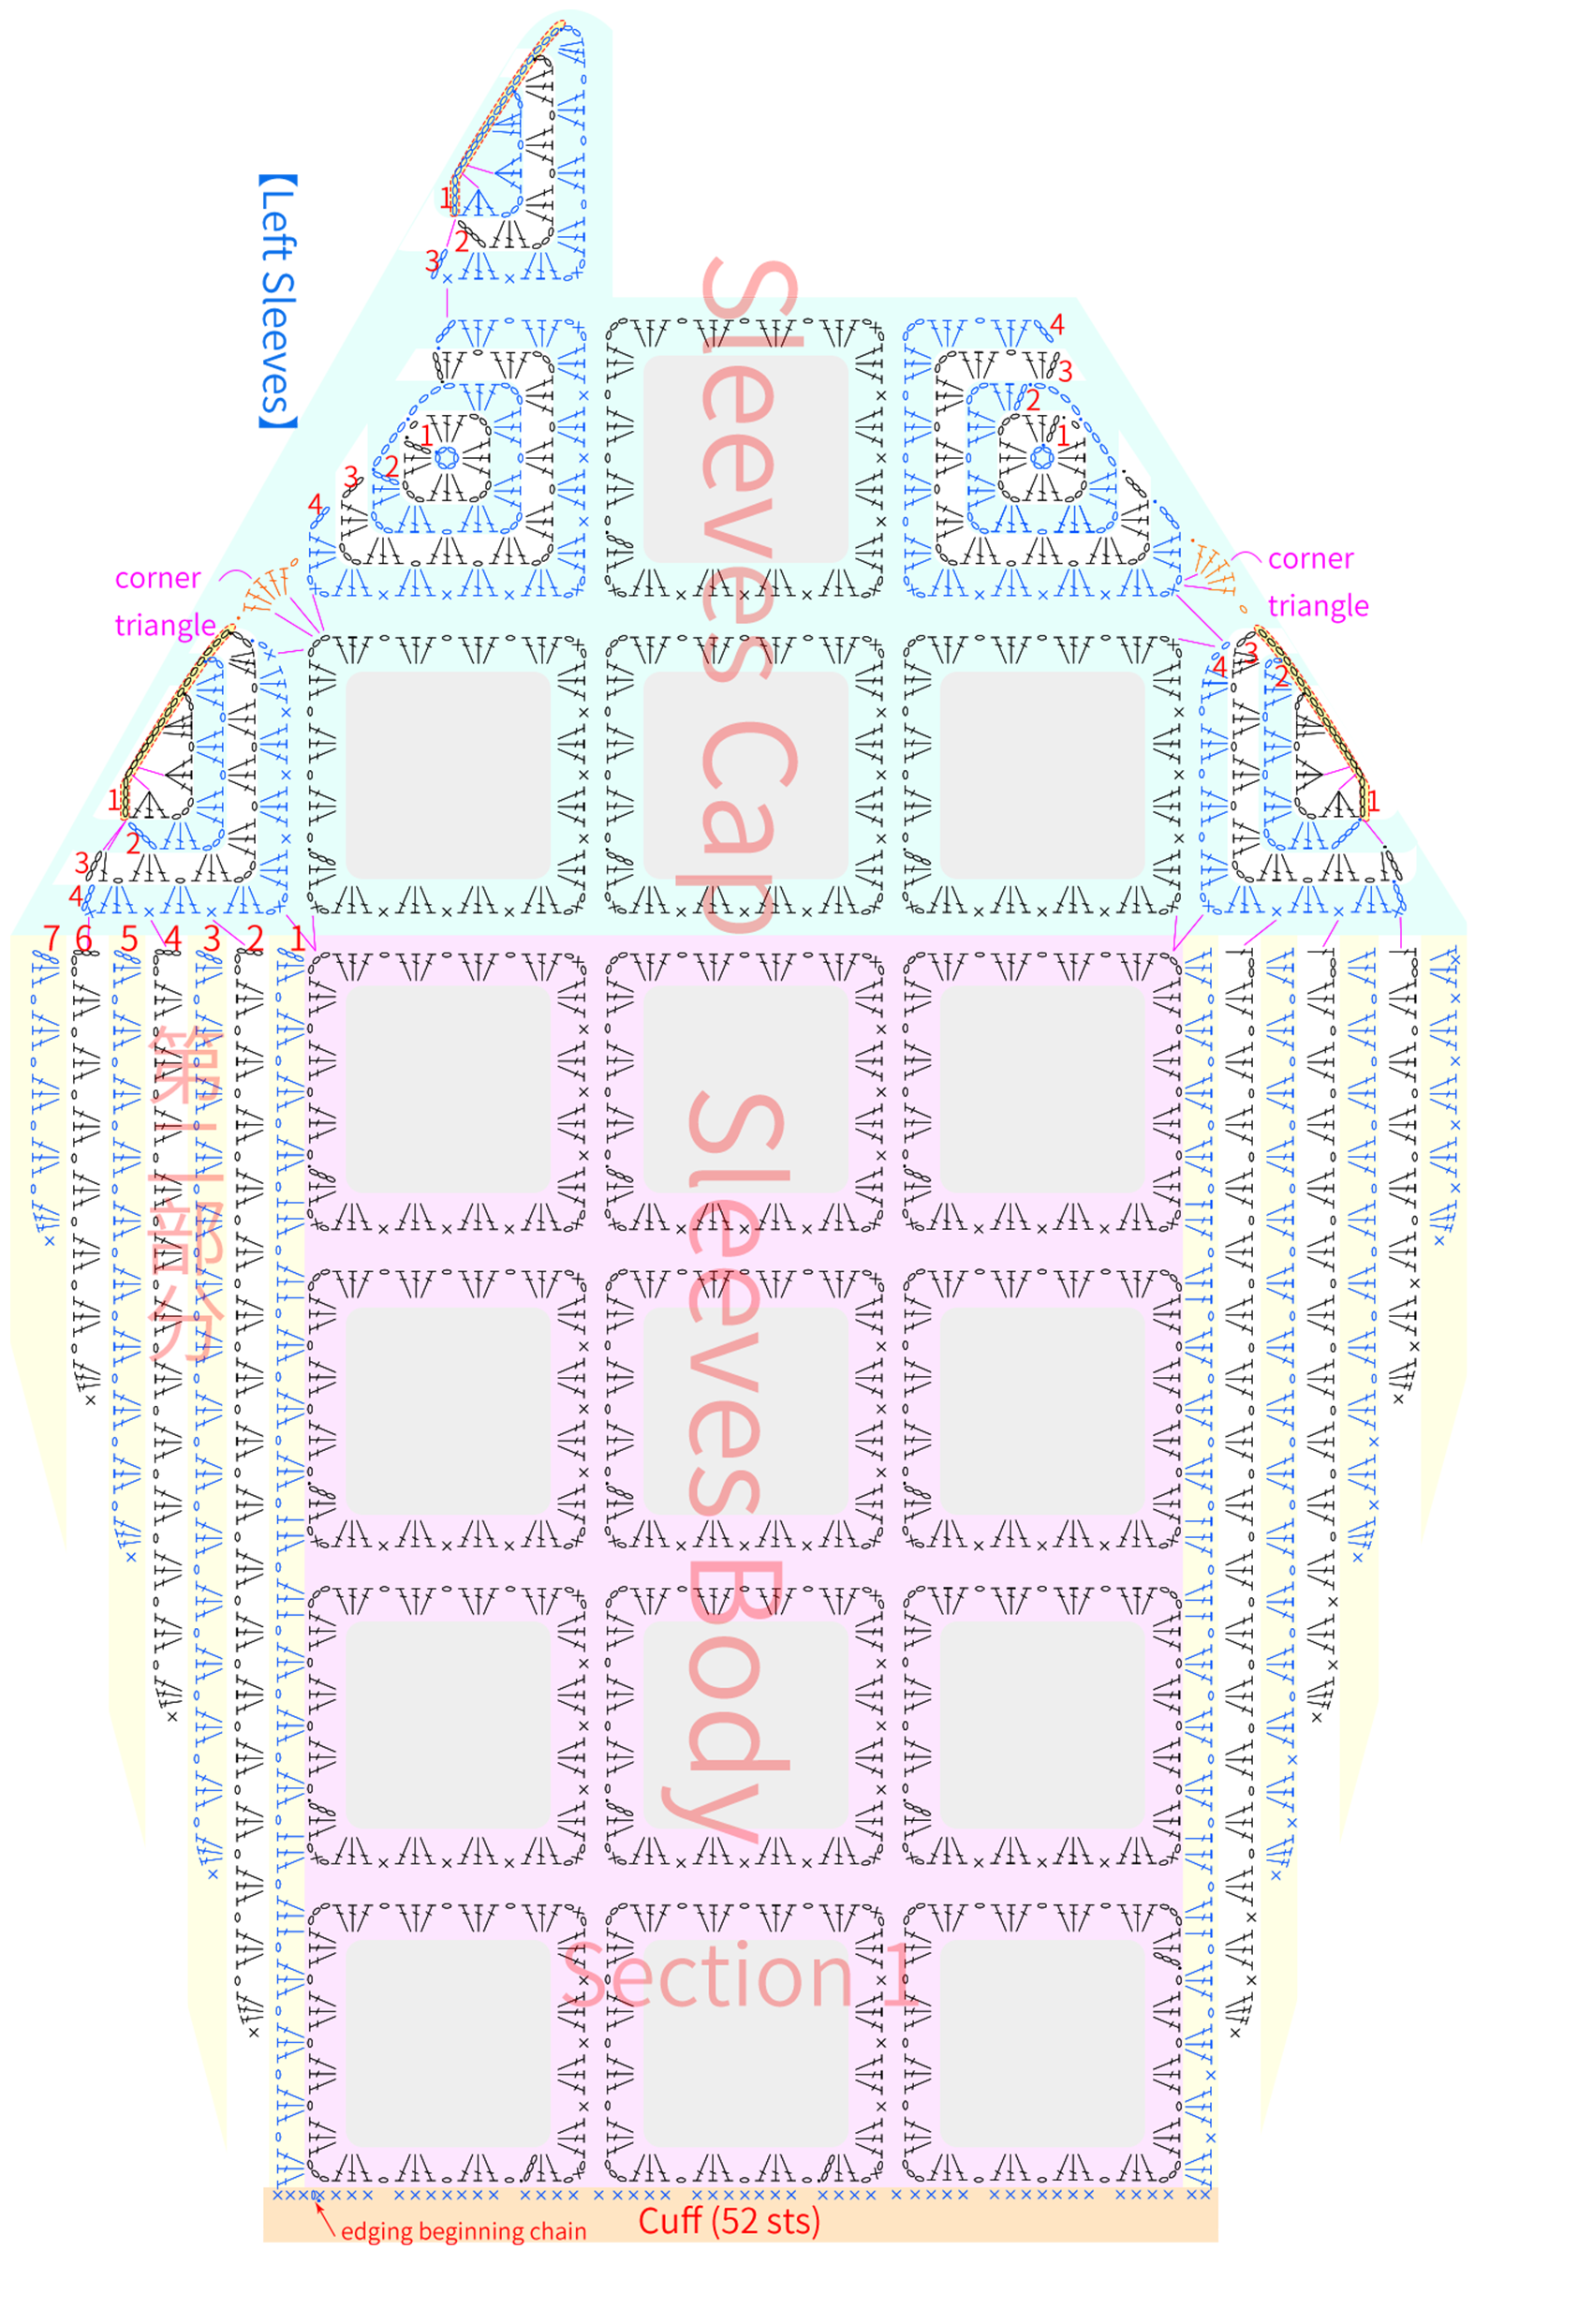
Step 2 Cuff 00' 04'' (Part 2)
After completing the sleeve caps and bodies for both left and right sleeves, work in rounds along the bottom of the sleeve body. First, crochet a round of single crochets (refer to the cuff ), then pick up stitches to continue.Please refer to the video demonstration for more details.
Step 3 Connections 21' 03'' (Part 2)
Once the sleeves are completed, attach them to the reserved cuff positions using the same color as the corner triangles. Then, crochet the corner triangle motifs at the attachment points.Please refer to the video demonstration for more details.
Part 4 Front Band 30' 30'' (Part 2)
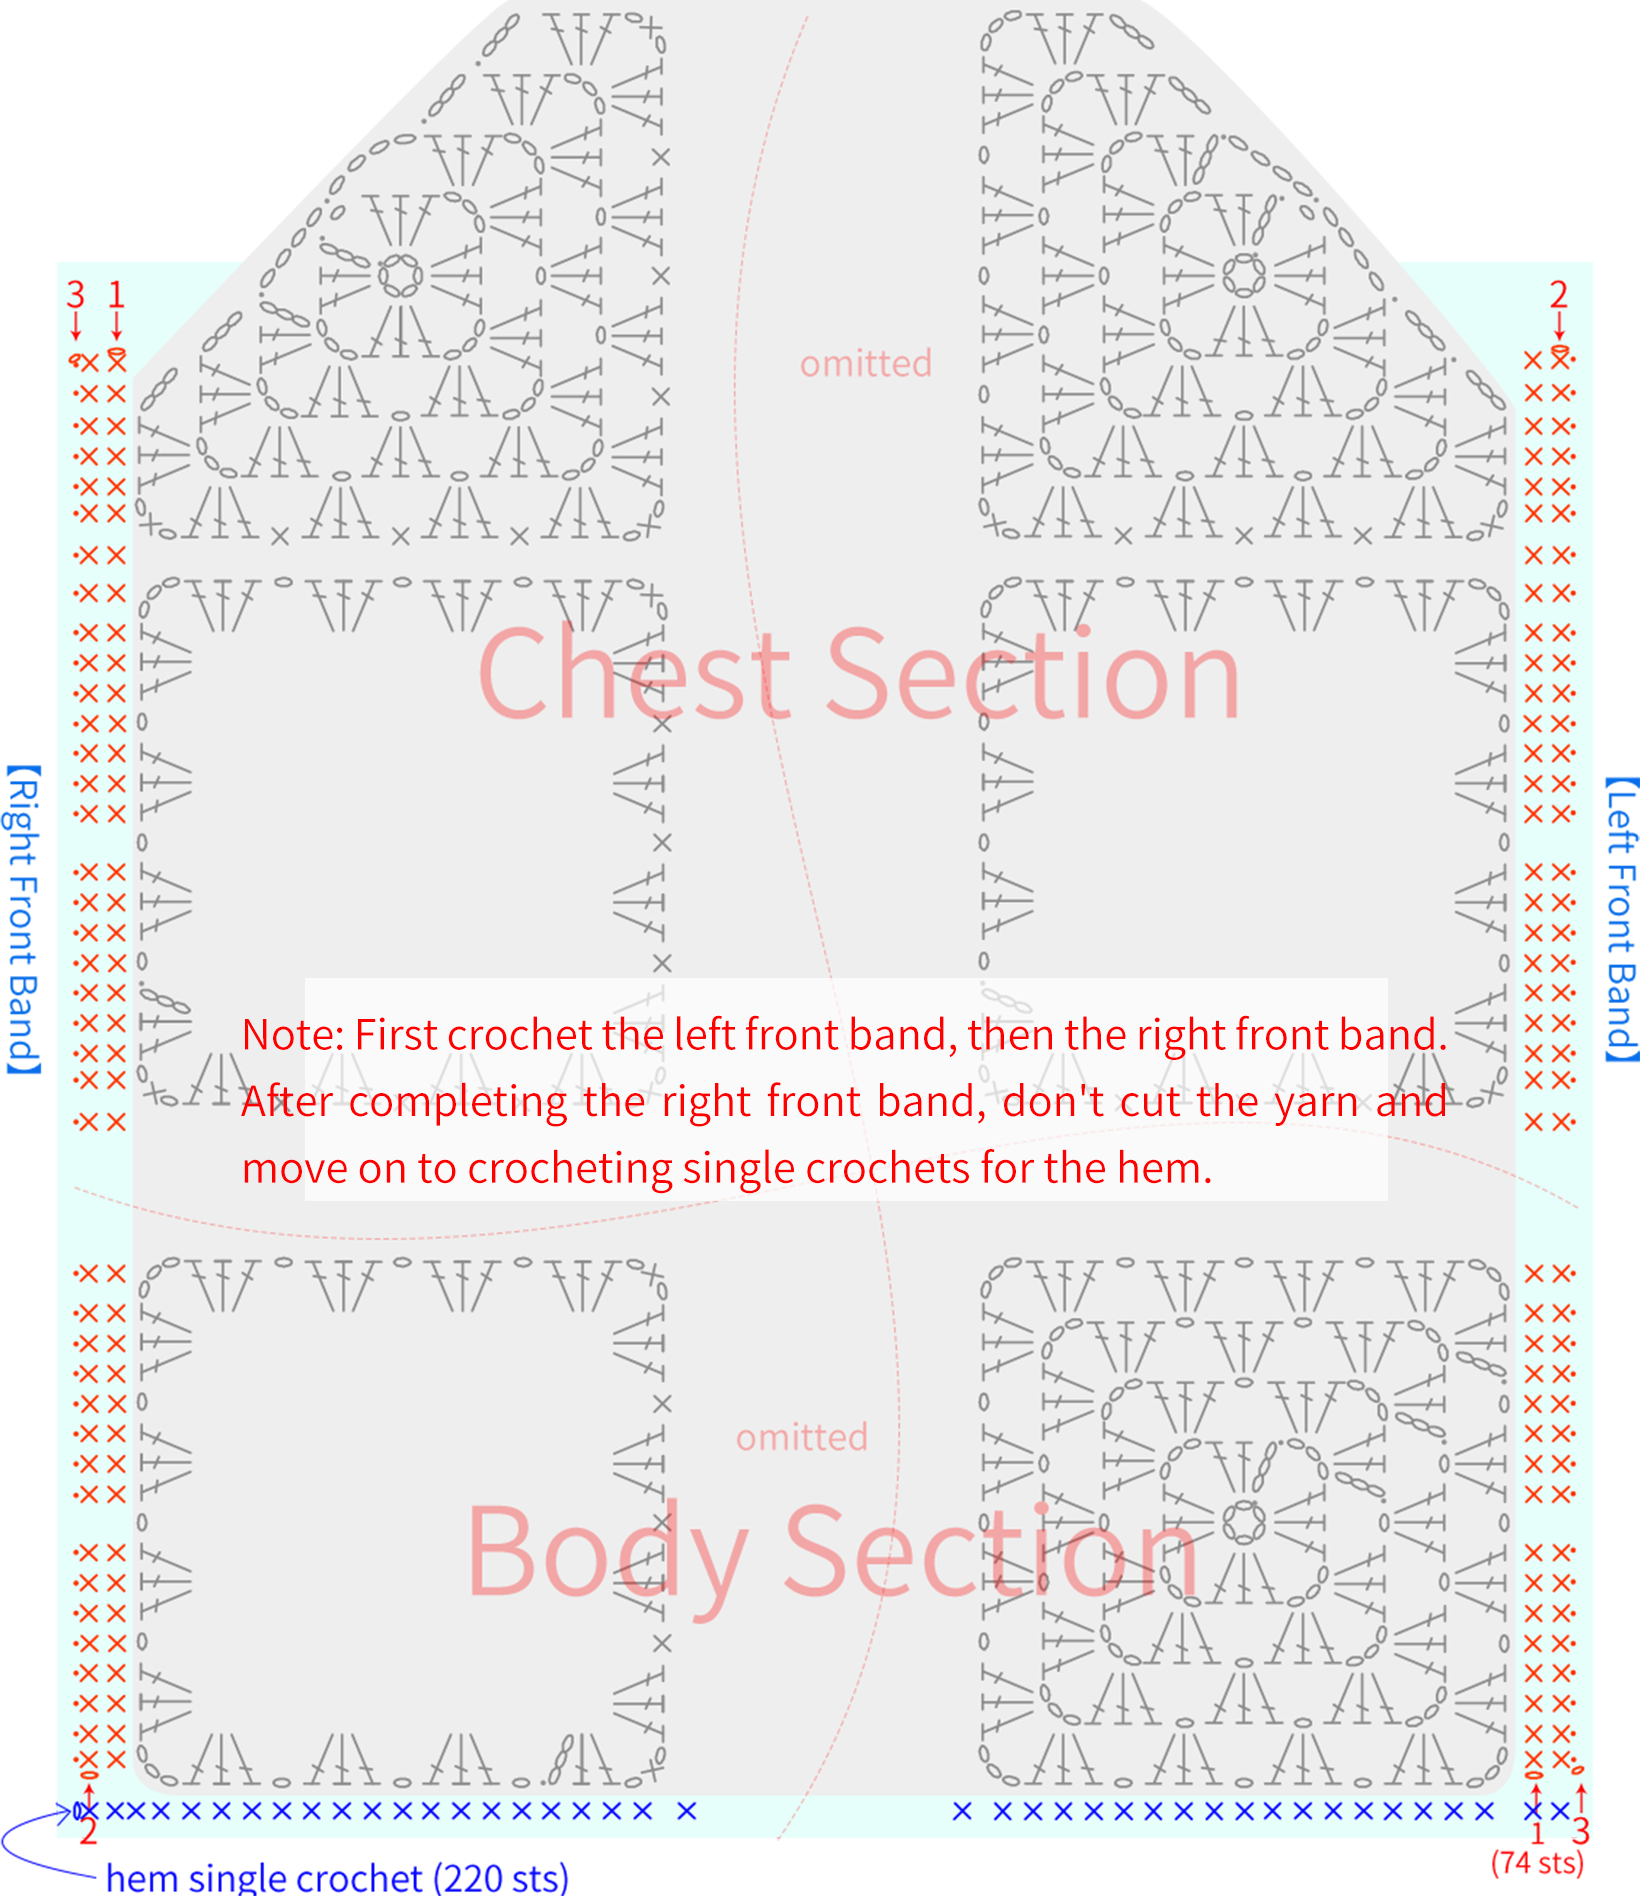
The left and right front bands are worked identically, both crocheted back and forth along the body and chest edges.Please refer to the video demonstration for more details.
Part 5 Hem 34' 45'' (Part 2)
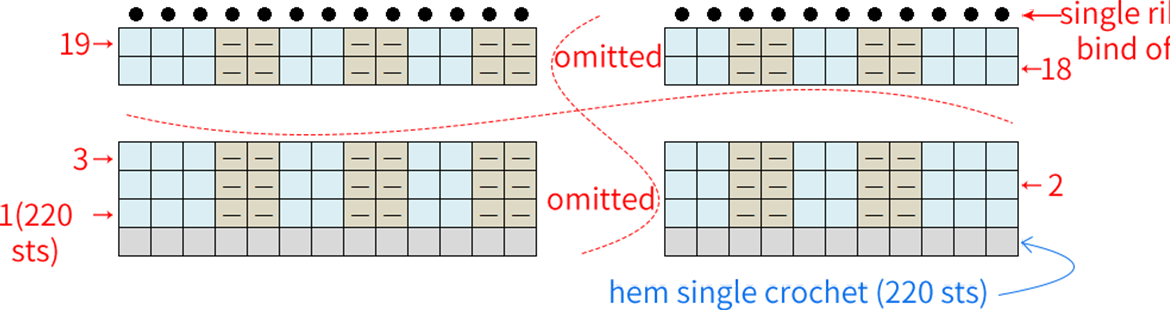
First, single crochet a row below the body, then pick up stitches and work back and forth in 2 by 2 ribbing, finally bind off using single ribbing method to close the ring.Please refer to the video demonstration for more details.
Part 6 Collar 43' 45'' (Part 2)
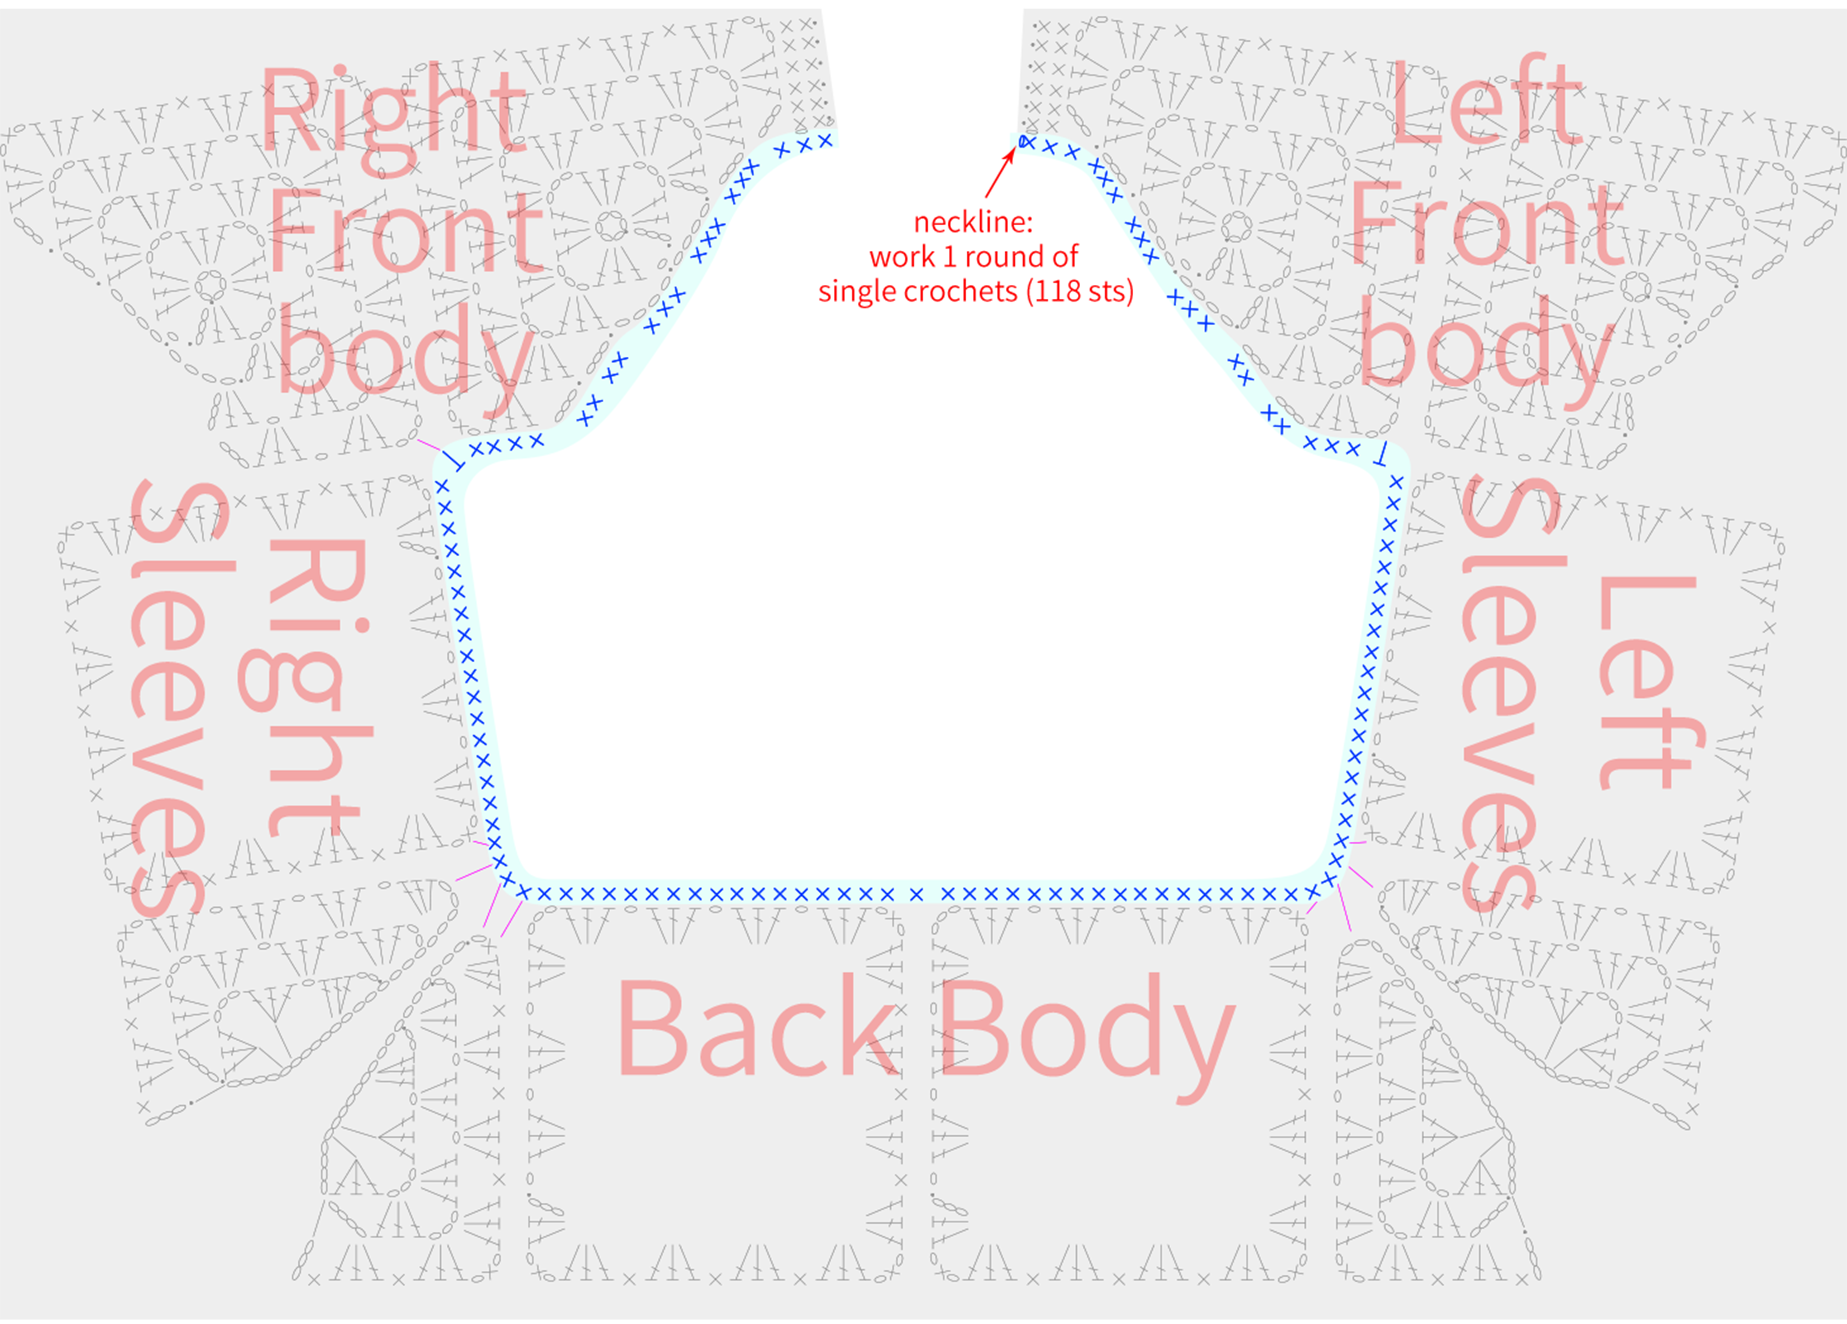
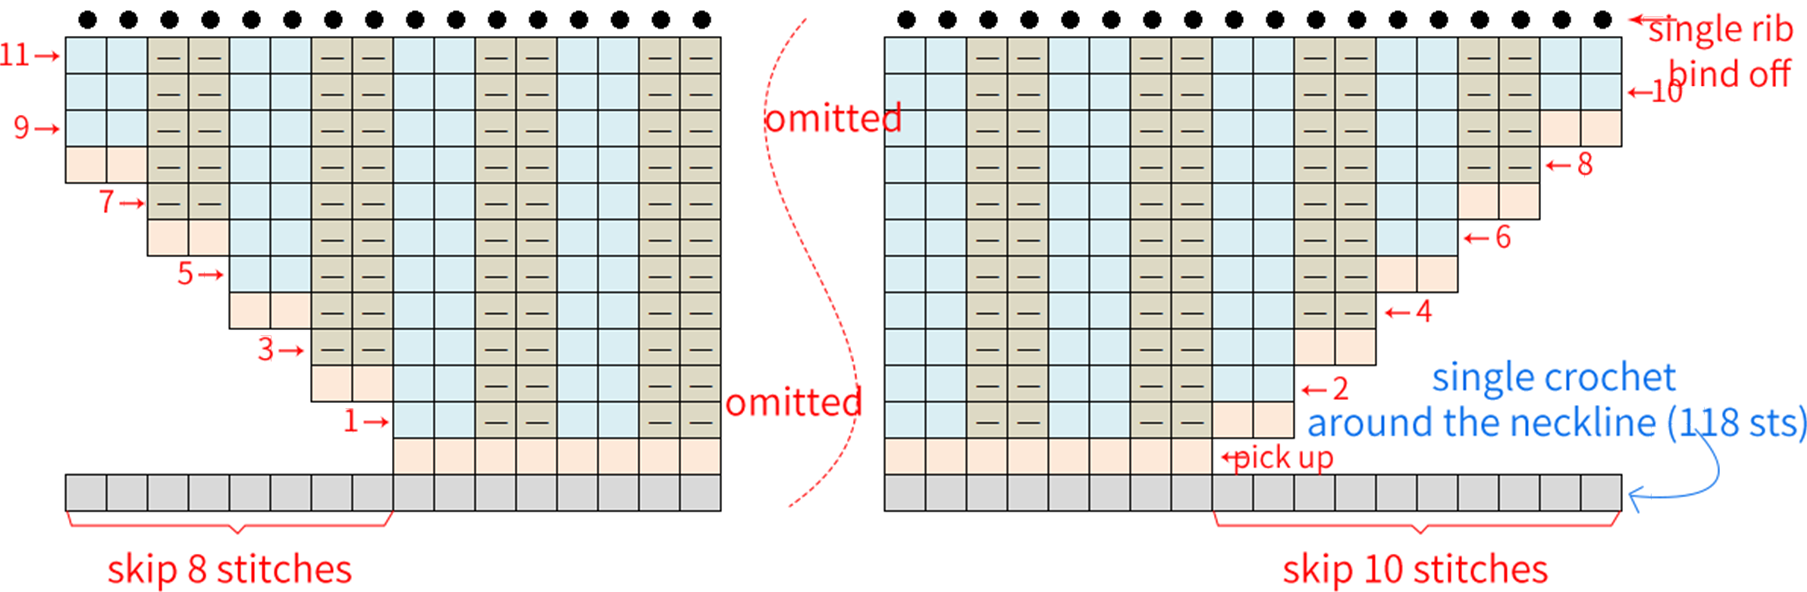
Work a row of single crochet around the neckline, then pick up stitches and work back and forth in 2 by 2 ribbing, finally bind off using single rib method to close the loop.Please refer to the video demonstration for more details.
Part 7 Zipper Securing 48' 31'' (Part 2)
Follow the method shown in the video to sew the zipper onto the corresponding position of the front band. Please refer to the video demonstration for more details.
Made by the community