Doll
Heavenly Canopy
Project preview
See the finished project
Pattern format
Instructions
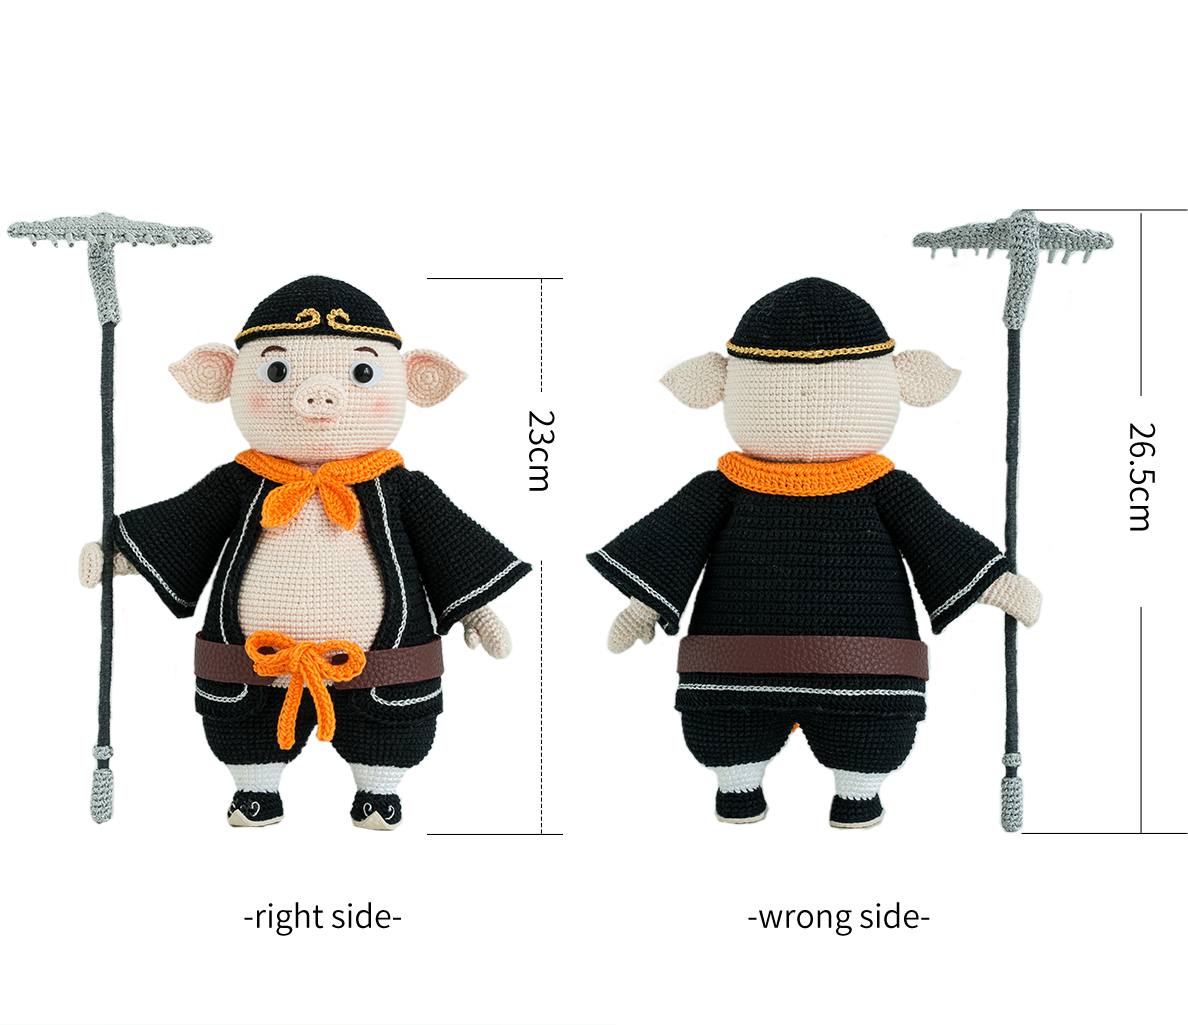
Due to variations in individual tension, the size of the sample is for reference only.
Materials: Combed 3# Lace
Hook: 1.75 mm crochet hook
ABBREVIATIONS
MRadjustable magic ring
Dao2start in 2nd CH from the hook
turnturn the piece
CHchain
Thalf double crochet
V = sc2-in-12 single crochets into the same stitch
A = sc2toginvisible single crochet 2 stitches together
(...)×6crochet item in the parentheses six times
HRow
RRound
[...]in the same stitch
W = sc3-in-13 single crochets into the same stitch
Fdouble crochet
FA = dc2togdouble crochet 2 stitches together
FV = dc2-in-12 double crochets into the same stitch
Sslip stitch
TW = hdc3-in-13 half double crochets into the same stitch
XX stitch single crochet
Note: This pattern is making in Chinese crochet pattern terms, and the stitch name is written using American terminology. All measurements in charts are in cm.

Part 1 Main Part
The main part includes the arms, legs, body, and head.
Note:
① Unless otherwise specified, when crocheting in rounds, start each round with a beginning chain and end with a slip stitch join.
② The beginning chain for the single crochet and the joining slip stitch do not count towards the stitch count, while the beginning chain for the half double crochet and double crochet counts as 1 stitch.
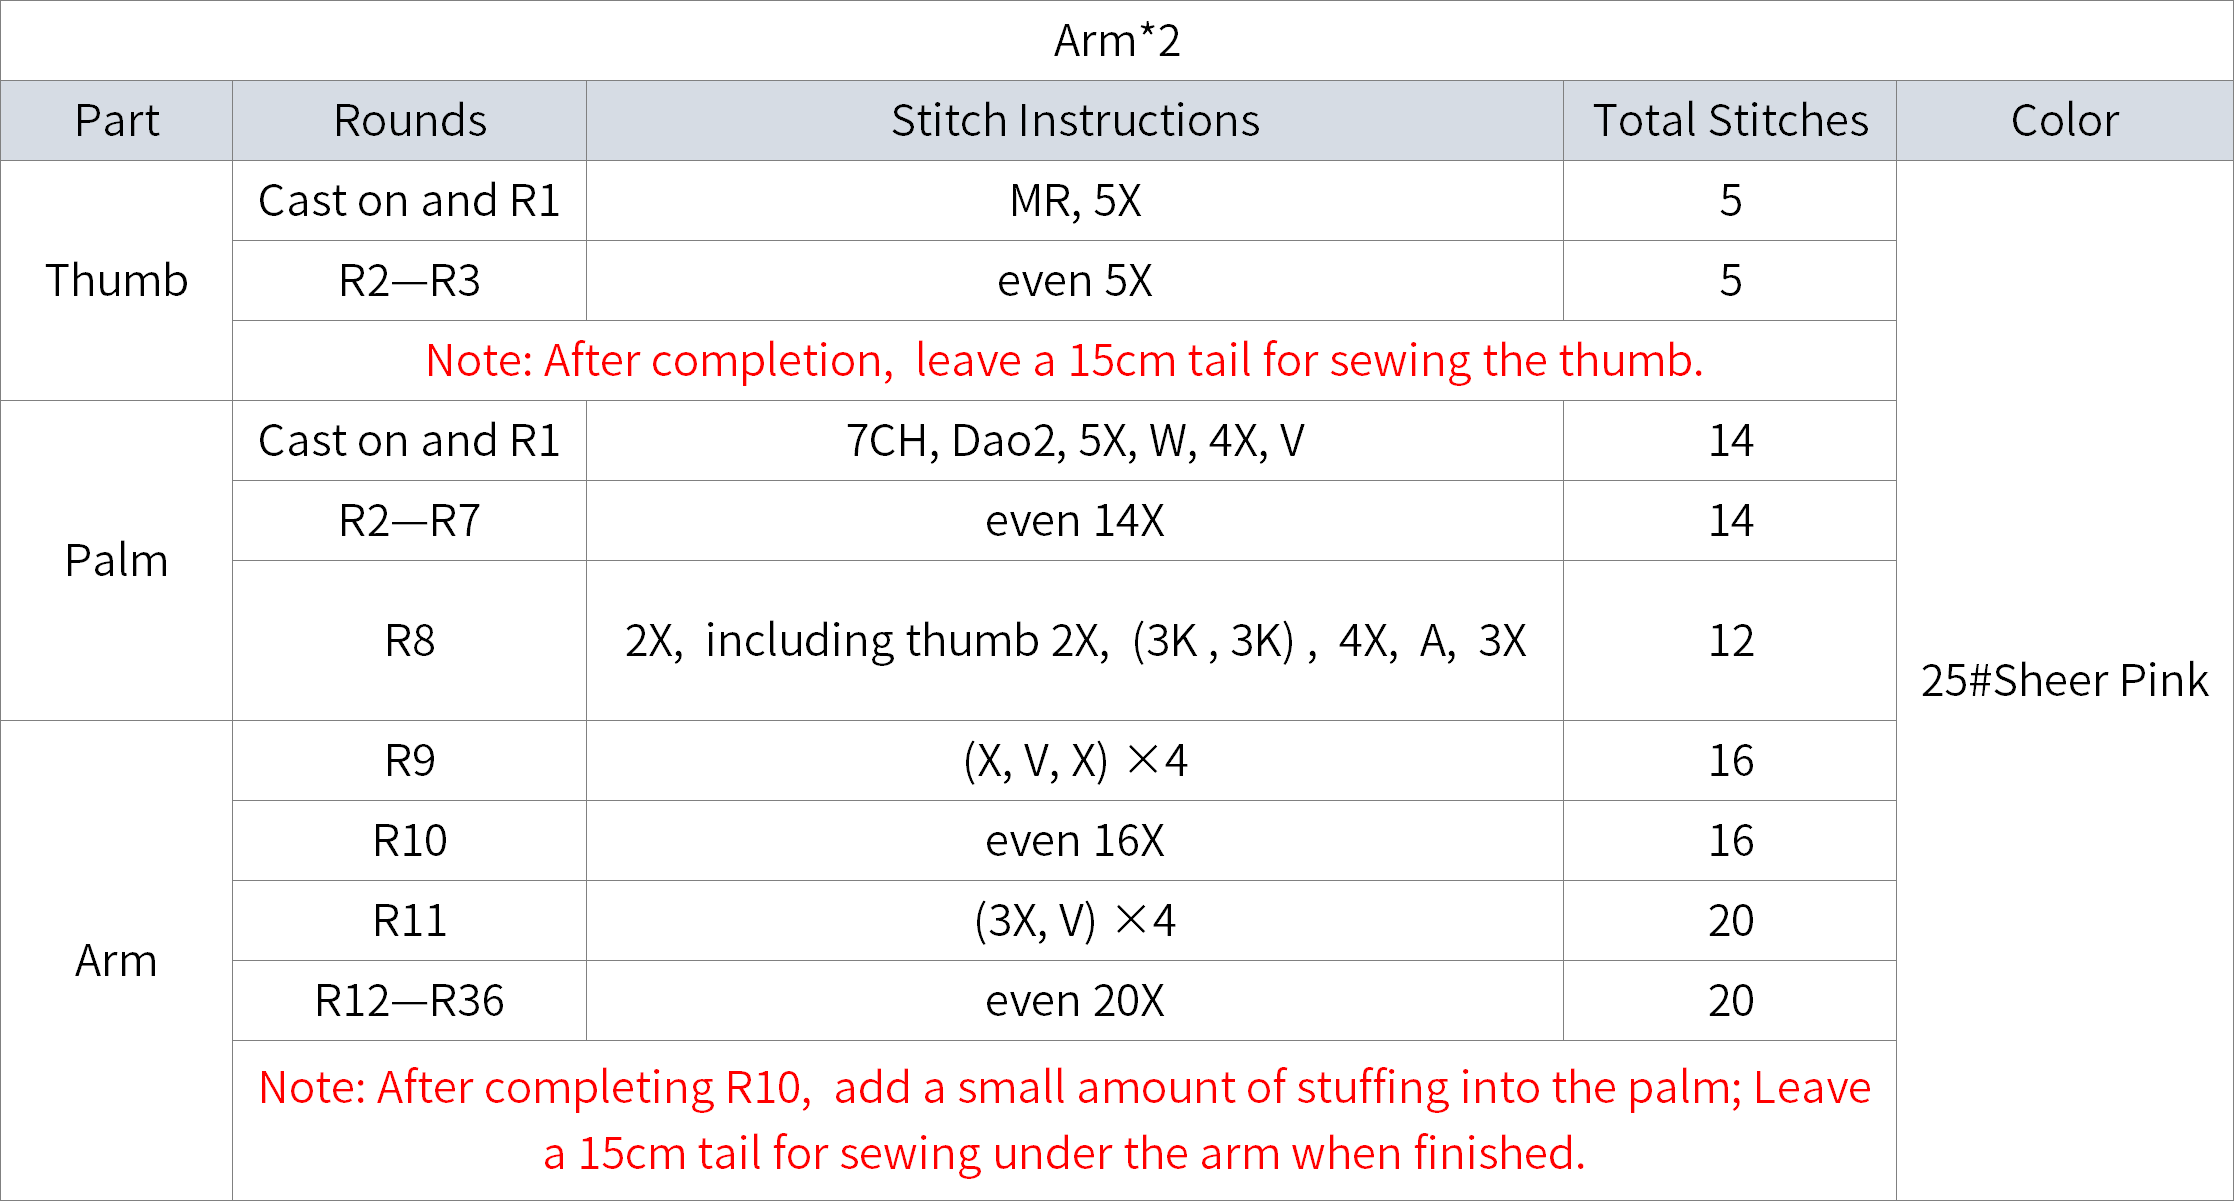
Step 1 Arm
First, crochet the thumb, then crochet the palm. After connecting the thumb and palm, work on the arm.
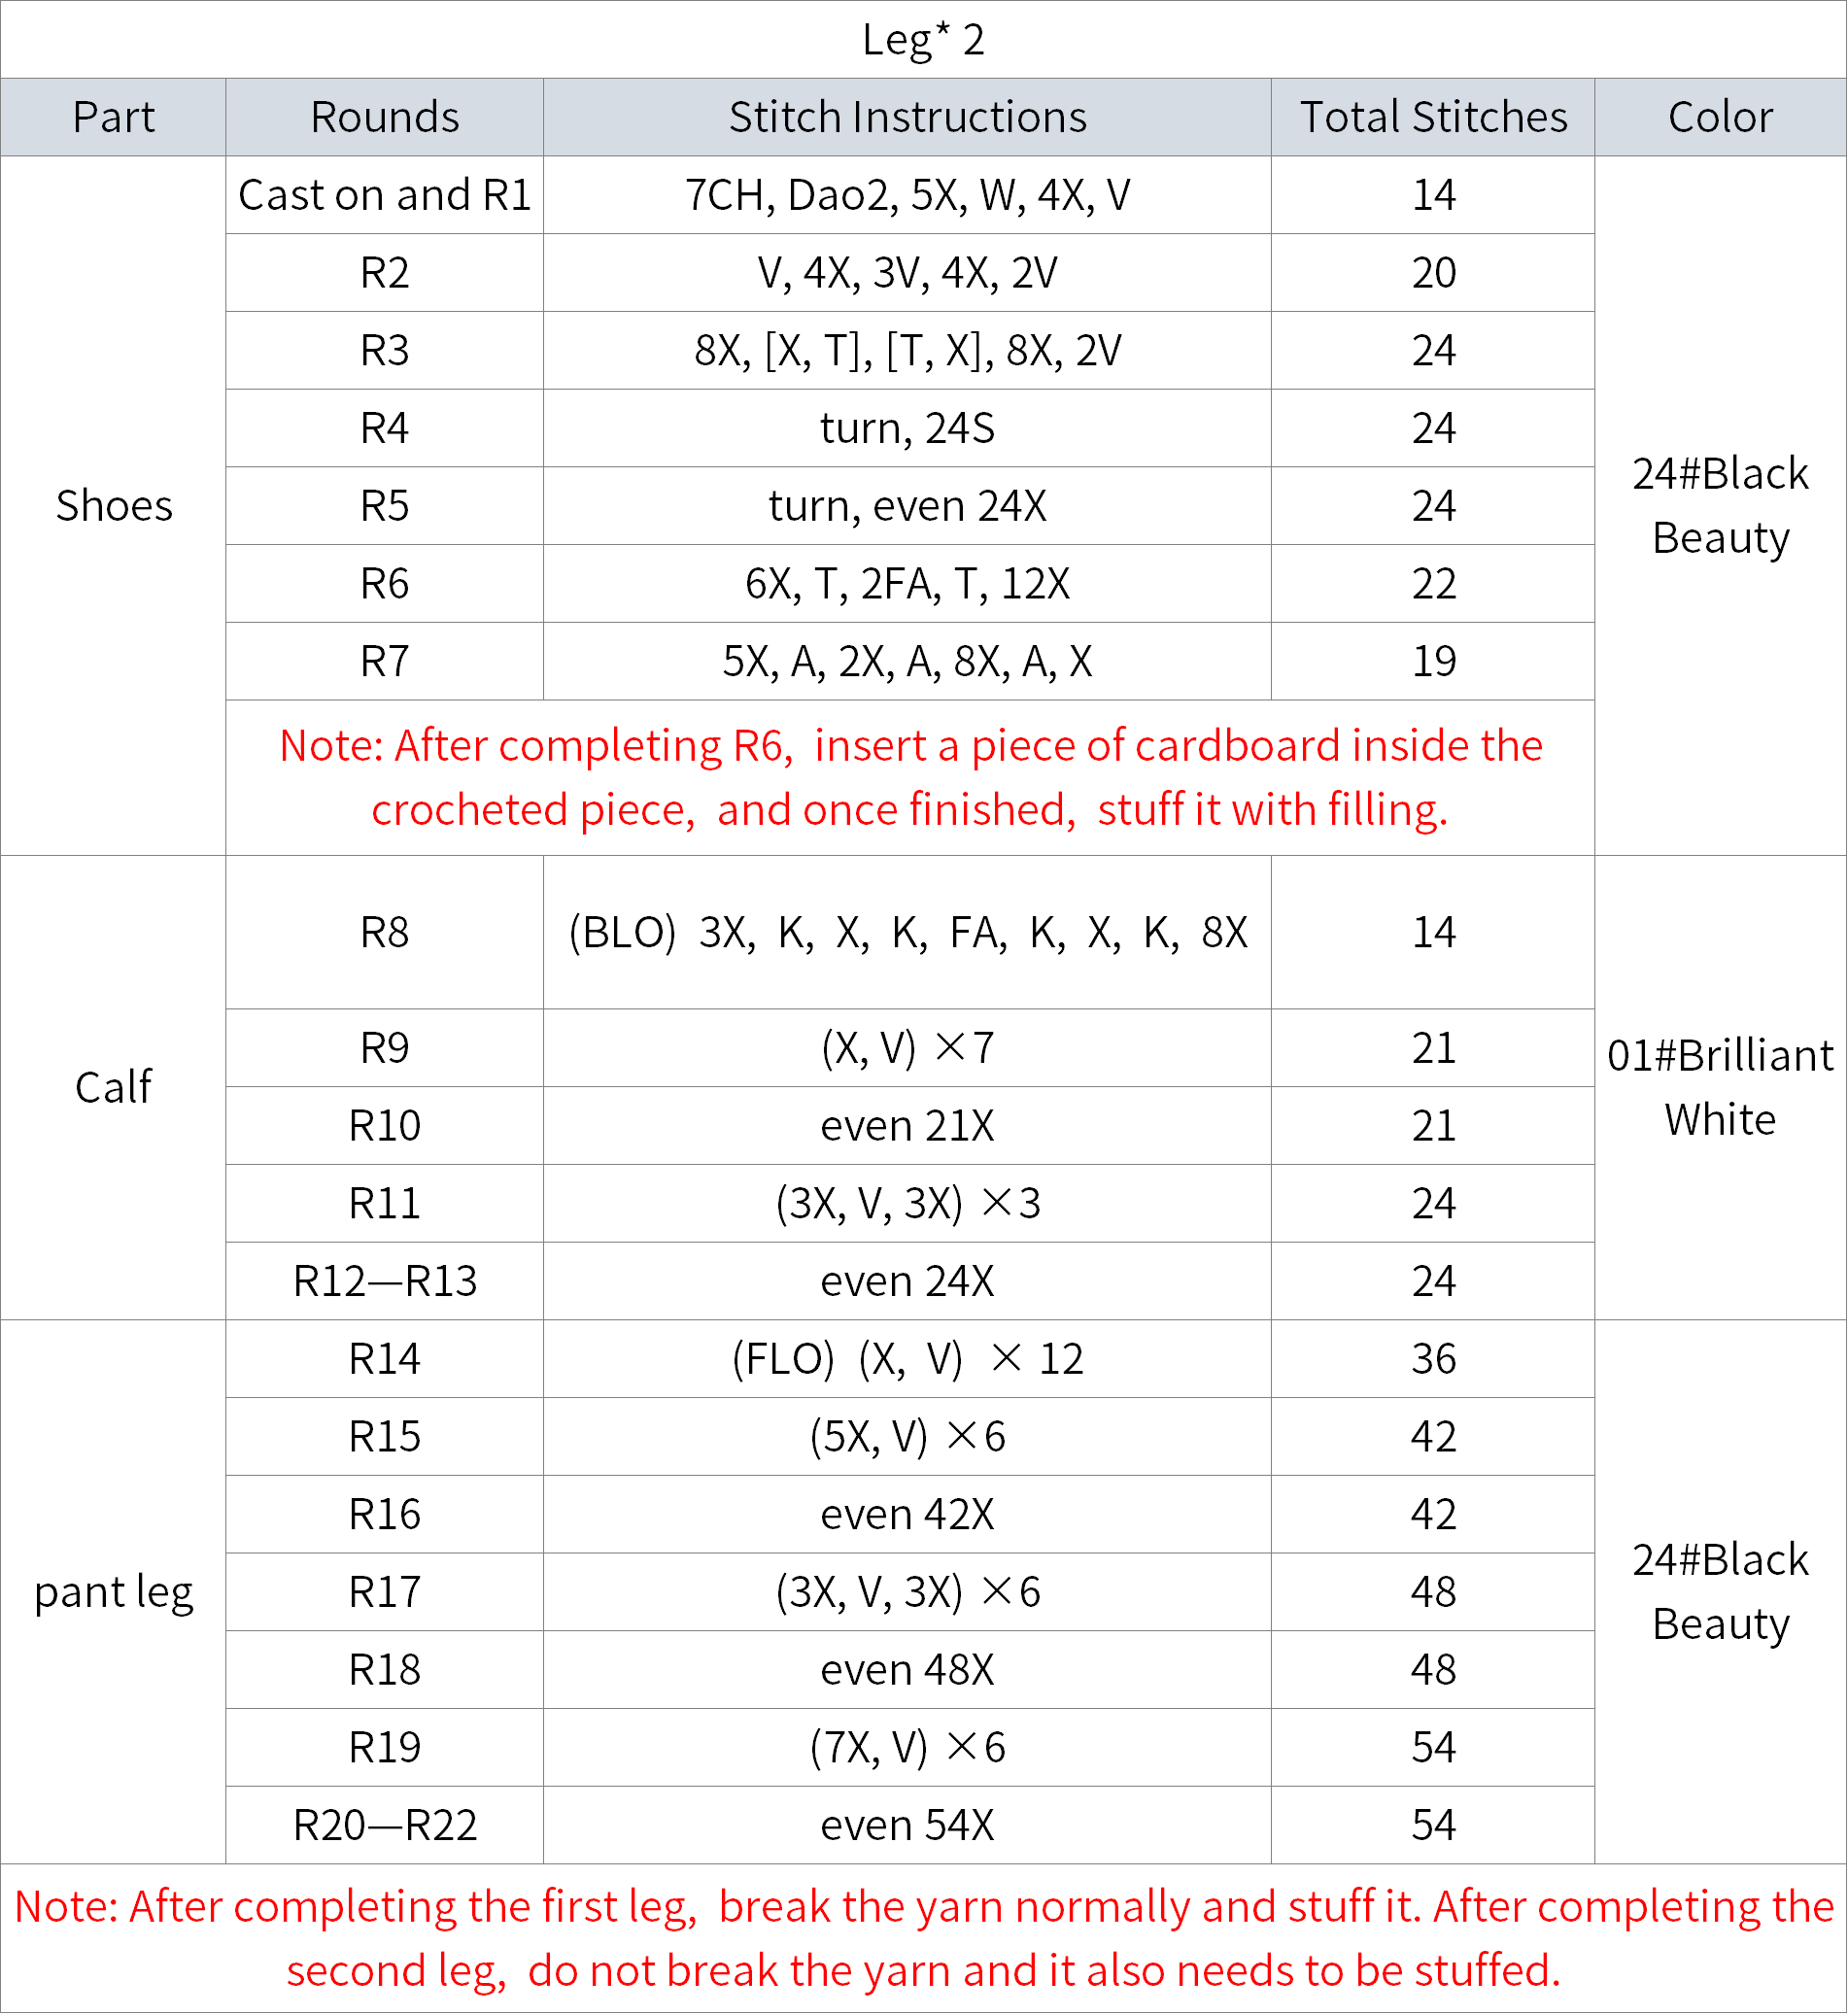
Step 2 Leg
Divide into four parts: shoes, lower leg, pant leg, and shoe decorations. For the shoes, we will start with a foundation chain and work in rounds from there. The lower leg and pant leg sections require color changes. After everything is completely finished, add decorations to the shoes.
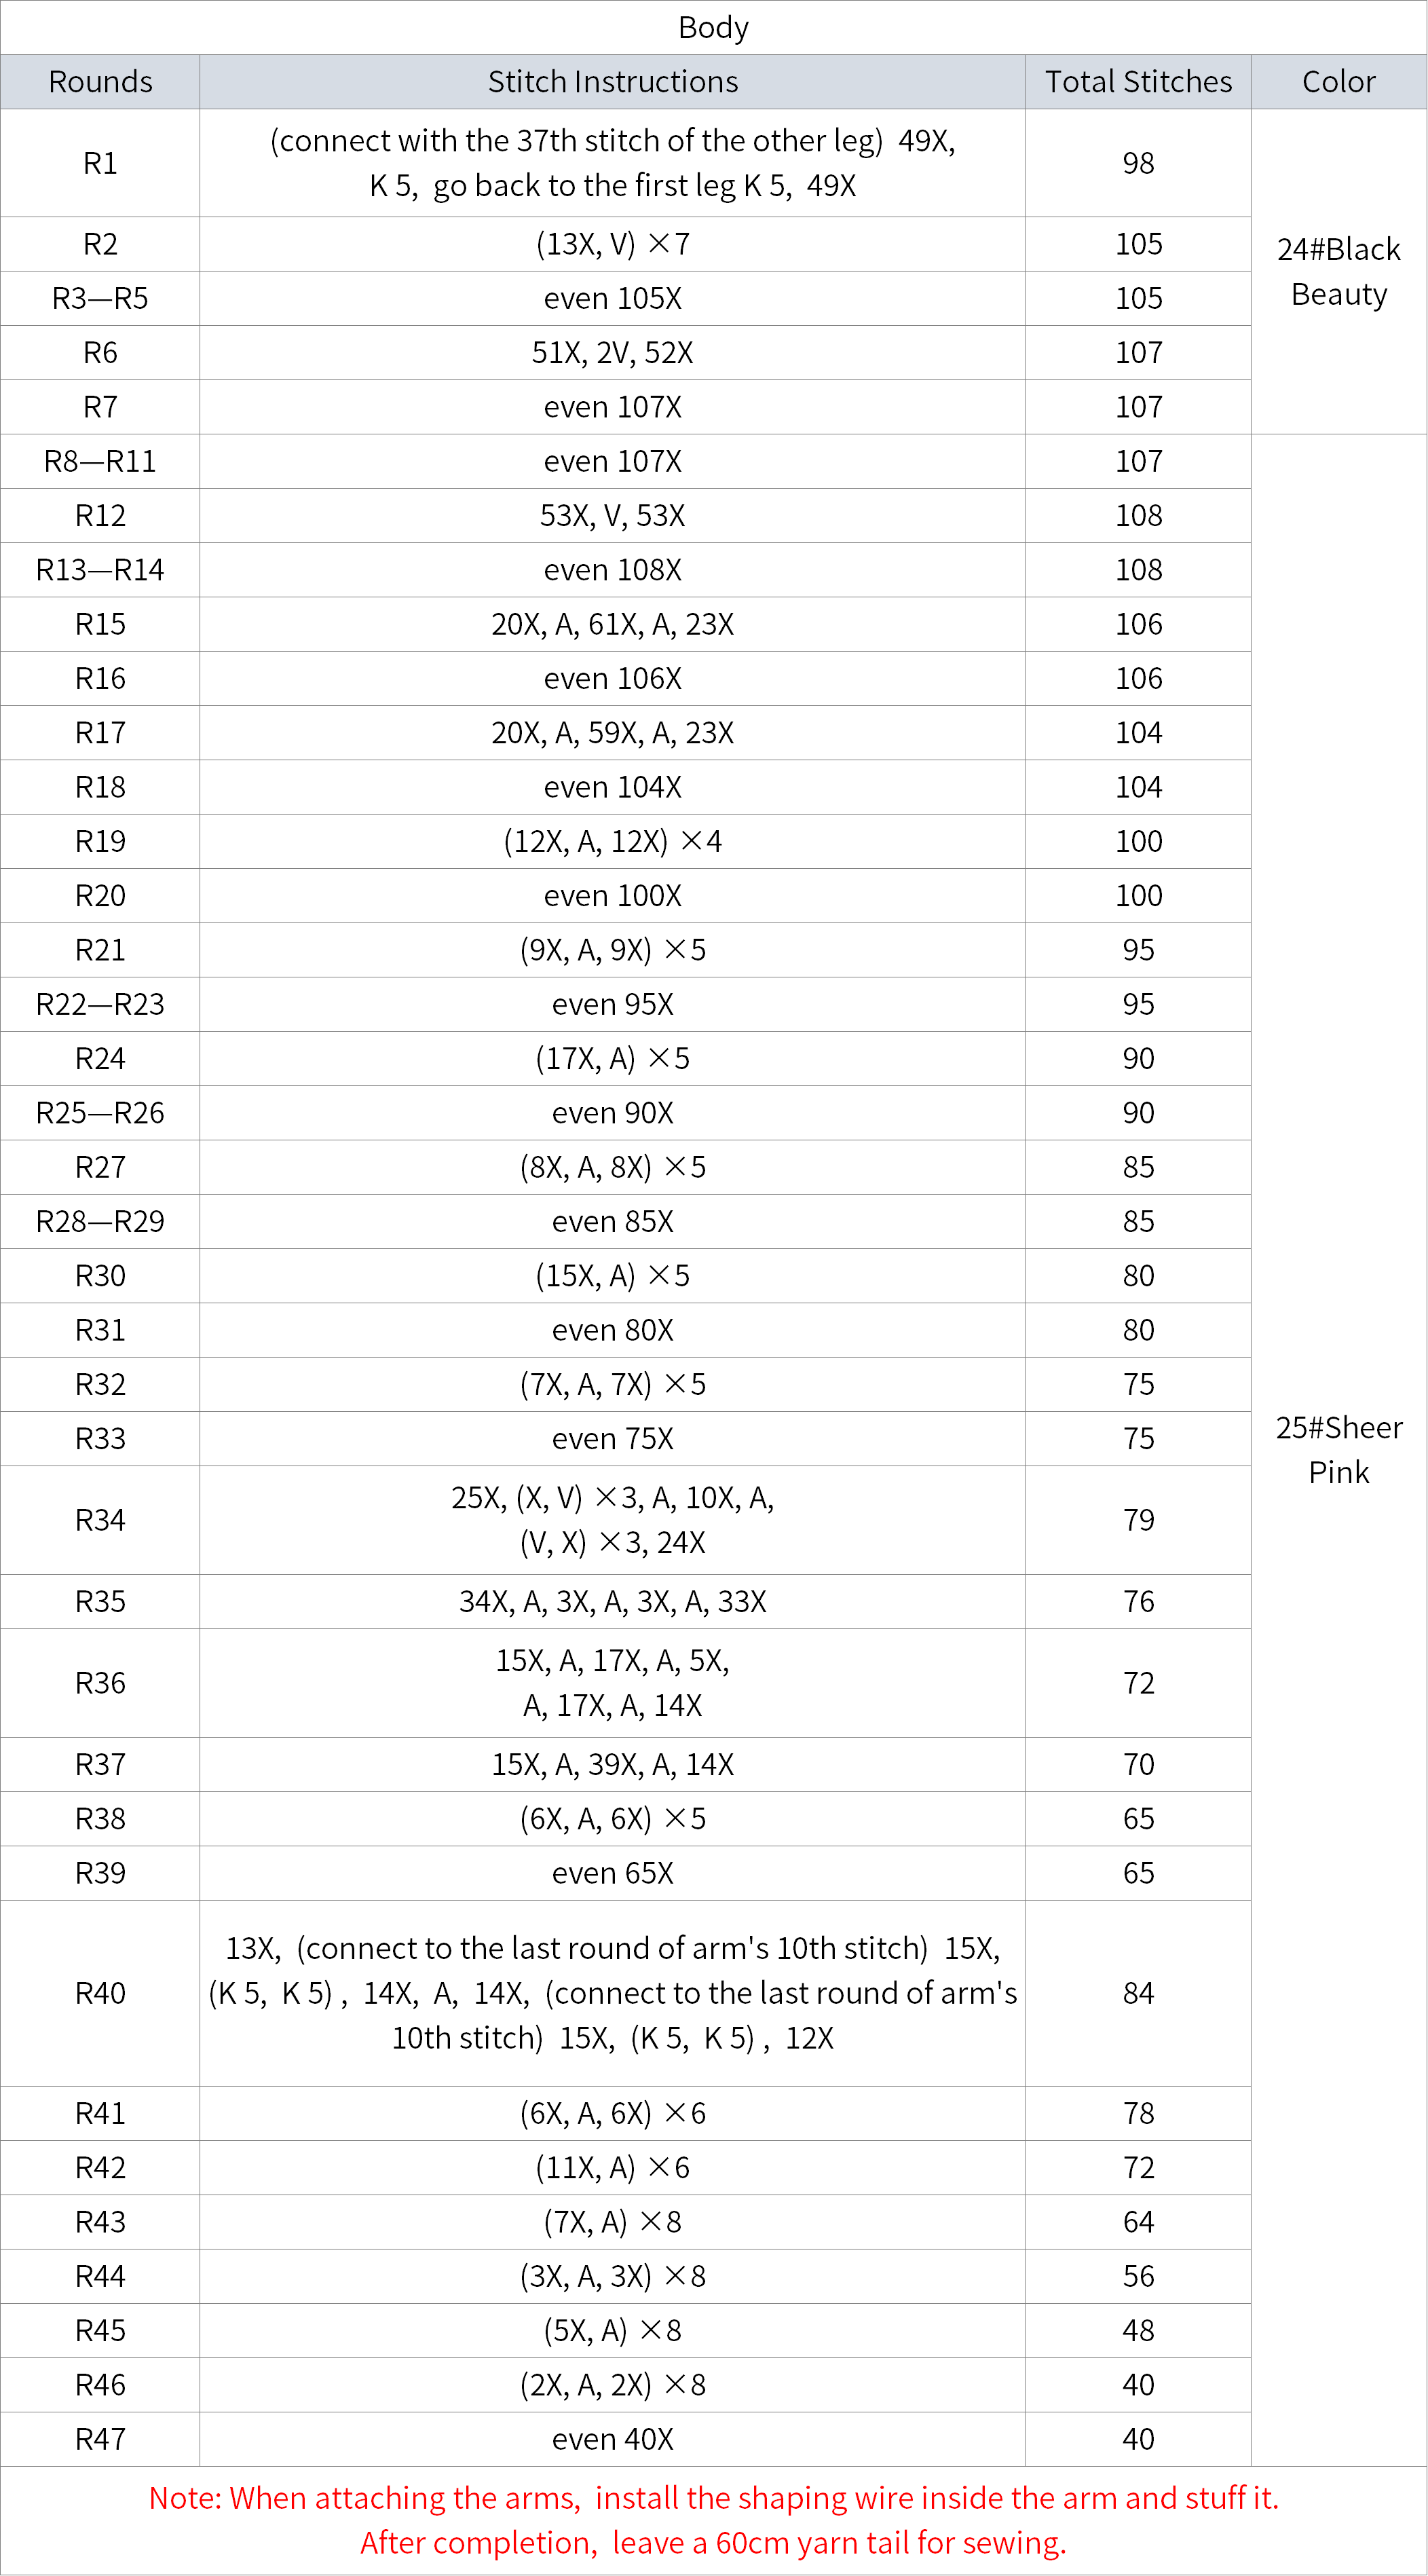
Step 3 Body
First, connect the two legs together, then continue crocheting upwards along the two legs. While crocheting, you need to attach the arms and add shaping wire and fiberfill.
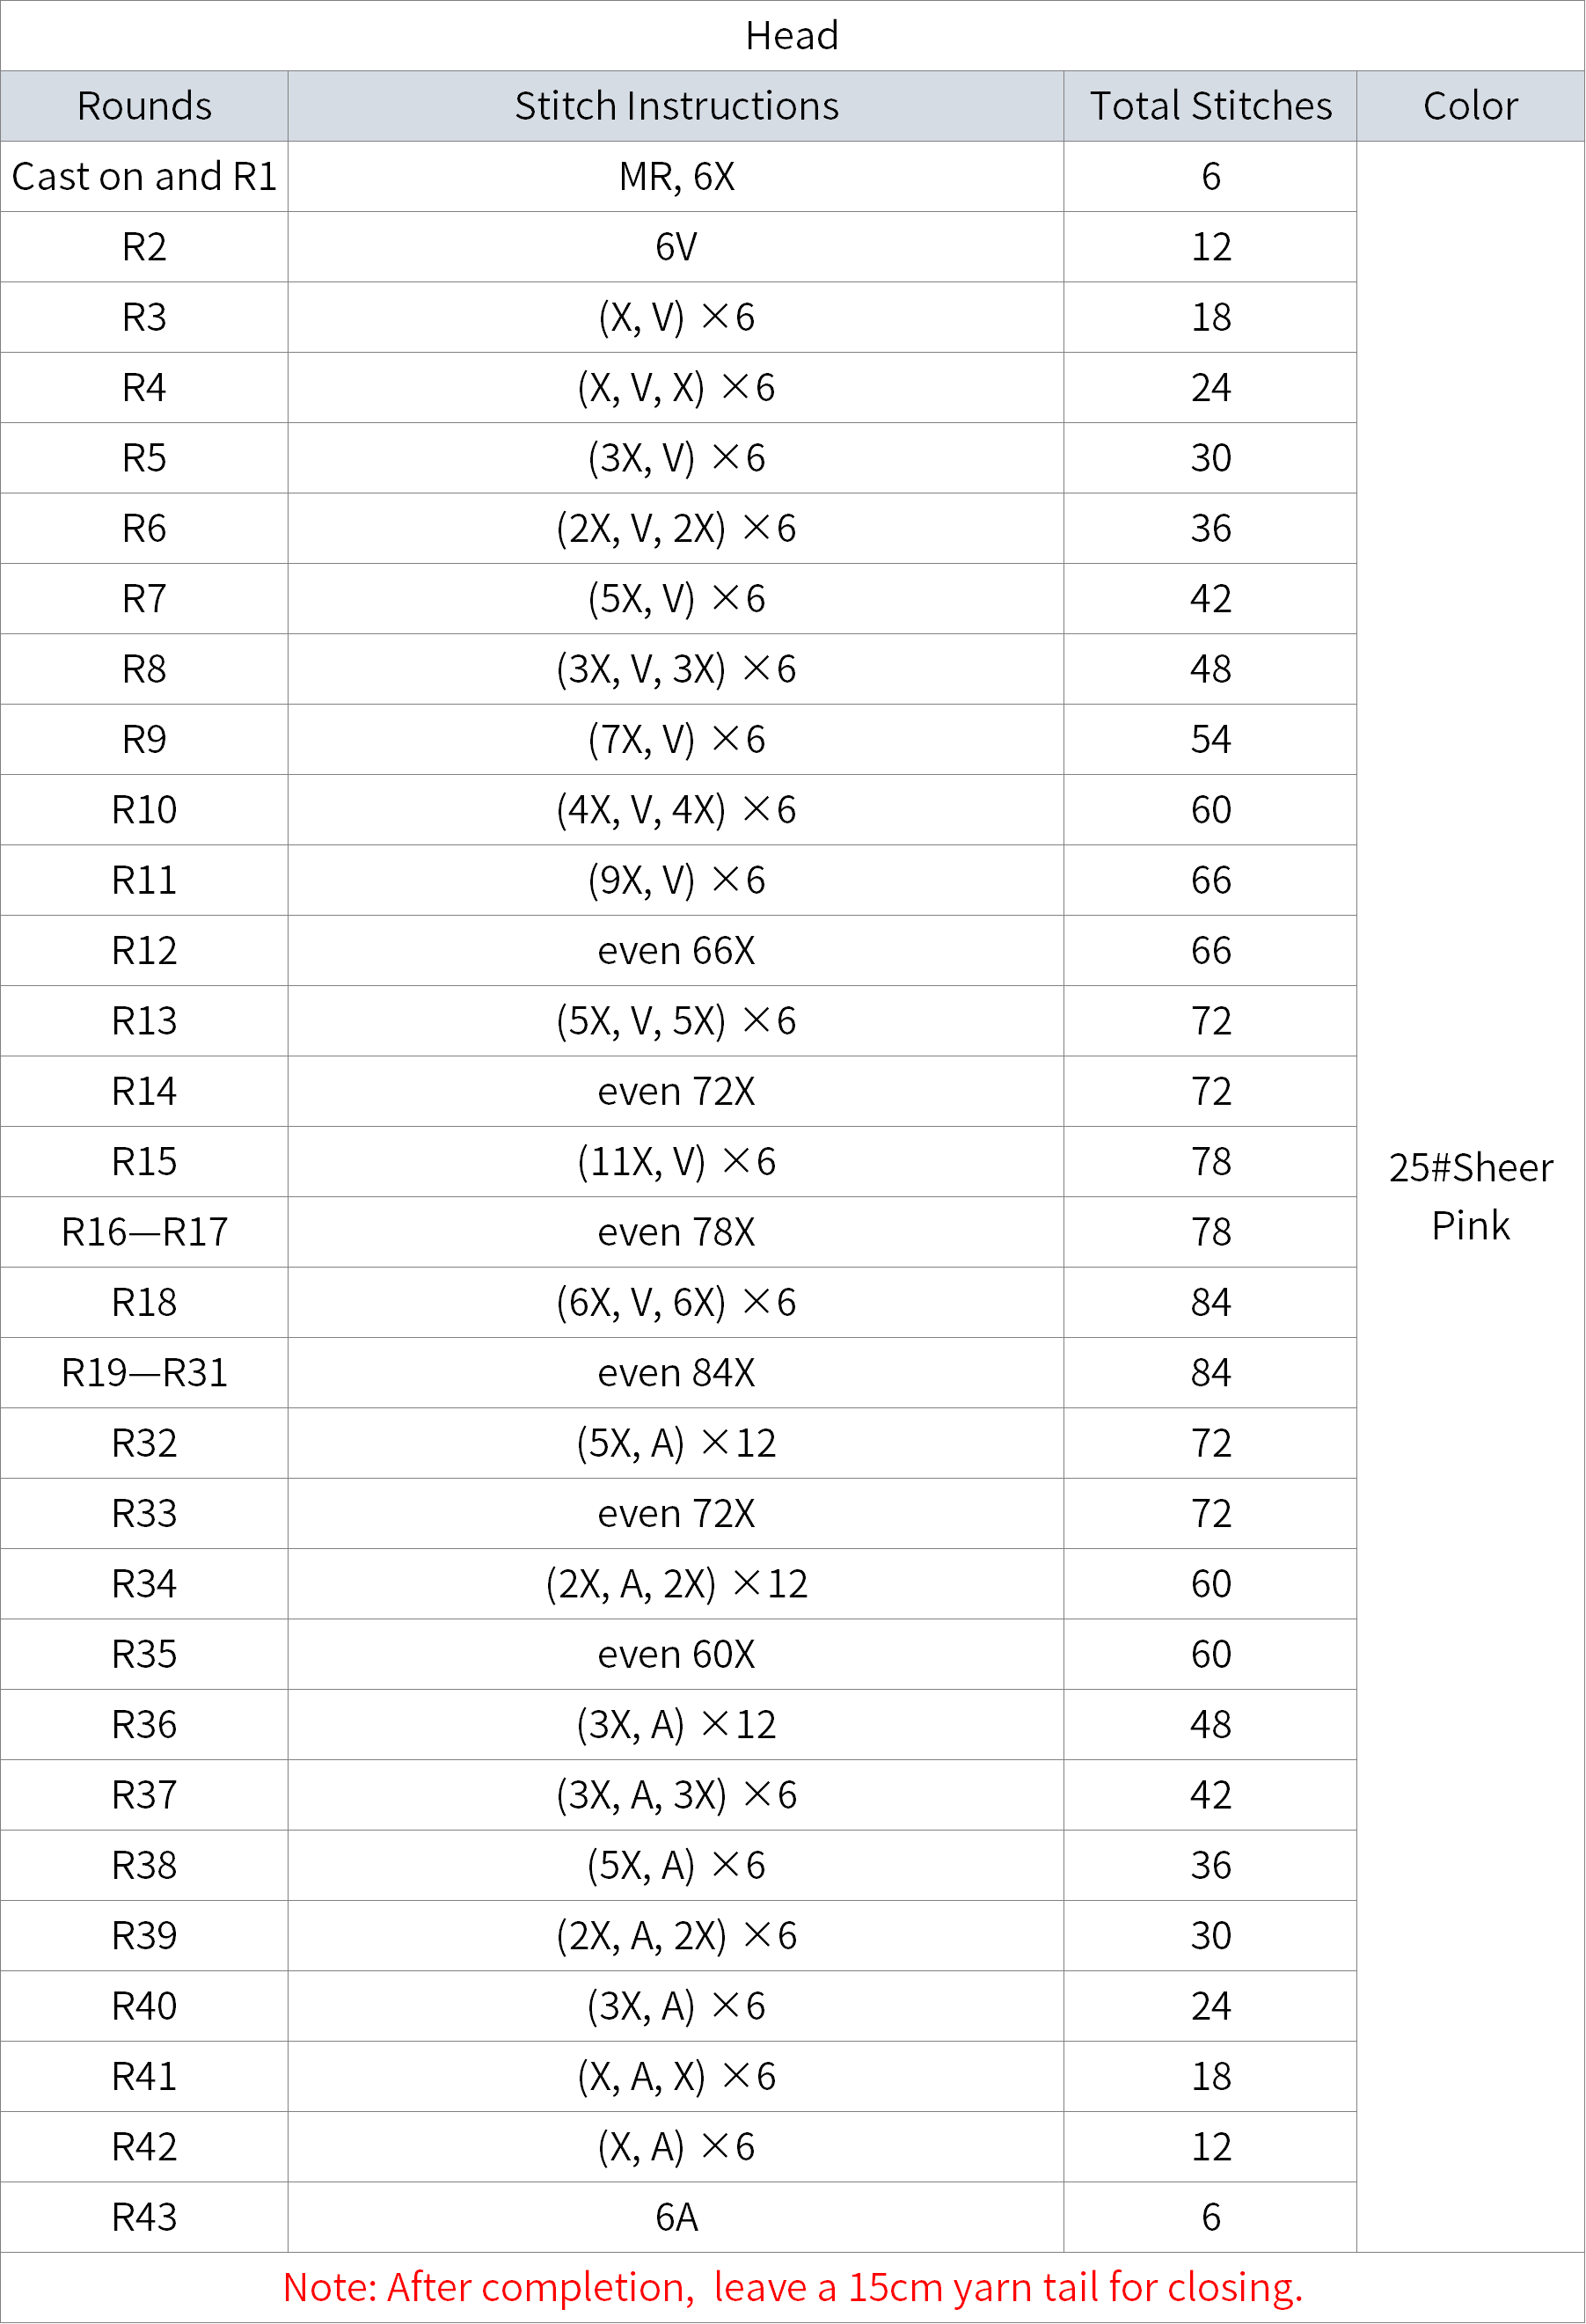
Step 4 Head
The head is also started with a magic ring, crocheting in rounds.
Part 2 Accessories
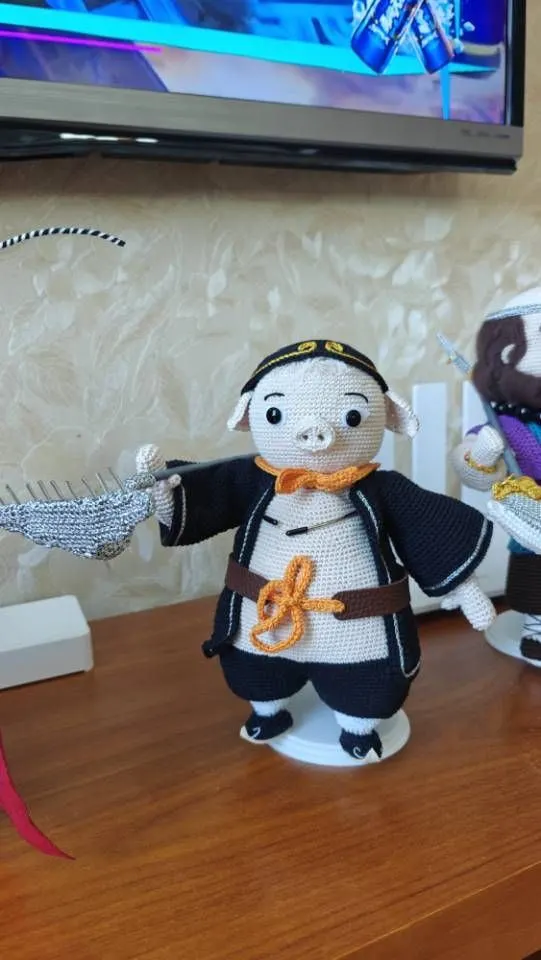
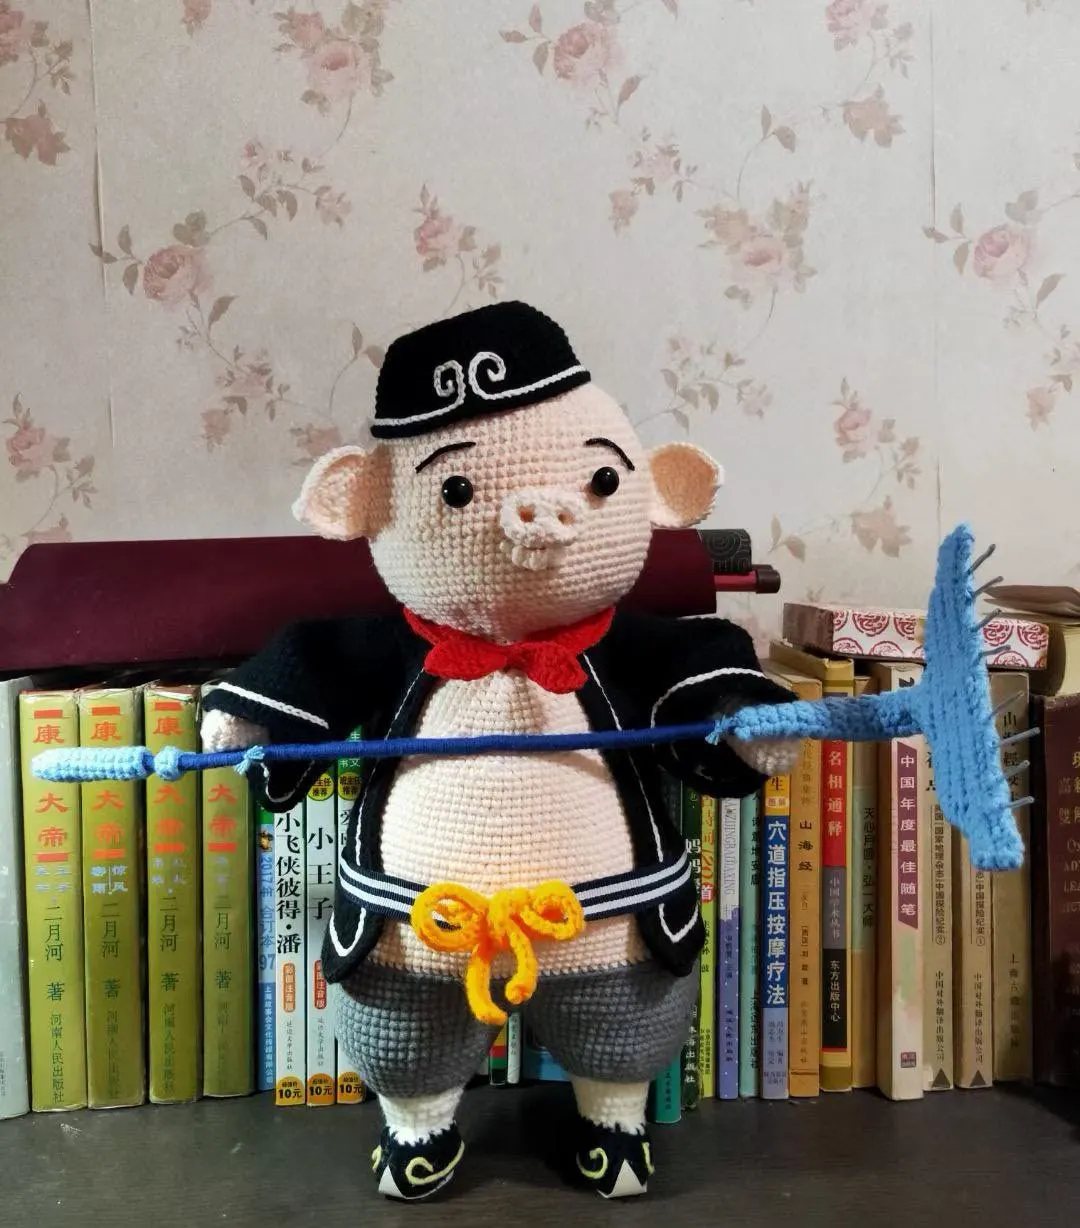
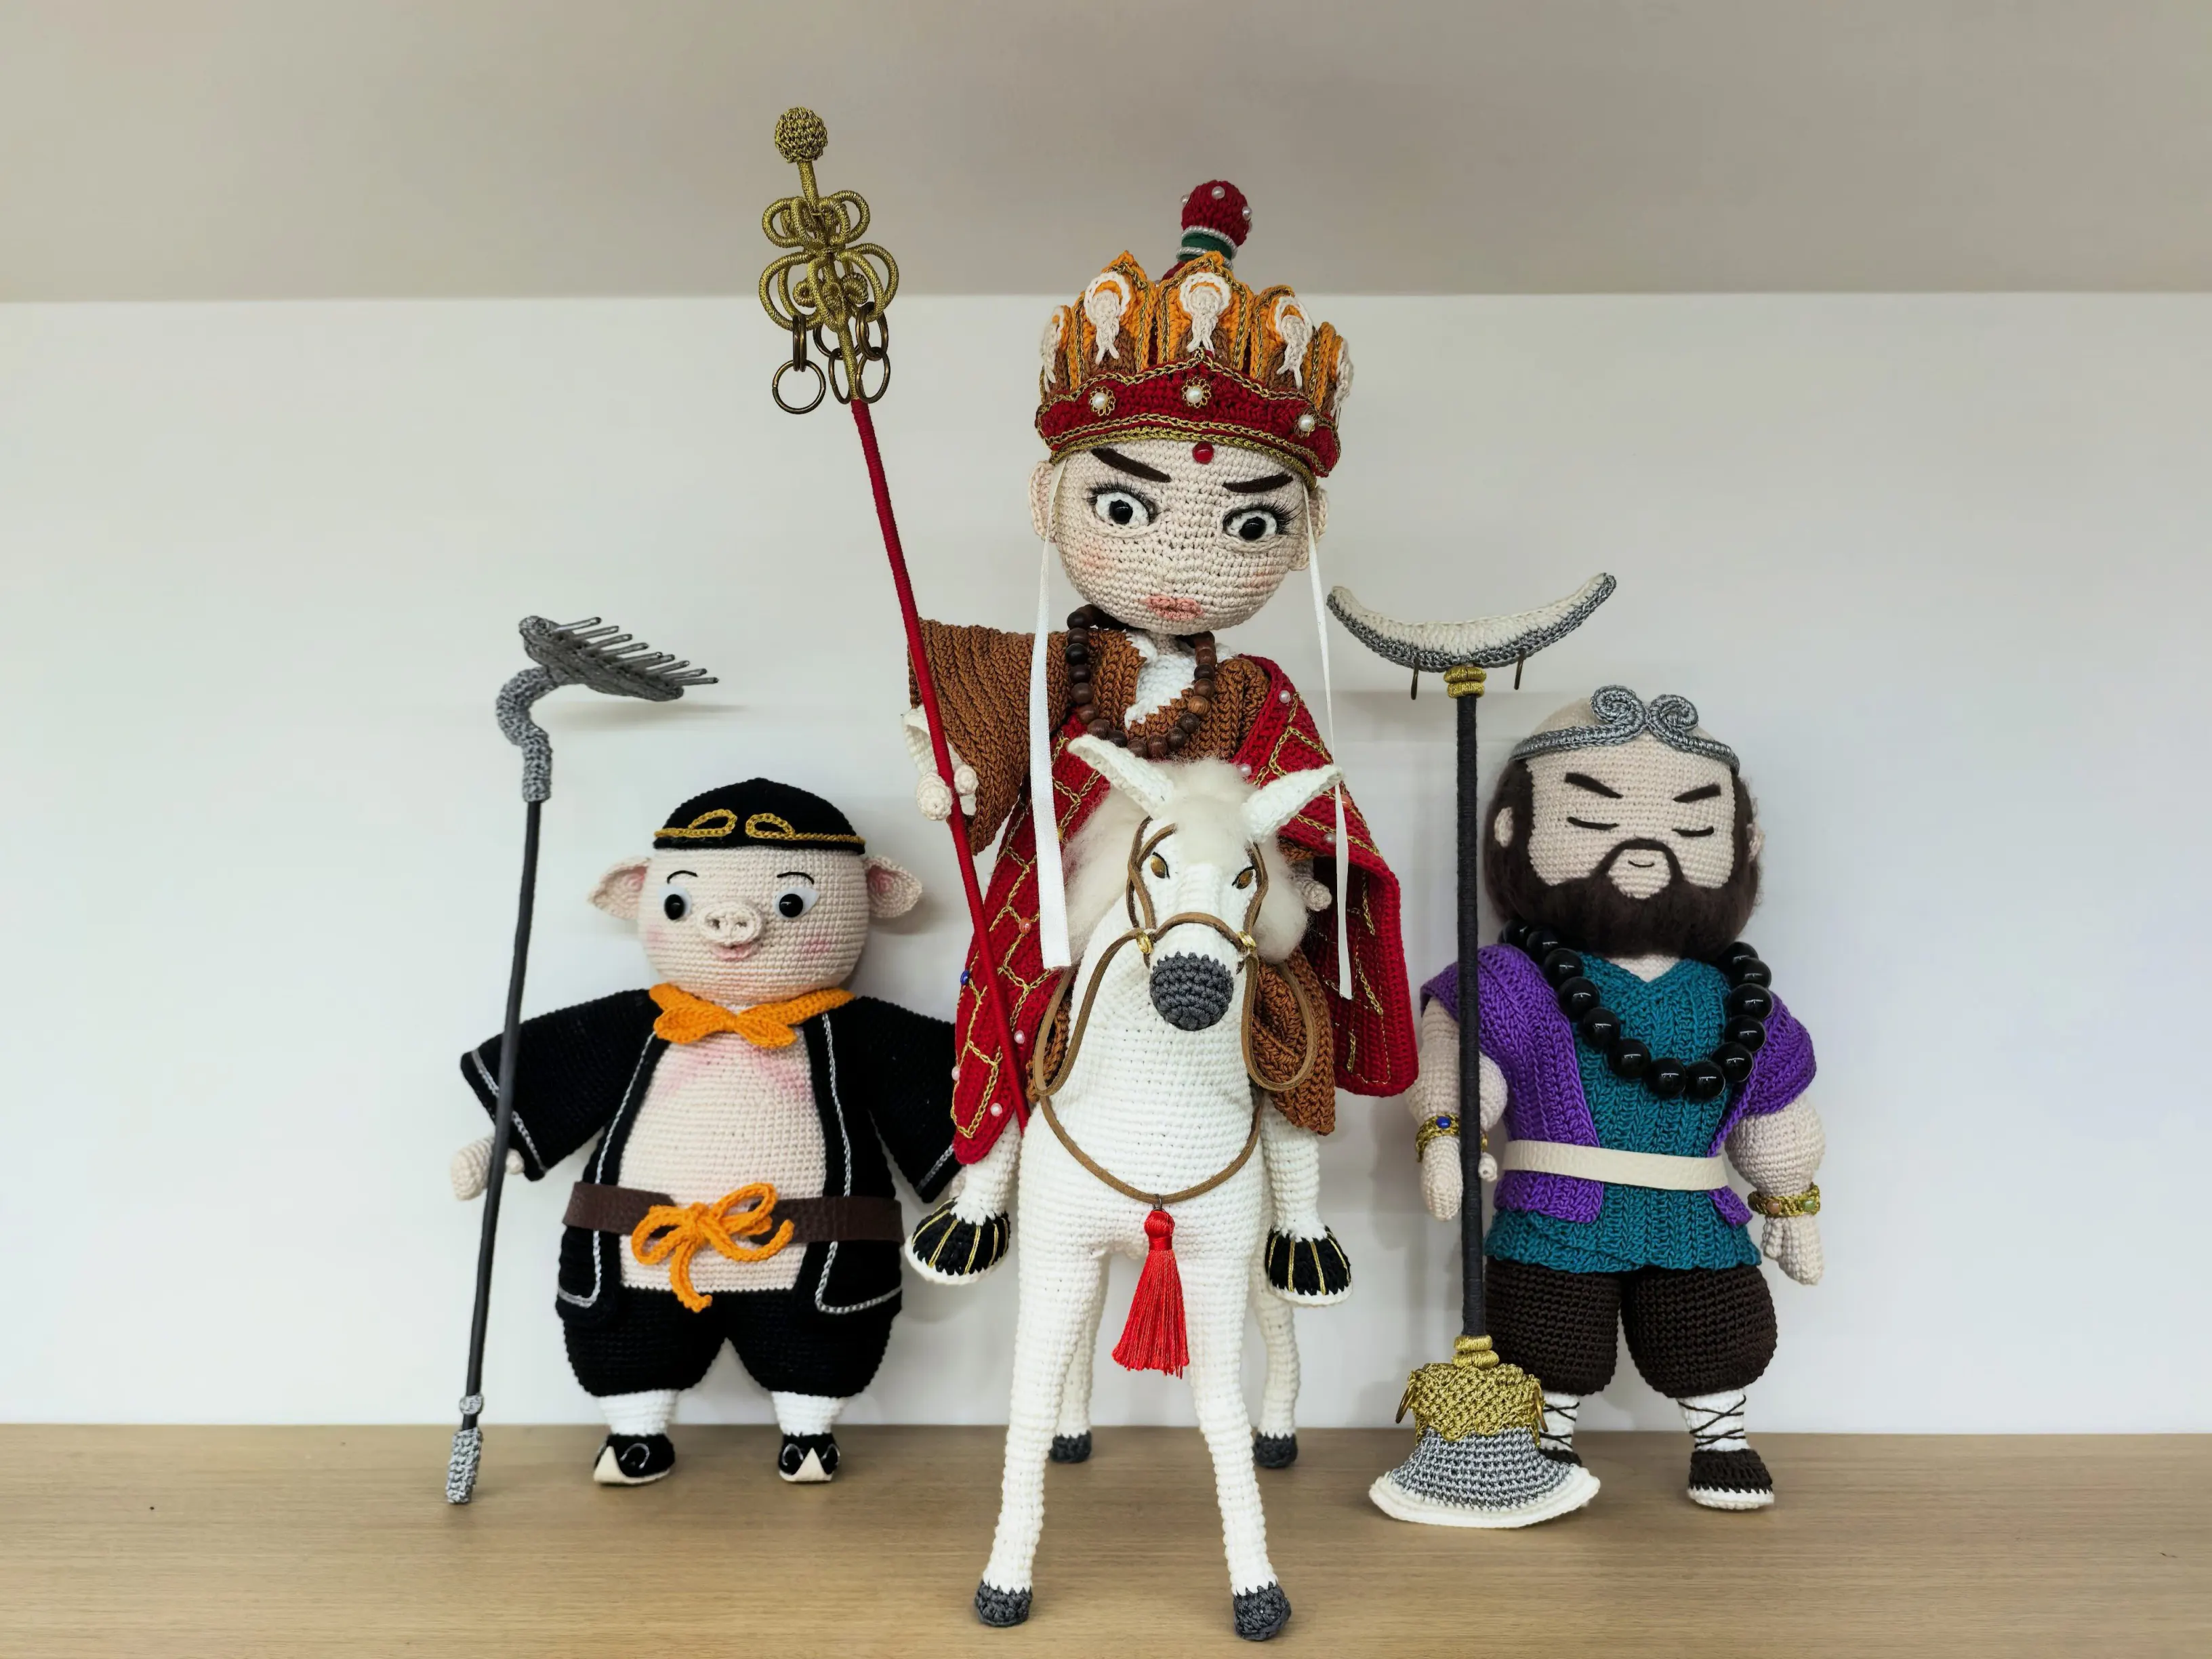
Accessories include face features, a coat, a hat, a scarf, a belt and a rake.
Step 1 Face Features
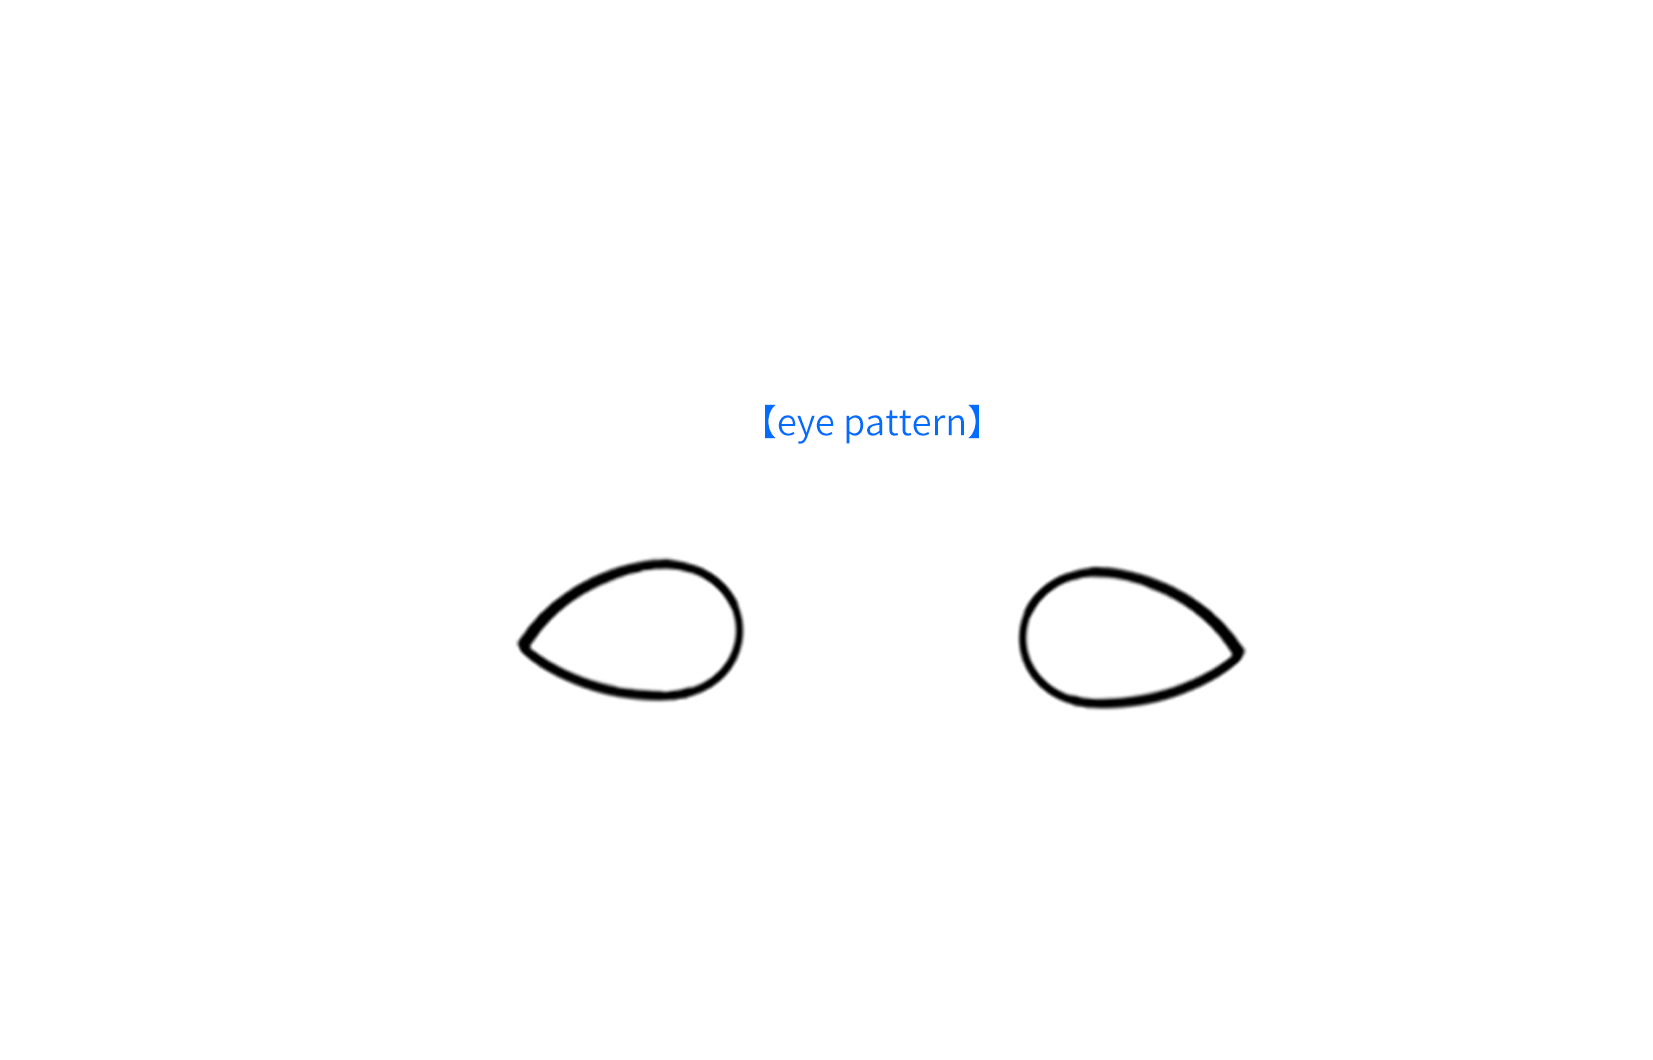
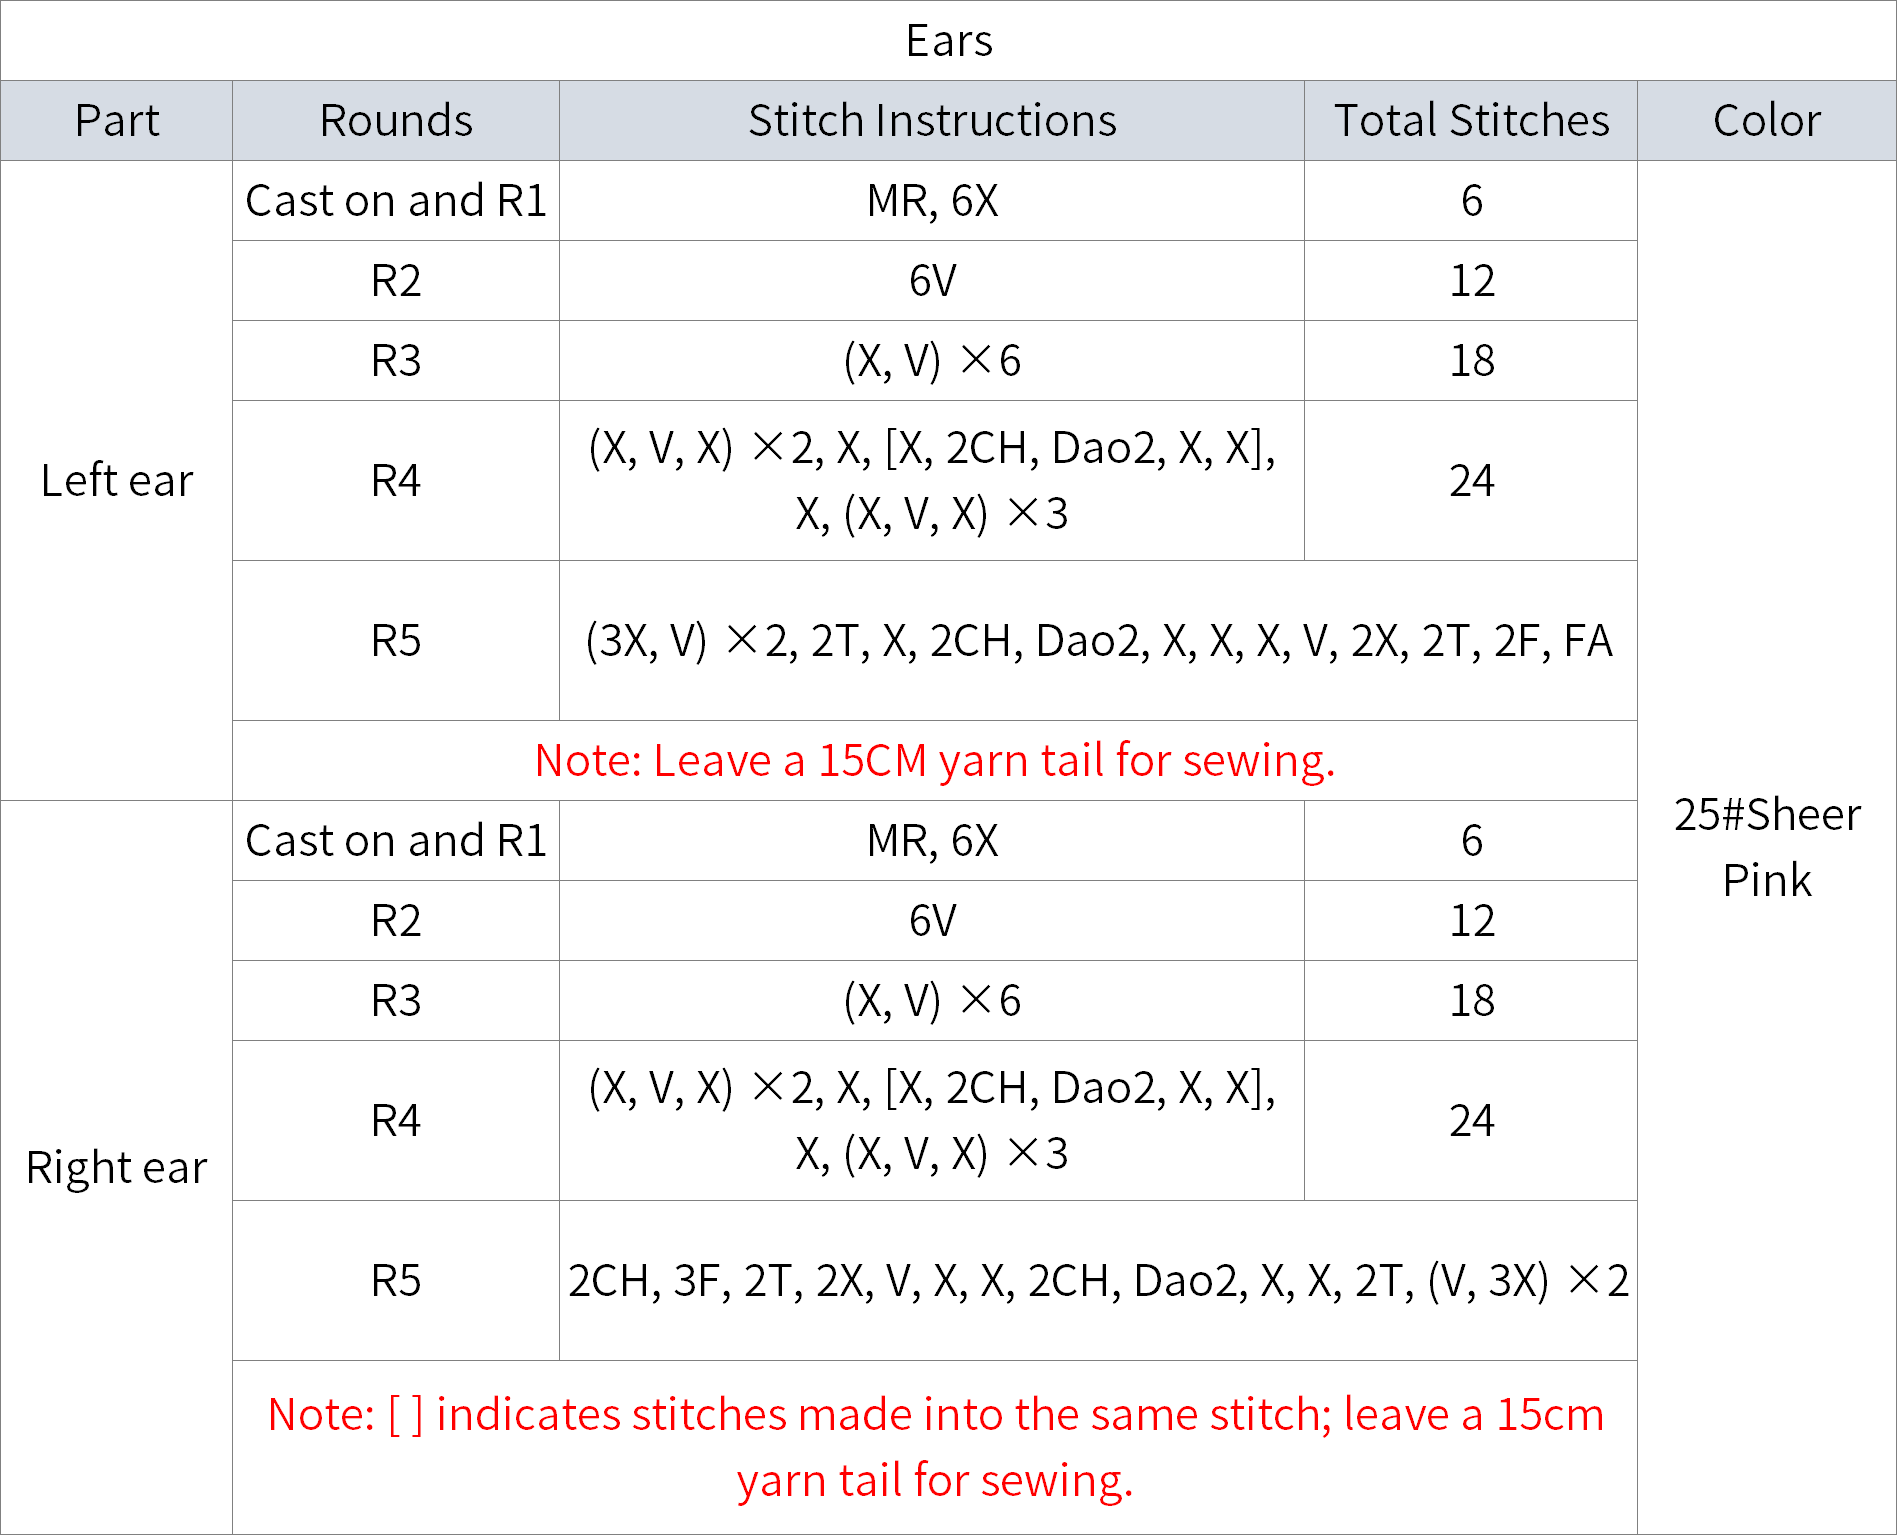
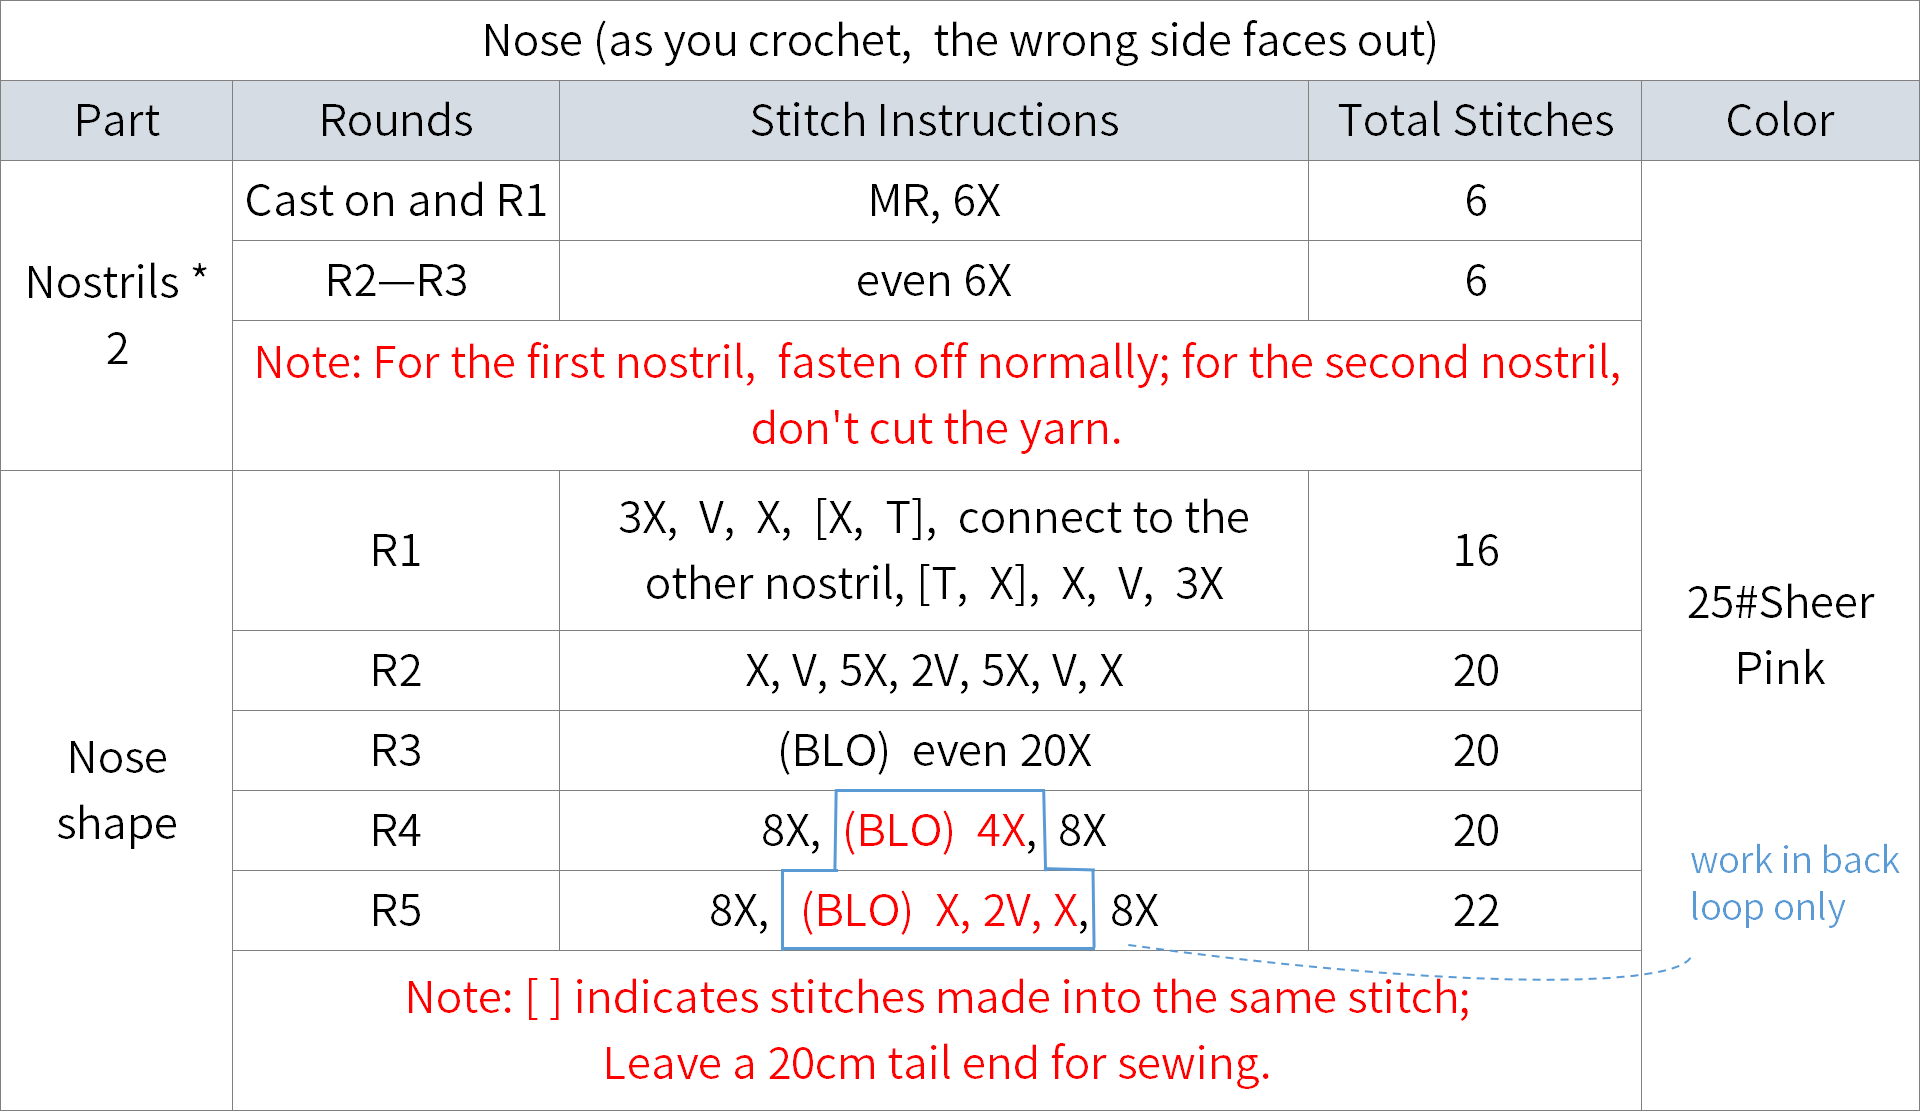
Crochet the left and right ears, nose, and lips separately, and attach them to the corresponding positions on the head. Then add the eyes and eyebrows (4-Ply Combed Cotton & Acrylic Fibre Hand Knitting Yarn - 61#Cappuccino) to the front of the head. Finally, add a tuft of hair and blush.
Step 2 Coat
The piece consists of the main body, edging, sleeves, and decorations. The main body starts with a foundation chain and is worked back and forth, leaving openings for the armholes as you go. Once completed, crochet around the edges of the garment to add the border. Next, pick up stitches at the armhole positions and work in rounds to create the sleeves. Finally, add the decorations.

Step 3 Hat
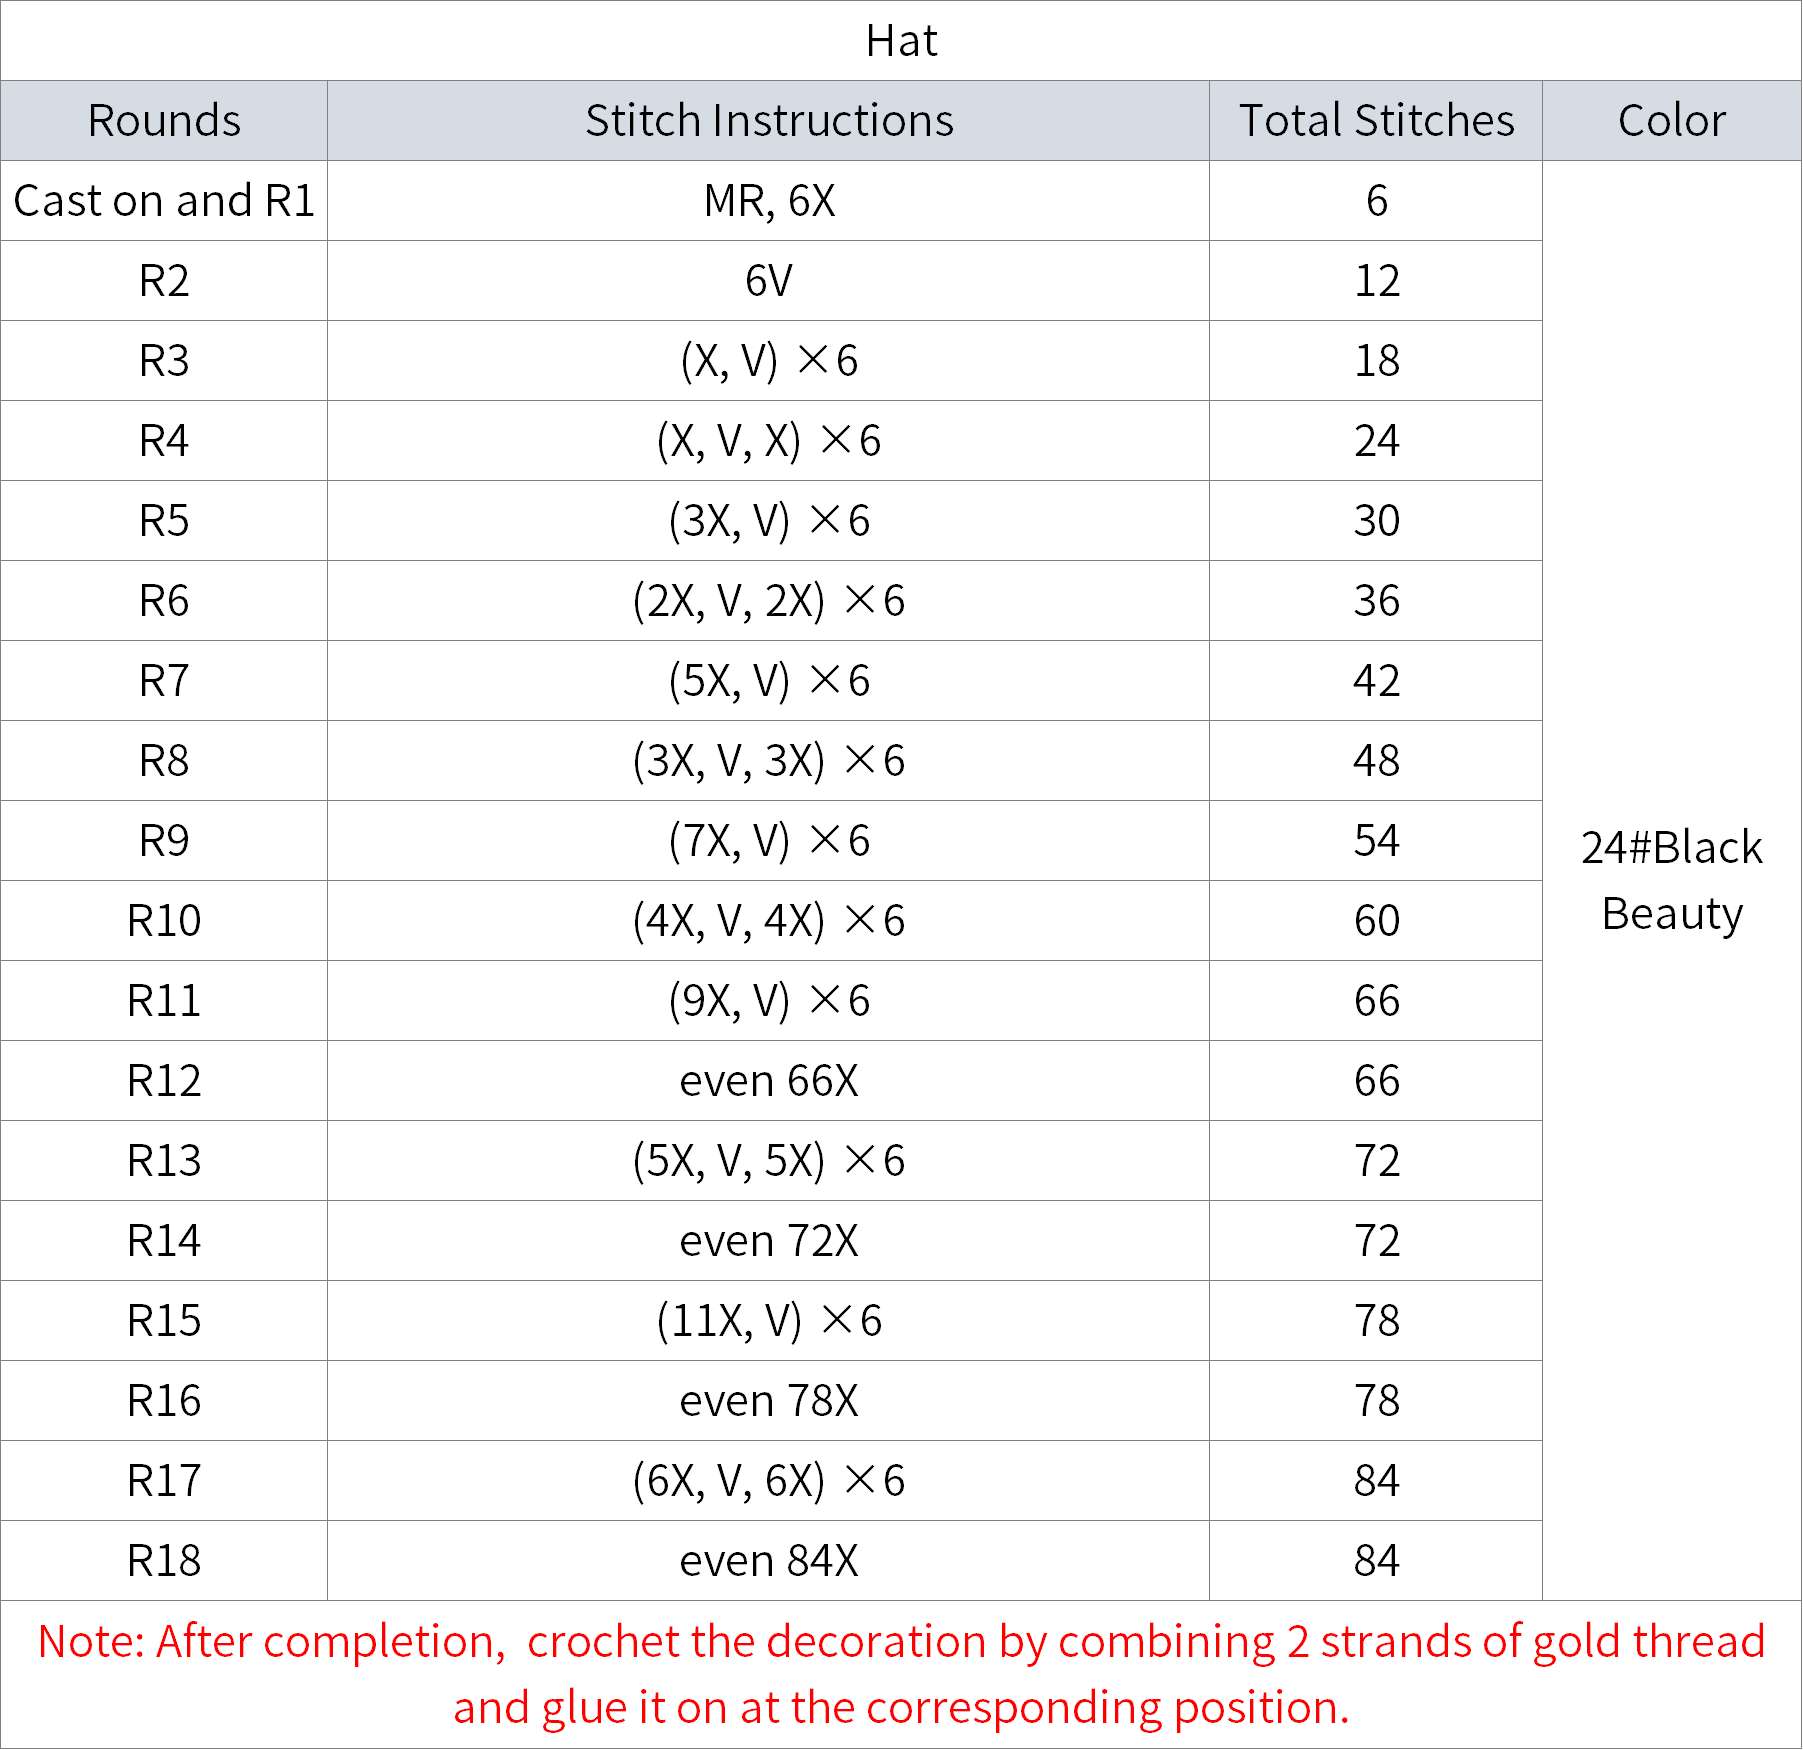
Divide into two parts: the main part and decorations. First, crochet the main part, then add the decorations (combine 2 strands of gold thread to crochet).
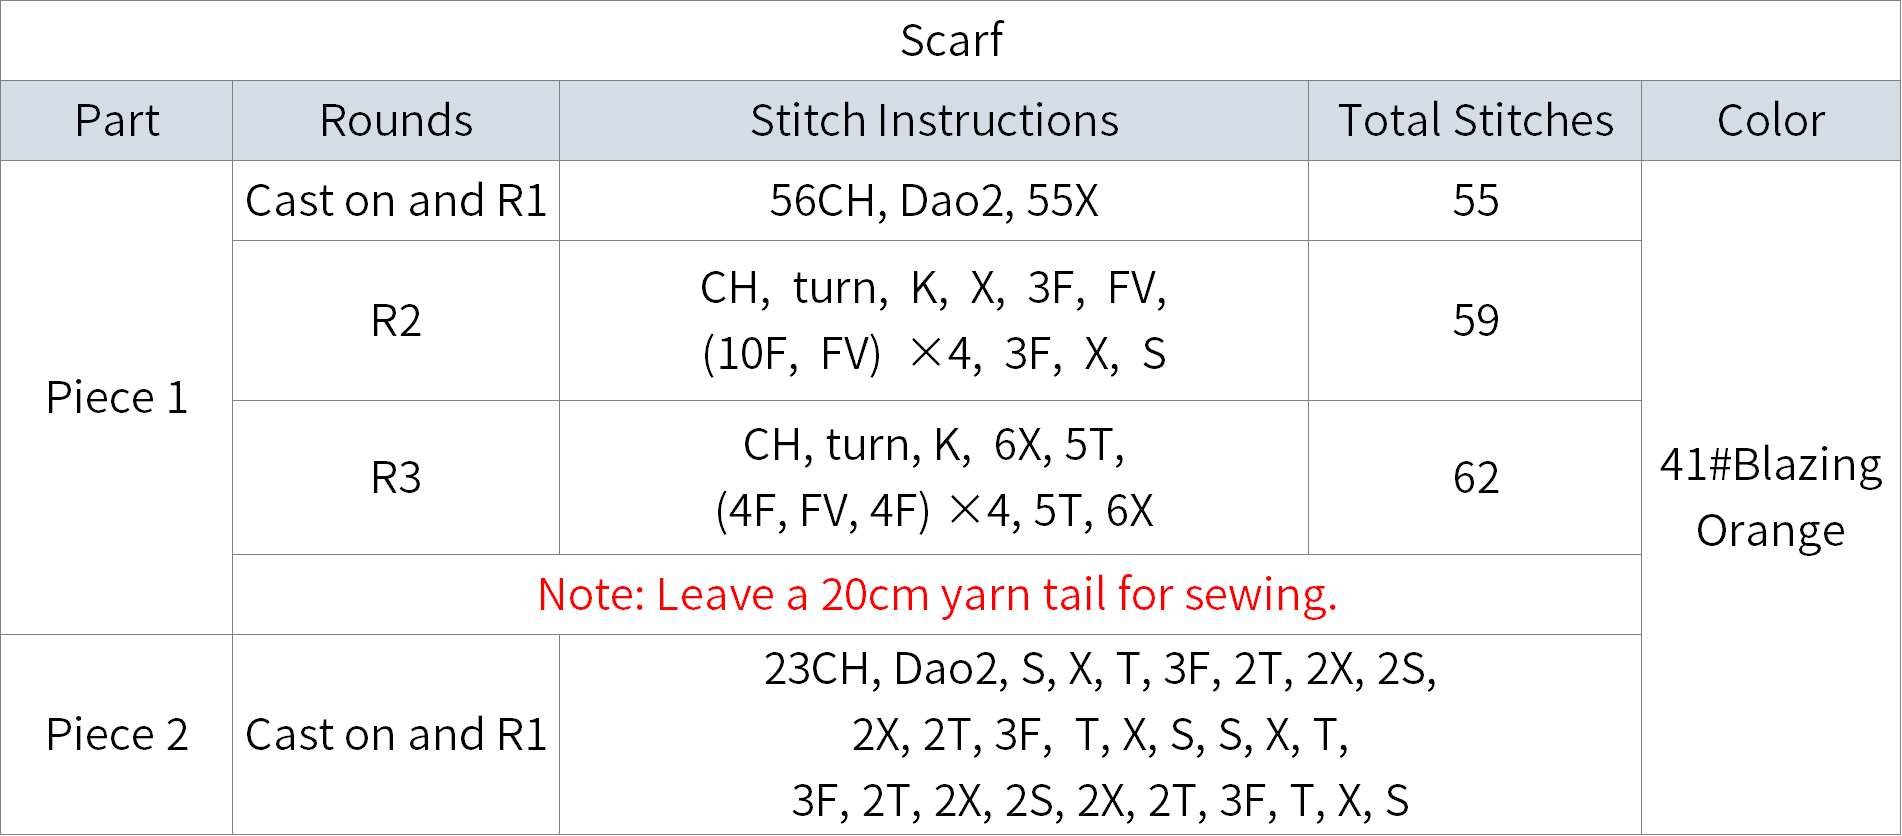
Step 4 Scarf
Composed of piece one and piece two, both use a chain stitch for casting on and work back and forth along the starting chain. After completion, they are sewn together.
Step 5 Belt
It's made up of belts and fabric pieces.

Step 6 Rake
It is assembled from 4 fabric pieces, a grid board, and shaping wires. First, crochet each piece separately, then proceed with the assembly.
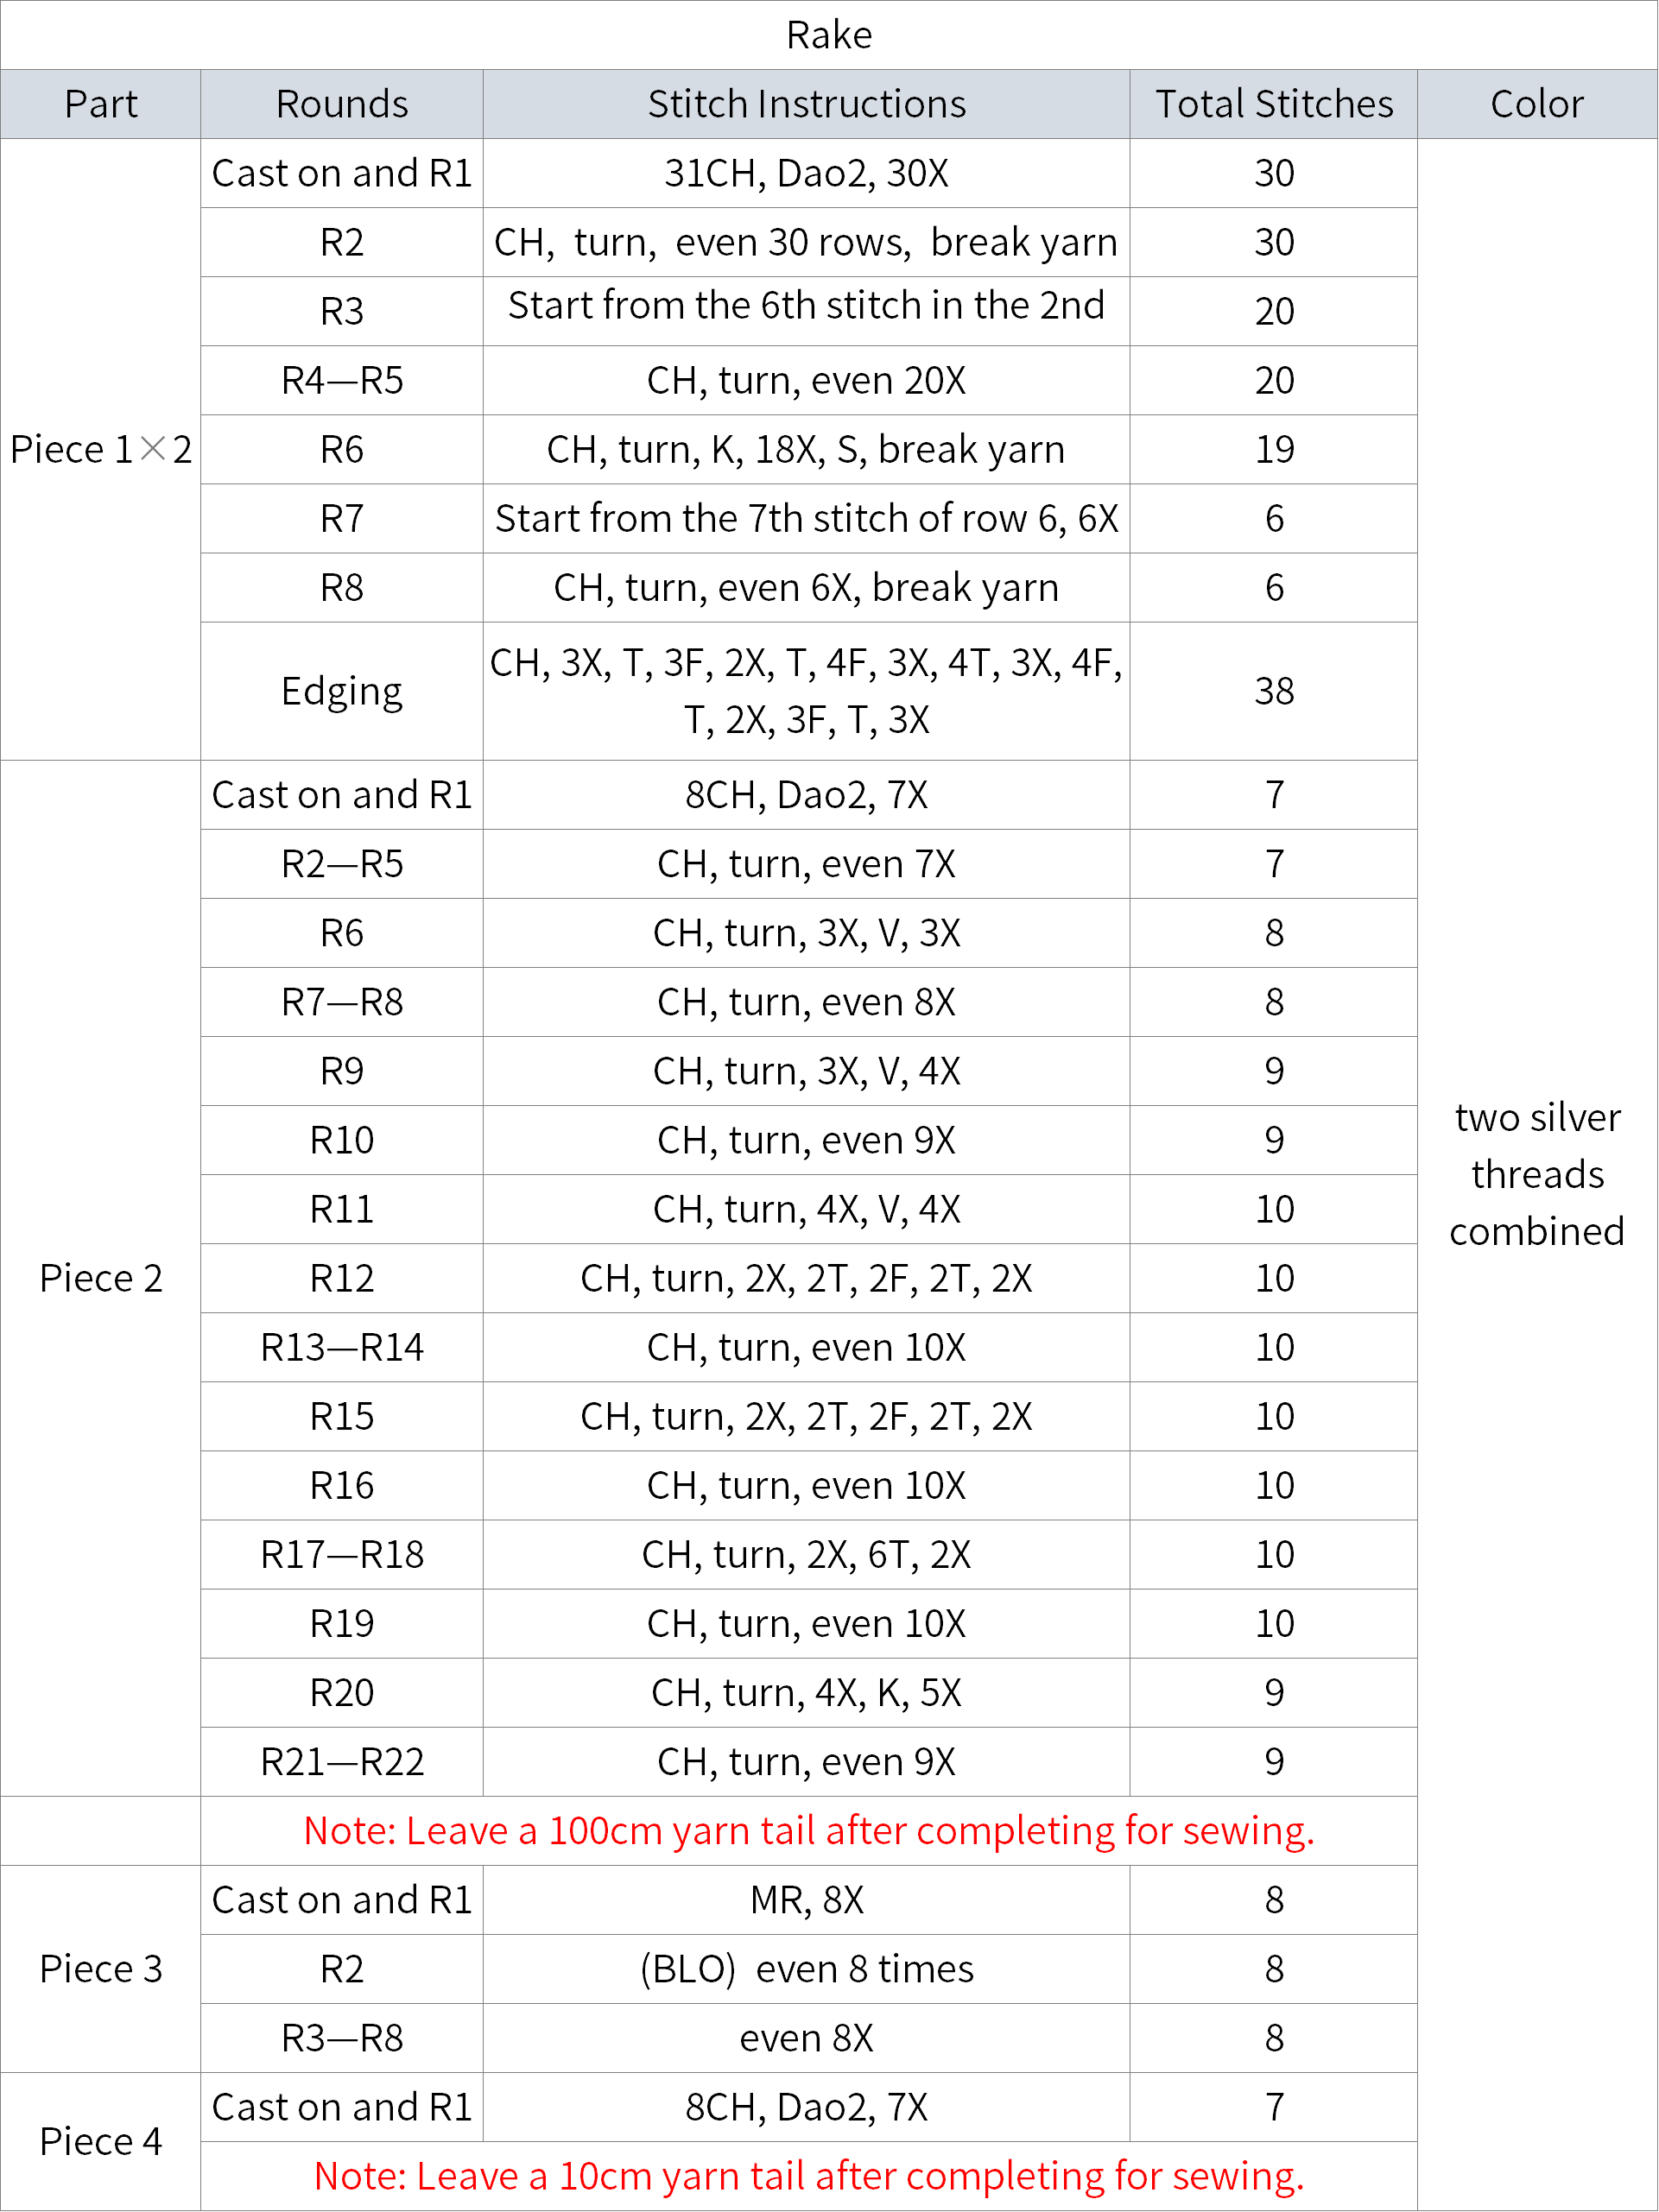
Rake teeth wrapping: Use one or two strands of silver thread for wrapping, ensuring the shaping wire is not exposed.
Rake handle wrapping: Use 4-Ply Combed Cotton & Acrylic Fibre Hand Knitting Yarn of 52#Blackened Pearl.
Made by the community