Bag
Hedgehog Pouch
Project preview
See the finished project
Pattern format
Instructions
| Style | Yarn | Color |
|---|---|---|
| Azure Ink Version | Handcrafted No.2 Knit Thread |  107#Azure Ink x 1 107#Azure Ink x 1 |
| 4-Ply Combed Cotton & Acrylic Fibre Hand Knitting Yarn | 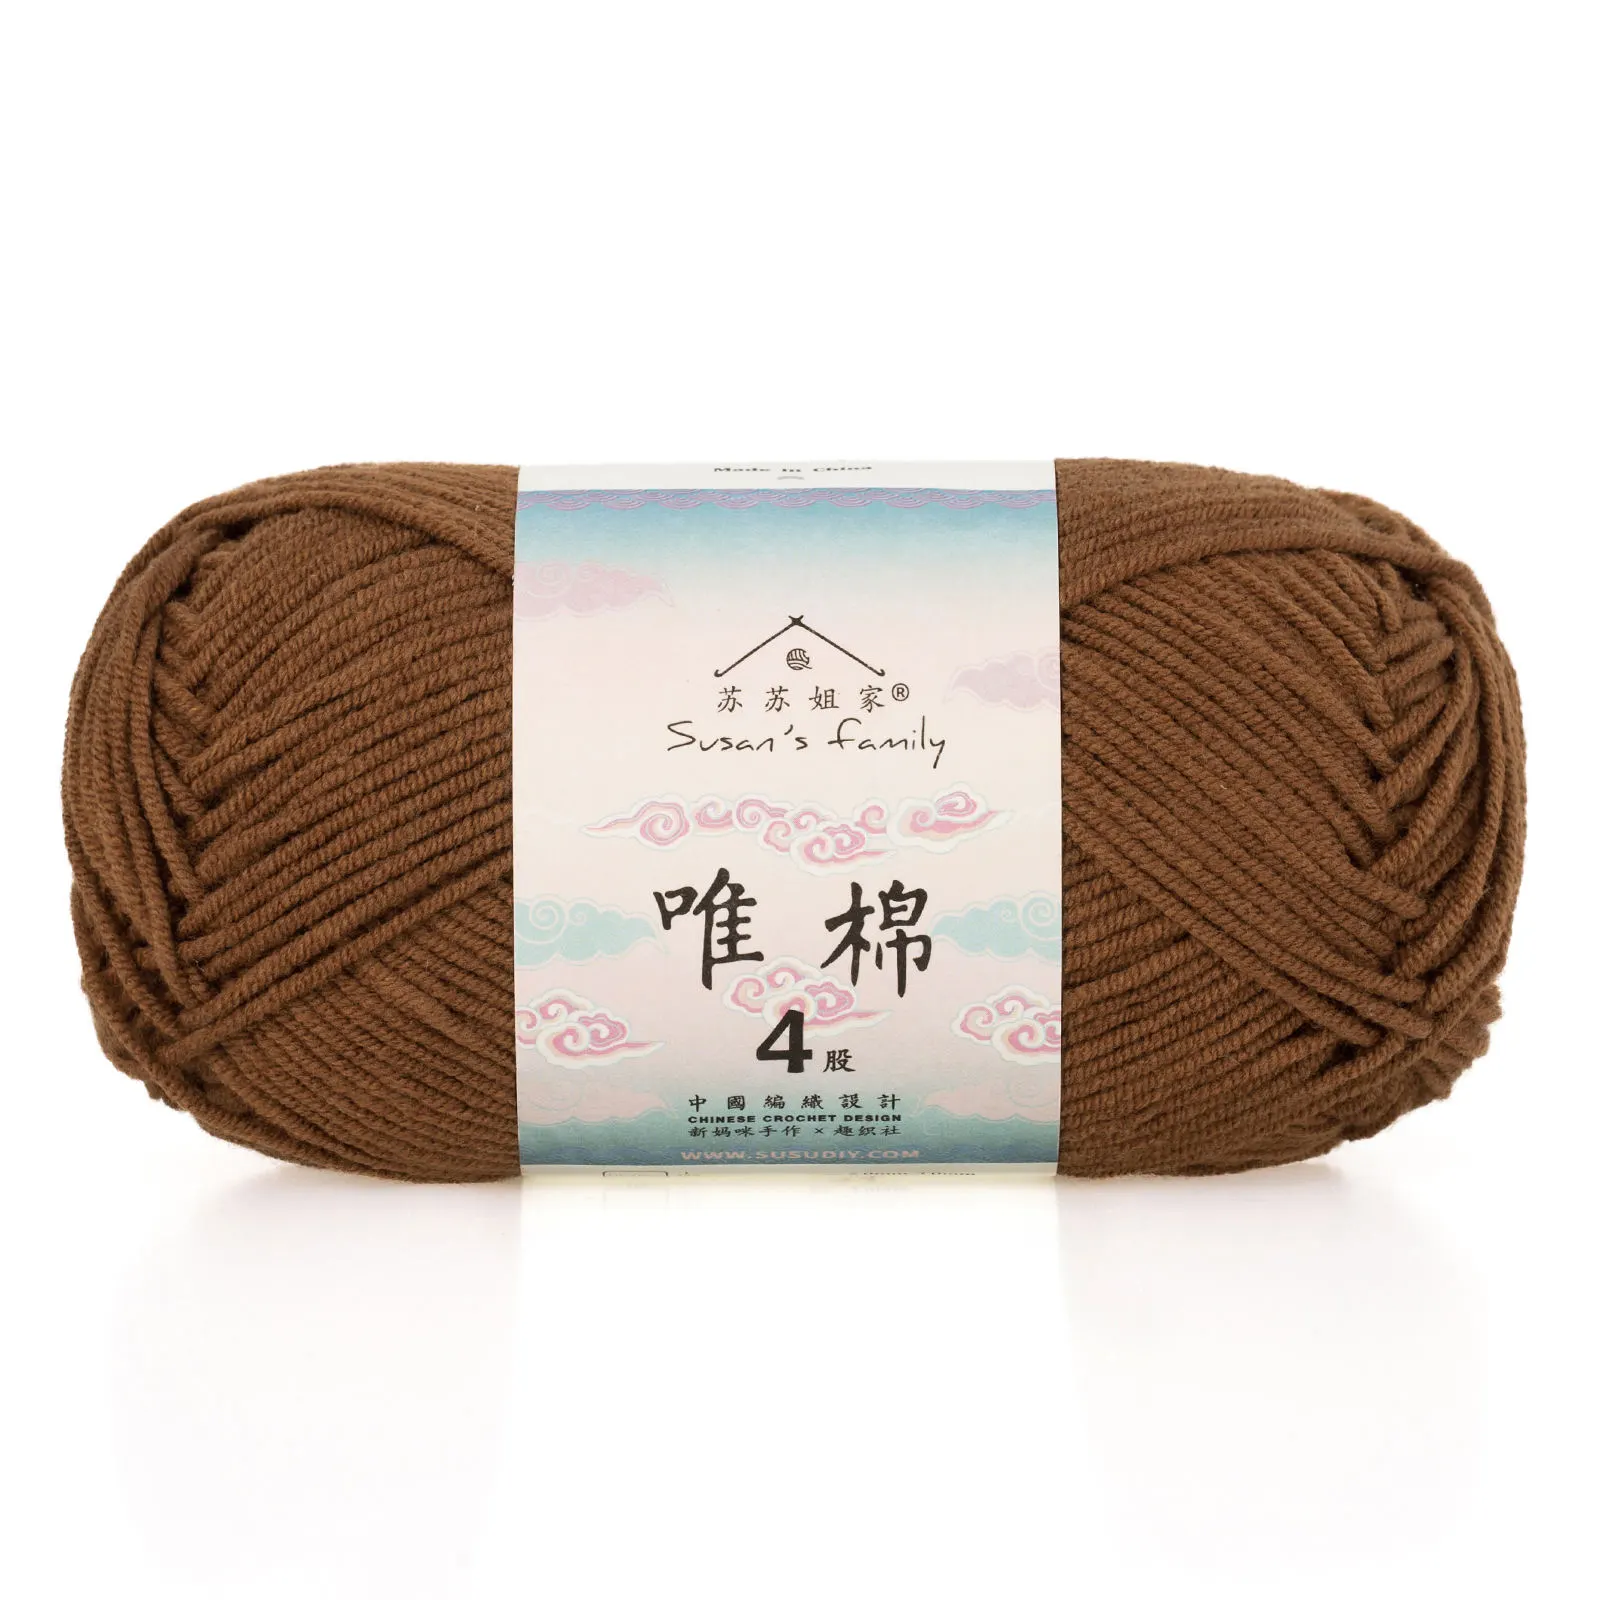 34#Toffee x 1 34#Toffee x 1 | |
| Garden Oasis Version | Handcrafted No.2 Knit Thread |  104#Garden Oasis x 1 104#Garden Oasis x 1 |
| 4-Ply Combed Cotton & Acrylic Fibre Hand Knitting Yarn | 34#Toffee x 1 |
This garment includes the left and right motif sections, two front pieces, front band, back piece, hem, sleeves, and collar. Start by crocheting the left and right motifs, then crochet the left and right front pieces and front band. Next, crochet the back piece and hem, followed by the sleeves and collar. Finally, sew the buttons onto the front band.
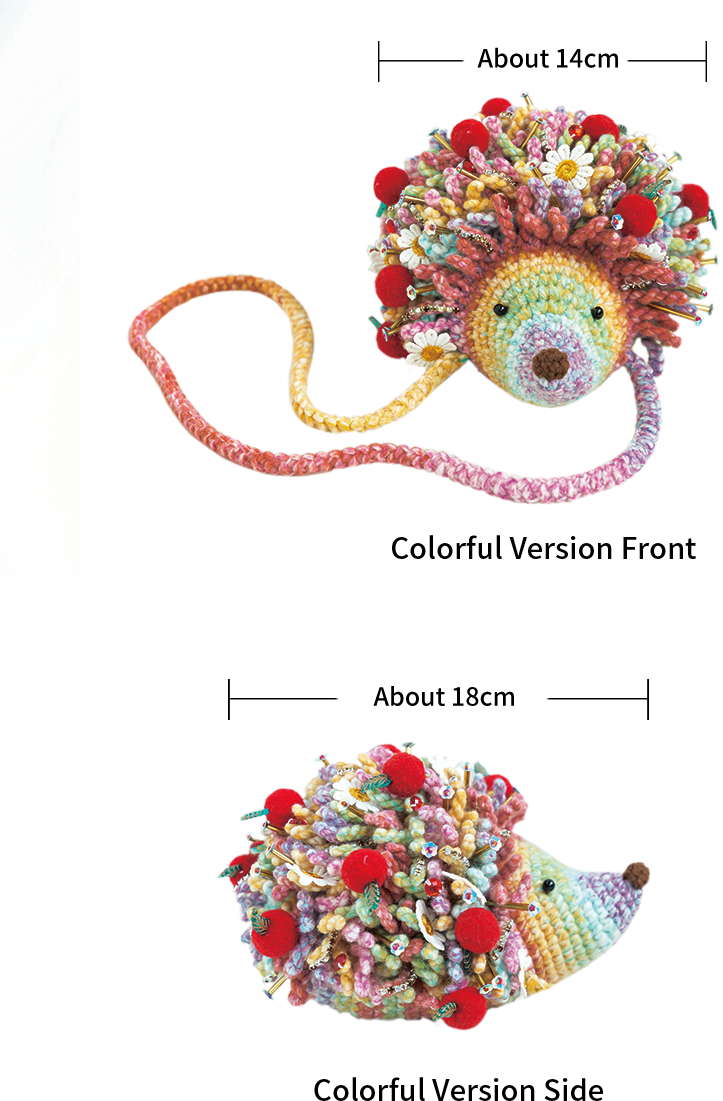
The handcrafted measurements may have an error, the size of the sample is for reference only.
Note: Because the yarn used for crocheting is special, the color of the yarn tail at the starting position of each skein is different, and the final crocheted effect will also vary.
Materials: Handcrafted No.2 Knit Thread & 4-Ply Combed Cotton & Acrylic Fibre Hand Knitting Yarn
Tool: 3.50 mm Crochet Hook






Note:
1. This pattern is making in Chinese crochet pattern terms, and the stitch name is written using American terminology. All measurements in charts are in cm.
Part 1 Main partA 00' 44''
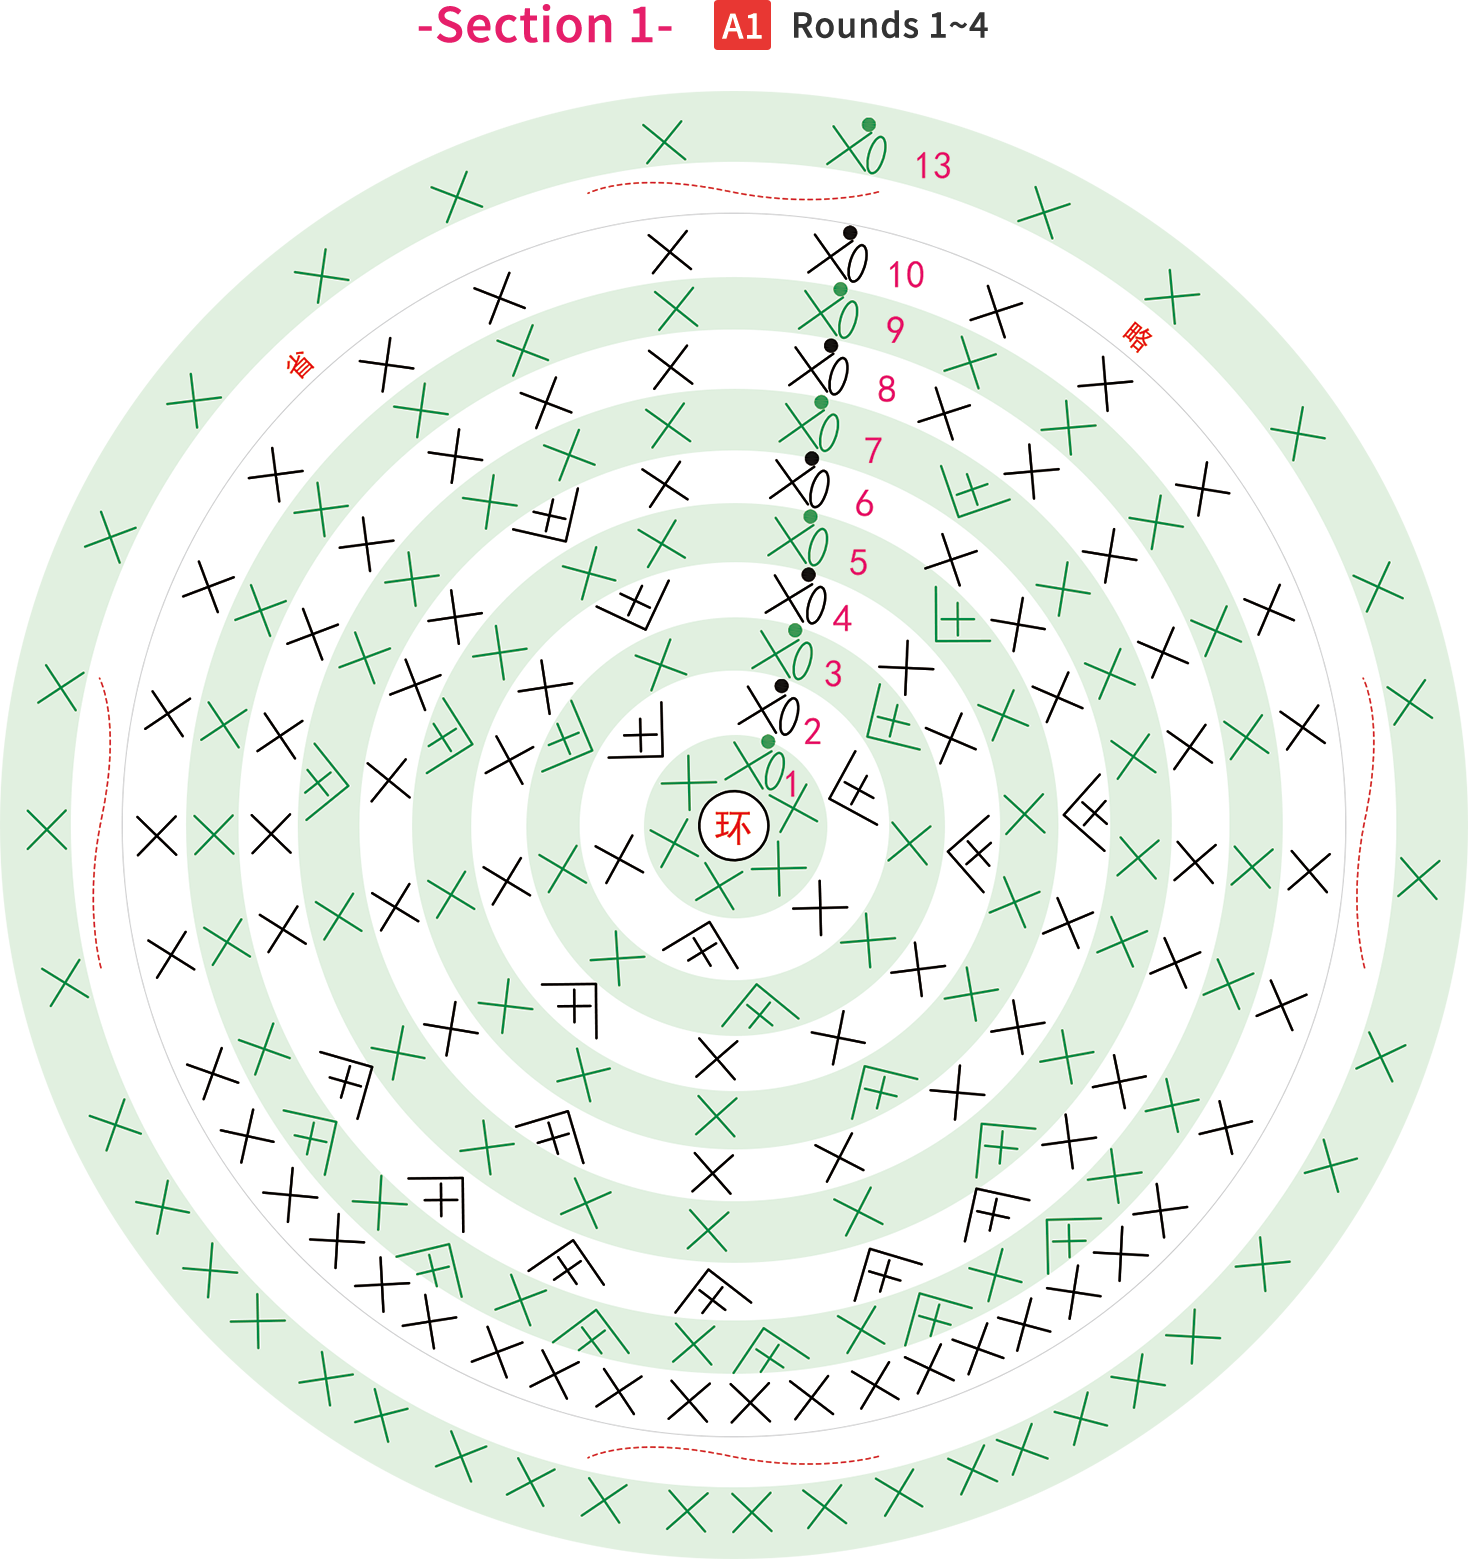
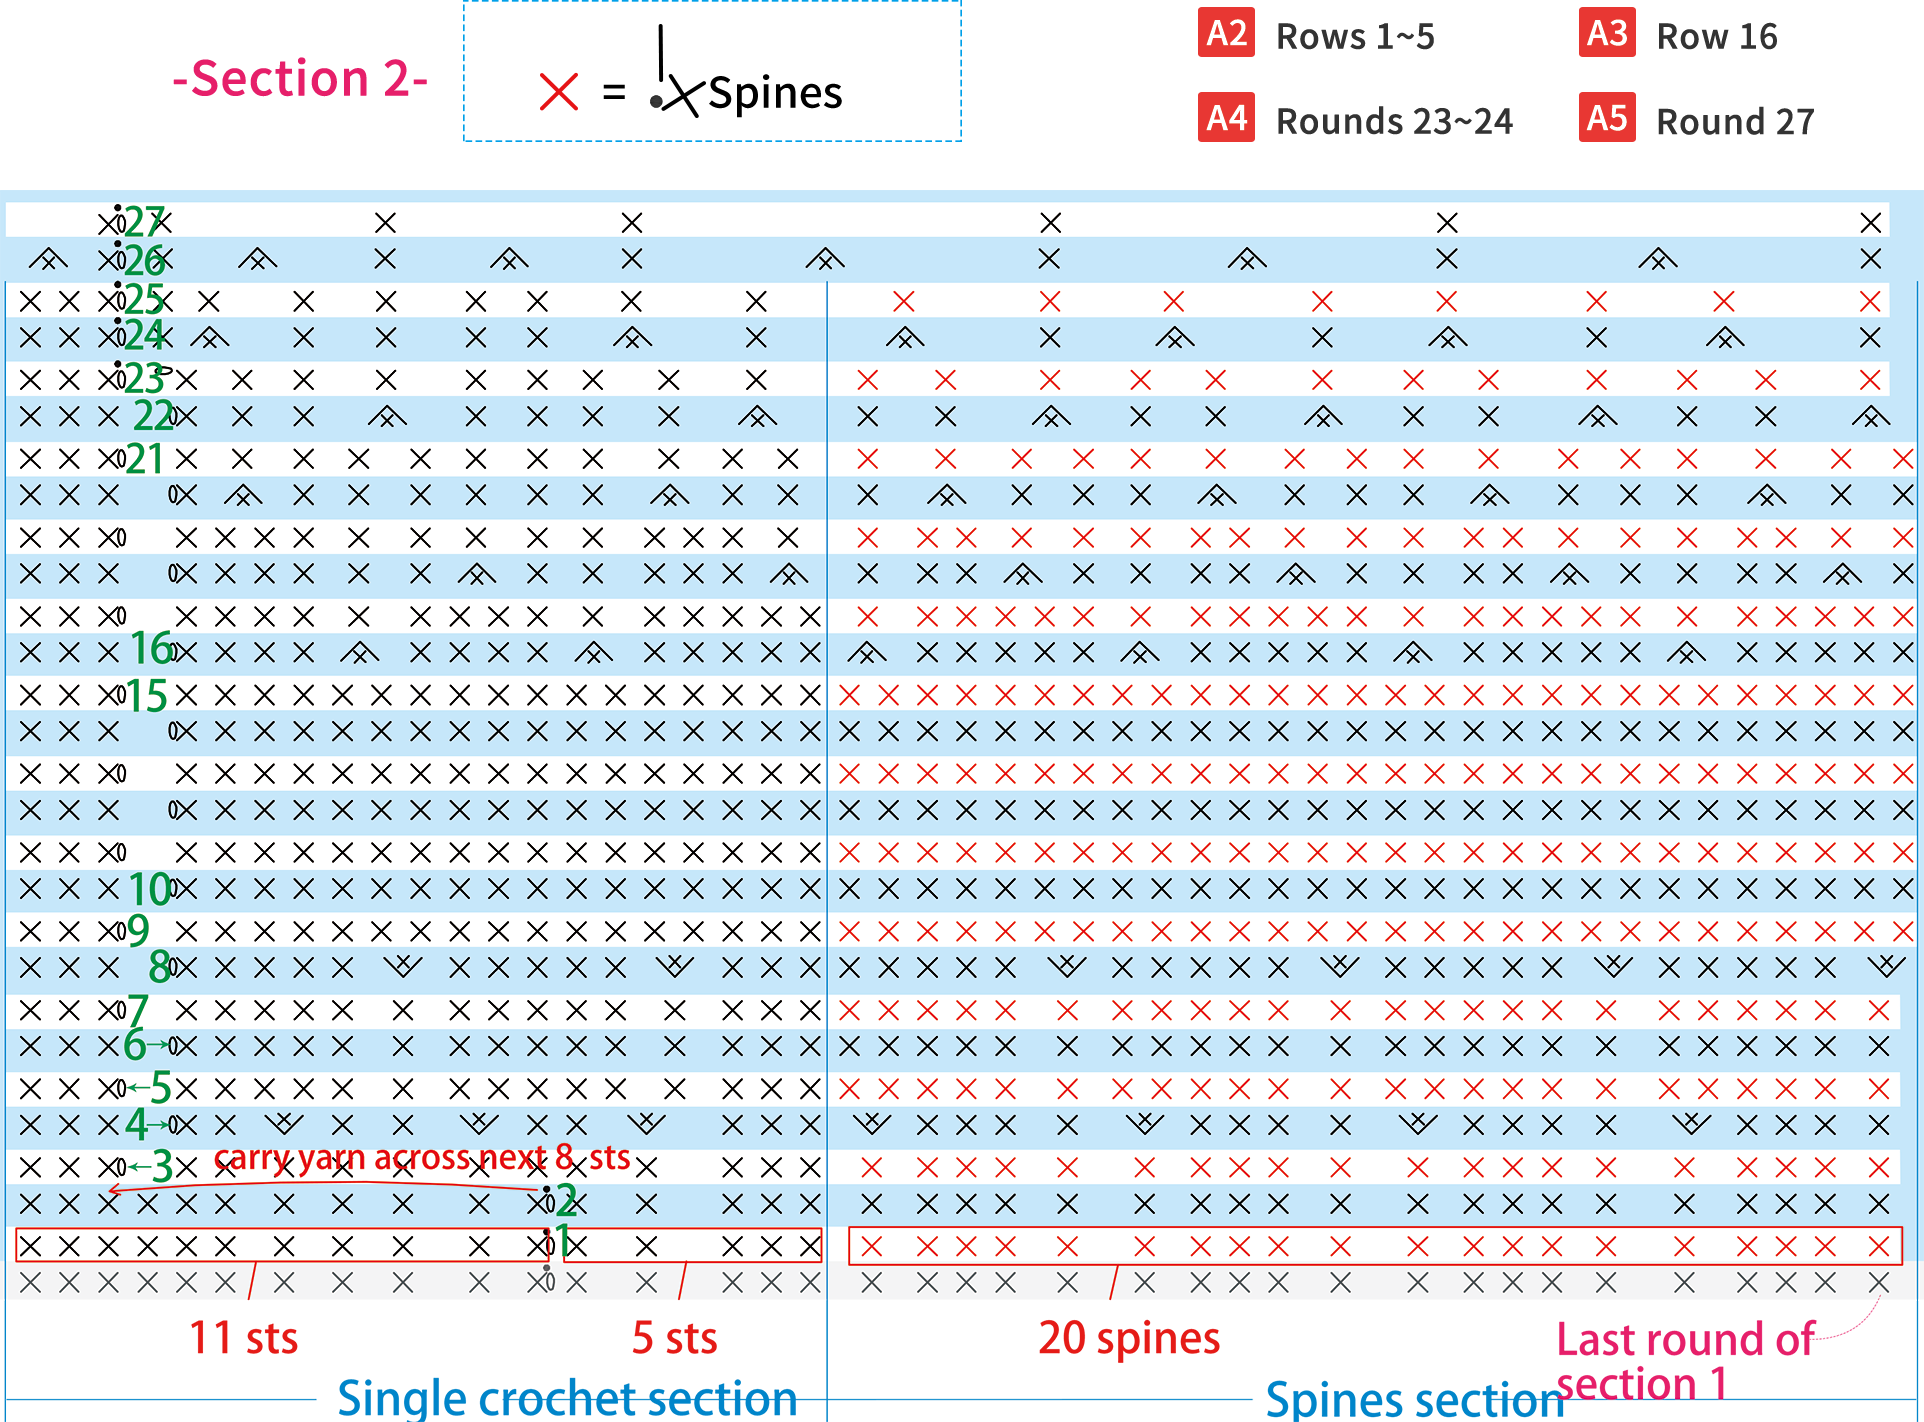
The main part is worked using the magic ring technique, crocheting around the initial loop. It is divided into Section 1 and Section 2. Section 1 is crocheted in rounds with increases made as you go. Section 2 involves crocheting decorative stitches and requires leaving an opening for attaching the zipper. For details, please refer to the video demonstration.
Note: When crocheting back and forth, you're always working on the right side. The placement of increases and decreases in the chart is for reference only. As long as you increase or decrease the same number of stitches as shown in the chart, it's fine.
| Section | Round | Stitch Count | stitch instructions |
| Section 1 | Round1 | 6 | — |
| Round2 | 9 | increase 1 stitch in every other stitch,Increase a total of 3 sts | |
| Round3 | 12 | increase 1 stitch in every 2 stitches,Increase a total of 3 sts | |
| Round4 | 15 | increase 1 stitch in every 3 stitches,Increase a total of 3 sts | |
| Round5 | 18 | increase 1 stitch in every 4 stitches,Increase a total of 3 sts | |
| Round6 | 21 | increase 1 stitch in every 5 stitches,Increase a total of 3 sts | |
| Round7 | 24 | increase 1 stitch in every 6 stitches,Increase a total of 3 sts | |
| Round8 | 30 | Note: Rounds 8 and 9 both increase 6 stitches. Refer to the chart for increase placement. | |
| Round9 | 36 | ||
| Rounds10~13 | 36 | No increases |
| Section | Round | Stitch Count | SC section stitch instructions | Spines section stitch instructions |
| Section 2 | Round1 | 36 | Work evenly | |
| Round2 | 36 | Work evenly | ||
| Row 3 | 35 | skip 1 sts | Work evenly | |
| Row 4 | 42 | Increase 3 sts | Increase 4 sts | |
| Rows 5~7 | 42 | Work evenly | ||
| Rows 8 | 48 | Increase 2 sts | Increase 4 sts | |
| Rows 9-15 | 48 | Work evenly | ||
| Row 16 | 42 | Decrease 2 sts | Decrease 4 sts | |
| Row 17 | 42 | Work evenly | ||
| Row 18 | 36 | Decrease 2 sts | Decrease 4 sts | |
| Row 19 | 36 | Work evenly | ||
| Row 20 | 30 | Decrease 2 sts | Decrease 4 sts | |
| Row 21 | 30 | Work evenly | ||
| Rows 22 | 24 | Decrease 2 sts | Decrease 4 sts | |
| Round23 | 25 | Increase 1 chain | Work evenly | |
| Round24 | 19 | Decrease 2 sts | Decrease 4 sts | |
| Round25 | 19 | Work evenly | ||
| Round26 | 13 | Decrease 1 stitch every other stitch, for a total of 6 decreases. | ||
| Round27 | 7 | Work 1 stitch in every other stitch around. | ||
Part 2 DecorationsB 44' 16''
First, crochet and sew the nose, then sew the eyes. Next, on the spines, sew on berries, daisies, acrylic rhinestones, chain beads, and long tube beads as decorations. The decorations on the cable pattern are placed randomly—you can sew them on according to your preference. For details, please refer to the video demonstration.
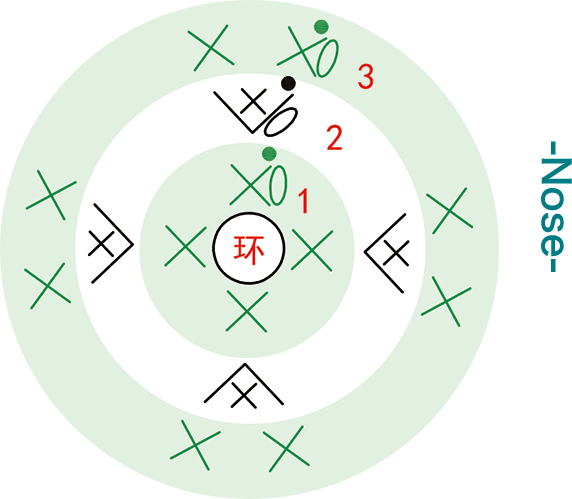
① NoseB1: Use 2 strands of 34#Toffee color cotton yarn.
② EyesB2: Take 2 strands out of the 34#Toffee color cotton yarn for embroidery.
③ Berries and decorationsB3: Berries, daisies, acrylic rhinestones, chain beads, and long tube beads are all sewn with sewing thread.
Note: After finishing the nose, leave a yarn tail of about 30 centimeters for sewing.
Part 3 ZipperC 67' 22''
After completing the decoration stitching, continue sewing the zipper onto the bag opening using sewing thread. Please refer to the video demonstration for details.
Part 4 Bag strapD 75' 23''
After sewing the zipper, continue crocheting the bag strap, and leave about 15 cm yarn tails on both ends for sewing. Please refer to the video demonstration for details.
Note: 1. Crochet the handle with the leftover yarn from the main piece; 2. The rope handle is about 80 cm in length, but you can adjust it to your preference.
Made by the community