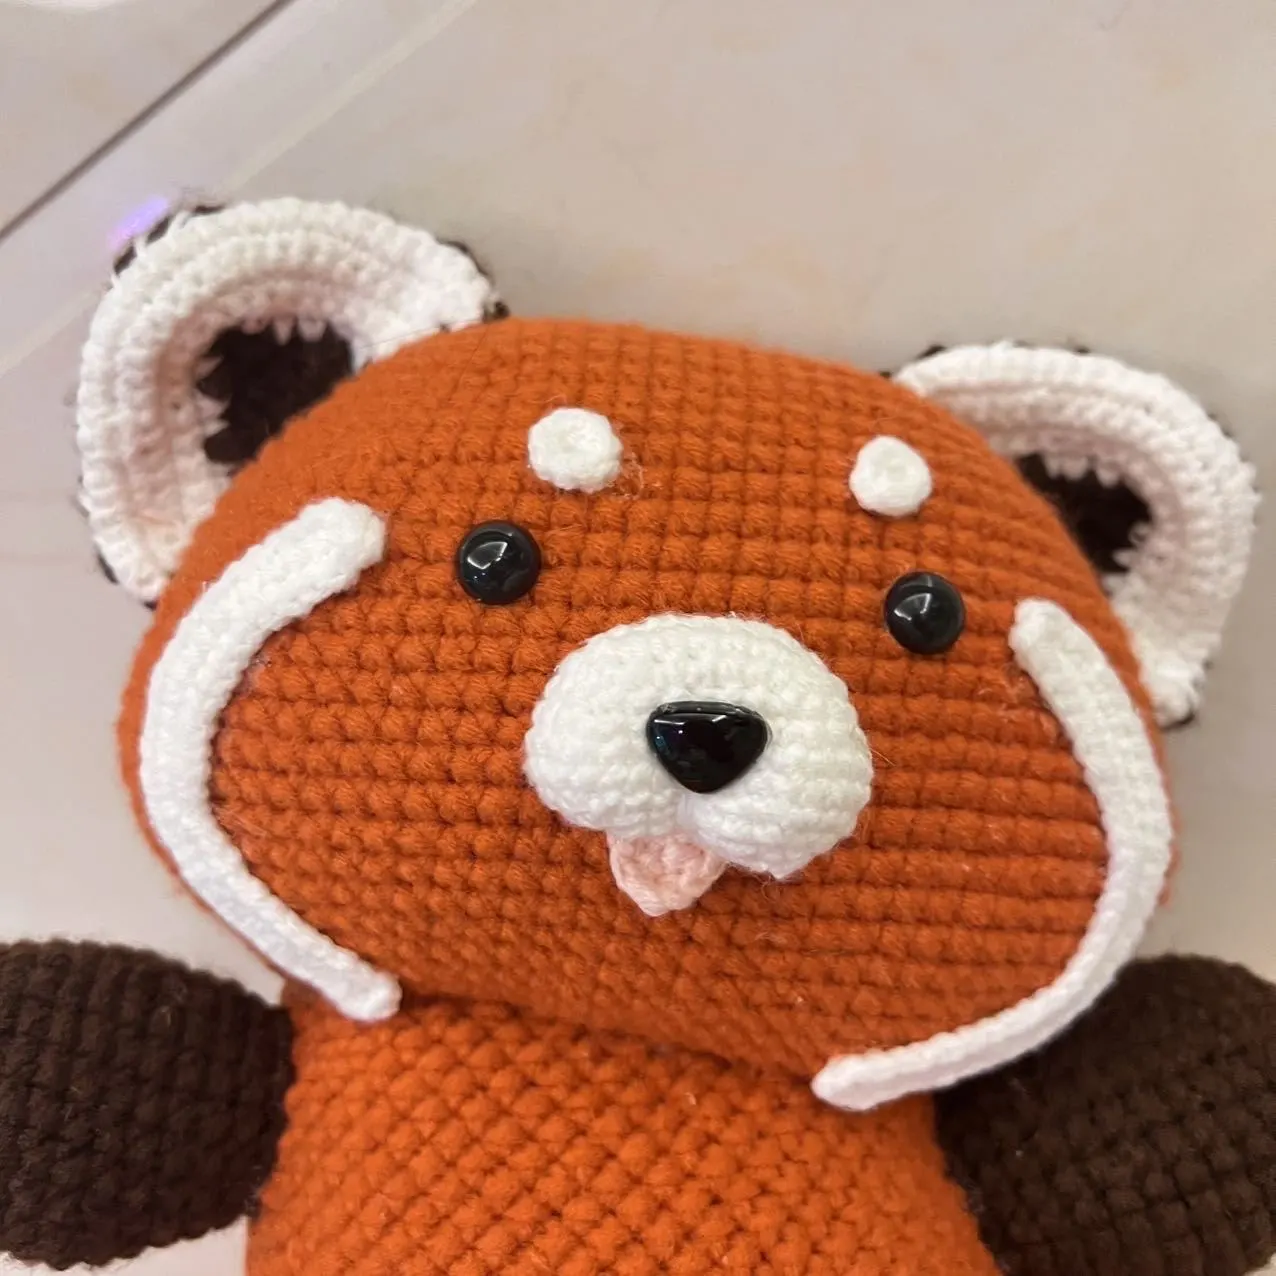
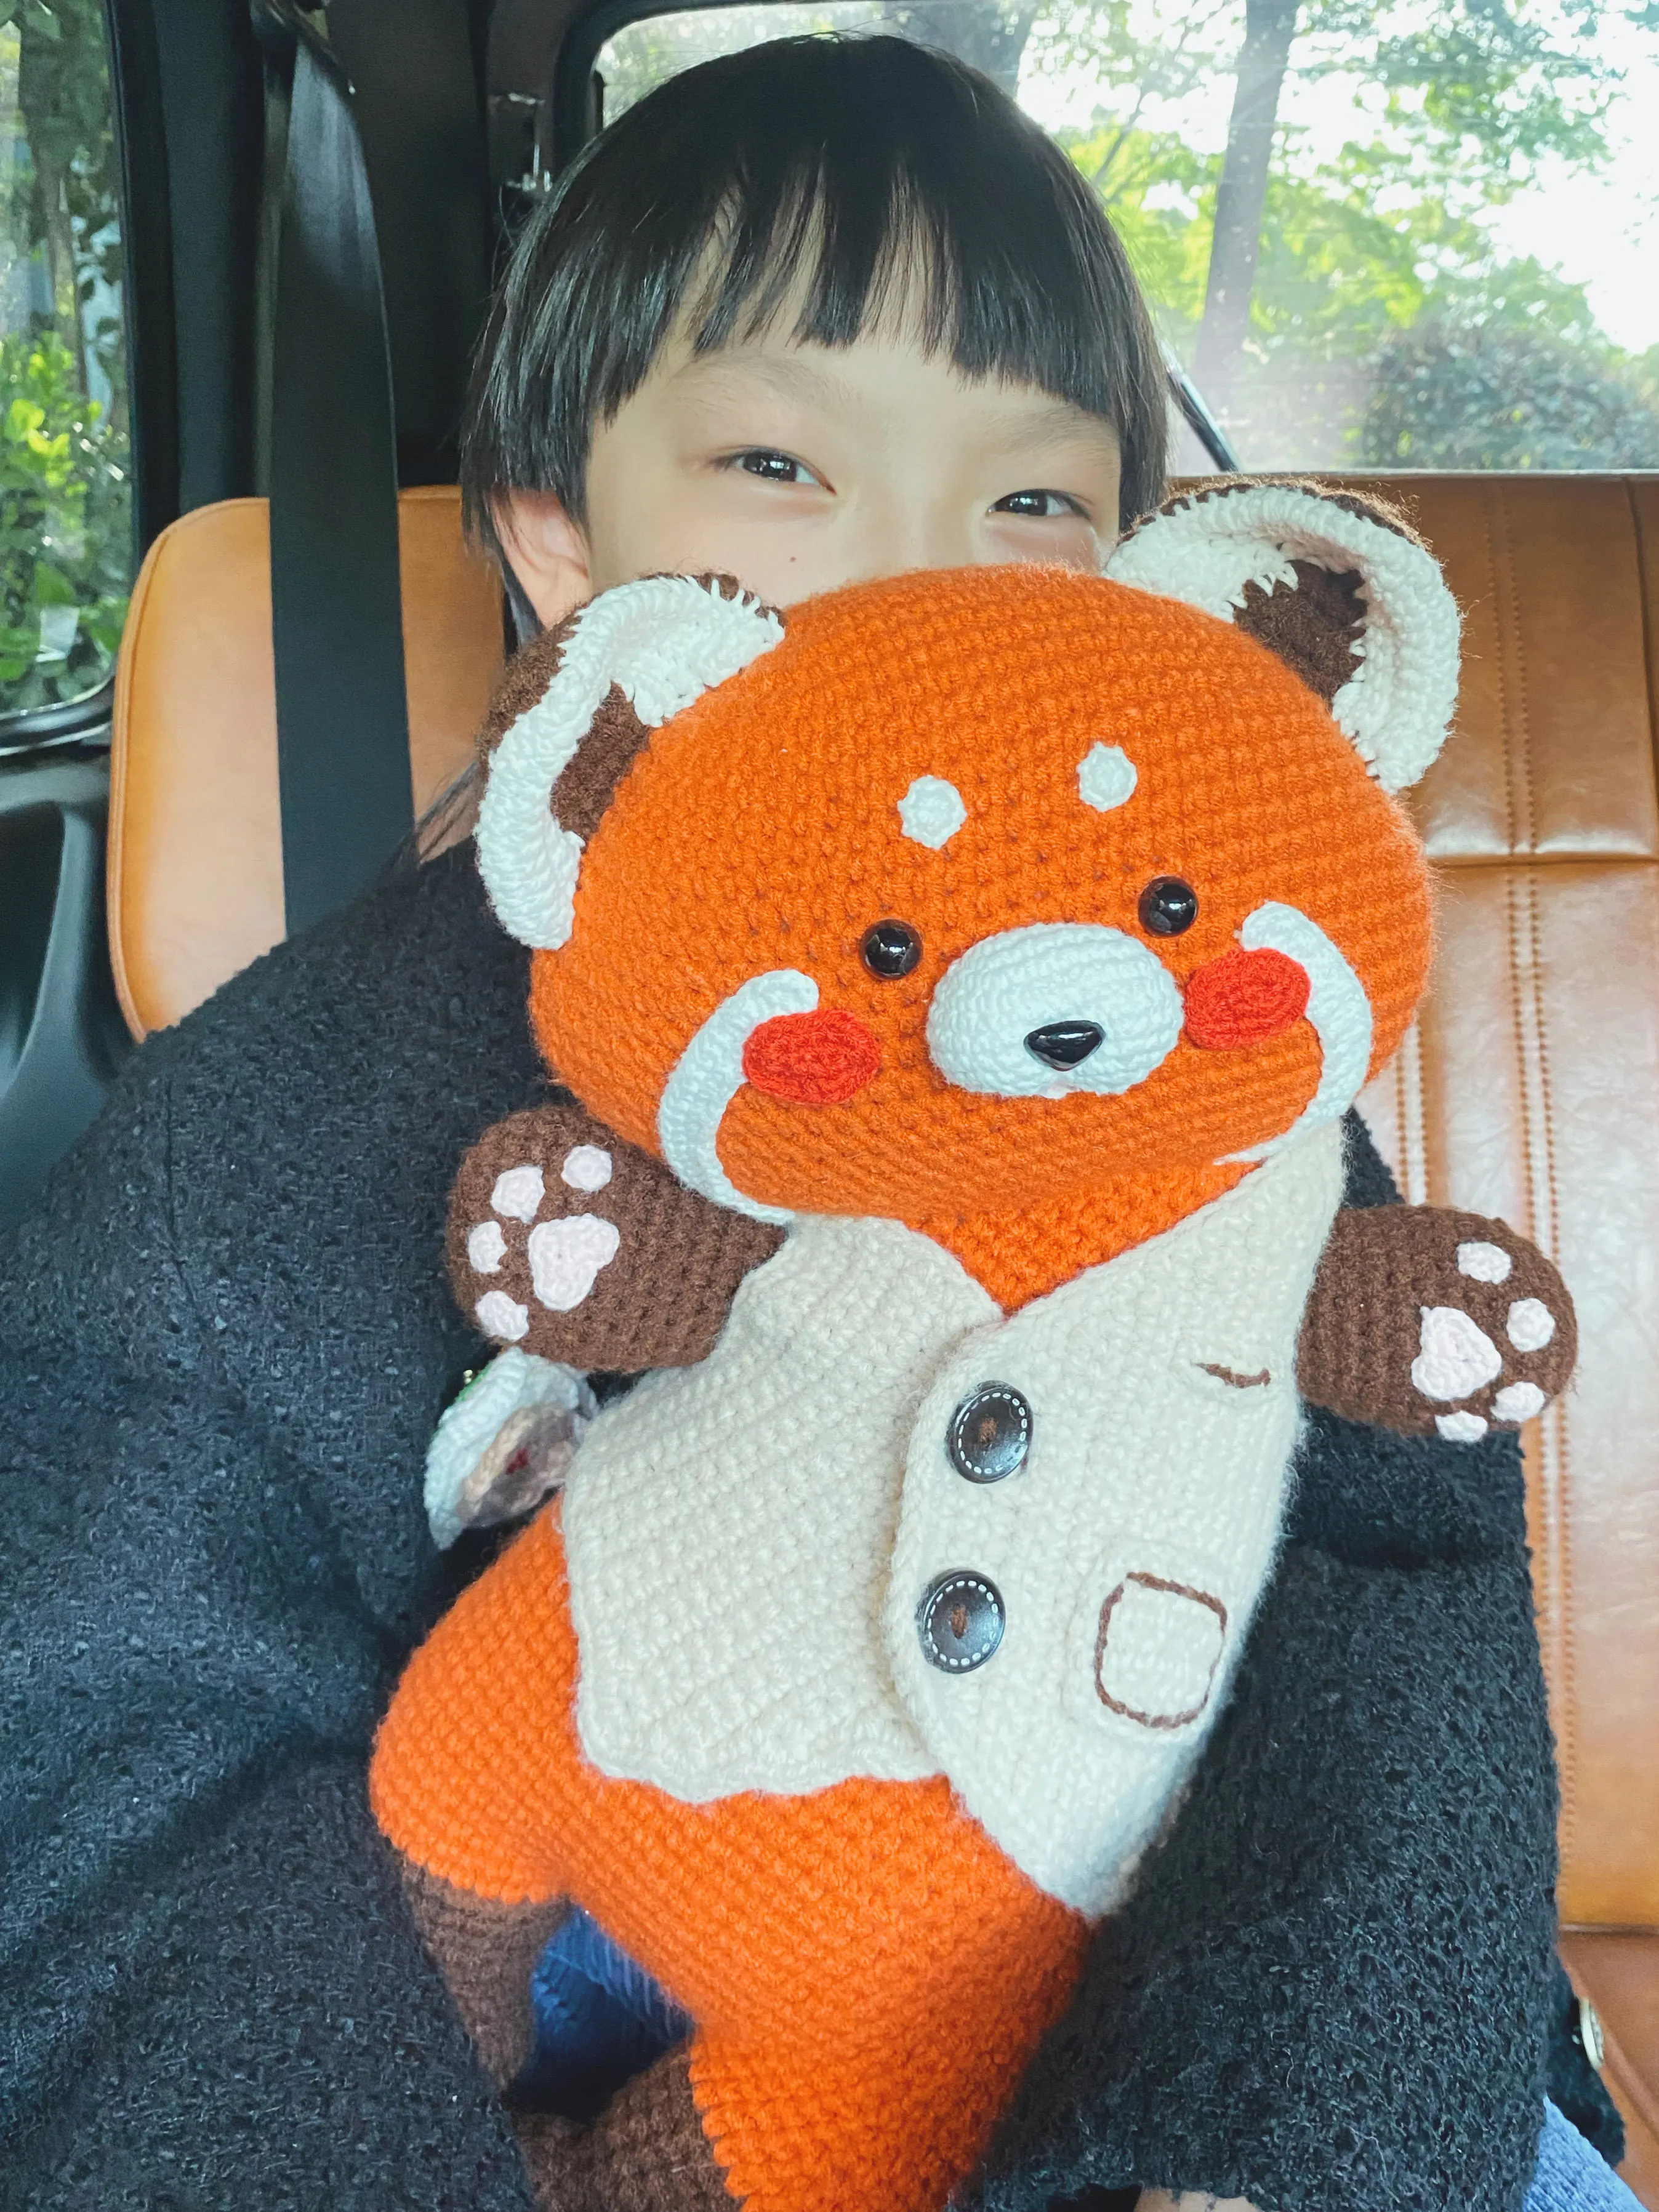
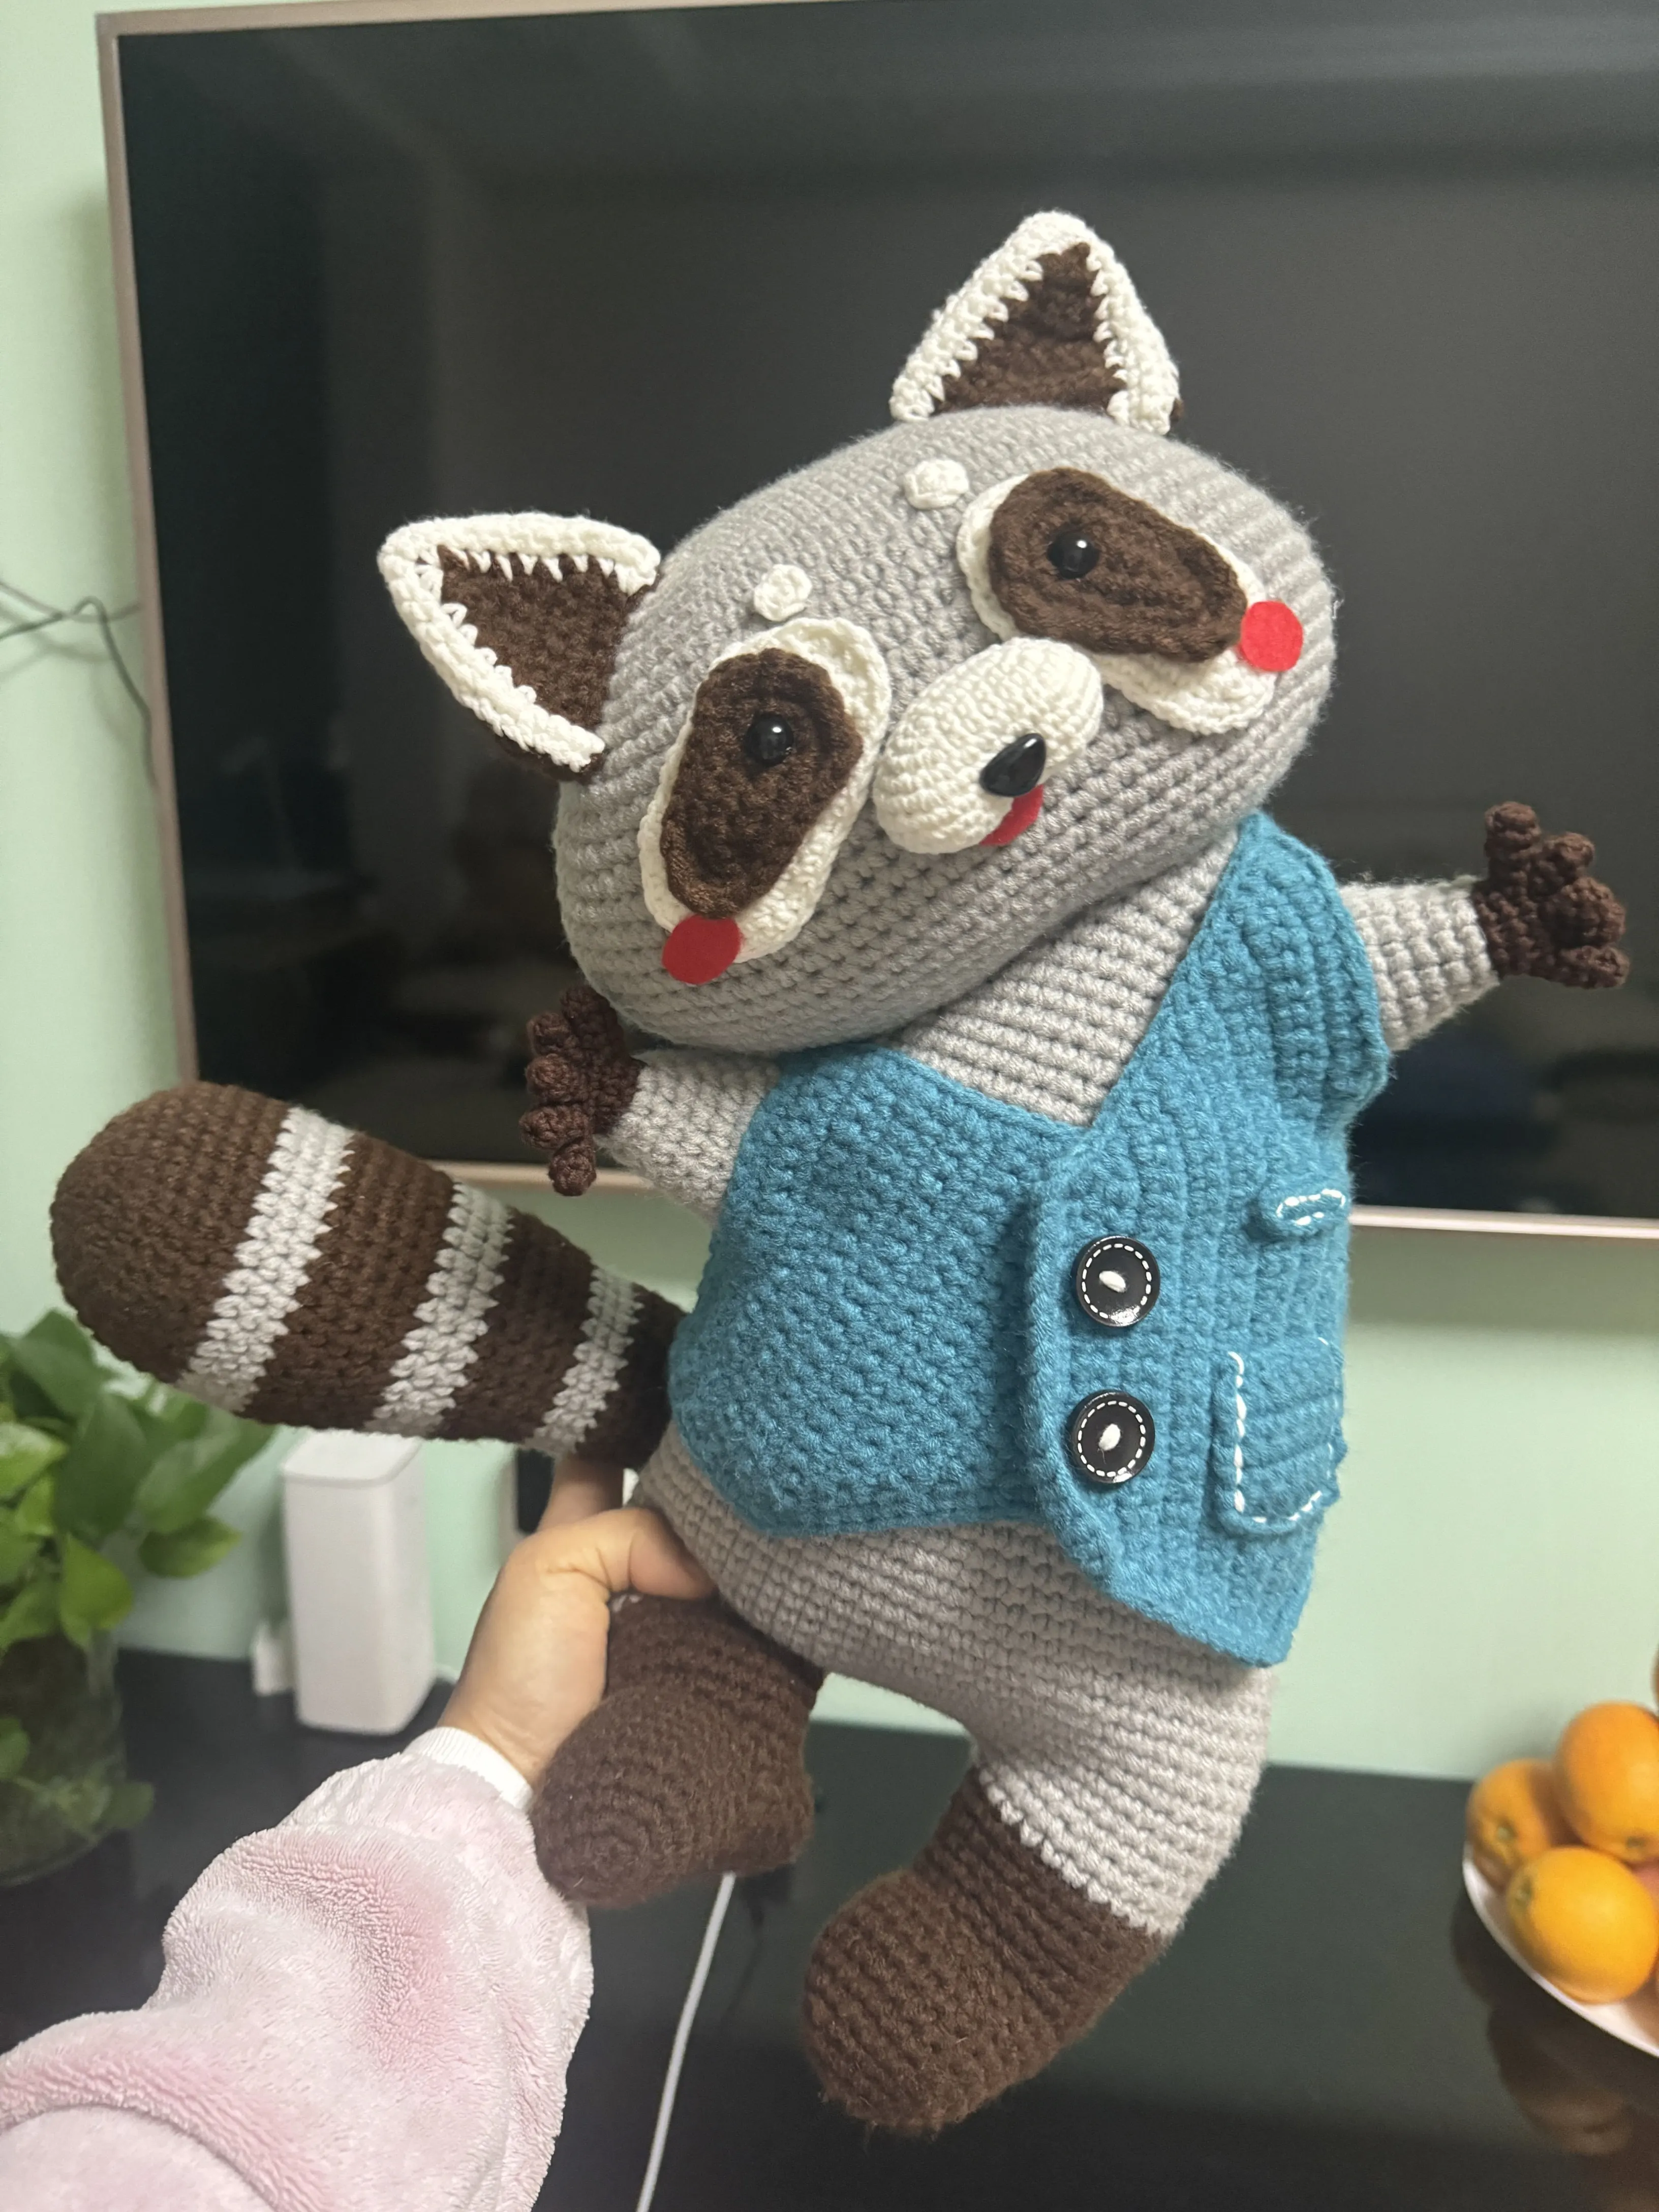
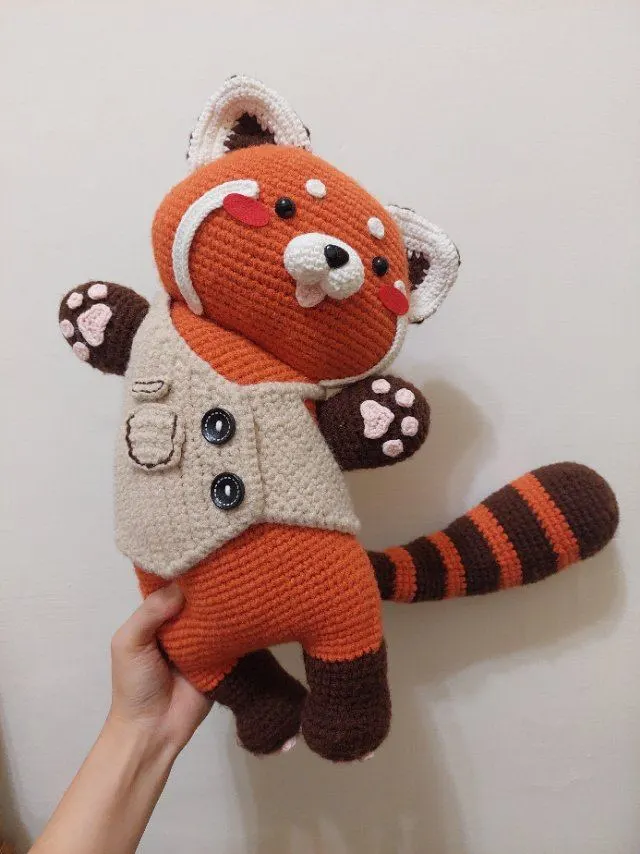
Doll
Huggy Cushion
Project preview
See the finished project
Pattern format
Instructions
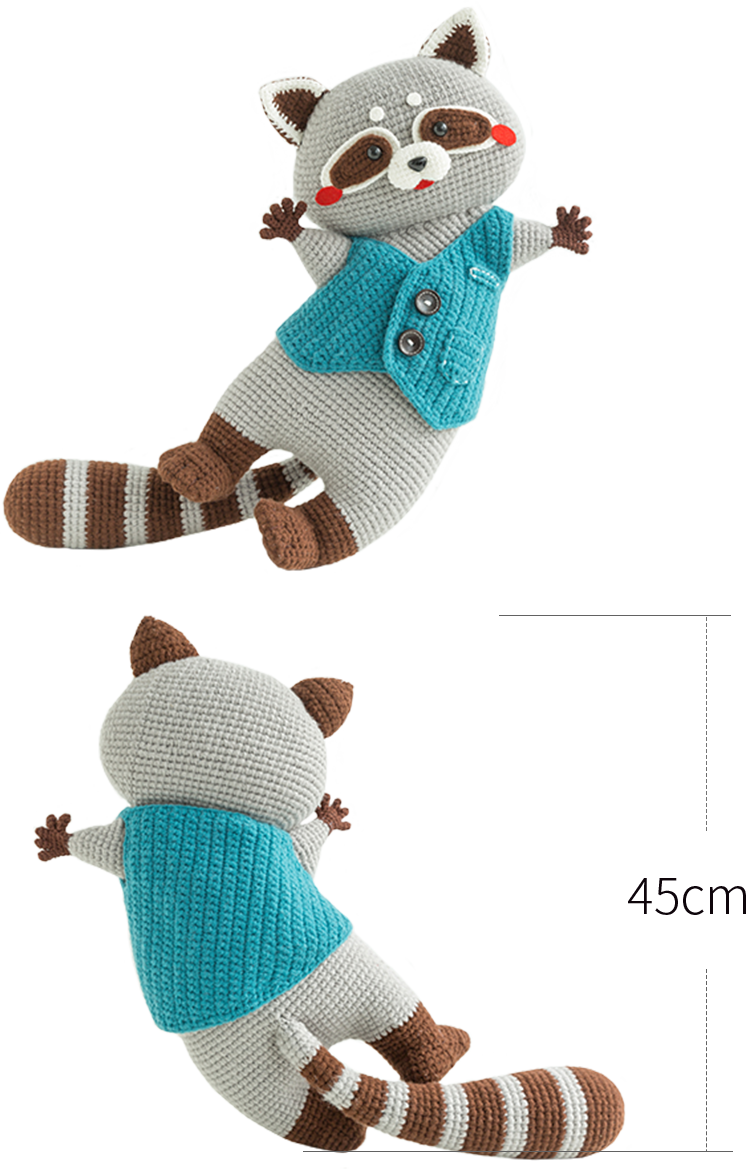
Note:
① All single crochet decreases are invisible single crochet decreases;
② When crocheting in rounds, unless otherwise specified, each round starts with a turning chain and ends with a slip stitch join. The turning chain for single crochet and the slip stitch join do not count as 1 stitch;
③ When working back and forth, the turning chain does not count as 1 stitch;
④ [ ] indicates crocheting into the same stitch.
The handcrafted measurements may have an error of 1 to 2 cm. Due to variations in individual tension, the size of the sample is for reference only.
Materials: Susan's FamilyHandcrafted No.2 Knit Thread
Handcrafted No.2 Knit Thread (3.00 mm crochet hook.)
4-ply Combed Cotton & Acrylic Fibre Hand Yarn (2.00 mm crochet hook)

ABBREVIATIONS
MRadjustable magic ring
Dao2start in 2nd CH from the hook
turnturn the piece
CHchain
Thalf double crochet
V = sc2-in-12 single crochets into the same stitch
A = sc2toginvisible single crochet 2 stitches together
(...)×6crochet item in the parentheses six times
HRow
RRound
[...]in the same stitch
Xsingle crochet
W = sc3-in-13 single crochets into the same stitch
Fdouble crochet
Sslip stitch
Kskip
TV = hdc2-in-12 half double crochets into the same stitch
Note:
1. This pattern is making in Chinese crochet pattern terms, and the stitch name is written using American terminology. All measurements in charts are in cm.
Part 1 Main body
The main part includes the arms, head, legs, body, and tail. Crochet each section separately first, then assemble them together.
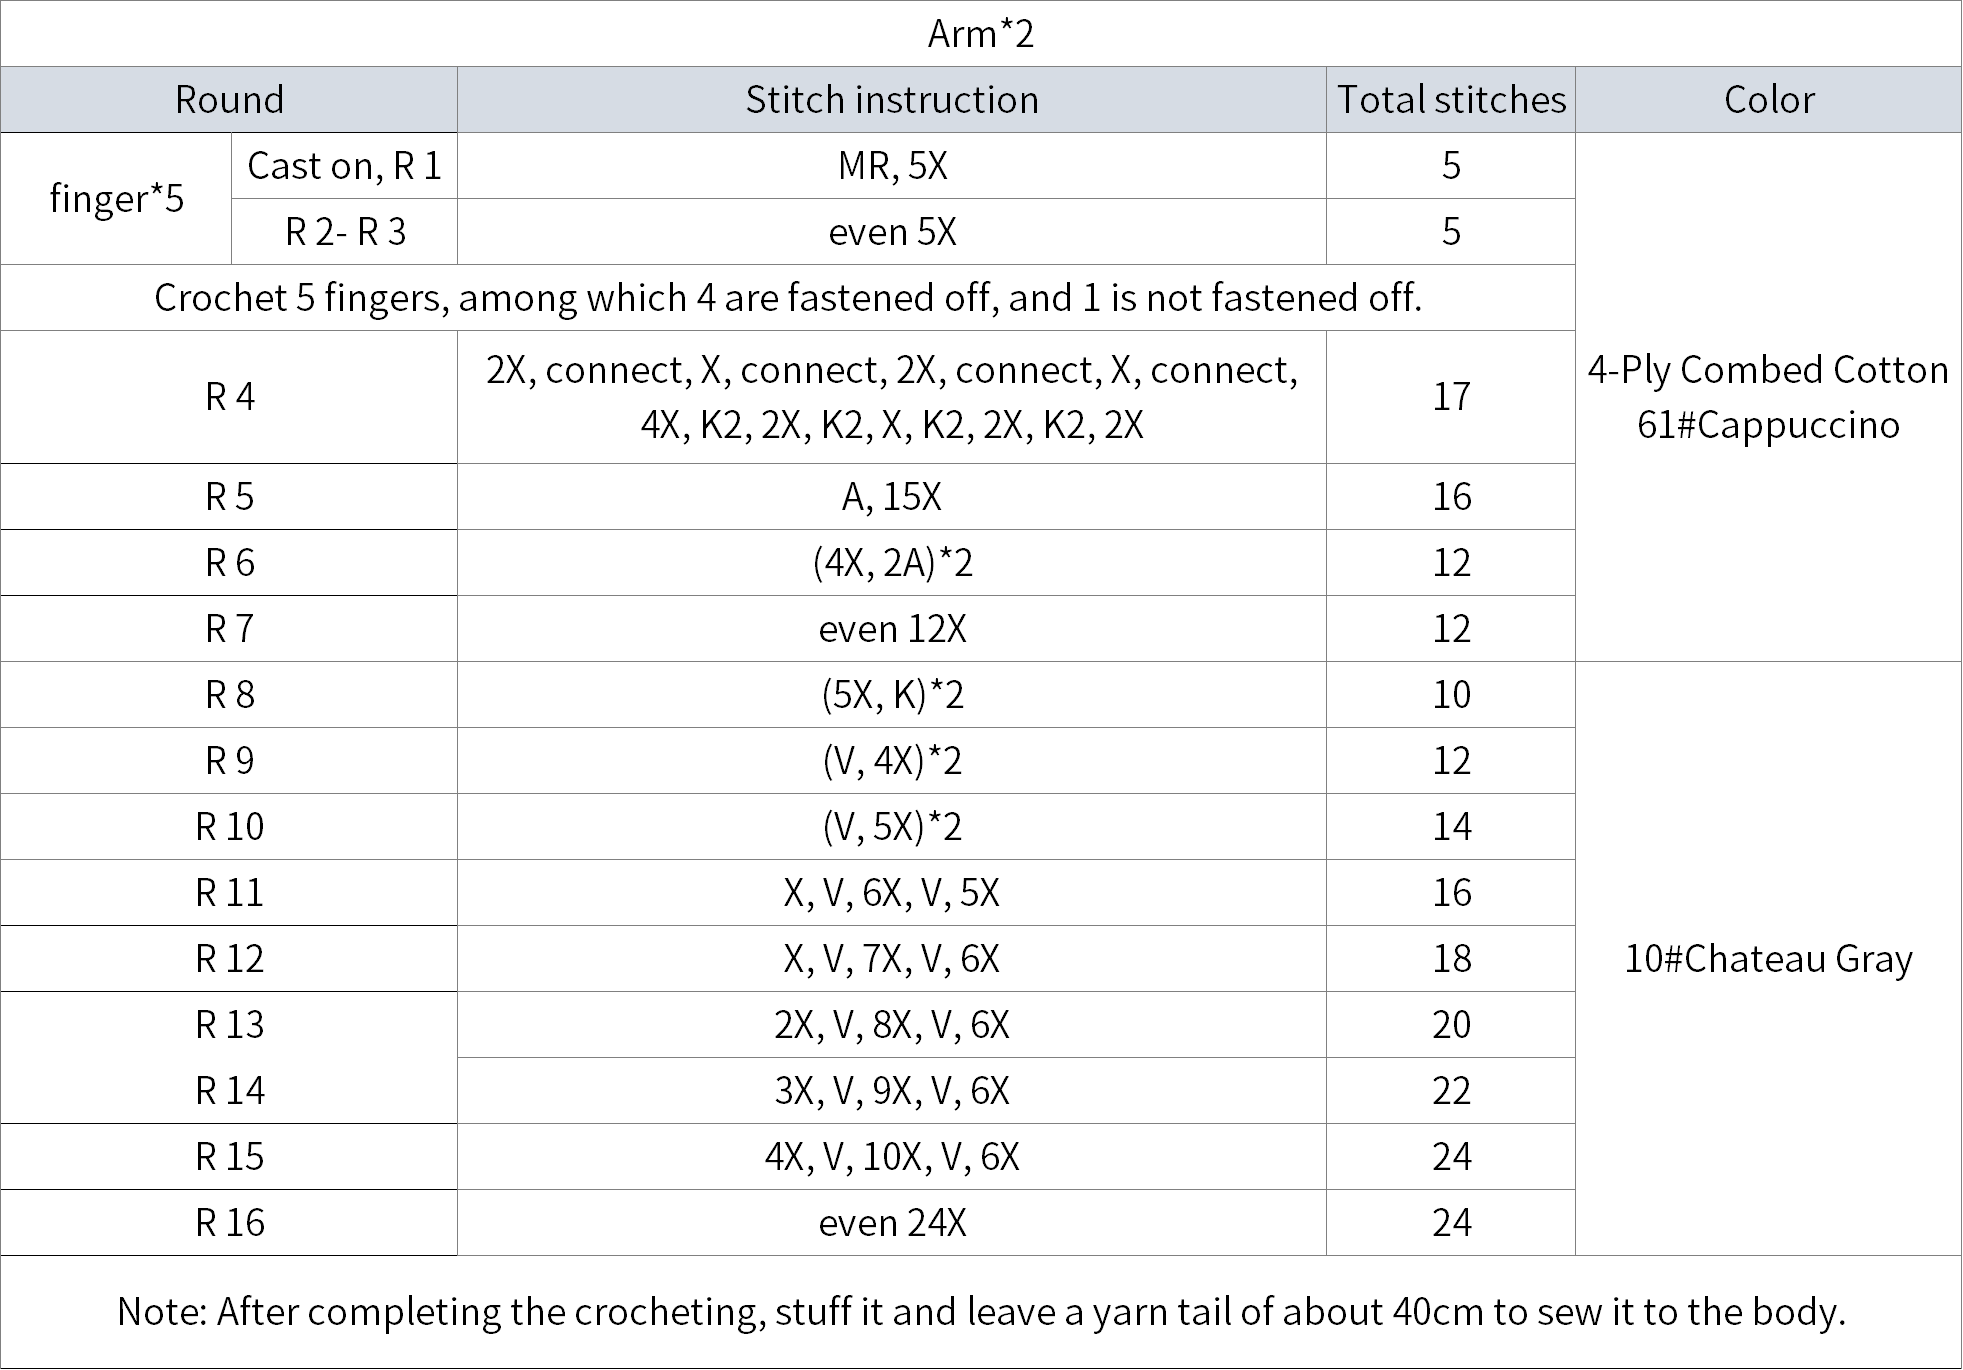
Step 1 Arms
The arms include the fingers and the arm part. For the fingers, use the magic ring method to start and work in rounds with slip stitches. First, crochet the fingers, and once the fingers are connected, continue crocheting in rounds for the arm. You will need to switch colors during the crocheting process.
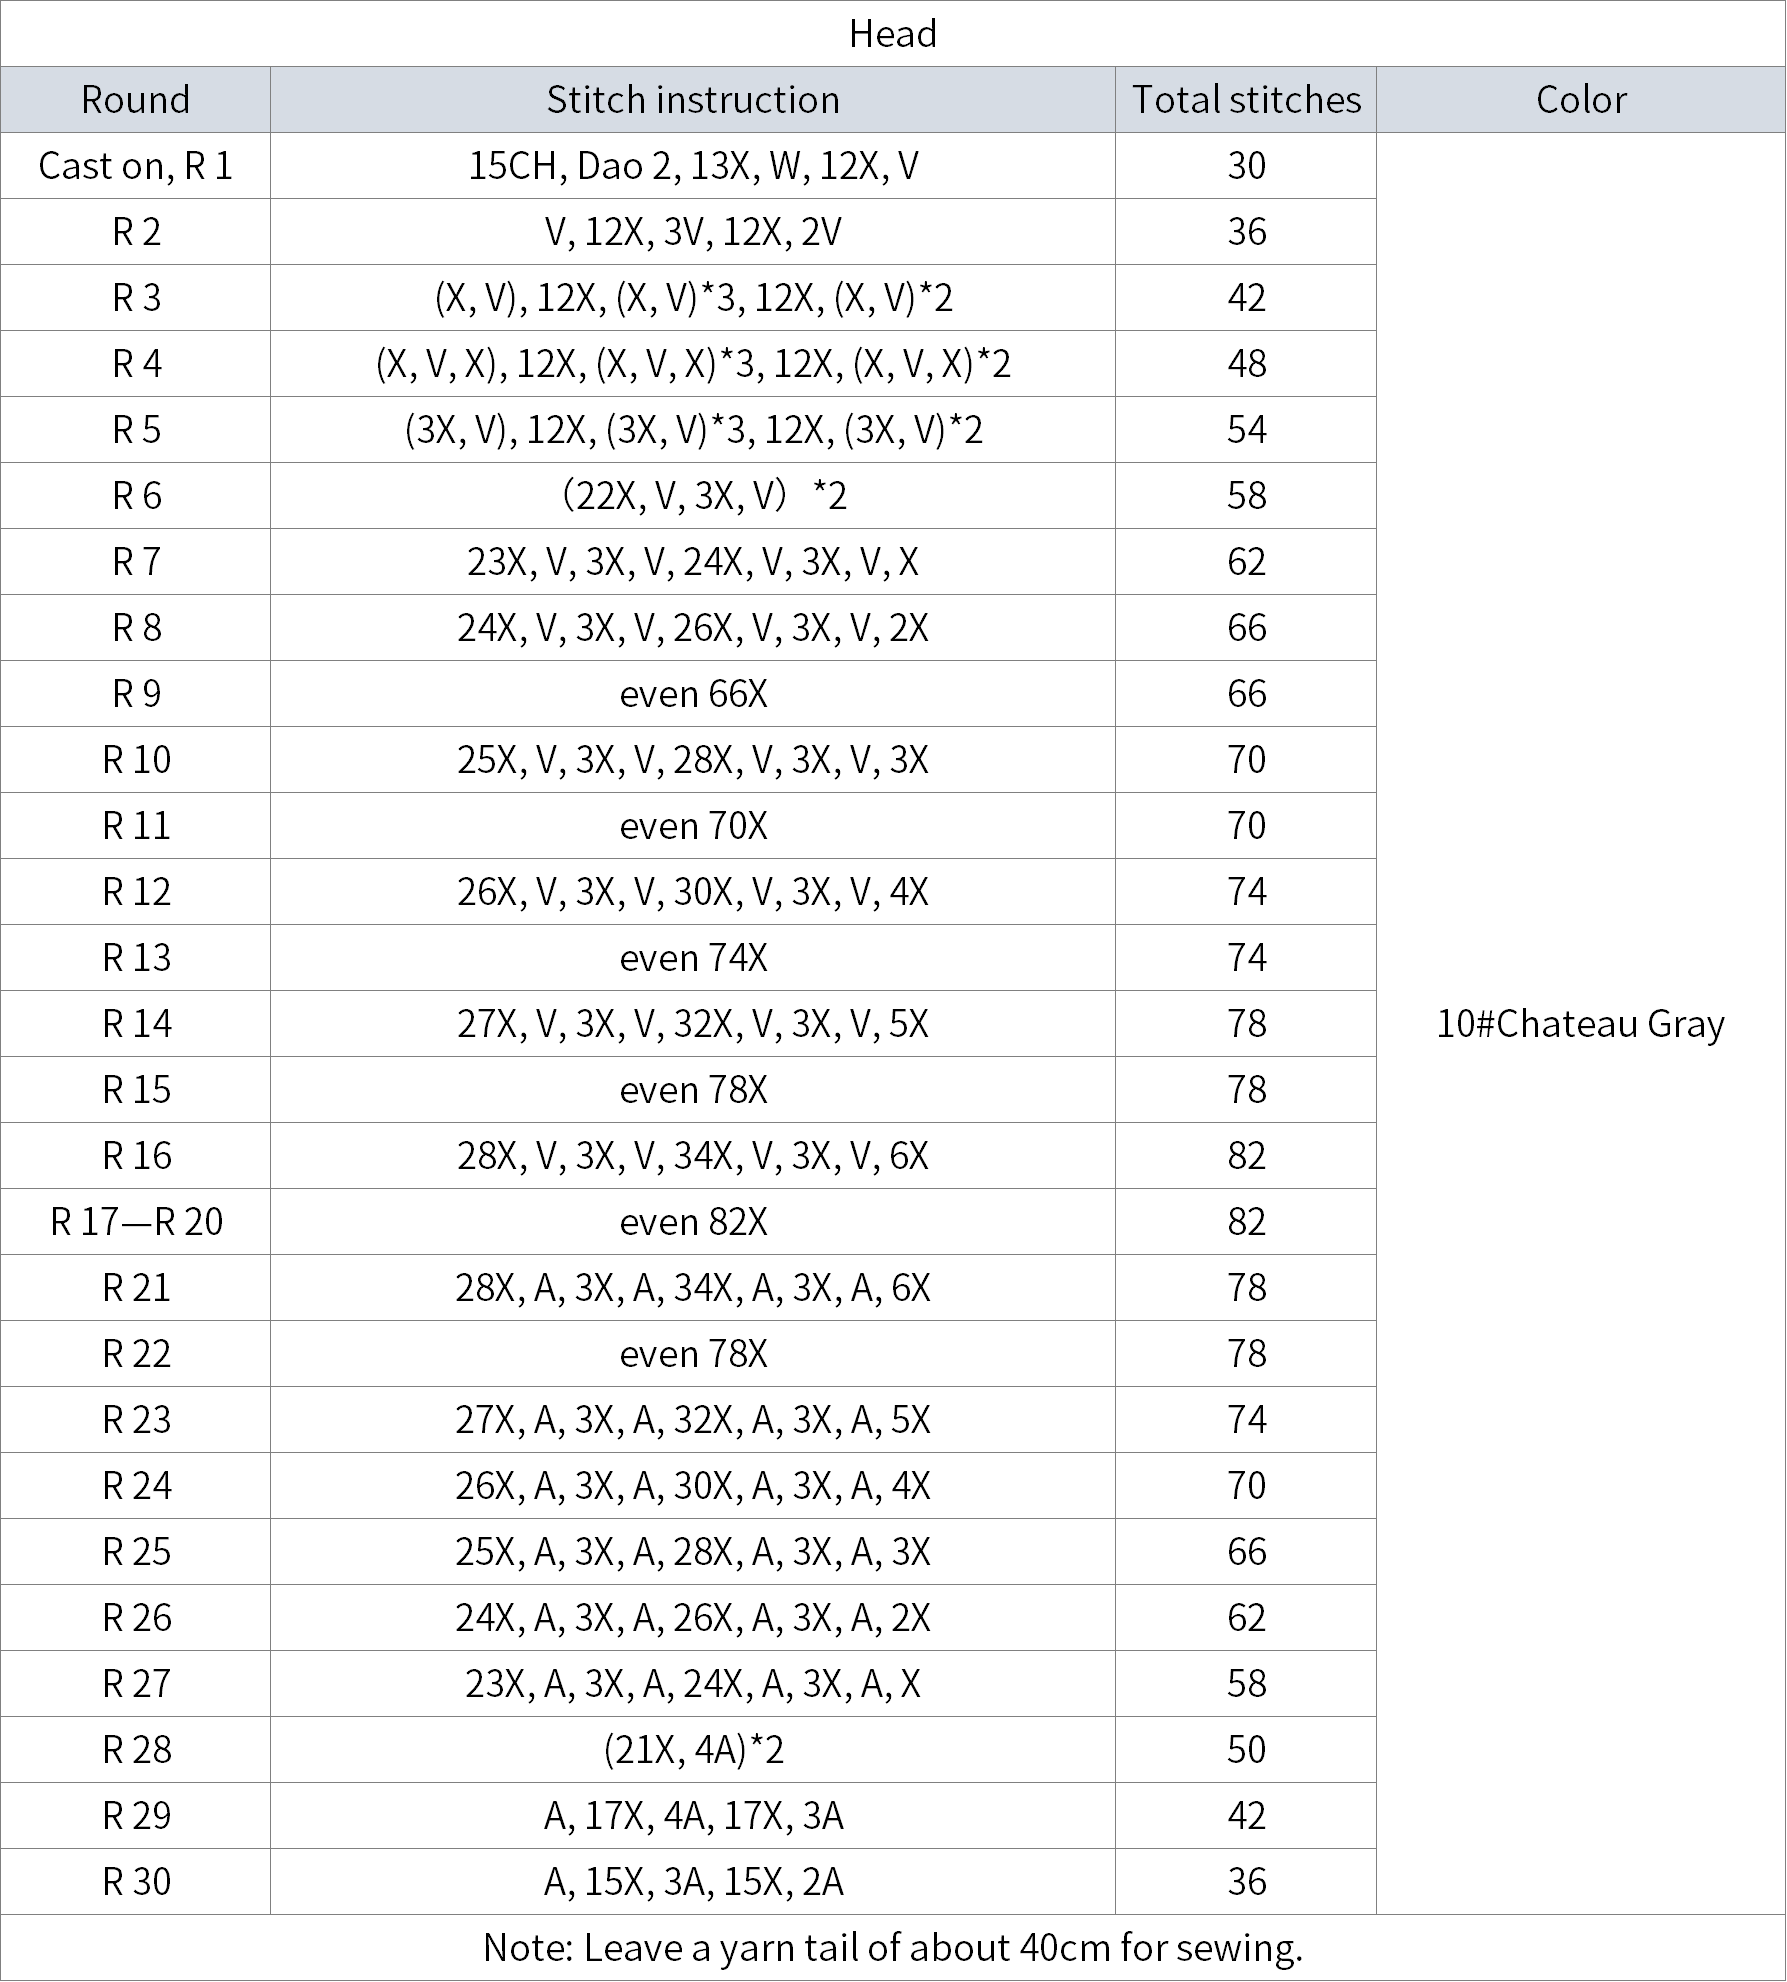
Step 2 Head
We will start from the foundation chain for the head, work in rounds with slip stitch crochet, and after completing the crocheting, proceed to stuff and sew it together.
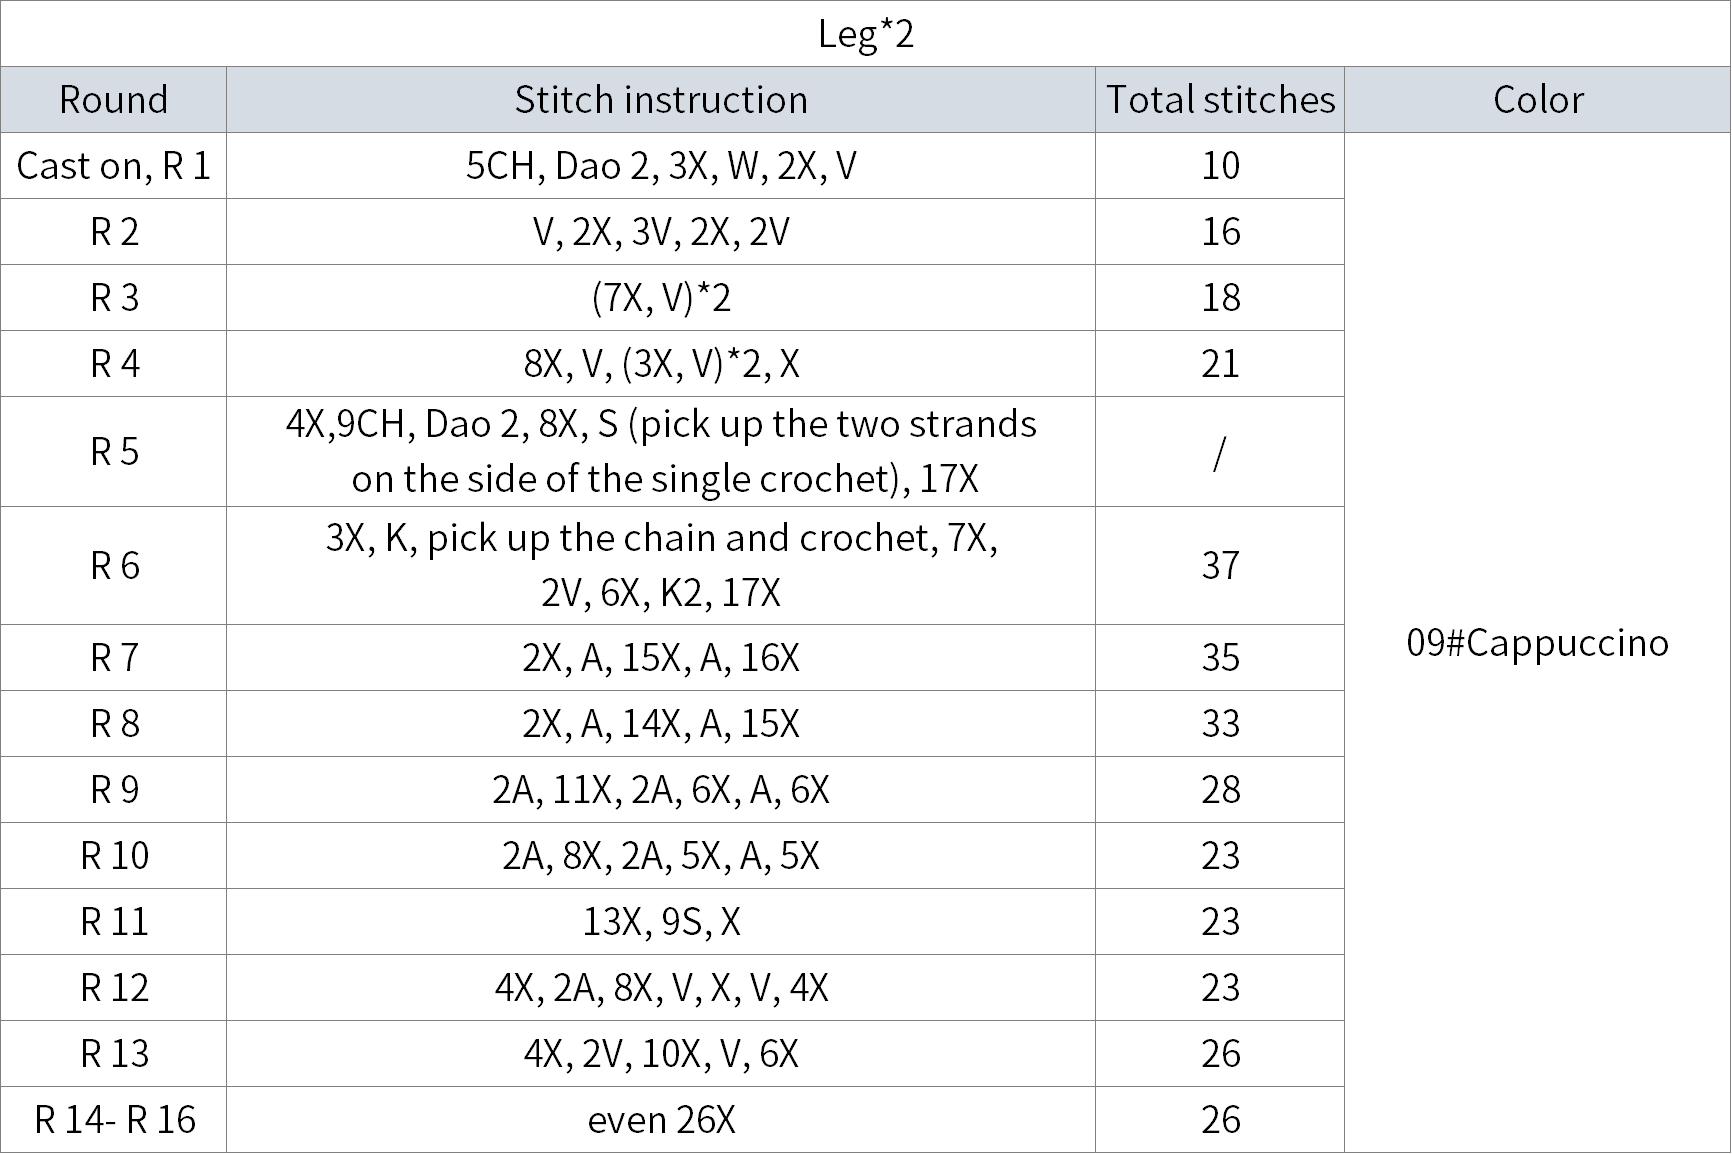
Step 3 Legs
Leg section is divided into 2 parts, both start with a chain stitch and are crocheted in rounds with slip stitches.
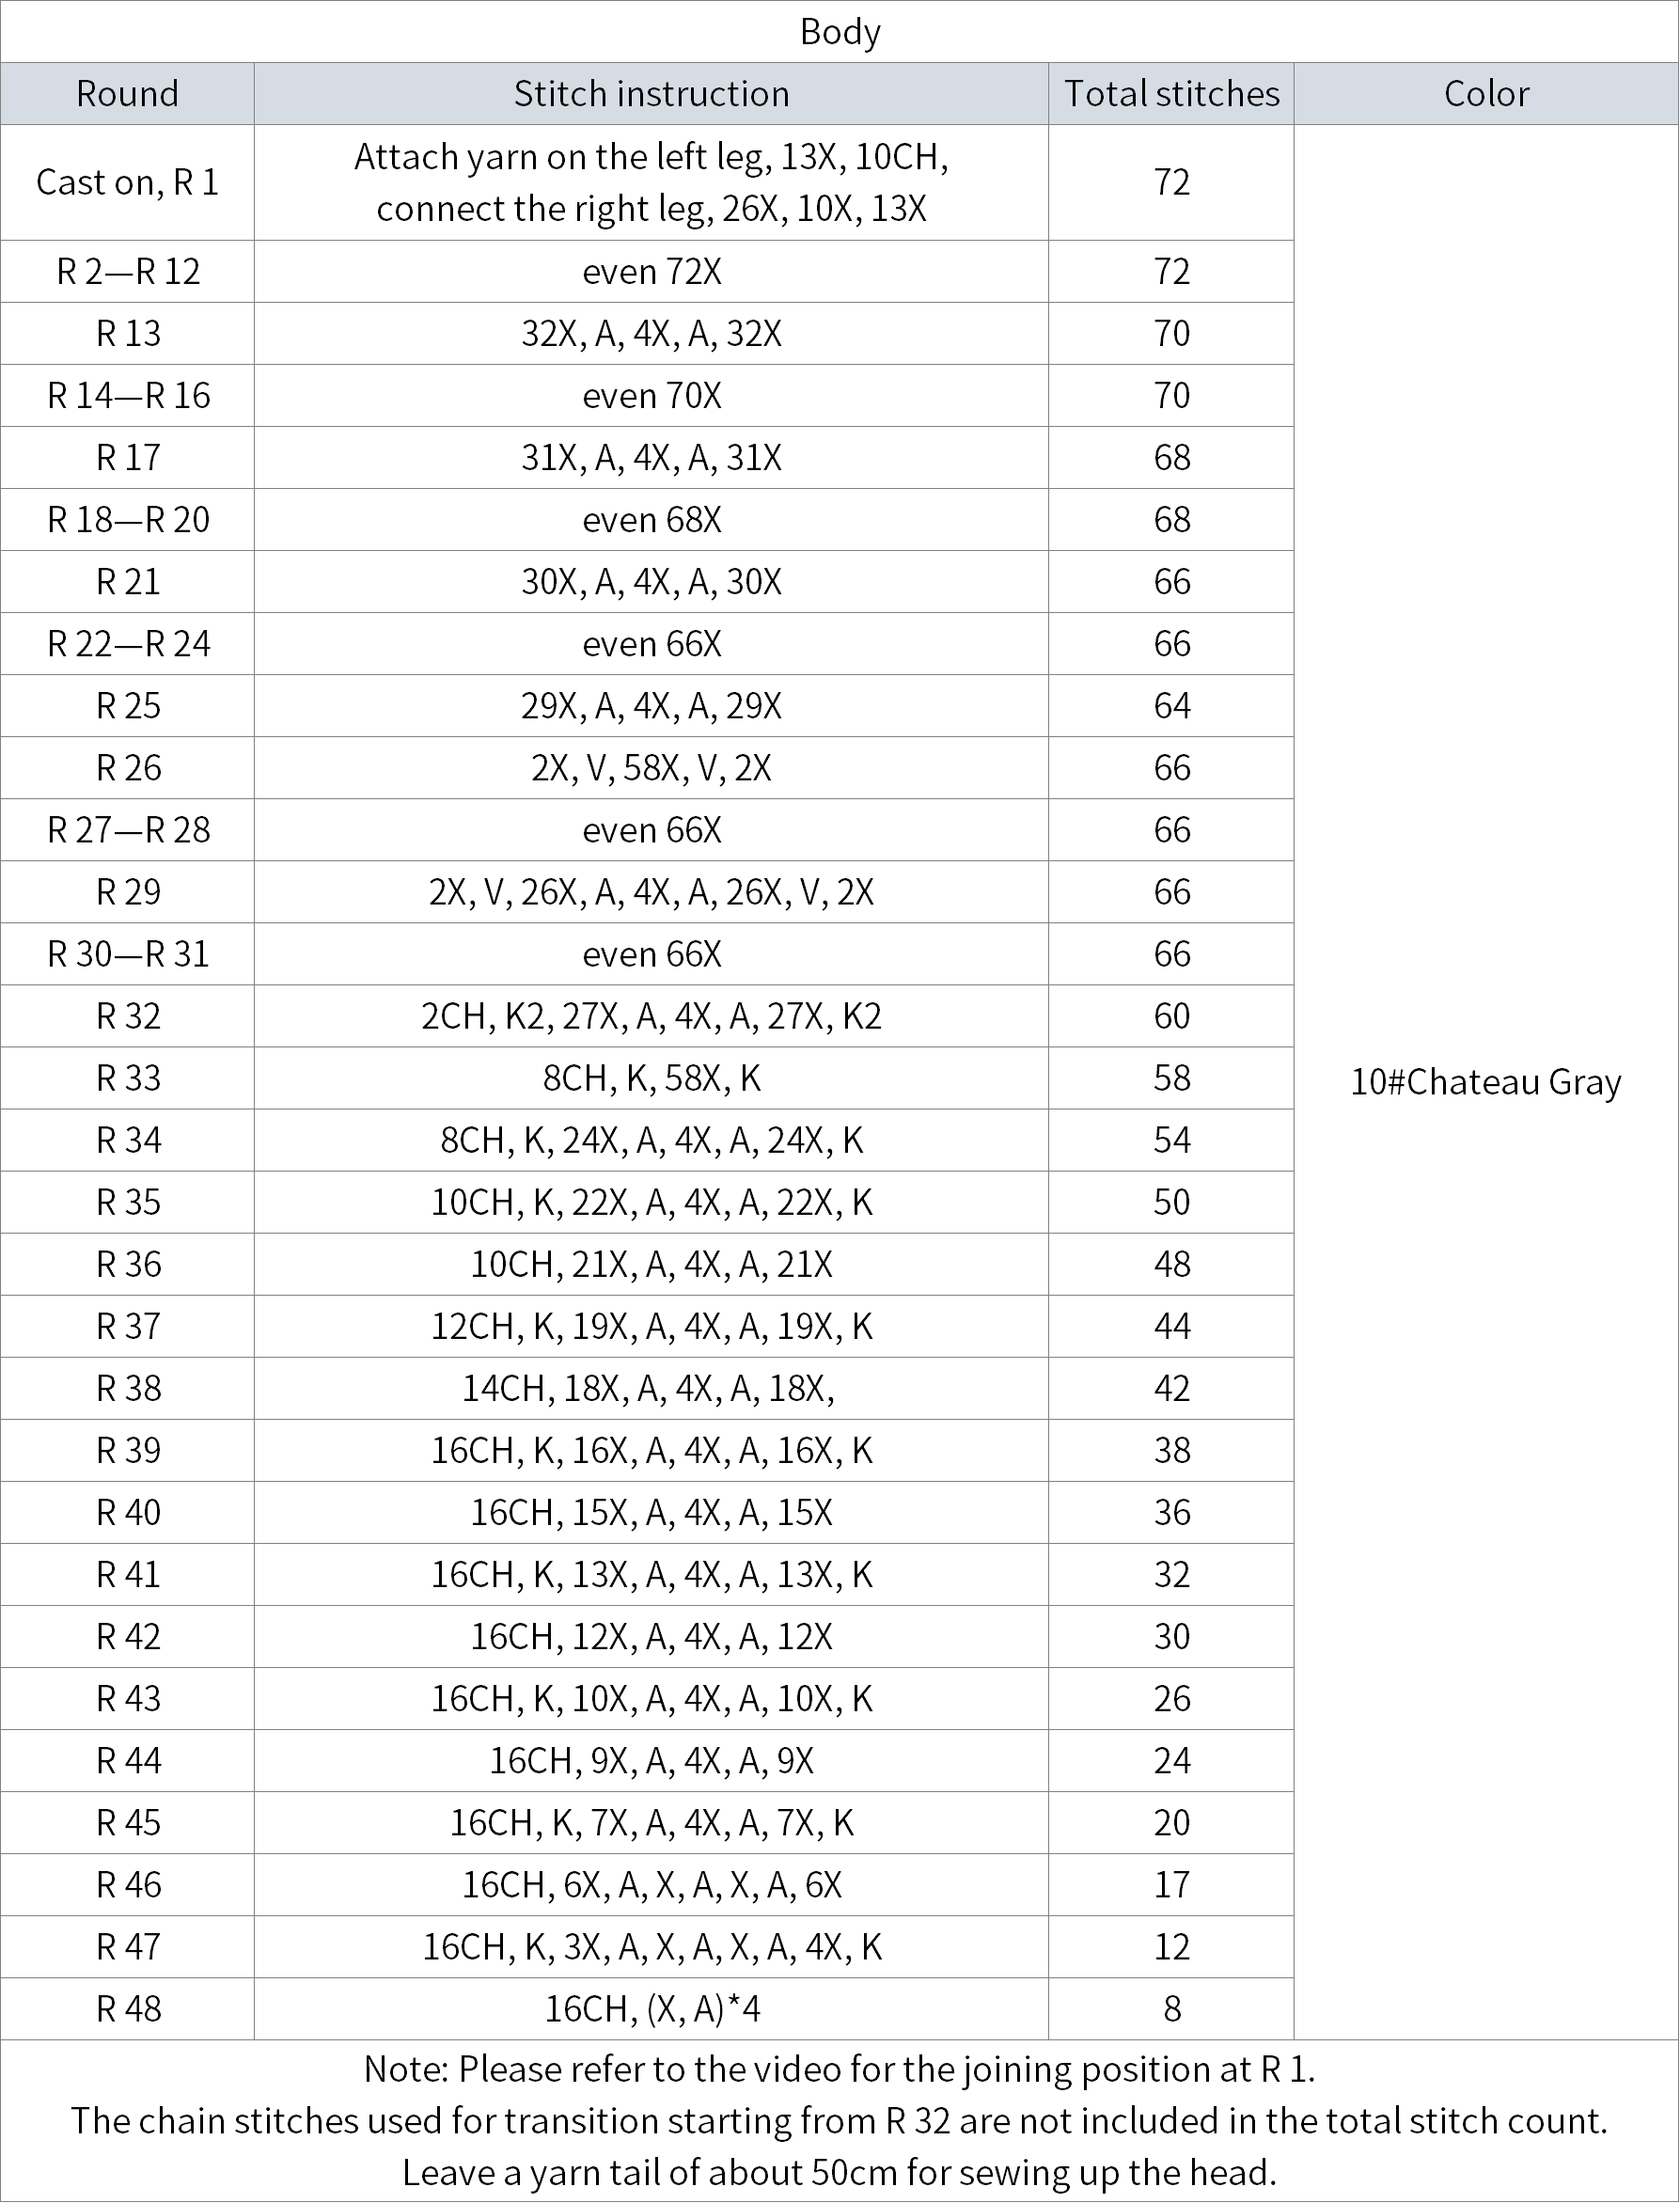
Step 4 Body
After connecting the two legs, continue to work the body by crocheting in rounds while stuffing with fiberfill as you go.
Step 5 Tail
The tail is started with an adjustable magic ring, and it needs to be stuffed as you go and have a shaping wire attached while crocheting. You will also need to switch yarns during the crocheting process.
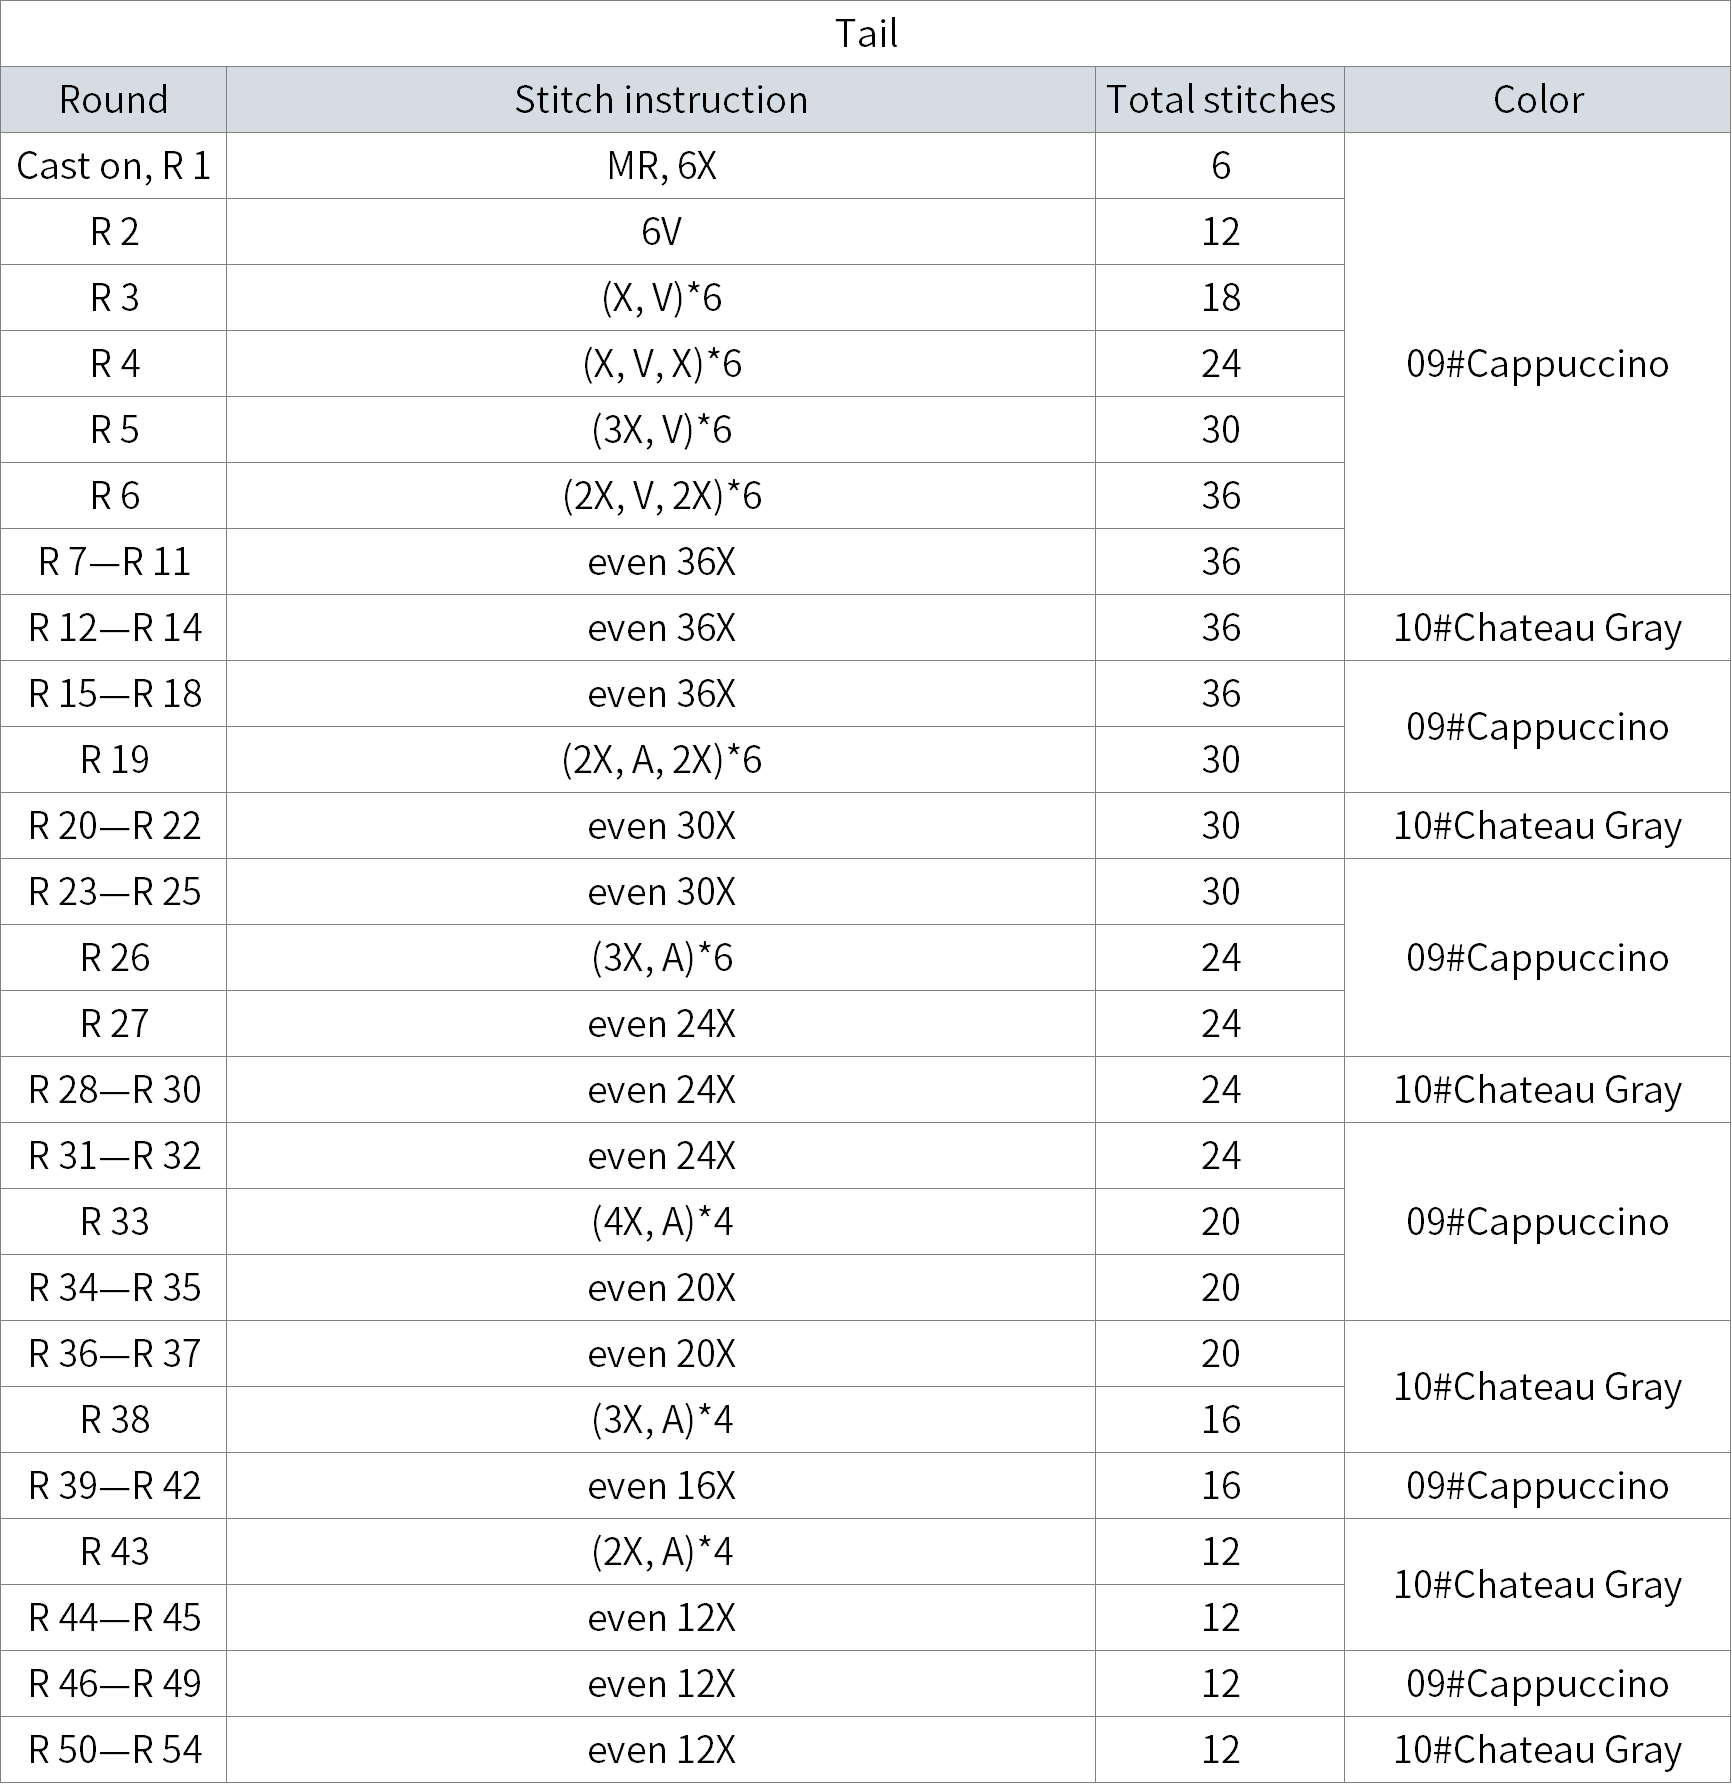
Note: Stuff with shaping wire and stuffing cotton around round 25. The shaping wire consists of 3 strands, each strand is approximately 50cm long. If it's too long after attaching, you can trim it. Leave about 30cm yarn tail and break yarn at the end.
Step 6 Assembly
After crocheting the above sections, sew them together and use the 09# Cappuccino yarn to outline the toe.
Part 2 Accessories
Accessories include facial features, clothing, and decorations.
Step 1 Facial features
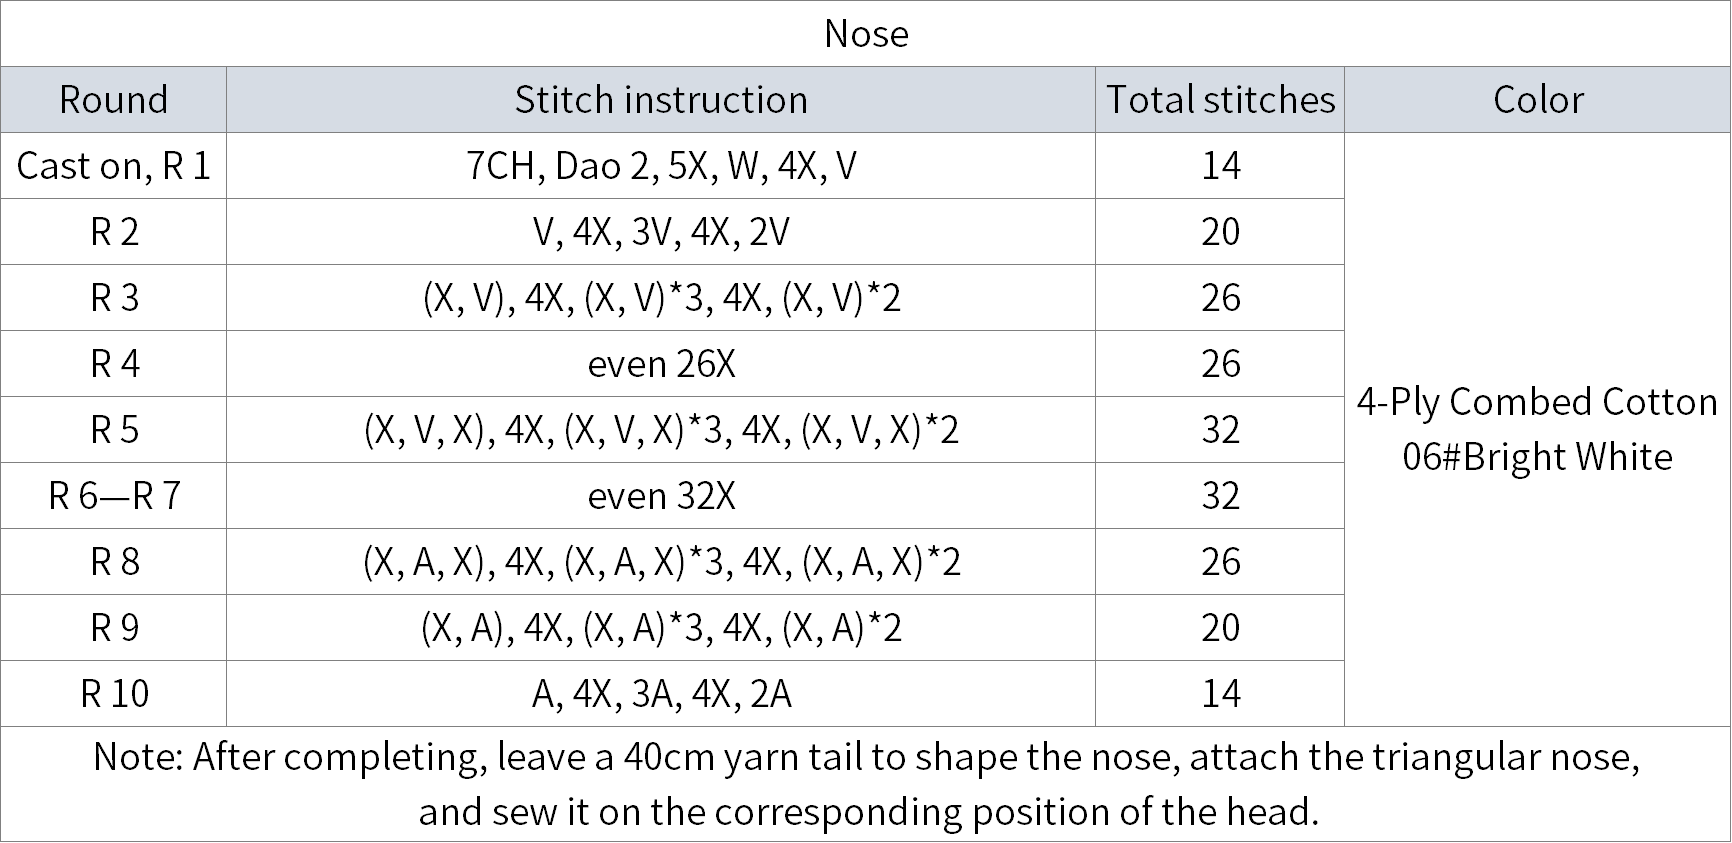
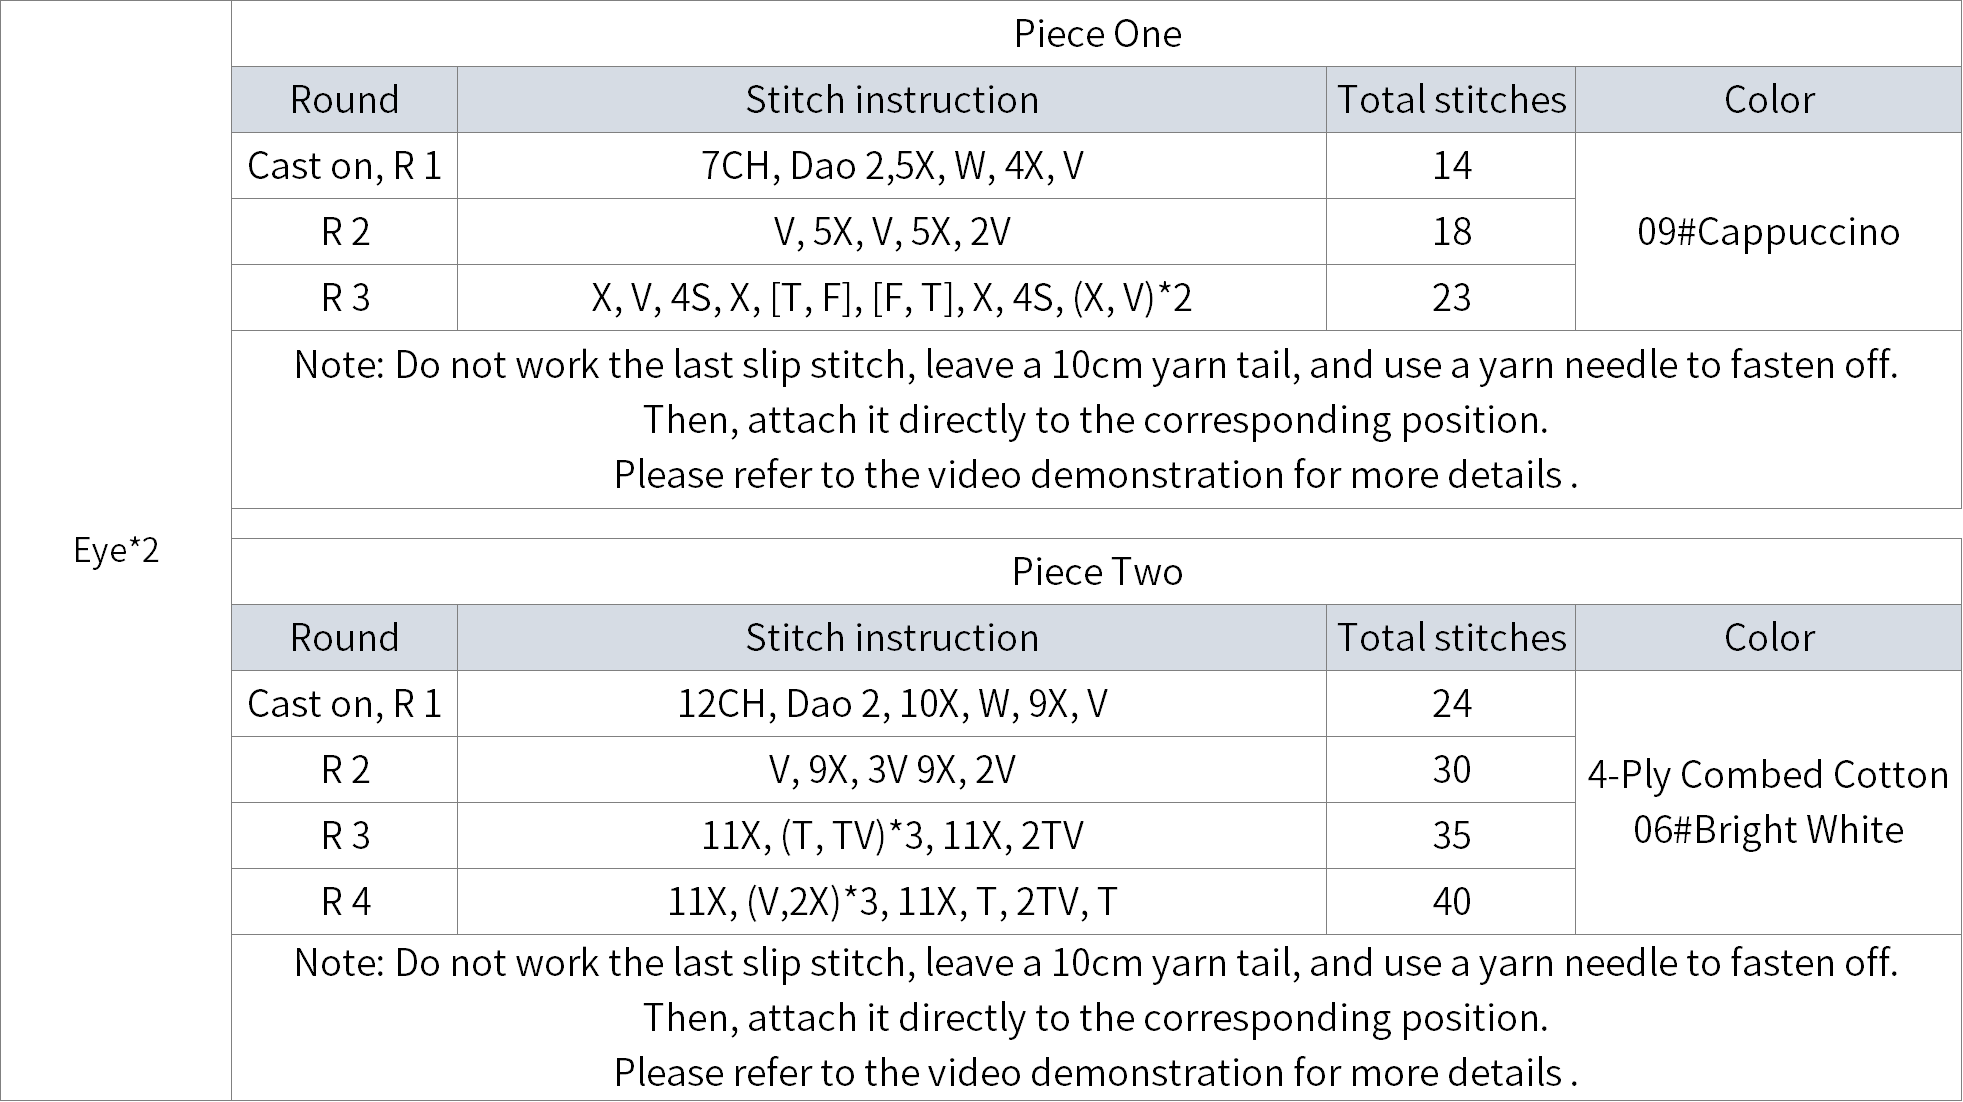
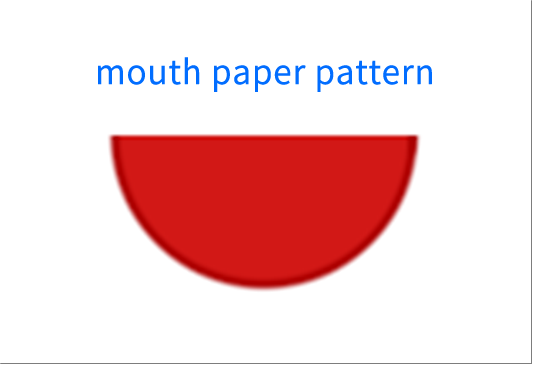
Facial features include ears, eyebrows, nose, eyes, and mouth. Complete the making of each part first before proceeding with assembly.
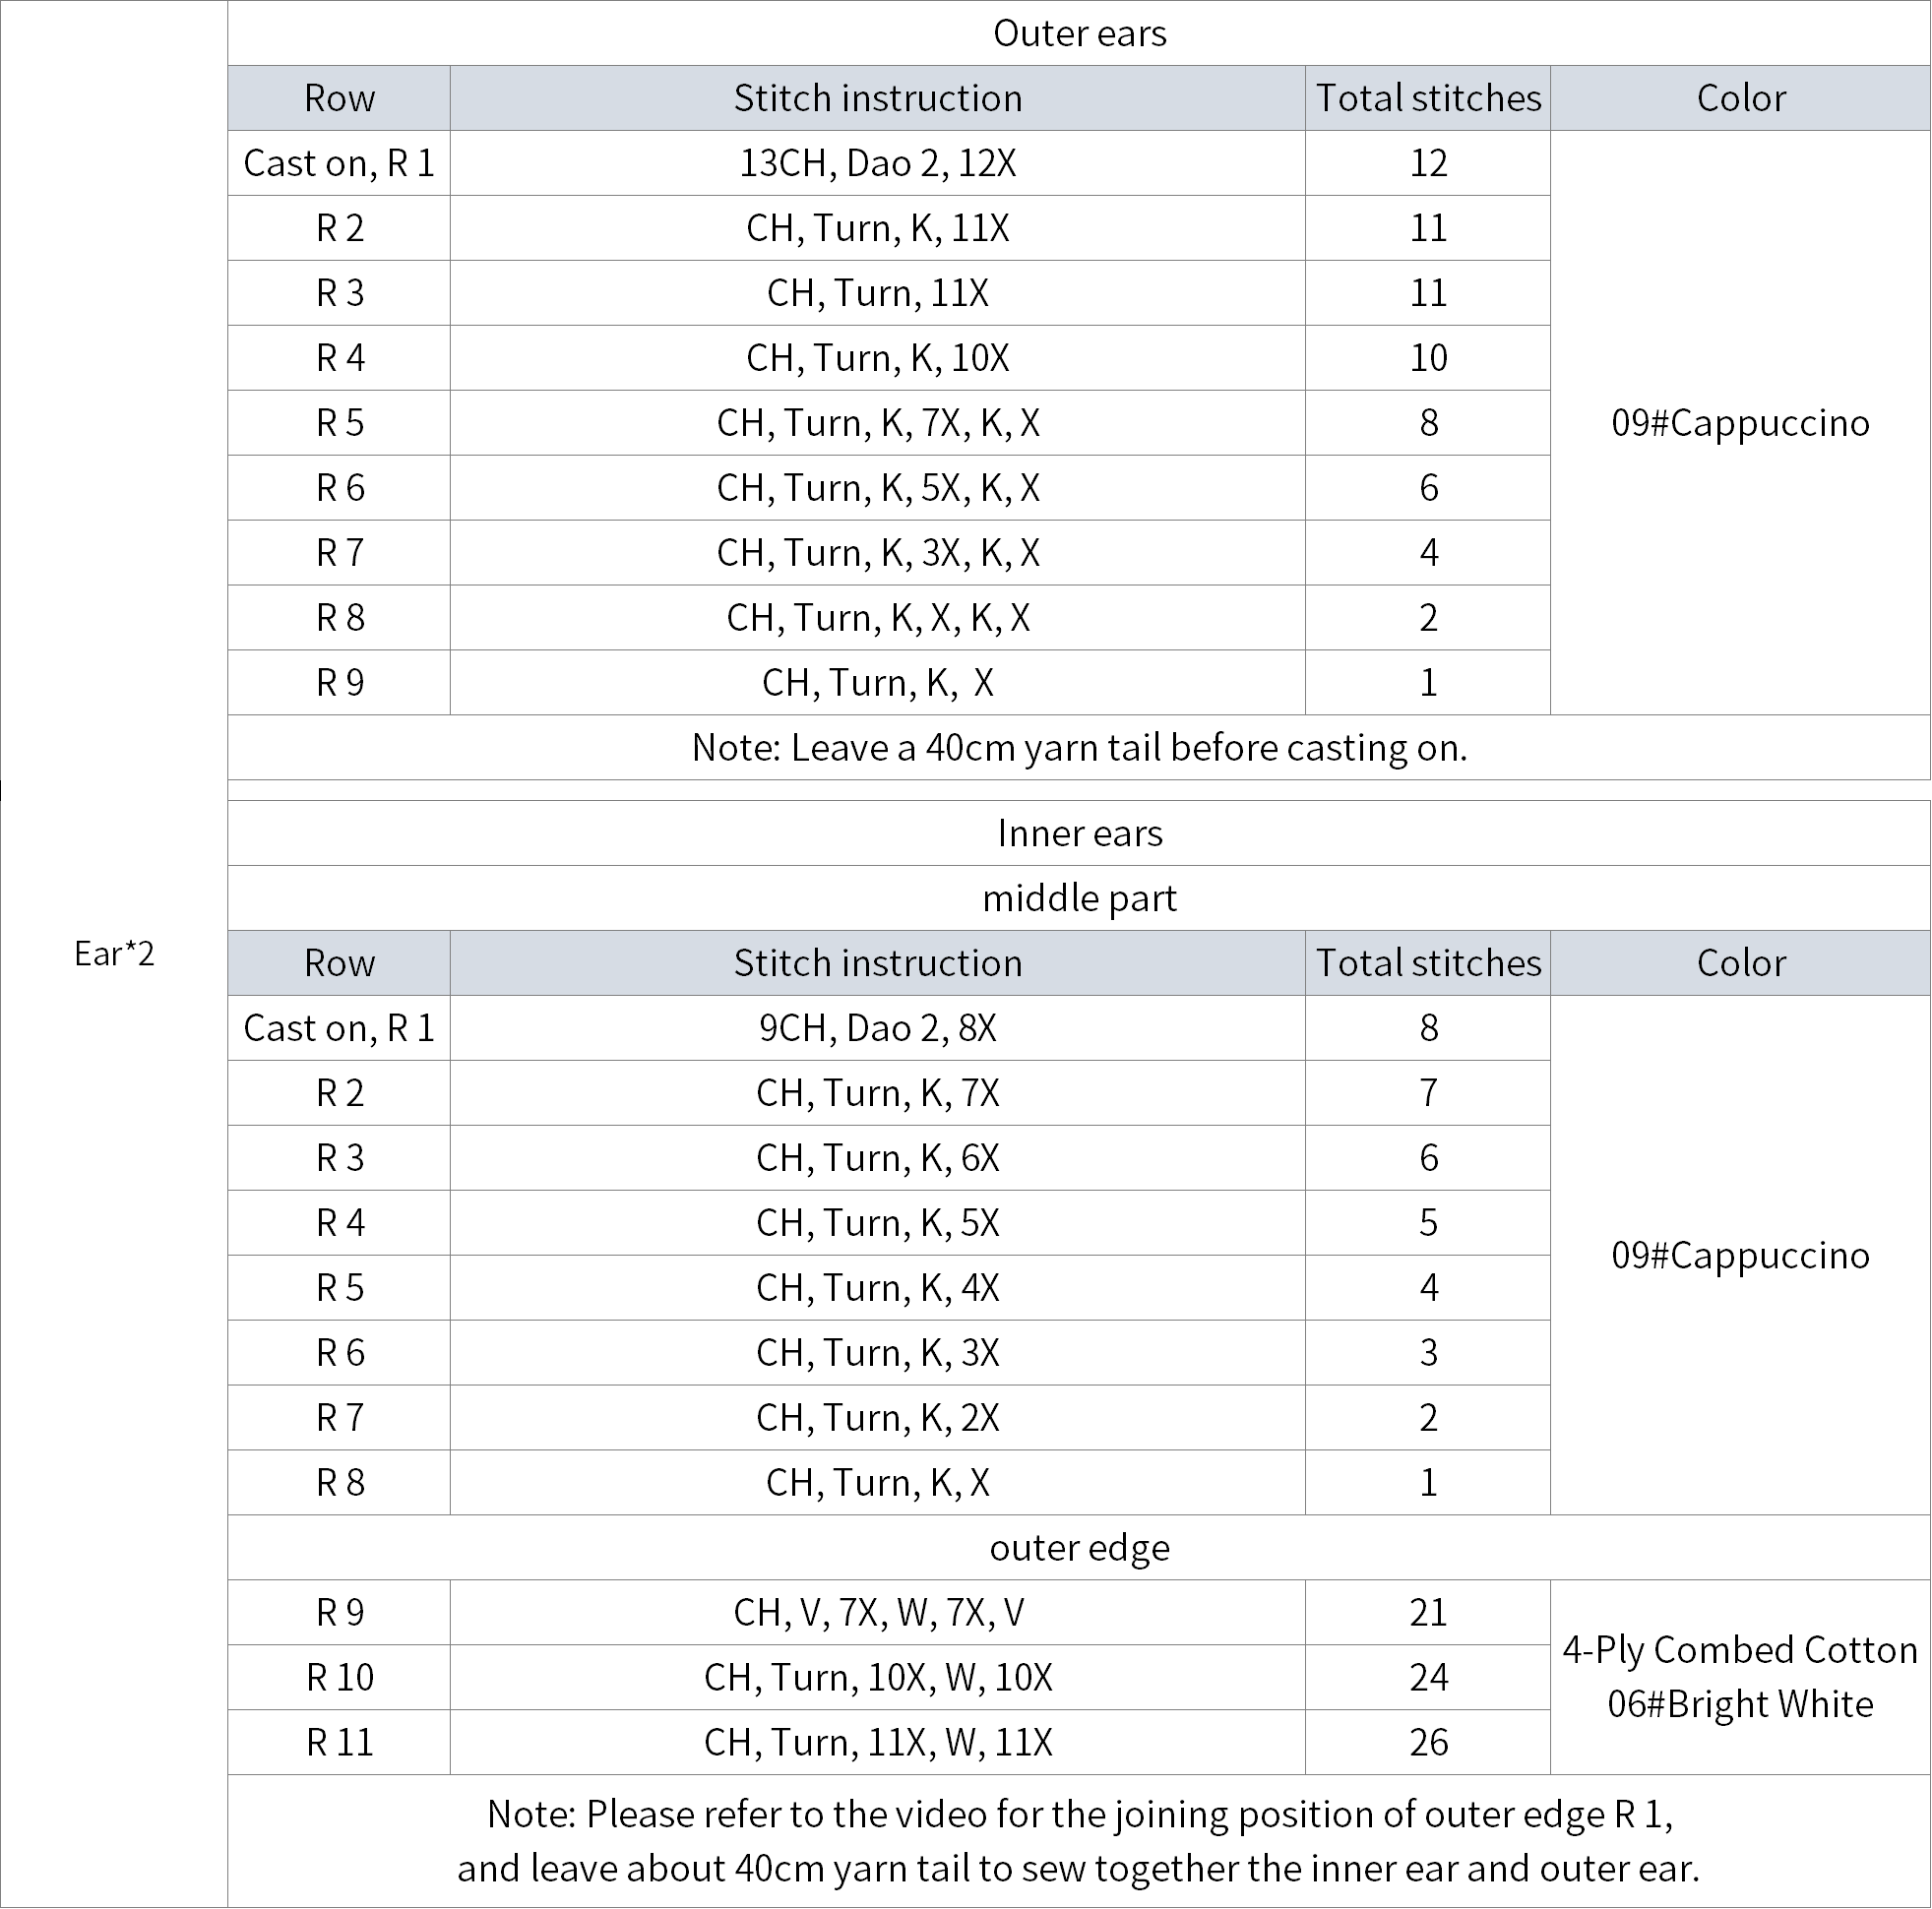
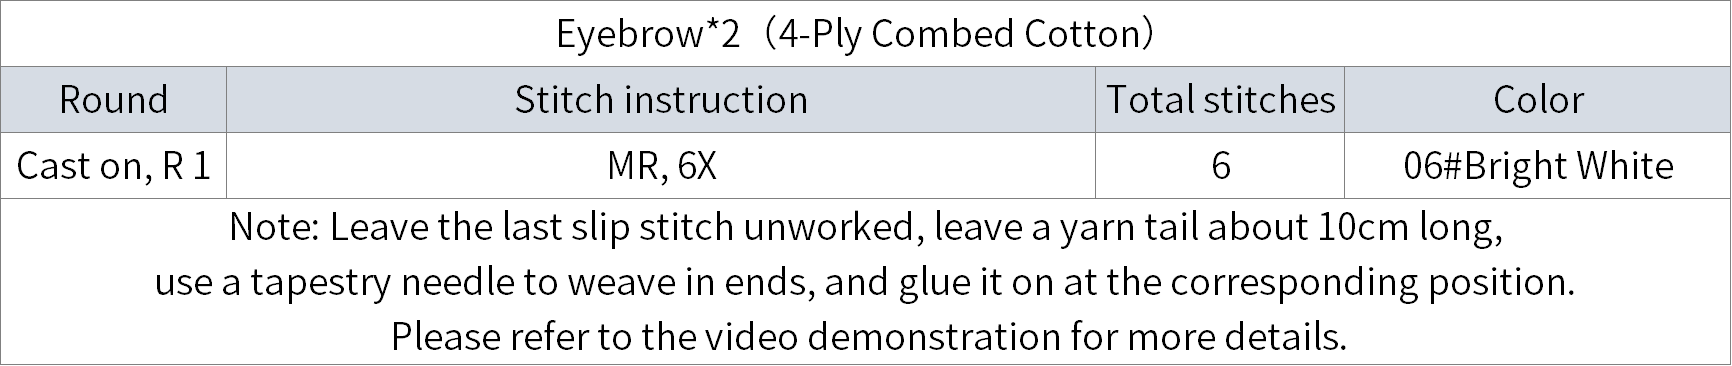
Step 2 clothing and edging
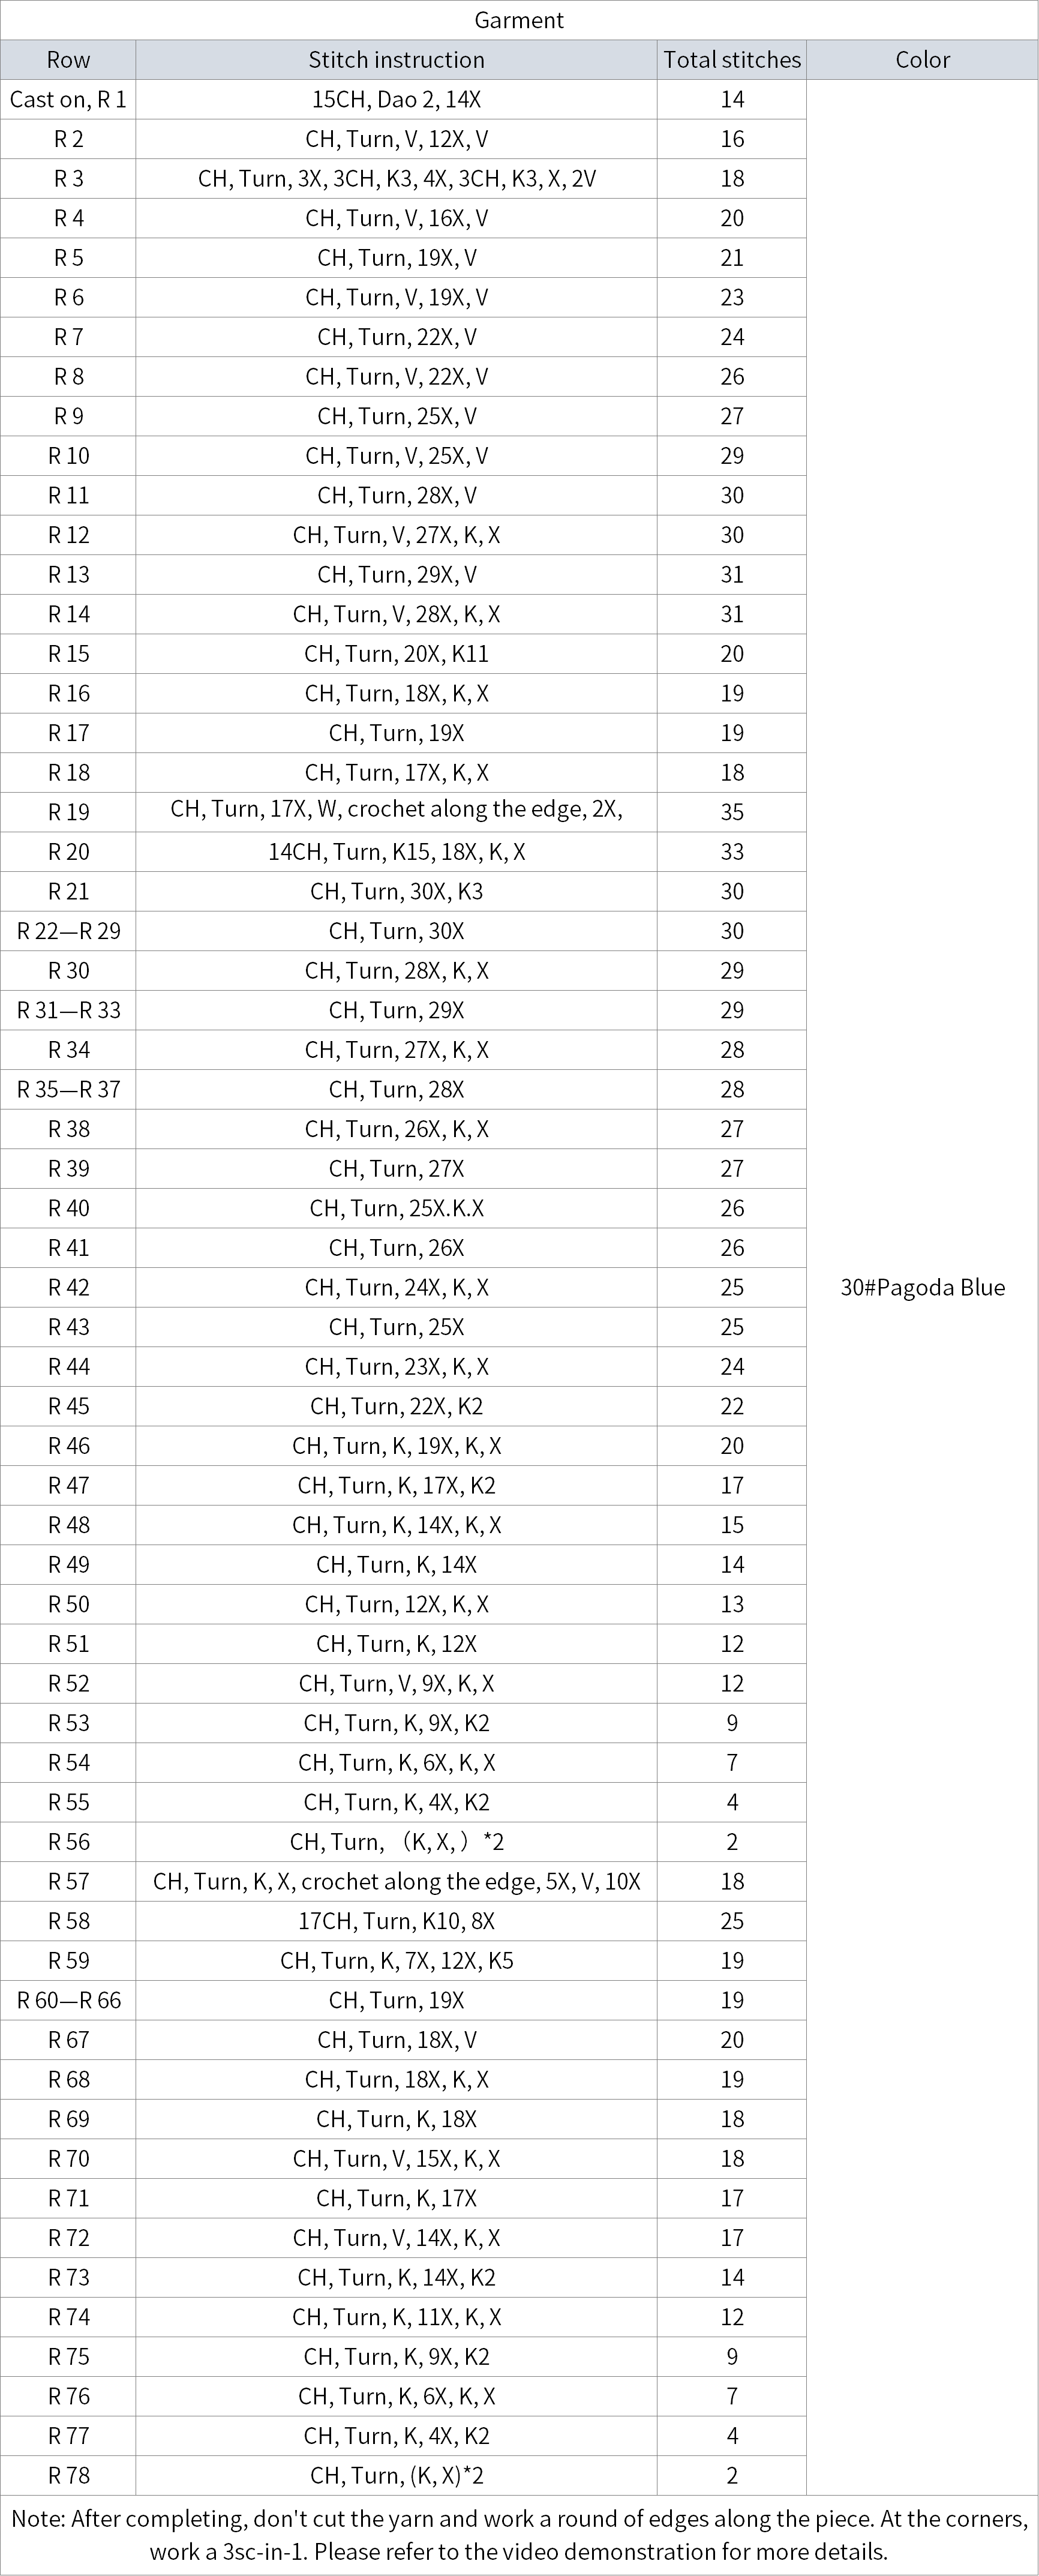
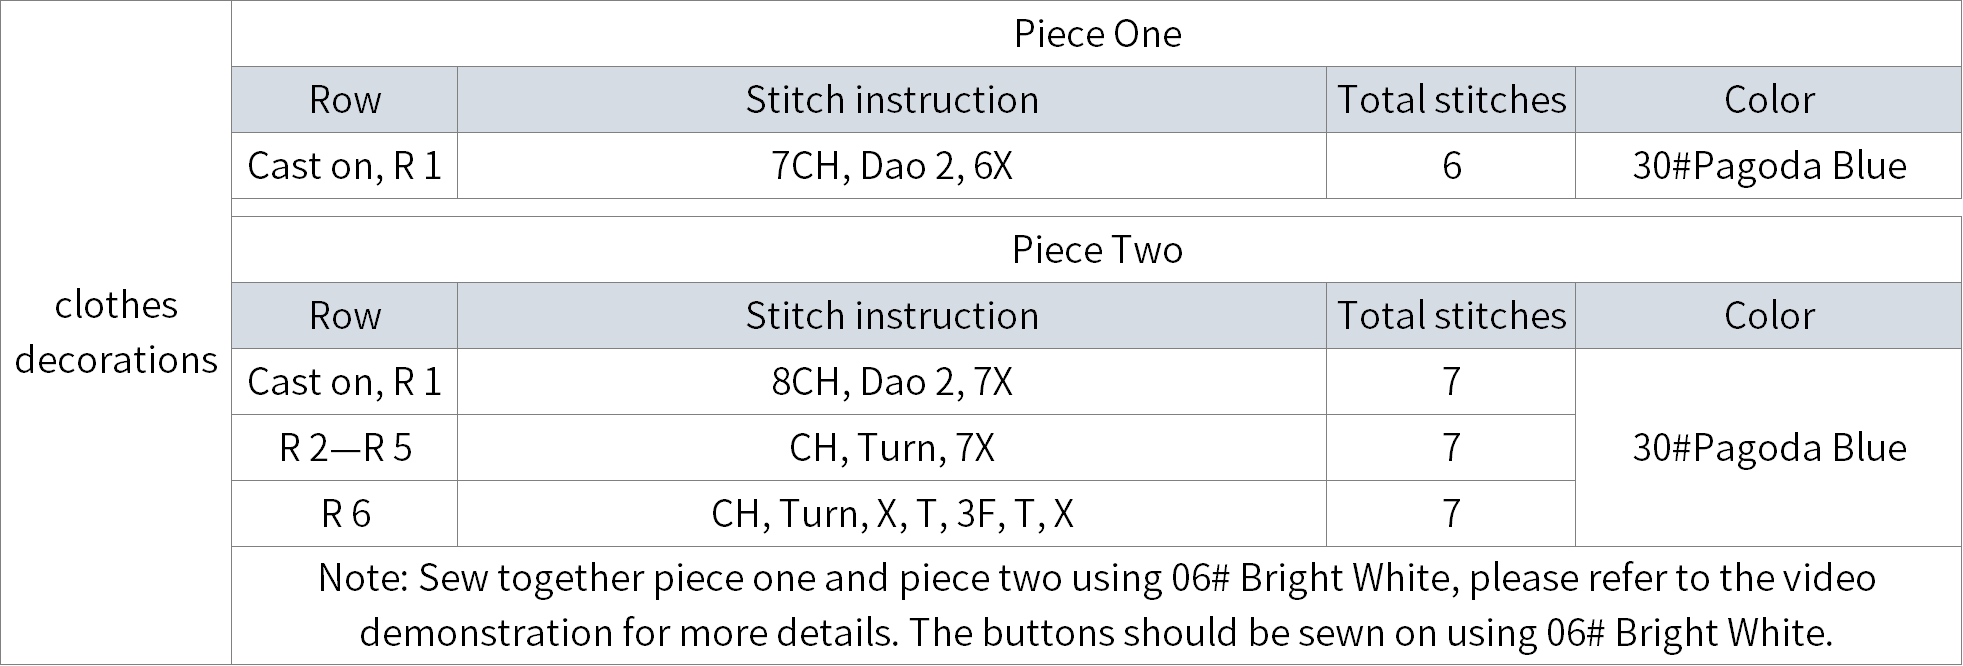
The garment is started with a chain cast on, then worked back and forth, and finally edges are crocheted.
Step 3 Decorations
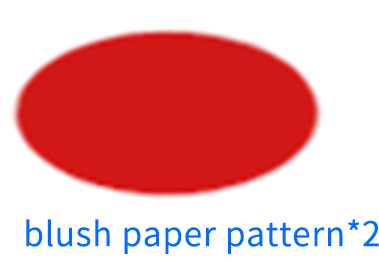
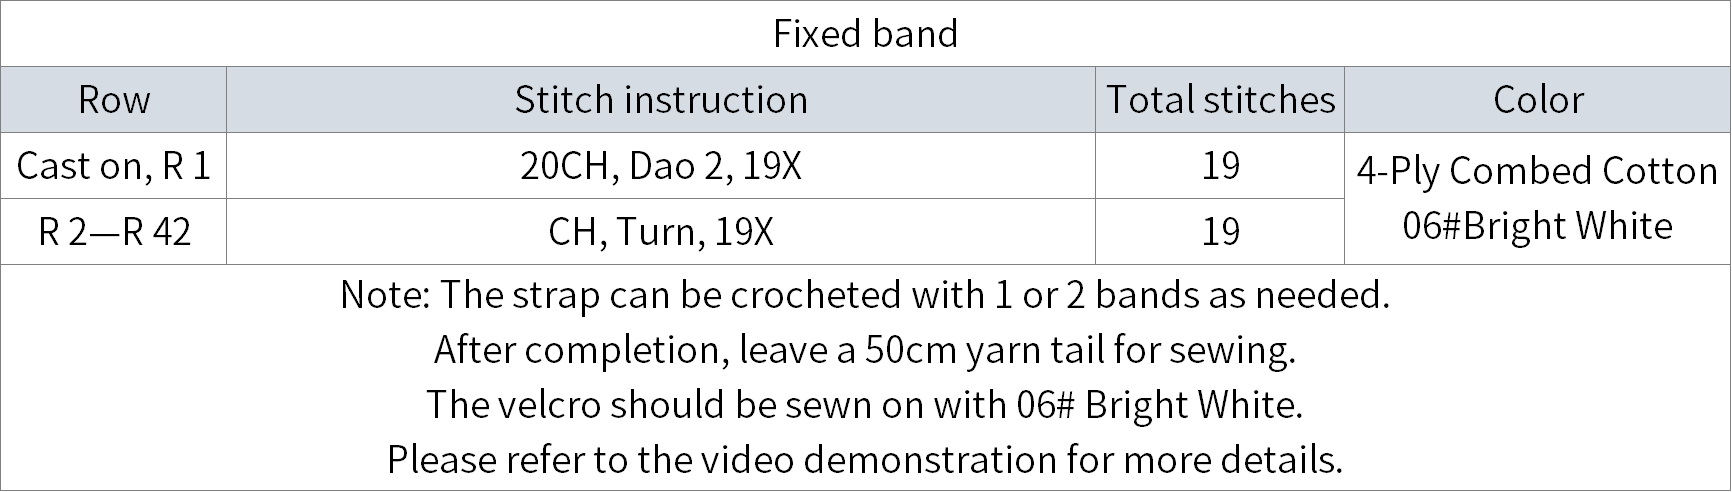
The decorations include blush, clothes decorations, and fixed band. First, complete the making of each part, then proceed with the assembly.
Made by the community