Flowers
Impressionism Bouquet || Monet's Garden
Project preview
See the finished project
Pattern format
Instructions
Watch and follow
Video tutorial
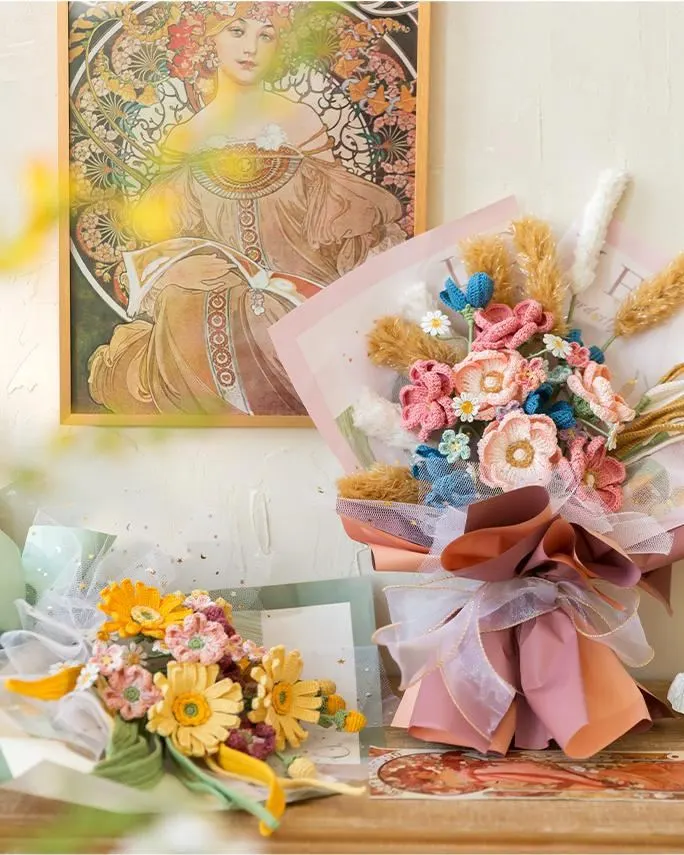
This Monet's Garden of bouquet is divided into two parts: the flower branches and the packaging.
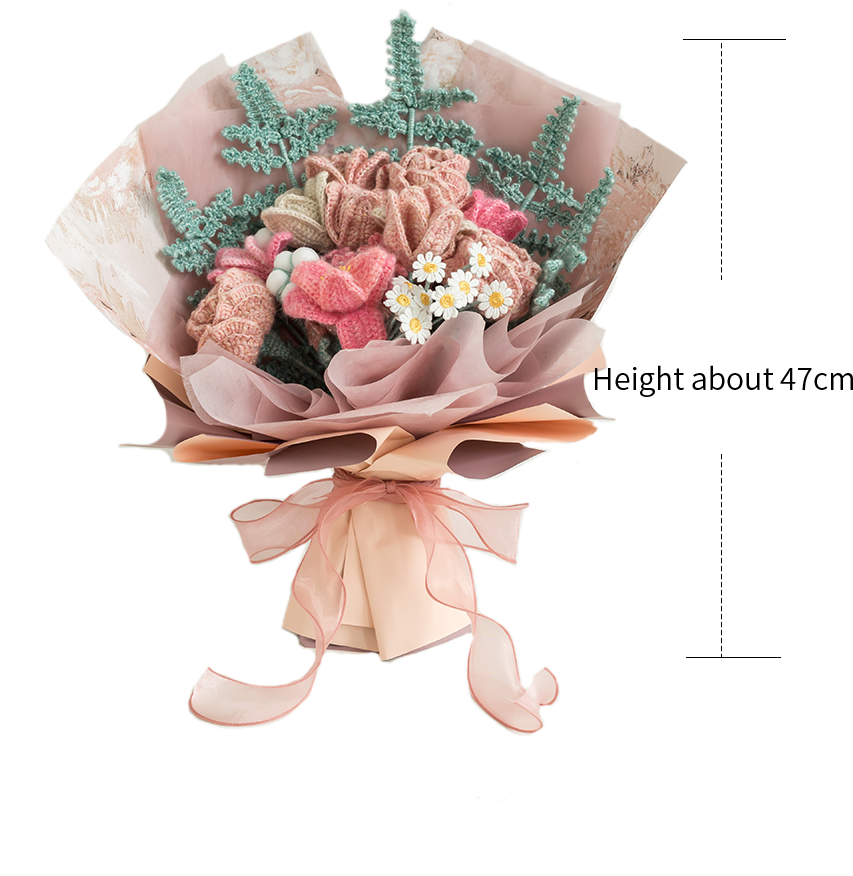
Due to variations in individual tension, the size of the sample is for reference only.
Materials: Susan's Family Impression Misty Feather and Dawn Impression
Hook: 2.00 mm crochet hook
(Wrap the flower stems uniformly with 22#Lcy Morn)
Chart Key













Note: This pattern is making in Chinese crochet pattern terms, and the stitch name is written using American terminology. All measurements in charts are in cm.

Part 1 Flower Branch A
There are mainly six types of flower branches: daisies, cotton, ferns, roses, tulips, and hydrangeas.
Step 1 DaisyA1 01' 05'' (Part 1)
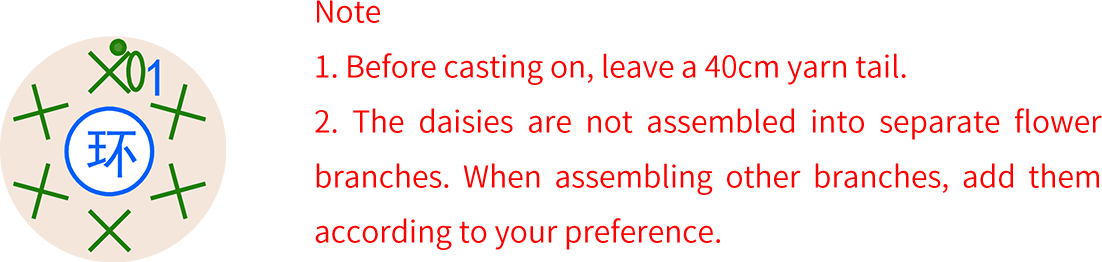
The daisies consist of multiple parts: the flowers, the calyx, and the assembly. The flowers are pre-made and do not need to be made. The calyx is started with an adjustable magic ring and crocheted in rounds counterclockwise. Please refer to the video demonstration for more details.
Step 2 Cotton A2 07' 37'' (Part 1)
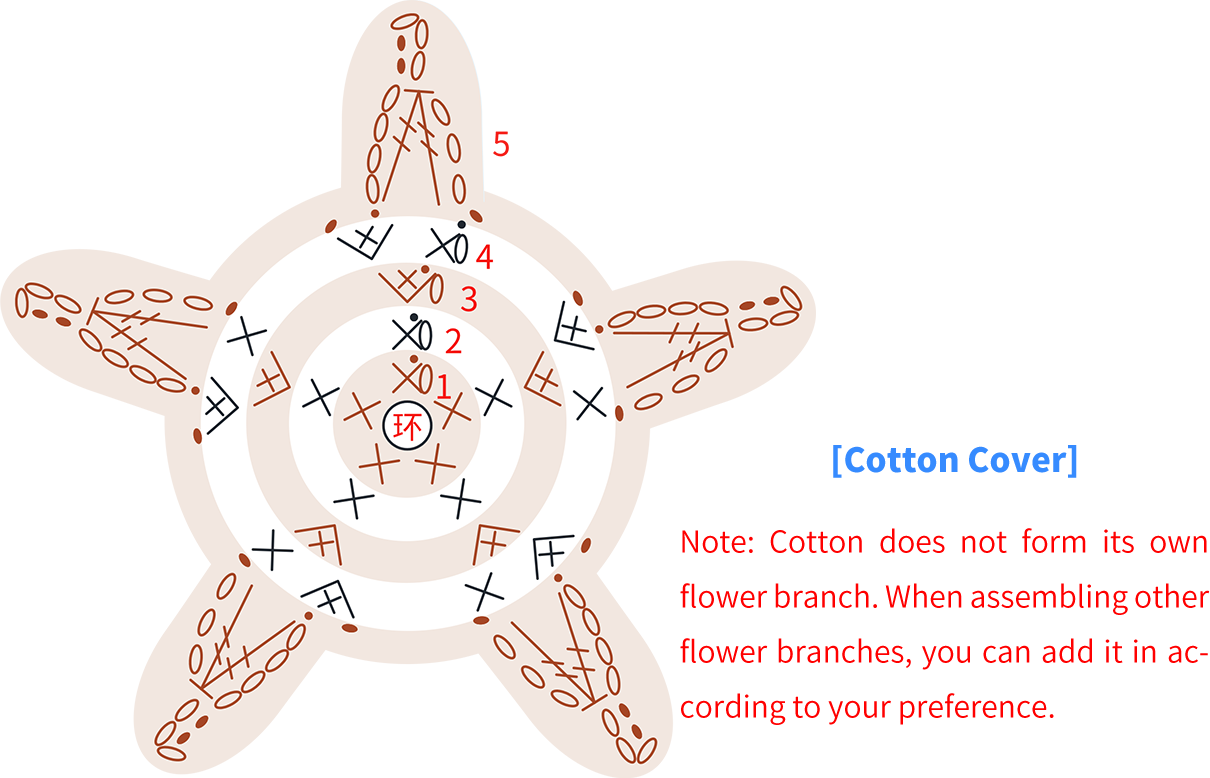
Cotton is made up of an outer shell and a cotton ball. First, complete the making of the cotton ball, then use the magic ring method to crochet the shell in rounds. After completing it, proceed to assemble. Please refer to the video demonstration for more details.
Step 3 Fern GrassA3 22' 34'' (Part 1)
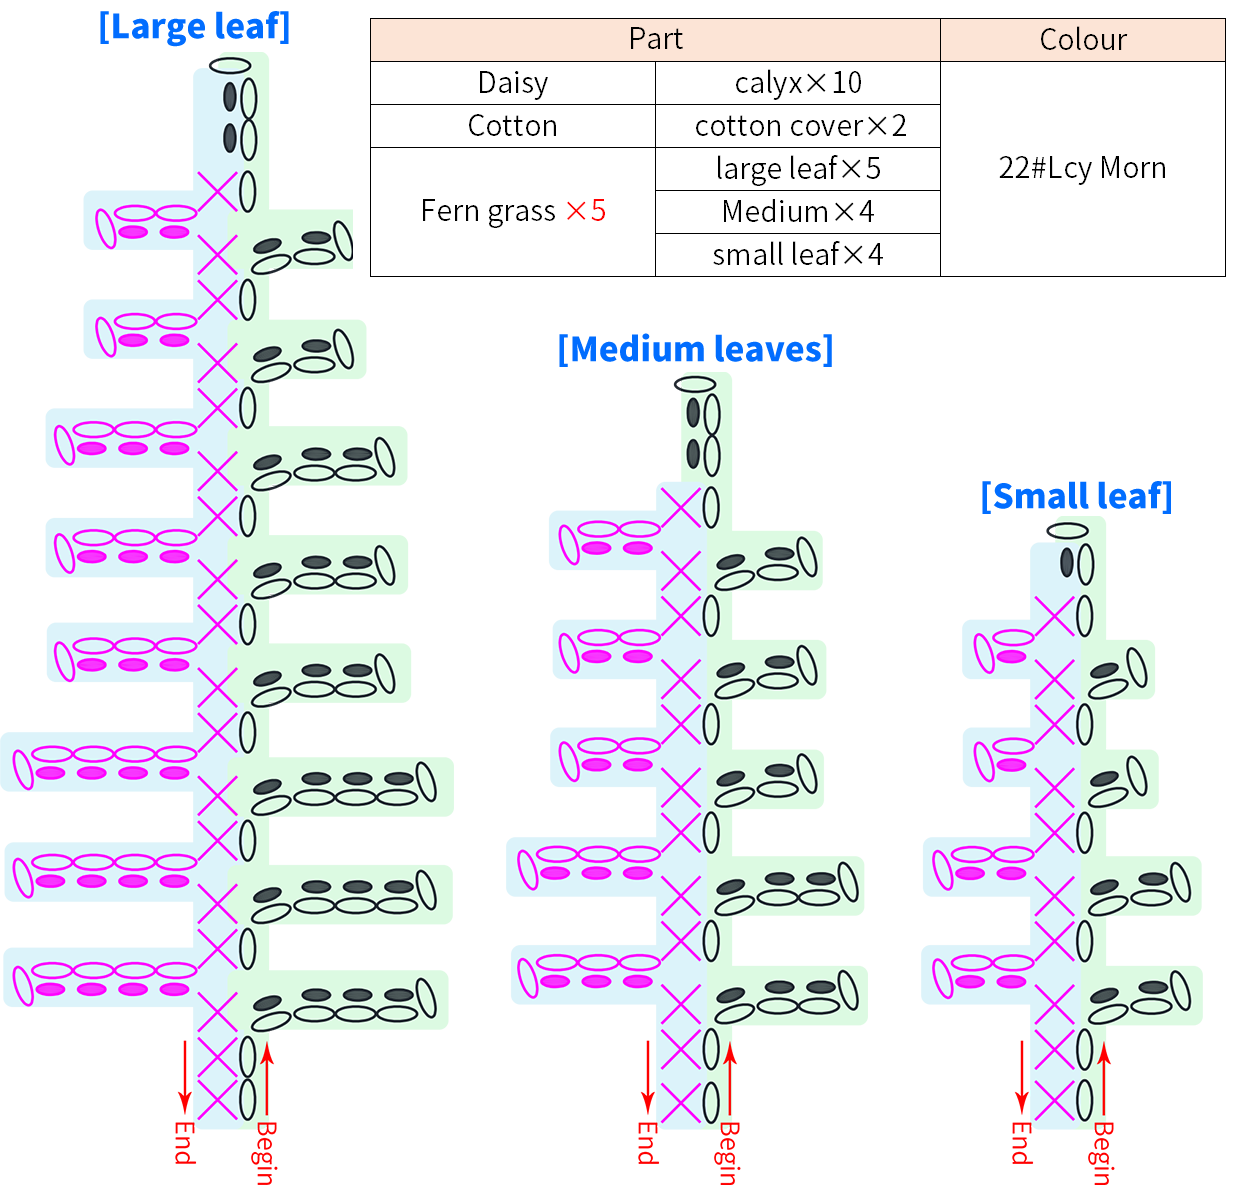
The fern is assembled from three sizes of leaves: large, medium, and small. First, crochet the leaves, and add thin wire while crocheting. Once completed, assemble them together. Please refer to the video demonstration for more details.
Step 4 Roses A4 34' 12'' (Part 1)
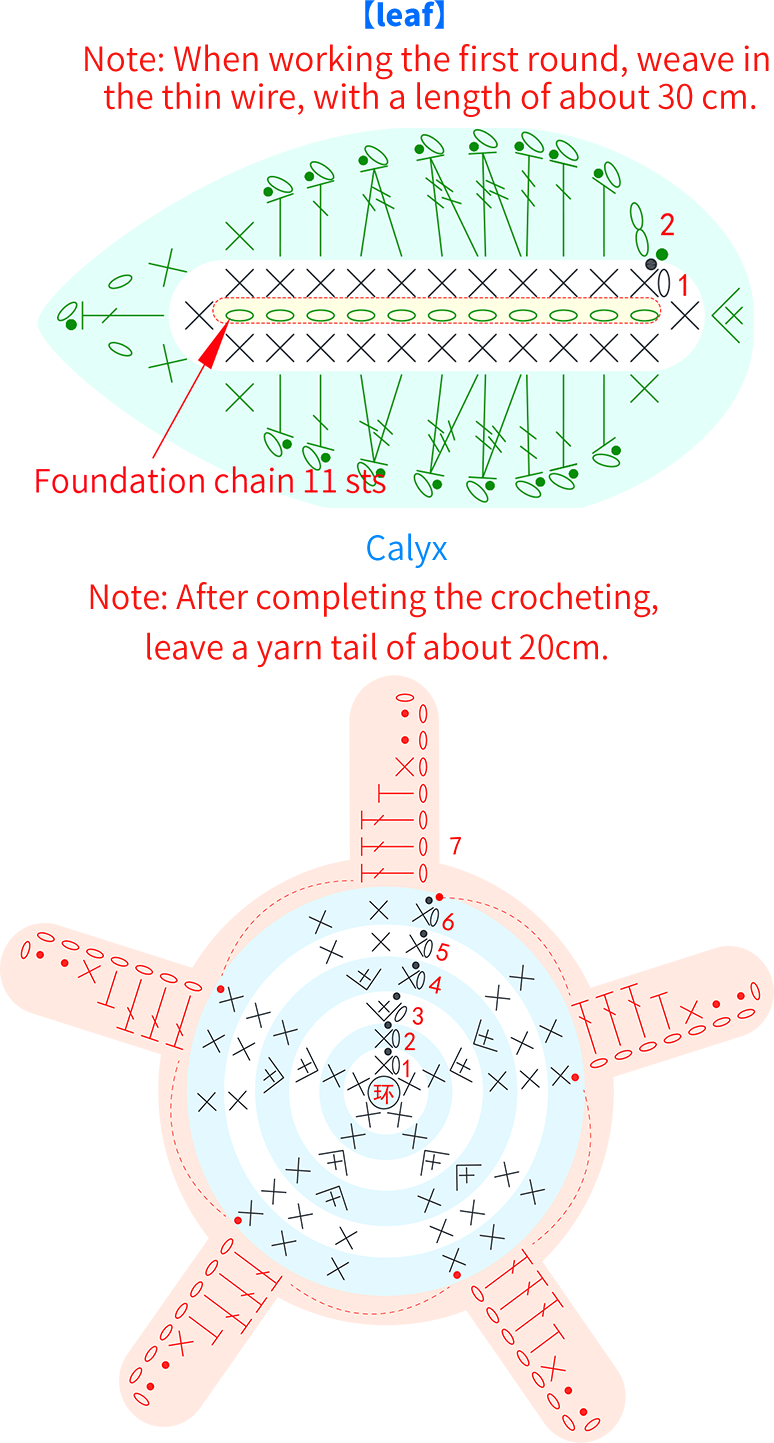
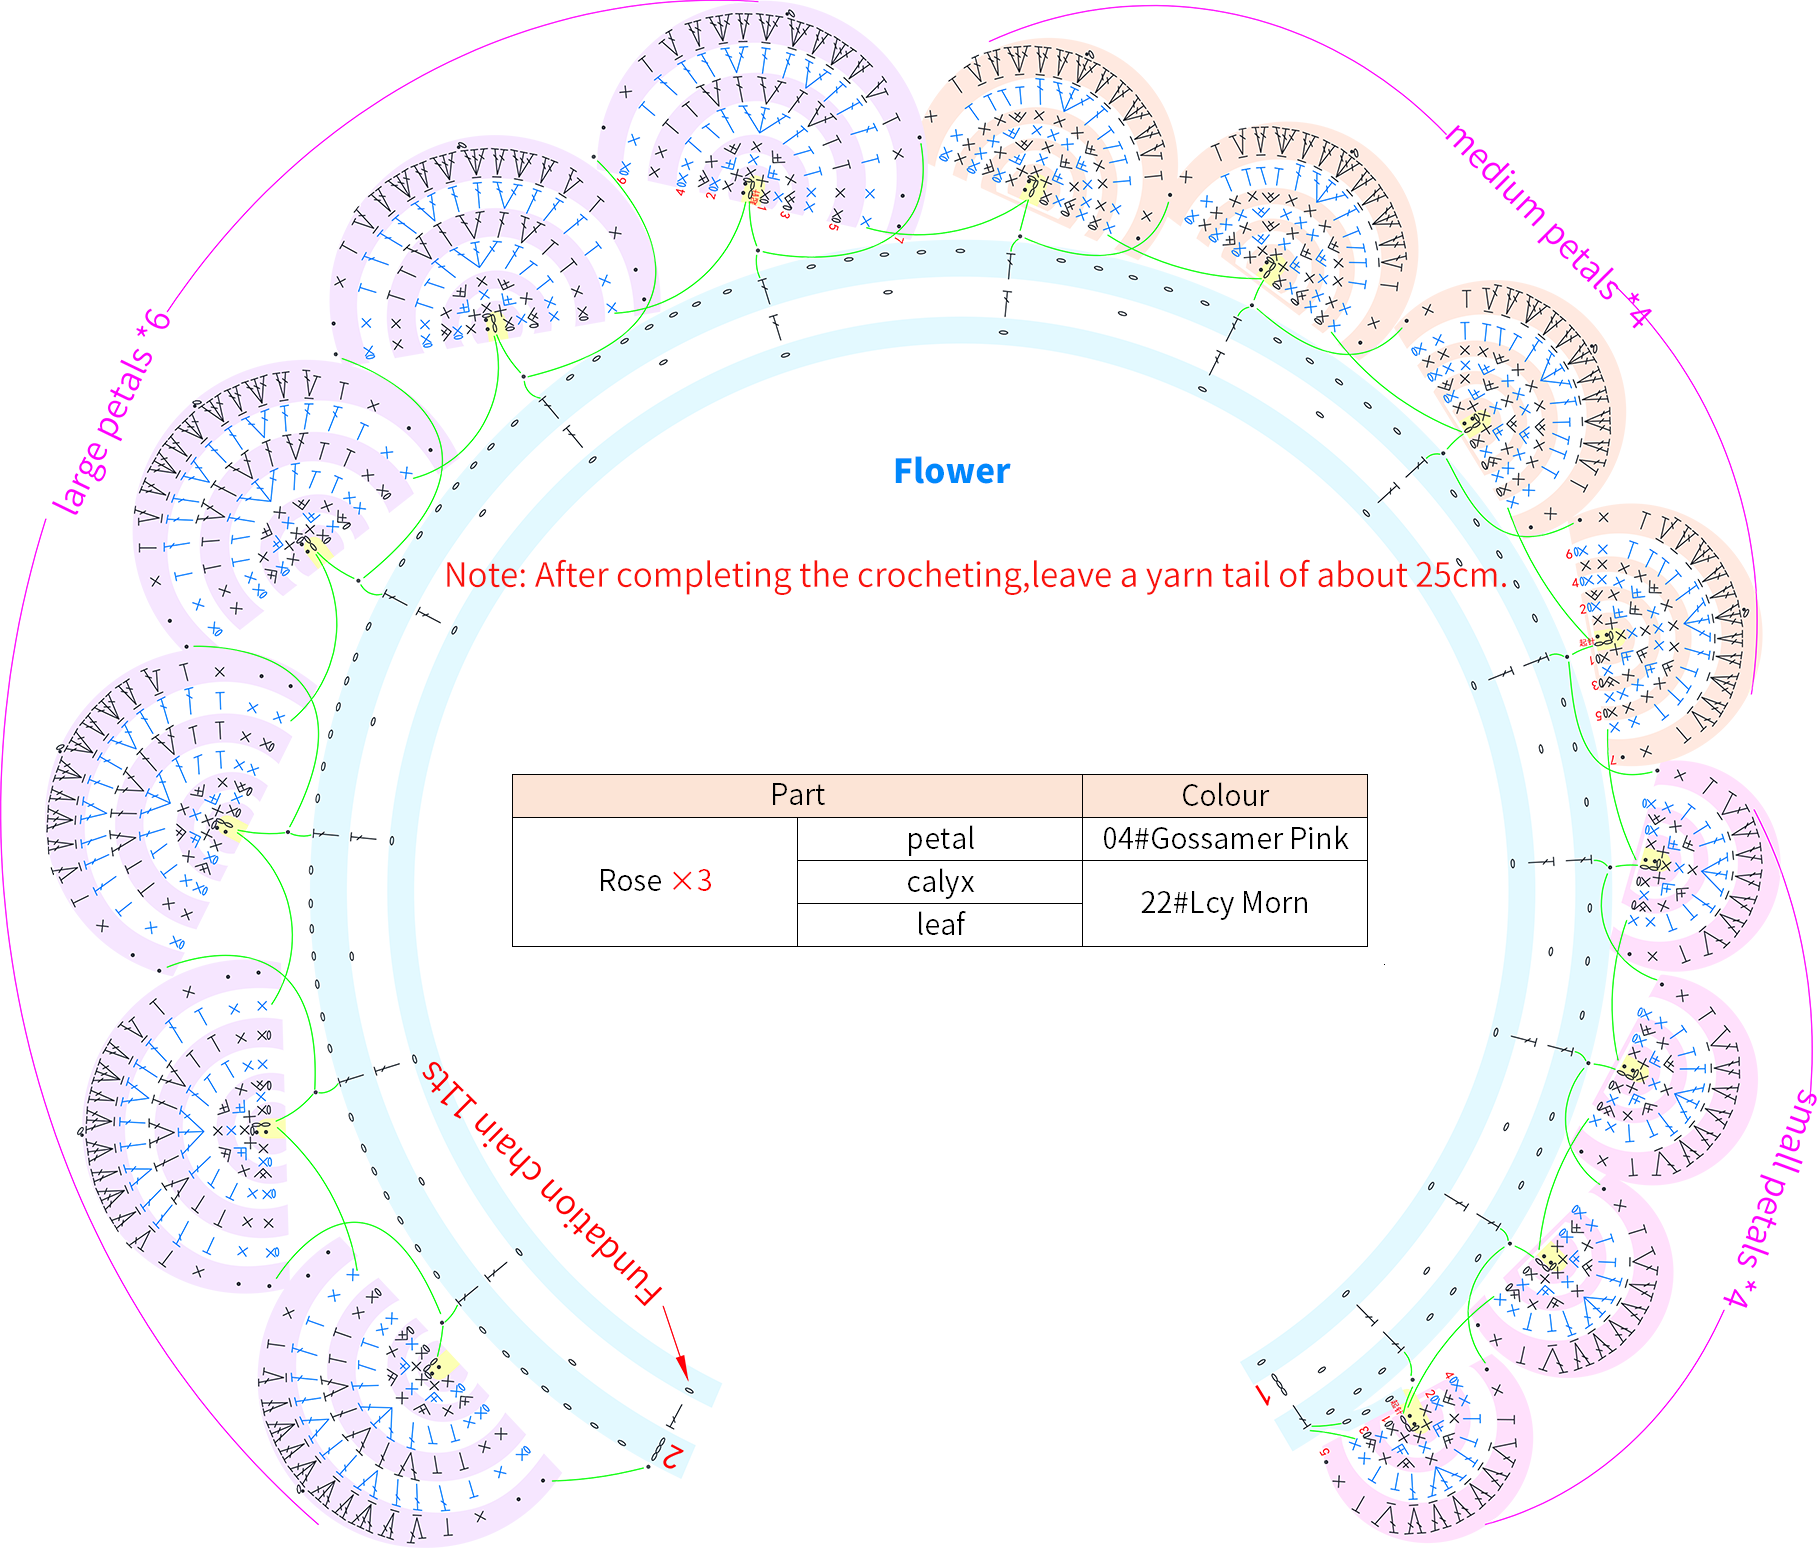
The rose includes leaves, calyx, flowers, and assembly. First, complete the crocheting of each part, and then assemble them. Please refer to the video demonstration for more details.
Step 5 TulipA5 00' 11'' (Part 2)
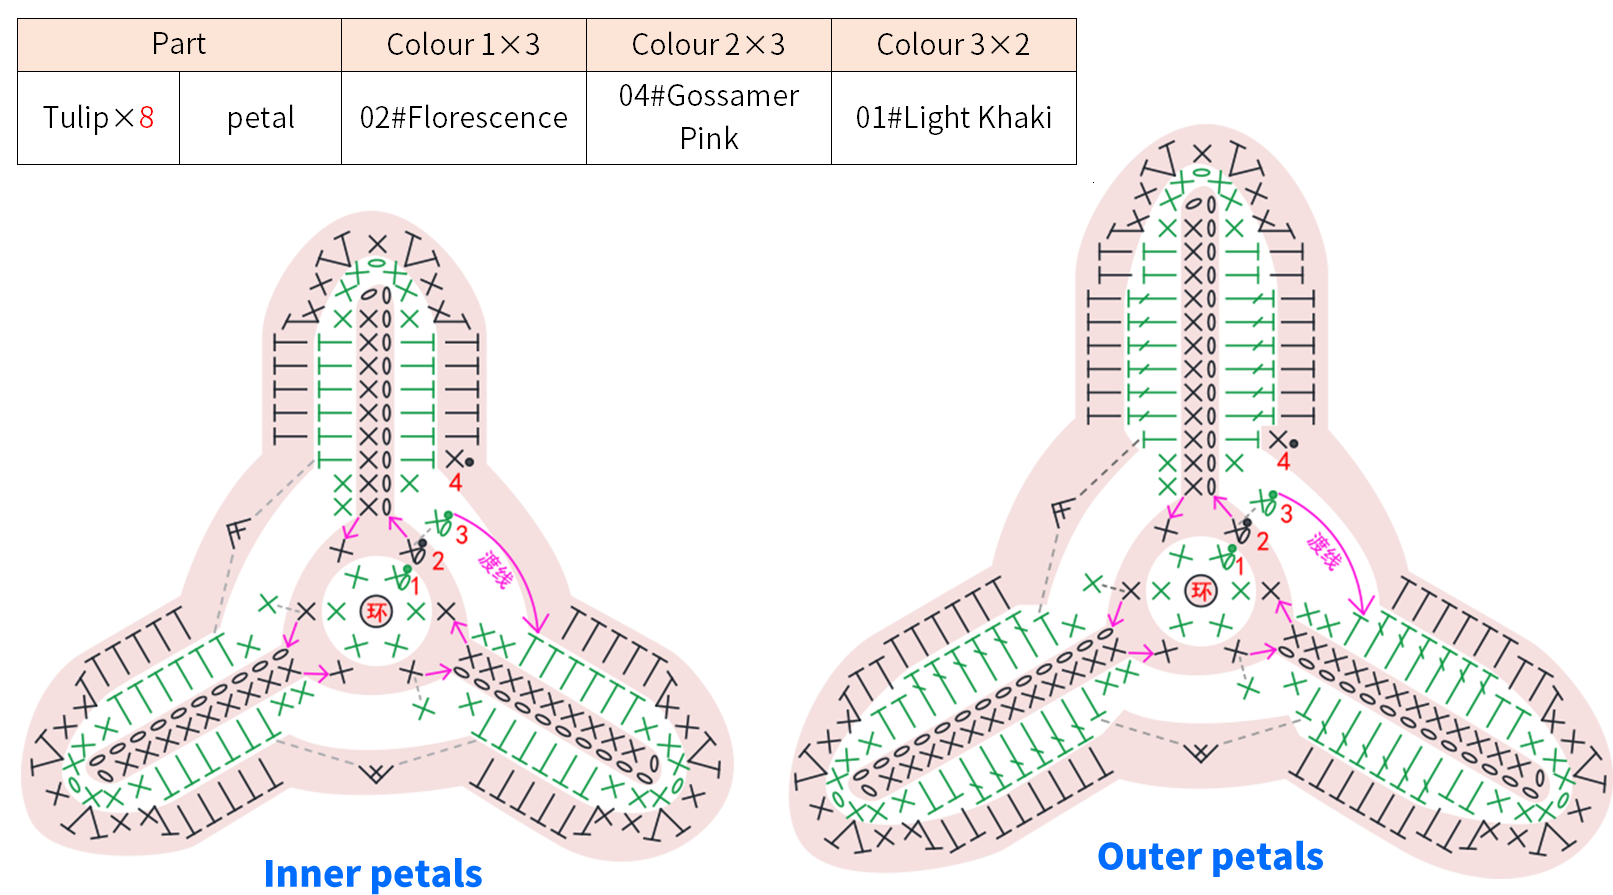
The tulip is divided into petals, pistil, and assembly. The petals include inner and outer layers. Please refer to the video demonstration for more details.
Step 6 Embroidered ball flowerA6 39' 12'' (Part 2)
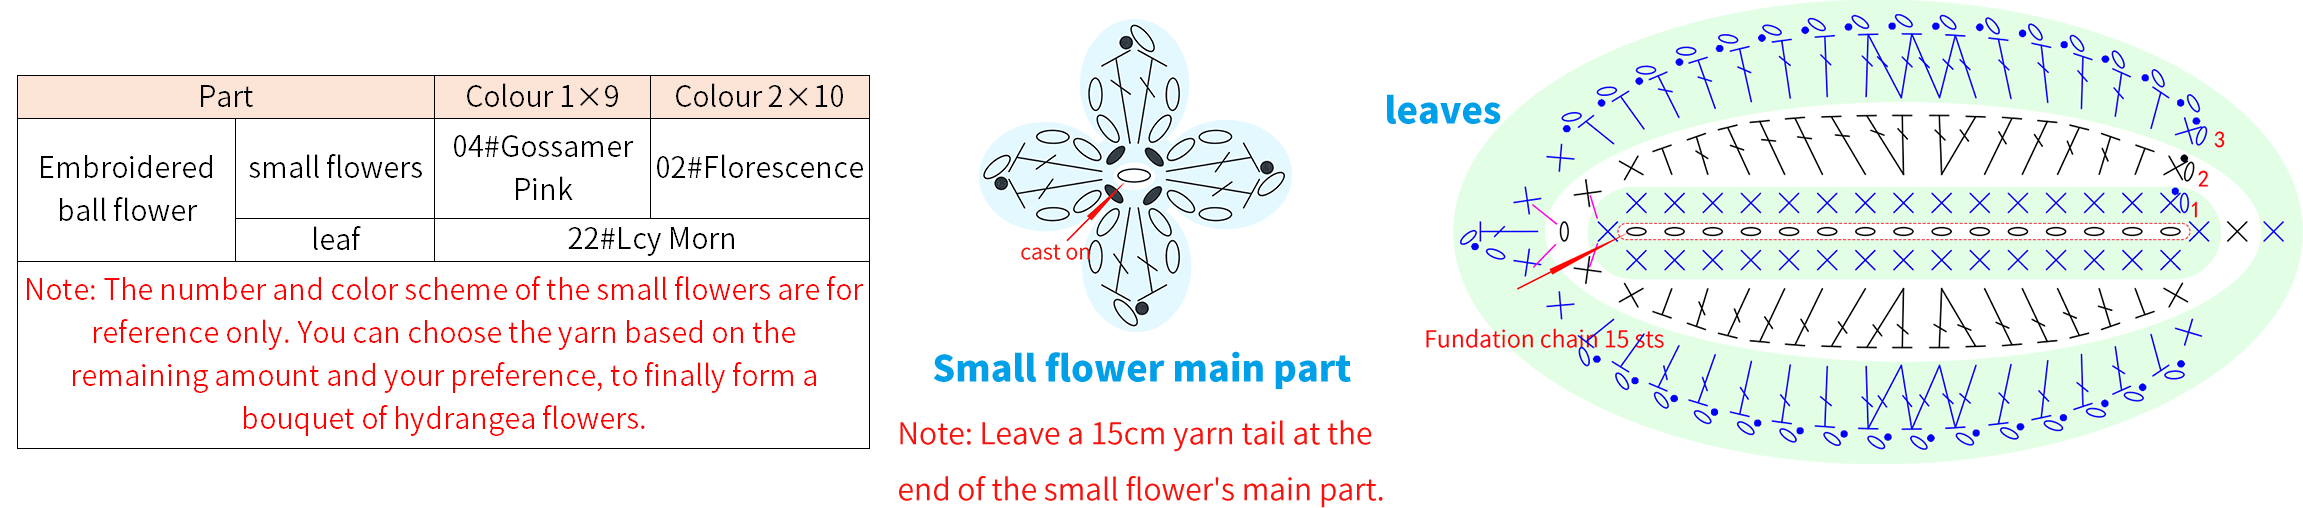
The hydrangea is assembled from small flowers and leaves. The small flowers include the main body and the flower core. When crocheting the leaves, you need to add thin wire. Please refer to the video demonstration for more details.
Part 2 Packaging
Finally, wrap all the flower branches. Please refer to the video demonstration for more details.
Made by the community