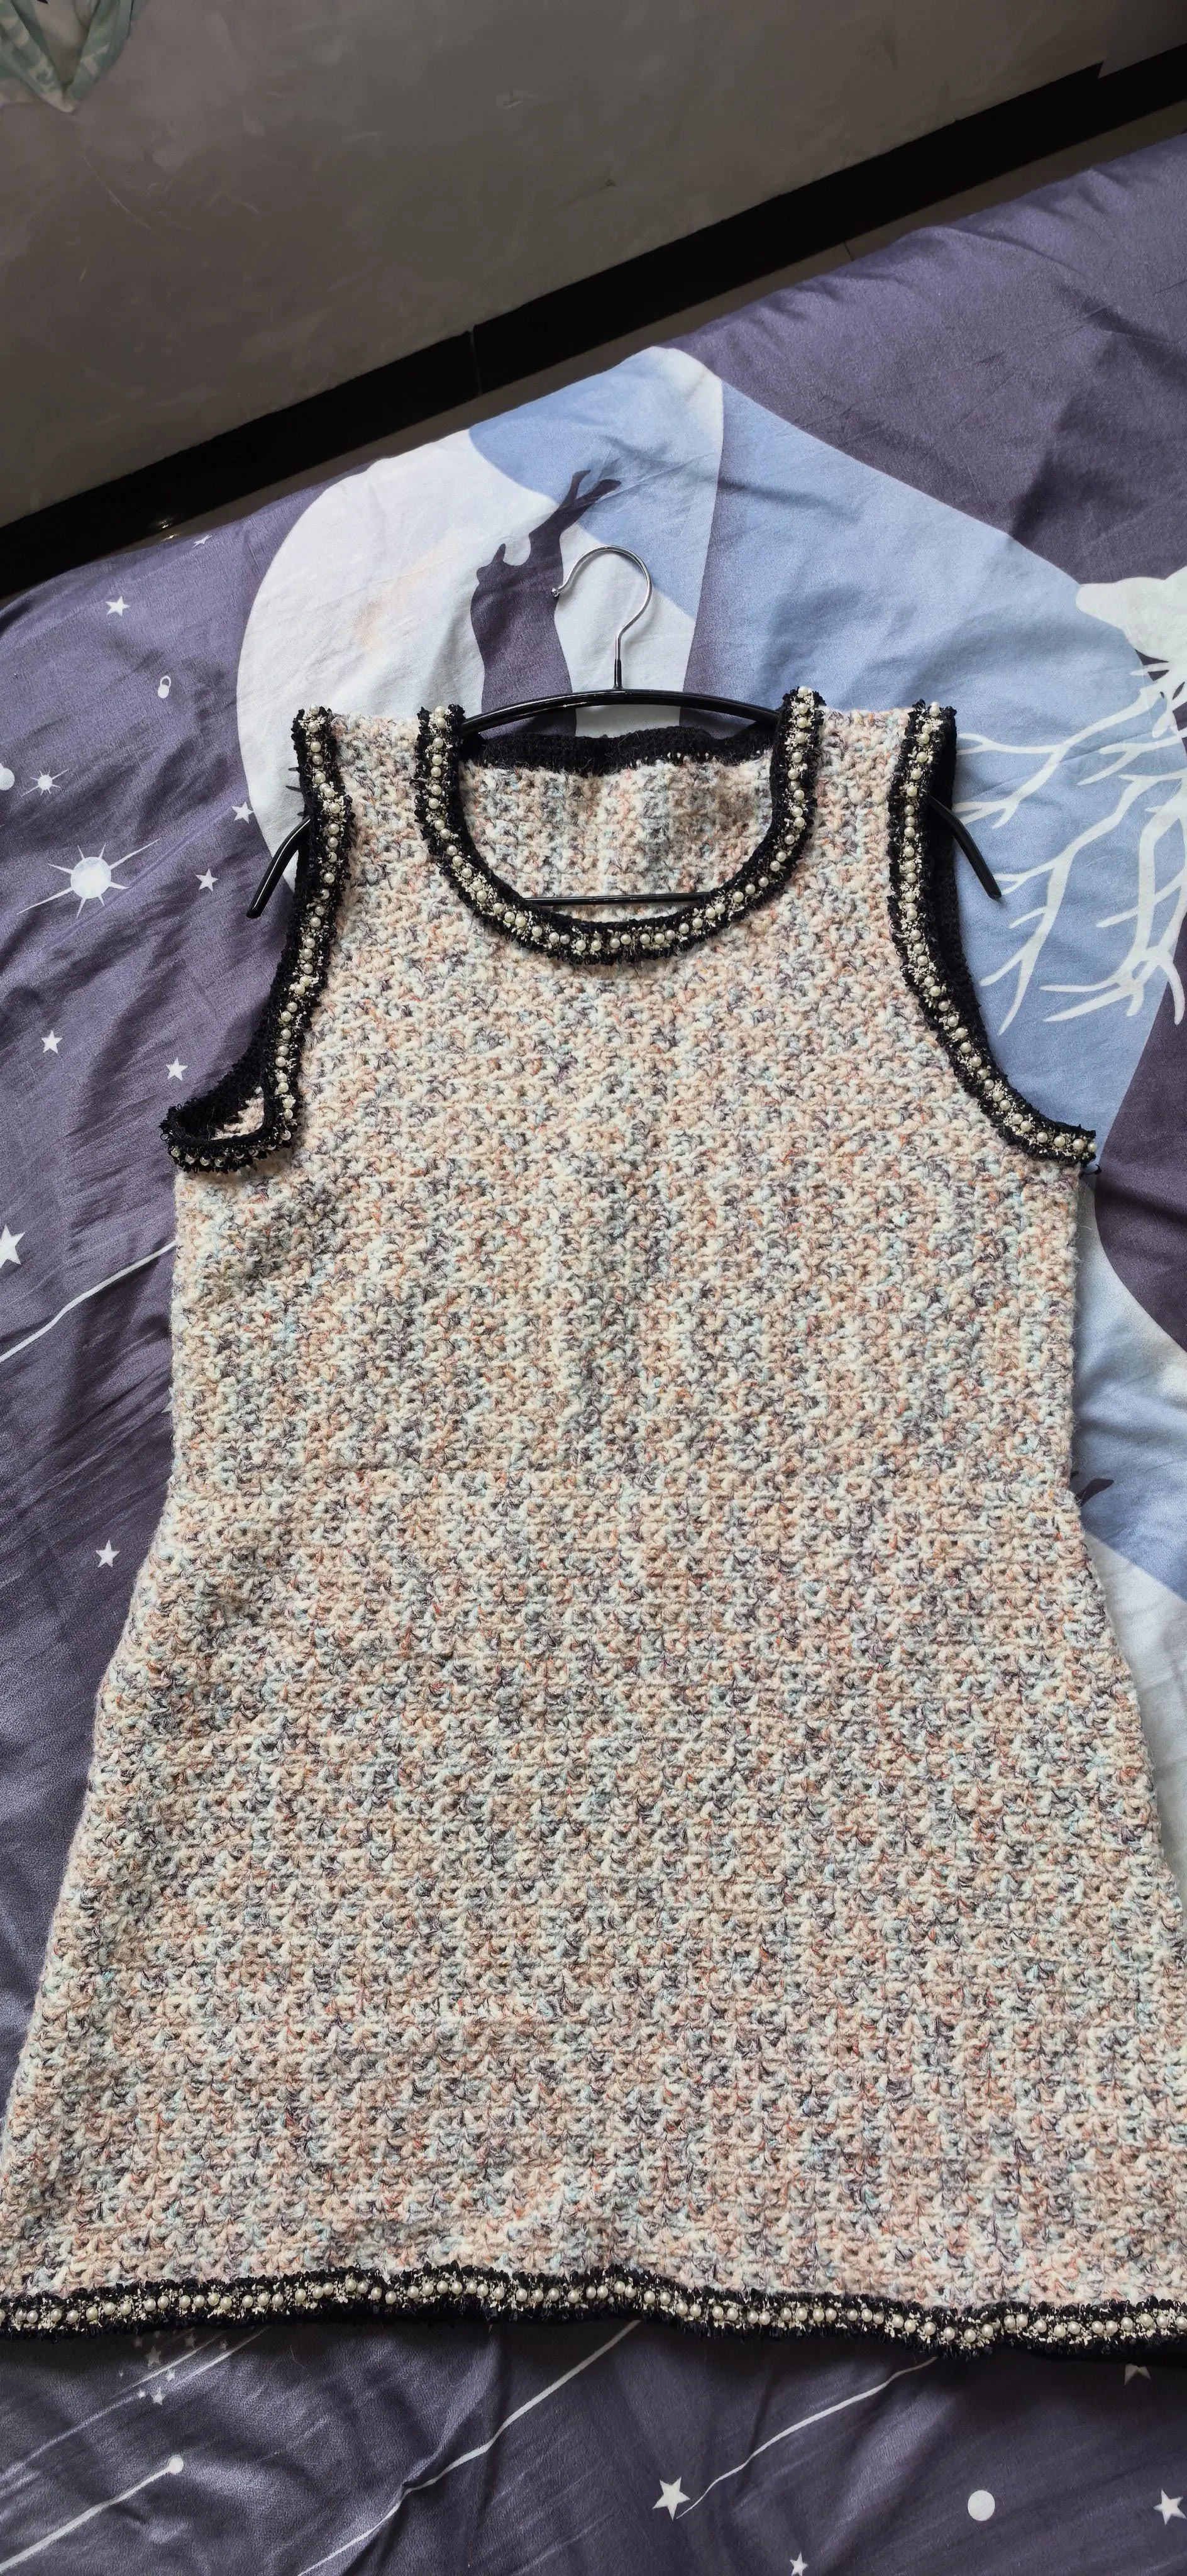
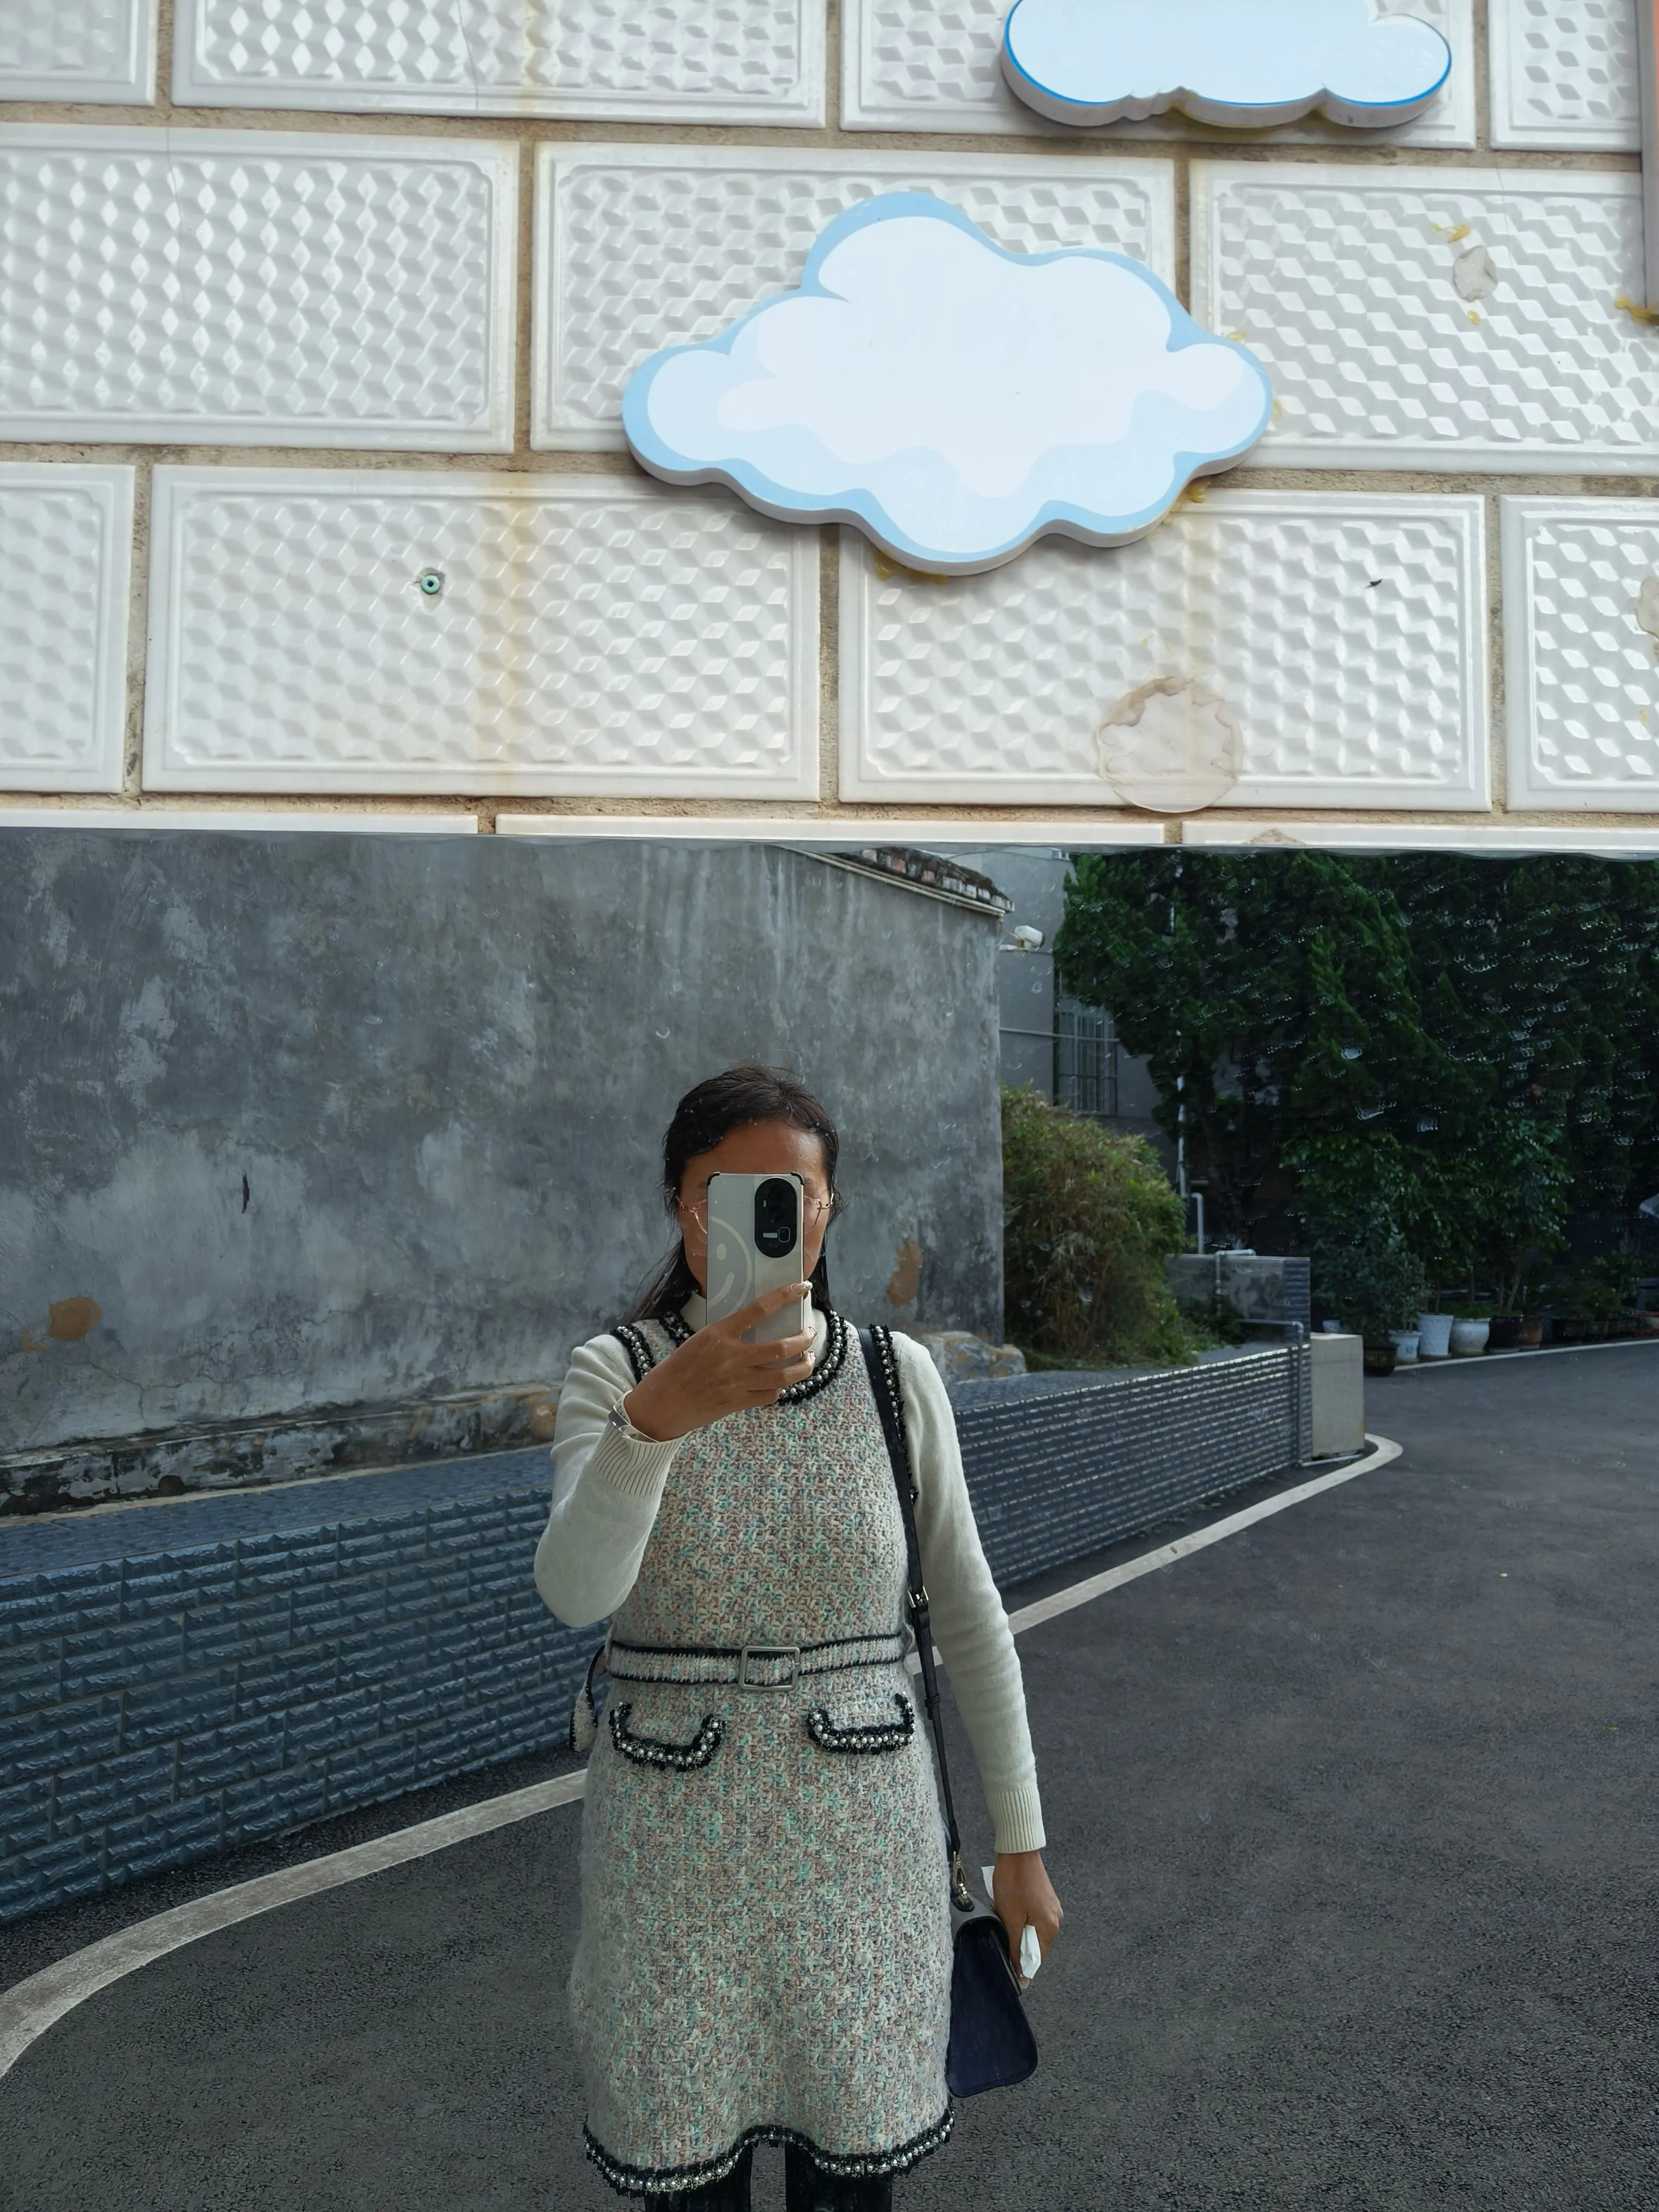
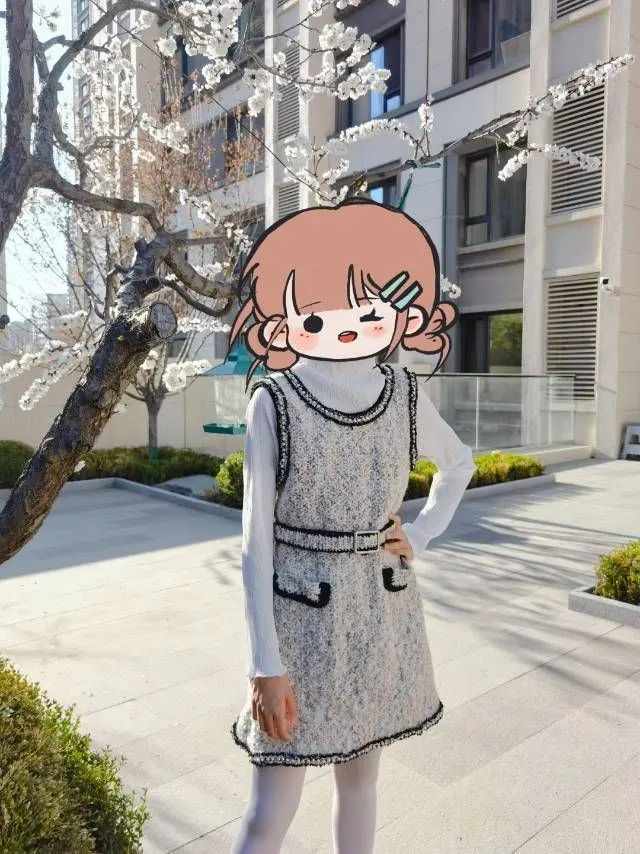
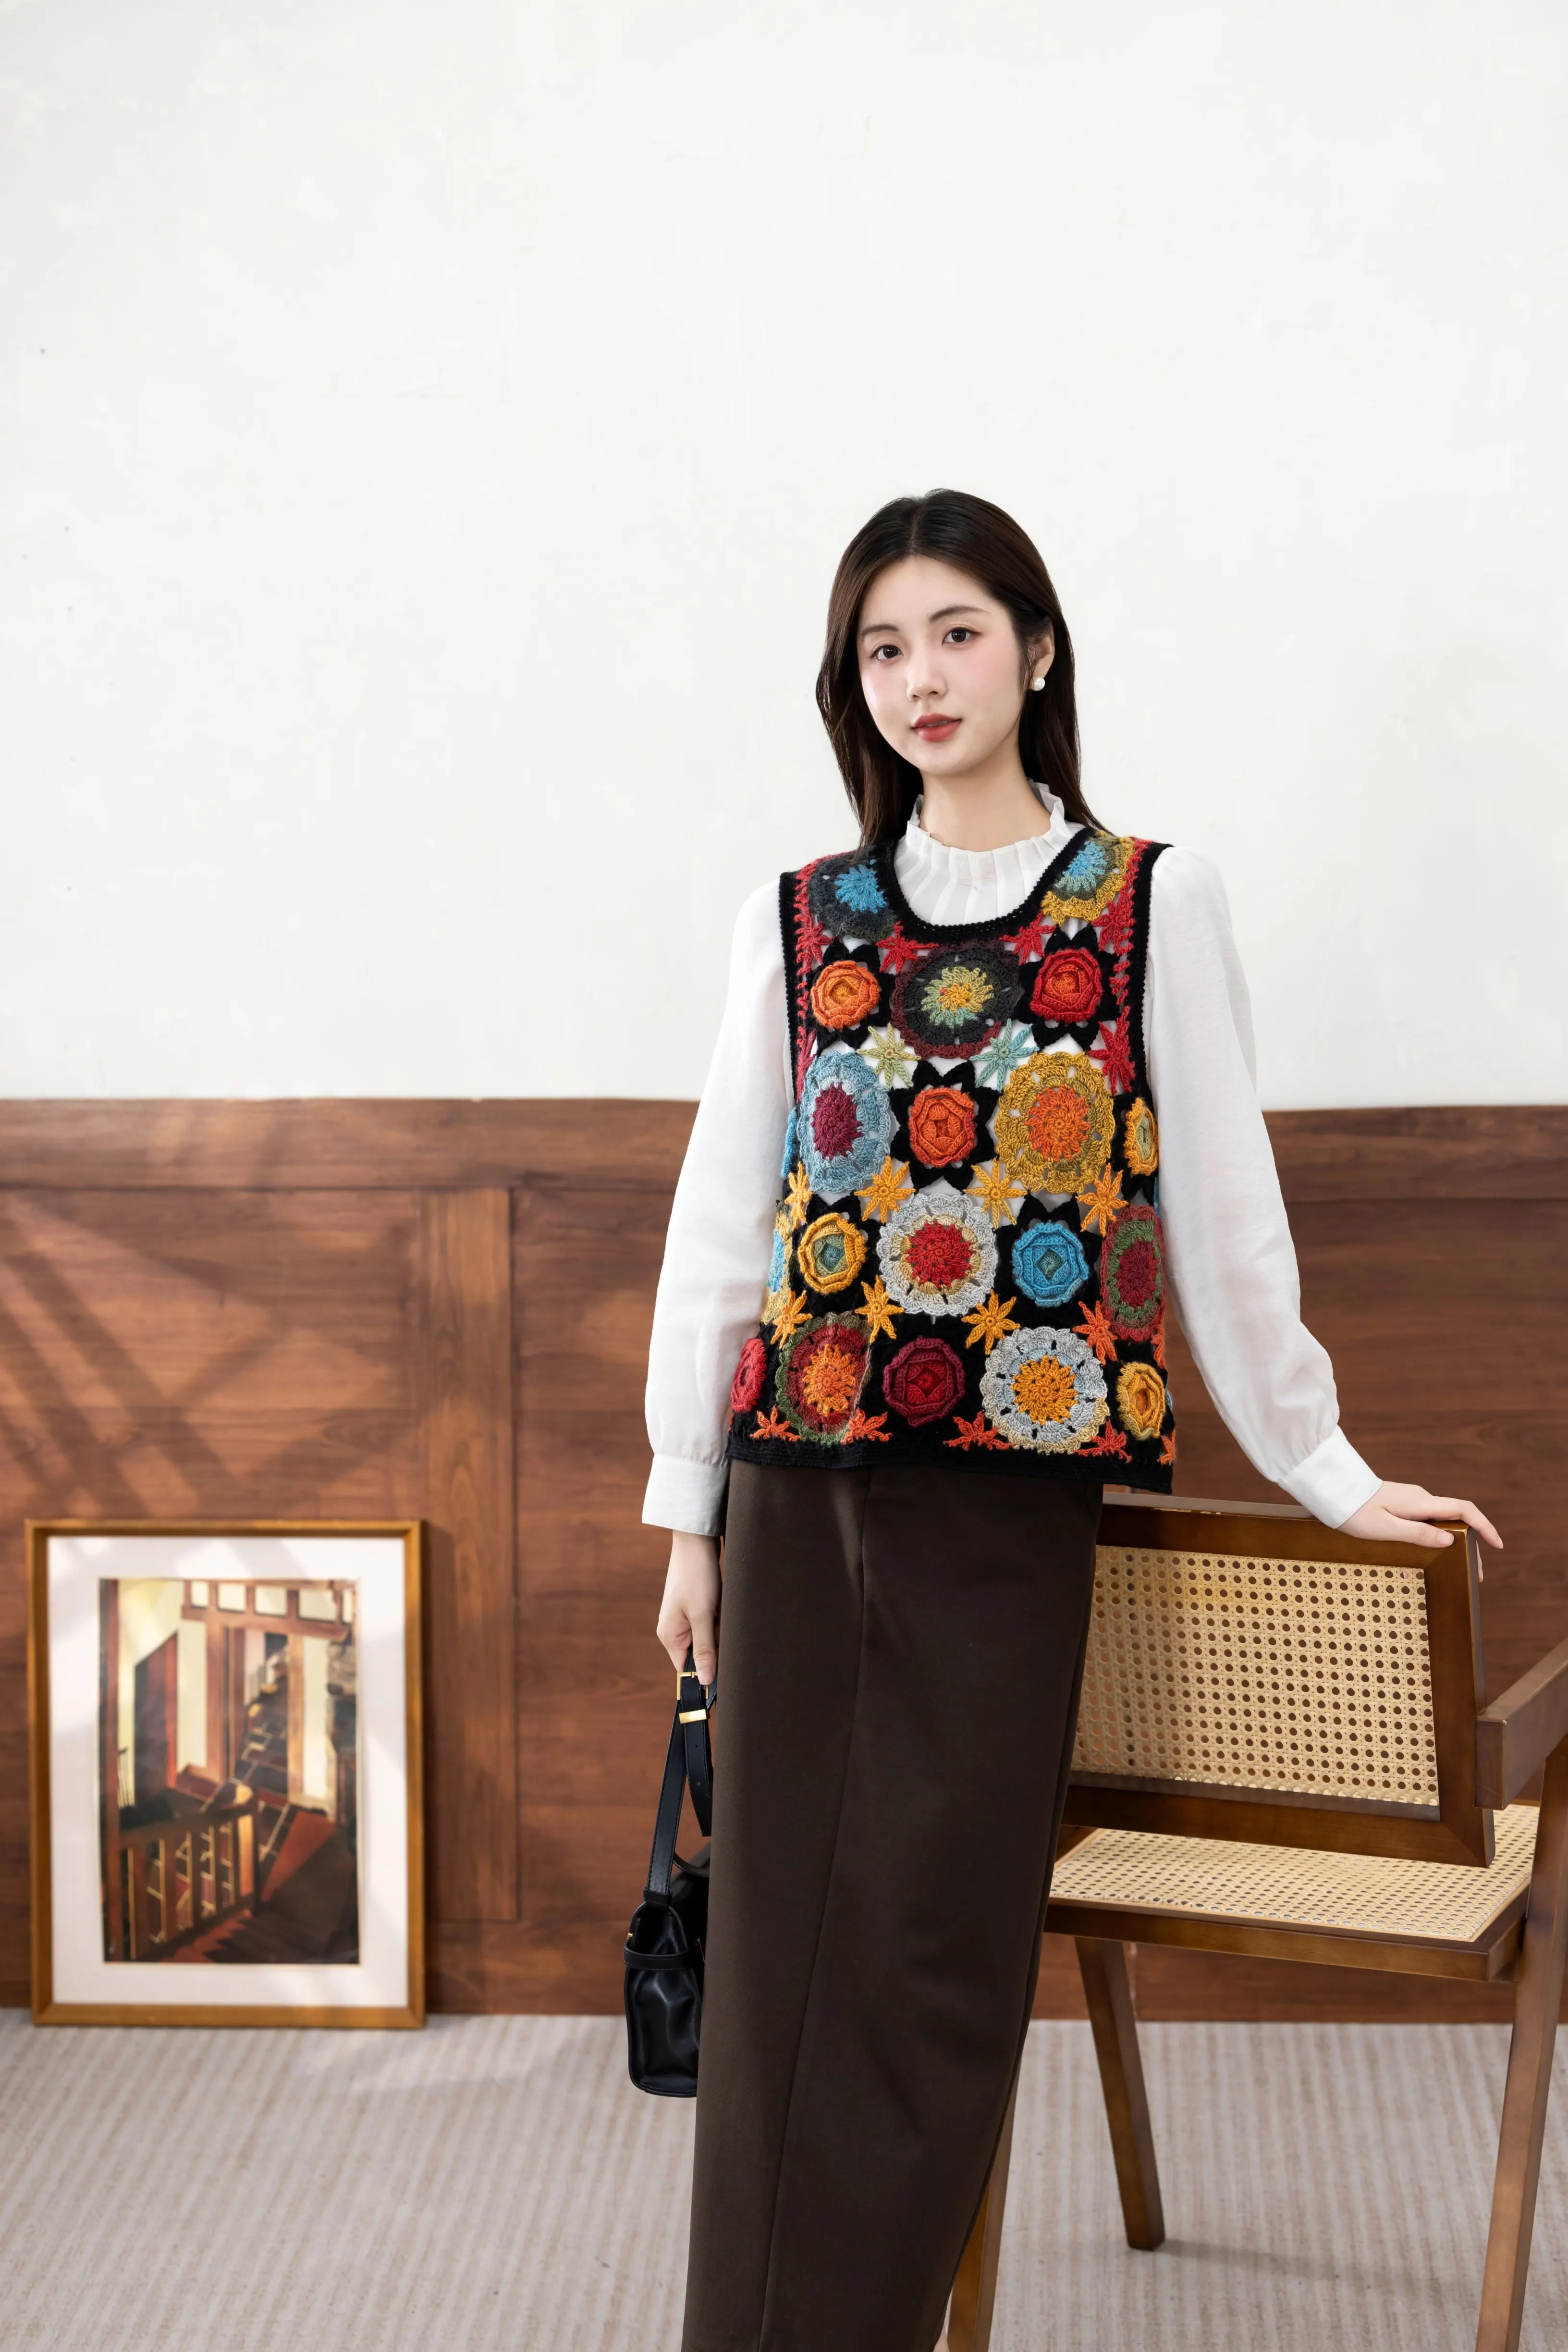
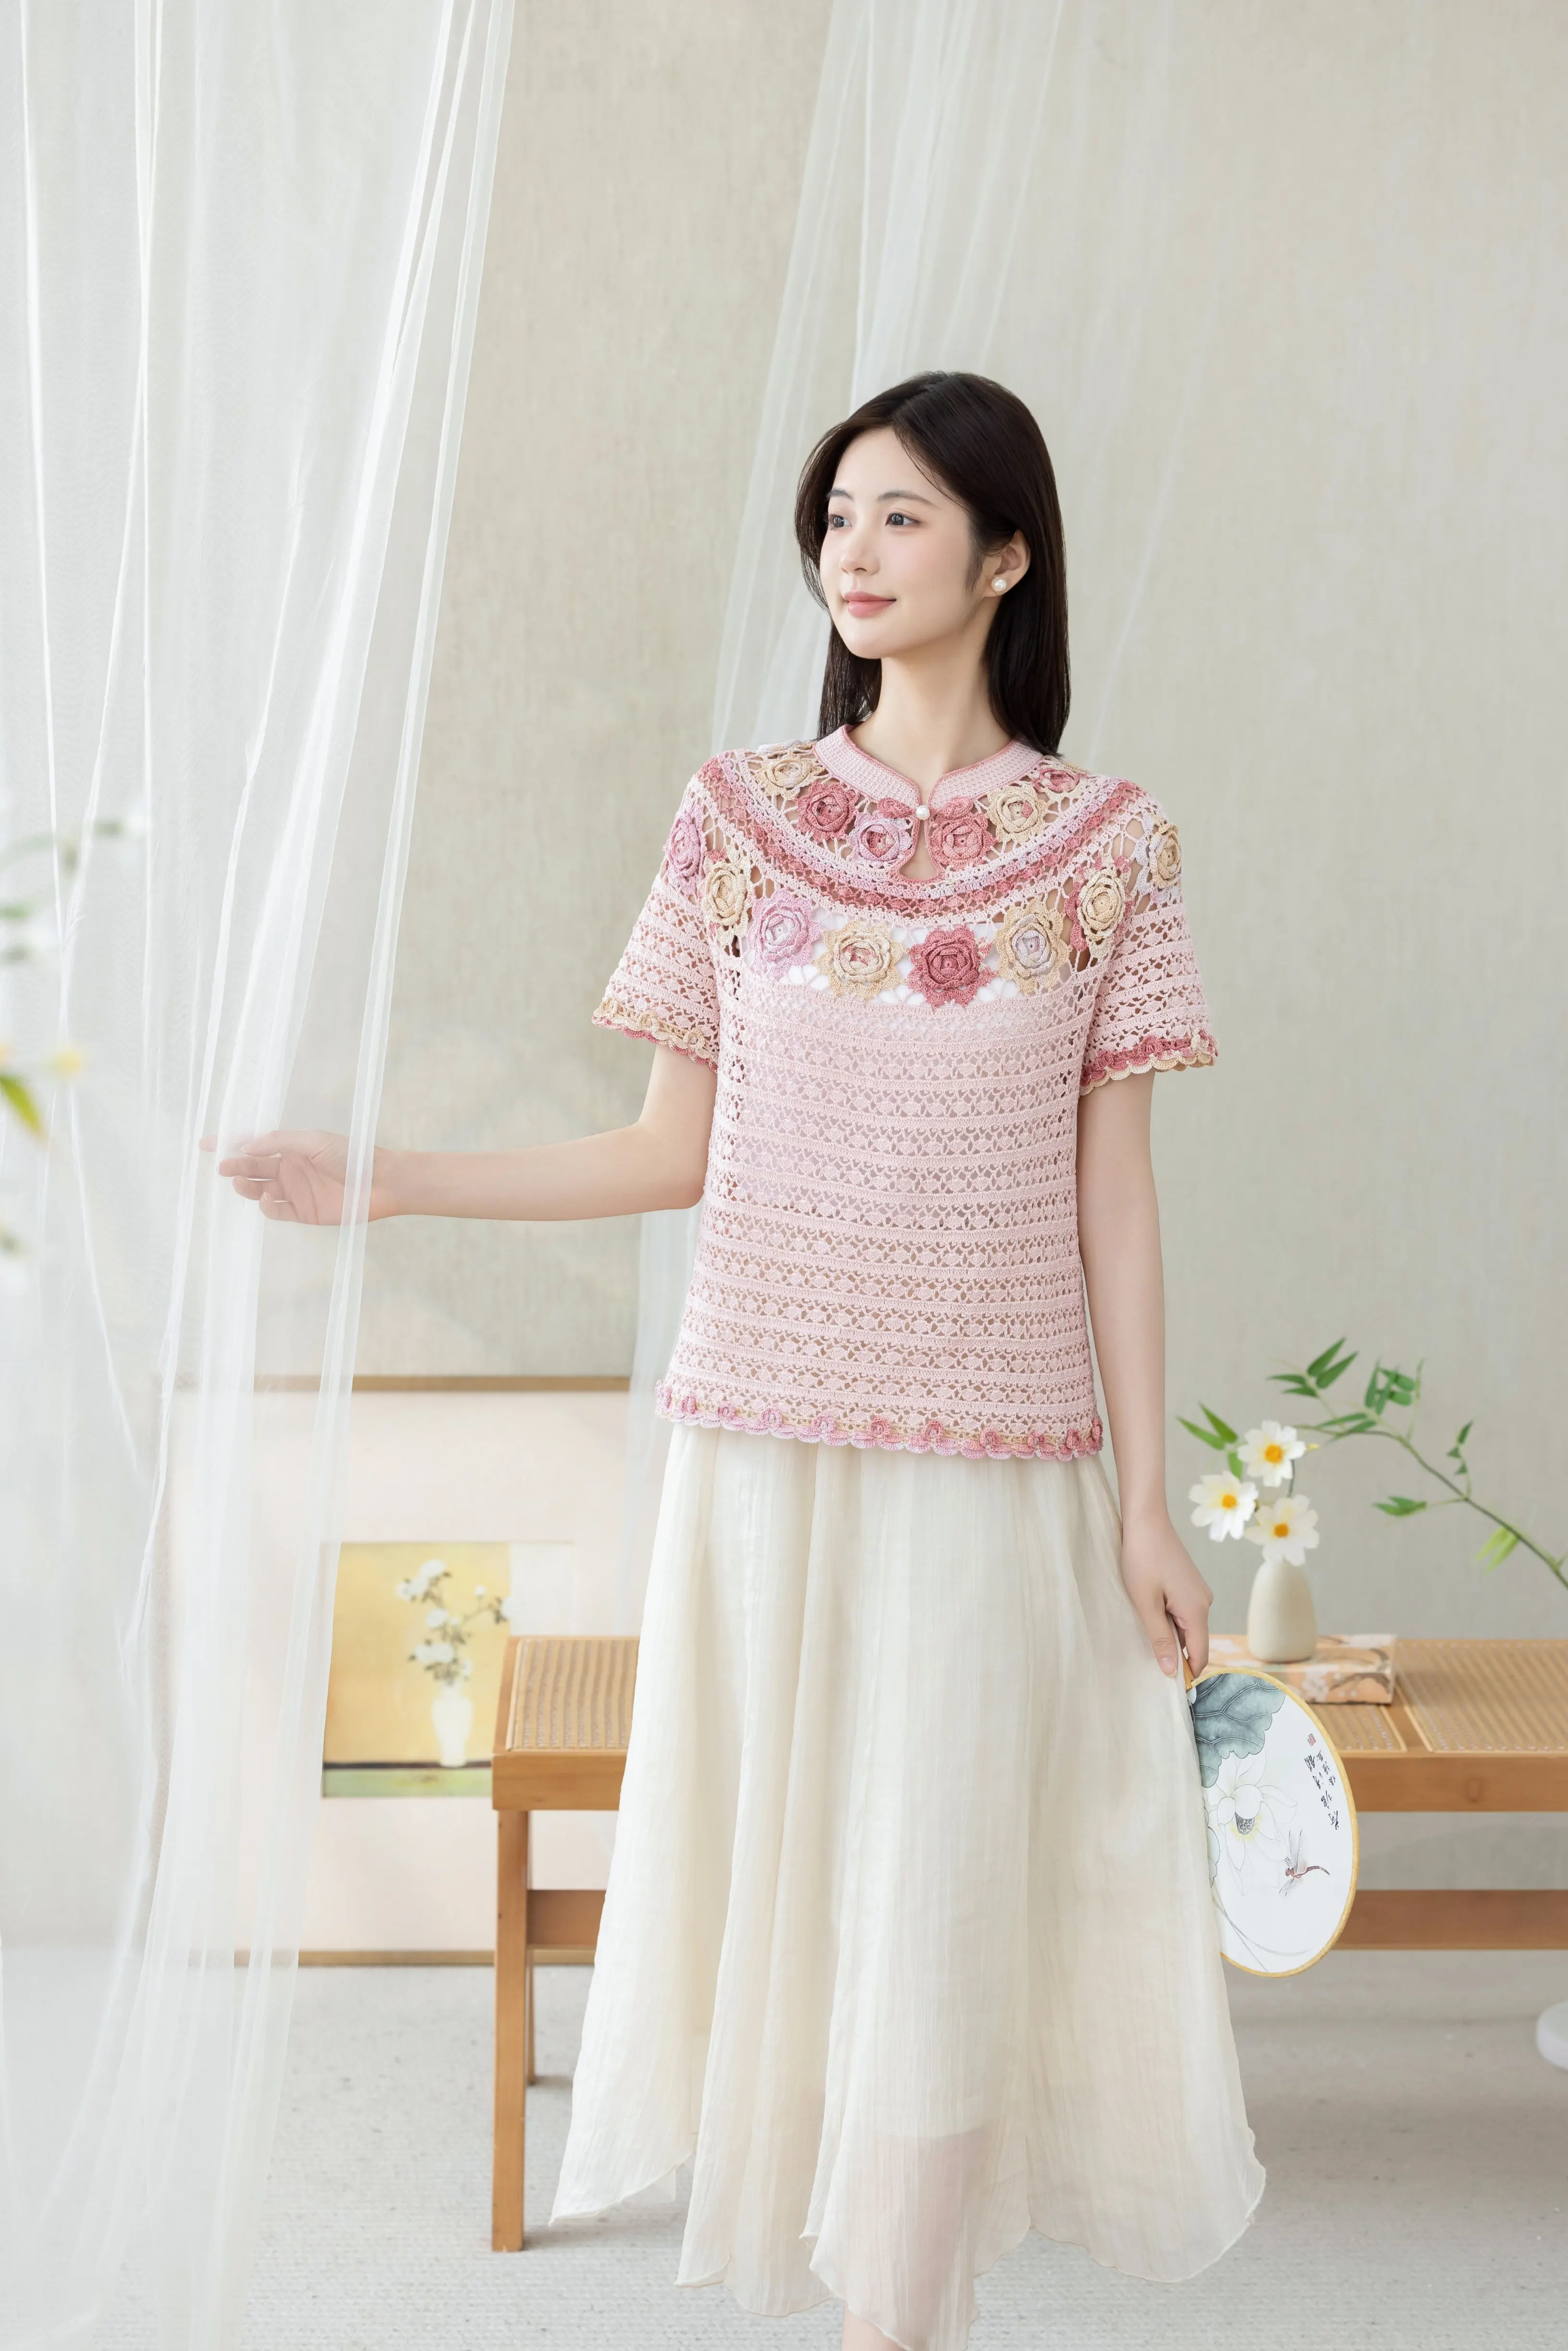
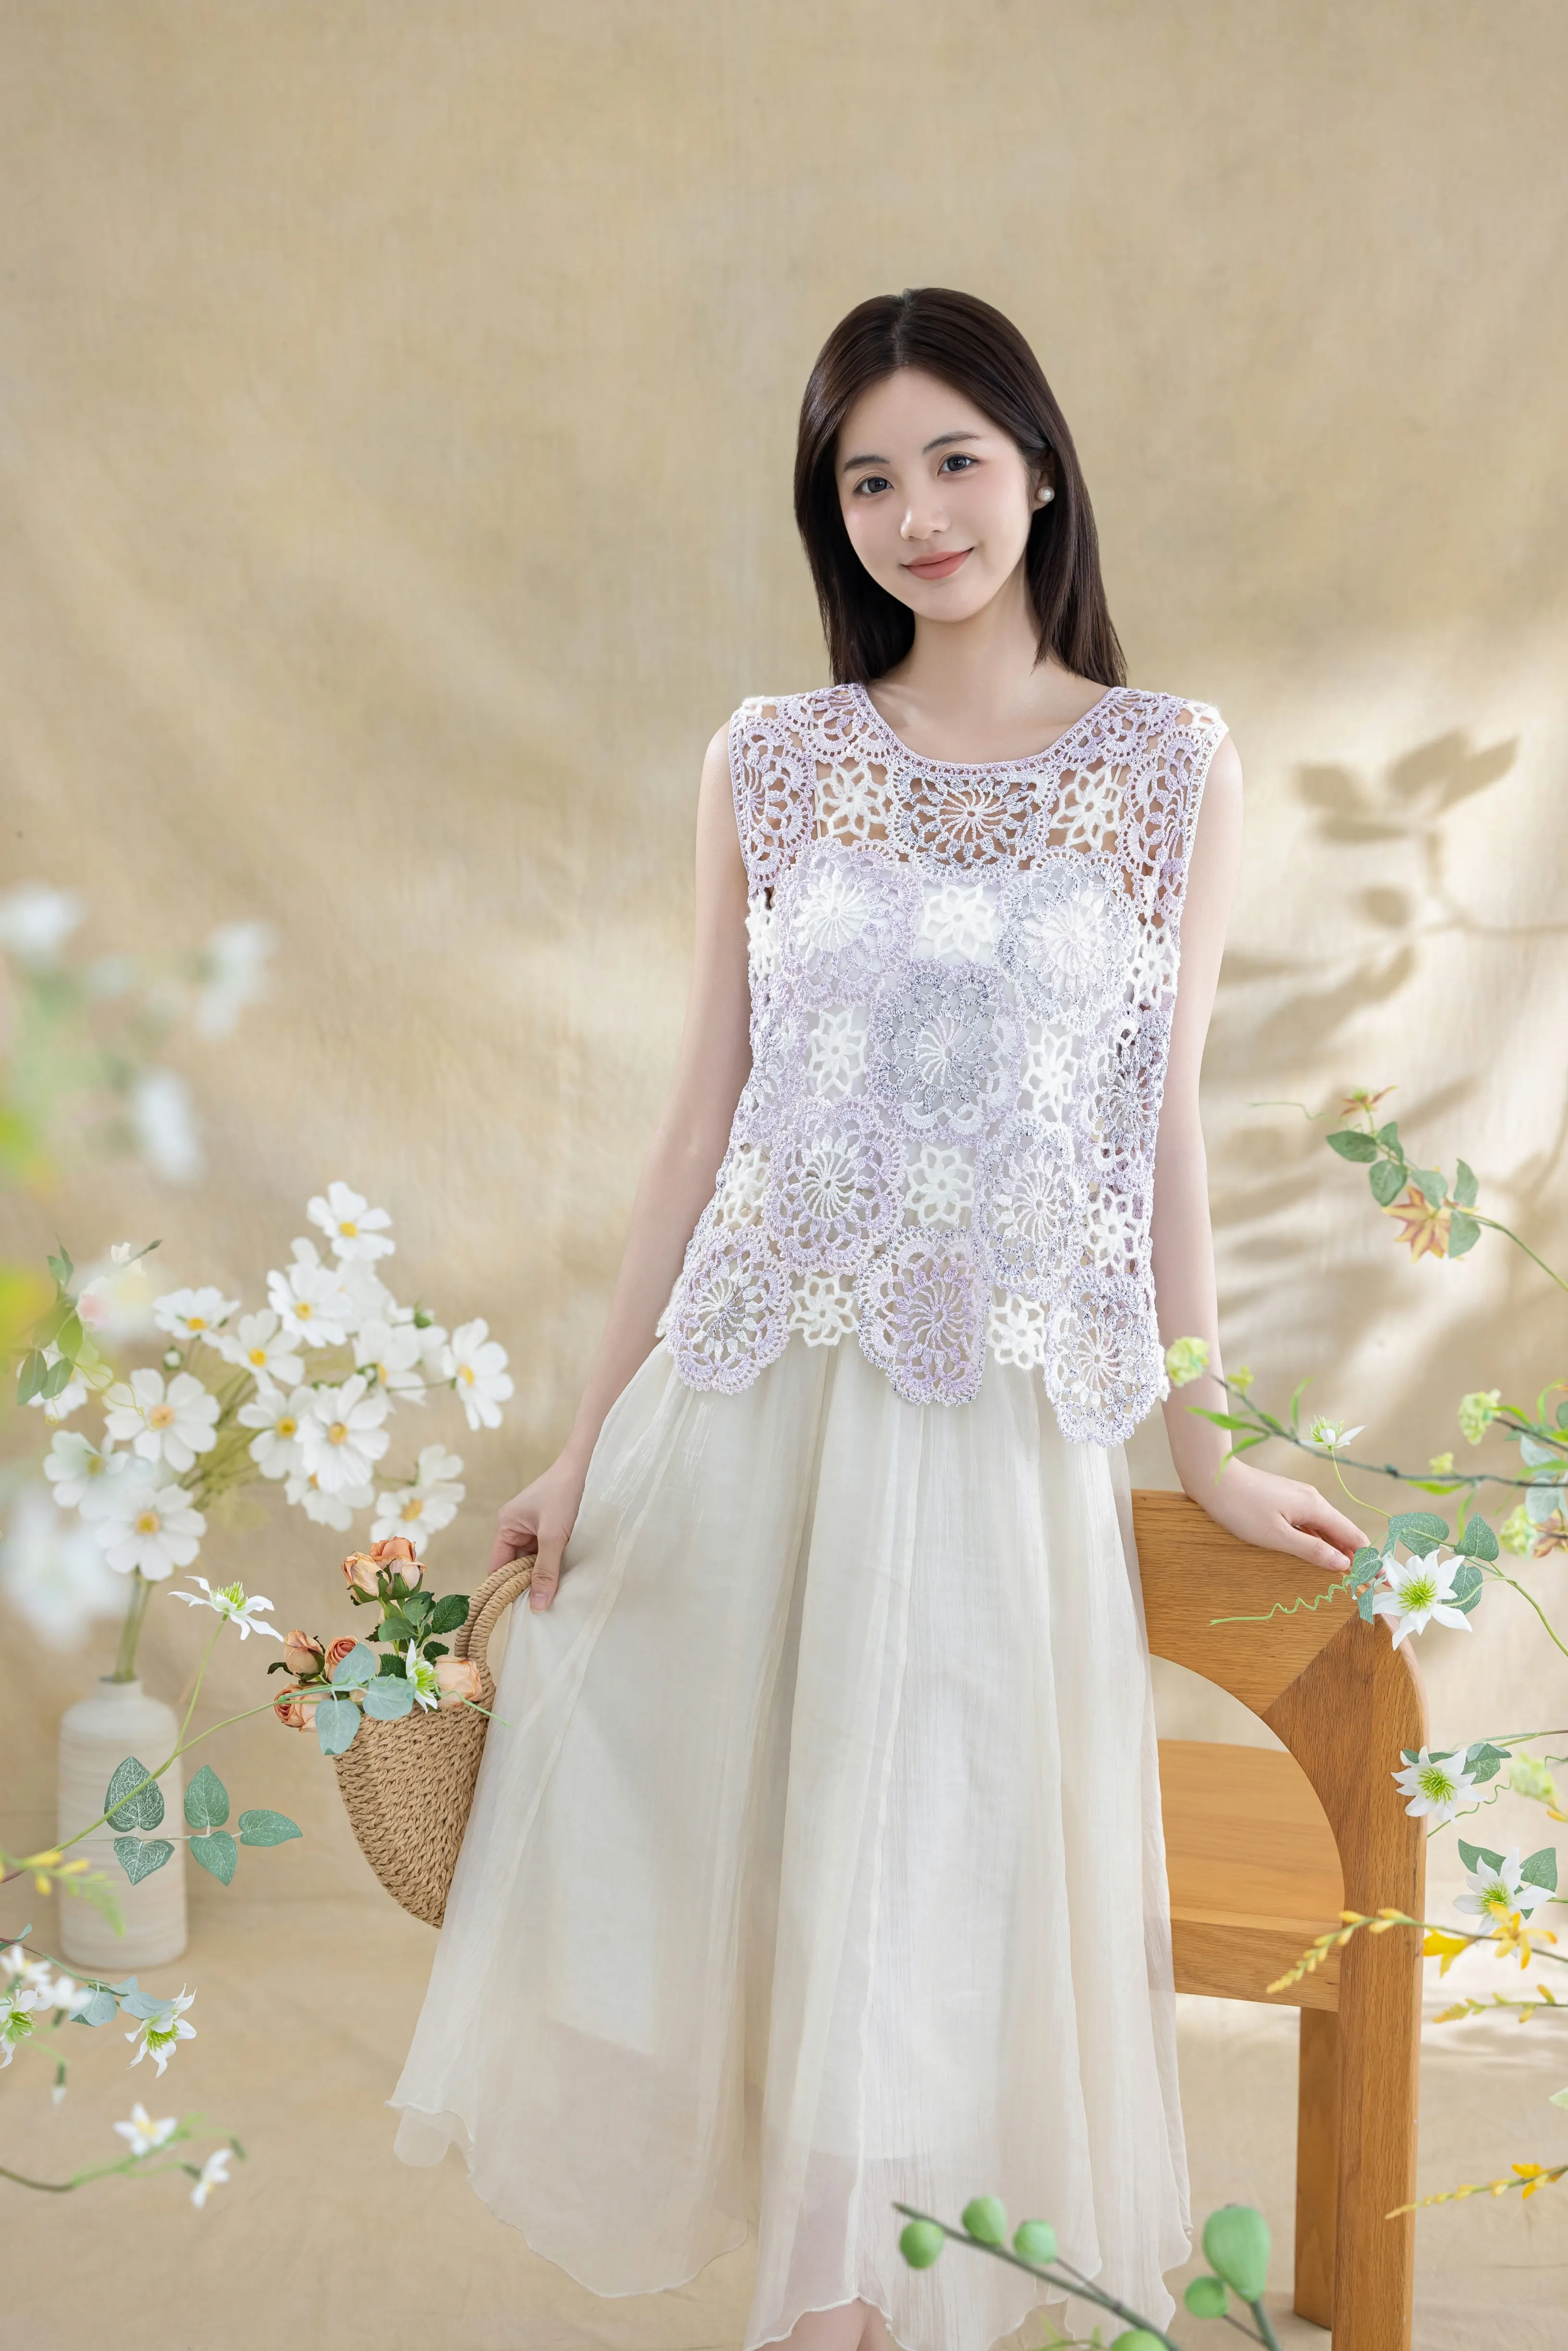
Clothes
Jianya
Project preview
See the finished project
Pattern format
Instructions
| Style | Yarn | Color |
|---|---|---|
| Colorful Shells Style | PolyNylon Blend Yarn |  01#Colorful Shells |
| Alpaca |  30#Black | |
| Multicolored Green Style | PolyNylon Blend Yarn |  02#Multicolored Green |
| Alpaca | 30#Black | |
| Classic White Style | PolyNylon Blend Yarn |  10#Classic White |
| Alpaca | 30#Black | |
| Sunflower Glow Style | PolyNylon Blend Yarn |  14#Sunflower Glow |
| Alpaca | 30#Black |
This dress comes in large and small sizes, and the making method is almost identical. The difference lies in the number of stitches and rows. The dress consists of two parts: the main part and accessories. The main part is divided into the front piece, back piece, joining together, and crocheting the edging. First, crochet the front and back pieces separately, then join them together, and finally crochet the edging at the corresponding positions. After completing the main part, make and attach each accessory.
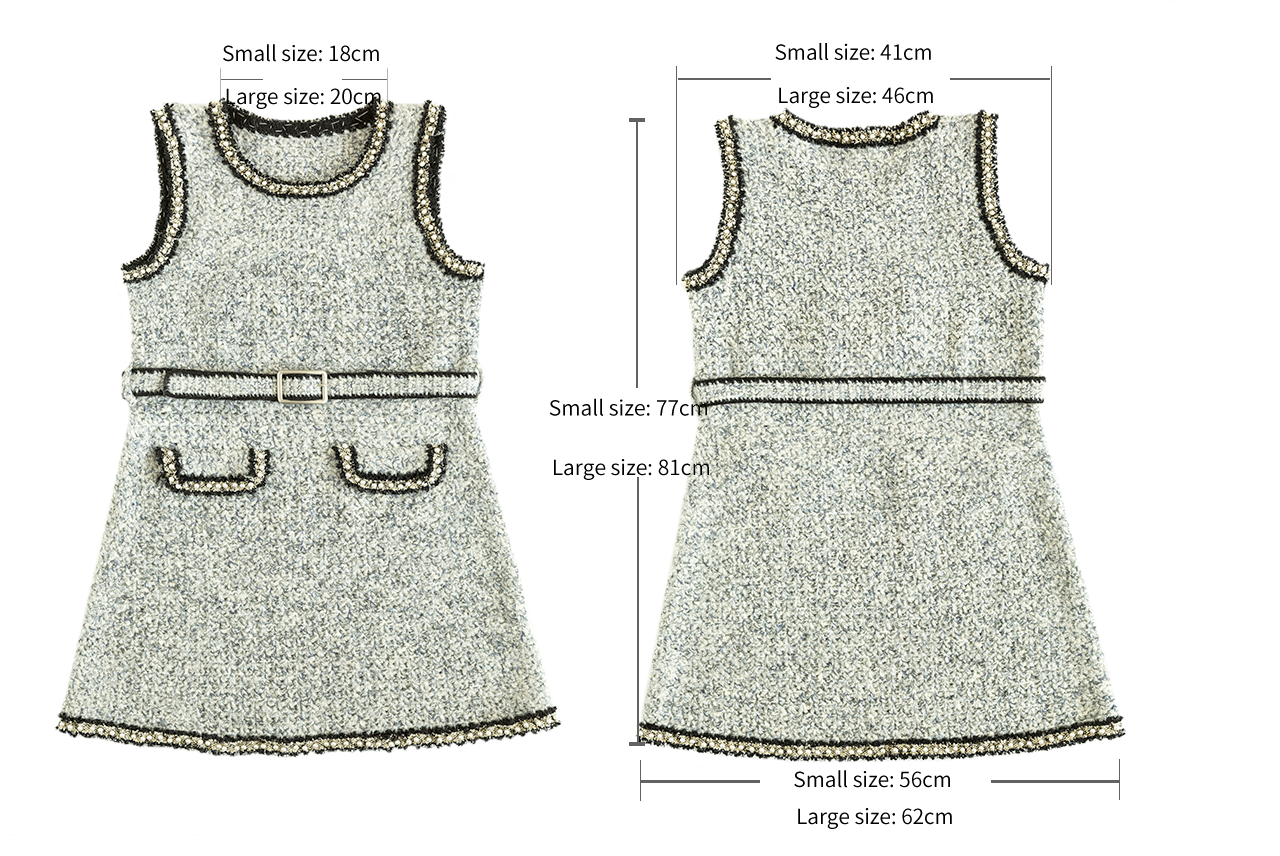
The handcrafted measurements may have an error of 1 to 2 cm.
Due to variations in individual tension, the size of the sample is for reference only.
Materials: PolyNylon Blend Yarn & Alpaca
Tools:9# hook or 3.5mm crochet hook
Chart Key




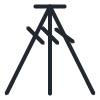

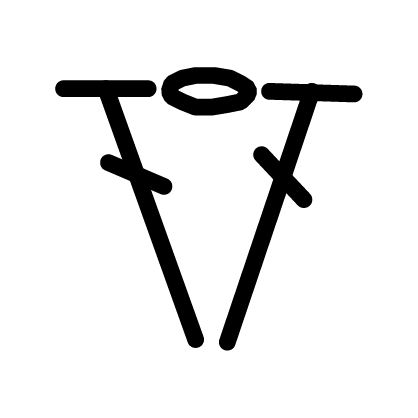
Note: 1. This pattern is making in Chinese crochet pattern terms, and the stitch name is written using American terminology. All measurements in charts are in cm.
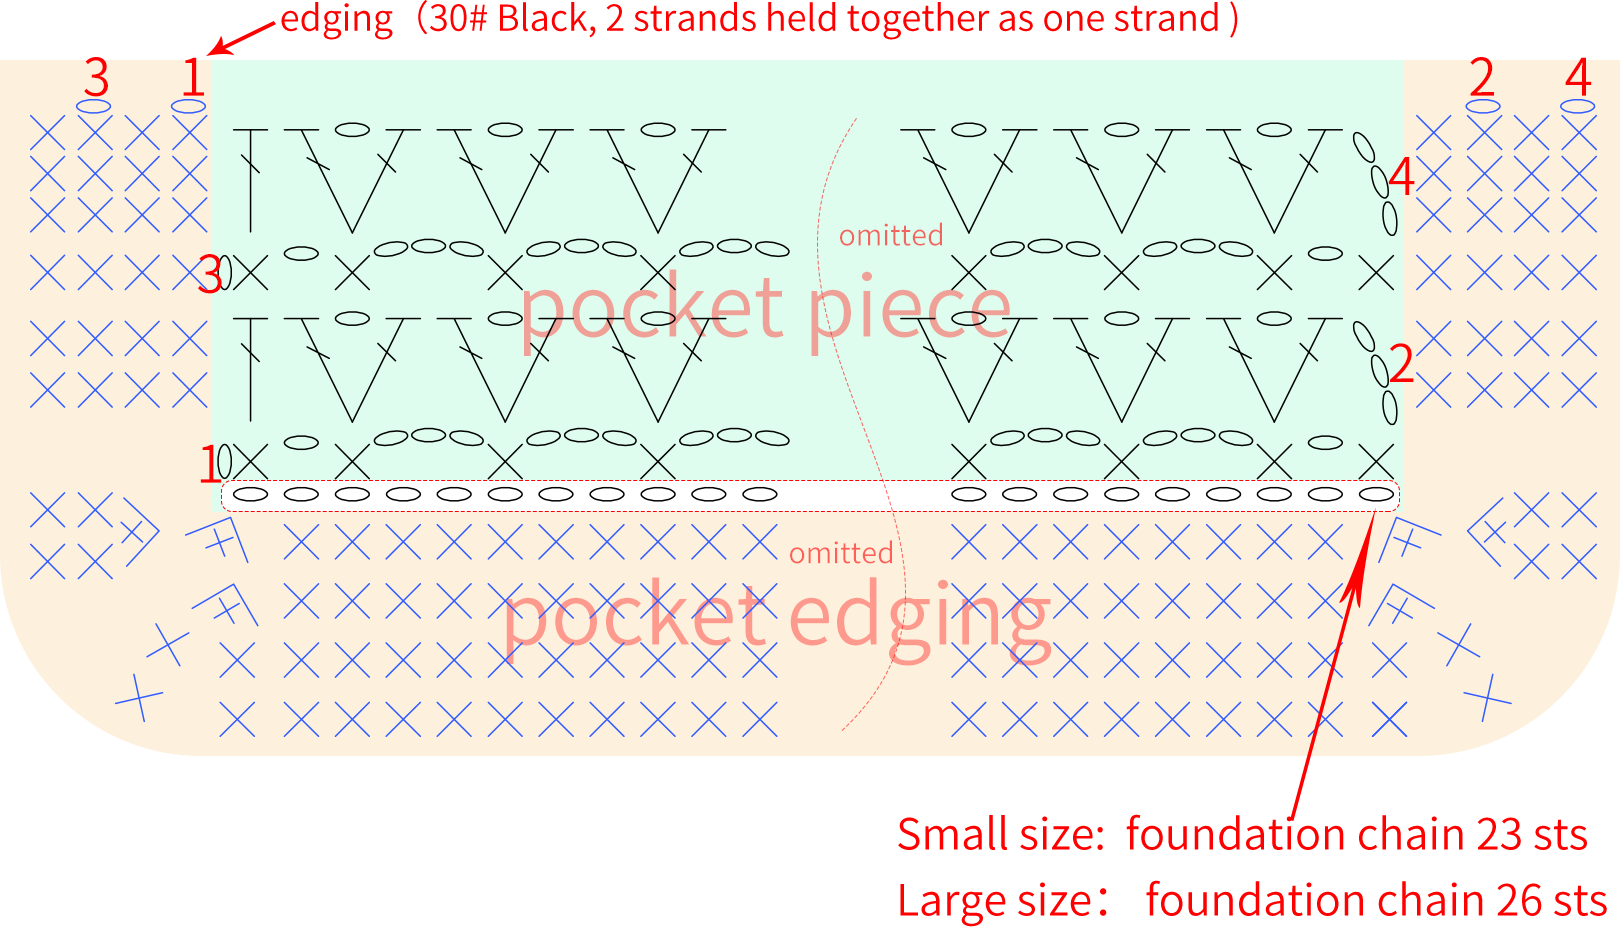
2. All edging is worked with 【30# Black, 2 strands held together as one strand】. Other areas are crocheted with the corresponding colorway yarn (one strand).

Part 1 Front Piece
The front piece is divided into the upper part and the lower part. Crochet the upper part first, and then crochet the lower part on the other side of the foundation chain.
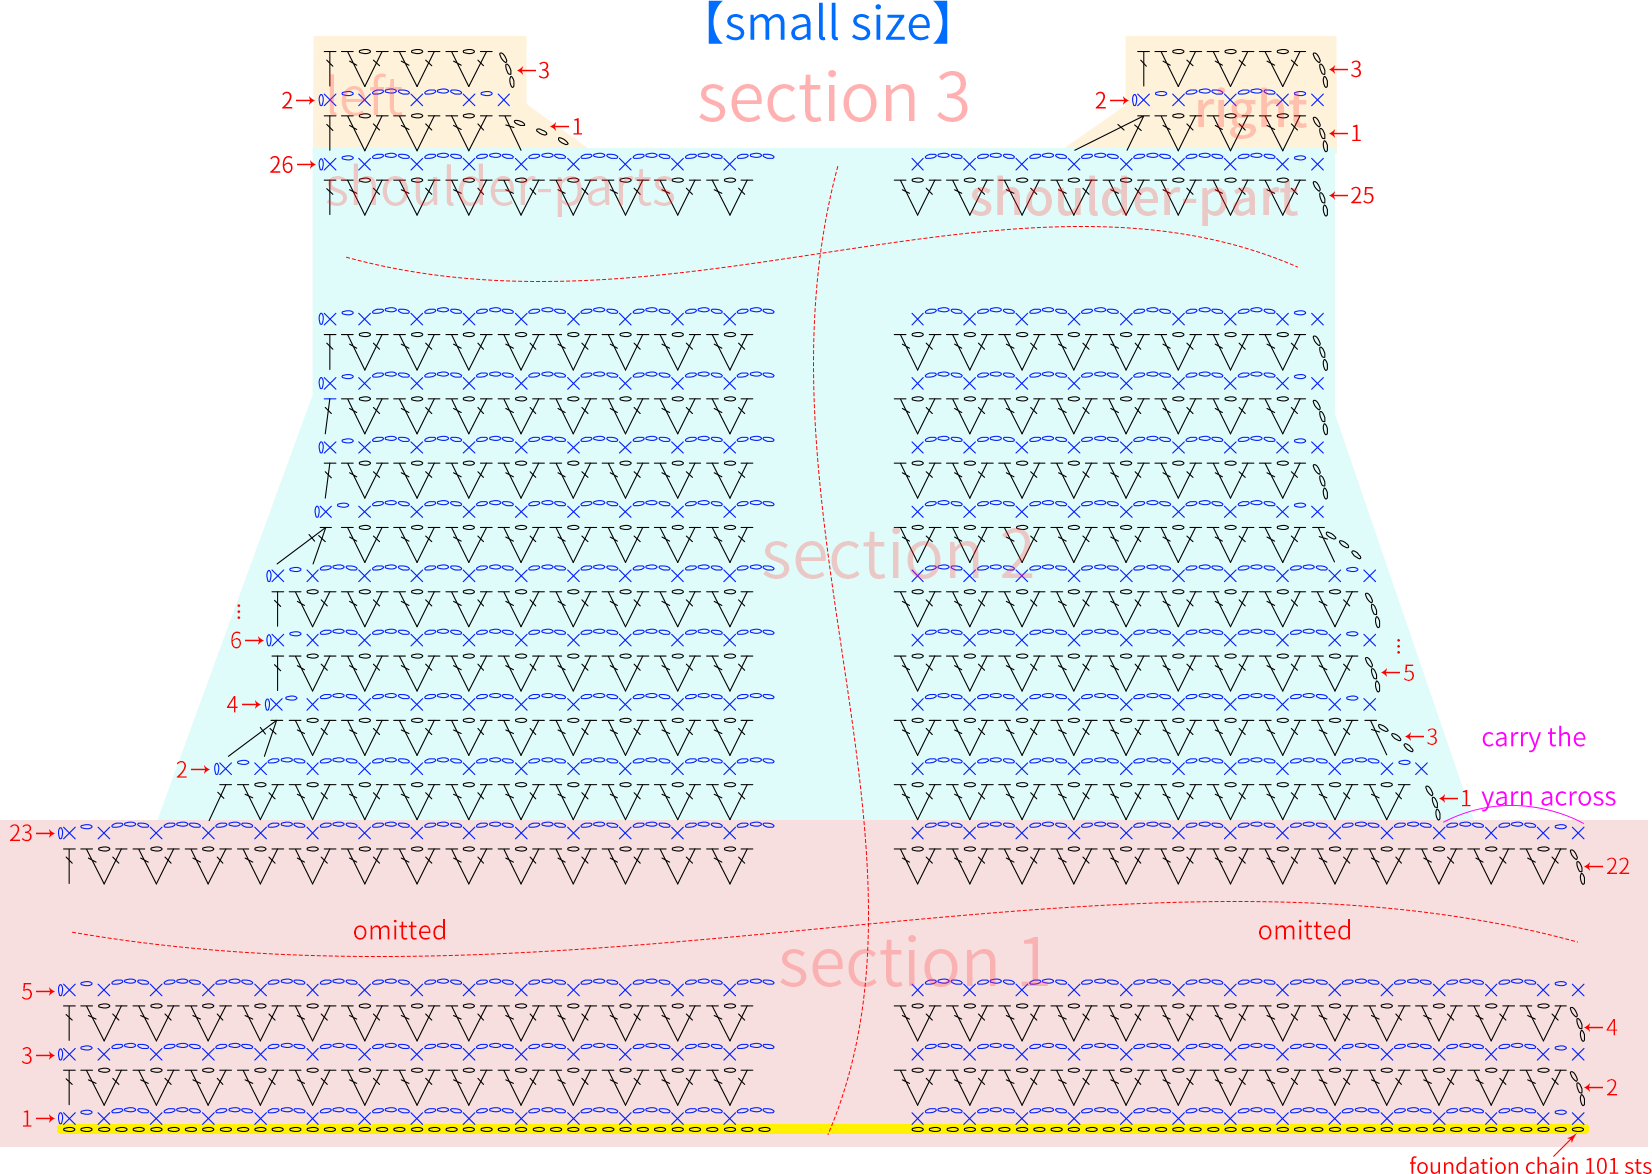
Step 1: Upper part of the front piece
The upper part of the front piece is divided into three areas. Section 1 is crocheted evenly without increasing or decreasing stitches. In Section 2, decrease stitches on both sides and leave a space for the armpit. In Section 3, decrease stitches on both sides of the neckline and leave a space for the neck opening.
| Upper part of the front piece | ||
| Part | Large size | Small size |
| Cast On | 101 sts | 119 sts |
| Section 1 | 23 rows | 25 rows |
| Section 2 | 14 rows | 16 rows |
| Section 3 | 15 rows | 15 rows |
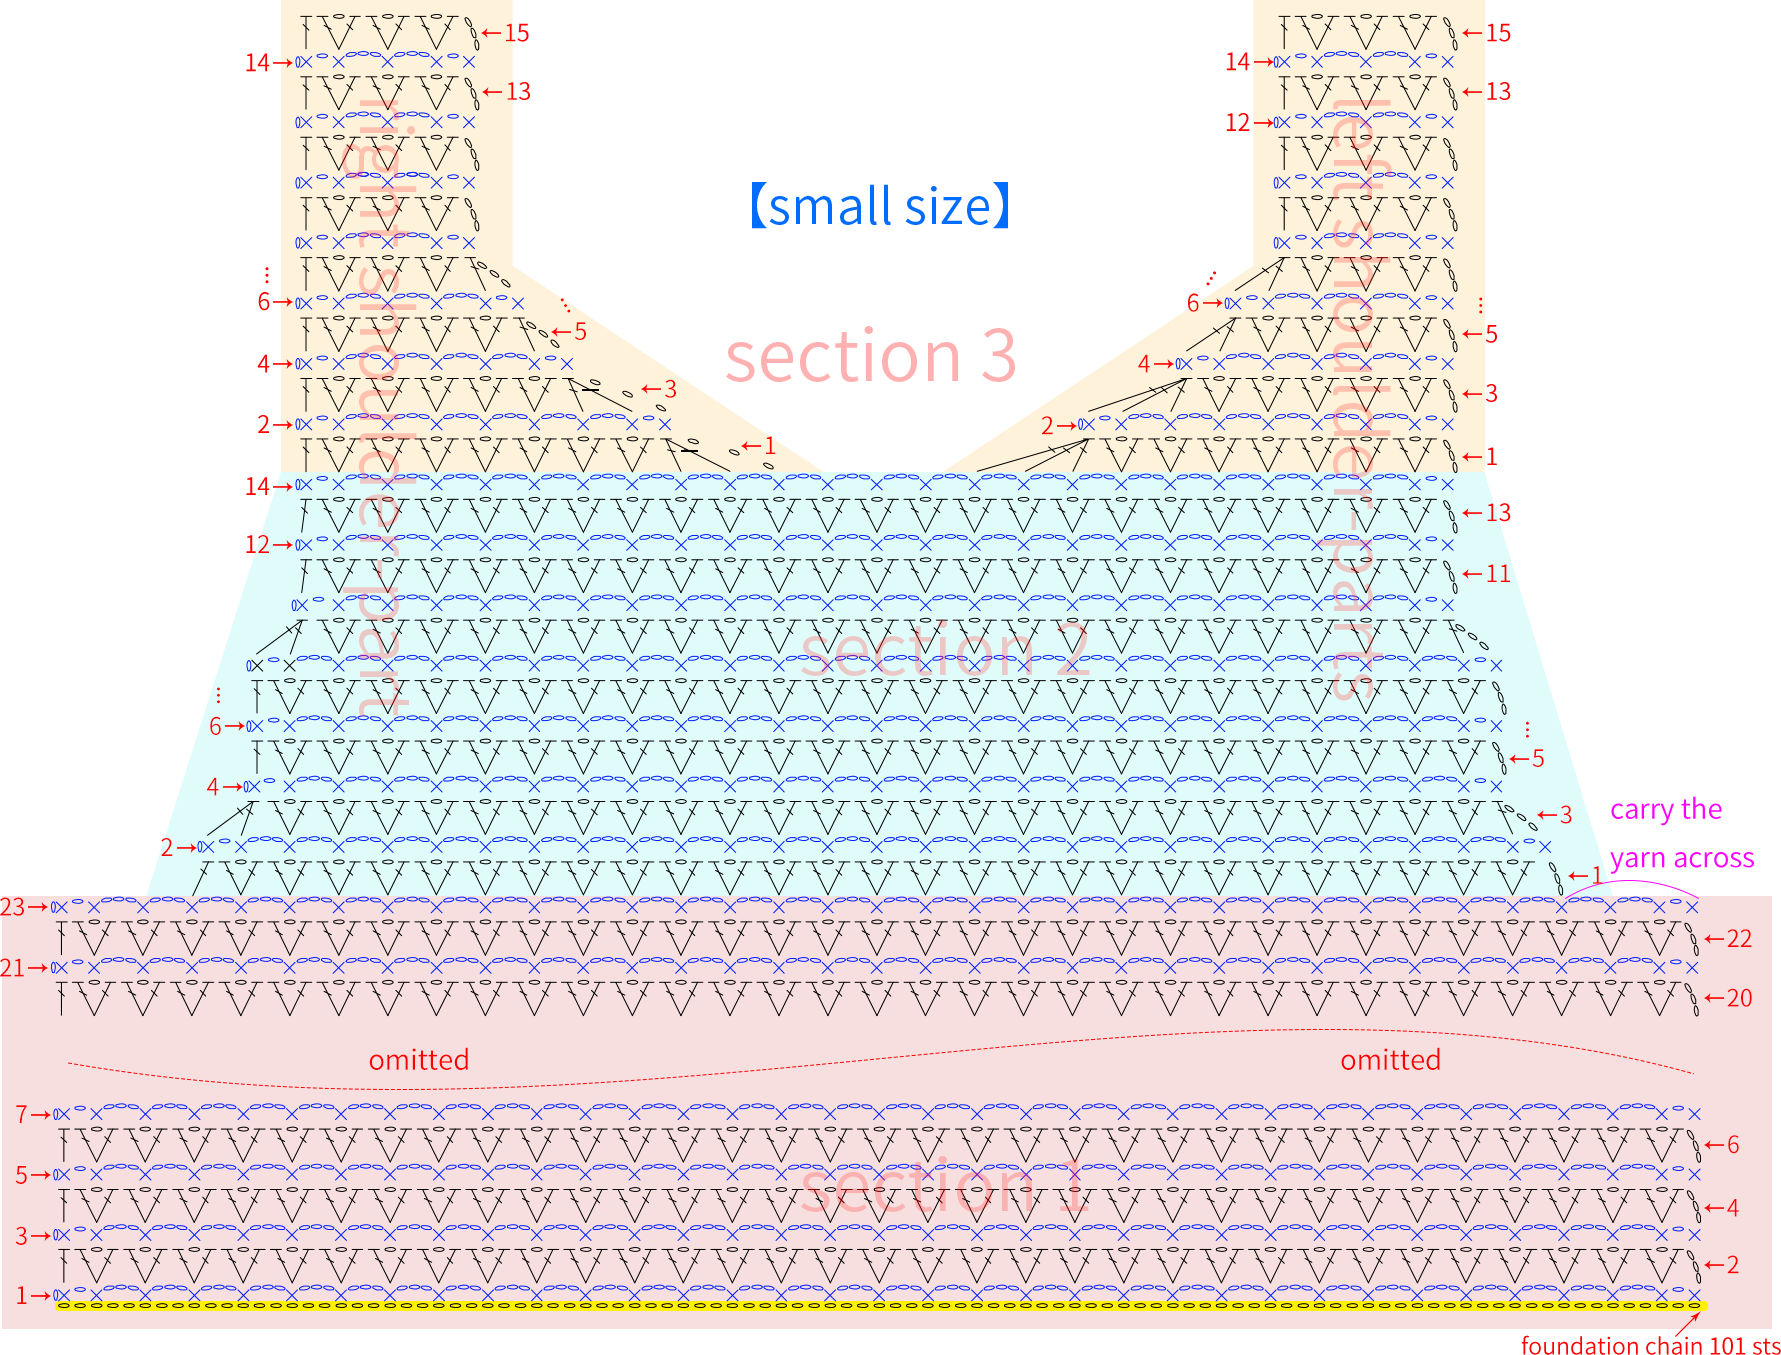
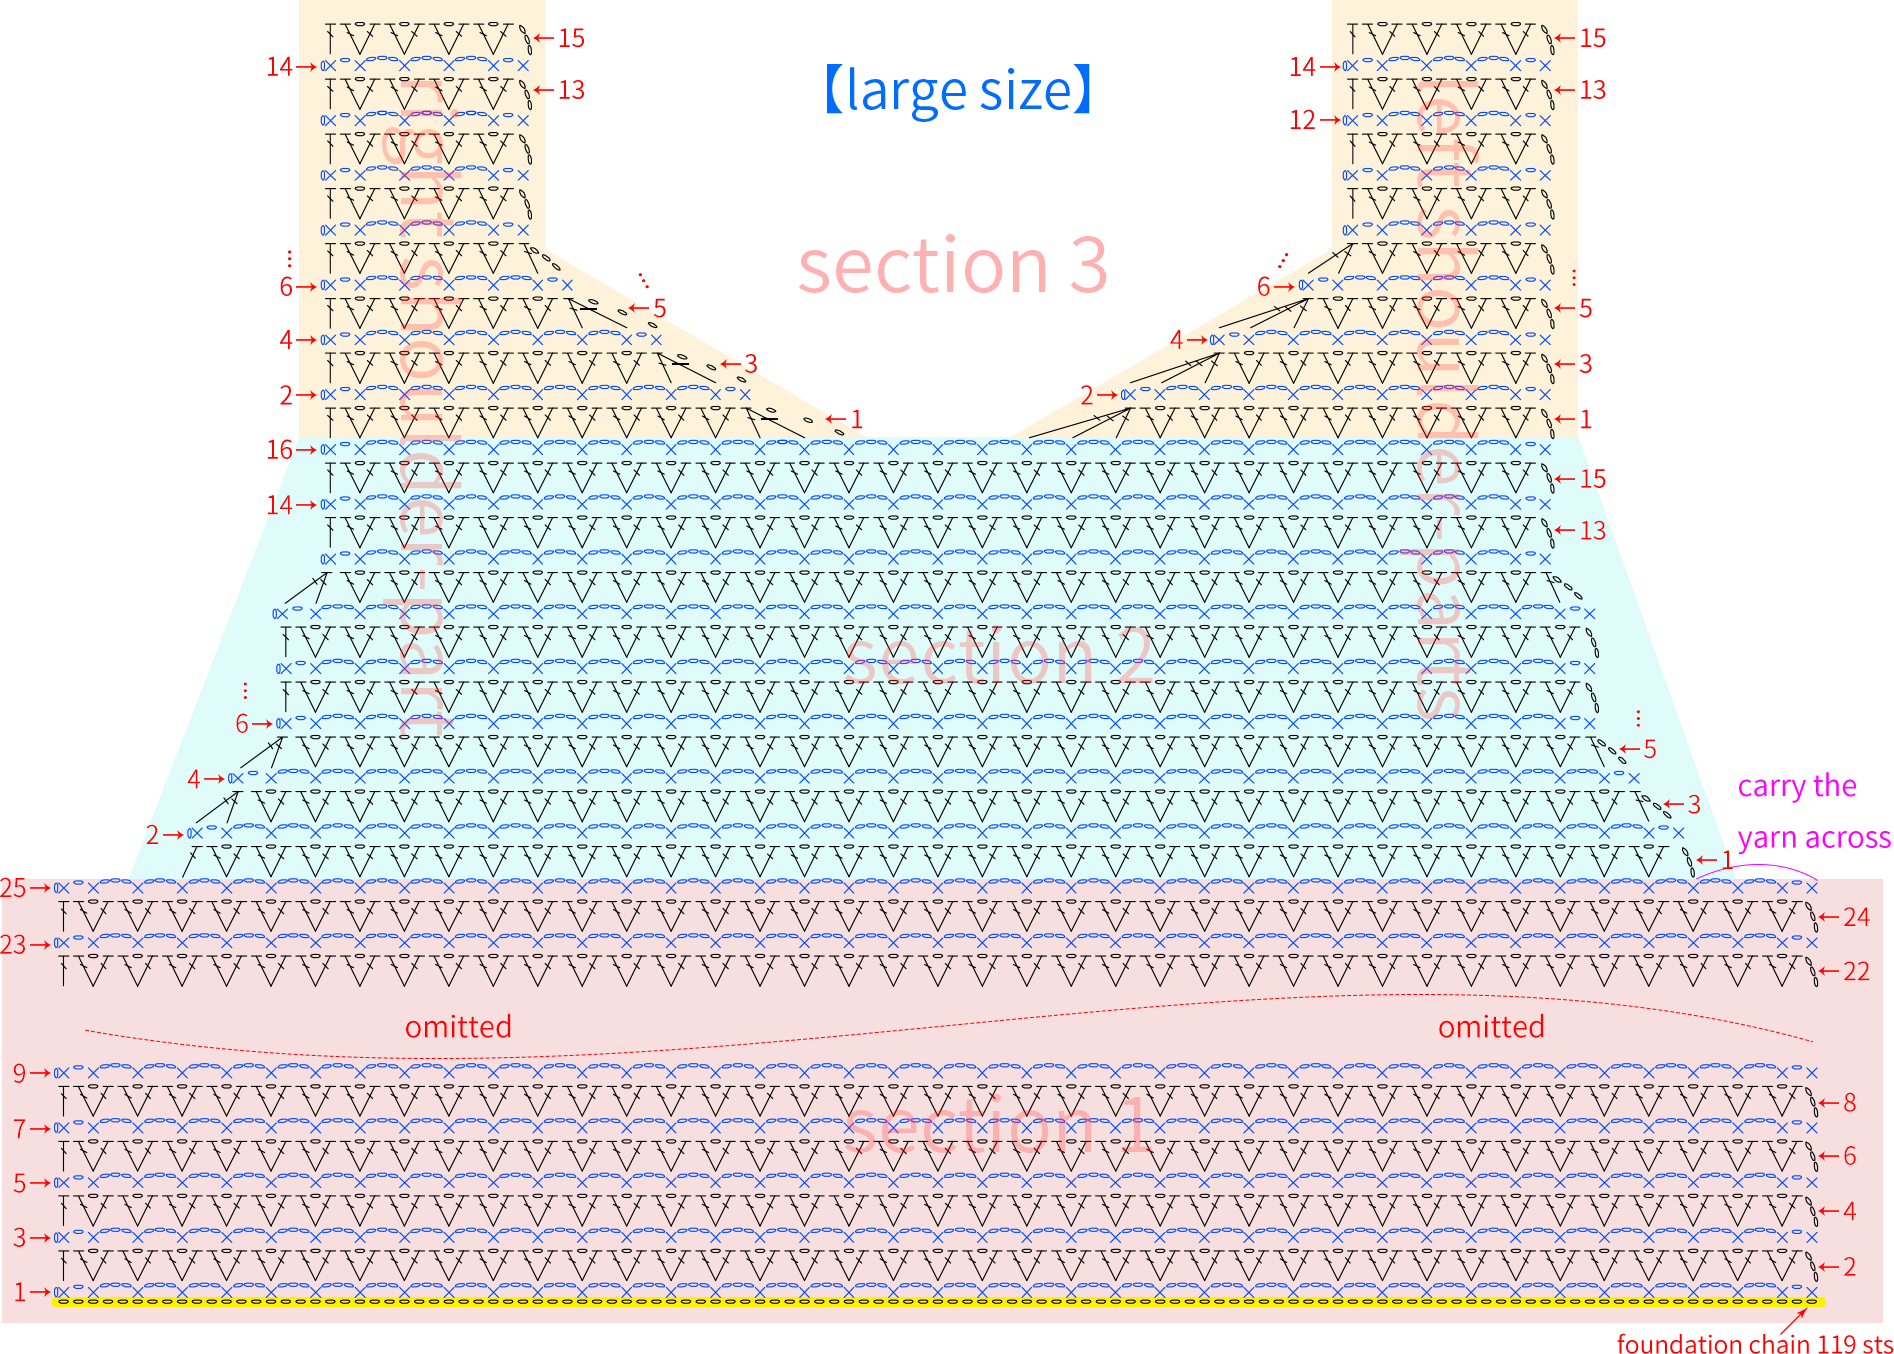
Note:
① After completing Row 5, you can measure the length and width. For a small size, it should be about 41*4 cm; for a large size, it should be about 46*4 cm. If the dimension doesn't fit properly, you need to adjust your tension and crochet again;
② The left and right mentioned here are based on the left and right when the garment is being worn.
Step 2 Lower part of the front piece
Work back and forth along the cast-on edge of the upper part, increasing stitches on both sides as you crochet.
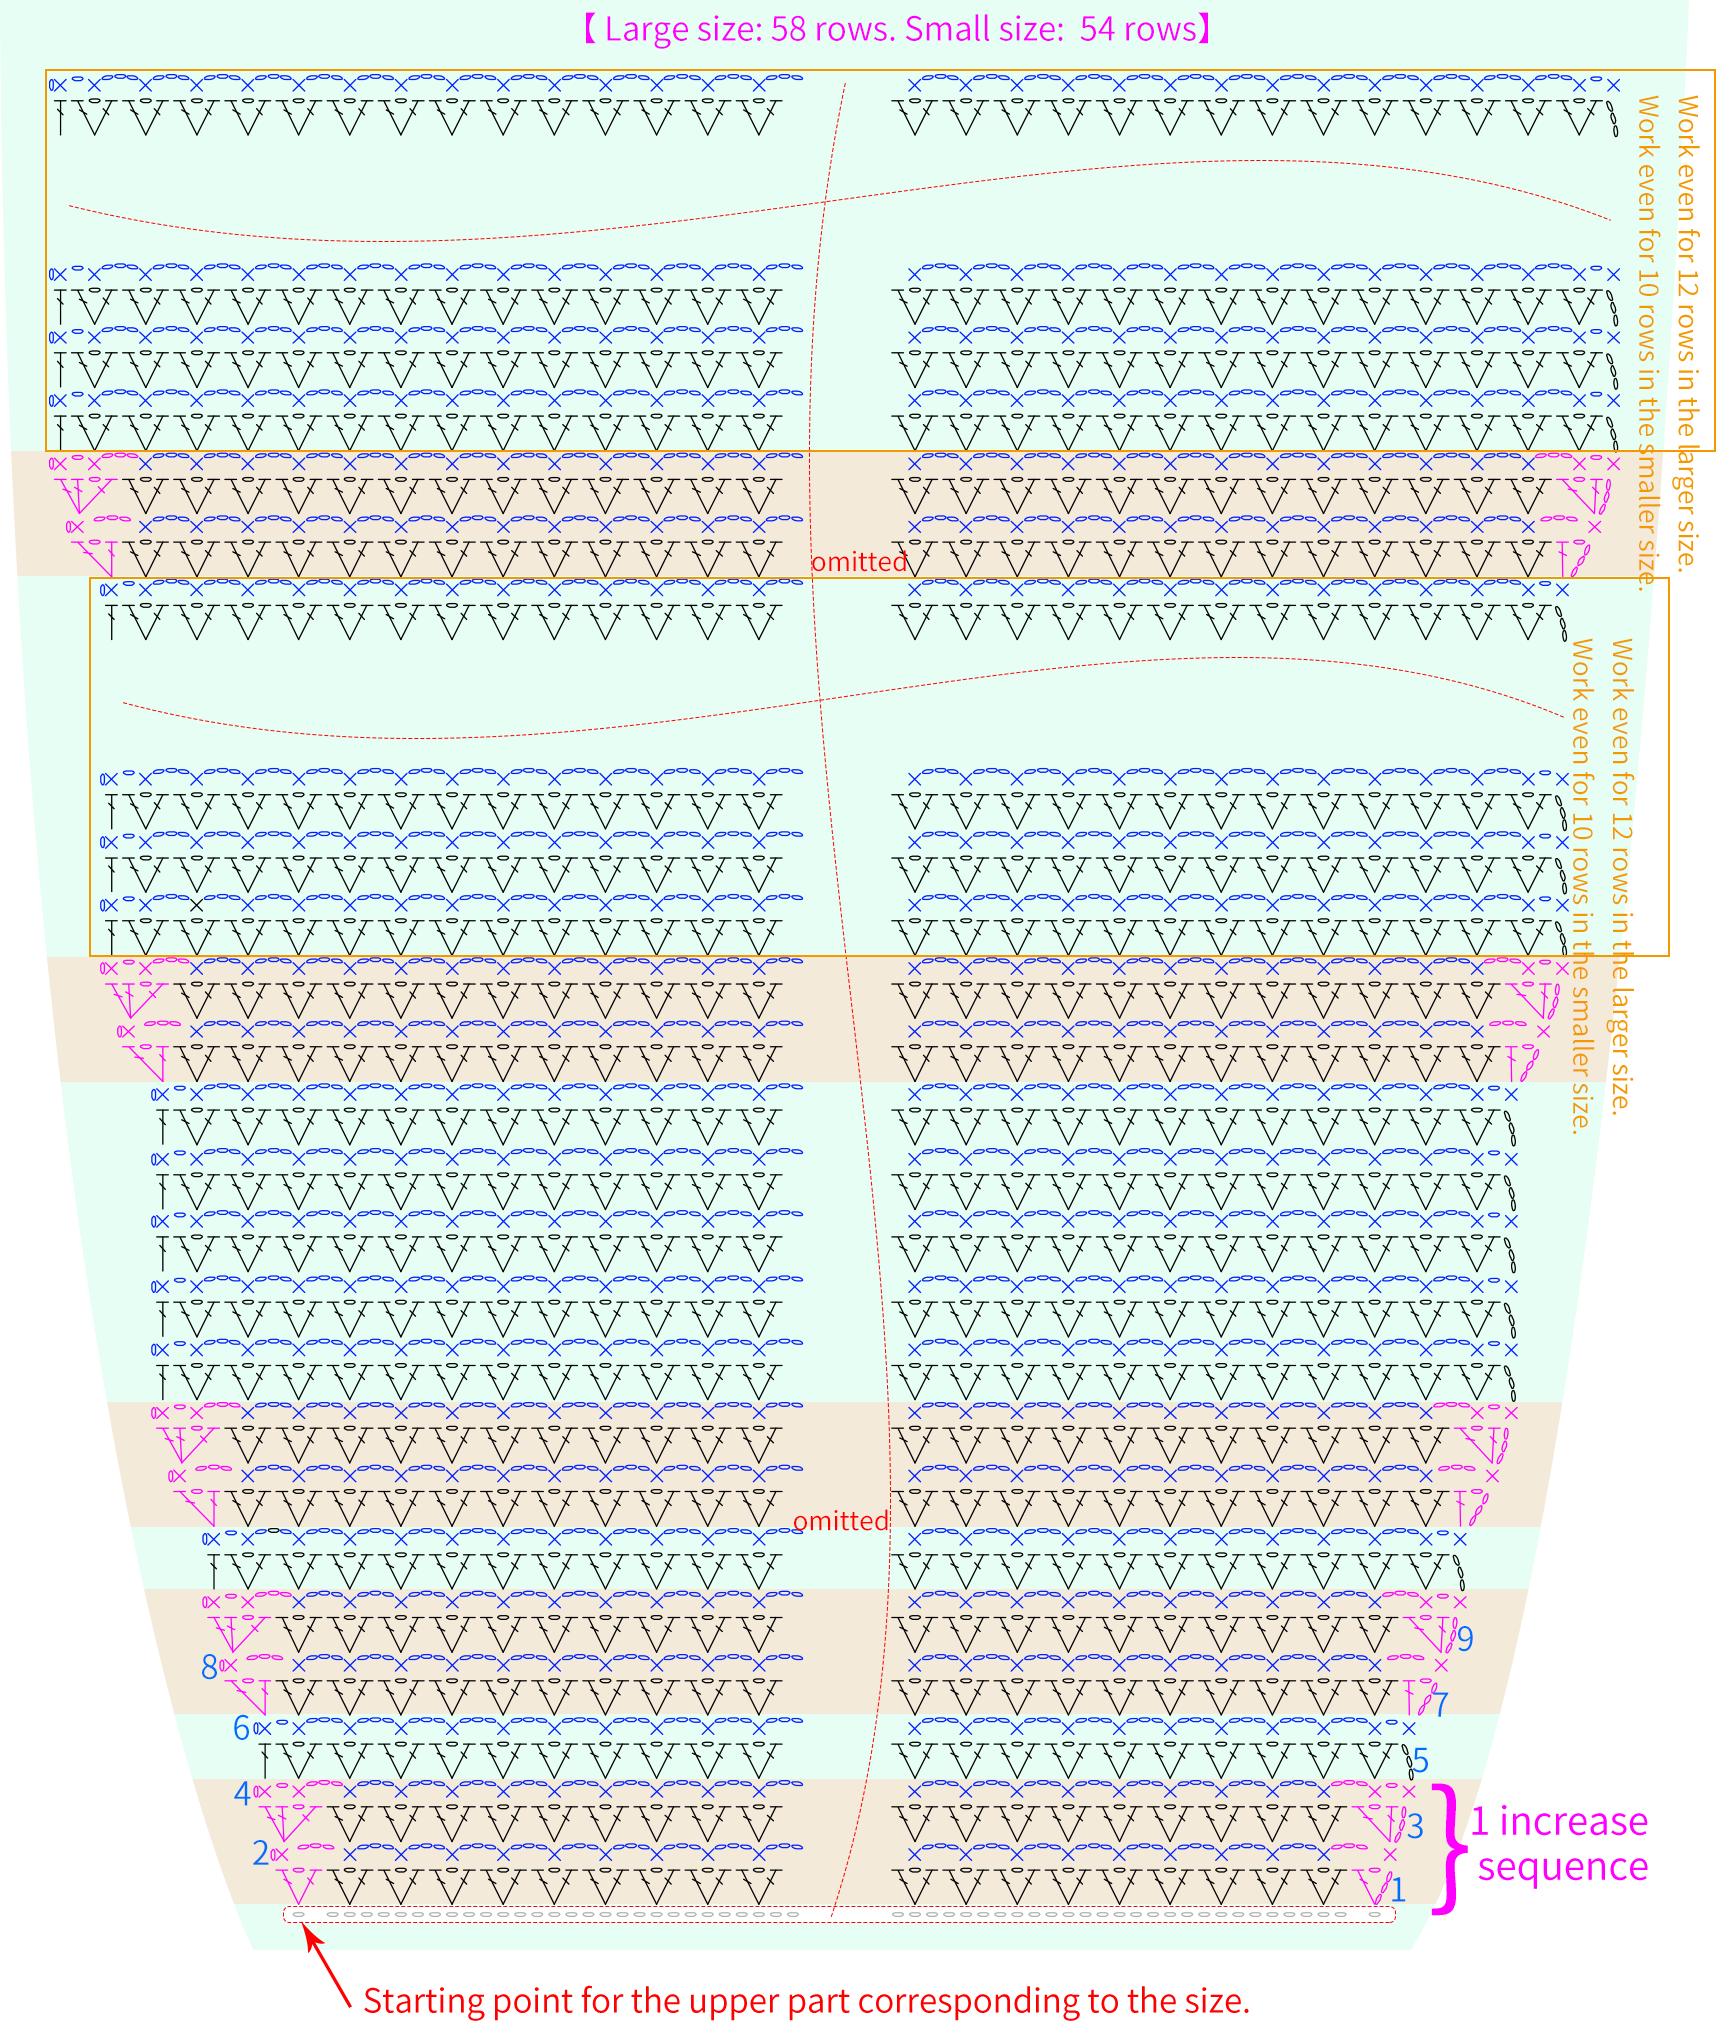
Part Back Piece
The back piece is also divided into an upper part and a lower part. The upper part is also divided into three sections. Section 1 and Section 2 are crocheted in a similar way to the upper part of the front piece, except that the number of rows in Section 2 is different. Section 3 is divided into the left shoulder-part and the right shoulder-part. Crochet the right shoulder-part first, then break the yarn and crochet the left shoulder-part. Both decrease stitches on the side of the neckline. The working method for the lower part of the back piece is identical to the working method for the lower part of the front piece.
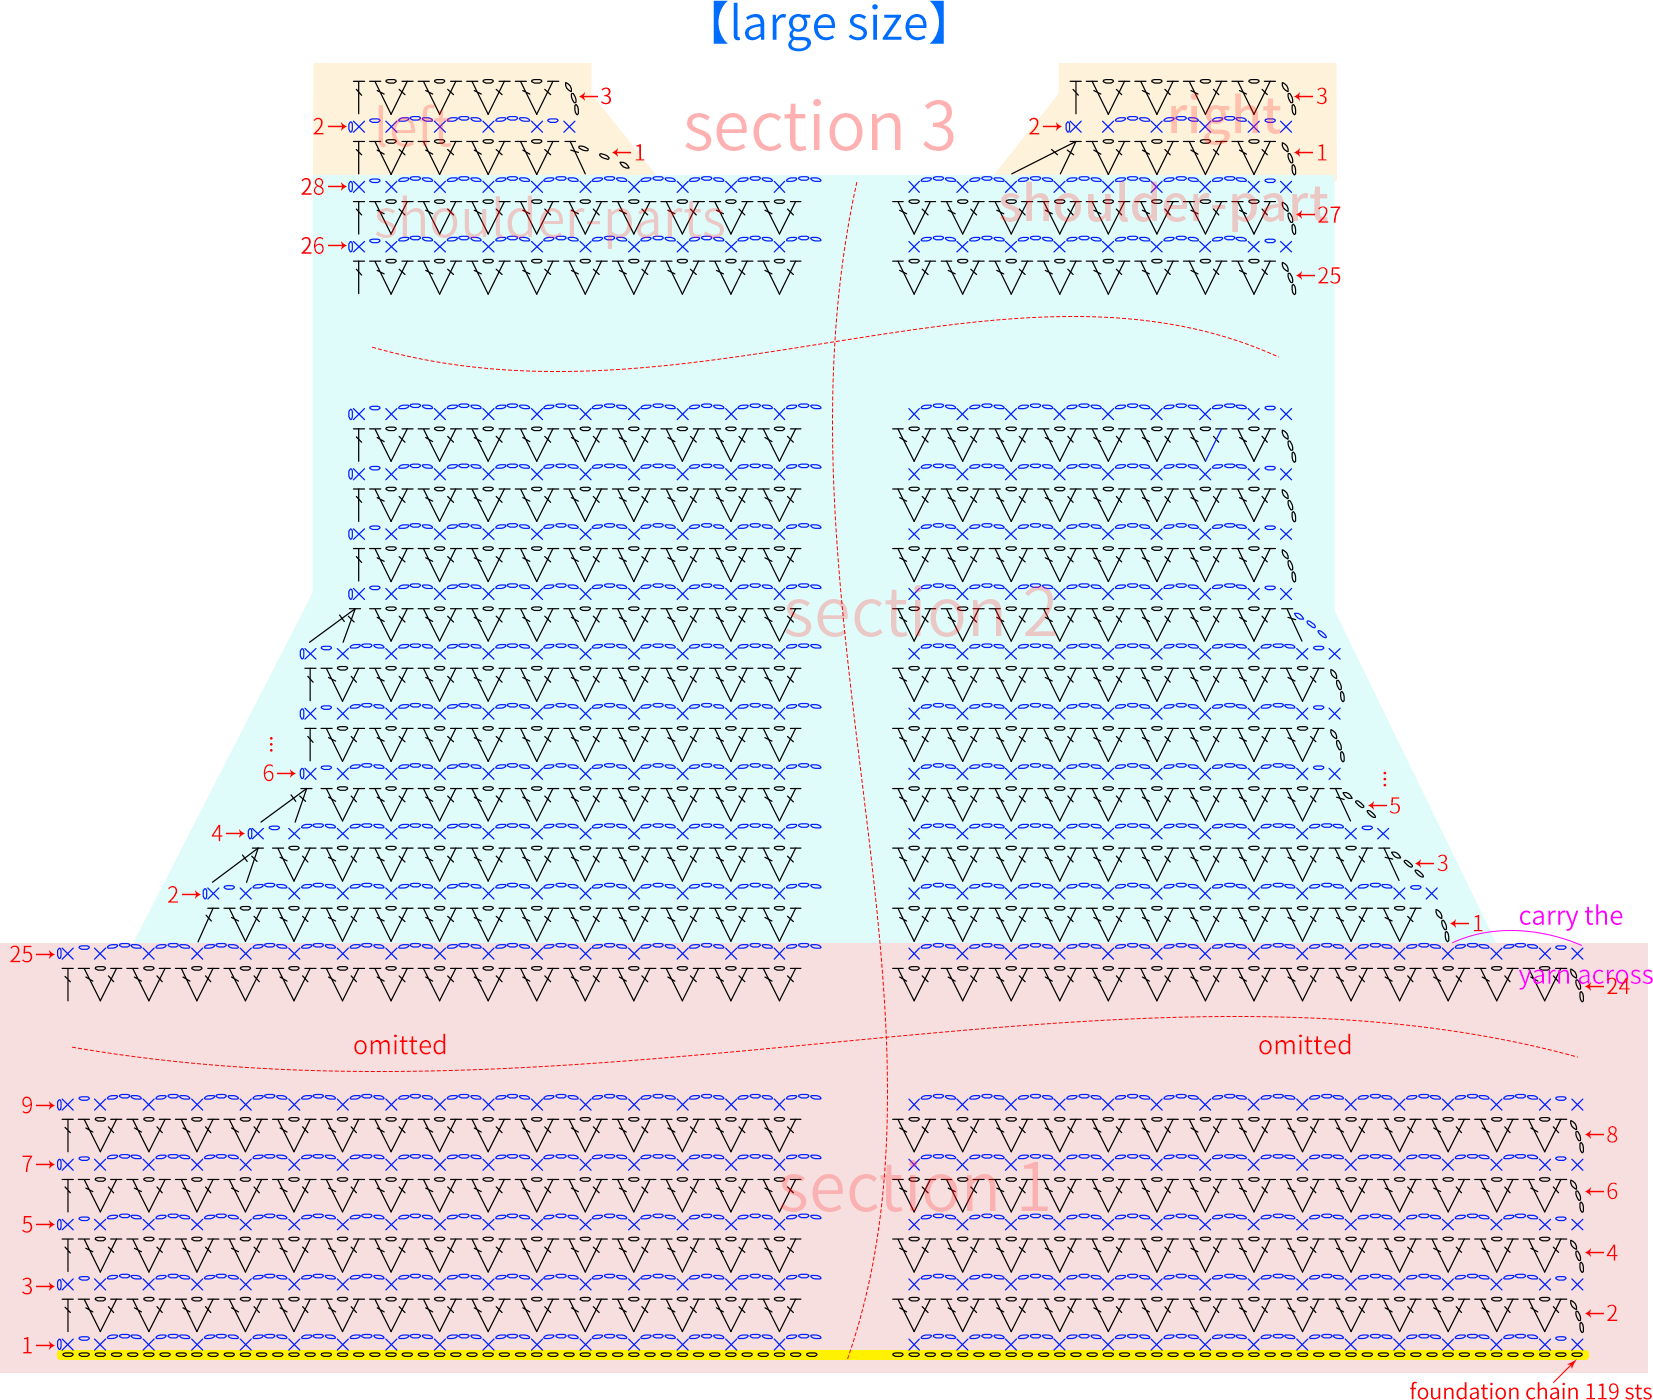
Part 3 Joining Together
After completing the front and back pieces, join the corresponding shoulders and side seams together. The joining method is identical for both large and small sizes, and the chart demonstrates the small size as an example.
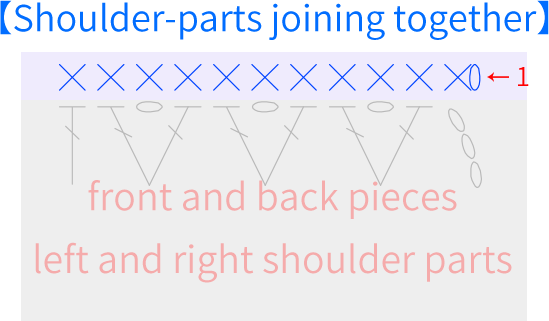

Part 4 Main part Edging
【30# Black, 2 strands held together as one strand】
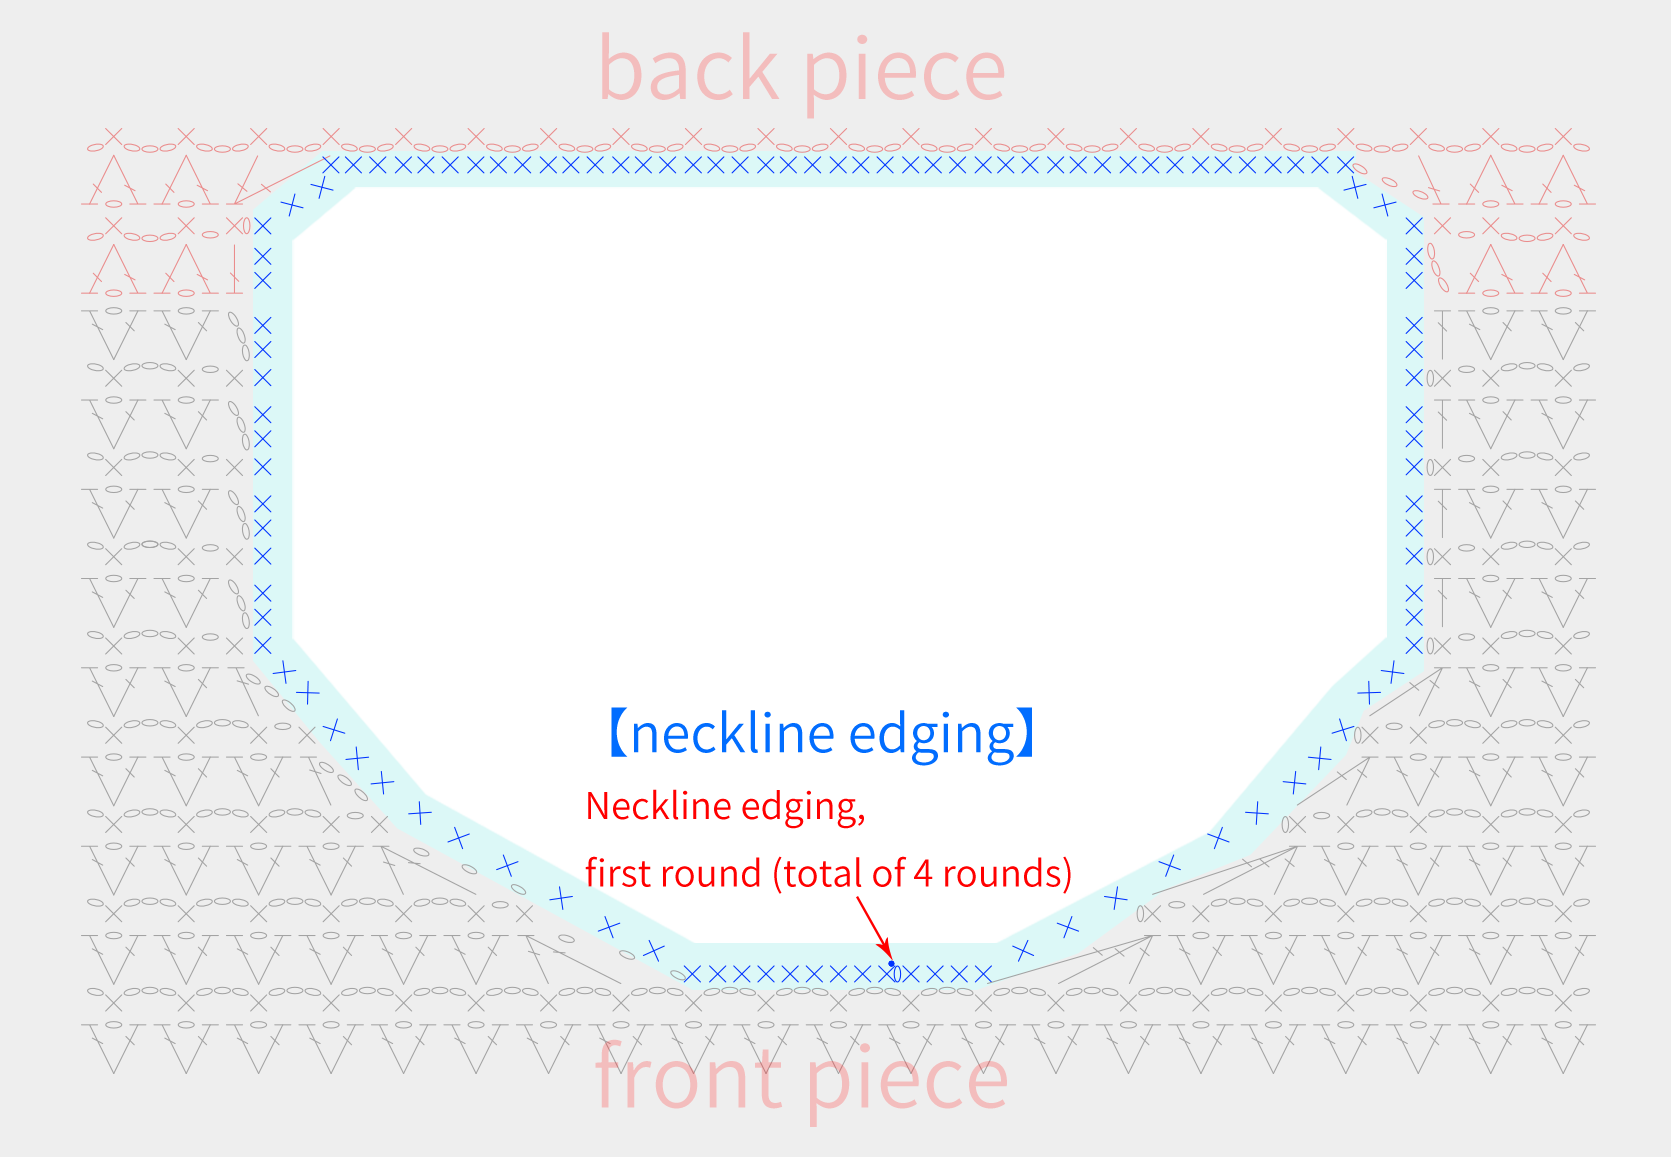
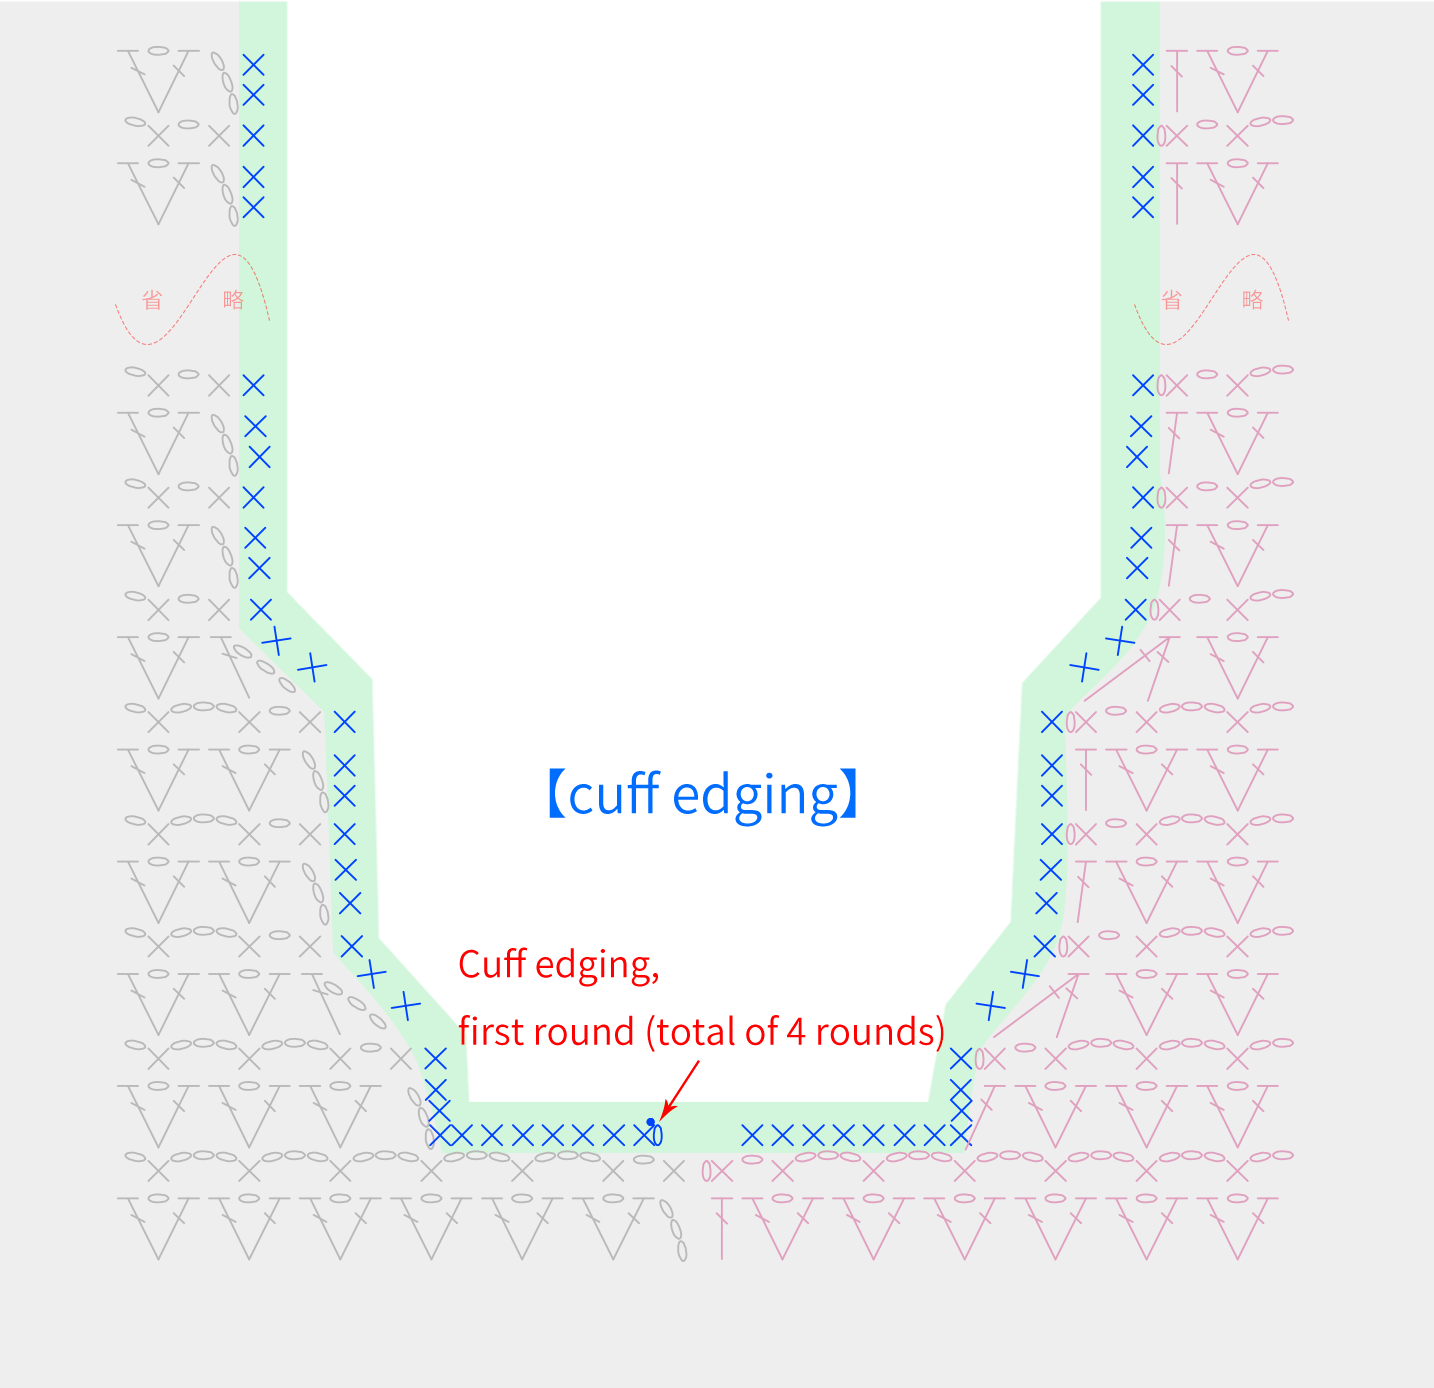
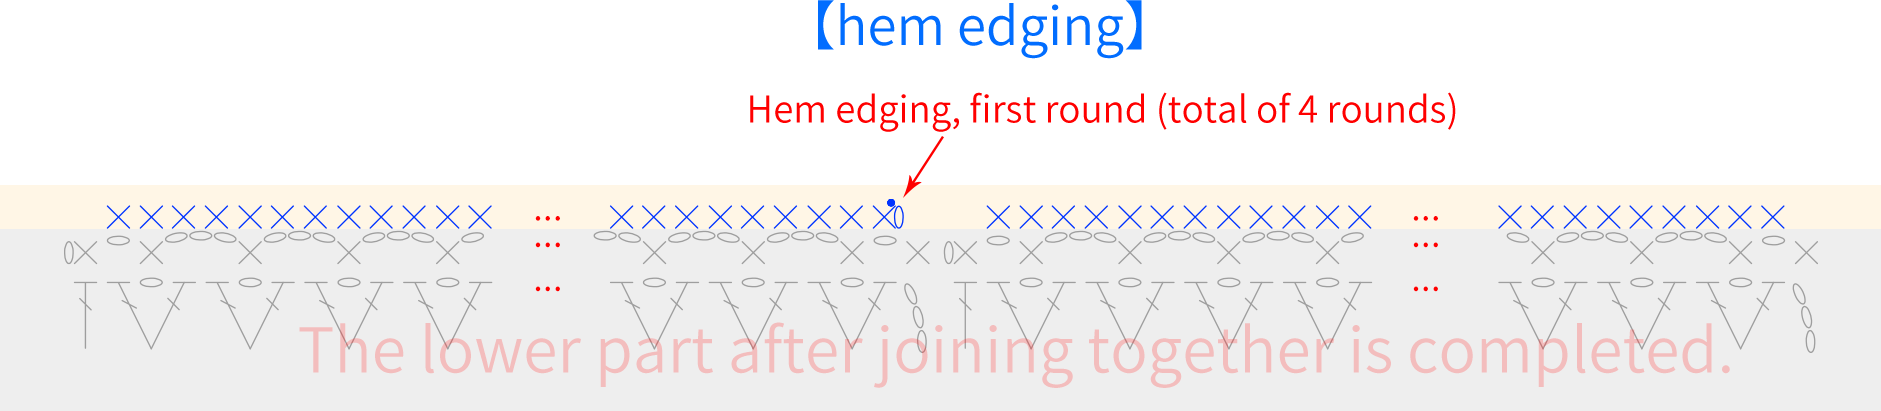
The border of the main part is divided into neckline edging, cuff edging, and hem edging.
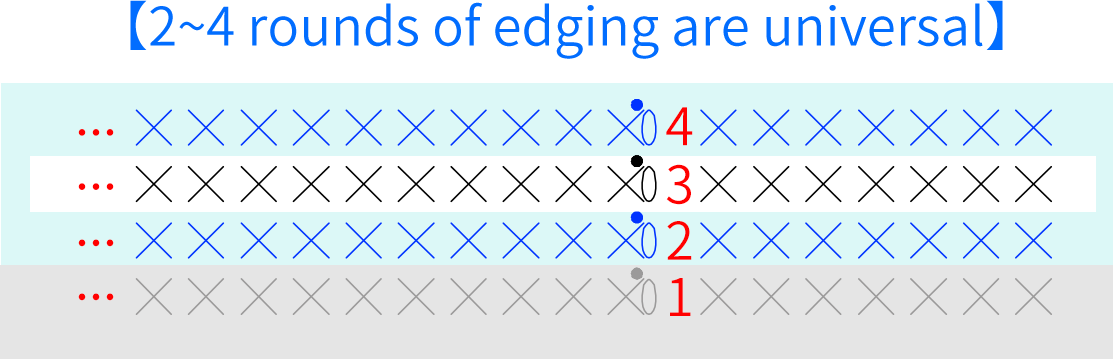
Note: The insertion points for the first round of edging are all demonstrated using the smaller size as an example.
Part 5 Accessories
The accessories include pockets, belts, buckles, and pearl lace trim.
Step 1 Pockets * 2
There are 2 pockets, both starting with a foundation chain, and then crocheting back and forth in rows to form the pocket piece. At the end, leave a yarn tail about 3 times the width of the piece for sewing. Then, crochet the edging. Finally, sew it onto the corresponding position of the main body.
Step 2 Belt
The belt is started with a foundation chain, and the main part of the belt is crocheted back and forth along the starting chain. After completing the main part, crochet one round for the edge, and finally add the belt buckle.
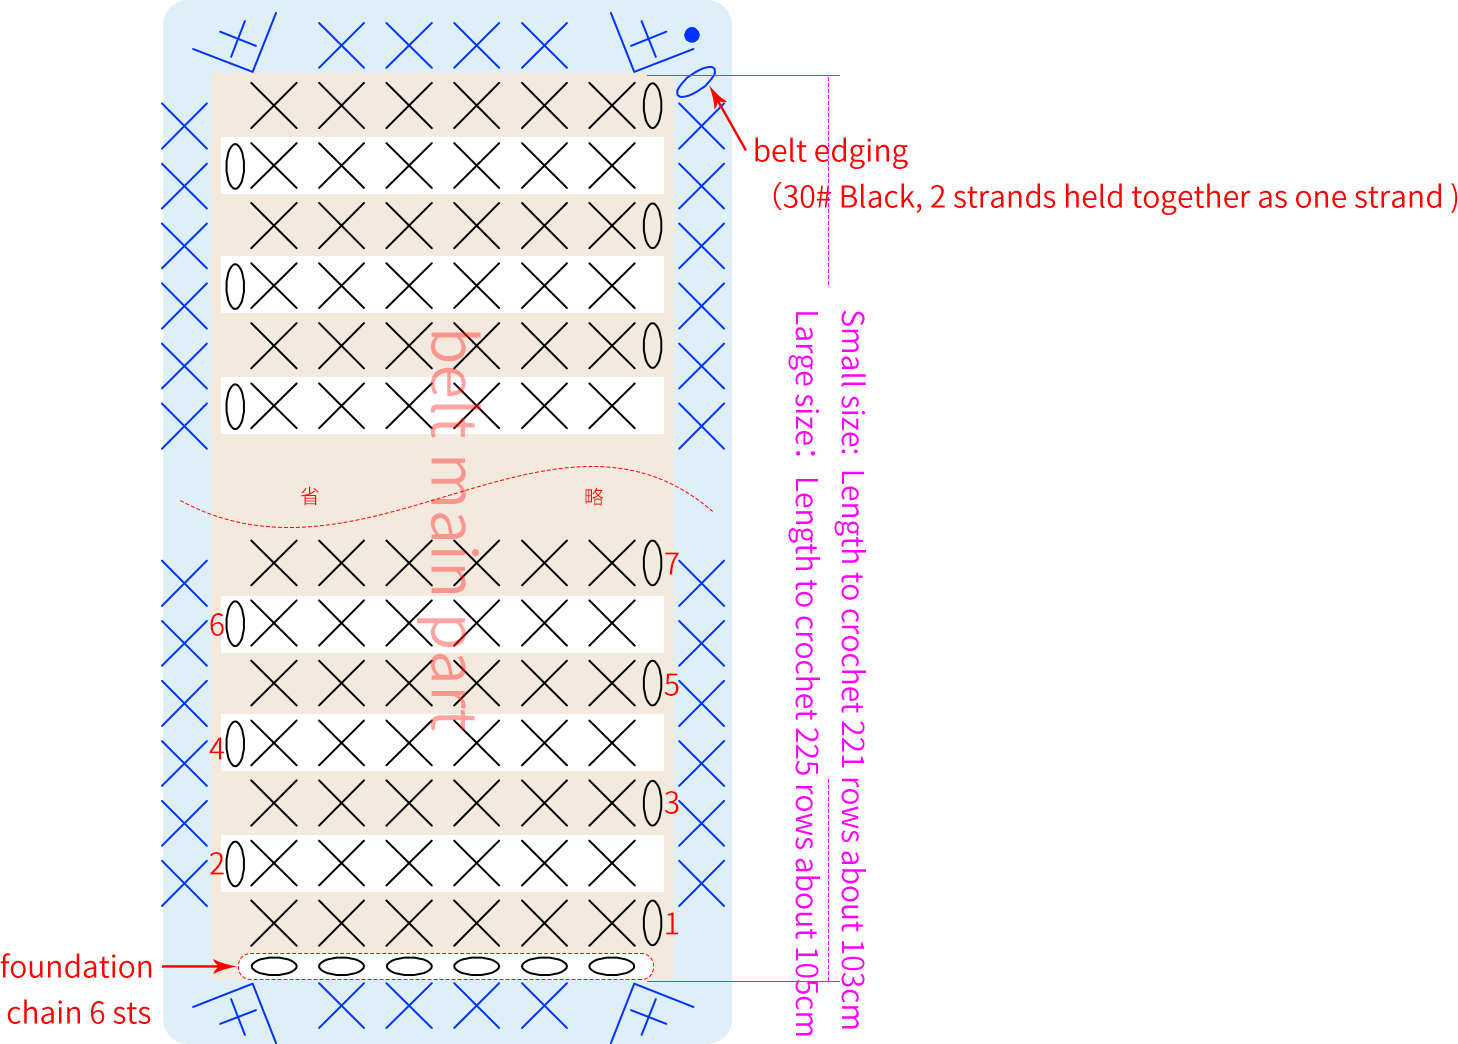
Note: Since everyone's tension is different, the number of rows is only for reference. You just need to crochet to the corresponding length for each size. You can also adjust the length according to your own needs.
Step 3 Loop*2
There are a total of 2 pieces. Both starting with a foundation chain, and single crochets are worked along the foundation chain. After completion, leave a yarn tail of about 15cm, and sew it onto the corresponding position.

Step 4 Pearl lace trim
Finally, sew the lace trim onto the positions of neckline edging, cuff edging, hem edging, and pocket edging.
Made by the community