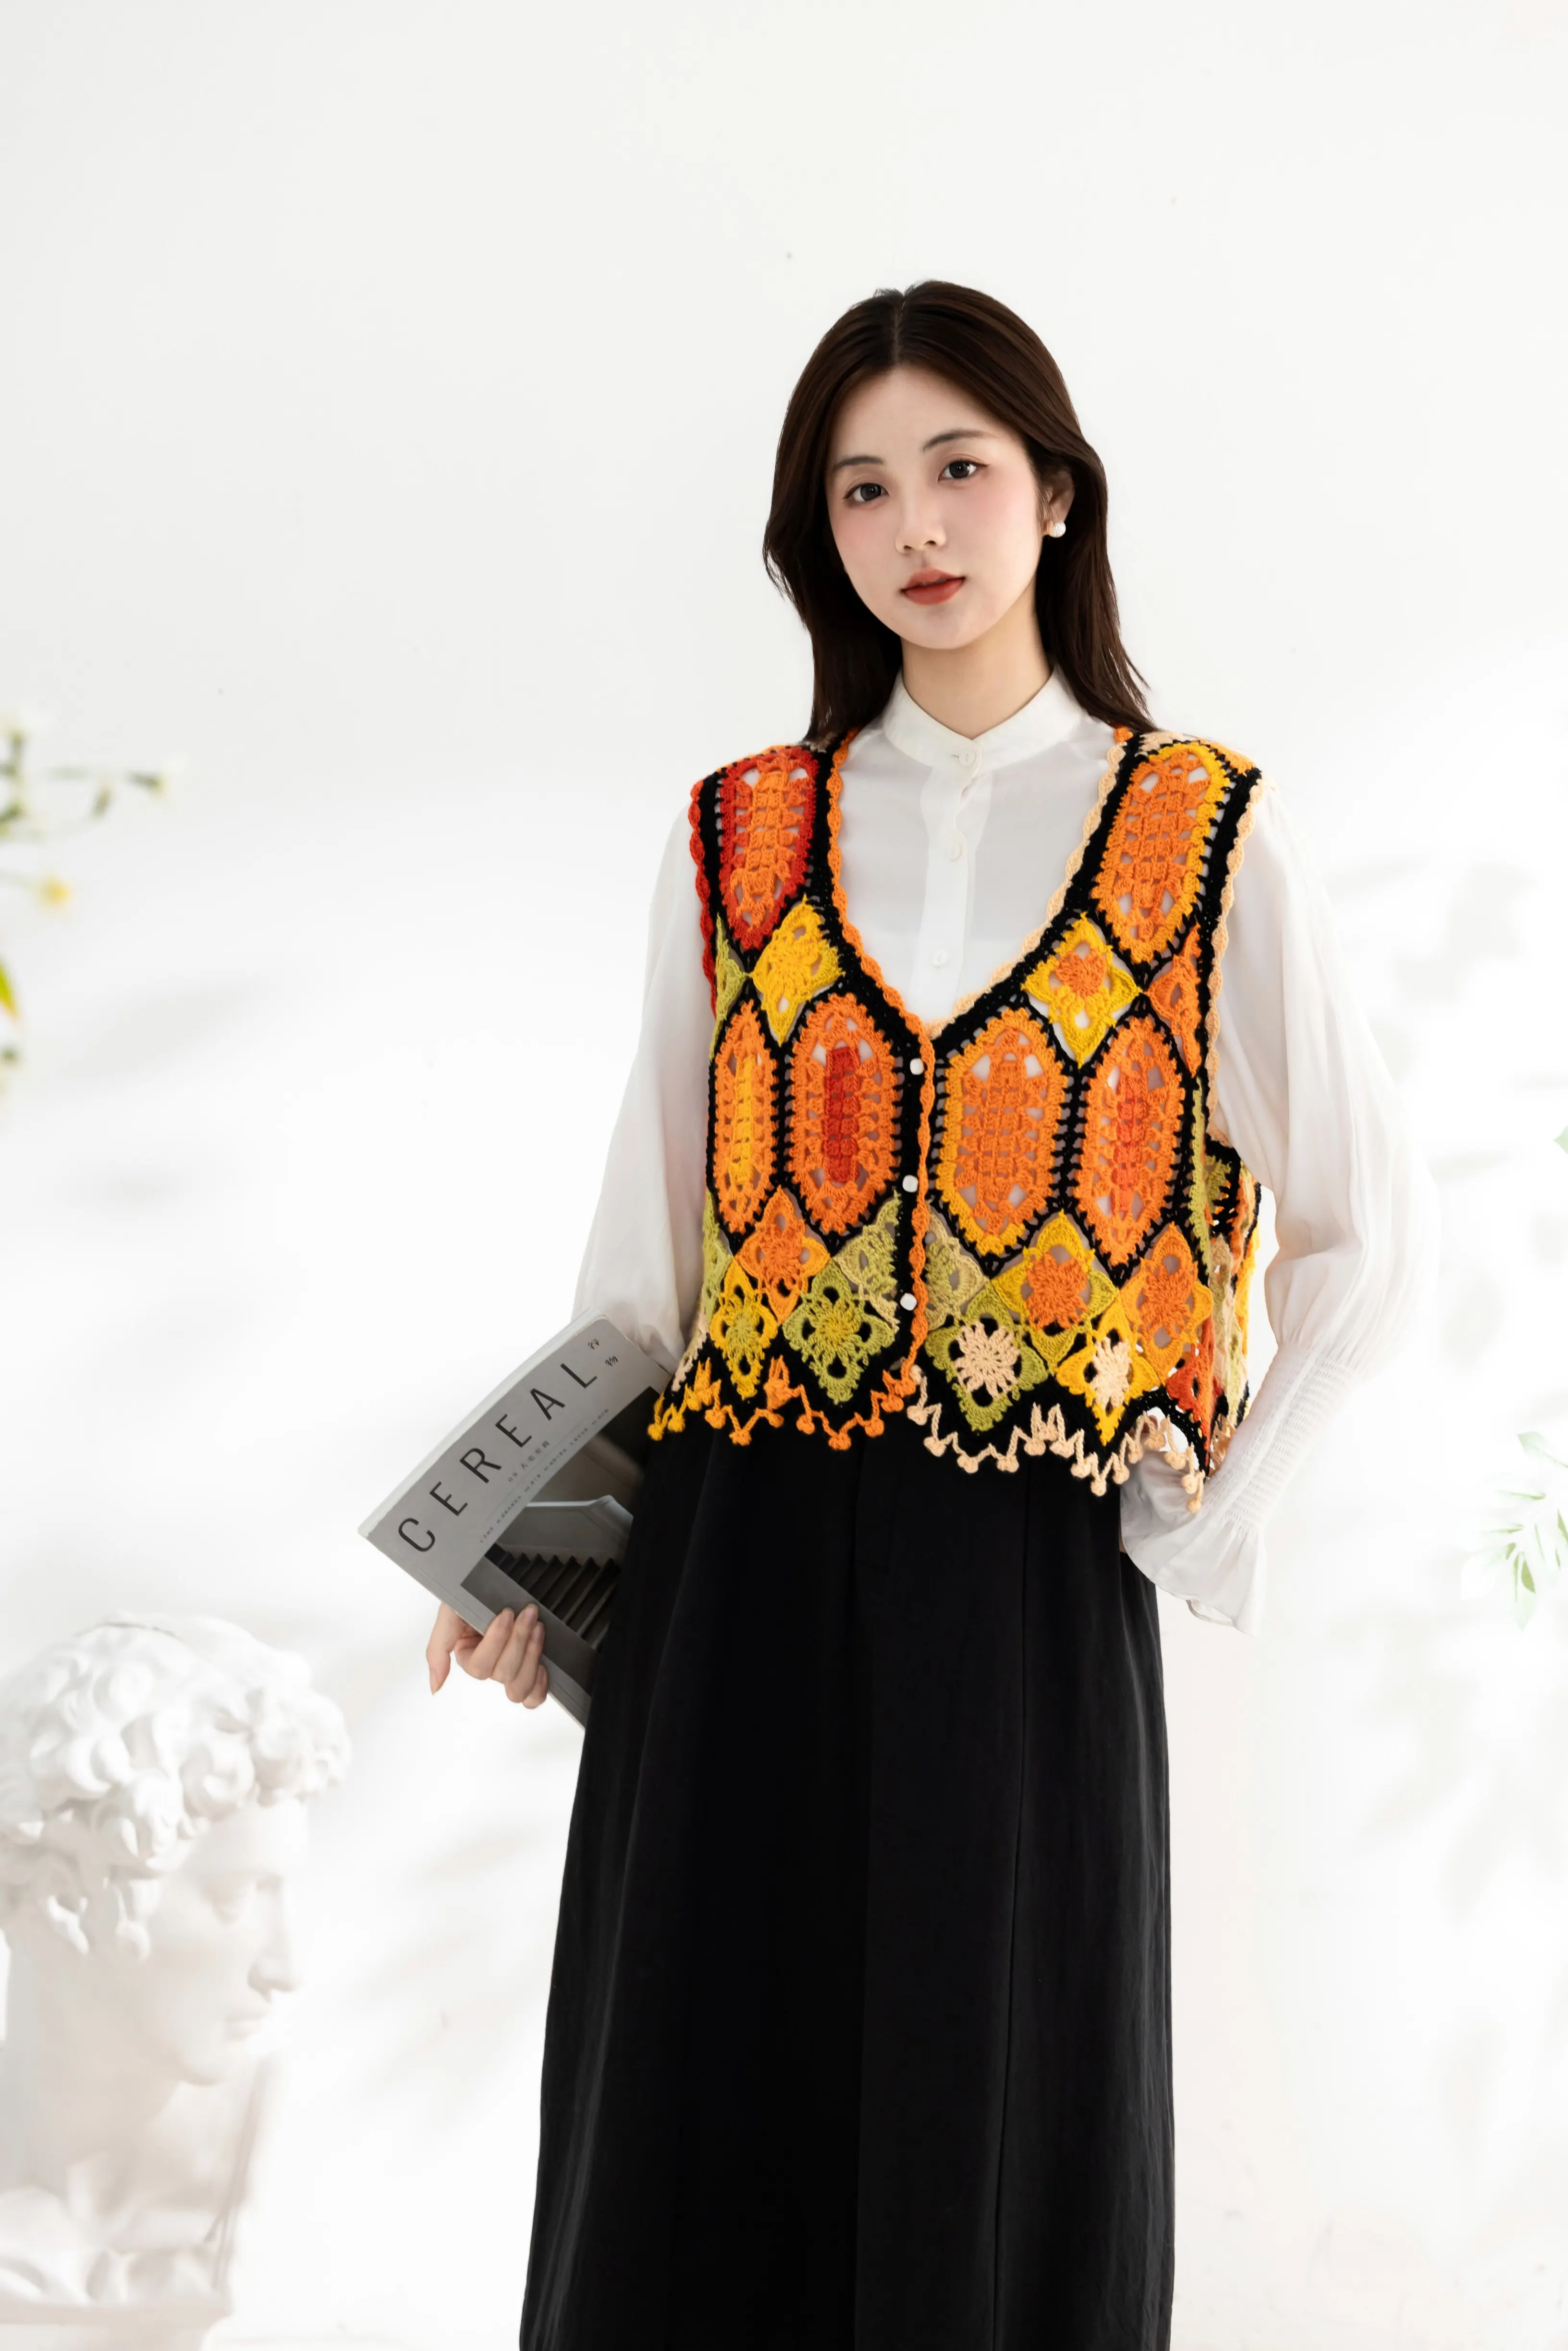
Clothes
Lillian
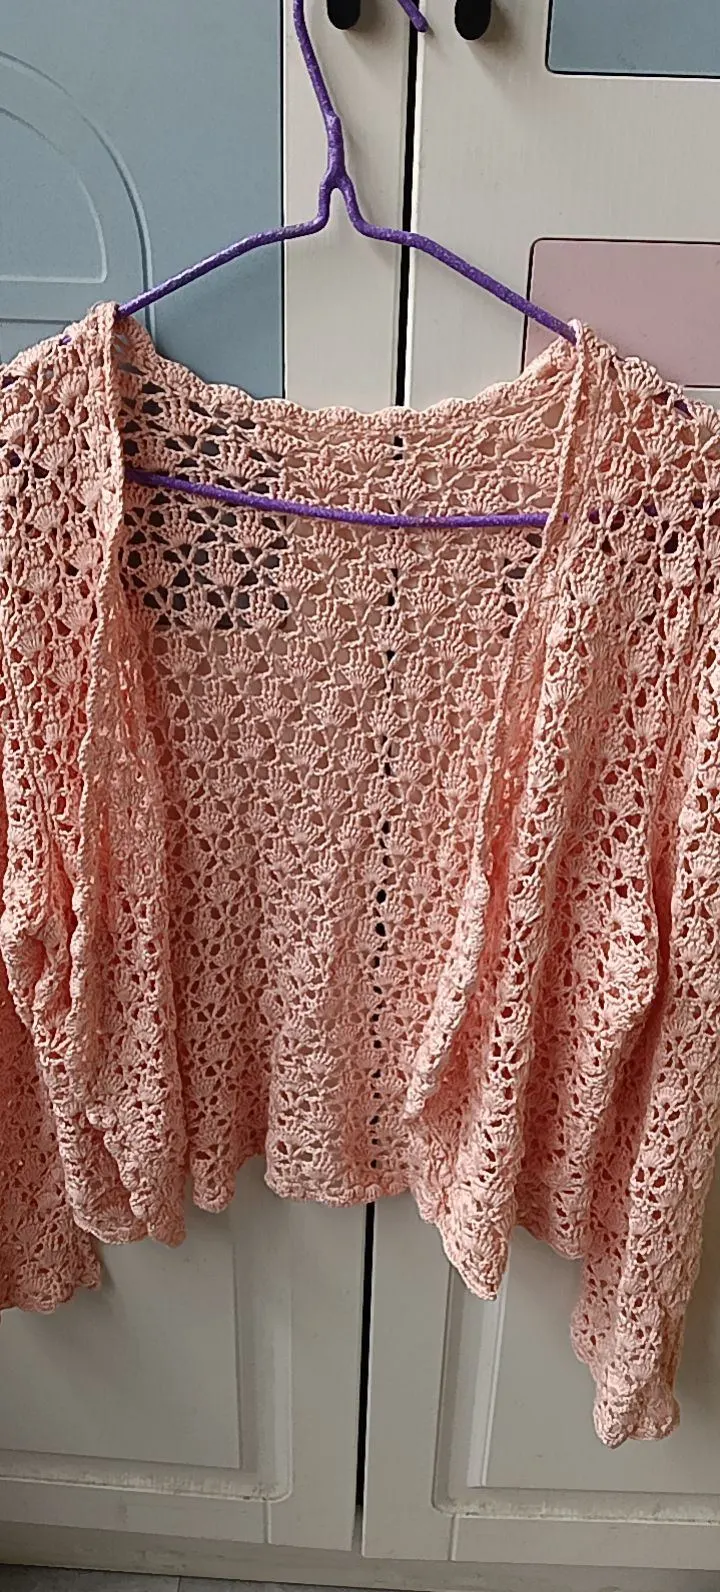
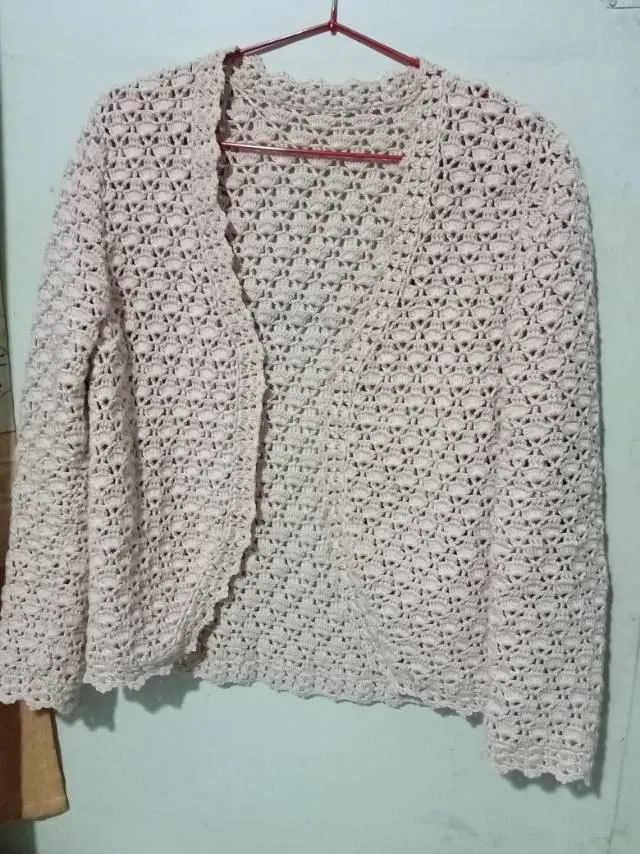
Project preview
See the finished project
Pattern format
Instructions
| Style | Yarn | Color |
|---|---|---|
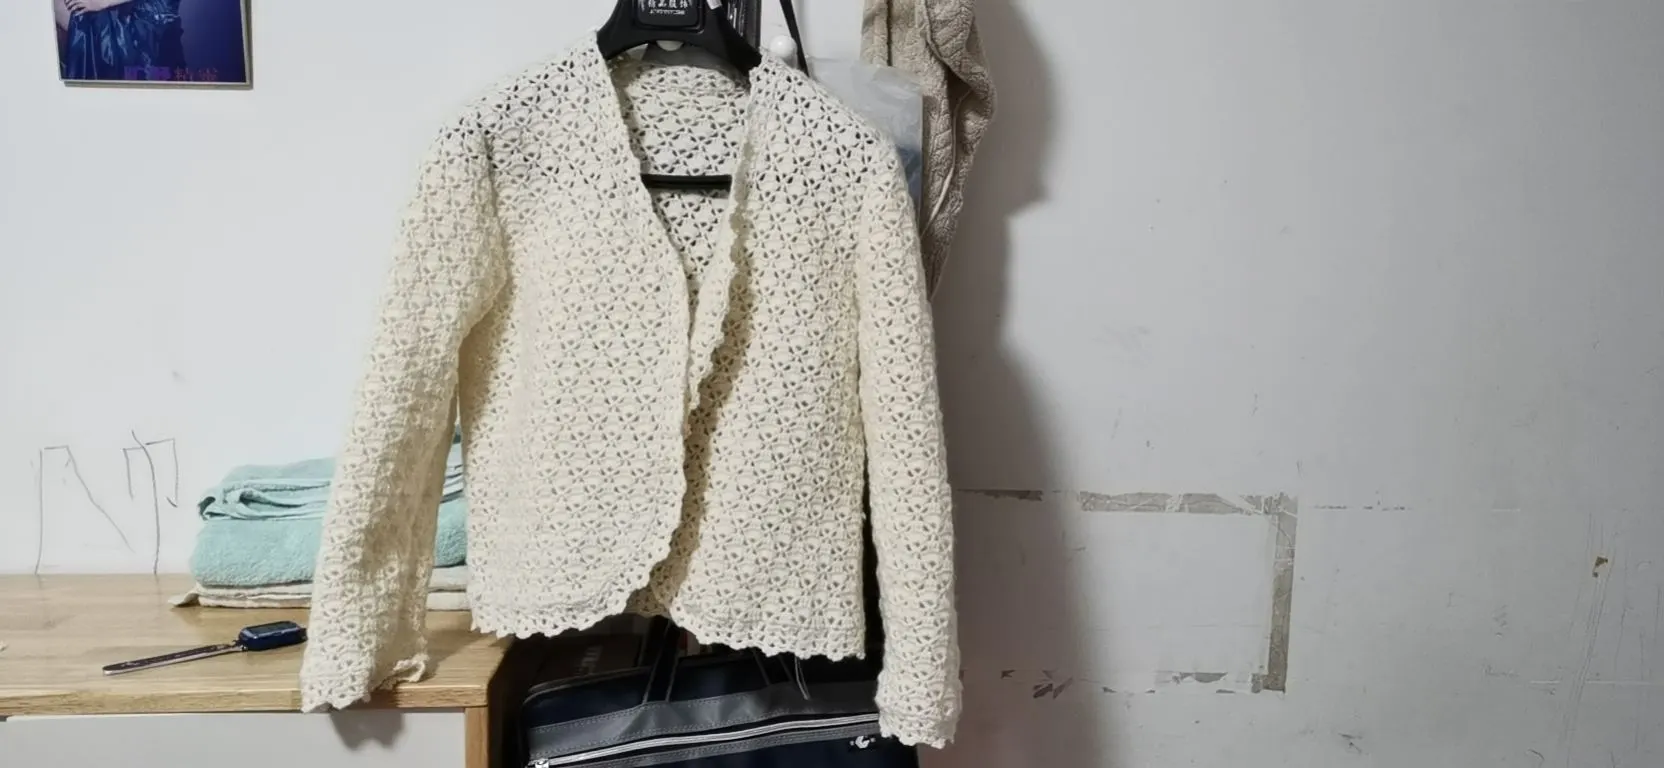
| Lilian Cardigan - Whisper White Version - Small | Velvet Merino |  01#Whisper White |
| Lilian Cardigan - Whisper White Version - Medium | Velvet Merino | 01#Whisper White |
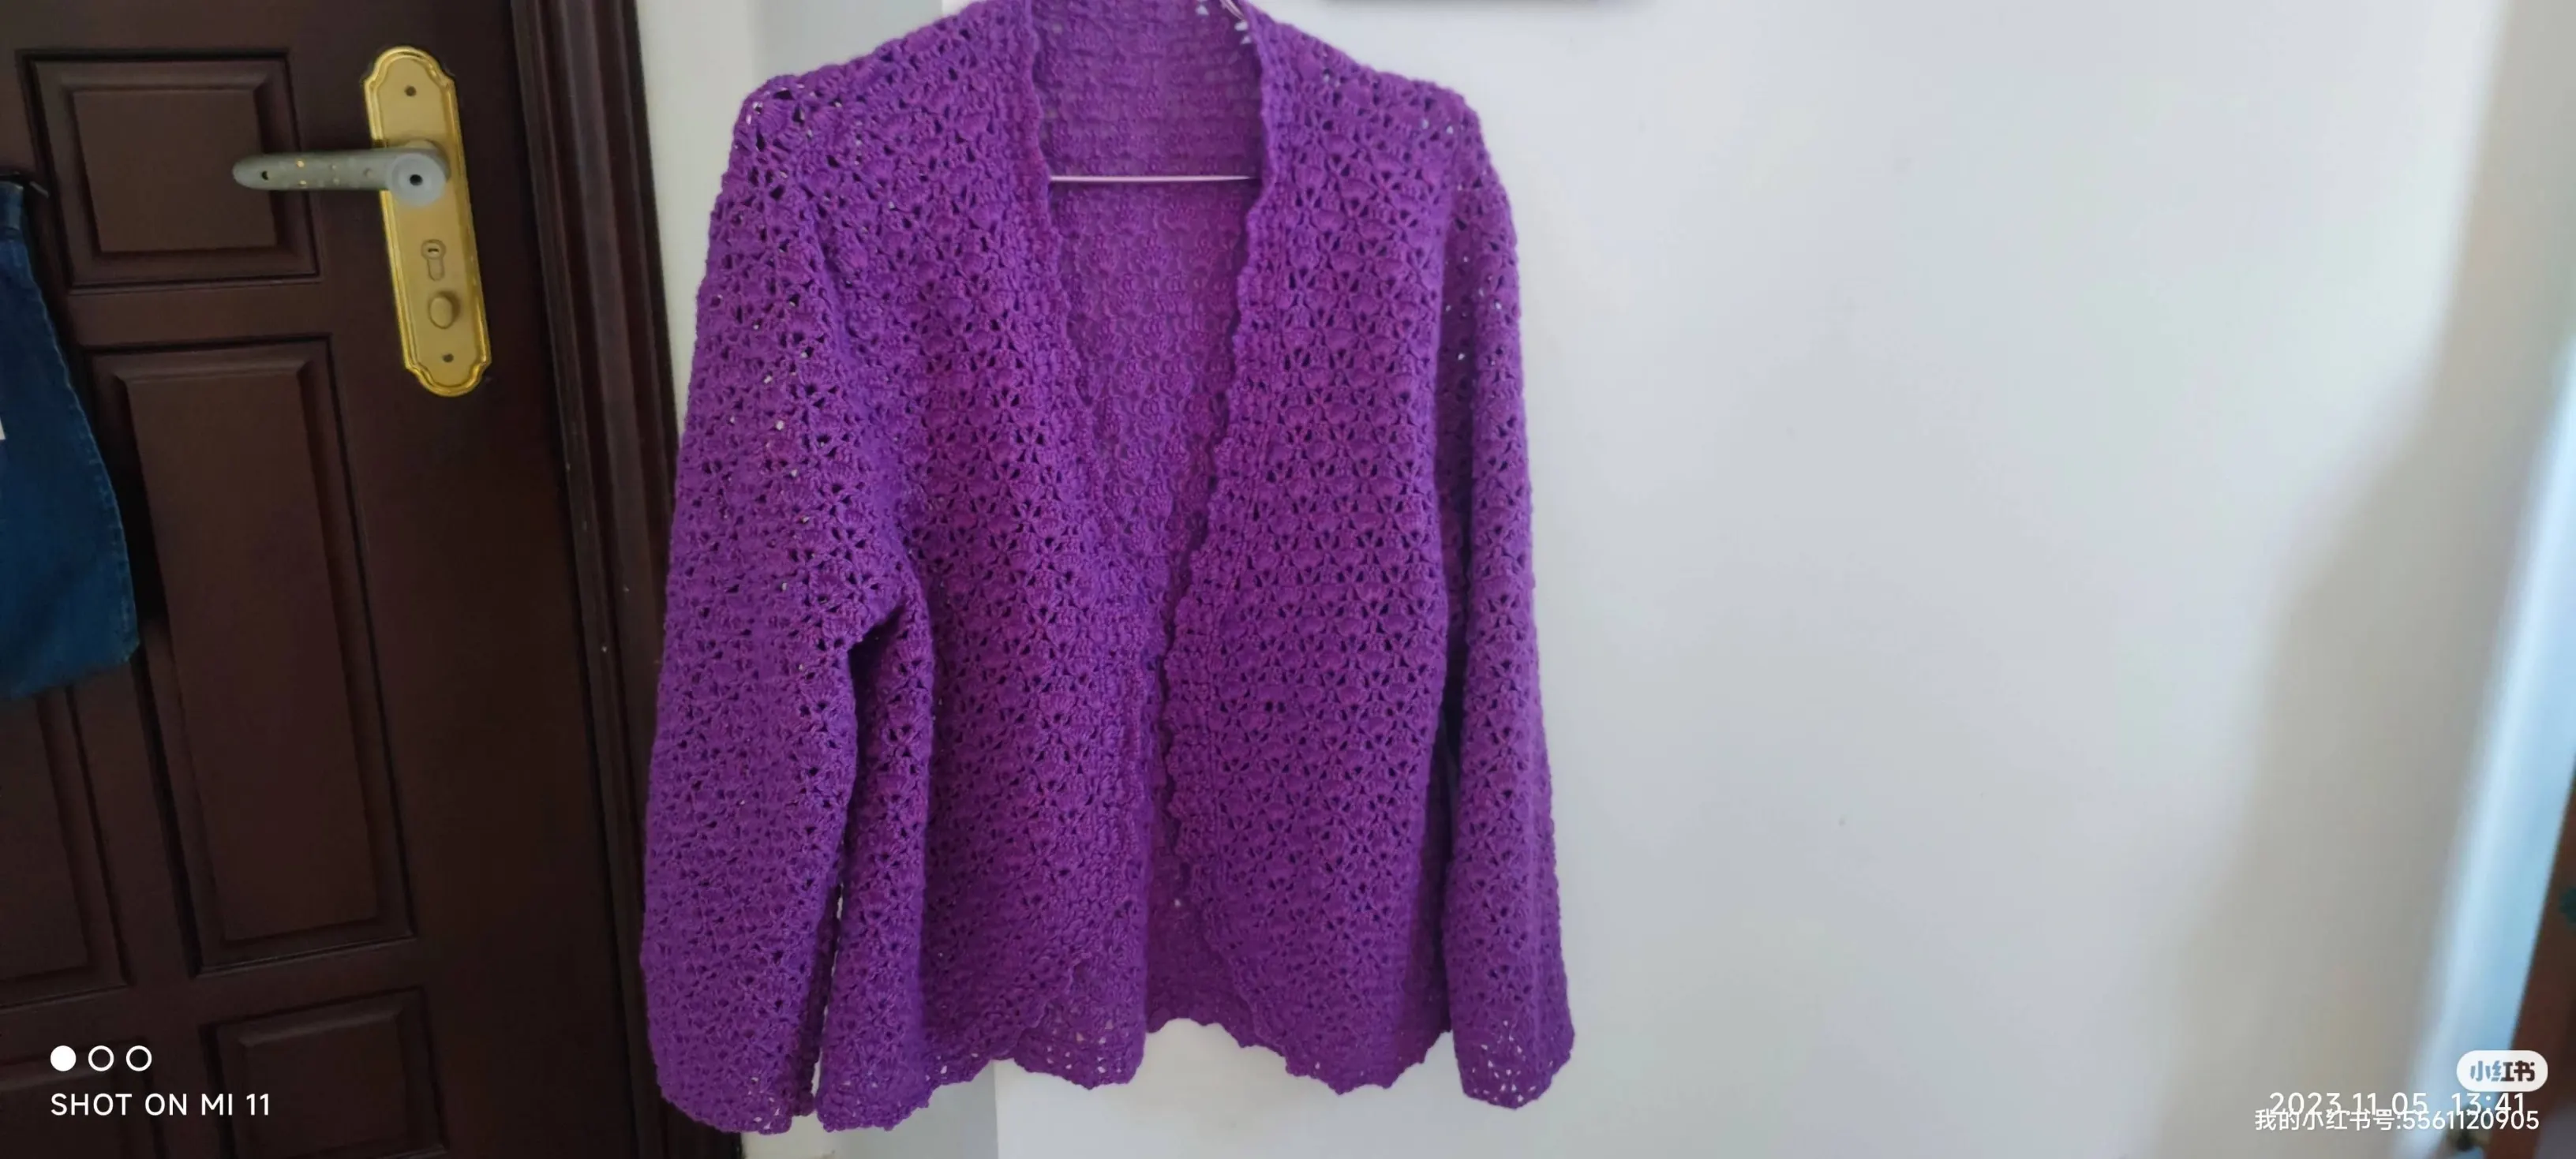
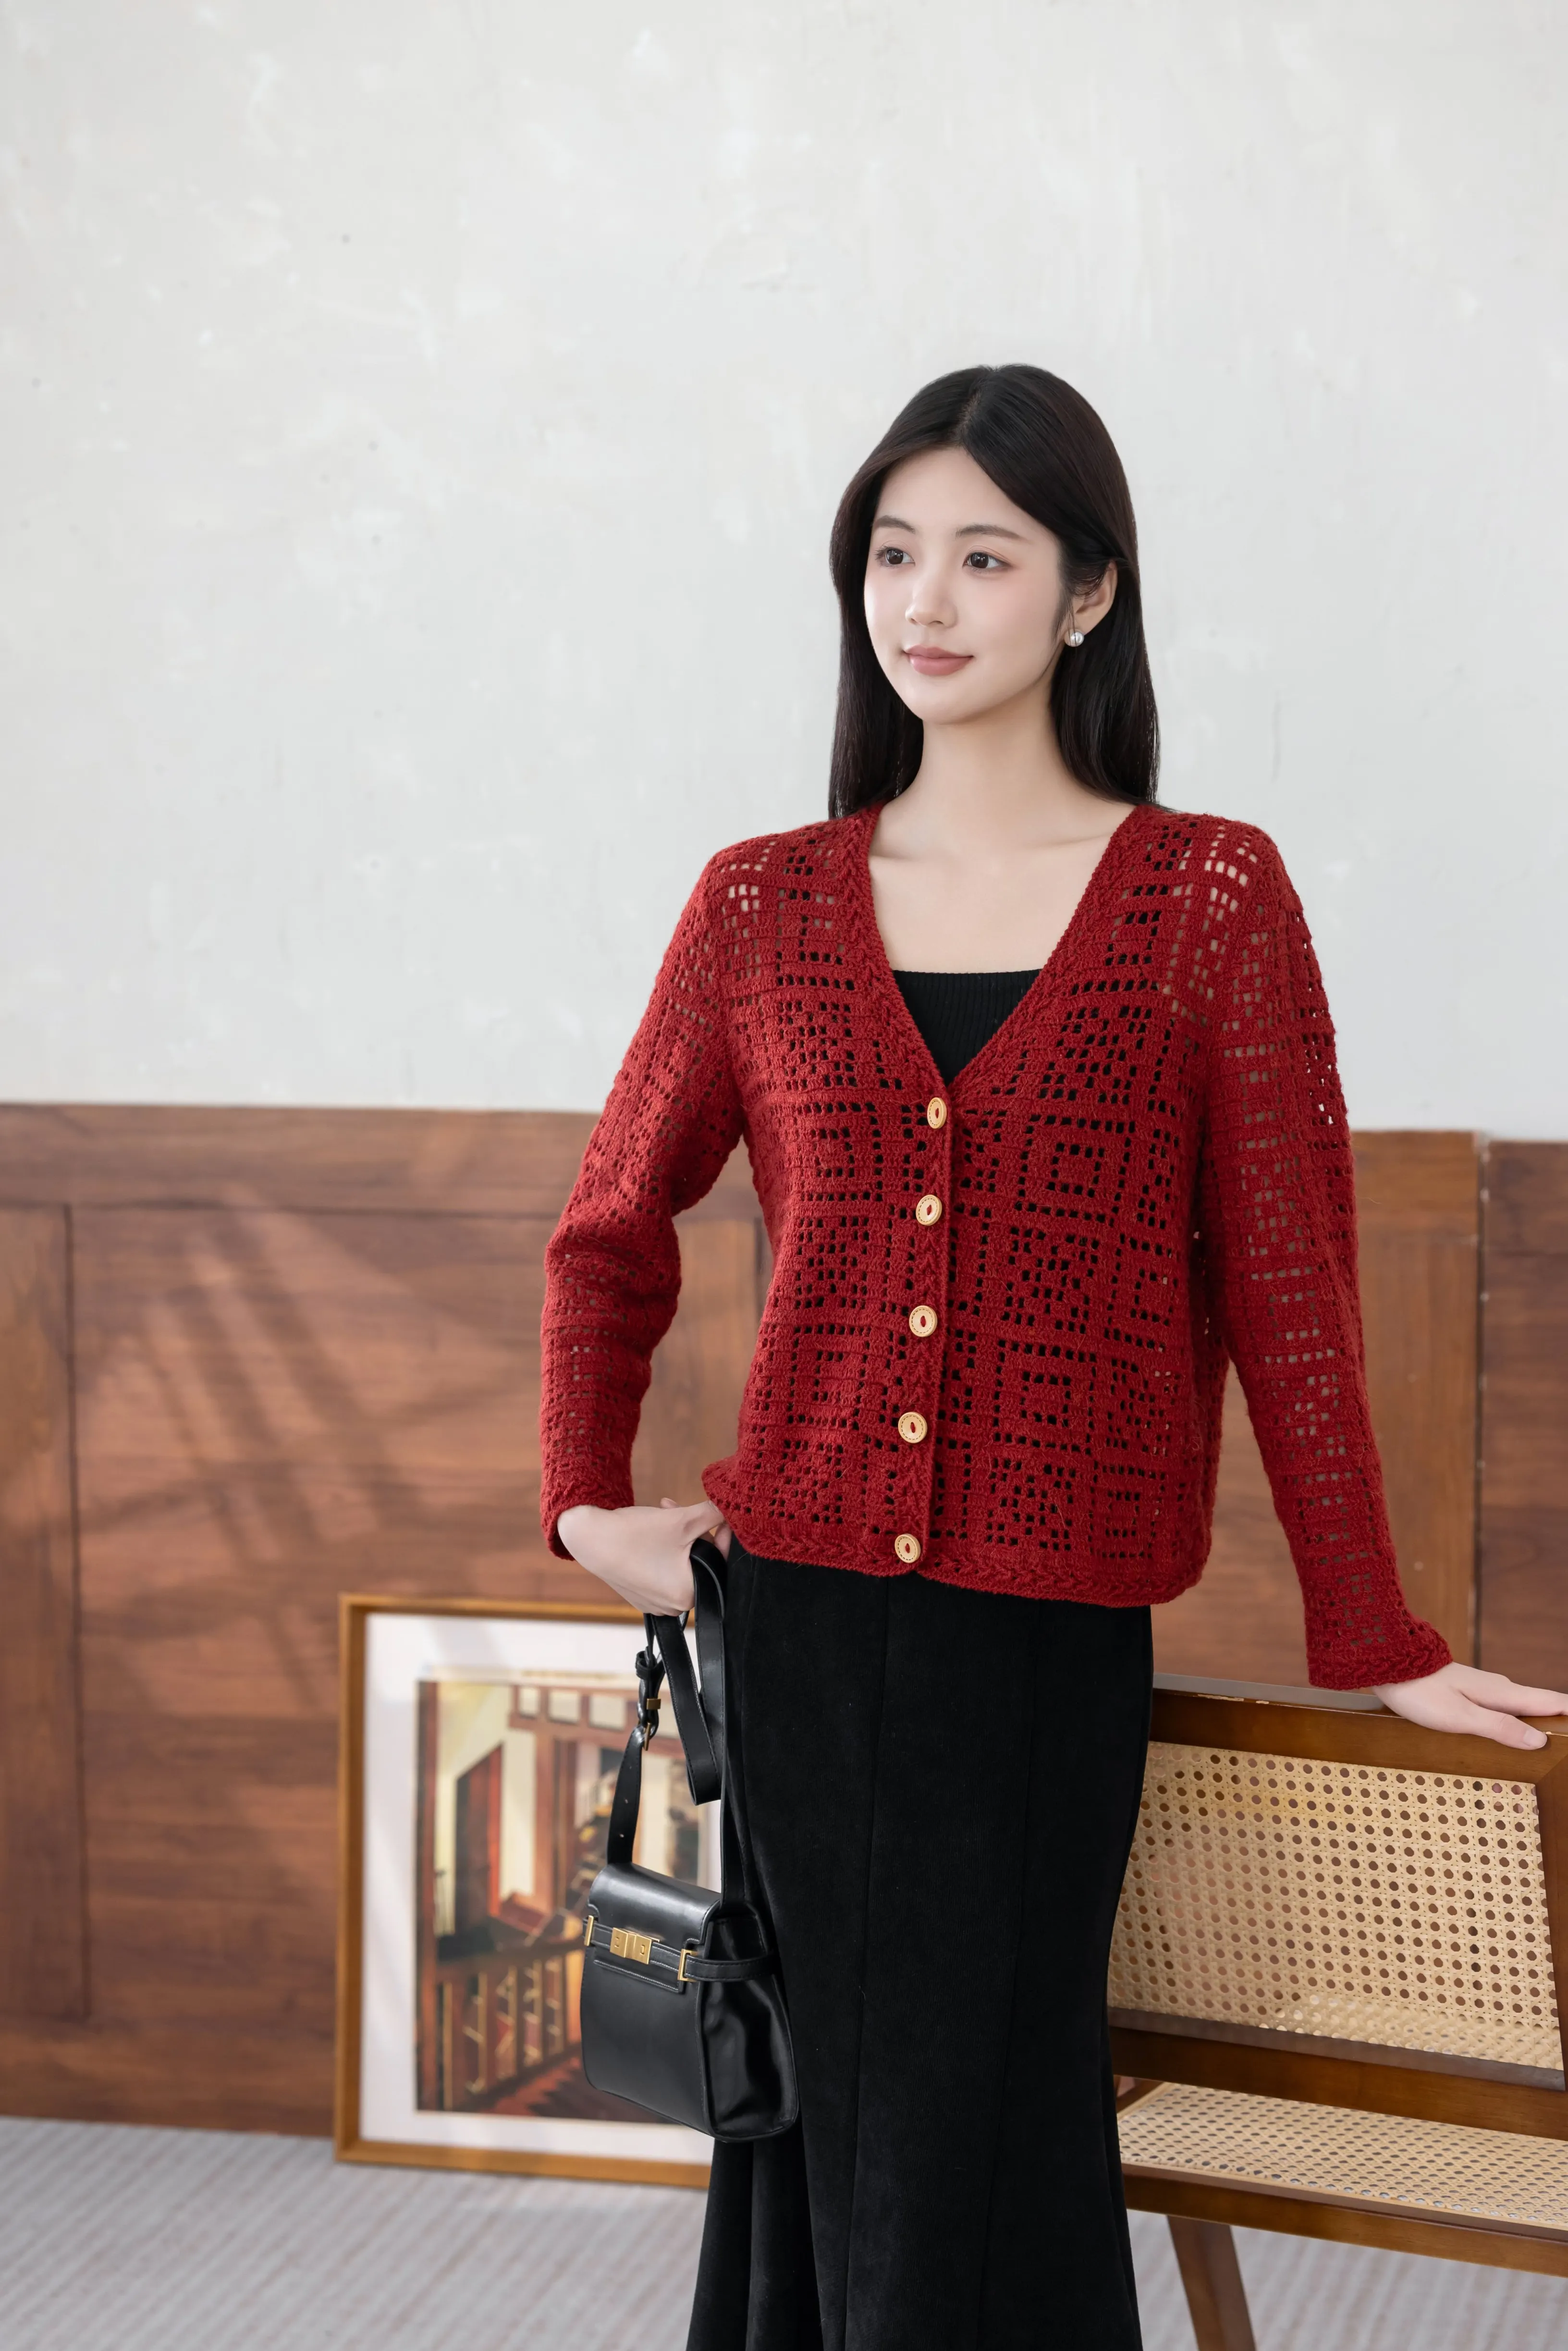
| Lilian Cardigan - Burnt Ochre Version - Small | Velvet Merino |  22#Burnt Ochre |
| Lilian Cardigan - Burnt Ochre Version - Large | Velvet Merino | 22#Burnt Ochre |
Lilian Cardigan - Whisper White Version - Small
01#Whisper WhiteLilian Cardigan - Whisper White Version - Medium
01#Whisper WhiteLilian Cardigan - Burnt Ochre Version - Small
22#Burnt OchreLilian Cardigan - Burnt Ochre Version - Large
22#Burnt Ochre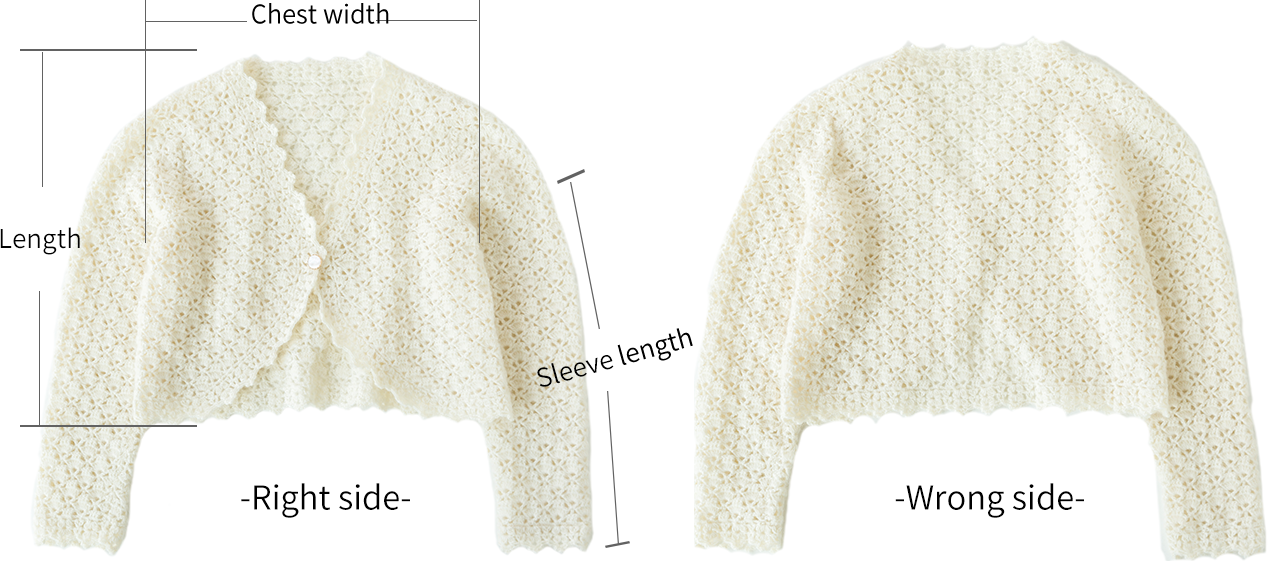
| Size | Chest width | Length | Sleeve length |
| Small | 47 cm | 41 cm | 52.5 cm |
| Medium | 50 cm | 48 cm | 55 cm |
The handcrafted measurements may have an error of 1 to 2 cm.
Due to variations in individual tension, the size of the sample is for reference only.
Materials: Susan's Family Preshrunk Wool Mixed Hand Knitting Yarn, South African Soft Mohair Mixed Hand-Knitting Yarn. Crochet using two strands held together
Tool : 2.00 mm crochet hook

Chart Key




Note:
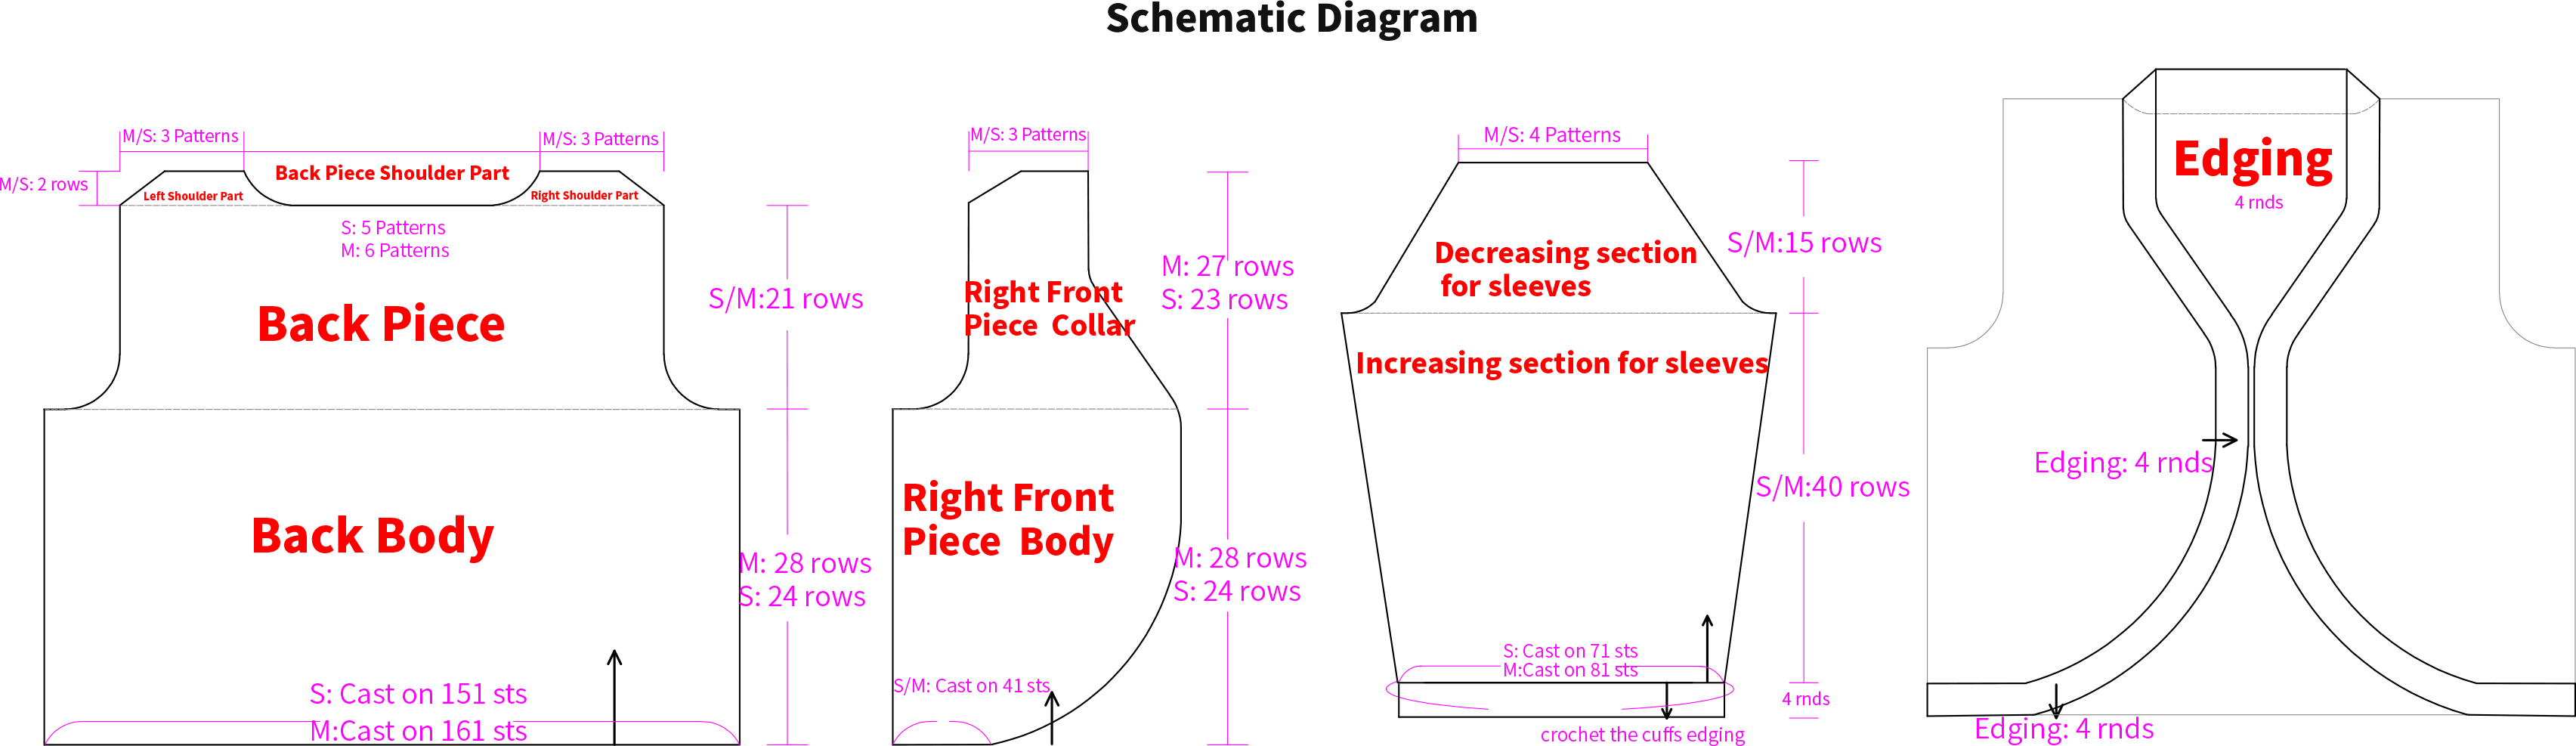
This pattern is making in Chinese crochet pattern terms, and the stitch name is written using American terminology. All measurements in charts are in cm.
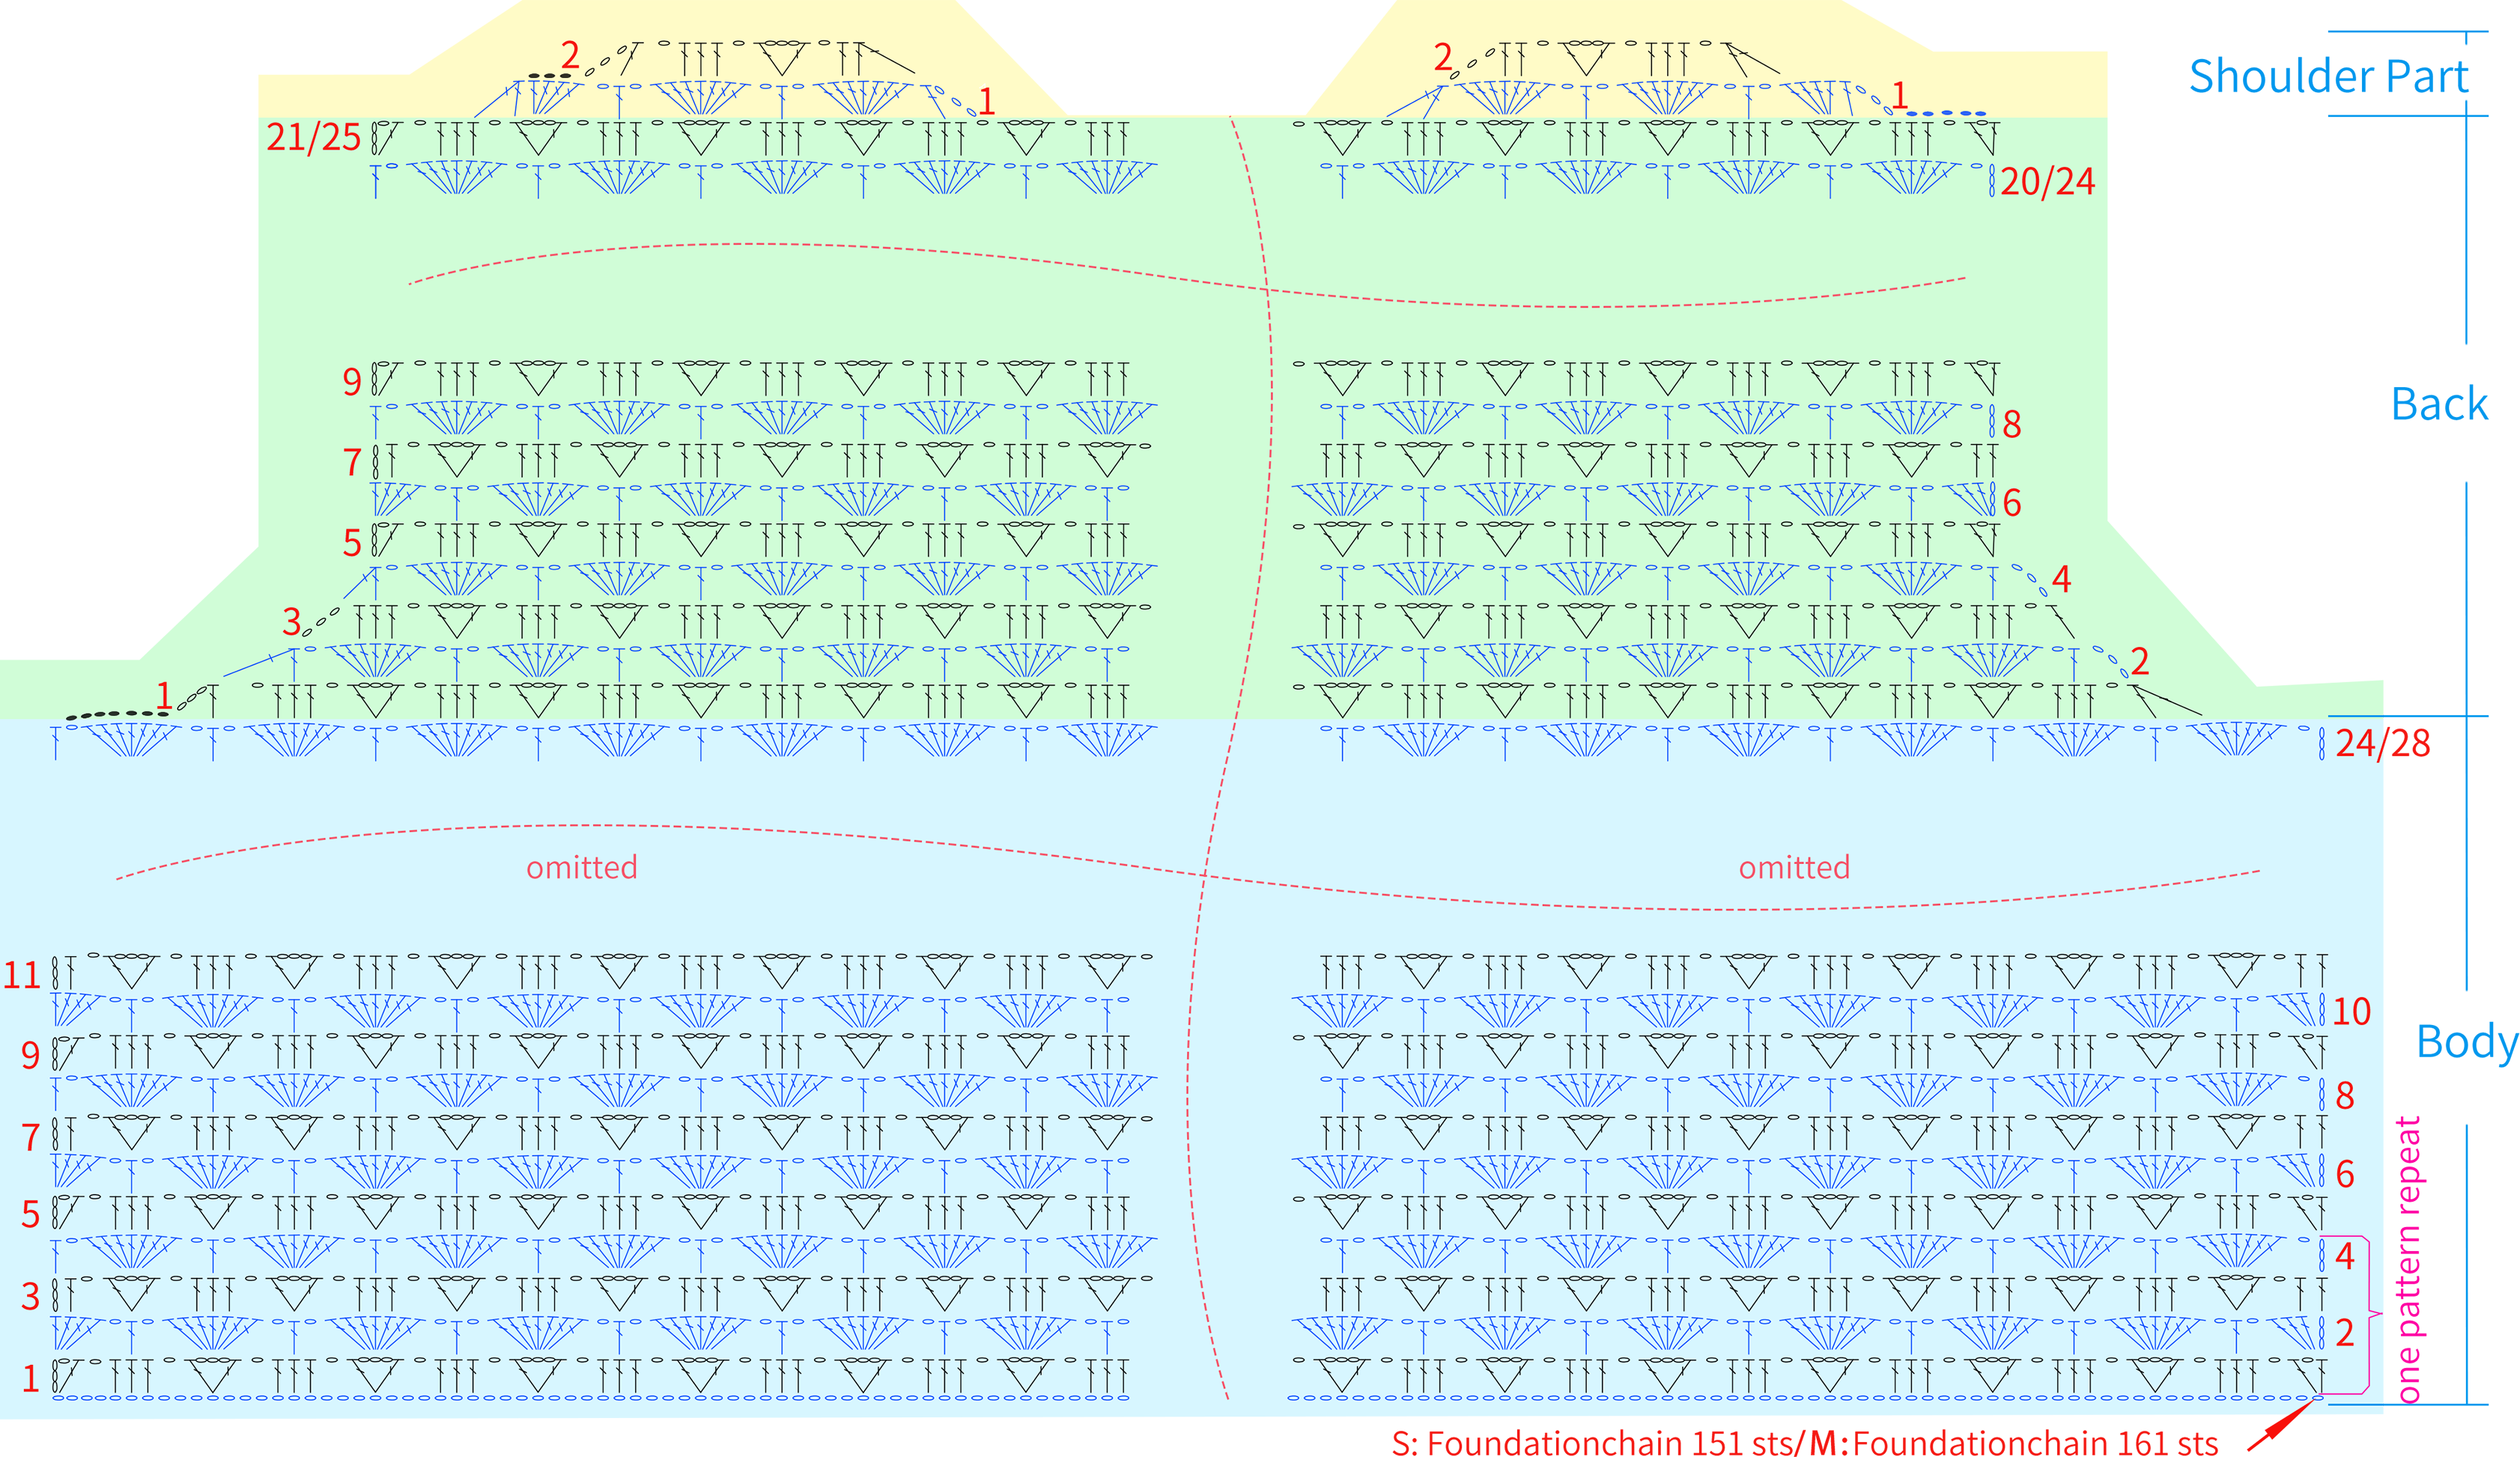
Part 1 The Back Piece A
The back piece is divided into three areas: the body, the back, and the shoulder-parts. Start by crocheting the body section. Use the chain stitch method to cast on, then work back and forth in rows going upwards.
Note:
1. For the medium size back body section, there are a total of 28 rows (Rows 5-28), repeat the stitch pattern of Rows 1-4 six times. For the small size back body section, there are a total of 24 rows (Rows 5-24), repeat the stitch pattern of Rows 1-4 five times.
2. For the medium size back piece back section, there are a total of 25 rows (Rows 9-24), repeat the stitch pattern of Rows 5-8 four times. For the small size back piece back section, there are a total of 21 rows (Rows 9-20), repeat the stitch pattern of Rows 5-8 three times.
3. If you need to adjust the length of the garment, you can increase or decrease the number of rows in the middle of the back body section by adding or subtracting the repeating patterns. The number of rows added or subtracted should be 4 or a multiple of 4.
4. After completing the first four rows, you can measure the width of the fabric piece. For the small size, it should be approximately 47cm, and for the medium size, it should be approximately 50cm. If there is too much difference, then you need to adjust your tension and re-crochet.
Part 2 The Front Piece B
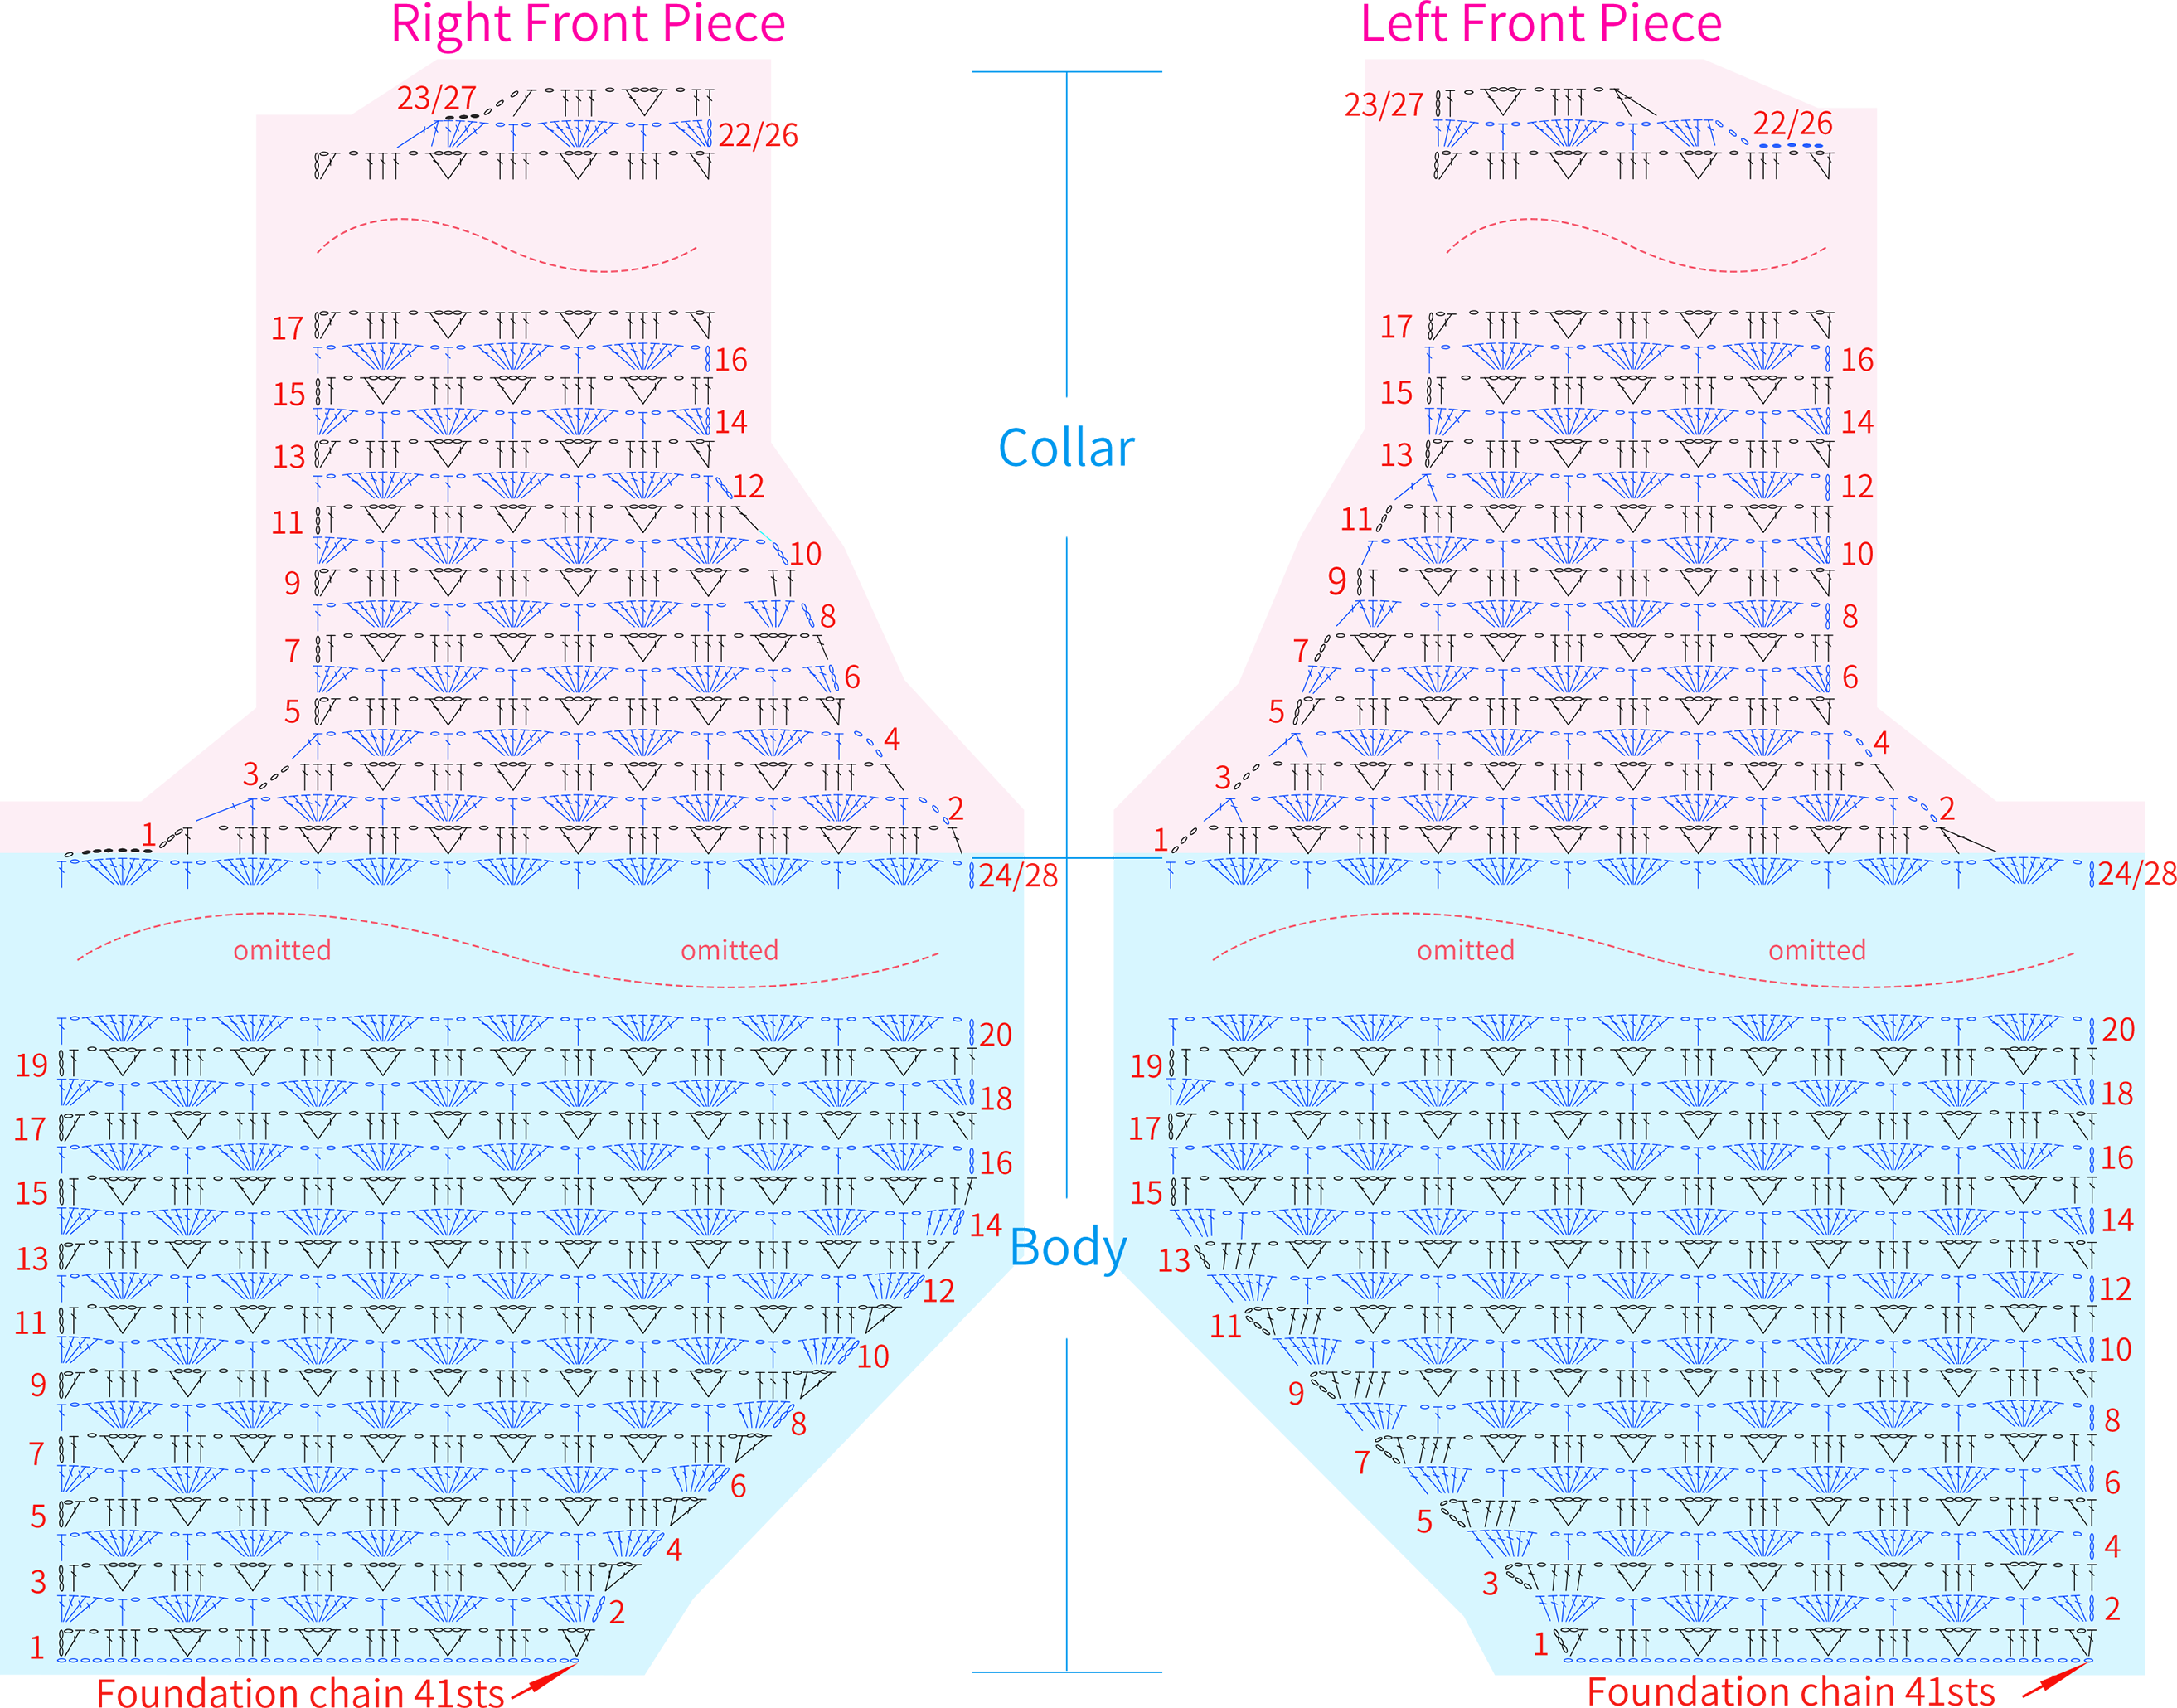
The front piece, including the left front piece and the right front piece, is divided into two parts: the body and the neckline. We will also start with a foundation chain and work back and forth in rows to crochet upwards.
Note:
1. The piece on the actual left side when worn is referred to as the left front piece, and the other piece is called the right front piece.
2. For the medium size, the back body section has a total of 28 rows. Rows 21-28 repeat the stitch pattern of rows 17-20 twice. For the small size, the back body section has a total of 24 rows. Rows 21-24 repeat the stitch pattern of rows 17-20 once.
3. For the medium size, the back neckline section has a total of 27 rows. Rows 17-24 repeat the stitch pattern of rows 13-16 twice. For the small size, the back neckline section has a total of 23 rows. Rows 17-20 repeat the stitch pattern of rows 13-16 once.
4. If the number of rows in the back body section is increased or decreased, the even sections of the left and right front body parts should also be increased or decreased by the same number of rows. Additionally, the tension for the front and back pieces needs to remain consistent.
Part 3 Sleeve × 2 C
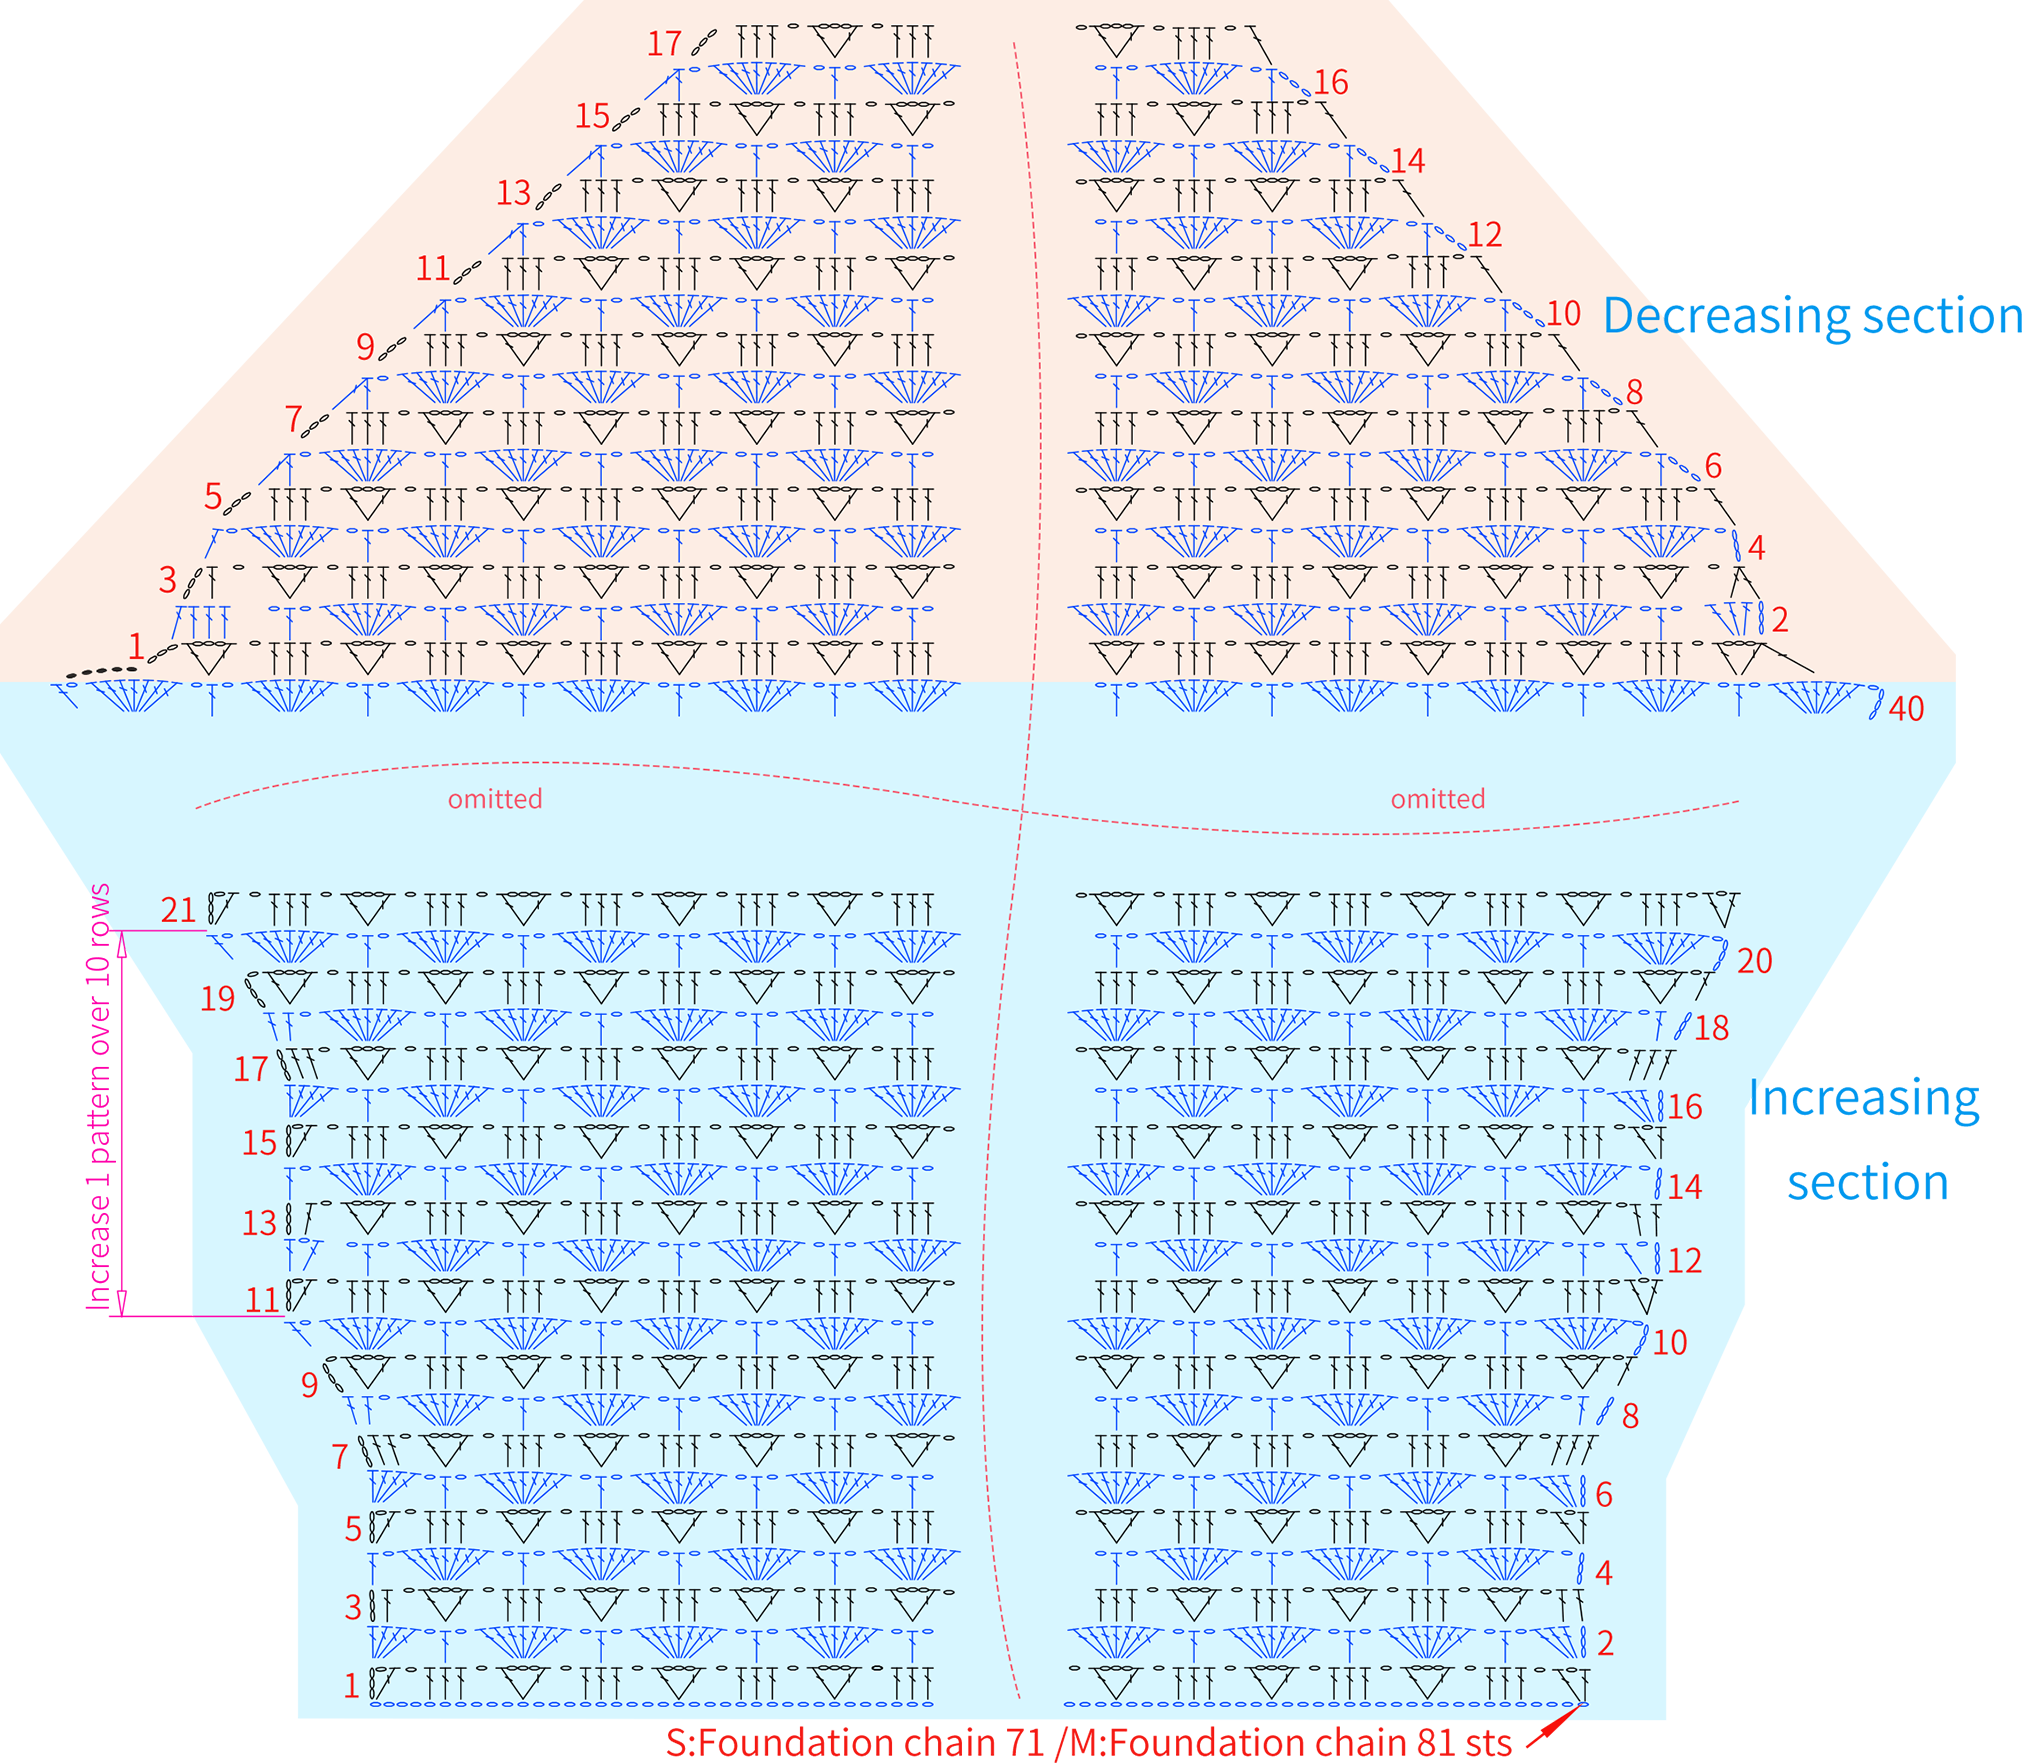
The crocheting method for both sleeves is identical. We will start from foundation chain and work back and forth to crochet upwards.
Note: For both sizes, the increasing section of the sleeves is a total of 40 rows, from row 21 to row 40, worked twice according to the pattern from row 11 to row 20. The decreasing section ends at row 15 for the smaller size and at row 17 for the medium size.
Part 4 Joining D
All connections are made on the wrong side of the piece. First, connect the front pieces to the back piece, then attach the sleeves to the armholes.
Step 1 Connect The Front and Back Pieces D1
The connection of the front and back pieces includes the connection of the body section and the shoulder-neck section, which is done using slip stitches and chain stitches.
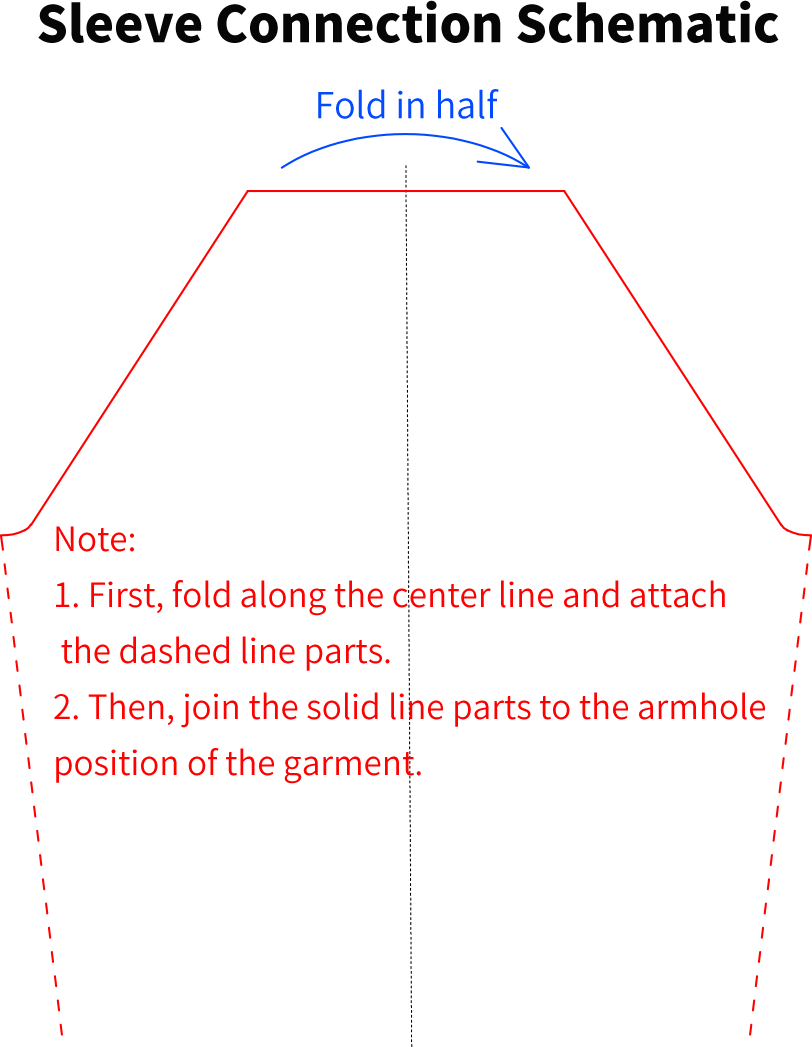
Step 2 Sleeve Joining D2
First, refer to the schematic for connecting the sleeves to connect the sleeve pieces into a tube shape. Then, connect them to the armhole positions of the front and back pieces. Both connections are done using slip stitches and chain stitches.
Part 5 Edging E
The edging includes the border for the body section and the edging at the cuff placement.
Step 1 Crochet The Edging For The Body E1
For the body section edging, crochet 4 rounds in circles along the outer edge.
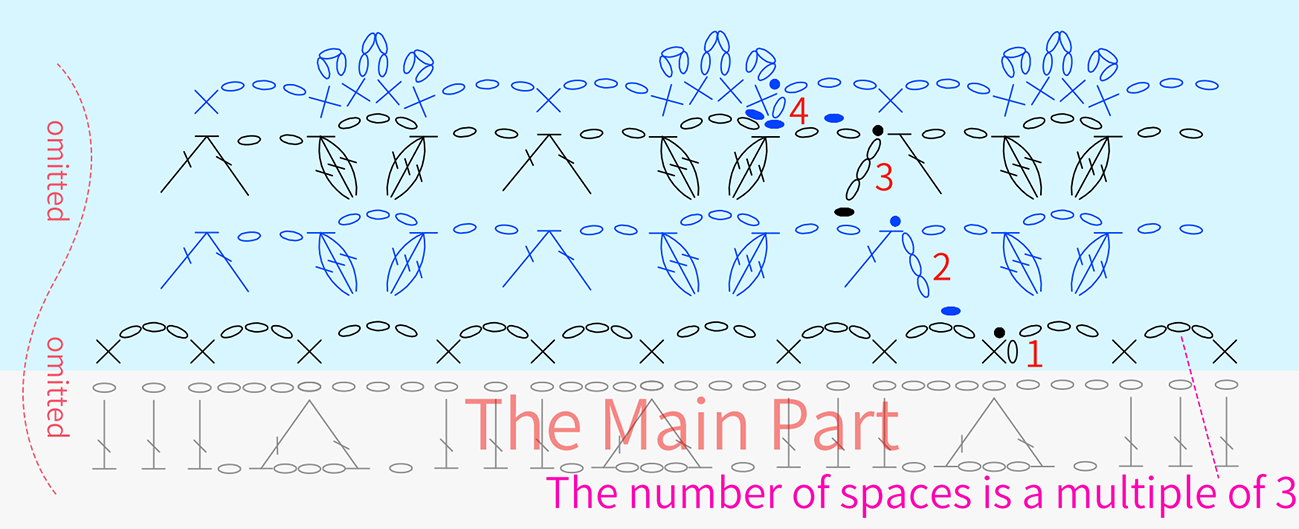
Step 2 Crochet The Edging For The Cuffs E2
The stitch technique for the body section is identical to the edging. Just work based on the pattern chart.
Step 3 Sew The Buttons E3
Lay the two front pieces flat and align them. Sew the buttons onto the left front piece, at the top of the body section where you work even, between the 2nd and 3rd rows of the edging (yarn used: Preshrunk Wool Mixed Hand Knitting Yarn).
Made by the community