
Doll
Lucky Tiger Doll
Project preview
See the finished project
Pattern format
Instructions
Watch and follow
Video tutorial
| Style | Yarn | Color |
|---|---|---|
| Nafu Tiger doll - High Risk Red Version | Handcrafted No.2 Knit Thread |  04#High Risk Red x 2 |
| 4-Ply Combed Cotton & Acrylic Fibre Hand Knitting Yarn | 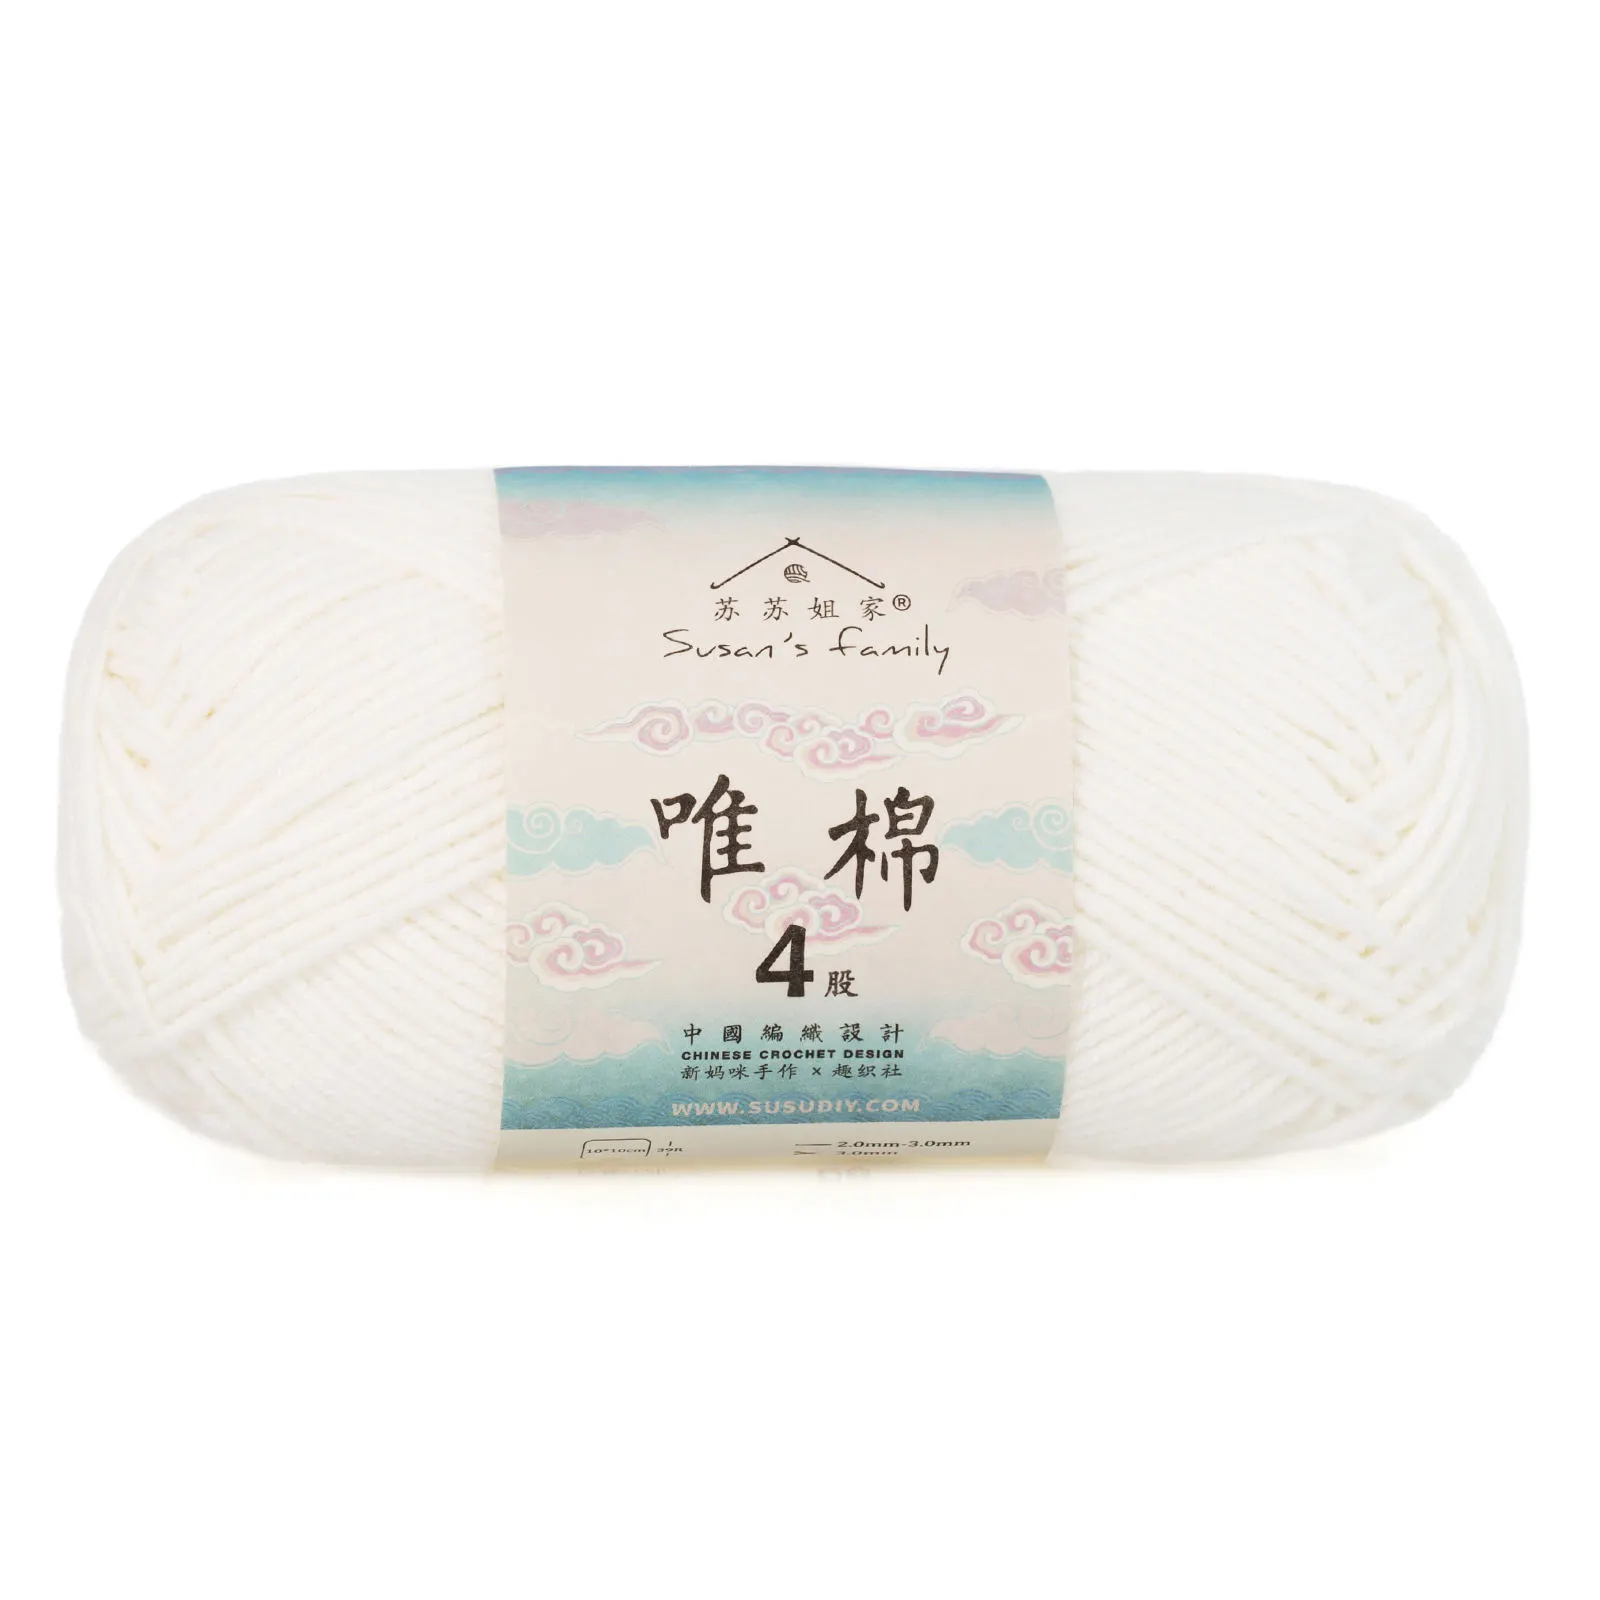 06#Bright White x 1  09#Aspen Gold x 1  51#High Risk Red x 1  57#Victoria Blue x 1 | |
| Nafu Tiger doll - Aspen Gold Version | Handcrafted No.2 Knit Thread |  15#Aspen Gold x 2 |
| 4-Ply Combed Cotton & Acrylic Fibre Hand Knitting Yarn | 06#Bright White x 109#Aspen Gold x 151#High Risk Red x 157#Victoria Blue x 1 |
Nafu Tiger doll - High Risk Red Version
Nafu Tiger doll - Aspen Gold Version
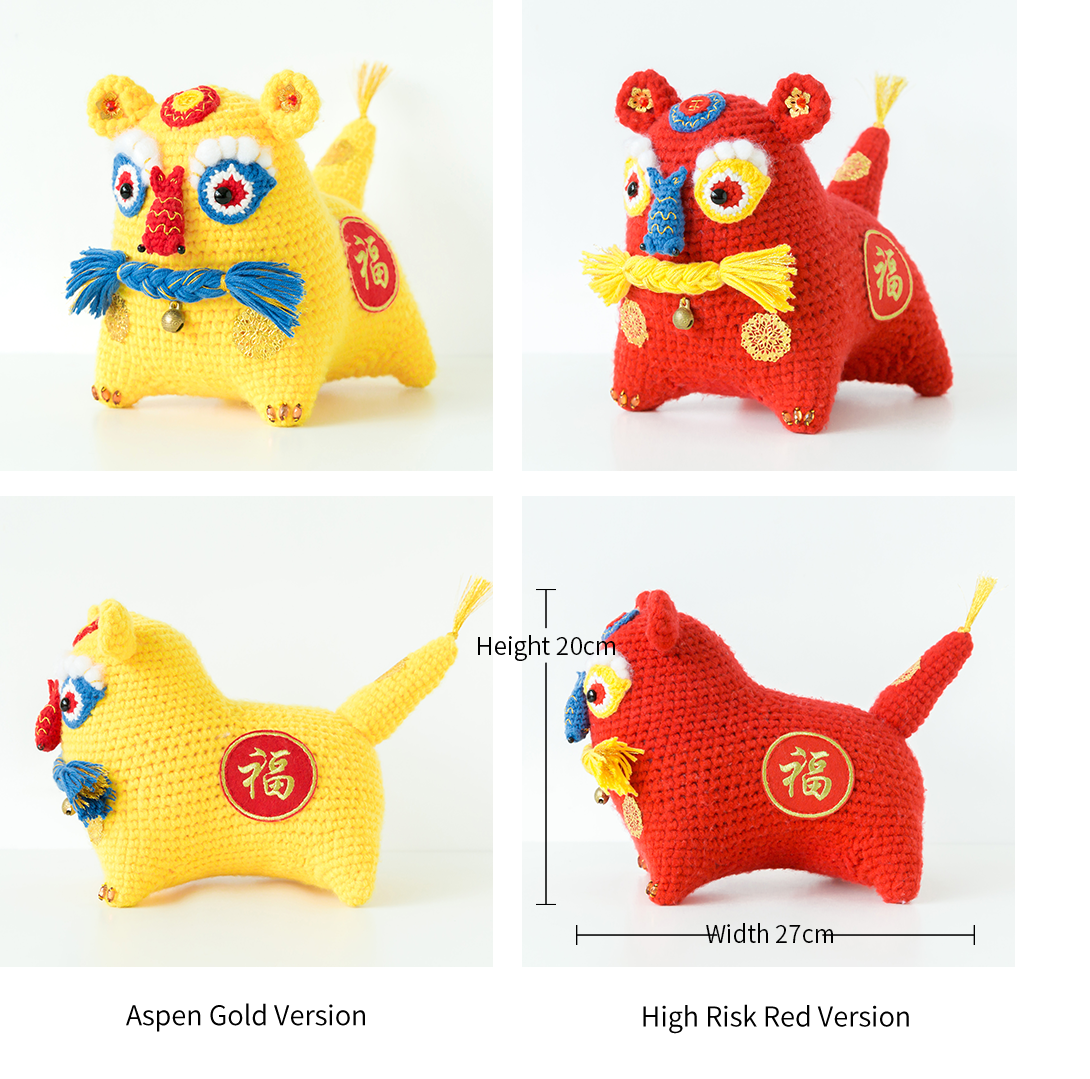
The handcrafted measurements may have an error of 1 to 2 cm.
Due to variations in individual tension, the size of the sample is for reference only.
Materials: 4-Ply Combed Cotton & Acrylic Fibre Hand Knitting Yarn Tool:2.00 mm Crochet Hook
Materials: Handcrafted No.2 Knit Thread Tool:3.50 mm Crochet Hook
ABBREVIATIONS
Note: 1. This pattern is making in Chinese crochet pattern terms, and the stitch name is written using American terminology. All measurements in charts are in cm.
2. Working in joined round: When crocheting in rounds without further guidance, working in closed rounds, start each round with a set number of beginning chains and close with a slip stitch.


Part 1 The Main Part (Handcrafted No.2 Knit Thread)
Step 1 Leg A 1 01' 05''
All four legs are crocheted in rounds using the magic ring method. Please refer to the video demonstration for more details.
| Leg × 4 | ||
| Rounds | Stitch Instruction | Total Stitches |
| Cast on - R 1 | MR ,6 X | 6 |
| R 2 | ( X,V) × 3 | 9 |
| R 3 | X,V,5 X,V, X | 11 |
| R 4 | V,6 X,V,3 X | 13 |
| R 5 | ( X,V) × 2,5 X,(V, X) × 2 | 17 |
| R 6 | (V, X) × 2,9 X,(V, X) × 2 | 21 |
Step 2 Body A 2 11' 55''
After crocheting the 4 legs, connect them together and crochet the body in rounds. Please refer to the video demonstration for more details.
| Body | ||
| Rounds | Stitch Instruction | Total Stitches |
| For the first leg, start 5 sts from the end and work 11 CH. For the second leg, on the 5th stitch work 13 X, then 18 CH. For the third leg, on the 5th stitch crochet 13 X, then 11 CH. For the fourth leg, on the 5th stitch crochet 13 X, then 18 CH. For the first leg again, on the 5th stitch crochet 13 X. | 110 | |
| R 1 | A ,3 X,V,3 X, A ,13 X, A ,14 X, A ,13 X, A ,3 X, V,3 X, A ,13 X, A ,14 X, A ,13 X |
104 |
| R 2 | [(4 X, A ) × 2,9 X, A ,16 X, A ,9 X, A ] × 2 | 94 |
| R 3 | Even 94 X | 94 |
| R 4 | 4 X, A ,44 X, A ,42 X | 92 |
| R 5 | 13 X, A ,24 X, A ,18 X, A ,25 X, A ,4 X | 88 |
| R 6 | 17 X, A ,29 X,V,29 X, A ,8 X | 87 |
| R 7 | 5 X, A ,31 X, A ,18 X, A ,27 X | 84 |
| R 8 | 7 X, A ,34 X,V,5 X,V,34 X | 85 |
| R 9 | 14 X, A ,20 X, A ,19 X, A ,20 X, A ,4 X | 81 |
| R 10 | 8 X, A ,30 X,V,8 X,V,28 X, A , X | 81 |
| R 11 | Even 81 X | 81 |
| R 12 | 6 X, A ,73 X | 80 |
Step 3 Stomach A 3 21' 35''
Crochet the belly in rounds below the legs. After completion, sew together the opening.Please refer to the video demonstration for more details.
| Stomach | ||
| Rounds | Stitch Instruction | Total Stitches |
| R 1 | ( A ,7 X, A ,8 X, A ,14 X, A ,8 X) × 2 | 82 |
| R 2 | ( A ,5 X, A ,8 X, A ,12 X, A ,8 X) × 2 | 74 |
| R 3 | ( A ,3 X, A ,8 X, A ,10 X, A ,8 X) × 2 | 66 |
| R 4 | [ A , X,( A ,3 X)*2, A ,8 X,( A ,3 X) × 2] × 2 | 54 |
| R 5 | (3 X, A ,3 X,2 A ,6 X,2 A ,3 X, A ) × 2 | 42 |
| R 6 | [2 X, A ,(3 X, A ) × 3,2 X] × 2 | 34 |
| R 7 | (6 X, A ,5 X, A ,2 X) × 2 | 30 |
| Leave a 40 centimeters yarn tail | ||
Step 4 Back A 4 Head A 5
Crochet the back part back and forth along the body's side seams. After completing, stuff it a bit. Then, crochet around the head in rounds, connecting the back side edges with the remaining part of the body.Please refer to the video demonstration for more details.
| Back | ||
| Rows | Stitch Instruction | Total Stitches |
| R 1 | 1CH,37 X | 37 |
| R 2 | 1CH, turn ,9 X, A ,(7 X, A ) × 2,8 X | 34 |
| R 3 | 1CH, turn ,13 X,( X, A ) × 3,12 X | 31 |
| R 4 | 1CH, turn ,11 X,( X, A ) × 3,11 X | 28 |
| R 5 | 1CH, turn ,10 X,( X, A ) × 3,9 X | 25 |
| R 6 | 1CH, turn ,11 X, A ,12 X | 24 |
| Leave a 40 centimeters yarn tail | ||
| Head | ||
| Rounds | Stitch Instruction | Total Stitches |
| R 1 | (2 X, A ) × 2,39 X,( A ,2 X) × 2 | 51 |
| R 2 | 5 X, A ,38 X, A ,4 X | 49 |
| R 3 | 5 X, A ,36 X, A ,4 X | 47 |
| R 4 | Even 47 X | 47 |
| R 5 | 24 X, A ,21 X | 46 |
| R 6 | Even 46 X | 46 |
| R 7 | 4 X, A ,33 X, A ,5 X | 44 |
| R 8 | Even 44 X | 44 |
| R 9 | 9 X, A ,22 X, A ,9 X | 42 |
| R 10 - 11 | Even 42 X | 42 |
| R 12 | (5 X, A ) × 6 | 36 |
| R 13 | (2 X, A ,2 X) × 6 | 30 |
| R 14 | (3 X, A ) × 6 | 24 |
| R 15 | ( X, A , X) × 6 | 18 |
| R 16 | ( X, A ) × 6 | 12 |
| R 17 | 6:00 AM | 6 |
| Stuff as you go, leave a 15 centimeters tail for closing. | ||
Step 5 Ears ×2 ,Tail A 6 50' 14''
Both the ears and tail are made using the magic ring method, crocheting in rounds, and then secured in the corresponding positions after completion. Please refer to the video demonstration for more details.
| Ears | ||
| Rounds | Stitch Instruction | Total Stitches |
| R 1 | MR ,6 X | 6 |
| R 2 | 6V | 12 |
| R 3 | ( X,V) × 6 | 18 |
| R 4 - 6 | Even 18 X | 18 |
| Leave a 40 centimeters yarn tail | ||
| Tail | ||
| Rounds | Stitch Instruction | Total Stitches |
| R 1 | MR ,6 X | 6 |
| R 2 | ( X,V) × 3 | 9 |
| R 3 - 4 | Even 9 X | 9 |
| R 5 | (V,2 X) × 3 | 12 |
| R 6 - 8 | Even 12 X | 12 |
| R 9 | (3 X,V) × 3 | 15 |
| R 10 - 11 | Even 15 X | 15 |
| R 12 | (2 X,V,2 X) × 3 | 18 |
| R 13 | Even 18 X | 18 |
| R 14 | (5 X,V) × 3 | 21 |
| R 15 | Even 21 X | 21 |
| Leave a 40 centimeters yarn tail | ||
Part 2 Accessories(4-Ply Cotton)
Step 1 Eye Piece B 1 ,Eyebrows ,Eyeball B 2 55' 17''
First, crochet the eye patches in rounds. After completing them, determine the correct placement on the head, secure the eyebrows and eye patches in place, then attach the eyeballs.Please refer to the video demonstration for more details.
| Left Eye Piece | ||||
| Rounds | Stitch Instruction | Total Stitches | High Risk Red Version | Aspen Gold Version |
| Cast on - R 1 | MR ,7 X | 7 | 51#High Risk Red | |
| R 2 | 7V | 14 | ||
| R 3 | ( X,V) × 7 | 21 | 06#Bright White | |
| R 4 | 16 X, 2T, FW, F,ch3 sl picot , same position F, X | \ | 09#Aspen Gold | 57#Victoria Blue |
| Leave a 40 centimeters yarn tail | ||||
| Right Eye Piece | ||||
| Rounds | Stitch Instruction | Total Stitches | High Risk Red Version | Aspen Gold Version |
| Cast on - R 1 | MR ,7 X | 7 | 51#High Risk Red | |
| R 2 | 7V | 14 | ||
| R 3 | ( X,V) × 7 | 21 | 06#Bright White | |
| R 4 | 16 X, same position, X ,F, ch3 sl picot ,F ,FW, 2T | \ | 09#Aspen Gold | 57#Victoria Blue |
| Leave a 40 centimeters yarn tail | ||||
Step 2 Nose B 3 70' 37''
The nose is composed of three parts: the nasal bridge, nostrils, and decorations. The nasal bridge is crocheted in rounds using the magic ring method. After completing it, crochet the nostrils and secure them on top of the nasal bridge, then sew on the decorations. Attach the nose to the corresponding position on the head.Please refer to the video demonstration for more details.
High Risk Red Version - 57#Victoria Blue,
Aspen Gold Version - 51#High Risk Red
| Nostrils × 2 | ||
| Rounds | Stitch Instruction | Total Stitches |
| R 1 | MR ,6 X | 6 |
| Leave a 20 centimeters yarn tail | ||
| Nose Bridge | ||
| Rounds | Stitch Instruction | Total Stitches |
| R 1 | MR ,6 X | 6 |
| R 2 | ( X,V) × 3 | 9 |
| R 3 | (V,2 X) × 3 | 12 |
| R 4 - 7 | Even 12 X | 12 |
| R 8 | (4 X, A ) × 2 | 10 |
| R 9 | ( A ,3 X) × 2 | 8 |
| R 10 | (2 X, A ) × 2 | 6 |
| R 11 | Pressing it flat, stuffing, and working together: 4CH , Dao 2, S, X, T, X, S, 4CH , Dao 2, S, X, T, S | \ |
| Leave a 30 centimeters yarn tail | ||
Step 3 Forehead Patch B 4 84' 12''
Use the magic ring method to crochet in rounds. After completion, sew on stripe decorations and secure them in the corresponding positions. Please refer to the video demonstration for more details.
| Forehead Patch | ||||
| Rounds | Stitch Instruction | Total Stitches | High Risk Red Version | Aspen Gold Version |
| R 1 | MR ,8 X | 8 | 51#High Risk Red | |
| R 2 | 8V | 16 | ||
| R 3 | Work the back horizontal lines of 2 single crochets, (X,V)*8 | 24 | 06#Bright White | |
| R 4 | (V,2 X) × 8 | 32 | 09#Aspen Gold | 57#Victoria Blue |
| Leave a 40 centimeters yarn tail | ||||
Step 4 Whiskers B 5, Decorations B 6 91' 46''
Cut 9 strands of 4-Ply Combed Cotton & Acrylic Fibre Hand Knitting Yarn and 9 strands of gold thread (each 90cm long). Twist them together, fold in half, and braid a cable to make the whiskers. Secure them in the corresponding positions. Lastly, attach various decorations on the main part as established.Please refer to the video demonstration for more details.
Whiskers:High Risk Red Version - 09#Aspen Gold , Aspen Gold Version - 57#Victoria Blue
Embroidery thread, ear decoration fixing thread- 51#High Risk Red
Made by the community


