Clothes
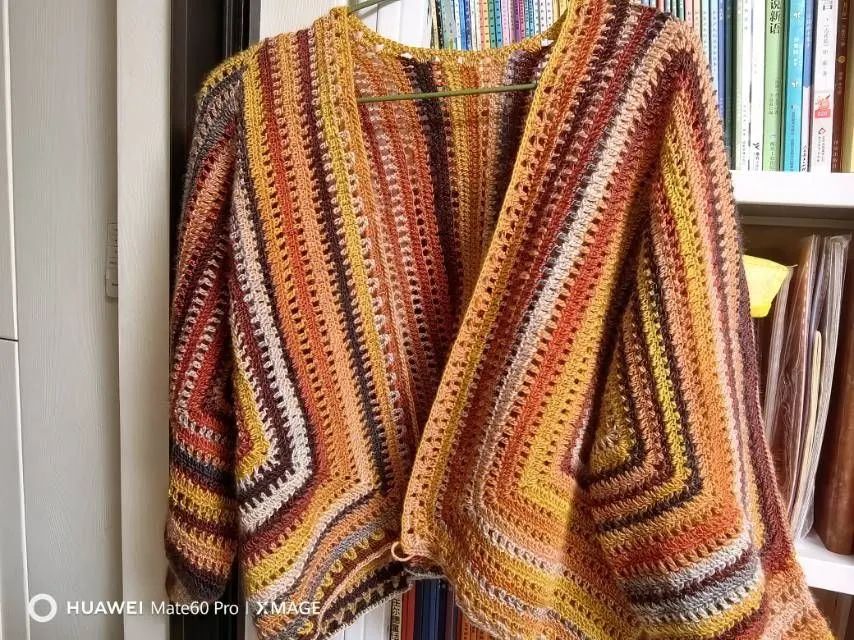
Monet Cardigan
Project preview
See the finished project
Pattern format
Instructions
Watch and follow
Video tutorial
| Style | Yarn | Color |
|---|---|---|
| Deep Sea Version | Monet Impression |  01#Deep Sea x 9 01#Deep Sea x 9 |
| Wisteria Version | Monet Impression |  03#Wisteria x 9 03#Wisteria x 9 |
| Sunrise Version | Monet Impression |  04#Sunrise x 9 04#Sunrise x 9 |
| Late Fall Version | Monet Impression |  07#Late Fall x 9 07#Late Fall x 9 |
| Hibiscus Version | Monet Impression | 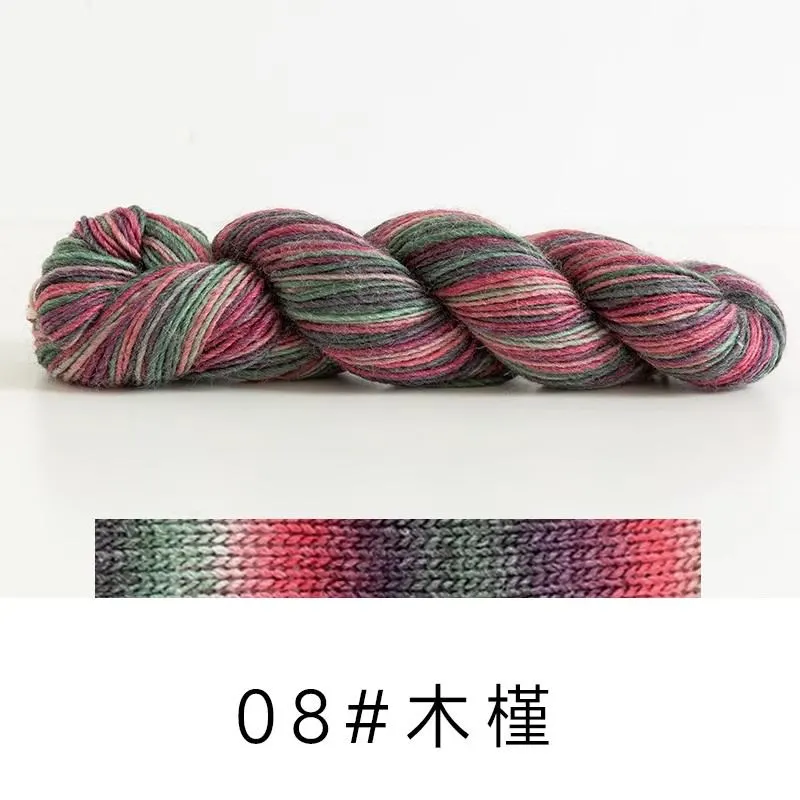 08#Hibiscus x 9 08#Hibiscus x 9 |
| Pleasure Version | Monet Impression |  11#Pleasure x 9 11#Pleasure x 9 |
| Dawn Version | Monet Impression |  12#Dawn x 9 12#Dawn x 9 |
| Florescence Version | Monet Impression |  13#Florescence x 9 13#Florescence x 9 |
Deep Sea Version
Wisteria Version
Sunrise Version
Late Fall Version
Hibiscus Version
Pleasure Version
Dawn Version
Florescence Version
This cardigan consists of sleeves, body , front bands, hems, and buttons.
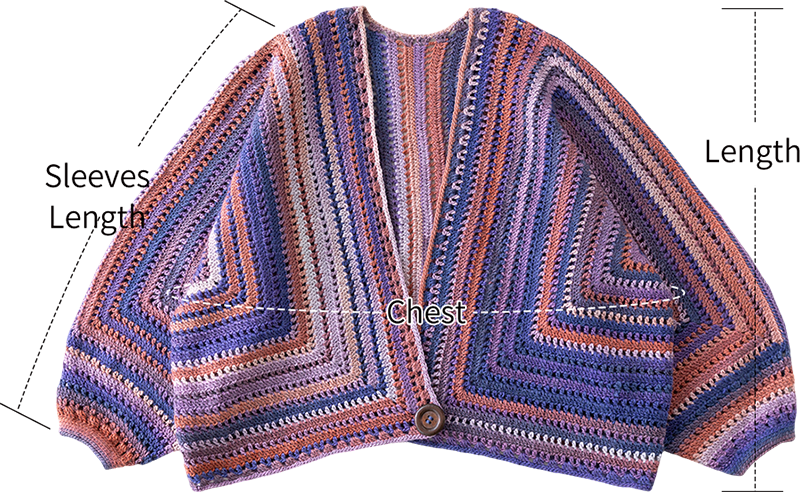
| Chest | Sleeves Length | Length |
| 118 cm | 48 cm | 46 cm |
Note: Hand-measured, with a margin of error of 1-2 cm. Due to varying tension among individuals, the sample size is for reference only.
Note: This piece is crocheted with self-striping yarn, so no color changes are needed mid-way. Depending on which color segment you start with, the finished product will look slightly different. You can choose your starting color based on preference or refer to the finished product for guidance.
Yarn : Monet Impression Tools : 3. 0 mm Crochet Hook






Note:
1. This pattern is making in Chinese crochet pattern terms, and the stitch name is written using American terminology. All measurements in charts are in cm.

Part 1 Sleeves 01' 31''
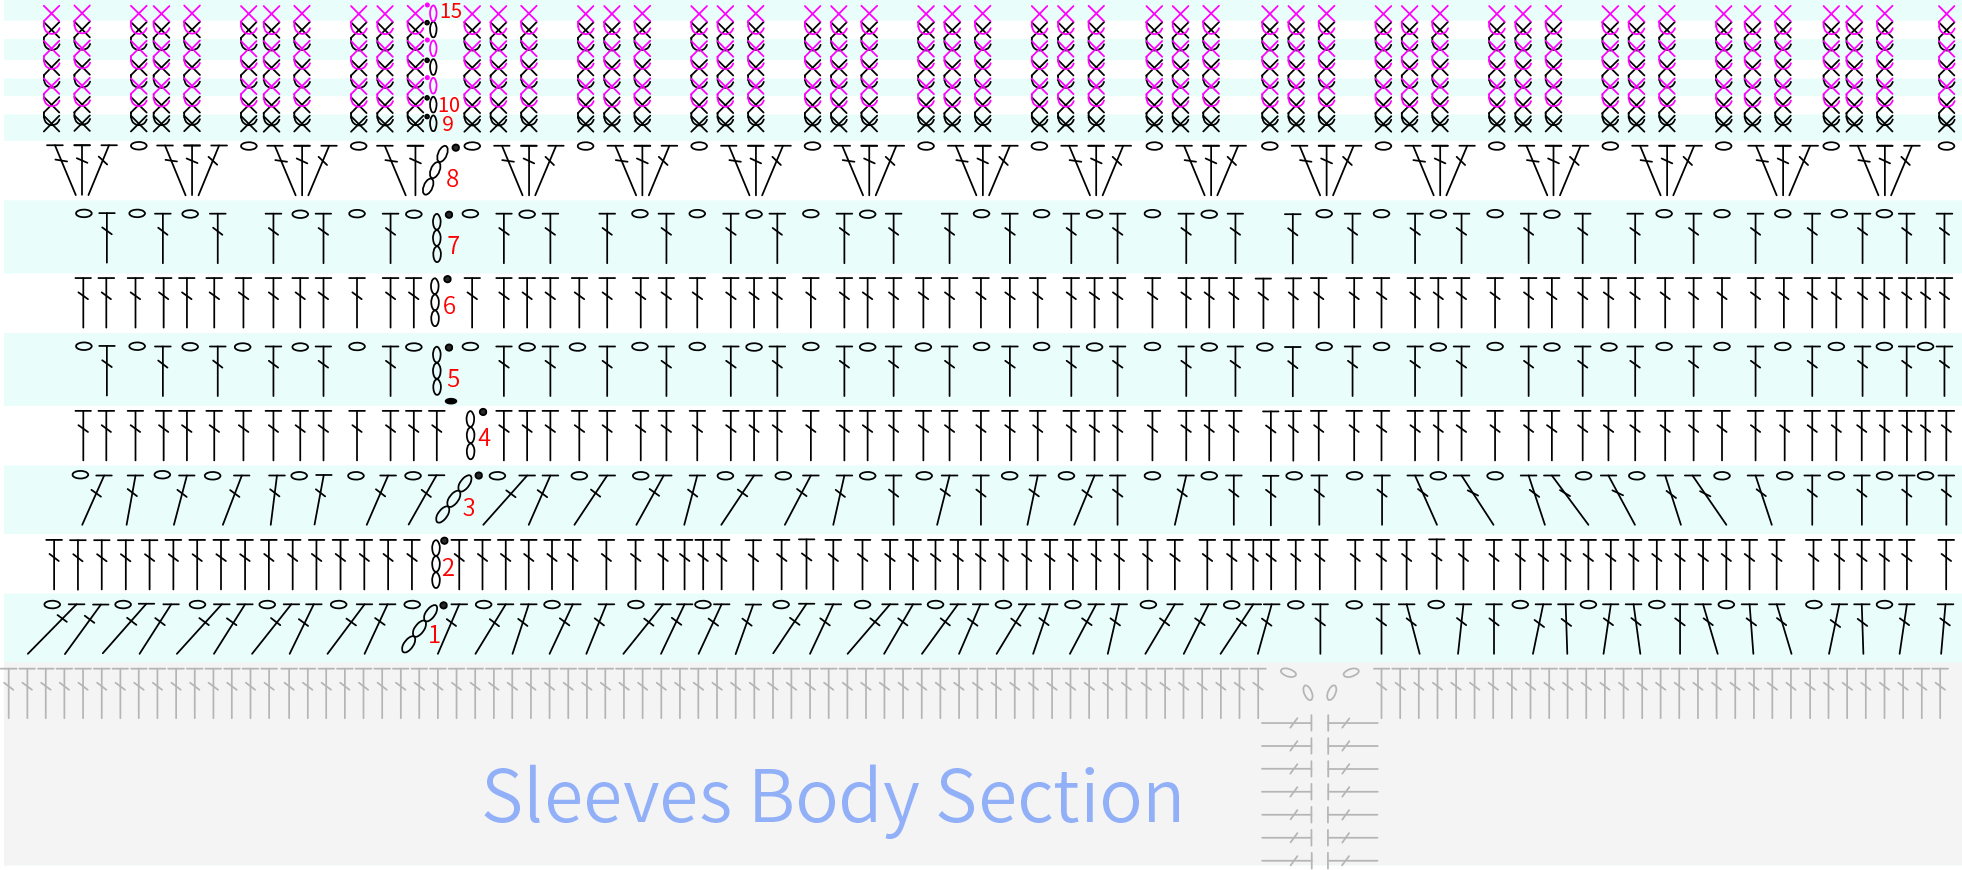
The sleeve consists of two parts: the sleeve body and the cuff. The sleeve body is a complete hexagon motif. After finishing the motif, fold the second edge in half at the middle, align and sew together the side seams, then crochet the cuff along the sleeve edge.
| Sleeves Body | Number of Sts Per Side |
| R 1 | 4 sts |
| R 2 | 3 granny squares |
| R 3 | 11 sts |
| R 4 | 7 granny squares |
| R 5 | 19 sts |
| R 6 | 11 granny squares |
| R 7 | 27 sts |
| R 8 | 15 granny squares |
| R 9 | 35 sts |
| R 10 | 19 granny squares |
| R 11 | 43 sts |
| R 12 | 23 granny squares |
| R 13 | 51 sts |
| R 14 | 27 granny squares |
| R 15 | 59 sts |
| R 16 | 31 granny squares |
| R 17 | 67 sts |
| R 18 | 35 granny squares |
| R 19 | 75 sts |
| R 20 | 39 granny squares |
| R 21 | 83 sts |
| R 22 | 43 granny squares |
| R 23 | 91 sts |
| R 24 | 47 granny squares |
| R 25 | 99 sts |
【Sleeves Body】 01' 31''
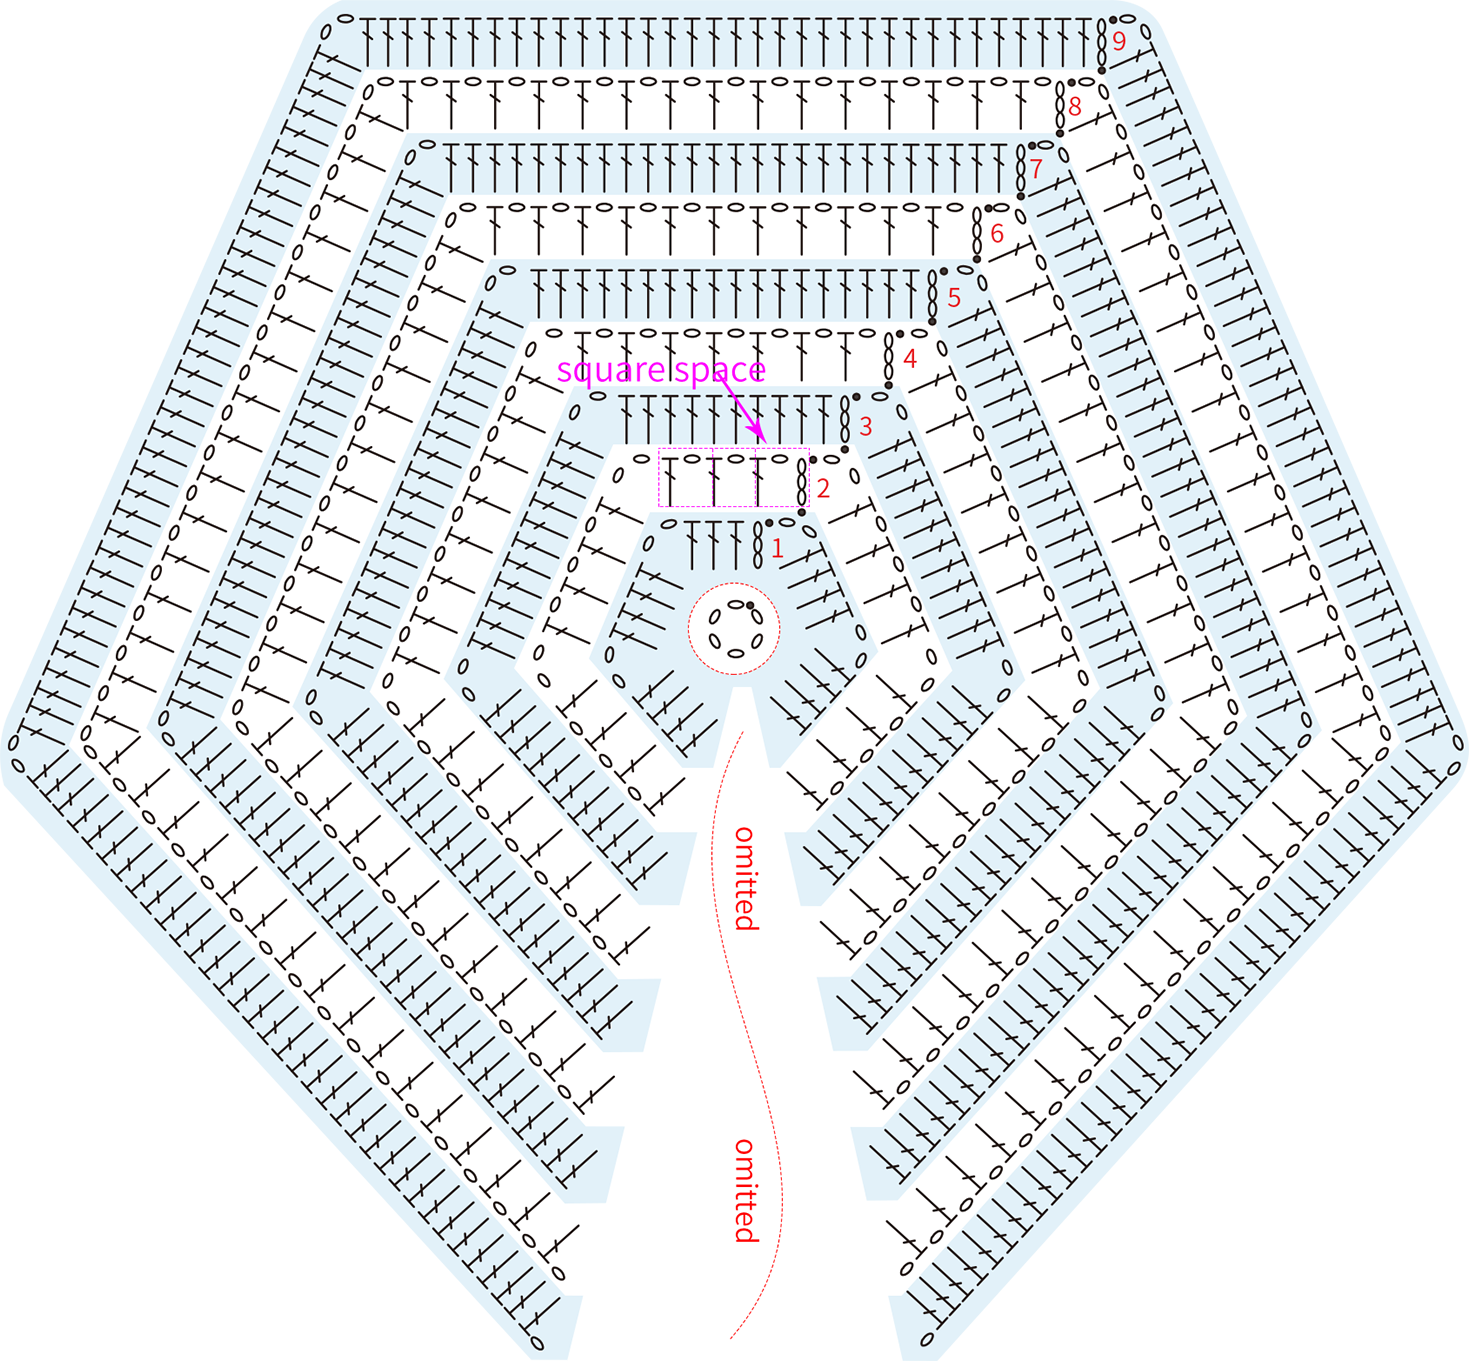
Note: Due to the full chart being too large, only part is shown in the image; refer to the corresponding table for other rounds. After completing crocheting, leave a yarn tail about 3 times the length of the side seam for sewing.
【Cuffs】 27' 51''
Part 2 Body, Front Band, Hems 40' 11''
The body is divided into 2 sections. For the first section, work yarn overs along the remaining side edge of the sleeve. For the second section, work from right to left along the edge of the first section, breaking the yarn at the end of each row. The crocheting methods for the left and right body panels are slightly different. Once completed, join them together and crochet in rounds along the body for the front bands and hems. Finally, secure the buttons. Please refer to the video demonstration for more details.
Note: Since the variegated yarn does not require color changes, this part differs slightly from the video demonstration—simply join with a slip stitch and continue crocheting.
| Section 1 | Part | Left Front | Right Front | ||
| Rounds | Long Side Stitch Count | Short Side Stitch Count | Long Side Stitch Count | Short Side Stitch Count | |
| R 1 | 102 granny squares | 51 granny squares | 102 granny squares | 51 granny squares | |
| R 2 | 209 sts | 107 sts | 209 sts | 107 sts | |
| R 3 | 106 granny squares | 55 granny squares | 106 granny squares | 55 granny squares | |
| R 4 | 217 sts | 115 sts | 217 sts | 115 sts | |
| R 5 | 110 granny squares | 59 granny squares | 110 granny squares | 59 granny squares | |
| R 6 | 225 sts | 123 sts | 225 sts | 123 sts | |
| R 7 | 113 granny squares | 62 granny squares | 114 granny squares | 63 granny squares | |
| Section 2 | R 1 | 114 sts | |||
| R 2 | 55 granny squares | ||||
| R 3 | 111 sts | ||||
| R 4 | 55 granny squares | ||||
| R 5 | 111 sts | ||||
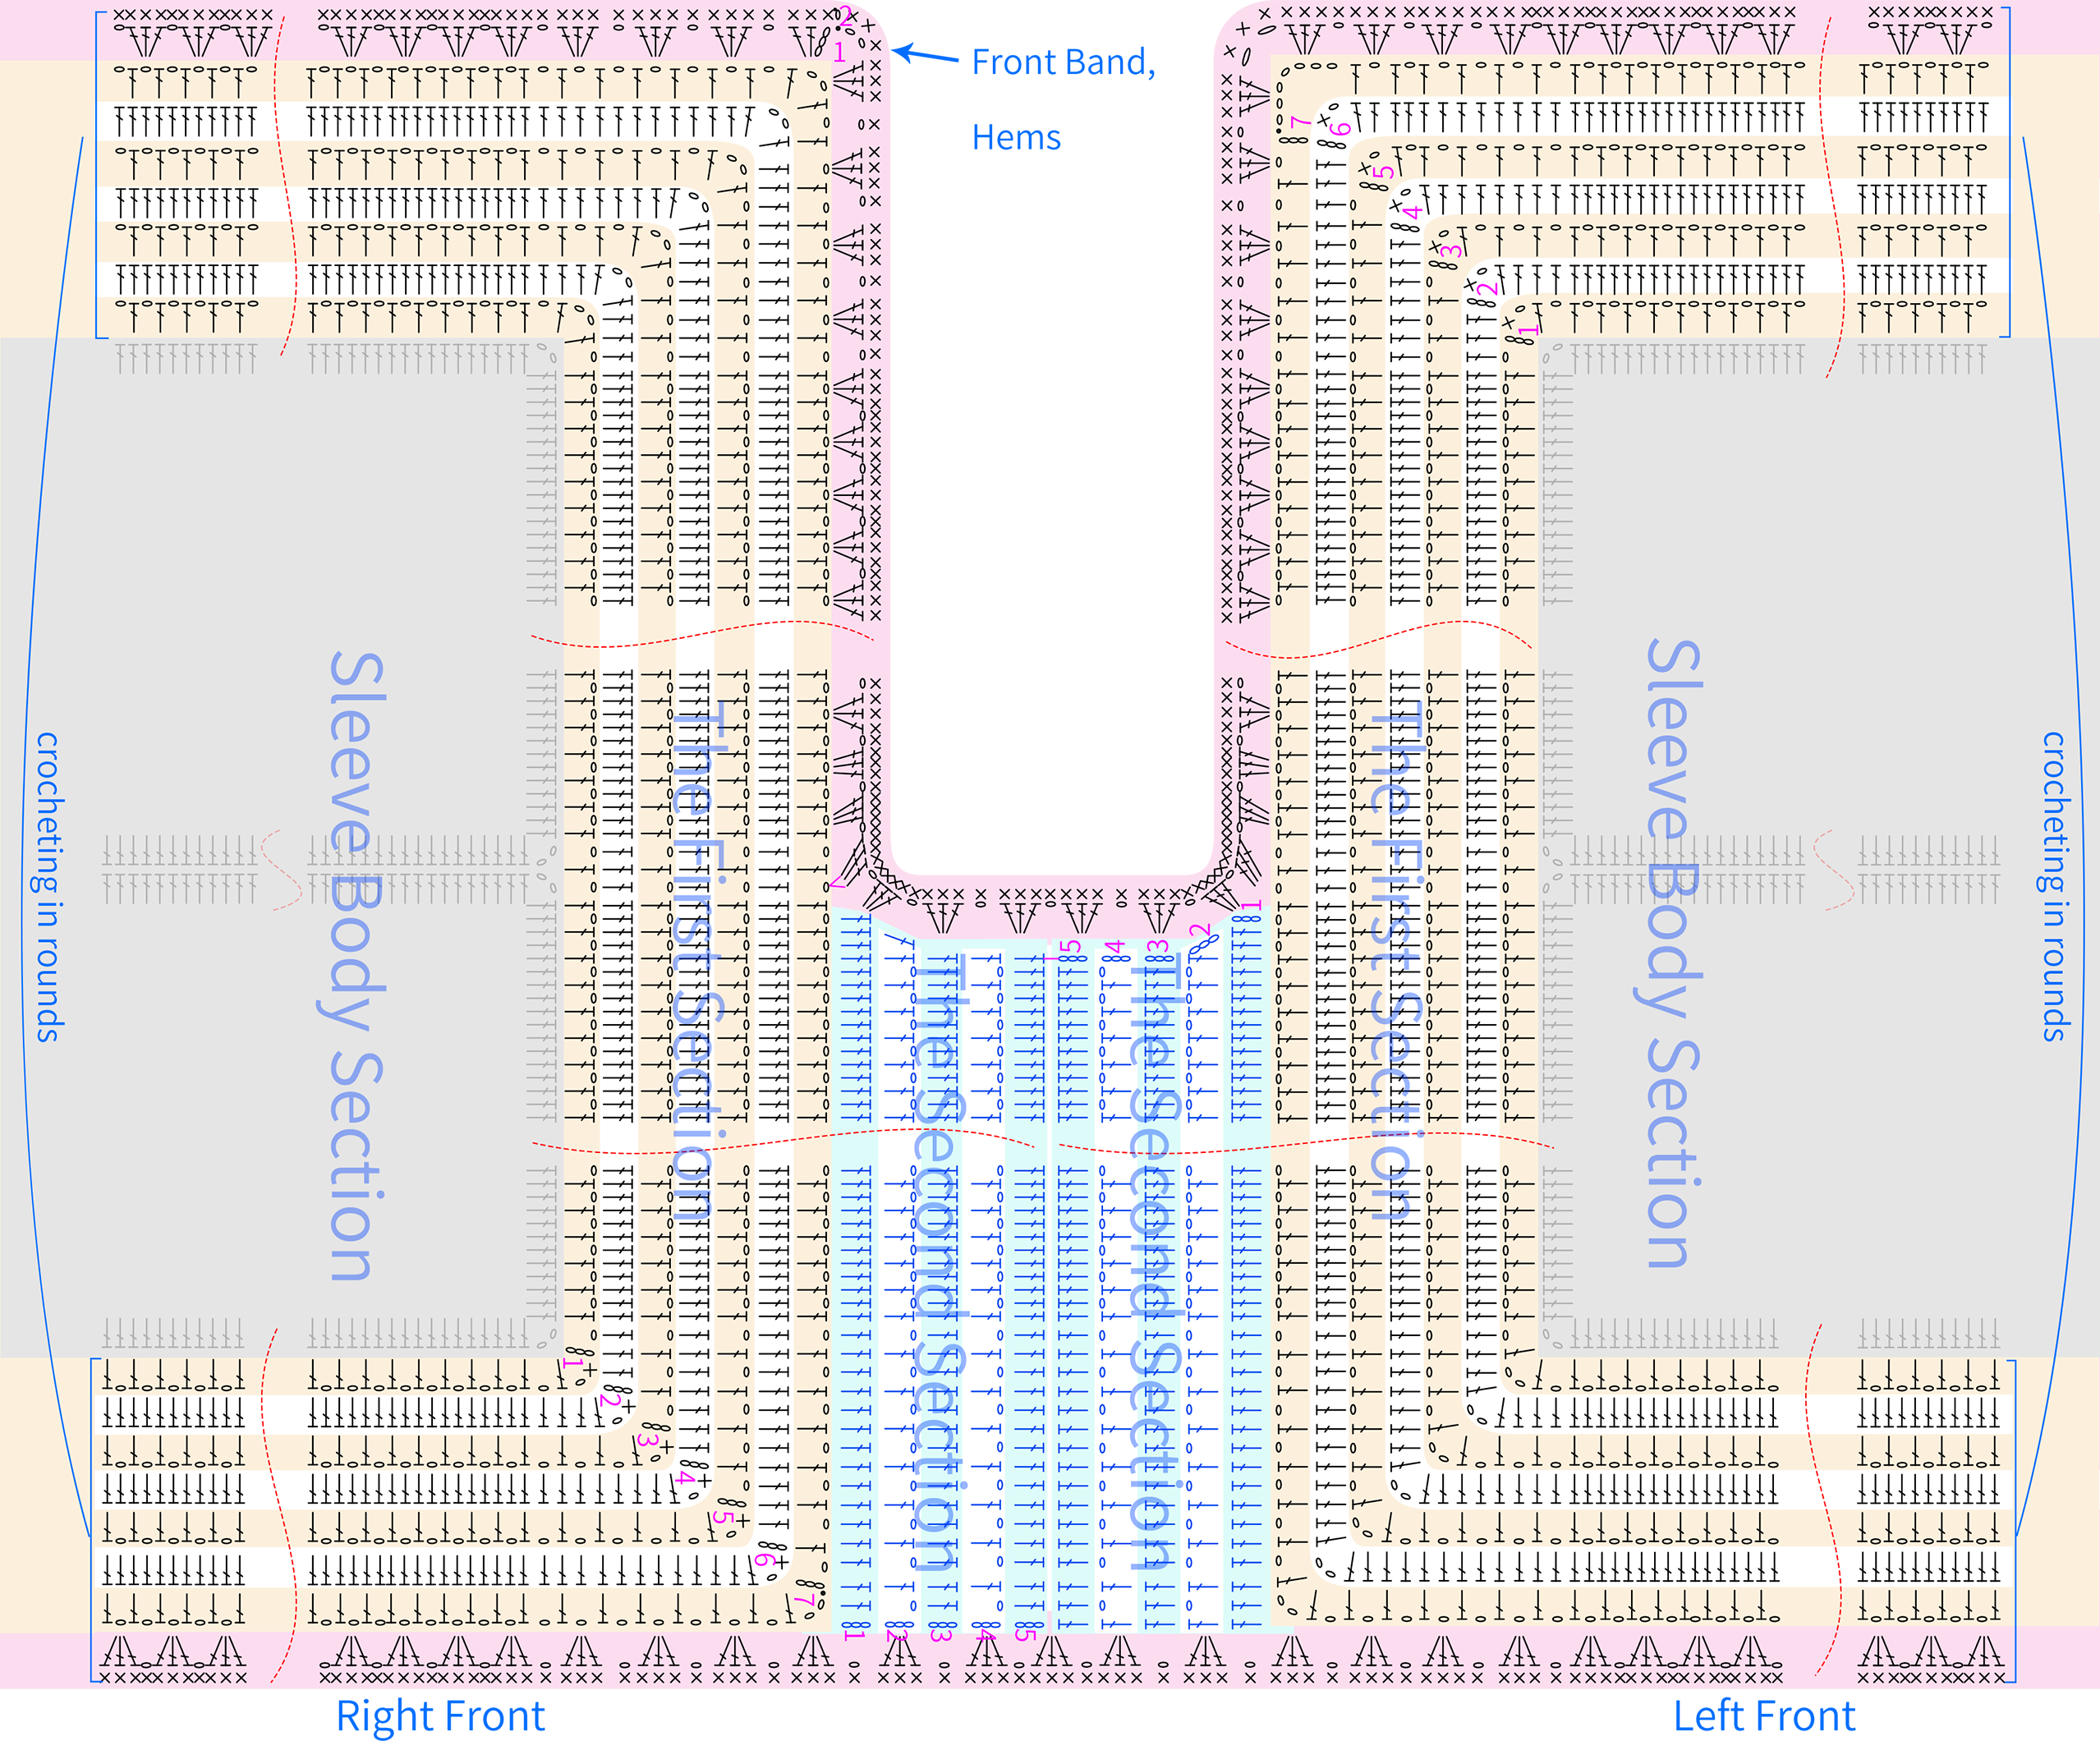
Note: After completing the second section of the right front, leave a yarn tail about 3 times the length of the side seam.
Made by the community