
Accessories / Ornament
Moody Brooch
Project preview
See the finished project
Pattern format
Instructions
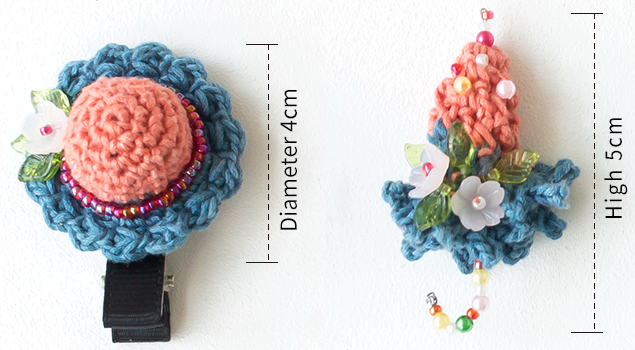
Explanation: For crocheting, use hand-dyed yarn. You can choose your preferred colors by referring to the finished product or based on your preference. Different colors will create different effects when crocheted. If you desire a gradient effect, you can start crocheting from the middle of one of the line segments.
Due to variations in individual tension, the size of the sample is for reference only.
Materials: Susan`s Family Fancy Dyed Lace
Hook: 1.50 mm crochet hook

Chart Key







Note: This pattern is making in Chinese crochet pattern terms, and the stitch name is written using American terminology. All measurements in charts are in cm.
Part 1 Hat
Composed of fabric and decorations, first work on crocheting the fabric, then attach the decorations once it's completed.
Step 1 Fabric
The fabric is worked with a magic ring, crocheting in rounds counterclockwise from the center outward.
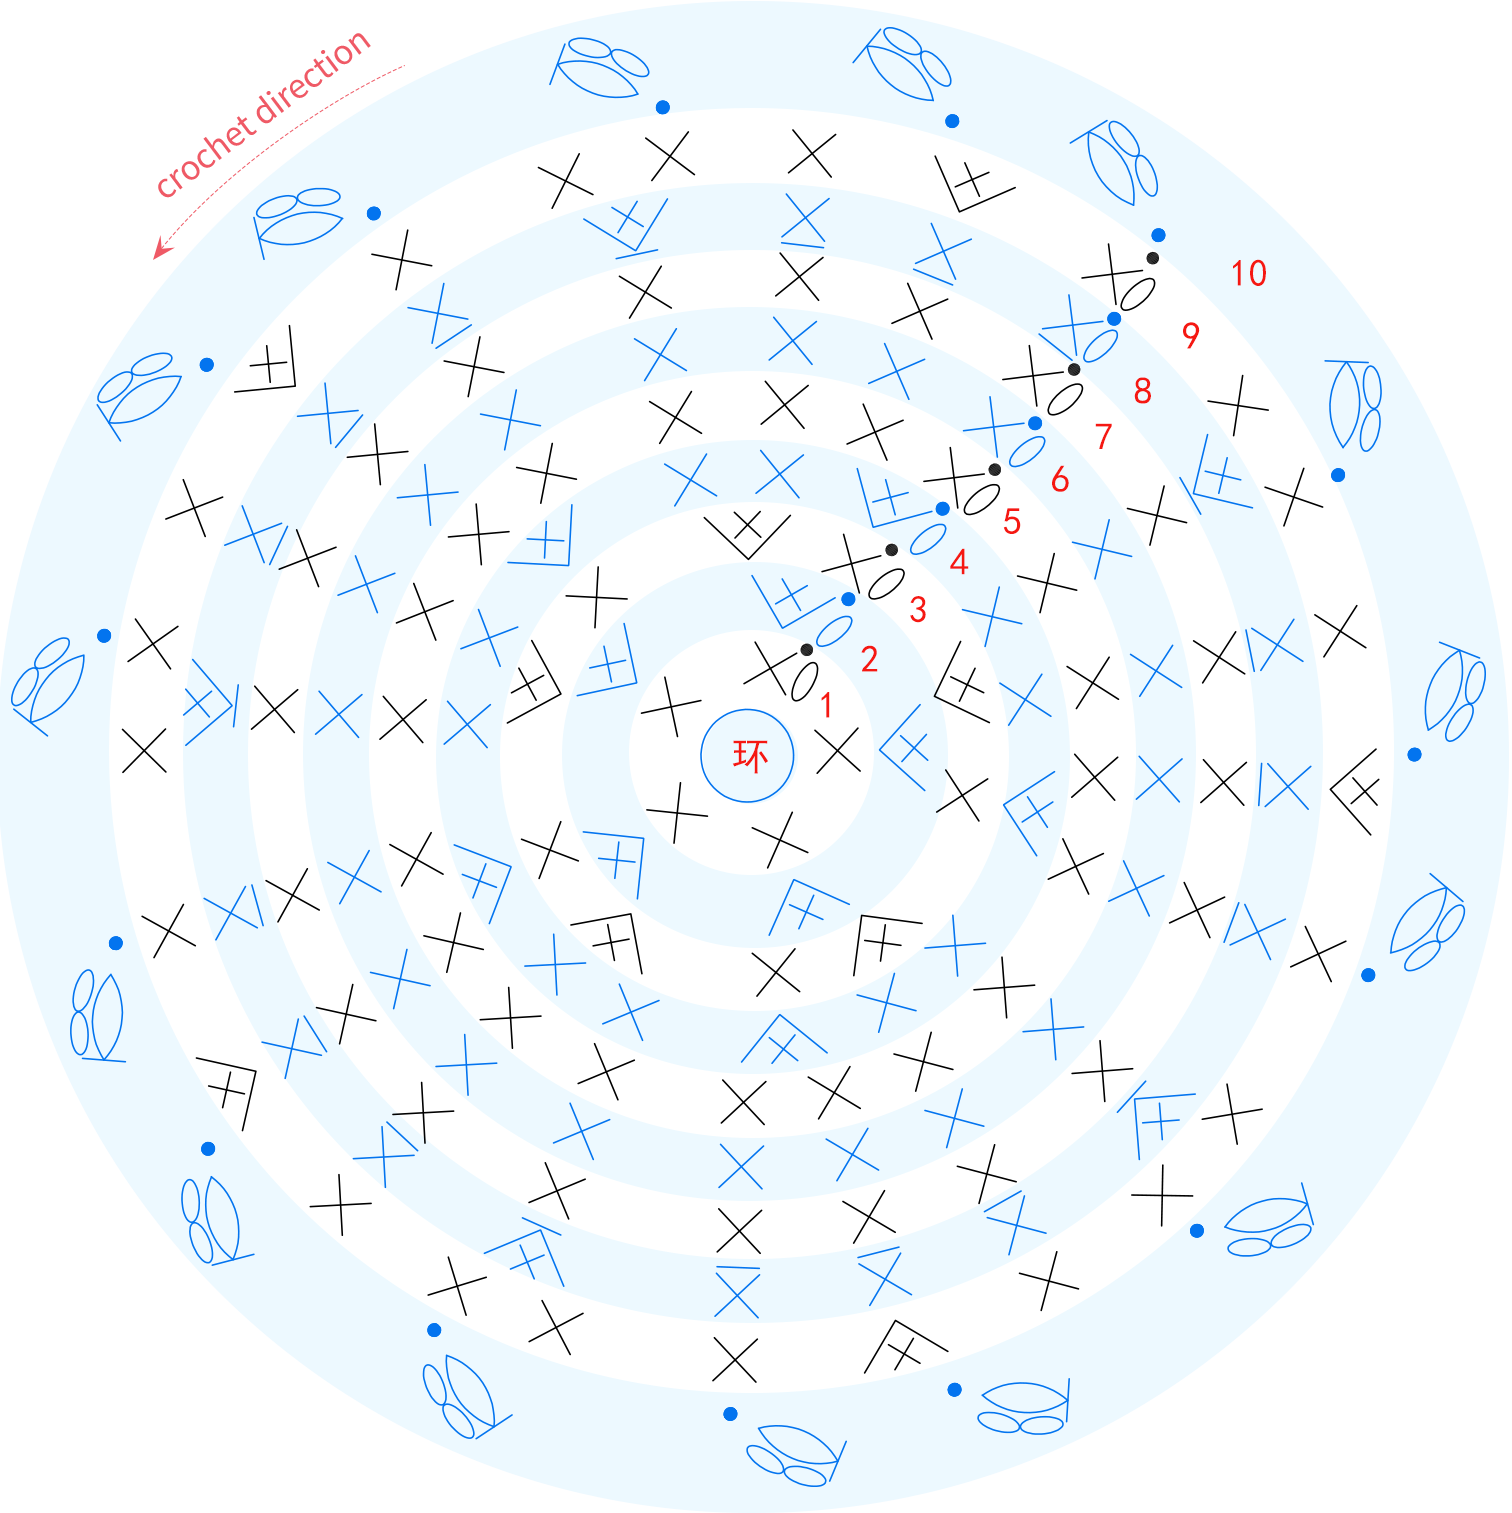
| Rounds | Add Stitches | Stitch Instructions | Total Stitches |
| Cast On and R1 | Start with a magic ring | 5 | |
| R2 | 5 | work 2 sts into each st | 10 |
| R3 | 5 | add 1 st every 2 sts | 15 |
| R4 | 5 | add 1 st every 3 sts | 20 |
| R5-R7 | 0 | even | 20 |
| R8 | 5 | add 1 st every 4 sts(pickingup the front loops) | 25 |
| R9 | 5 | add 1 st every 5 sts | 30 |
| R10 | refer to the chart | ||
Step 2 Decoration
First, attach 2-3 leaves at any position on the hat. Then, assemble a flower centered above the leaves. Next, starting from one end of the beginning and ending of the leaves, attach seed beads along the body of the hat.
Part 2 Umbrella
Composed of fabric and decorations, first work on crocheting the fabric, then attach the decorations once it's completed.
Step 1 Fabric
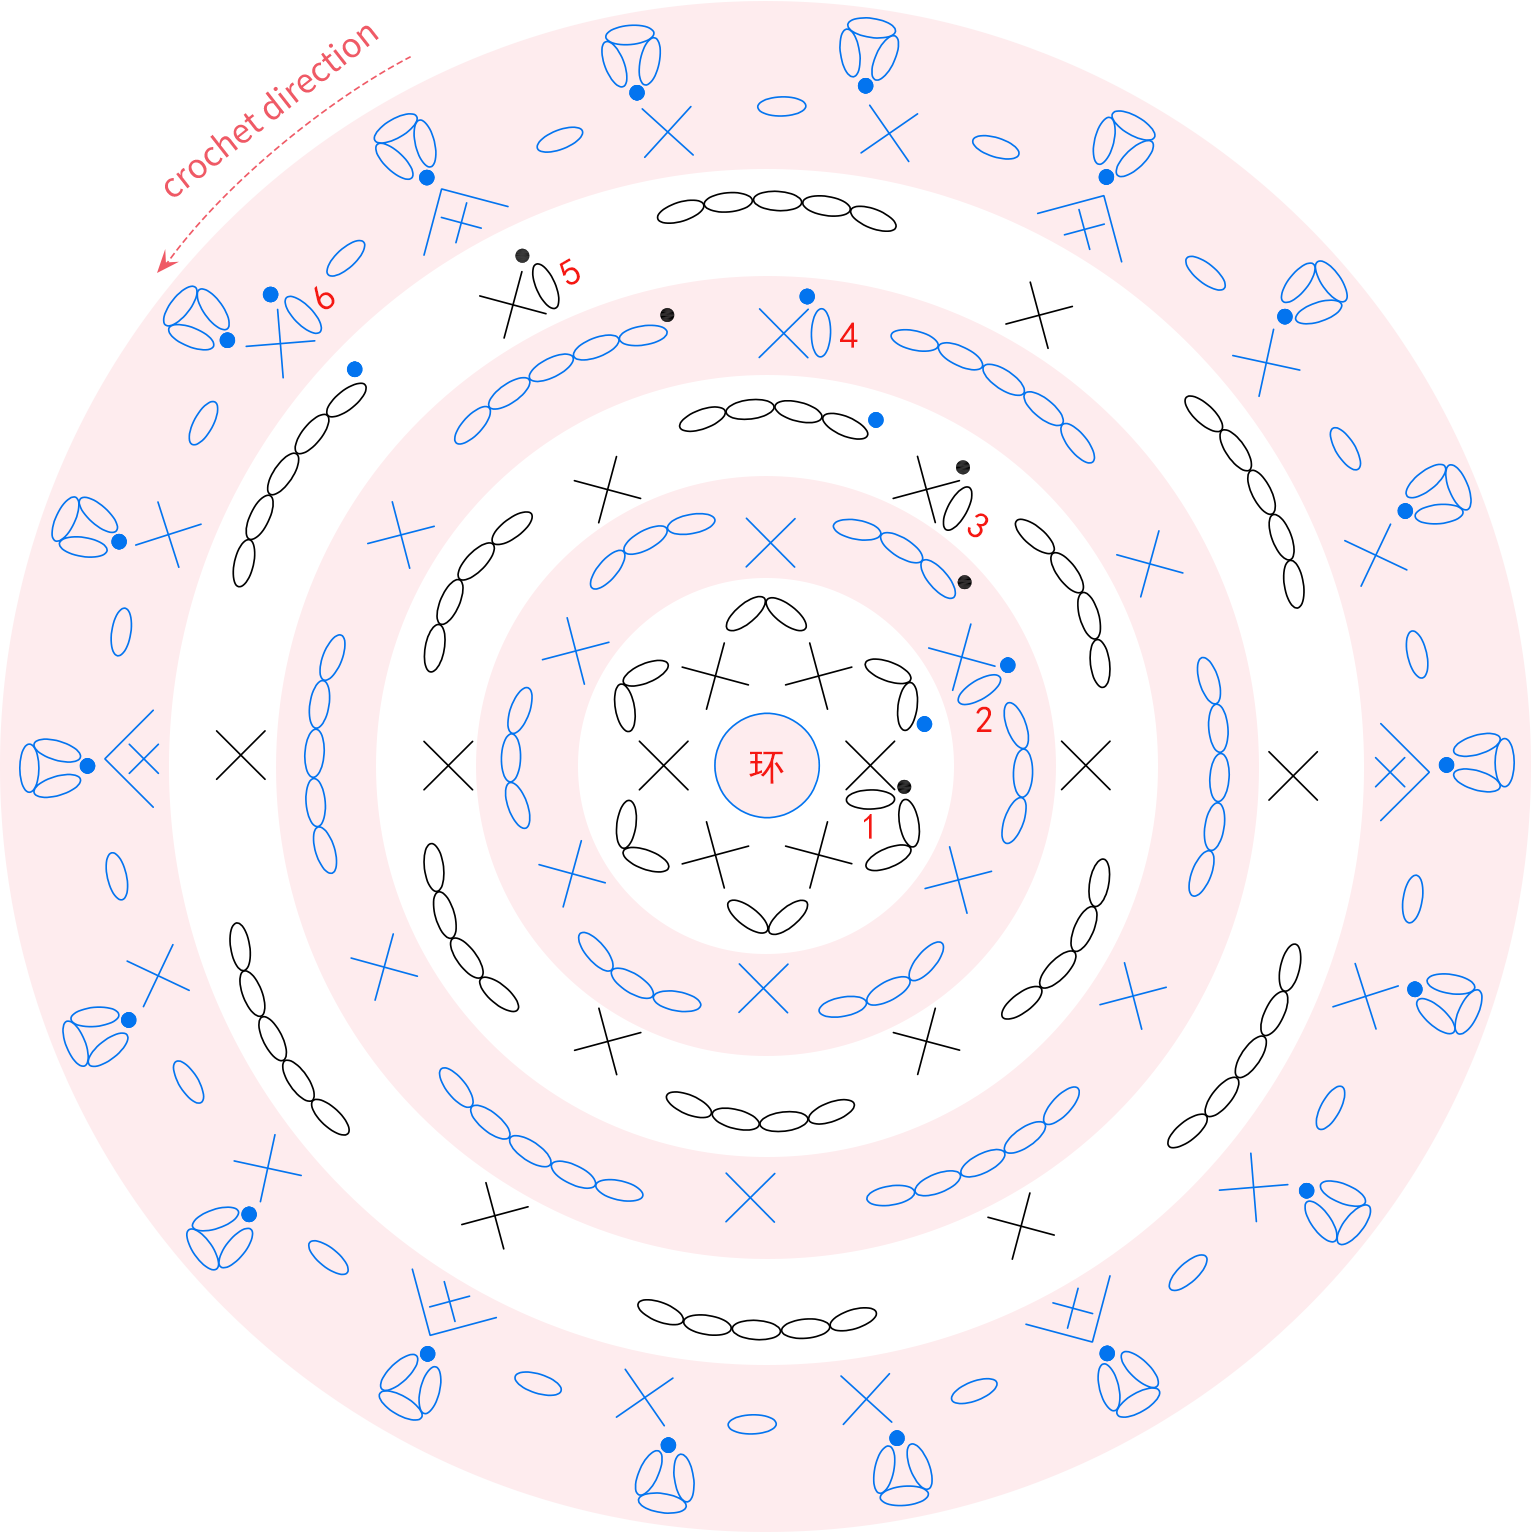
The fabric is worked using a magic ring, crocheting in rounds counterclockwise.
Step 2 Decoration
First, make the umbrella handle and attach it at the same time. Once completed, gather the fabric inward and tie it up. Finally, attach flowers, leaves, and some beads on the surface.
Part 3 Accessories
Attach hair clips, brooch pins, and hanging strings as needed.
Made by the community


