Home / Blanket
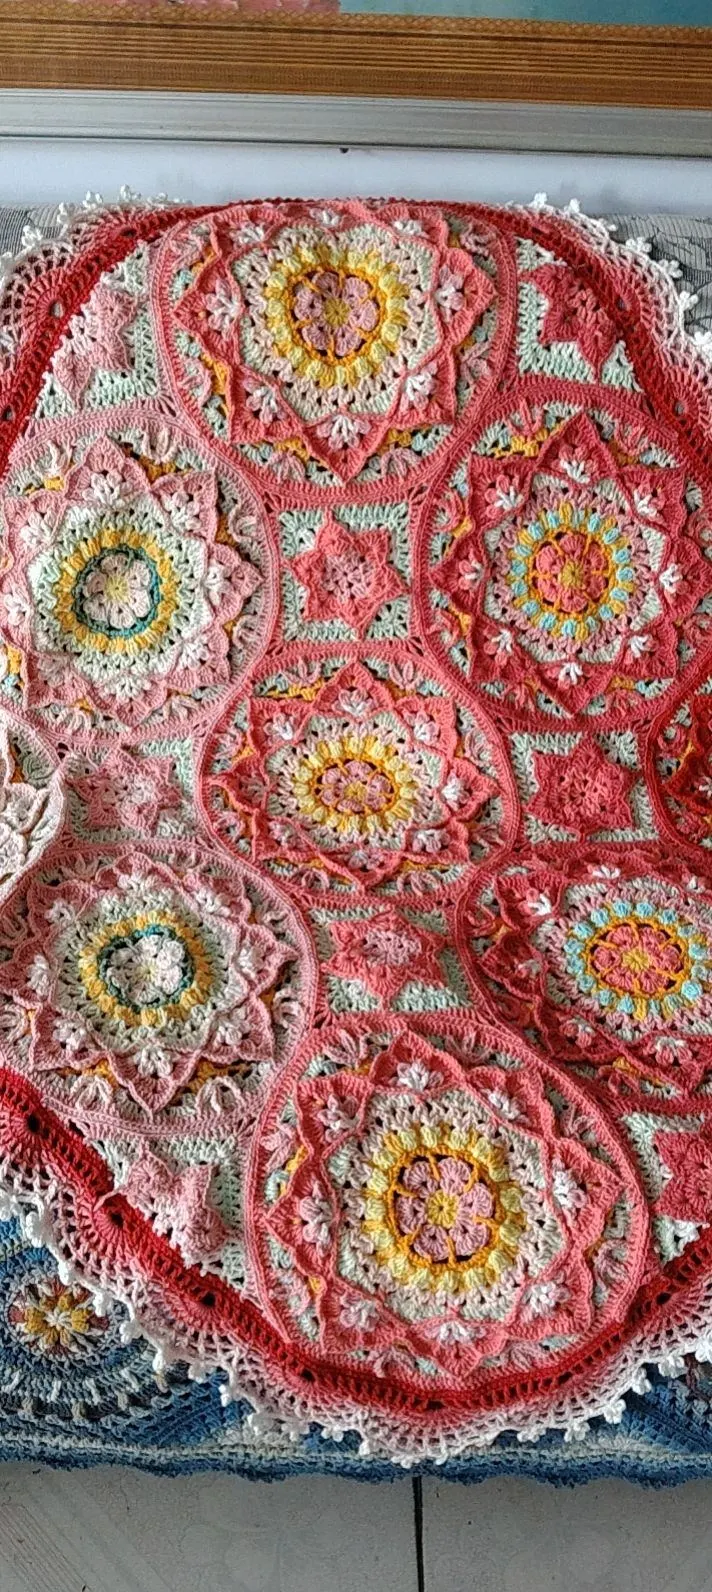
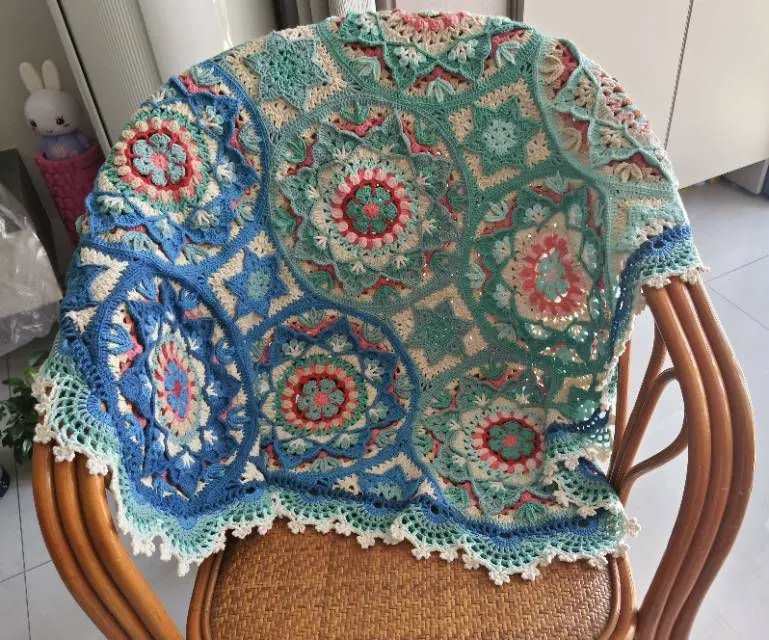
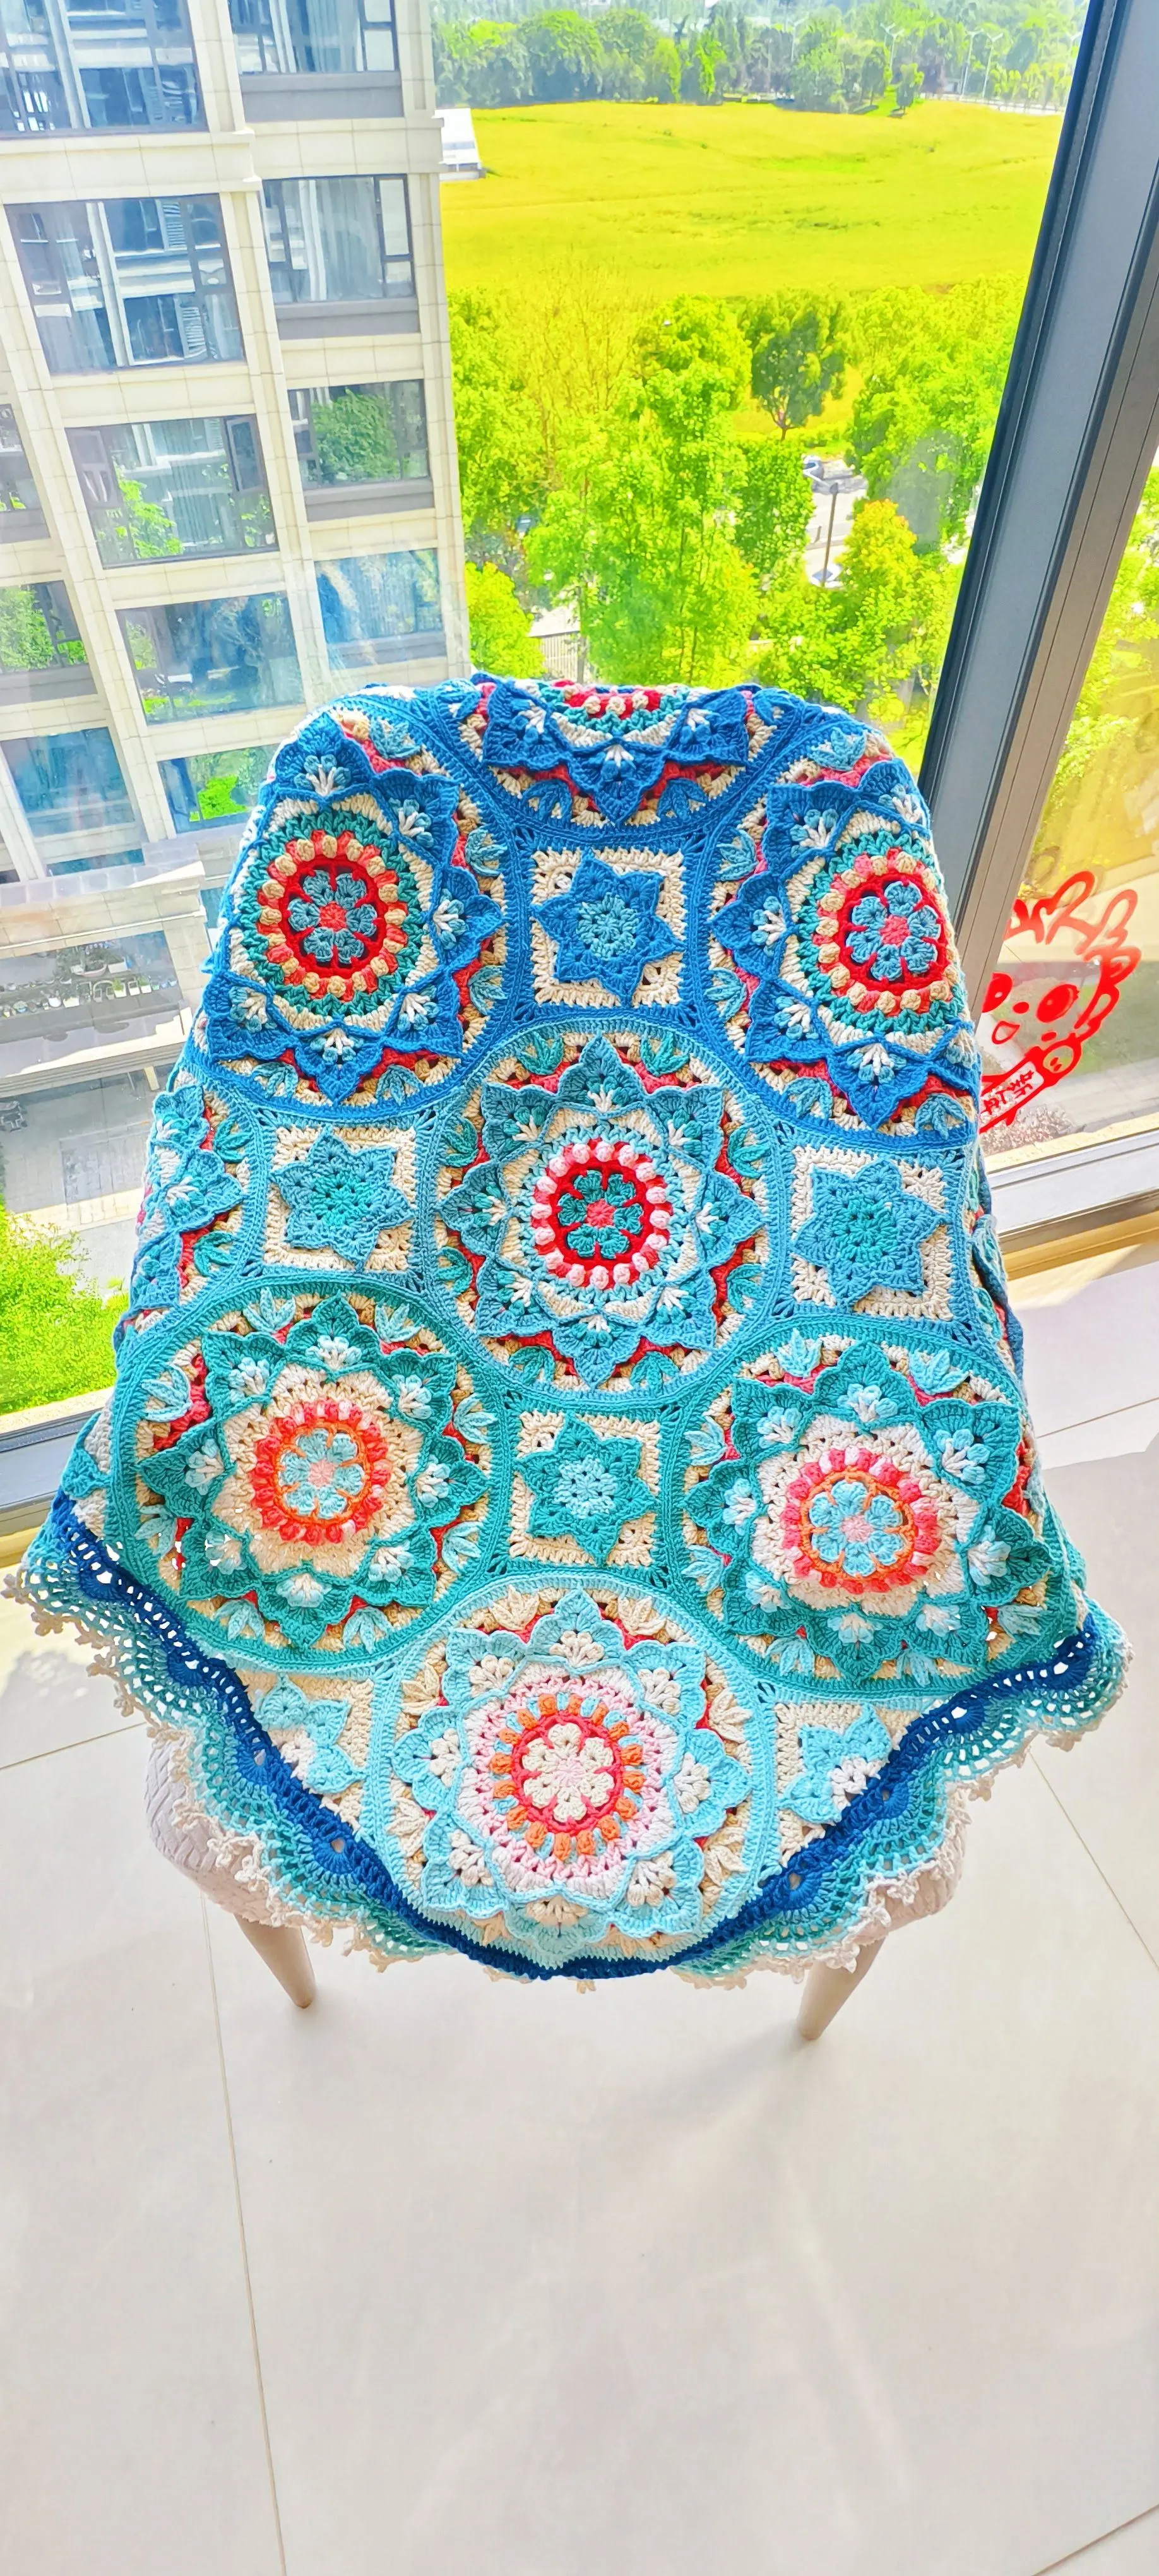
Mucha Patchwork Blanket
Project preview
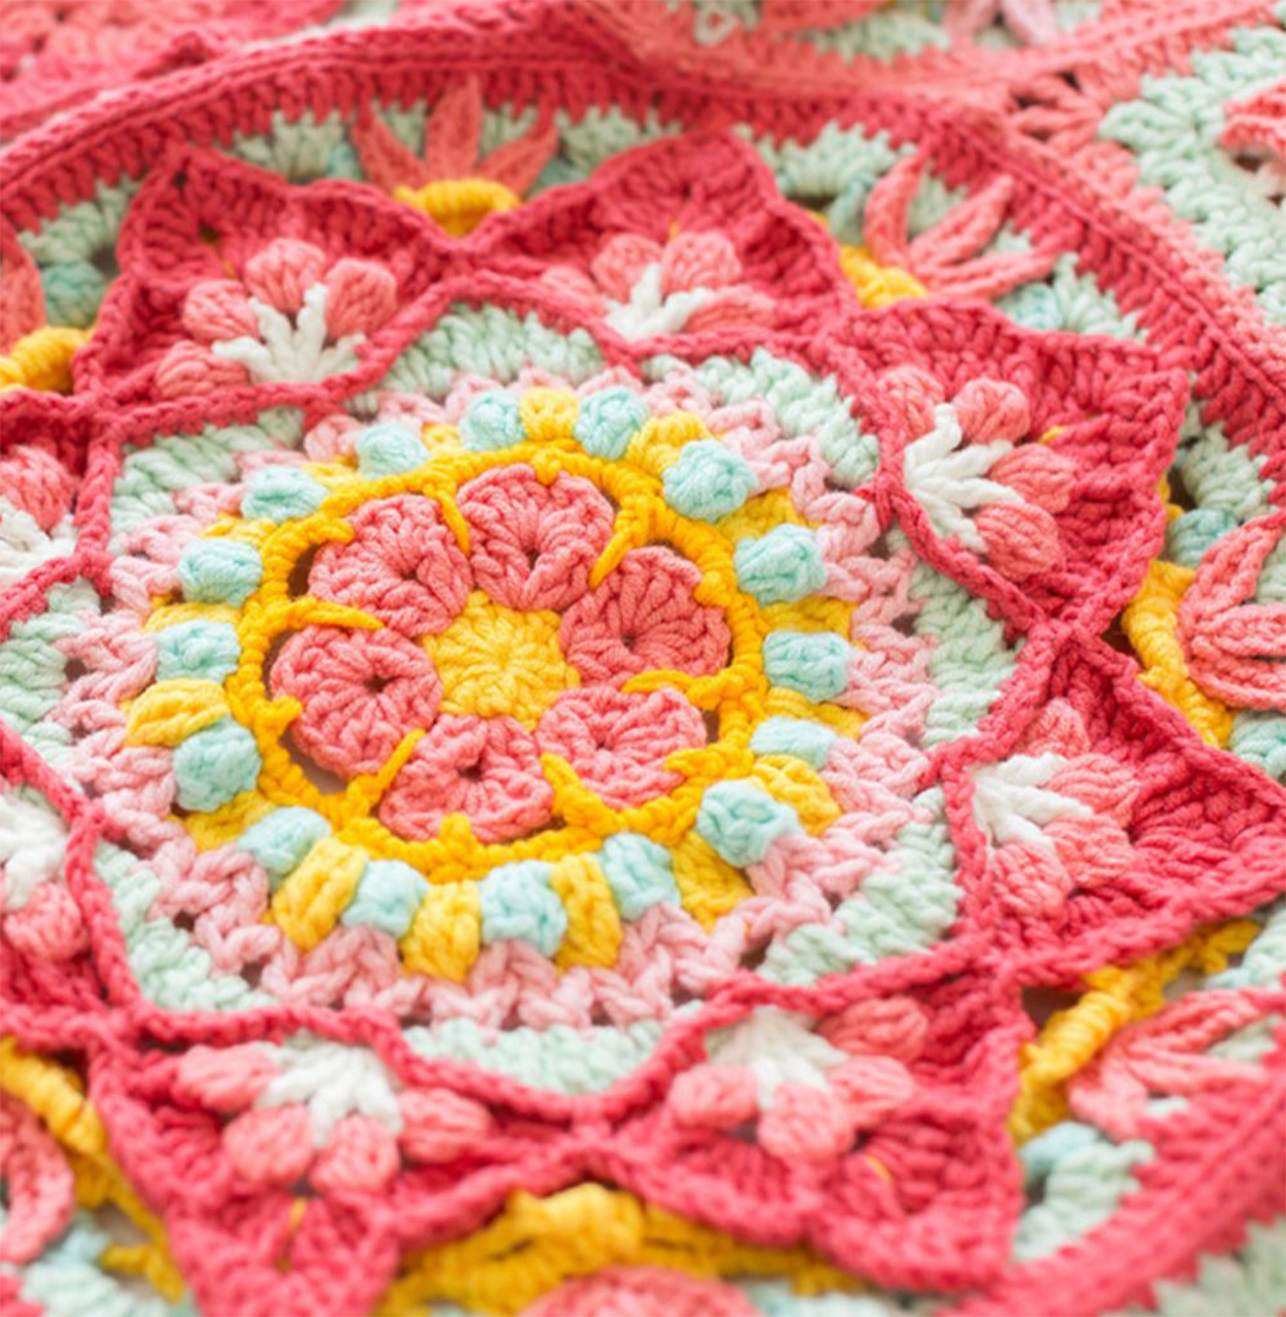
See the finished project
Pattern format
Instructions
Watch and follow
Video tutorial
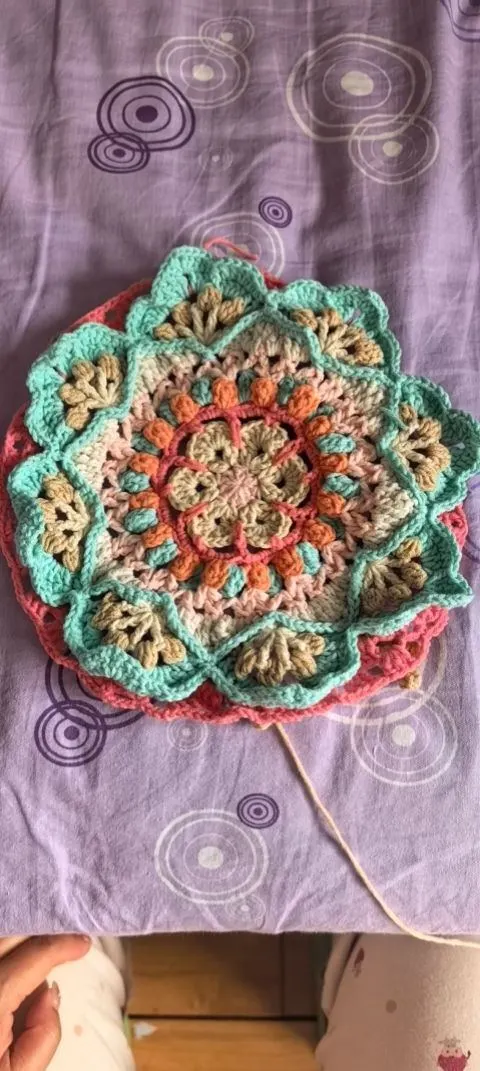
This blanket includes five parts: motif 1, motif 2, motif 3, sewing, and edging. First, crochet the motifs. Then sewing them together accordingly and edging in end.
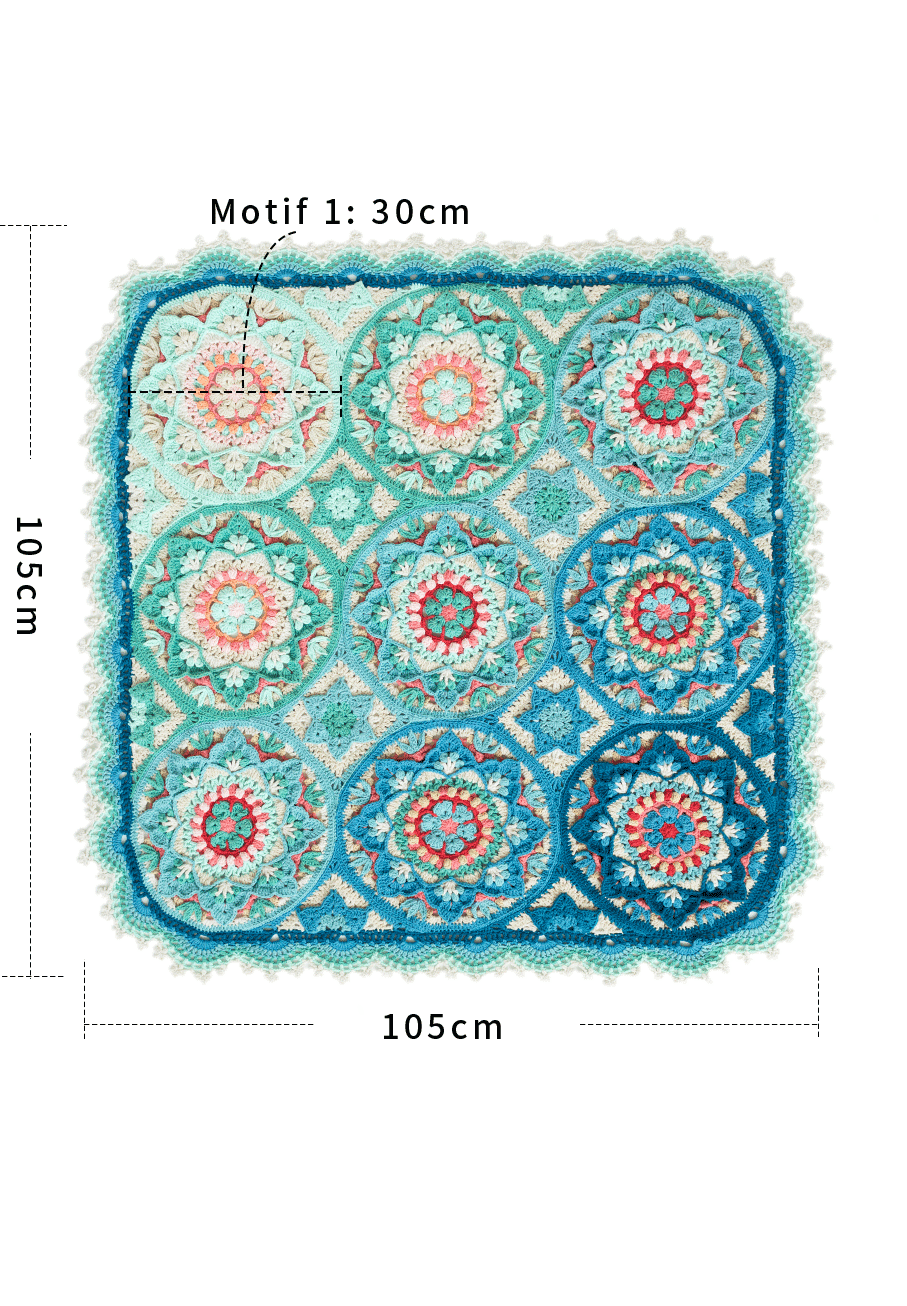
The handcrafted measurements may have an error of 1 to 2cm. Due to variations in individual tension, the size of the sample is for reference only.
Materials:4-Ply Combed Cotton & Acrylic Fibre Hand Knitting Yarn
Hook:3.00mm crochet hook

Note:
This pattern is making in Chinese crochet pattern terms, and the stitch name is written using American terminology. All measurements in charts are in cm.
Chart Key


















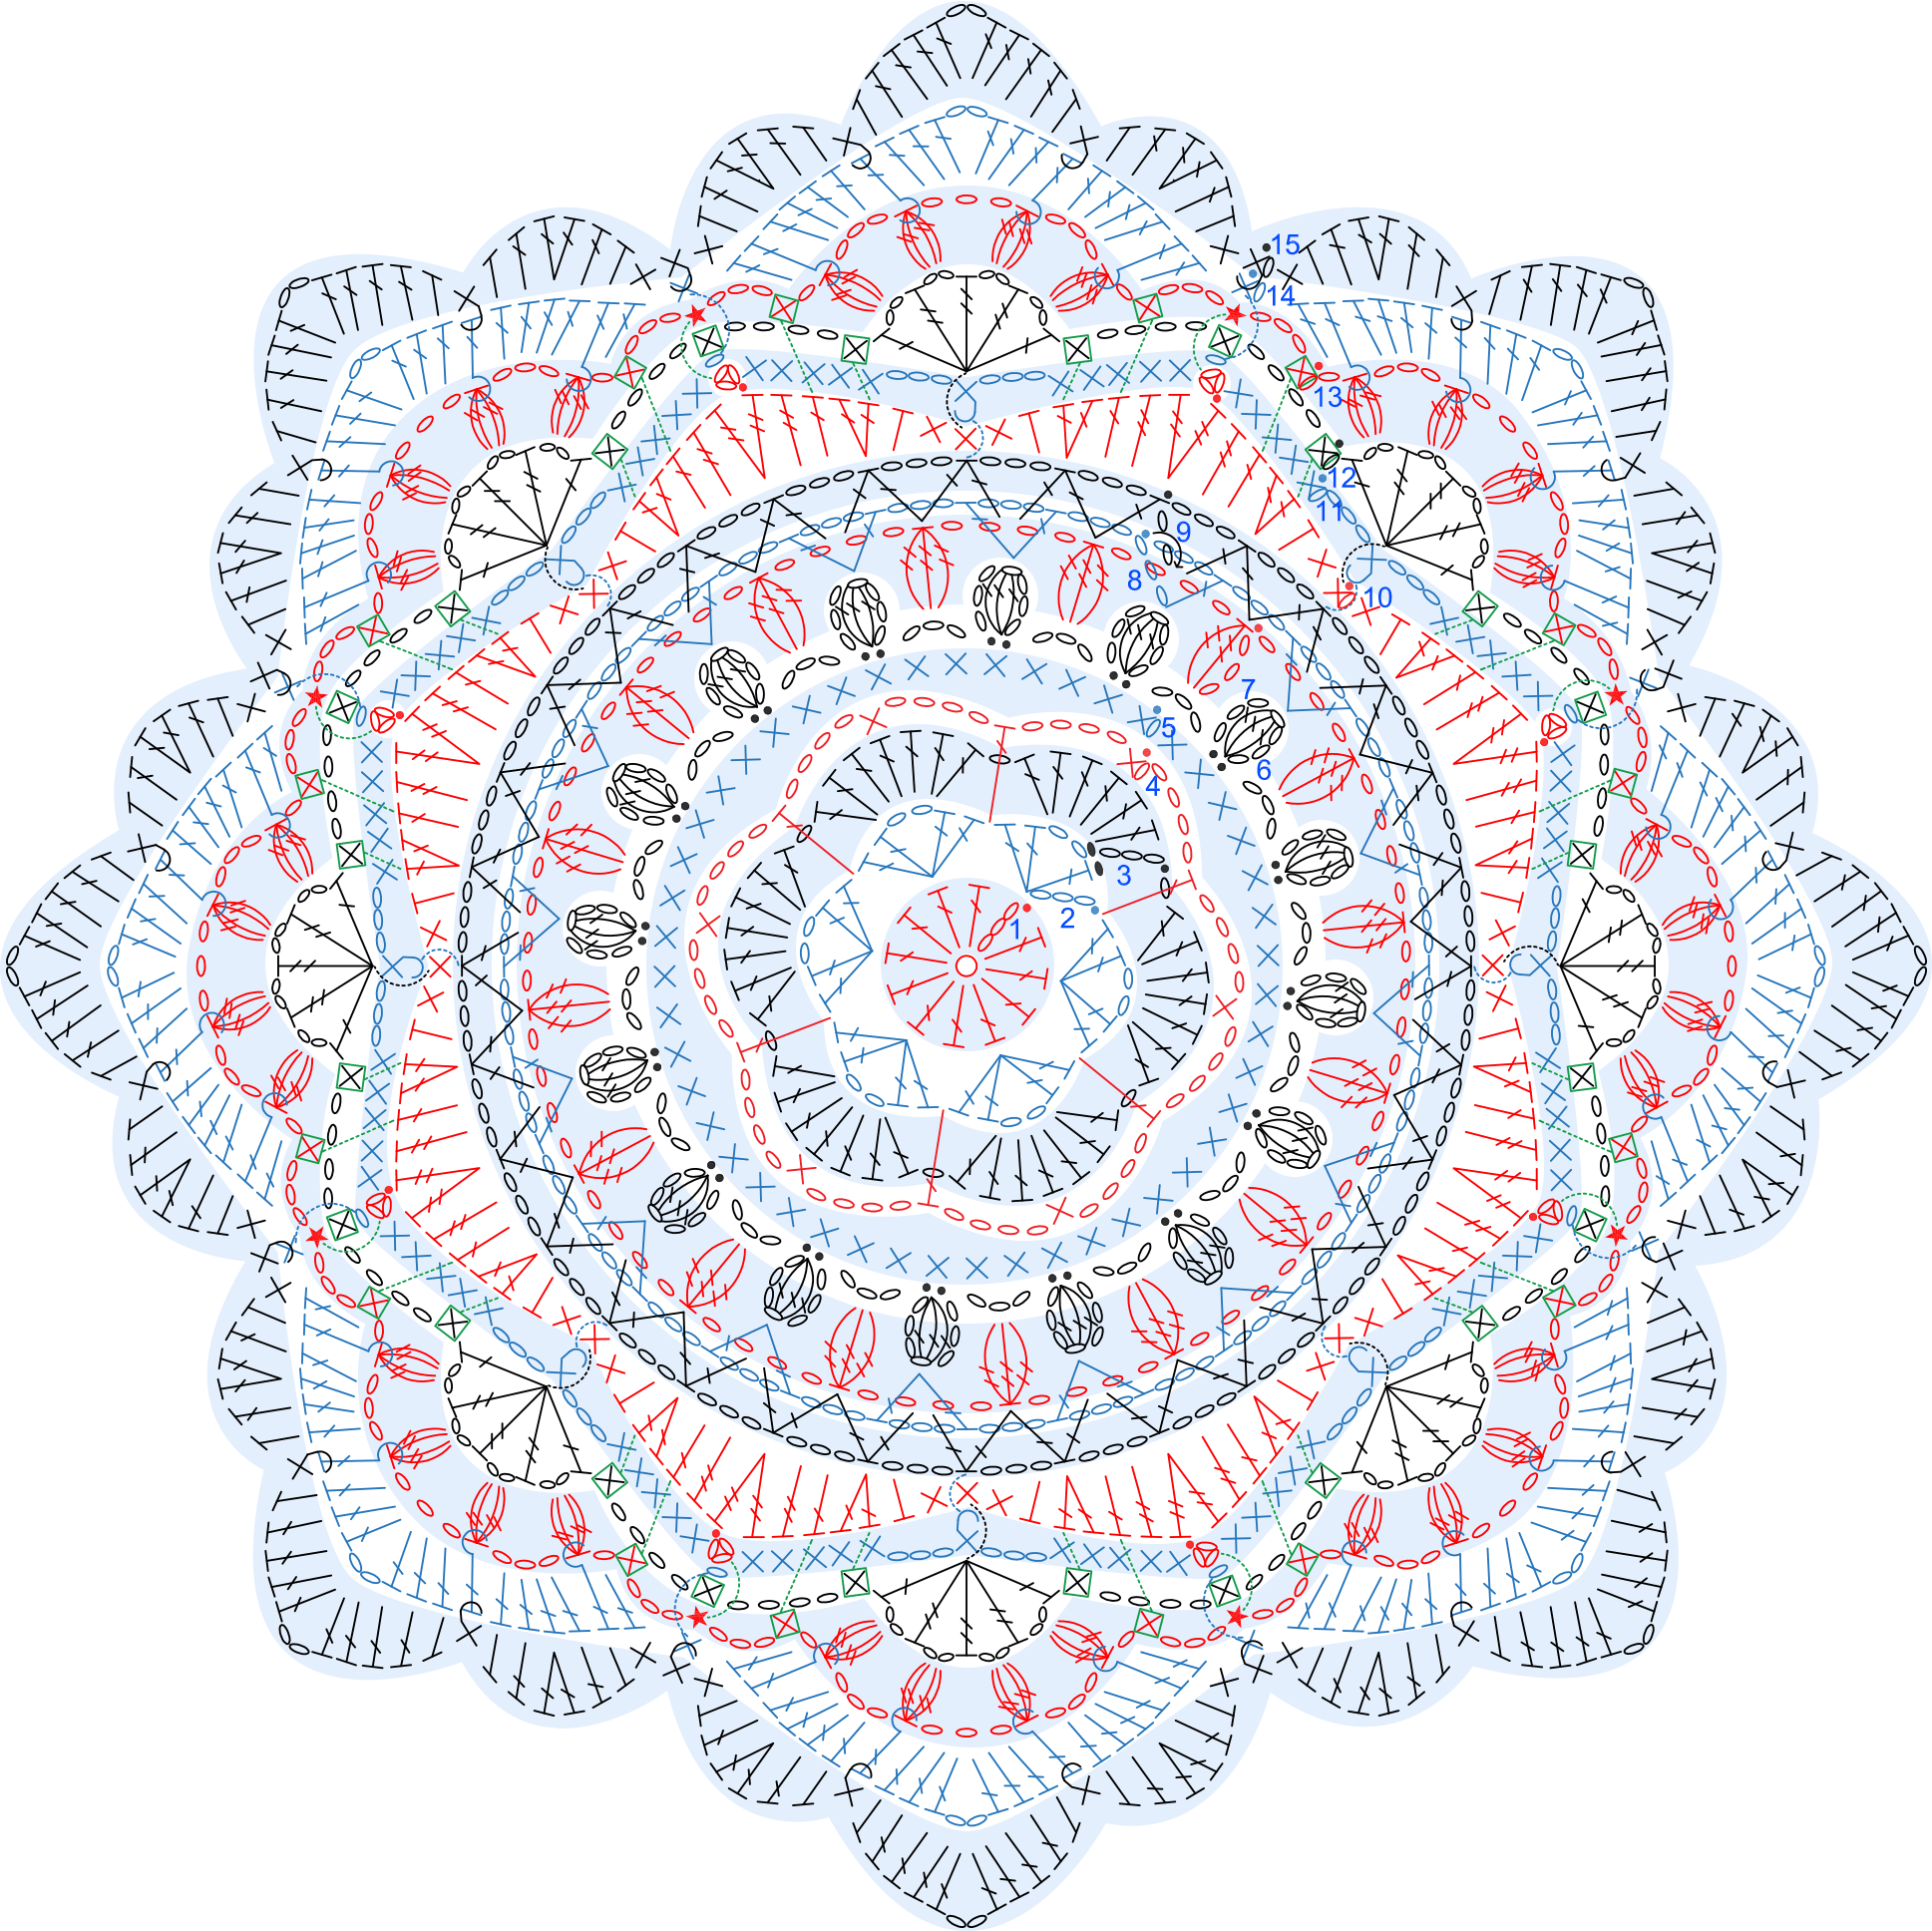
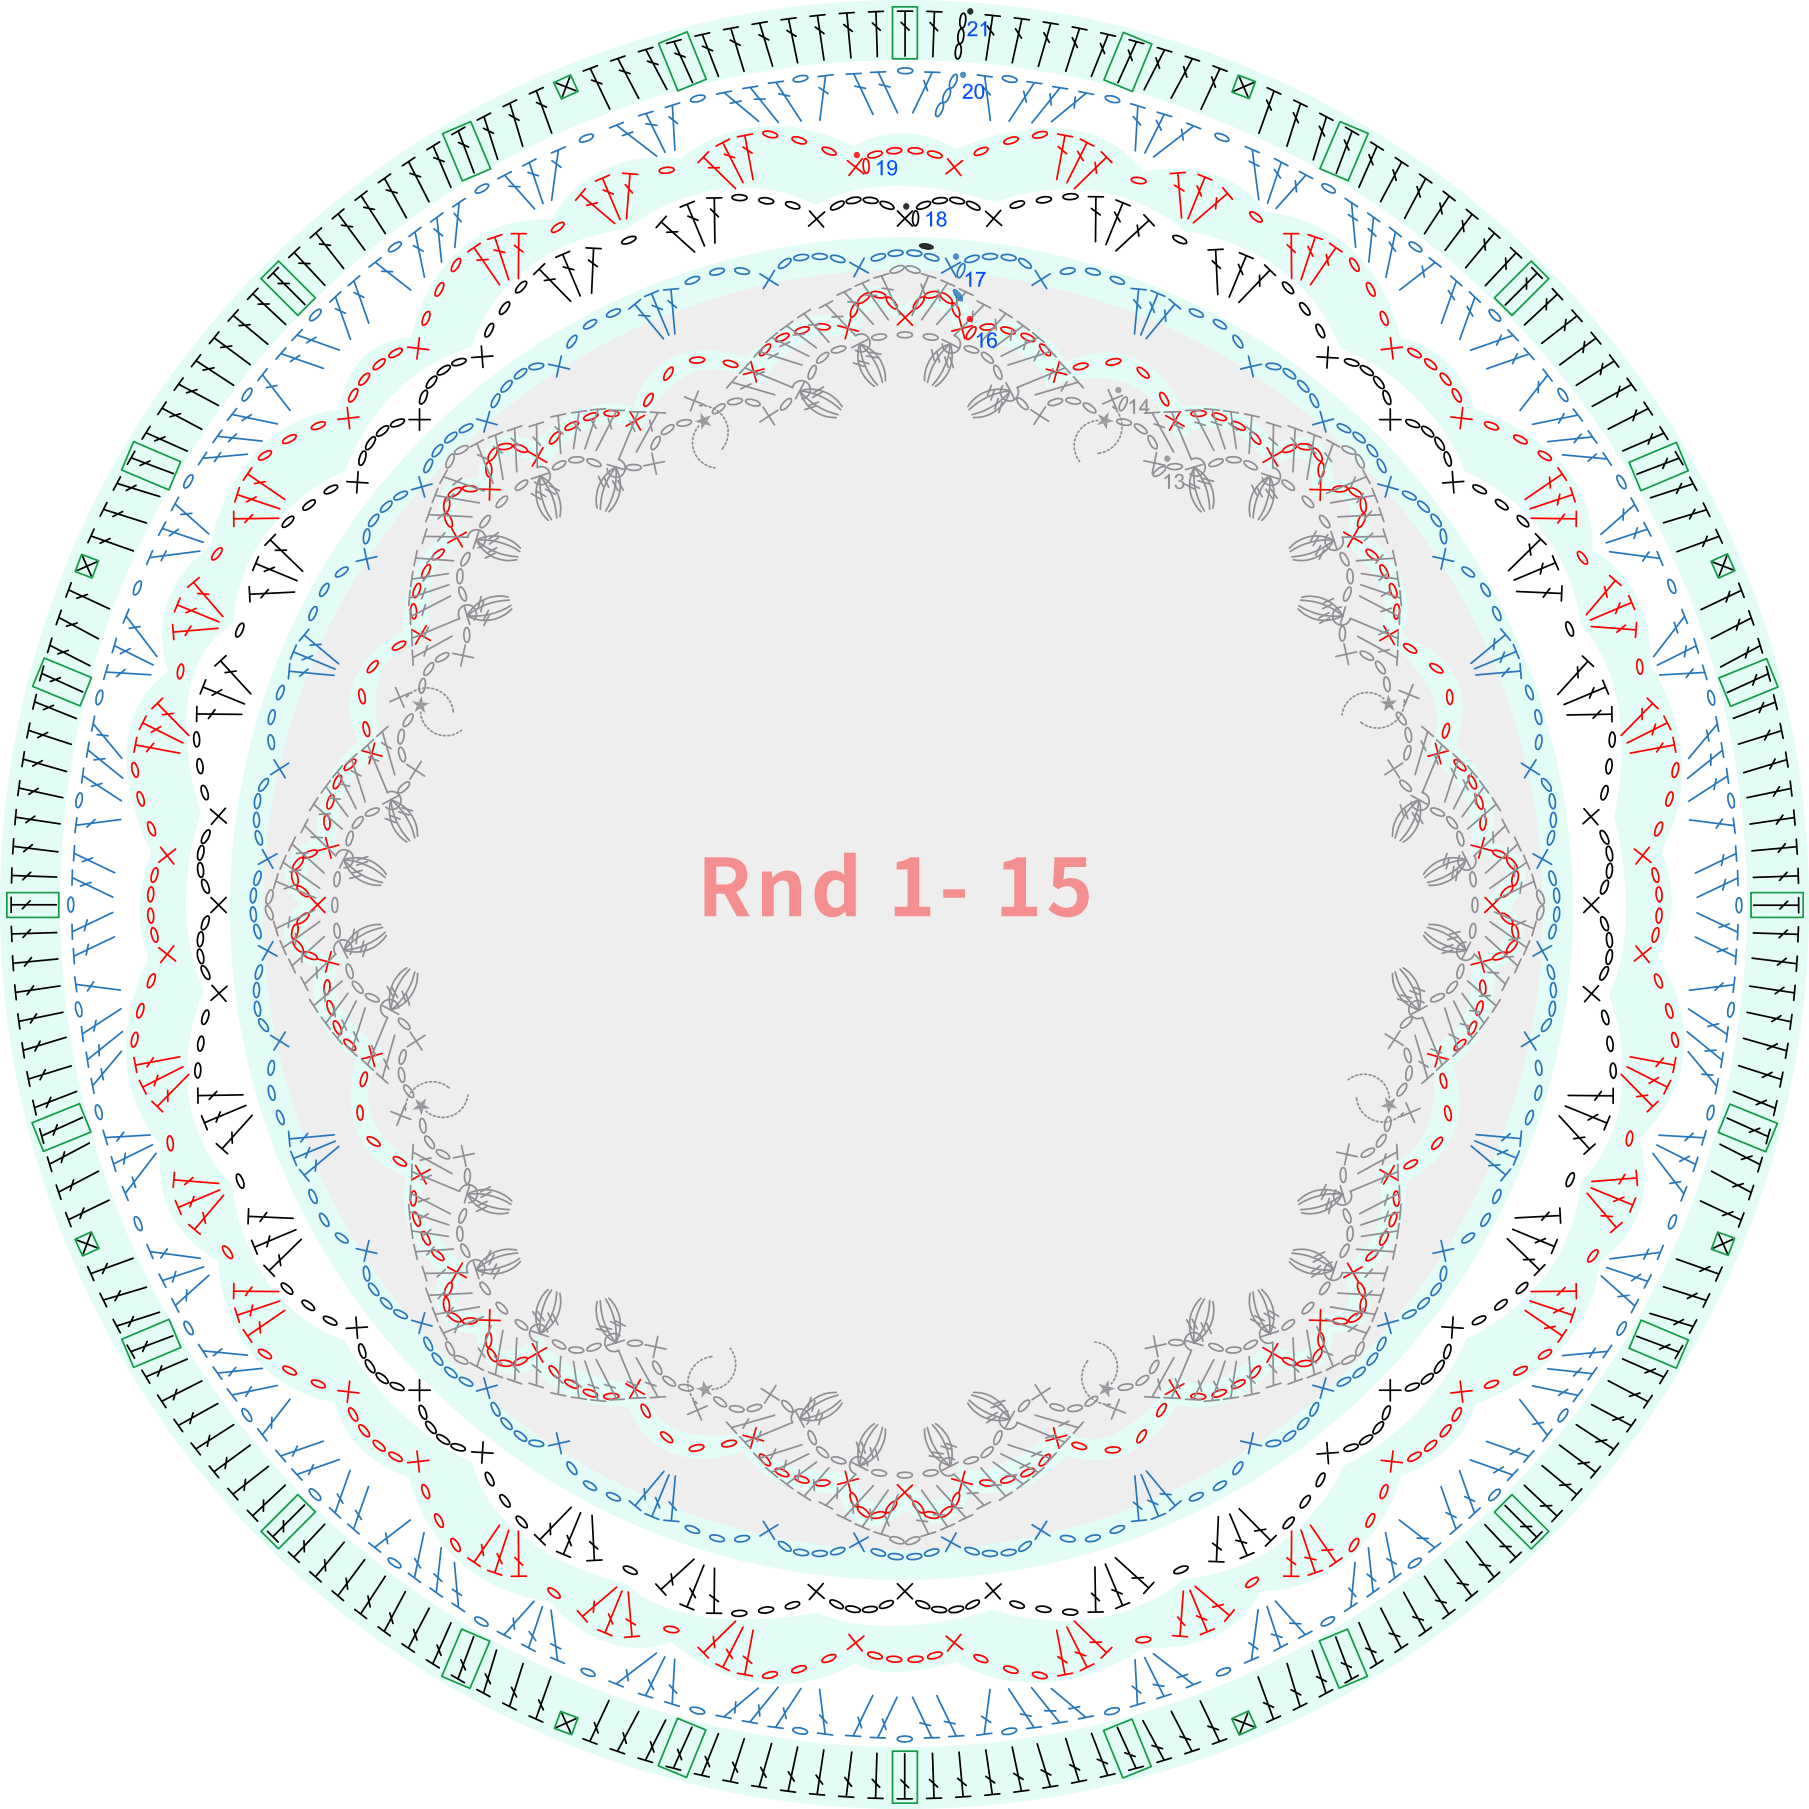
Part 1 Motif 1A 00' 40'' (Part 1)
The Motif 1 starts with an adjustable magic ring and work in rounds counter-clockwise. Please refer to the video demonstration for more details.
Note:
① While crocheting motifs, they might appear slightly uneven – this is normal. After completing all the motifs, you can steam block them to flatten them out.
② The insertion point for stitches on the bordered pattern is unique. please refer to the video for details.
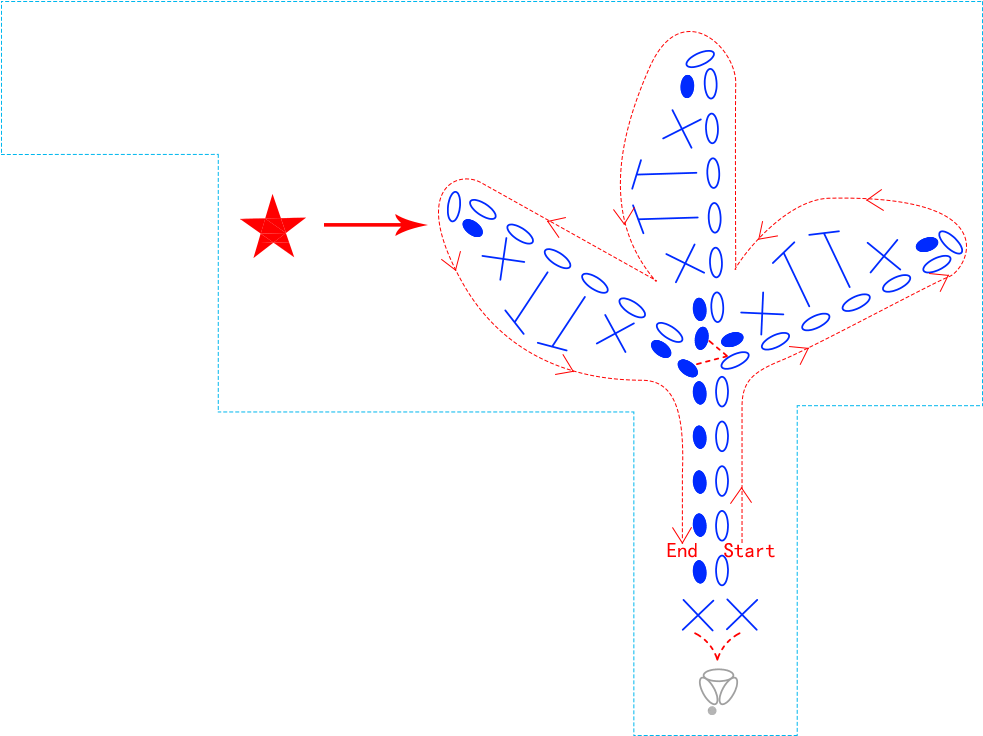
③ For the slip stitch placement in the five-pointed star pattern, also consult the video for guidance.
【Star symbol 】 61' 27'' (Part 1)
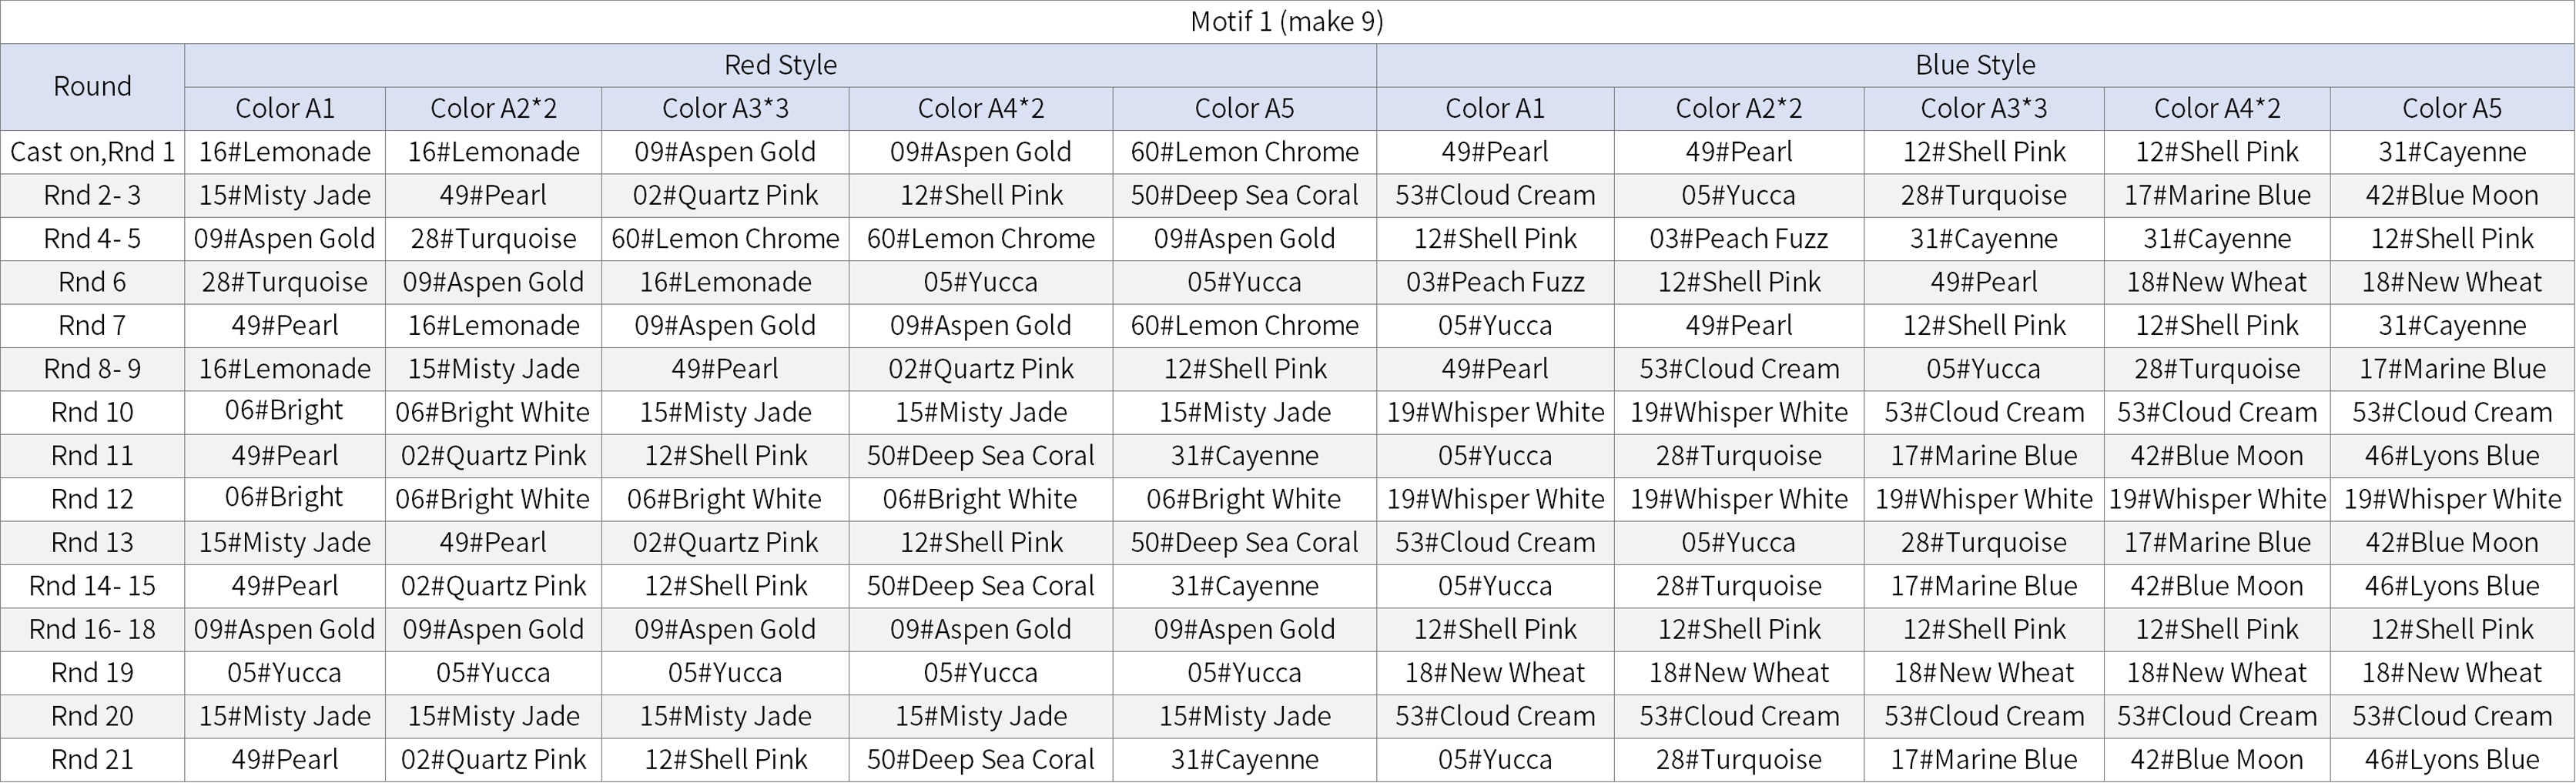
【Motif 1 Rnd 1- 15】
【Motif 1 Rnd 16- 21】
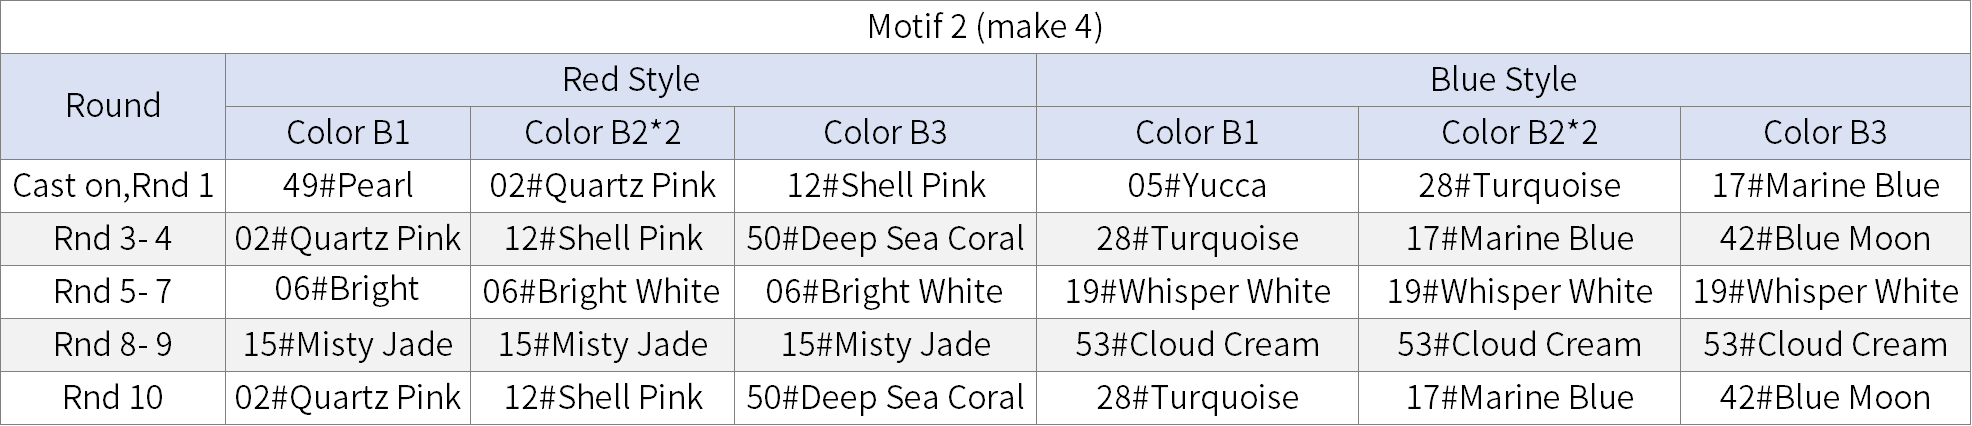
Part 2 Motif 2B 00' 11'' (Part 2)
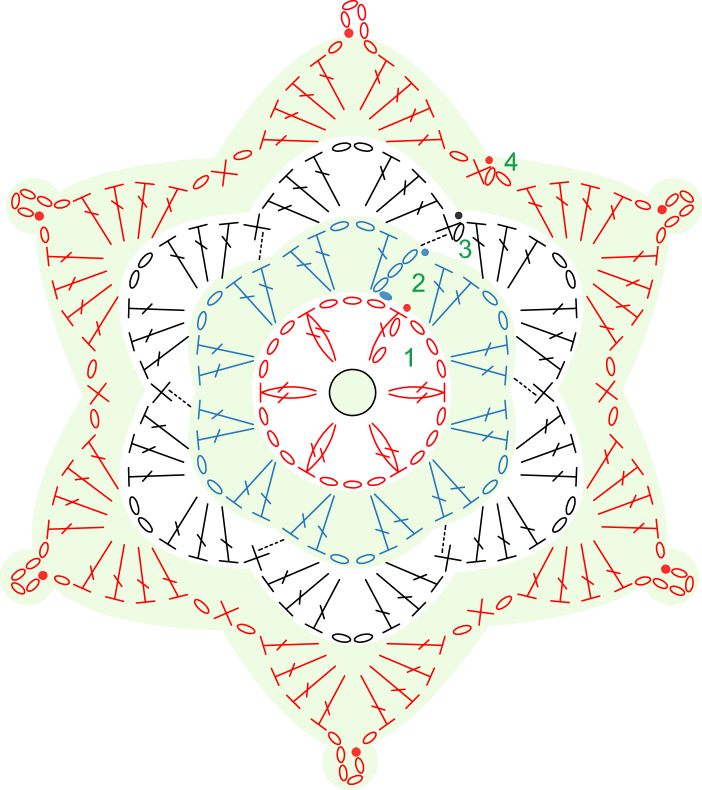
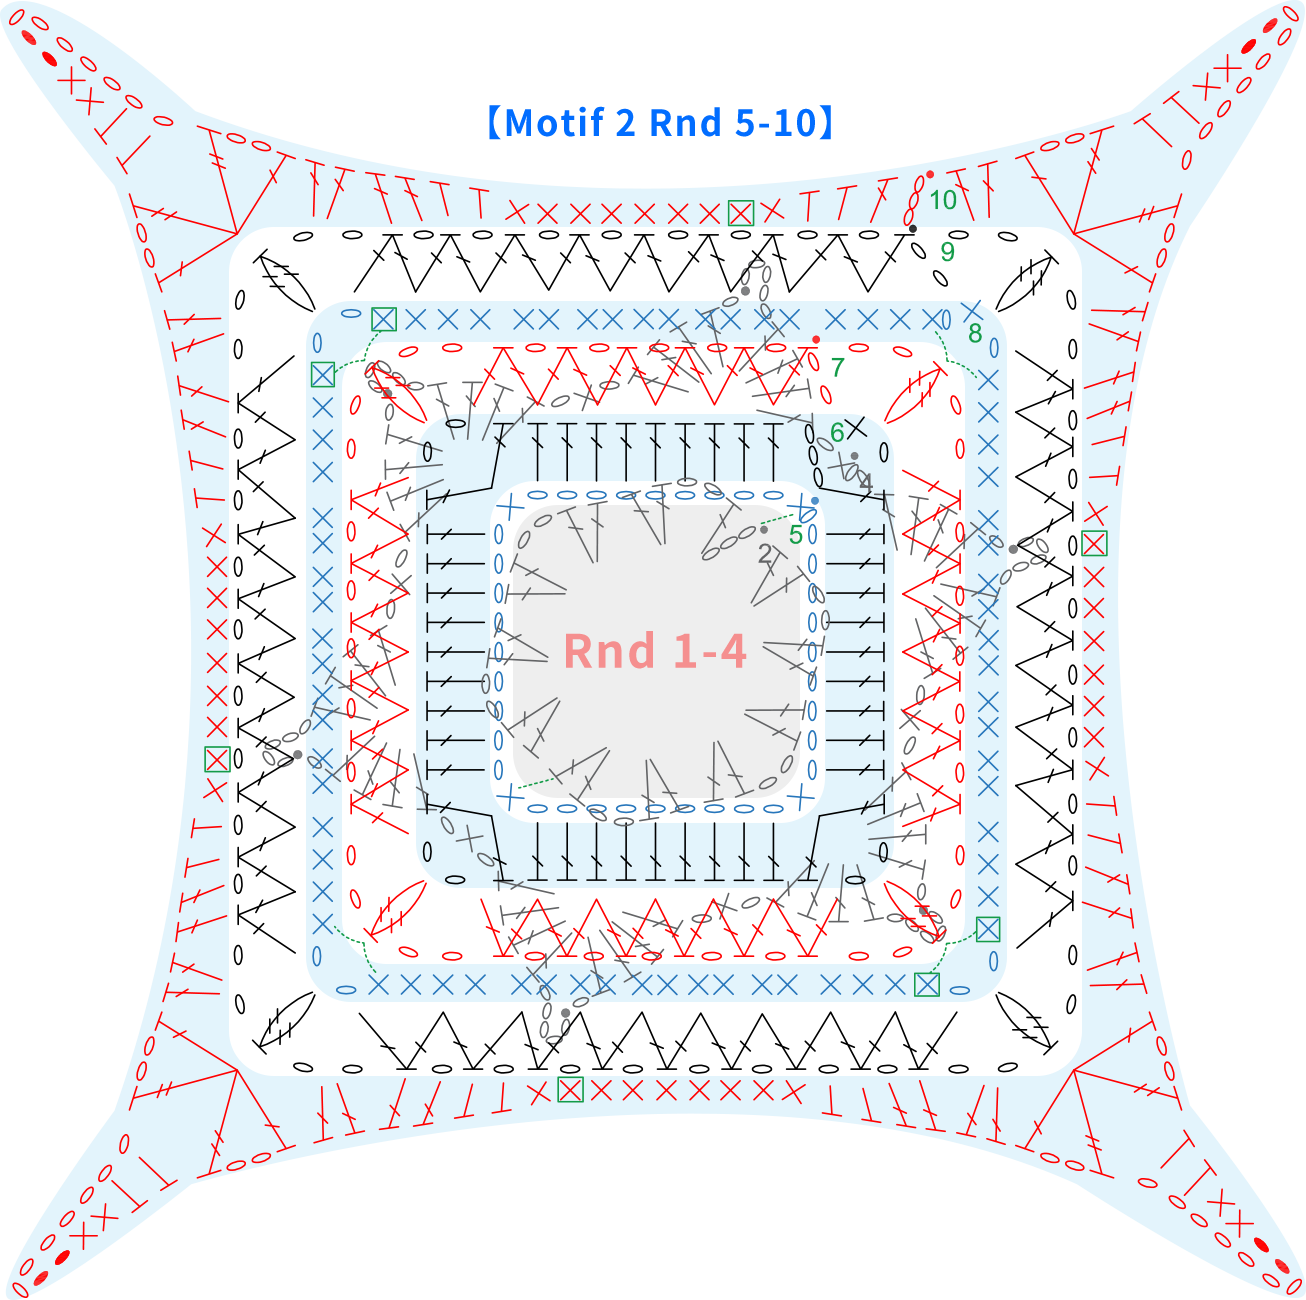
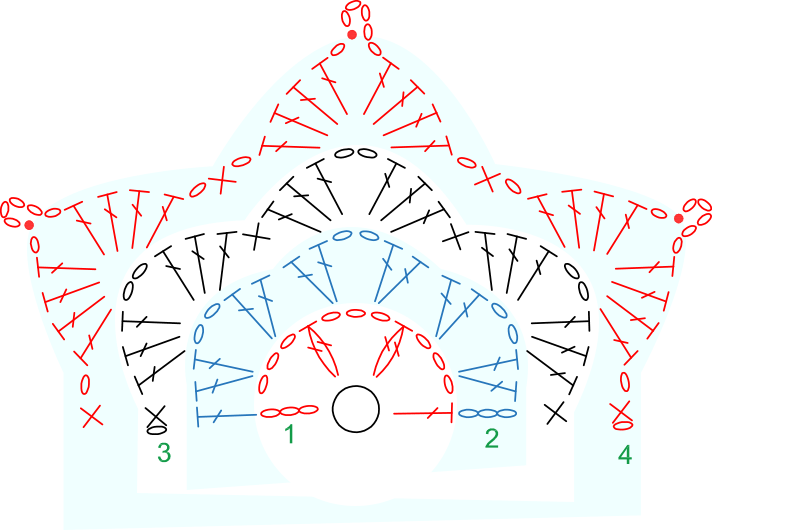
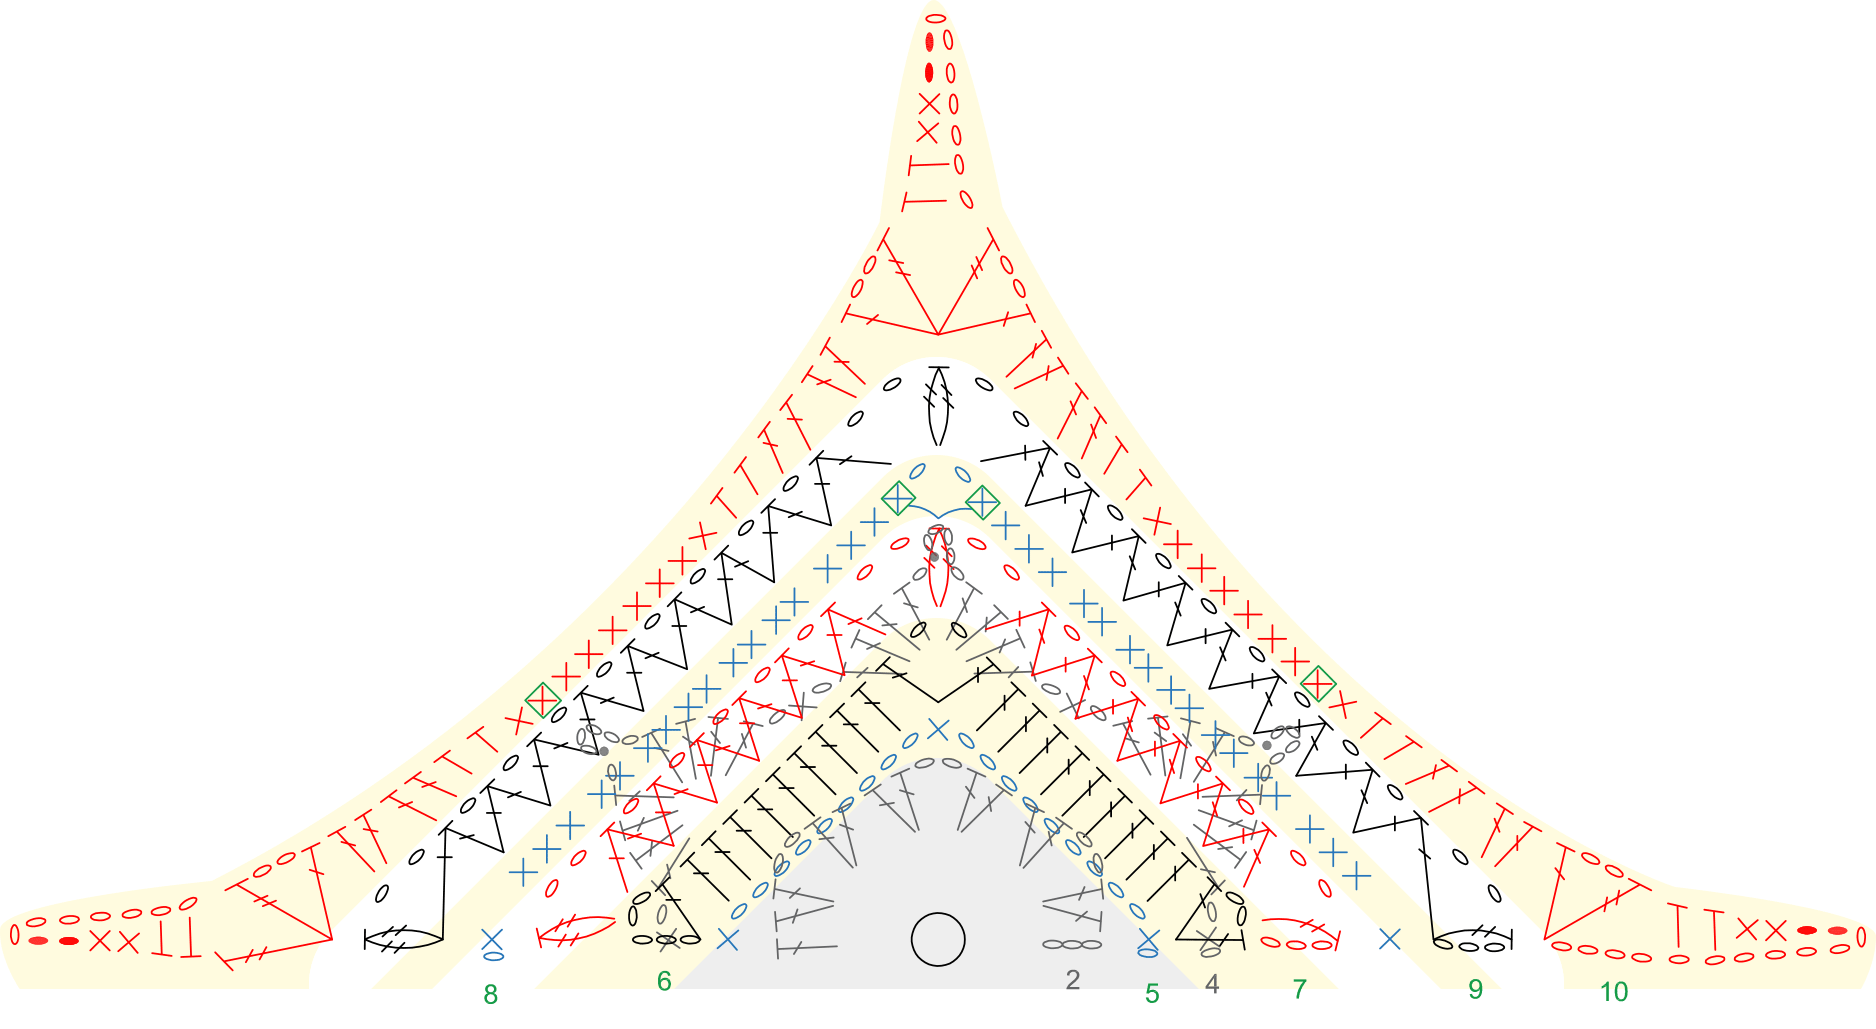
The Motif 2 starts with an adjustable magic ring and work in rounds counter-clockwise. Please refer to the video demonstration for more details.
【Motif 2 Rnd 1-4】
【Motif 2 Rnd 5-10】
Part 3 Motif 3C 26' 05'' (Part 2)
Motif 3 is roughly half of the size of Motif 2. It also starts with an adjustable magic ring and crochet in rows. Please refer to the video demonstration for more details.

【Motif 3 Rnd 1-4】
【Motif 3 Row 5-10】
Part 4 SewingD 42' 02'' (Part 2)
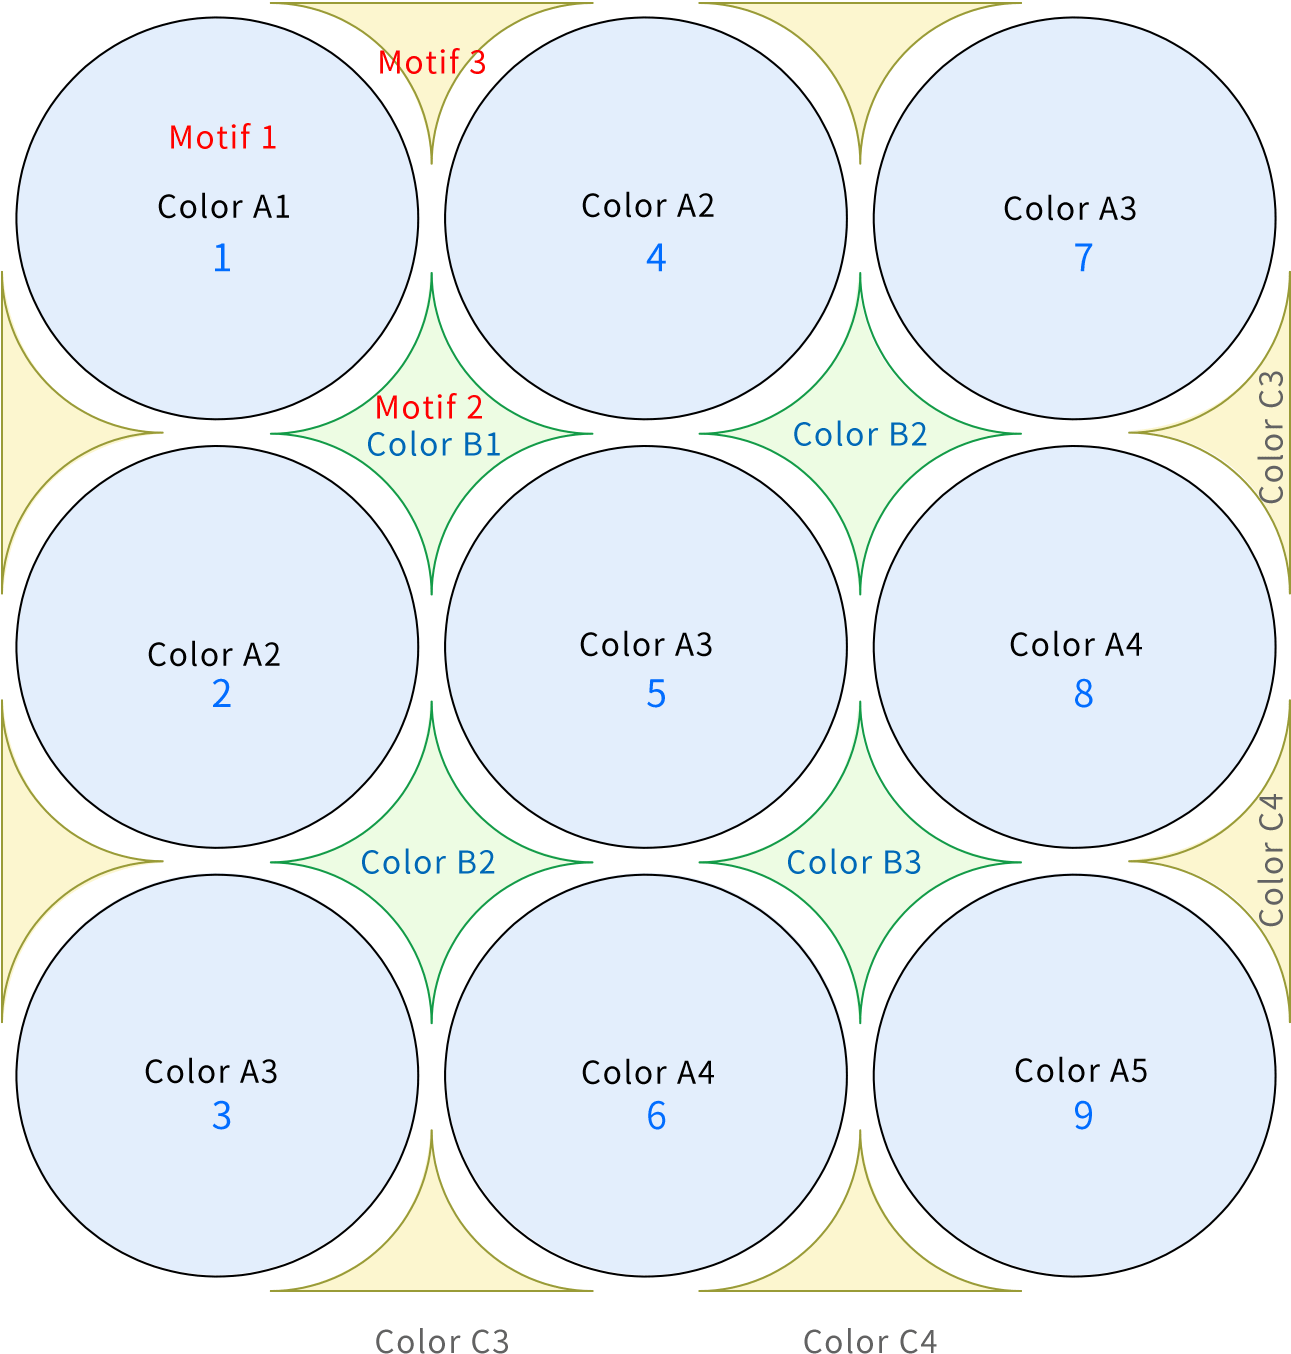
When you crocheted all the Motifs, you'll need to refer to the diagram to sew them together. Please refer to the video demonstration for more details.
Note:
① The individual numbers for the Motif 1 indicate the sewing sequence. Start by sewing the first Motif 1 to its adjacent motifs in order; then attach the second Motif 1 to the remaining motifs in sequence. Continue this pattern until all motifs are sewn together. You can adjust the sewing technique according to your preference. ② Use the same color yarn as the outermost round of the current Motif 1 for sewing.
Sewing diagram
Part 5 EdgingD 42' 02'' (Part 2)
After you sew all the motifs together, Next, we'll work an edging along the edge. Please refer to the video demonstration for more details.
Note:
① In Round 2, each cluster consists of 20 single crochets. ② In Round 3, at each corner, work 11 double crochets in the large space, and for the remaining big spaces, crochet 9 double crochets.



Made by the community