
Clothes
Nested Square Couple Vest
Project preview
See the finished project
Pattern format
Instructions
Watch and follow
Video tutorial
| Style | Yarn | Color |
|---|---|---|
| Tigerlily Version | Impression Misty Feather |  01#Light Khaki 01#Light Khaki 11#Golden Apricot 11#Golden Apricot 18#Tigerlily 18#Tigerlily 21#Dusty Coral 21#Dusty Coral |
| Pinecine Version | Impression Misty Feather | 01#Light Khaki 07#Samoan Sun 07#Samoan Sun 10#Warm Sand 10#Warm Sand 20#Pinecine 20#Pinecine |
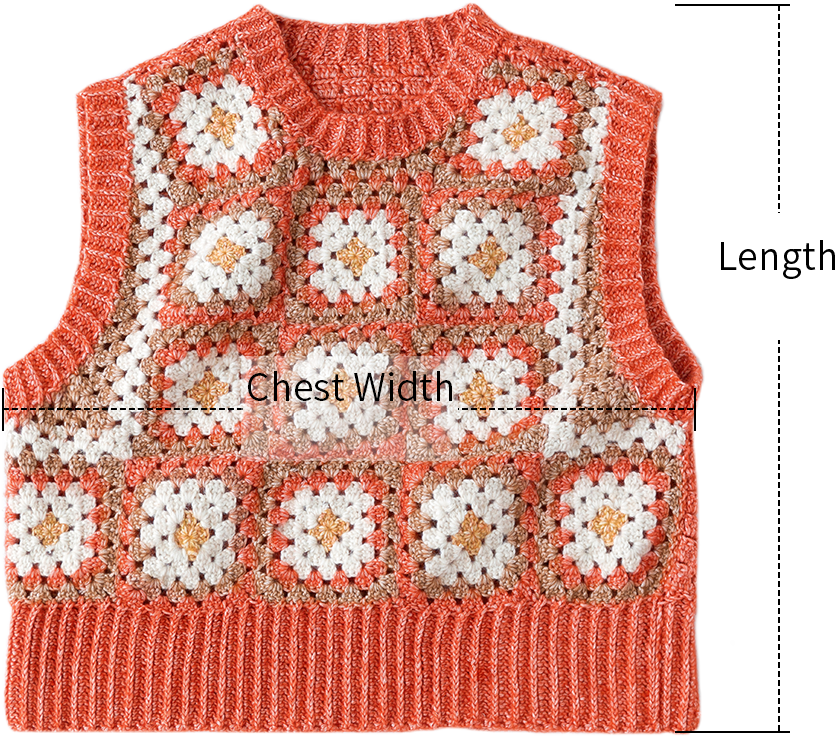
| Size | Chest Width | Length |
| Small | 51 cm | 50.5 cm |
Materials: Impression Misty Feather
Tool: 3.50 mm Crochet Hook








Note:
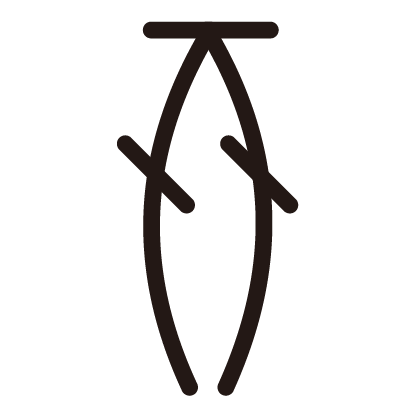
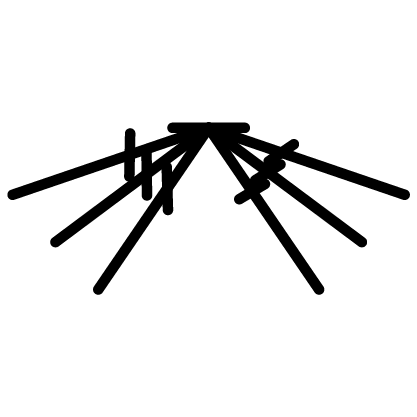
- This pattern is making in Chinese crochet pattern terms, and the stitch name is written using American terminology. All measurements in charts are in cm.

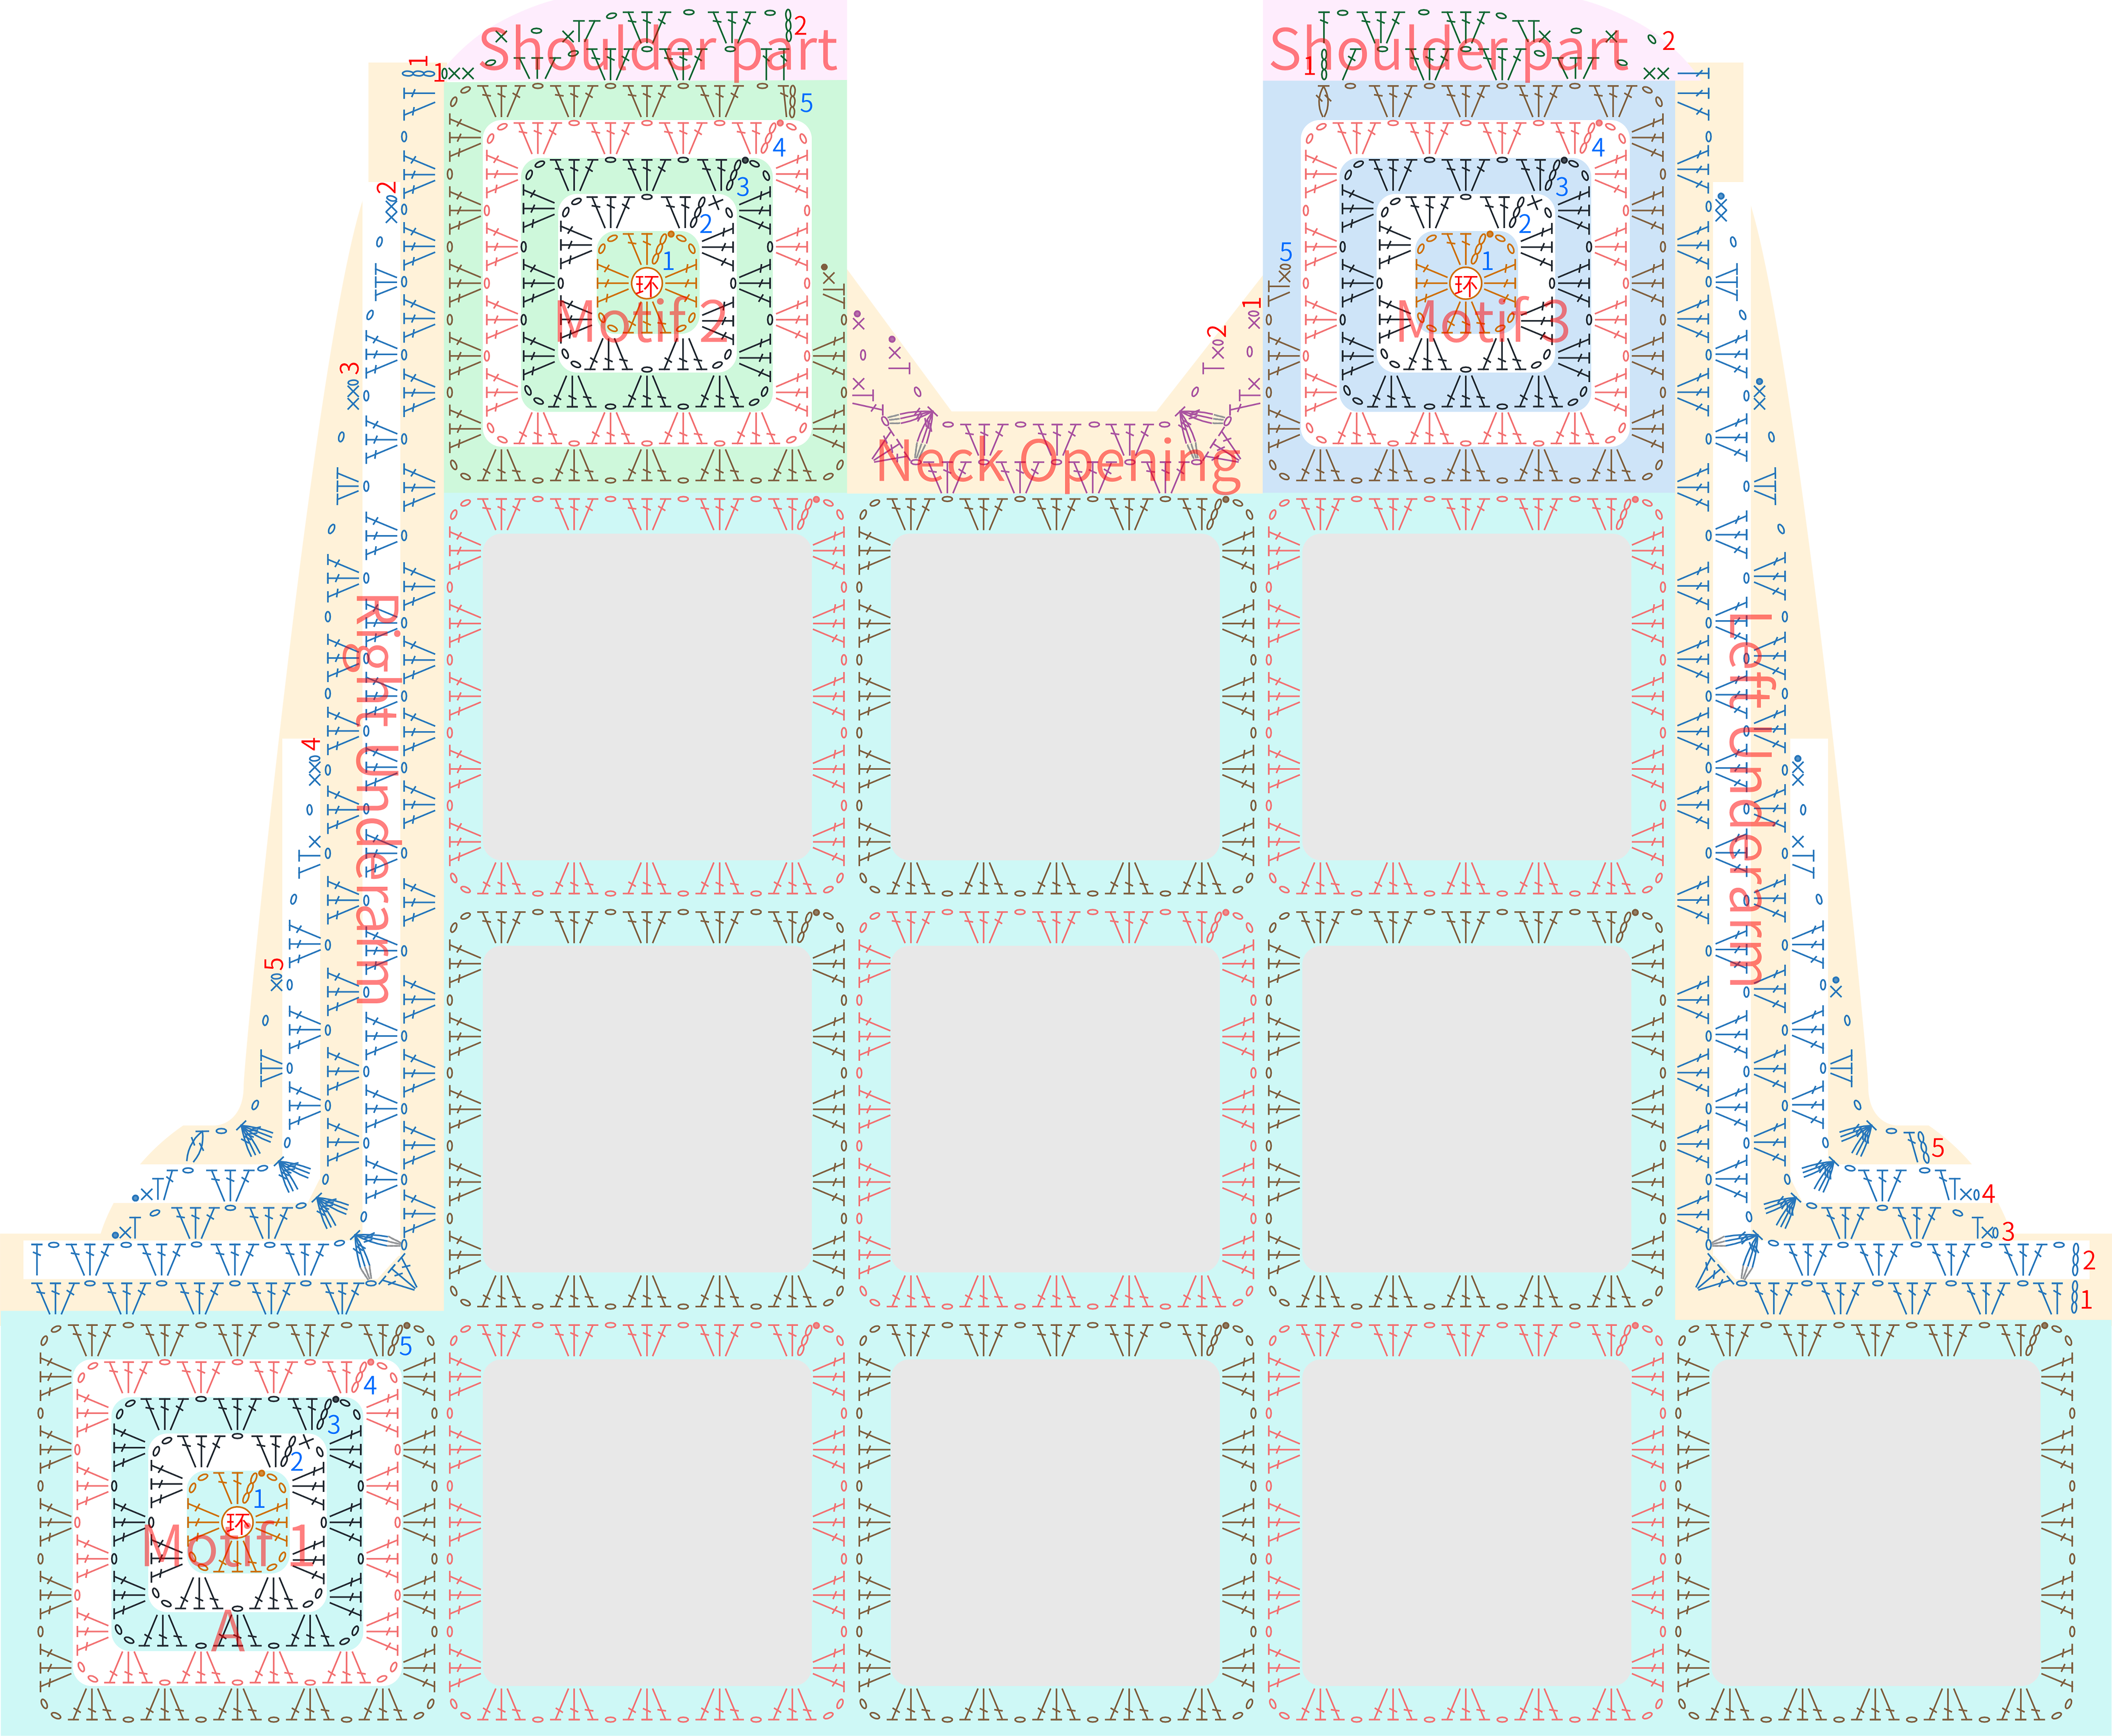
Part 1 Front Piece A 00' 55'' (Part 1)
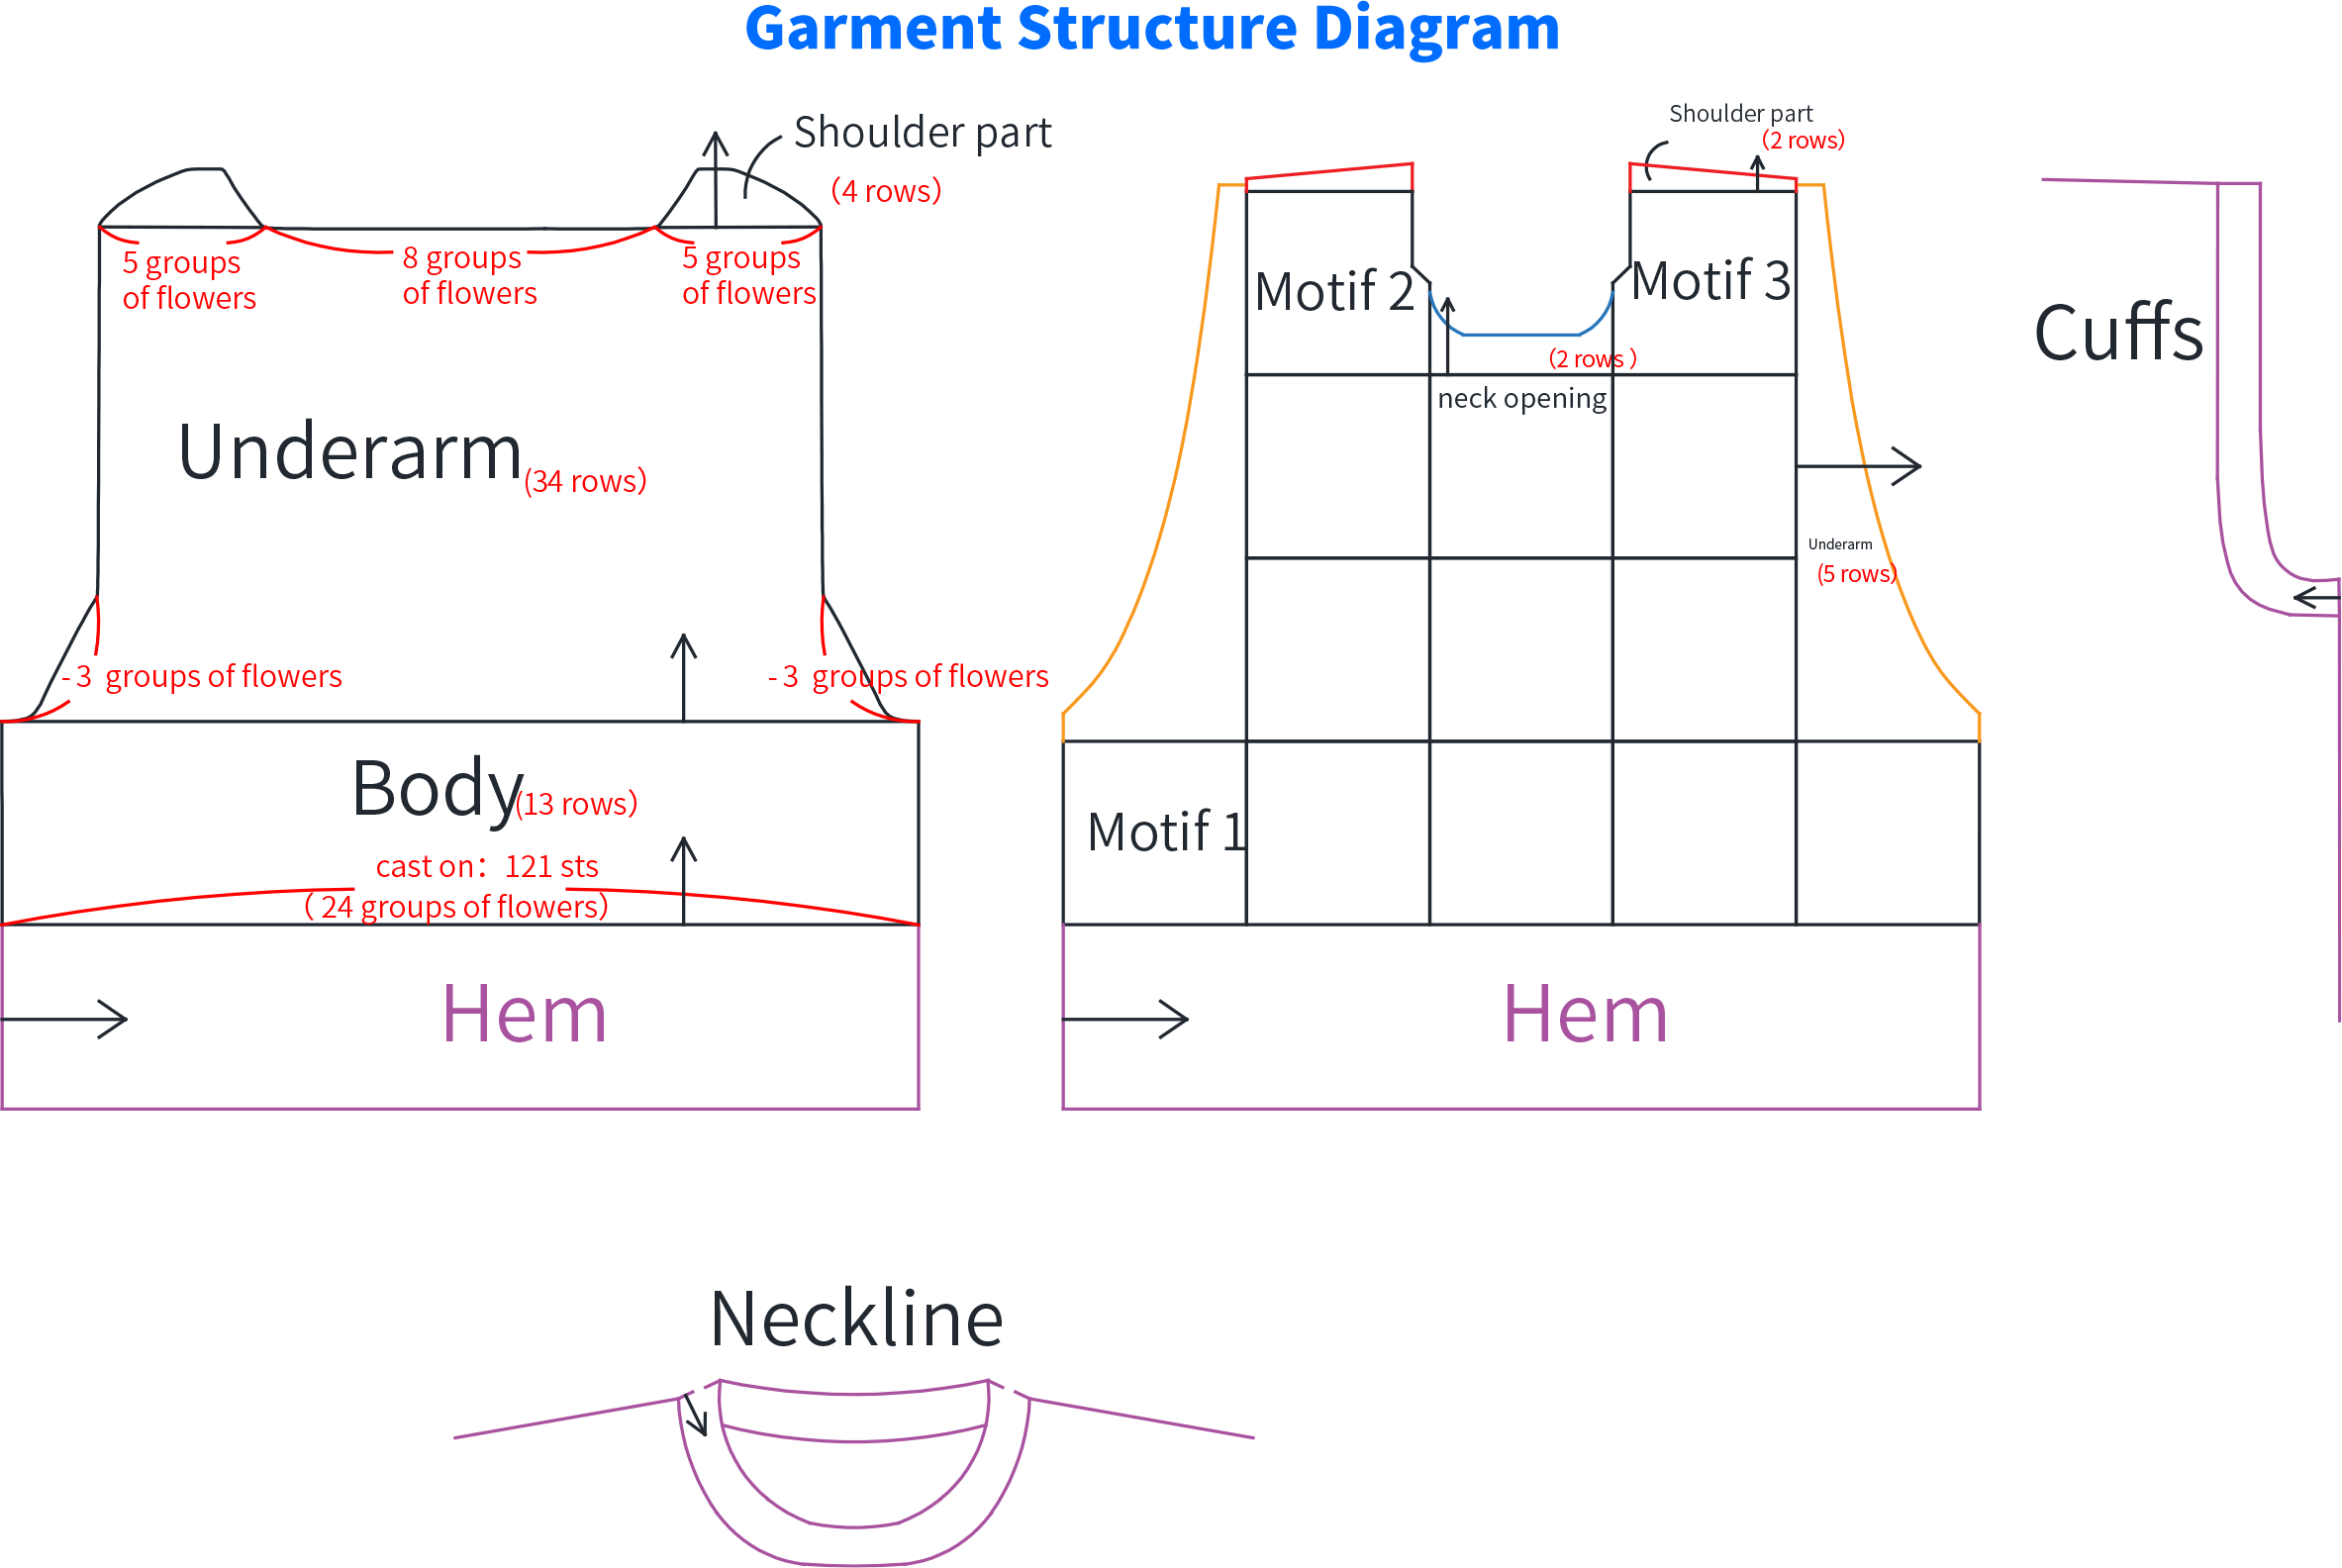
Divide into sections: motif part A 1, side A 2, shoulder A 3, neck opening A 4, and underarm A 5. Among these, the side and shoulder parts are only needed for certain sizes. Start by making and joining the motifs, then pick up at corresponding positions to crochet the remaining parts.Please refer to the video demonstration for more details.
Note:
① First, crochet one complete Motif 1. The remaining Motifs 1 will be worked and joined along the outermost round. After all Motifs 1 are completed, then make Motif 2 and Motif 3.
② After finishing the first Motif 1, check the size—it should be about 10 x10 cm. If the size is significantly different, we recommend switching to a different hook size or adjusting your tension and re-crocheting.
③ Alternate the two color schemes when placing the motifs.
| Tigerlily Version | |||||
| Name | Rounds/Rows | Motif 1(Color A)*6 | Motif 1(Color B)*5 | Motif 2 | Motif 3 |
| Motif | R 1 | 11#Golden Apricot | |||
| R 2-3 | 01#Light Khaki | ||||
| R 4 | 18#Tigerlily | 21#Dusty Coral | 18#Tigerlily | ||
| R 5 | 21#Dusty Coral | 18#Tigerlily | 21#Dusty Coral | ||
| Neck Opening | R 1 | 18#Tigerlily | |||
| R 2 | 21#Dusty Coral | ||||
| Underarm | R 1 - 2 | 01#Light Khaki | |||
| Other rows | 21#Dusty Coral | ||||
| Front Piece Shoulder-part, Back Piece, Connect, Collar, Cuffs,Hem | 18#Tigerlily | ||||
| Pinecine Version | |||||
| Name | Rounds/Rows | Motif 1(Color A)*6 | Motif 1(Color B)*5 | Motif 2 | Motif 3 |
| Motif | R 1 | 07#Samoan Sun | |||
| R 2-3 | 01#Light Khaki | ||||
| R 4 | 20#Pinecine | 10#Warm Sand | 20#Pinecine | ||
| R 5 | 10#Warm Sand | 20#Pinecine | 10#Warm Sand | ||
| Neck Opening | 10#Warm Sand | ||||
| Underarm | R 1 - 2 | 01#Light Khaki | |||
| Other rows | 10#Warm Sand | ||||
| Front Piece Shoulder-part, Back Piece, Connect, Collar, Cuffs,Hem | 20#Pinecine | ||||
Part 2 Back Piece B 00' 12'' (Part 2)
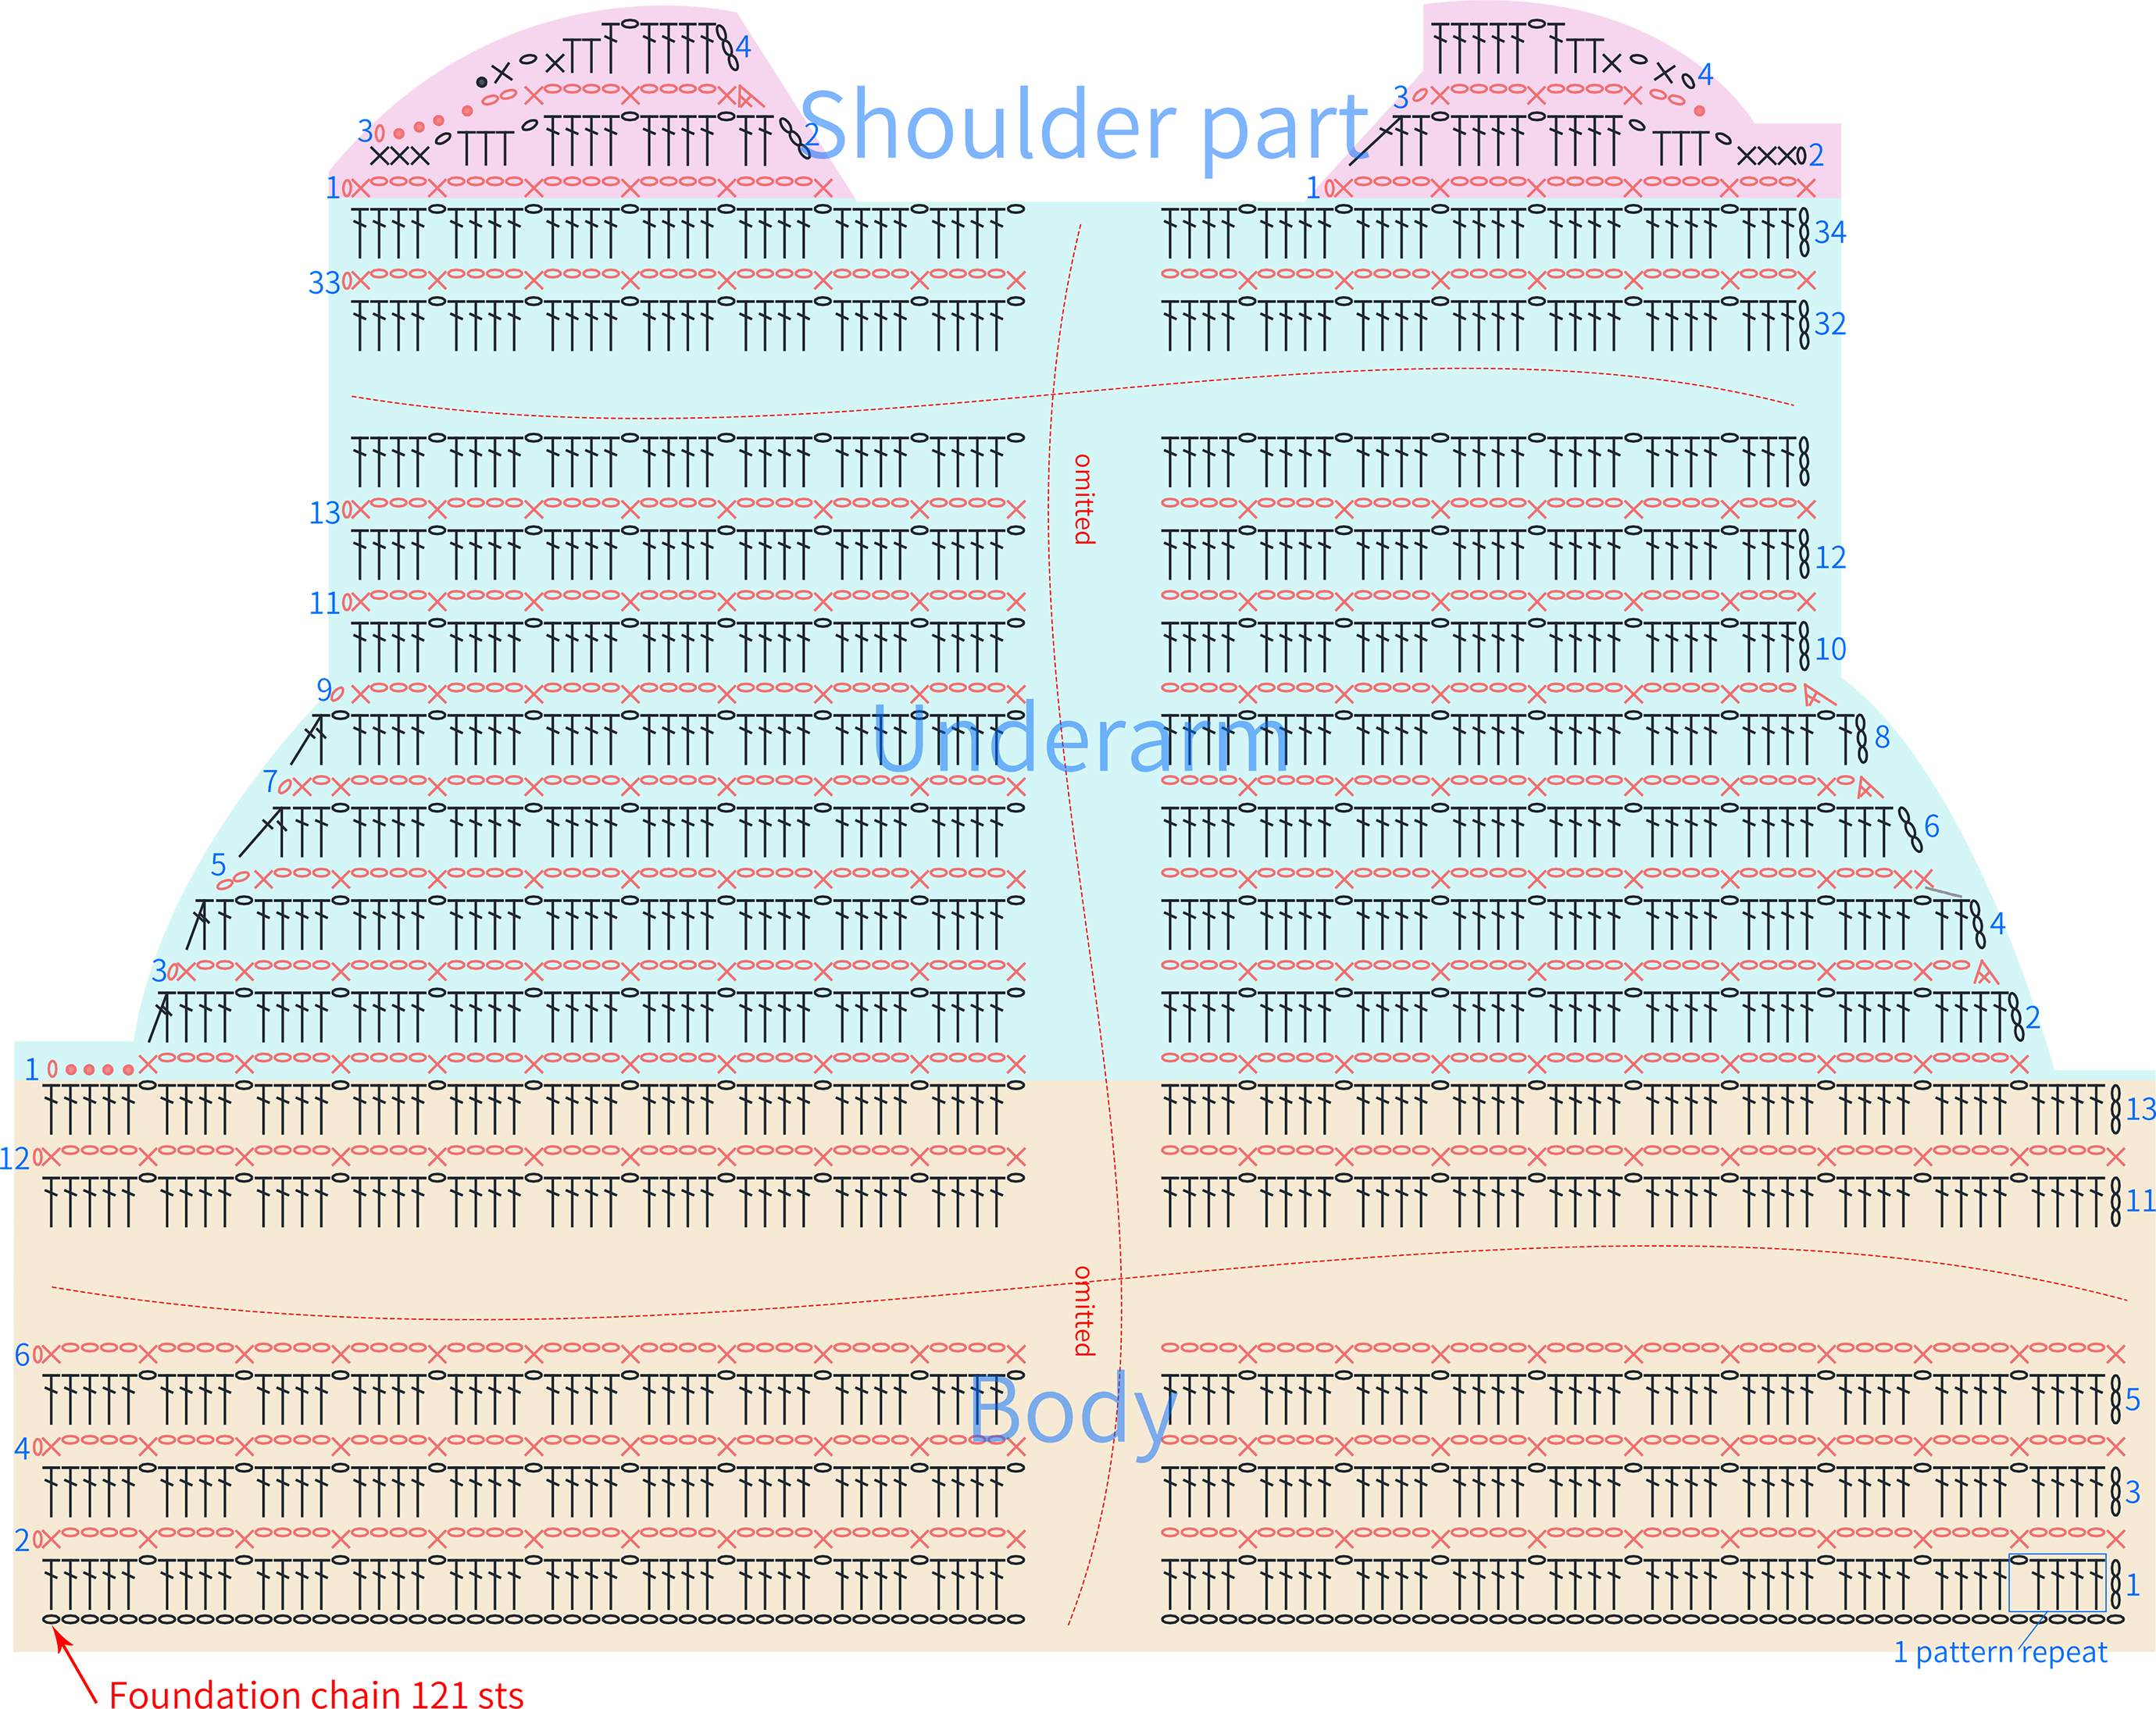
Divided into three sections: body B 1, underarm B 2, and neckline/shoulder B 3. Begin with a chain stitch and work from the bottom up. Please refer to the chart and video demonstration for details.
Note: After completing row 3, compare the length with the front piece. At this point, the height should be around 3 cm. If the size is slightly off, you can gently stretch the fabric. If it's significantly different, consider switching to a different hook size or adjusting your hand tension and crocheting again.
Part 3 Connect C, Collar D, Cuffs E, Hem F 23' 35'' (Part 2)
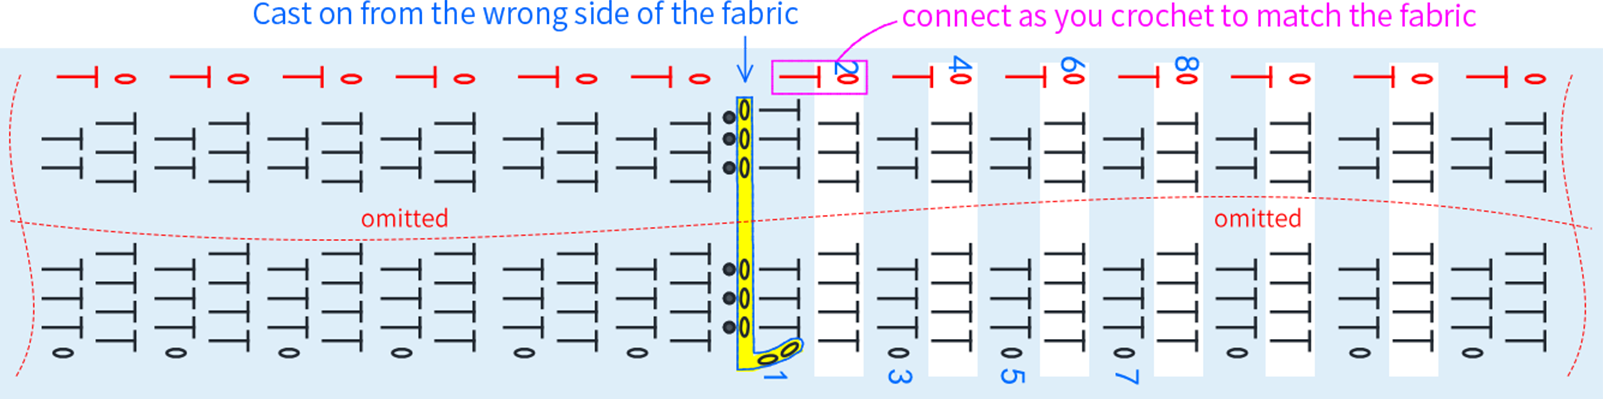
First, connect the shoulders and body parts of the front and back pieces. After completing this, pick up stitches around the neckline and armhole areas separately, then crochet the collar and cuffs. Finally, crochet the hem at the bottom. Please refer to the chart and video demonstration for details.
| Part | Cast on | Rows |
| Neckline | 9 sts | 68 rows |
| Cuffs | 9 sts | 74 rows |
| Hem | 23 sts | 156 rows |
| Note: The number of rows and starting stitches can be adjusted according to preference. | ||
Made by the community





