Clothes
Nimbus
Project preview
See the finished project
Pattern format
Instructions
| Style | Yarn | Color |
|---|---|---|
| Cream White Style | Linenelle Lace Yarn |  01#Cream White x 6 01#Cream White x 6 14#Hazy Blue x 2 14#Hazy Blue x 2 |
| Bamboo Shoot Green Style | Linenelle Lace Yarn | 01#Cream White x 2 13#Bamboo Shoot Green x 6 13#Bamboo Shoot Green x 6 |
Cream White Style
01#Cream White x 614#Hazy Blue x 2Bamboo Shoot Green Style
01#Cream White x 213#Bamboo Shoot Green x 6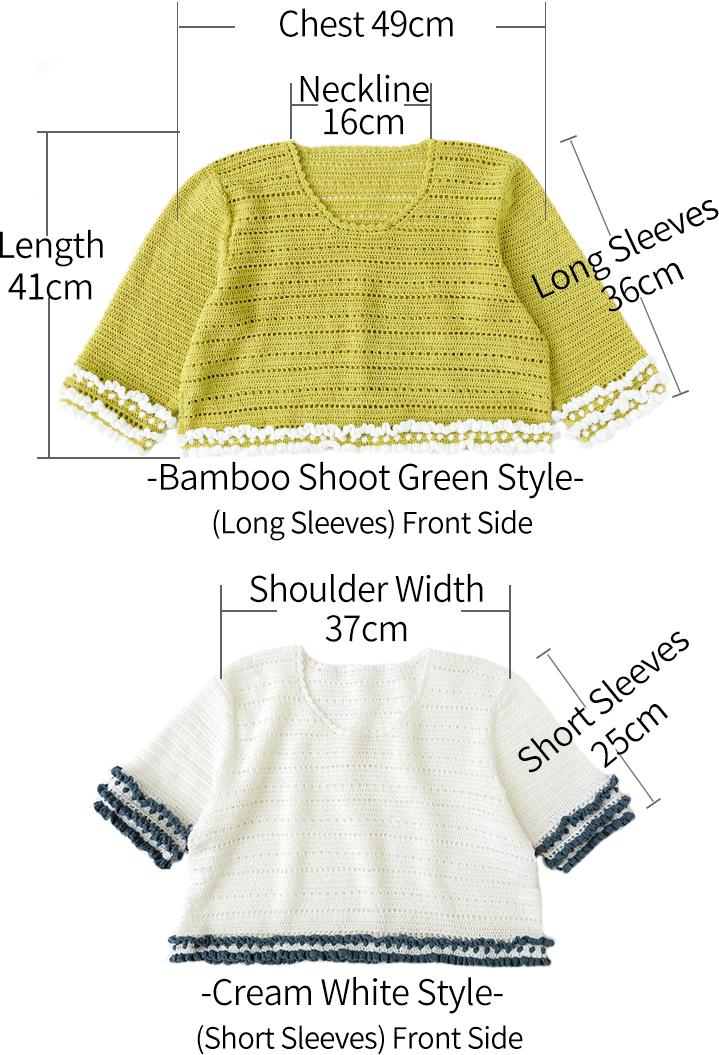
| Color Scheme Chart | ||||
| Style | Main Color Yarn | Contrasting Color Yarn | Lace Trim | Collar |
| Cream White Style | 01#Cream White | 14#Hazy Blue | 01#Cream White | |
| Bamboo Shoot Green Style | 13#Bamboo Shoot Green | 01#Cream White | 13#Bamboo Shoot Green | |
The handcrafted measurements may have an error, the size of the sample is for reference only.
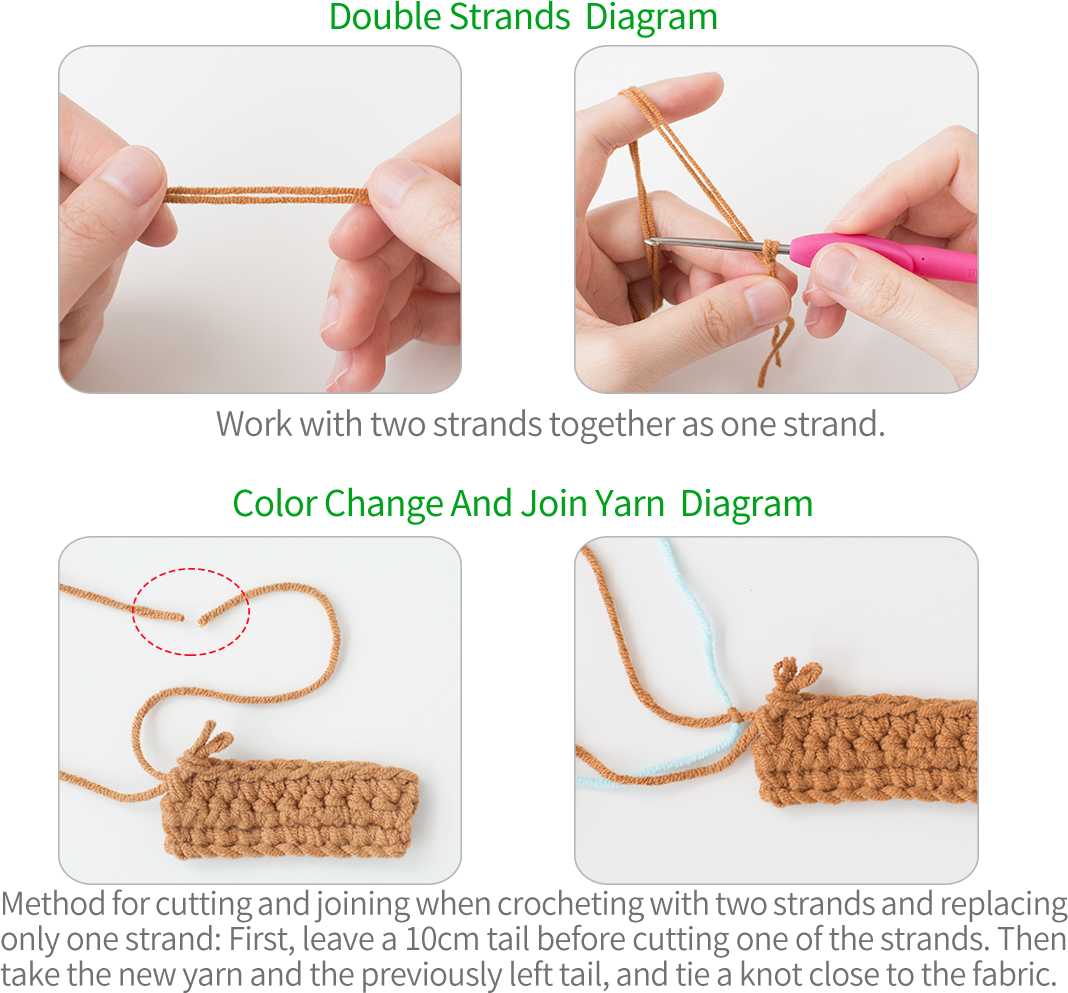
Materials: Linenelle Lace Yarn (Double Strands )
Tool: 2.50 mm Crochet Hook











Note:
This pattern is making in Chinese crochet pattern terms, and the stitch name is written using American terminology. All measurements in charts are in cm.
Part 1 Front Piece
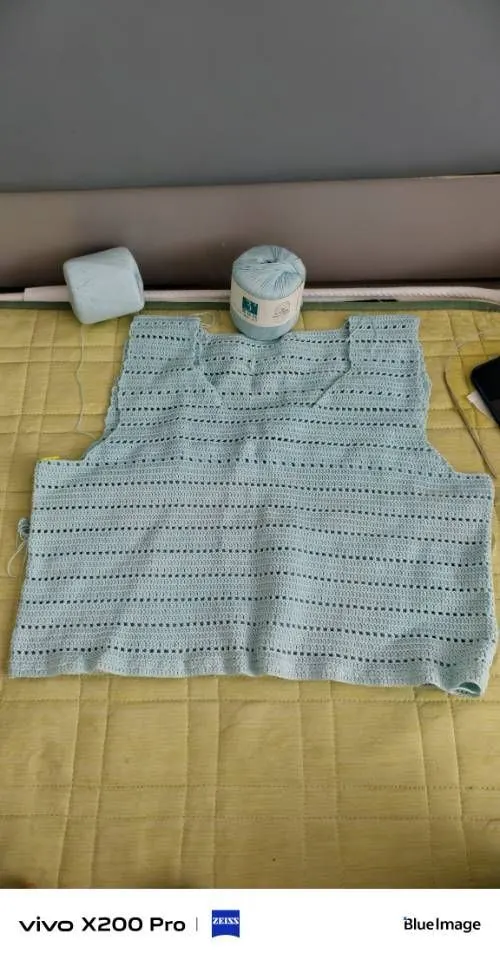
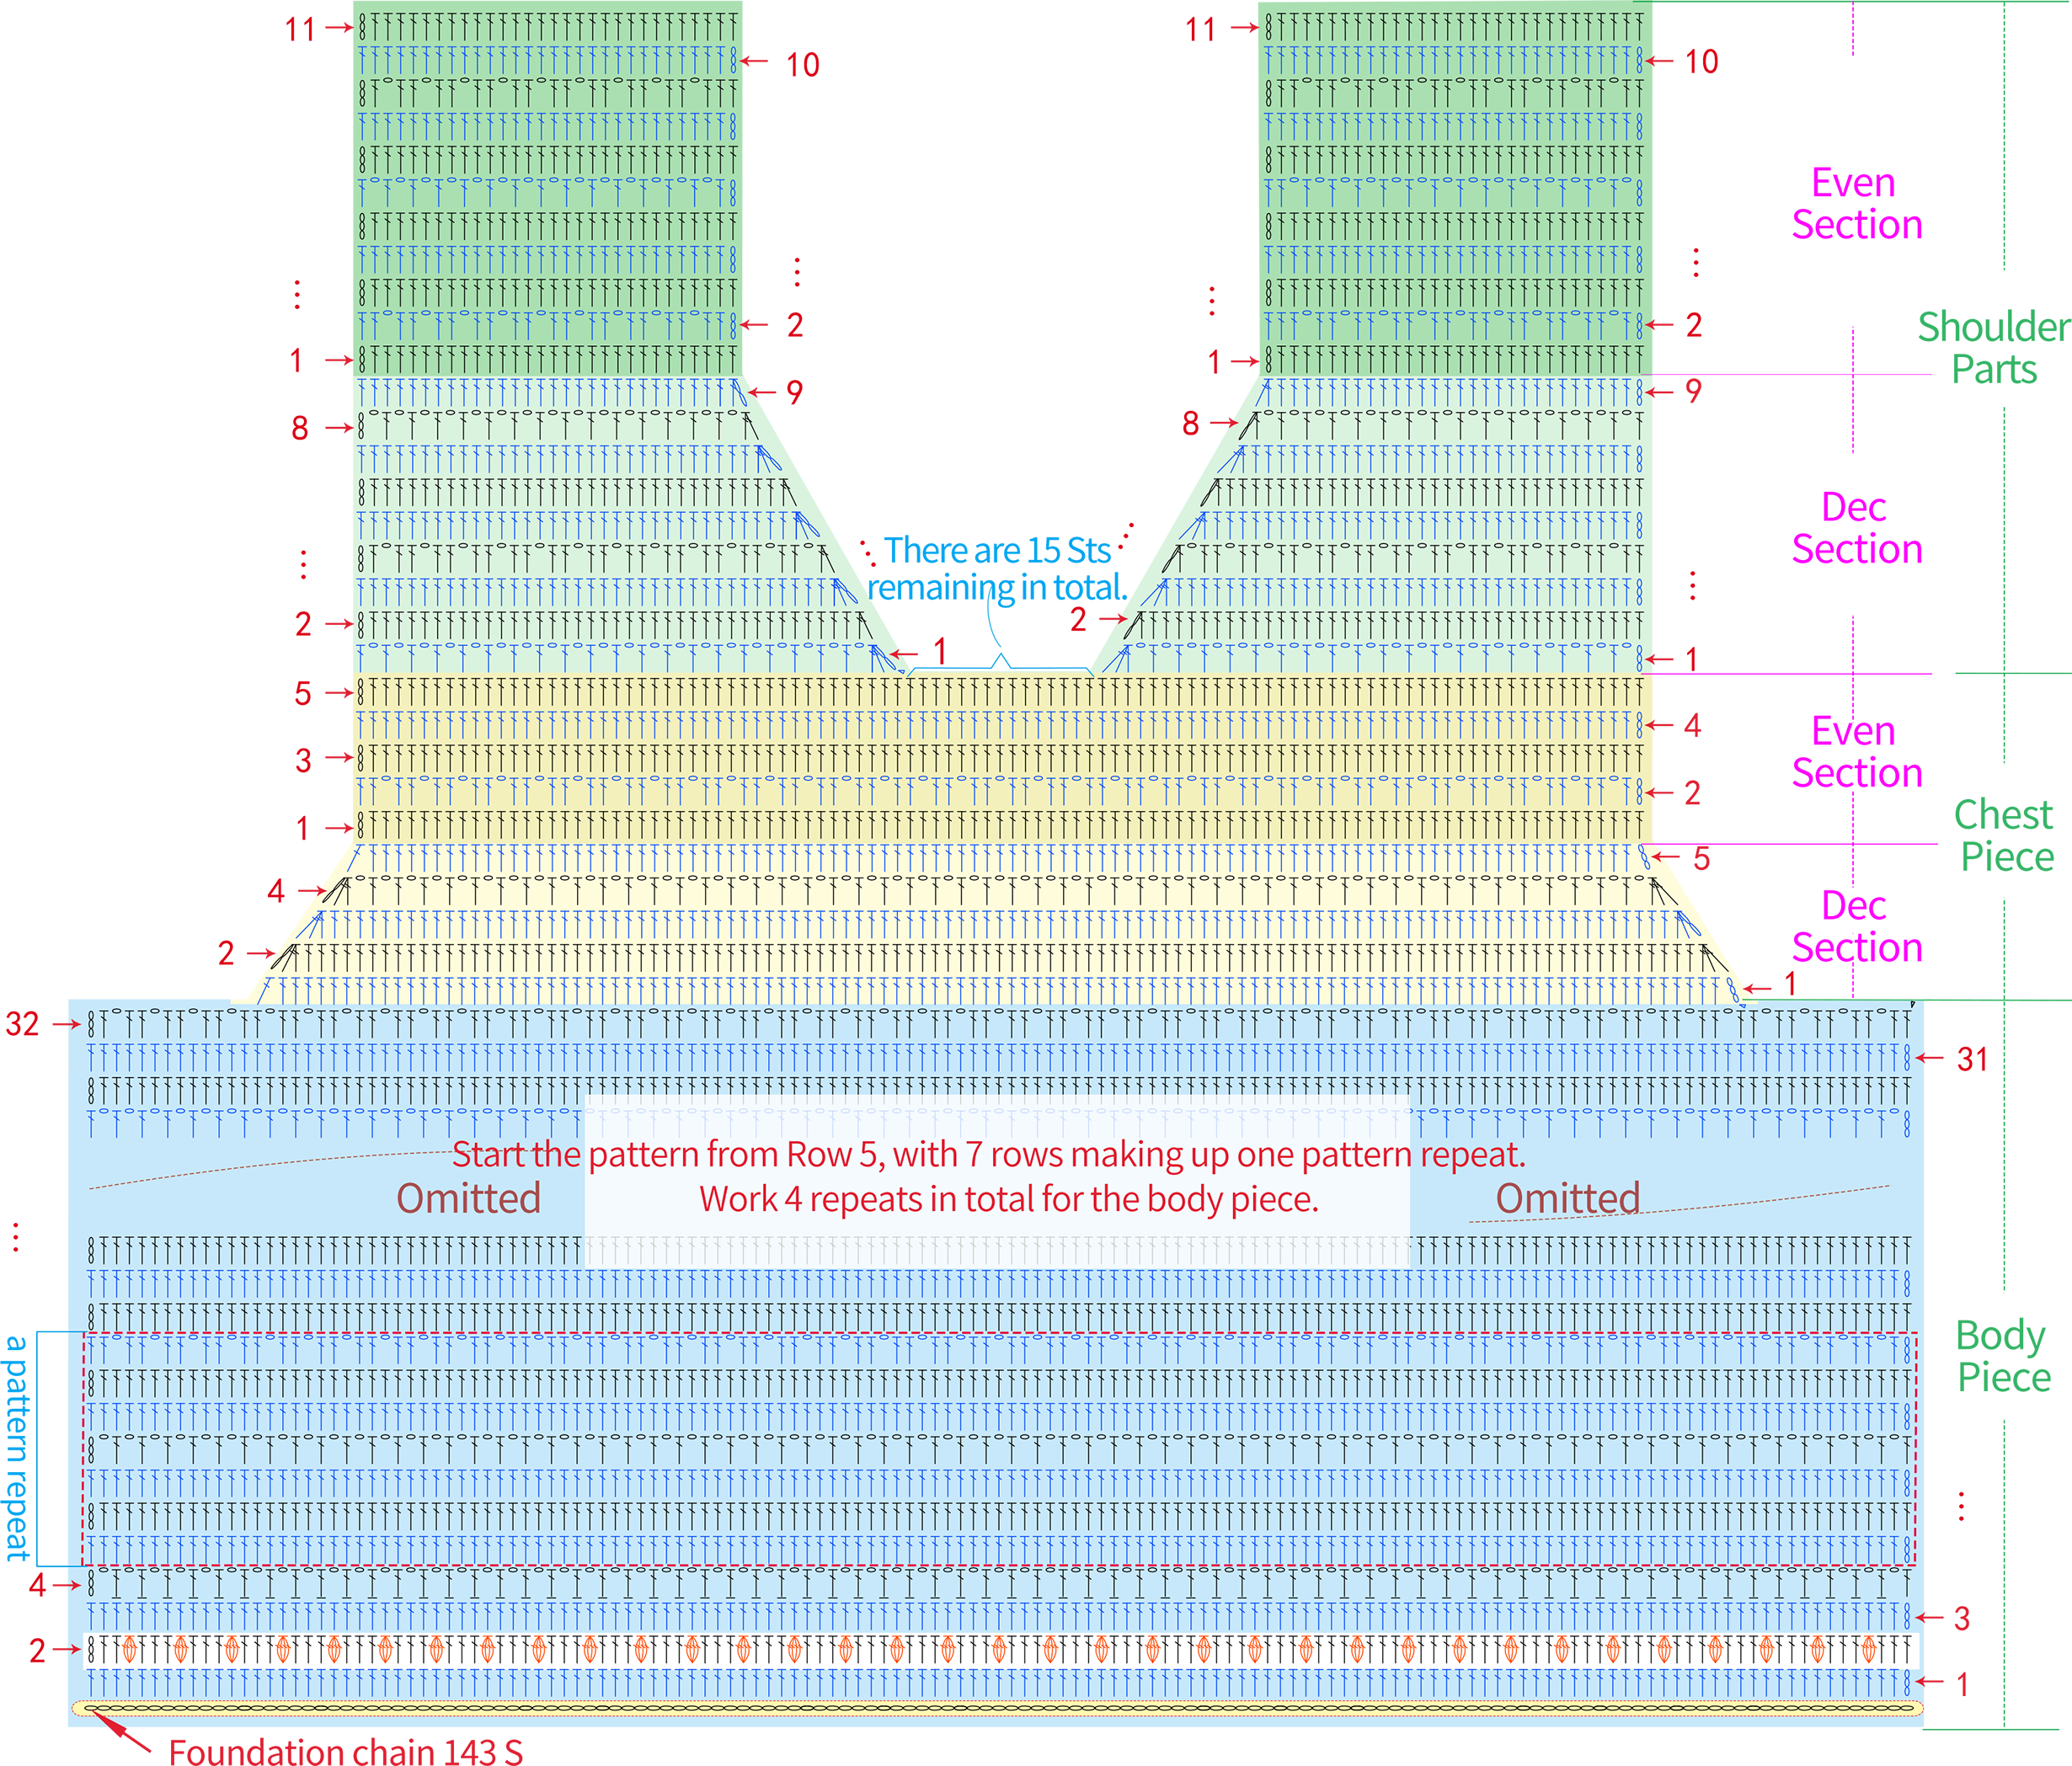
Start with a foundation chain stitch, work back and forth in rows, and pay attention to the color change positions during crocheting. The project is divided into three parts: the body piece, the chest piece , and the shoulder parts.
Note:
1. Don't crochet the starting chain too tight. When making the dc4-bobble, switch to the contrasting color yarn;
2. Pay attention to the stripe pattern in Row 4 when crocheting the dc; leave about 2 meters of yarn tail at each of the left and right shoulder-parts at the end.
Part 2 Back Piece
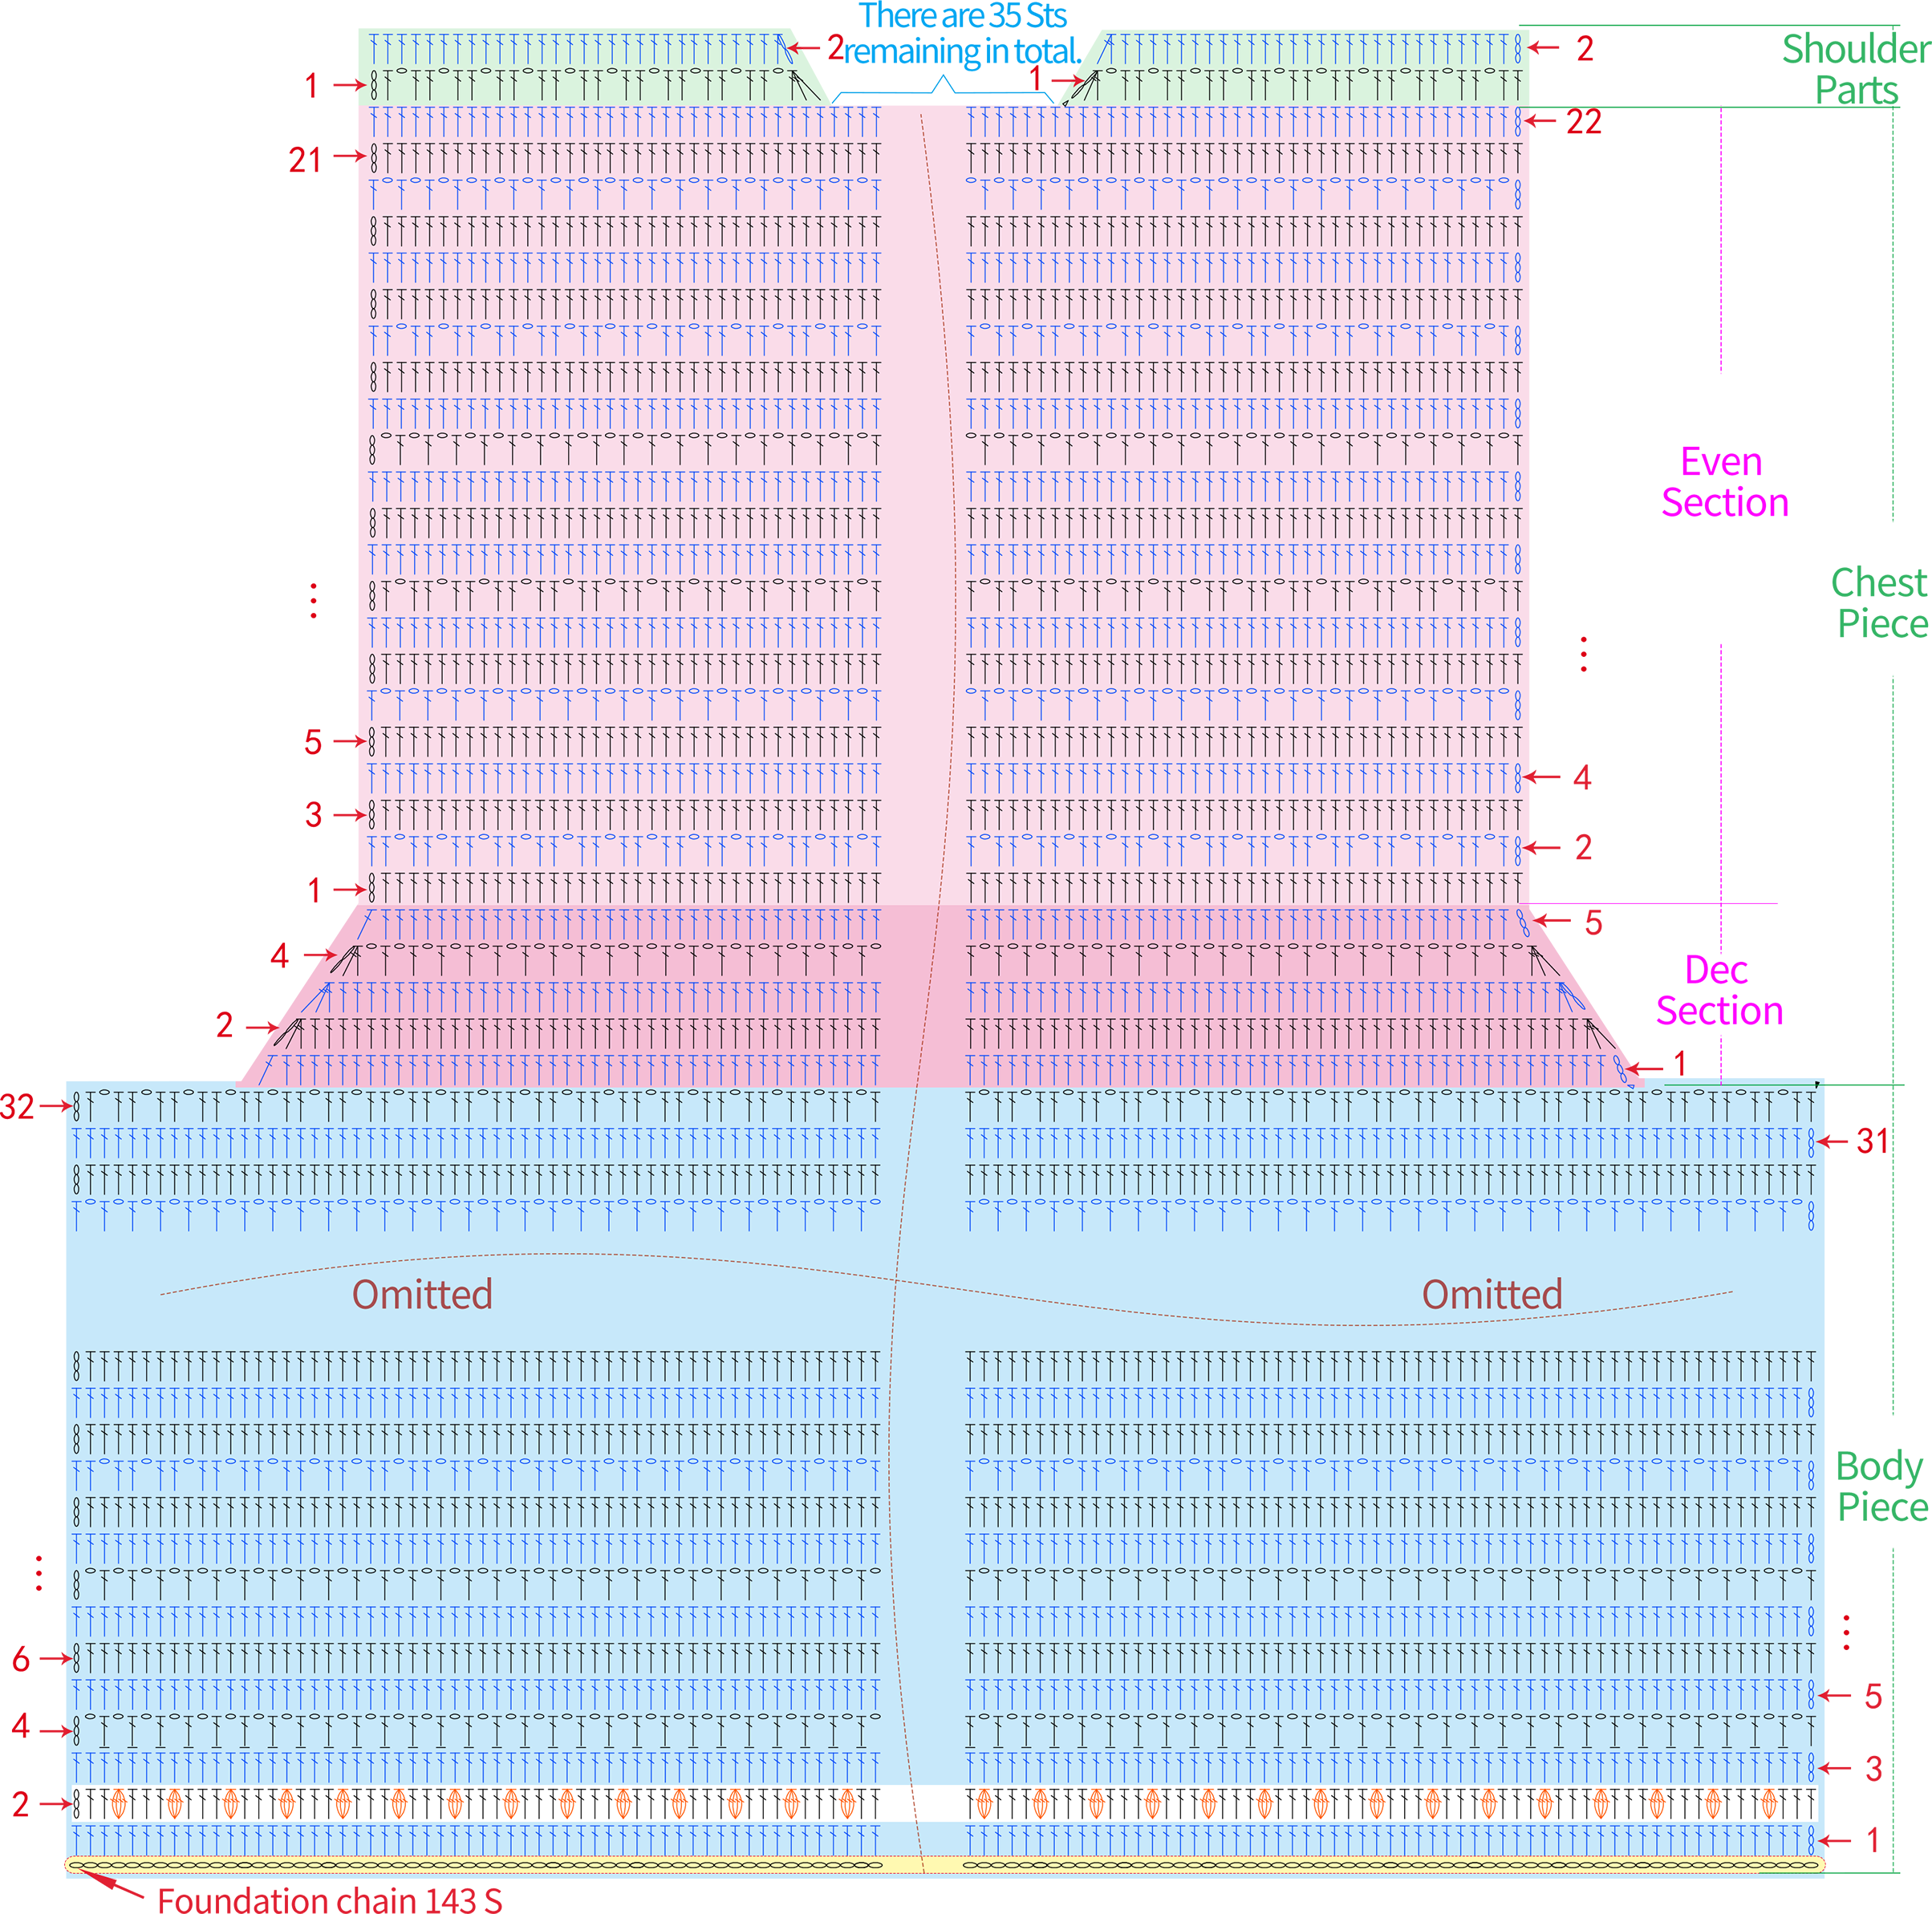
The back piece is also divided into 3 sections, starting with a foundation chain cast on and worked back and forth. You can follow the same crocheting method as the front piece.
Note:
1. The crochet pattern for the back piece is the same as the front piece. When crocheting the dc4-bobble, you also need to switch to the contrasting color yarn; pay attention to the stripe pattern in Row 4 when crocheting the dc.
2. Leave about 5cm yarn tails at the end of each of the left and right shoulder parts .
Part 3 Connecting Pieces & Lace Trim
After completing the front and back pieces, connect the pieces first, then crochet the border.
Step 1 Joining The Pieces
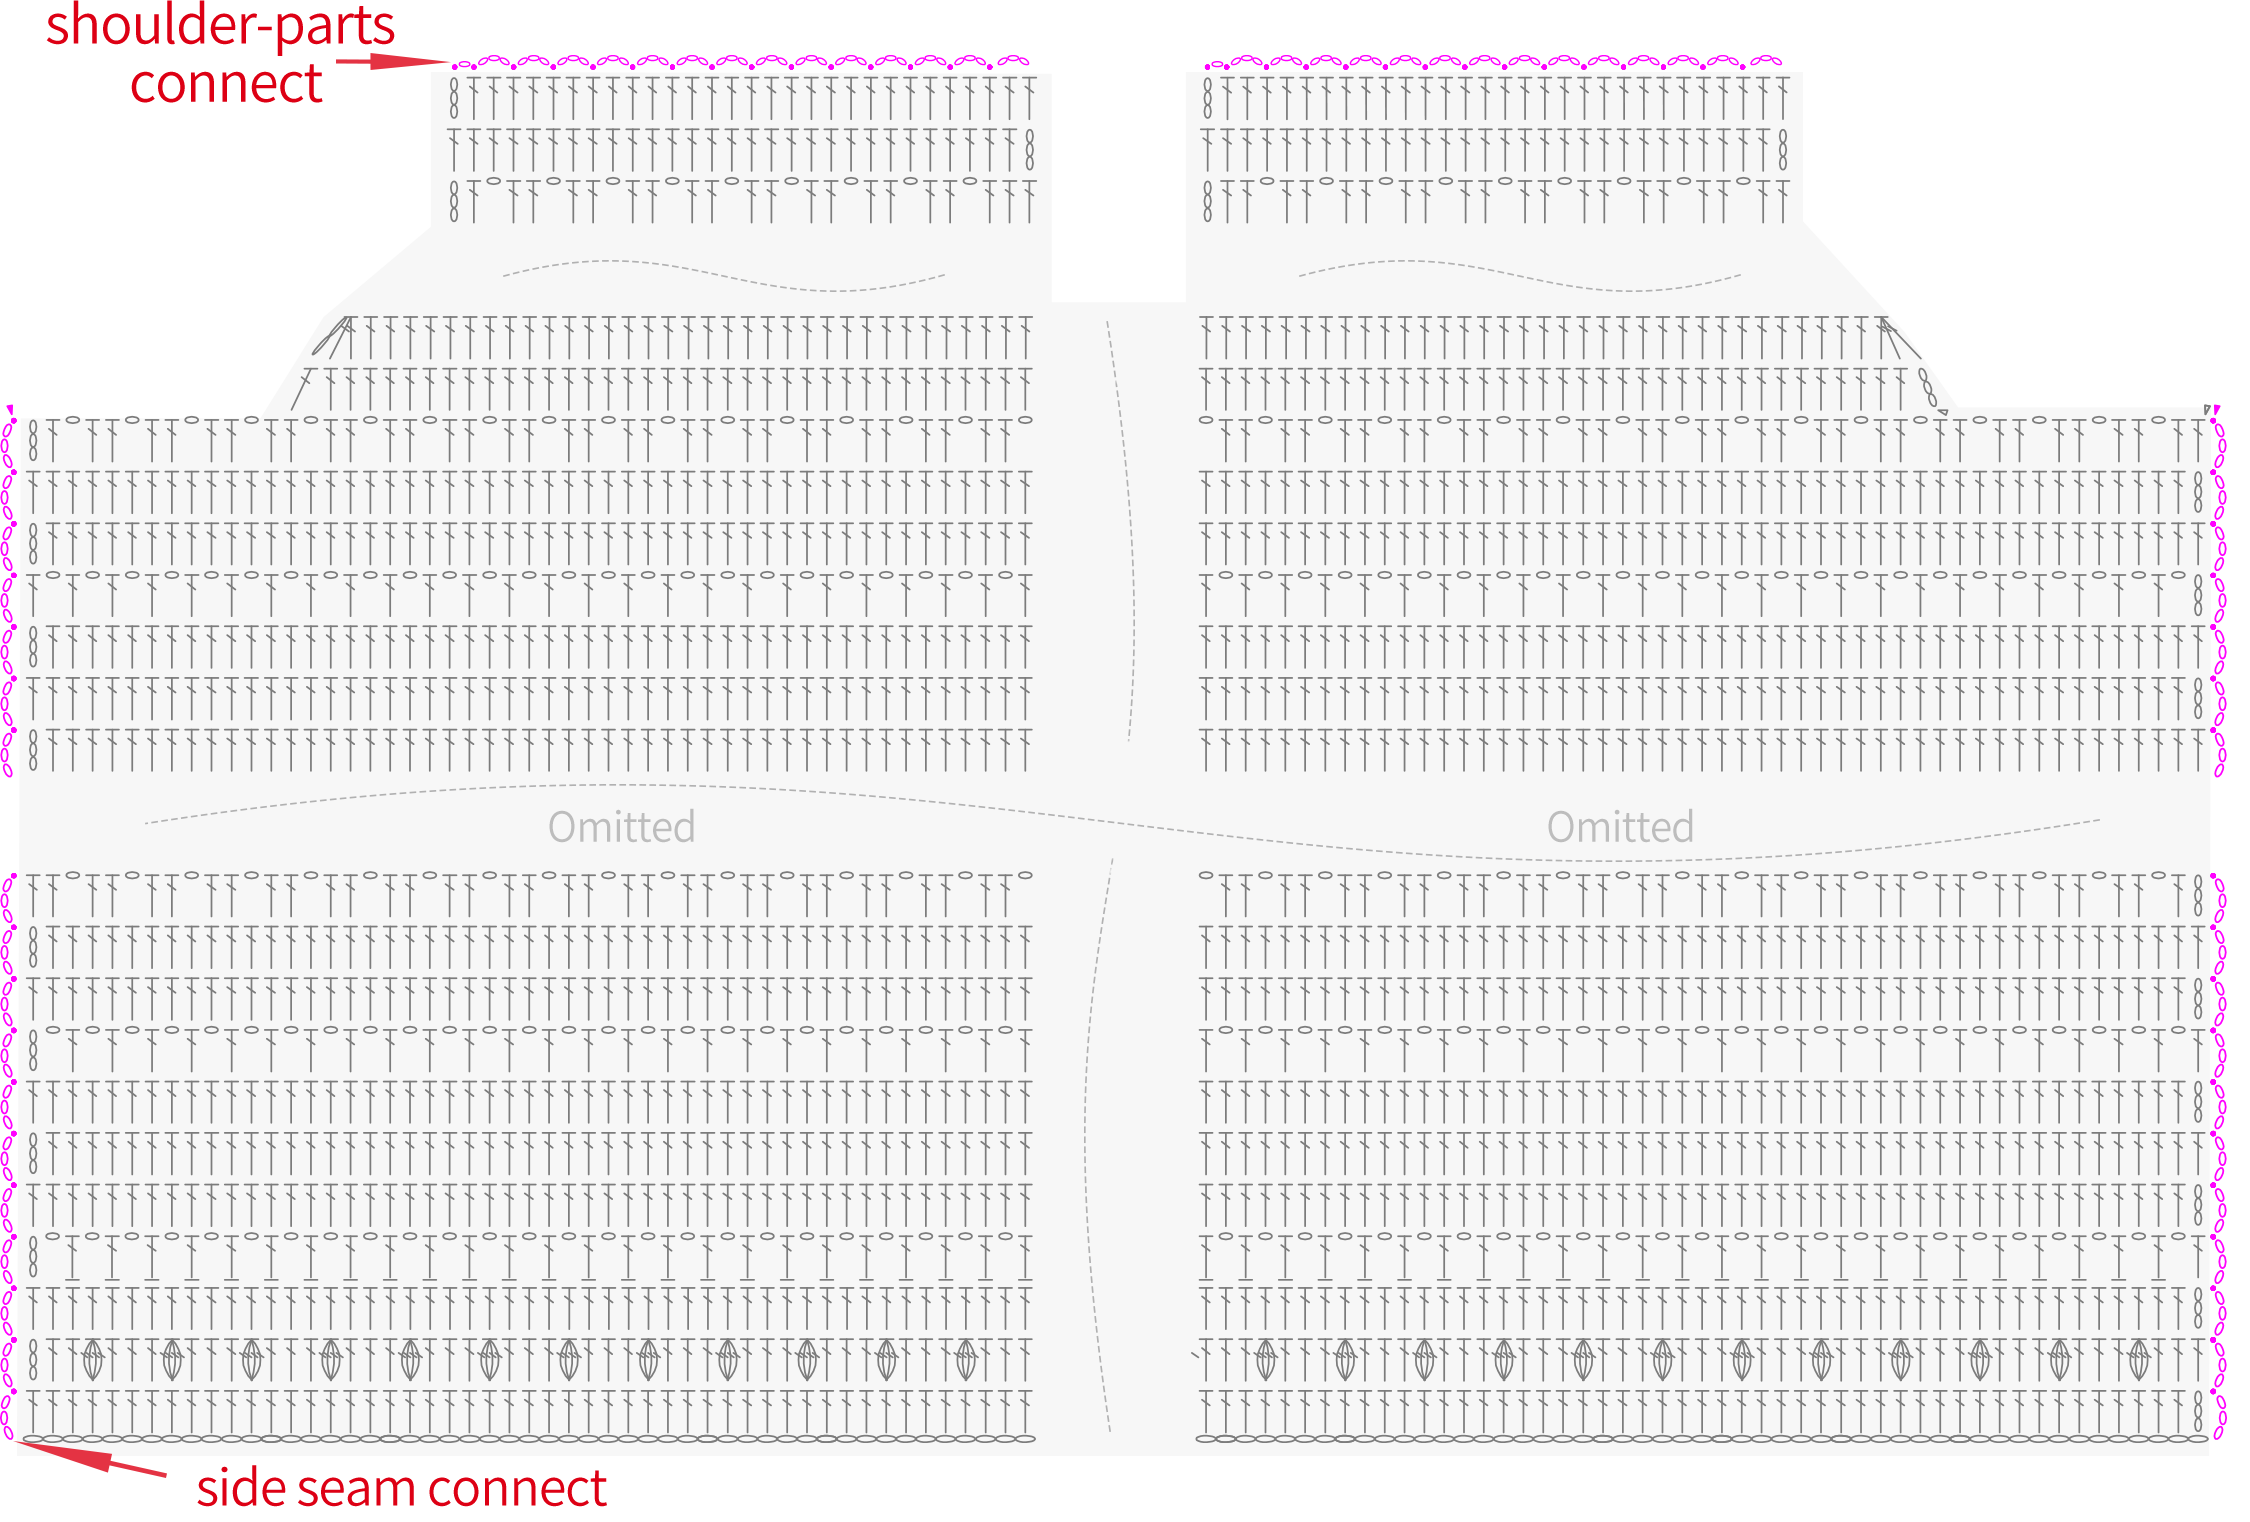
After completing the front and back pieces, place the right sides of the fabric together. First, connect the shoulder parts, then connect the left and right side seams.
Step 2 Lace Trim
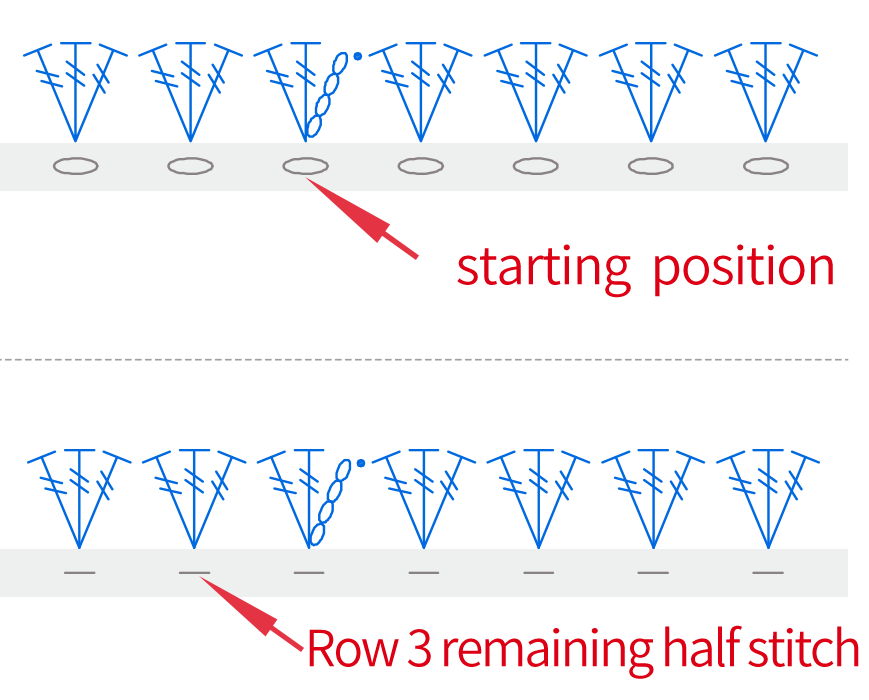
The lace trim is crocheted in rounds, placed in different positions, for a total of 2 rounds.
Part 4 Sleeves
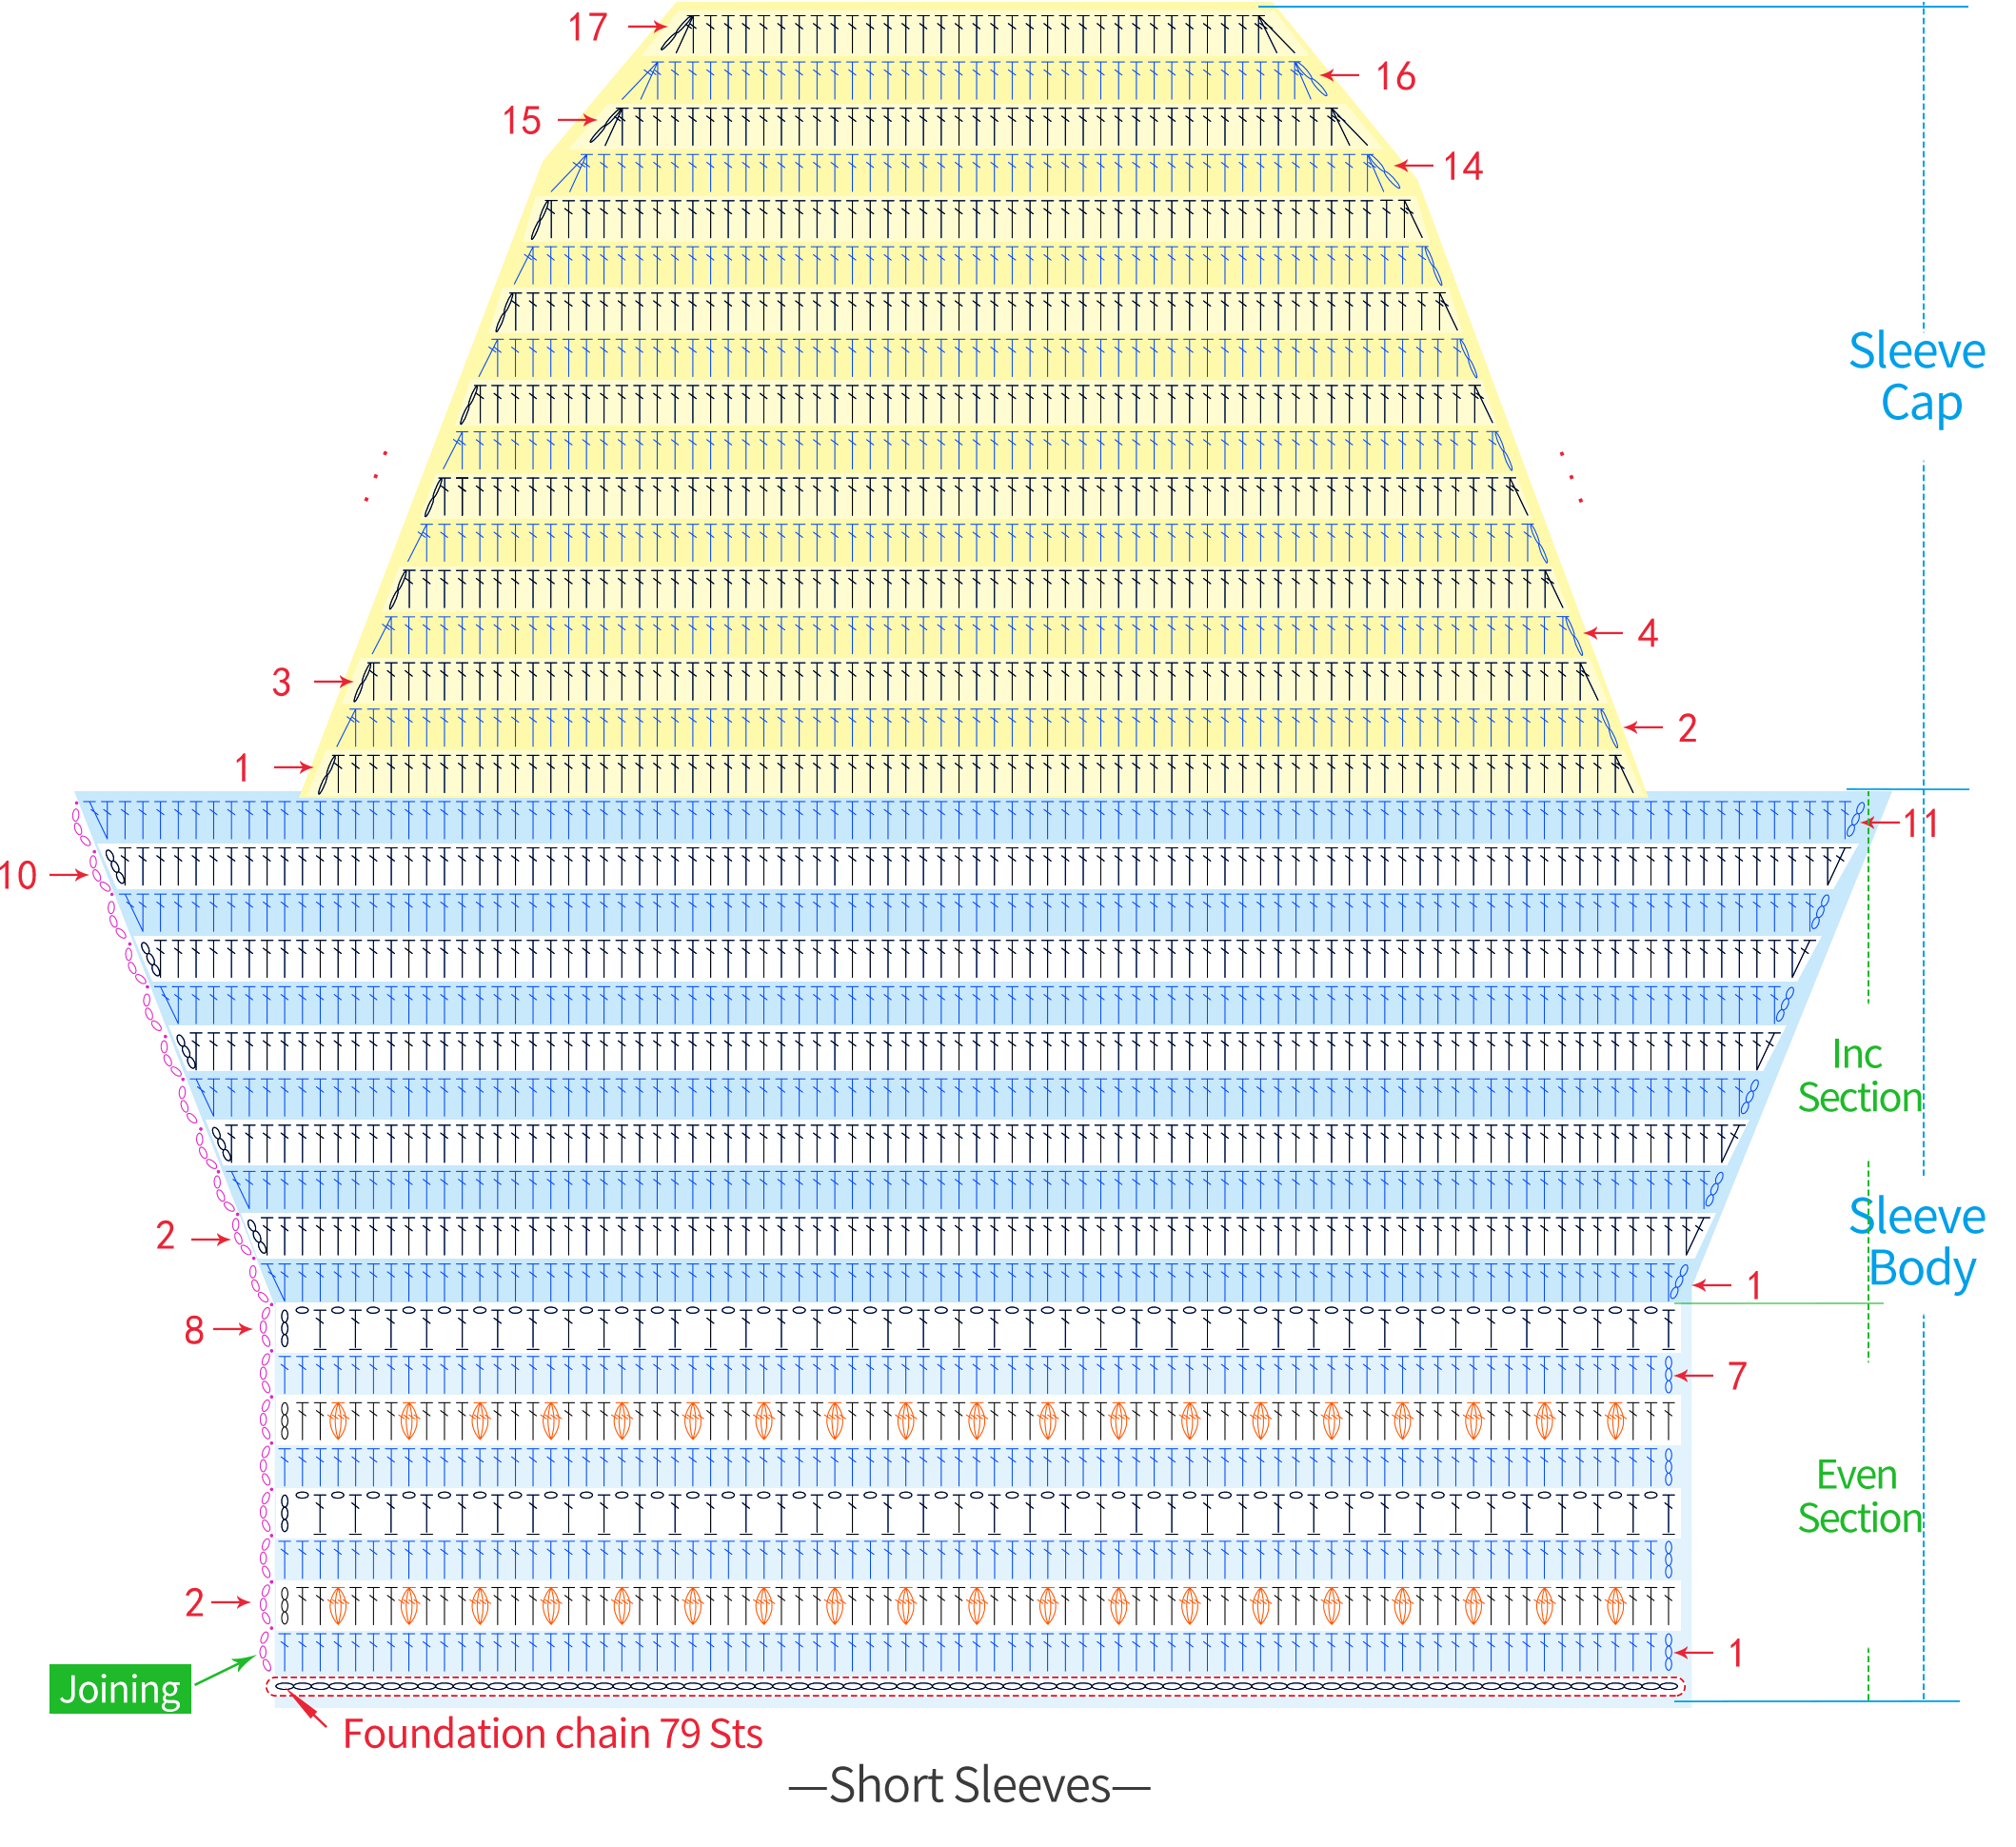
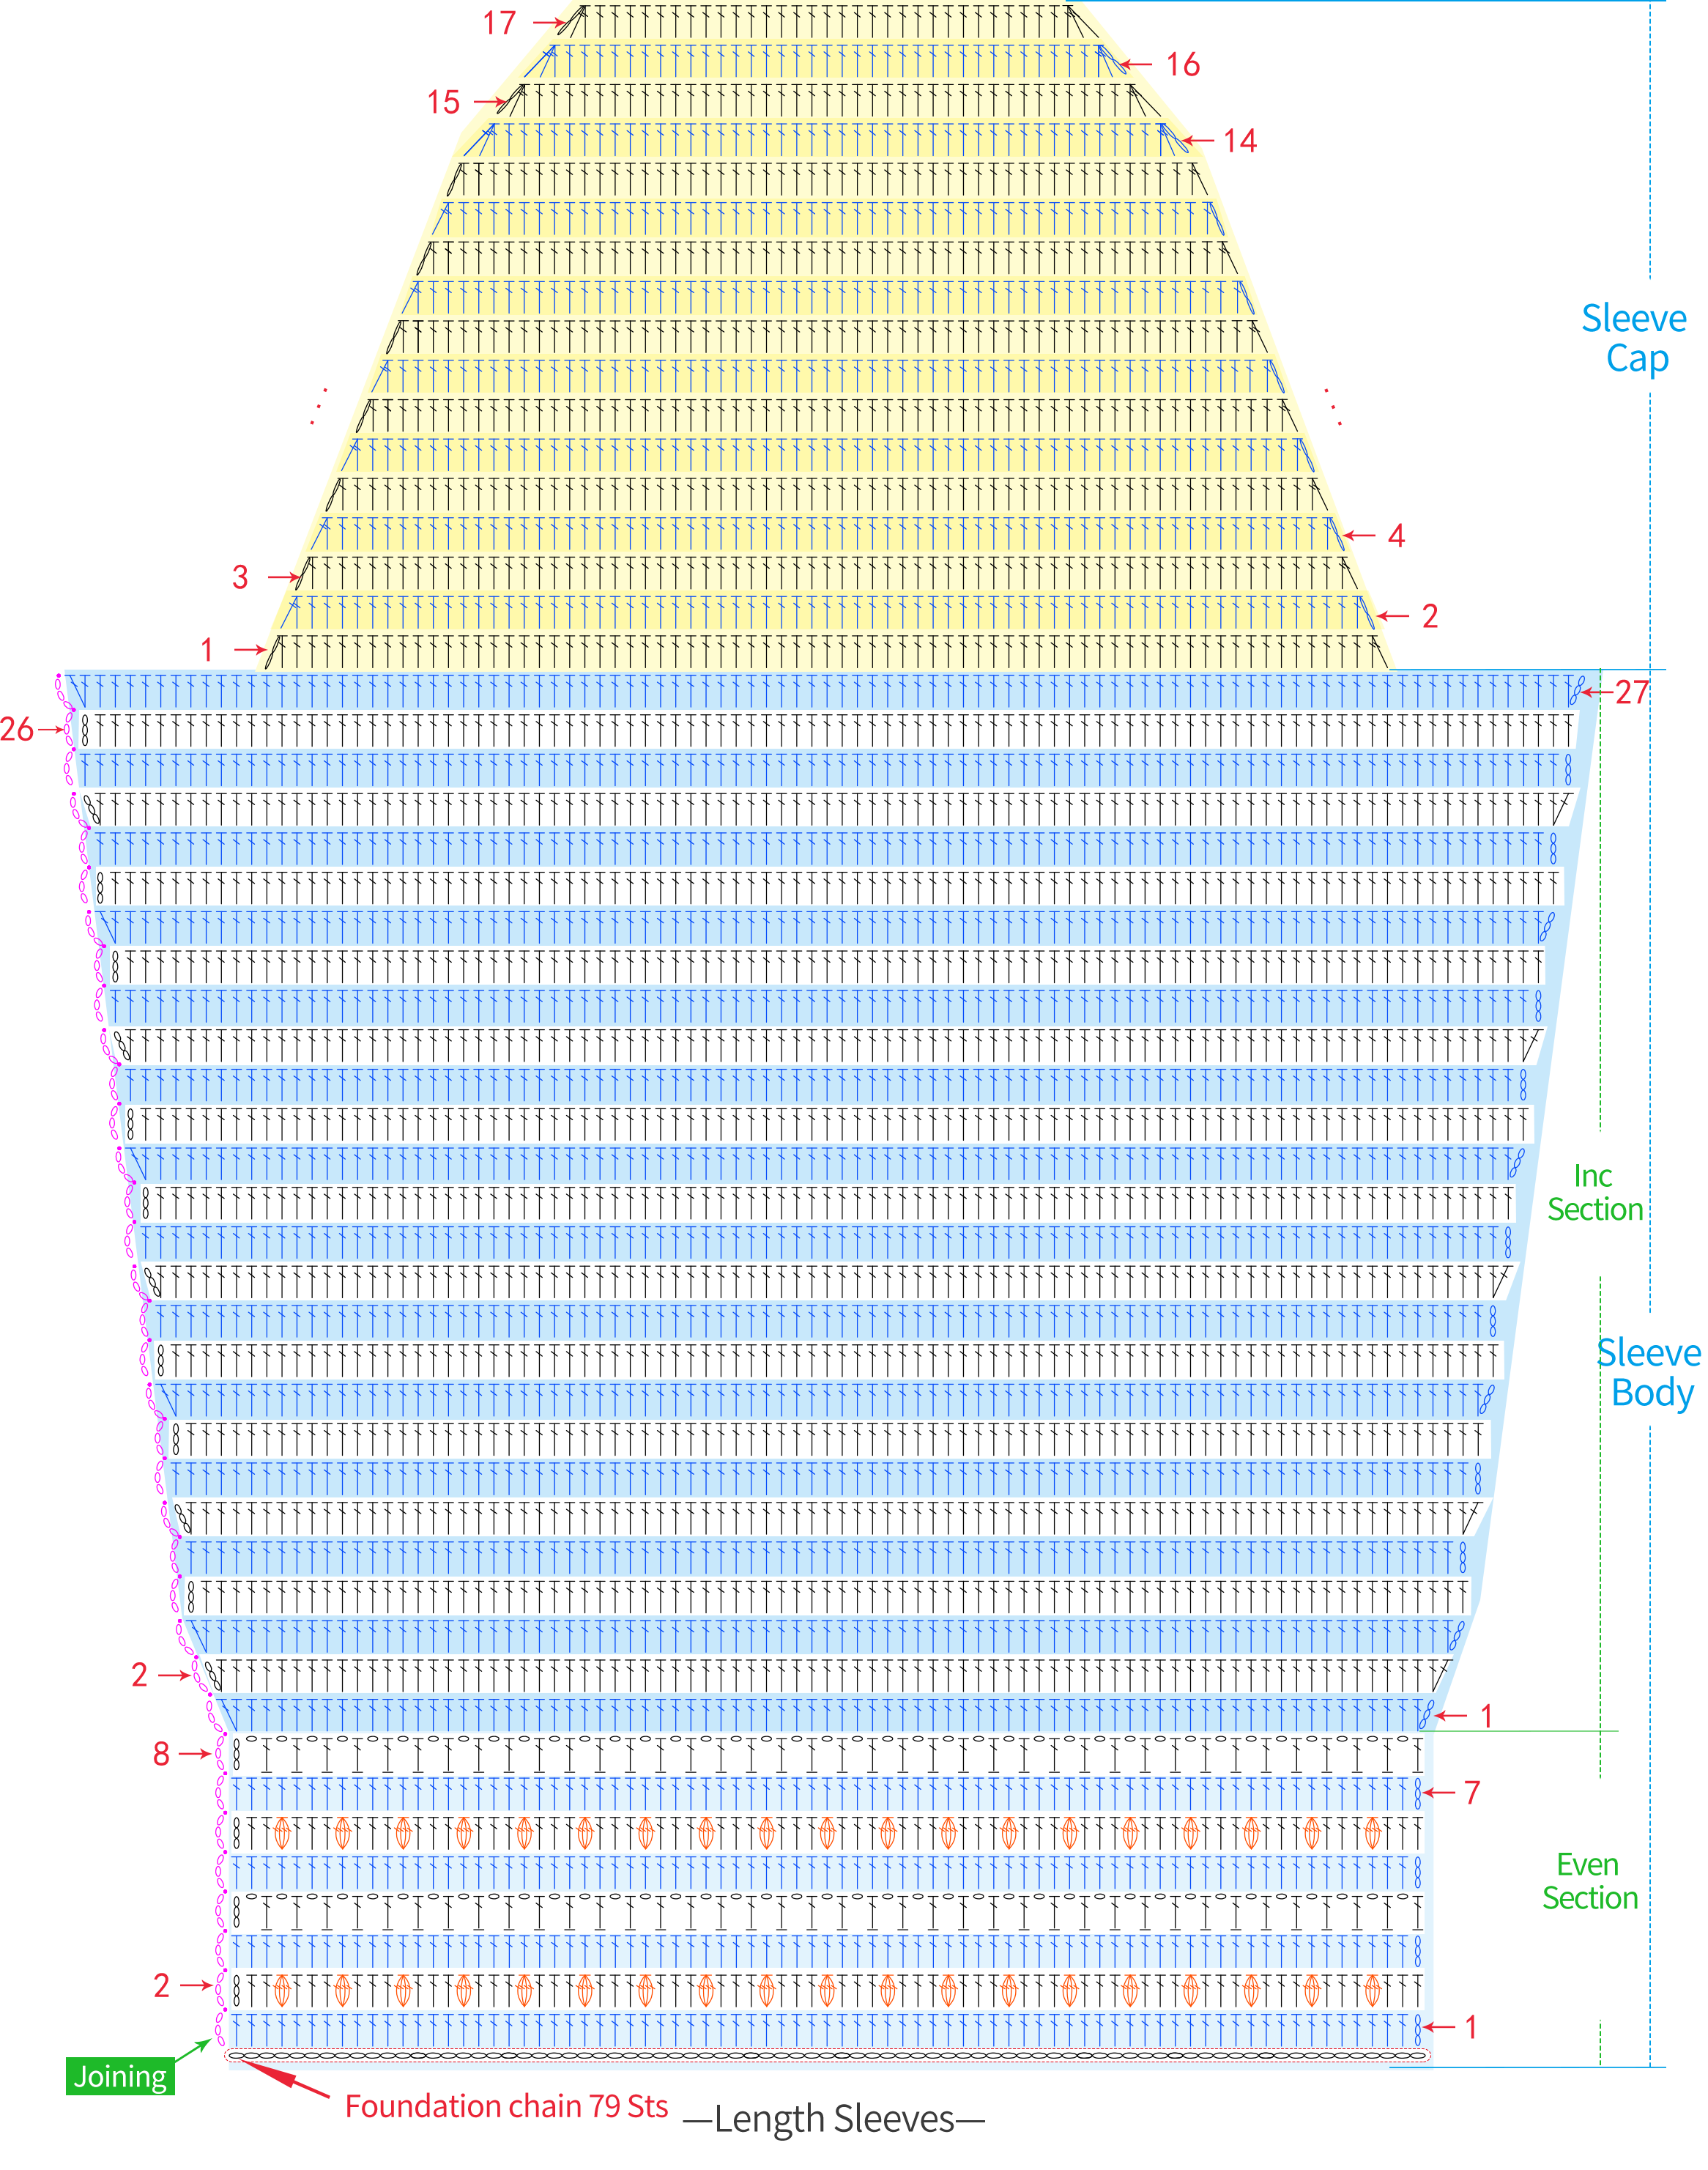
There are two options for the sleeves: short sleeves and length sleeves. The crochet methods are similar. Both start with a chain stitch and are worked back and forth. Each sleeve is divided into two sections: the section 1 is the sleeve body, and the section 2 is the sleeve cap. Once the sleeve body is completed, the edges are joined, then the lace trim is crocheted. Finally, the sleeve is attached to the front and back fabric pieces.
Note:
1. Pay attention to the stripe pattern made with dc on Row 4 and Row 8;
2. Once the sleeves are joined, begin crocheting the border — 2 rounds are worked on the front loops of the sleeves, and the final round is worked on the other side of the starting chain.
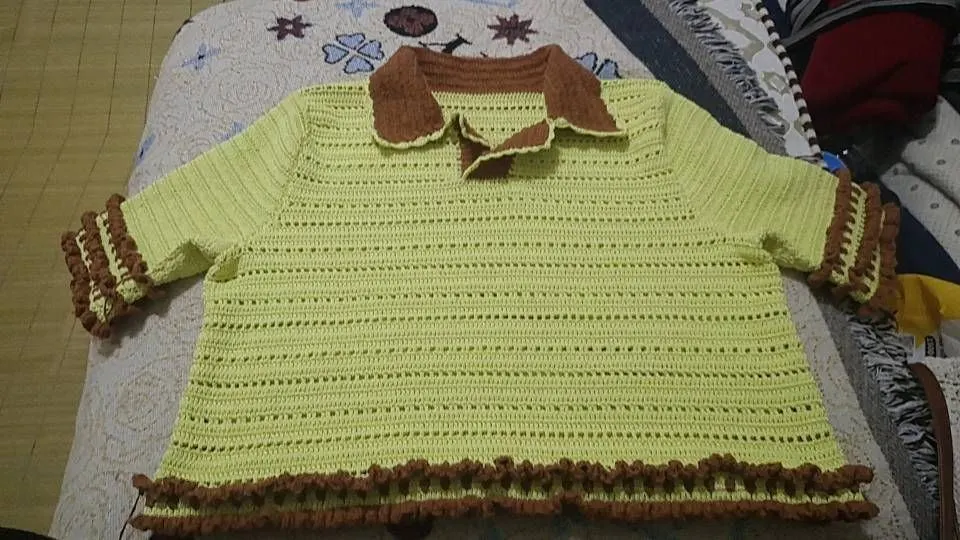
Made by the community