Doll
Osmanthus Rabbit
Project preview
See the finished project
Pattern format
Instructions
Note: This product comes from susudiy.com crochet enthusiasts, including students, full-time mothers, and freelancers. If there are any errors in the tutorial, please contact us promptly.
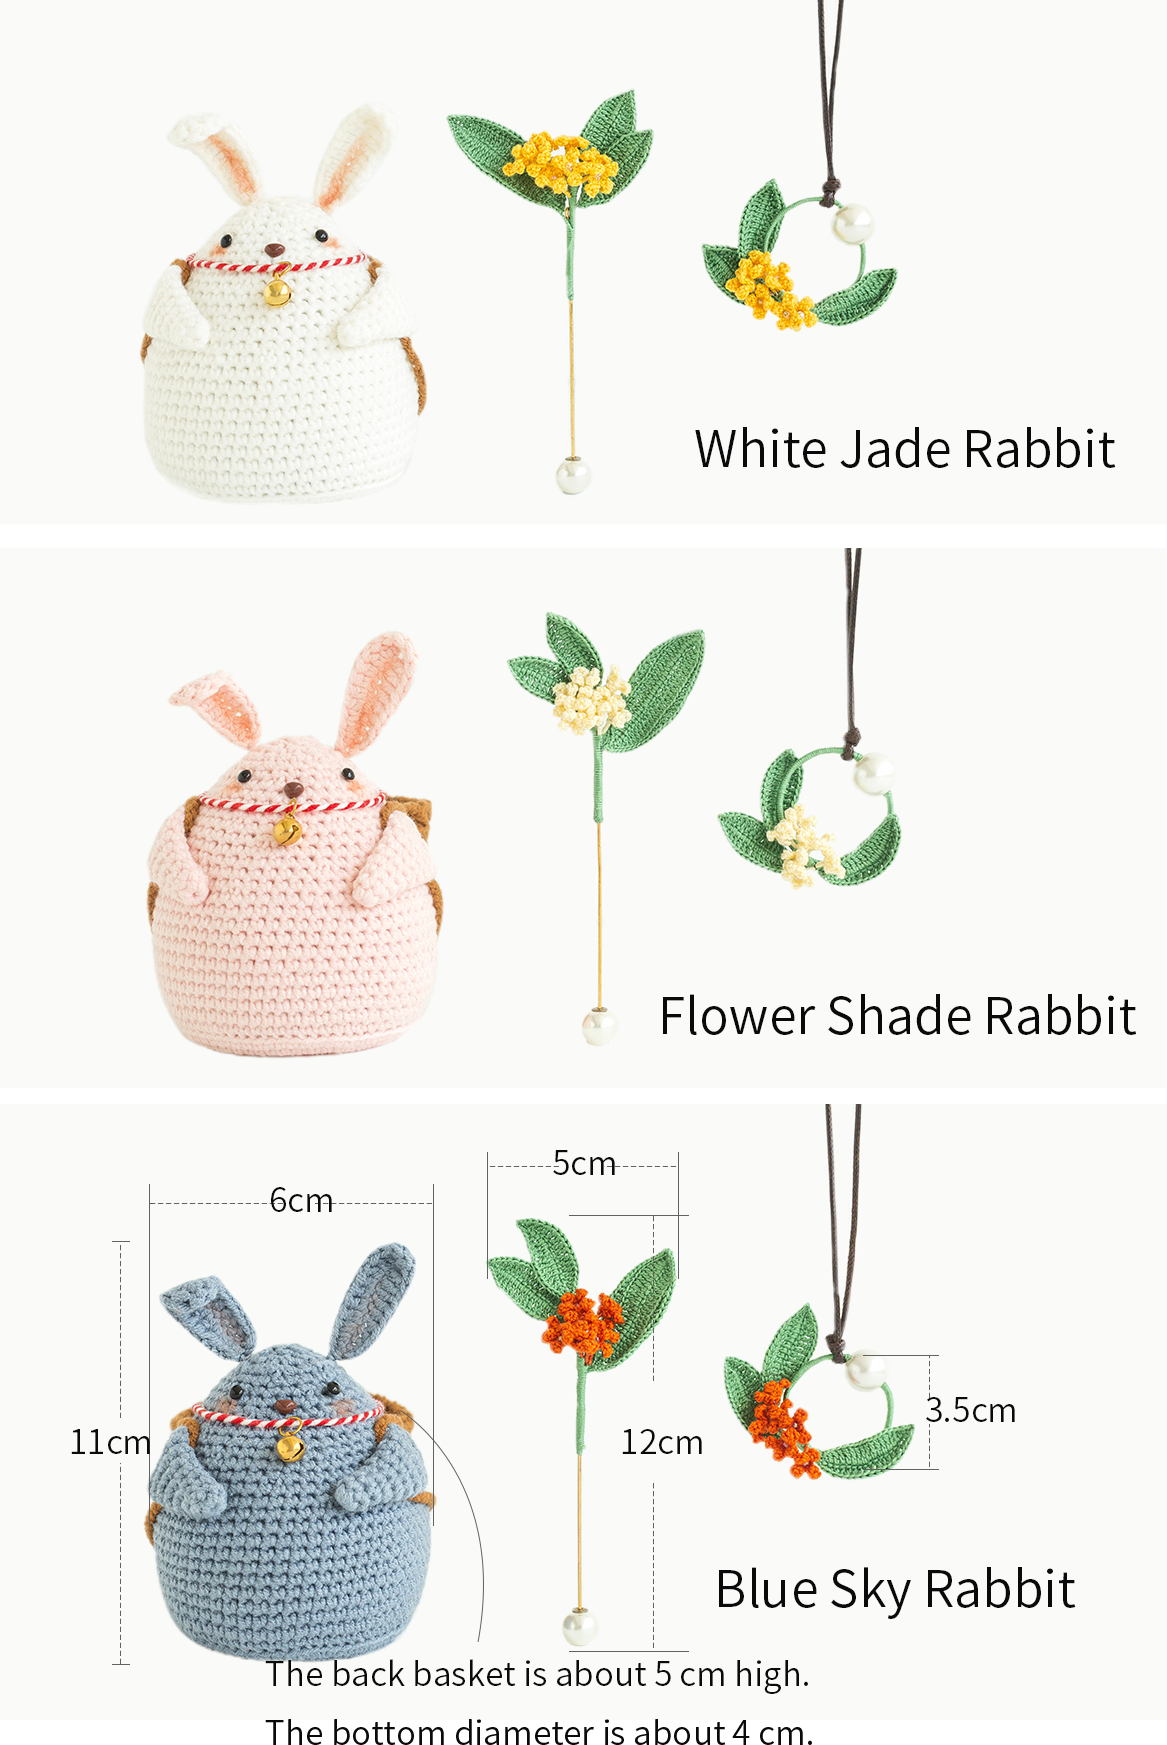
The handcrafted measurements may have an error of 1 to 2 cm. Due to variations in individual tension, the size of the sample is for reference only.
Materials: Rabbit and back basket: Susan's Family 4-Ply Combed Cotton & Acrylic Fibre Hand Knitting Yarn (2.5 mm crochet hook)
Osmanthus decorations: Combed 8# Lace (1.0 mm crochet hook)

ABBREVIATIONS
MRadjustable magic ring
Dao2start in 2nd CH from the hook
turnturn the piece
CHchain
Thalf double crochet
V = sc2-in-12 single crochets into the same stitch
(...)×6crochet item in the parentheses six times
HRow
RRound
Fdouble crochet
Xsingle crochet
A = sc2toginvisible single crochet 2 stitches together
Etreble crochet
FLOfront loop only
BLOback loop only
Kskip
Sslip stitch
Note:
1. This pattern is making in Chinese crochet pattern terms, and the stitch name is written using American terminology. All measurements in charts are in cm.
2. Working in joined round
When crocheting in rounds without further guidance, working in closed rounds, start each round with a set number of beginning chains and close with a slip stitch. The beginning chain preceding a single crochet and the slip stitch used for joining rounds are not included in the total stitches.
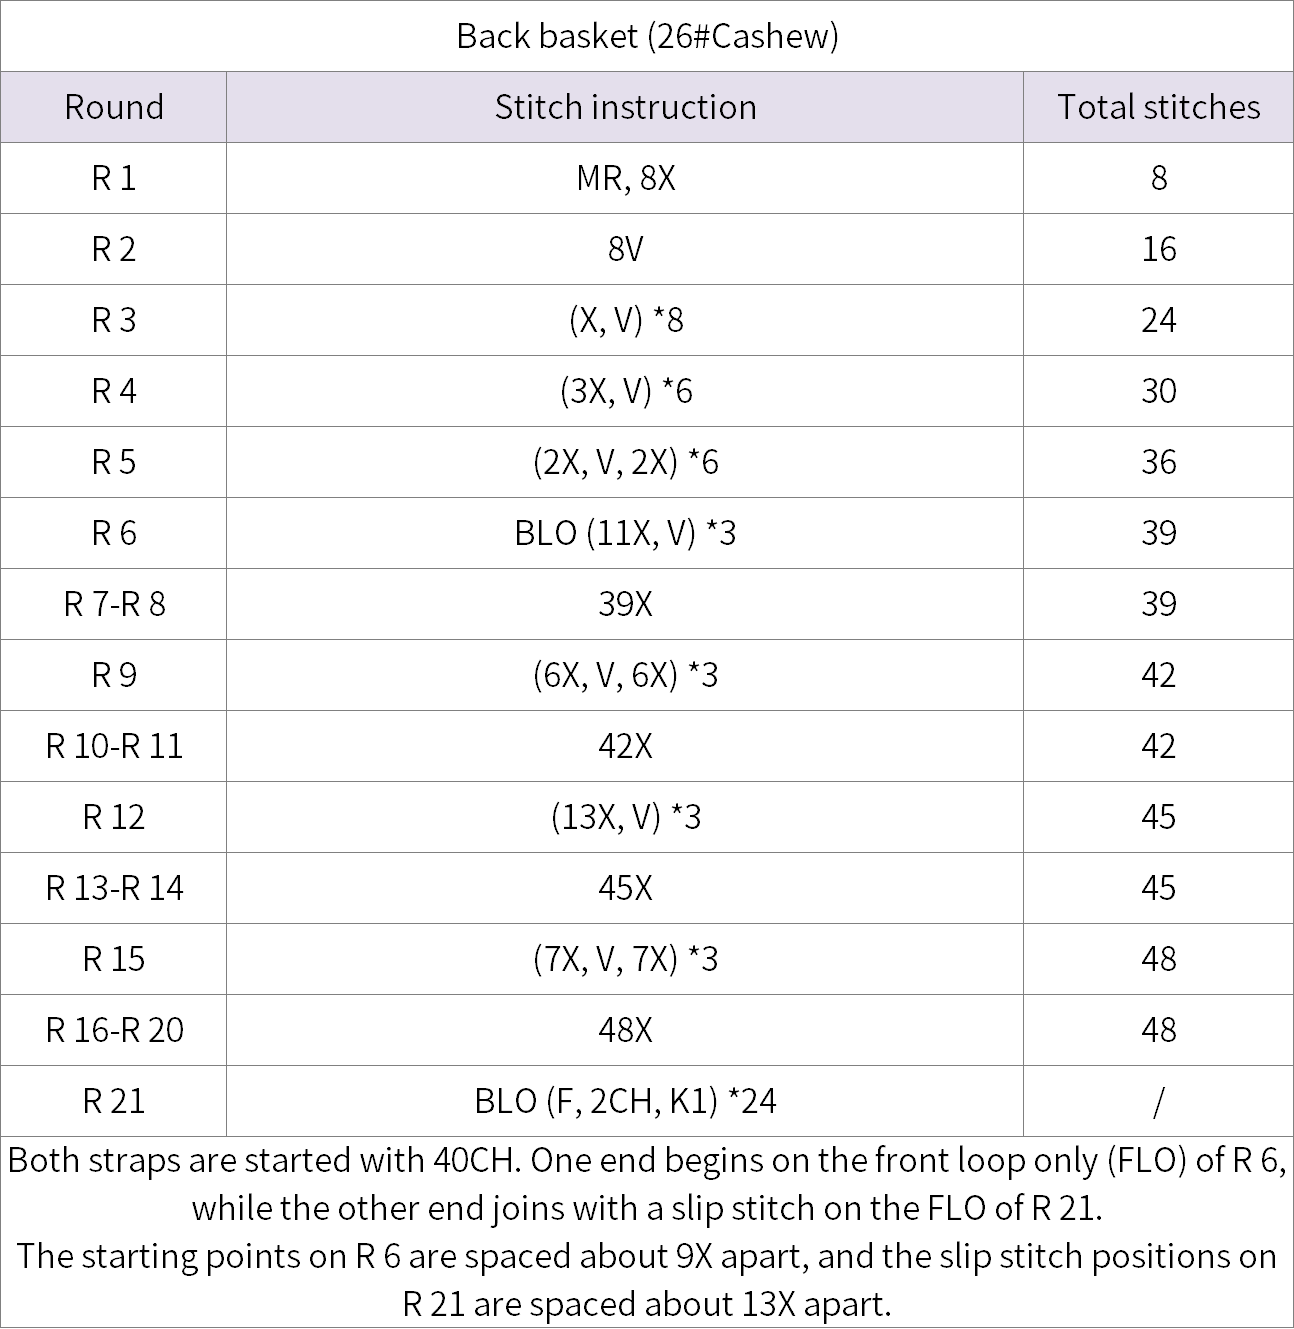
Part 1 Back basket
Work in rounds using the magic ring method. After completing the main part, add straps at the appropriate position.
Part 2 Rabbit
The rabbit is made up of the body, arms, and ears, which need to be made separately and then assembled.
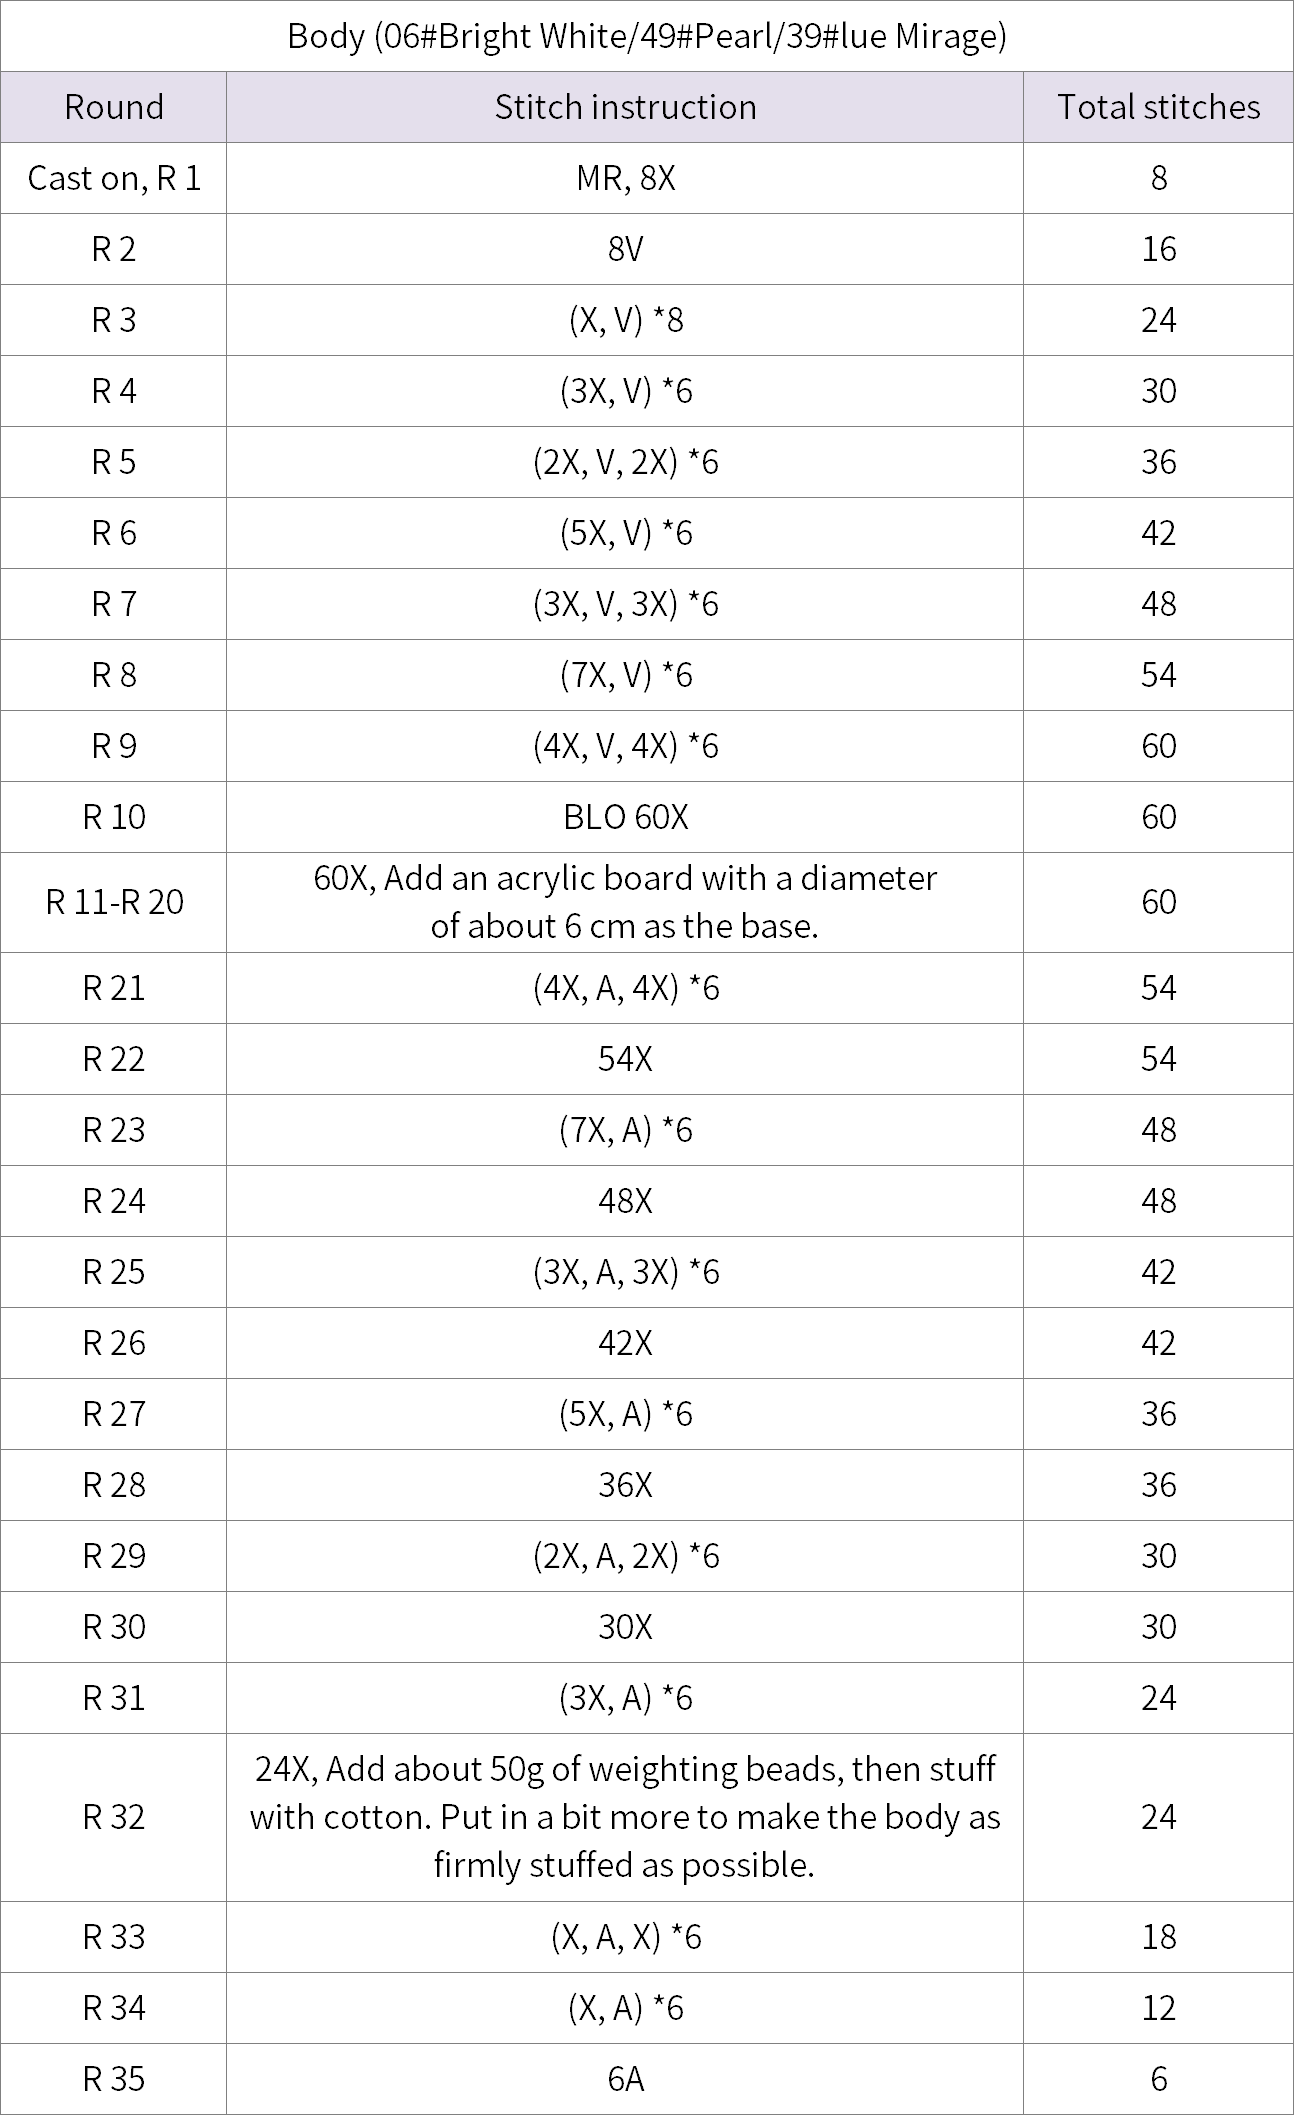
Step 1 Body
Using the magic ring method, crochet in rounds.
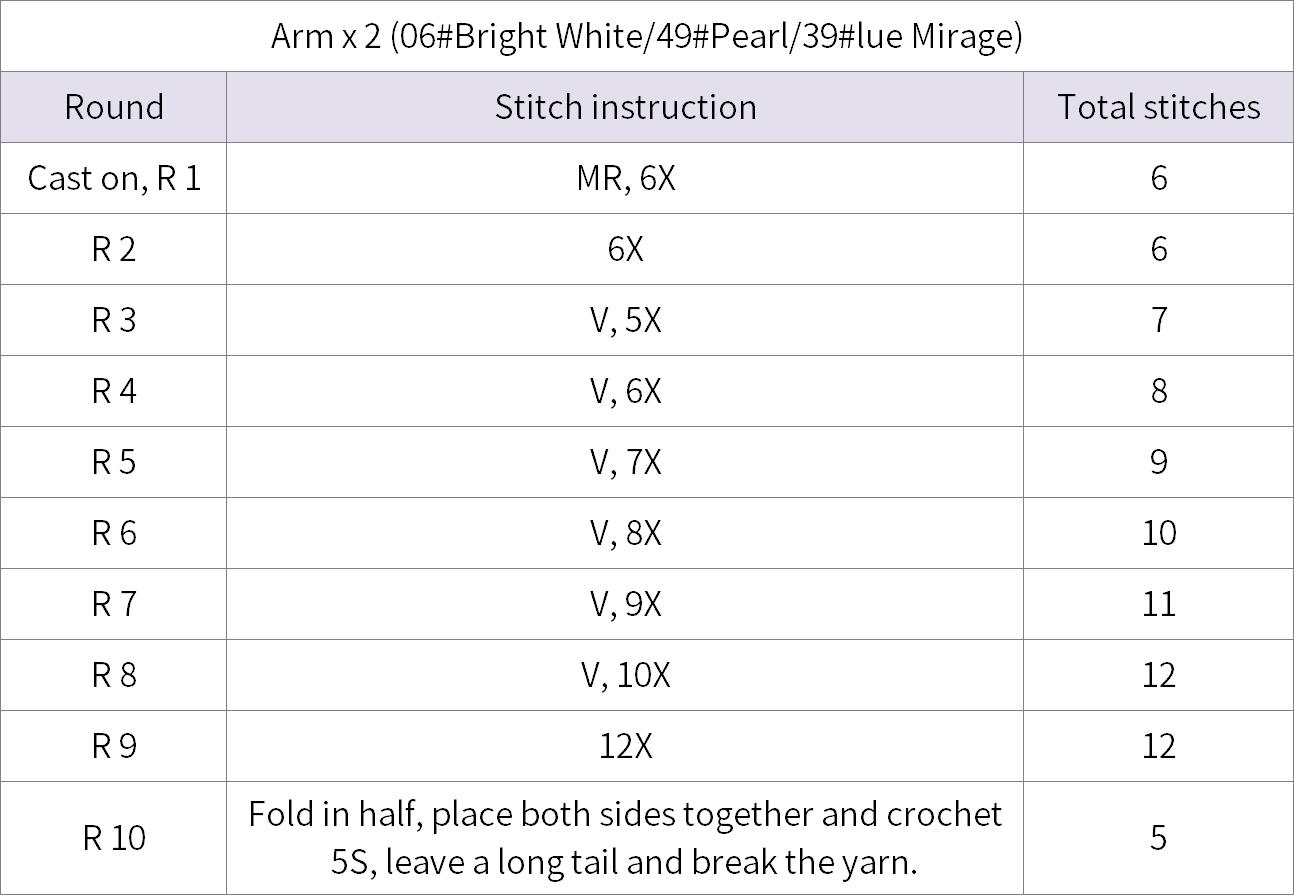
Step 2 Arms
Using the magic ring method, crochet in rounds.
Step 3 Ears
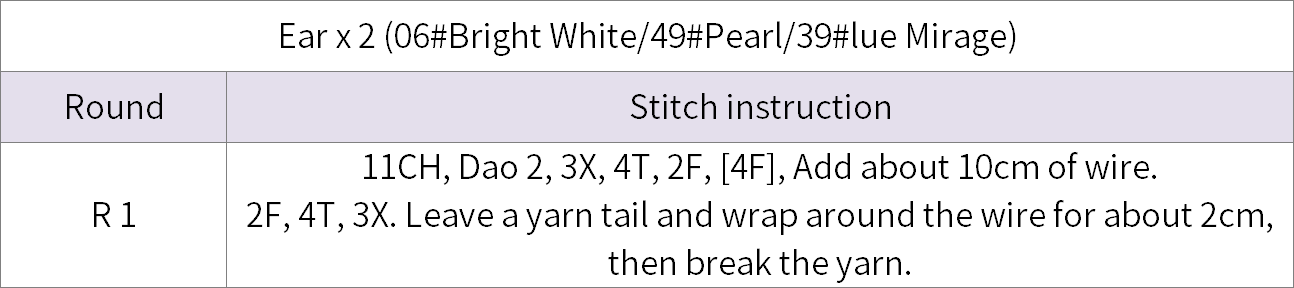
Work a foundation chain with wire included.
Step 4 Assembly
Apply a small amount of glue on the wire of both ears and insert them between R2-R3 on both sides of the head. Insert the eyes between R5-R6, with an interval of six single crochets. Insert the nose between R6-R7, in the middle between the two eyes. Start sewing the arms between R9-R10 on the sides of the body. First, attach the backpack, then secure the front edge of the arms.
Take a red yarn and a white yarn, each about 30cm long, for the collar. Secure one end at the midpoint between R8 and R9 on the back of the body. Begin twisting in one direction to make a cable, applying a small amount of glue as you twist. Add the bell at the midpoint on the right side (below the nose). After completing one round, tie off and secure it on the back, then weave in ends. Finally, apply blush to the middle of the ears and below the eyes.
Part 3 Osmanthus
The osmanthus consists of flowers, large leaves, and small leaves. For the two decorations, a total of 14 flowers, 1 large leaf, and 5 small leaves are needed.
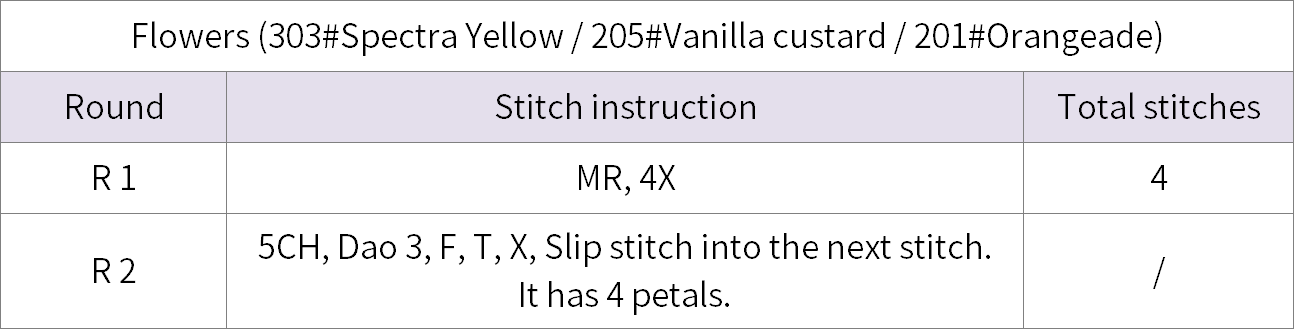
Step 1 Flowers
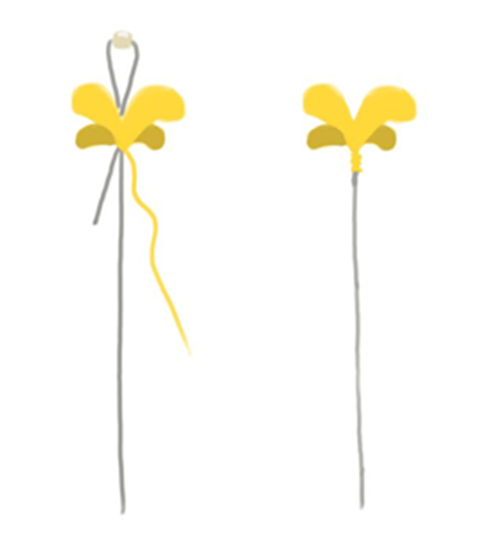
Work in rounds using the magic ring technique. After completing one flower, take about 20cm of wire, first thread it through a seed bead, then bend it at about 5cm, pass it through the flower and twist to secure. Wrap the yarn tail around the wire for about 0.5cm, secure and break the yarn. Trim the short end of the wire, leaving only the longer piece.
Step 2 Leaves
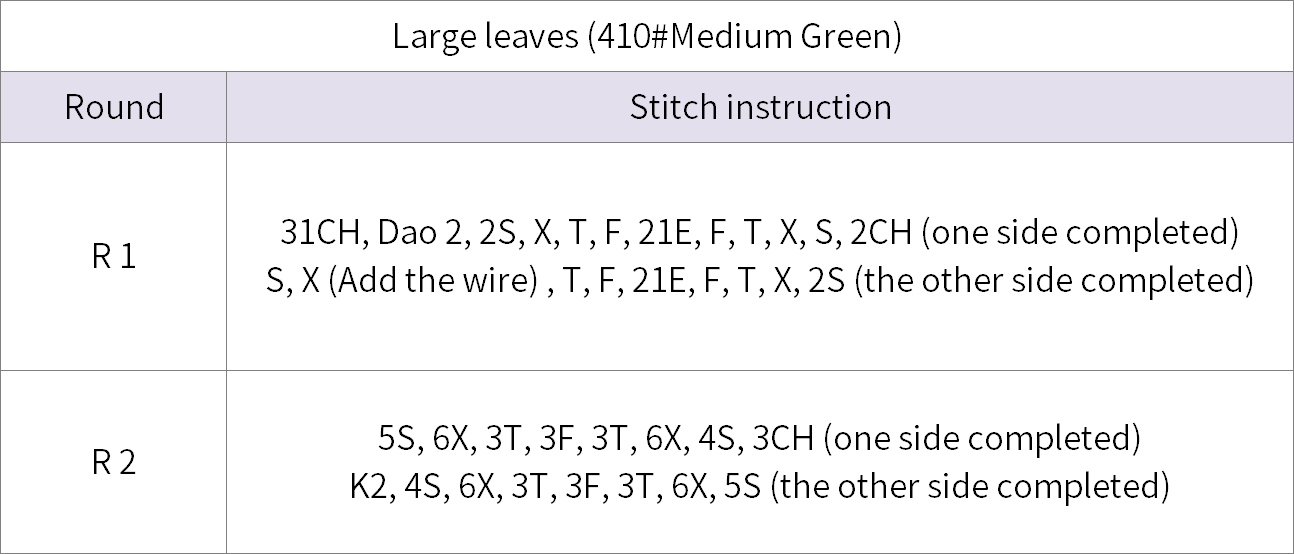
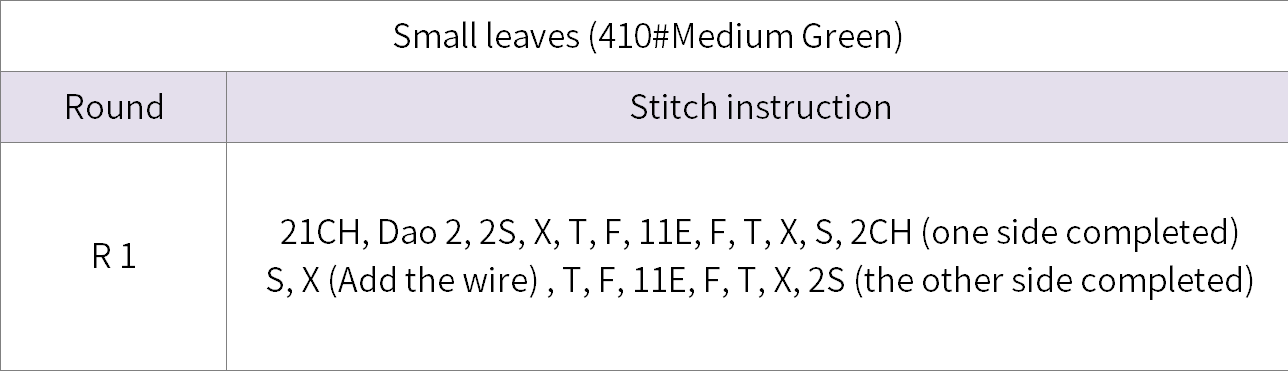
After casting on with a foundation chain, crochet in rounds, adding wire as you go. Large leaves require one additional round compared to small leaves.
Part 4 Assembling decorations
Step 1 Brooch
It consists of 8 flowers, 1 large leaf, and 2 small leaves. You can stagger the flowers and leaves as per your preference and wrap them with green yarn. Then, wrap it around and secure it on the brooch, and after wrapping for about 2.5cm, cut the yarn, apply glue, and finish.
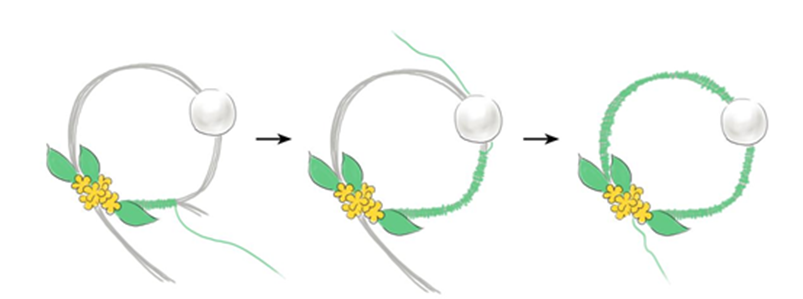
Step 2 Necklace pendant
Composed of 6 flowers, 3 small leaves, and one bead. Take about 150cm of green yarn, complete the flower-leaf cluster in the order of two leaves—flower—one leaf, wrap the yarn for about 3cm then add the bead. If the bead's hole is too small, you can cut 2-3 wires appropriately, then thread the yarn and wire through the bead together, continue wrapping the yarn for about 6cm then bend it into a circular pattern, wrap together with the completed flower branches for about 1cm, break yarn and secure.