
Clothes
Palm Blouse
Project preview
See the finished project
Pattern format
Instructions
Watch and follow
Video tutorial
| Style | Yarn | Color |
|---|---|---|
| Sky Blue Version | Sequin Mahai | 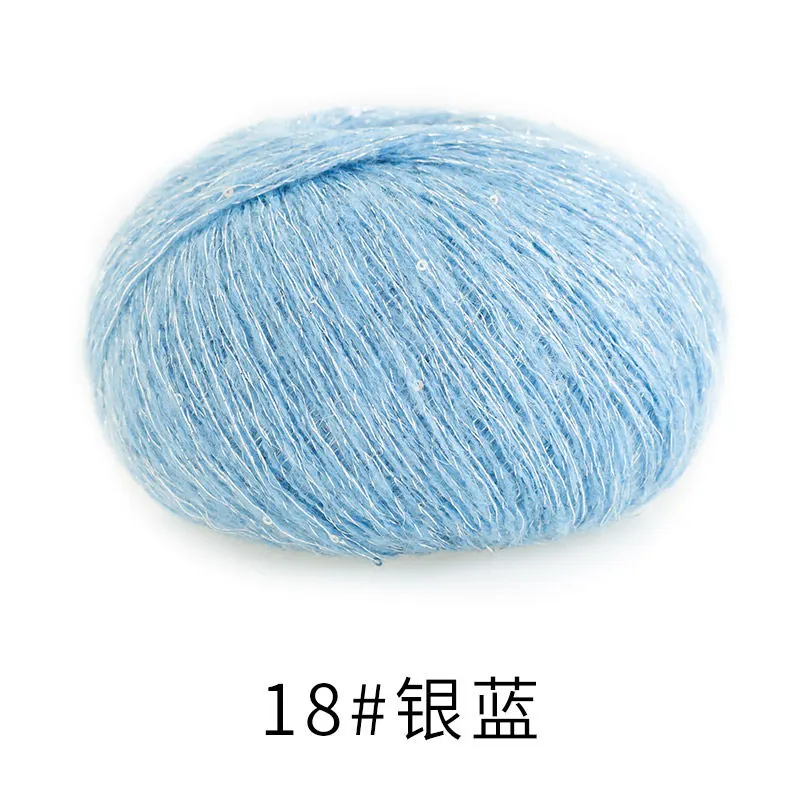 18#Sky Blue x 6 18#Sky Blue x 6 |
| Snow White Version | Sequin Mahai |  03#Snow White x 6 03#Snow White x 6 |
| Dark Green Version | Sequin Mahai | 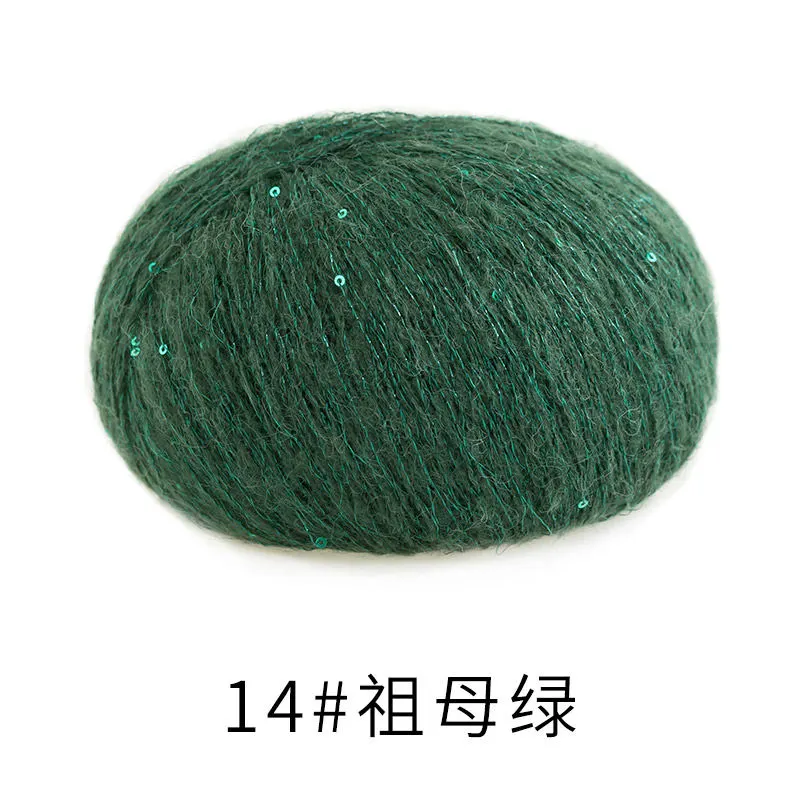 14#Dark Green x 6 14#Dark Green x 6 |
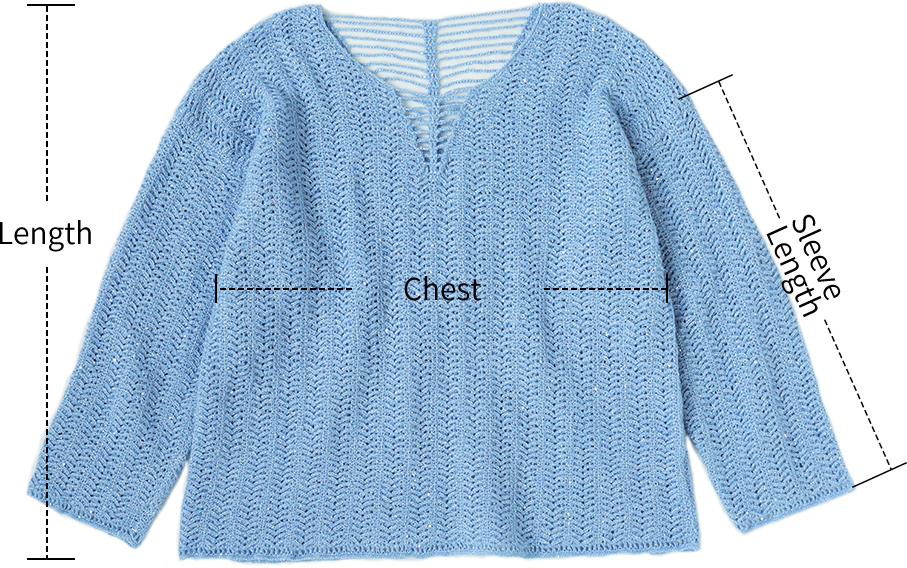
| Chest | Length | Sleeve Length | |
| Long Sleeve | Short Sleeve | ||
| 52 cm | 57 cm | 43 cm | 18 cm |
The handcrafted measurements may have an error of 1 to 2 cm.
Due to variations in individual tension, the size of the sample is for reference only.
Materials: Sequin Mohair
Tool : 2.00 mm crochet hook
Note: Since the yarn is quite special, it's not easy to undo while crocheting. I suggest you watch the demonstration first, or practice the method using some yarn from home.

Chart Key








Note:
This pattern is making in Chinese crochet pattern terms, and the stitch name is written using American terminology. All measurements in charts are in cm.
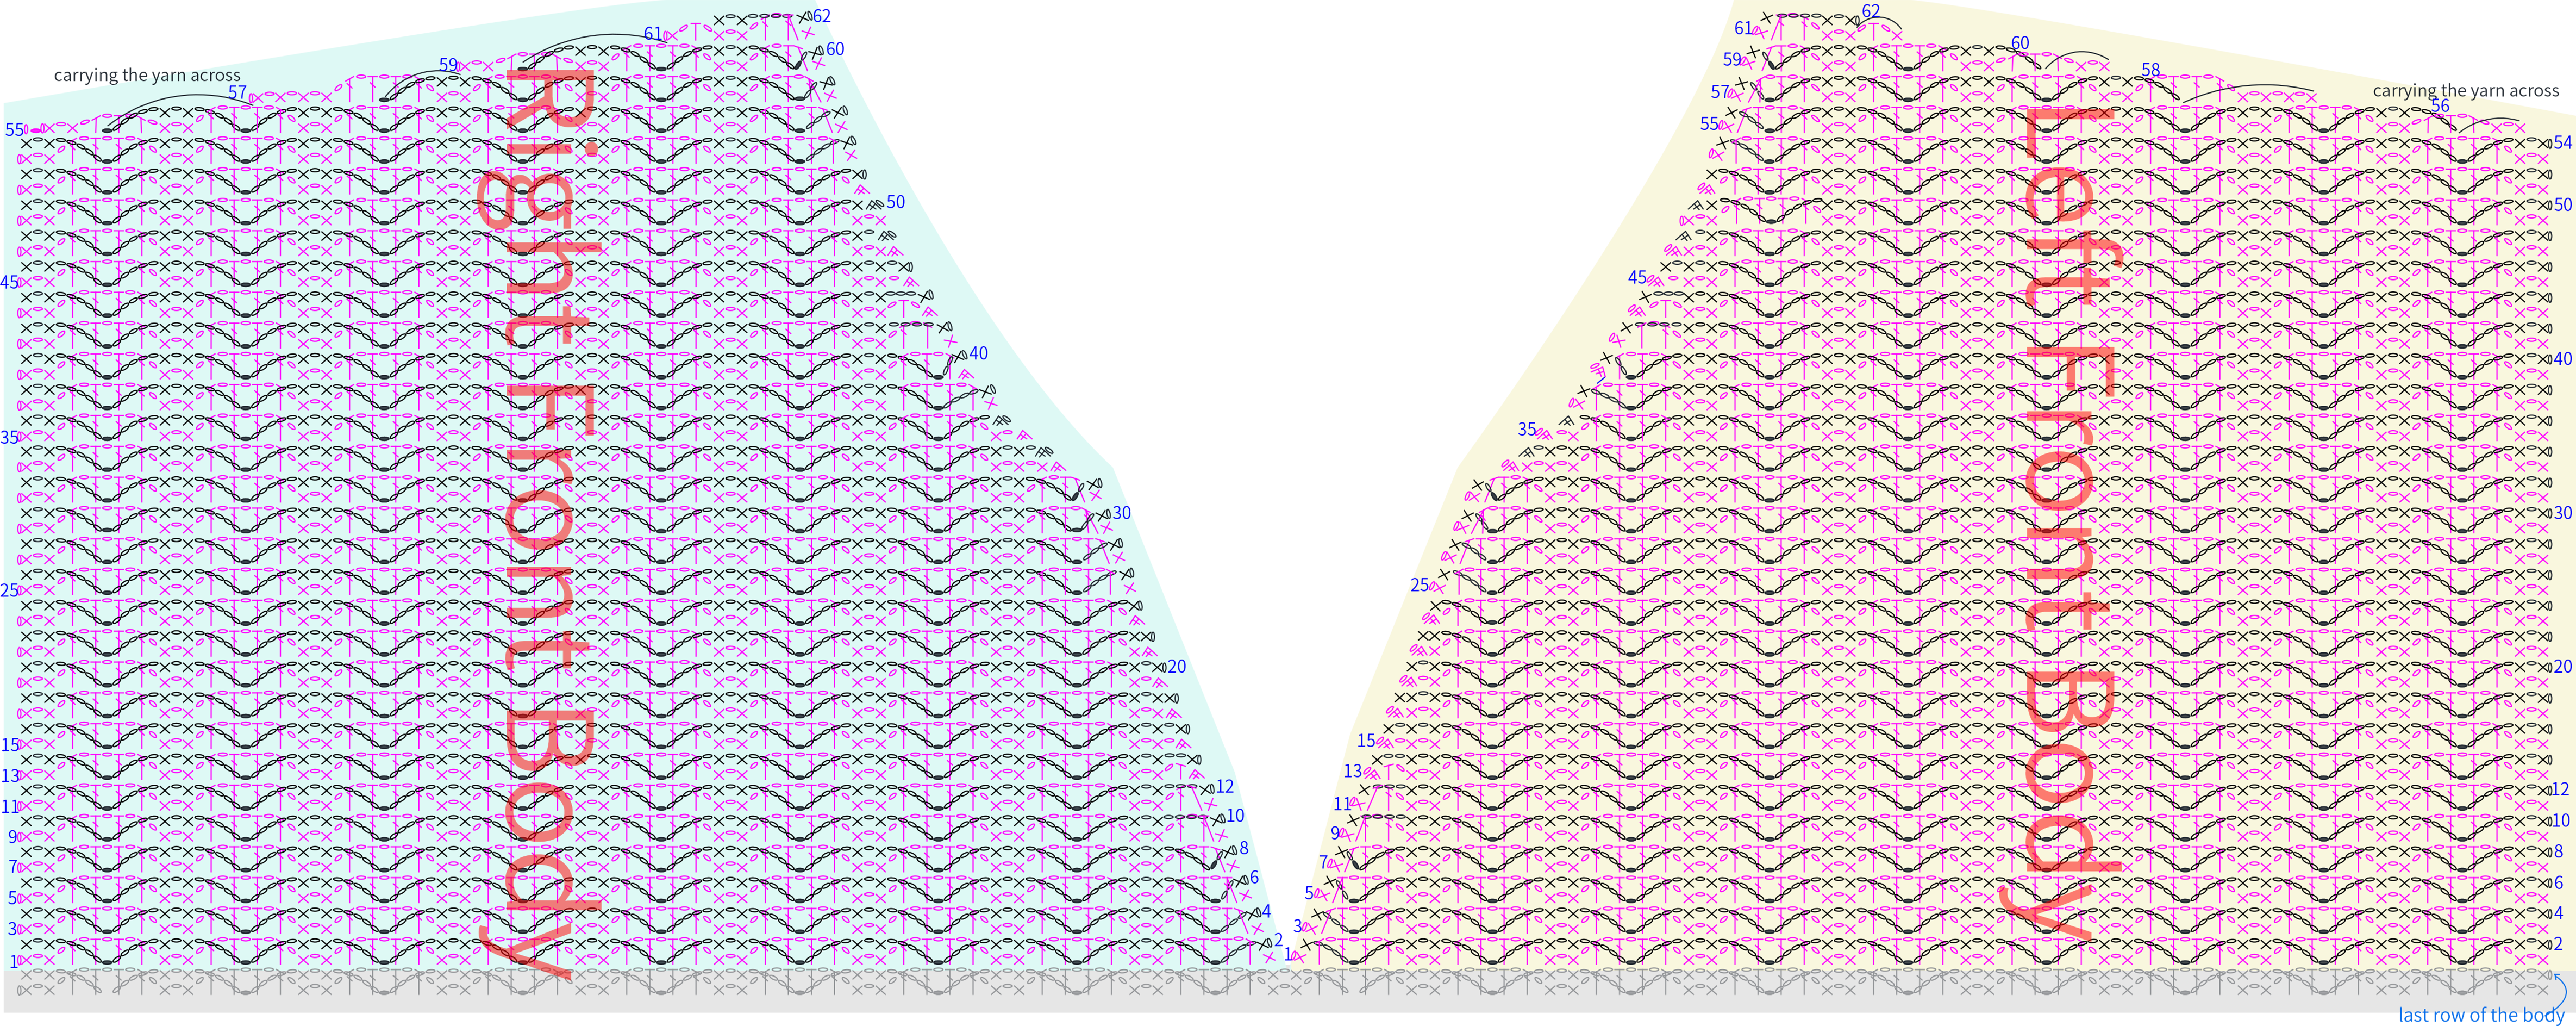
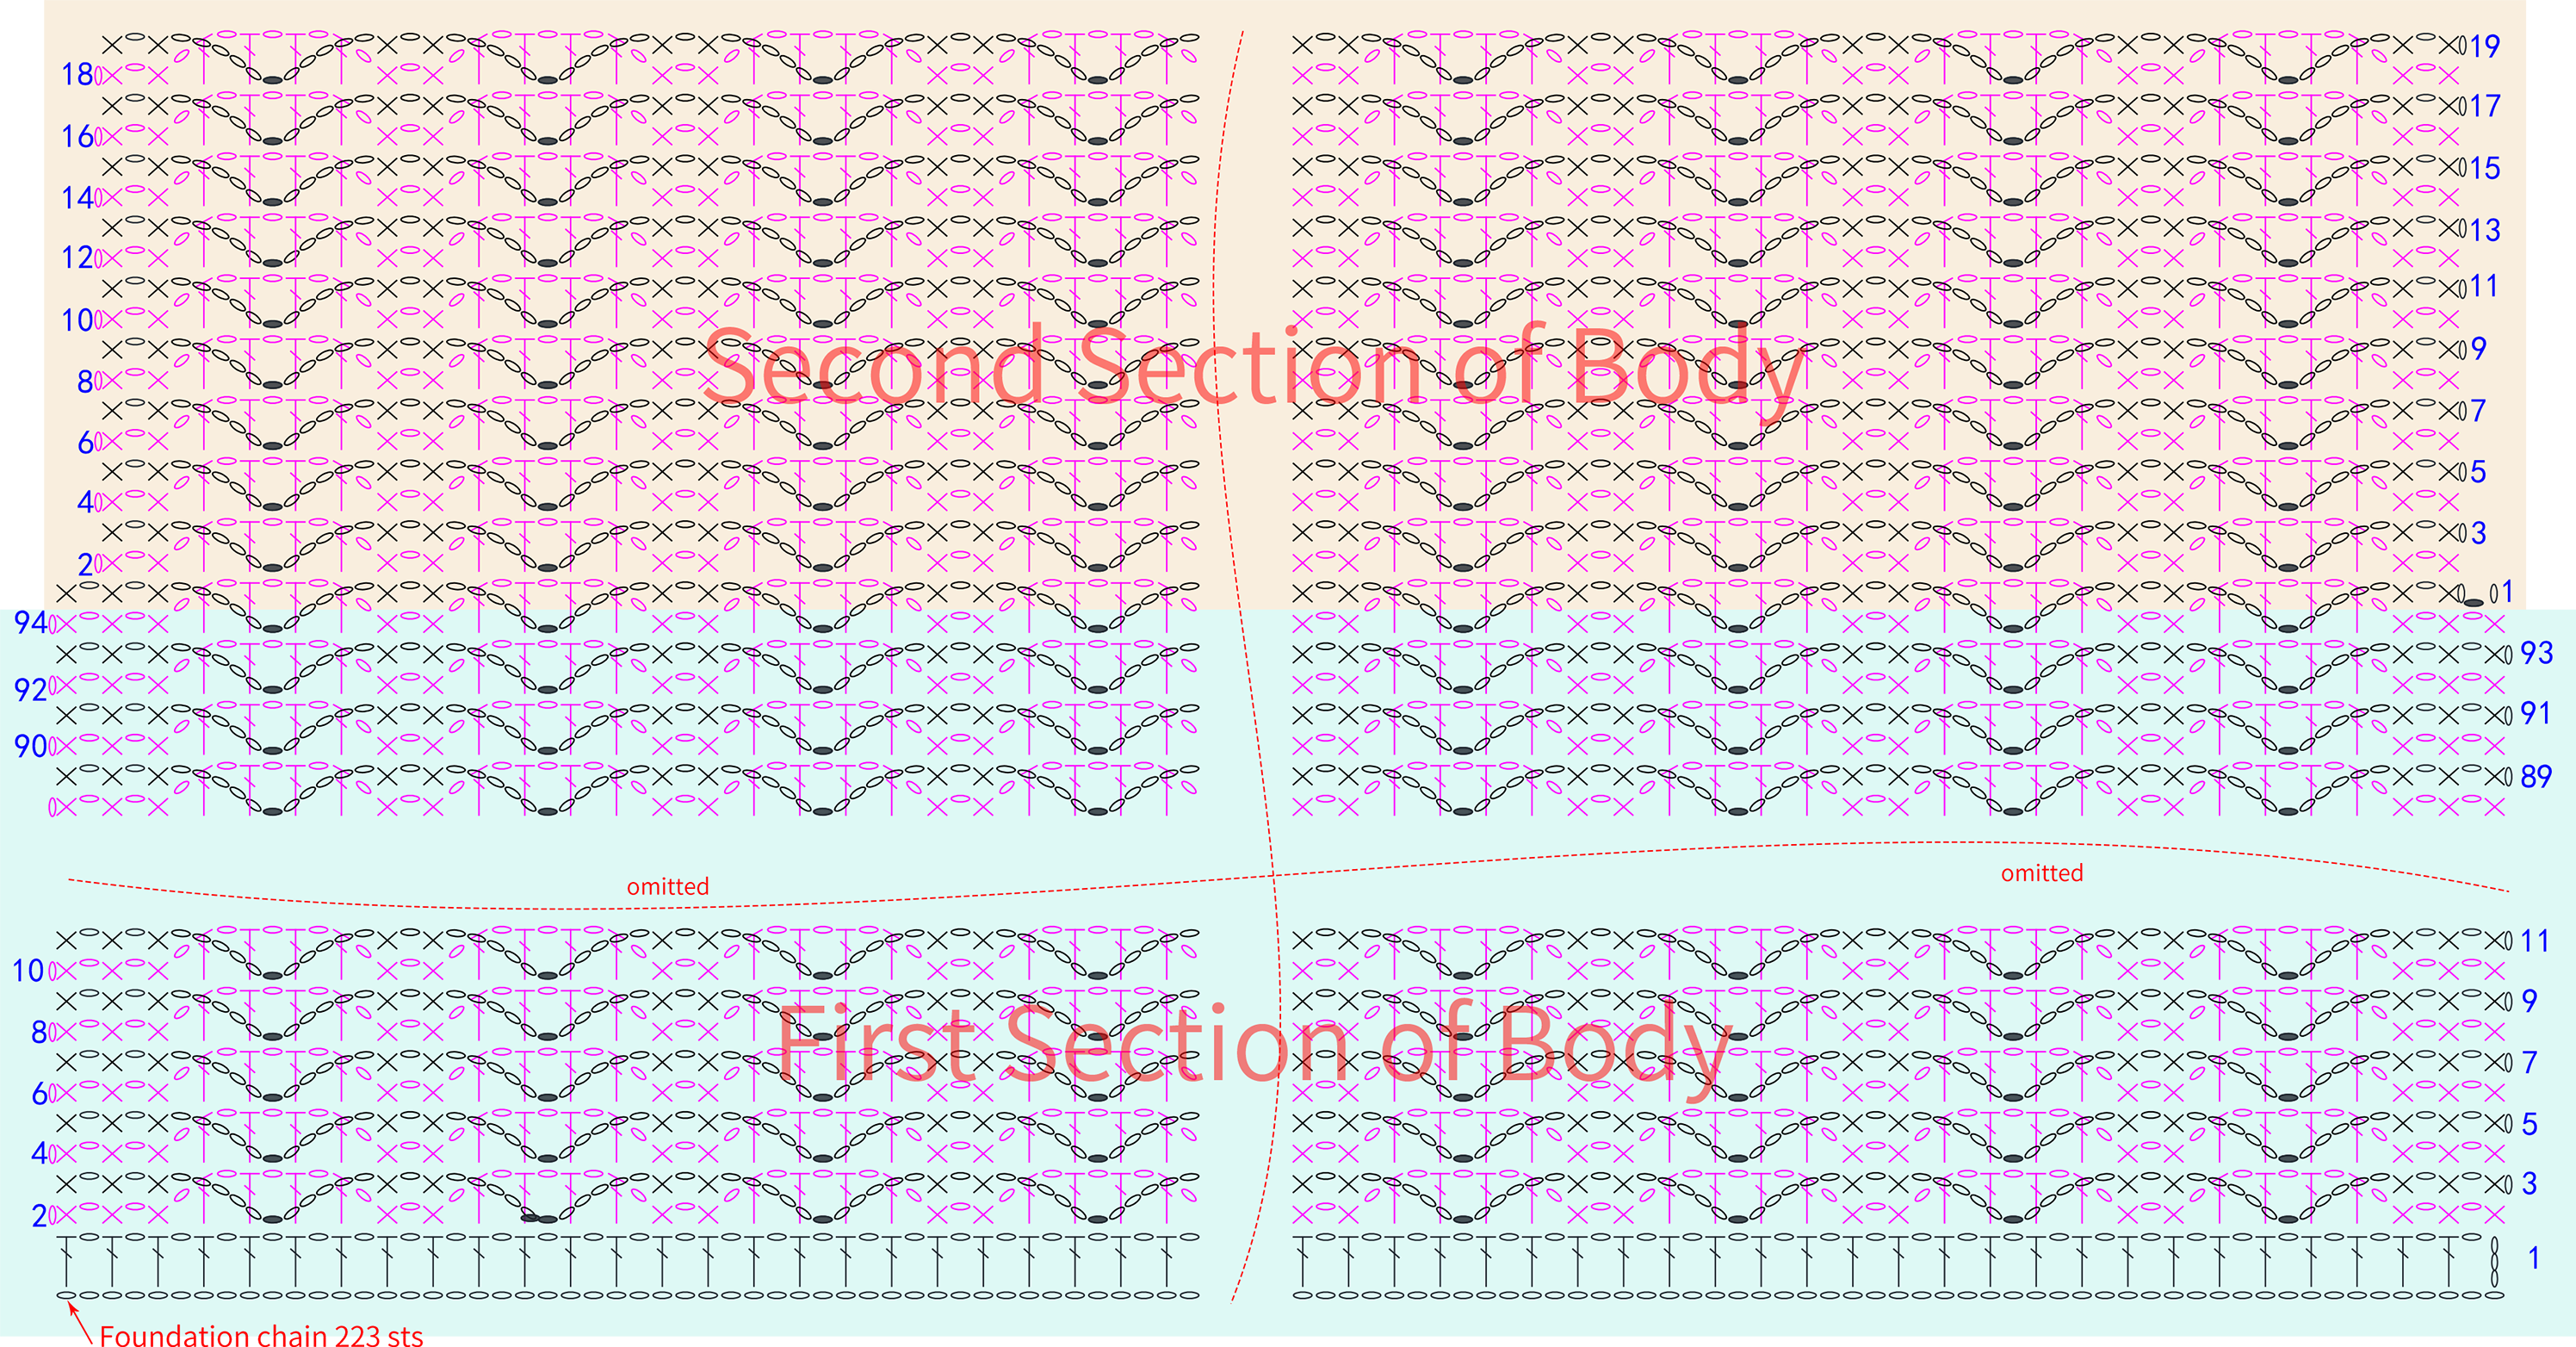
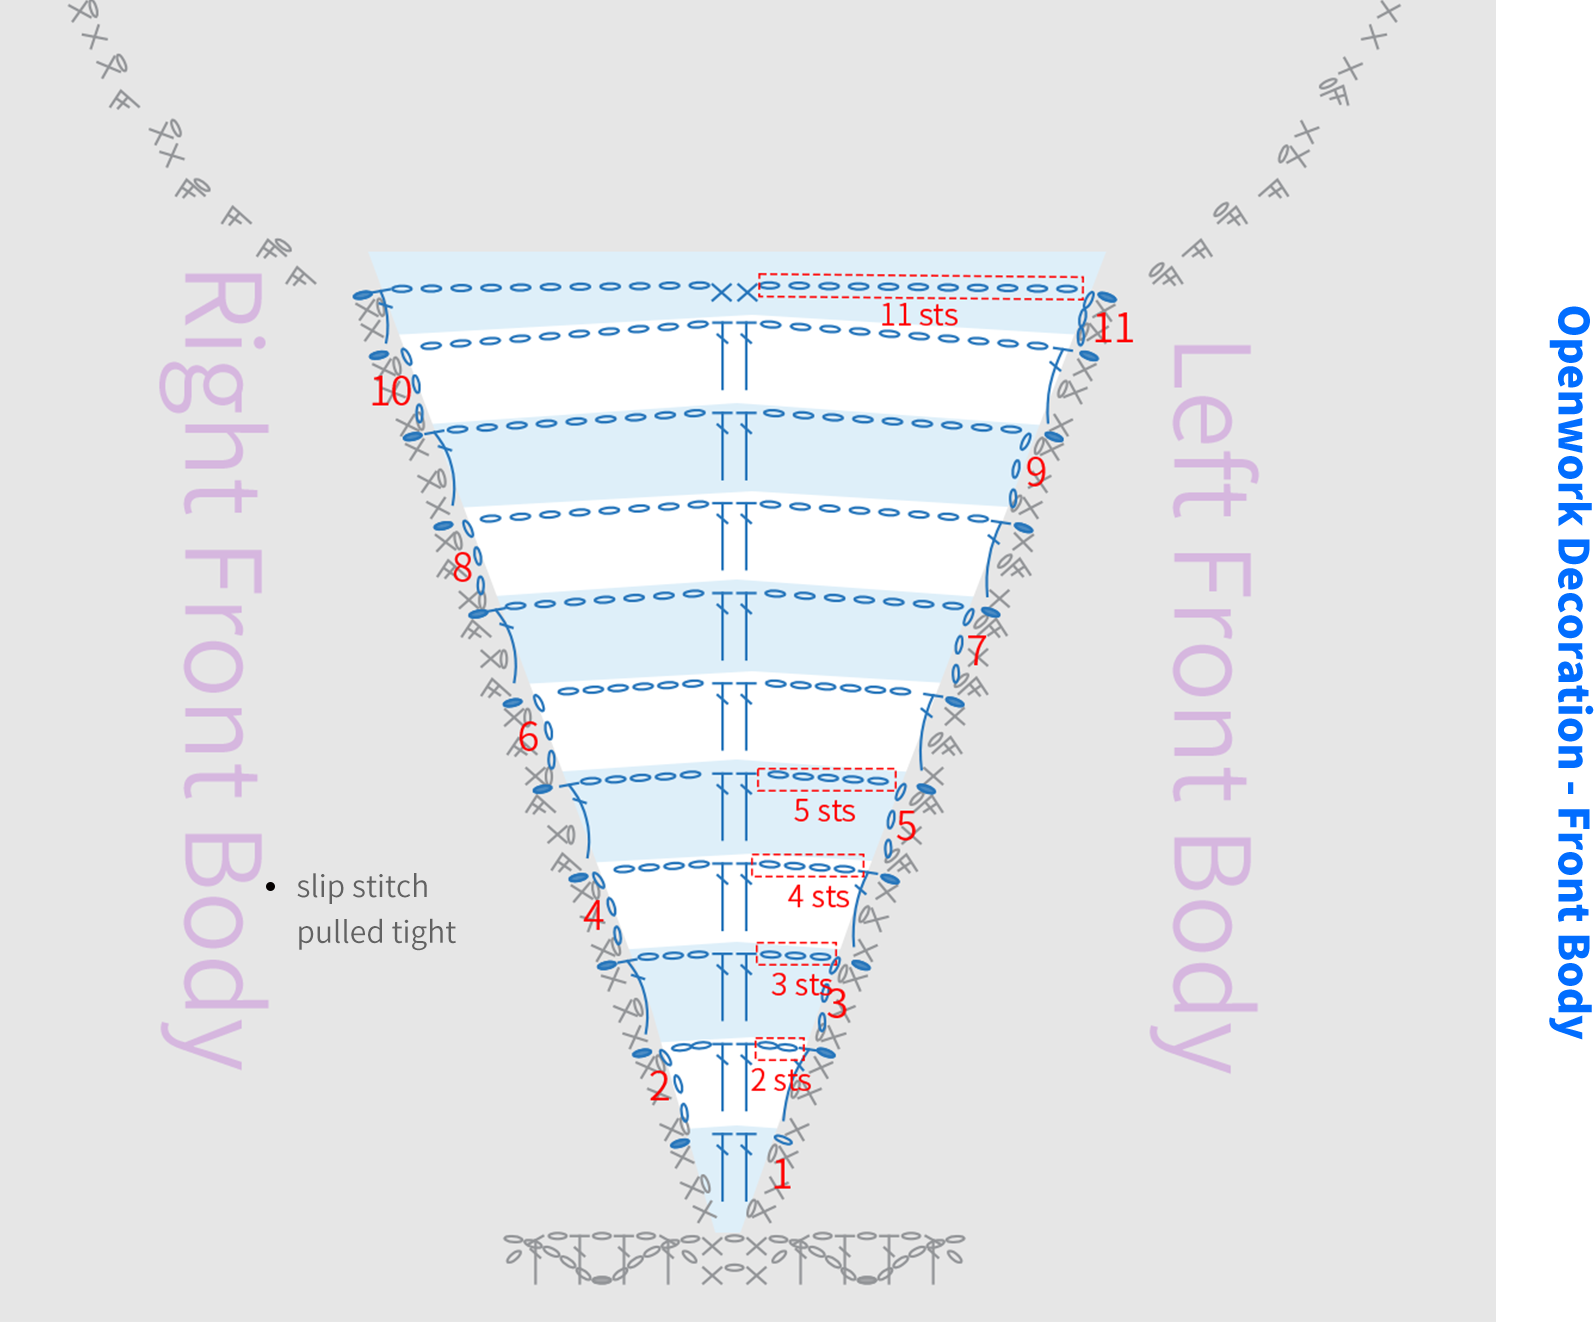
Part 1 Front Body A 01' 10''
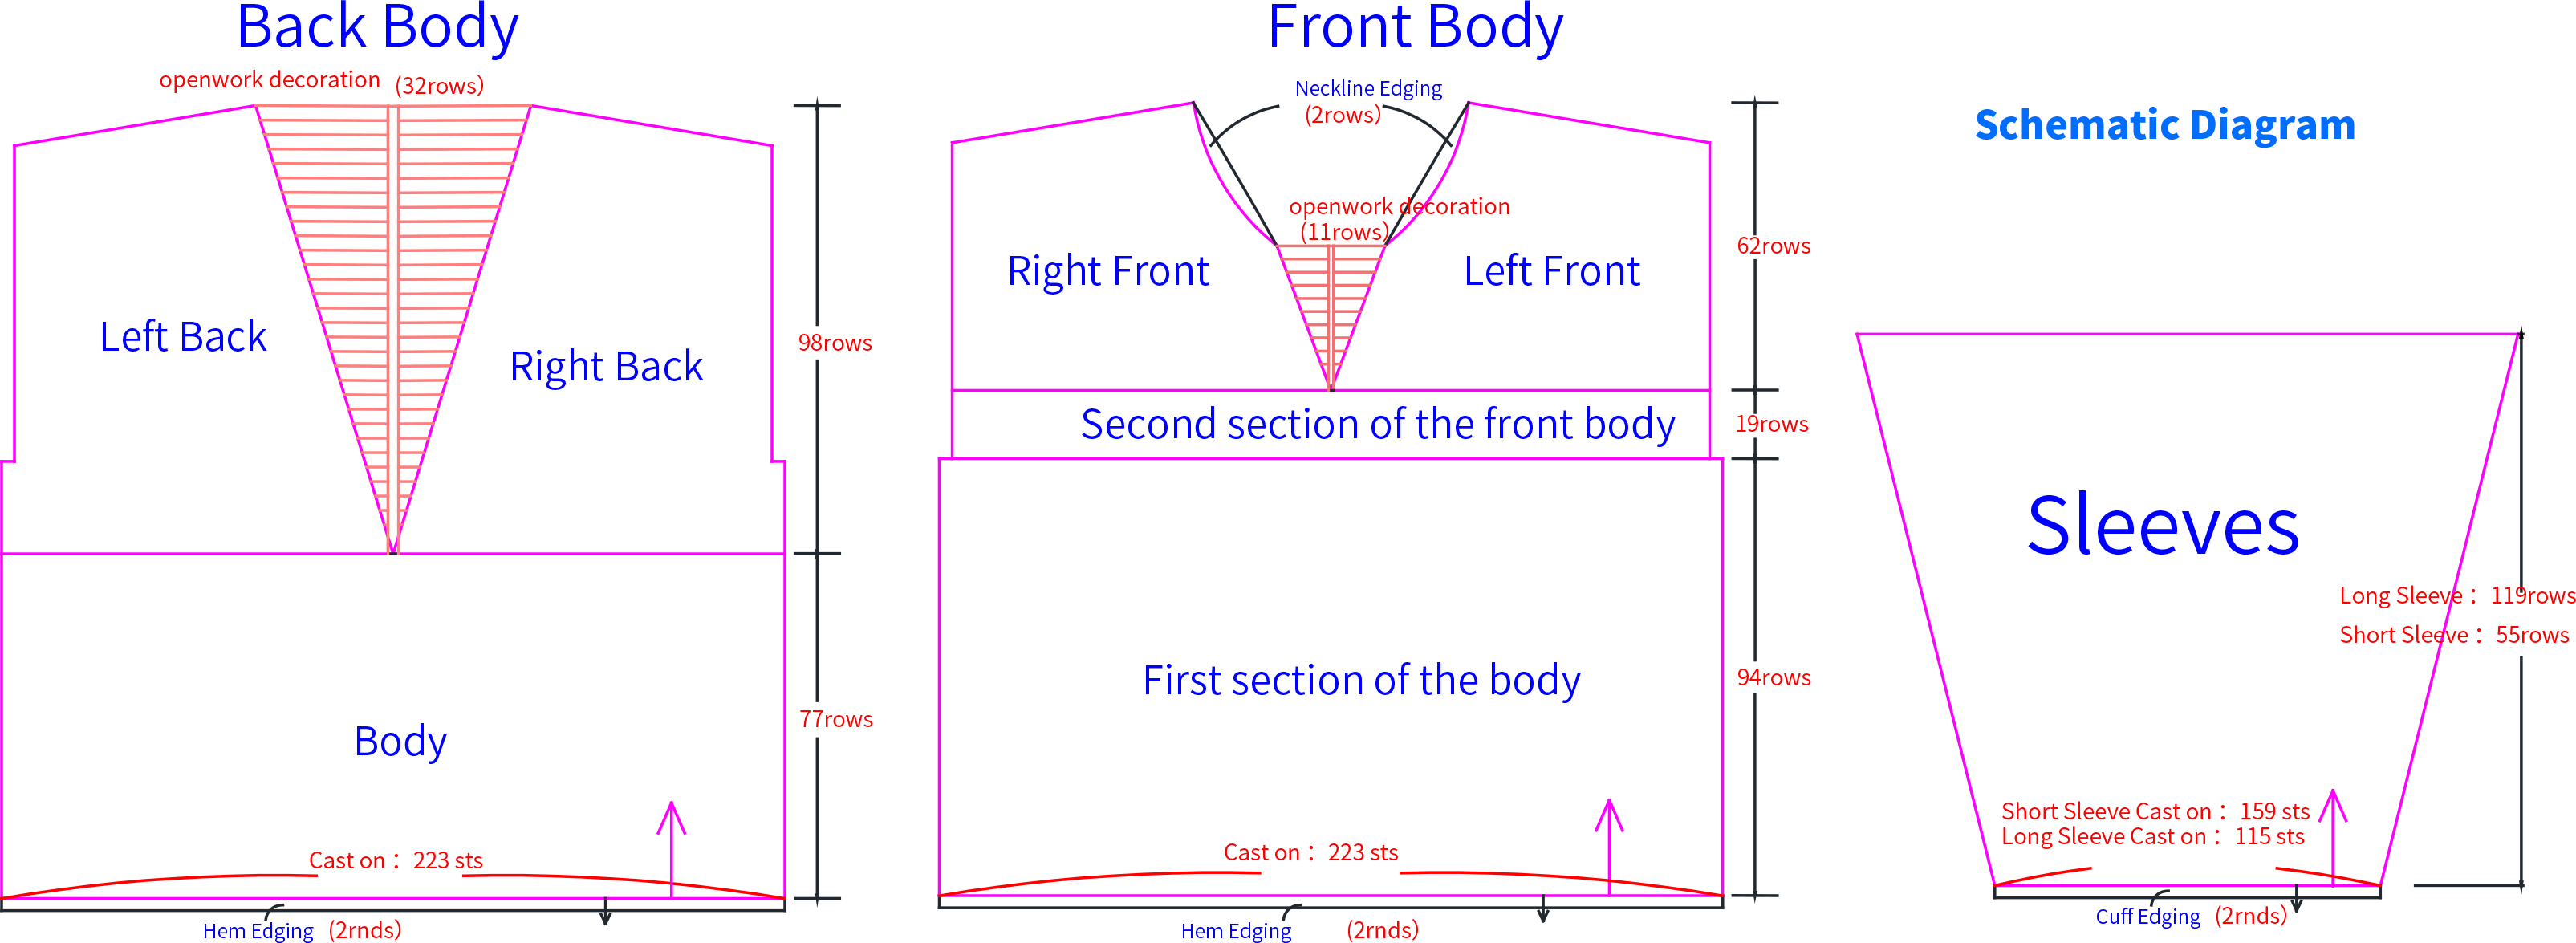
It consists of the body and the left and right front body. The body is divided into first section of the body and second section of the body . Use foundation chain to start and crochet upwards sequentially from bottom to top. Please refer to the video demonstration for more details.
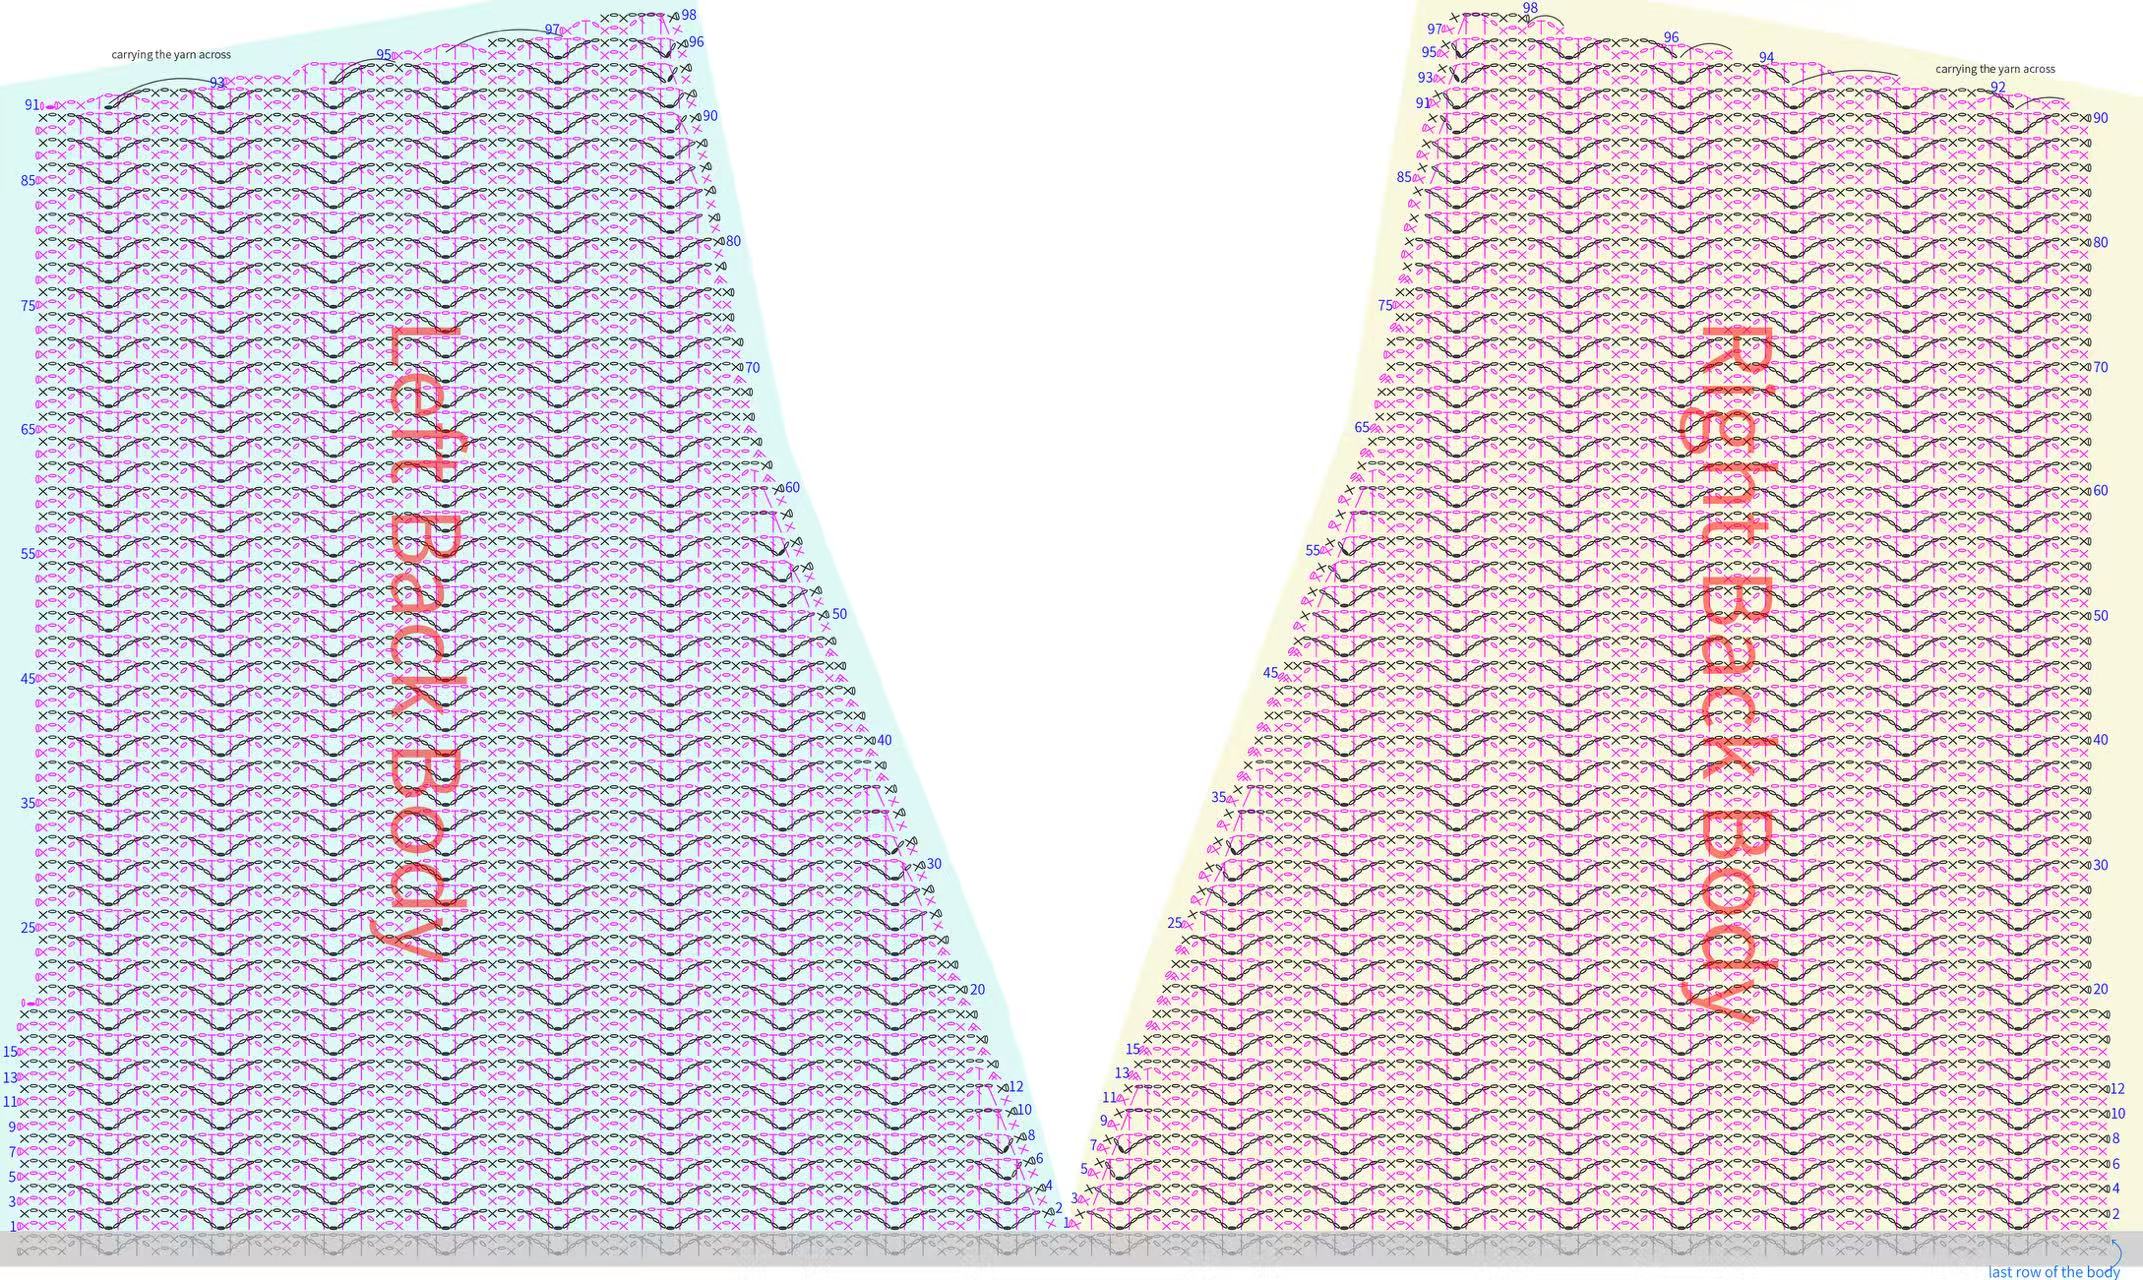
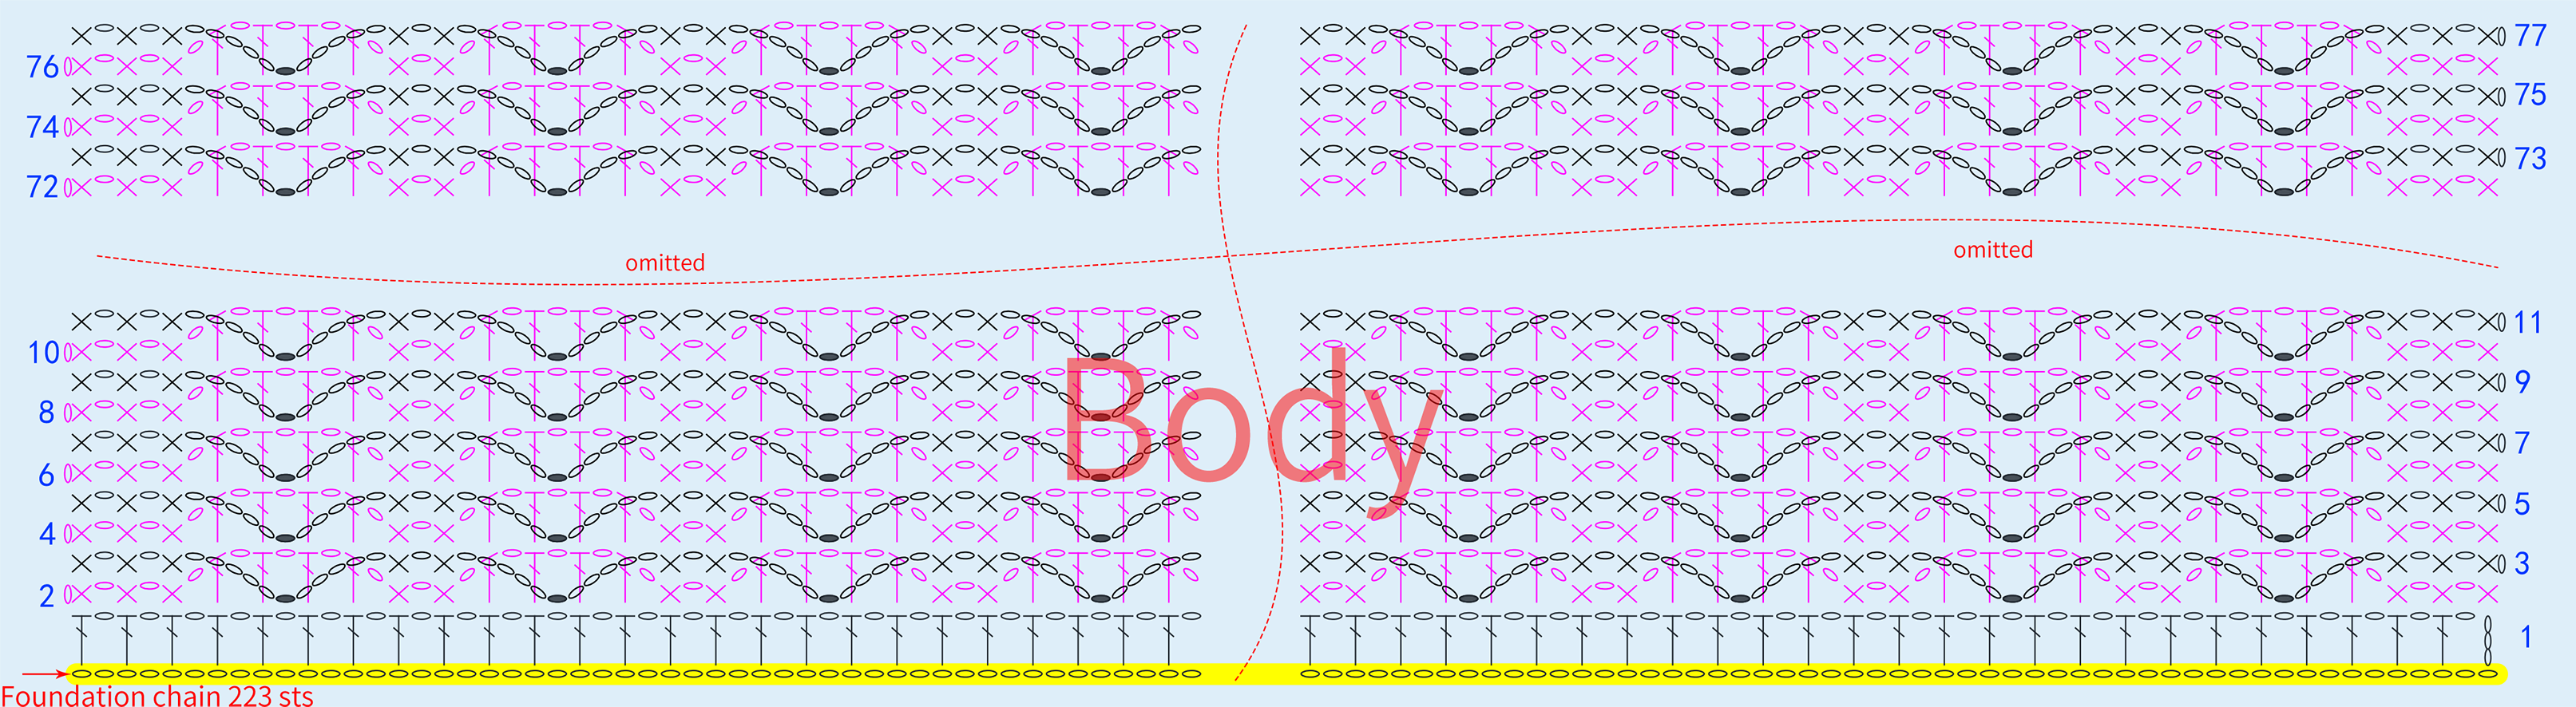
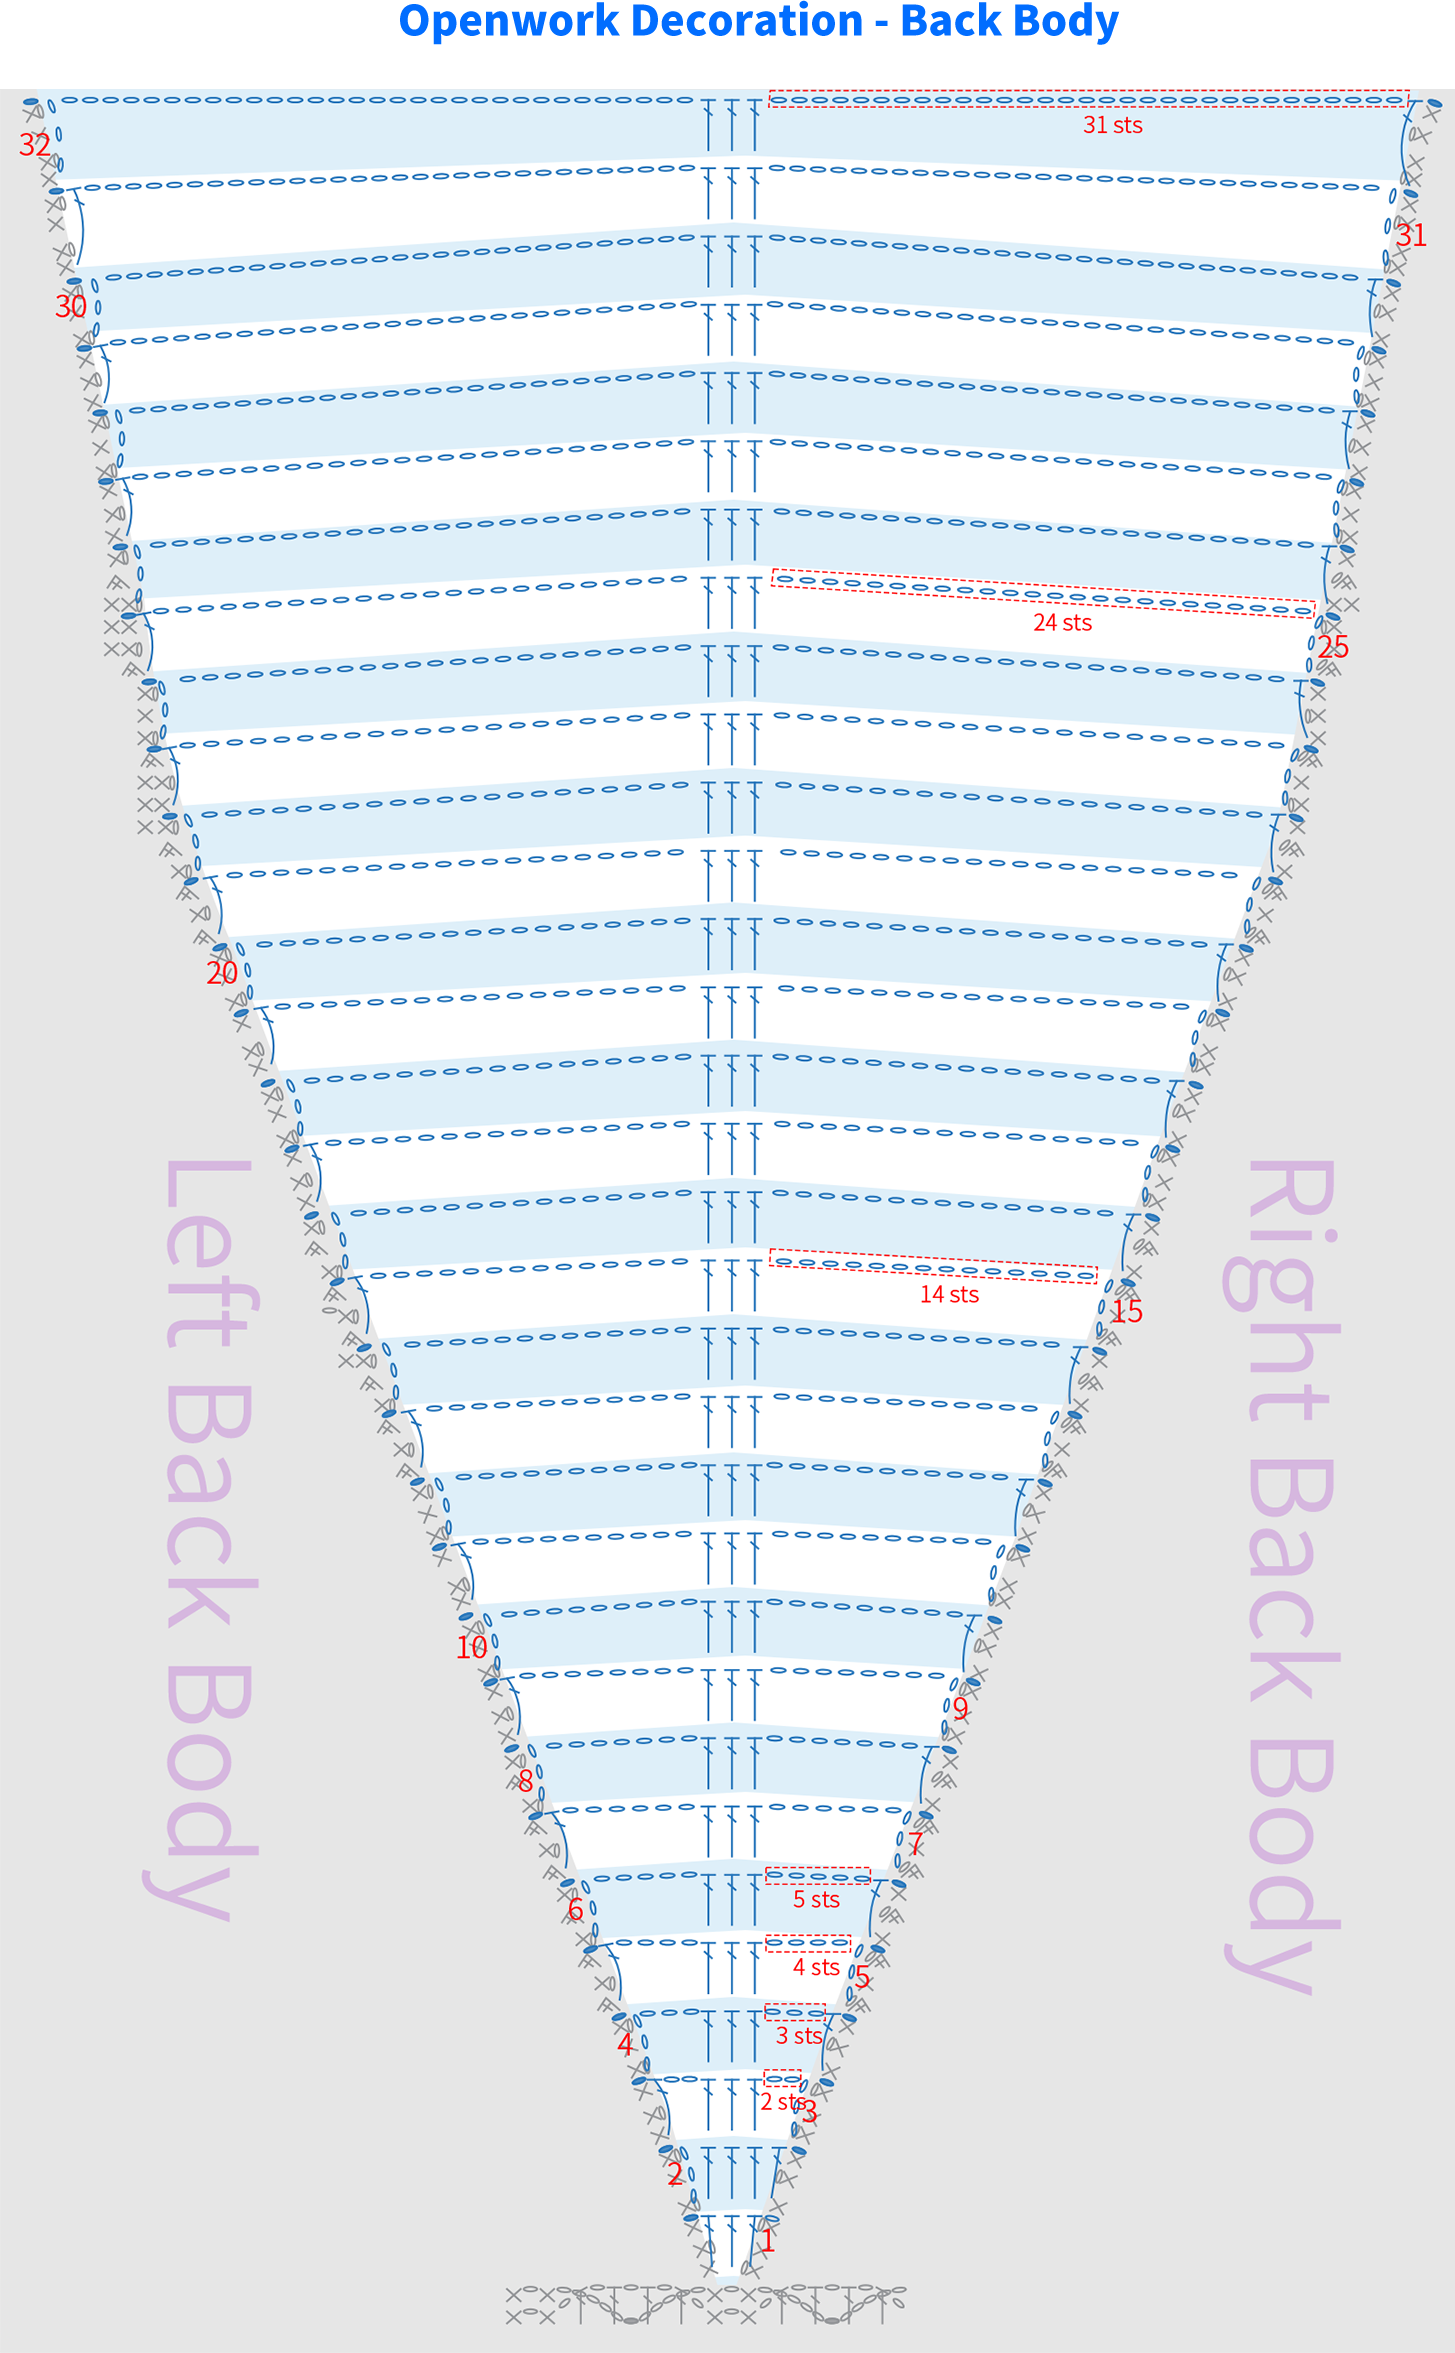
Part 2 Back Body B 37' 57''
Divide into the body and the left and right back body, using the identical method as for the front body. Please refer to the video demonstration for more details.
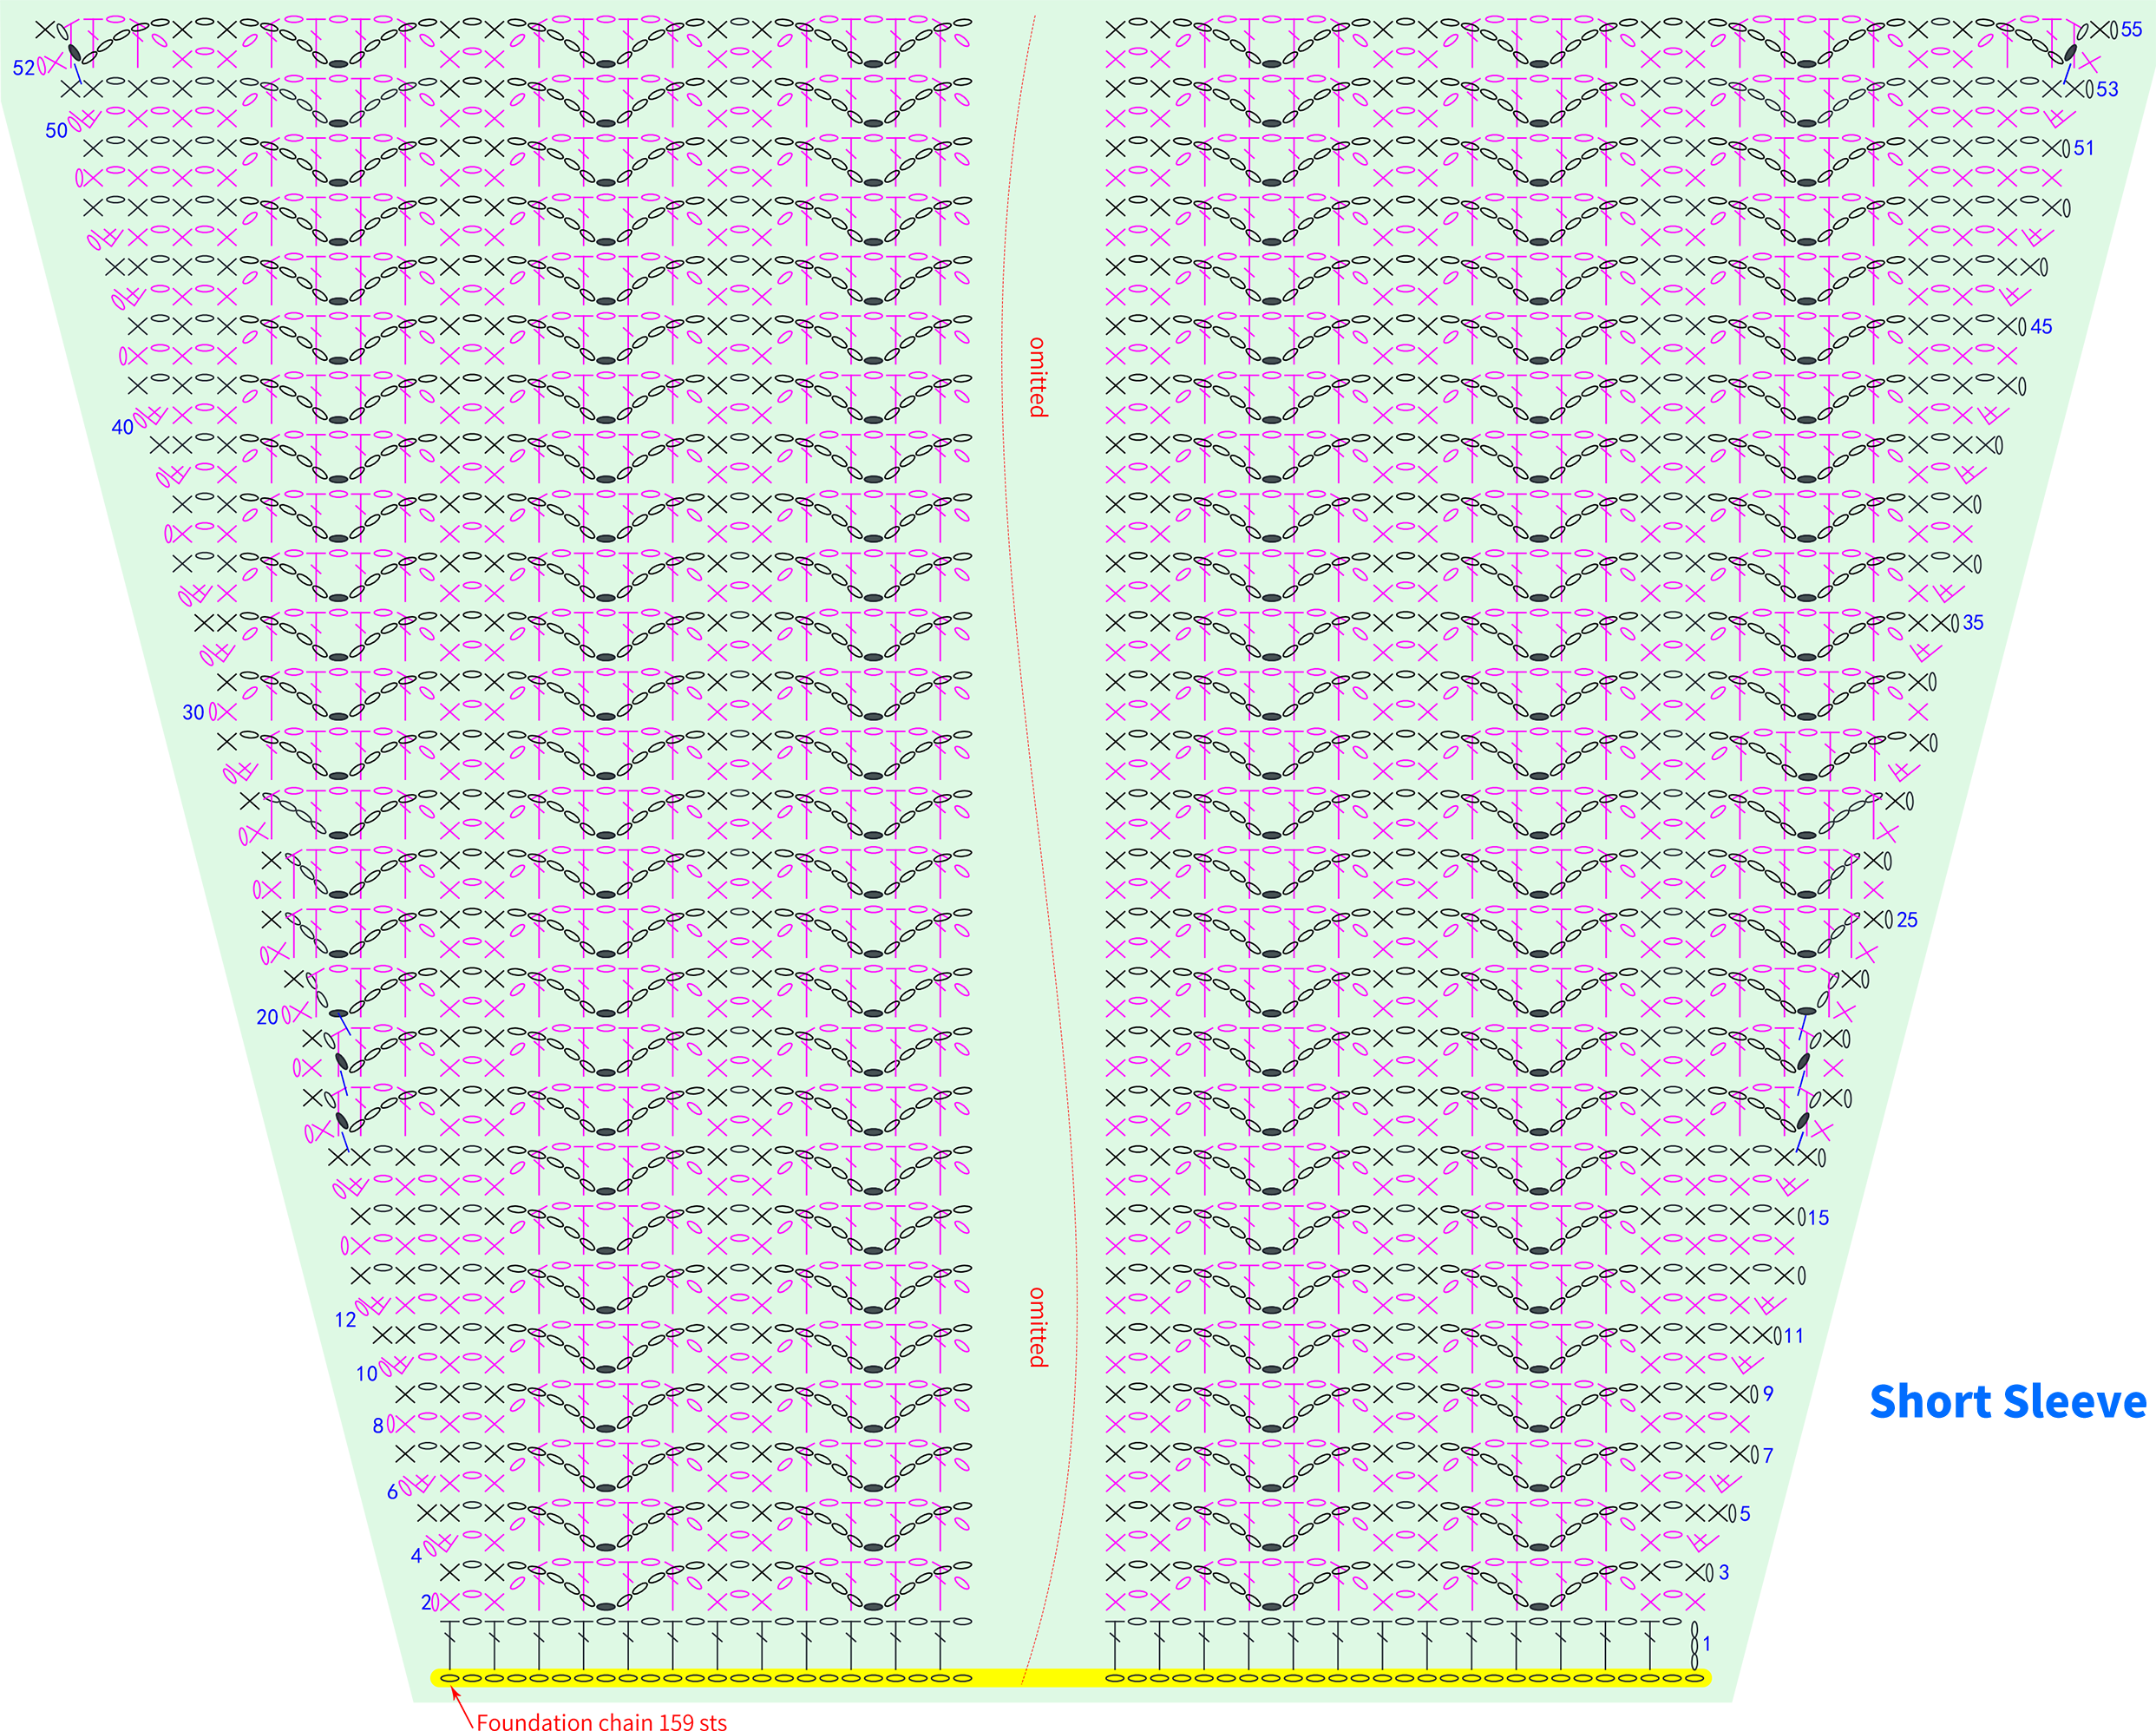
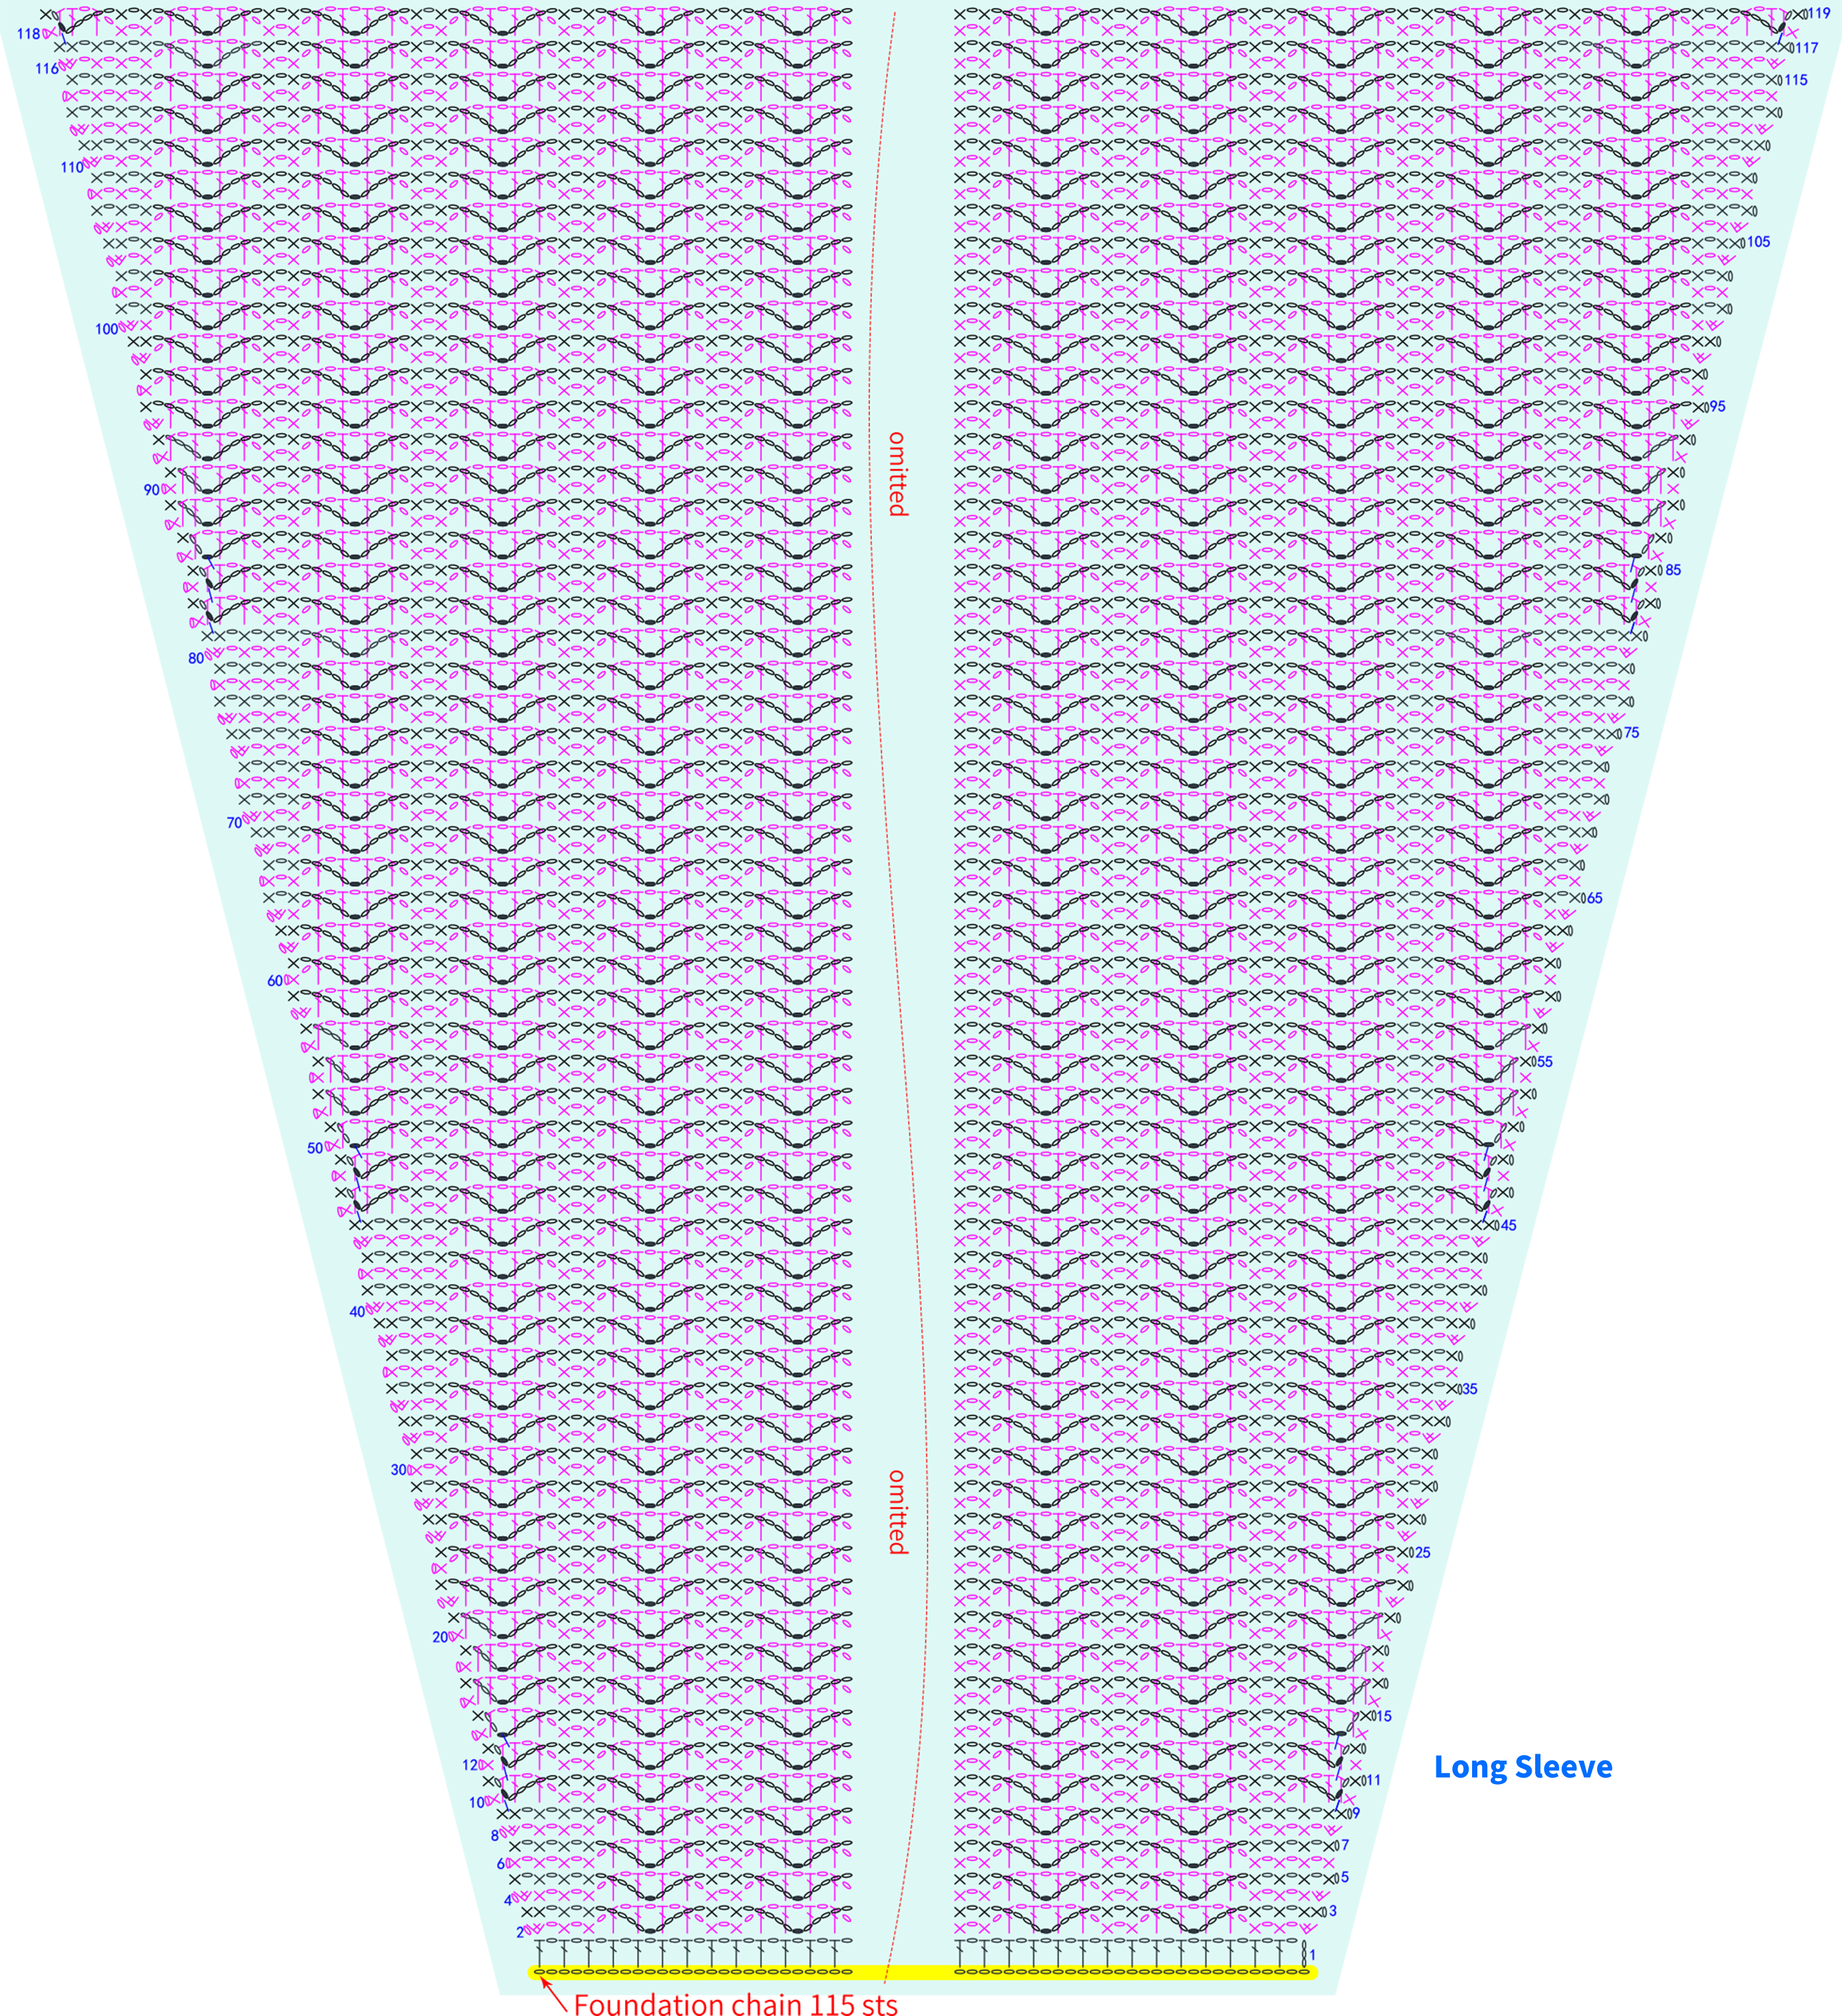
Part 3 Sleeves C 38' 49''
There are two versions: long sleeves and short sleeves, and the method is the same. The short sleeves are just based on the long sleeves with some rows reduced. Please refer to the video demonstration for more details.
Part 4 Openwork Decoration D, Joining E, Edging F
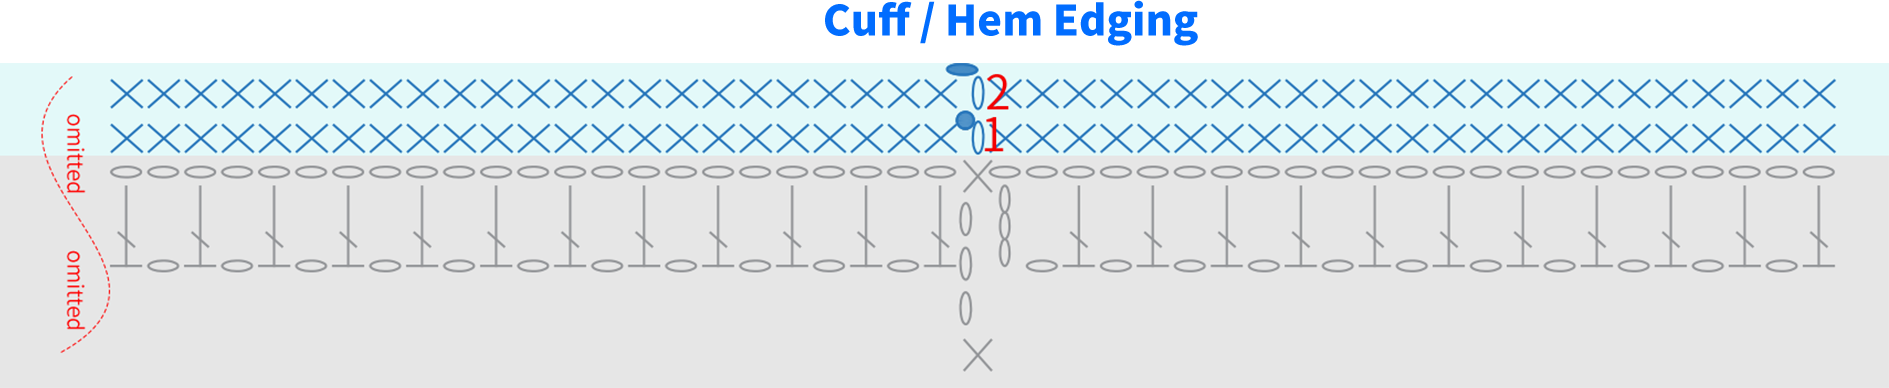
First, crochet the lace decorations for the front and back pieces. Then, proceed with the body and shoulder joining for the front and back pieces. Next, join the sleeves and attach them to the corresponding positions on the front and back pieces. Finally, pick up stitches in the corresponding areas to crochet the neckline edging F1, cuff edging F2, and hem edging F3. Please refer to the video demonstration for more details.


Note: The number of stitches can be adjusted according to the actual situation, as long as the piece lays flat.
Made by the community




