
Home / Blanket
Relievo Intarsia Blanket
Project preview
See the finished project
Pattern format
Instructions
Watch and follow
Video tutorial
This blanket is divided into three parts: crocheting the motifs, joining and edging.
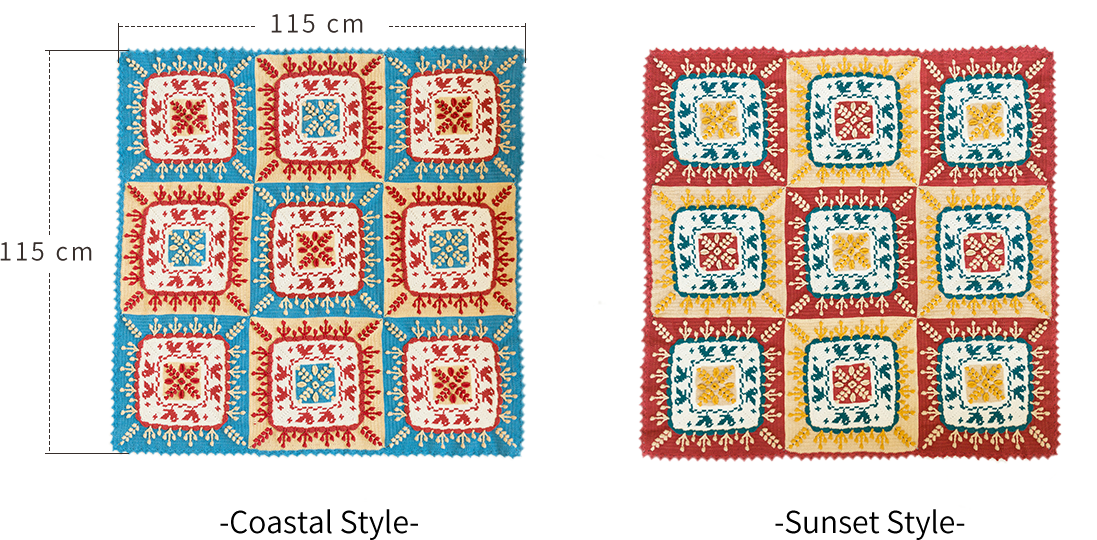
The handcrafted measurements may have an error of 1 to 2 cm. Due to variations in individual tension, the size of the sample is for reference only.
Materials: Susan's Family 4-Ply Combed Cotton & Acrylic Fibre Hand Knitting Yarn
Hook: 3.00 mm crochet hook

Chart Key
















Note: This pattern is making in Chinese crochet pattern terms, and the stitch name is written using American terminology. All measurements in charts are in cm.

Step 1 Motif ×9 pieces 00' 59''
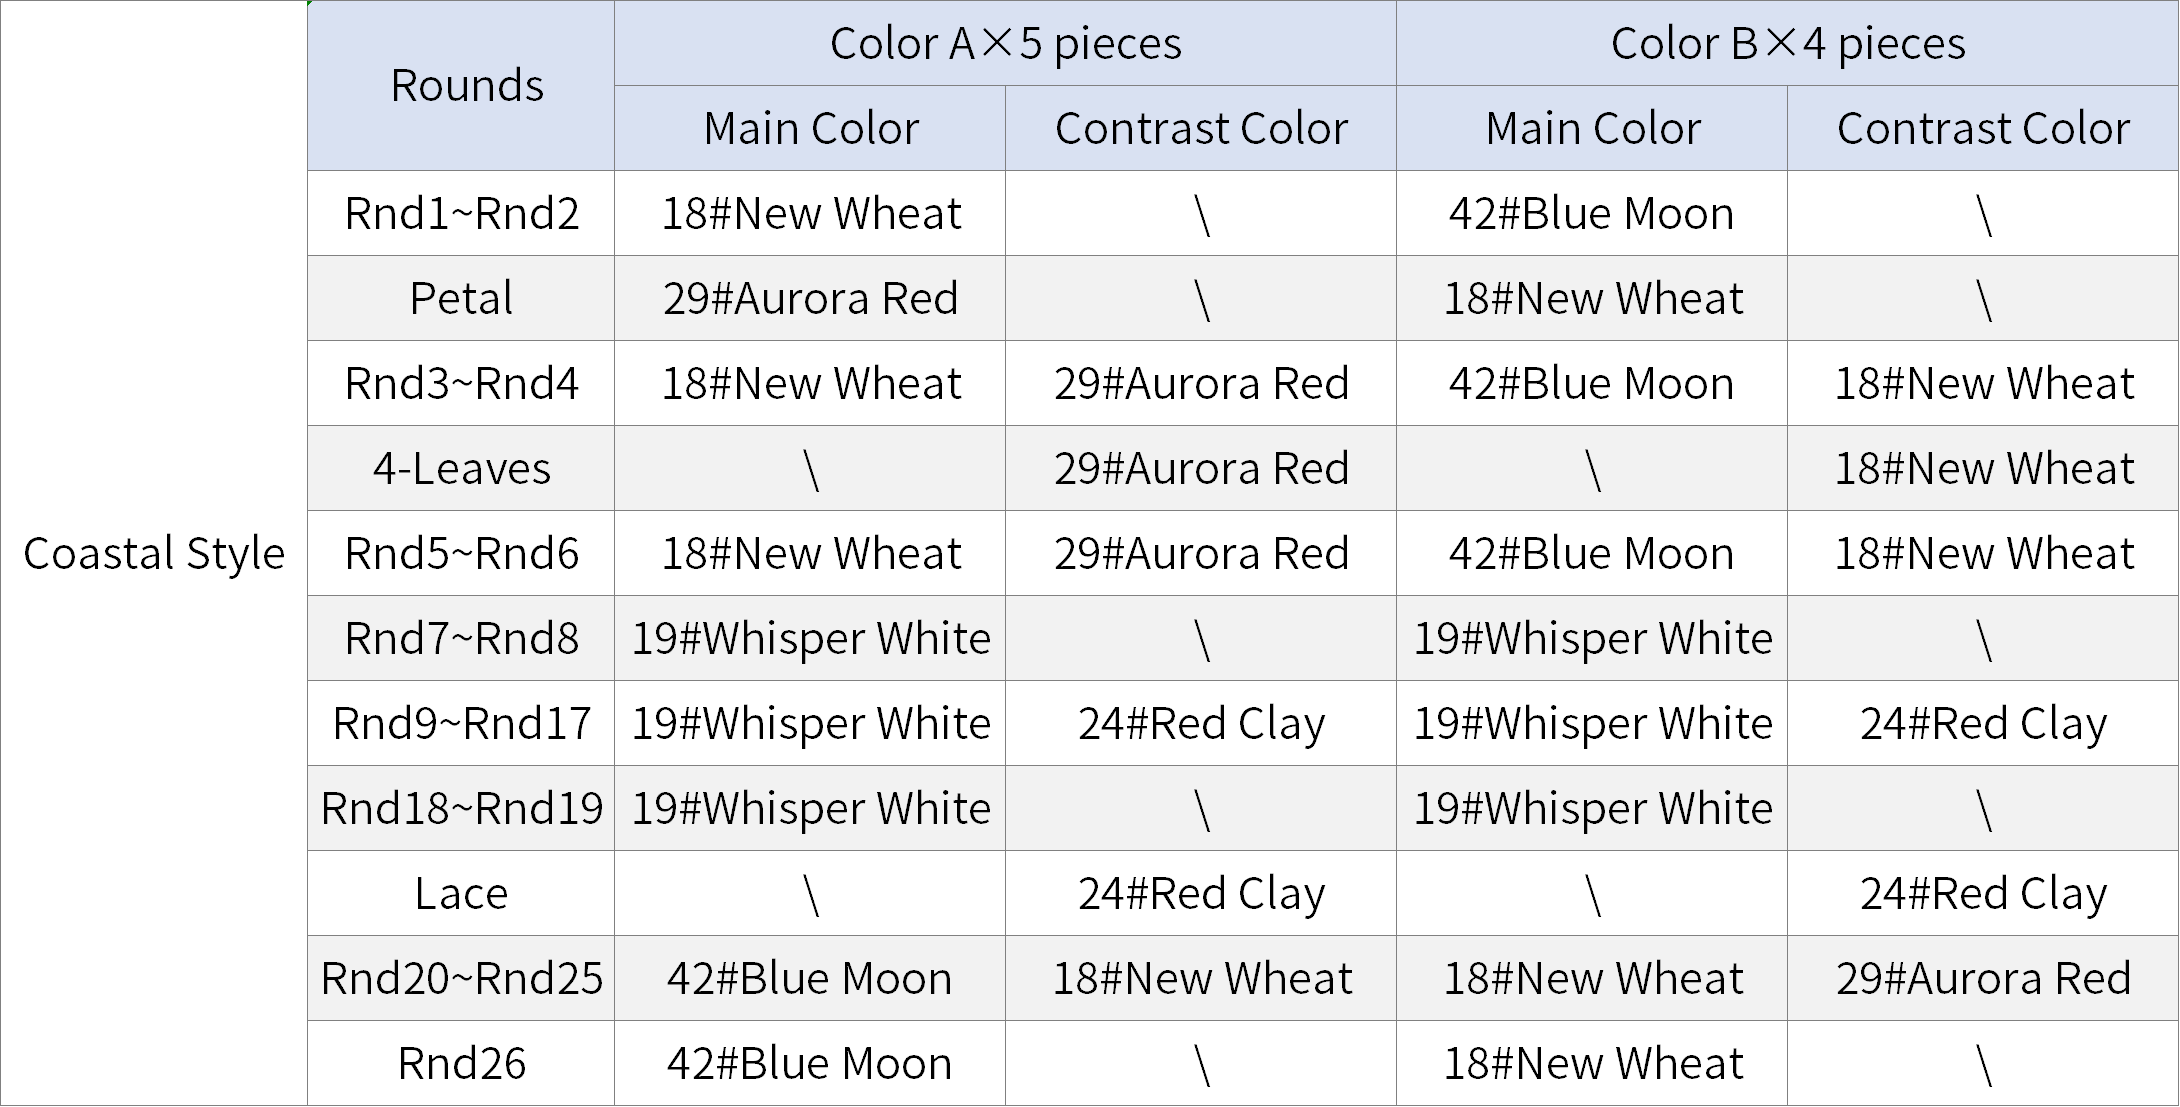
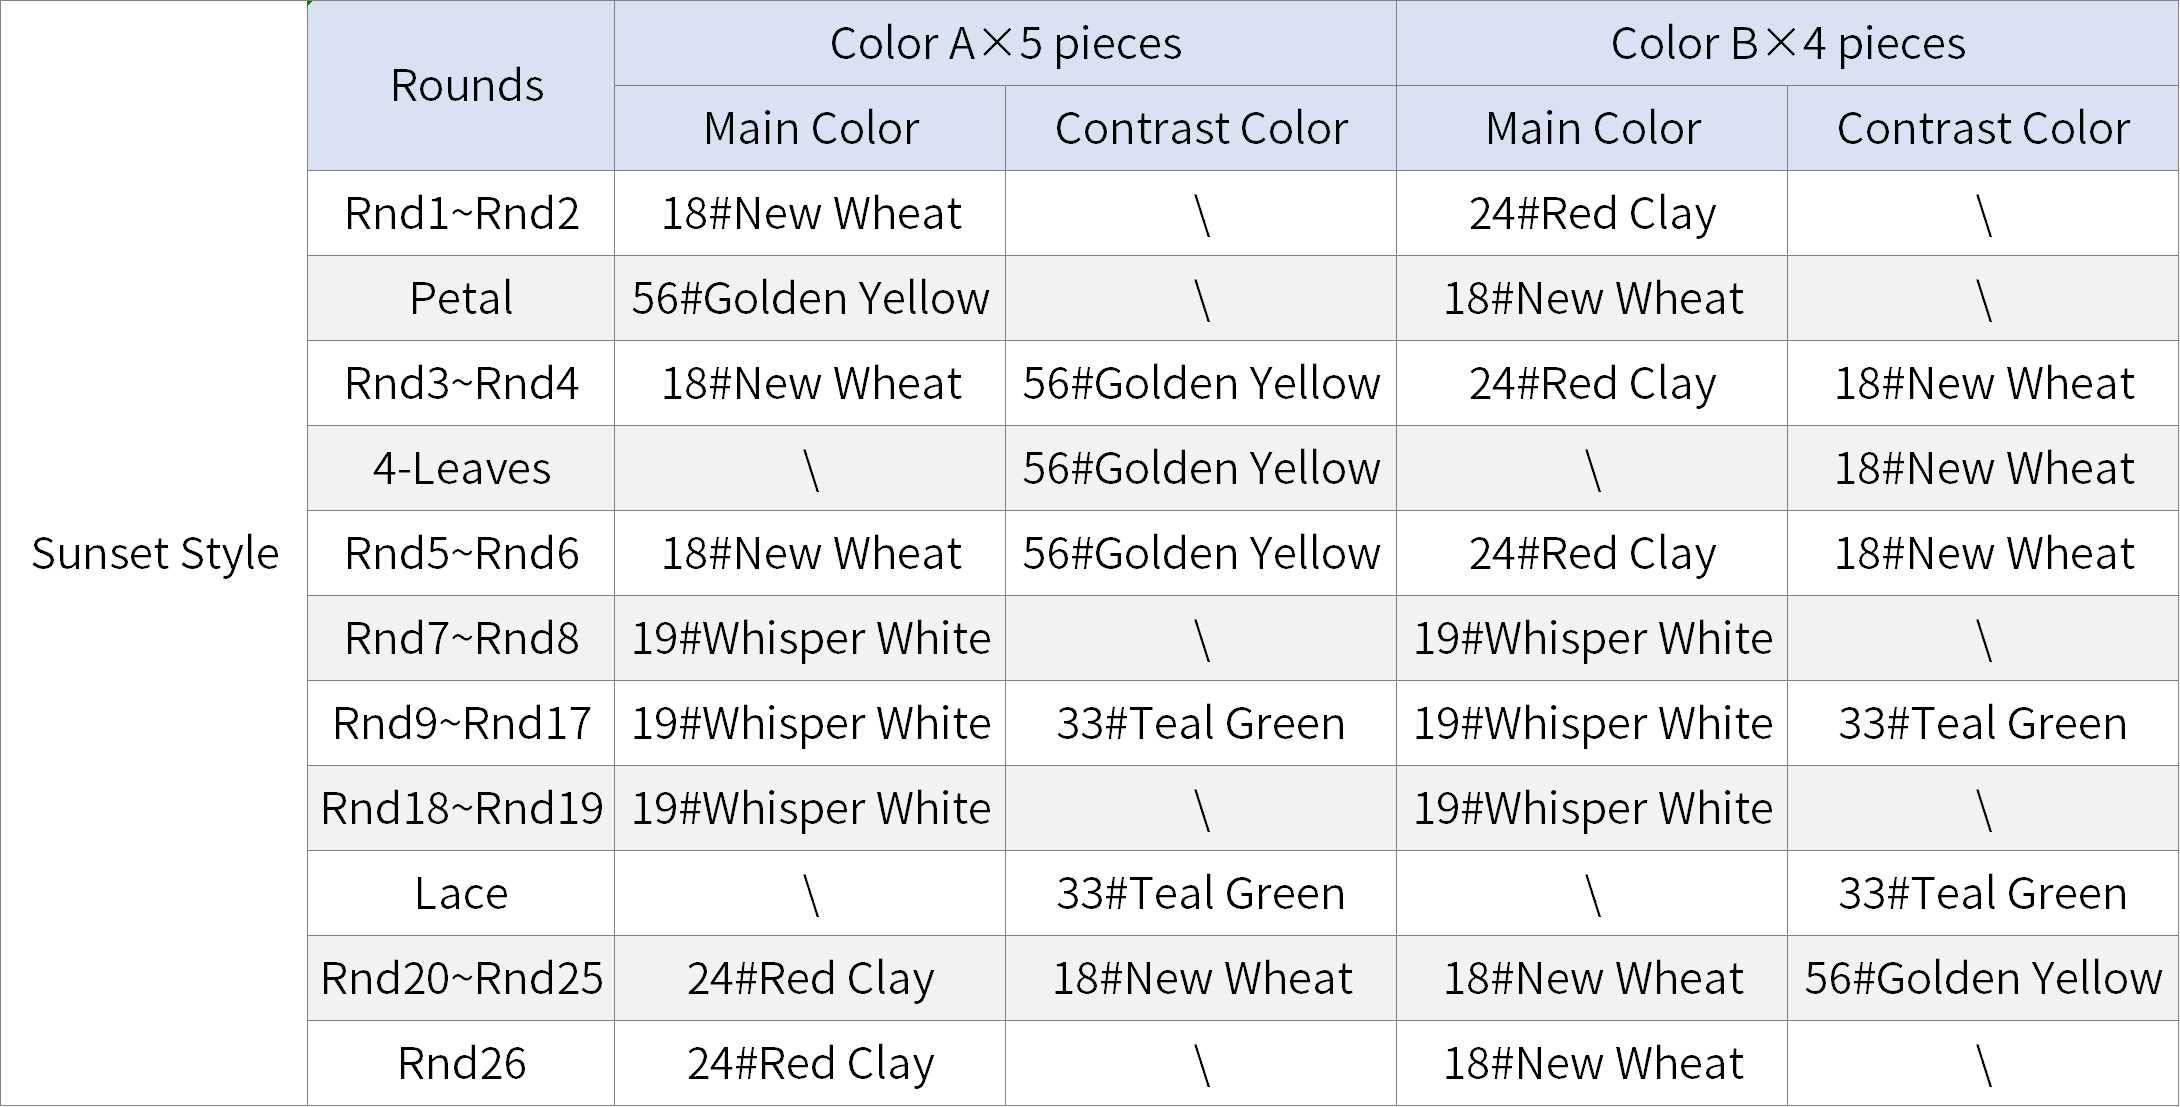
The motifs come in two color schemes, with a total of nine pieces. The motifs begin with a double magic ring. Crochet in rounds counterclockwise. Please refer to the video demonstration for more details.
Note:
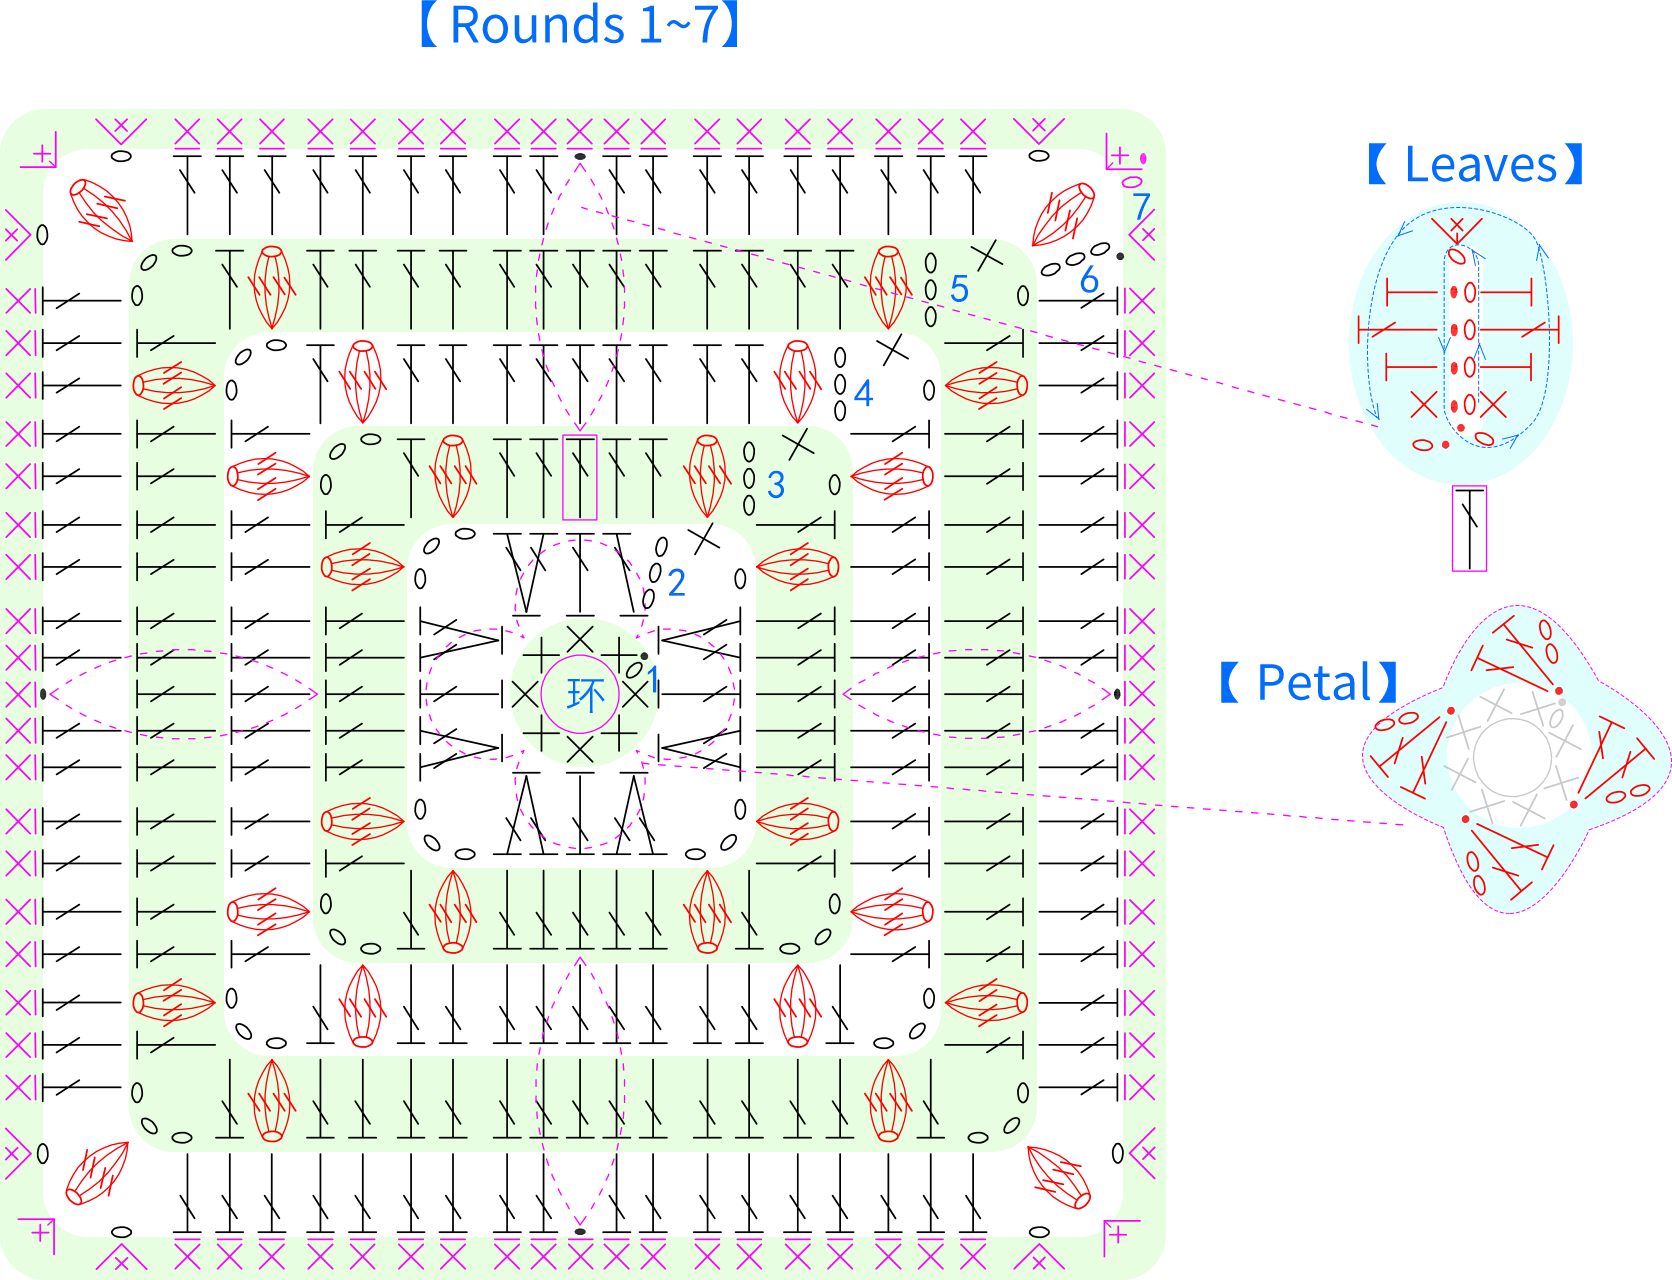
1. For rounds 1 to 6, the red stitch symbols are worked with the contrasting color yarn.
2. For the 6th round, work loose slip stitches on the leaves. From the 7th to the 19th round, end each round with a loose slip stitch.
3. After finishing the sixth round, measure the width; it should be approximately 10 to 10.5 centimeters. If there's a significant difference, adjust your tension or switch to a different crochet hook and start over.
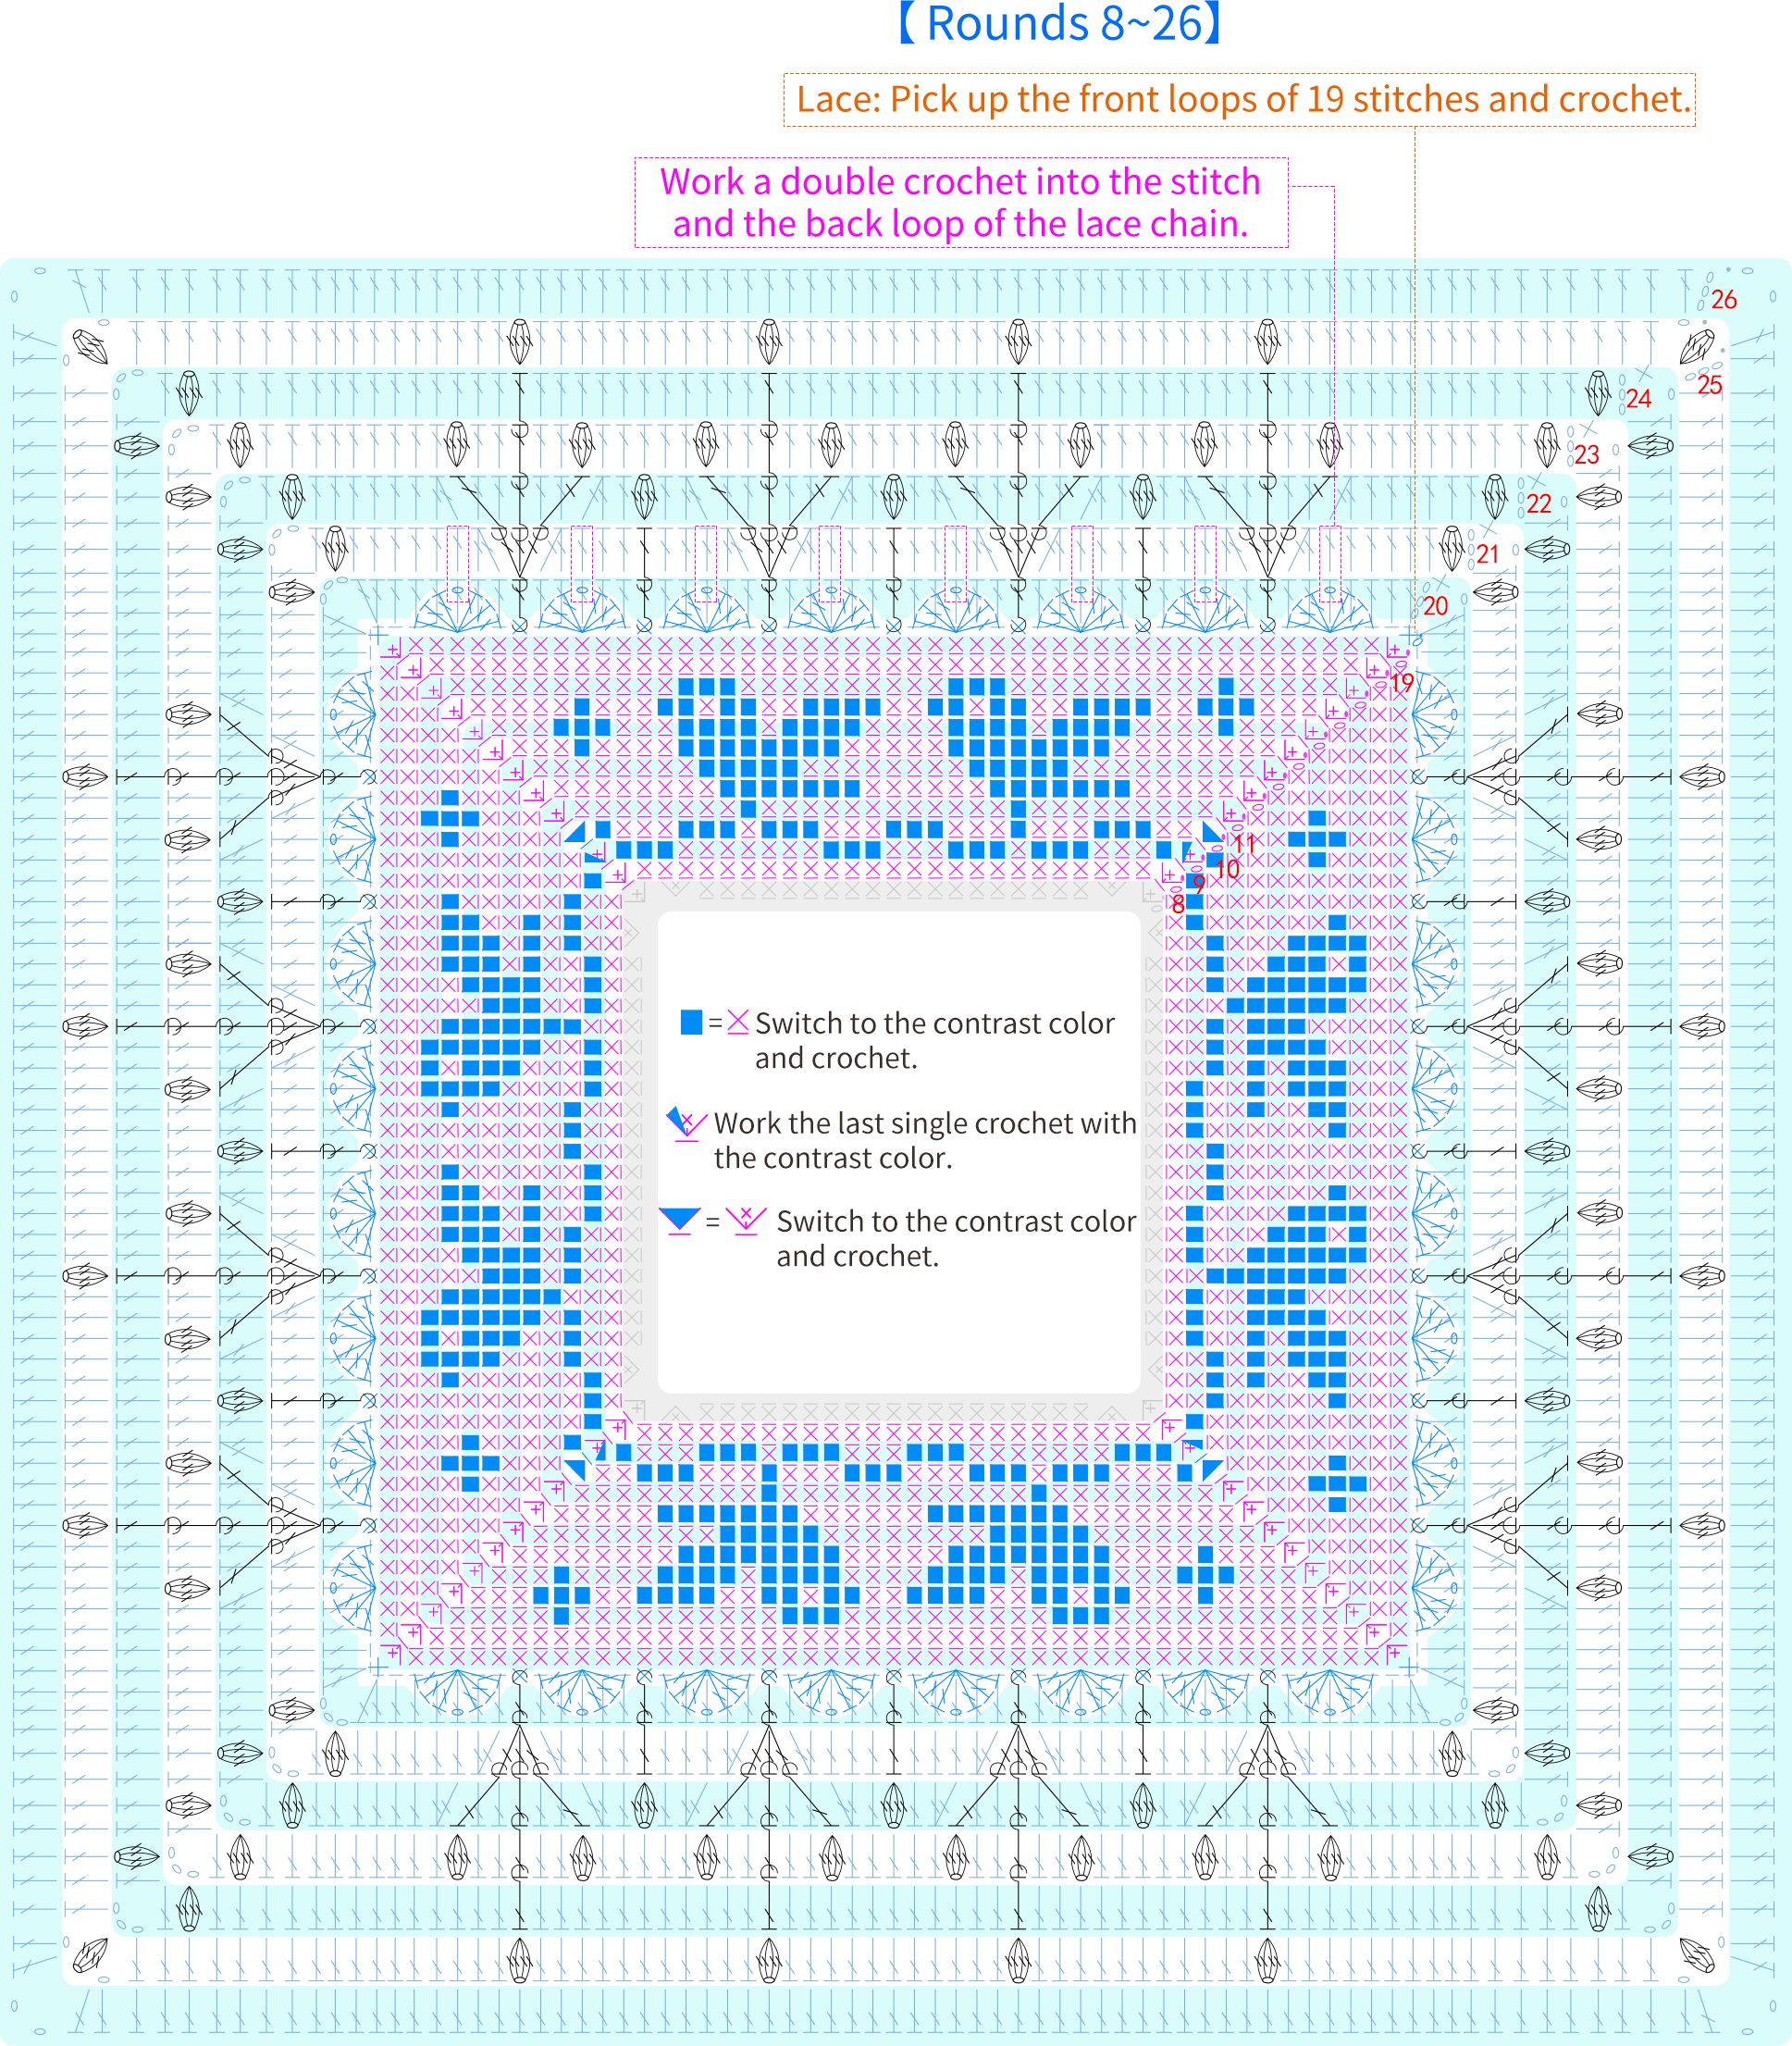
Note: For rounds 8 to 19, crochet the blue symbols with the contrasting color yarn. For rounds 20 to 26, crochet the black stitch symbols with the contrasting color yarn.
Step 2 Joining and Edging 67' 22''
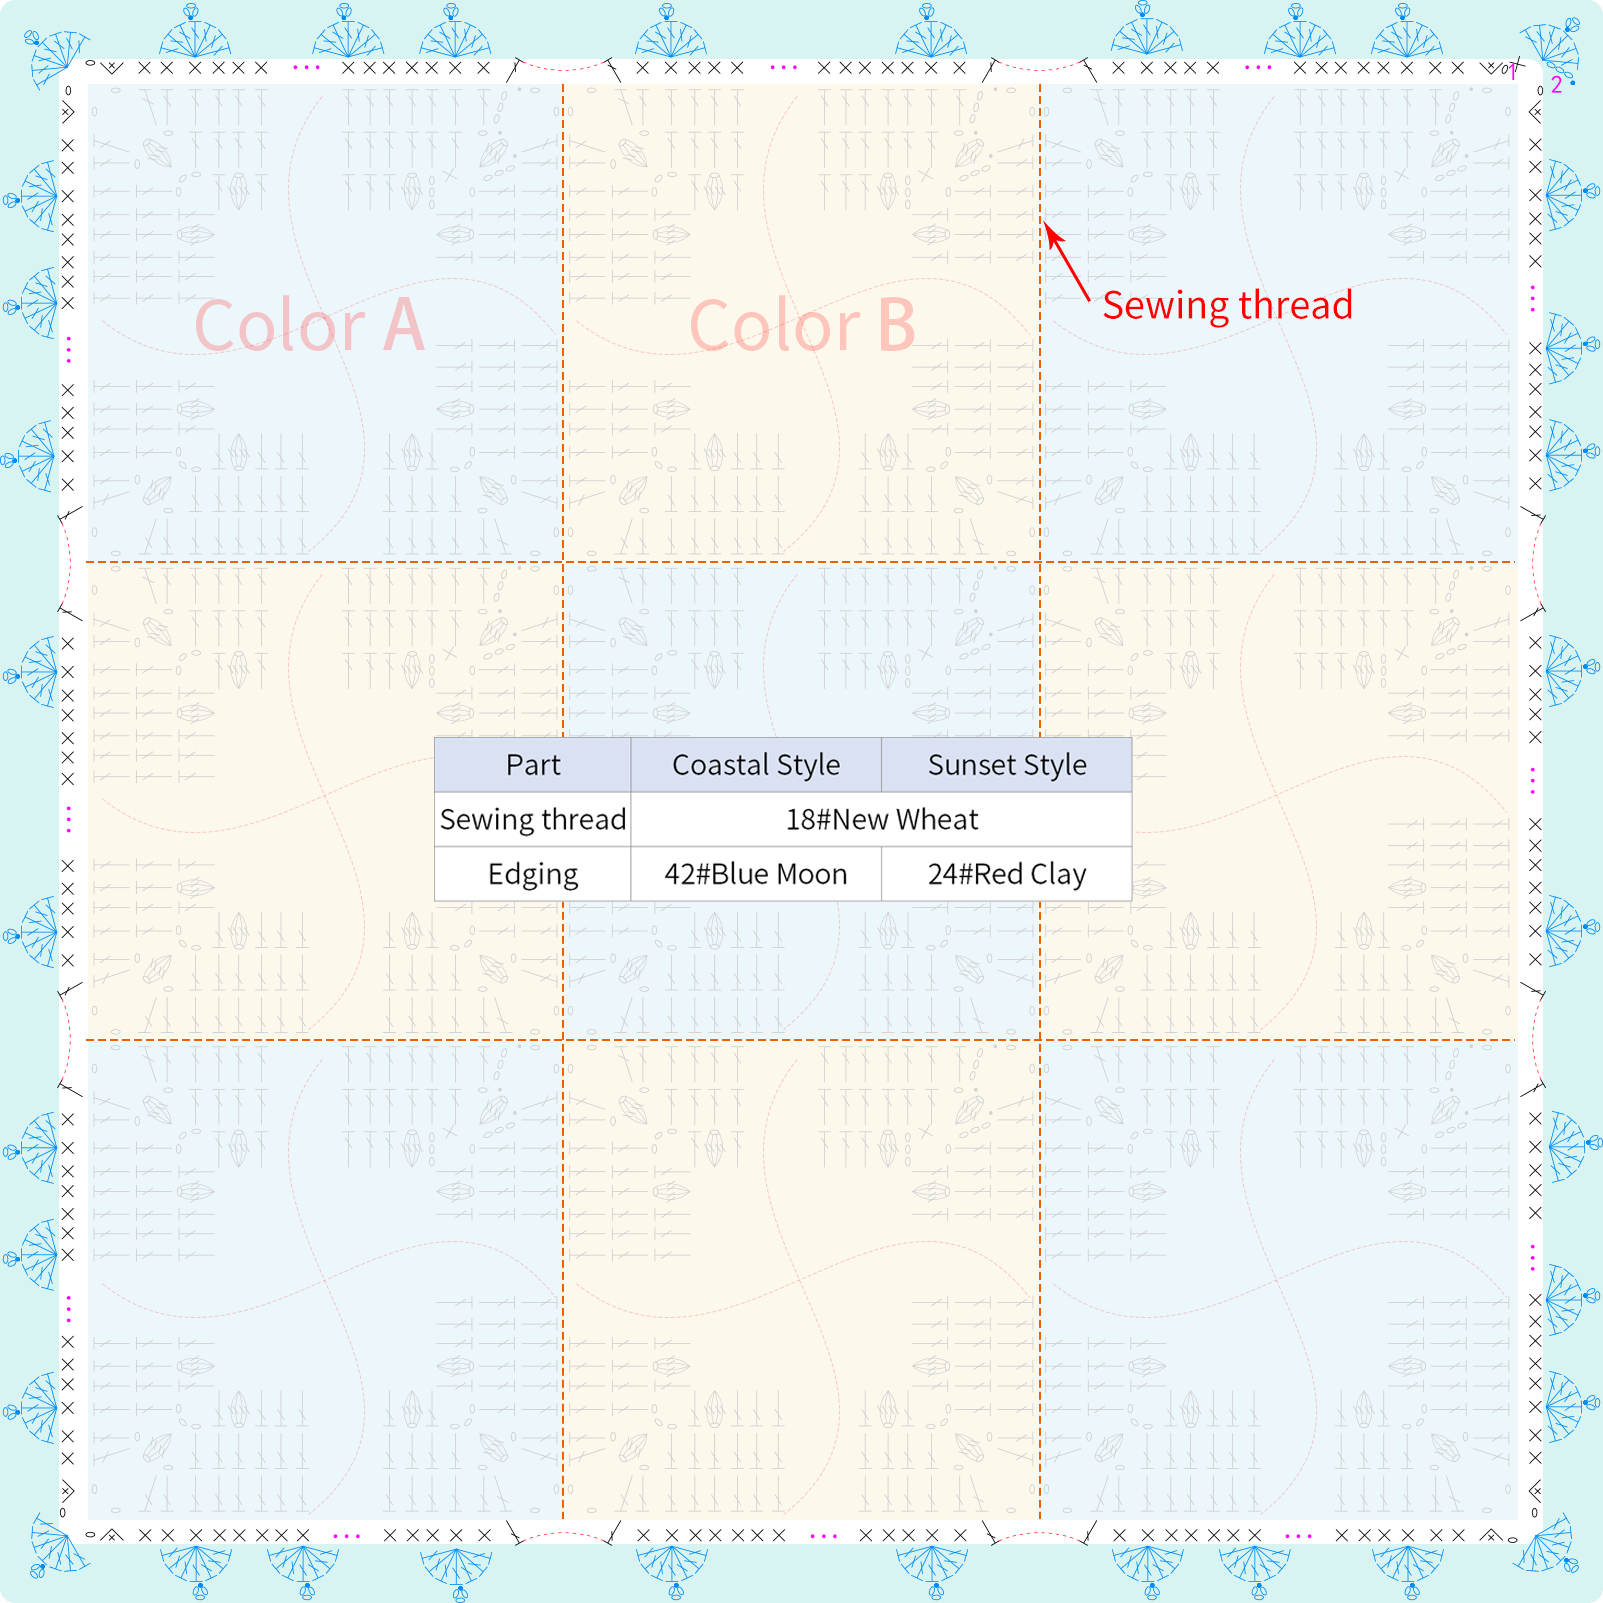
After positioning correctly, use the pick-up and sew method to align and sew together. After sewing, crochet the edging around the outer edge. Please refer to the video demonstration for more details.
Made by the community





