Accessories / Headwear
Snowman Winter Set
Project preview
See the finished project
Pattern format
Instructions
Watch and follow
Video tutorial
This set includes a hat and a scarf. We'll start by making the hat, then move on to the scarf.
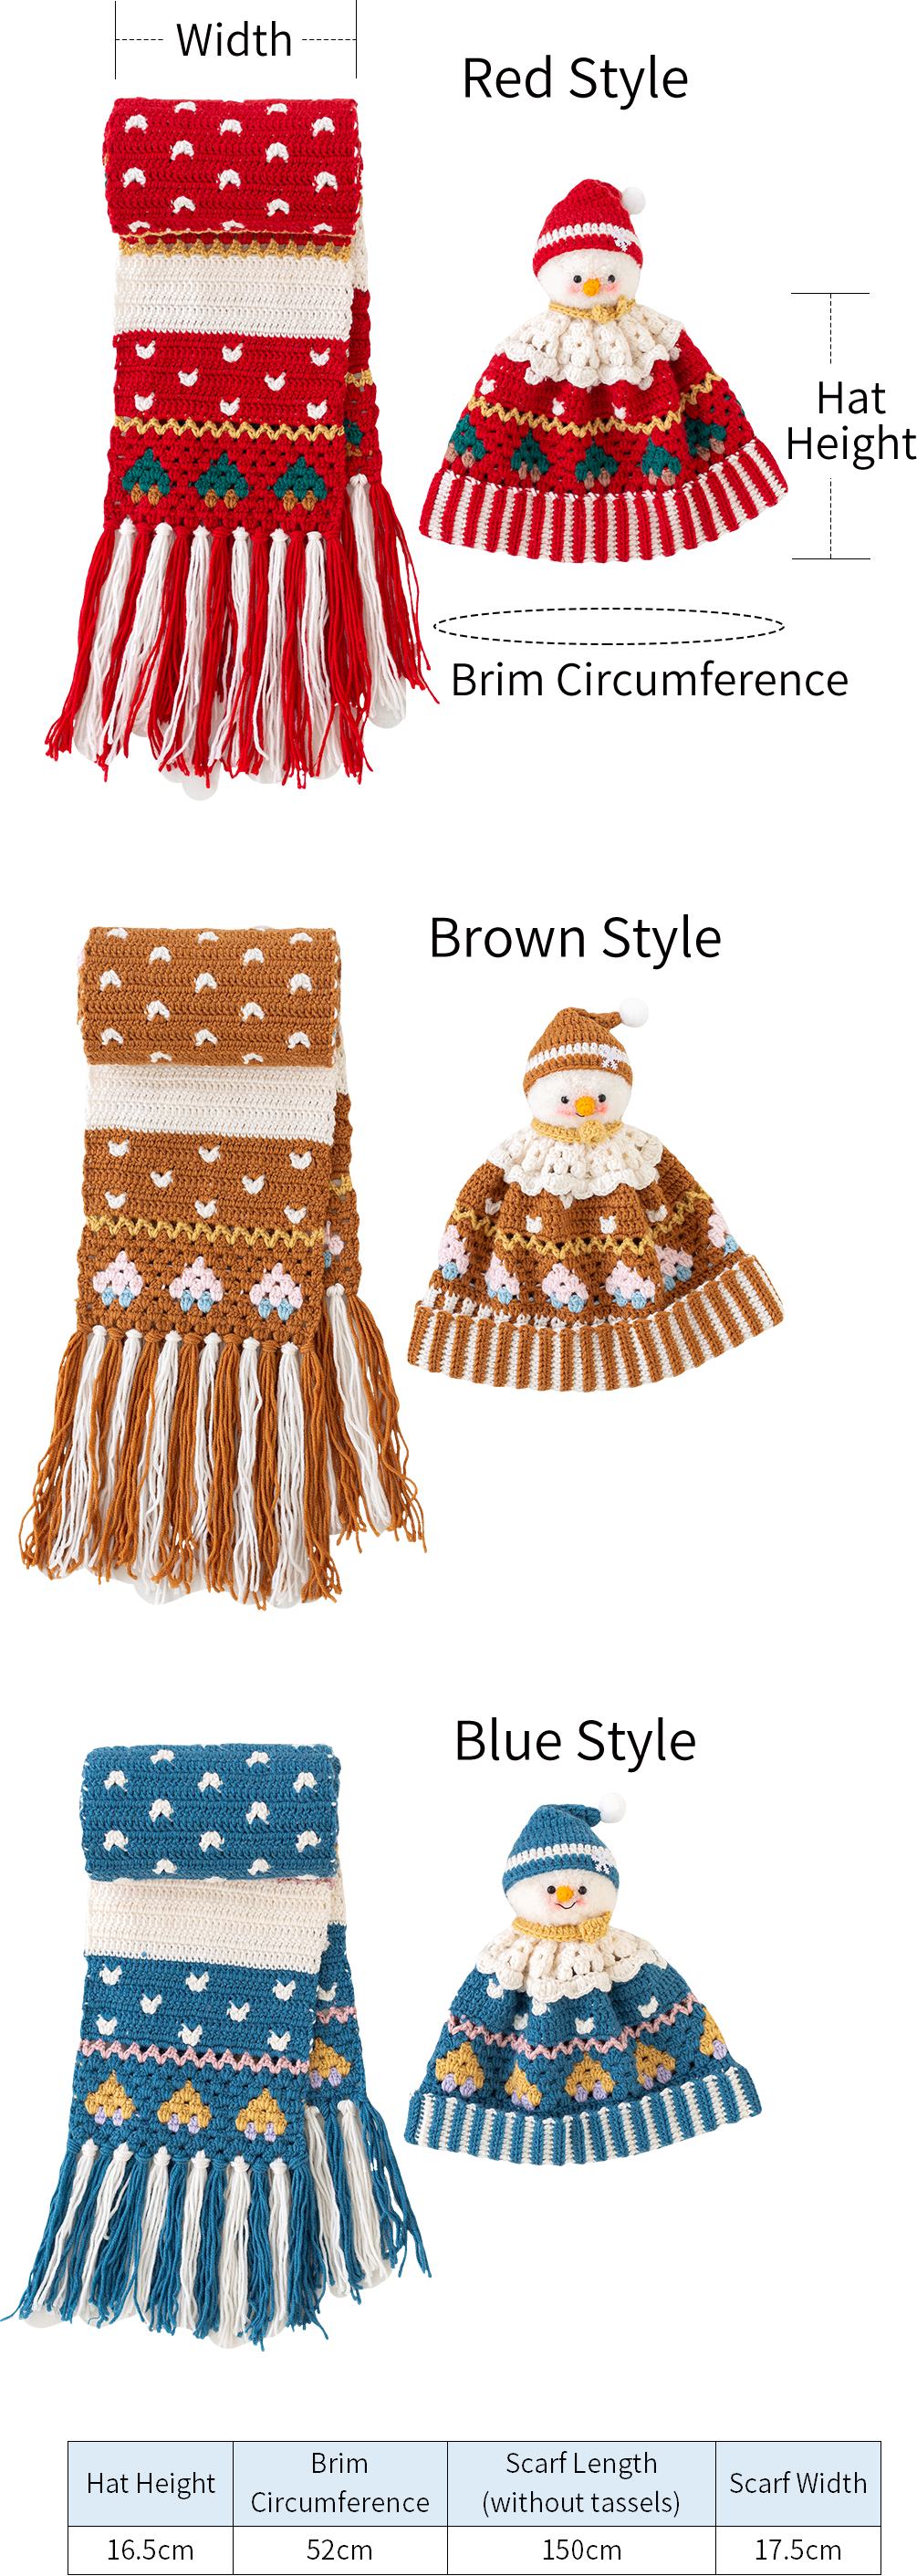
The handcrafted measurements may have an error of 1 to 2 cm. Due to variations in individual tension, the size of the sample is for reference only.
Materials: Susan's Family Morandi 6#, 4-Ply Combed Cotton & Acrylic Fibre Hand Knitting Yarn
Hook: 3.00 mm crochet hook

Chart Key













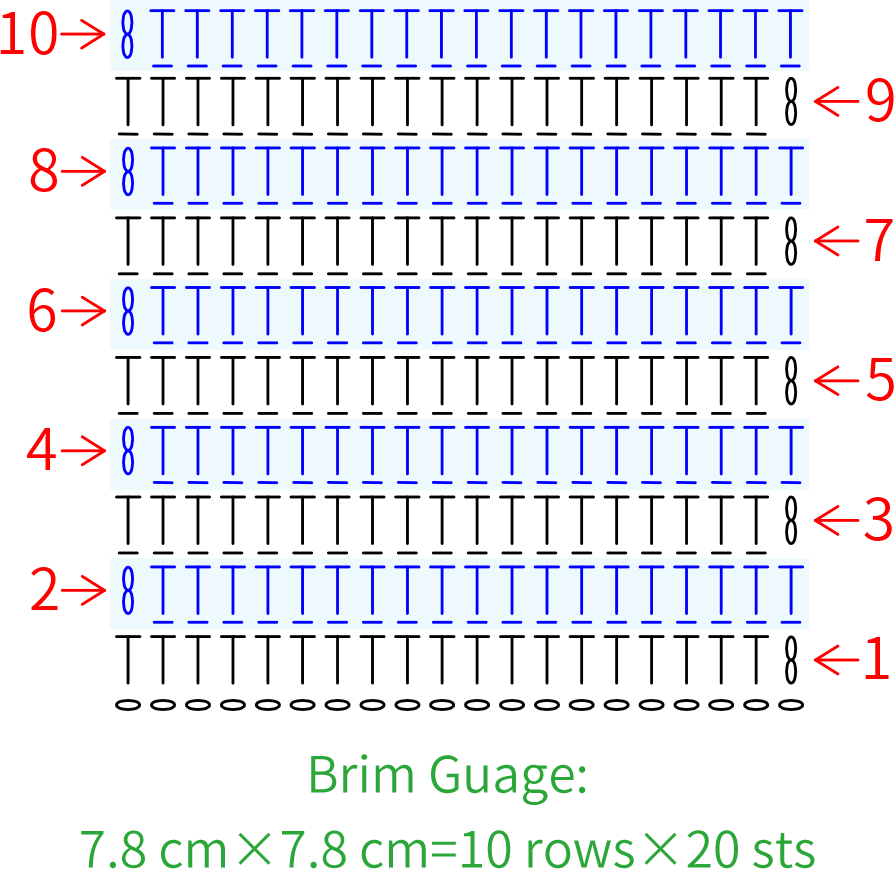
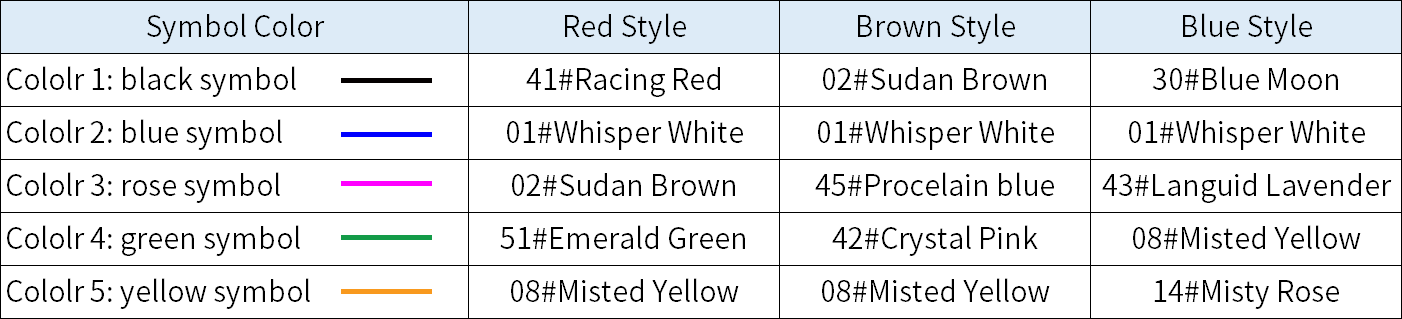
Note: Morandi 6# uses different stitch symbols to indicate using different colors of yarn. The 4-Ply Combed Cotton are separately labeled.
Note:
1. This pattern is making in Chinese crochet pattern terms, and the stitch name is written using American terminology. All measurements in charts are in cm. 
Part 1 HatA
The hat is divided into the brim, the body, and the snowman. Crochet them in order, and finally make the snowman and assemble it.
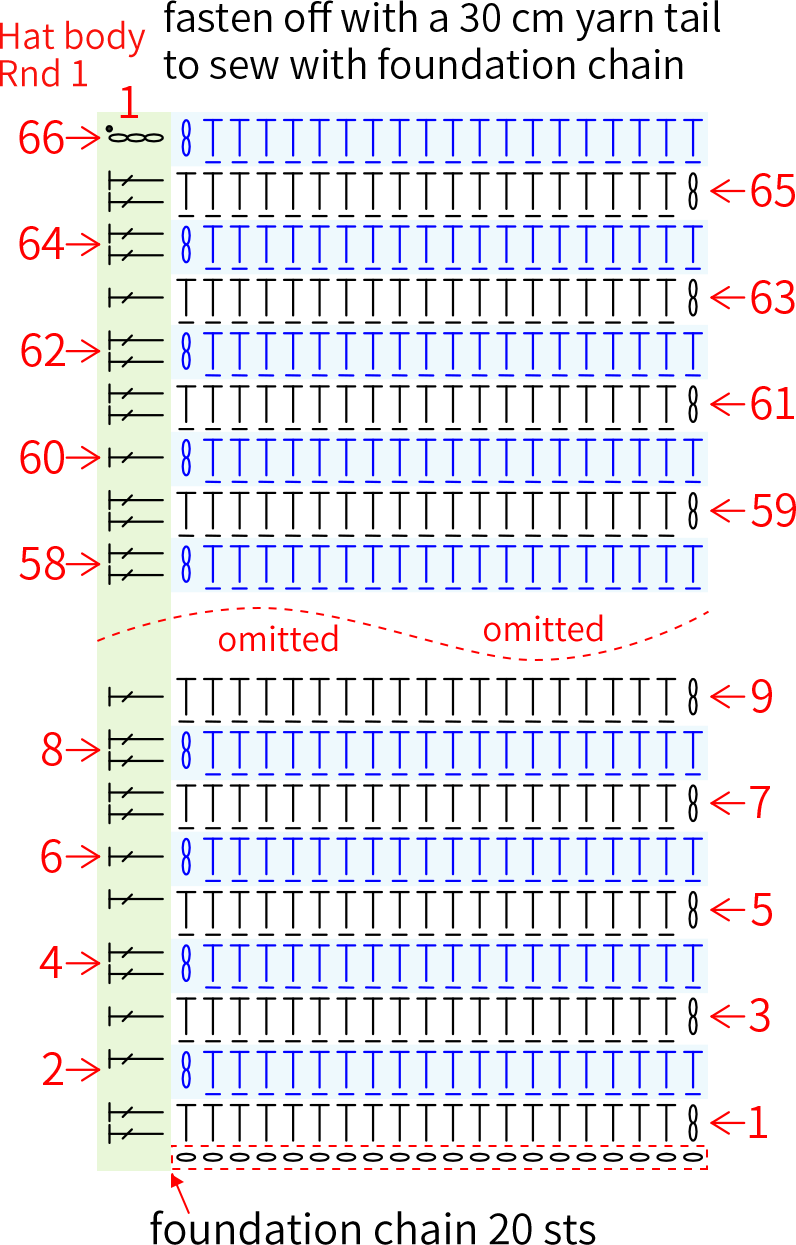
Step 1 Hat BrimA1 00' 43''
The hat brim starts with a foundation chain, then works back and forth in rows, with color changes throughout the process. Please refer to the video demonstration for details.
Note:
1. When you're near the end of your work and have a few rows left, try it on as you go to adjust your tension, preventing the piece from becoming too large or too small.
2. For the Round 1 of the hat body, follow the pattern of pick 5 sts from 3 rows, and for the last 6 rows, follow the pattern of pick 4 sts from 3 rows, totaling pick up double crochet 108 sts.
Step 2 Hat BodyA2 14' 47''
The hat body is worked in round counterclockwise along the edge of the finished brim, with color changes throughout the process. At the end, you need to close the opening and crochet a lace trim. Please refer to the video demonstration for specifics.
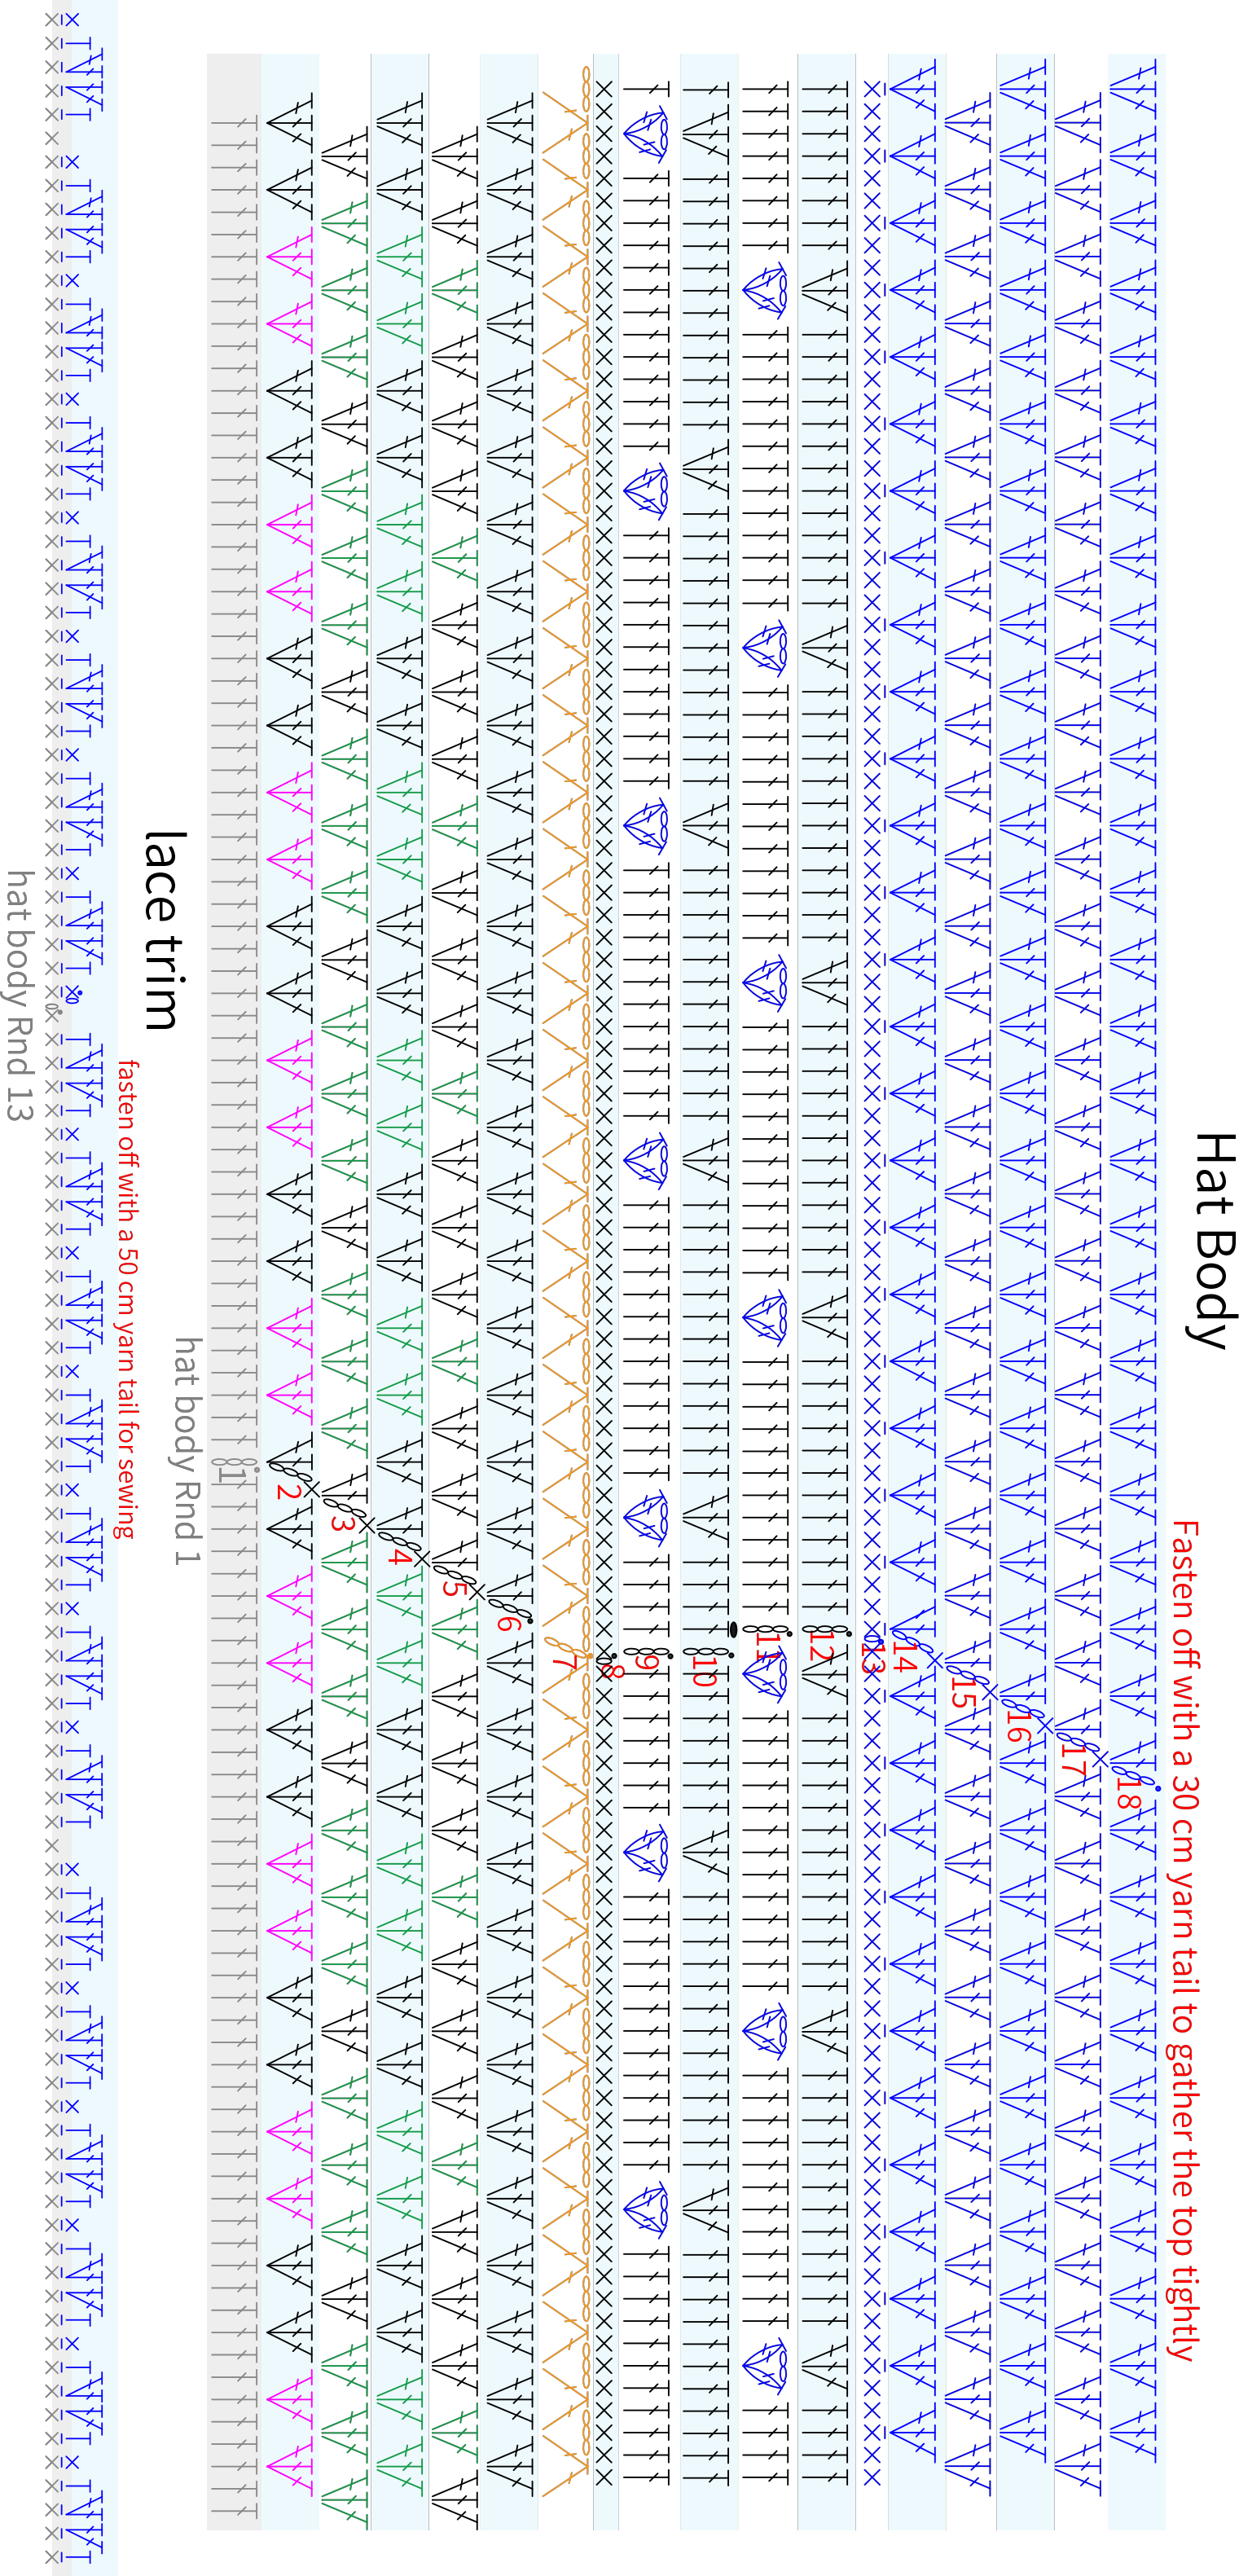
Note: The lace trim is crocheted in the reverse direction of the hat body.
Step 3 SnowmanA3 48' 52''
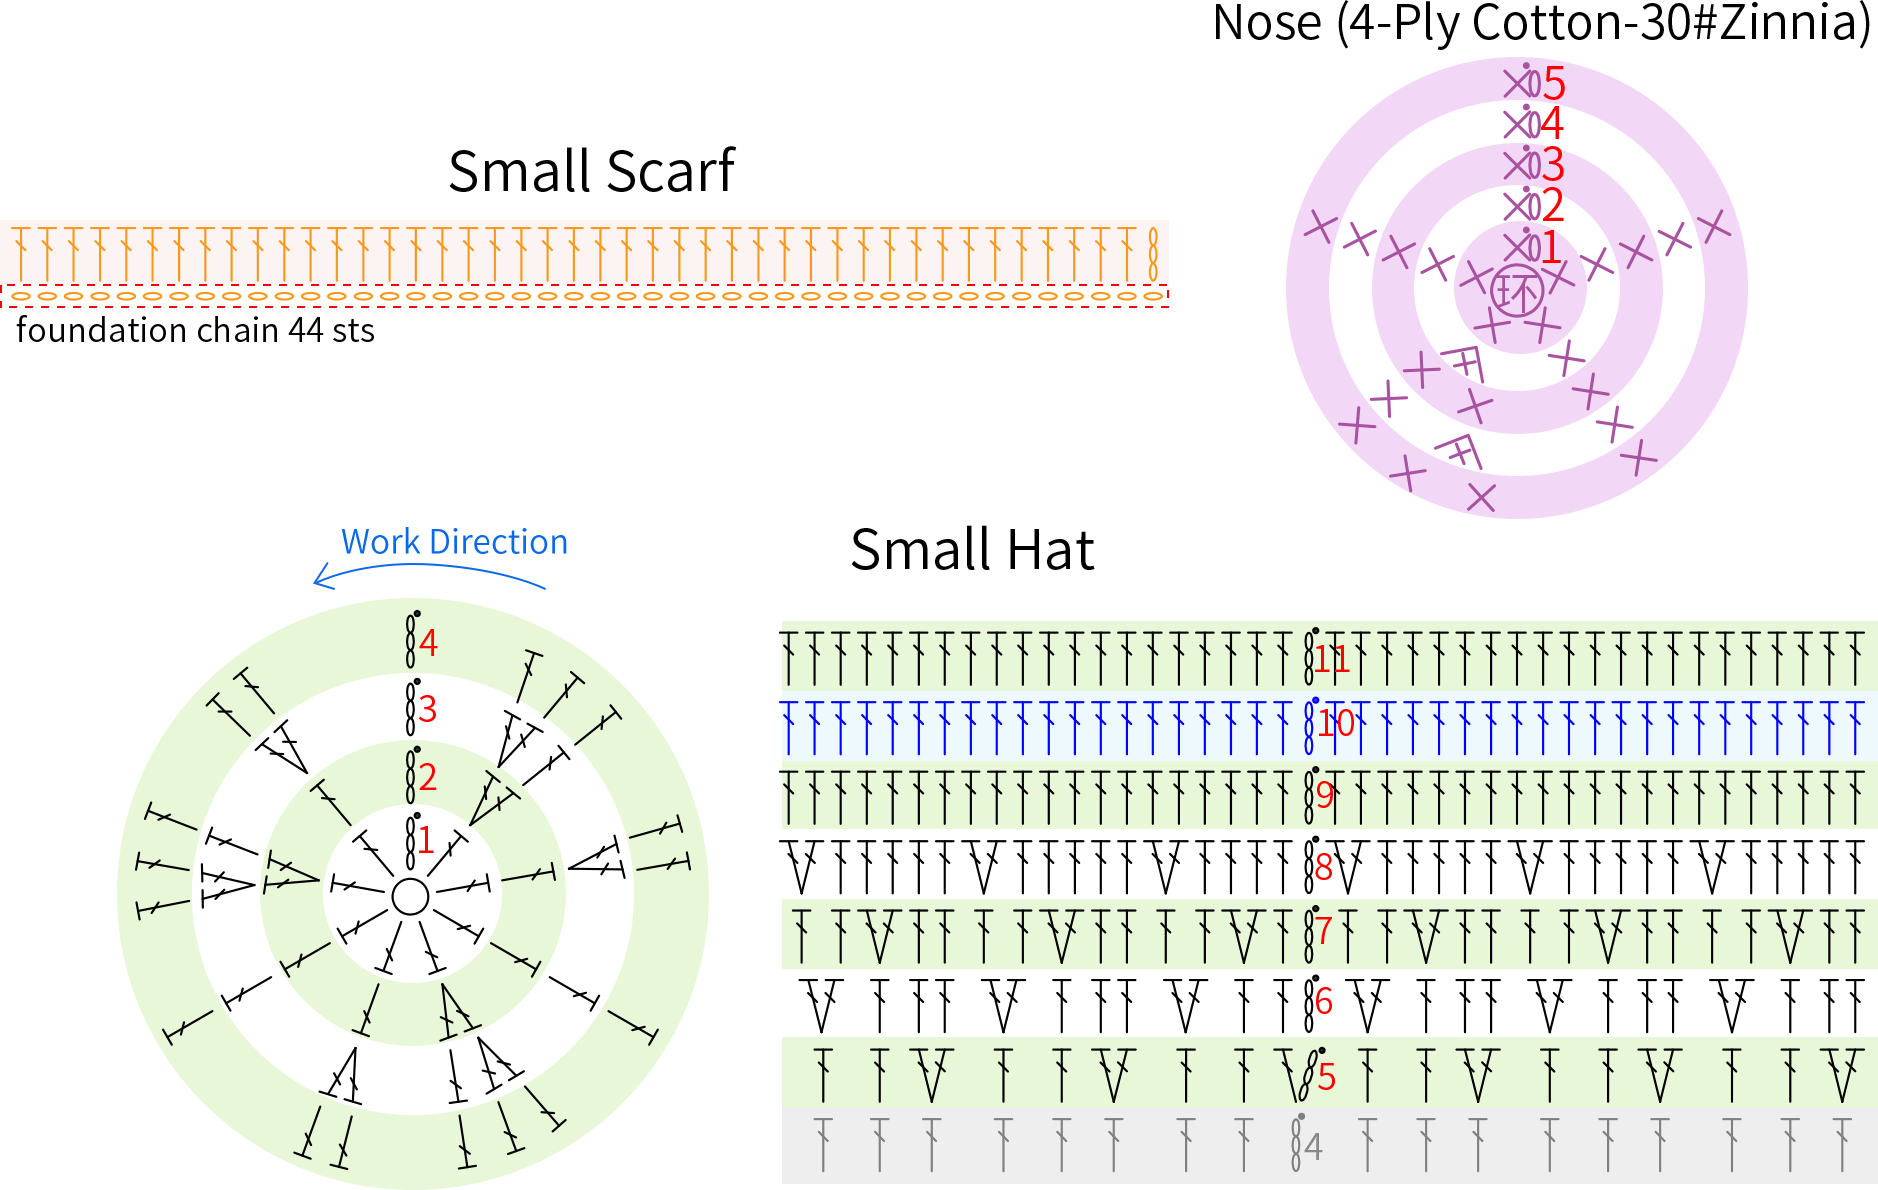
The snowman is divided into a small hat, a small scarf, and the head. The head consists of a pom-pom and facial features. Make them in sequence and assemble at the end. Please refer to the video demonstration for details.
Note:
1. Use a 7 cm pom-pom maker, wrapping 2 strands of 01#Whisper White yarn together, approximately 225 times on each side, or wrap 2 strands of 01#Whisper White yarn around a cardboard 450 times to make the pom-pom.
2. For the snowman's mouth, cut a 15 cm length of 4-ply cotton 21#Black Beauty, separate one strand, and sew it onto the pom-pom.
Part 2 ScarfB
The scarf is divided into the main body and tassels. First, crochet the main body, then make the tassels and assemble them after it's done.
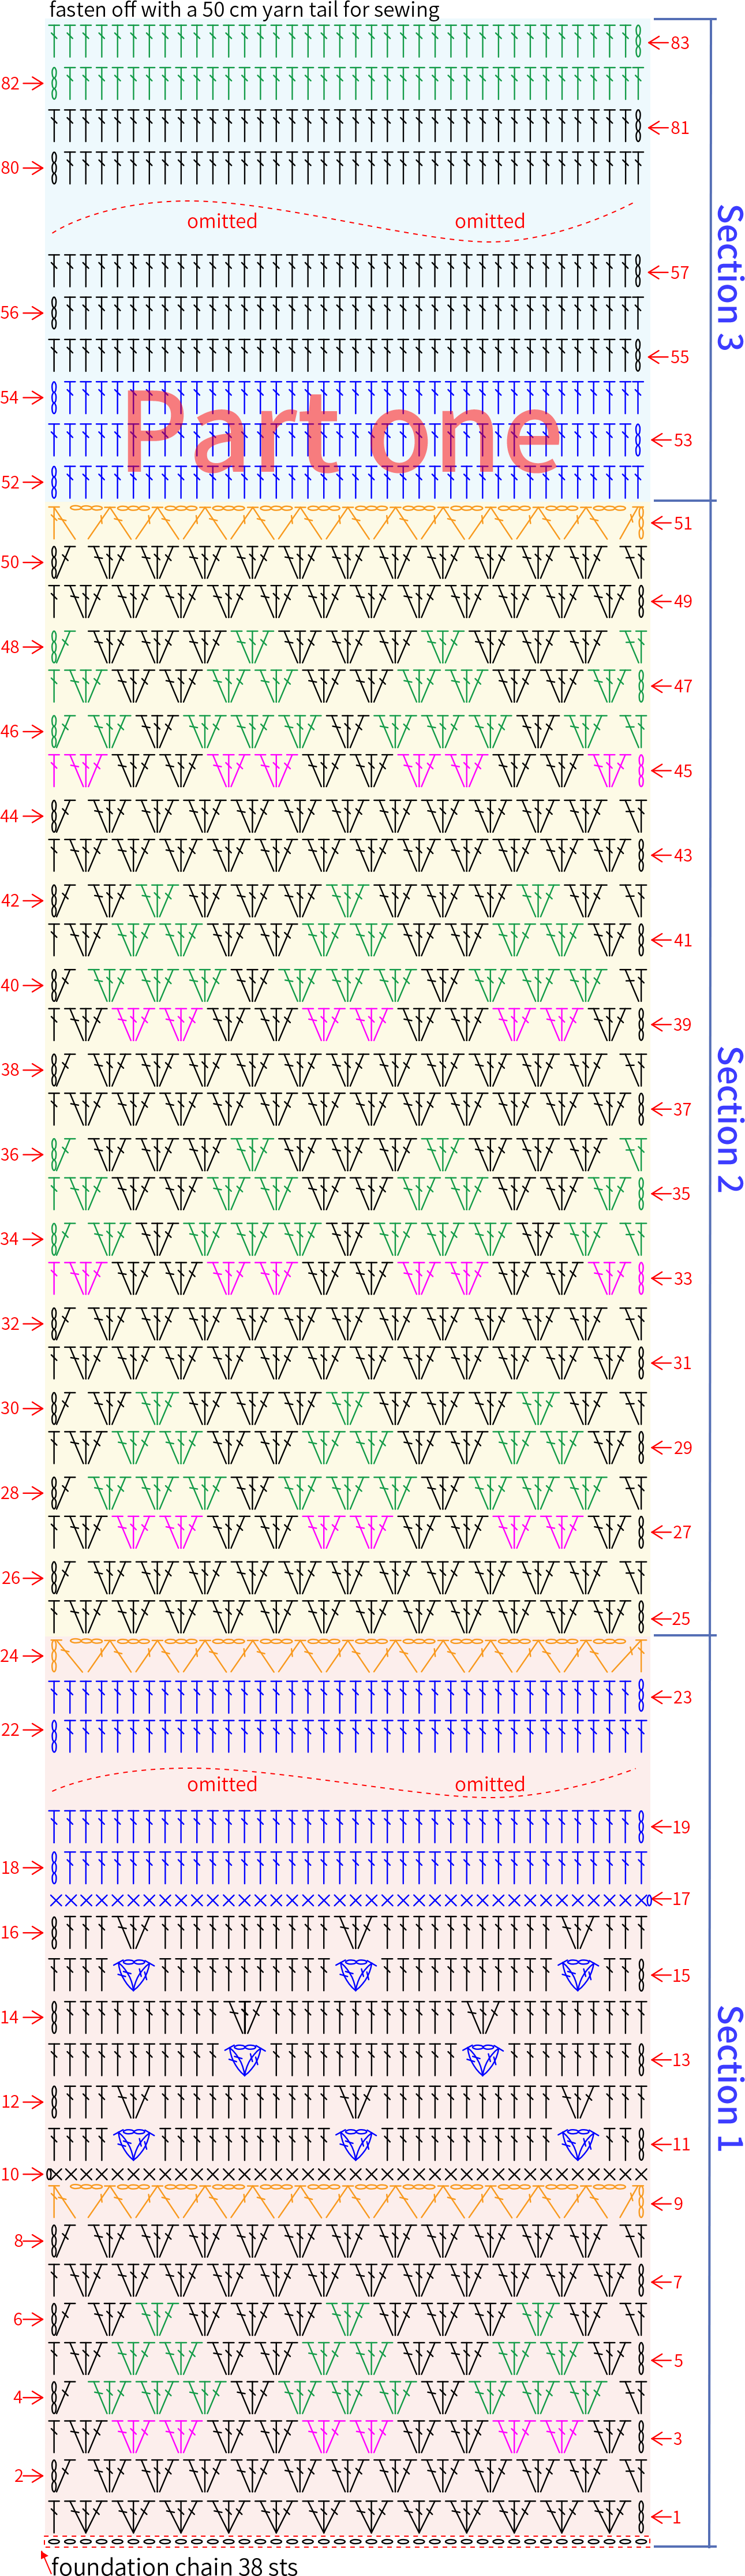
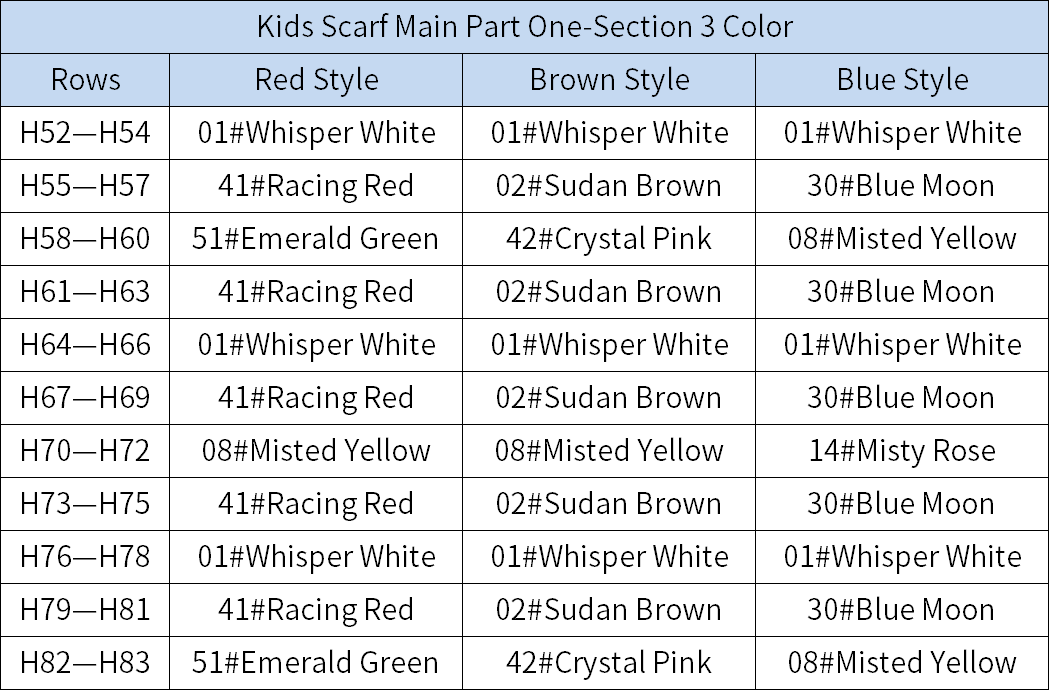
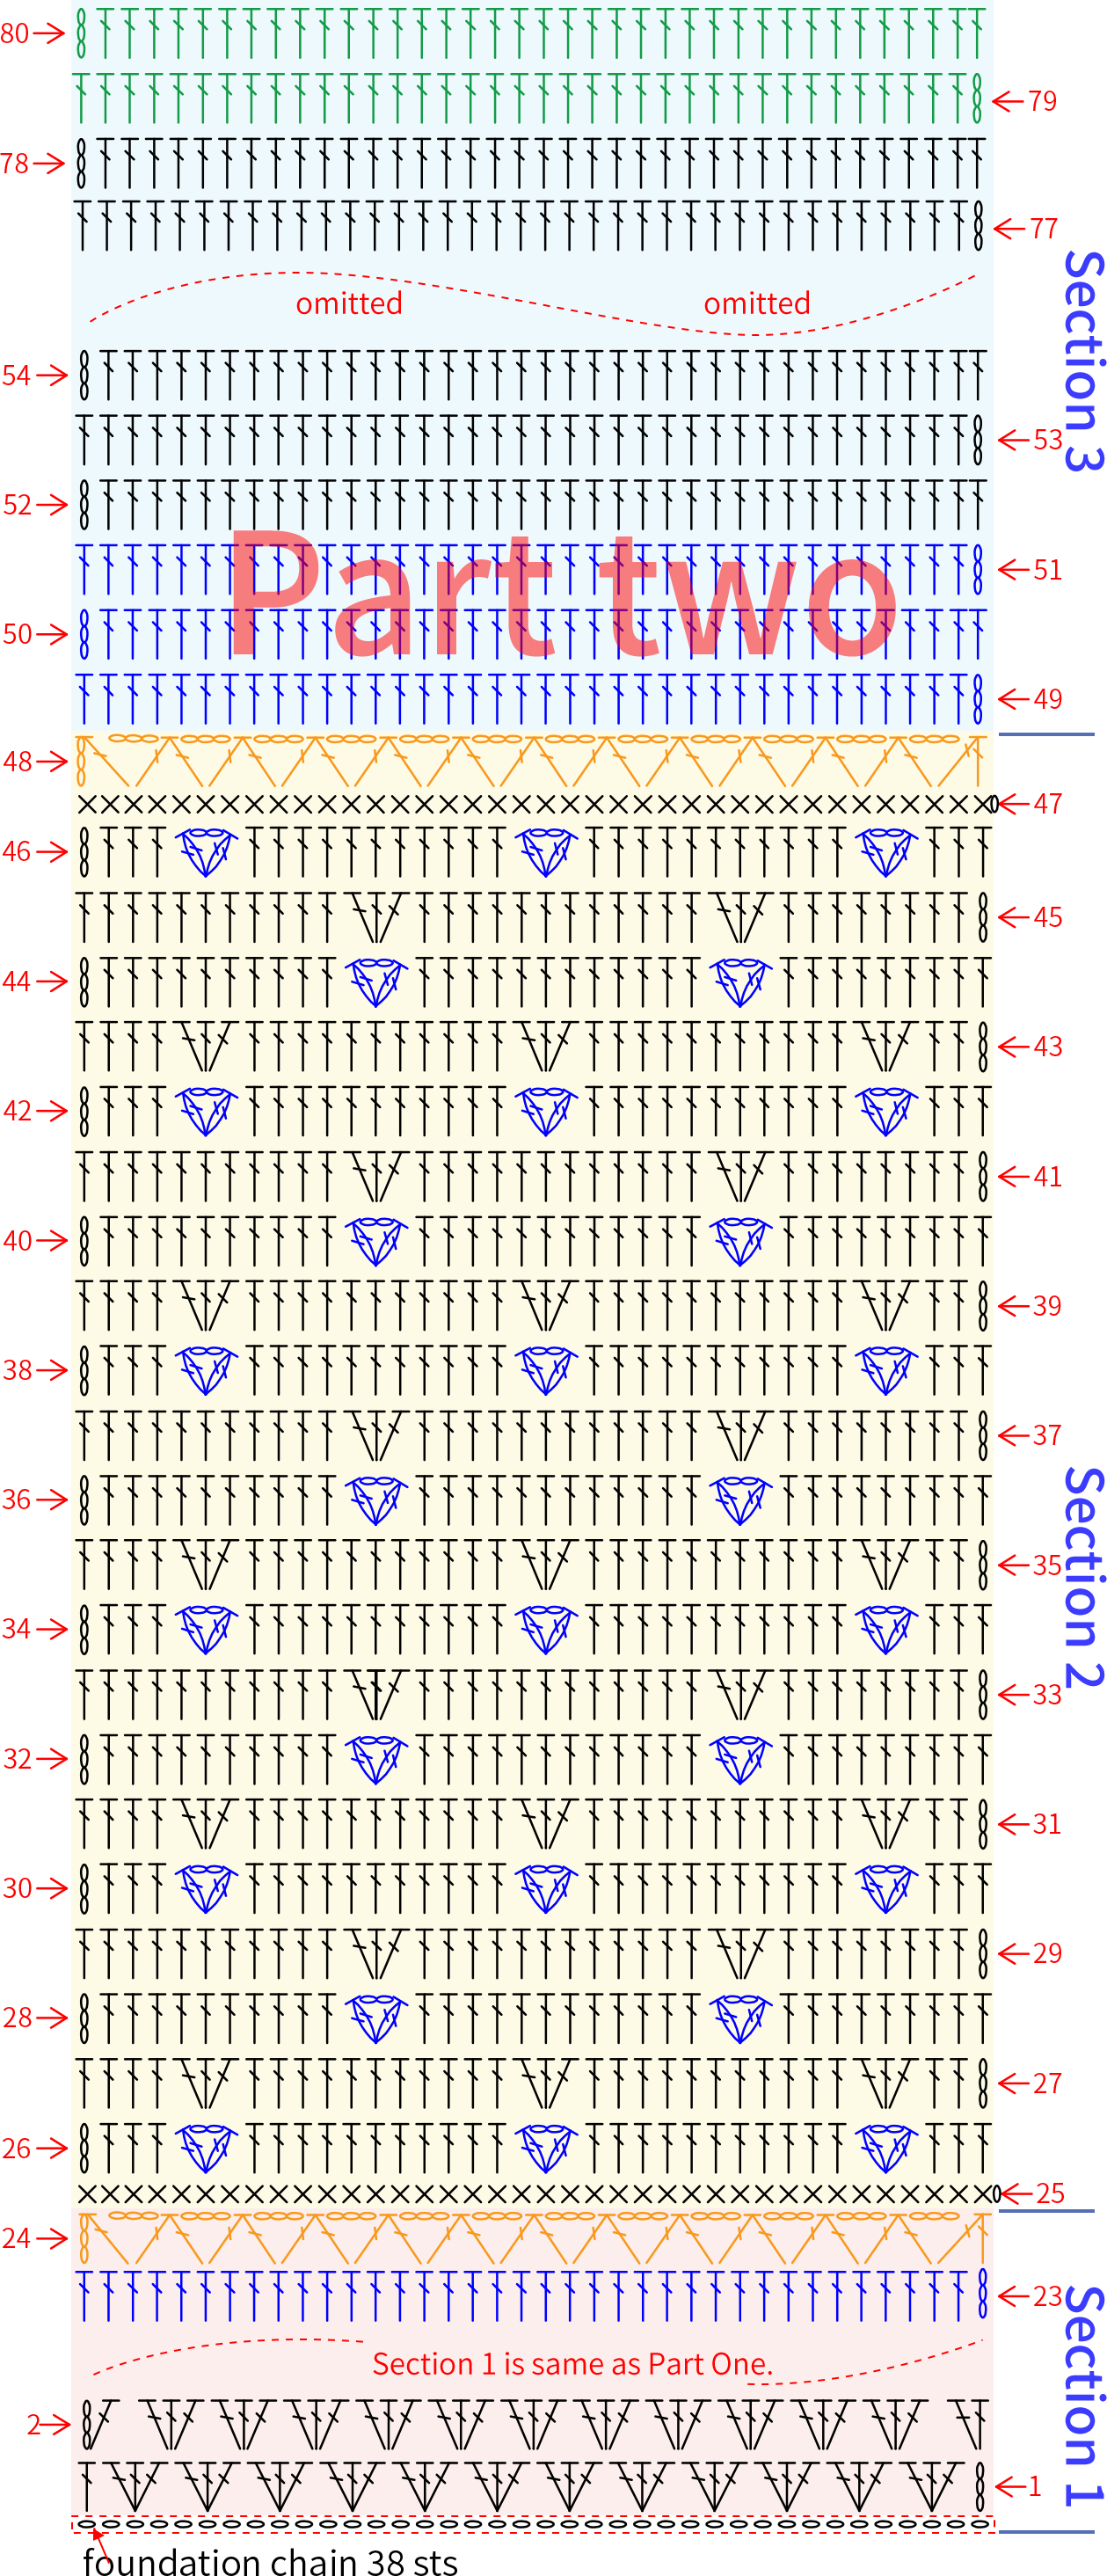
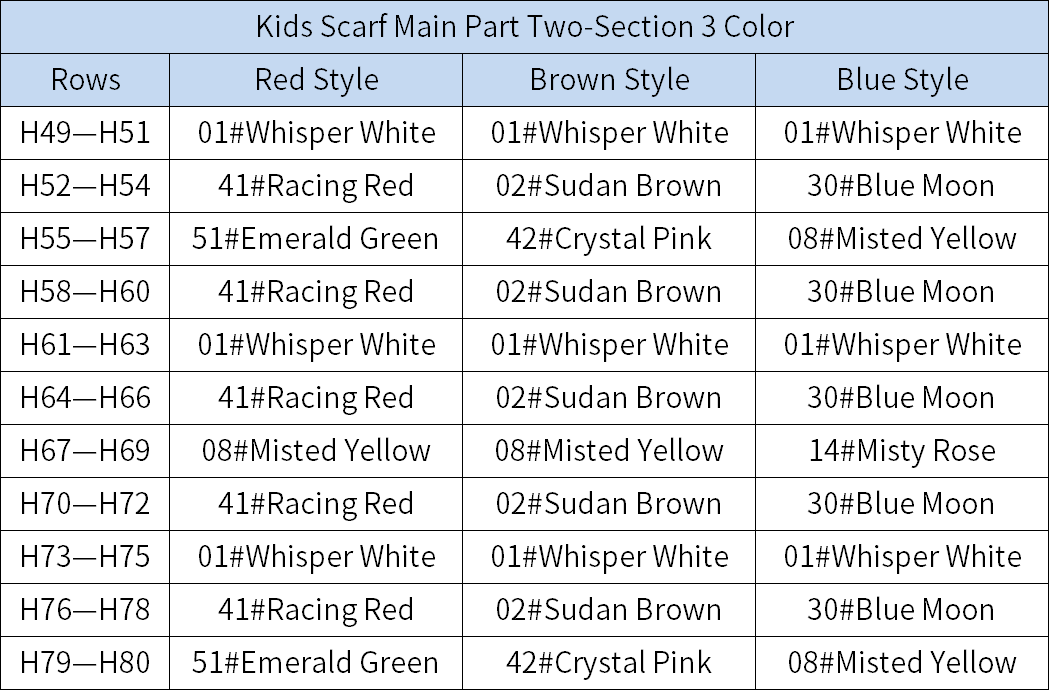
Step 1 Main BodyB1 73' 01''
The main body consists of two fabric pieces, both started with a foundation chain and worked back and forth. After completing them, sew the pieces together. Please refer to the video demonstration for details.
Step 2 TasselsB2 93' 27''
Cut out line segments in the corresponding colors, fold them in half, and insert them separately into the starting point of the main piece. Please refer to the video demonstration for specifics.
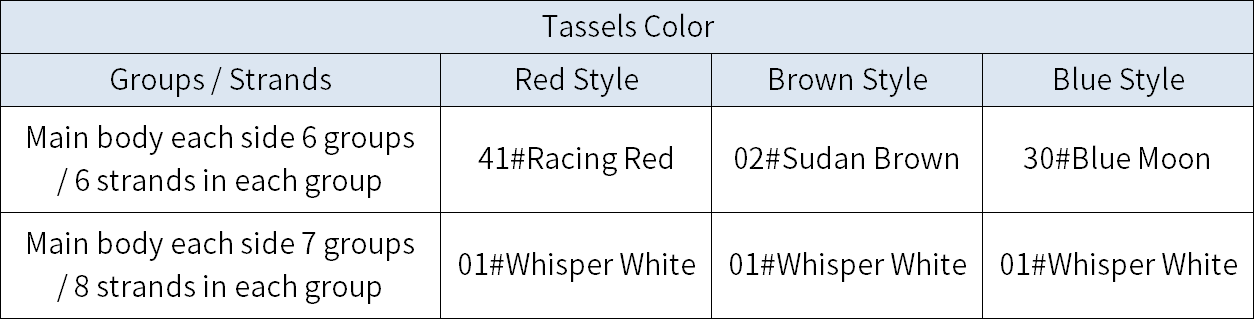
Note: For the tassels of kids scarf, each strand of yarn is 25 cm long. The color and number of tassels can also be adjusted according to your preference.
Made by the community