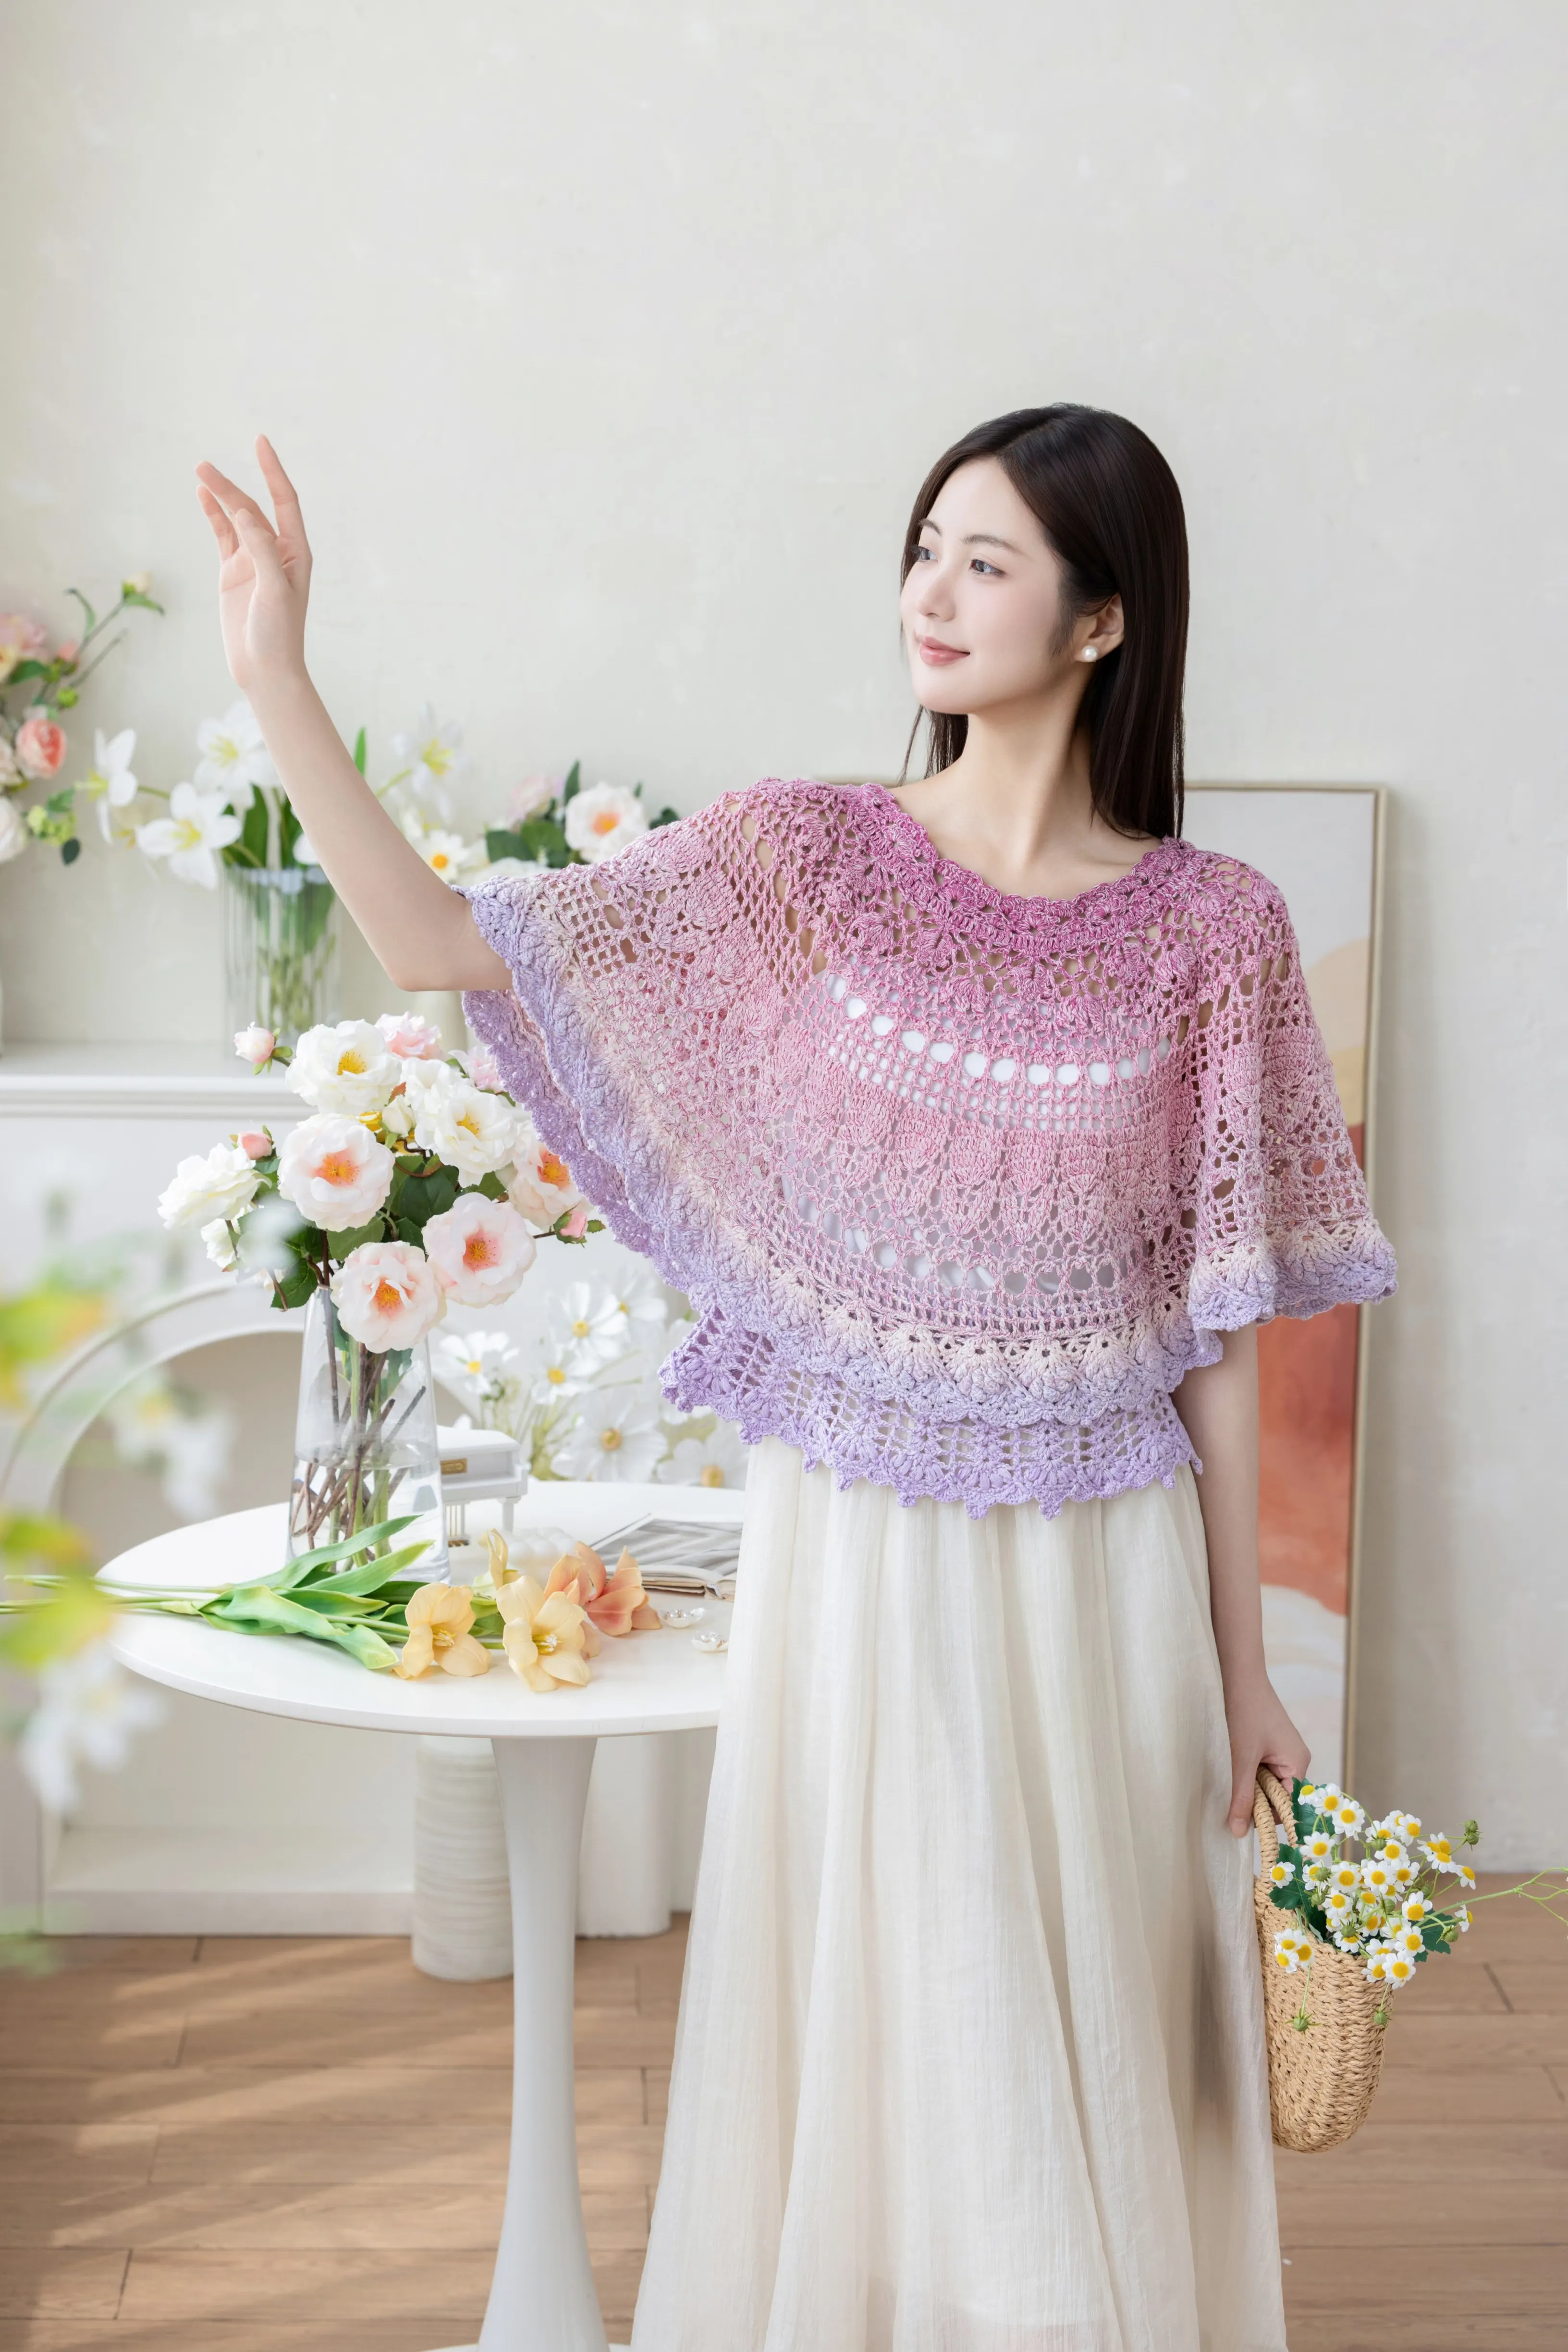
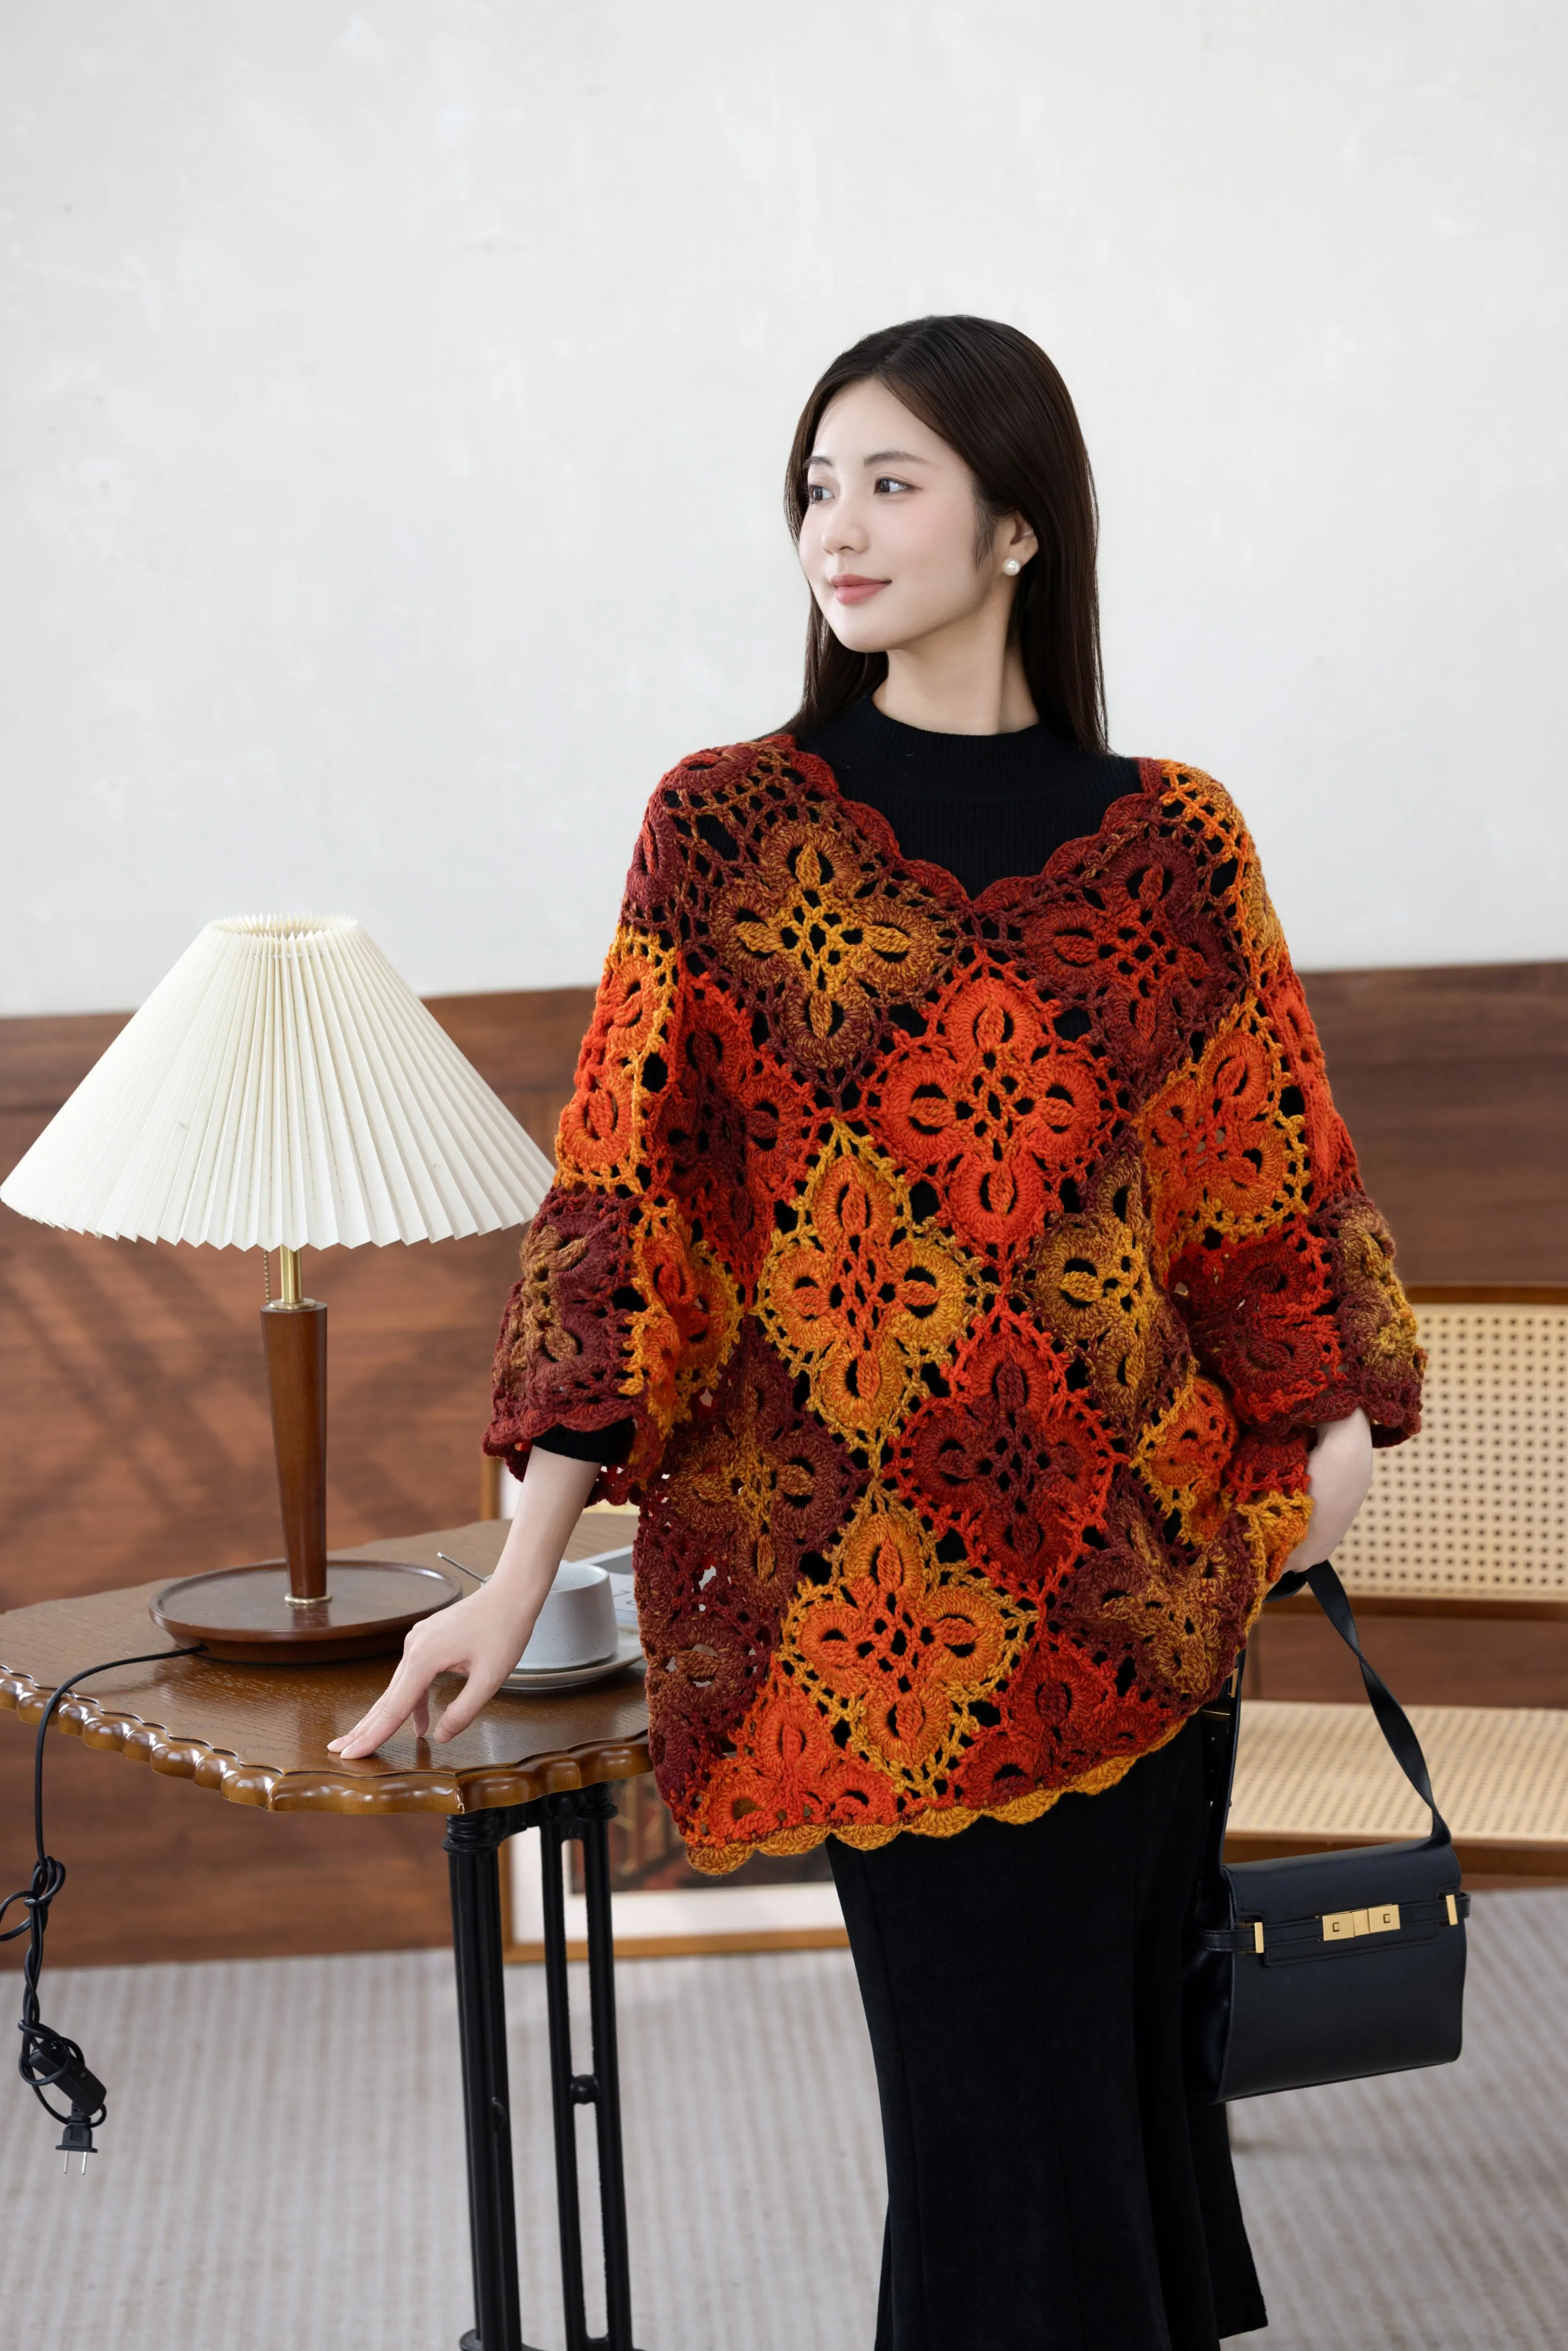
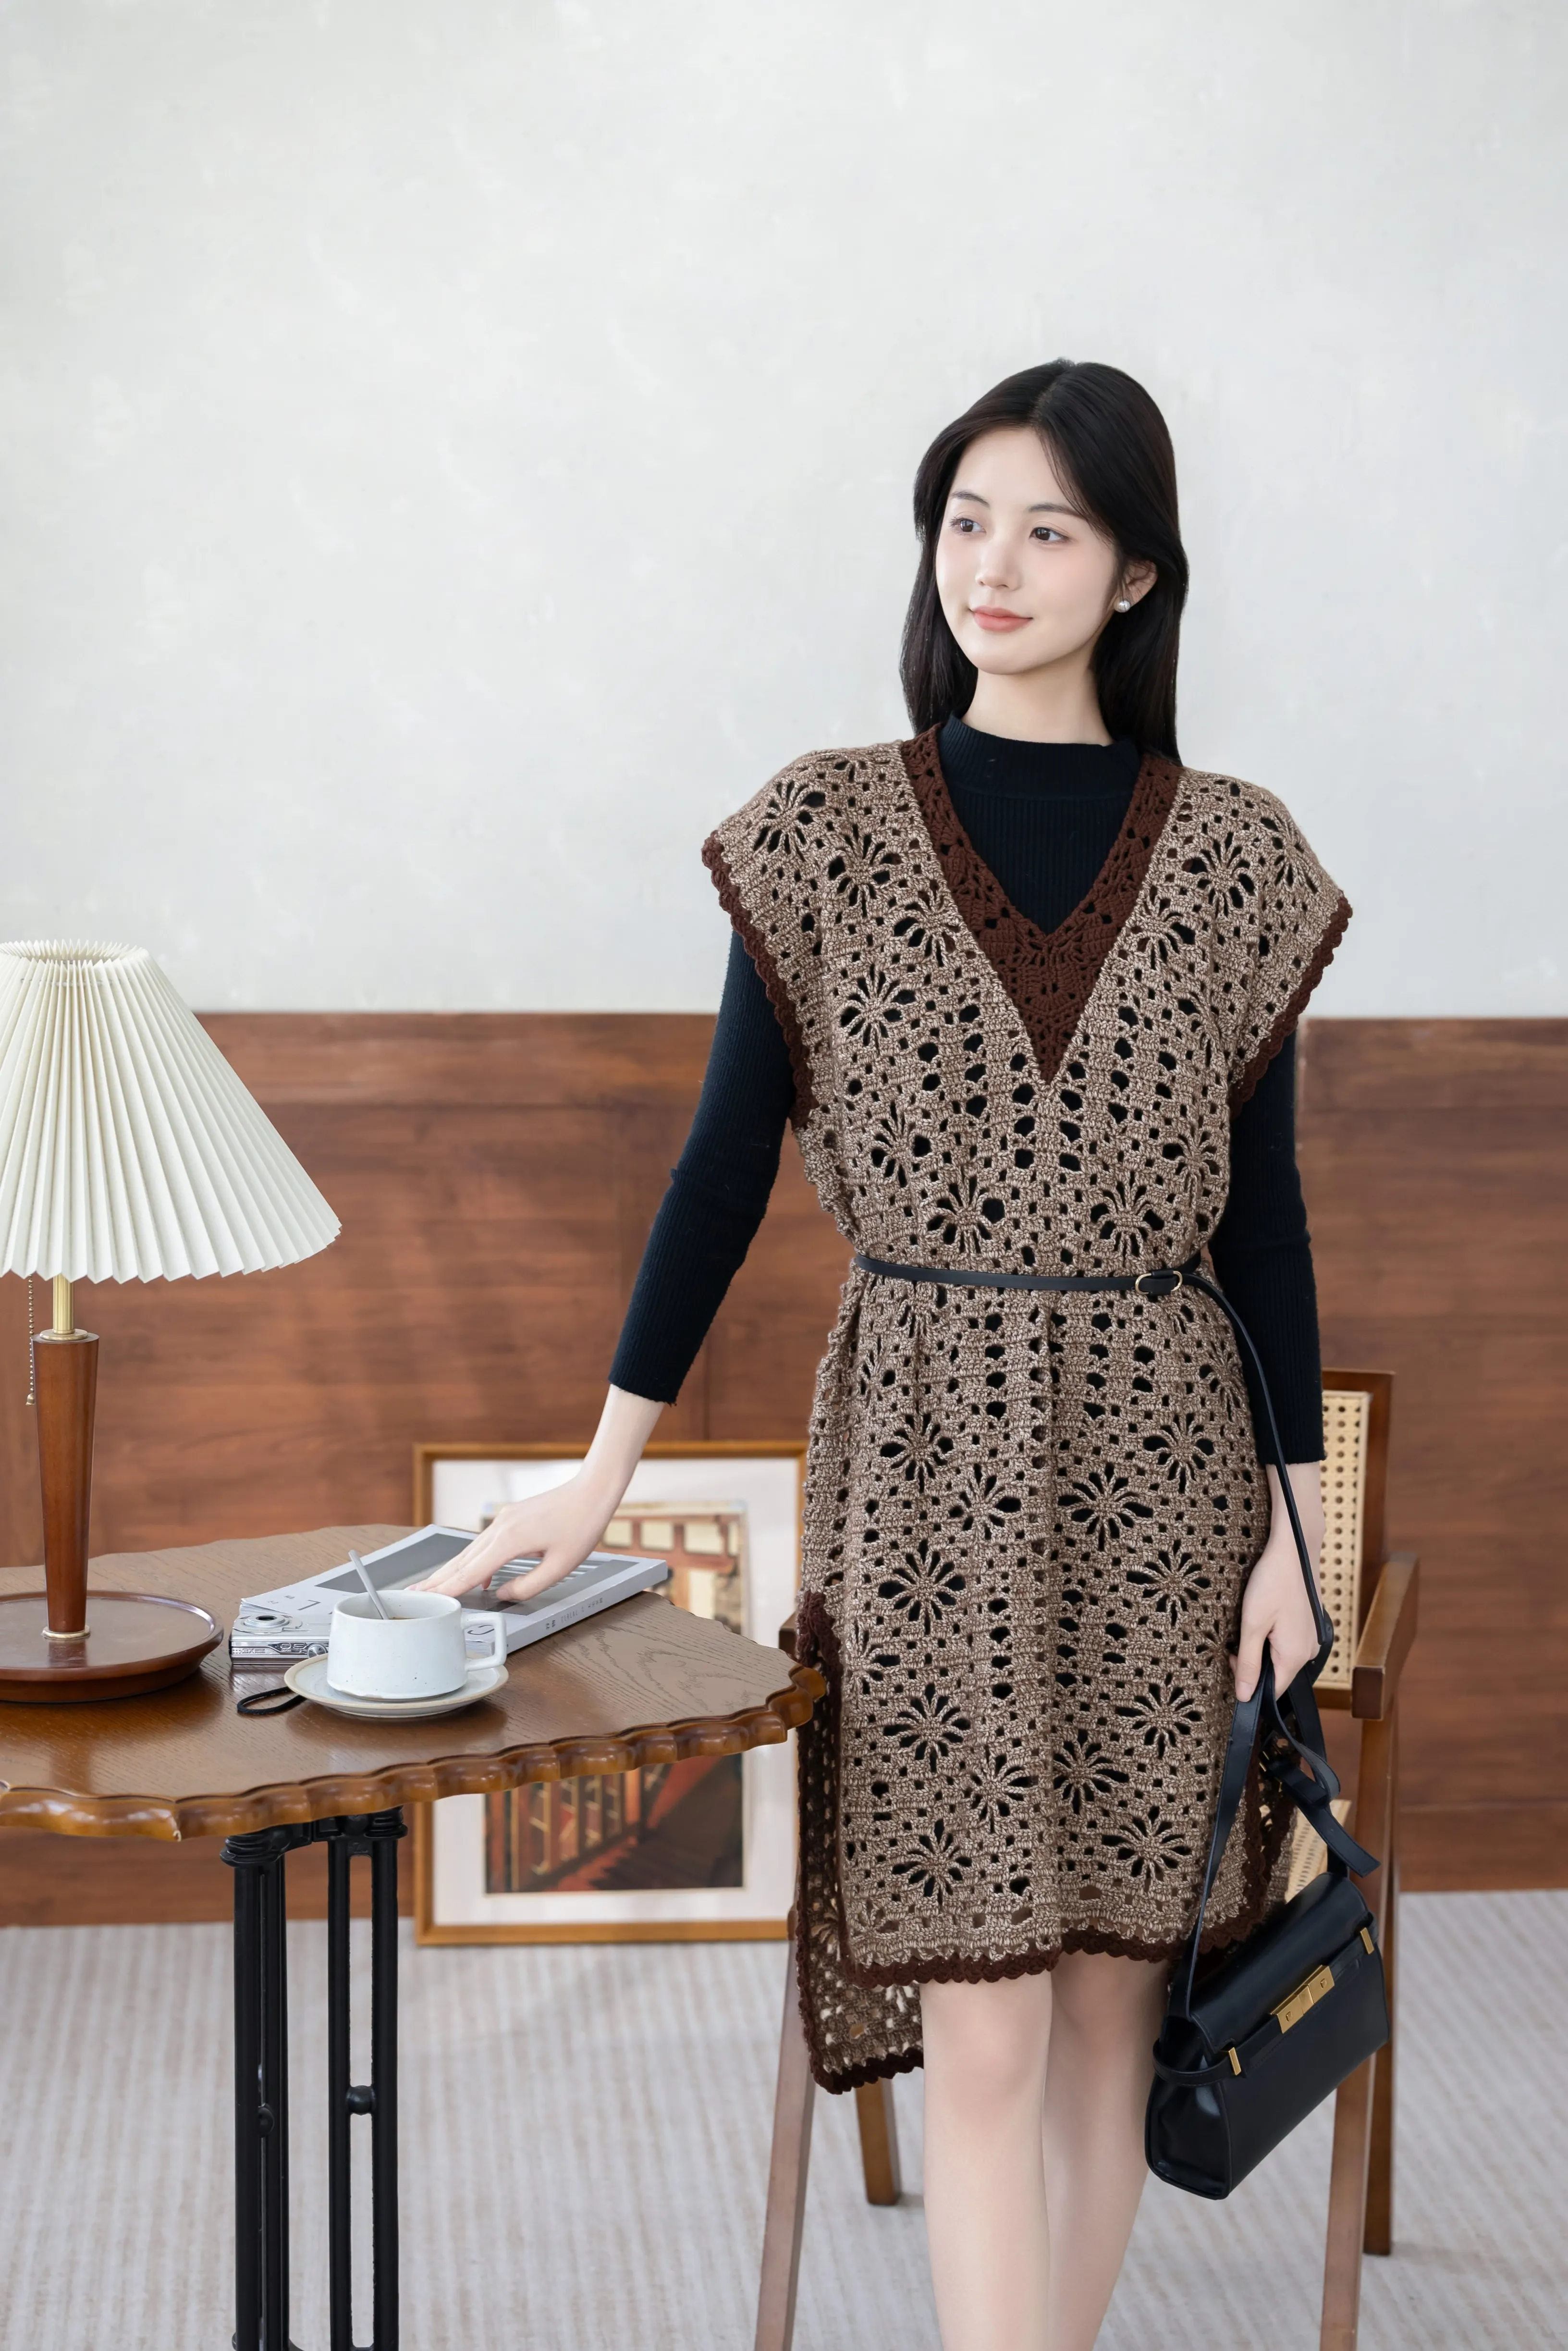
Clothes
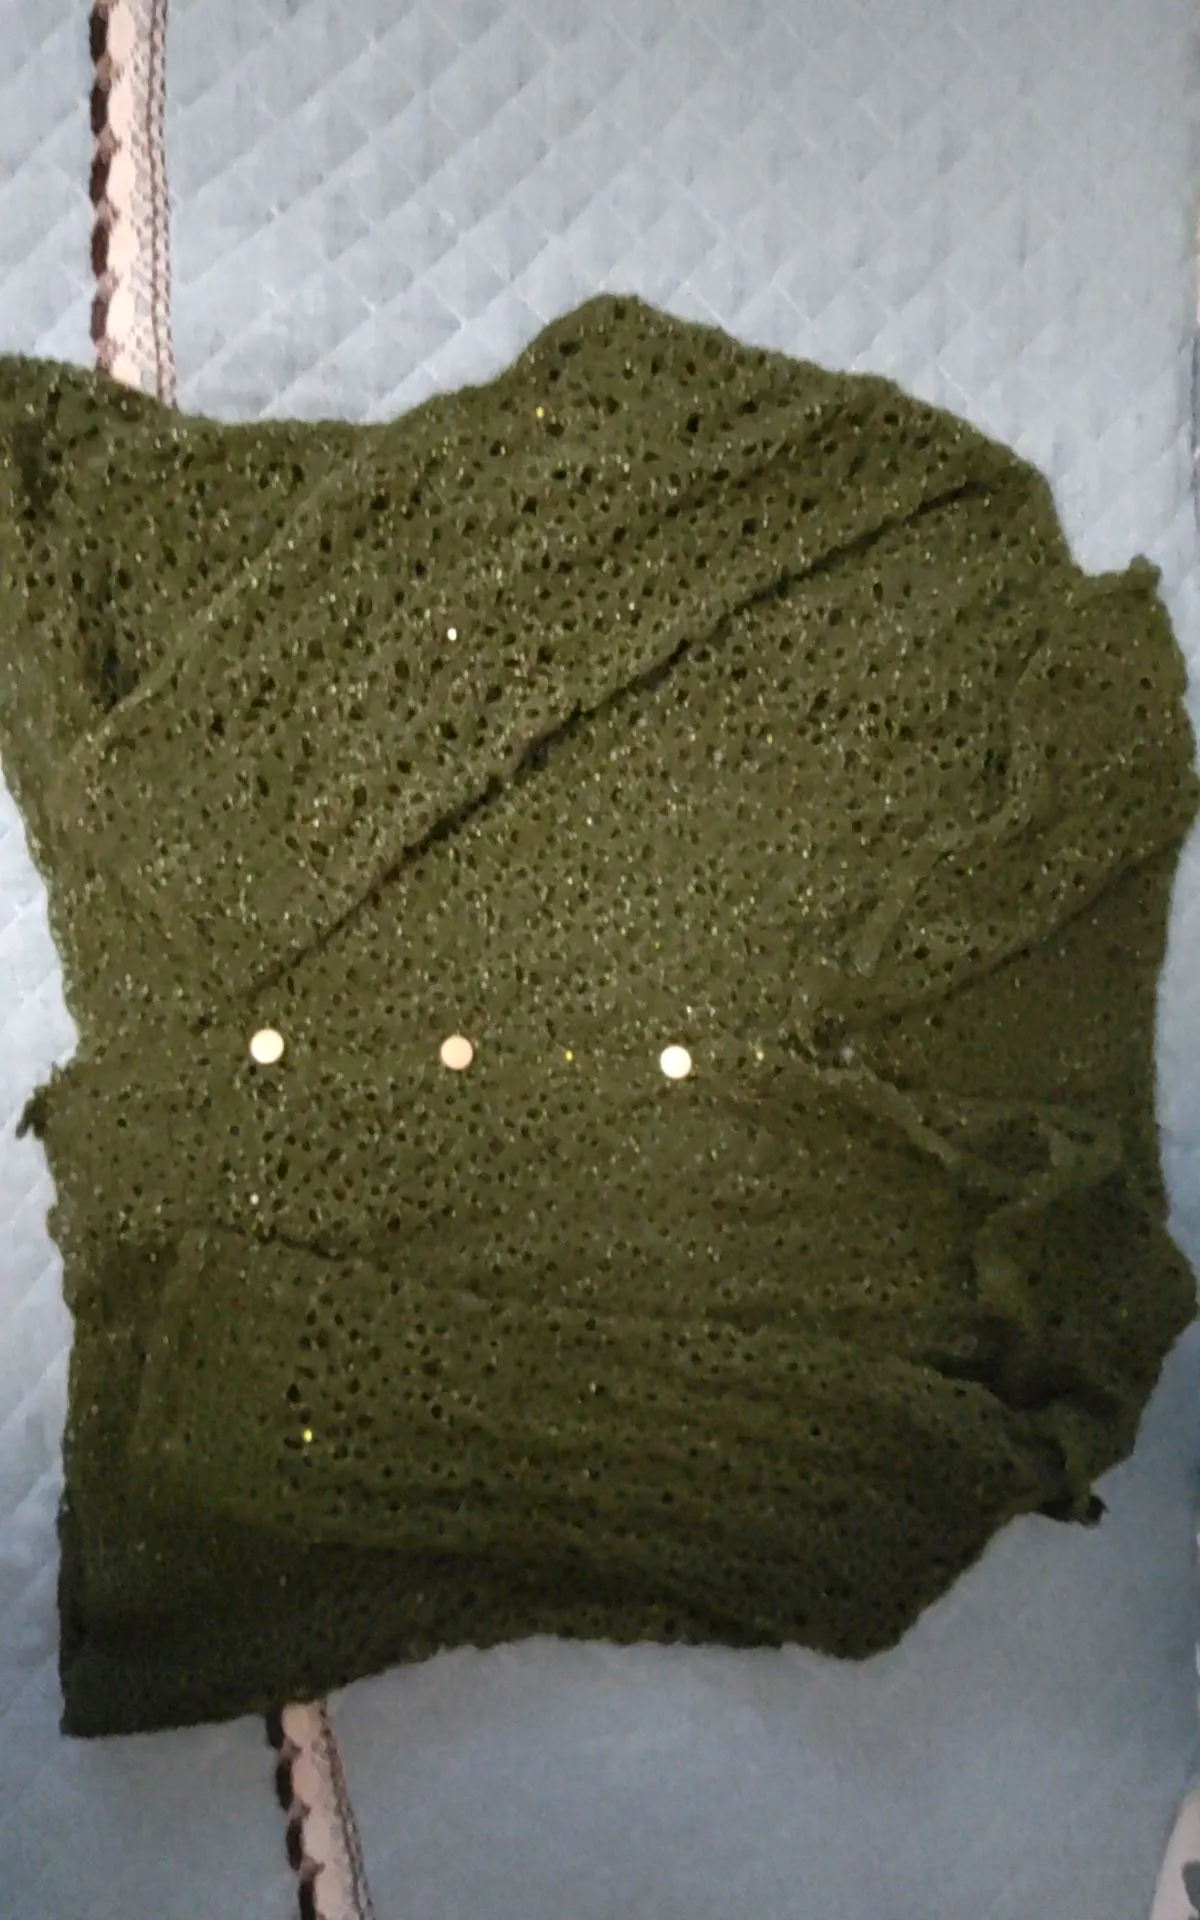
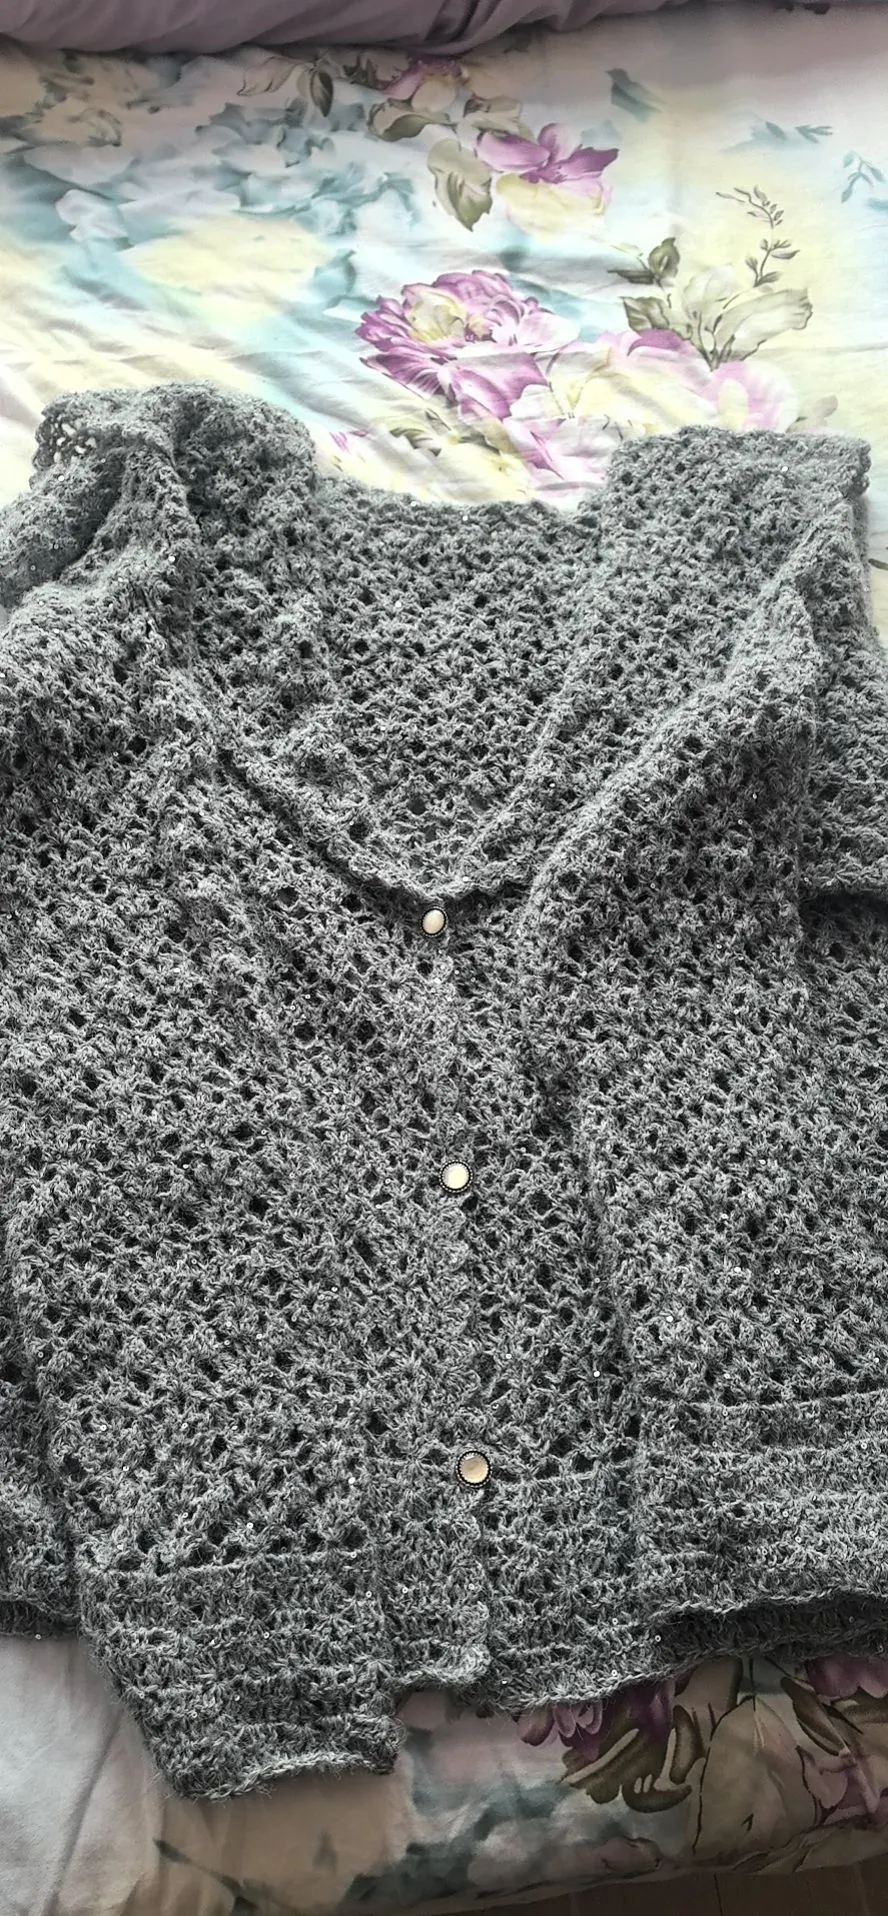
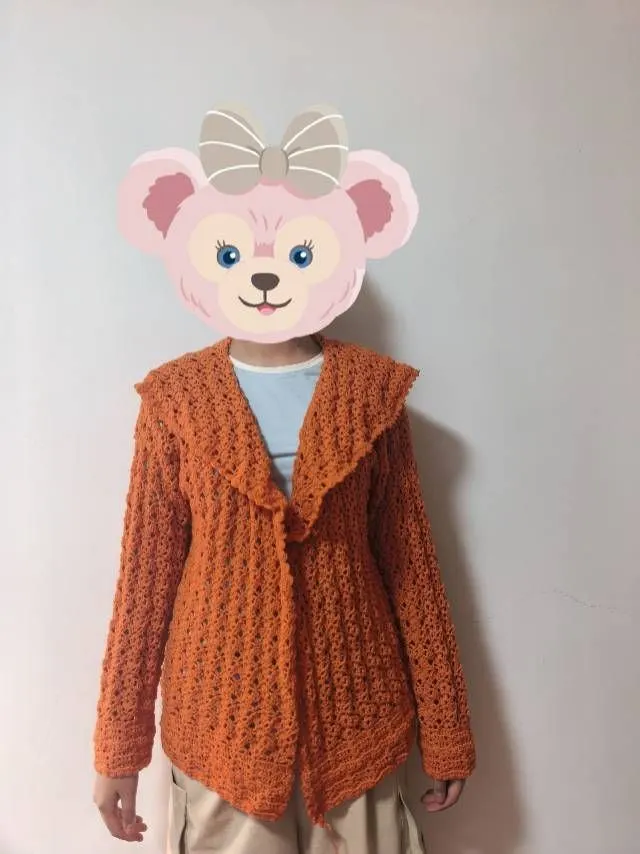
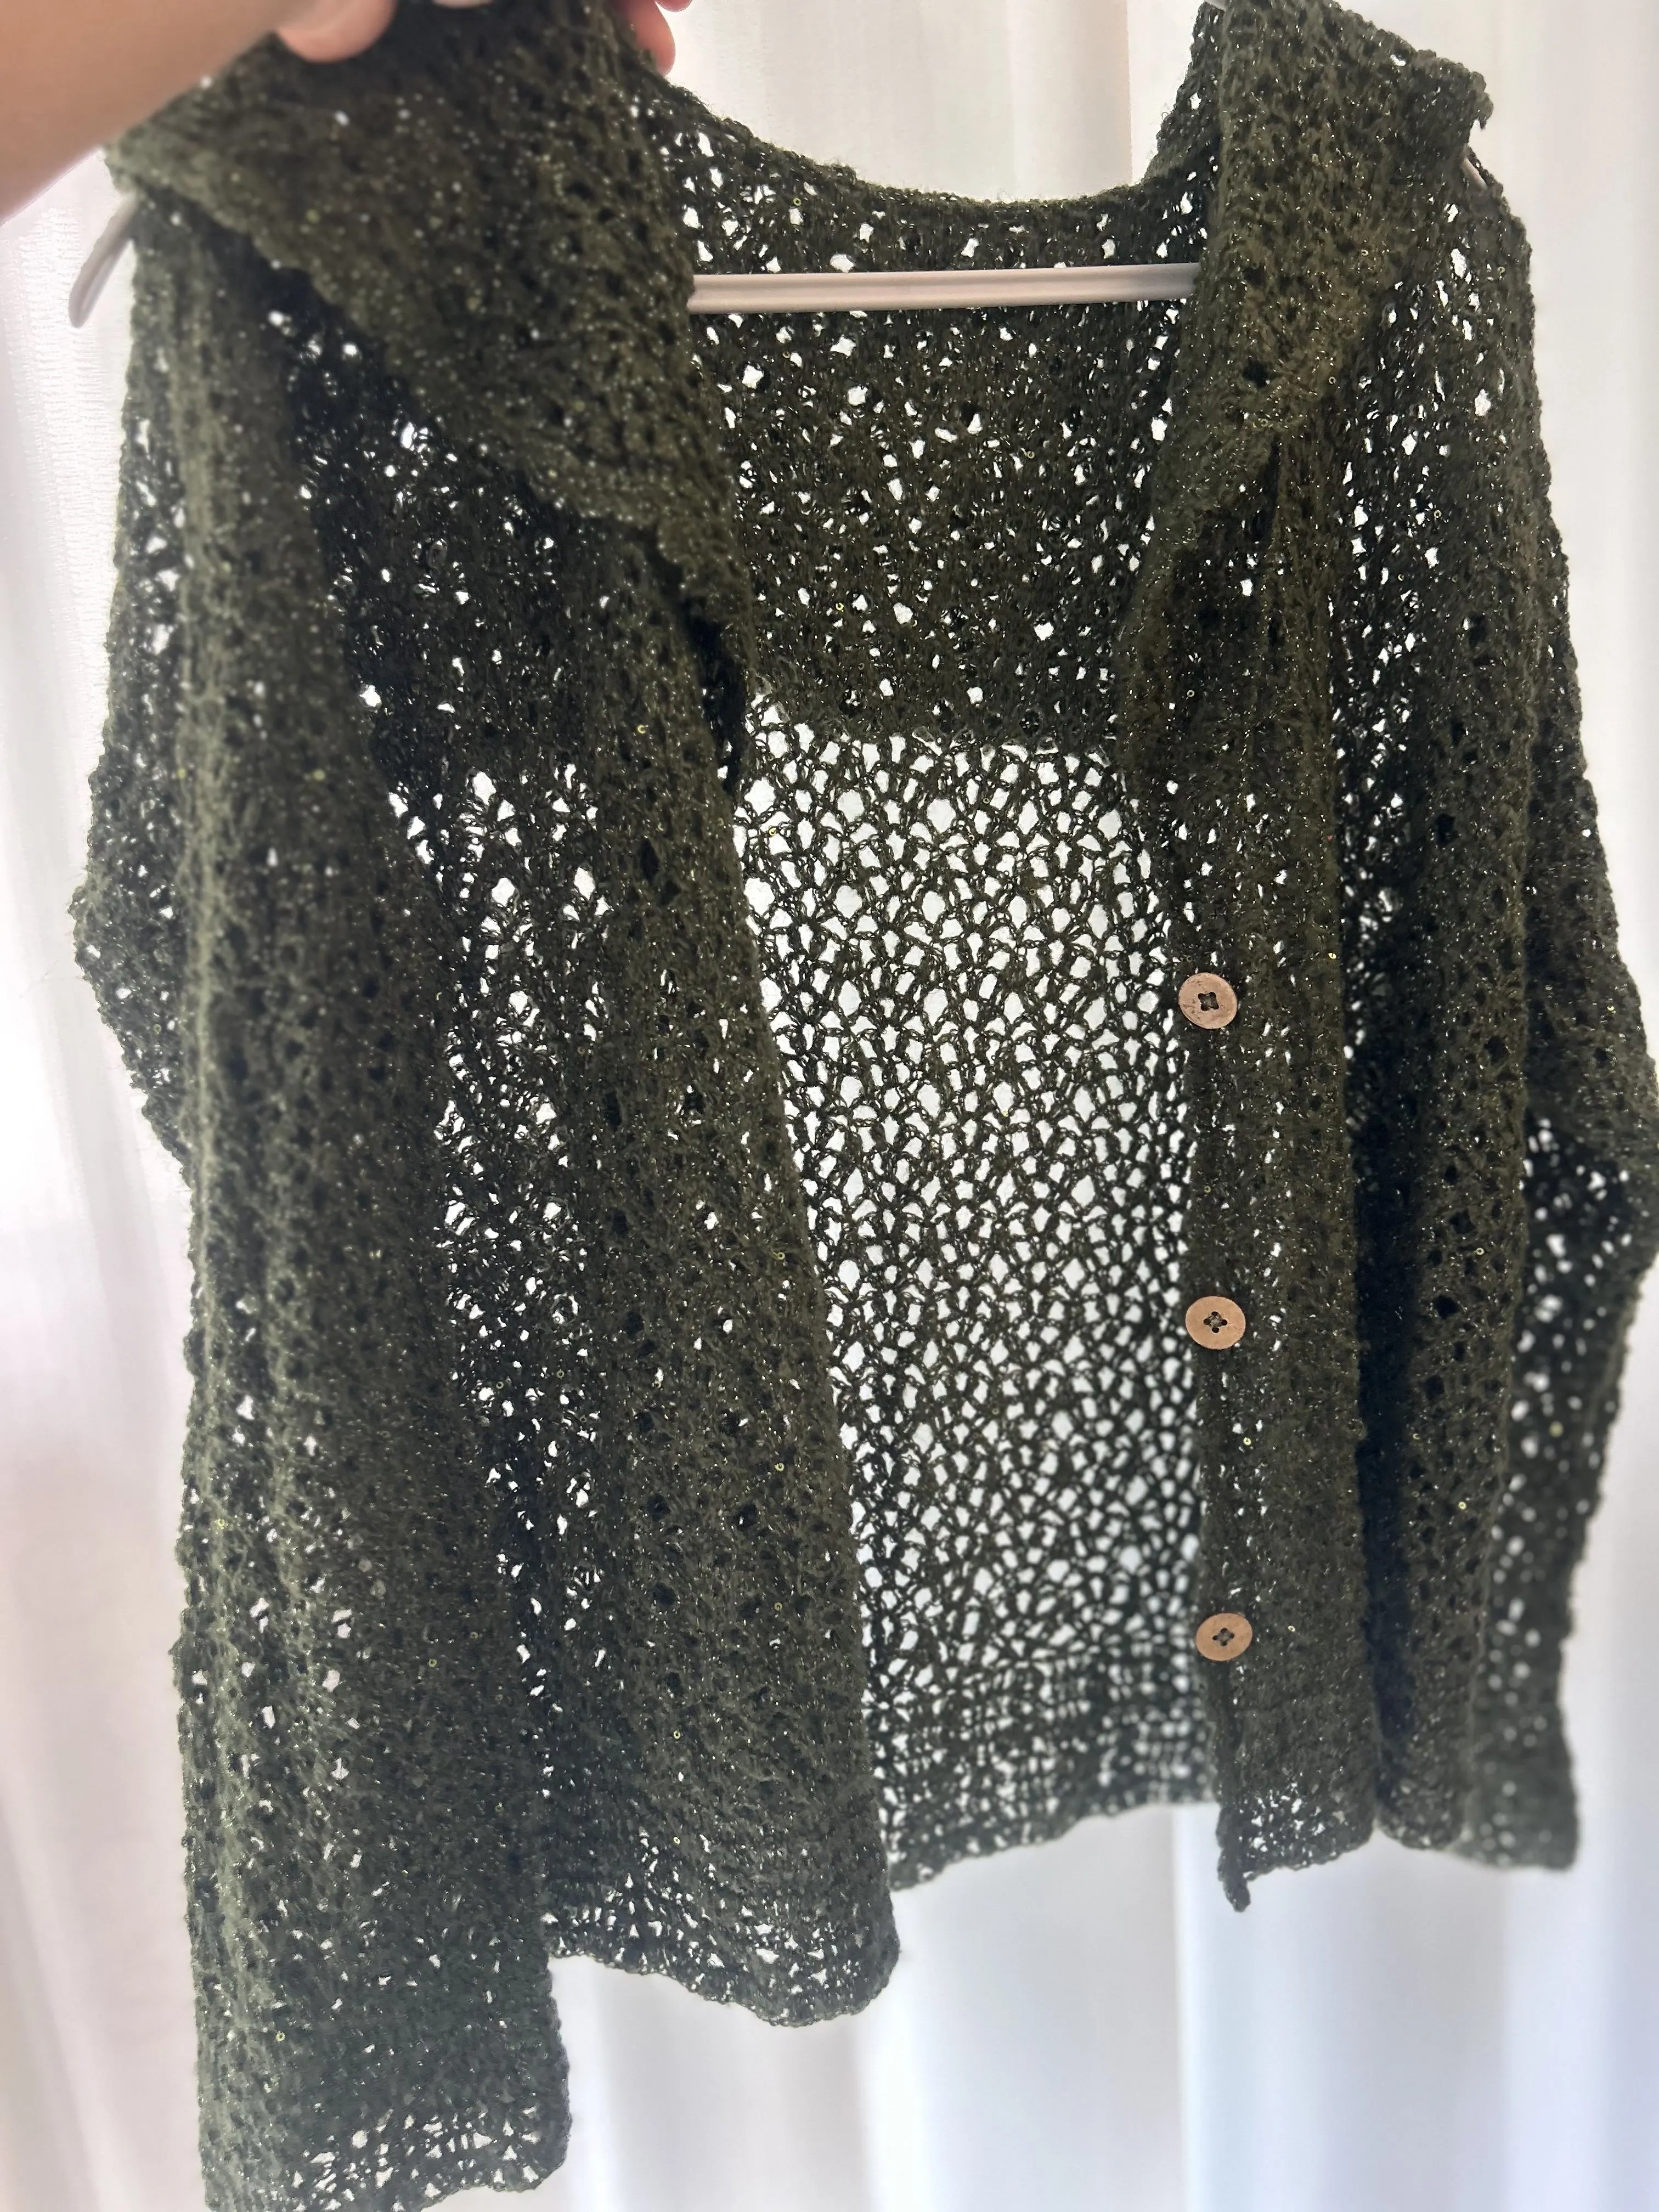
Starhold Cardigan
Project preview
See the finished project
Pattern format
Instructions
Watch and follow
Video tutorial
| Style | Yarn | Color |
|---|---|---|
| Moss Whisper Version | Sequin Mahai |  24#Moss Whisper x 5 24#Moss Whisper x 5 |
| Tea Rose Version | Sequin Mahai | 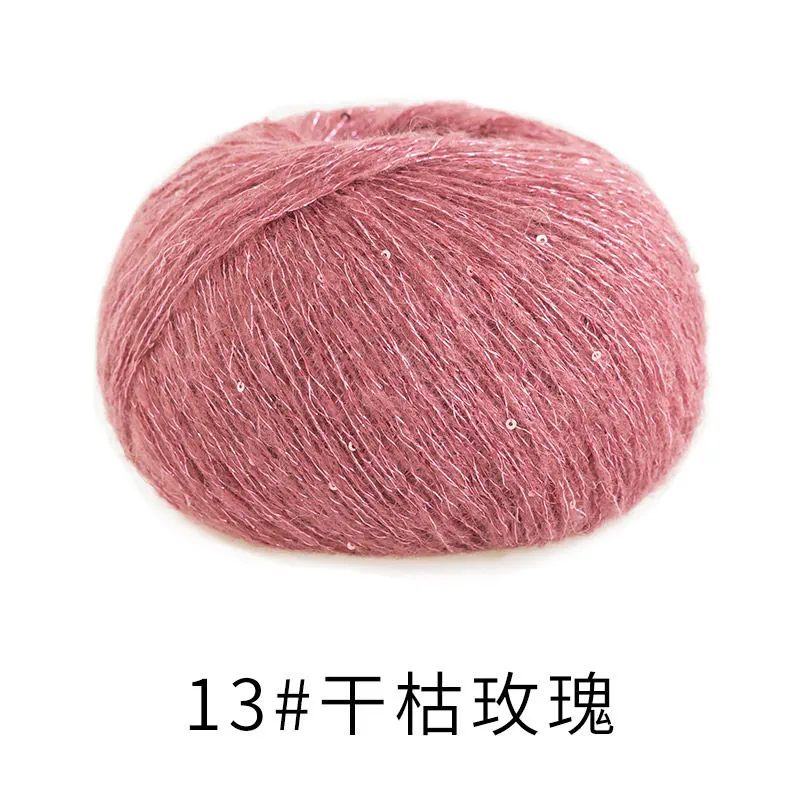 13#Tea Rose x 5 13#Tea Rose x 5 |
| Black Version | Sequin Mahai |  16#Black x 5 16#Black x 5 |
| Bleached Sand Version | Sequin Mahai |  05#Bleached Sand x 5 05#Bleached Sand x 5 |
This cardigan is made up of the back body, front body, sleeves, shawl collar, joining, edging, and buttons. First, crochet the back body, front body, sleeves, and shawl collar, then join them together. After that, work the edging, and finally attach the buttons.
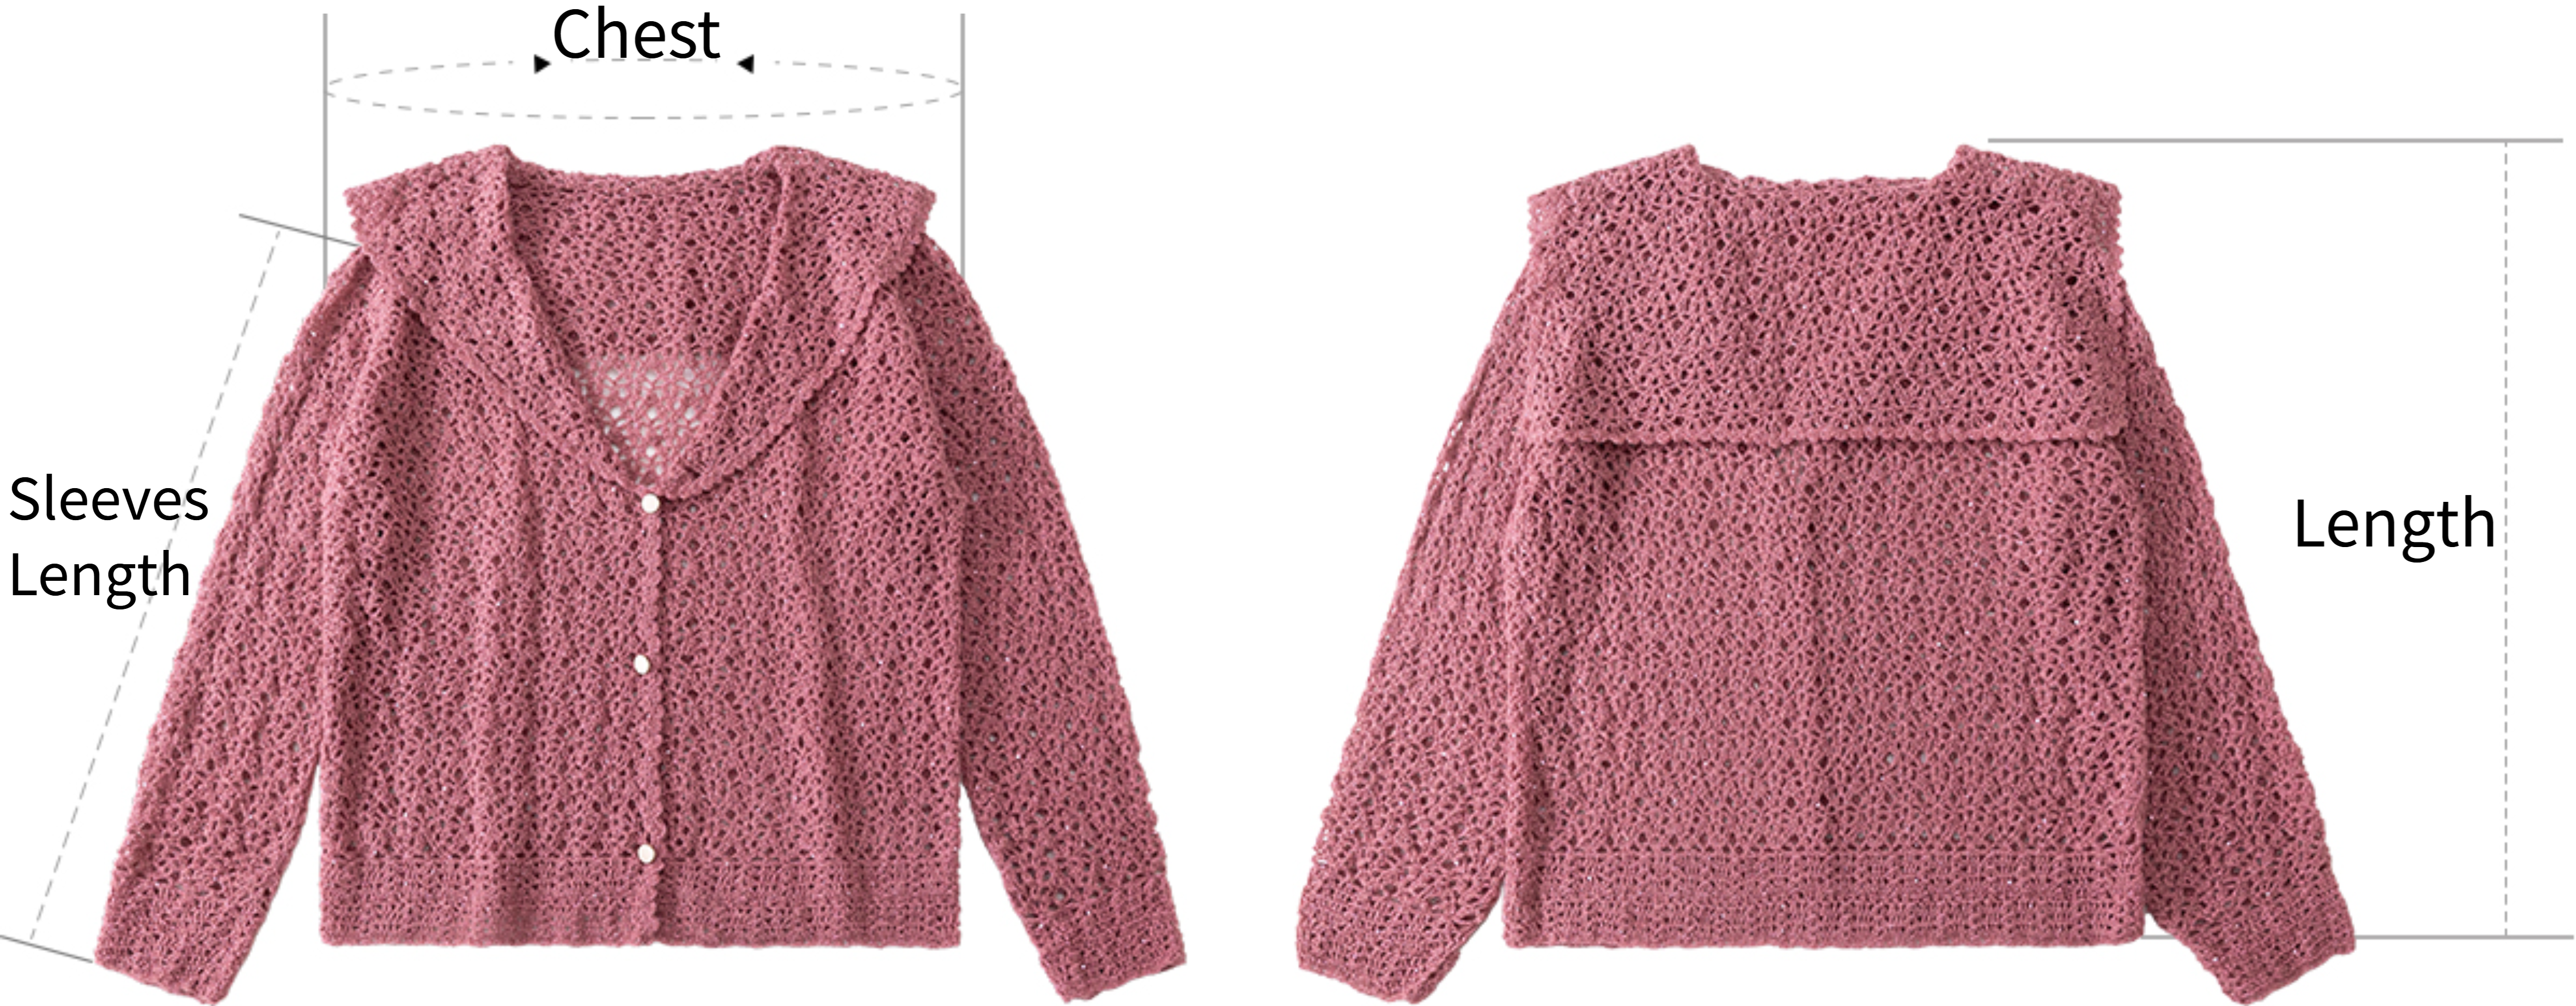
| Unit : cm | Chest | Length | Sleeves Length |
| Small size | 110 | 52 | 42 |
Note: Measurements are taken by hand, so there might be a 1-2cm error.Since everyone’s tension varies, the sample size is just for reference.
Yarn : Sequin Mahai . Tools : 3.0 mm crochet hook.
Note: The yarn used for this project is special and not easy to undo. I suggest you practice the crochet method with some scrap yarn from home first, and then use the original yarn once you're familiar with it.

The tutorial uses the small size as an example. For other sizes, please refer to the corresponding pattern.
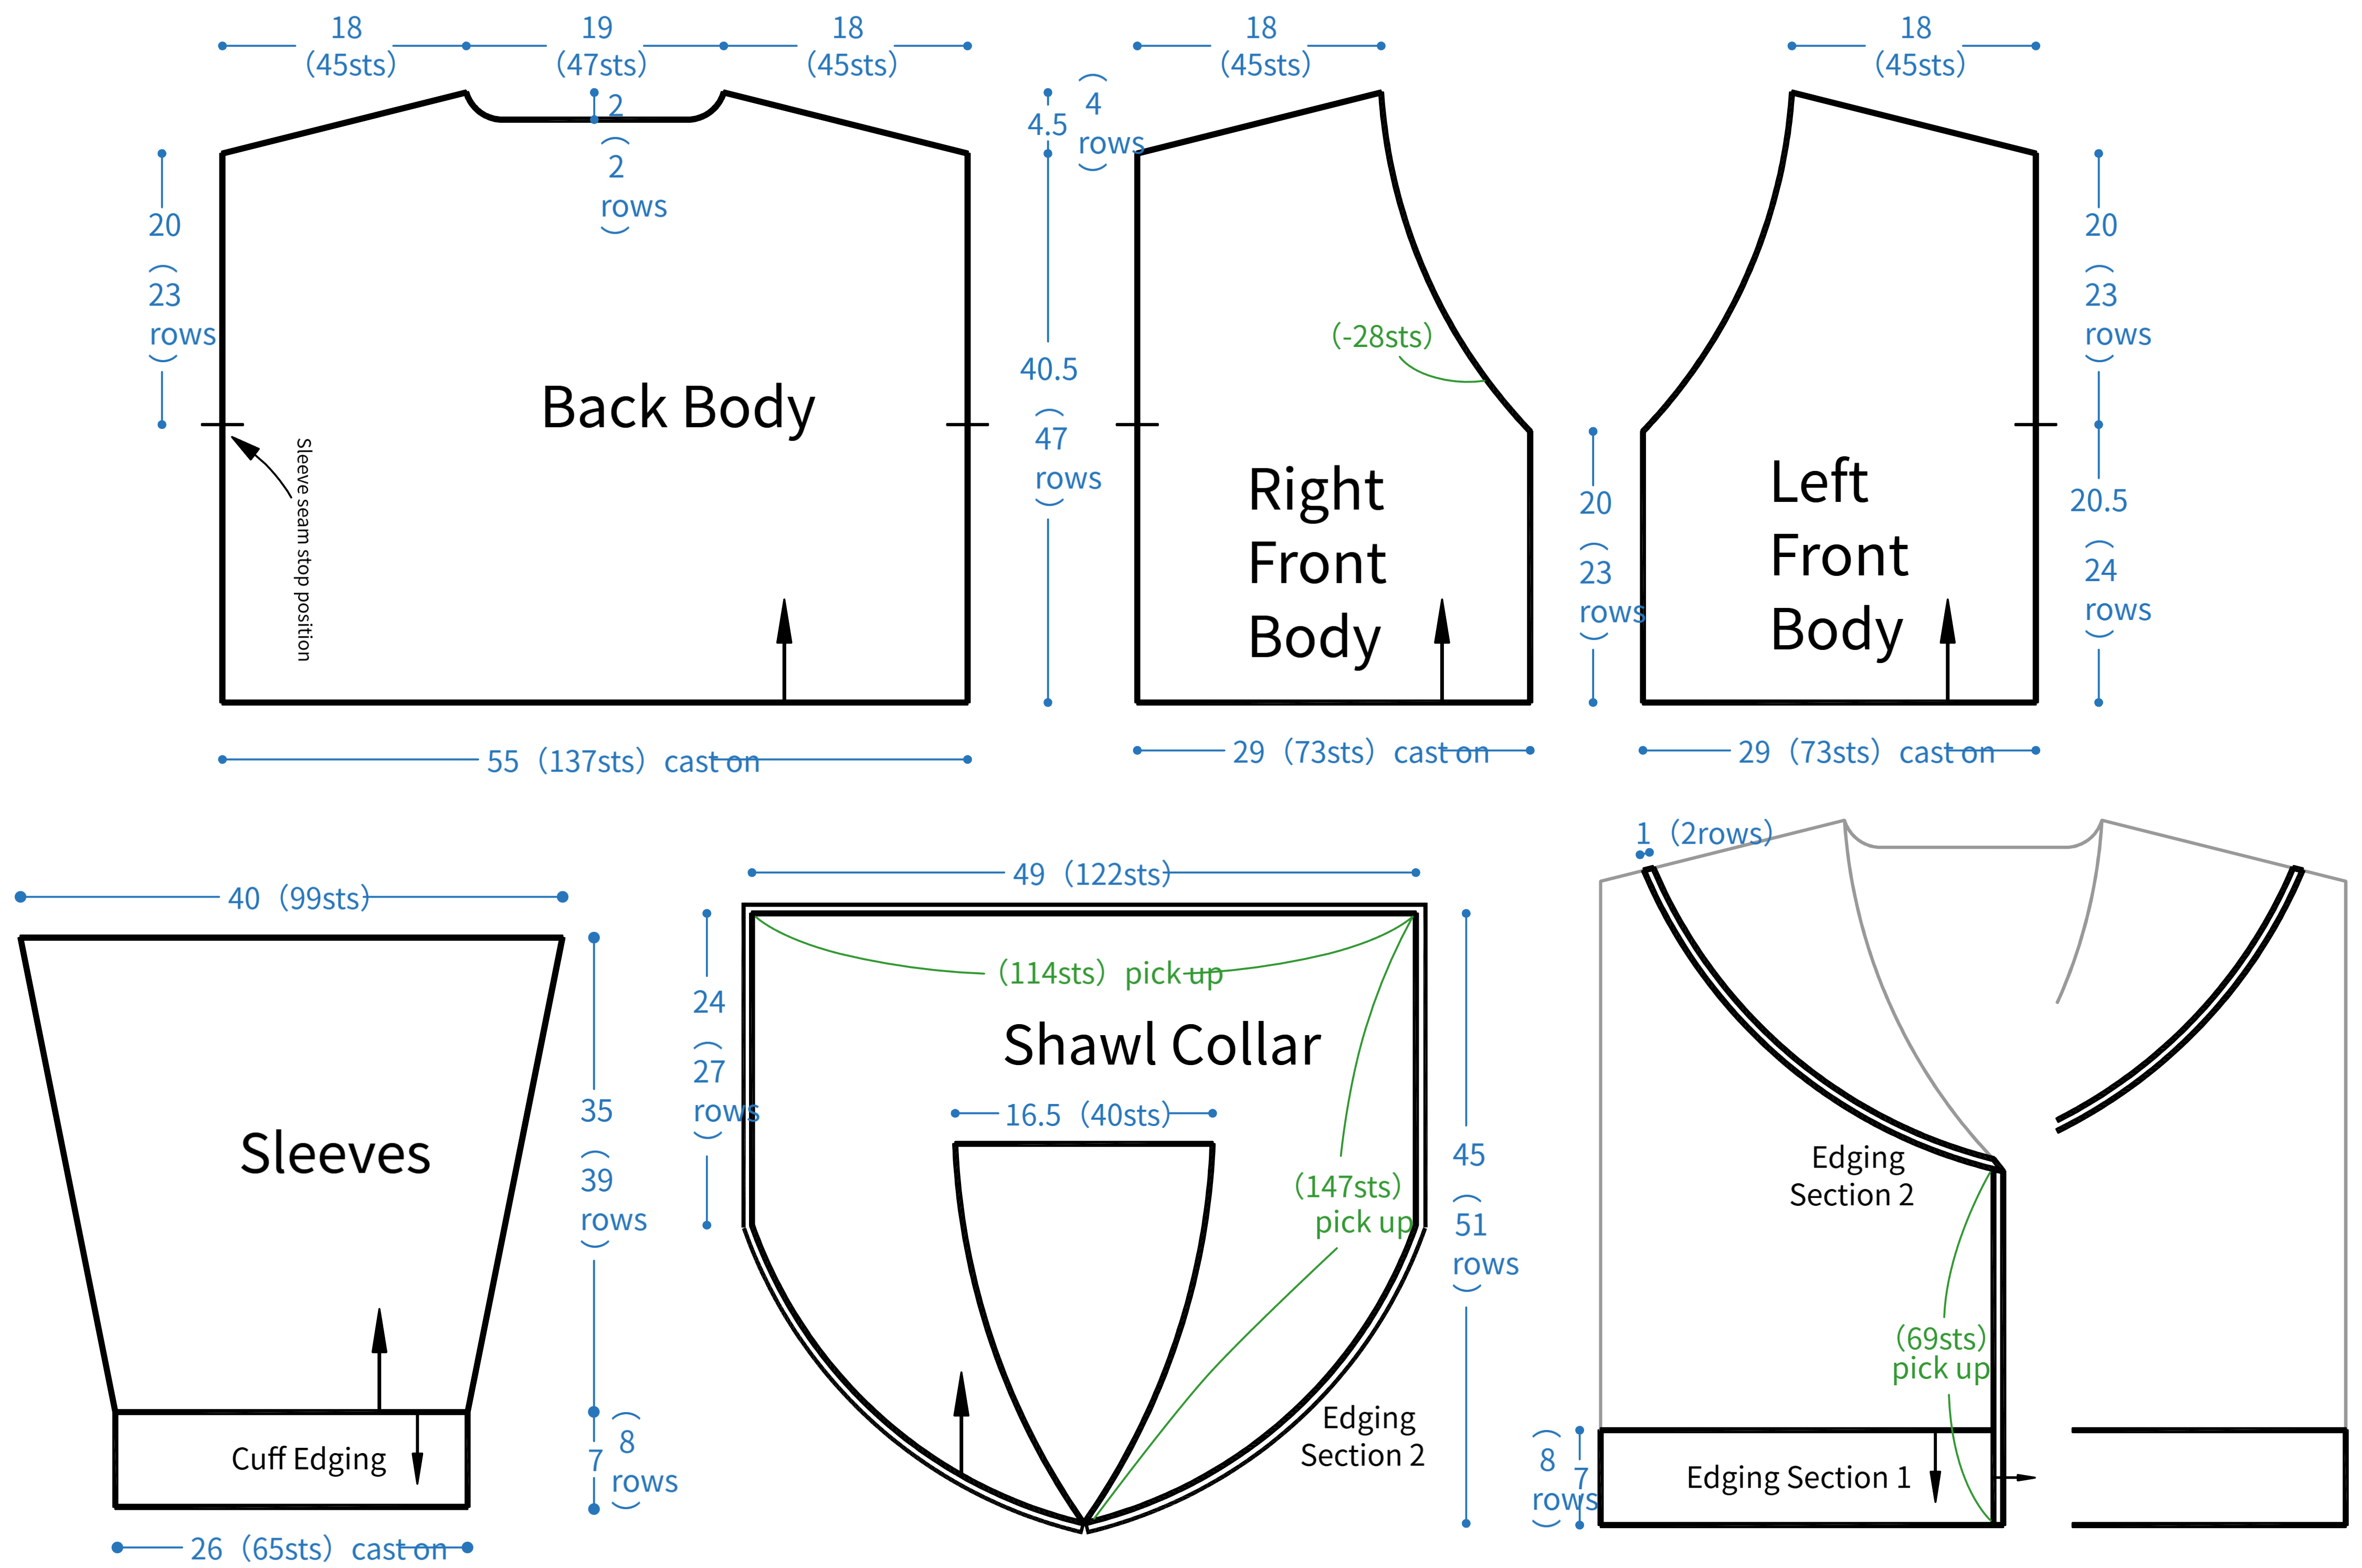
Schematic Diagram
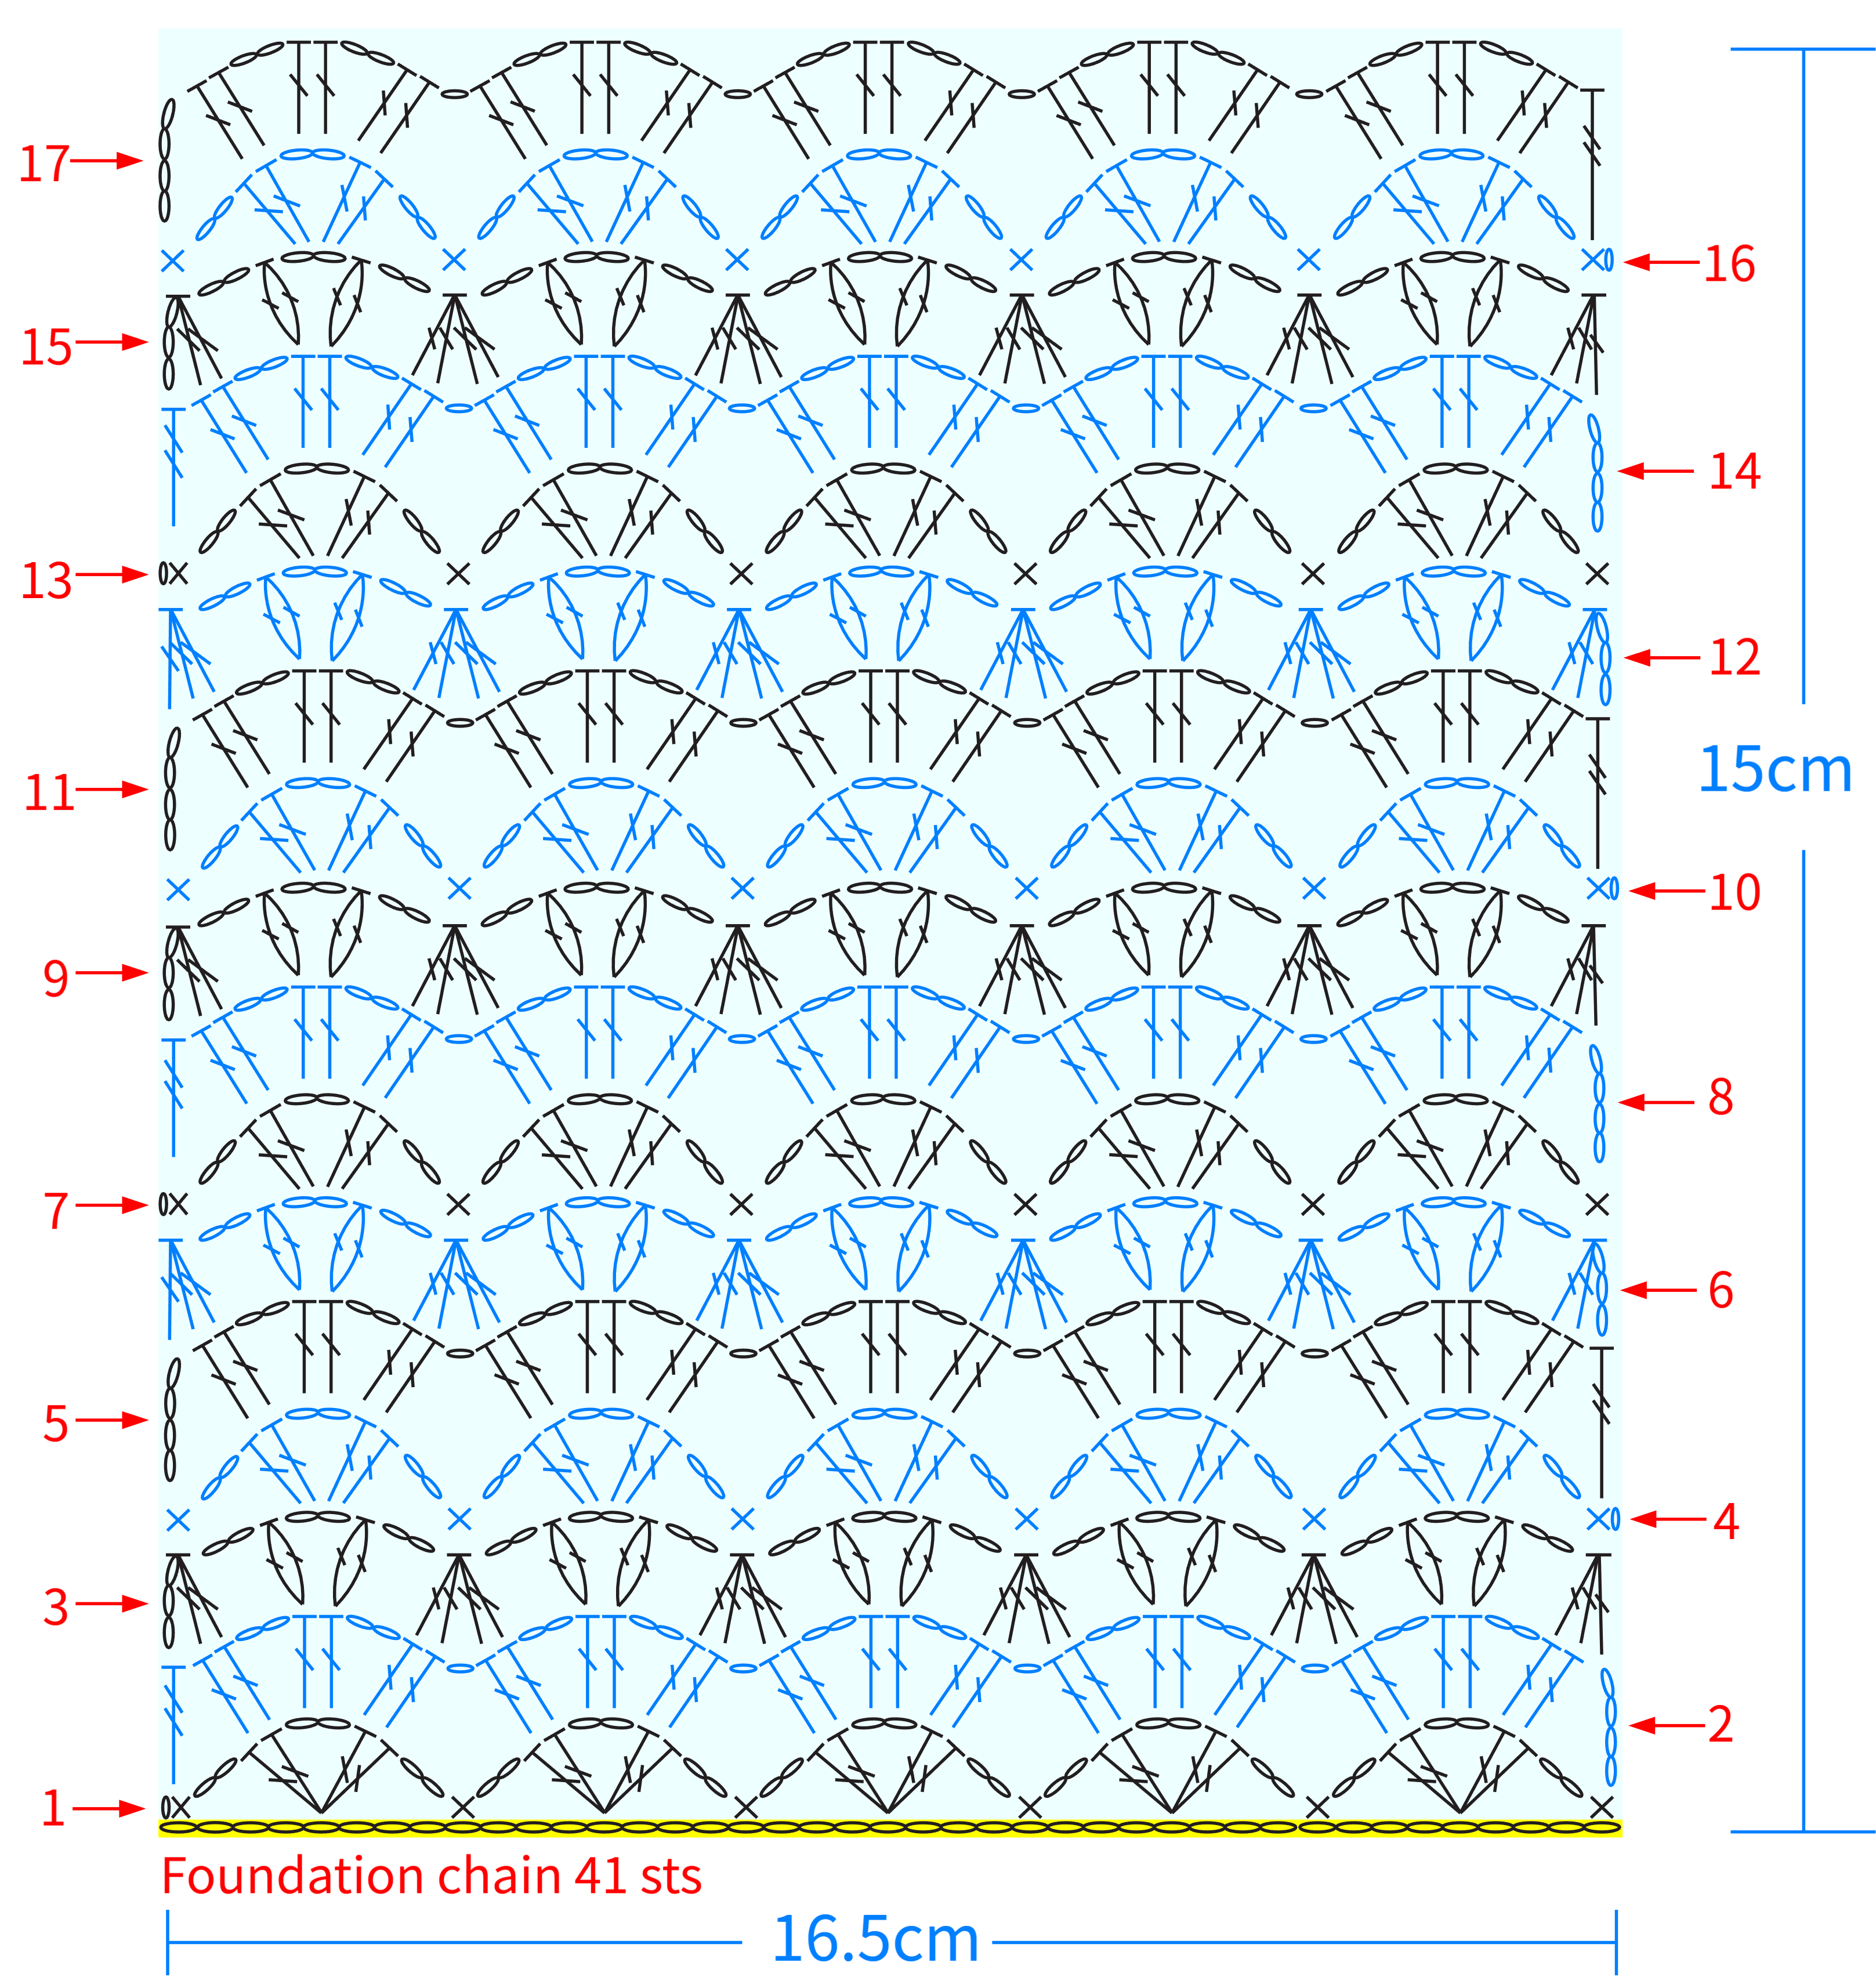
Gauge Swatch
















Note:
1. This pattern is making in Chinese crochet pattern terms, and the stitch name is written using American terminology. All measurements in charts are in cm.

Part 1 Back Body A 01' 54''
The back body is split into two sections: the body and the shoulder - part section. Start with a foundation chain method, then crochet back and forth in rows along that starting chain. Please refer to the video demonstration for more details.
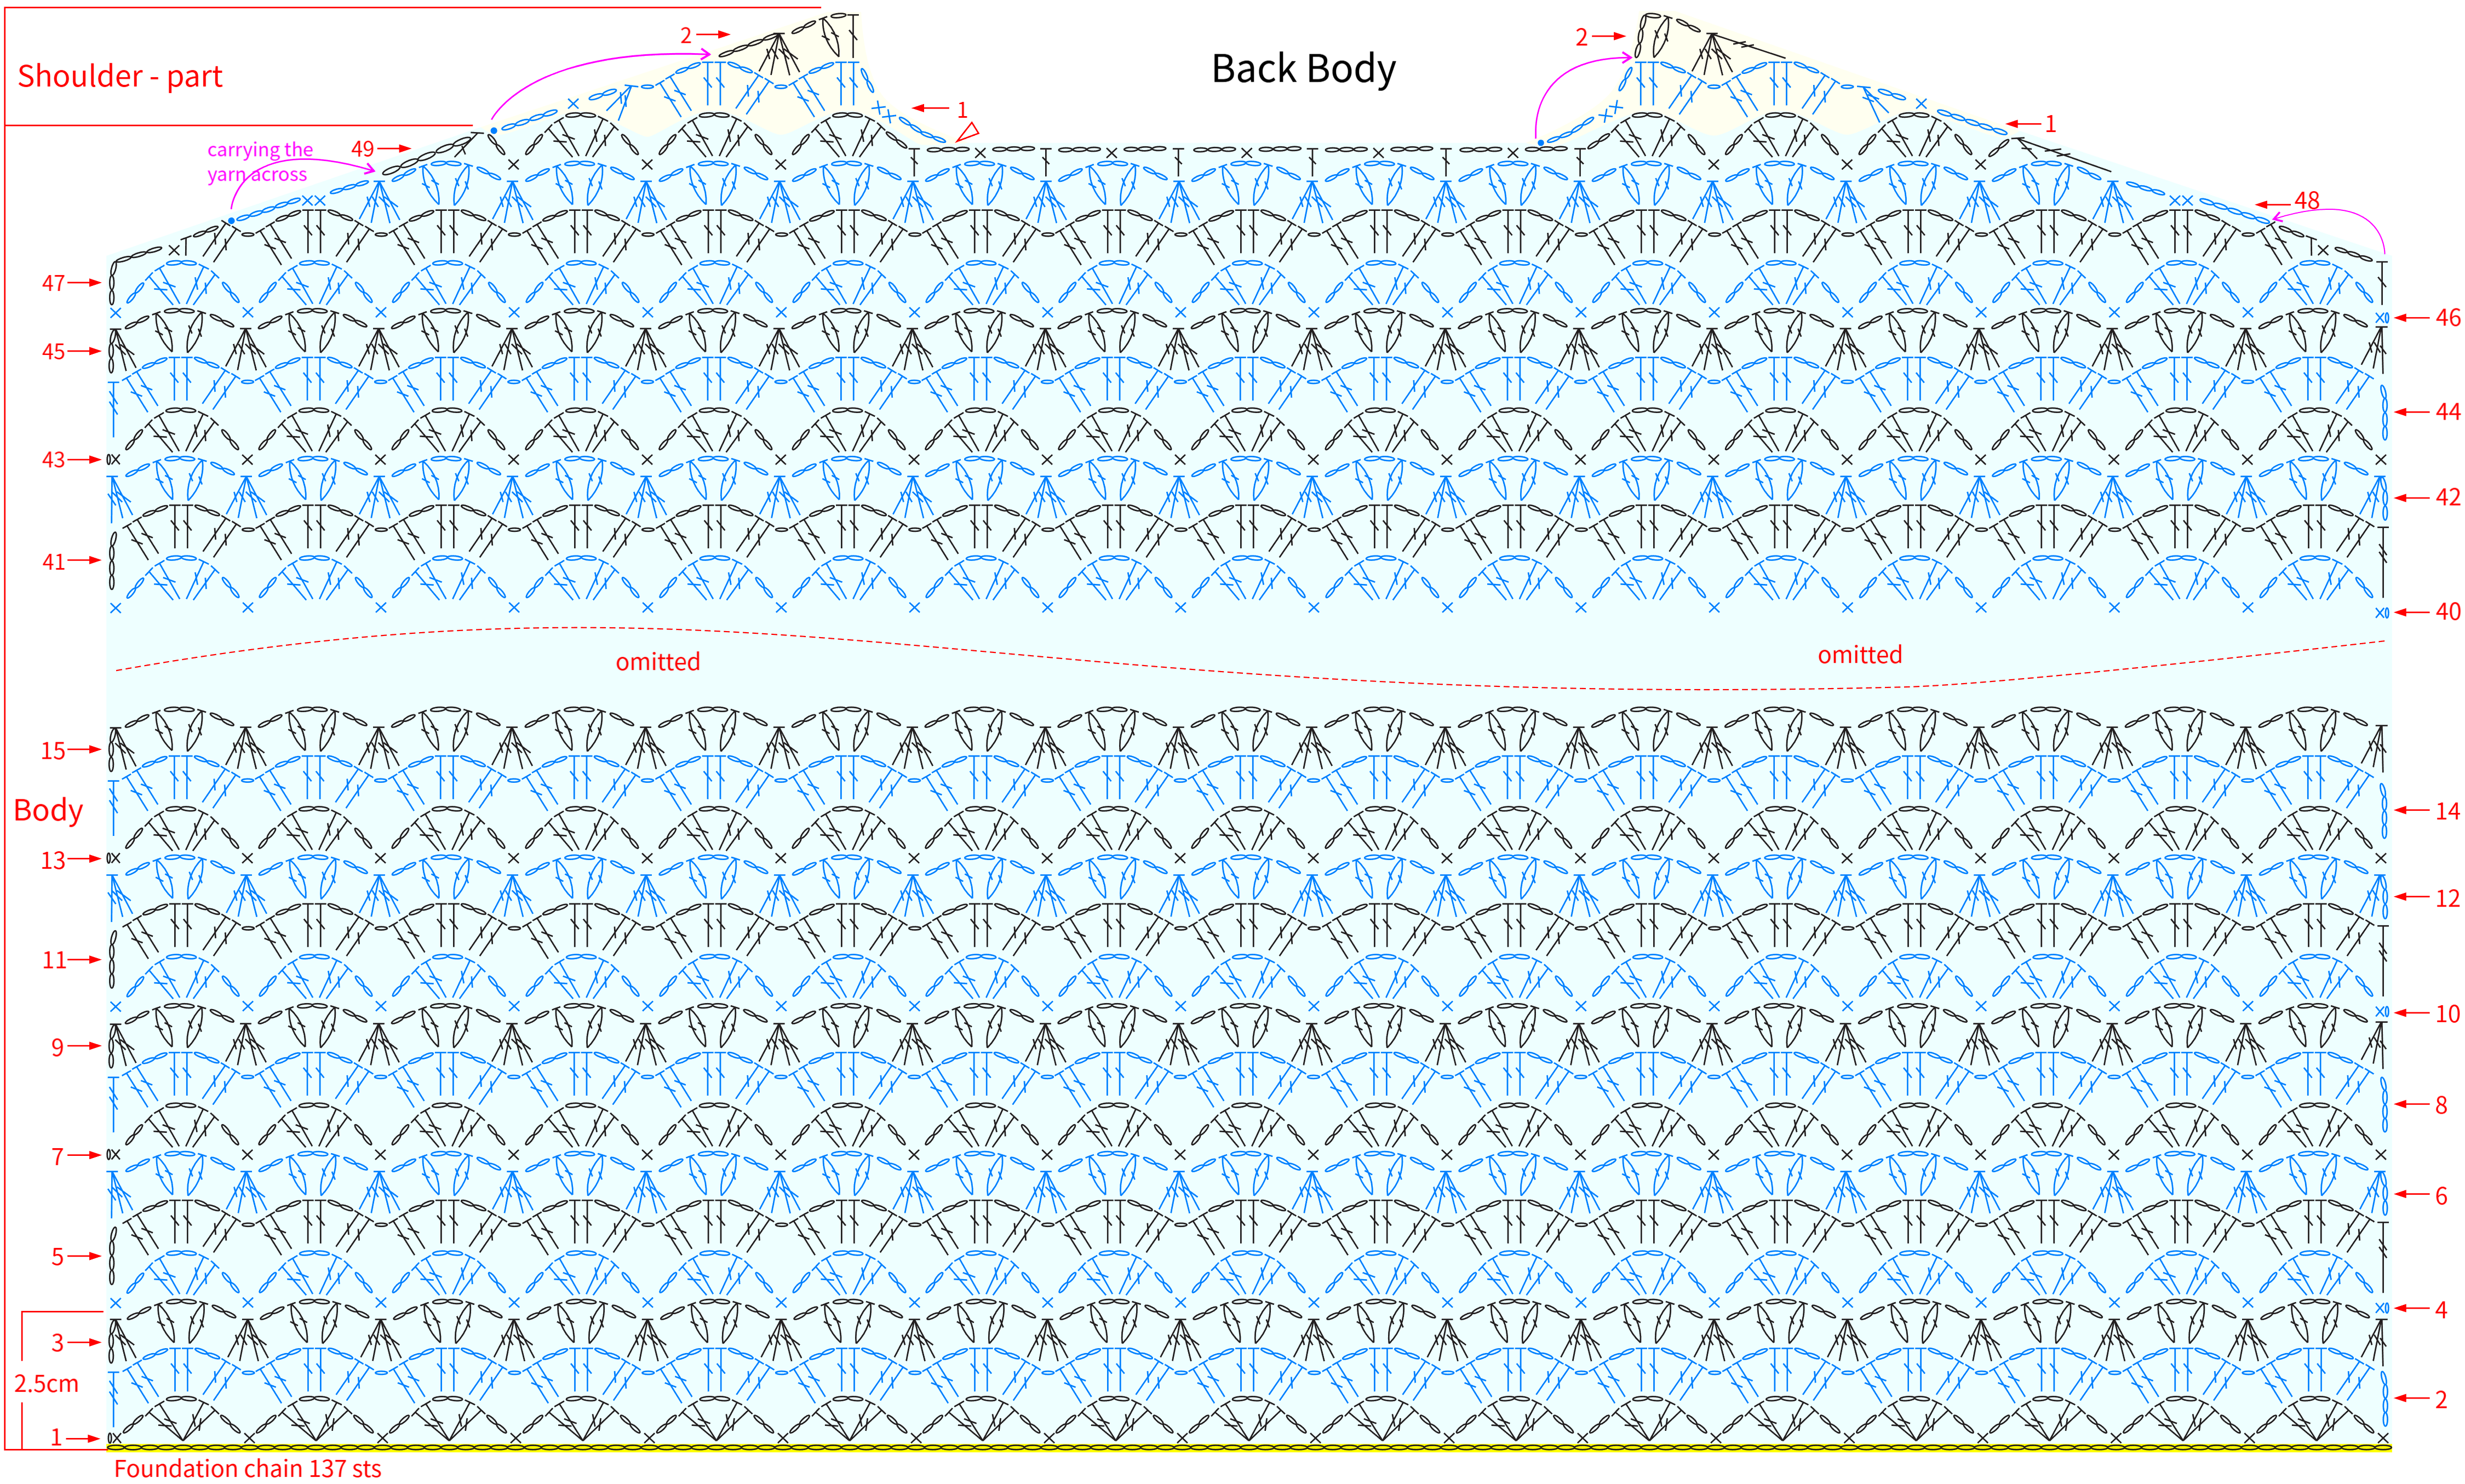
Note: After finishing row 3, you can check your measurements. It should be about 2.5 cm tall and 55 cm wide. If it’s way off, I’d suggest adjusting your tension and crocheting it again, so the final size doesn’t end up wrong.
Part 2 Front Body B 42' 31''
The front body is split into a left front body and a right front body.Please refer to the video demonstration for more details.
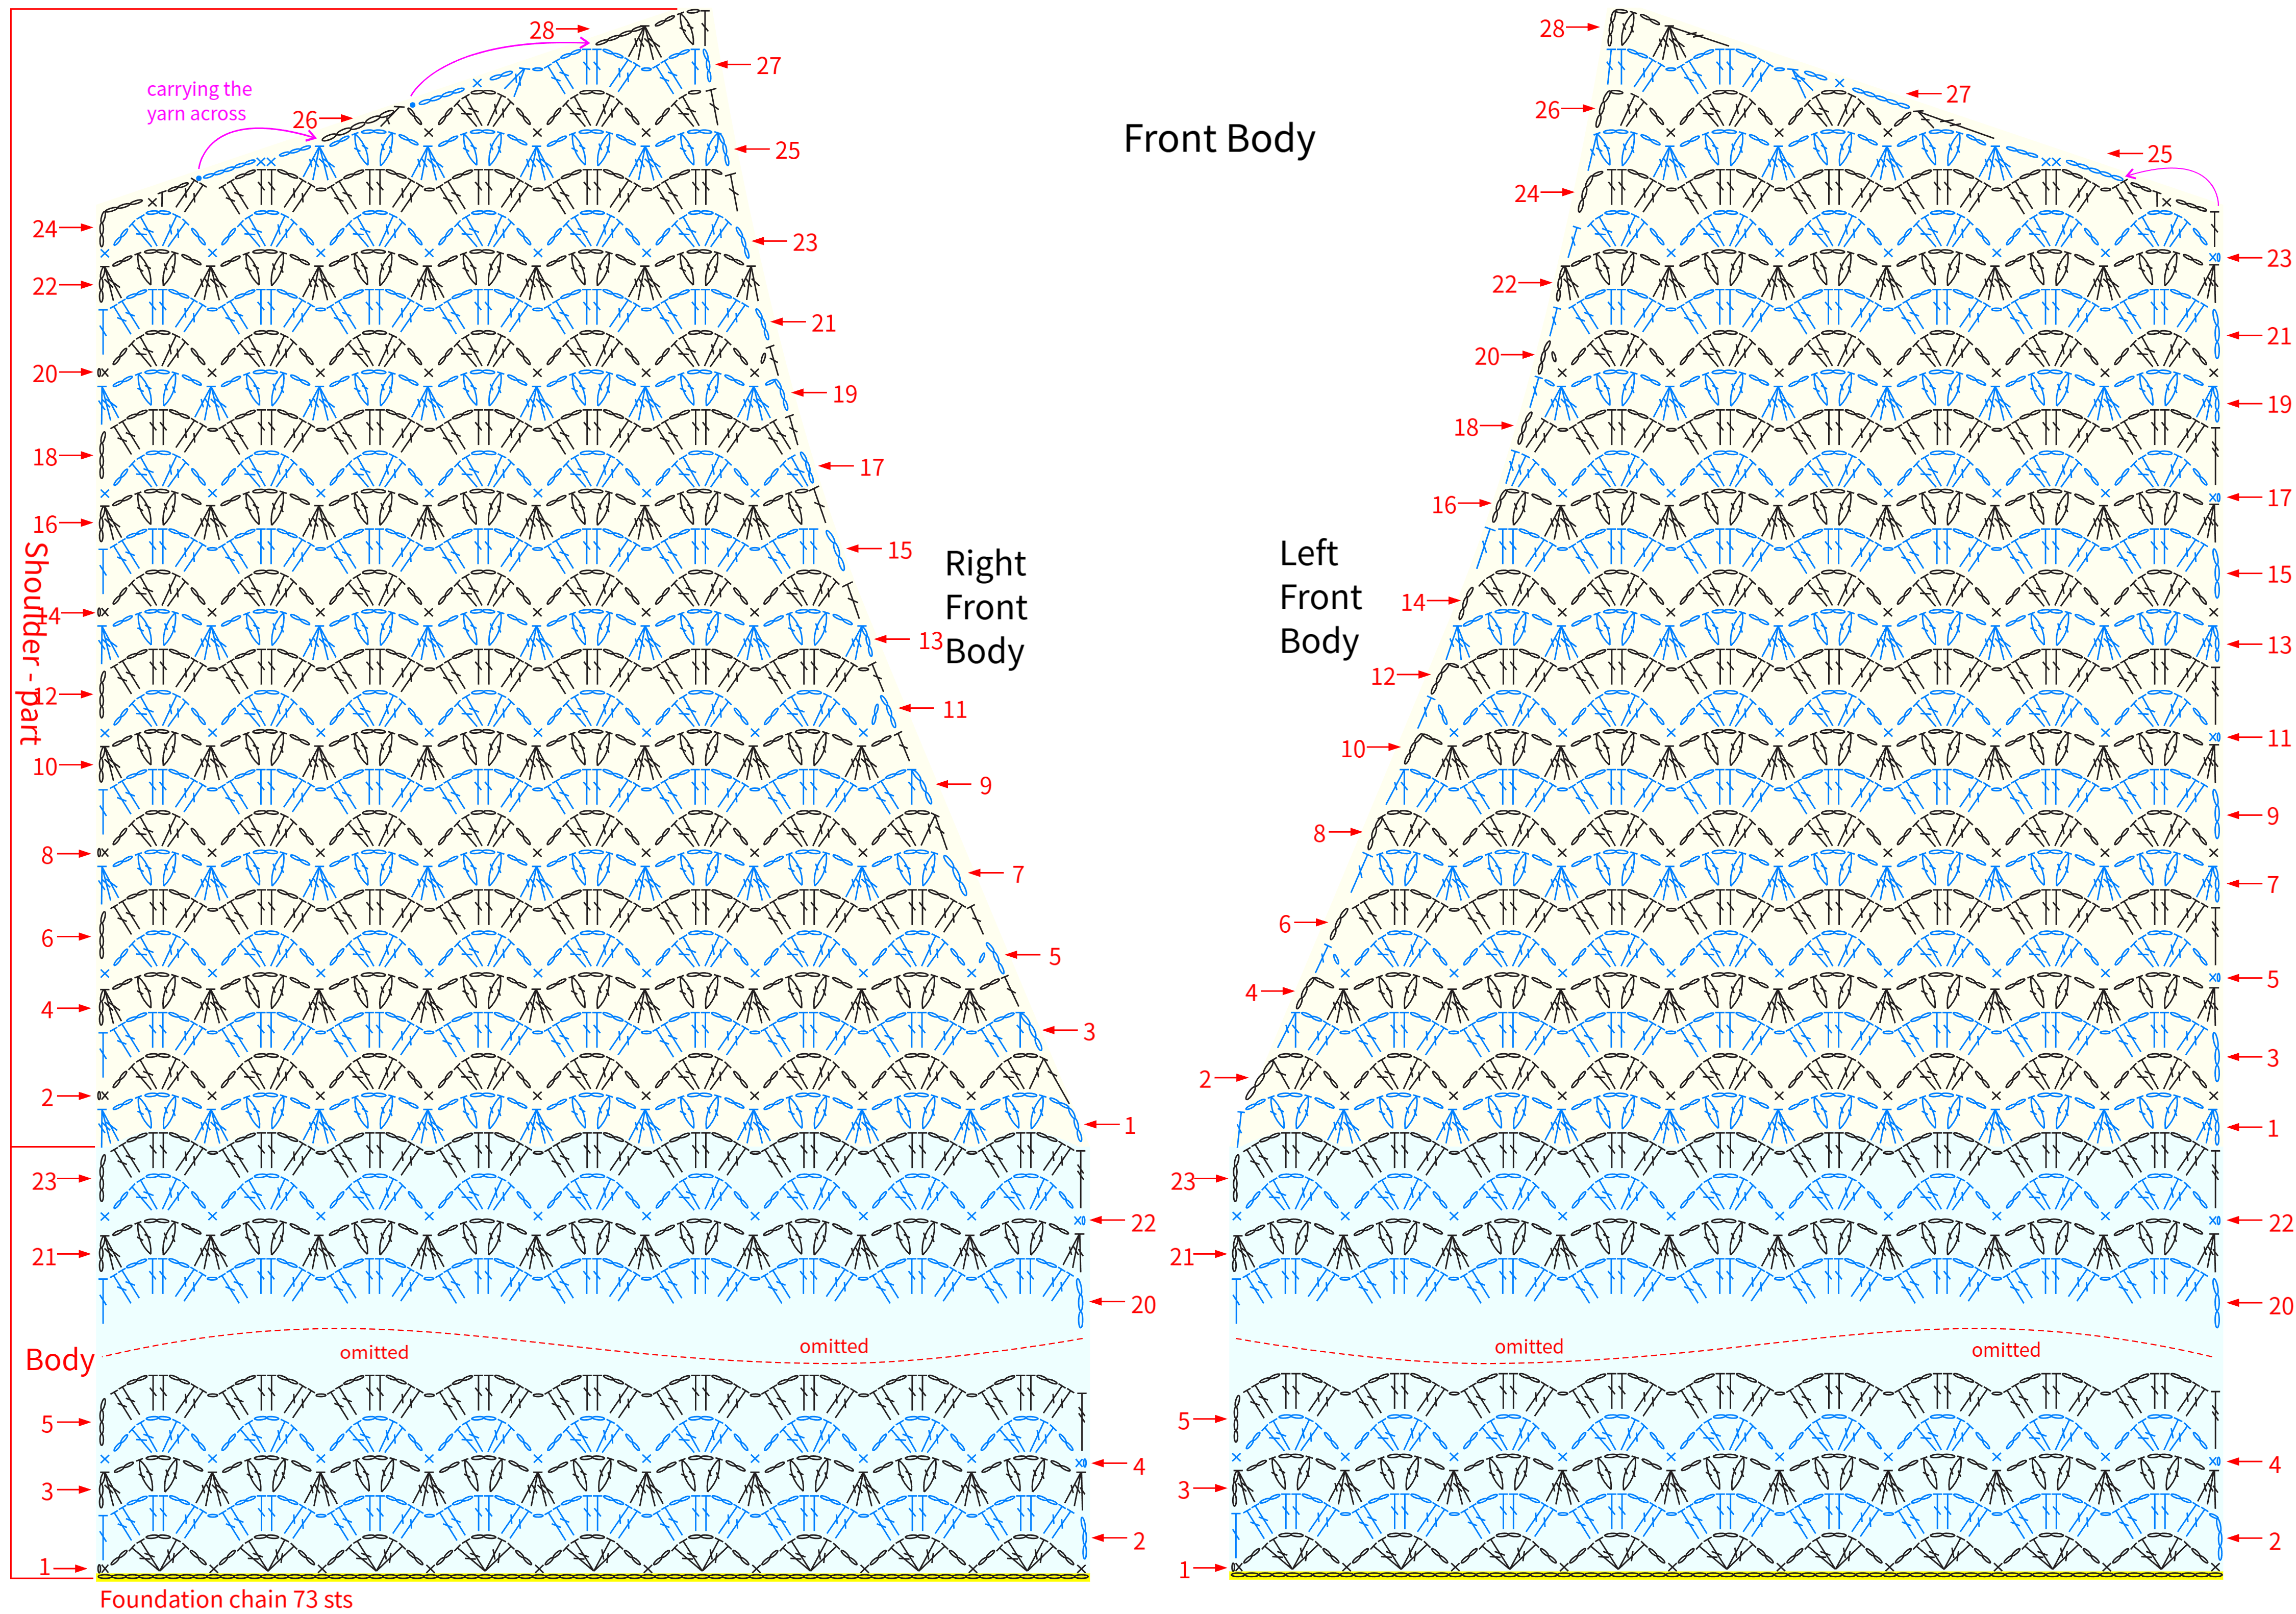
Note: After finishing row 3, you can check the measurements or just compare it with the back body. It should be about 2.5 cm tall and 29 cm wide. If there’s a big difference, I’d suggest adjusting your tension and re-crocheting to keep things flat when you join them later.
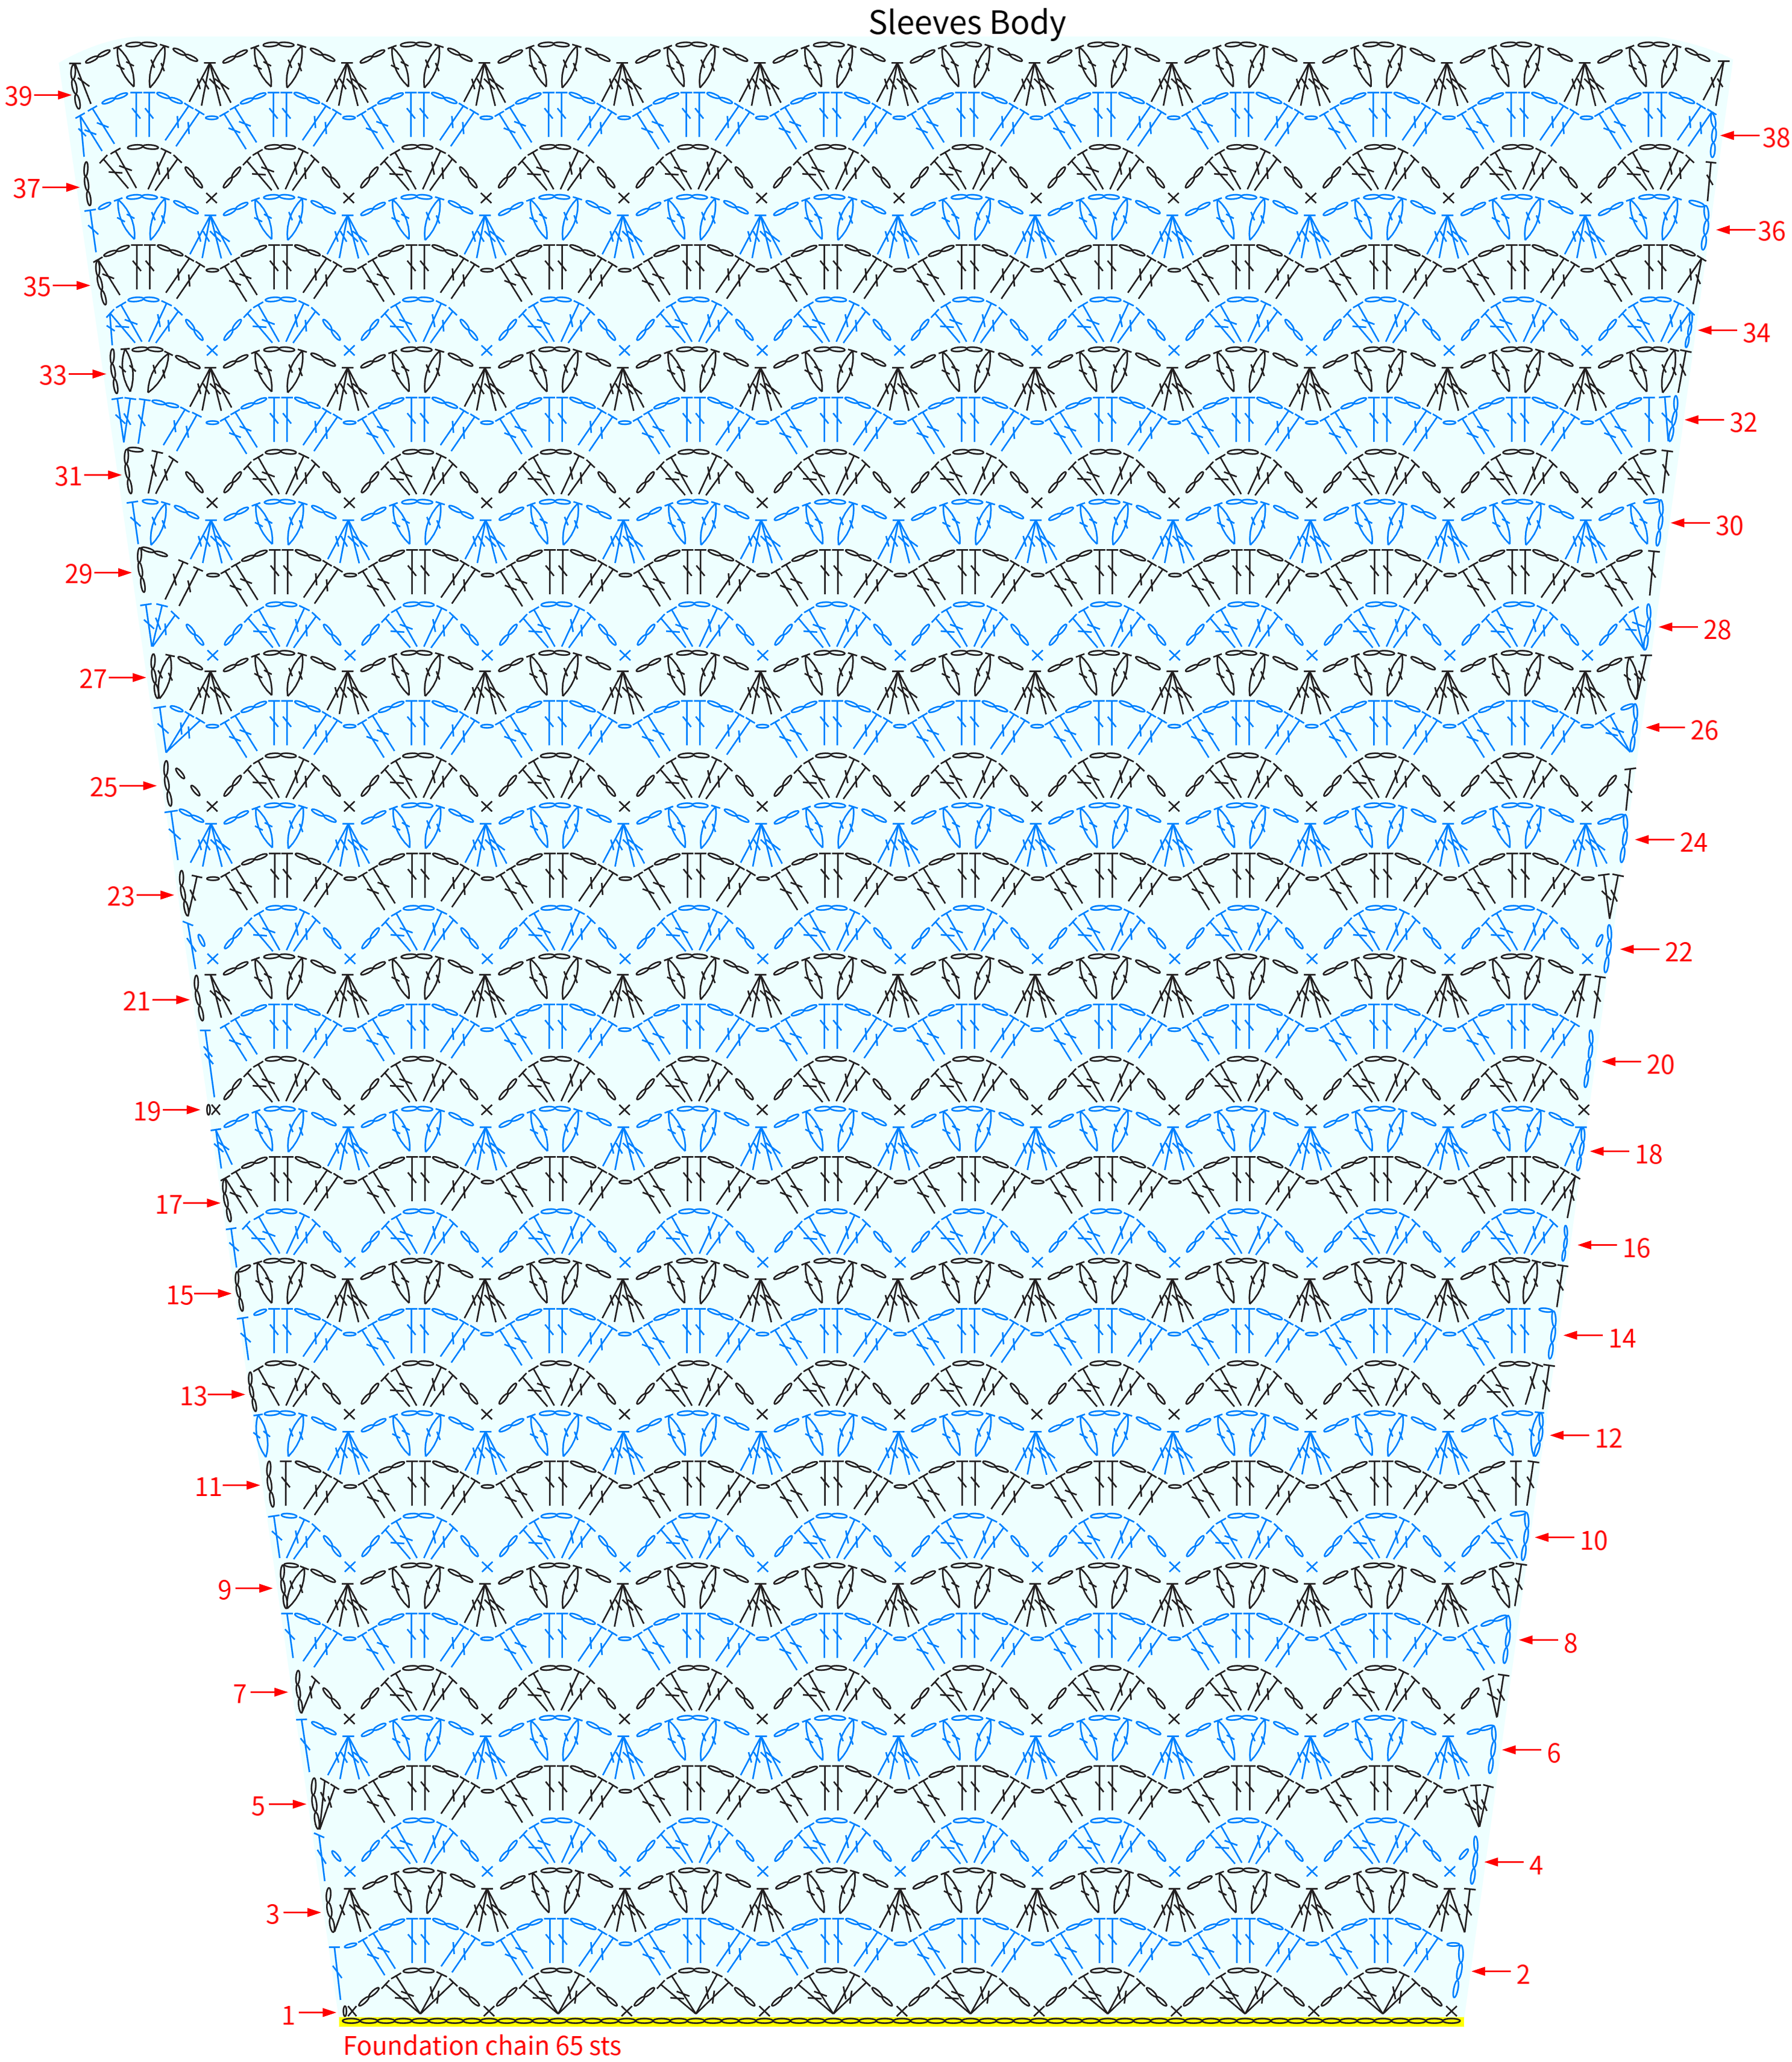
Part 3 Sleeves ×2 C 46' 48''
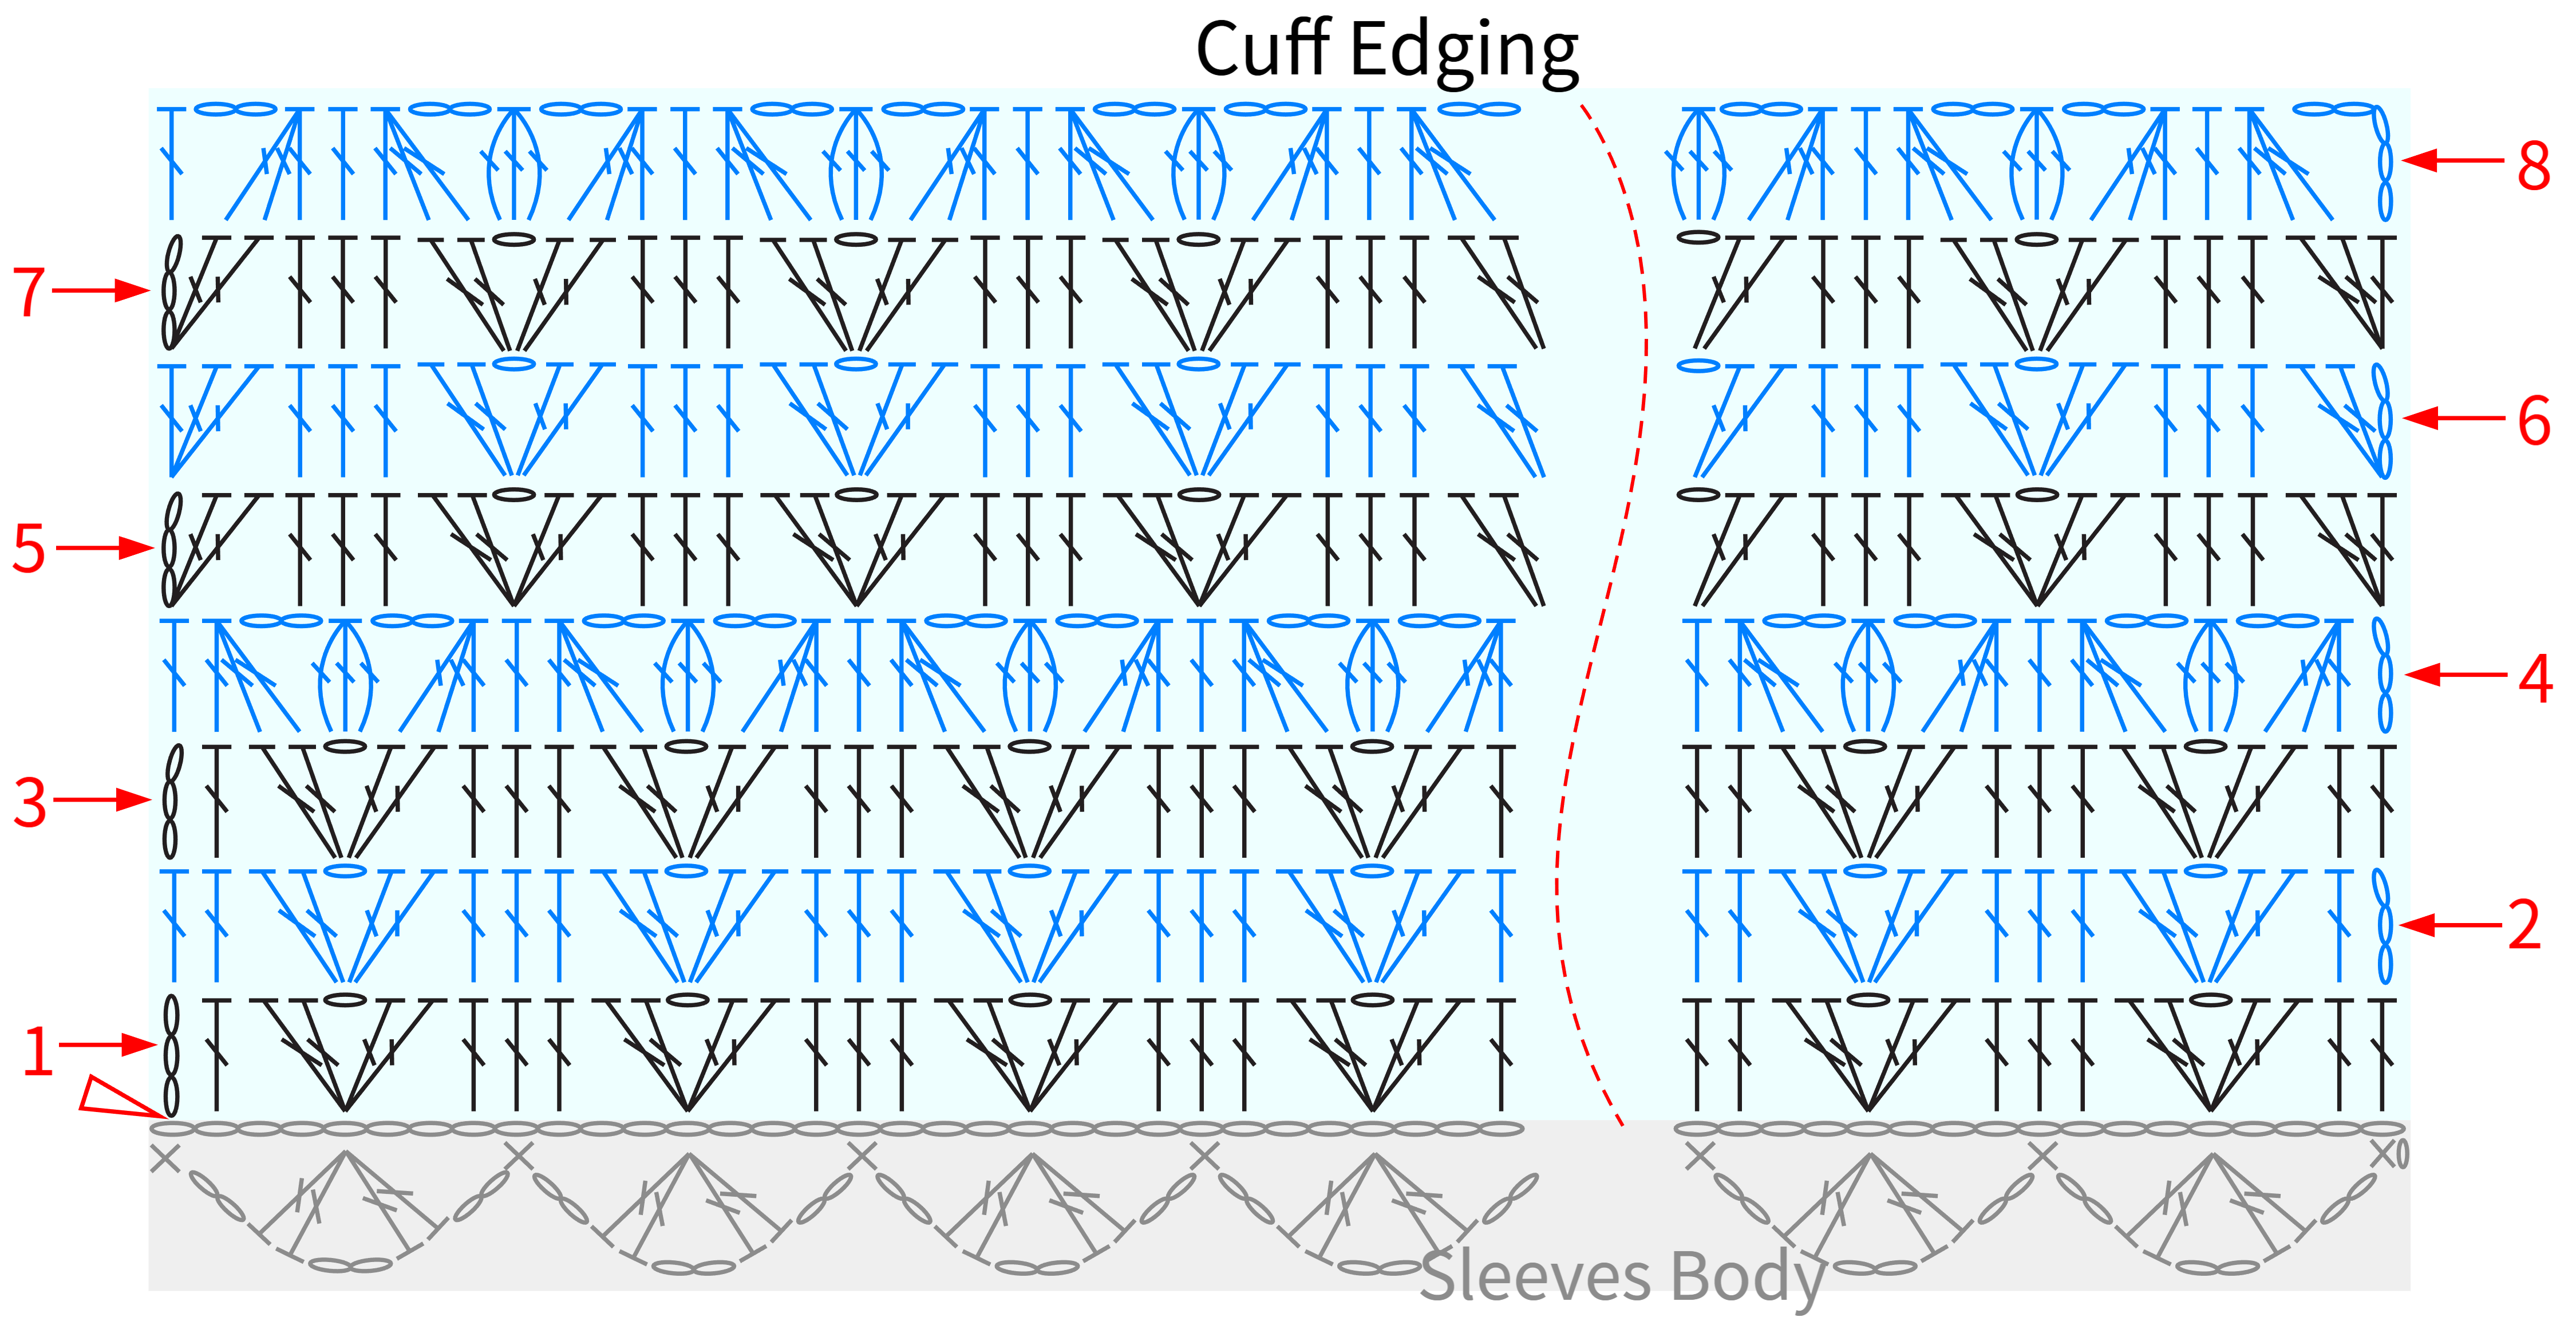
There are 2 sleeves. Each sleeve is made up of the sleeve body and the edging for the cuff. For the sleeve body, start with a foundation chain method, then crochet back and forth in rows upwards from the cast-on edge. Once that’s done, go back to the starting chain, pick up stitches on the other side, and continue crocheting back and forth in rows for the cuff.Please refer to the video demonstration for more details.
Part 4 Shawl Collar D 62' 07''
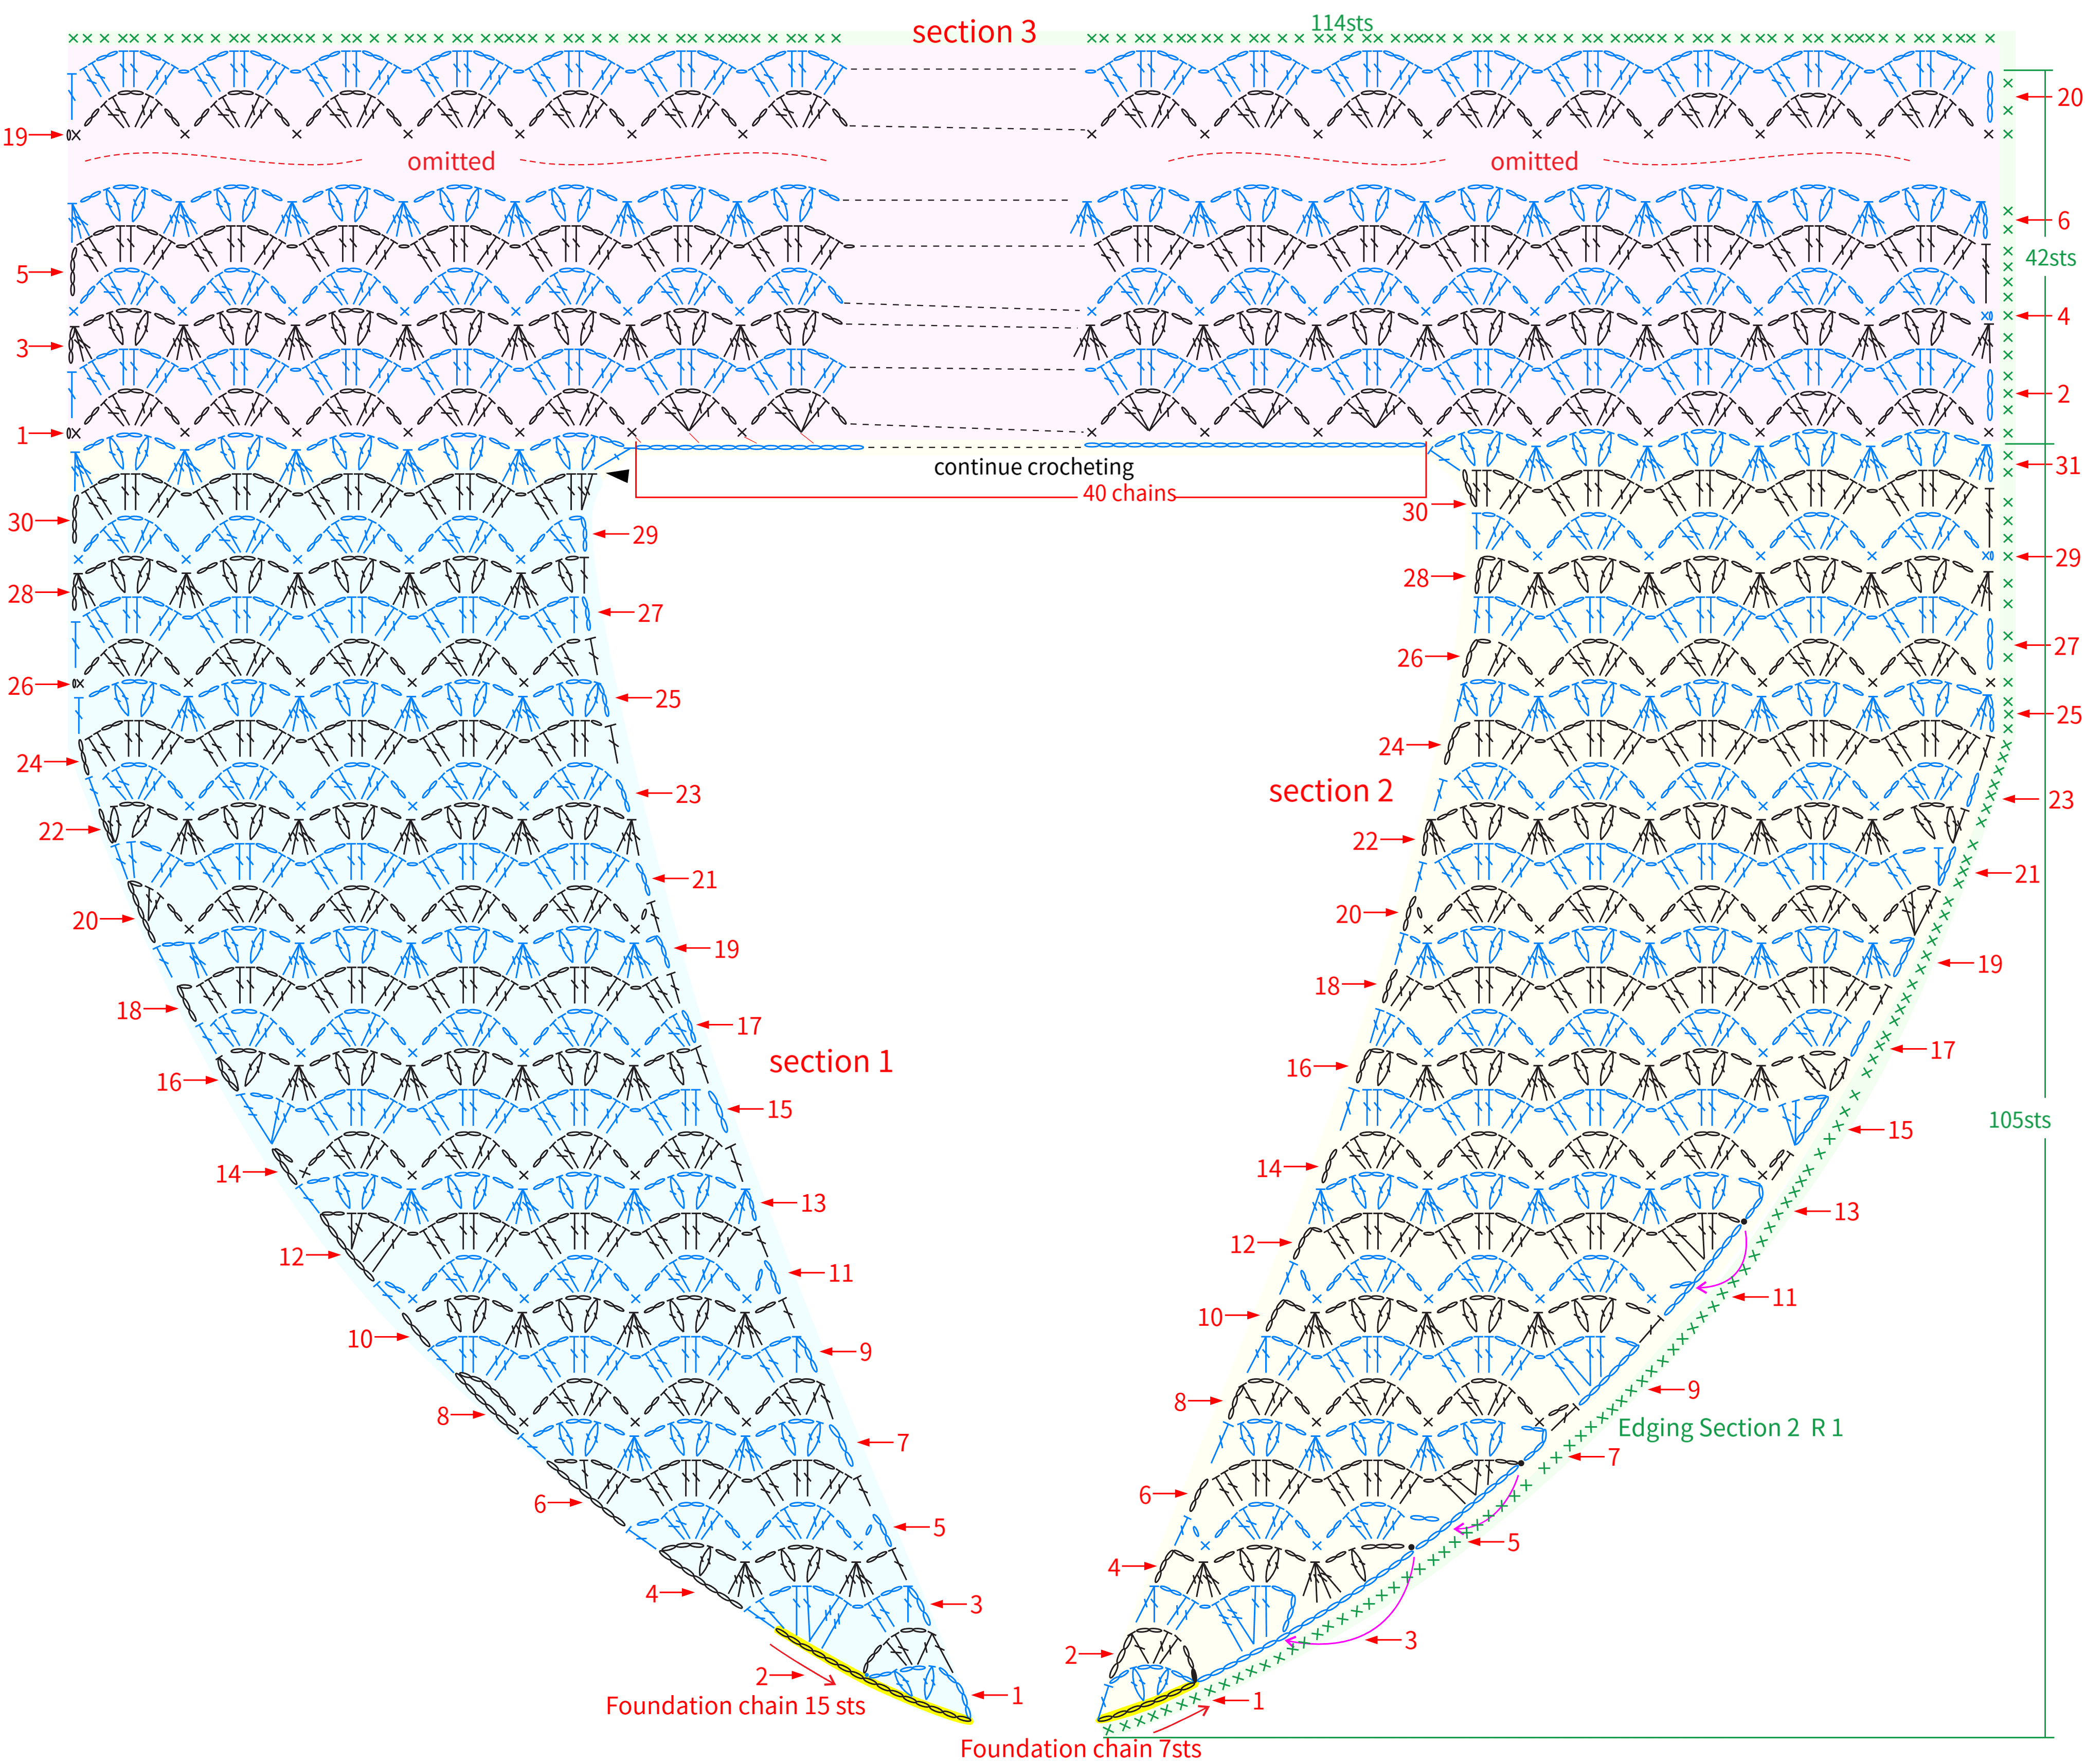
The shawl collar is made up of 3 sections. Start by crocheting section 1, then move on to section 2. When you’re working the last row of section 2, make sure to join it to section 1. Once that’s done, don’t cut the yarn—just keep going and crochet section 3. Please refer to the video demonstration for more details.
Part 5 Joining Together E 80' 50''
Once you've finished the back body, front body, sleeves, and shawl collar, it's time to join them all together. Work from the wrong side, picking up stitches or chain spaces along both edges with single crochets, and chain 2 or 3 in between to bridge the gap. Please refer to the video demonstration for more details.
Part 6 Edging F 95' 47''
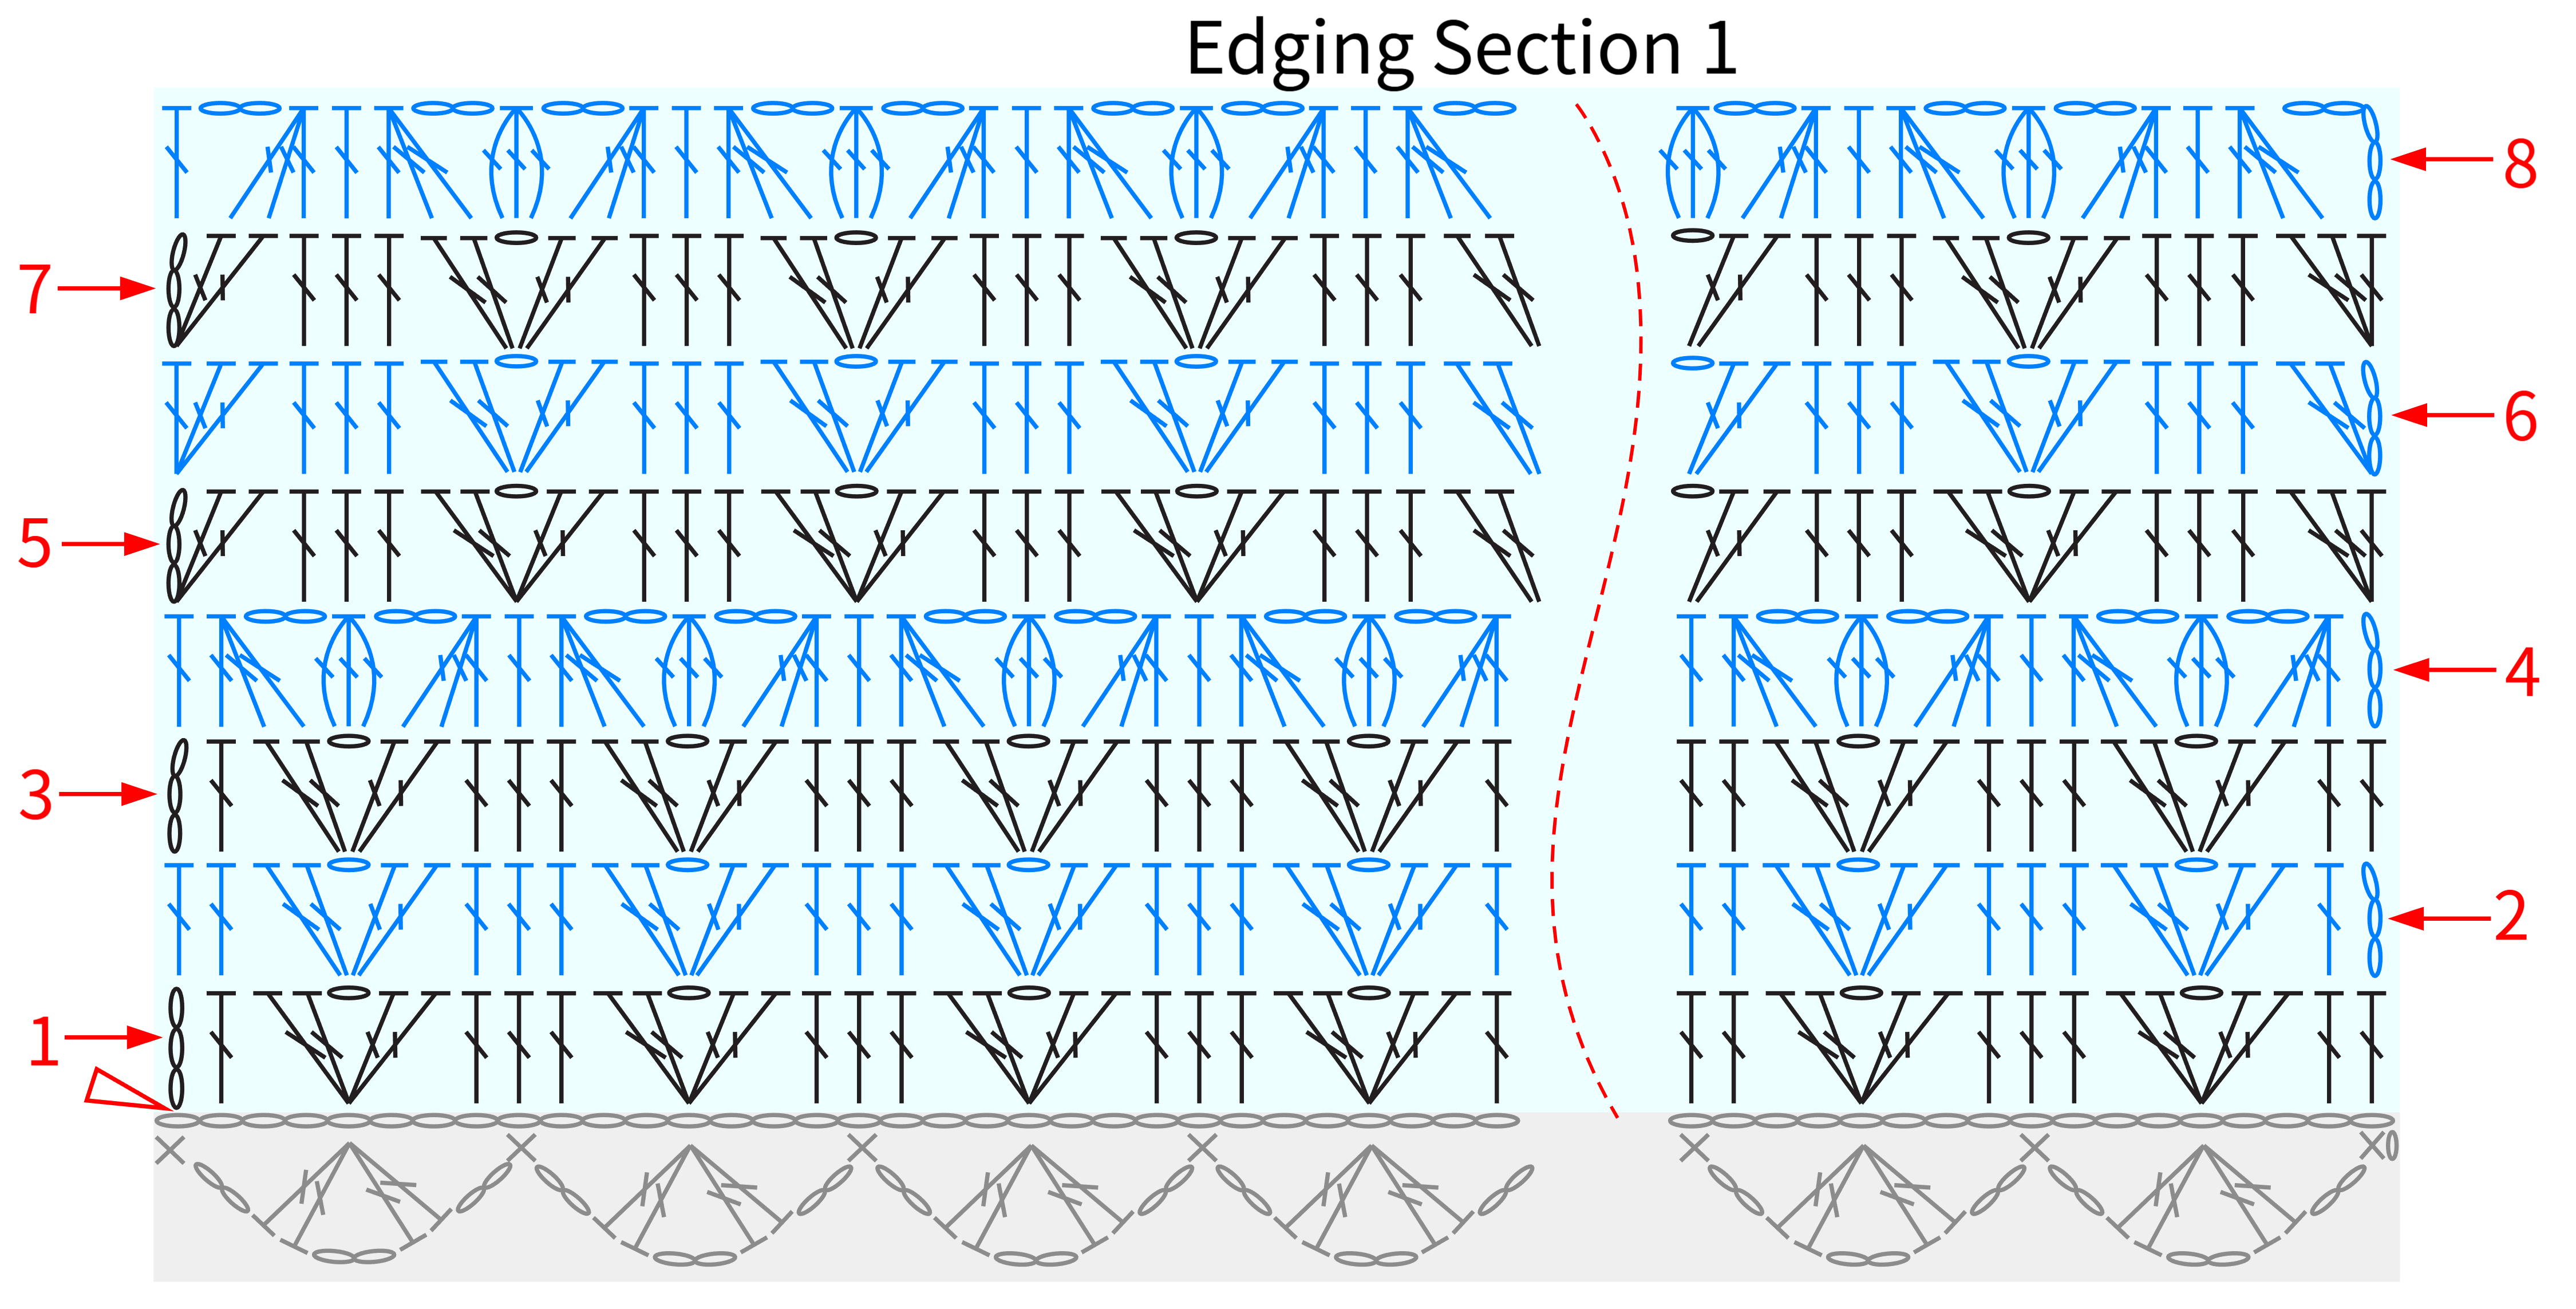
The edging is split into two sections.Section 1 is worked back and forth in rows along the cast-on edge of the front and back bodies,Section 2 is crocheted along the front bands and the shawl collar.Please refer to the video demonstration for more details.

Note: Row 1 of Section 2 has a total of 546 single crochets. You can refer to the shawl collar chart for guidance. Pick up 69 stitches on each front band, 147 stitches on each side of the shawl collar, and 114 stitches on the last row. I suggest checking your stitch count as you go to make sure everything adds up, so you don’t mess up the pattern in Row 2. For the exact placement and distribution of the single crochets, check out the structure diagram and the shawl collar chart. Or, feel free to adjust based on your actual piece—just make sure the total number of single crochets is a multiple of 3.
Part 7 Buttons G 101' 26''
Made by the community