Home / Container
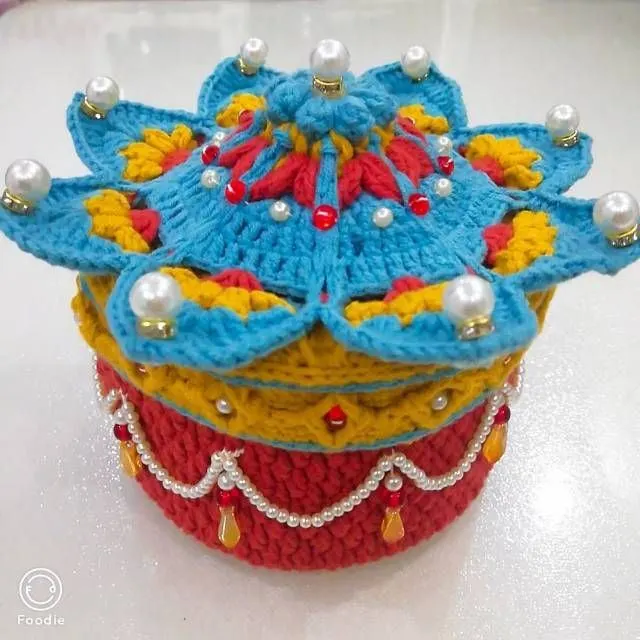
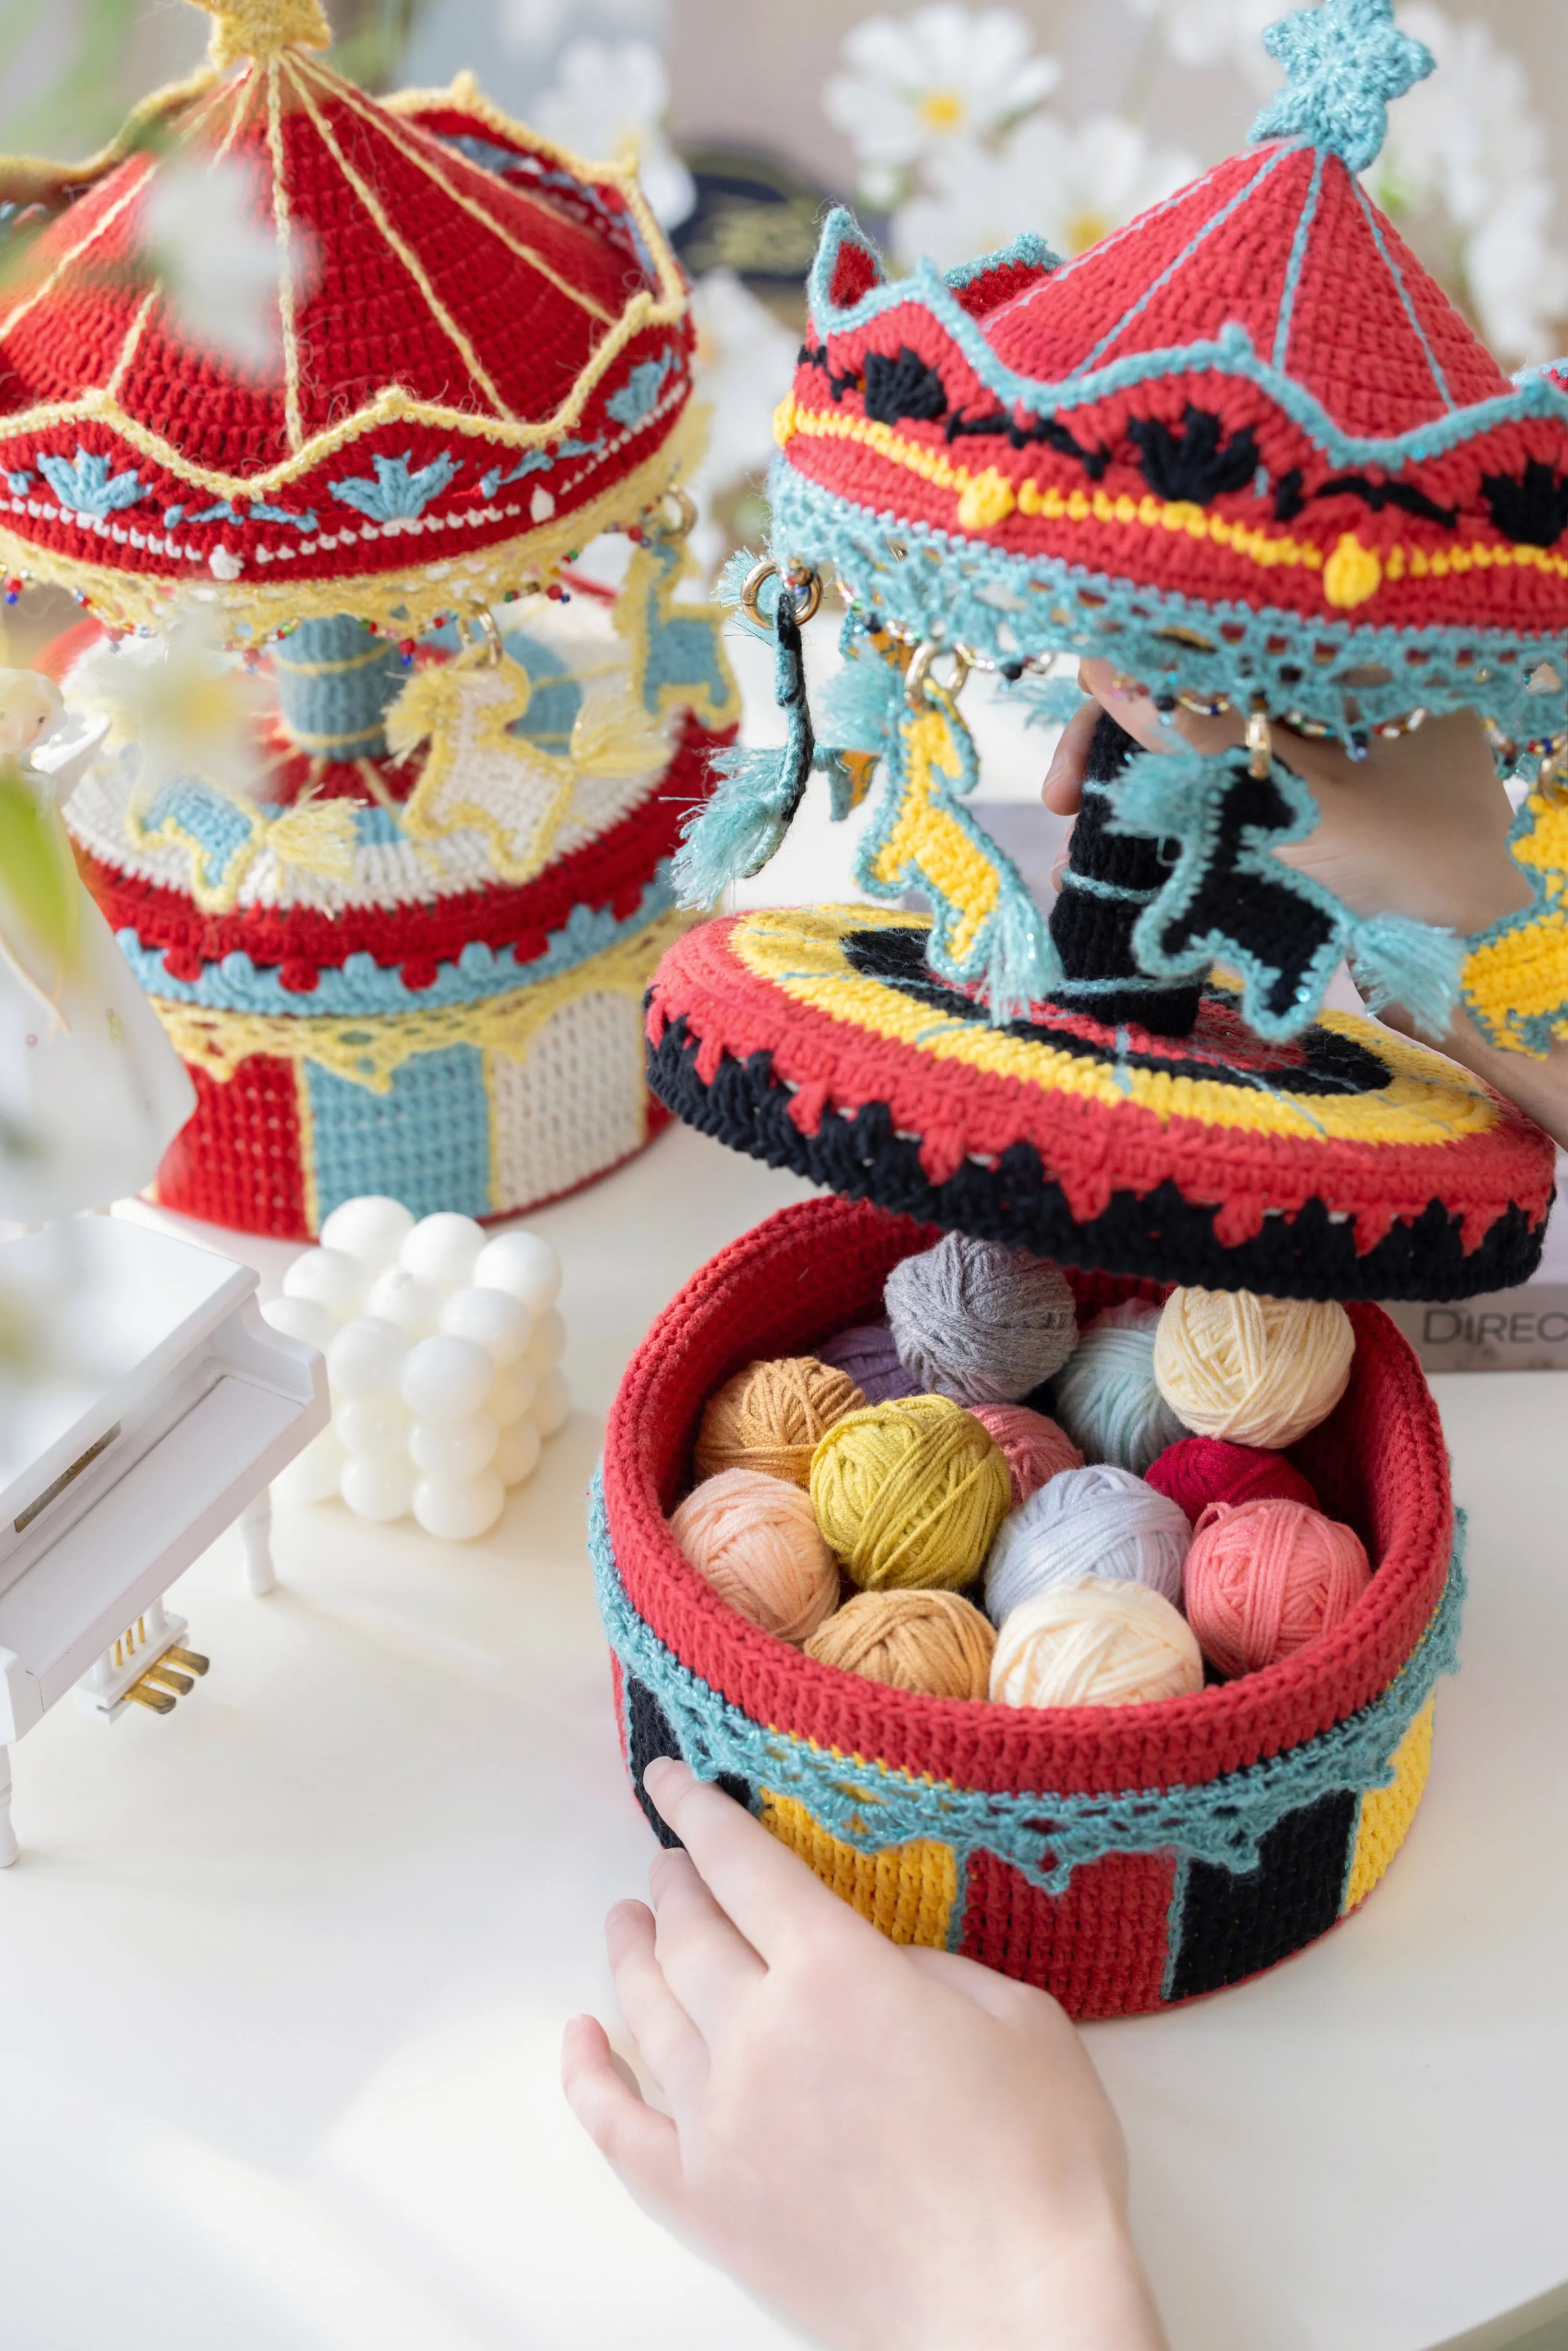
Tang Imperial Canopy Box
Project preview
See the finished project
Pattern format
Instructions
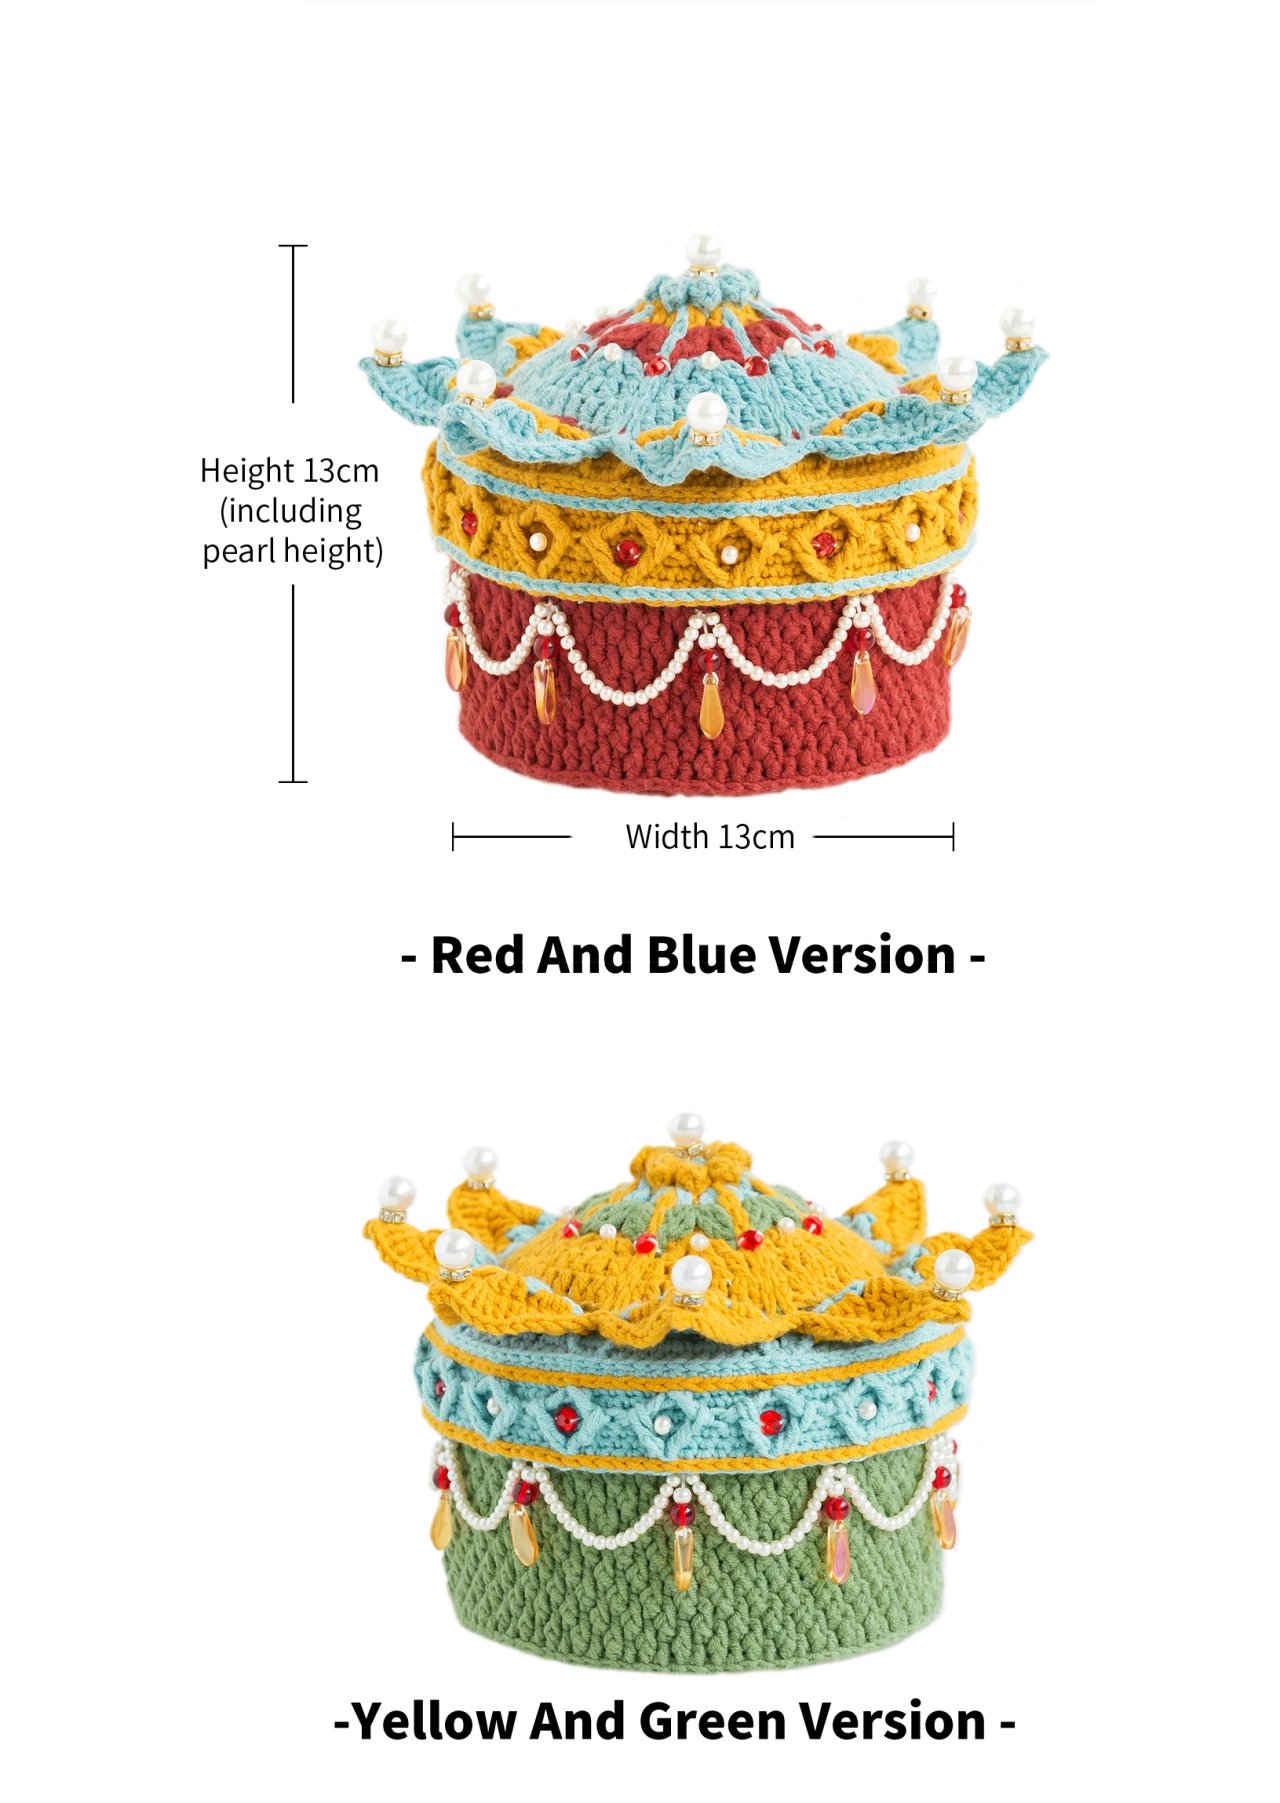
Due to variations in individual tension, the size of the sample is for reference only.
Materials: 4-Ply Combed Cotton
Hook: 2.00 mm crochet hook

Chart Key










Note: This pattern is making in Chinese crochet pattern terms, and the stitch name is written using American terminology. All measurements in charts are in cm.
Part 1 Main part
The main parts consist of the box bottom, box body, and box lid. The box bottom is pre-made, so there's no need to make it. The box body is crocheted onto the box bottom, and the box lid is made separately.
Step 1 Box Body (Red and Blue Version: 24#Red Clay /Yellow and Green Version: 32#Aspen Green)
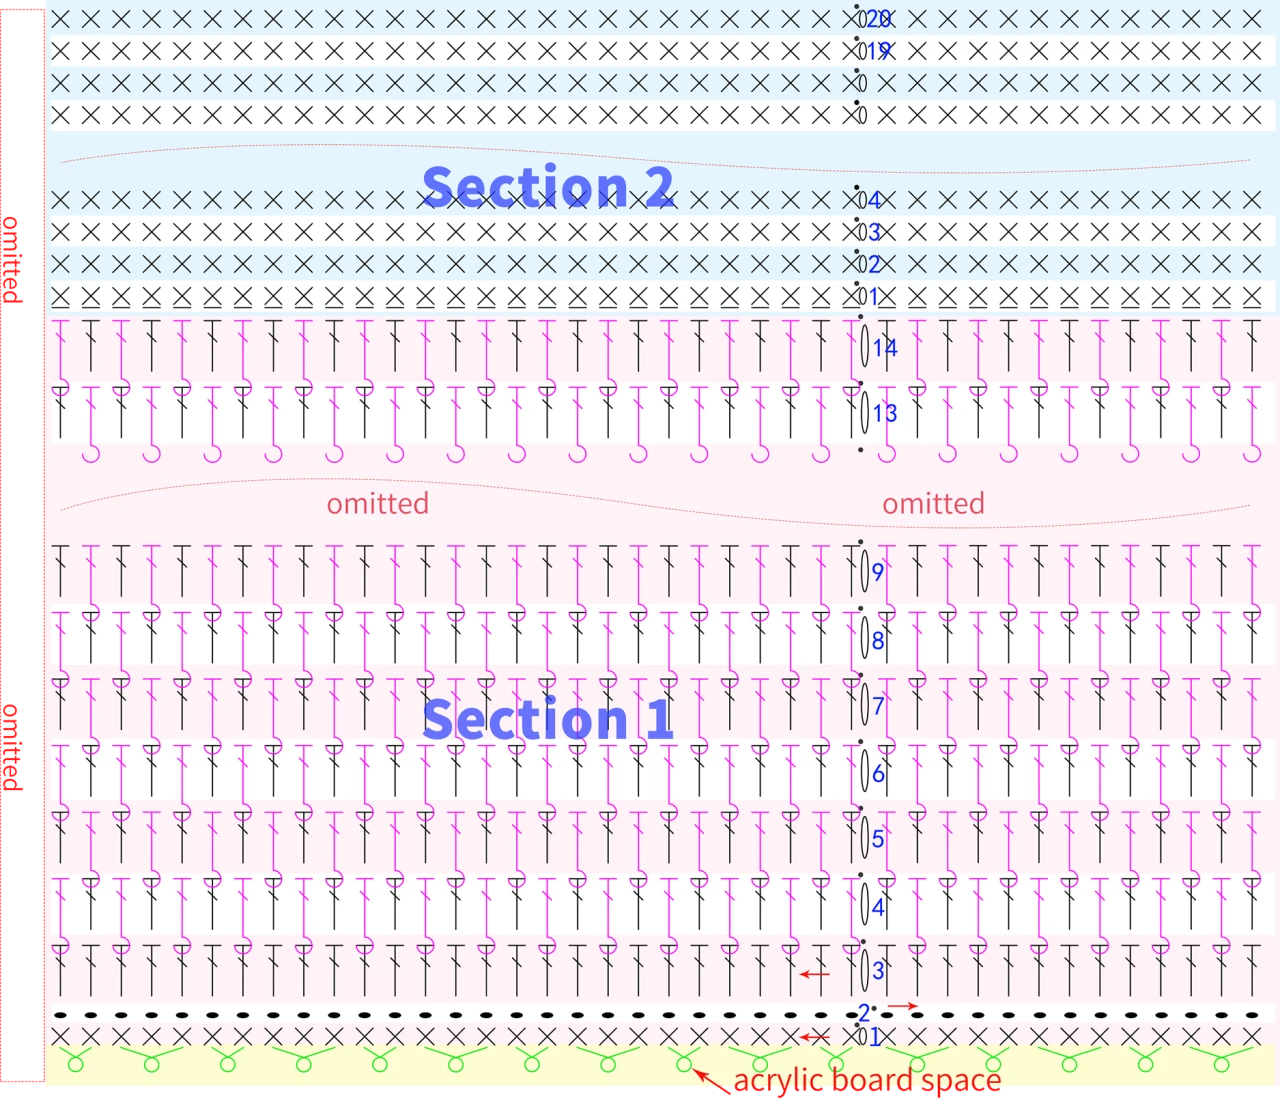
The box body is crocheted in rounds upwards through the holes of the acrylic board, divided into Section 1 A1 and Section 2 A2. After completion, add the grid plate and finally sew the fabric piece to secure it in place.
Note:
① In Section 1, the first round consists of 90 single crochets. Since crochet tension varies from person to person, the number of rounds provided in the chart for Section 1 is for reference only. You can measure as you crochet to reach the desired height, which is approximately 7.5 centimeters for the finished box body. Adjust according to your preference.
② In Section 2, the first round is worked into the back loop only. The number of rounds for Section 2 is also for reference. As you crochet, fold Section 2 inward and compare it with Section 1, crocheting until you reach the position of the bottom acrylic board. Finally, leave a yarn tail about twice the circumference of the box bottom for sewing.
Step 2 Box Lid
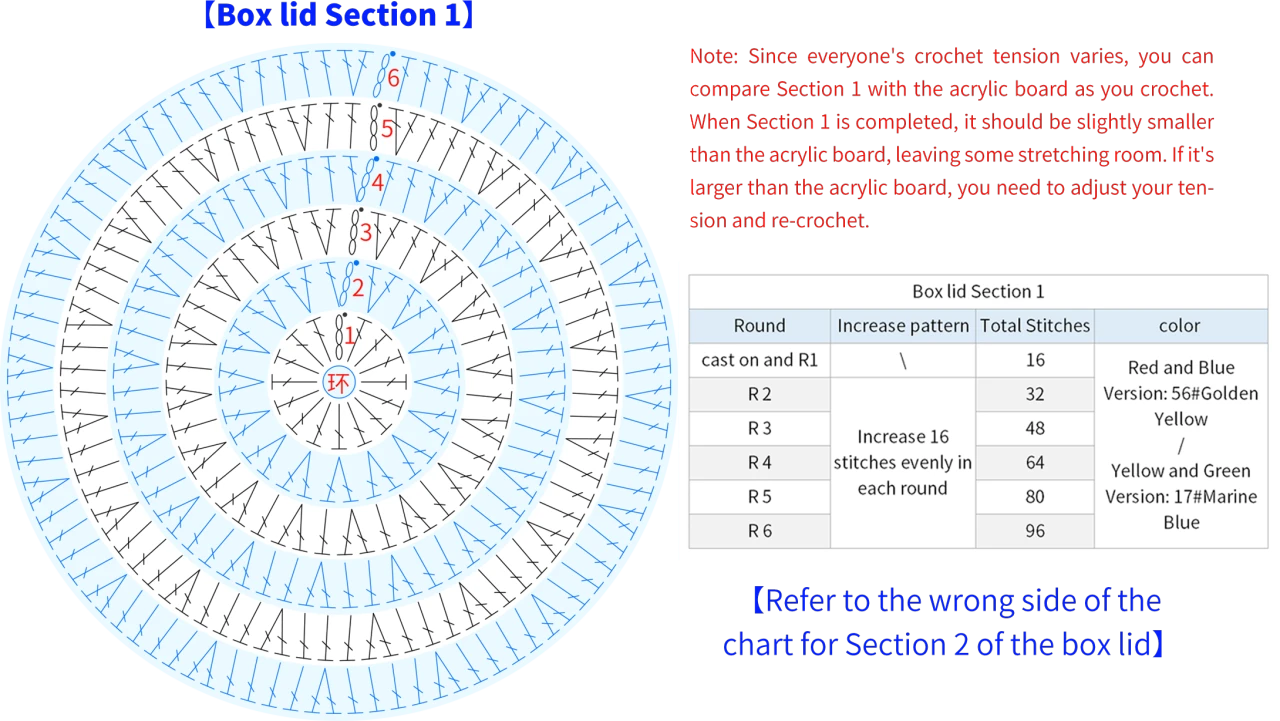
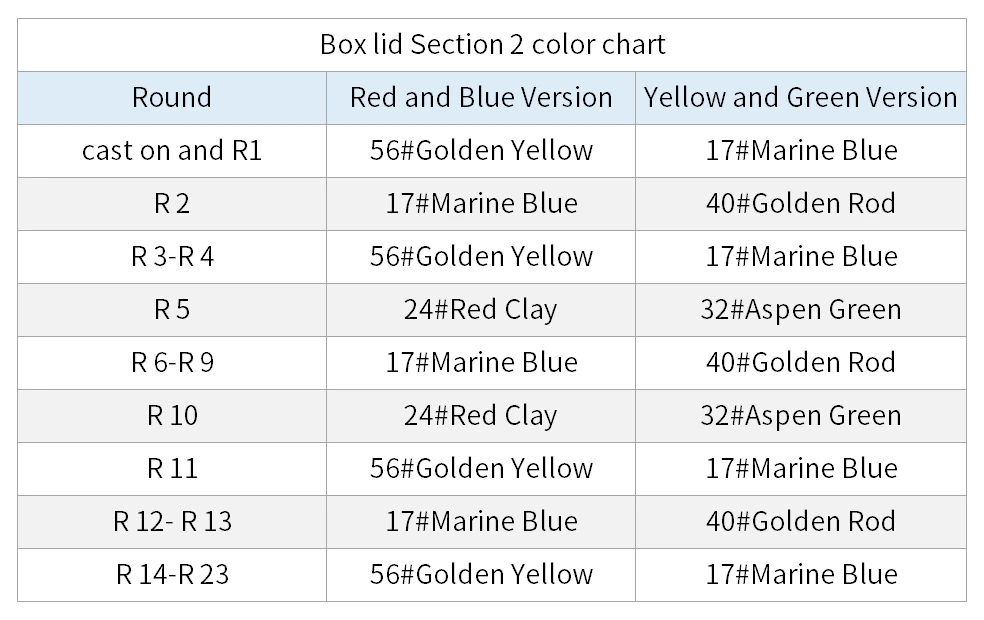
The box lid is divided into Section 1 A3 and Section 2 A4. Section 1 starts with a magic ring and is crocheted in rounds counterclockwise. Section 2 also begins with a magic ring and is crocheted in rounds counterclockwise. During the crocheting process, you need to switch colors and add thin wire at the corresponding round number. After reaching the specified round number, connect it to the acrylic board and add stuffing. Then join it with Section 1. Please refer to the video demonstration for specifics.
Part 2 Accessories
The accessories mainly include bead chain B1, slip stitch decoration B2, pearls, and acrylic rhinestones B3, as well as pearl pendants B4.
Note:
① Secure the box lid closed, with the pearl chain positioned on the box body edge below the corresponding edge of the box lid, securing it once every 8 stitches ;
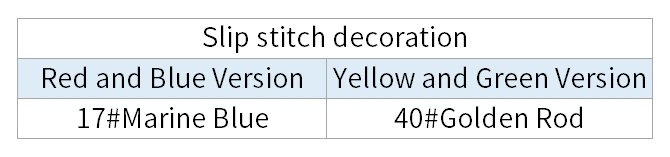
② Make slip stitch decorations at the stitch positions of round 17 and the last round in Section 2 of the box lid ;
③ There are 2 circles of pearl and acrylic stones decoration, one circle is at the 7th round position in Section 2 of the box lid, and the other circle is at the center position of the front post double crochet decrease ;
④ There are a total of 9 pearl pendants, with 1 secured while crocheting Section 2 of the box lid, and the rest fixed at the 8 pointed positions of the box lid.
Note:
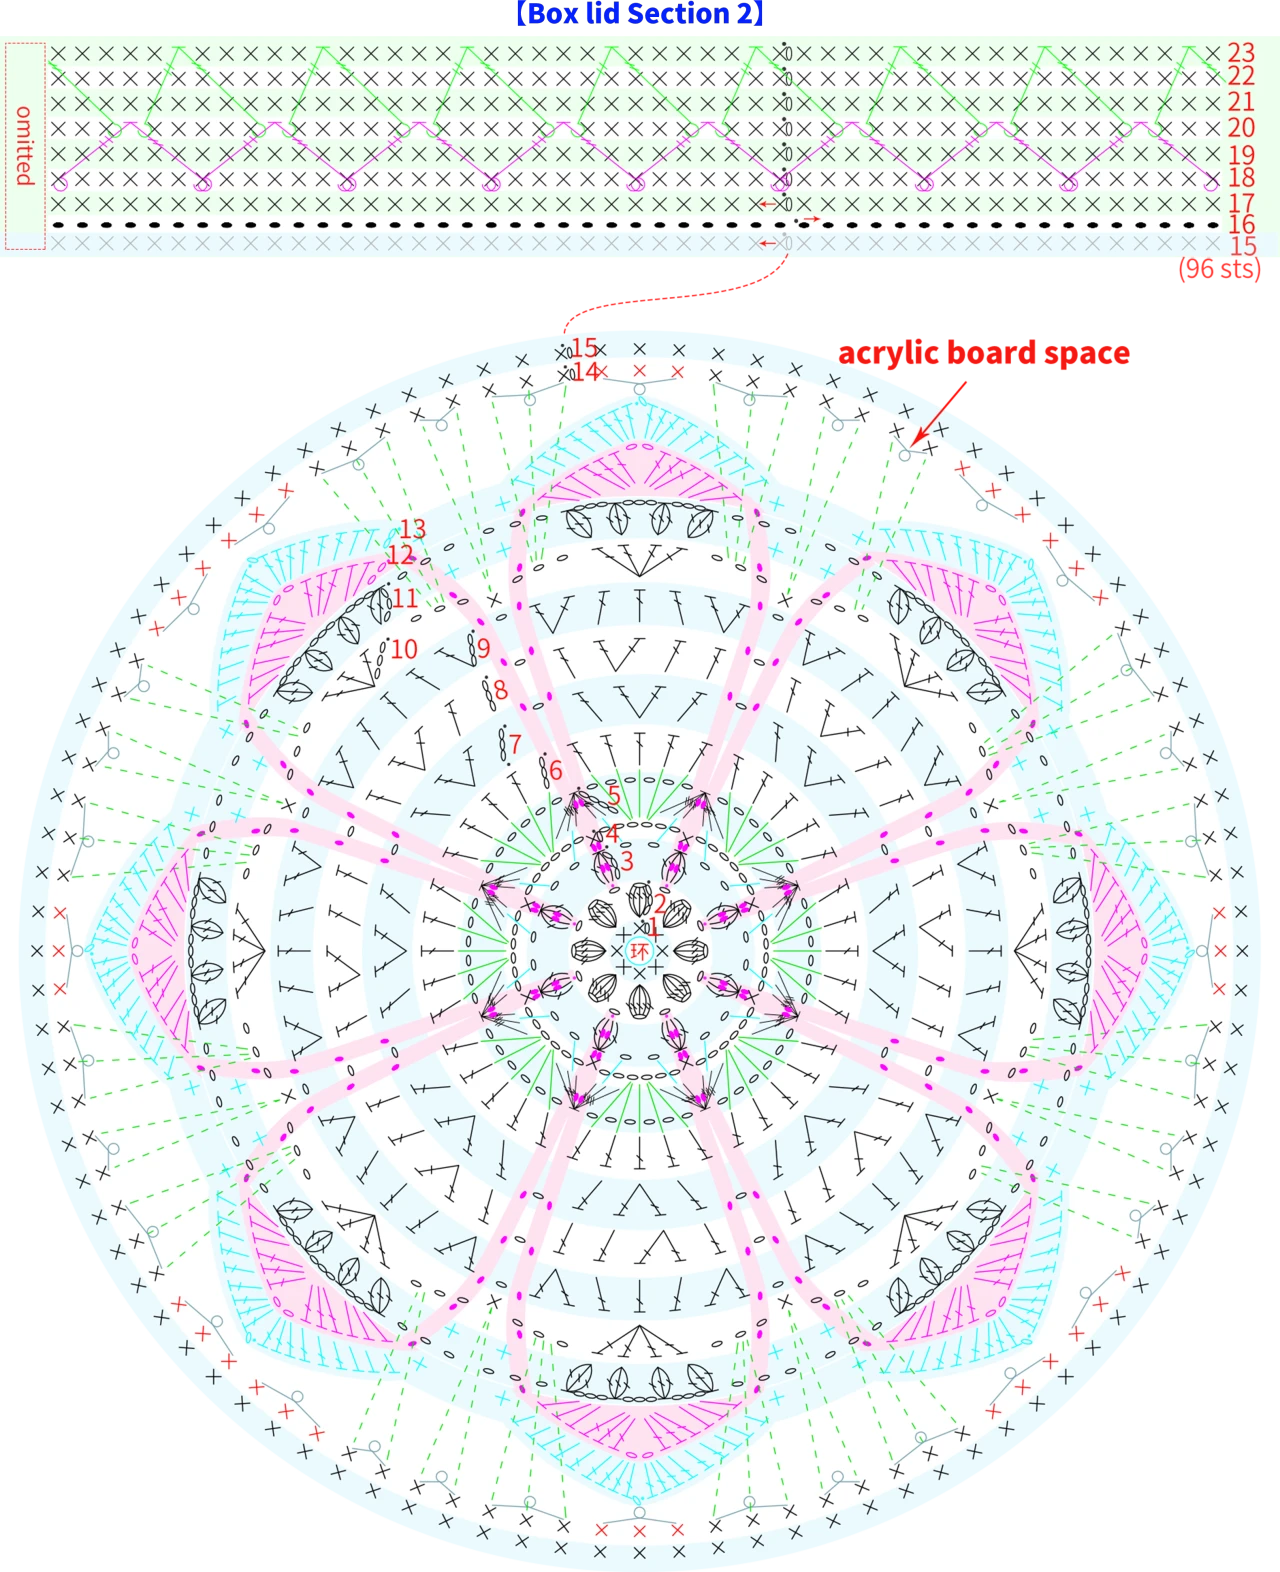
① After completing Round 10, compare the fabric piece with the acrylic board. The chain stitch positions of this round should be approximately below the holes on the acrylic board; it's fine if it's slightly smaller. If it exceeds too much, adjust your tension and re-crochet the last few rounds;
② When crocheting Round 13, add a thin wire (note to fold the wire in half before adding). For convenience in sewing, after completing Round 13 of Section 2, sew a pearl pendant at the center position on the right side of the fabric piece first;
③ When crocheting Round 14, you need to add the acrylic board. The red stitches are only crocheted into the holes of the acrylic board, with 3 stitches per hole. For other stitch patterns, crochet simultaneously into the corresponding positions of Round 10 and the holes of the acrylic board. When nearing completion and there's still some distance left, stuff in waste yarn and apply glue around to secure it;
④ When crocheting Round 15, crochet together with the chain braid from Round 11, and join it with Section 1 of the box lid.
Made by the community