Accessories / Headwear
Tilted Wind
Project preview
See the finished project
Pattern format
Instructions
Watch and follow
Video tutorial
| Style | Yarn | Color |
|---|---|---|
| Black Beauty Version | Combed 3# Lace |  03#Bleached Sand x 4 03#Bleached Sand x 4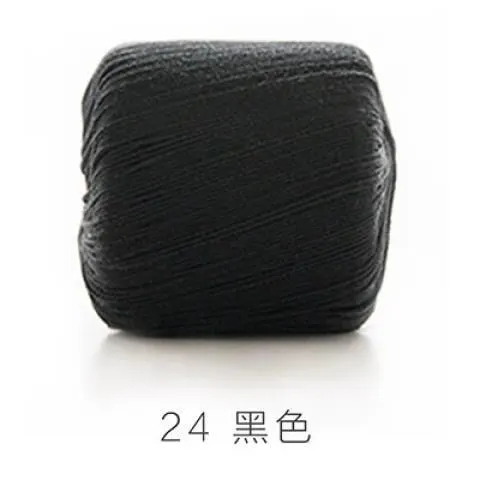 24#Black Beauty x 2 24#Black Beauty x 2 |
| Green Milieu Version | Combed 3# Lace | 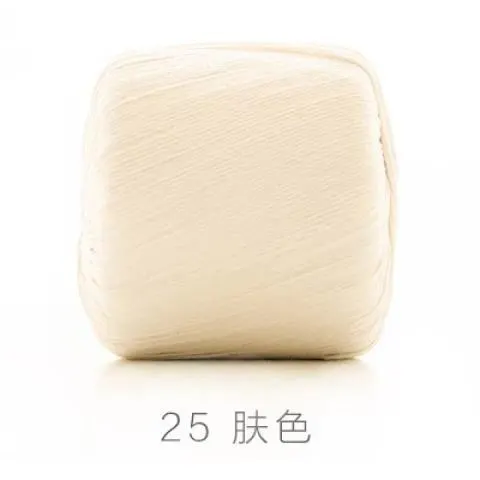 25#Sheer Pink x 4 25#Sheer Pink x 4 58#Green Milieu x 2 58#Green Milieu x 2 |
| Moonlight Blue Version | Combed 3# Lace |  52#Moonlight Blue x 2 52#Moonlight Blue x 2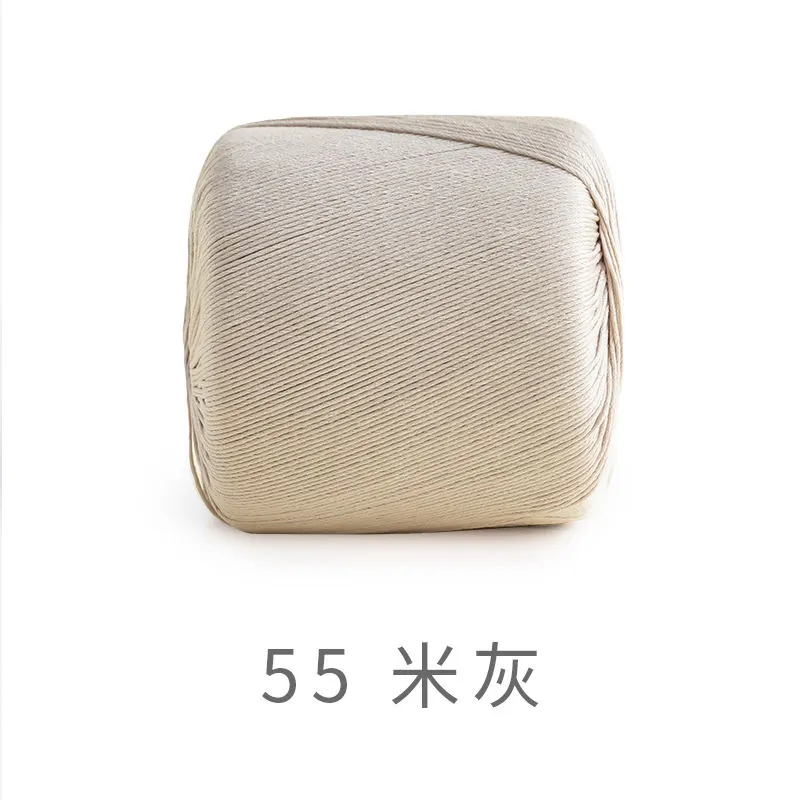 55#Gray Morn x 4 55#Gray Morn x 4 |
| Dusky Orchid Version | Combed 3# Lace |  05#Pearl x 4 05#Pearl x 4 53#Dusky Orchid x 2 53#Dusky Orchid x 2 |
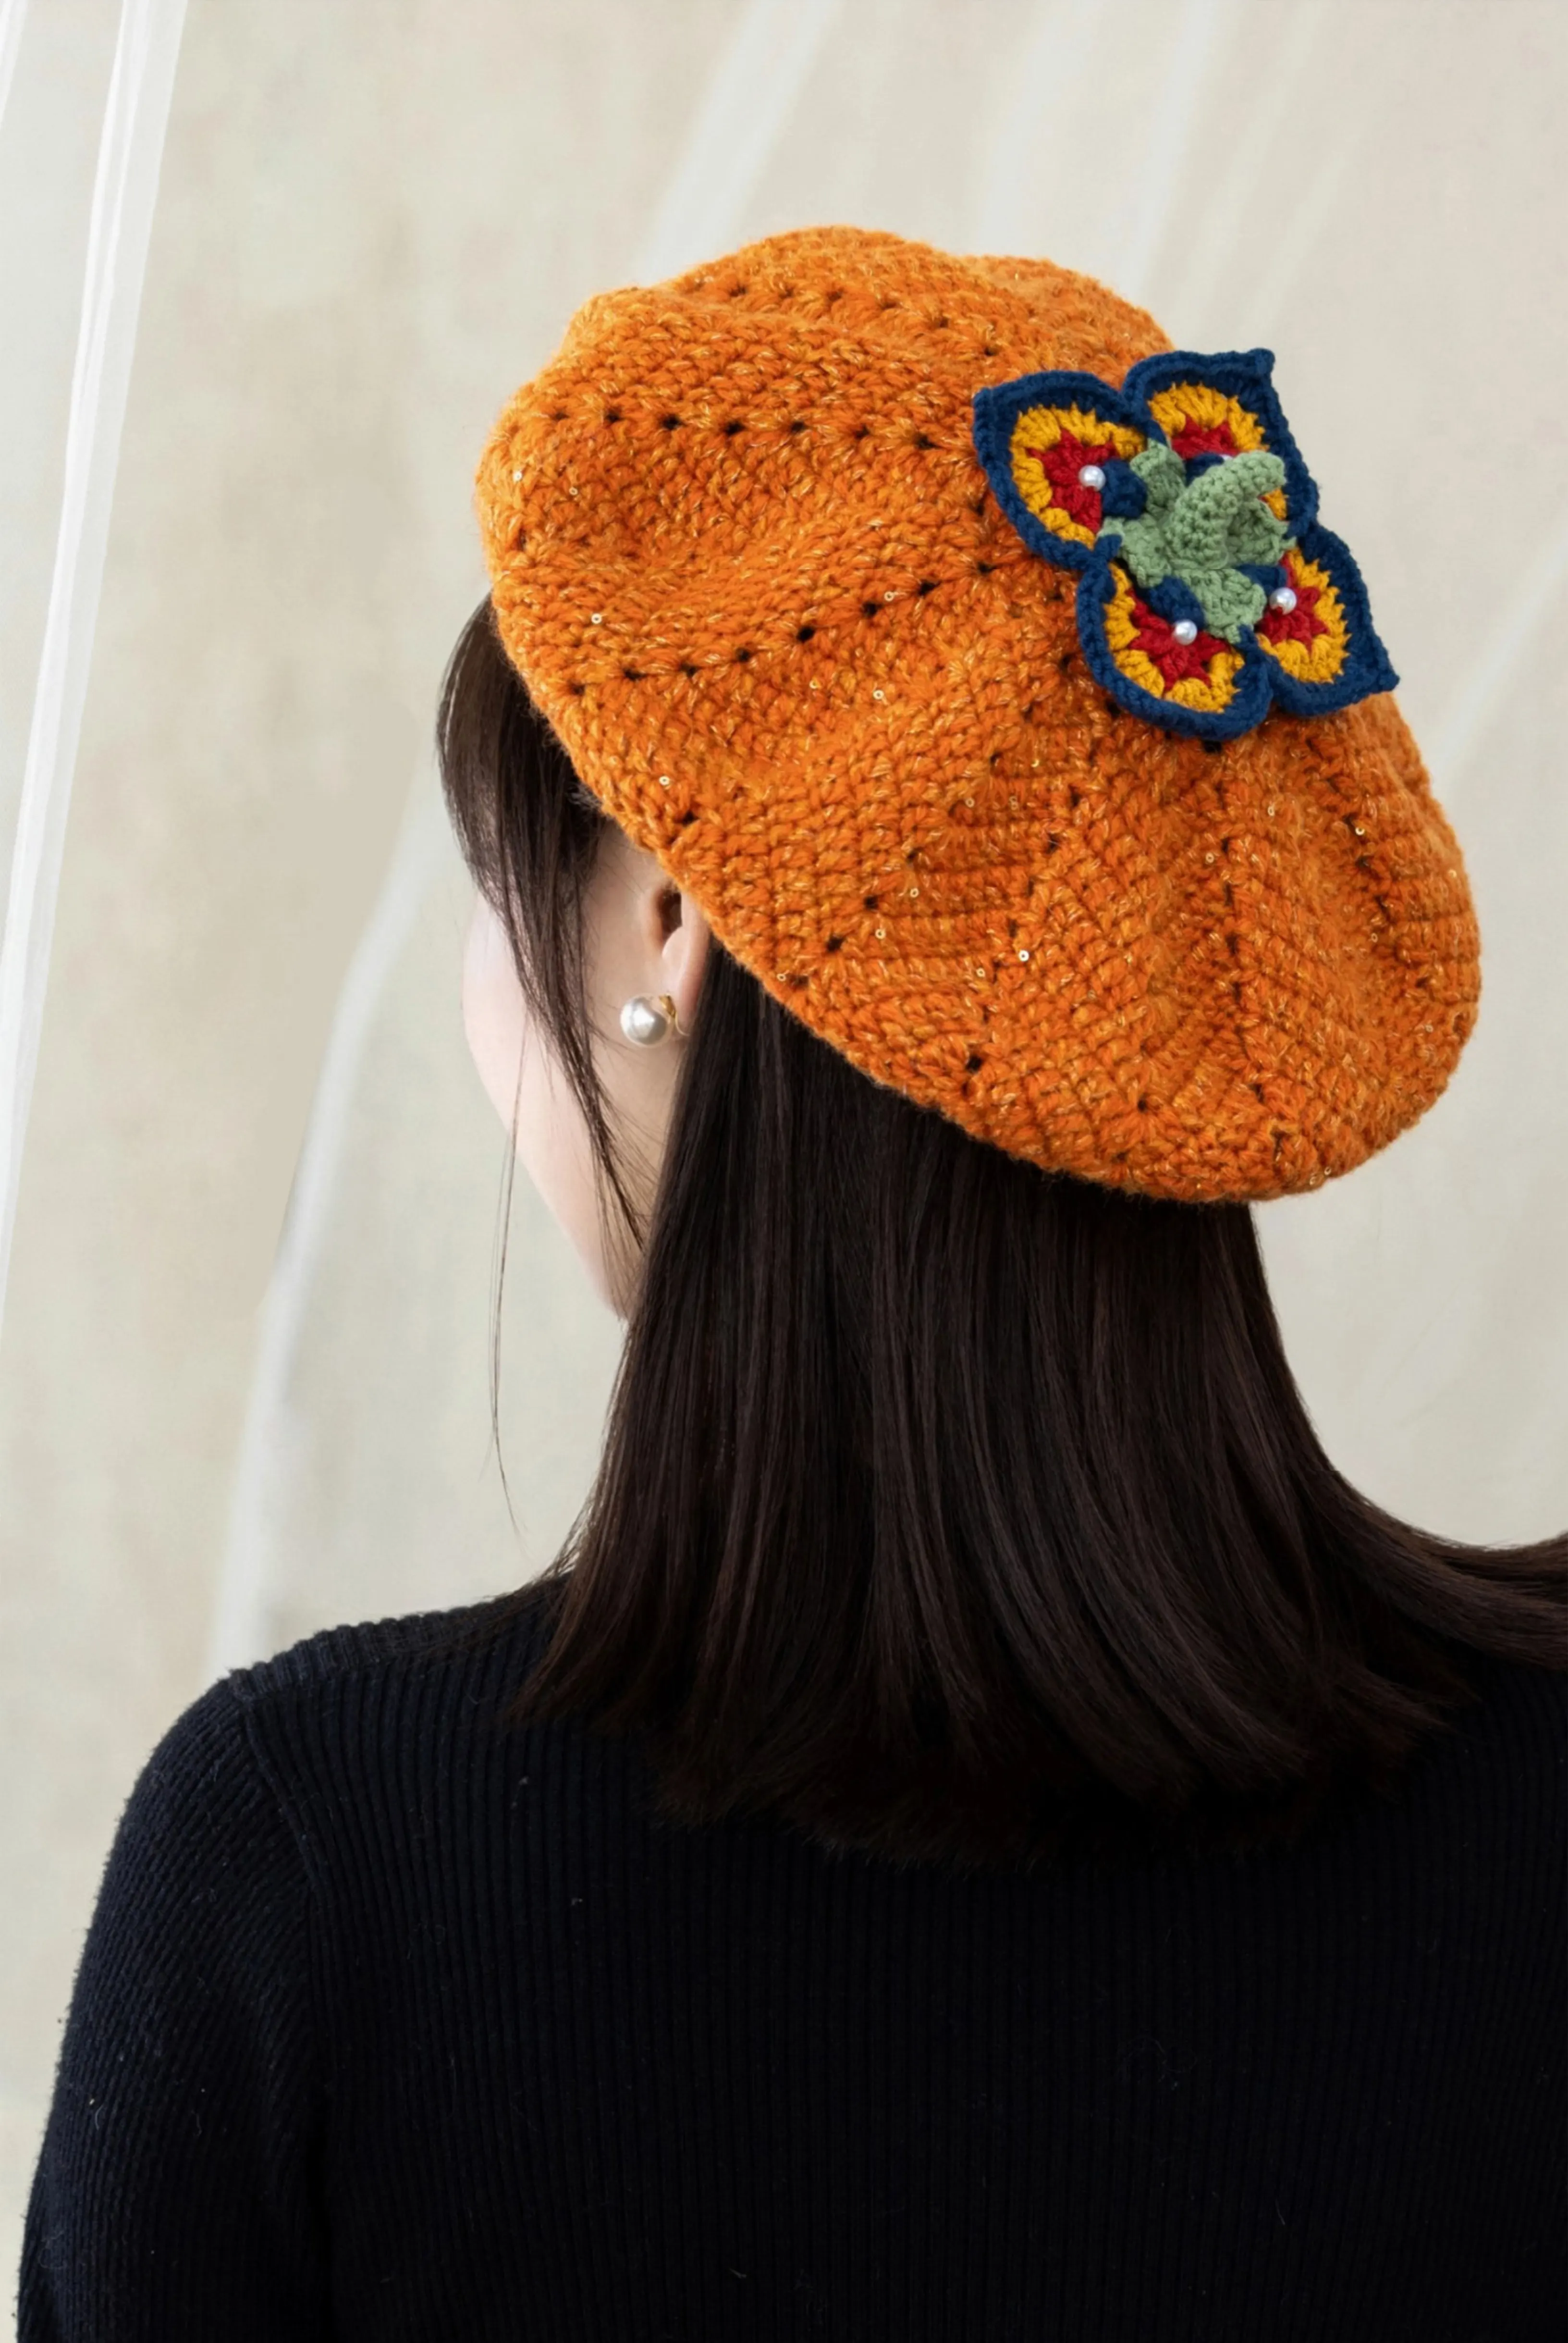
This hat consists of the crown, body, brim, bow, ties, and sweatband. Crochet each part separately first, then assemble them together.
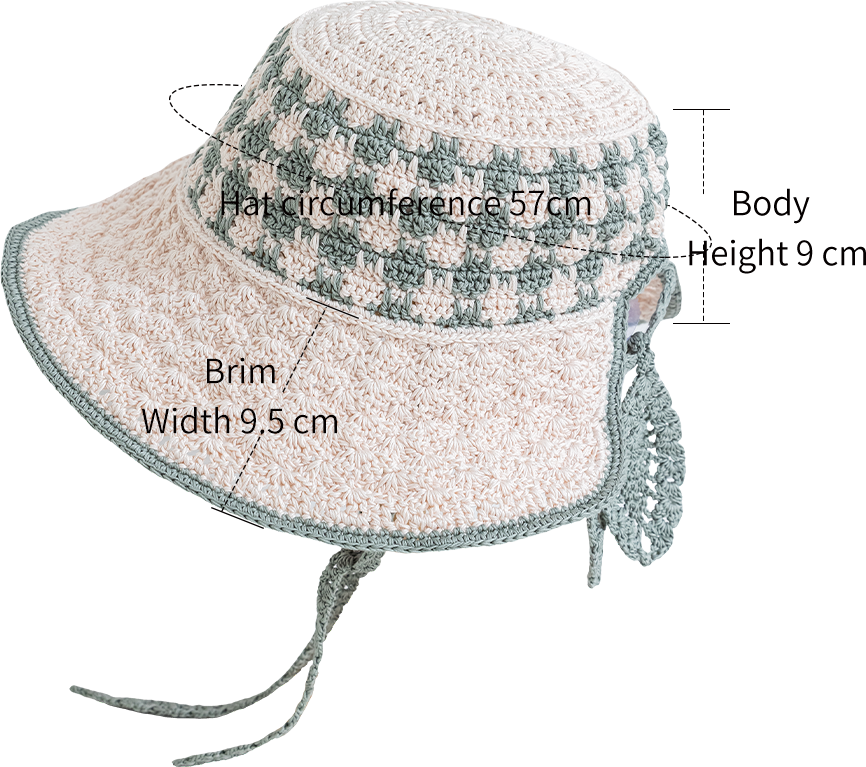
The handcrafted measurements may have an error of 1 to 2 cm.
Due to variations in individual tension, the size of the sample is for reference only.
Materials: Combed 3# Lace
Tools:3.00 mm crochet hook
Chart Key









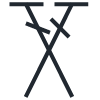
Note: 1. This pattern is making in Chinese crochet pattern terms, and the stitch name is written using American terminology. All measurements in charts are in cm.


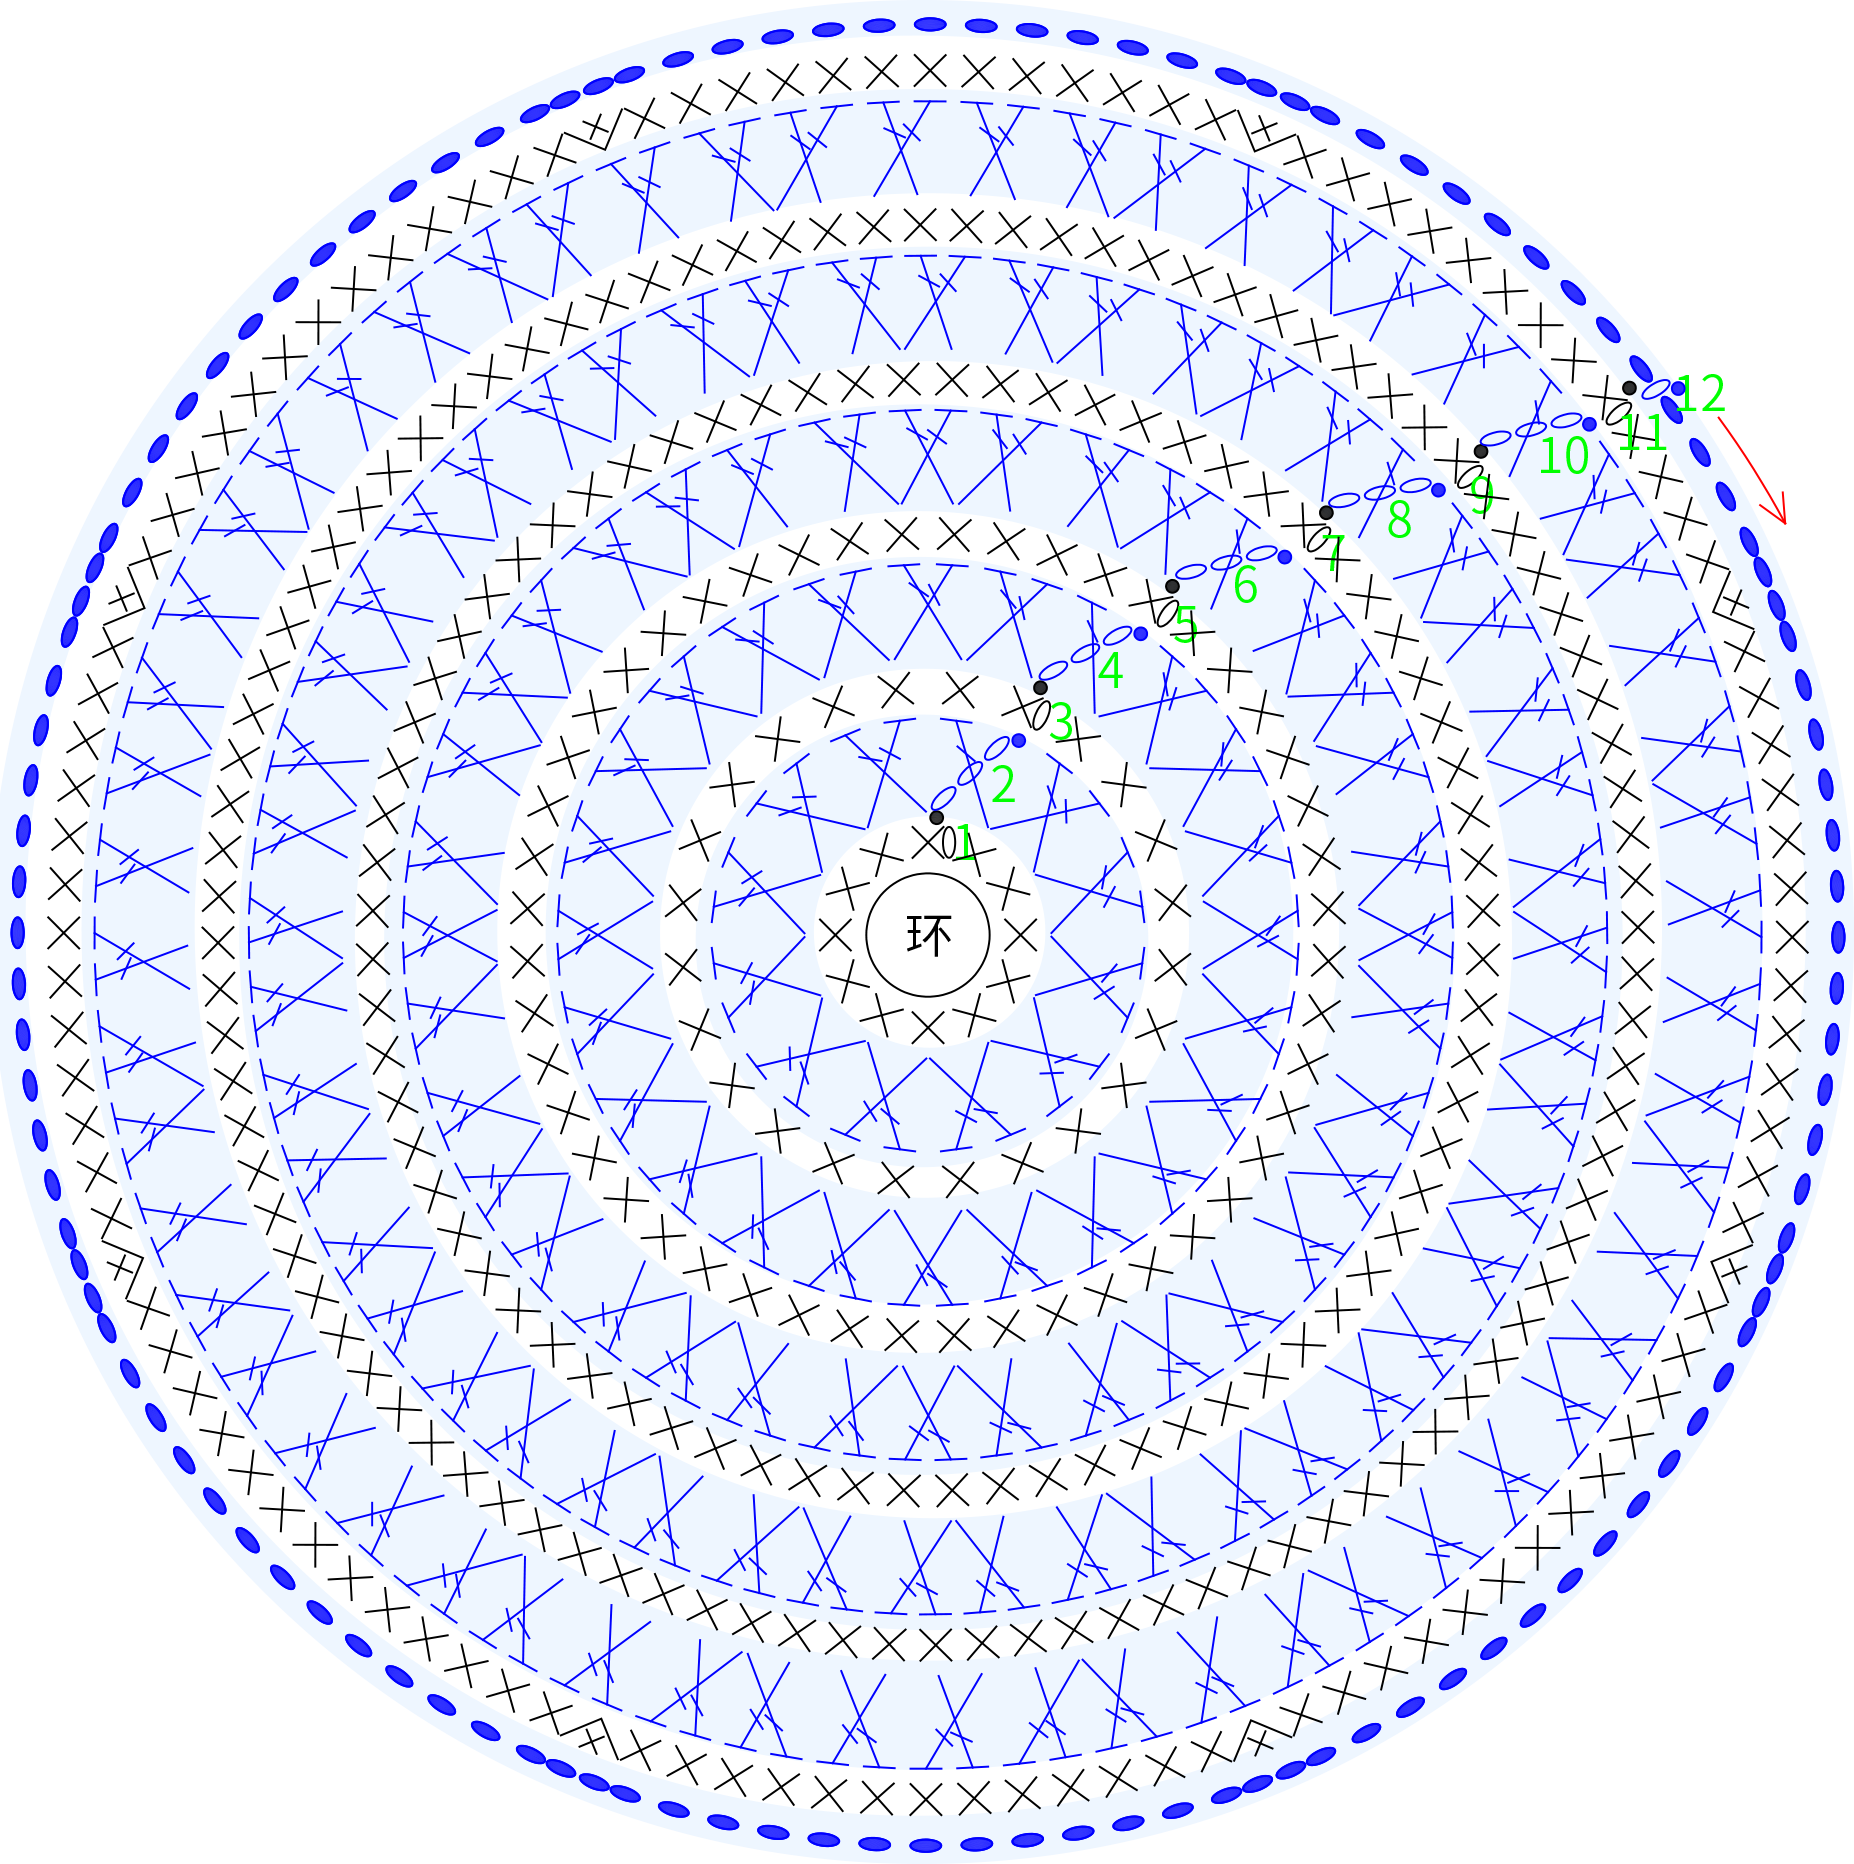
Part 1 The Crown A 00' 35''
The crown of the hat uses the magic ring method, crocheting in rounds counterclockwise from the center out. Please refer to the video demonstration for more details.
Note: The finished measurement after completing the sixth round should be 9.5 cm, and the finished measurement after completing the crown should be 16 cm. Measure the fabric size as you crochet the edging. If there is a significant difference from the dimensions marked on the chart, it is recommended to adjust your tension and re-crochet.
| Part | Strand | Rounds/Rows | Color | ||||
| Black Beauty Version | Green Milieu Version | Gray Morn Version | Dusky Orchid Version | ||||
| Crown | Two Strands | 03#Bleached Sand | 25#Sheer Pink | 55#Gray Morn | 05#Pearl | ||
| Body | Two Strands | R 1 | 03#Bleached Sand | 25#Sheer Pink | 55#Gray Morn | 05#Pearl | |
| R 2 -R 3 | 24#Black Beauty | 58#Green Milieu | 52#Moonlight Blue | 53#Dusky Orchid | |||
| R 4 -R 5 | 03#Bleached Sand | 25#Sheer Pink | 55#Gray Morn | 05#Pearl | |||
| R 6 -R 7 | 24#Black Beauty | 58#Green Milieu | 52#Moonlight Blue | 53#Dusky Orchid | |||
| R 8 -R 9 | 03#Bleached Sand | 25#Sheer Pink | 55#Gray Morn | 05#Pearl | |||
| R 10 | 24#Black Beauty | 58#Green Milieu | 52#Moonlight Blue | 53#Dusky Orchid | |||
| R 11 | |||||||
| R 12 -R 13 | 03#Bleached Sand | 25#Sheer Pink | 55#Gray Morn | 05#Pearl | |||
| R 14 | 24#Black Beauty | 58#Green Milieu | 52#Moonlight Blue | 53#Dusky Orchid | |||
| R 15 -R 16 | 03#Bleached Sand | 25#Sheer Pink | 55#Gray Morn | 05#Pearl | |||
| Brim | Section 1 | Two Strands | 03#Bleached Sand | 25#Sheer Pink | 55#Gray Morn | 05#Pearl | |
| Section 2 | Two Strands | R 1 | 03#Bleached Sand | 25#Sheer Pink | 55#Gray Morn | 05#Pearl | |
| R 2 -R 3 | 24#Black Beauty | 58#Green Milieu | 52#Moonlight Blue | 53#Dusky Orchid | |||
| Bow/Ties | One Strand | 24#Black Beauty | 58#Green Milieu | 52#Moonlight Blue | 53#Dusky Orchid | ||
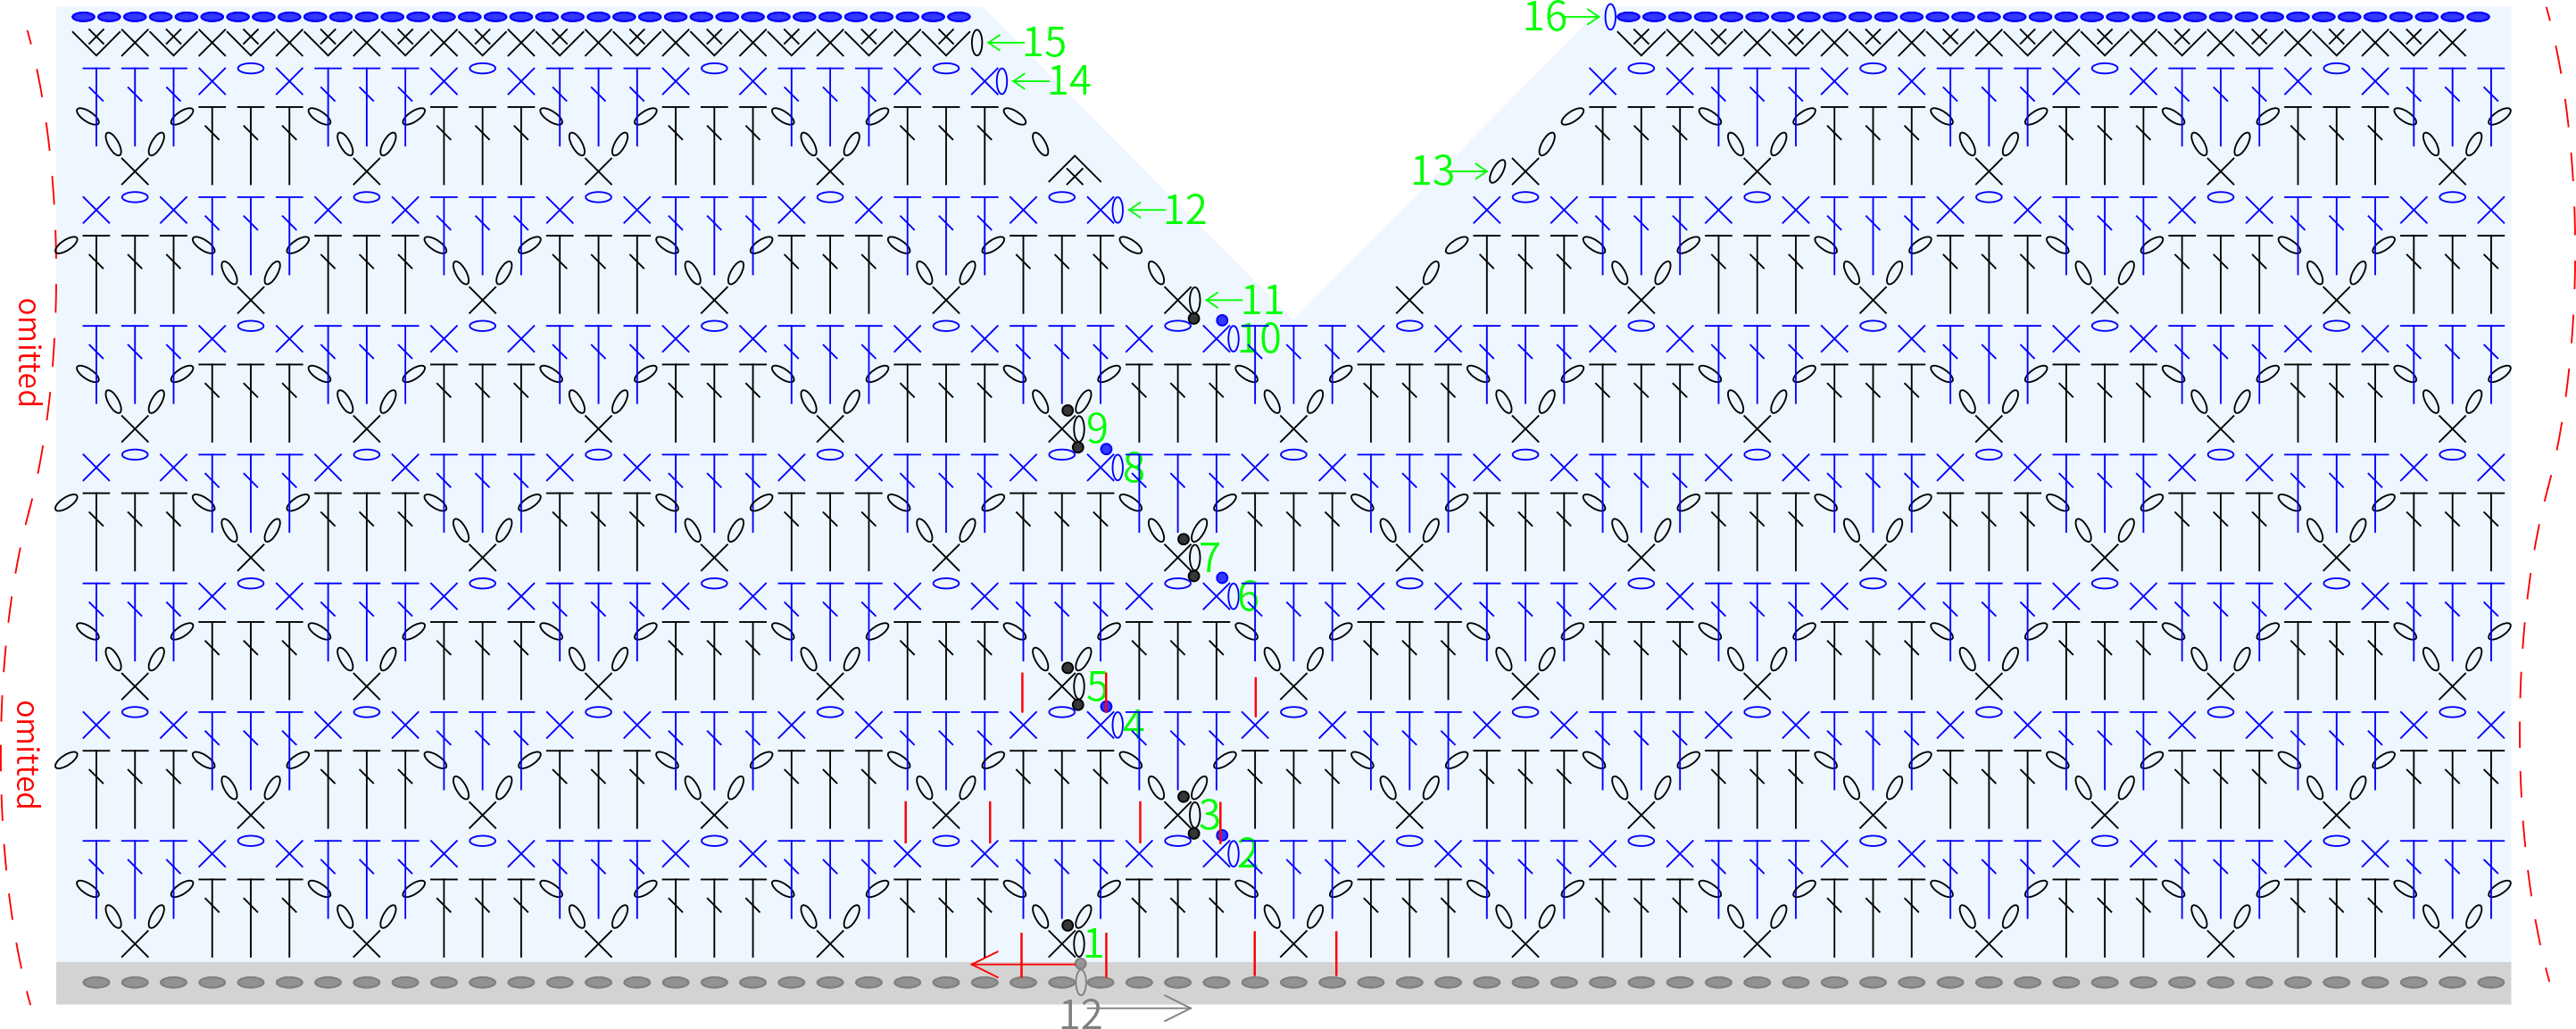
Part 2 The Body B 26' 02''
First, crochet in rounds along the top of the hat, then work back and forth after reaching a certain number of rounds. You need to change colors while crocheting. Pay attention to try it on as you crochet the edges, adjust your tension according to the actual situation to ensure it fits properly. Please refer to the video demonstration for more details.
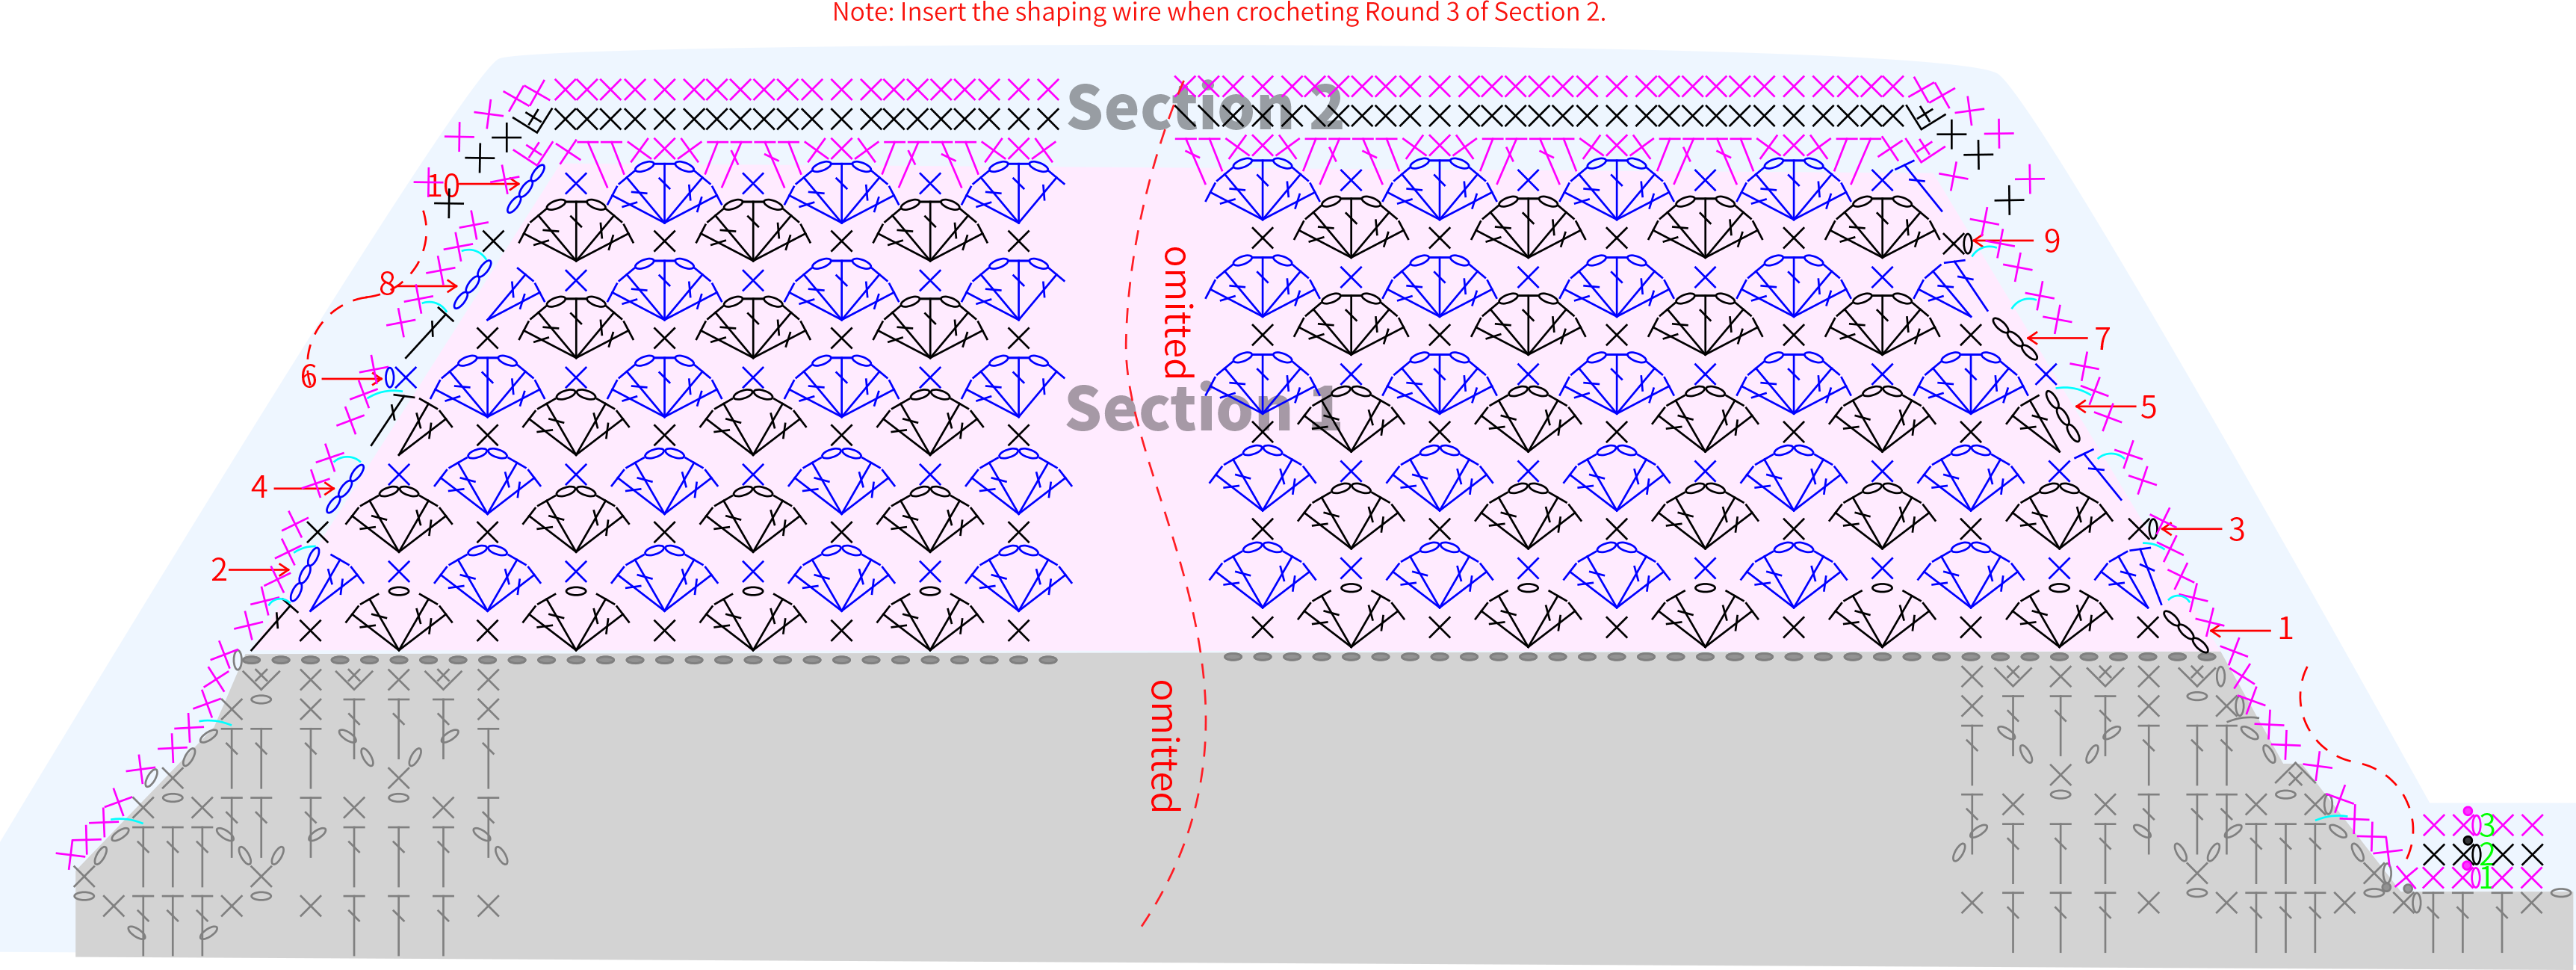
Part 3 The Brim C 52' 46''
The brim is divided into part 1 and part 2. Crochet part 1 first, then crochet part 2 along the outer-ring and add the shaping wire. Please refer to the video demonstration for more details.
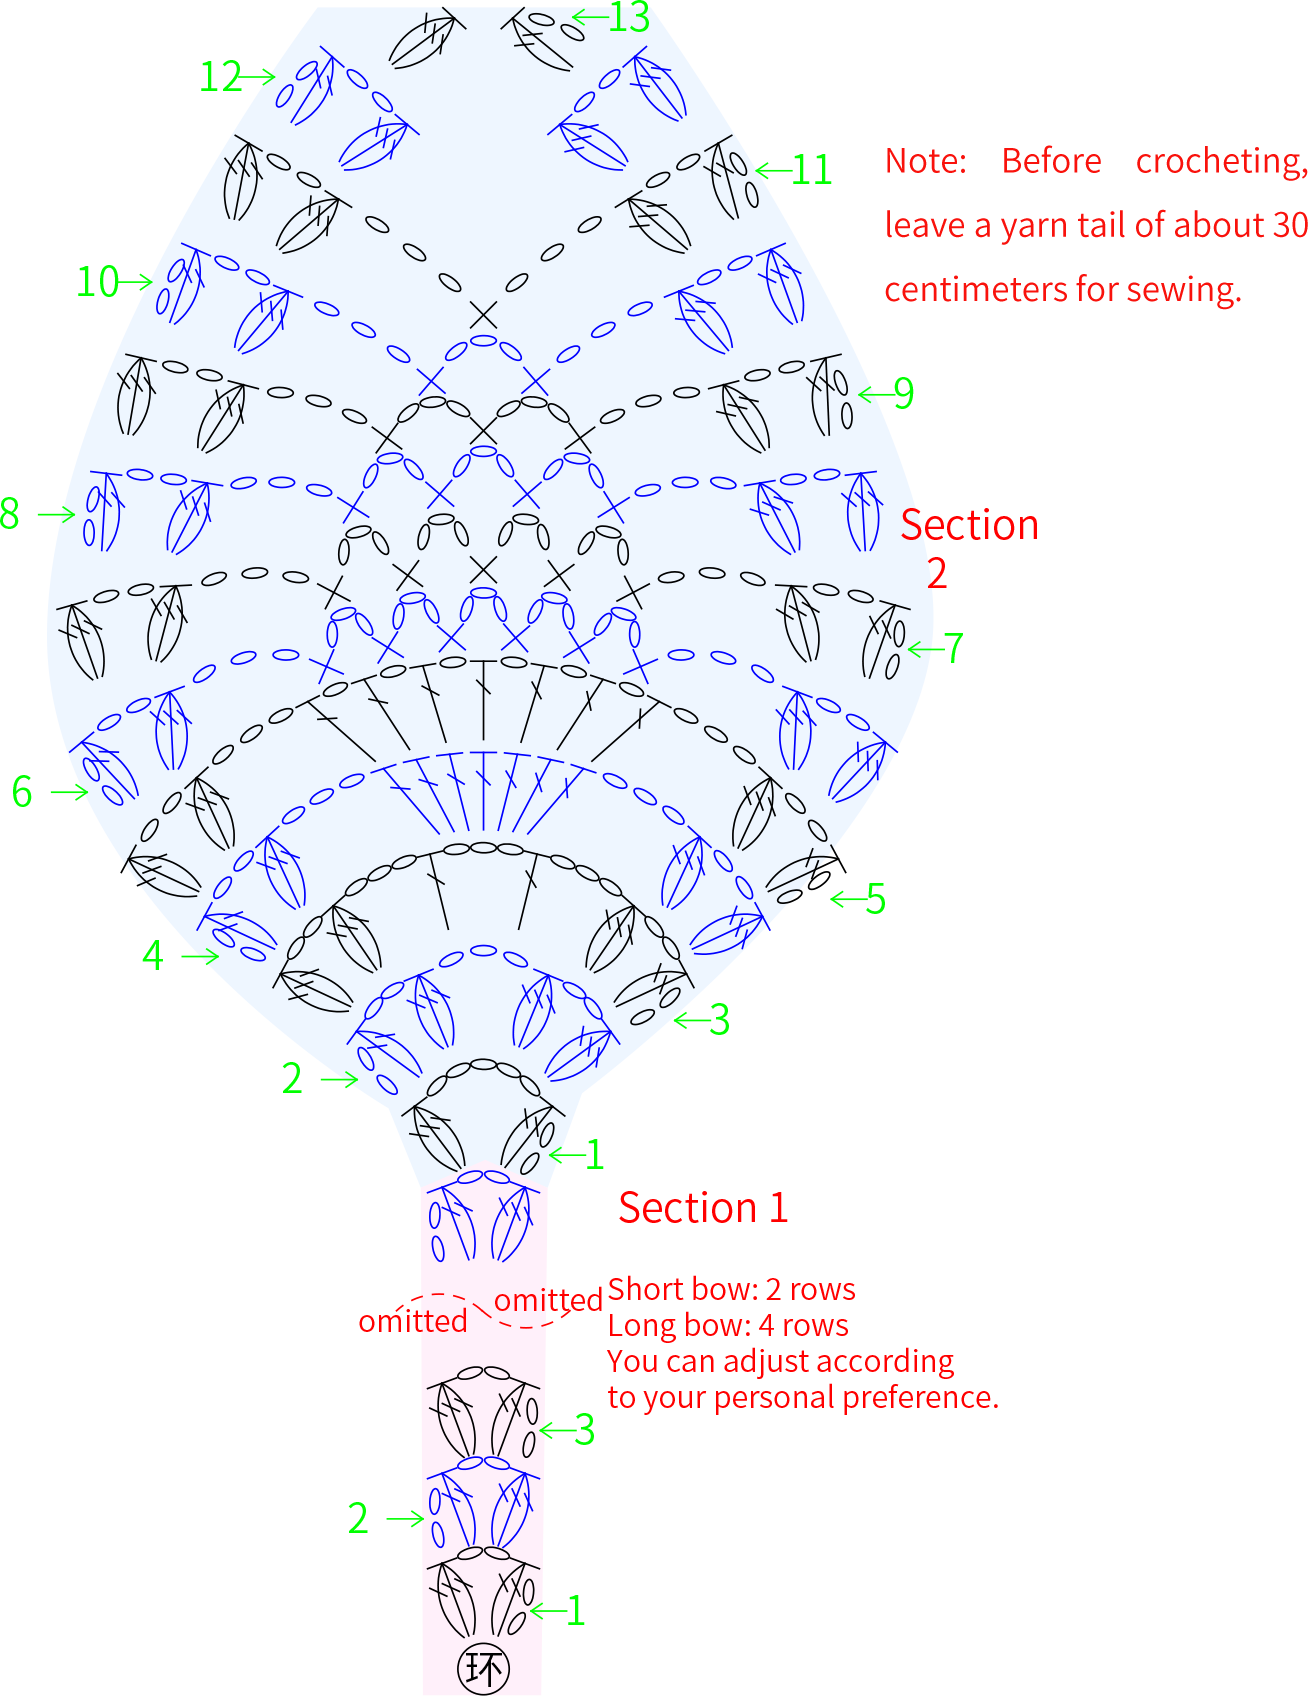
Part 4 Hat Edge D 89' 14''
You'll need to crochet 2 bows. Divide them into two areas: Area 1 and Area 2. Use the magic ring method, then work back and forth. After completing the crocheting, sew it onto the brim of the hat at a proper position.Please refer to the video demonstration for more details.
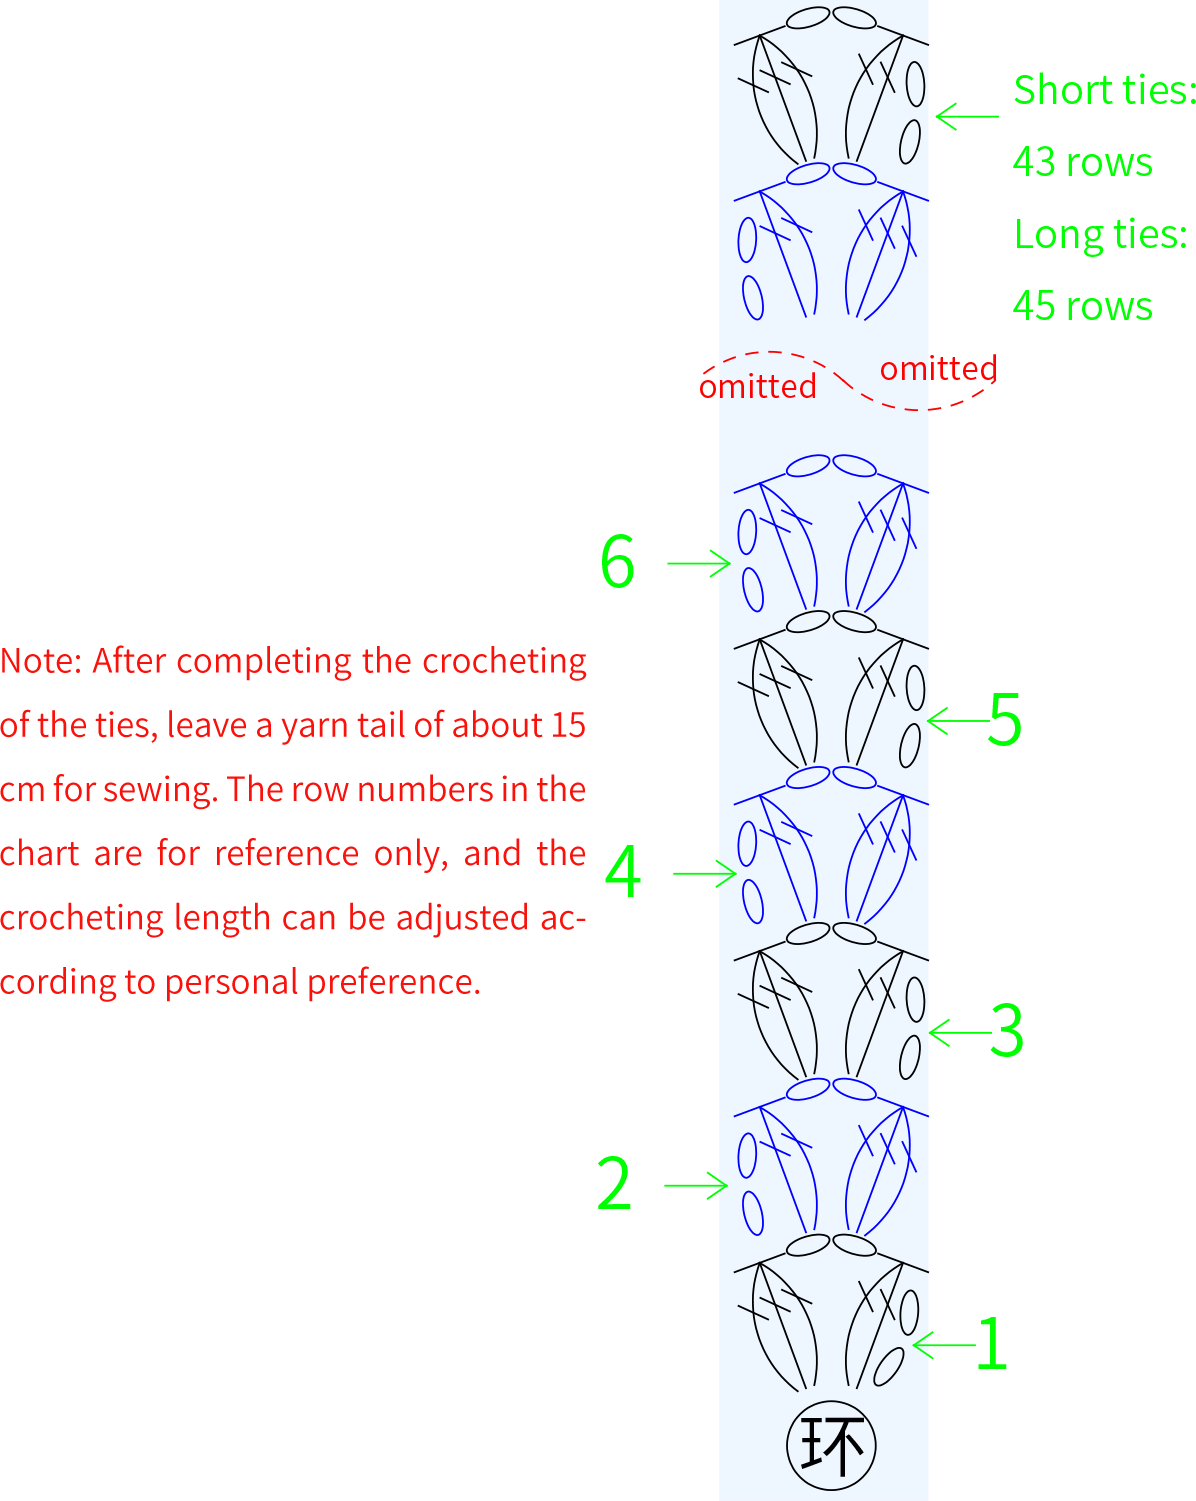
Part 5 Ties E 140' 00''
You need to crochet 2 ties, and you can choose whether to crochet them based on your personal preference. The crocheting method is similar to the method used for Section 1 of the bow. After completing the crocheting, sew them onto a proper position of the last row of the hat body. Please refer to the video demonstration for more details.
Part 6 Sweatband F 140' 46''
Sew the sweatband at the junction of the cap body and brim, roughly centered. The exact position can also be adjusted according to your own needs. Please refer to the video demonstration for more details.
Made by the community