Clothes
Waltz Vest
Project preview
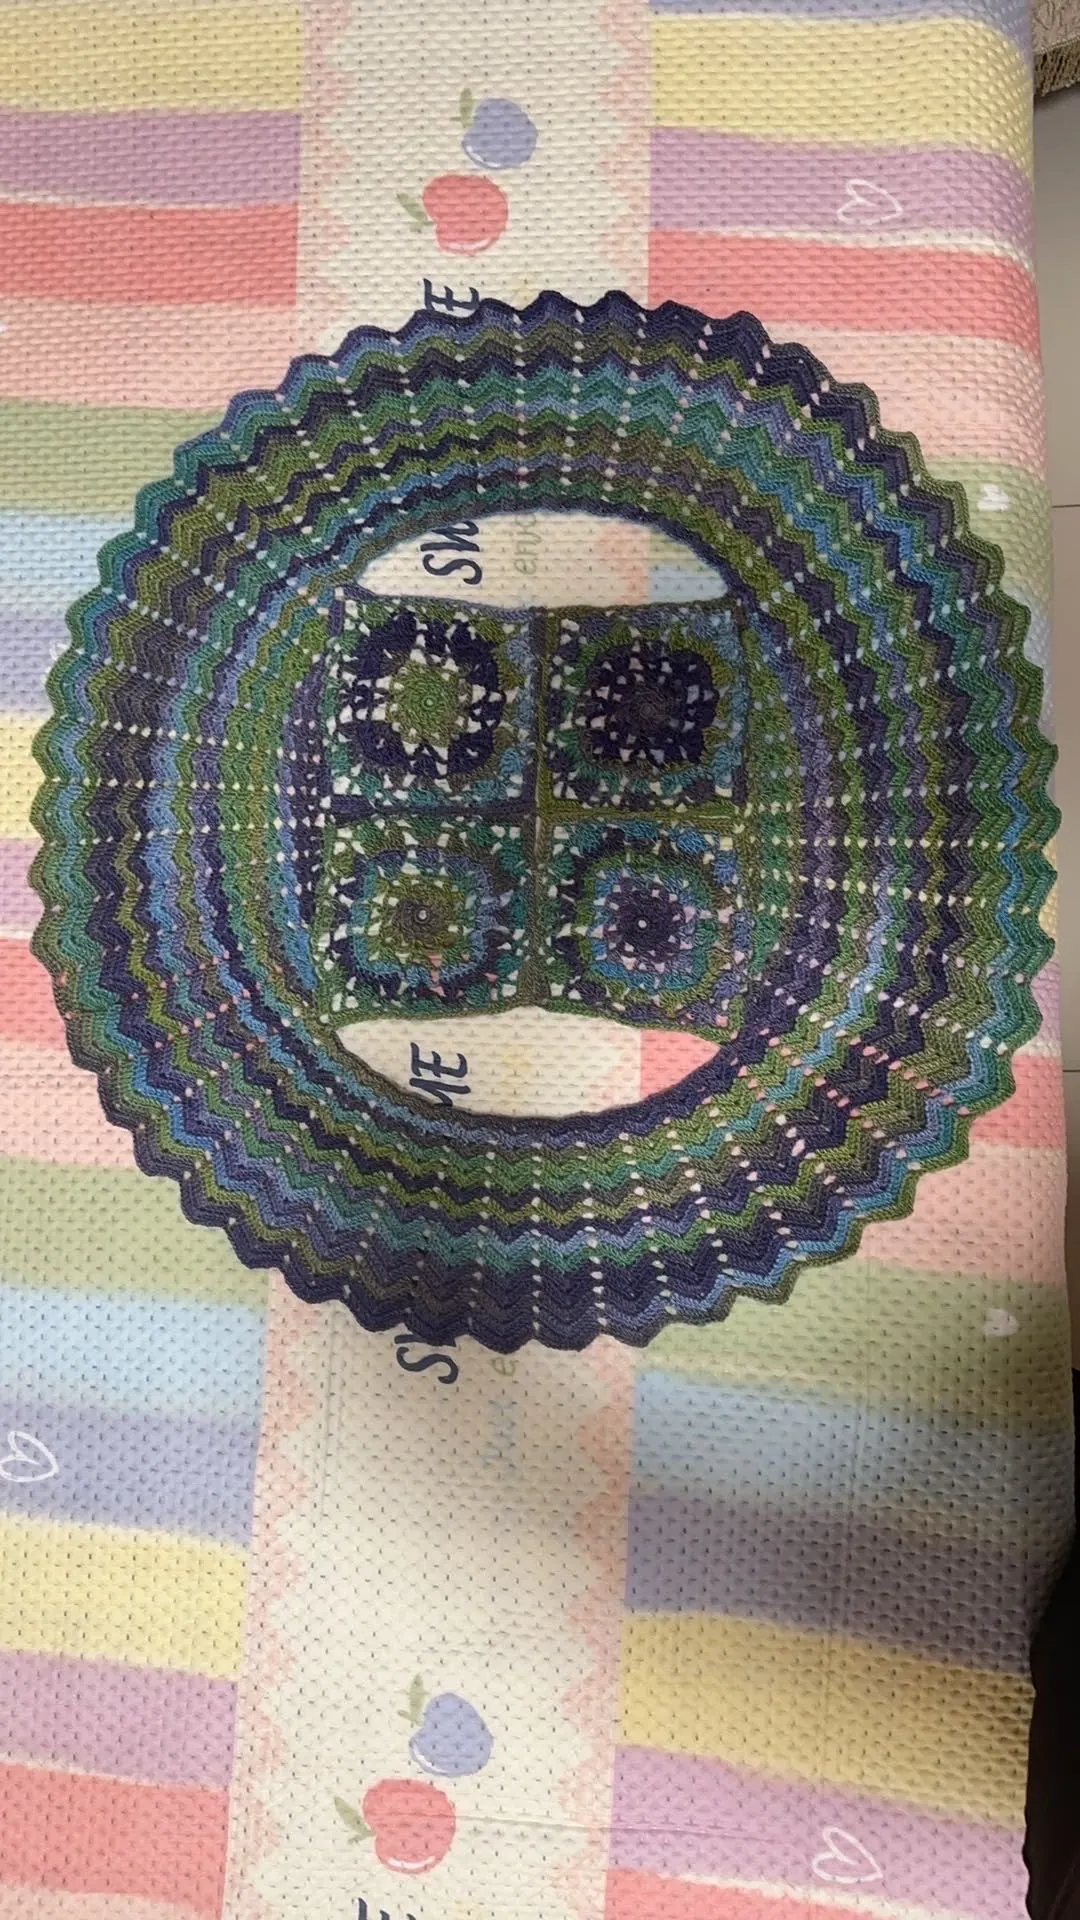
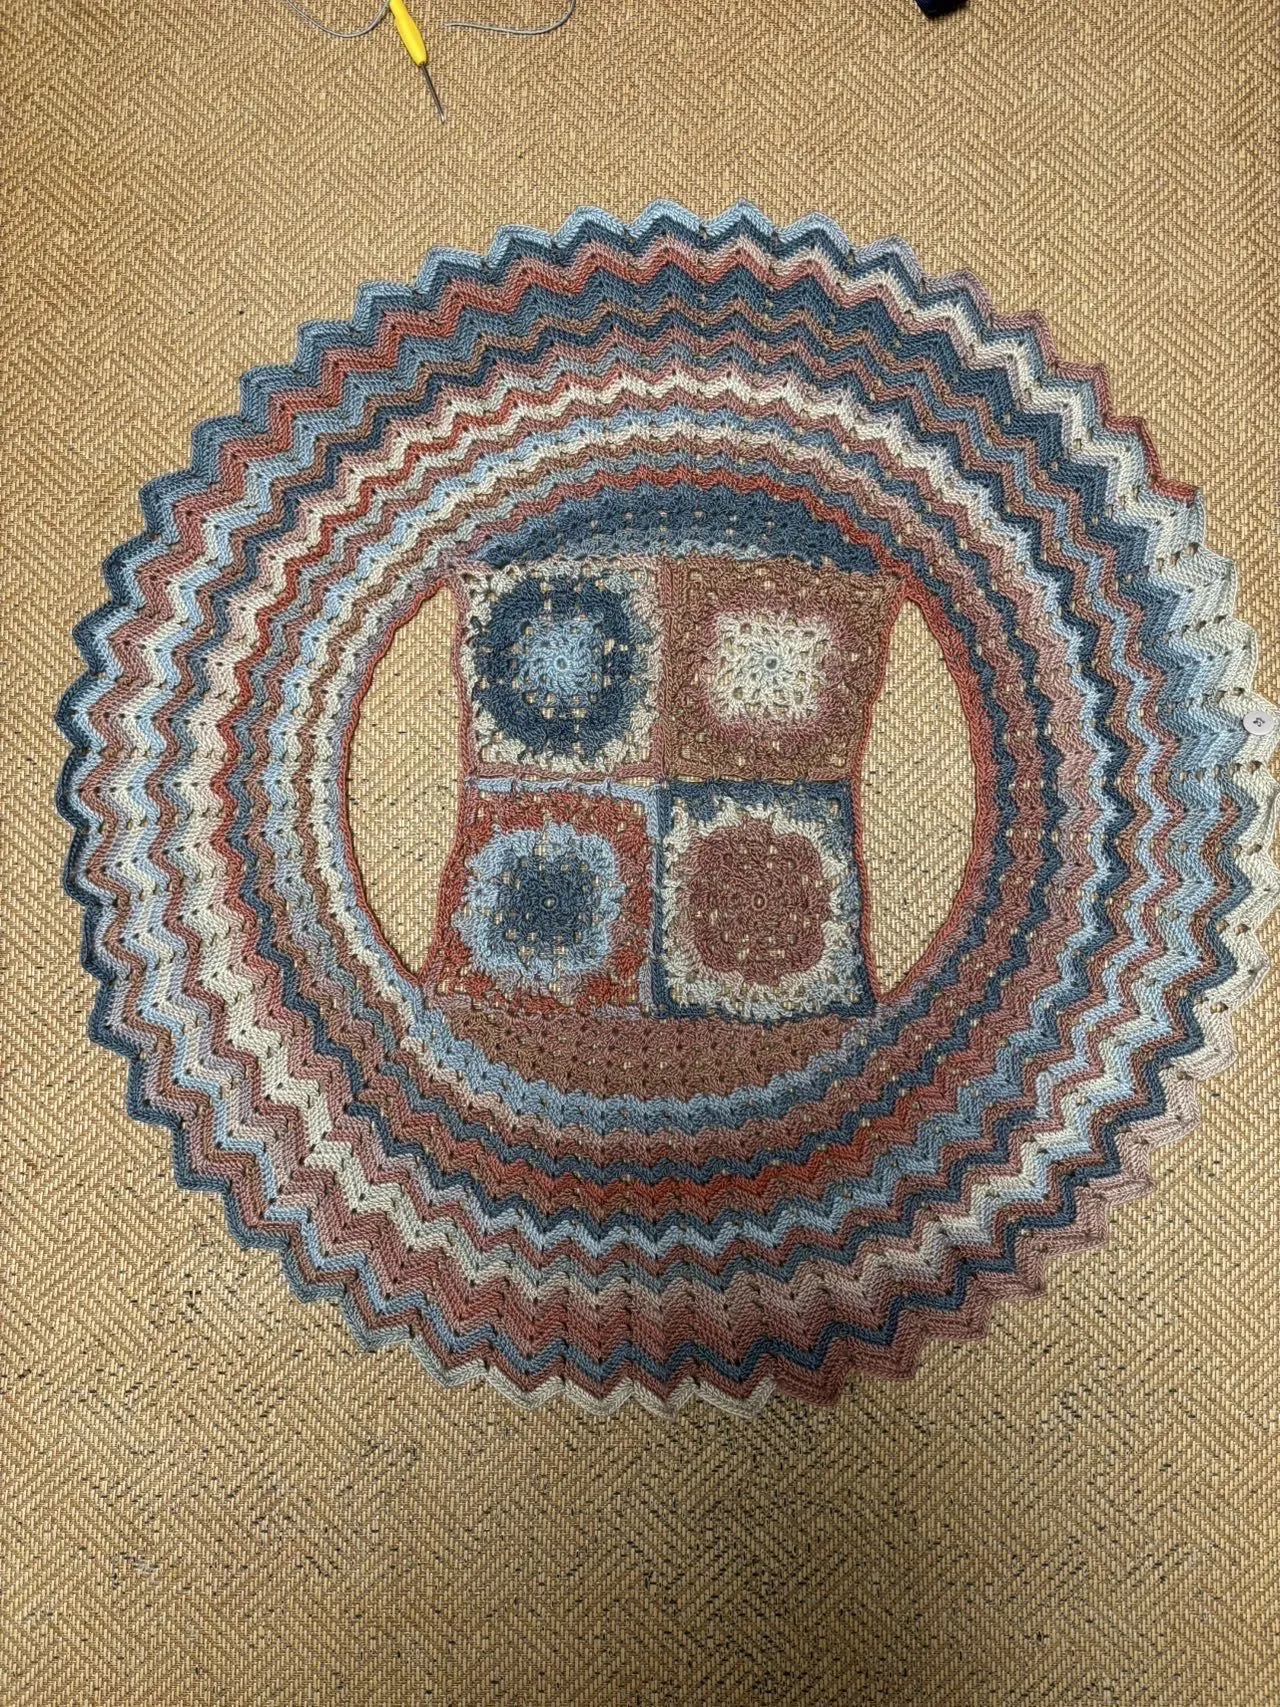
See the finished project
Pattern format
Instructions
Watch and follow
Video tutorial
| Style | Yarn | Color |
|---|---|---|
| Neon Version | Monet Impression |  27#Neon x 6 27#Neon x 6 |
| Dawn Oracle Version | Monet Impression |  33#Dawn Oracle x 6 33#Dawn Oracle x 6 |
| Spring Rain Version | Monet Impression | 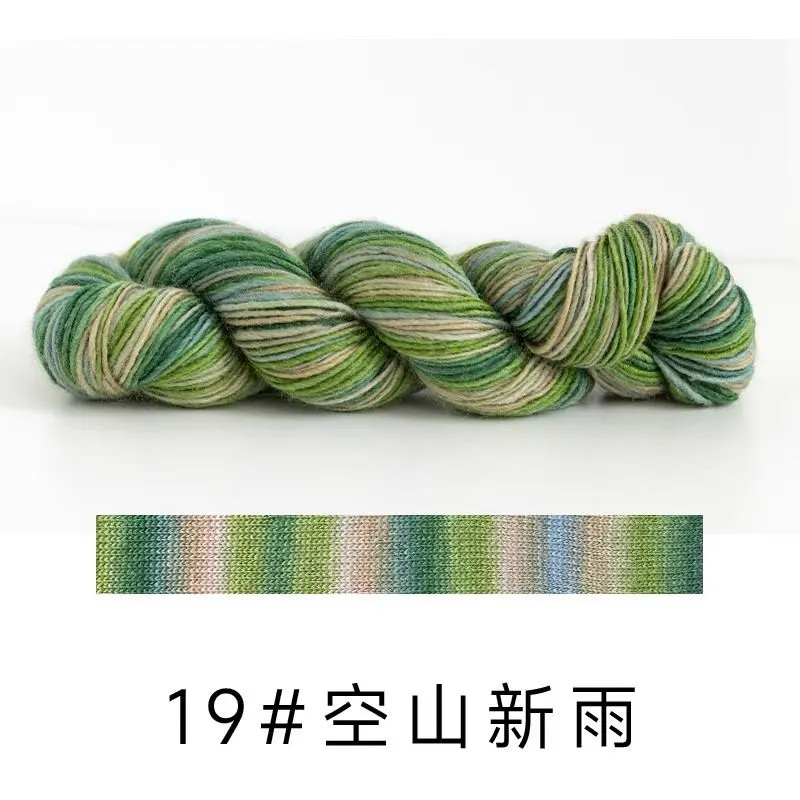 19#Spring Rain x 6 19#Spring Rain x 6 |
| Blossom Version | Monet Impression | 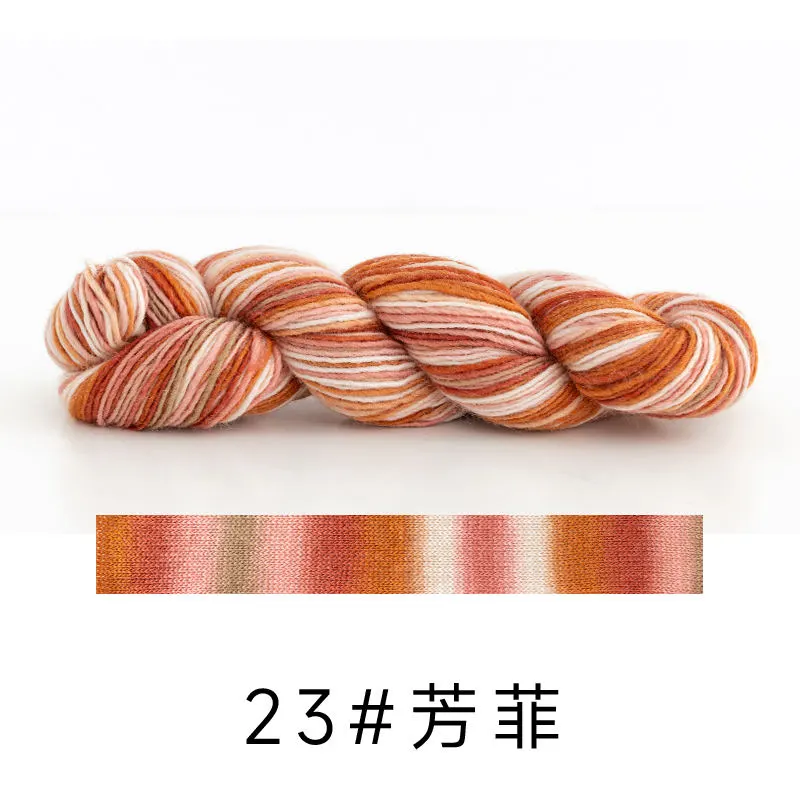 23#Blossom x 6 23#Blossom x 6 |
This product consists of the main part, cuffs, and buttons. First, crochet the main part, then crochet the cuffs at the sleeve openings, and finally sew on the buttons.
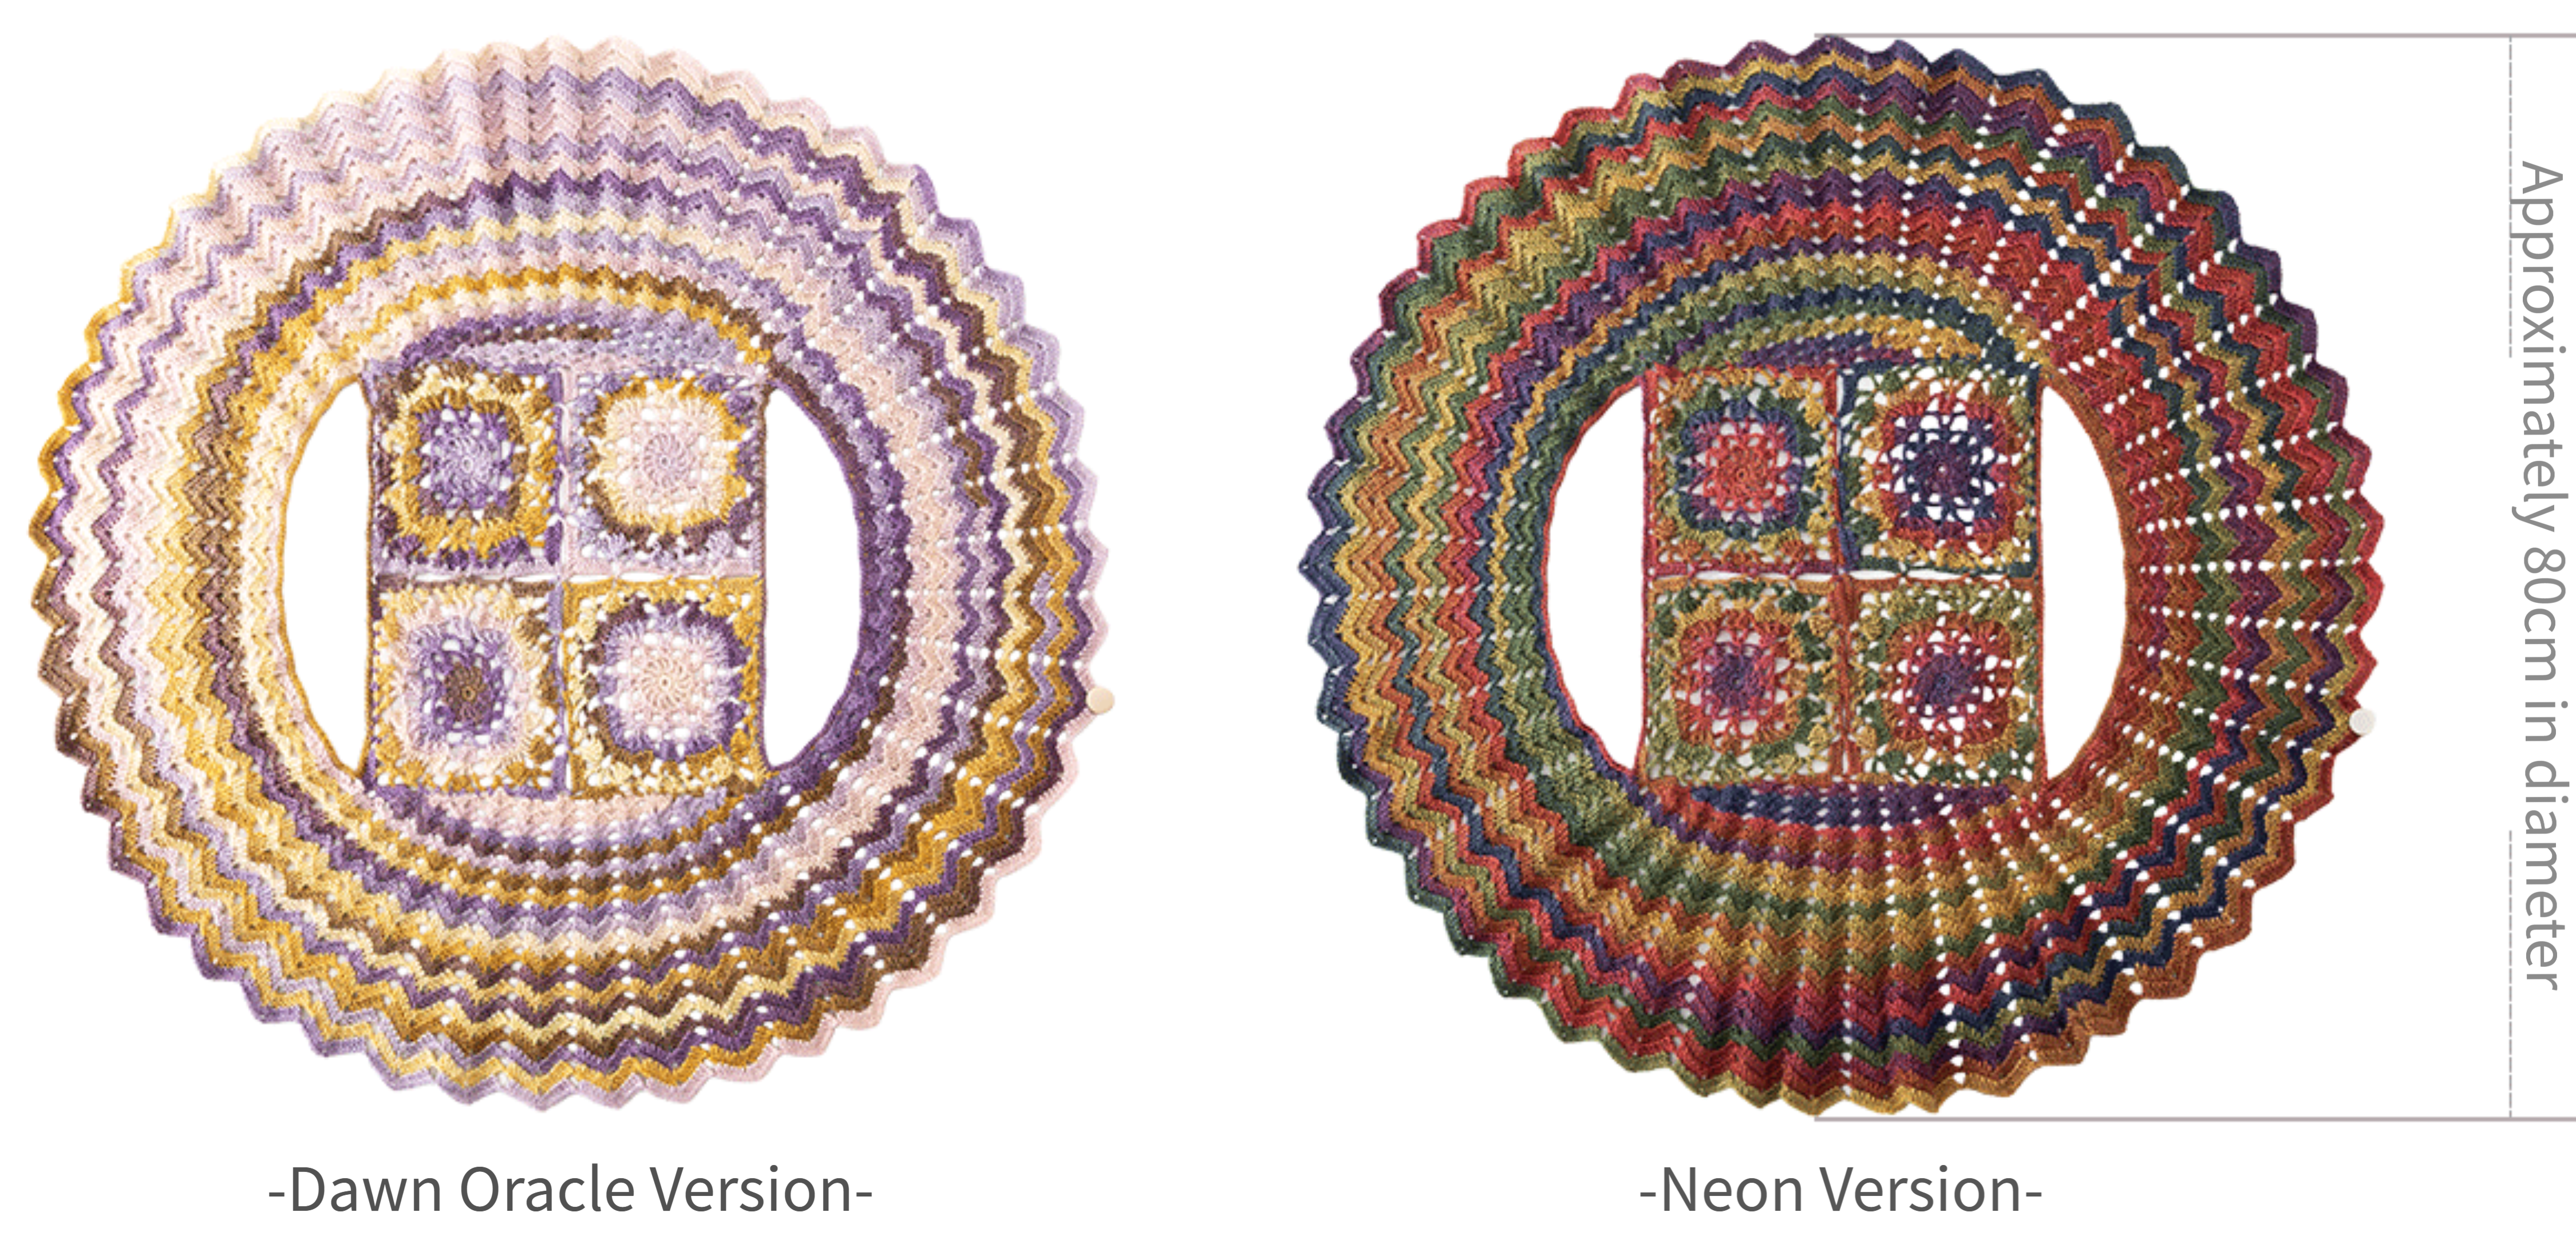
Note: Hand-measured, with a possible error of 1-2 cm. Due to differences in individual tension, the sample size is for reference only.
Yarn : Monet Impression. Tools : 3.0 mm.

Note: ①. The yarn is not easy to unravel when crocheting, so it's recommended to crochet a bit slower when using the original yarn.
②. This product uses variegated yarn, which has multiple color sections. Depending on where you start crocheting, the final look will vary. You can refer to the finished sample or choose your preferred color section to begin crocheting.
Structure Diagram







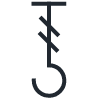



Note:
1. This pattern is making in Chinese crochet pattern terms, and the stitch name is written using American terminology. All measurements in charts are in cm.

PART 1 Main Part A
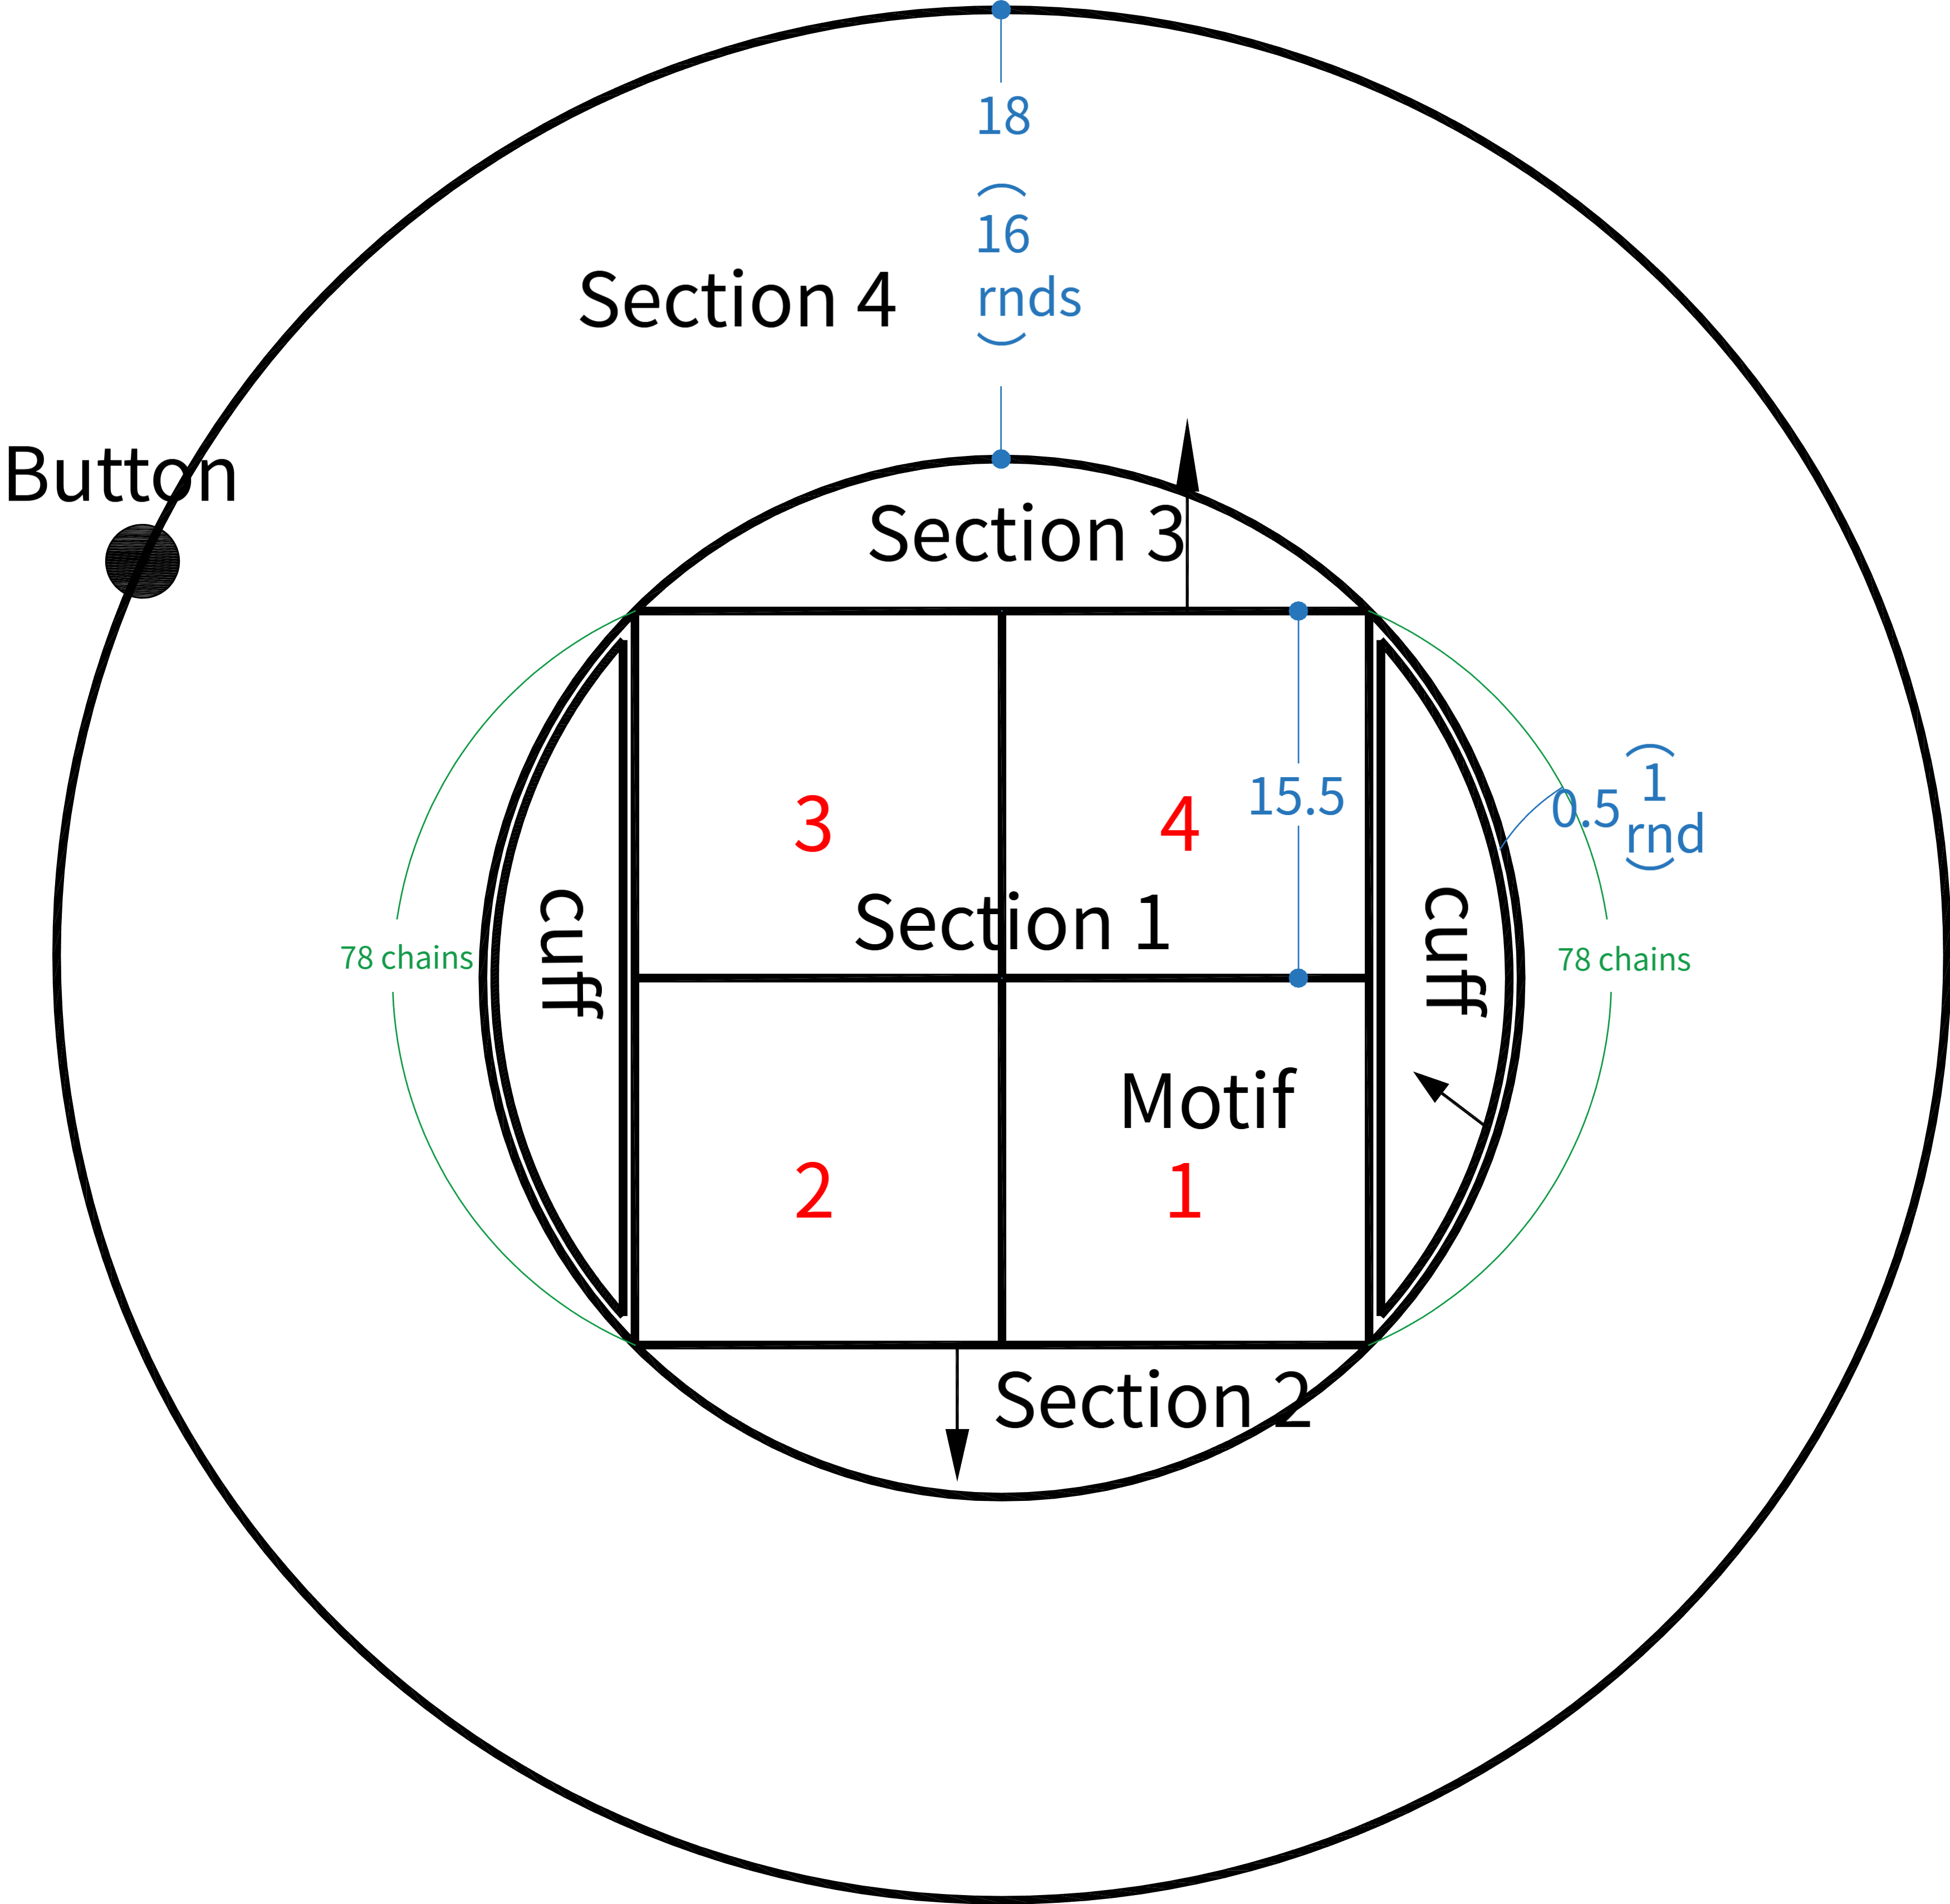
The main part is divided into Section 1, Section 2, Section 3, and Section 4.
STEP 1 Part 1 A1 01' 14''
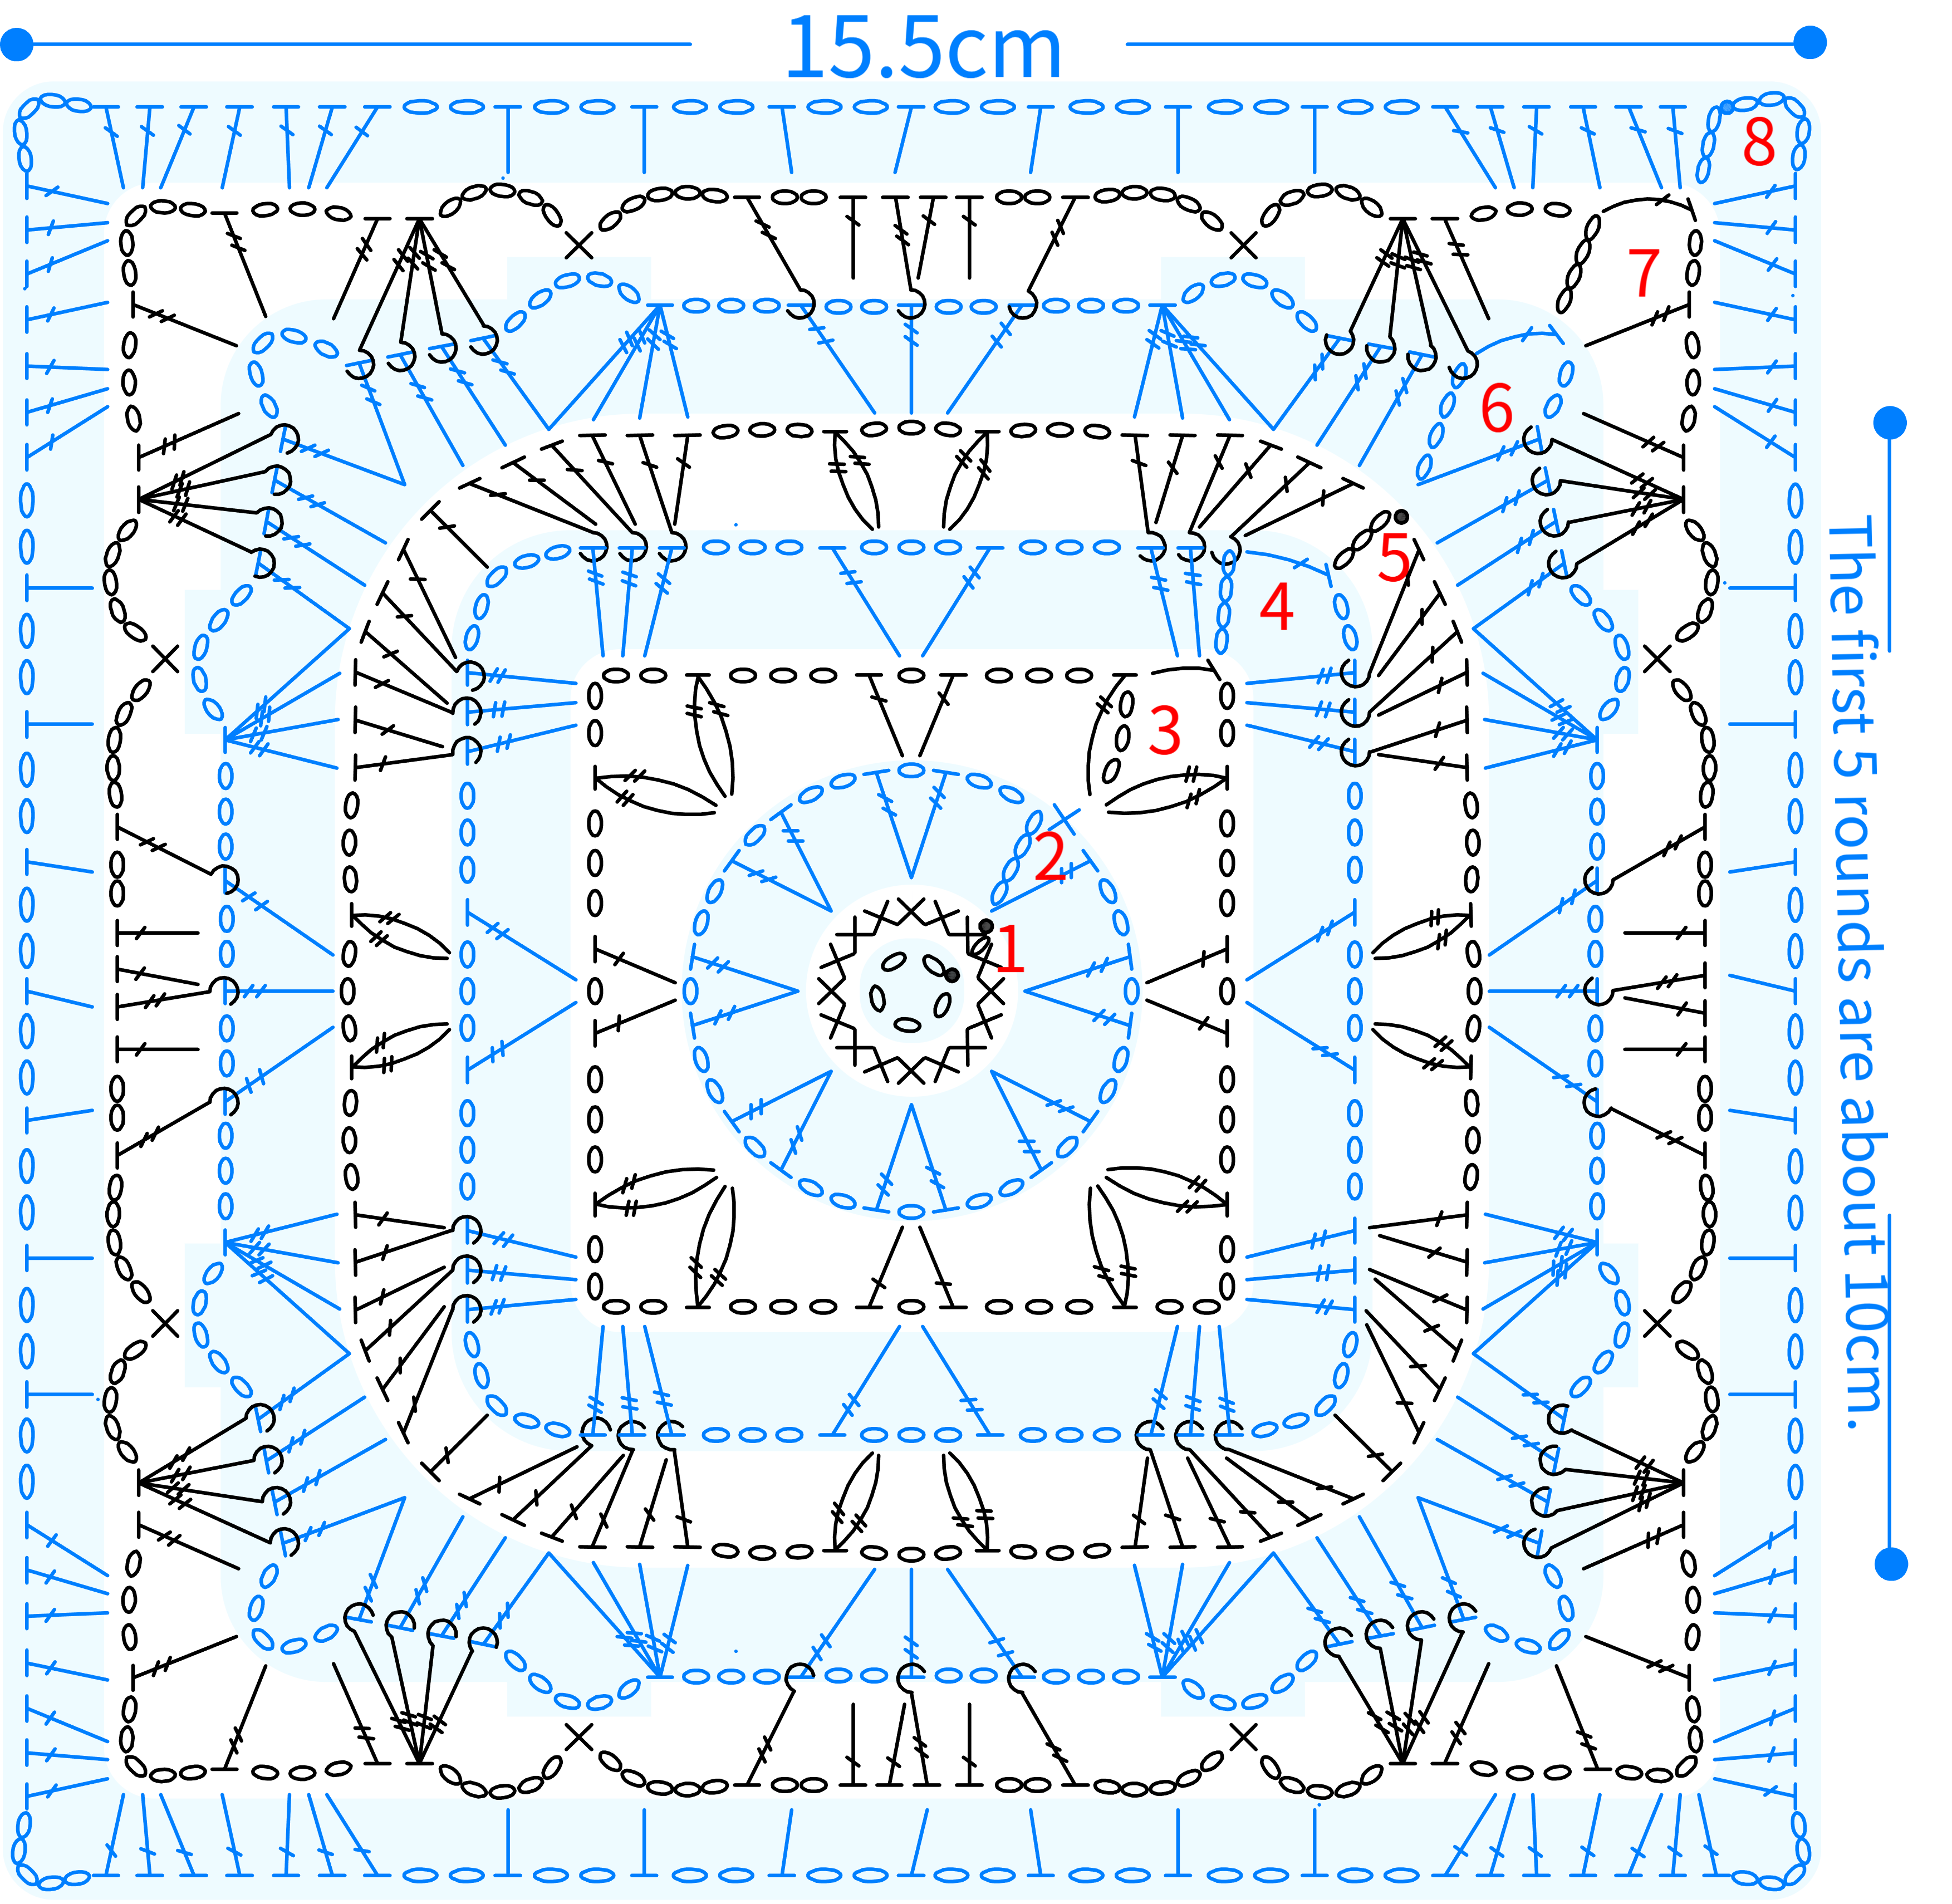
Section 1 consists of motifs and motif connections. Except for the first motif which is crocheted normally, all other motifs need to be connected while crocheting the last round. Motifs are started with a foundation chain method and crocheted in rounds counterclockwise. Please refer to the video demonstration for more details.
Motif
Motif Connection Diagram
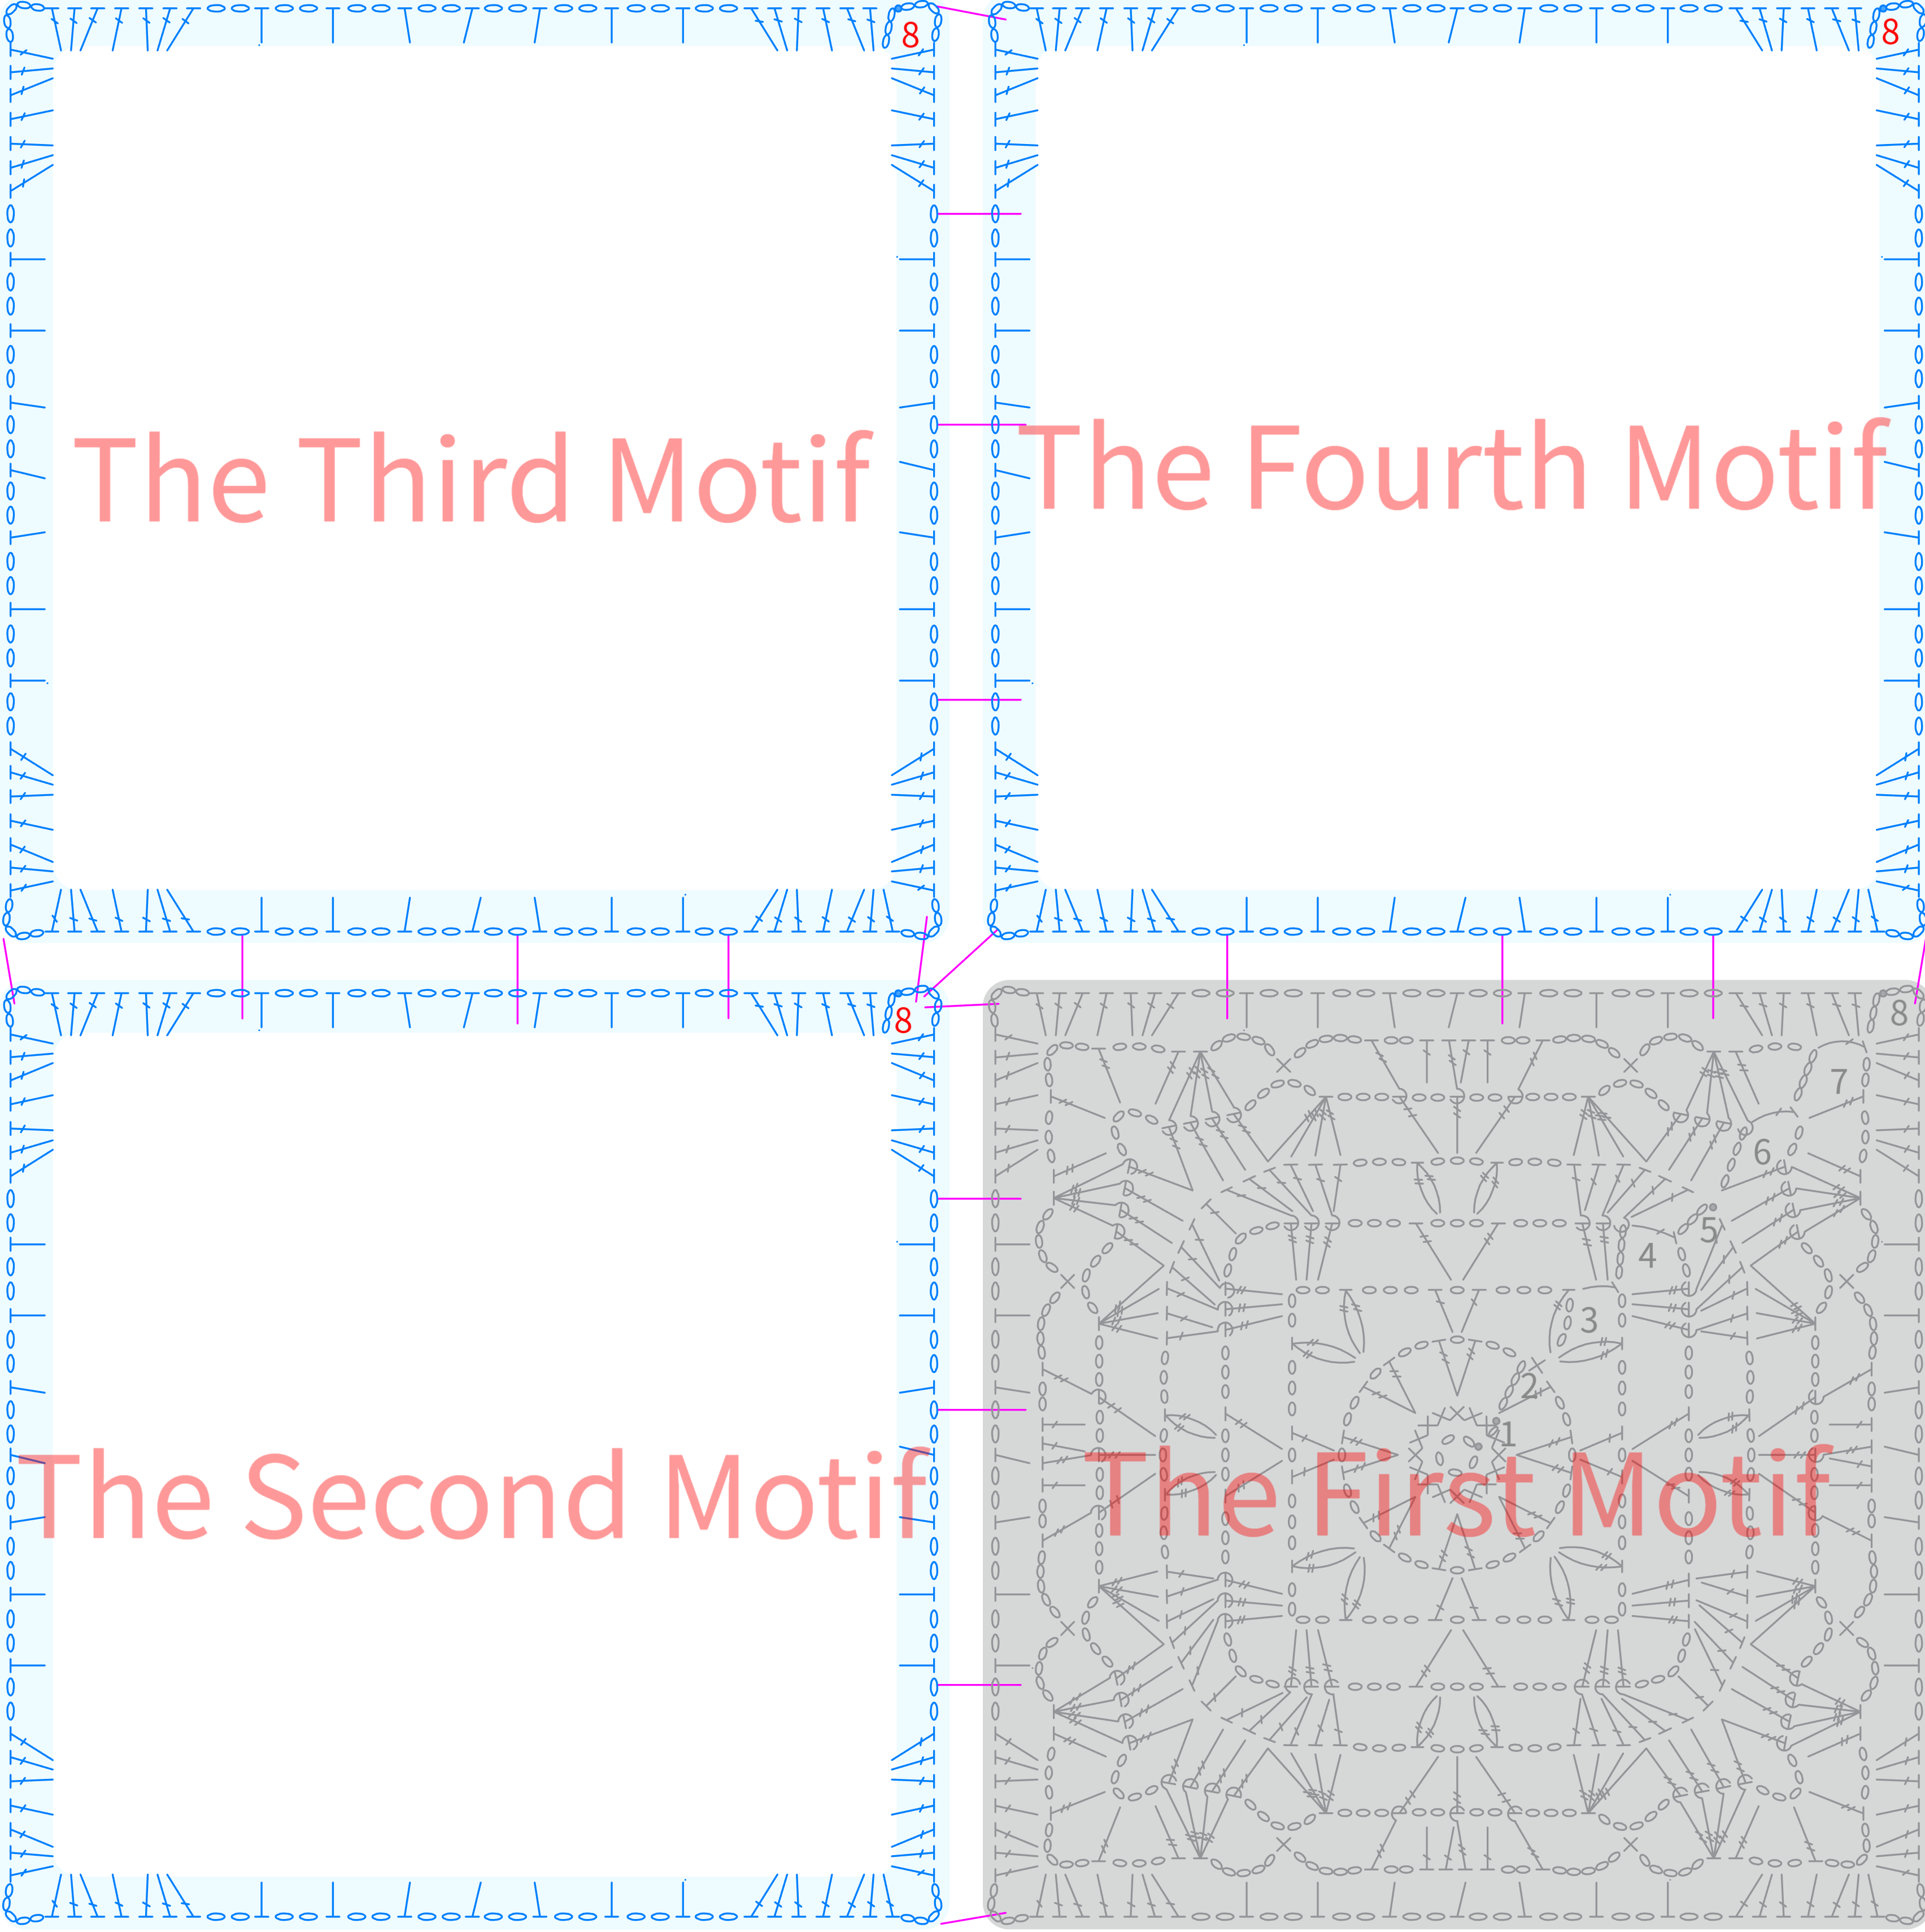
Note: ① While crocheting the first motif, compare its size with the dimensions indicated in the chart. If there's a significant difference, adjust your tension or change the hook size and start over.
② Motifs are joined using the "pull-through" method. For details, please refer to the video demonstration, or you may use your preferred joining method.
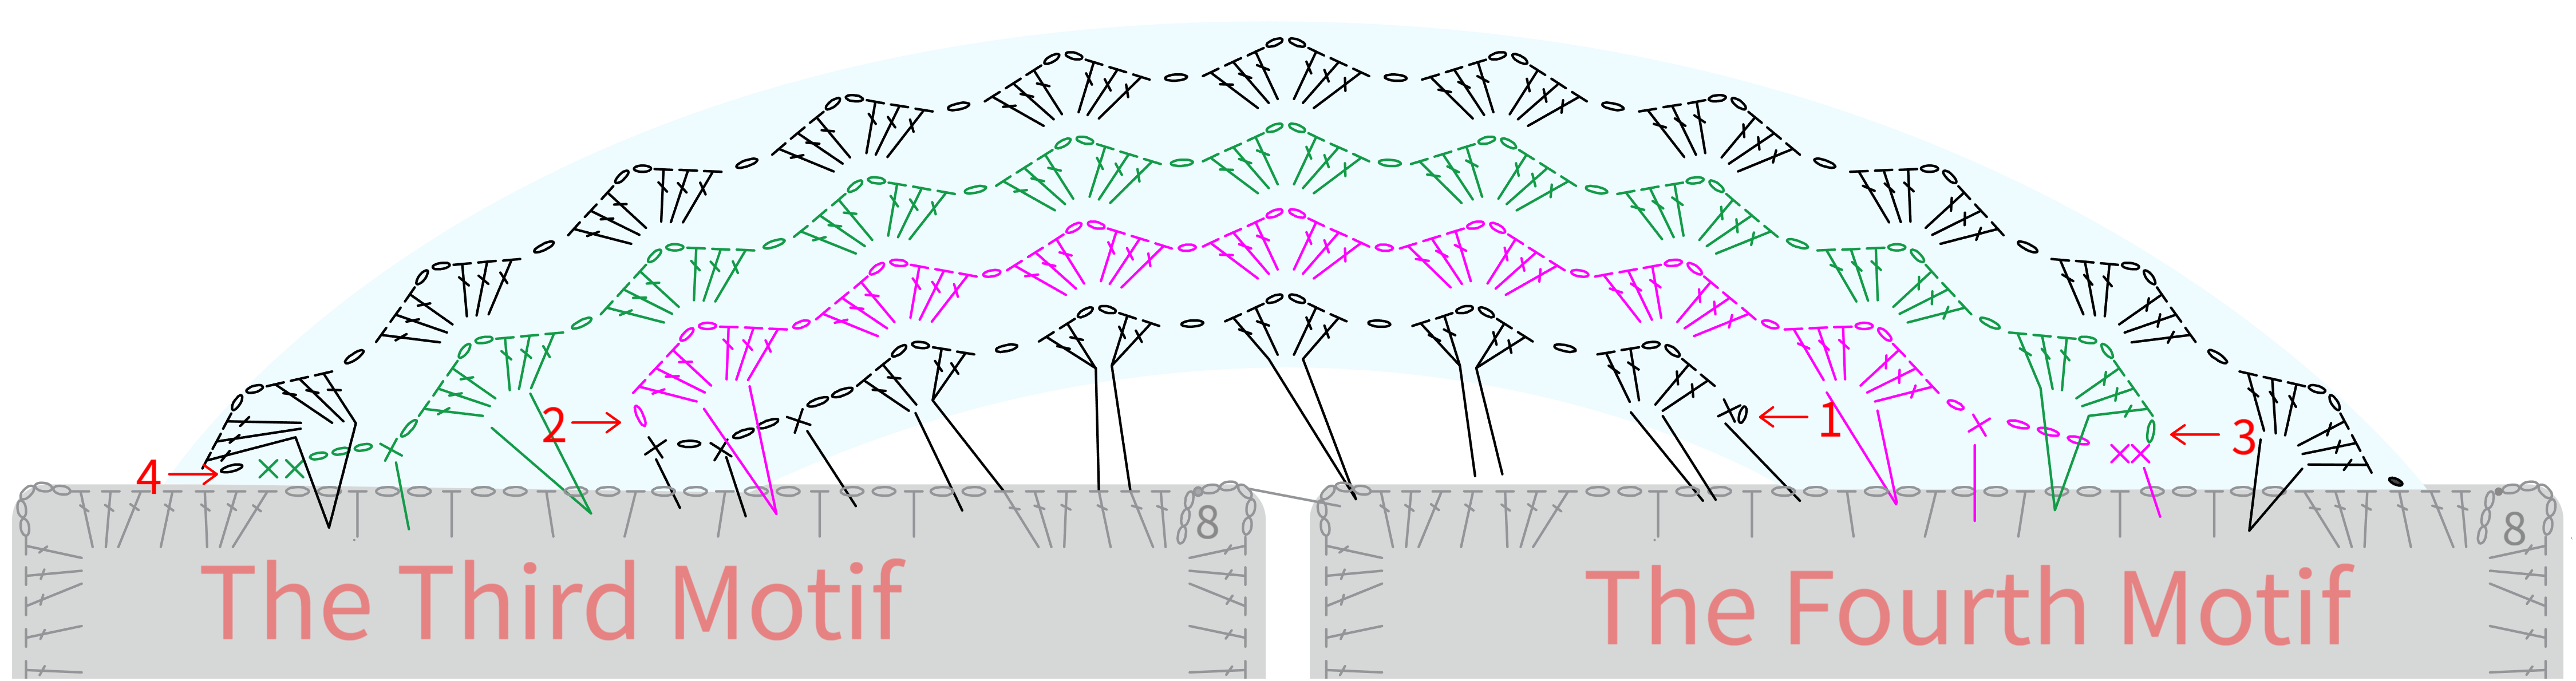
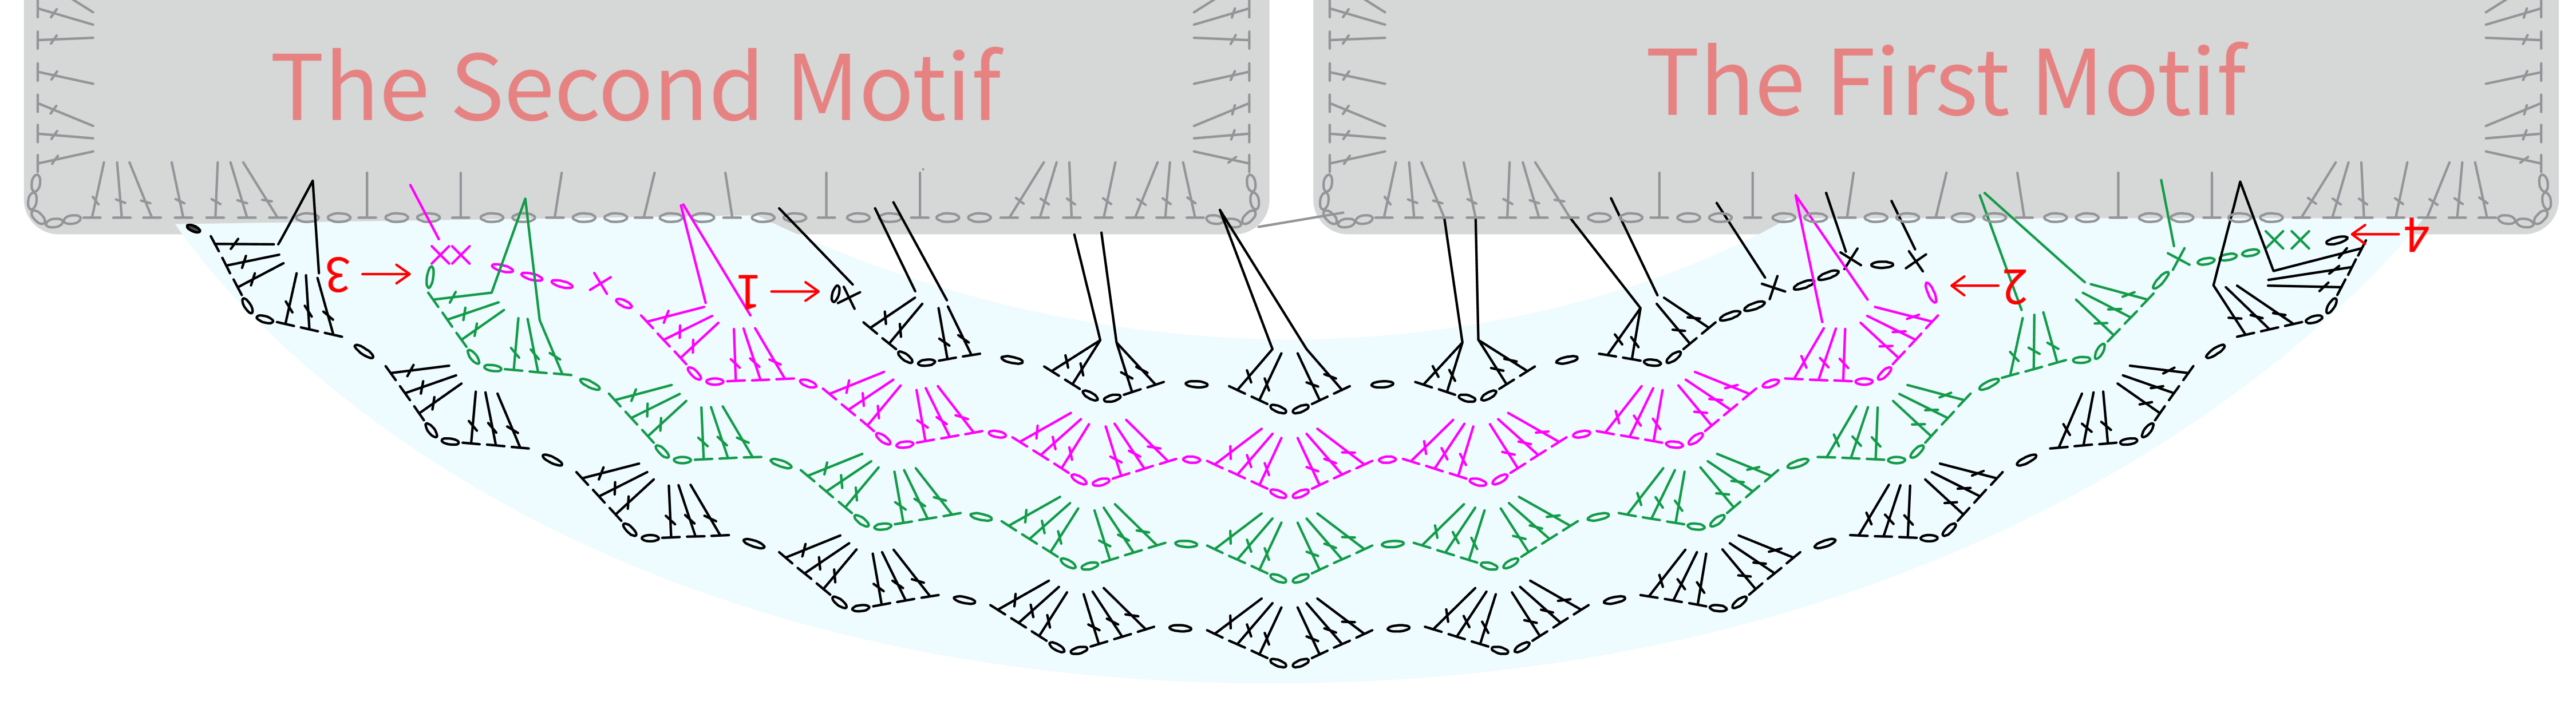
STEP 2 Section 2, Section 3 A2 35' 02''
For Section 2 and Section 3, both start by attaching yarn to the connected motifs side. Work back and forth along the motifs. Note that Section 2 and Section 3 should create symmetrical effects. After completing Section 2, finish off the yarn. For Section 3, leave the yarn attached when finished. Please refer to the video demonstration for more details.
Section 3
Section 2
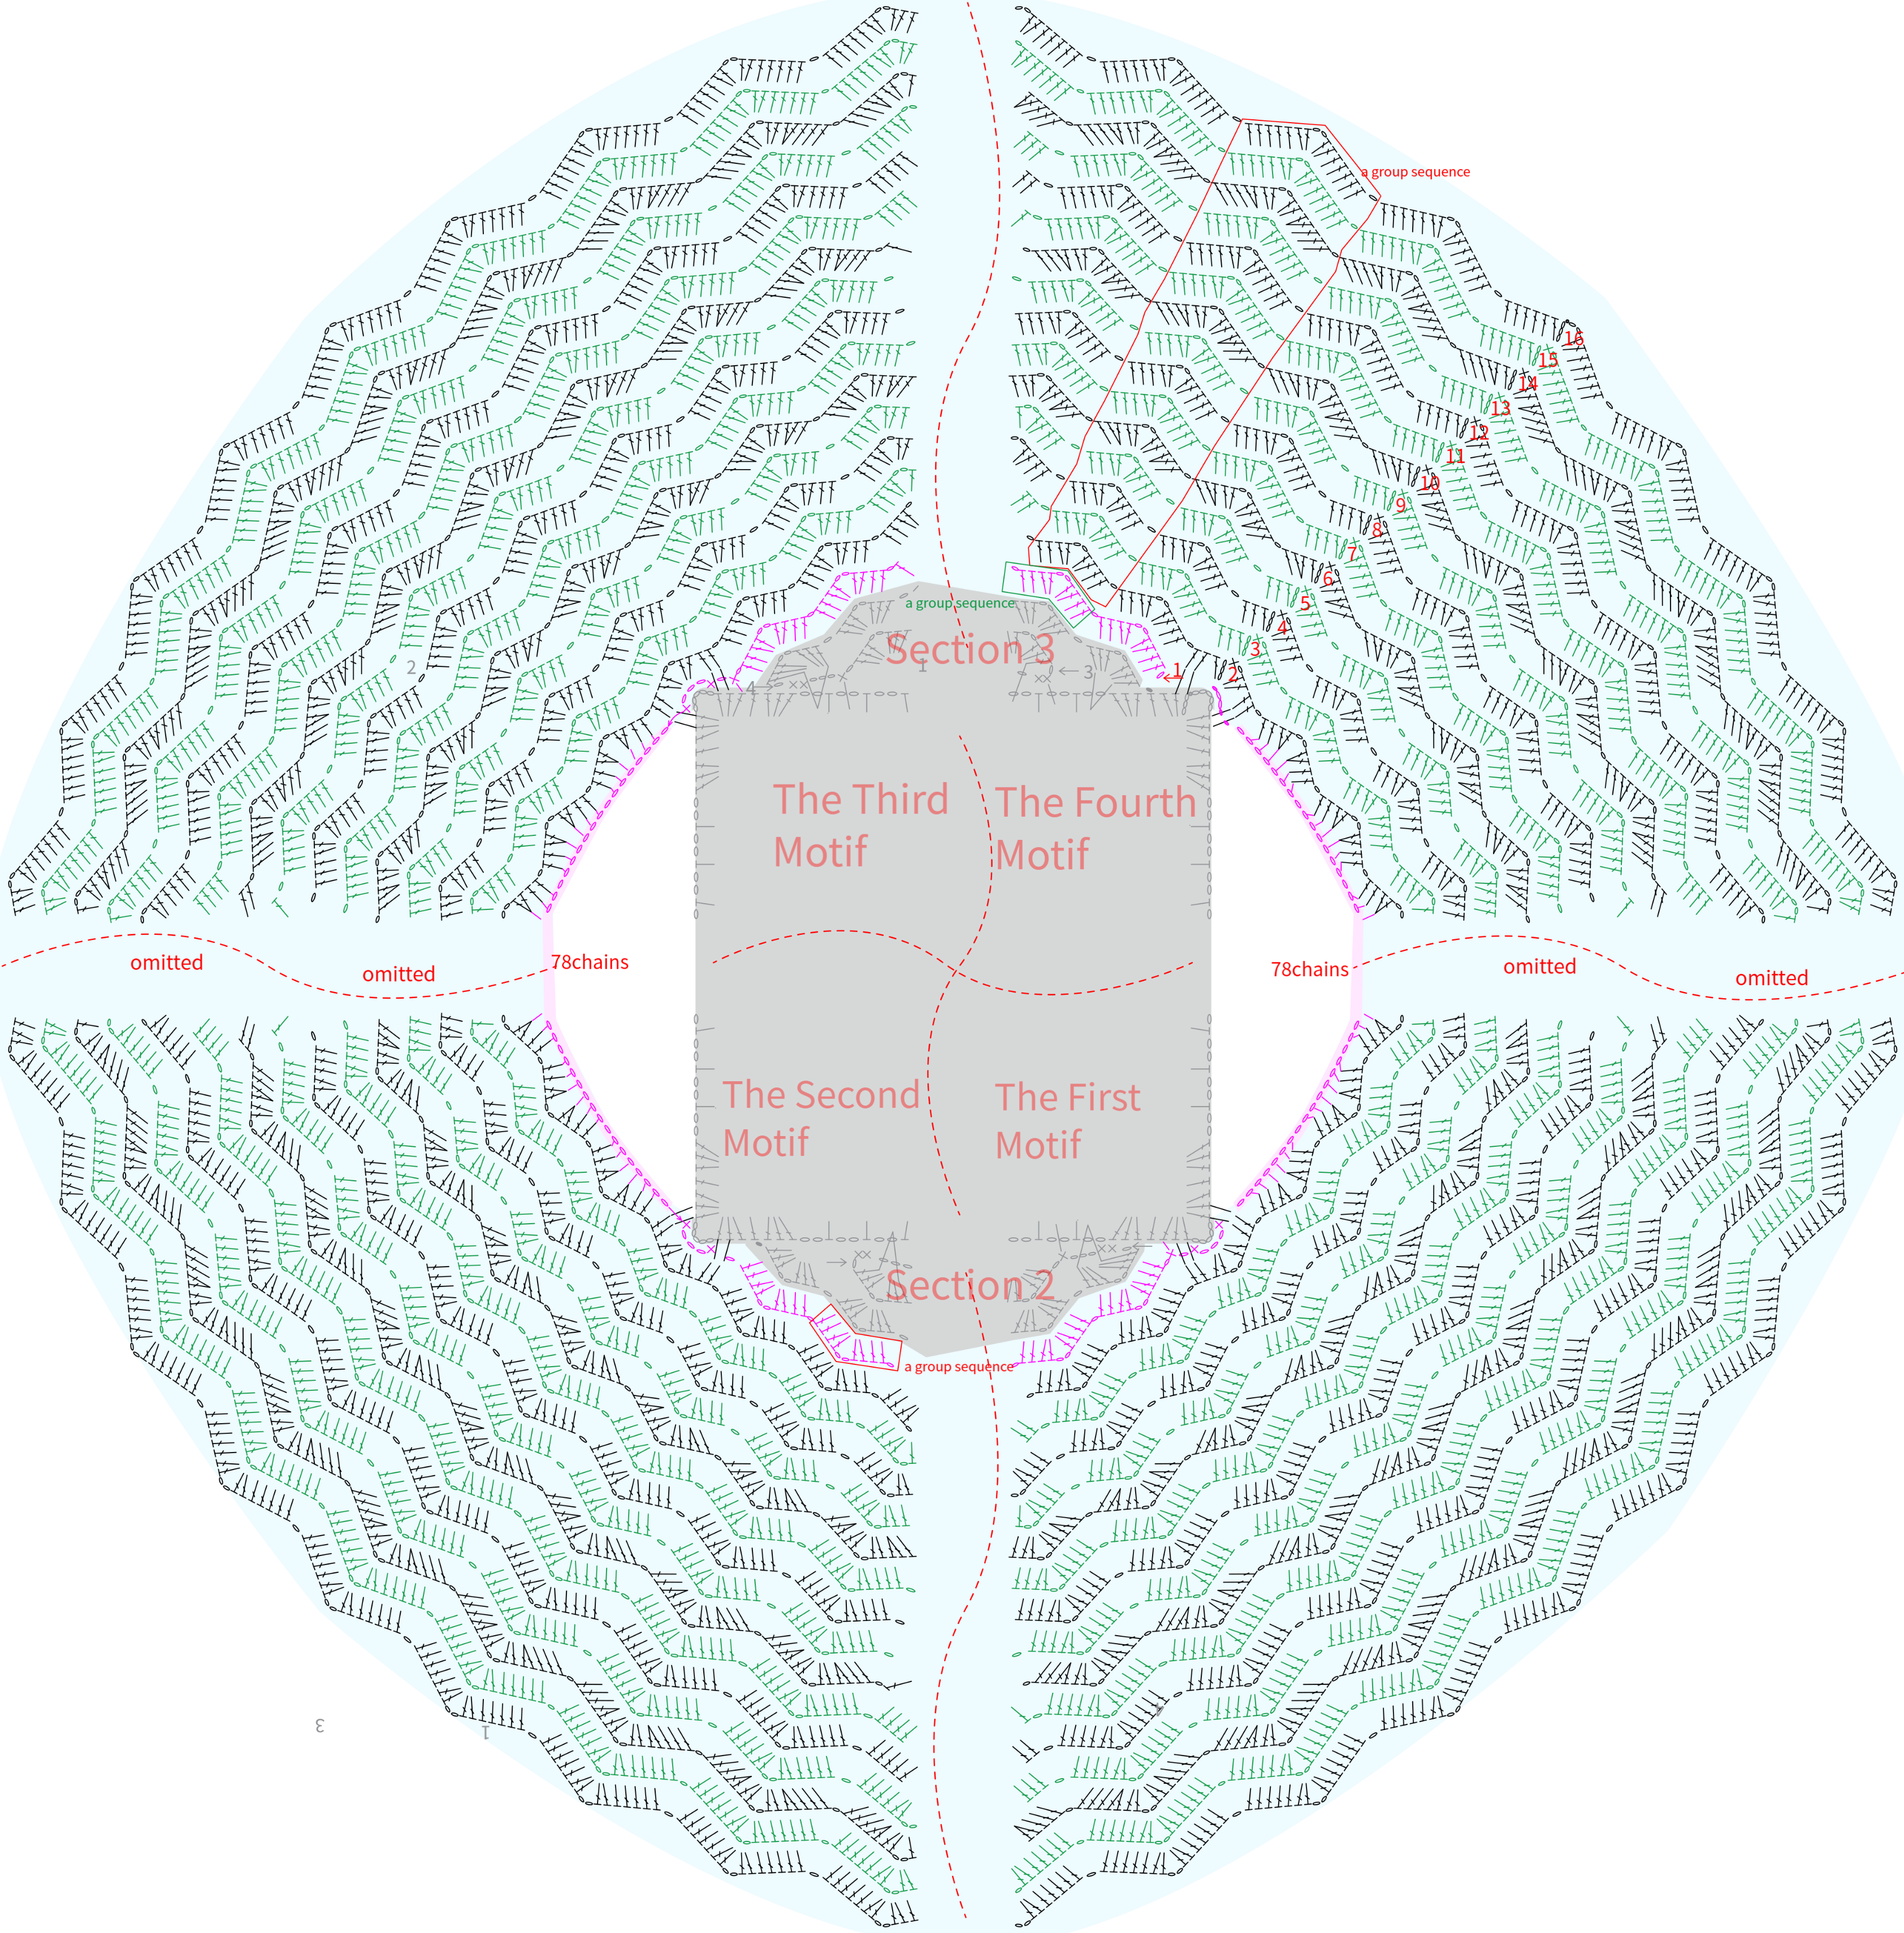
STEP 3 Section 4 A3 45' 37''
Section 4 continues from Section 3 without cutting the yarn. Crochet in rounds along Section 3 and Section 2, making sure to work chain stitches in between to create the armholes. Please refer to the video demonstration for more details.
PART 2 Cuffs, Buttons B 56' 59''
Both sleeve cuffs are worked at the armhole position, crocheting in rounds counterclockwise. There's no specific number of single crochet stitches required—just keep the fabric even and flat. Once finished, try it on and sew the buttons onto the positions you like. For details, Please refer to the video demonstration for more details.
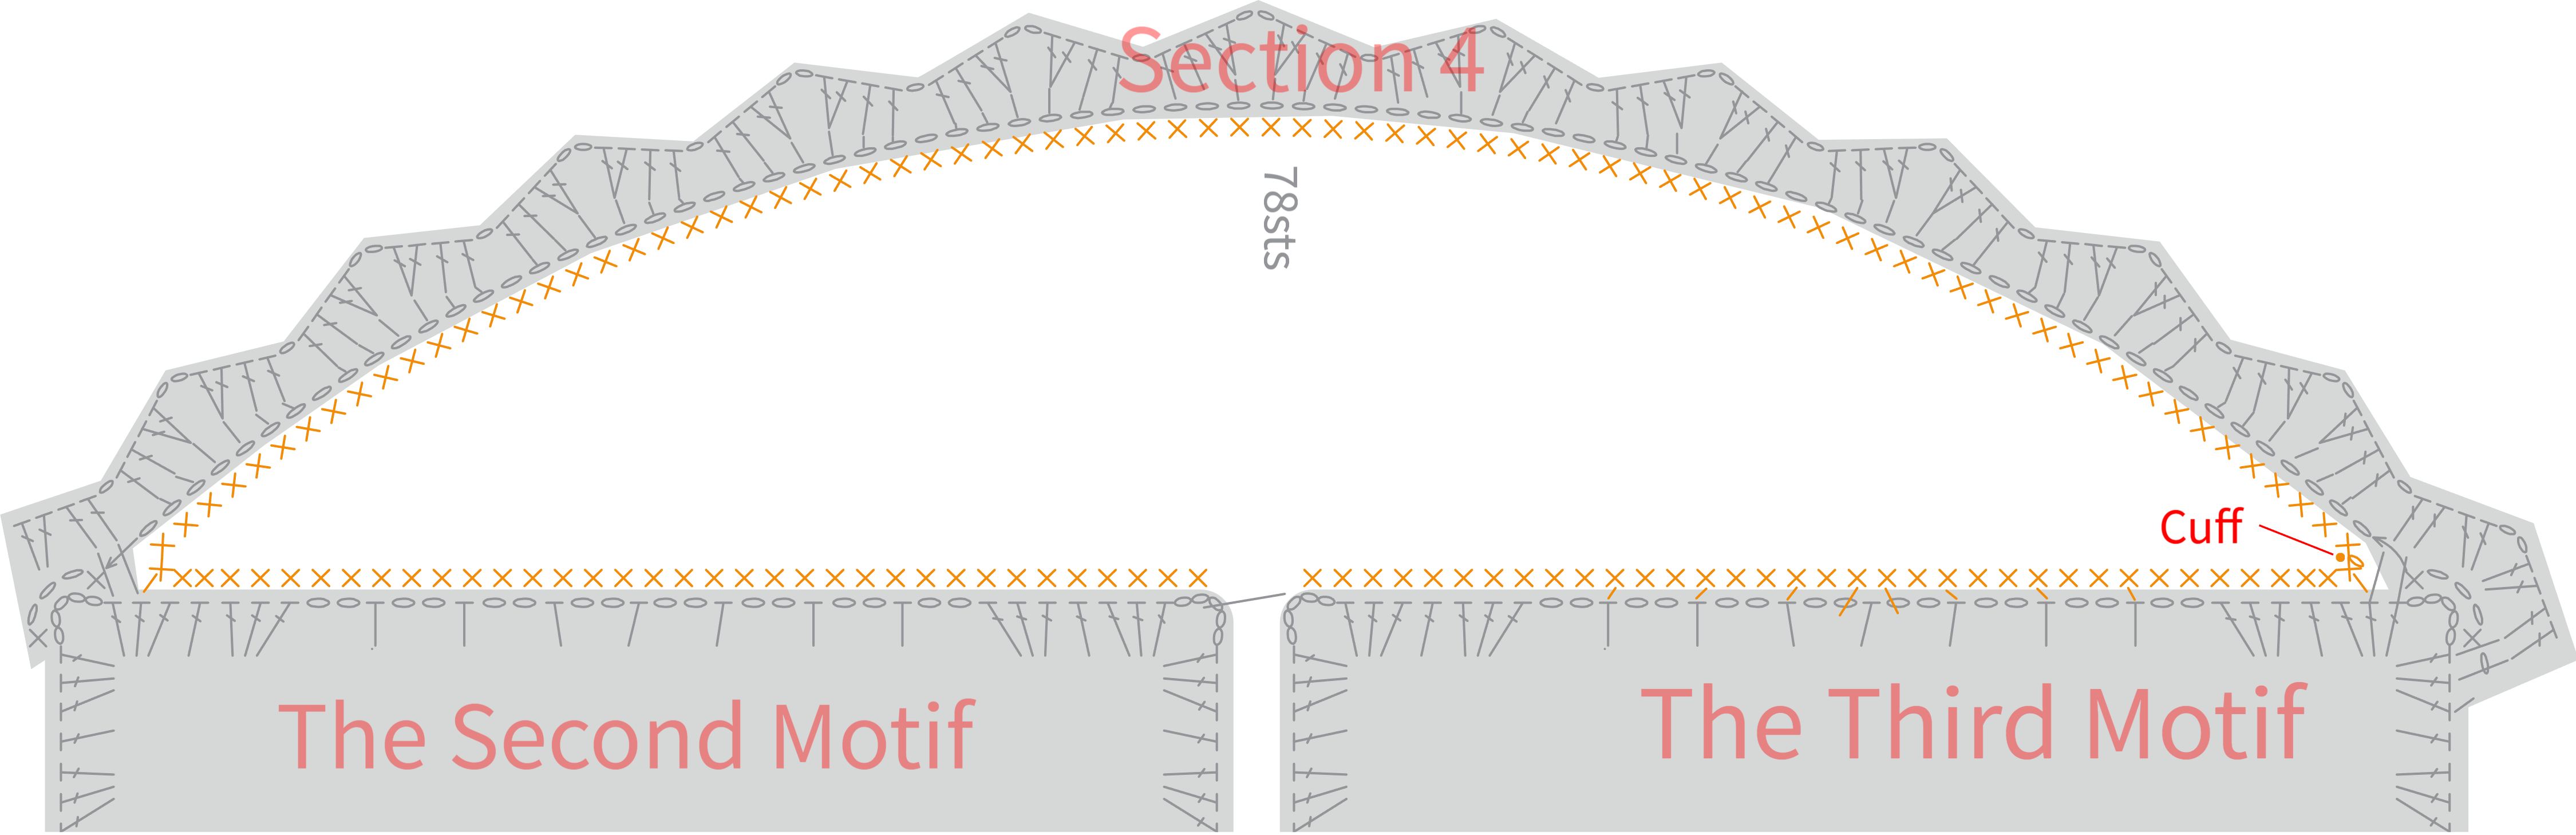
Note: The diagram is shown using the left sleeve cuff as an example, and the diagram for the right sleeve cuff is symmetrical to that of the left sleeve cuff.
Made by the community