Home / Pillow
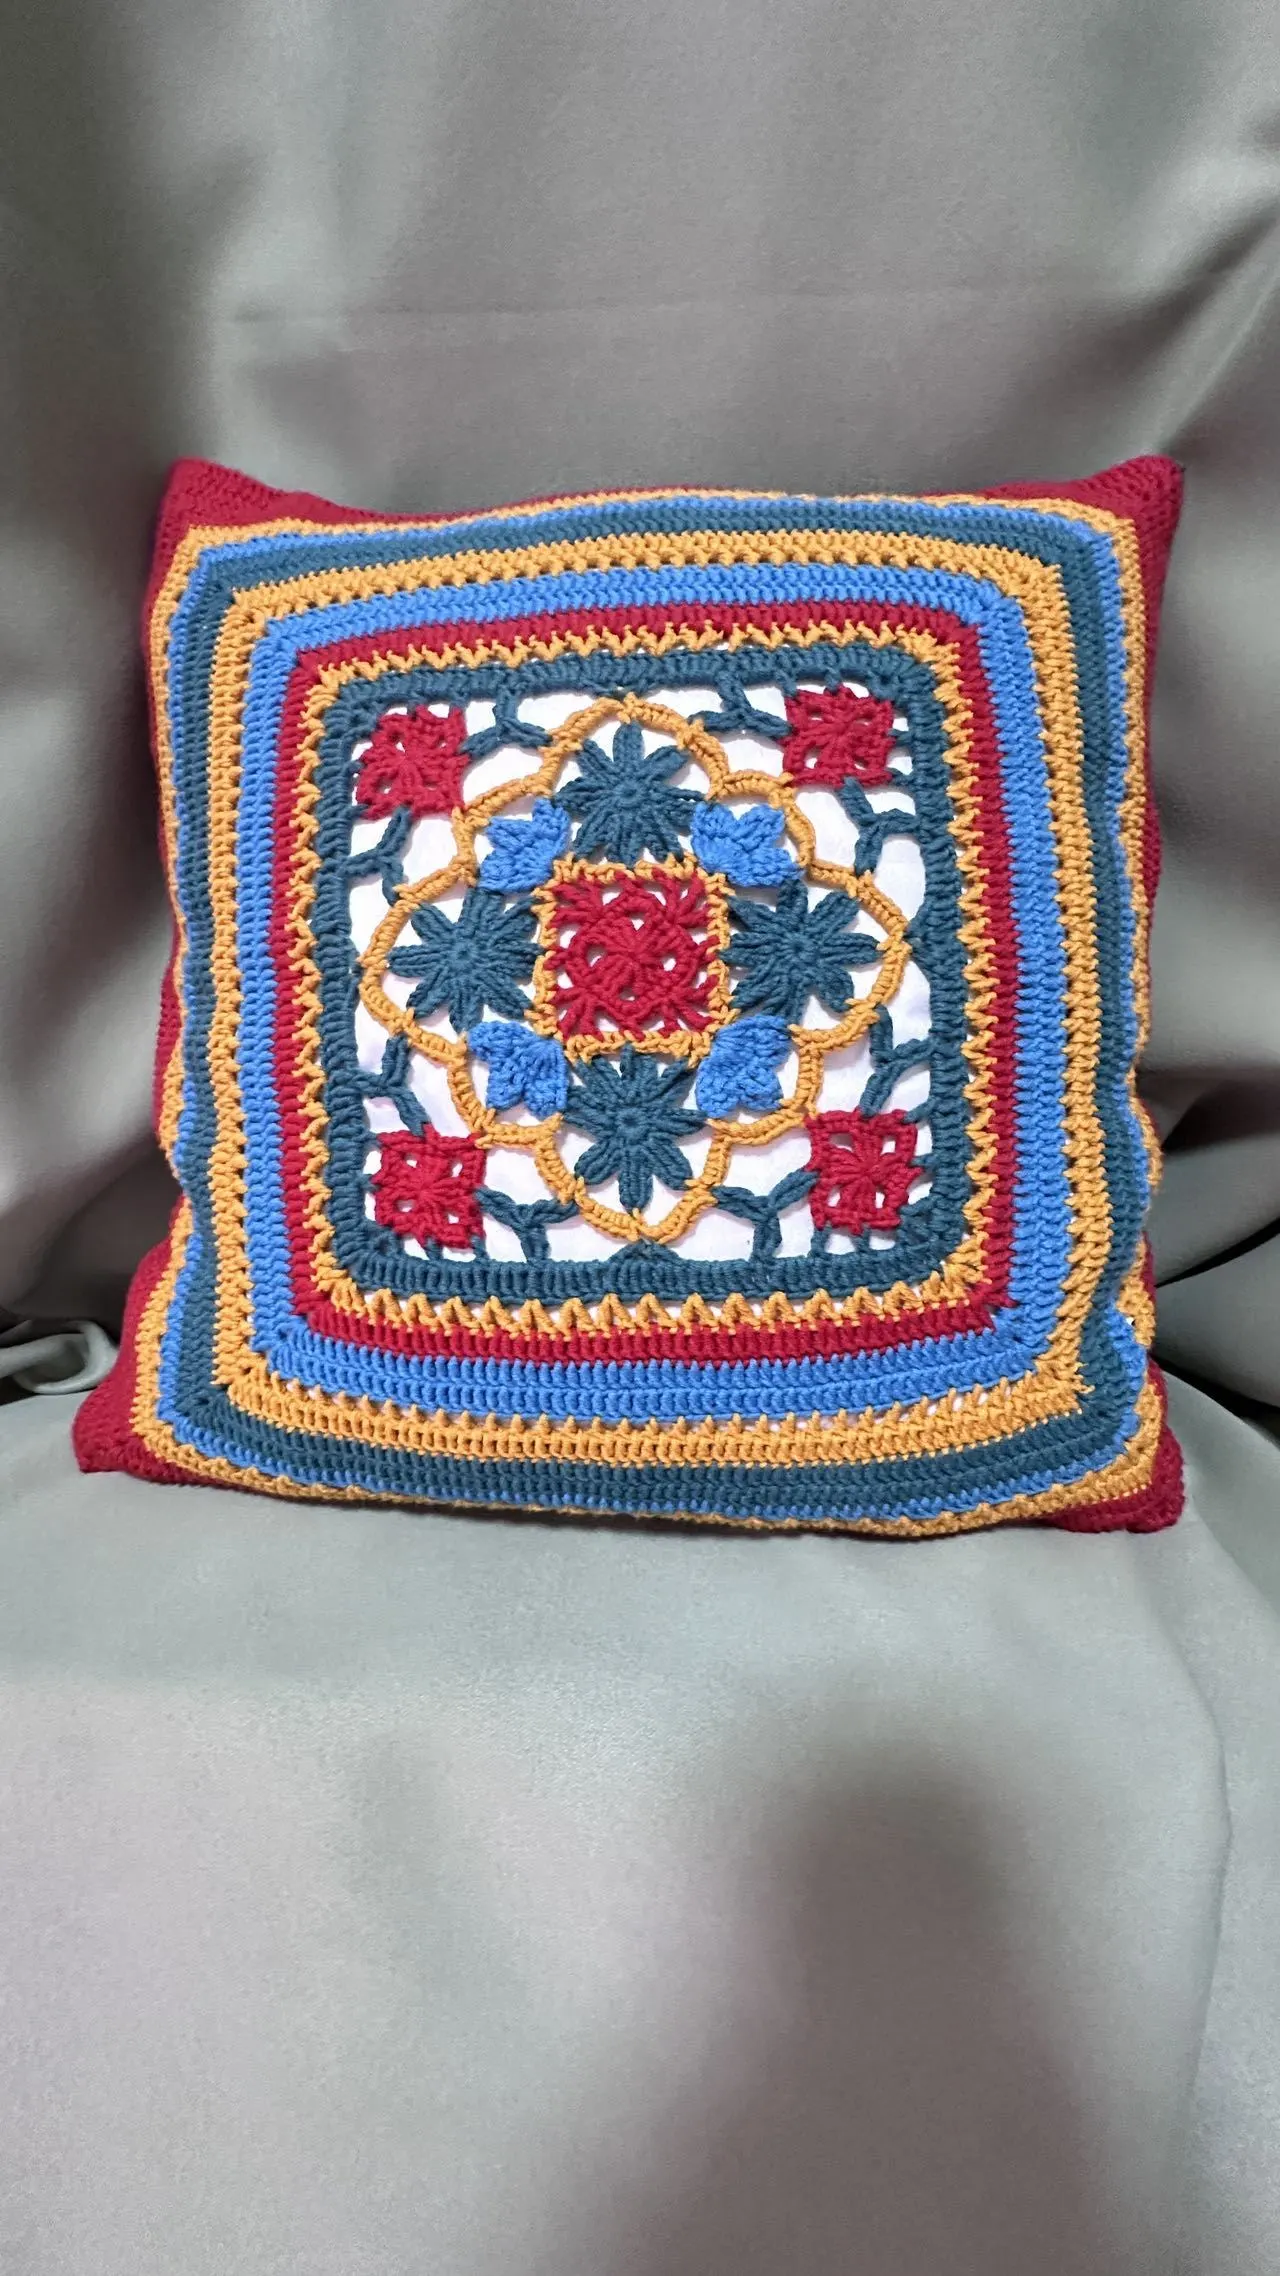
Window at Dawn Cushion Cover
Project preview
See the finished project
Pattern format
Instructions
Watch and follow
Video tutorial
This pillow cover consists of the front piece, back piece, decorative pieces, and accessories.
The handcrafted measurements may have an error of 1 to 2 cm. Due to variations in individual tension, the size of the sample is for reference only.
Materials:
4-Ply Combed Cotton & Acrylic Fibre Hand Knitting Yarn
2.00 mm hook
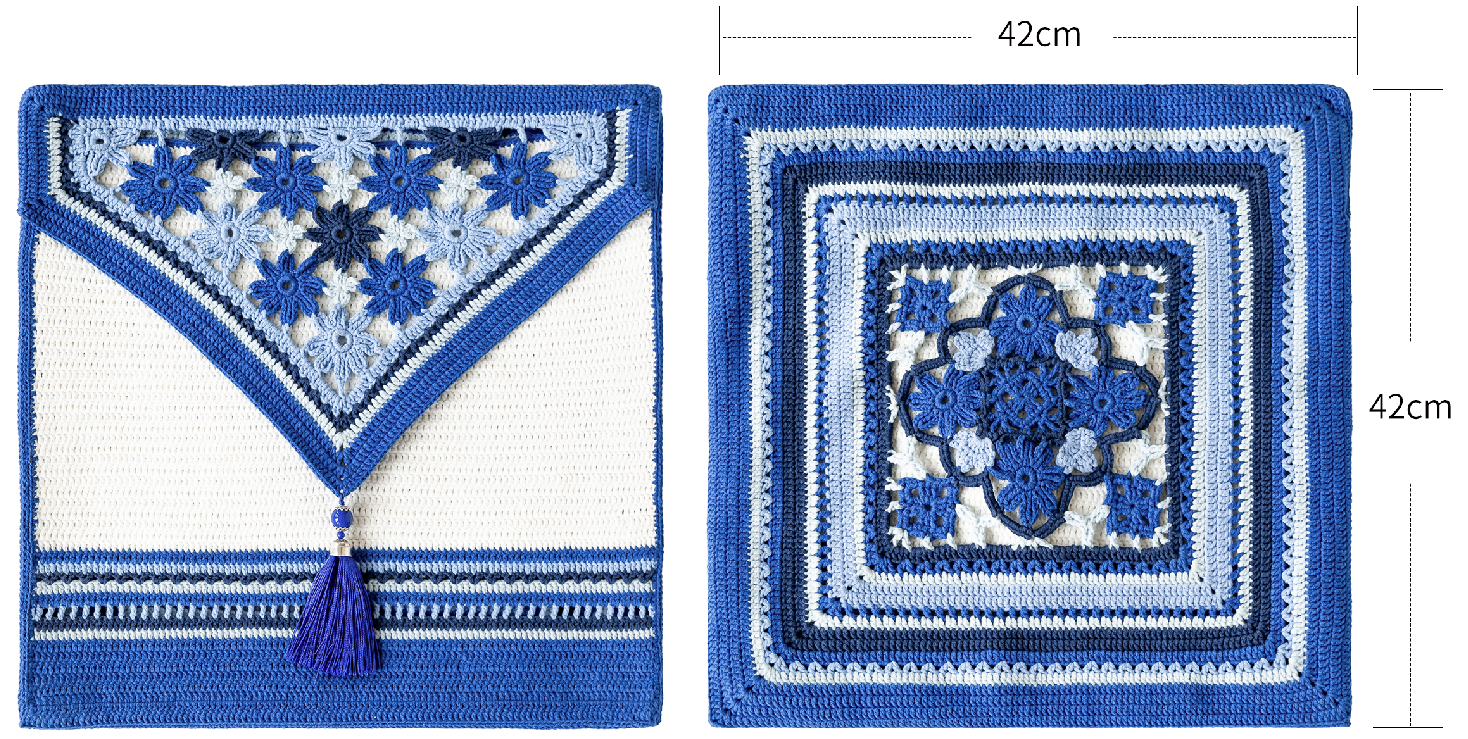
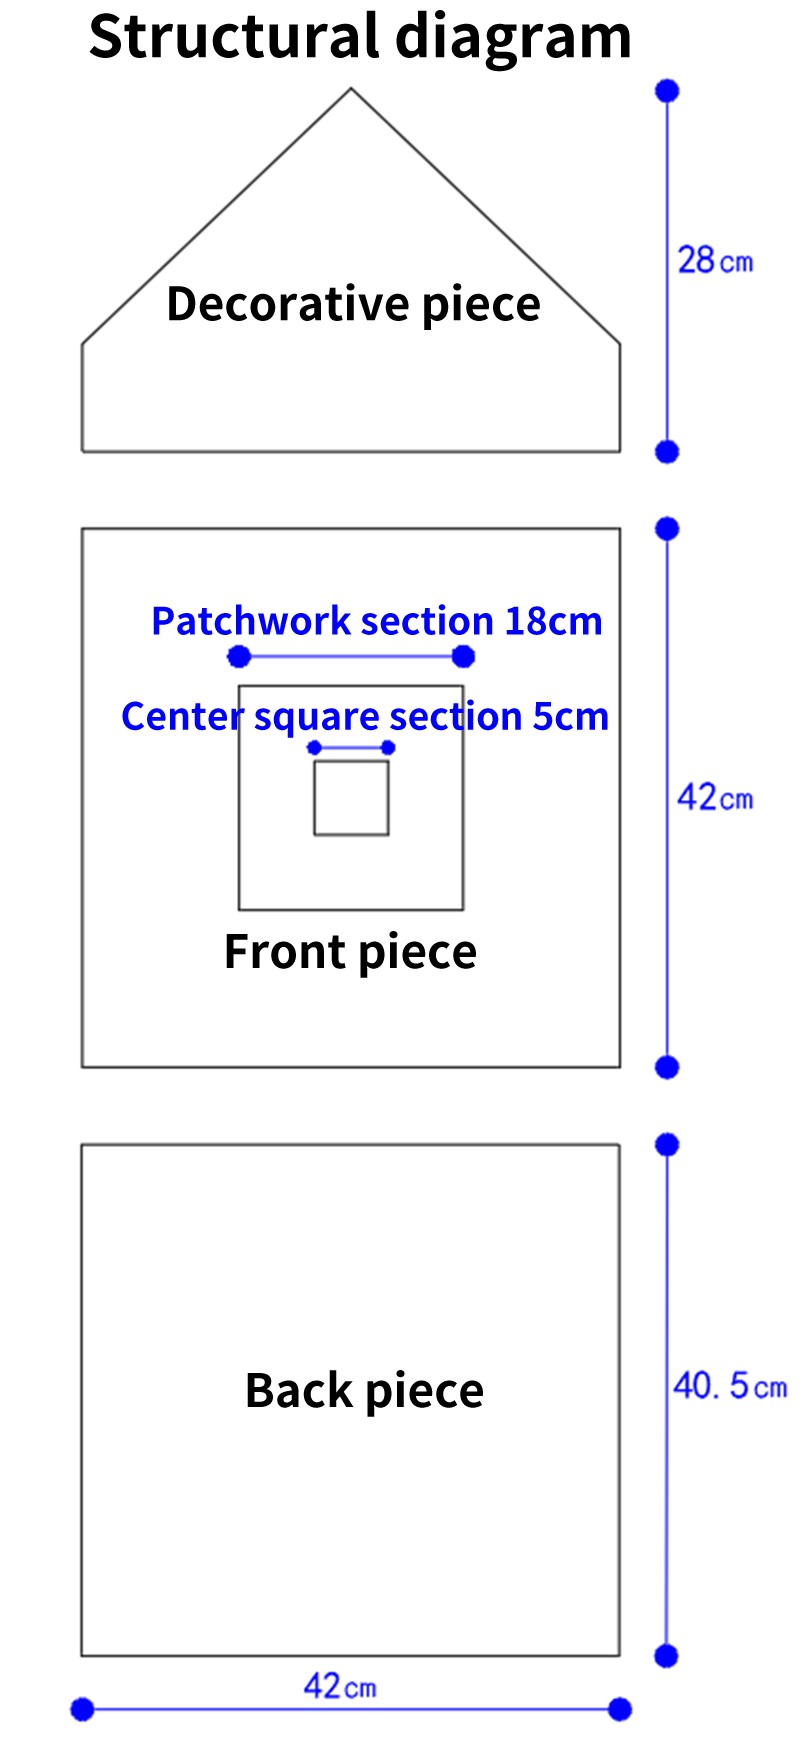
Chart Key










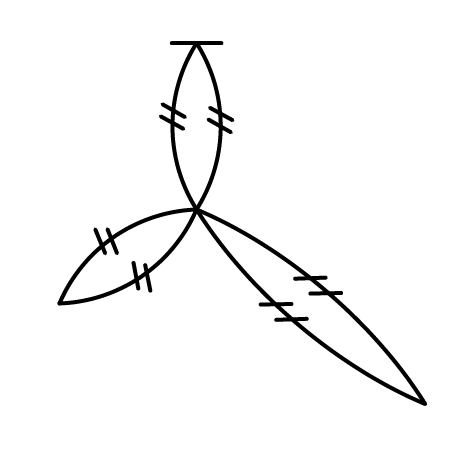

Note:
1. This pattern is making in Chinese crochet pattern terms, and the stitch name is written using American terminology. All measurements in charts are in cm. 
Part 1 Back pieceA 00' 44'' (Part 1)
The back piece consists of the main part and the edge. First, crochet the main part back and forth, and then crochet 1 row of edging. Please refer to the video demonstration for more details.
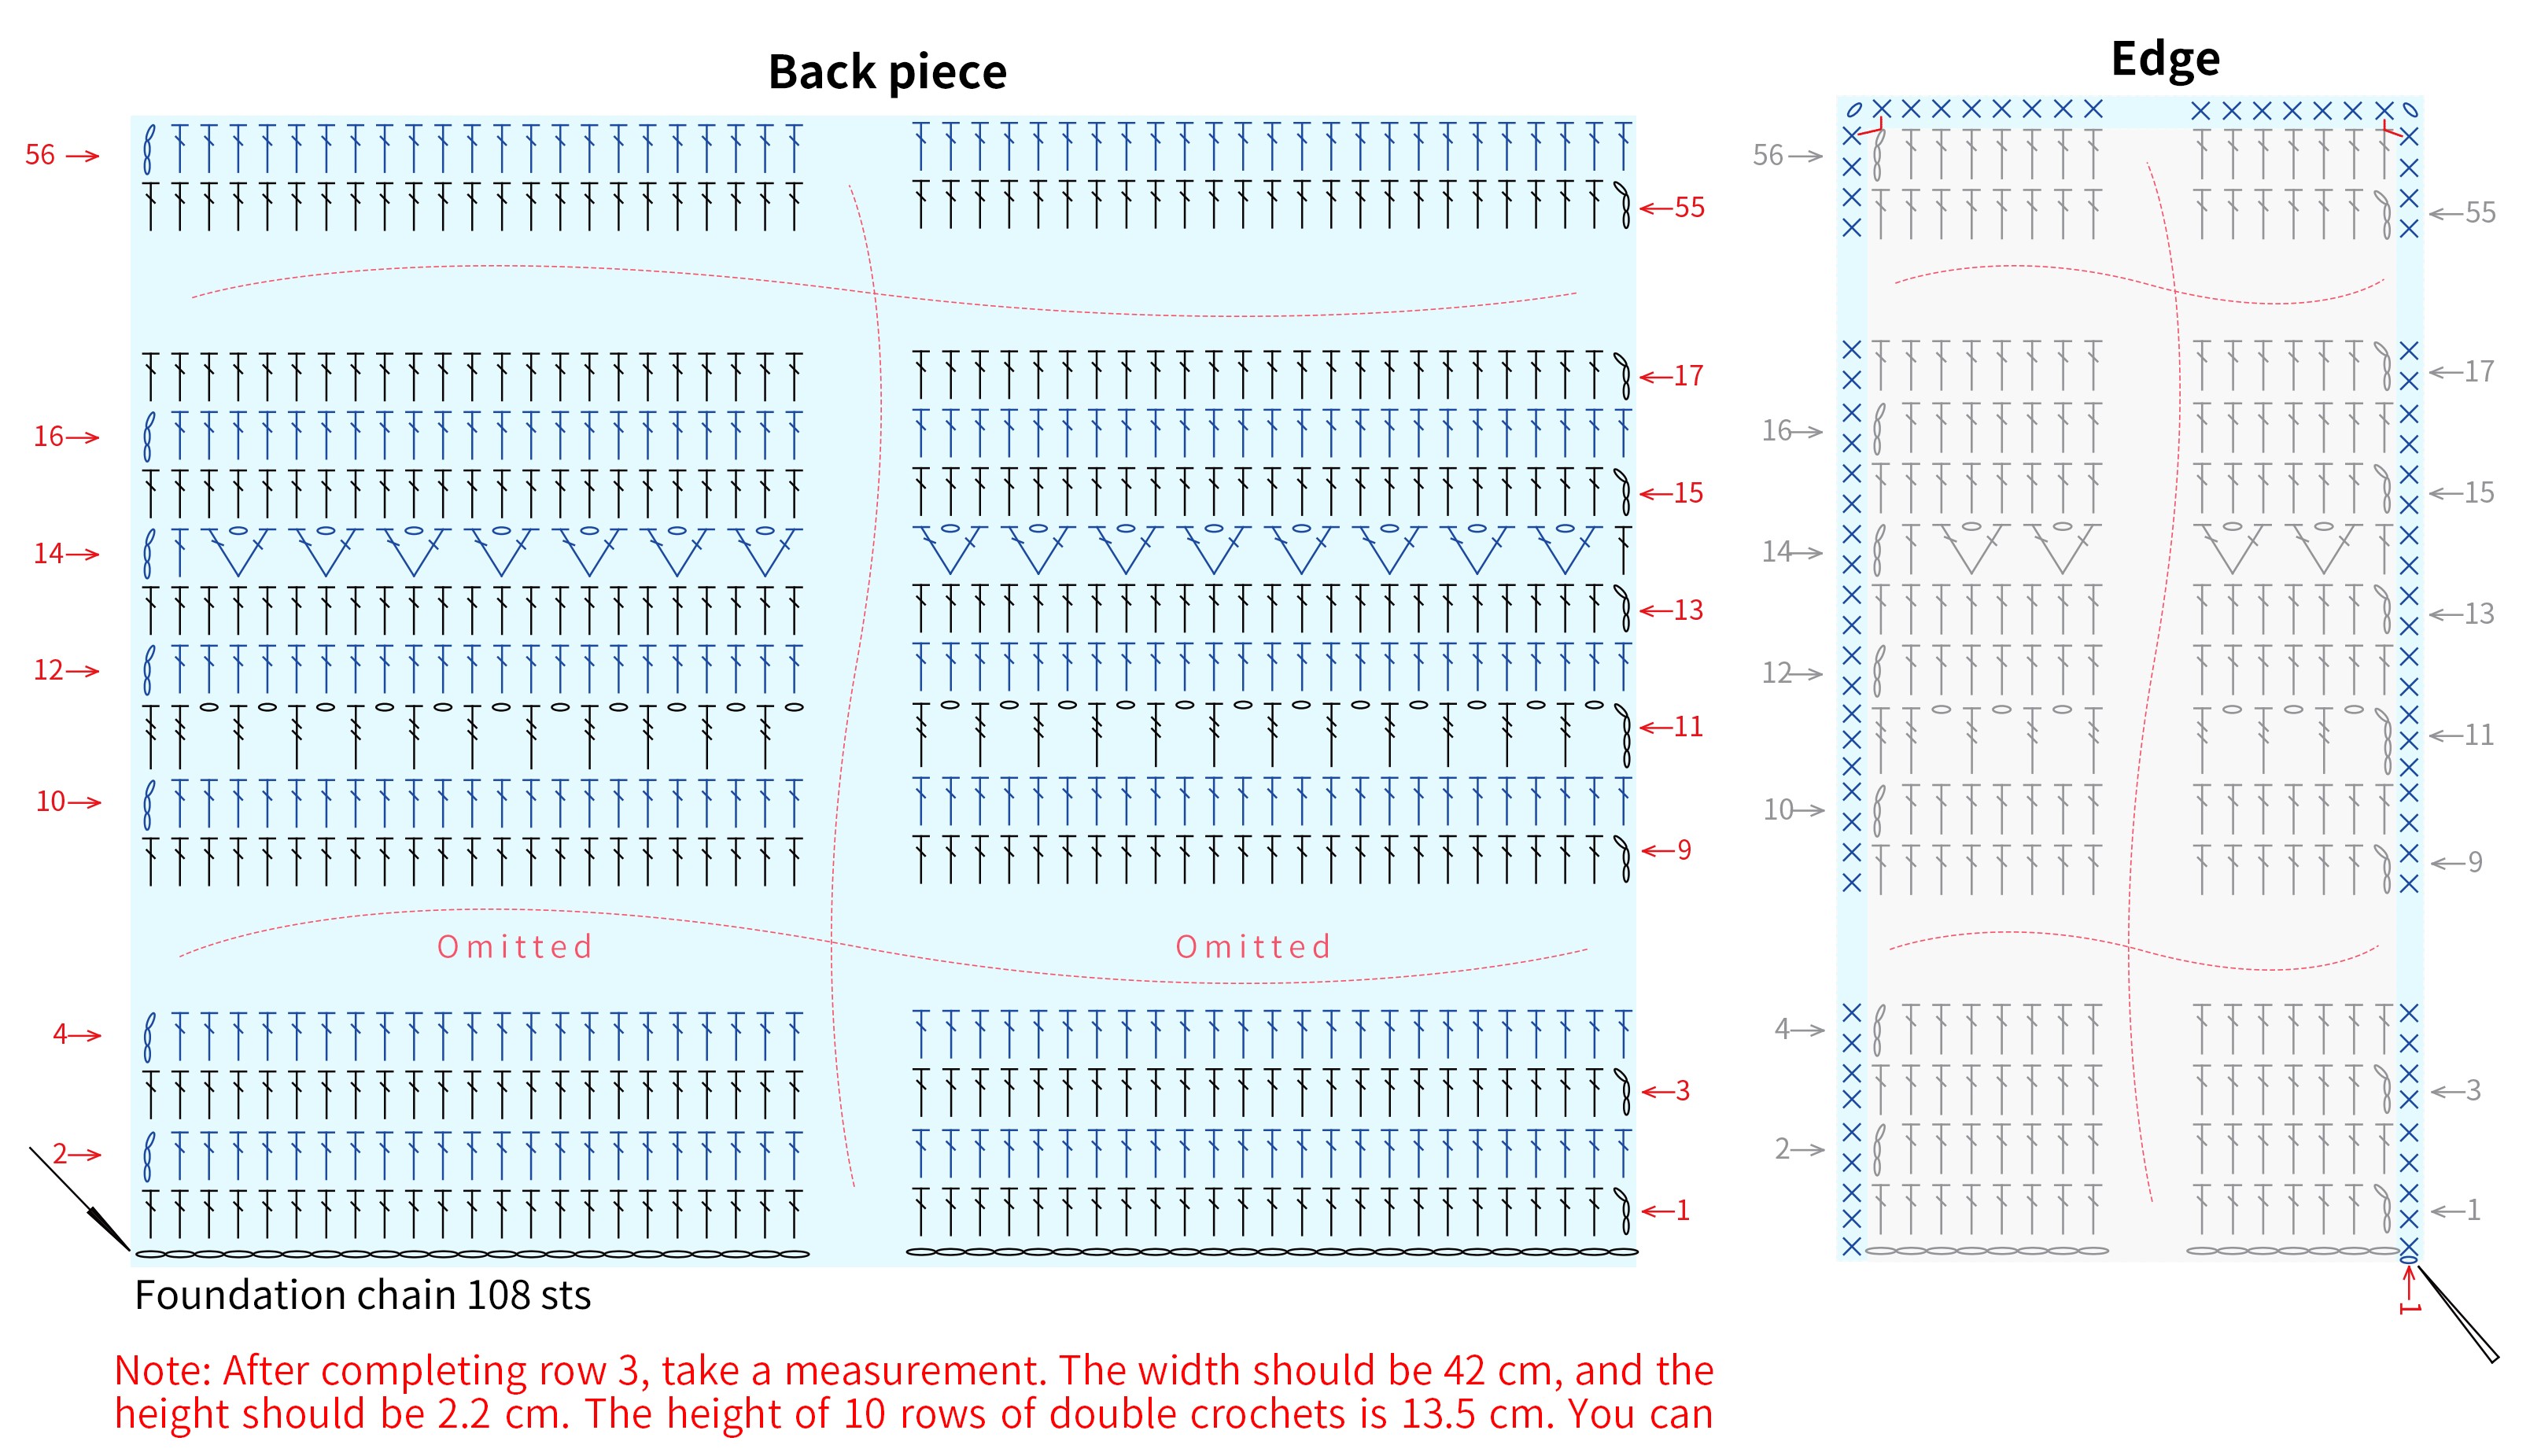
Color chart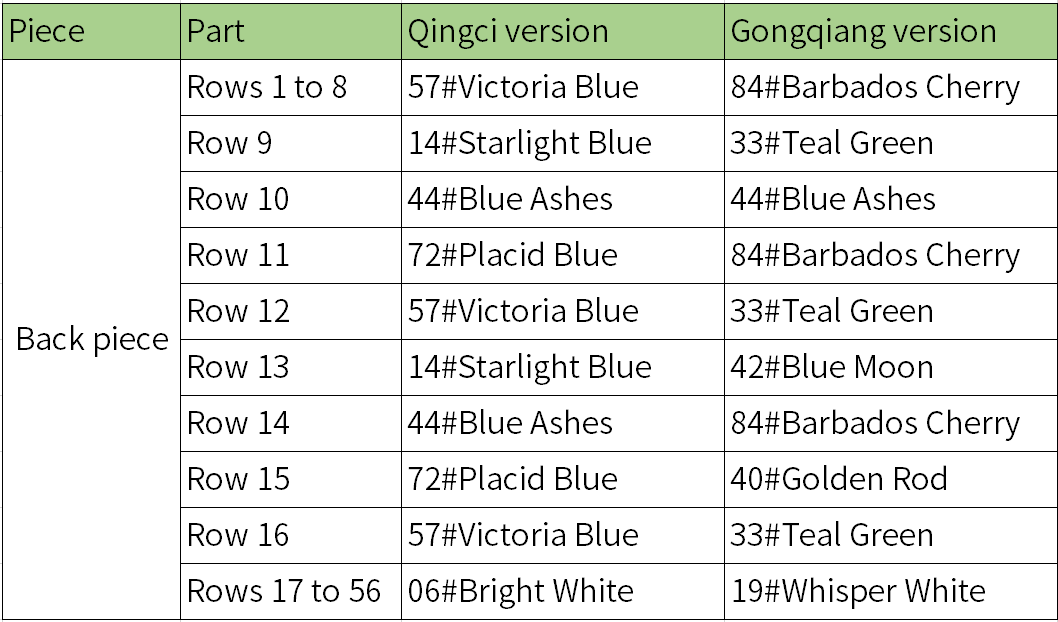
Part 2 Front pieceB 46' 43'' (Part 1)
The front piece includes the patchwork area and the outer-ring area. First, crochet the central square in the patchwork area, then crochet small flower 1 and small flower 2. Next, crochet two circles, and finally, crochet small flower 3. Please refer to the video demonstration for more details.
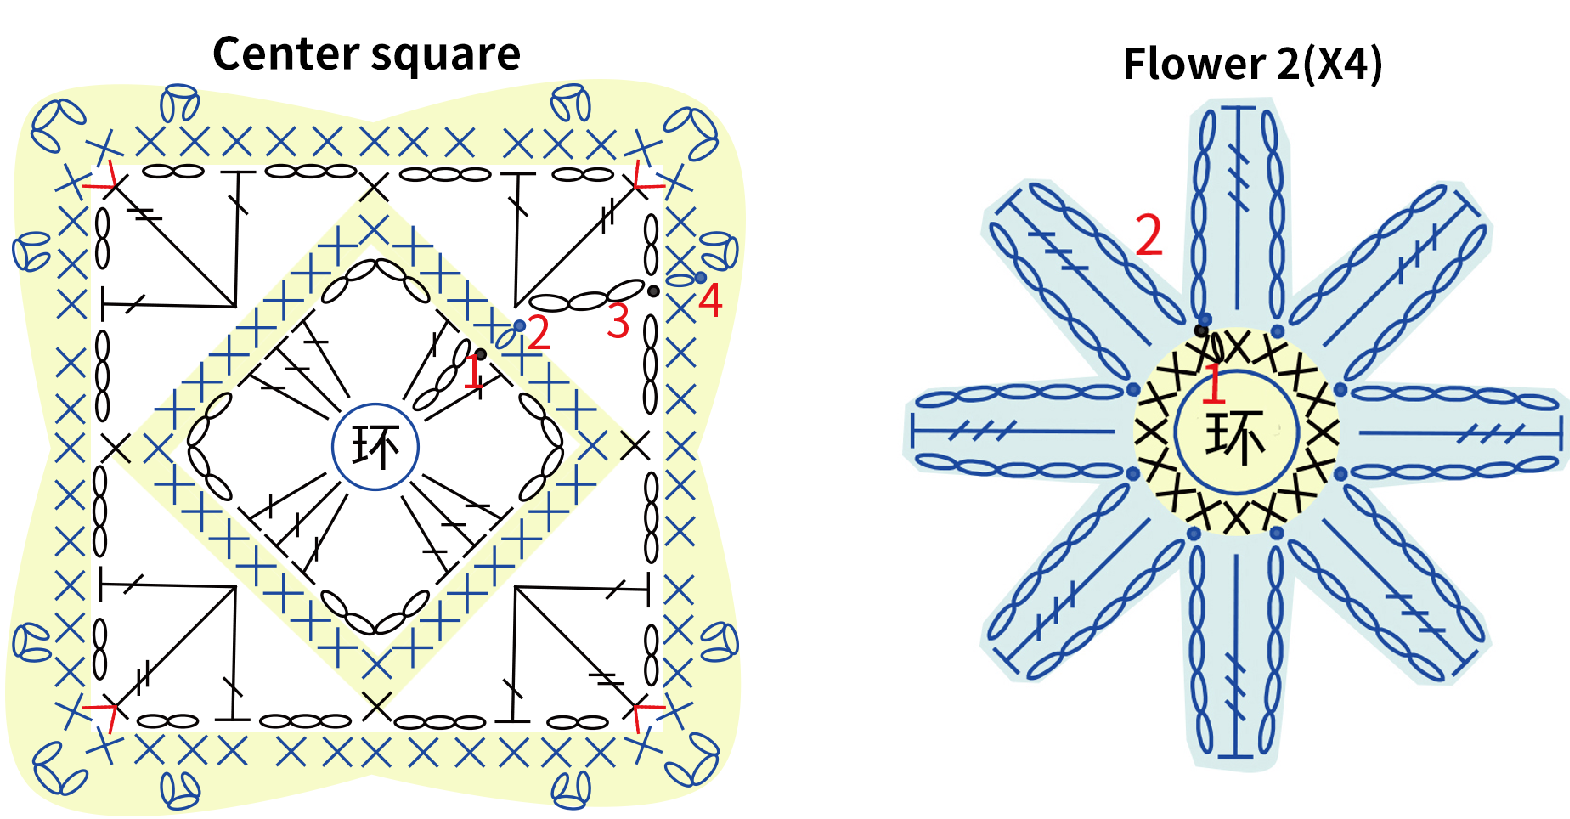
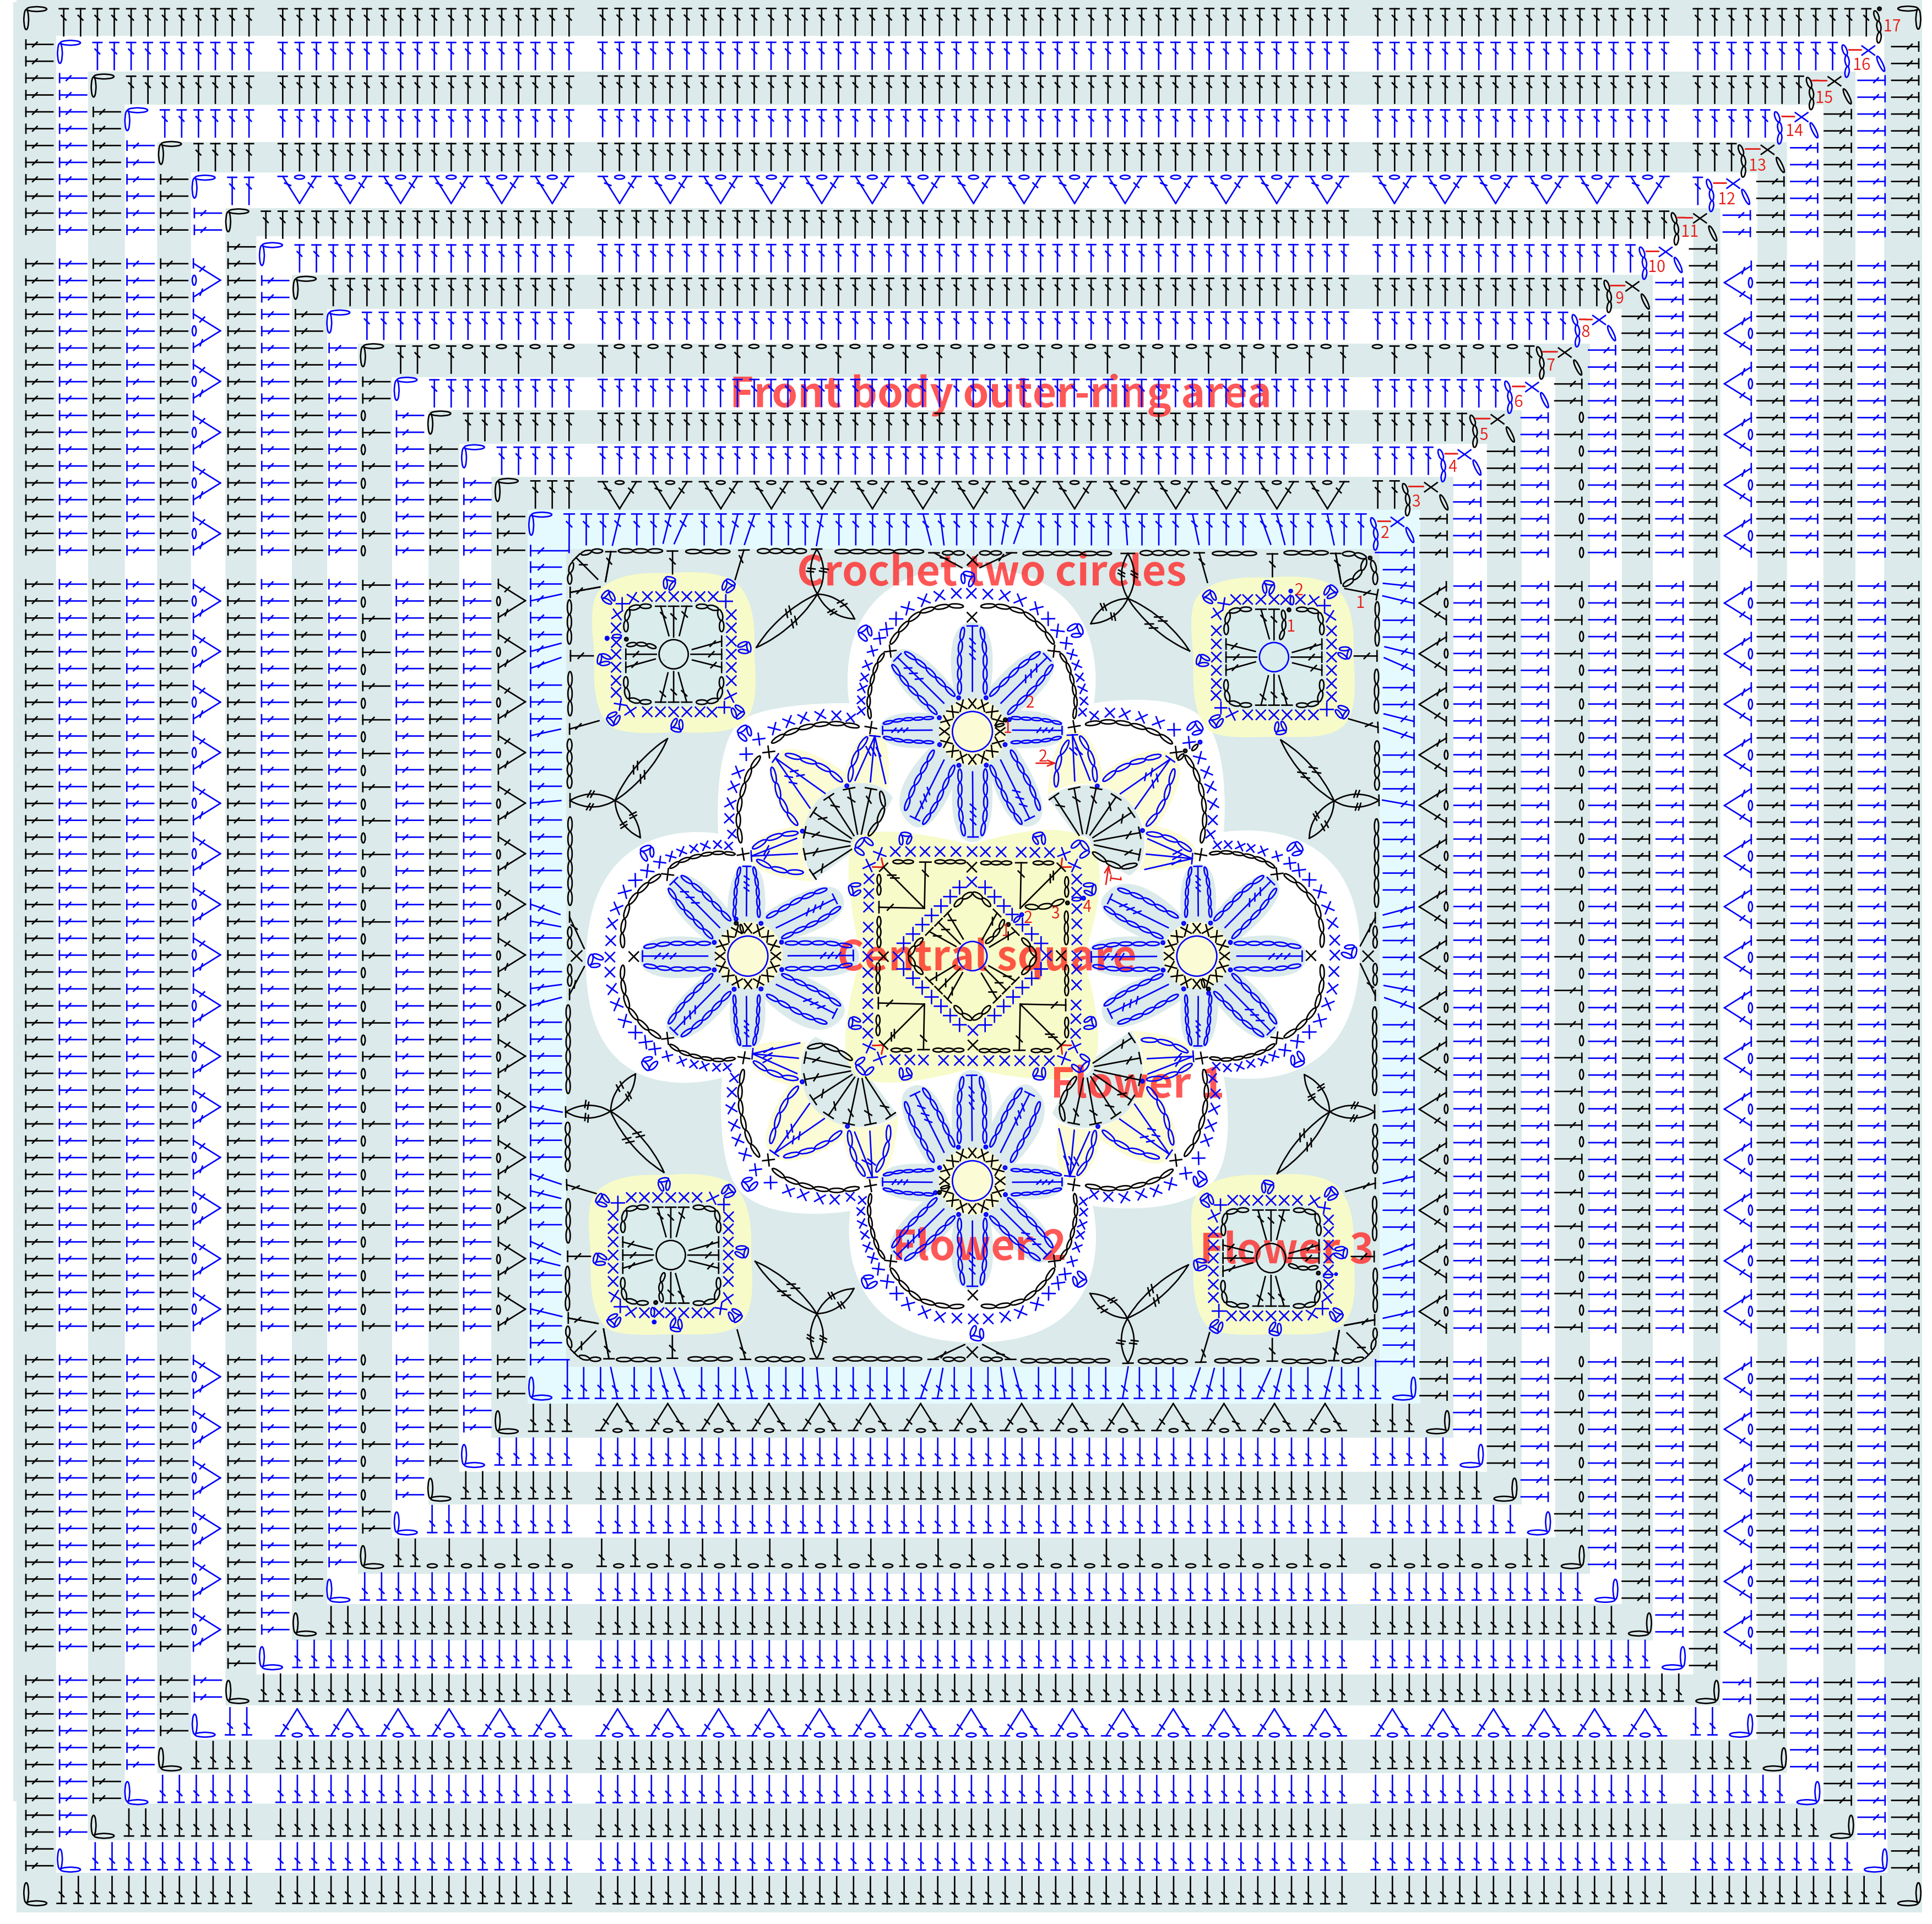
Color chart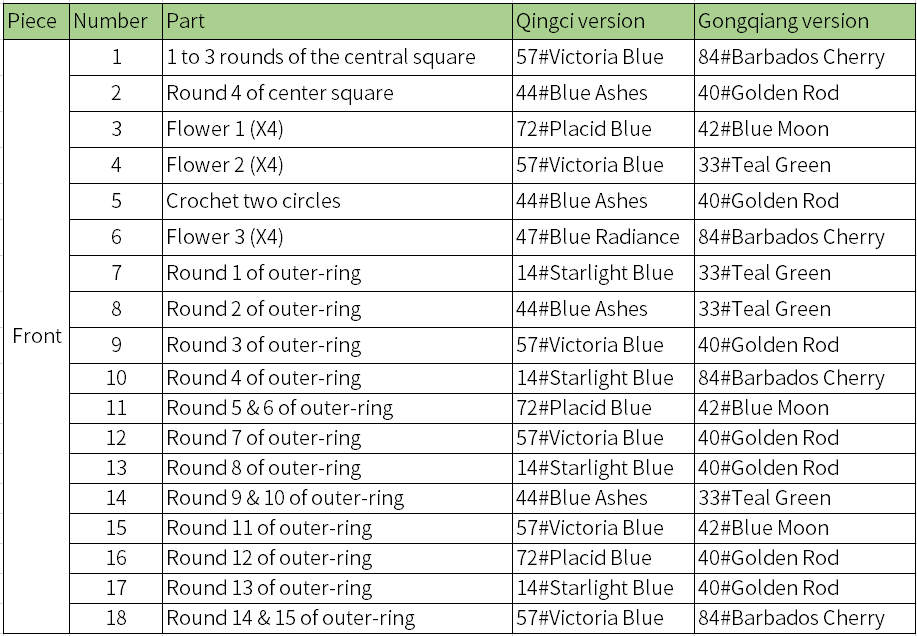
Part 3 Decorative pieceC 24' 38'' (Part 2)
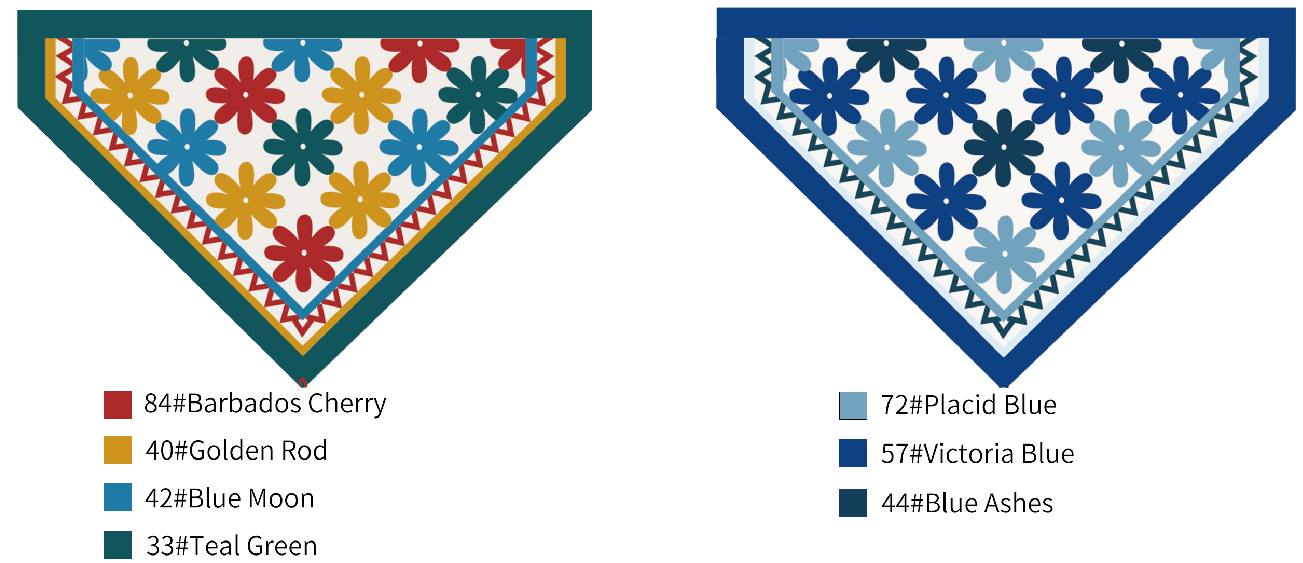
The decorative piece includes the patchwork area and the outer ring. Crochet the patchwork area first, then crochet the outer ring. Please refer to the video demonstration for more details.
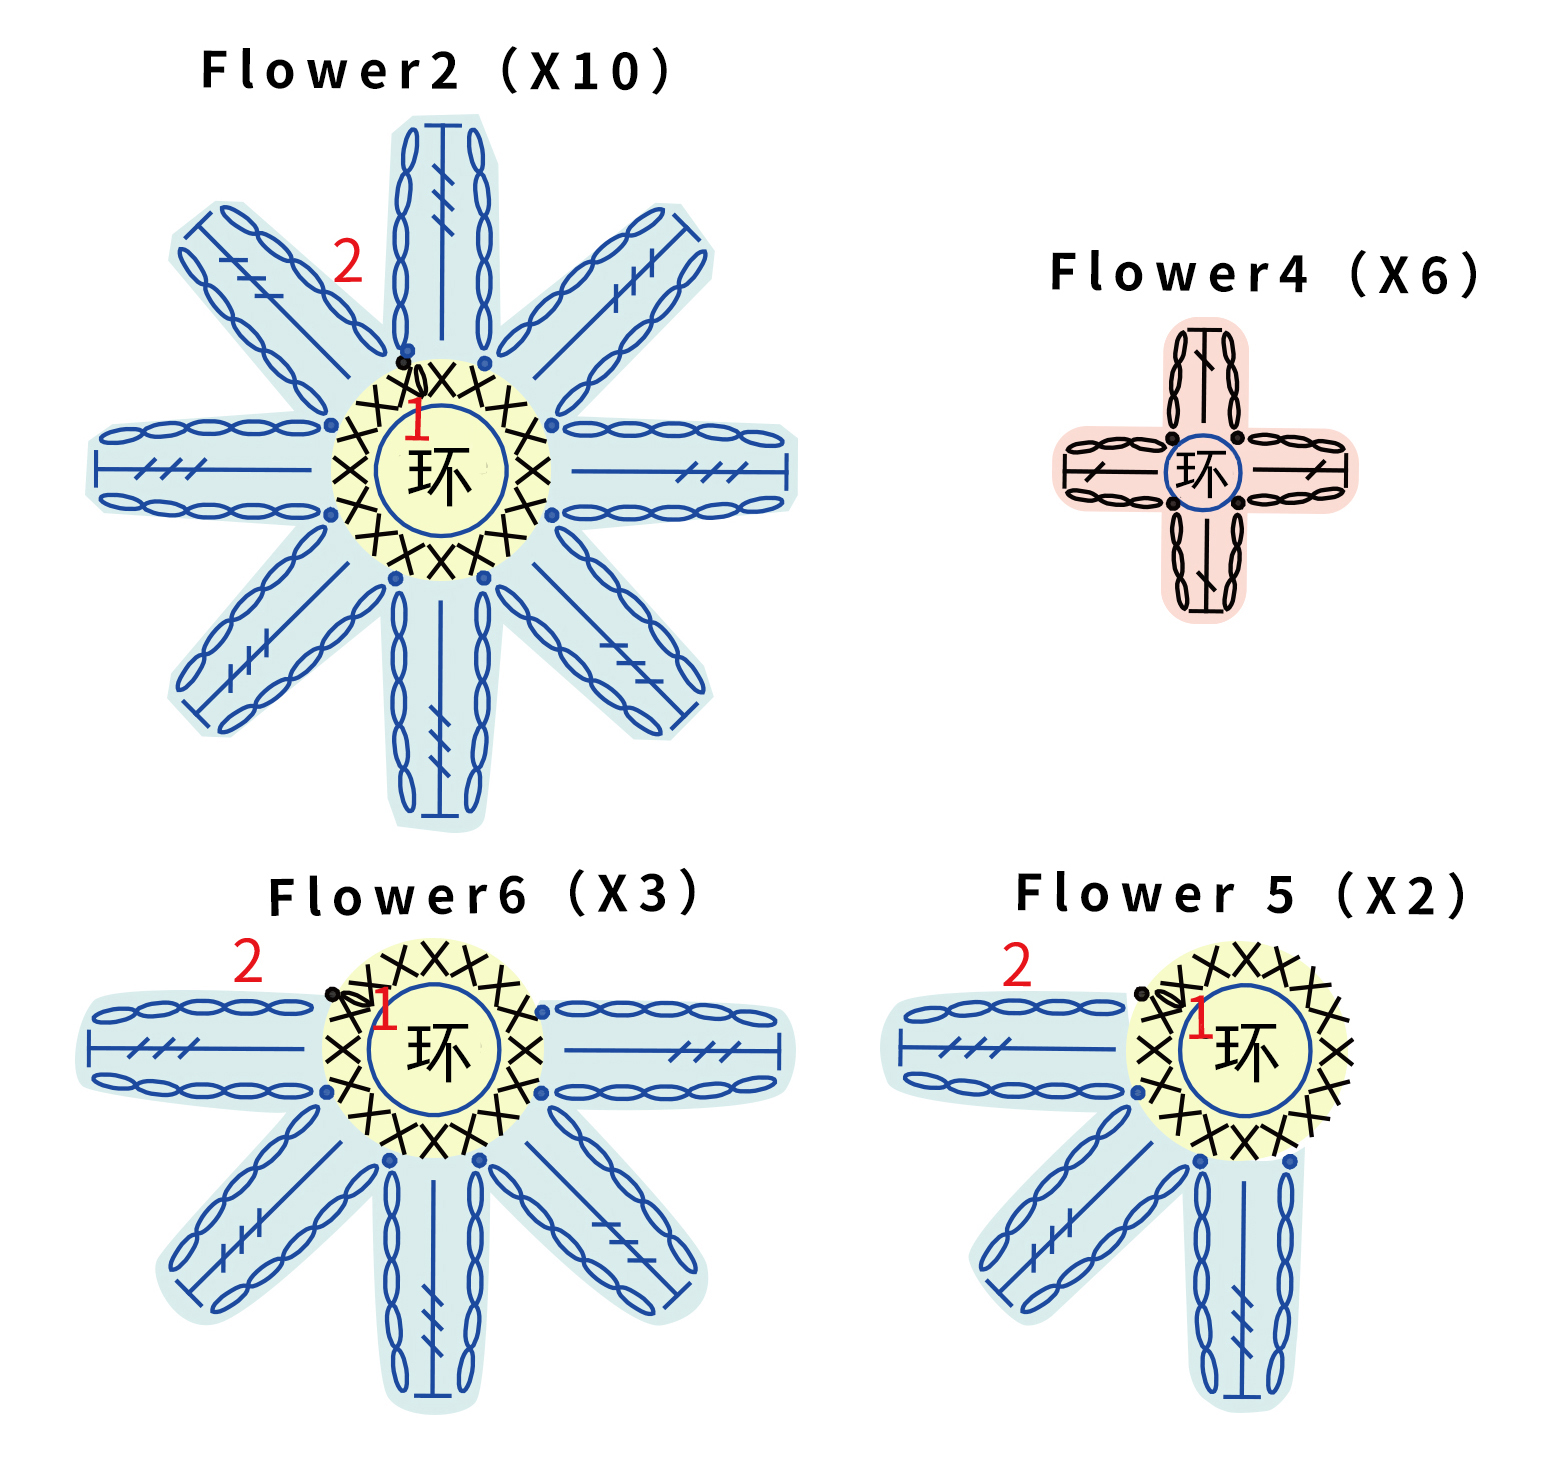
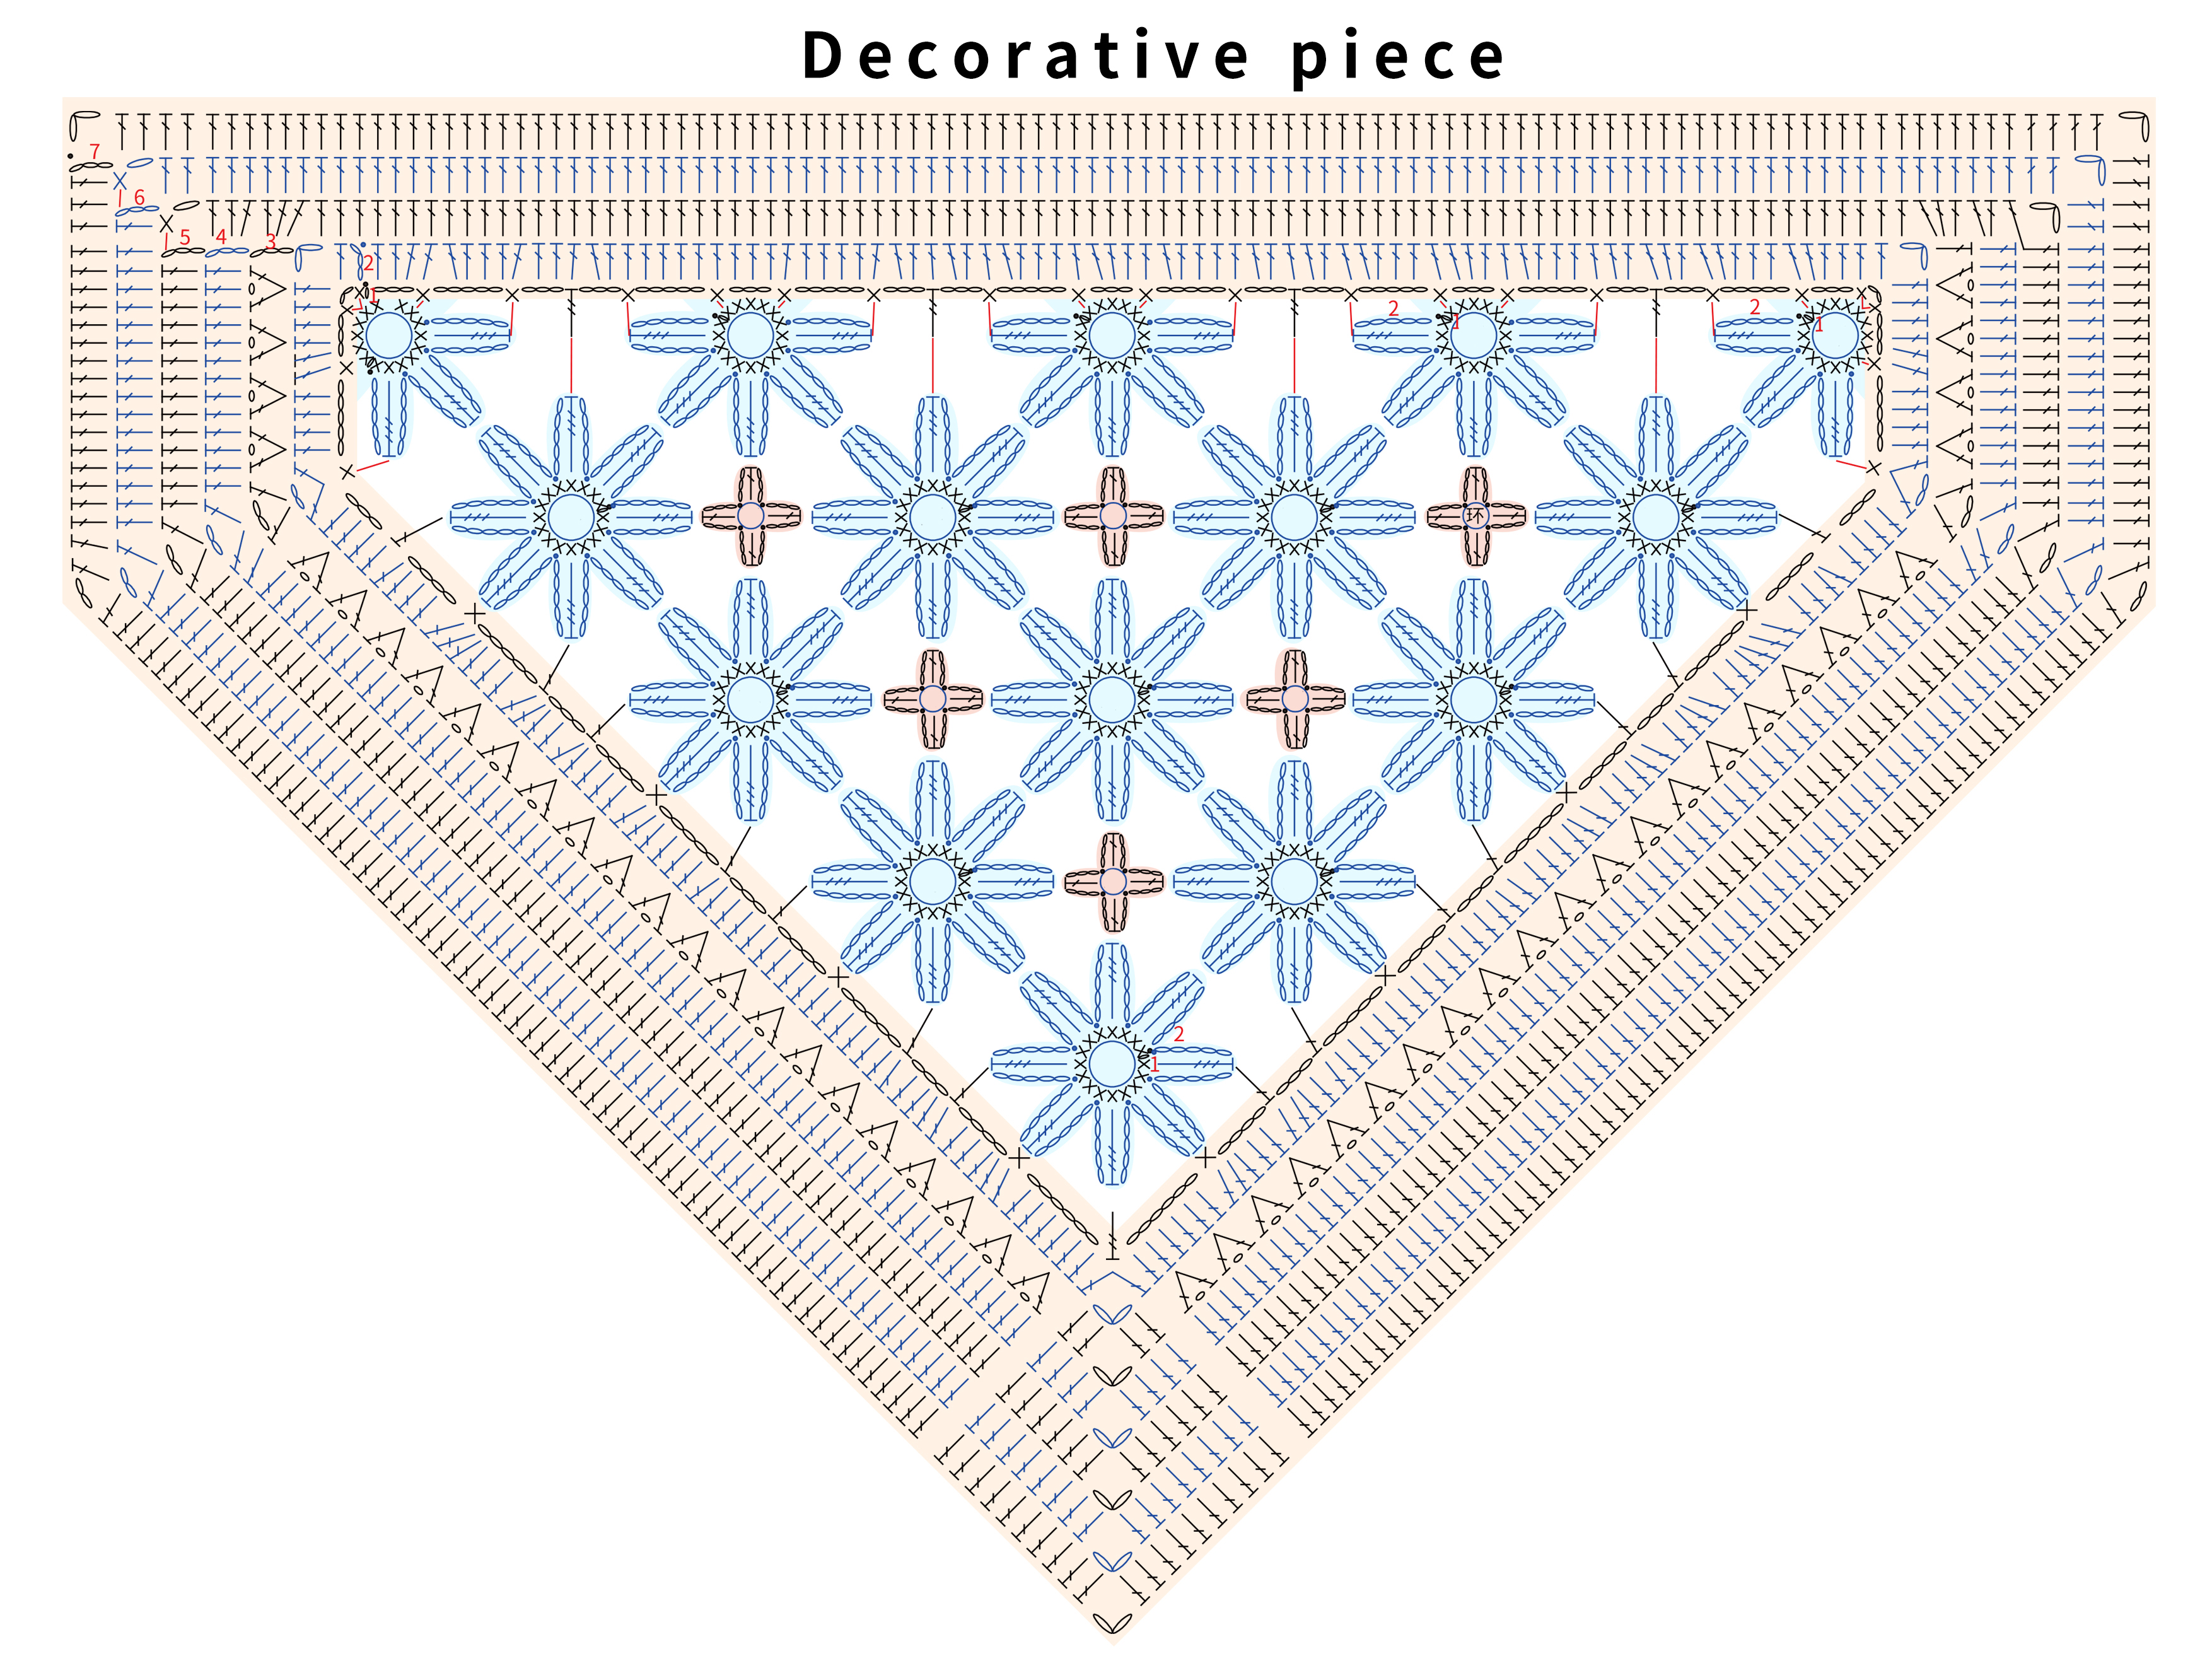
Part 4 Sew togetherD 62' 05'' (Part 2)
First sew together the front piece and the back piece, then sew on the decorative elements. Please refer to the video demonstration for more details.
Part 5 AccessoriesG 74' 46'' (Part 2)
After sewing is complete, sew on the buttons and fix the tassels. Please refer to the video demonstration for details.
Made by the community