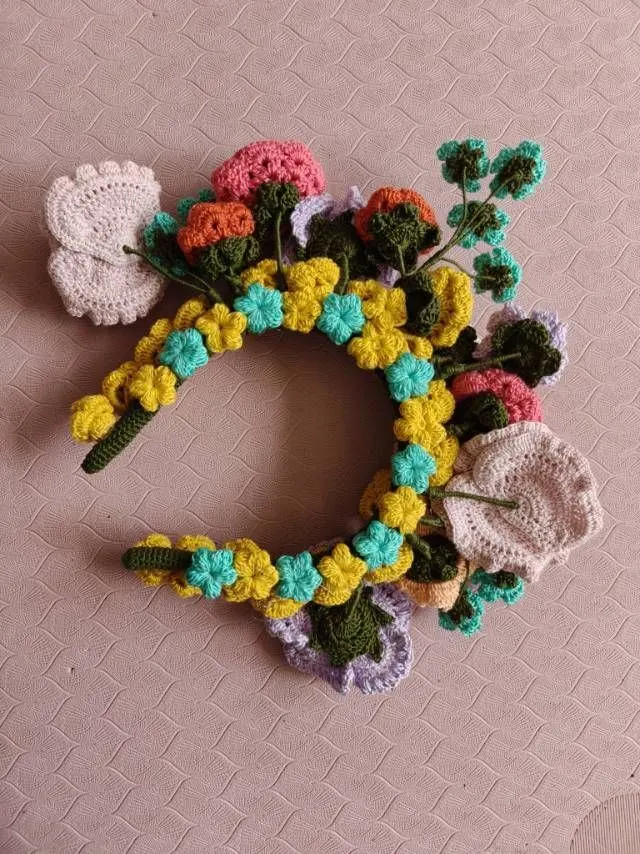
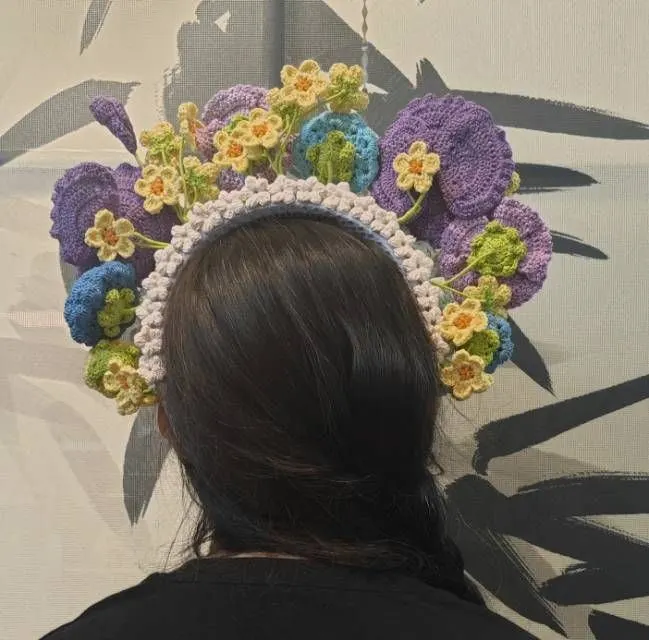
Accessories / Ornament
Zanhua Floral Hairband
Project preview
See the finished project
Pattern format
Instructions
Watch and follow
Video tutorial
The hair accessories consist of a headband, flowers, and assembly. First, make the headband, then crochet the needed flowers, and finally assemble them together with the headband.
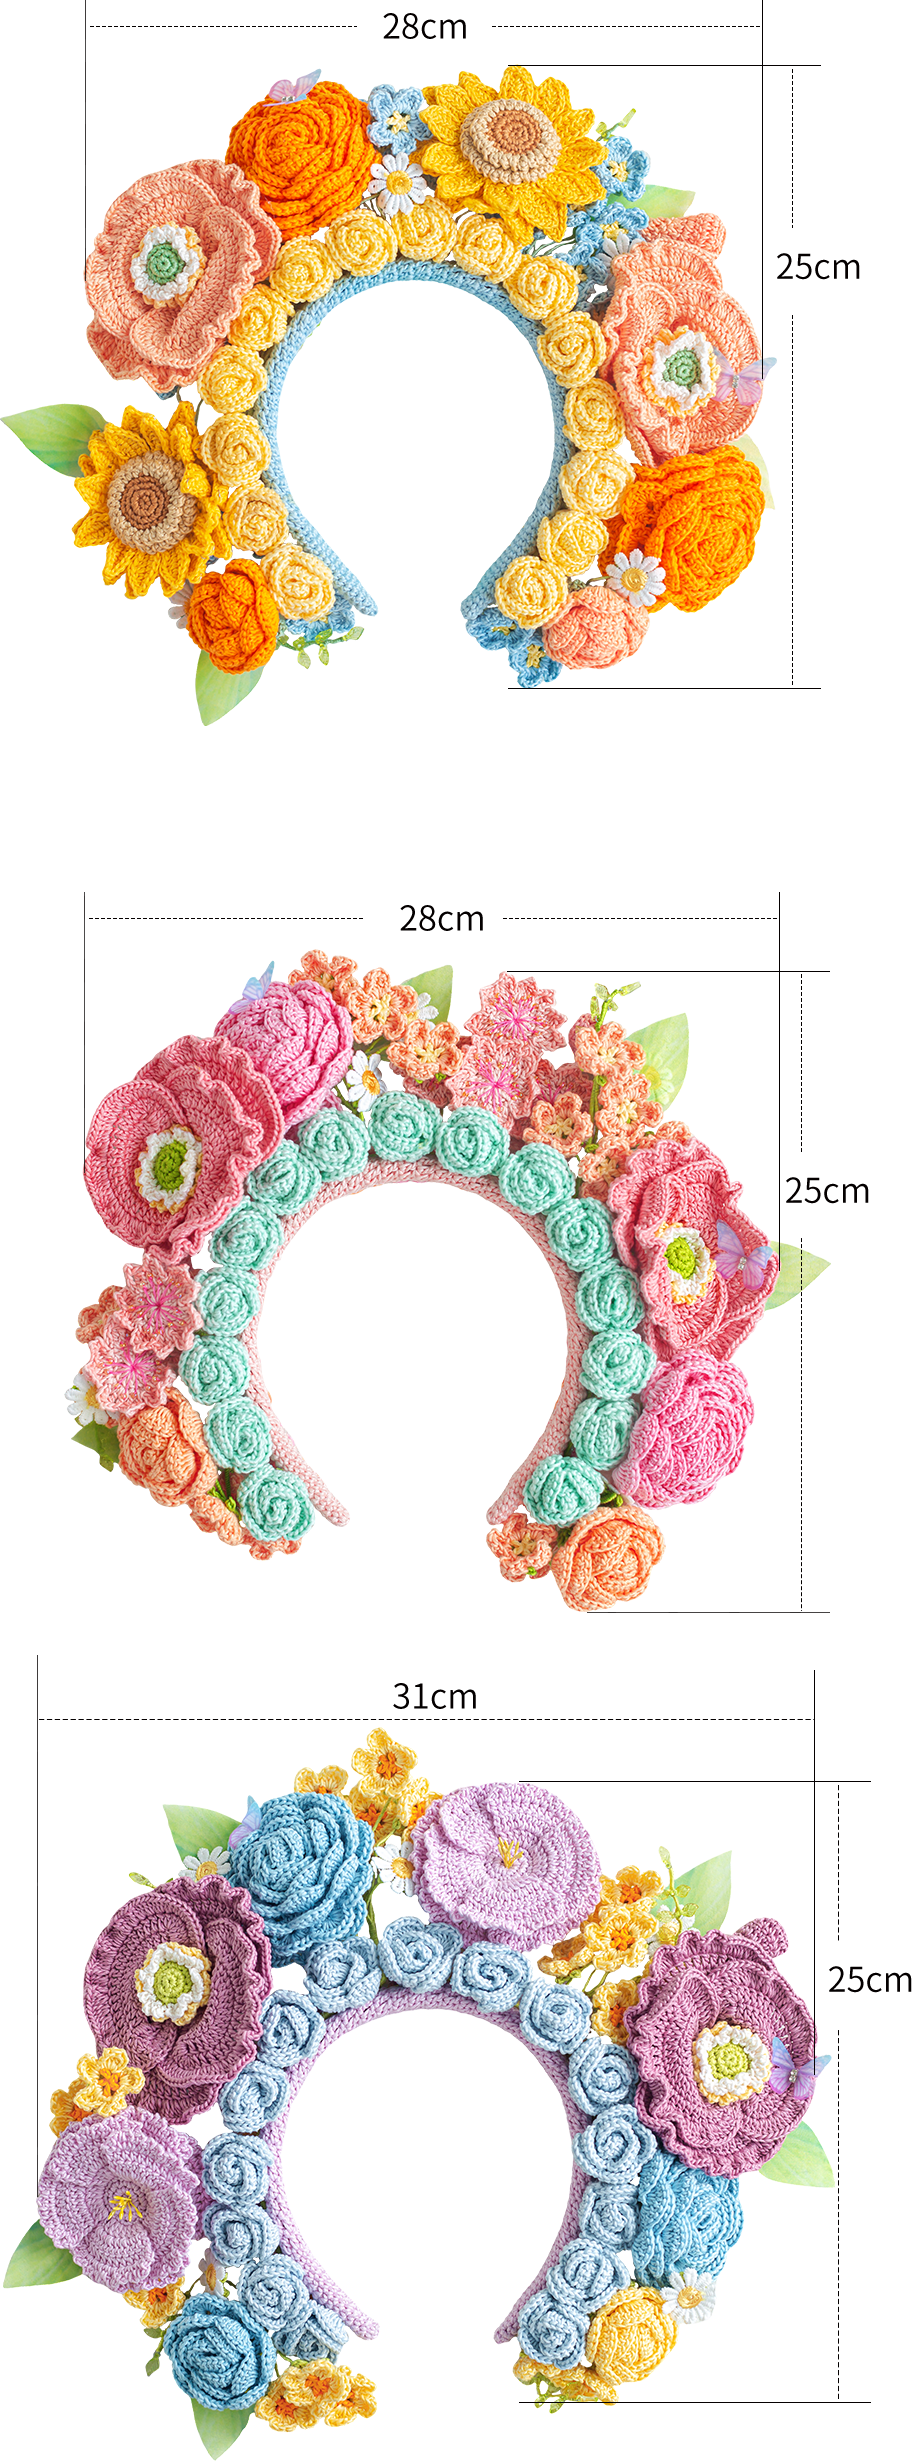
The handcrafted measurements may have an error of 1 to 2 cm. Due to variations in individual tension, the size of the sample is for reference only.
Materials: Susan's Family 3# lace Thread (1.75 mm hook)

ABBREVIATIONS
MRadjustable magic ring
CHchain
Thalf double crochet
Kskip
V = sc2-in-12 single crochets into the same stitch
(...)×6crochet item in the parentheses six times
[...]in the same stitch
Dao2start in 2nd CH from the hook
SLslip stitch
turnturn the piece
Etreble crochet
FV = dc2-in-12 double crochets into the same stitch
A = sc2togsingle crochet 2 stitches together
Fdouble crochet
FW = dc3-in-13 double crochets into the same stitch
BLOback loop only
FLOfront loop only
RRound
HRow
Chart Key













Note:
1. This pattern is making in Chinese crochet pattern terms, and the stitch name is written using American terminology. All measurements in charts are in cm.
2. Working in joined round
When crocheting in rounds without further guidance, working in closed rounds, start each round with a set number of beginning chains and close with a slip stitch. The beginning chain preceding a single crochet and the slip stitch used for joining rounds are not included in the total stitches.
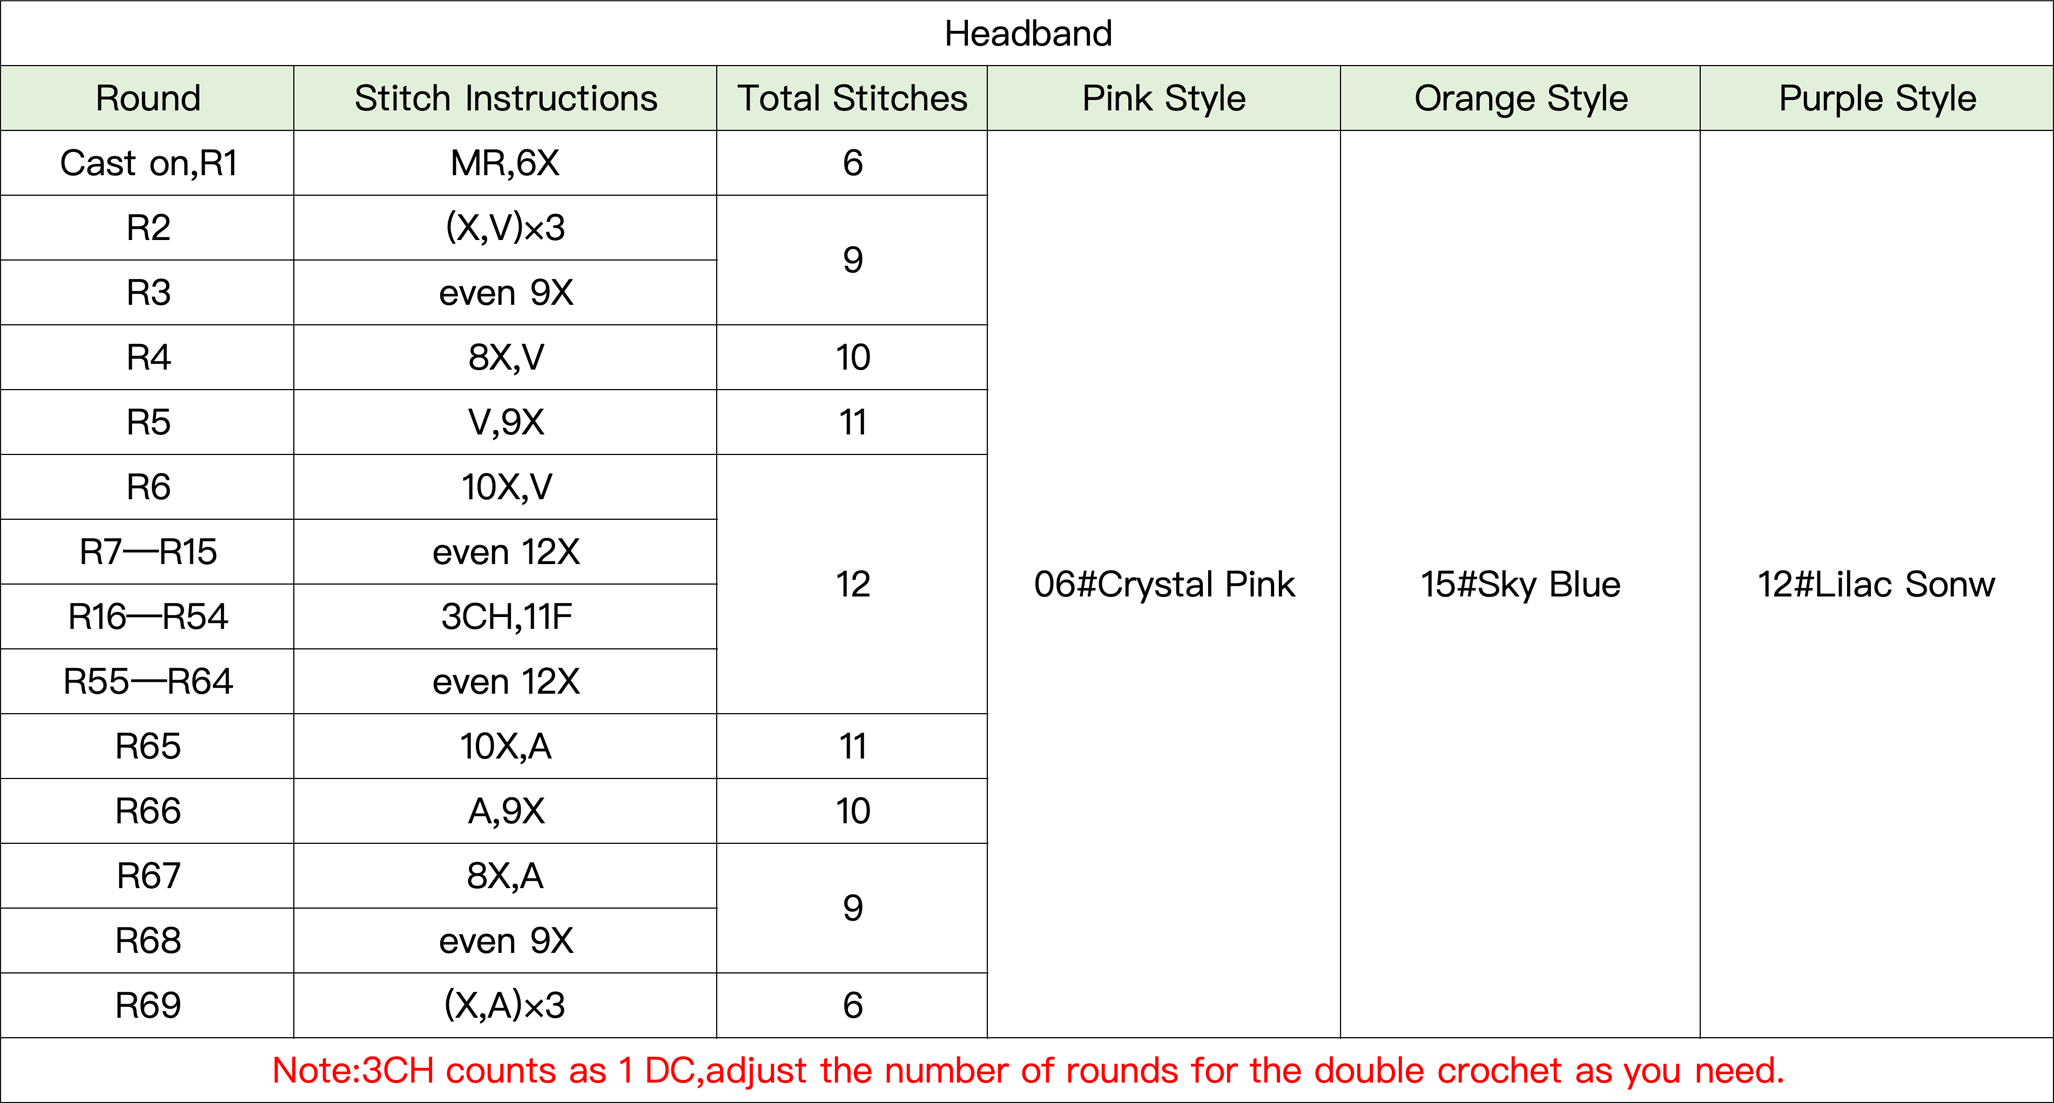
PART 1 HeadbandA 00' 42'' (Part 1)
The headband starts with a magic ring and is crocheted in rounds counterclockwise. It's assembled with the accessories as you go. For specifics, please refer to the video demonstration.
PART 2 FlowersB
STEP 1 Common PartB1 08' 10'' (Part 1)
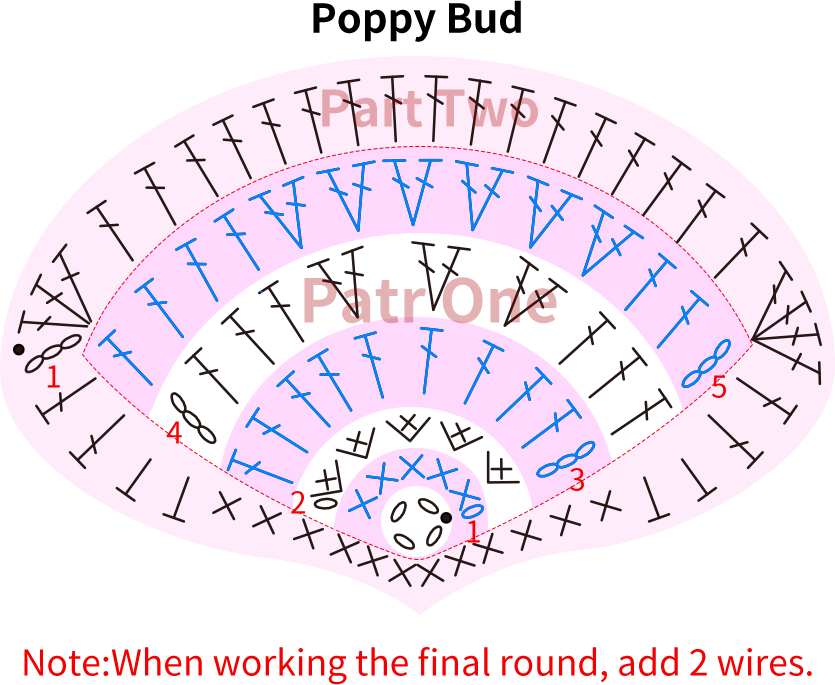
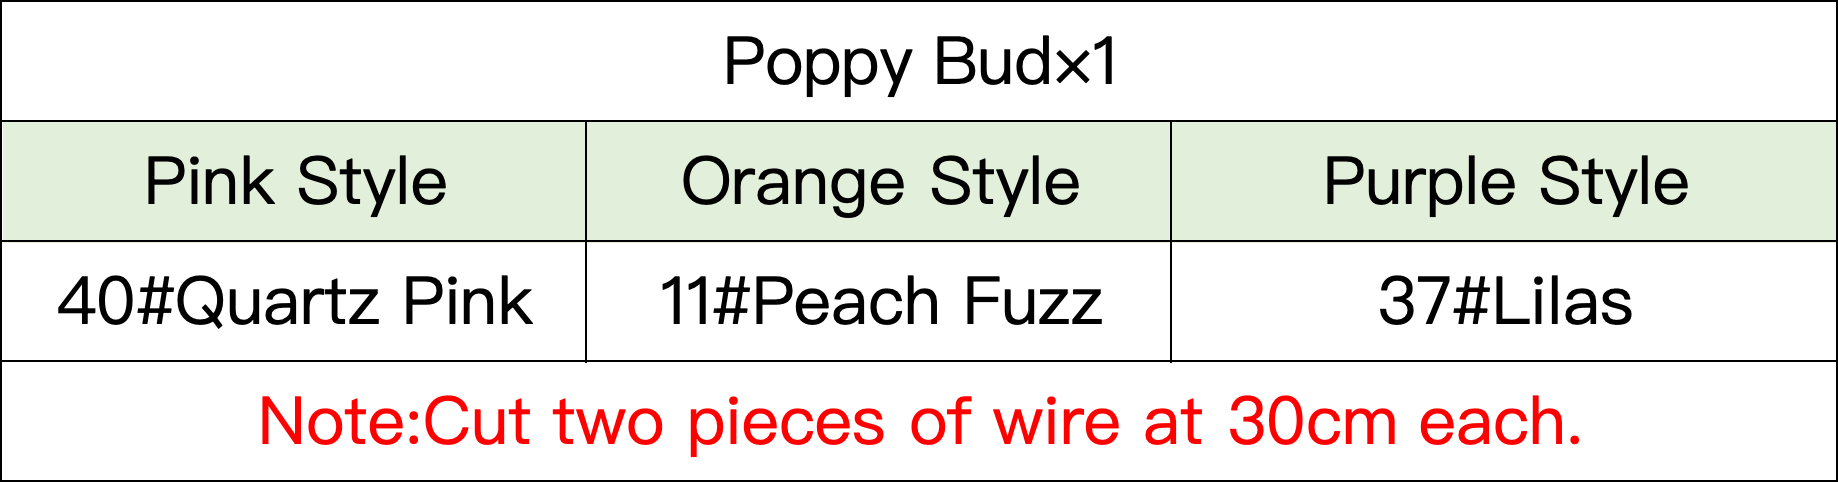
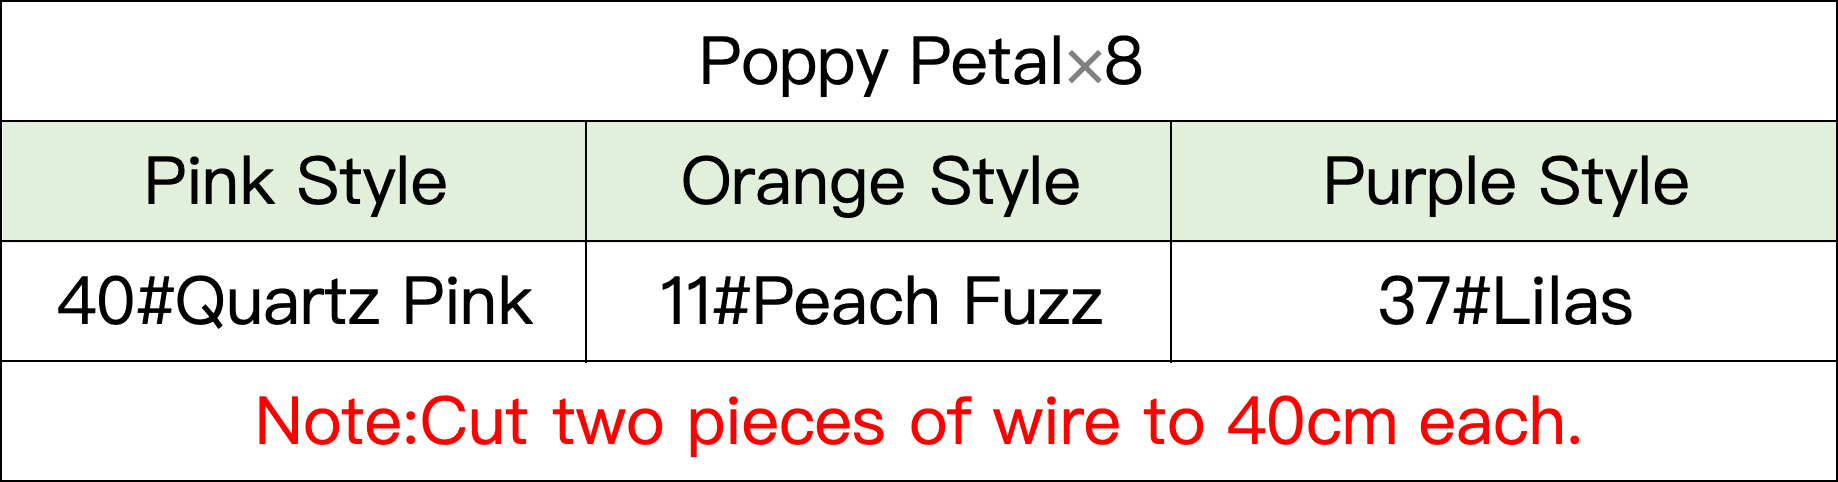
The common part includes small roses, small flowers, small calyx, daisies, puff flowers, poppy petals, poppy buds, poppy centers, medium-sized roses, large roses, medium calyxes, large calyxes, and green leaves. Please refer to the video demonstration for specifics.
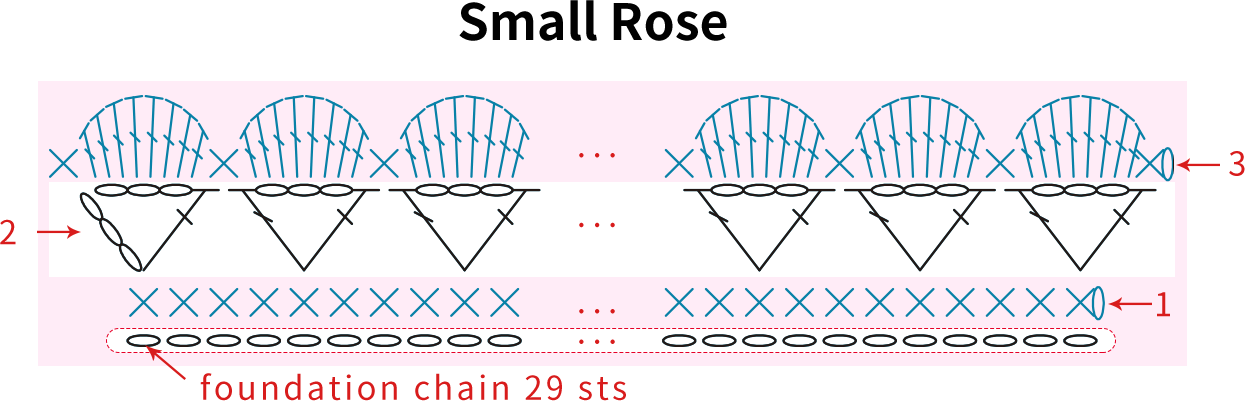
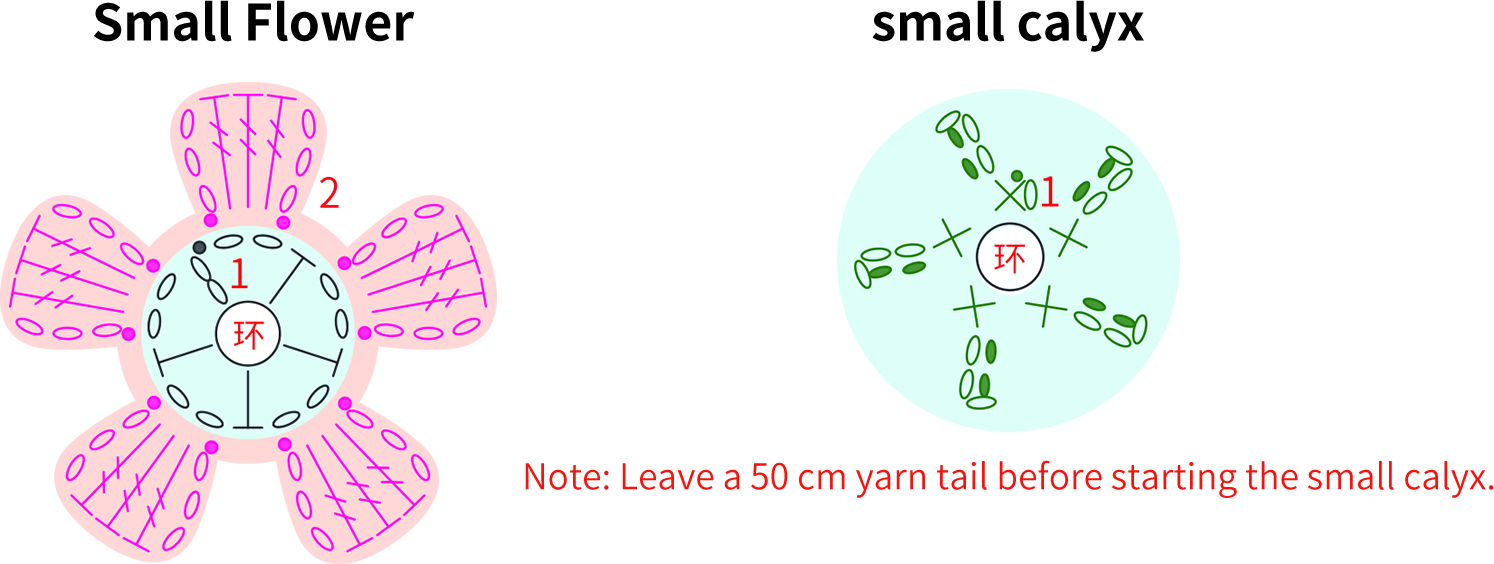
Daisy
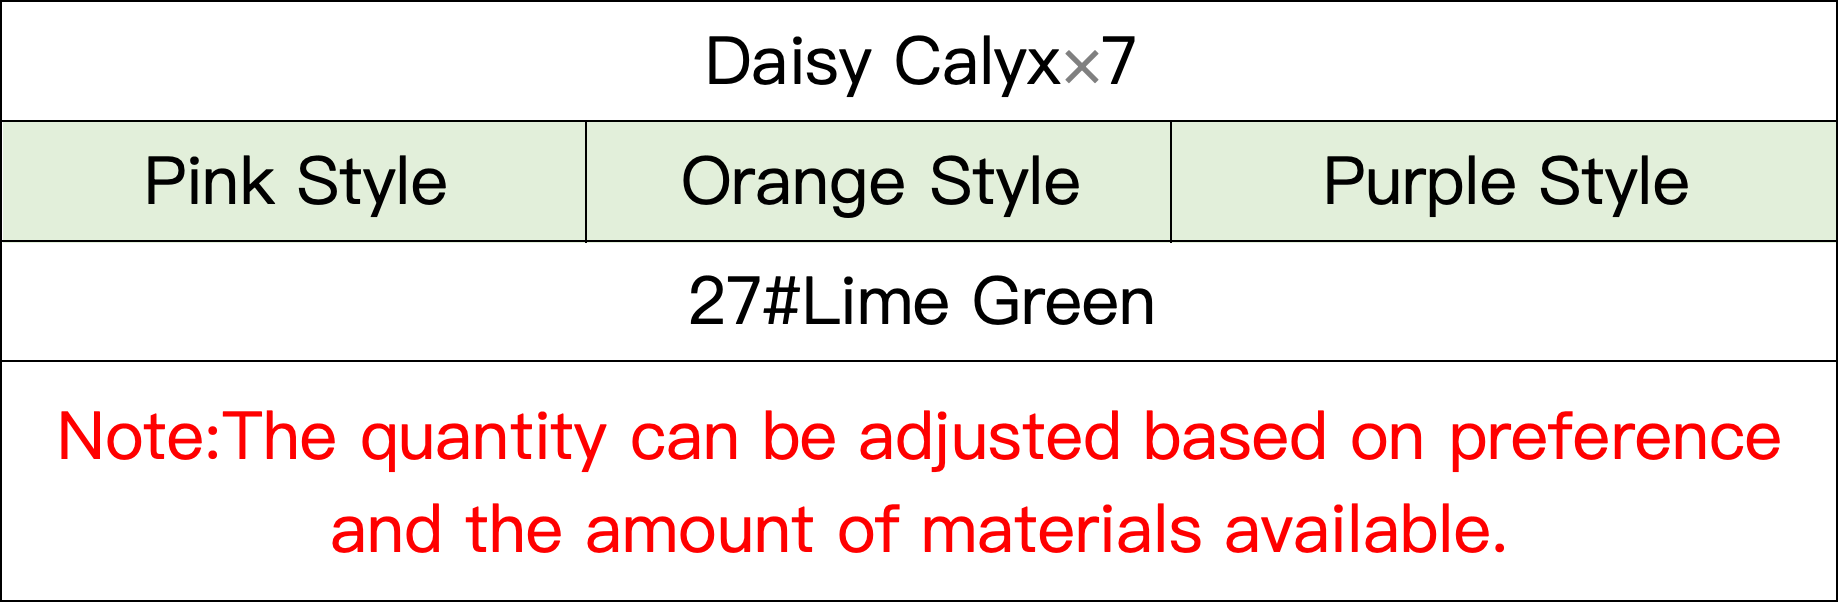
Daisies are divided into flowers, butts and assemblies, flowers are finished, do not need to be made, after the completion of assembly. Refer to the video demo. Quantity can be adjusted according to preferences and quantity of material.
Puff Flower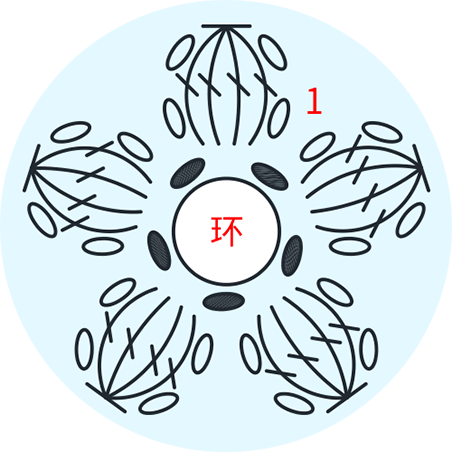
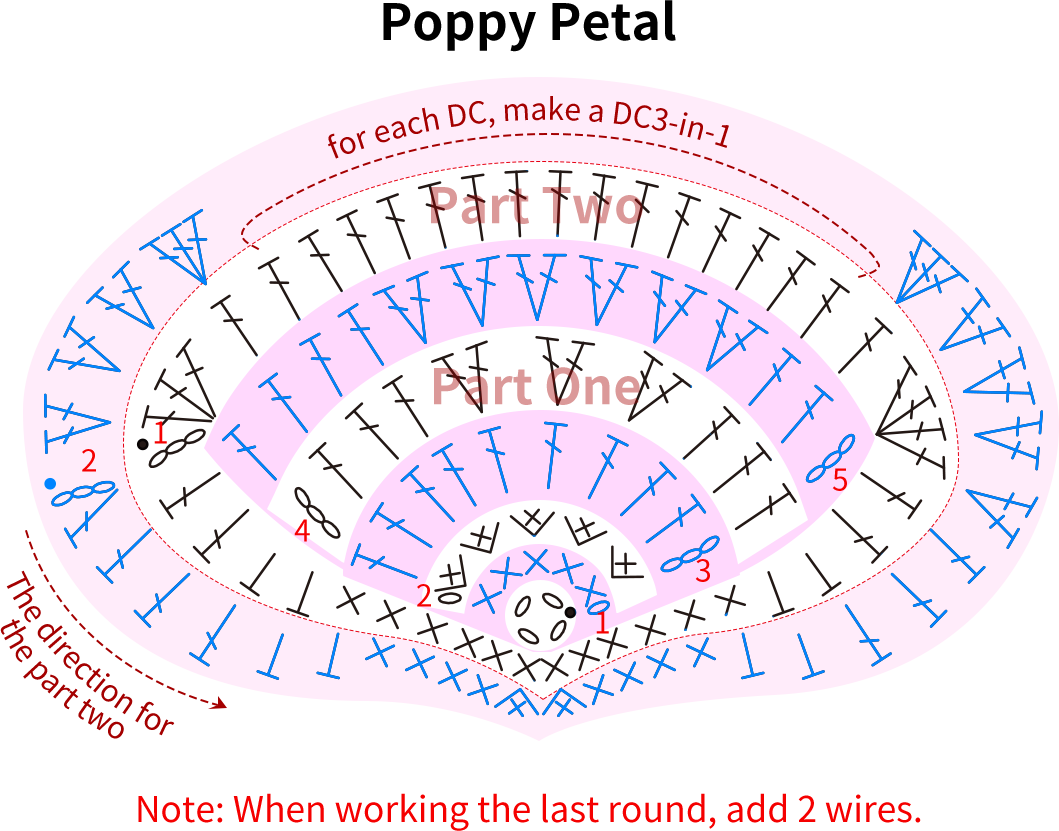





Green leaves × 3: Thread a leaf bead onto a 30cm wire, fold it in half, and thread a pair of leaf beads on each side. Skip a distance, then thread two pairs of leaf beads separately.
Step 2 Purple Style 42' 42'' (Part 2)
The purple style also includes lisianthus and lisianthus calyx. Please refer to the video demonstration for details.
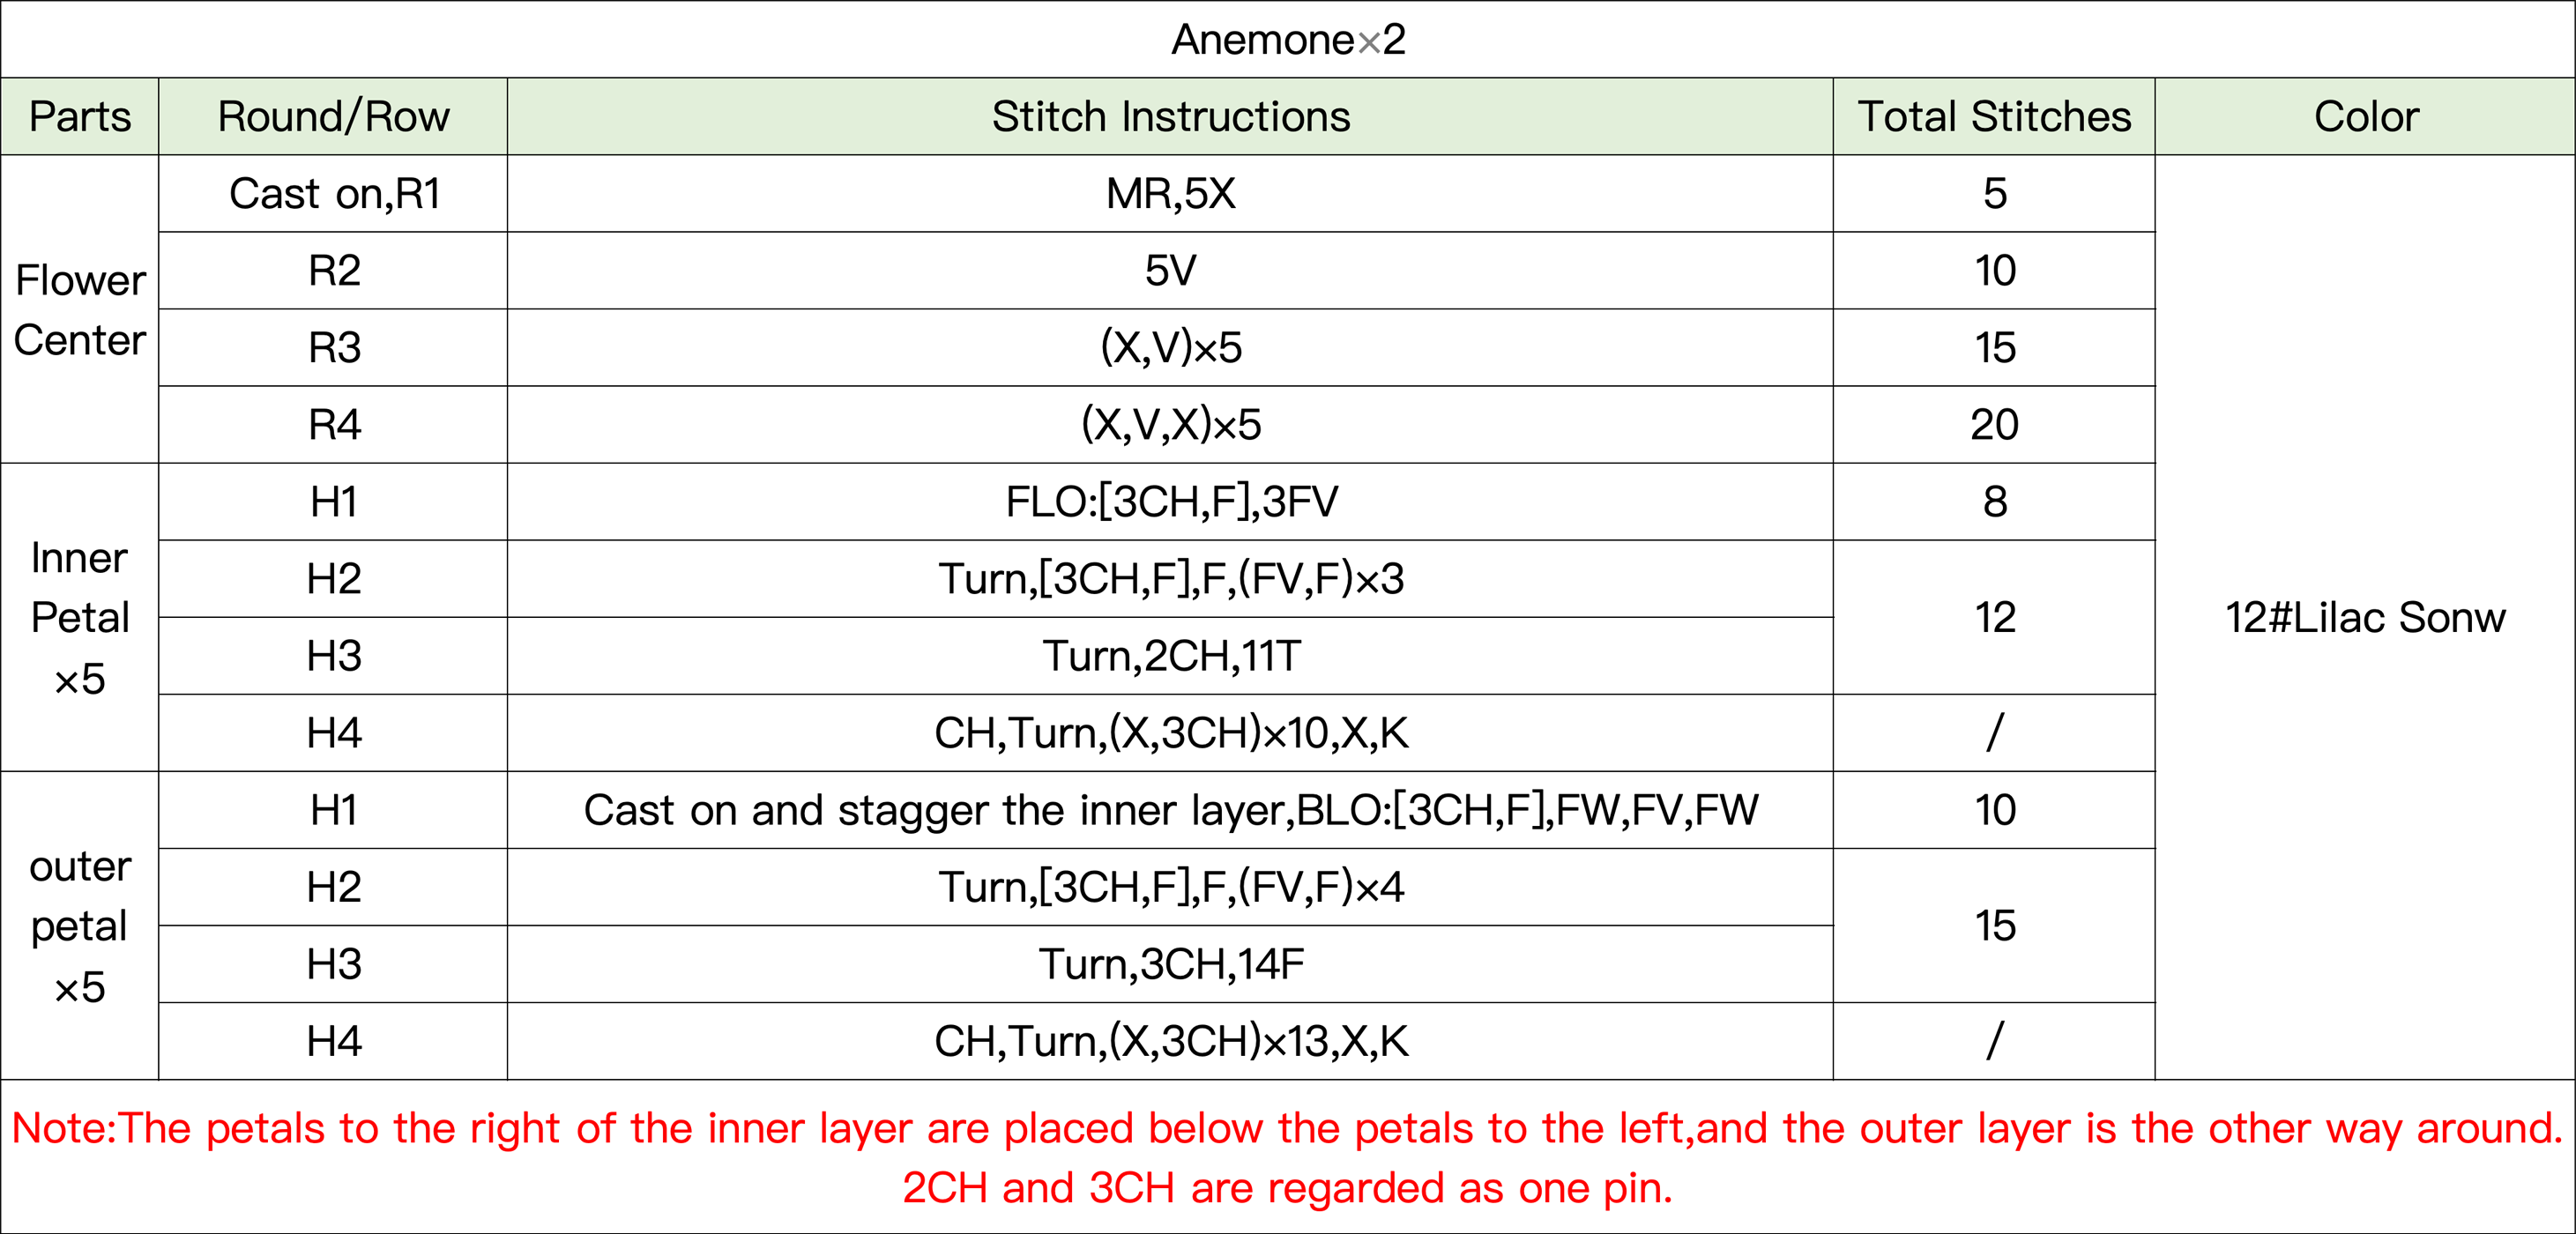
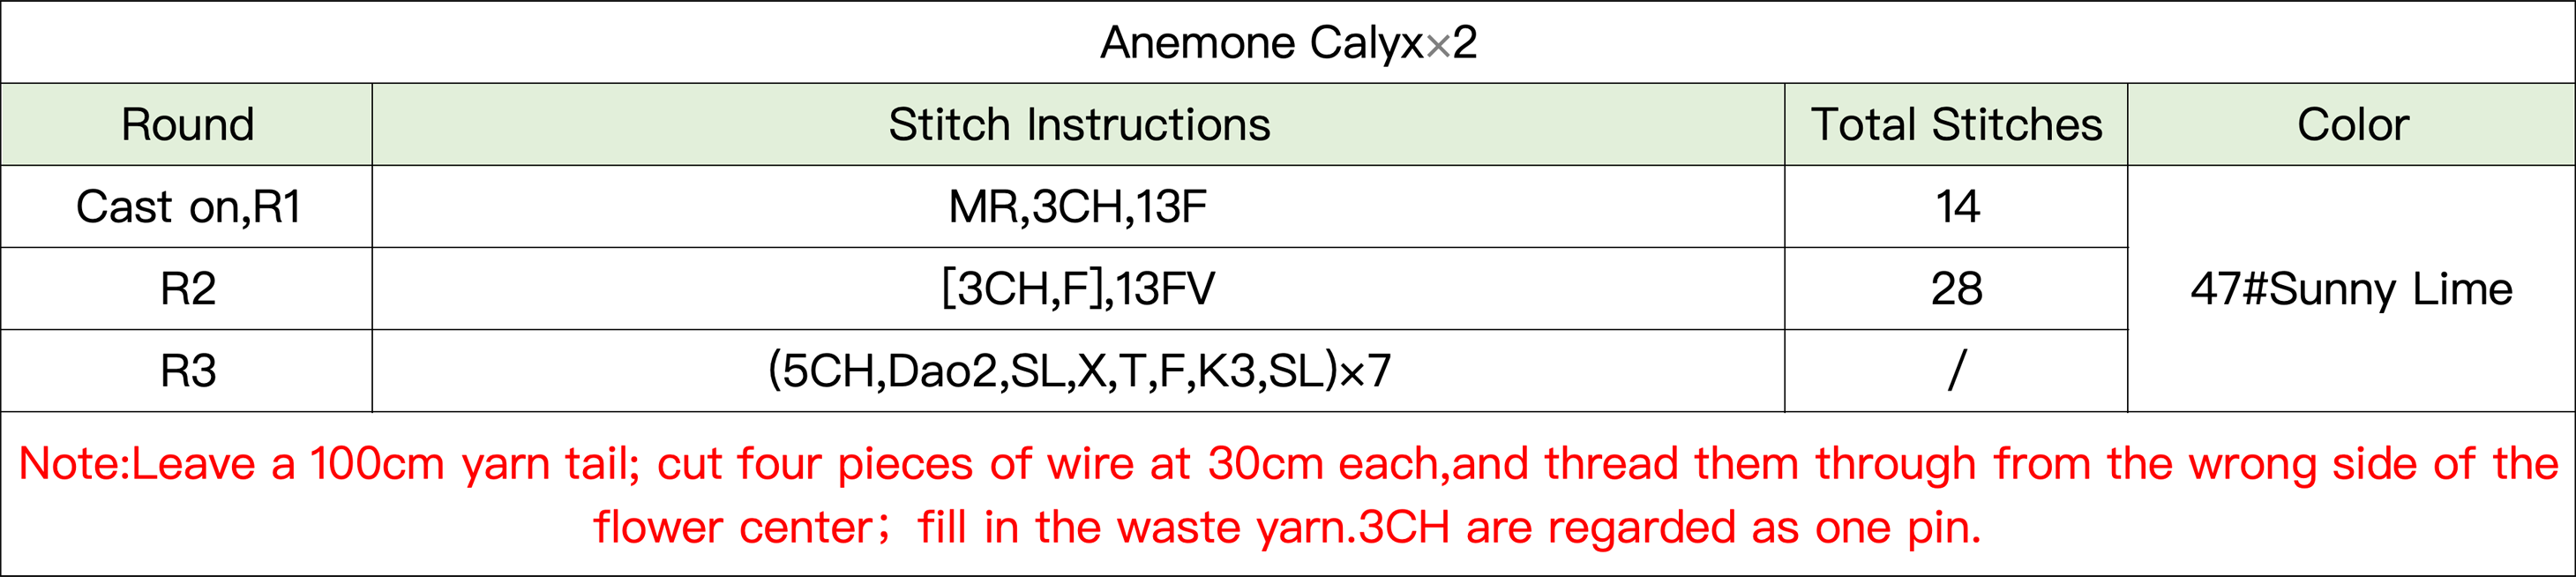
Step 3 Pink Style 49' 57'' (Part 2)
The pink style includes cherry blossoms and cherry blossom calyxes. Please refer to the video demonstration for details.
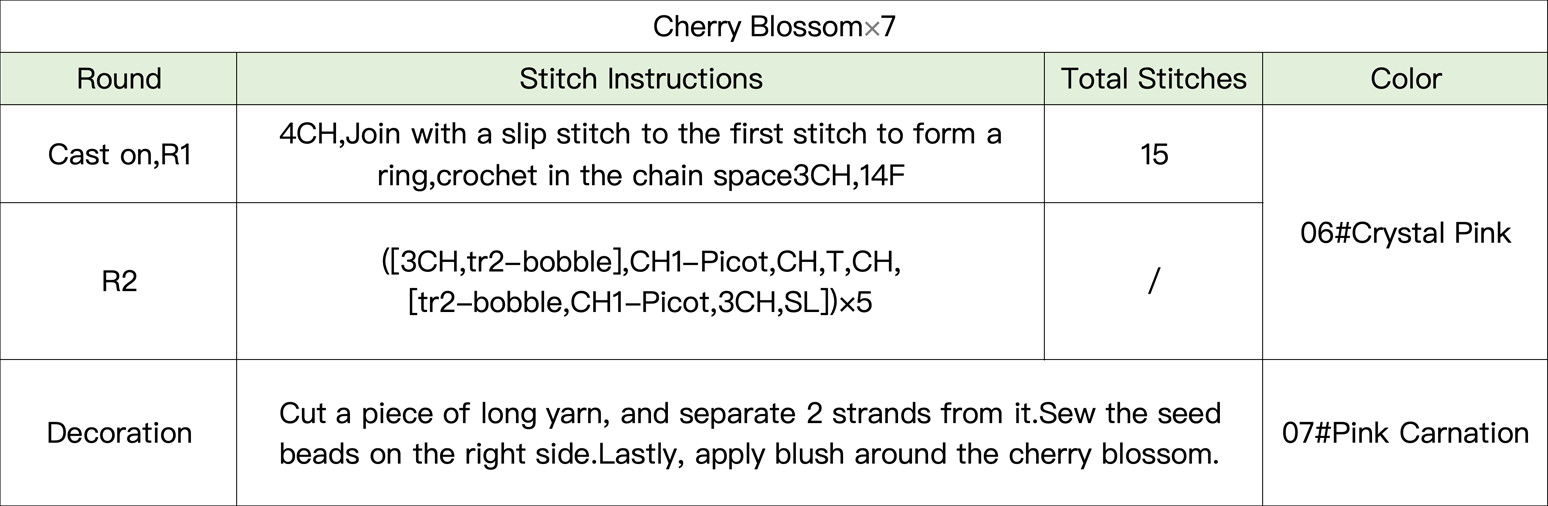

Step 4 Orange Style 58' 08'' (Part 2)
The orange style includes the sunflower center, sunflower petal, and sunflower calyx. Please refer to the video demonstration for details.
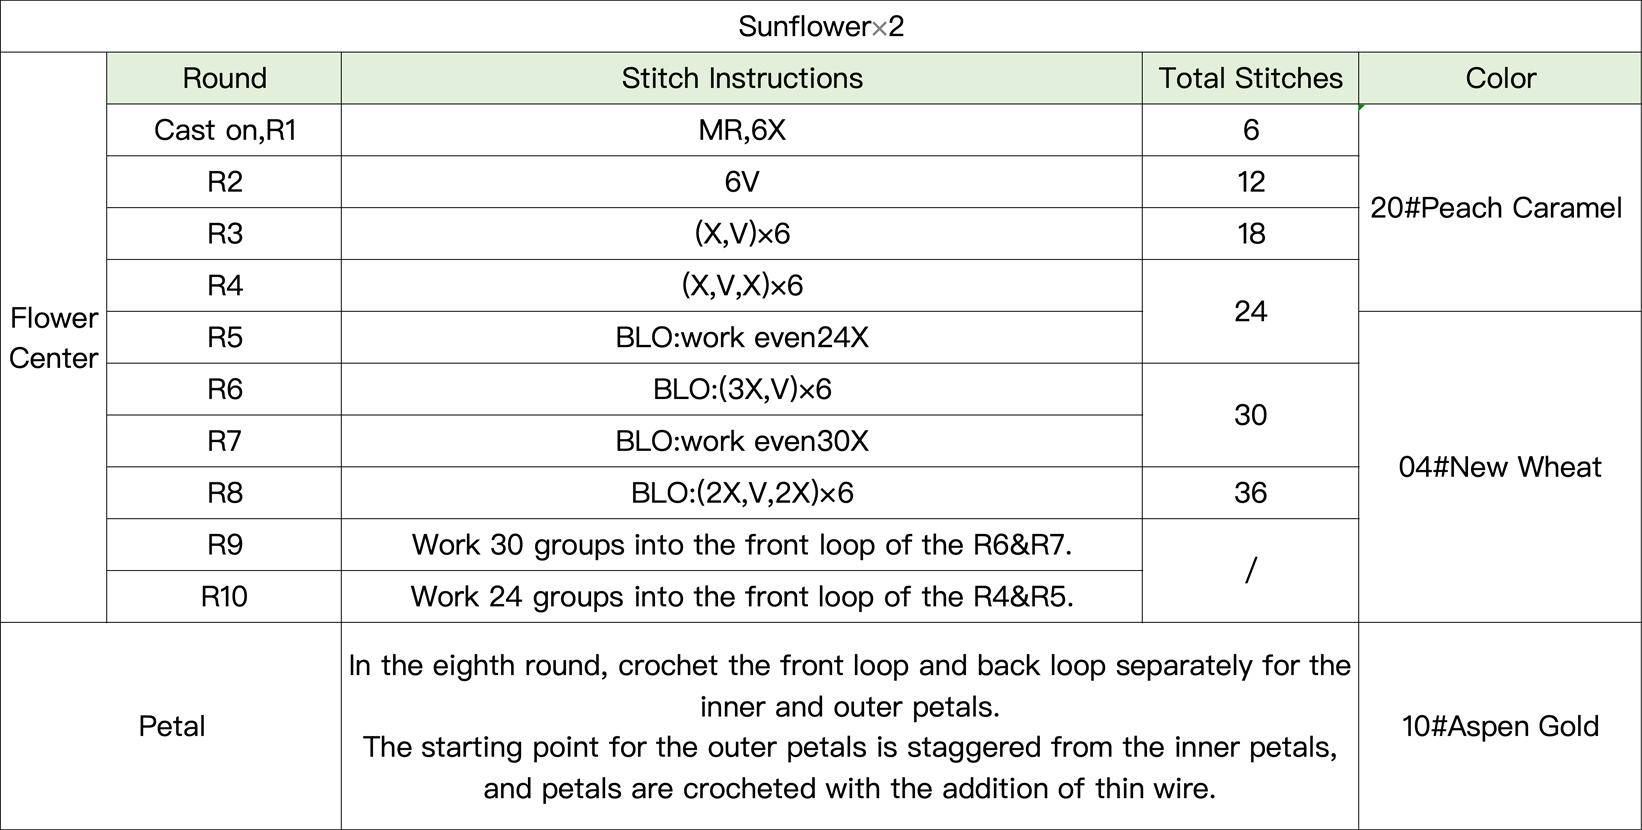
R9 and R10 charts for the sunflower center
Sunflower petals (with wire)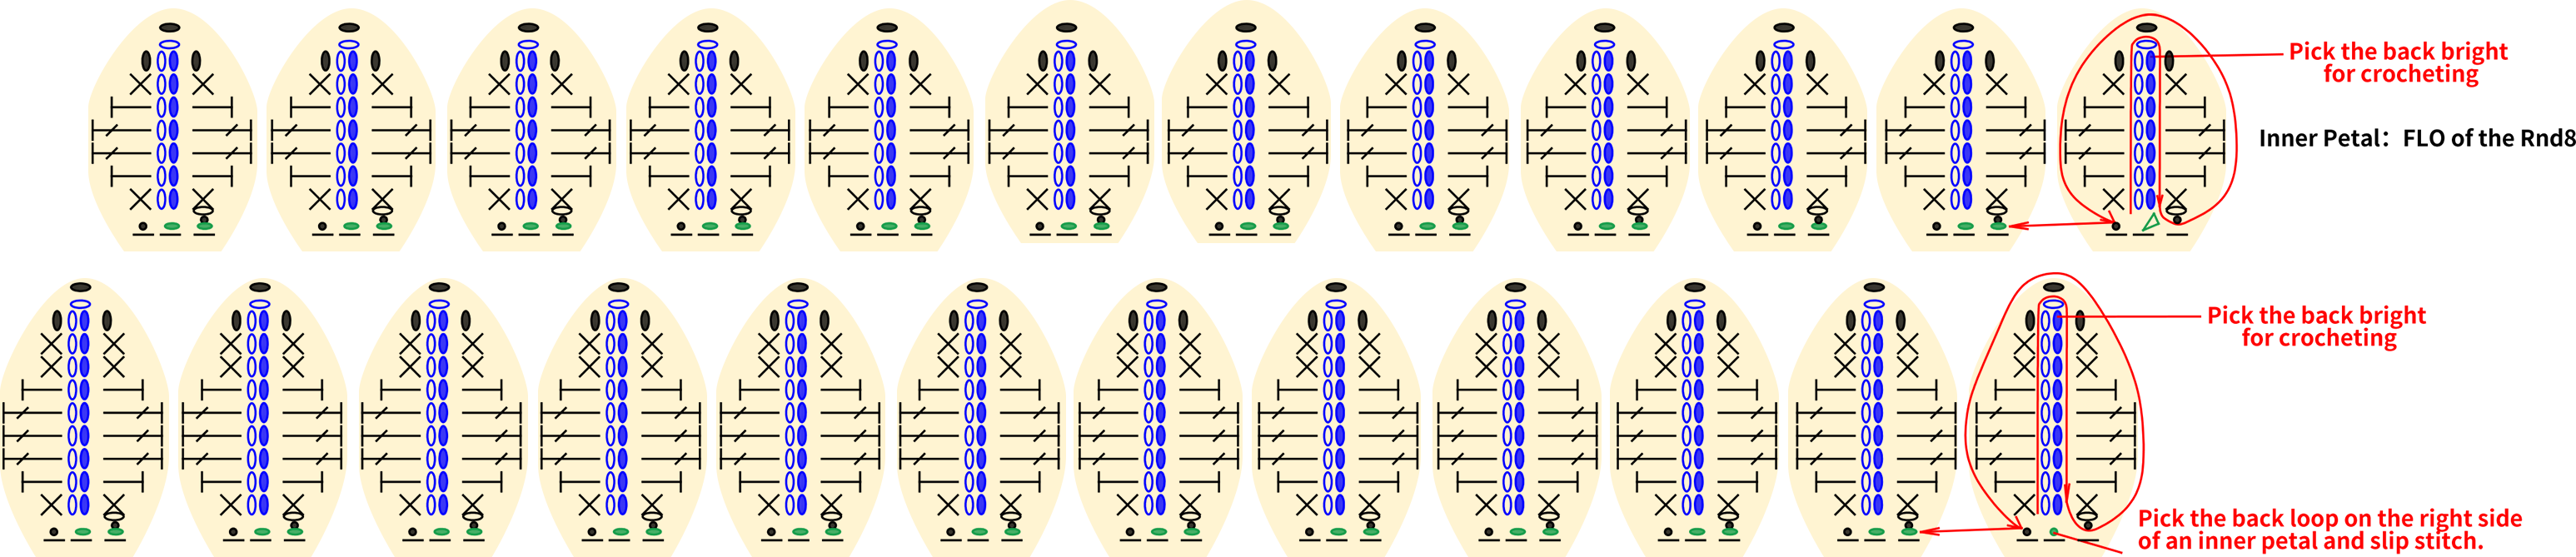
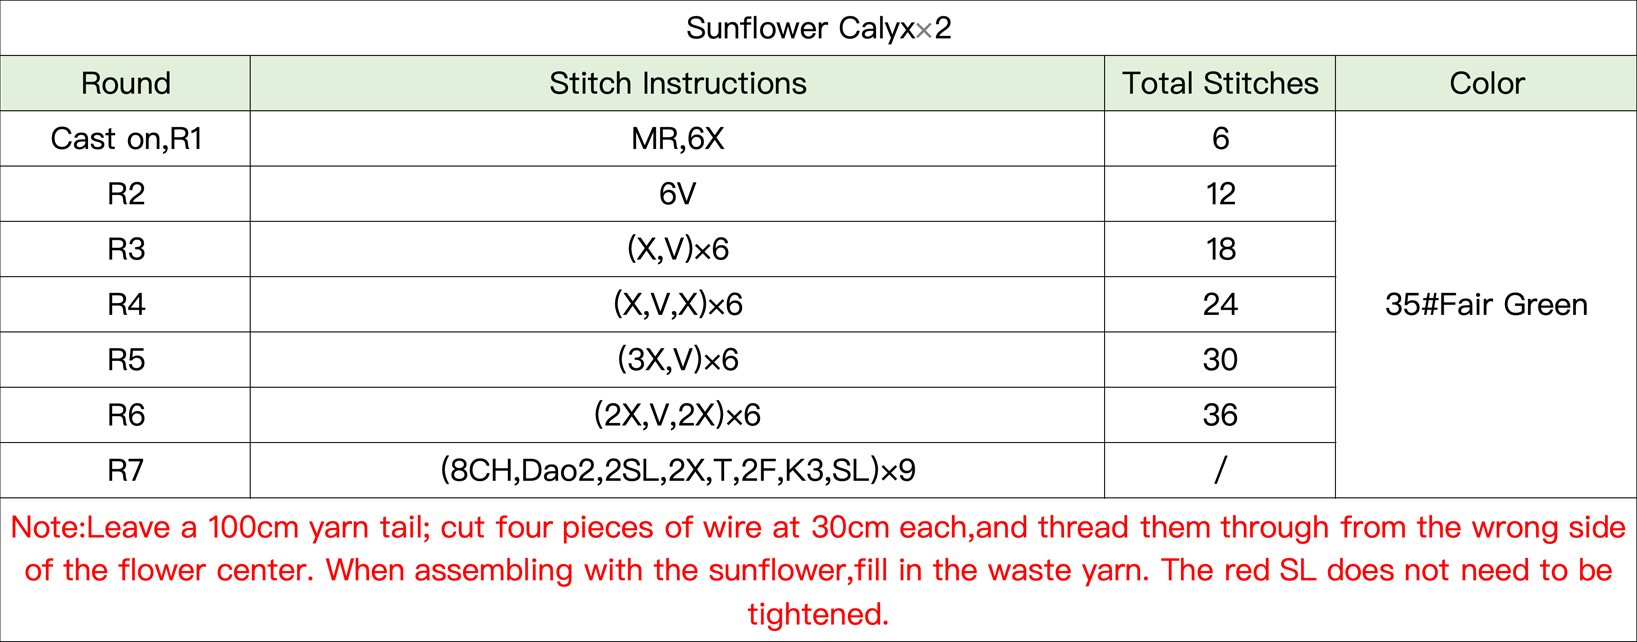
Part 3 AssemblyC 69' 57'' (Part 2)
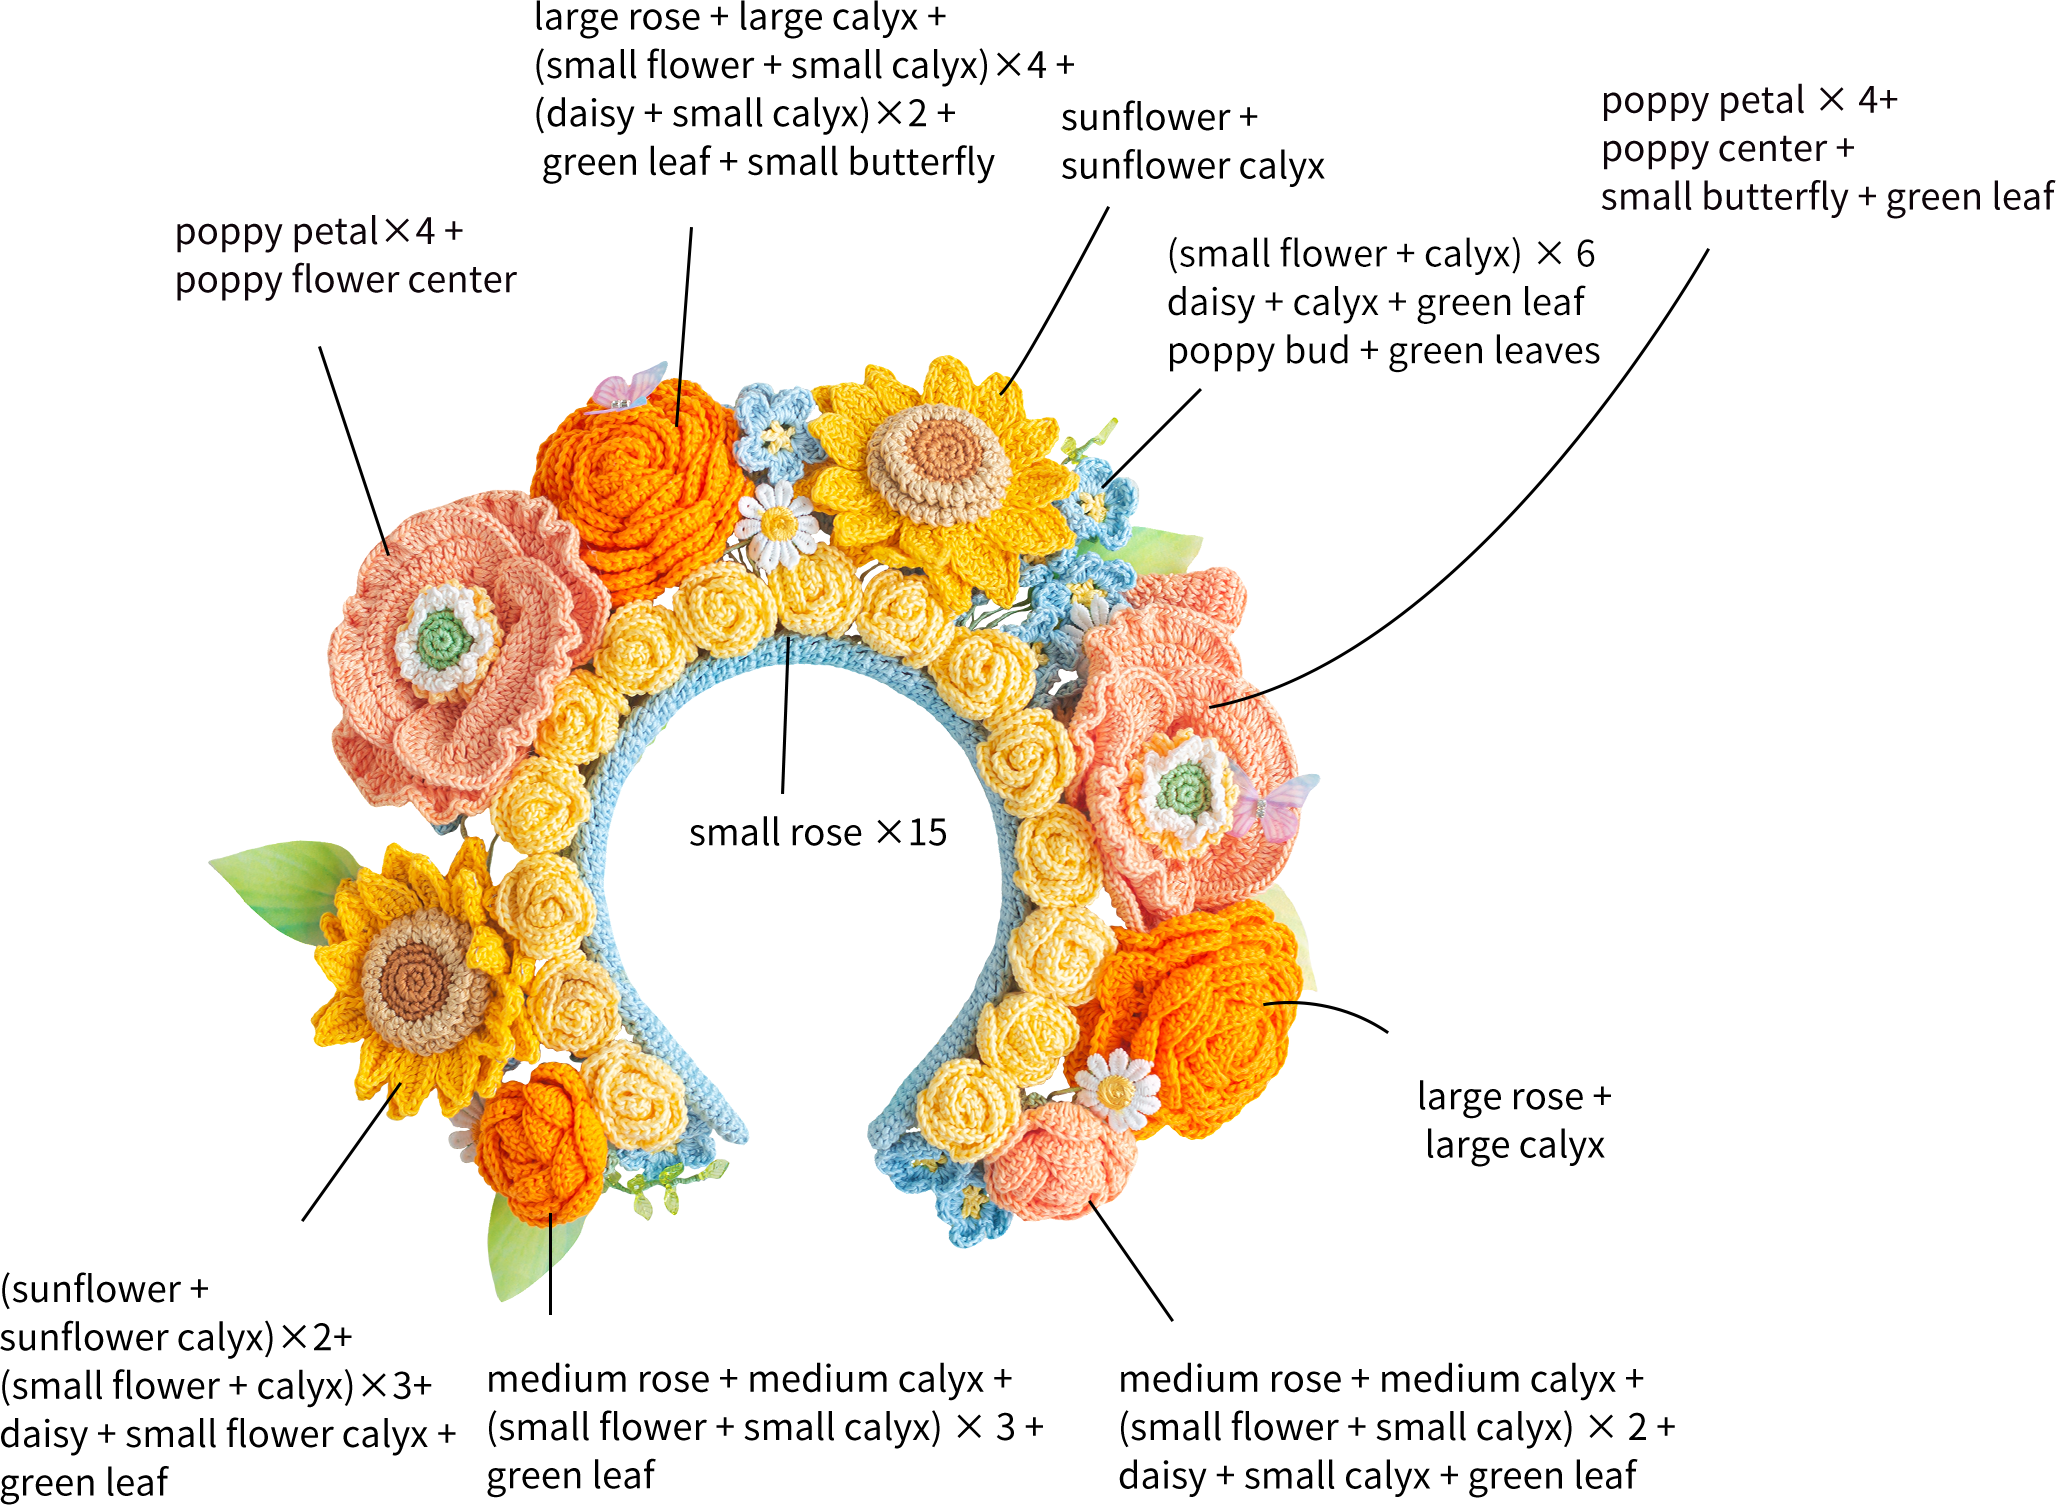
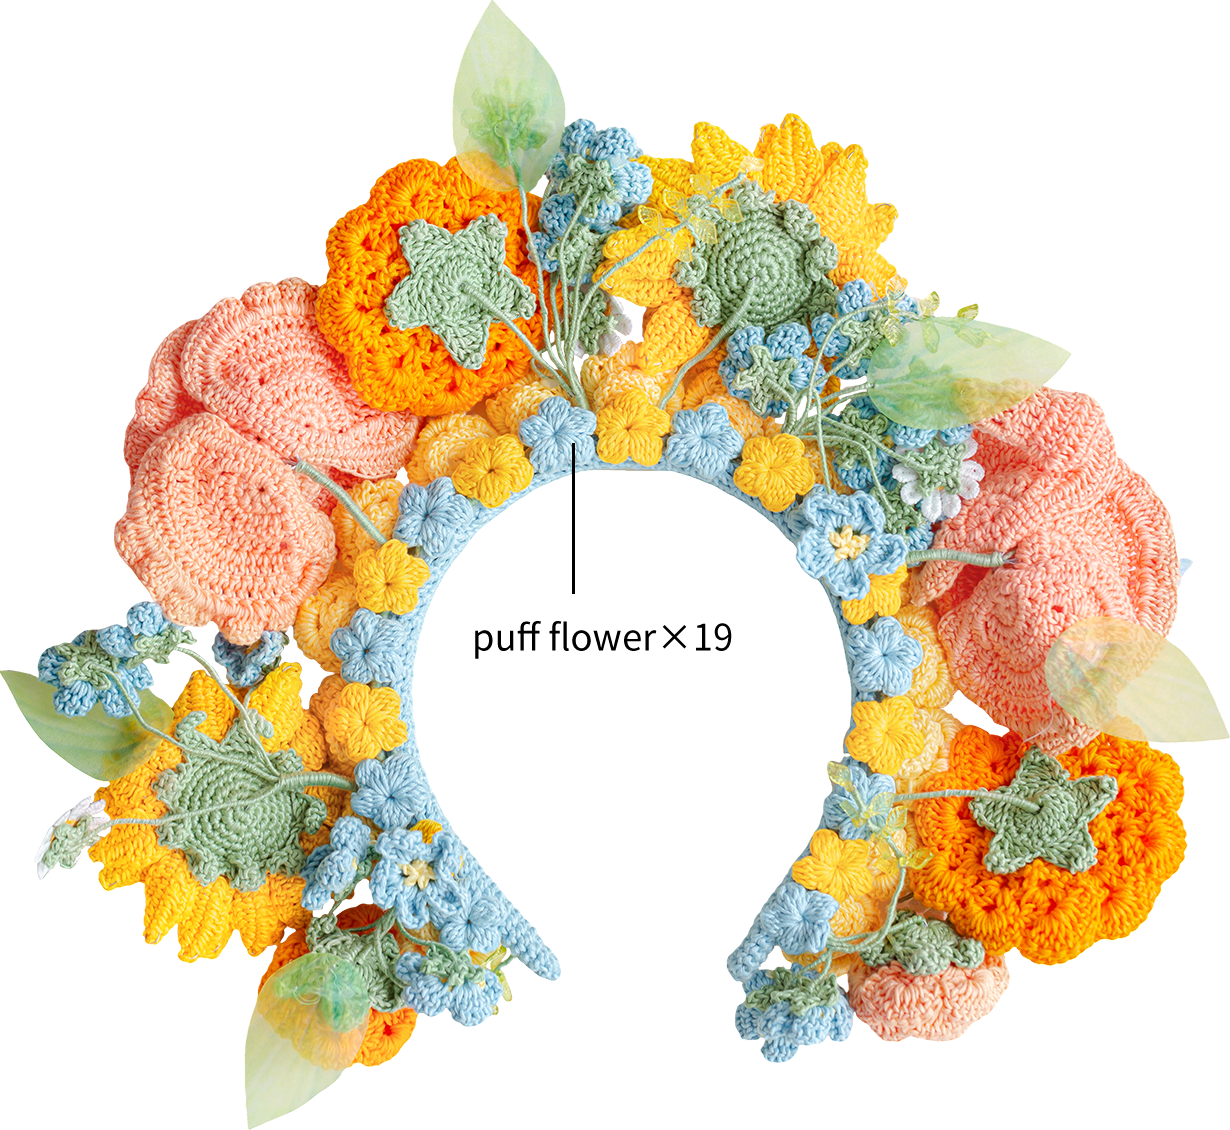
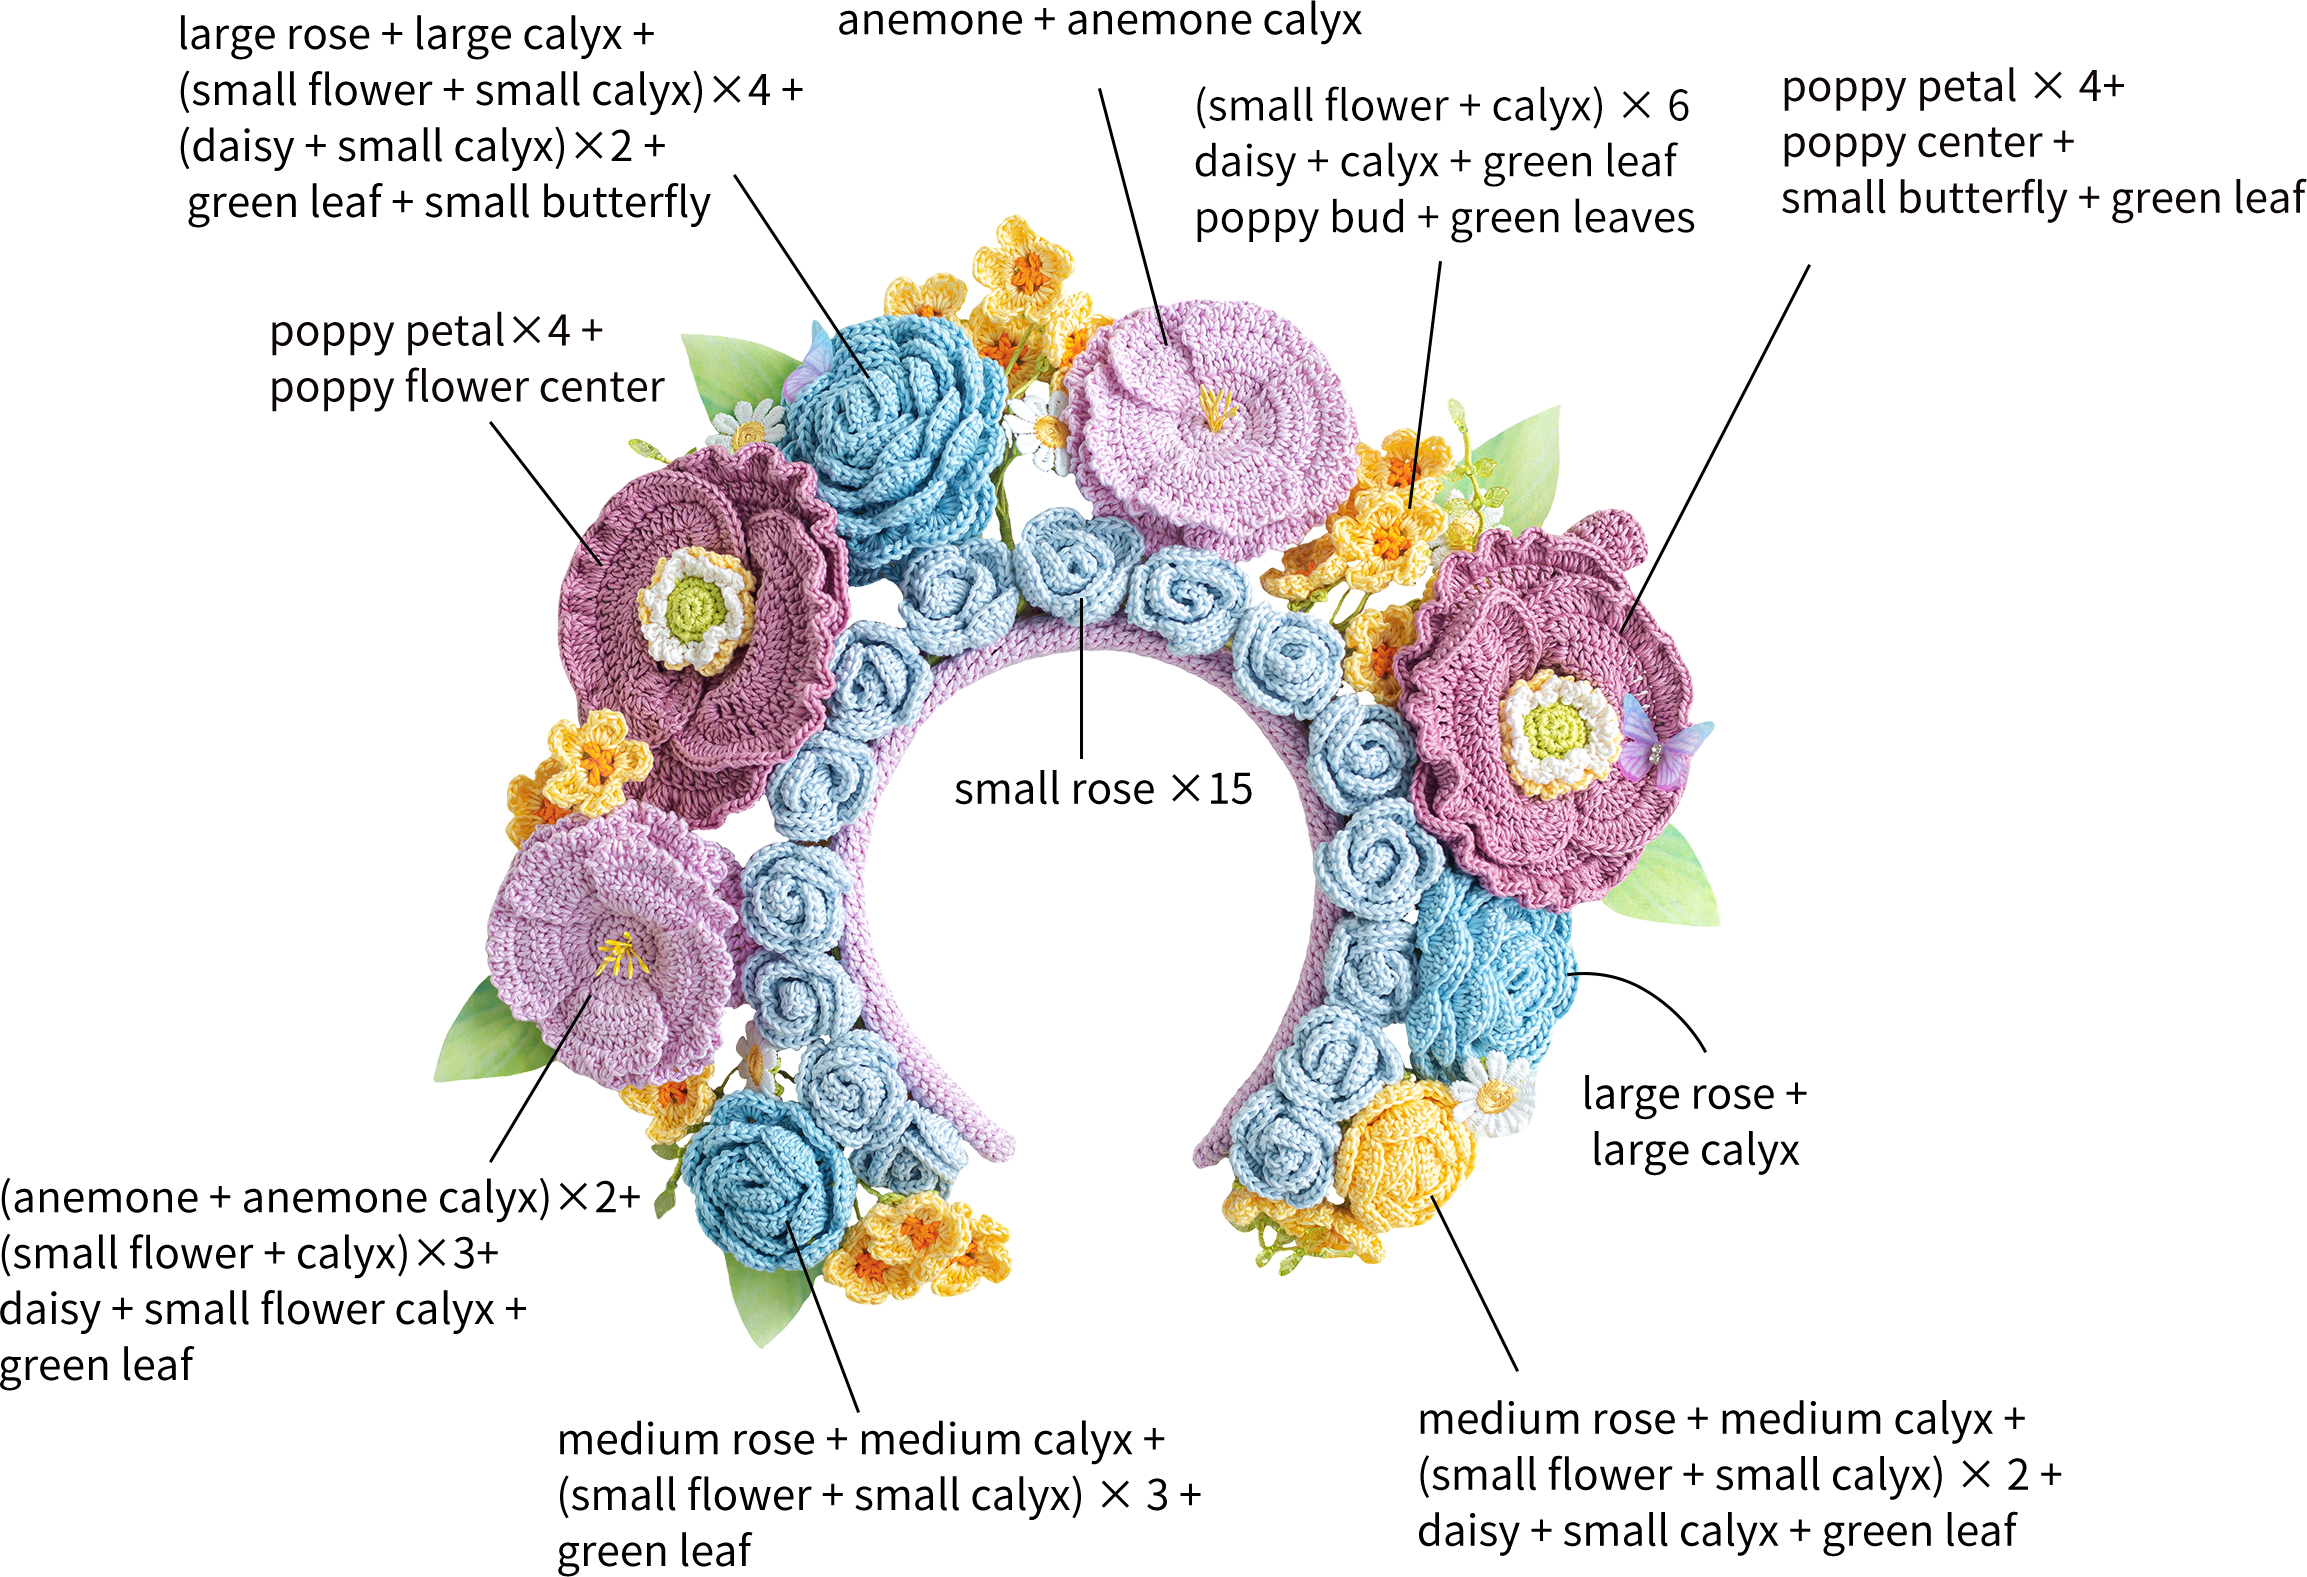
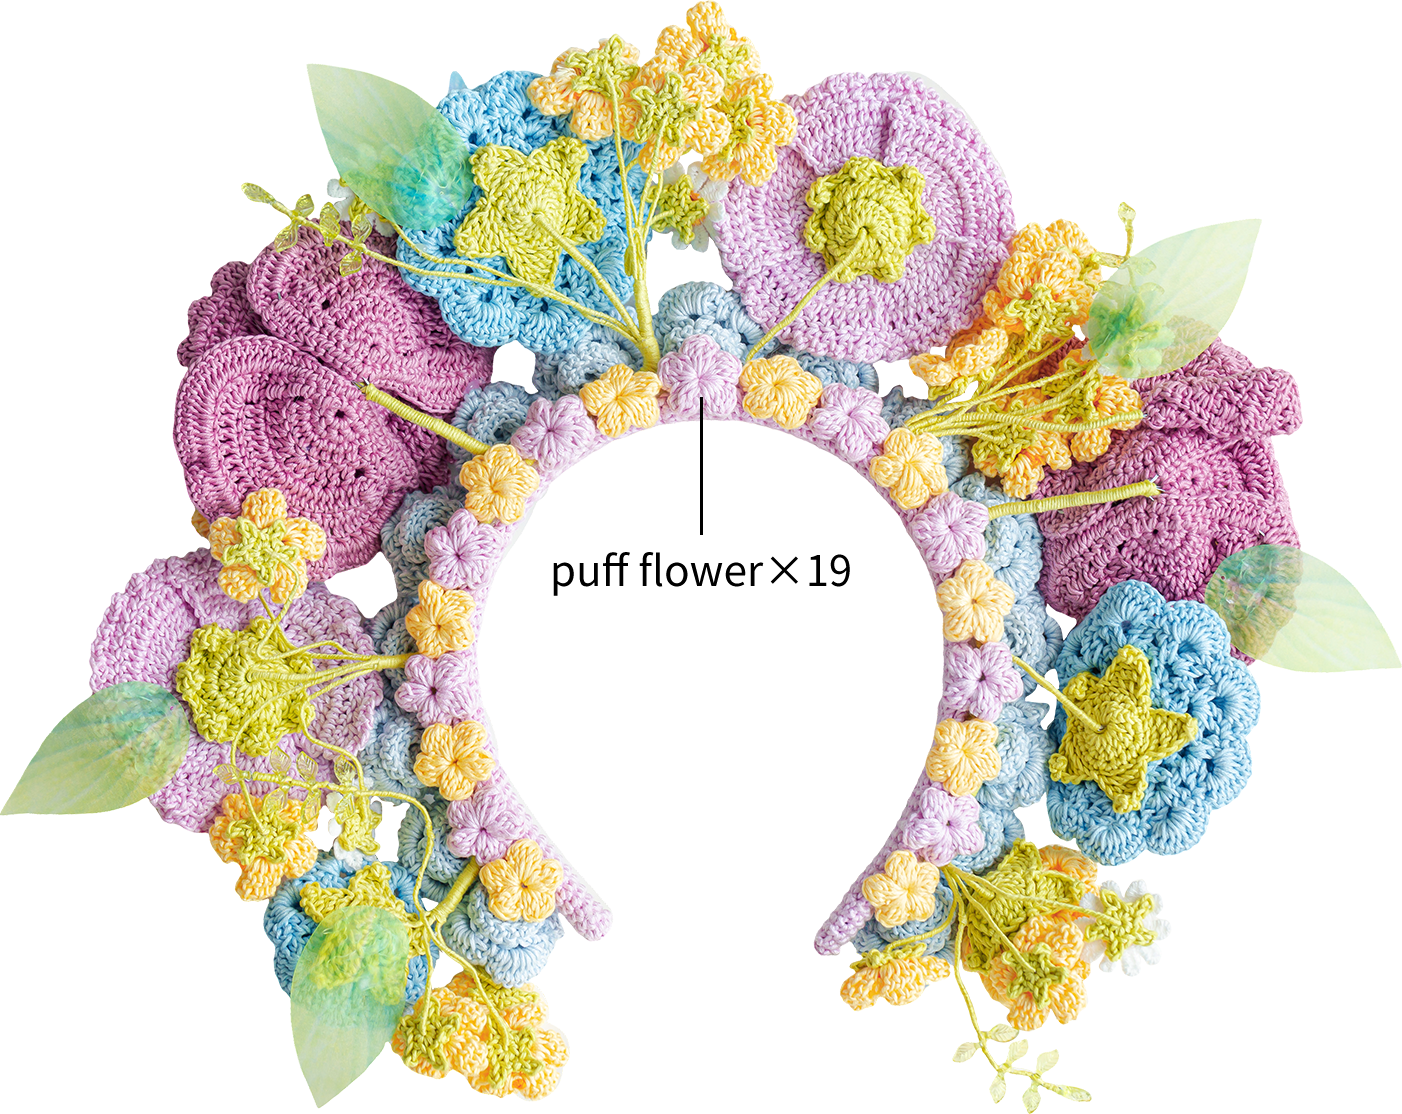
The assembly is pasted with hot melt adhesive first in the hair hoop above a ring of small roses. Pay attention to the direction. After that, the remaining flowers and other parts are fixed to the hair hoop above. Finally, puff flowers are pasted on the back. Refer to the physical or according to preferences, assemble the well-made flowers and decorations together, pay attention to assemble before placing the hoop to compare, determine whether the height and shape is appropriate, and then assemble. Refer to the video demo.
Assembly Diagram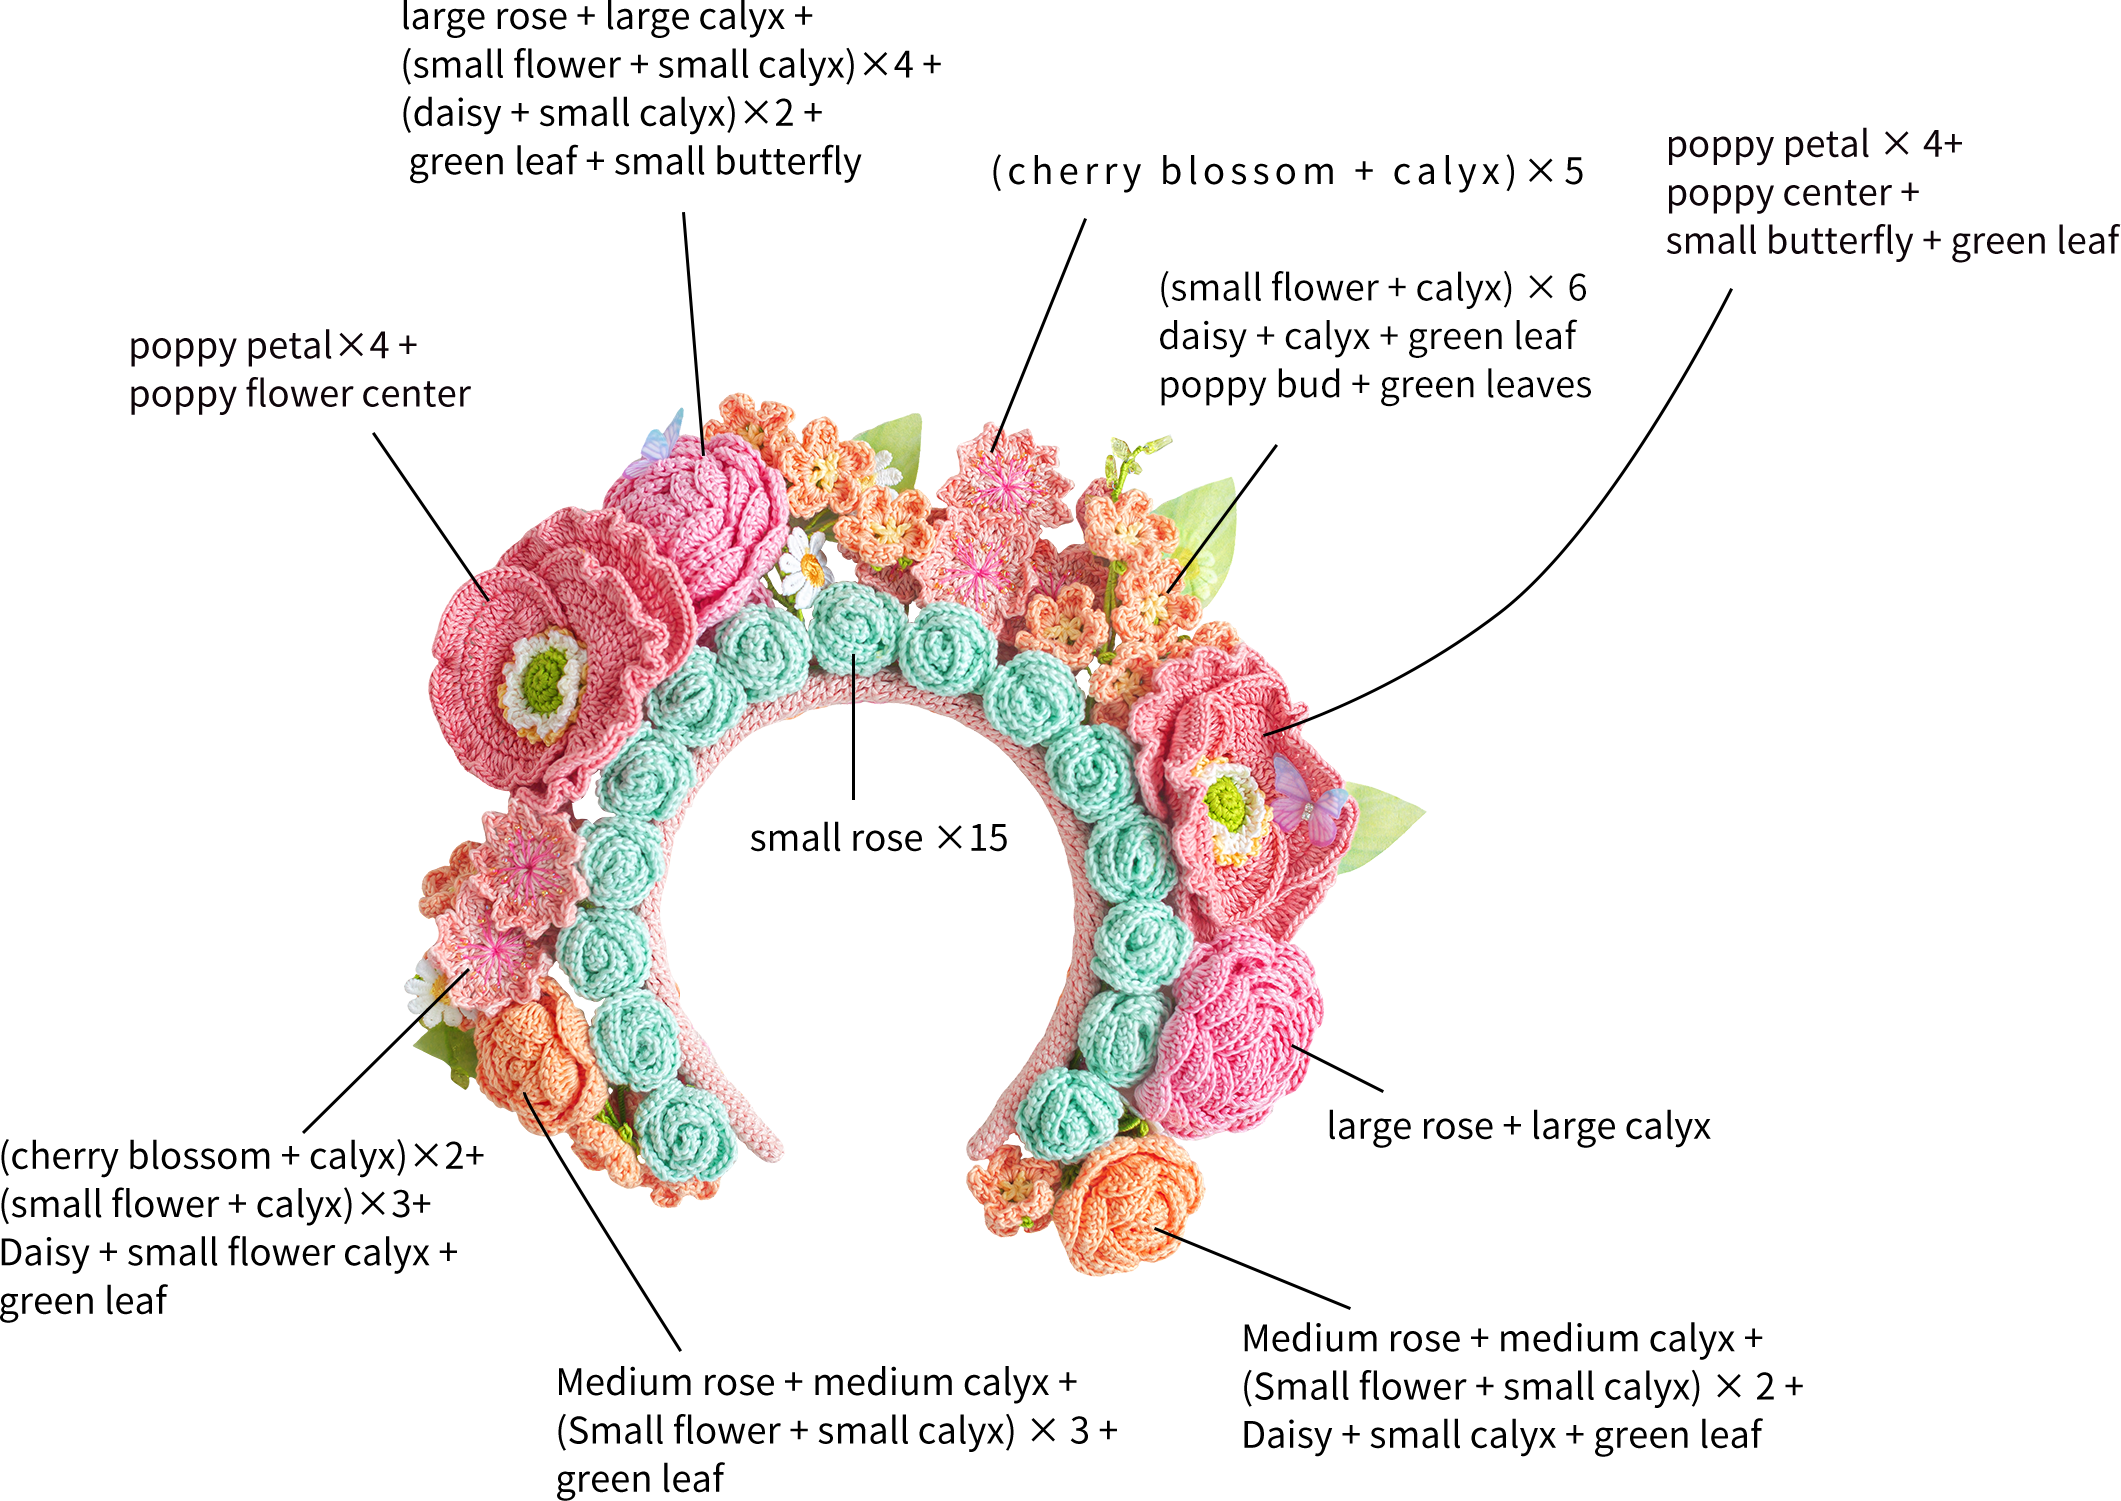
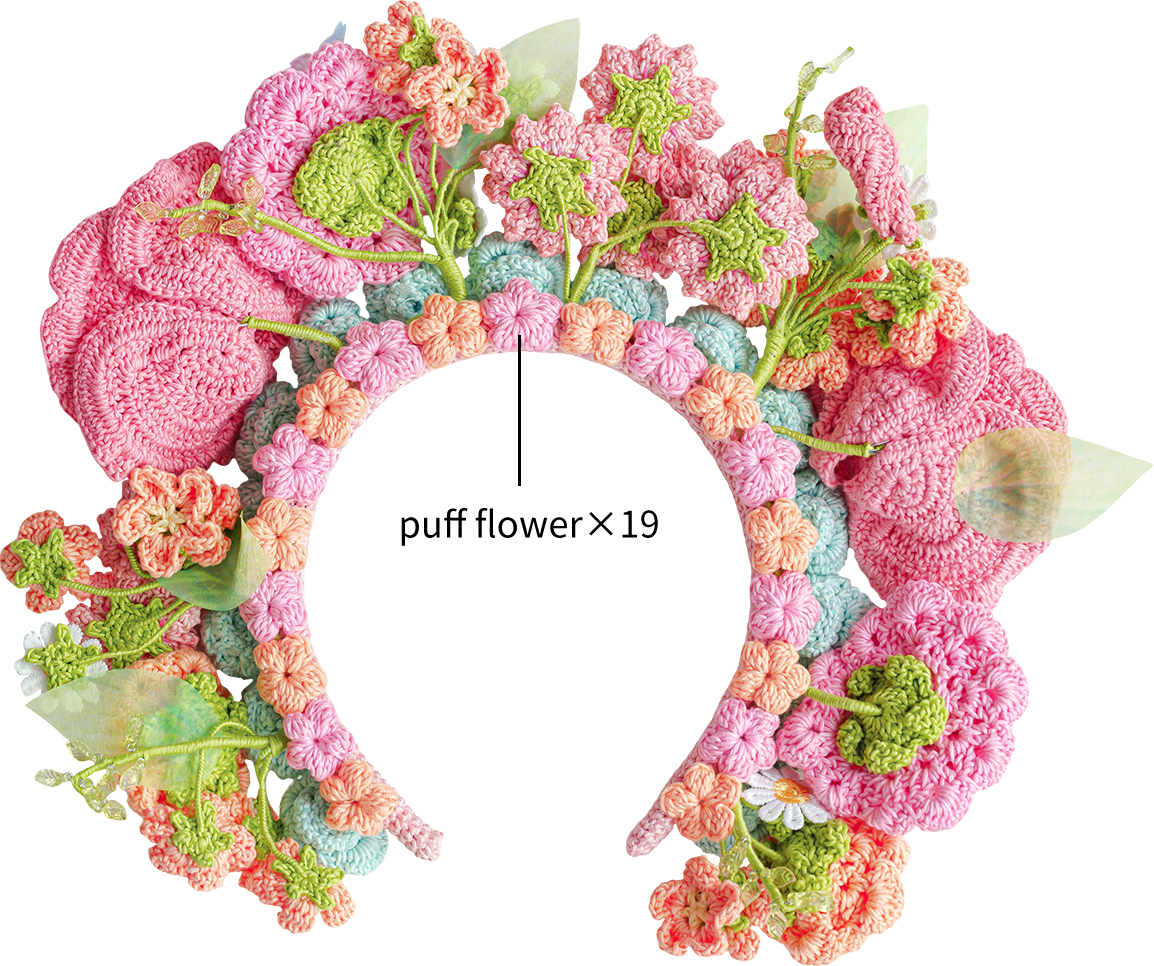
Made by the community