Accessories / Scarf
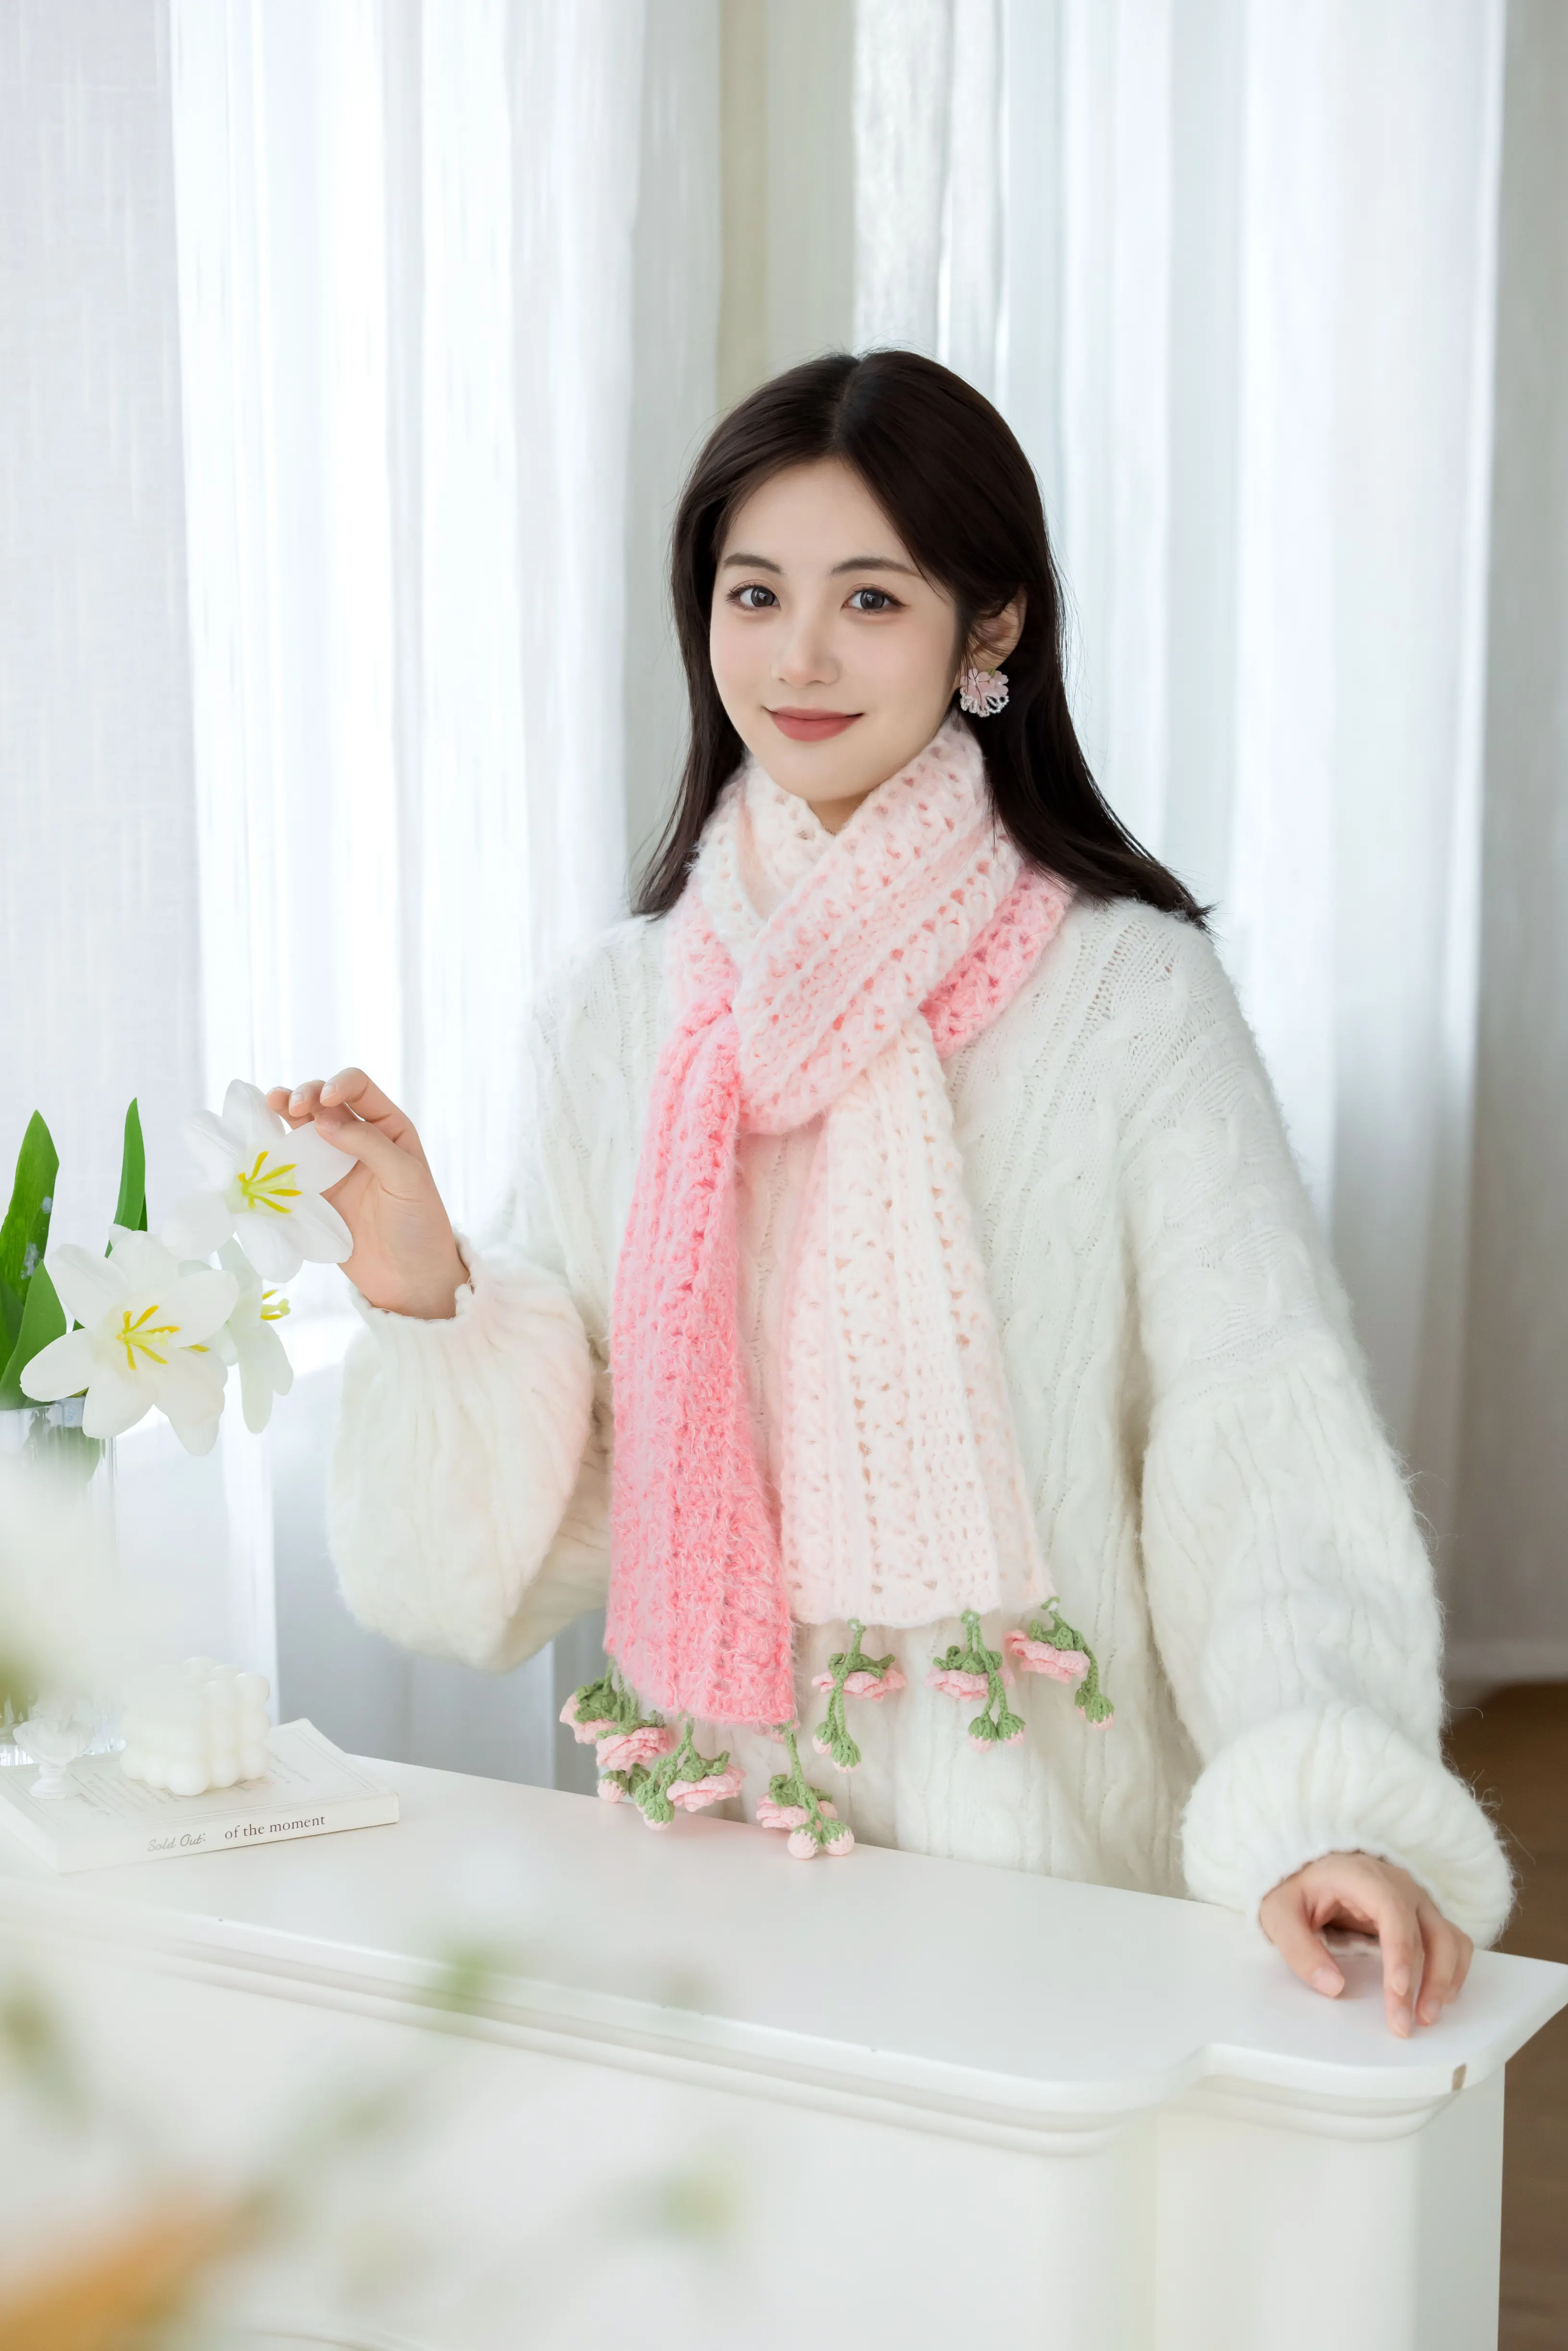
Cozy Neck Warmer
Project preview
See the finished project
Pattern format
Instructions
Watch and follow
Video tutorial
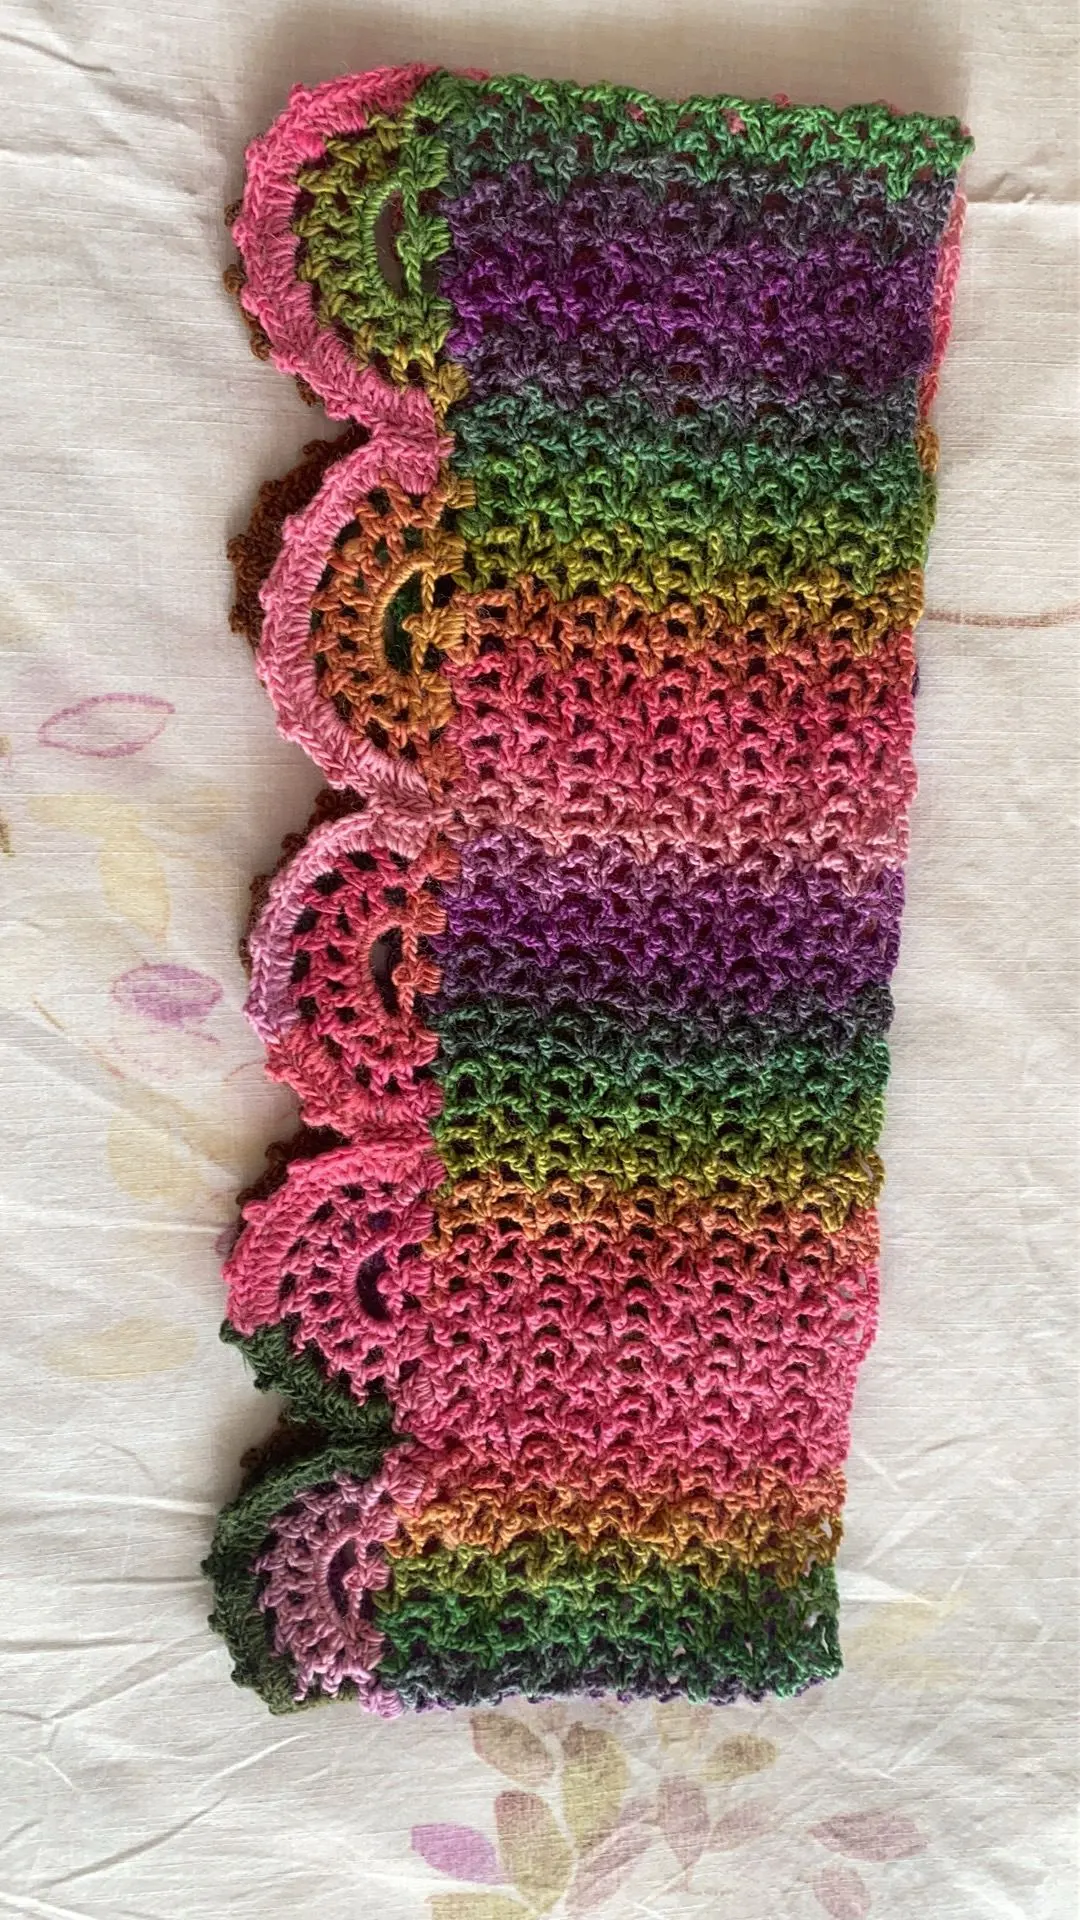
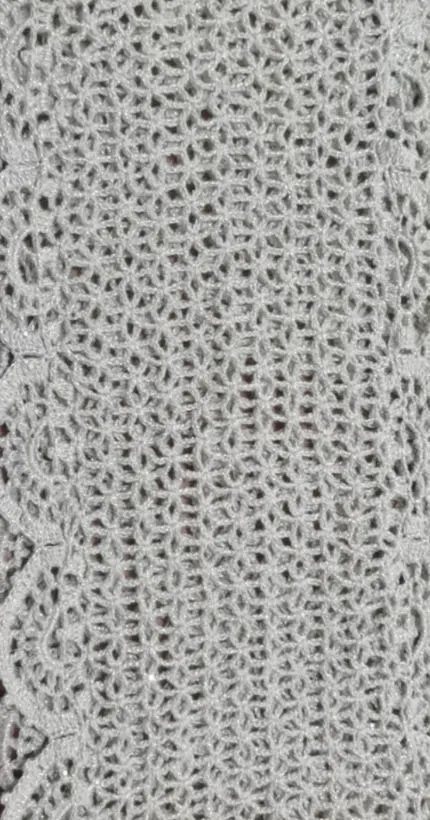
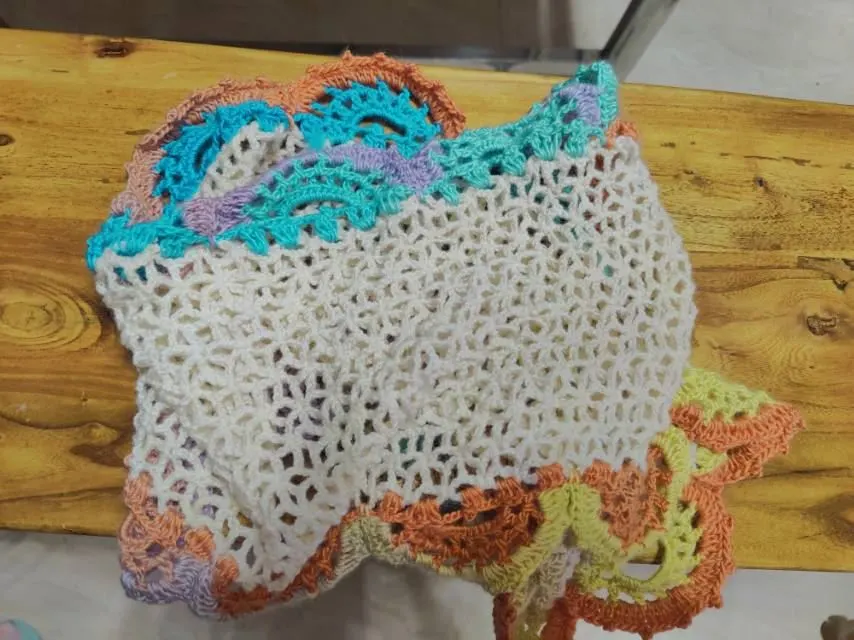
This scarf consists of the main body and edge.
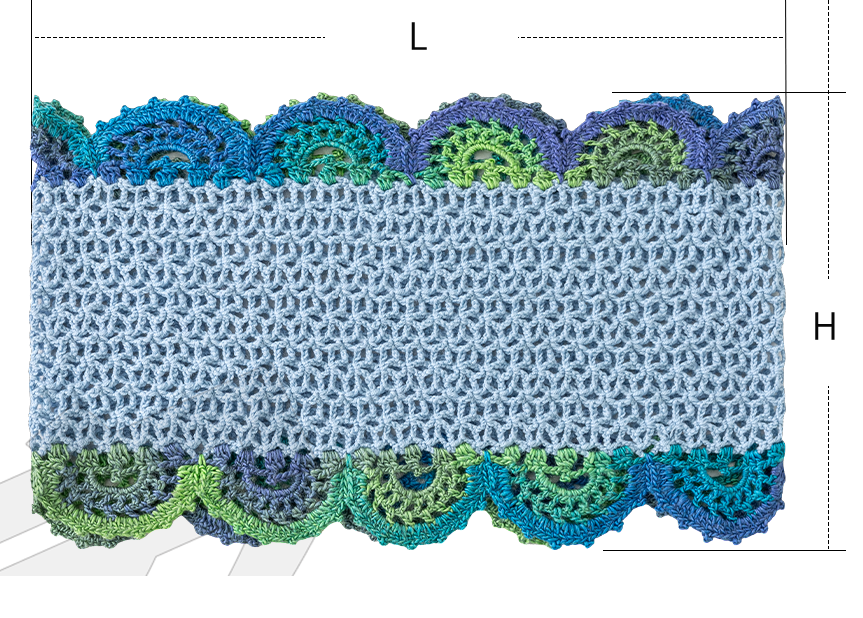
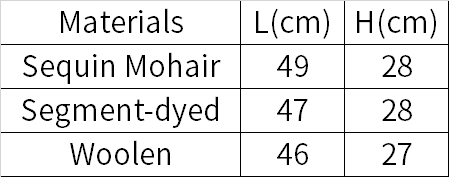
The handcrafted measurements may have an error of 1 to 2 cm. Due to variations in individual tension, the size of the sample is for reference only.
Materials:
Sequin Mohair Style-Susan's Family Sequin Mohair(Using two strands of yarn together, treated as a single strand)
Woolen Style-Susan's Family Morandi 4#,Monet Impression.(The main body using Morandi 4#, and the edging using Monet Impression .)
Segment-dyed Style-Susan's Family Monet Impression.
Hook: 2.5 mm crochet hook
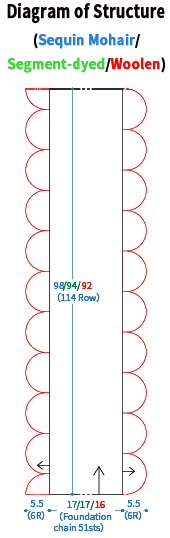

Chart Key







Note: This pattern is making in Chinese crochet pattern terms, and the stitch name is written using American terminology. All measurements in charts are in cm. 
Part1 Main BodyA 00' 45''
The main body starts with a foundation chain. Work up the main body along the braid from the starting chain.On the last row, work and join simultaneously to the starting position,form a tube.Please refer to the video demonstration for more details.
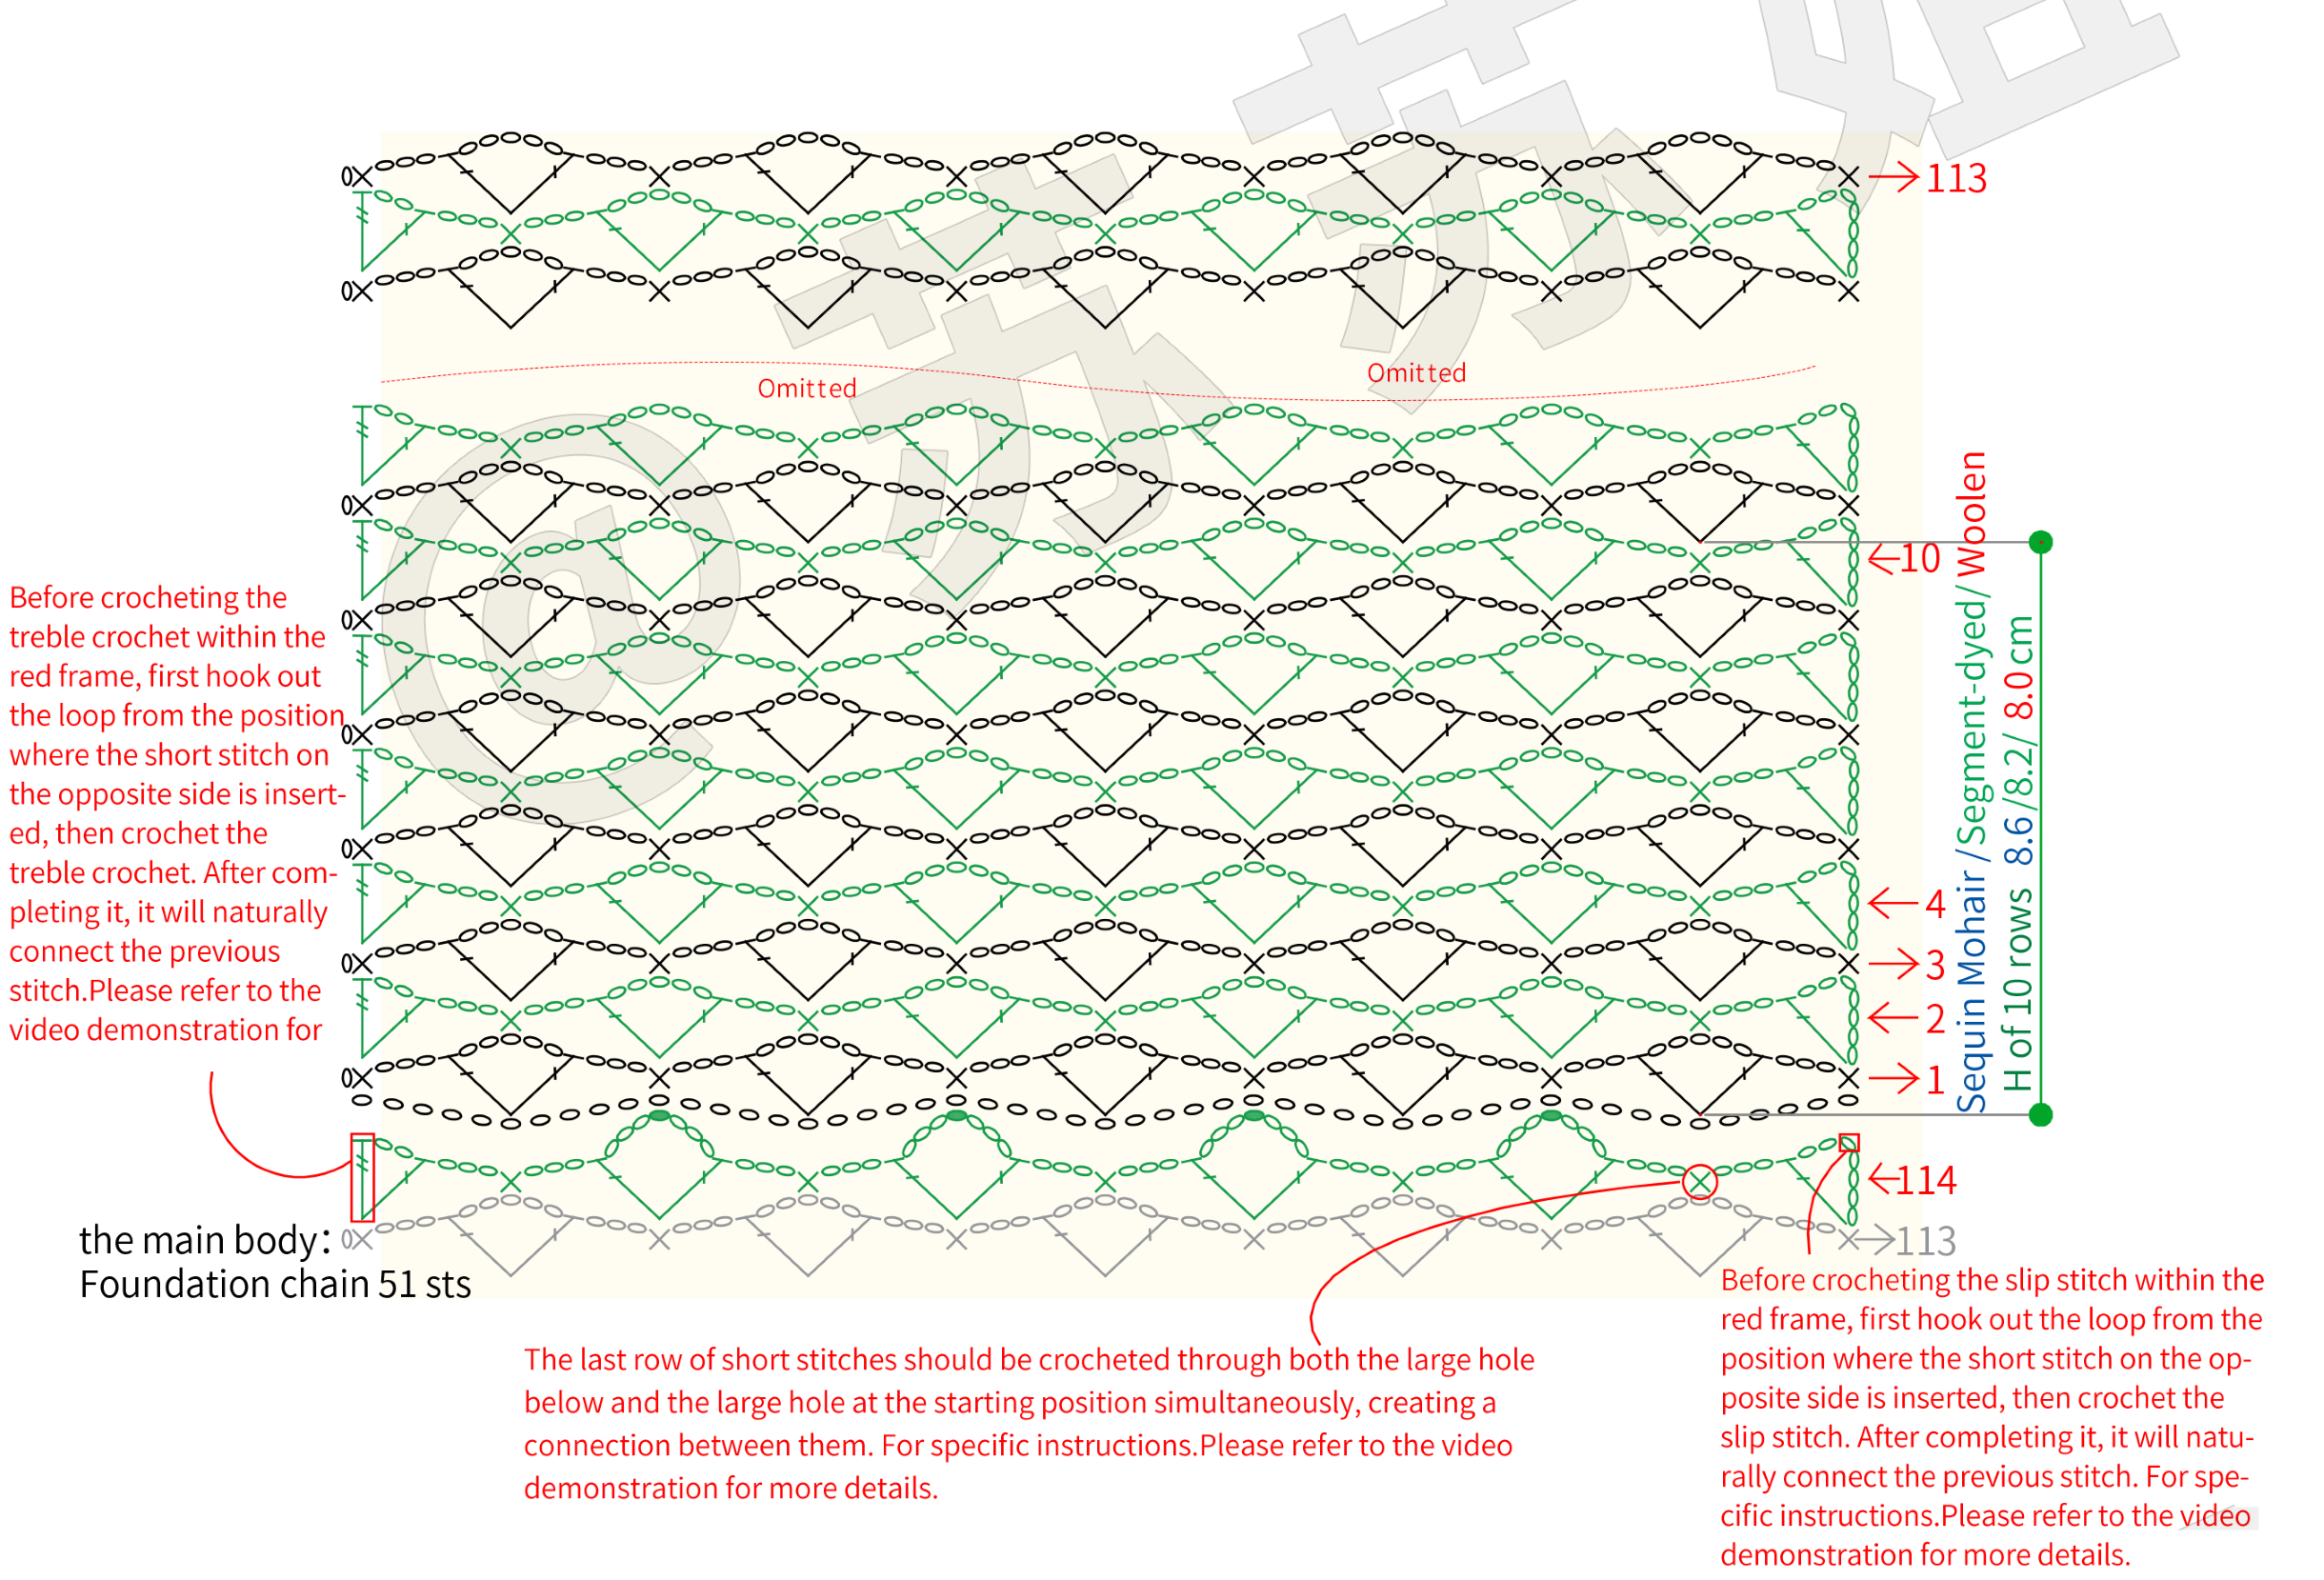
Part2 EdgeB 16' 41''
After completing the main body, crochet the sides on both edges.Please refer to the video demonstration for more details.
Note: If the number of rows in the main body is adjusted, the pattern for picking up stitches in the first row of the side edges should also be adjusted accordingly.
1.Hooking one side first: Create 10 flowers within the 57 holes, with some short stitches hooked in corresponding short stitch positions. In other words, follow the pattern inside the green frame for the front part, and for the last flower, follow the illustration to occupy 6 holes.
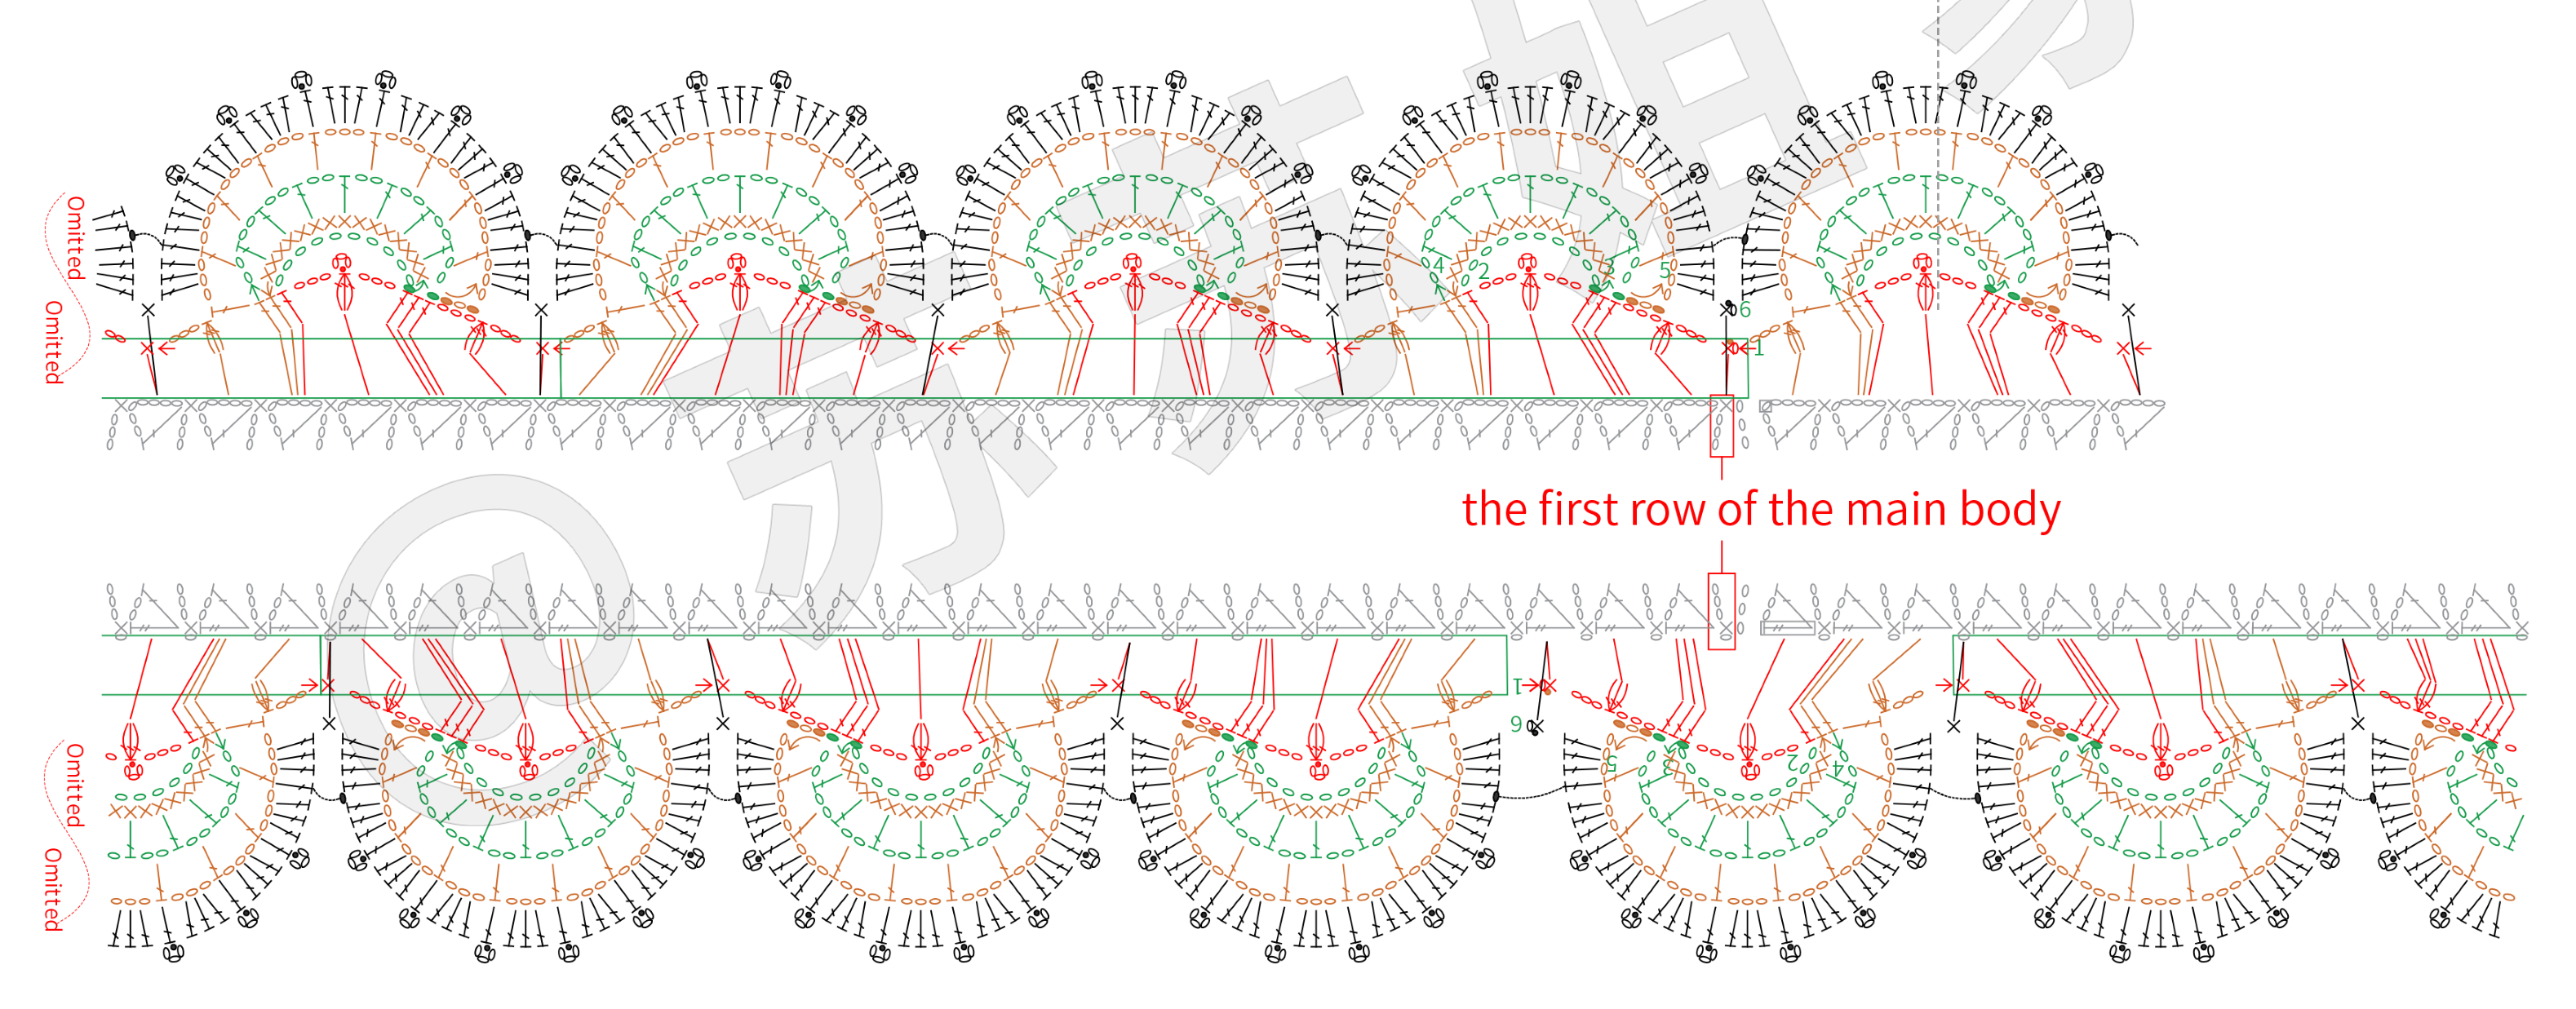
2.The pattern on the side that is hooked later should be roughly staggered from the pattern on the previously hooked side. You can follow the starting position in the illustration or adjust it according to your preference. (The first pattern occupies 6 holes, and the rest are hooked according to the pattern inside a green frame.)
Made by the community