Home / Lamp
Starlight Sweet Dream Lamp
Project preview
See the finished project
Pattern format
Instructions
Watch and follow
Video tutorial
This lamp consists of two parts: the main part and the accessories. Let's start from the main part. Then, we'll work the accessories.
Materials: 4-Ply Combed Cotton & Acrylic Fibre Hand Knitting Yarn
Susan's Family Shetland
Hook: 1.75mm crochet hook
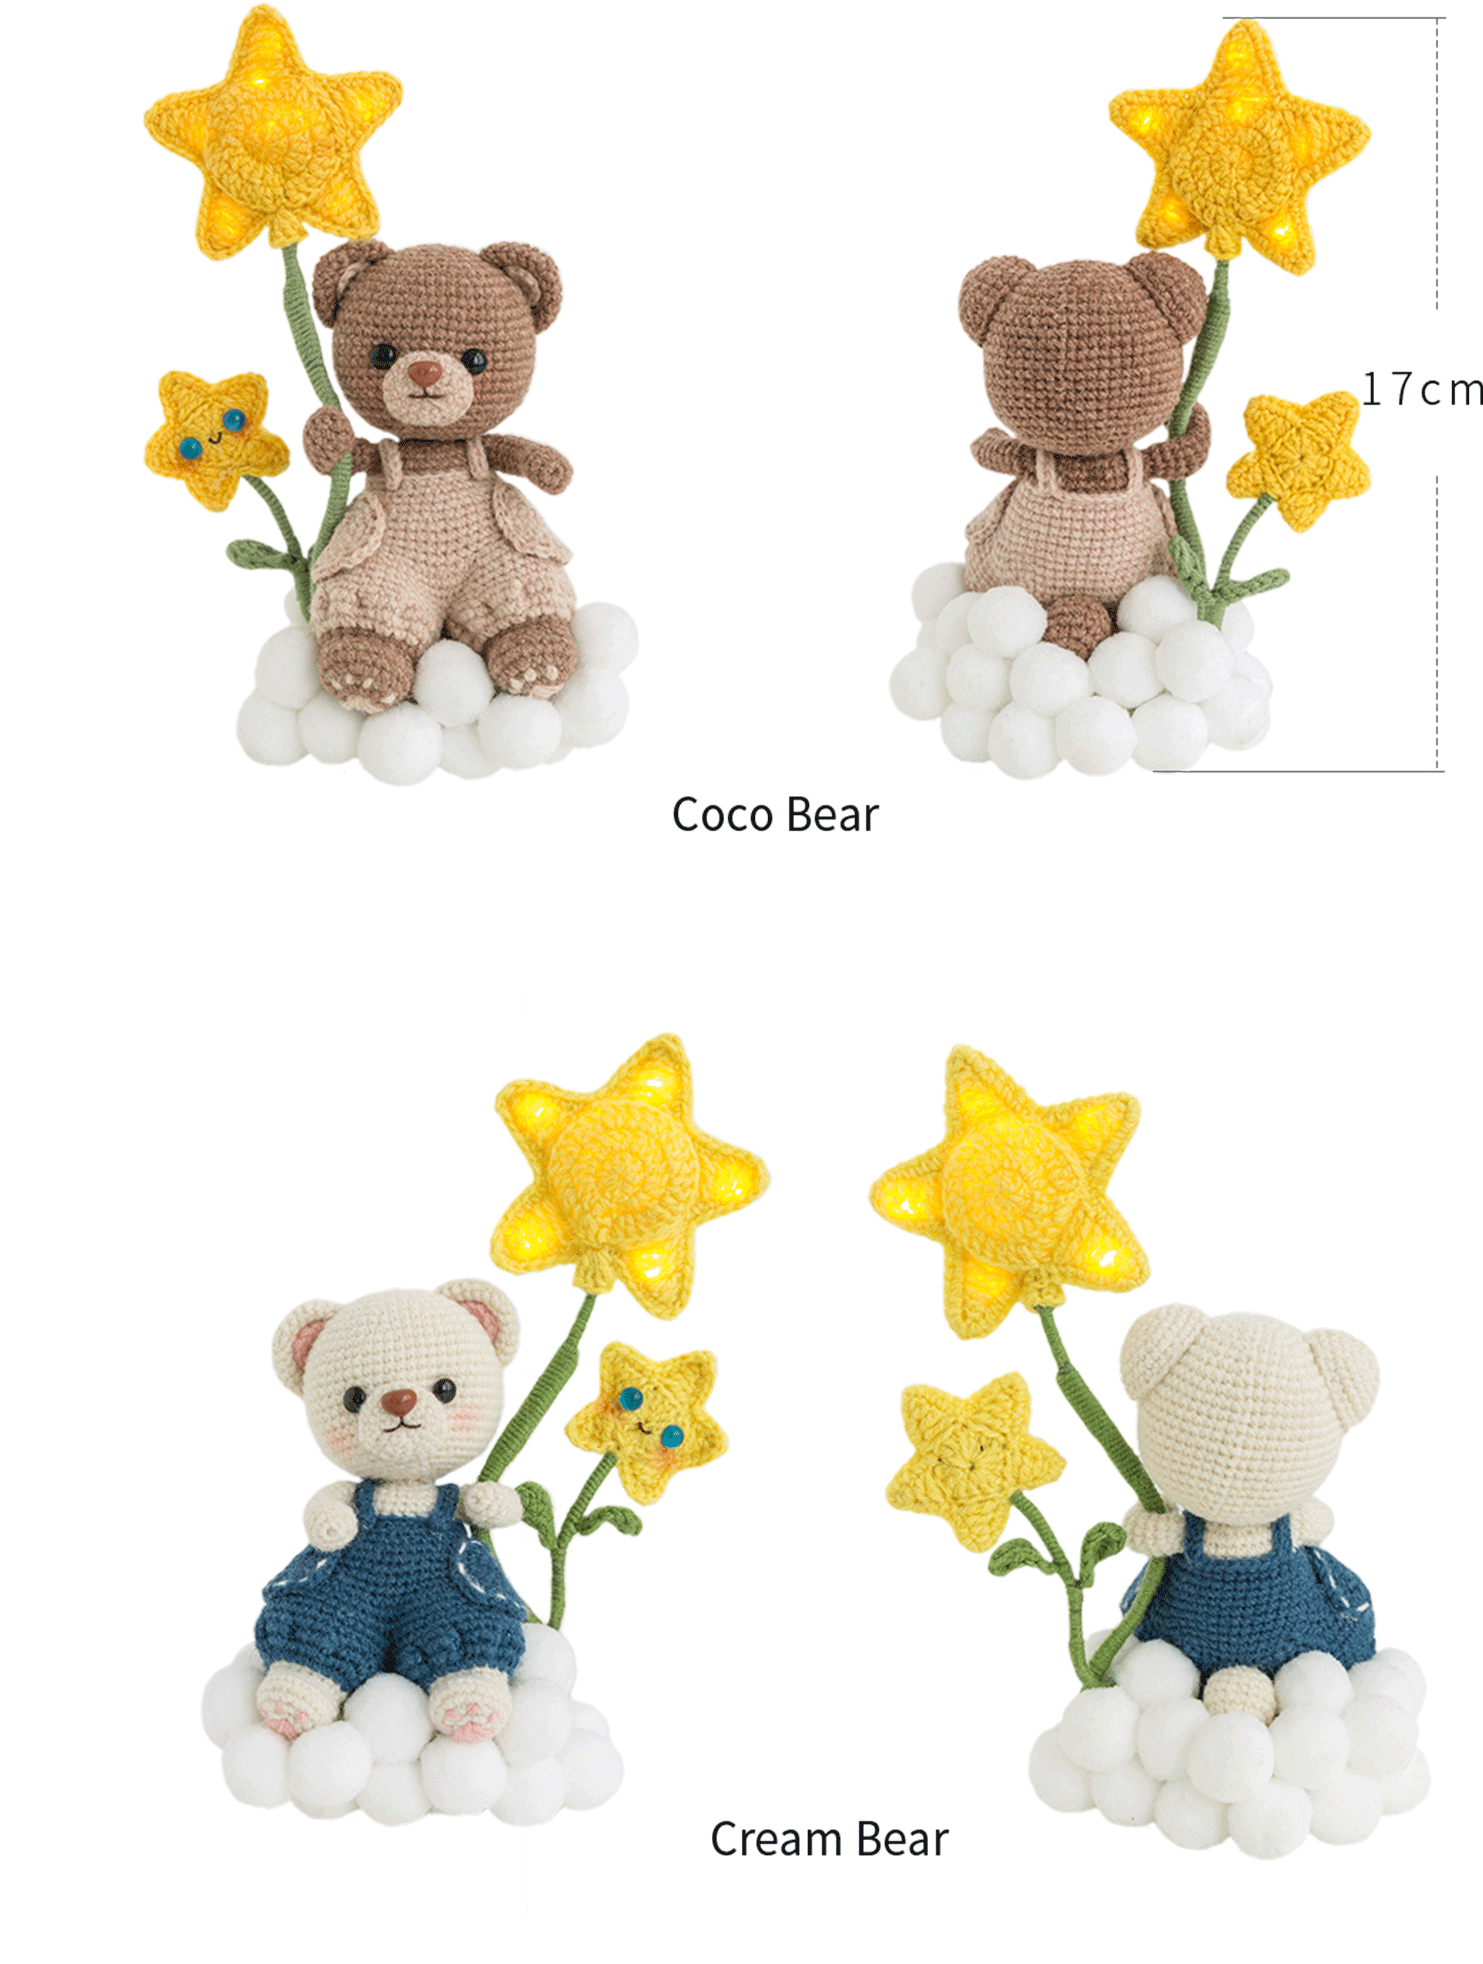
The handcrafted measurements may have an error of 1 to 2cm. Due to variations in individual tension, the size of the sample is for reference only.
Note:
This pattern is making in Chinese crochet pattern terms, and the stitch name is written using American terminology. All measurements in charts are in cm. When crocheting in rounds without further guidance, working in closed rounds, start each round with a set number of beginning chains and close with a slip stitch. The beginning chain preceding a single crochet and the slip stitch used for joining rounds are not included in the total stitches.
ABBREVIATIONS
MRadjustable magic ring
CHchain
SLslip stitch
XX stitch single crochet
Thalf double crochet
Fdouble crochet
Etreble crochet
A = sc2toginvisible single crochet 2 stitches together
V = sc2-in-12 single crochets into the same stitch
W = sc3-in-13 single crochets into the same stitch
TV = hdc2-in-12 half double crochets into the same stitch
FV = dc2-in-12 double crochets into the same stitch
TW = hdc3-in-13 half double crochets into the same stitch
turnturn the piece
BLOback loop only
FLOfront loop only
[...]in the same stitch
(...)×6crochet item in the parentheses six times
Chart Key

Part 1 Main partA
The main part is made up of the arms, legs, body, head, and tail.
Step 1 ArmsA1 00' 47''
The arm is started with a magic ring and crochet in rounds. Please refer to the video demonstration for more details.
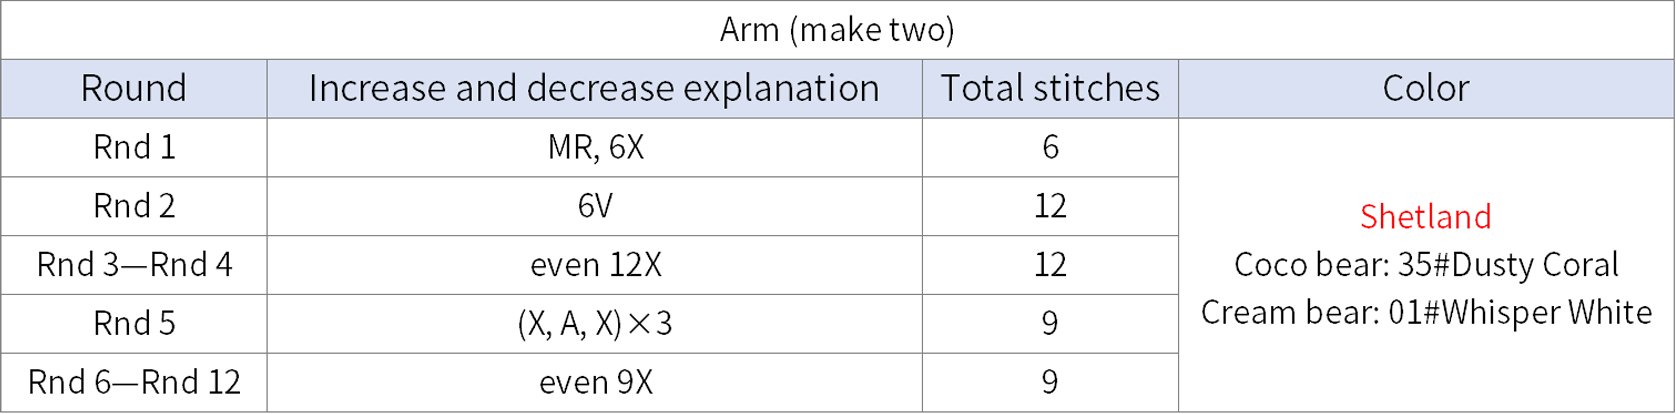
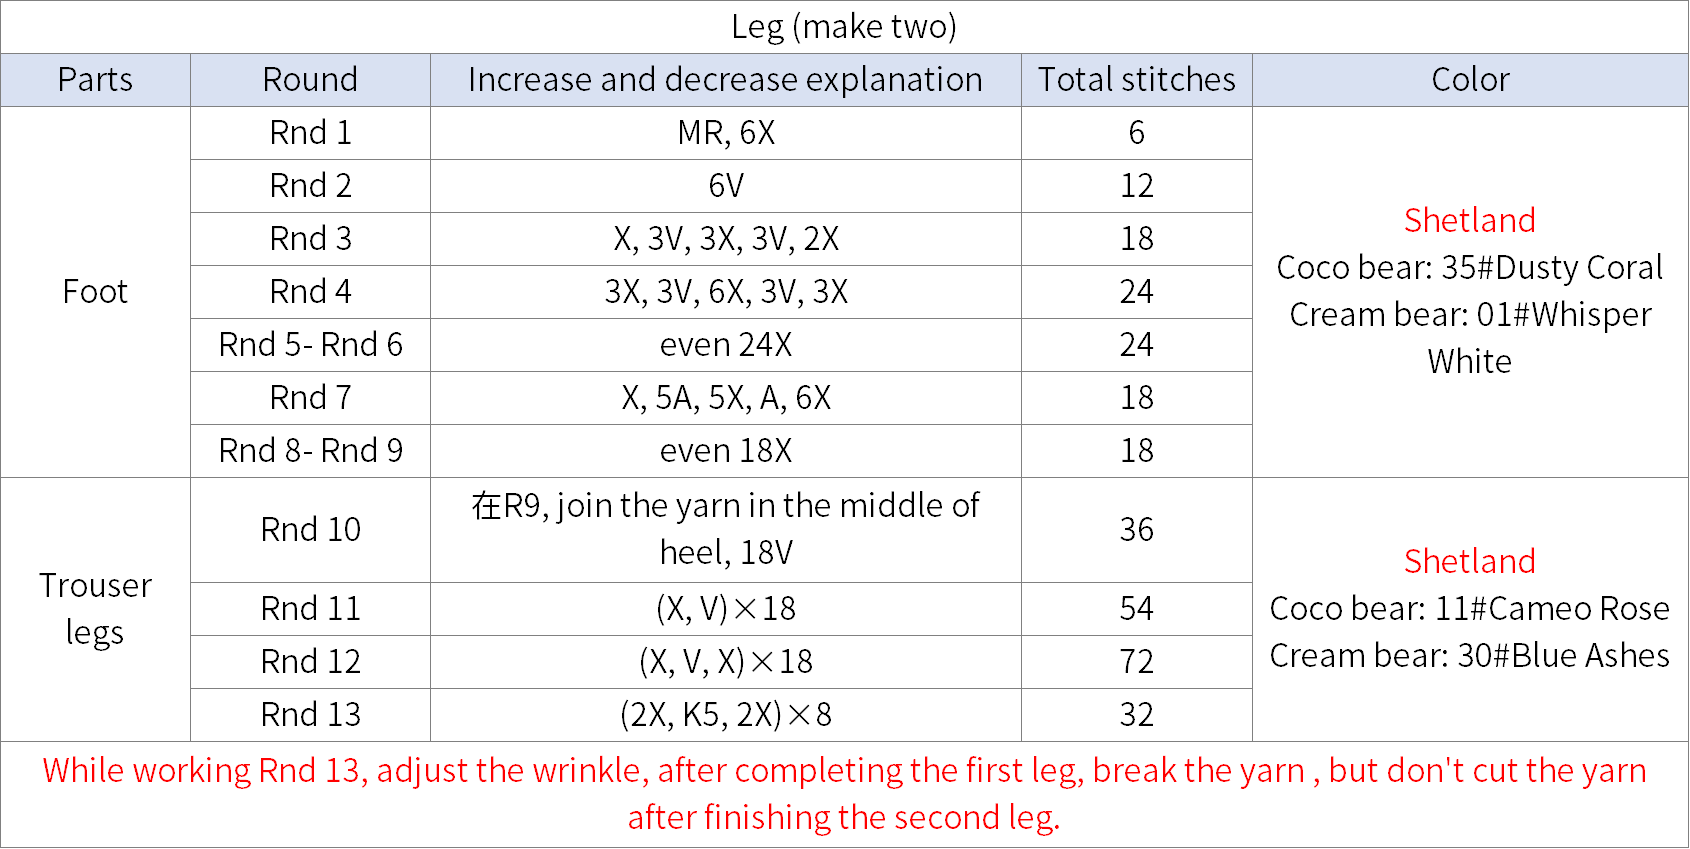
Step 2 LegsA2 09' 22''
The Leg consists of the foot and the trouser legs. The foot will start with a magic ring and crochet in rounds. You'll need to change colors for the trouser legs. Please refer to the video demonstration for more details.
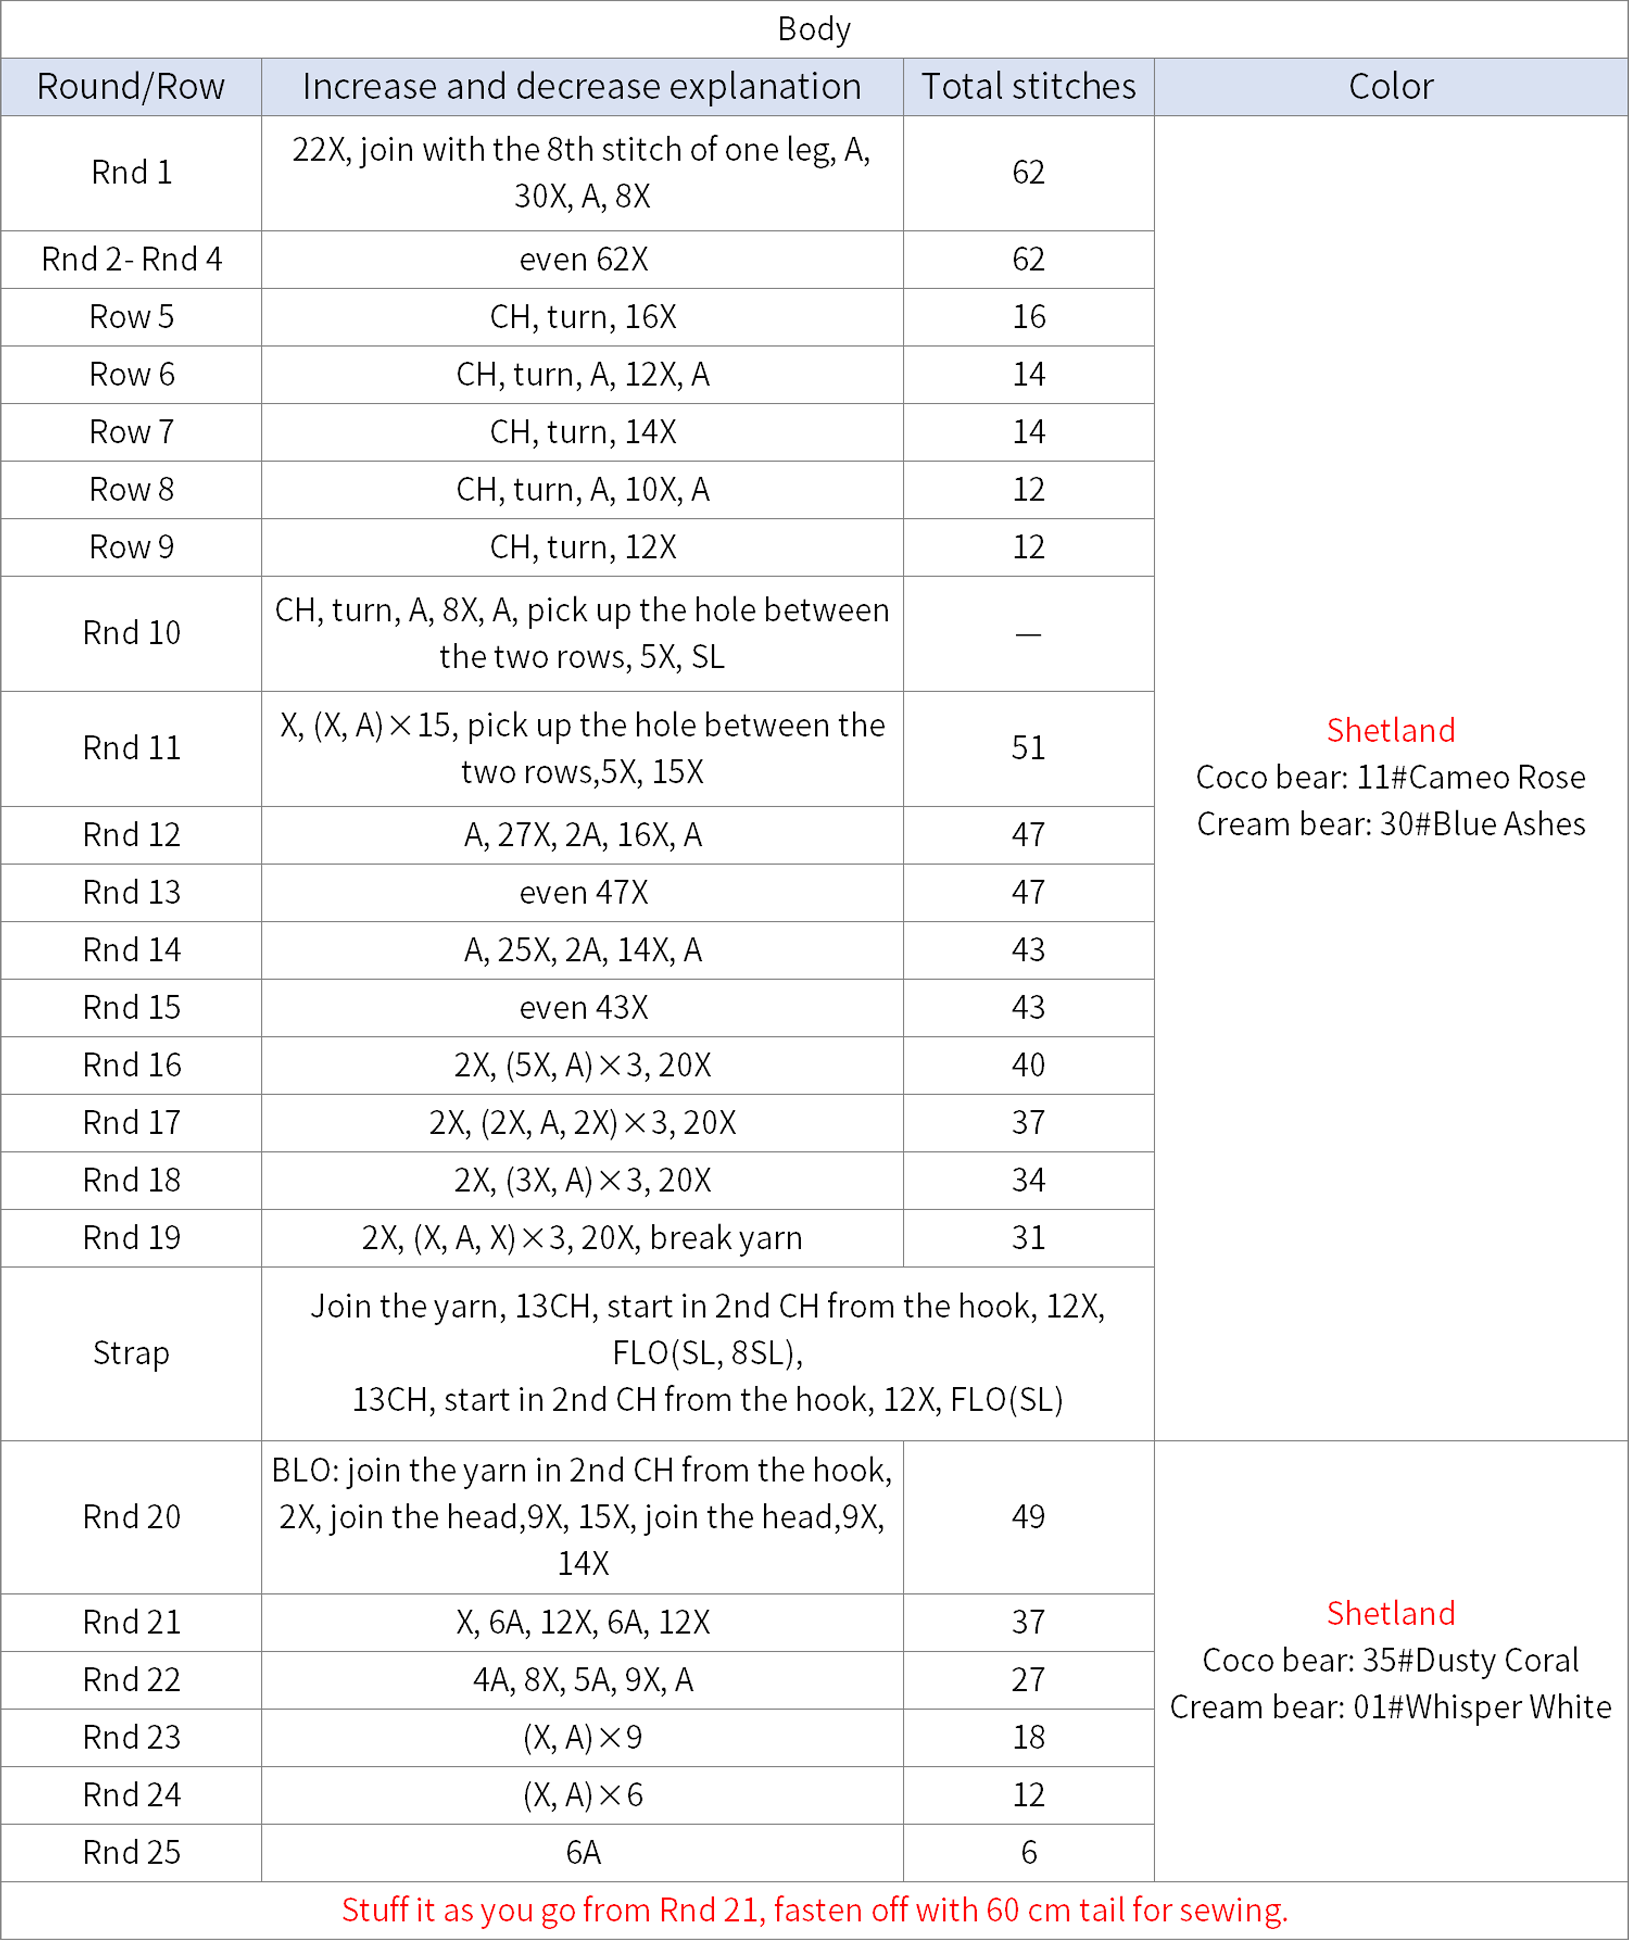
Step 3 BodyA3 14' 25''
First, connect the two legs together. Then, continue crocheting upwards along both legs, while crocheting, attach the arms and stuff with fiberfill. Please refer to the video demonstration for more details.
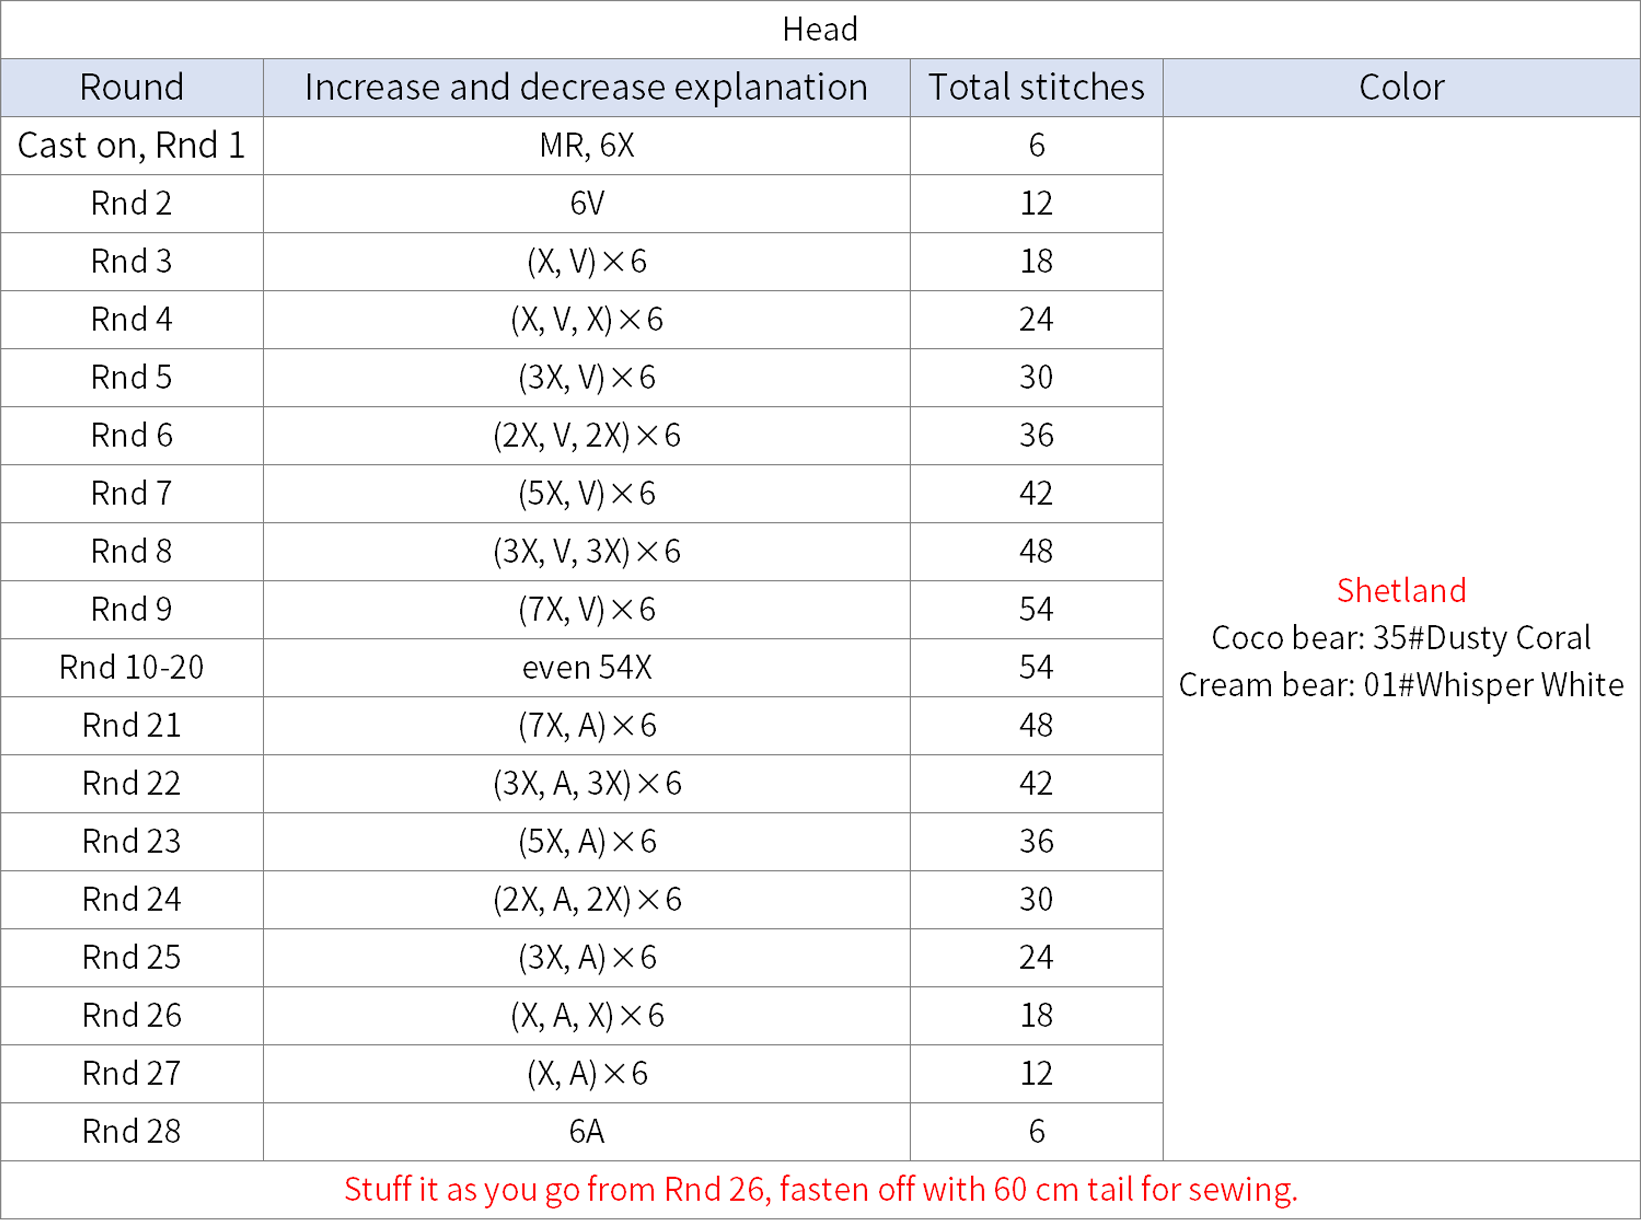
Step 4 Head A4 and tailA5 34' 14''
The head starts with a magic ring. Then, work in rounds according to the chart. Please refer to the video demonstration for more details.
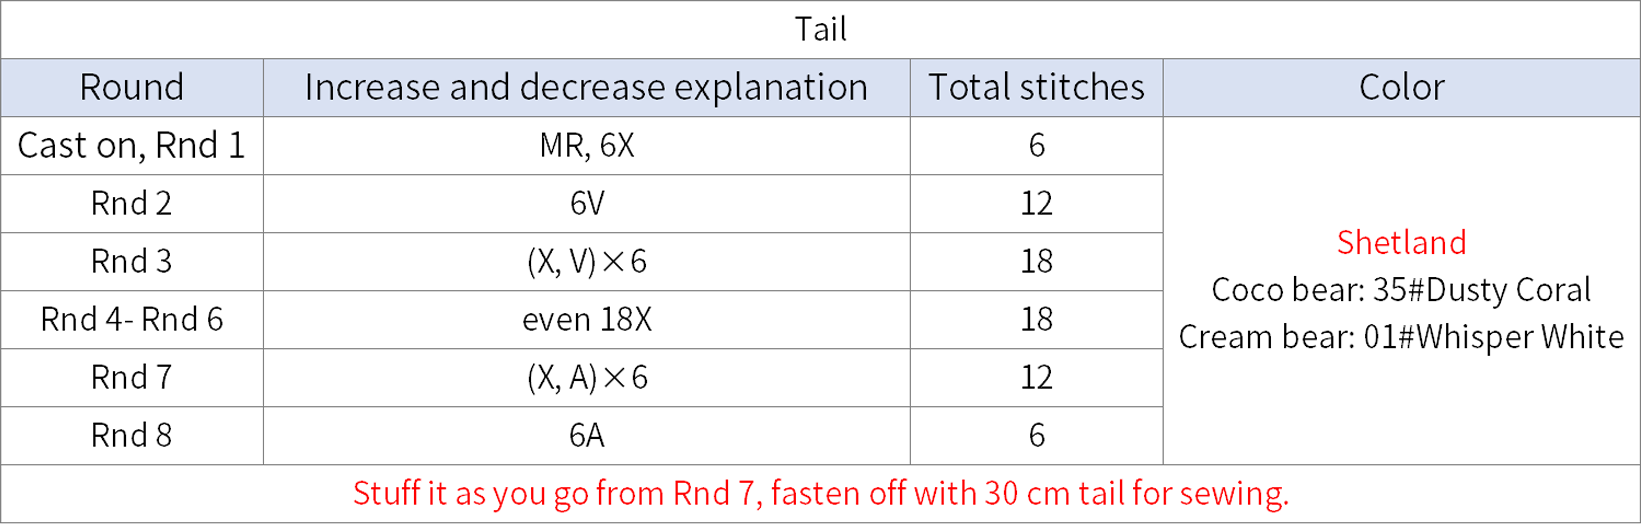
Part 2 AccessoriesB
The accessories include facial features, paws, trouser pockets, star lights, battery holder and clouds.
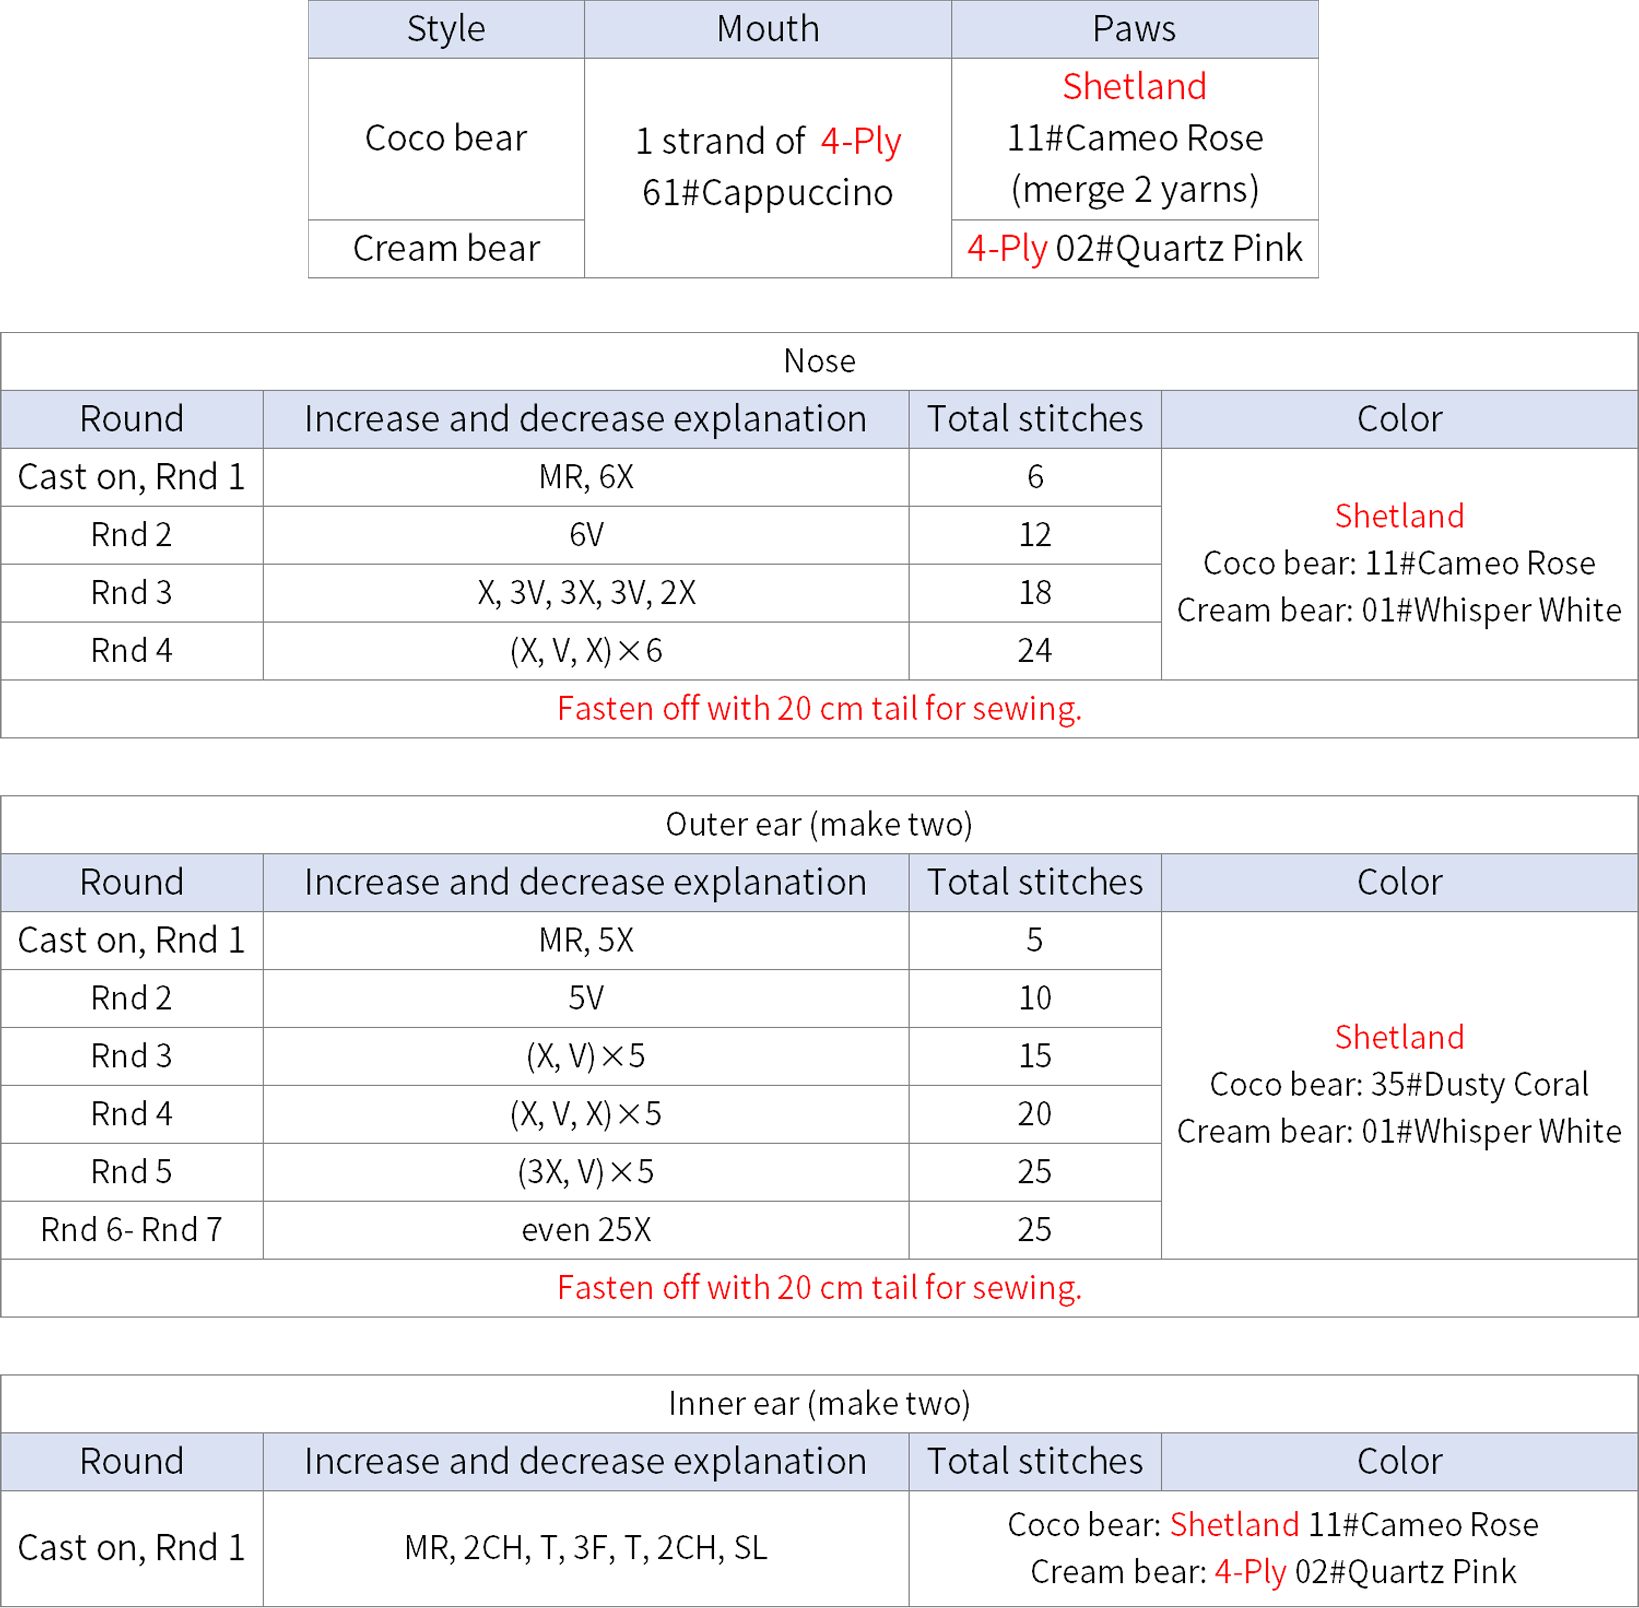
Step 1 Facial features B1 and paws B2 41' 29''
The facial features includ the ears, eyes, nose, mouth and blush. Crochet the ears and nose separately, then attach them to the head at their corresponding positions. Emboss eye sockets using the same color yarn as the head, combining two strands. Lastly, add blush below the eyes. For the legs, embroider the soles of the feet. Please refer to the video demonstration for more details.
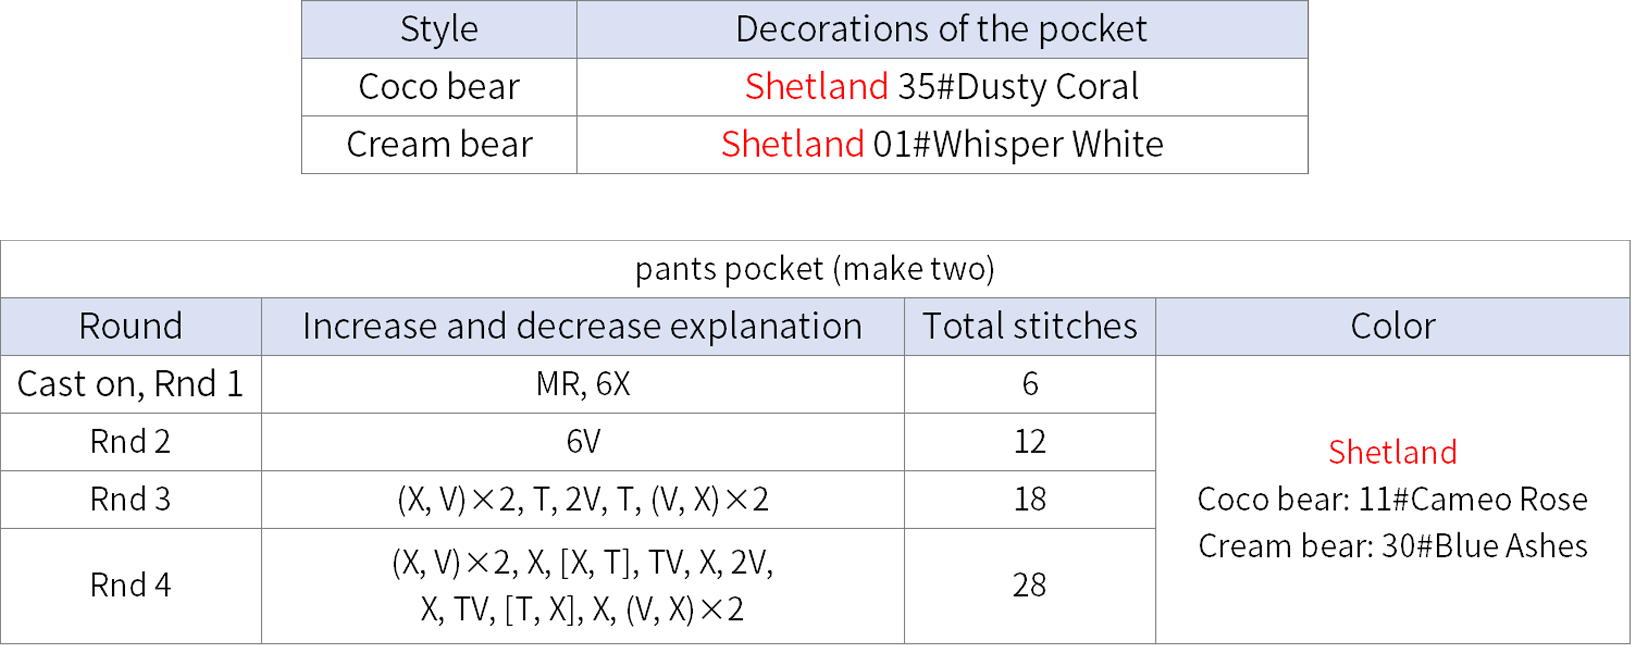
Step 2 Pants pocketB3 63' 45''
The pants pocket consists of the piece and the decorations. The piece starts with a magic ring and crochet in rounds. After completion, add the decorations. Finally, attach them to the proper position on the body. Please refer to the video demonstration for more details.
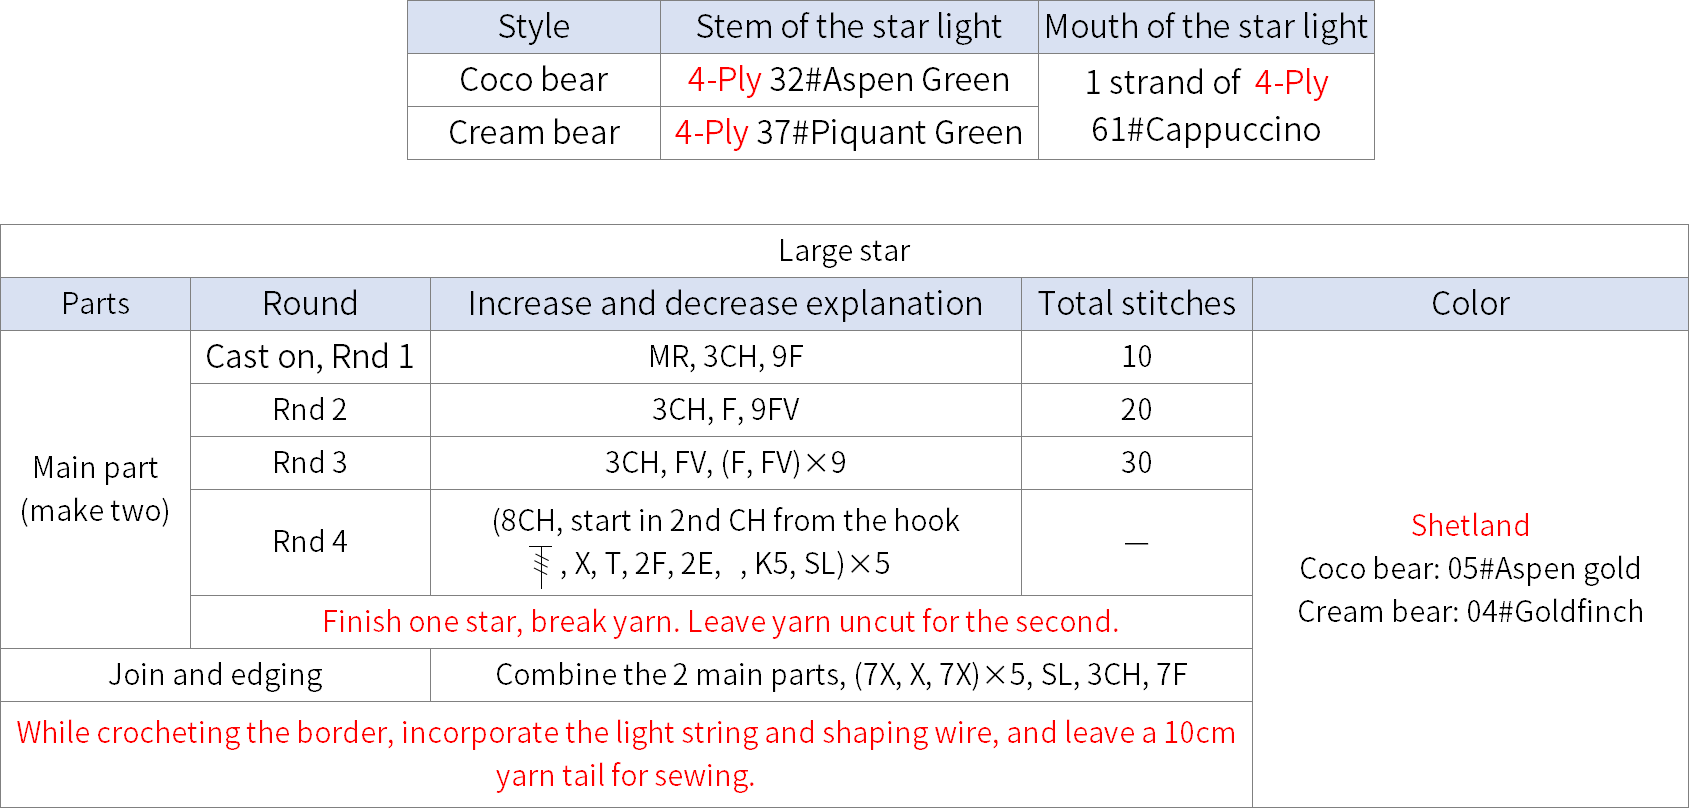
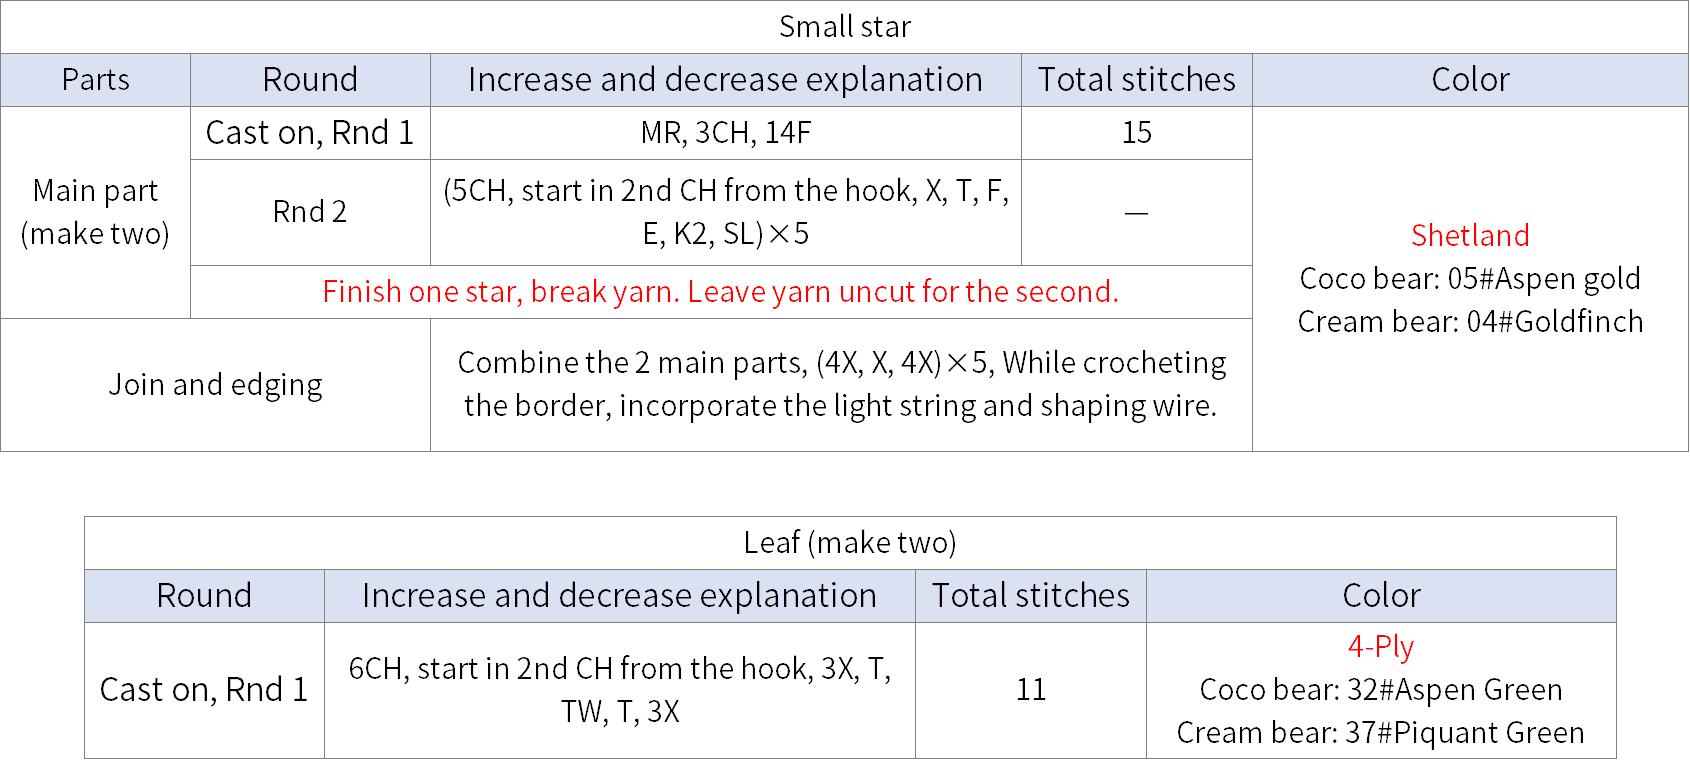
Step 3 Star lightB4 69' 58''
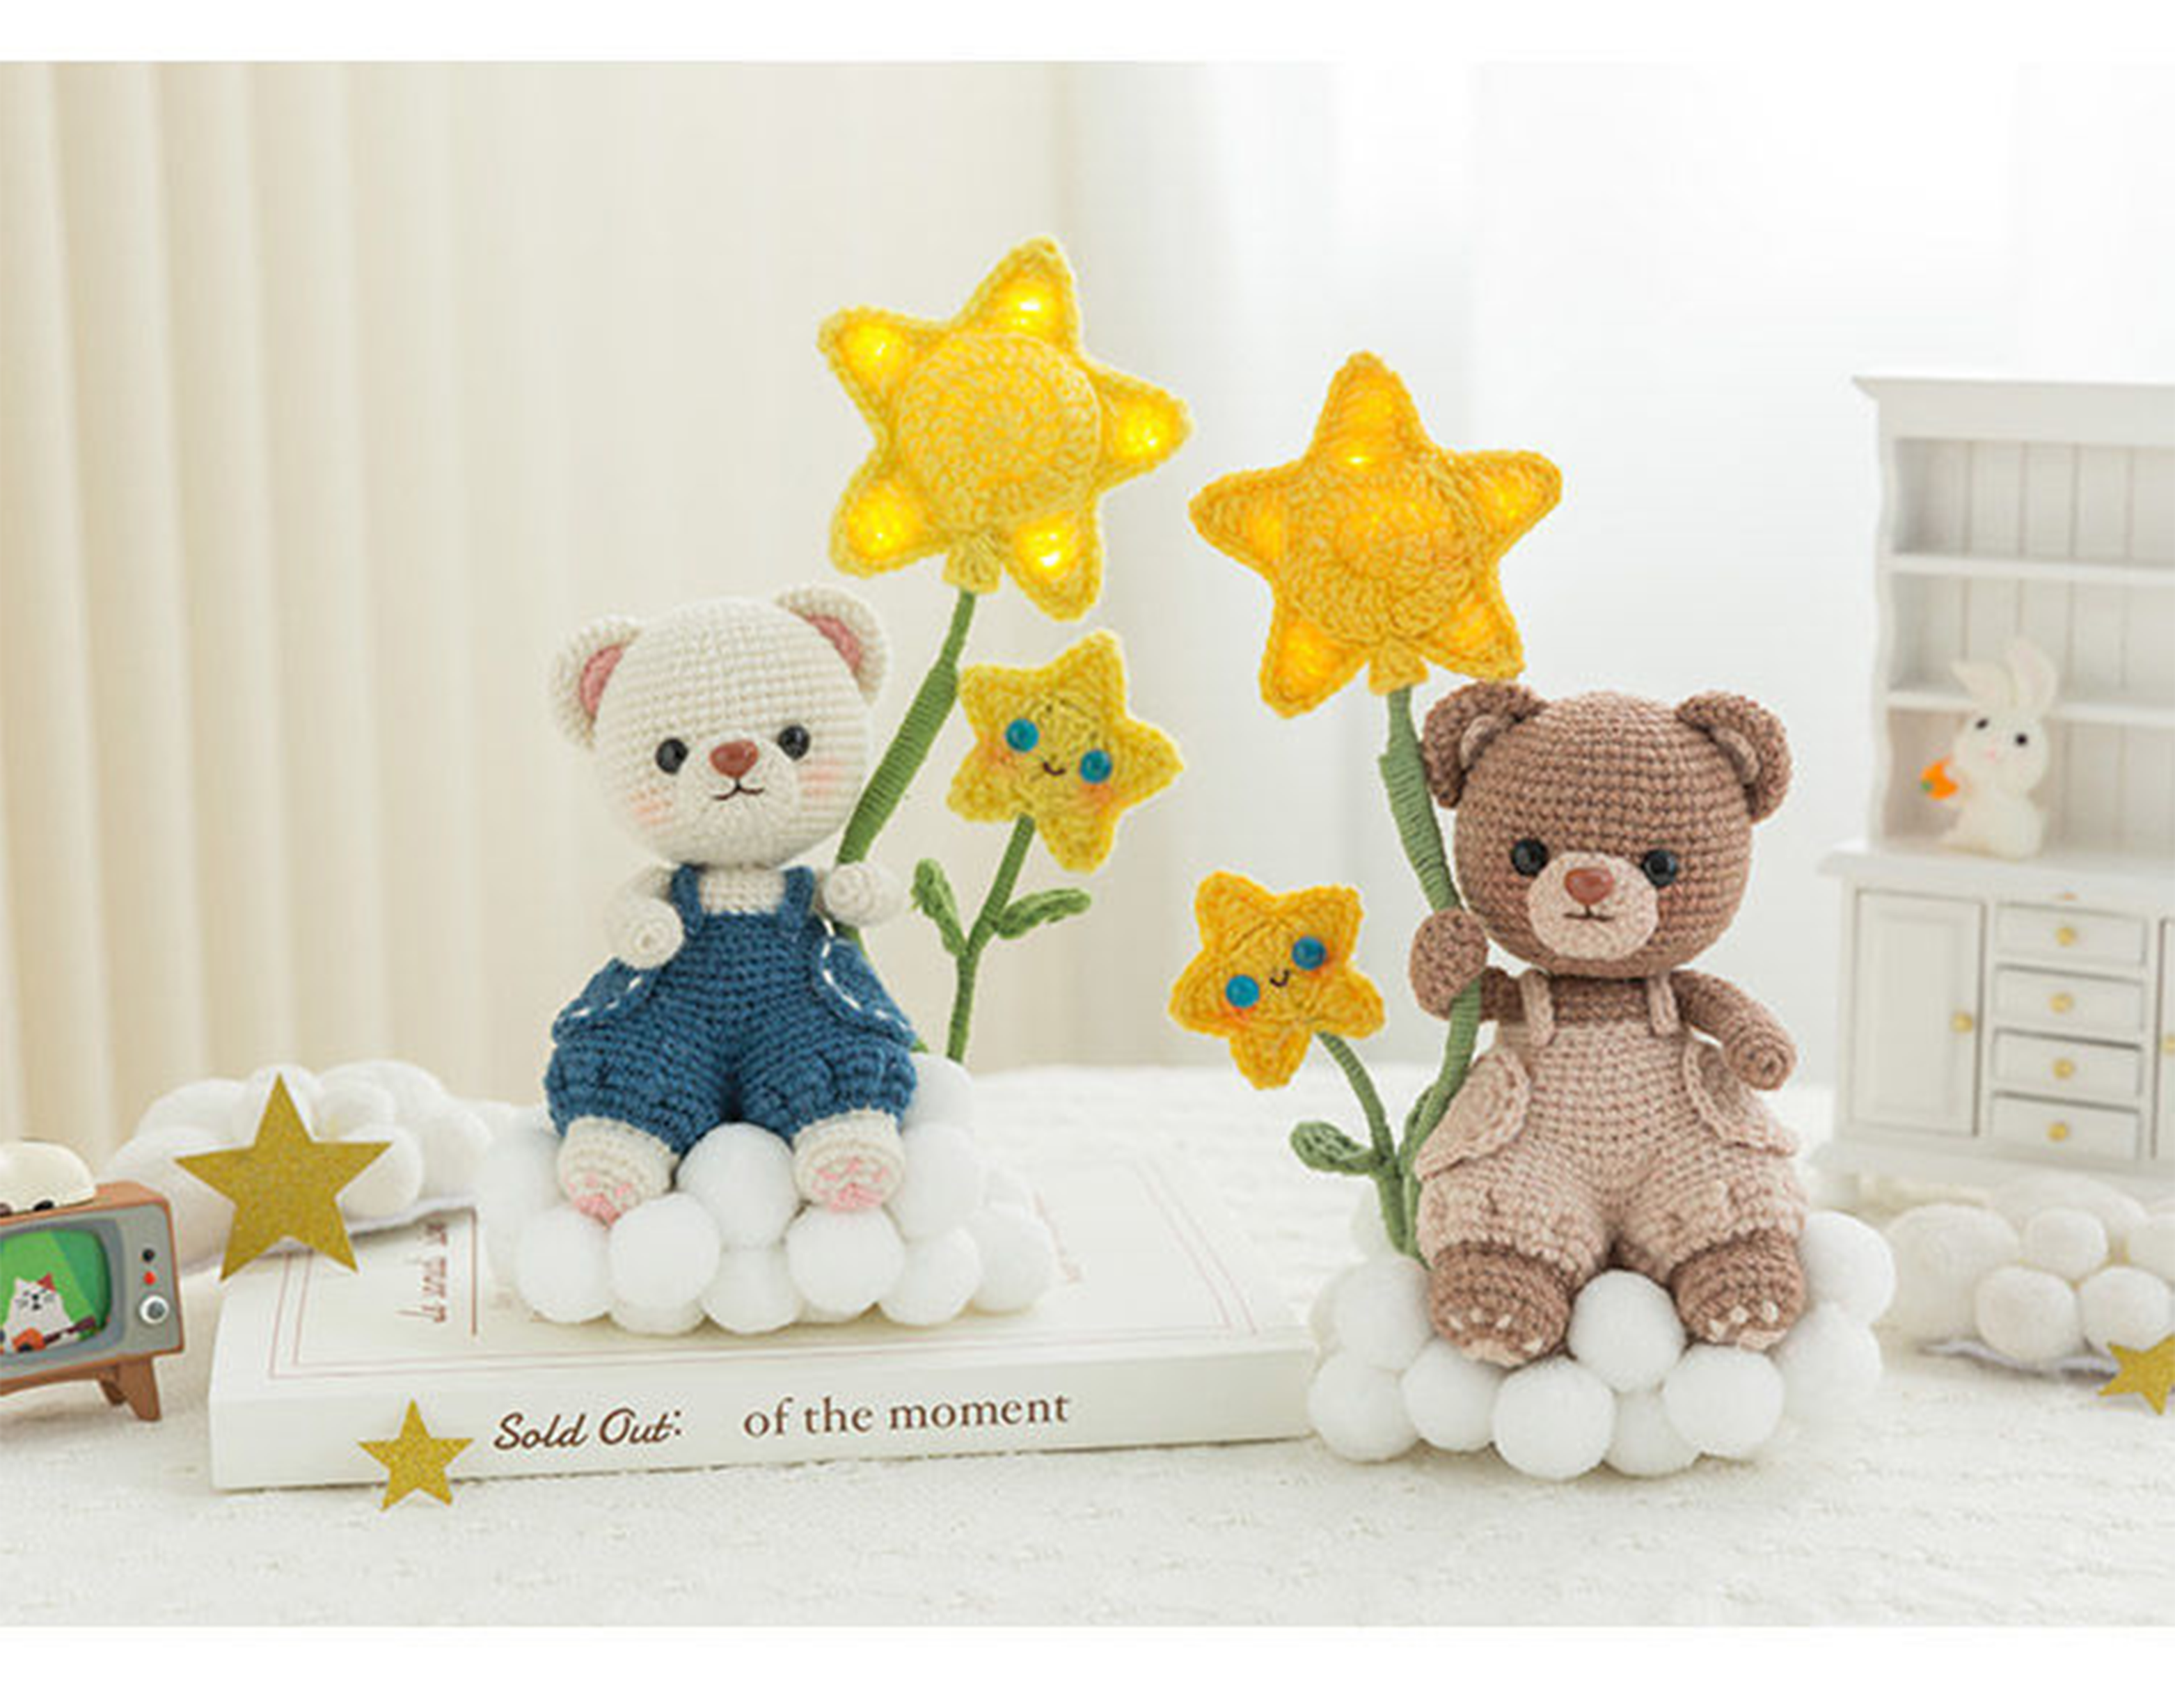
The star light consists of large star, small star, branches, leaves and string lights. Crochet each part separately, then assemble them together. Please refer to the video demonstration for more details.
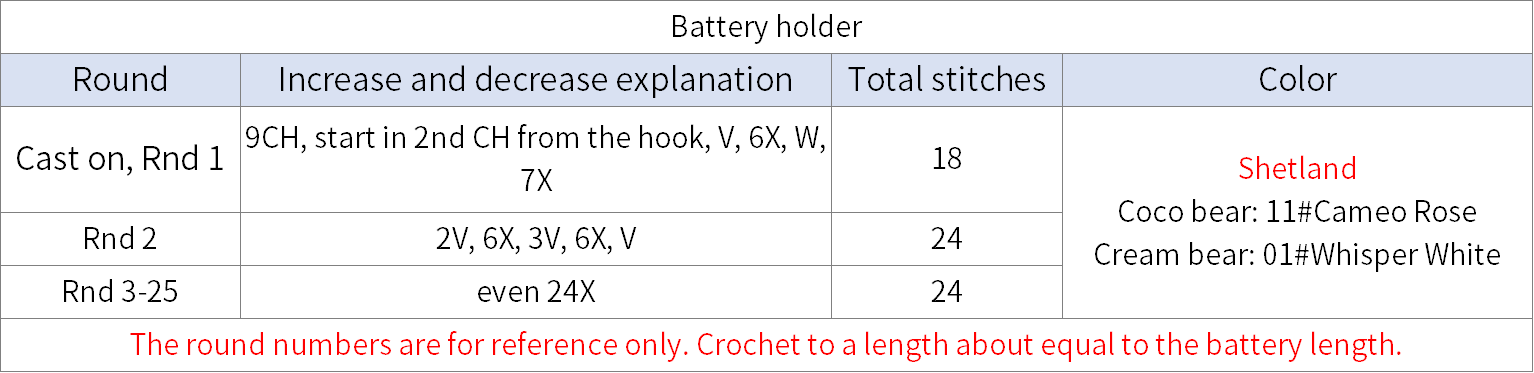
Step 4 Batter holder B5 and clouds B6 100' 46''
The battery holder is started with a foundation chain and work in rounds. Finish and attach it below the main part, adding clouds and star lights. Please refer to the video demonstration for more details.
Made by the community