Clothes
Wenlan
Project preview
See the finished project
Pattern format
Instructions
Watch and follow
Video tutorial
| Style | Yarn | Color |
|---|---|---|
| Linen Style | Morandi 4# |  04#Praline x 1 04#Praline x 1 08#Linen x 9 08#Linen x 9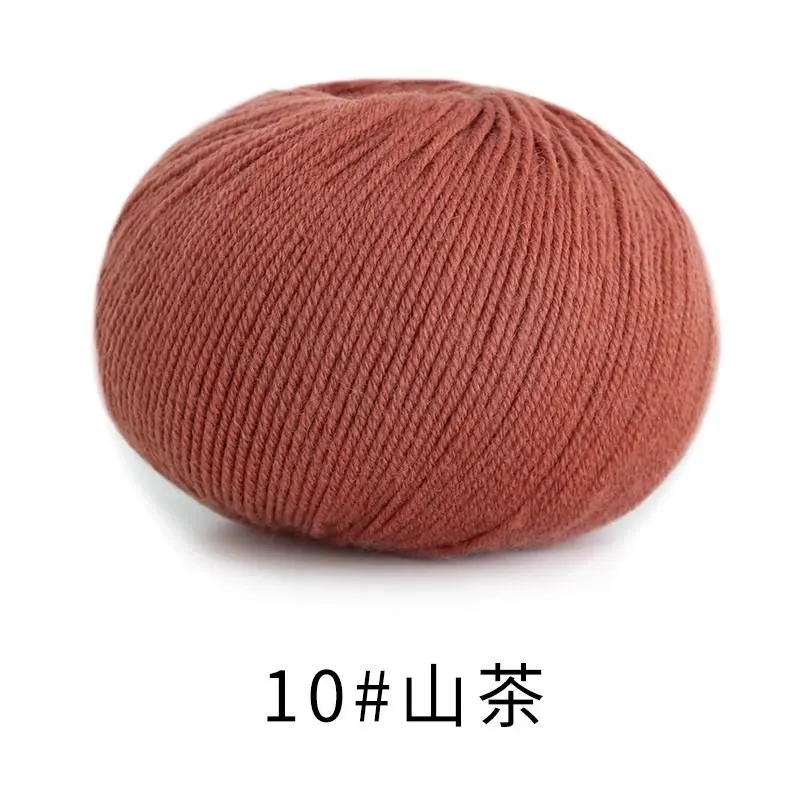 10#Aragon x 1 10#Aragon x 1 |
| Zen Blue Style | Morandi 4# |  01#Whisper White x 1 01#Whisper White x 1 03#Mauve Mist x 1 03#Mauve Mist x 1 26#Zen Blue x 9 26#Zen Blue x 9 |
| Iceberg Green Style | Morandi 4# |  02#Cameo Brown x 1 02#Cameo Brown x 1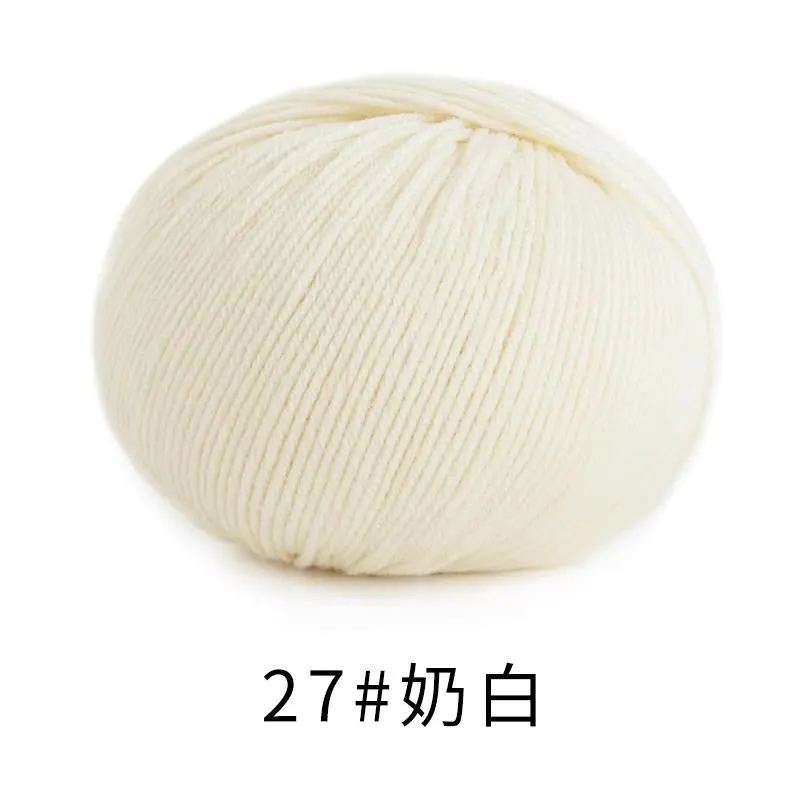 27#Antique White x 1 27#Antique White x 1 28#Iceberg Green x 9 28#Iceberg Green x 9 |
| Whispering Blue Style | Morandi 4# |  07#Provincial Blue x 1 07#Provincial Blue x 1 33#Whispering Blue x 9 33#Whispering Blue x 9 44#Glacier Gray x 1 44#Glacier Gray x 1 |
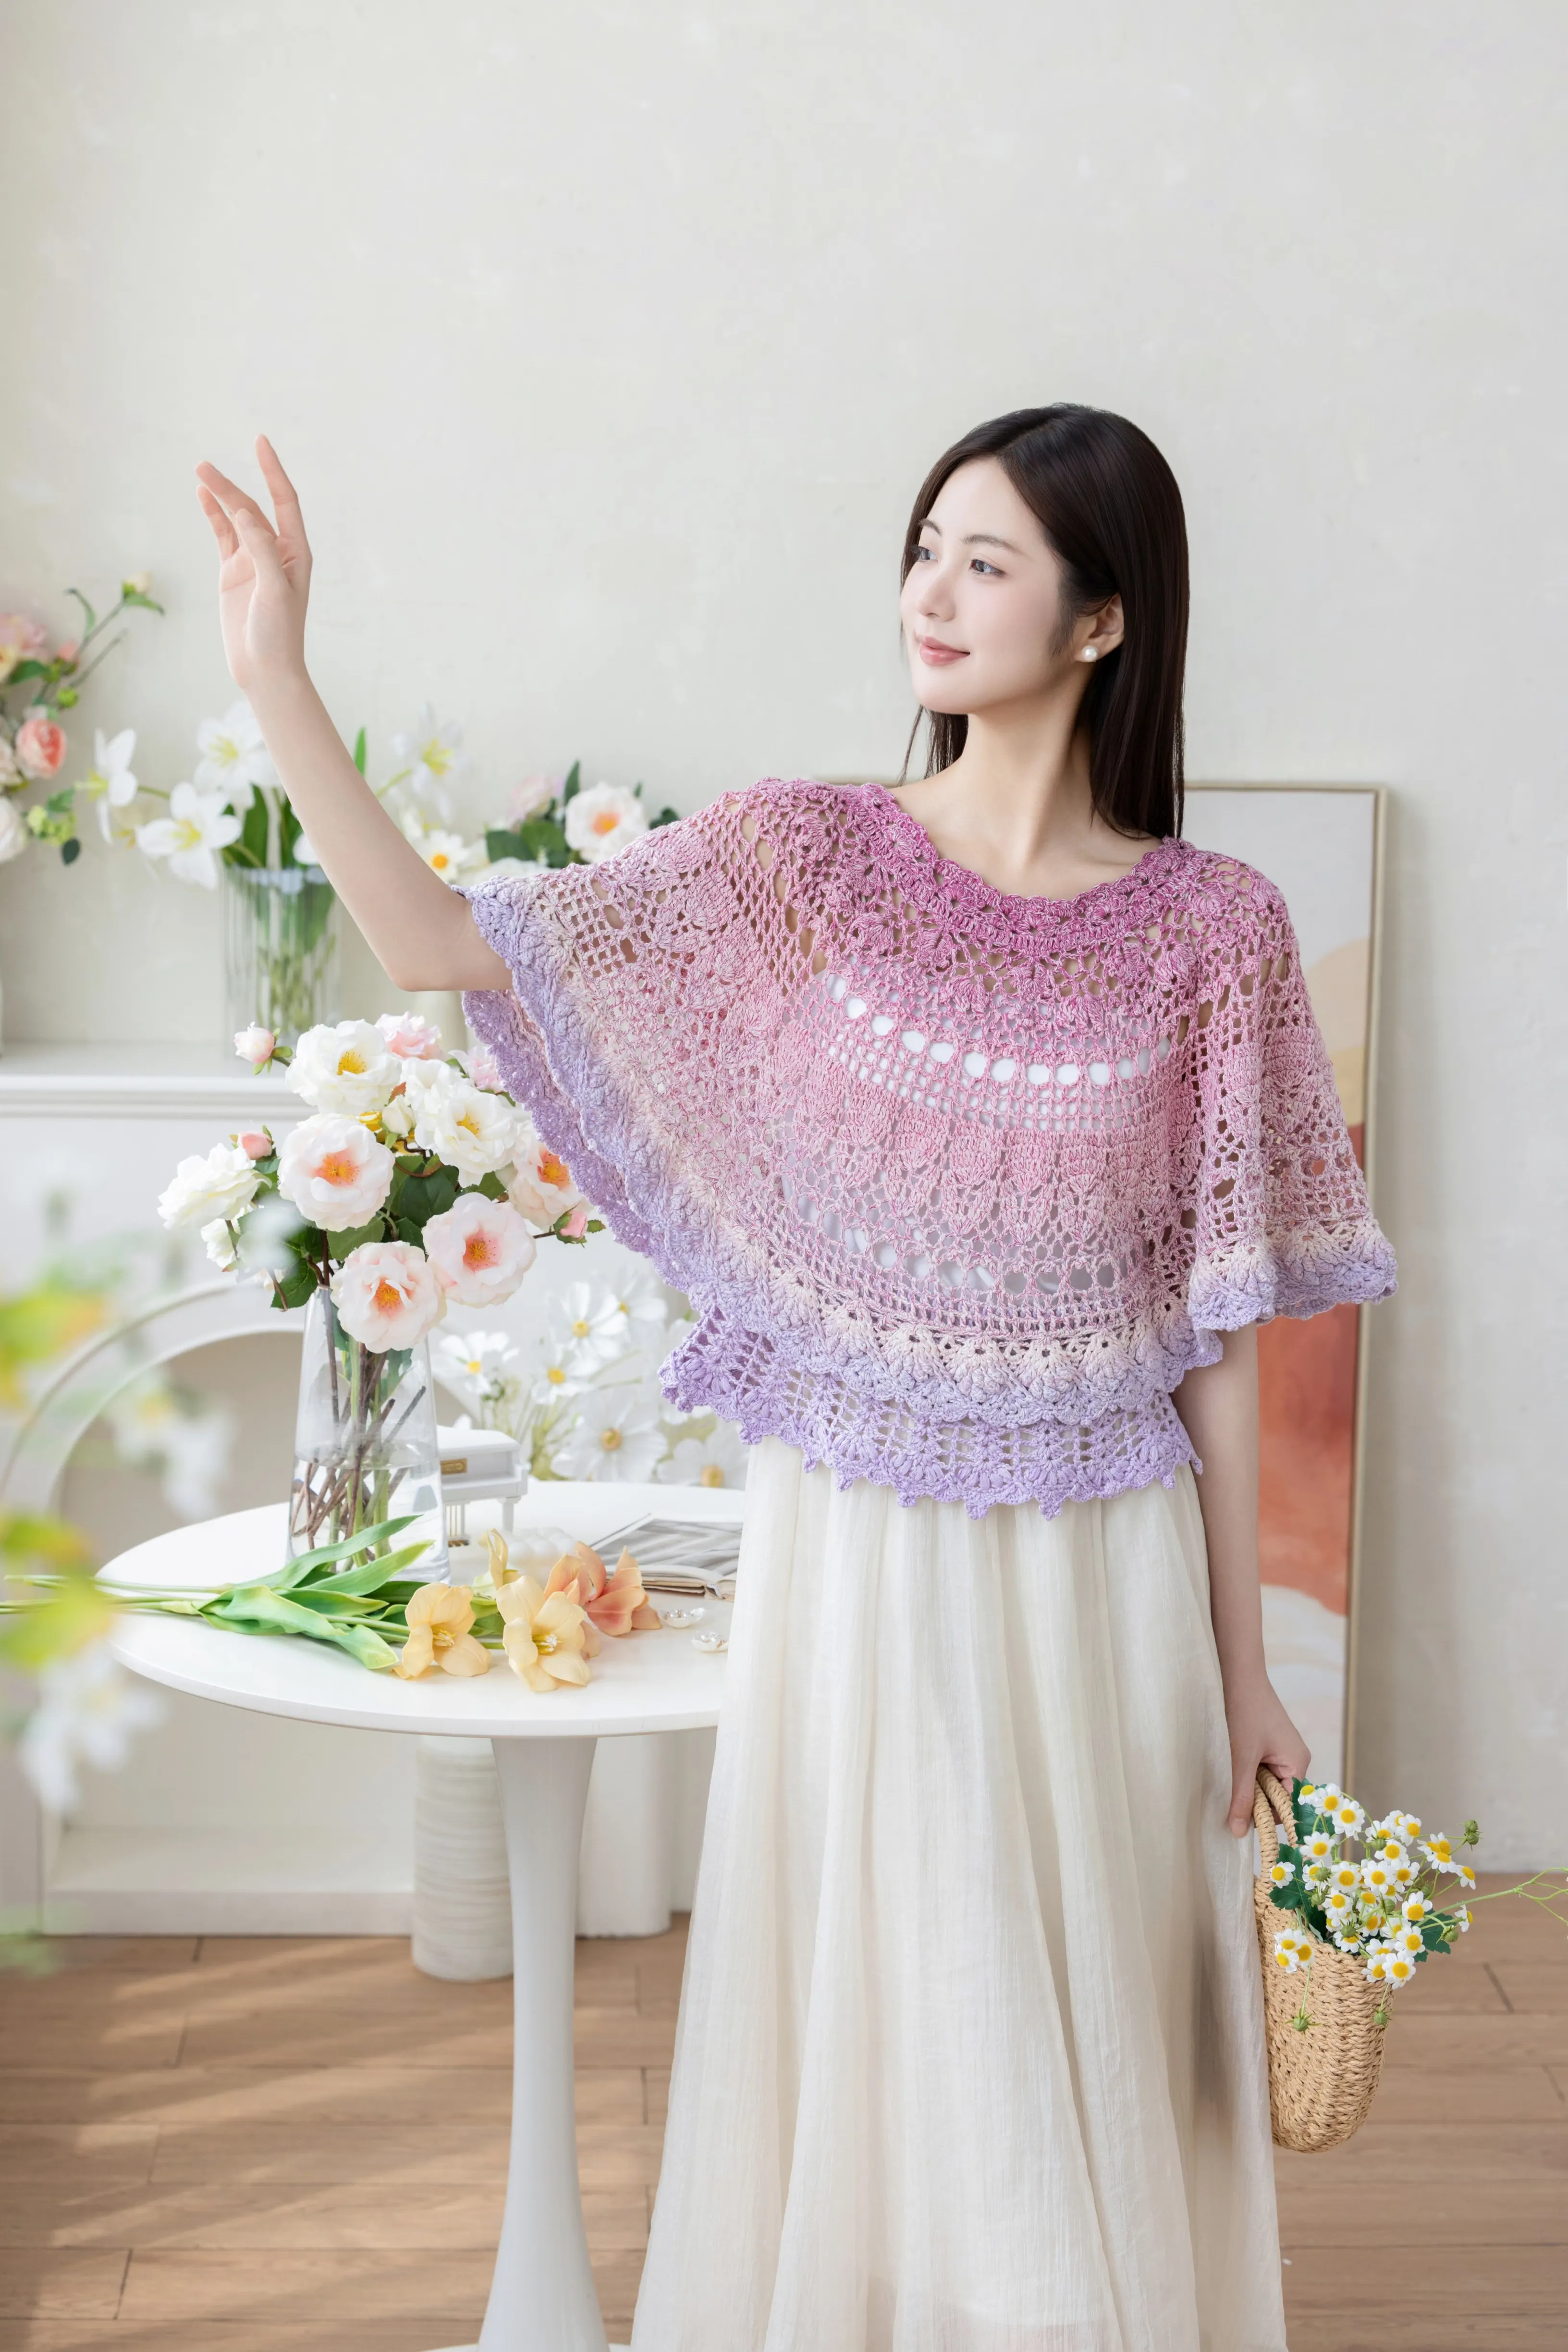
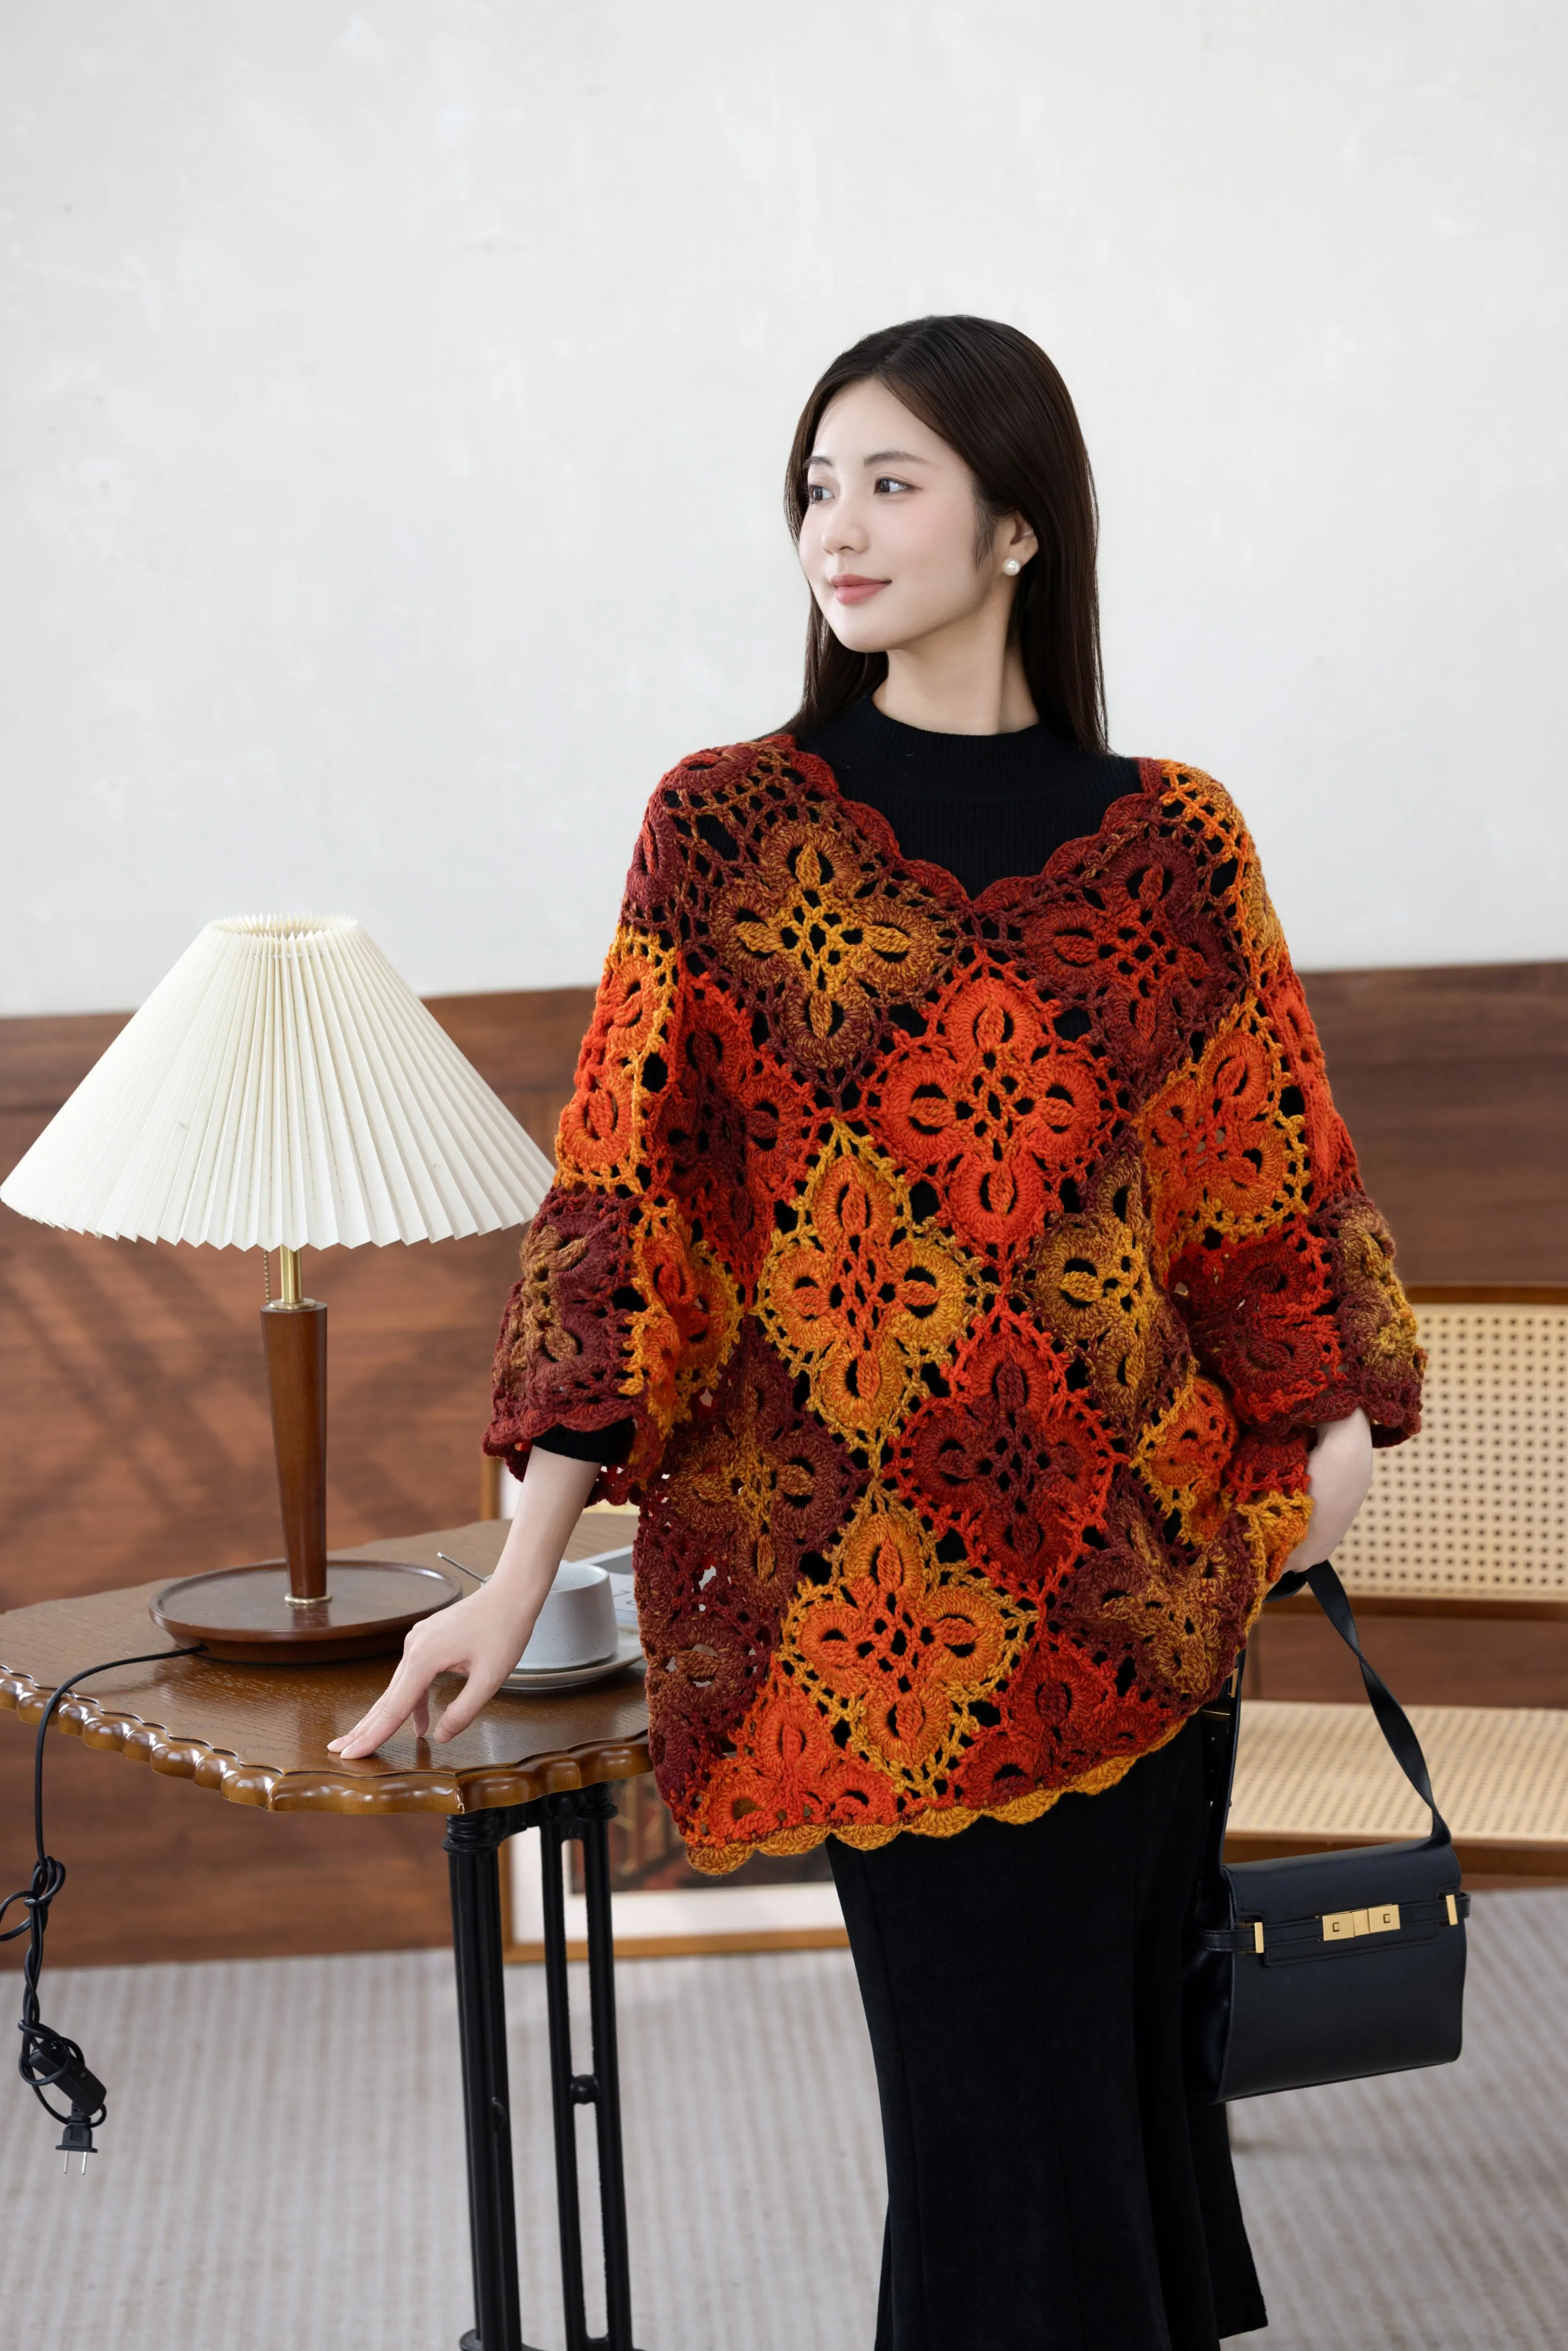
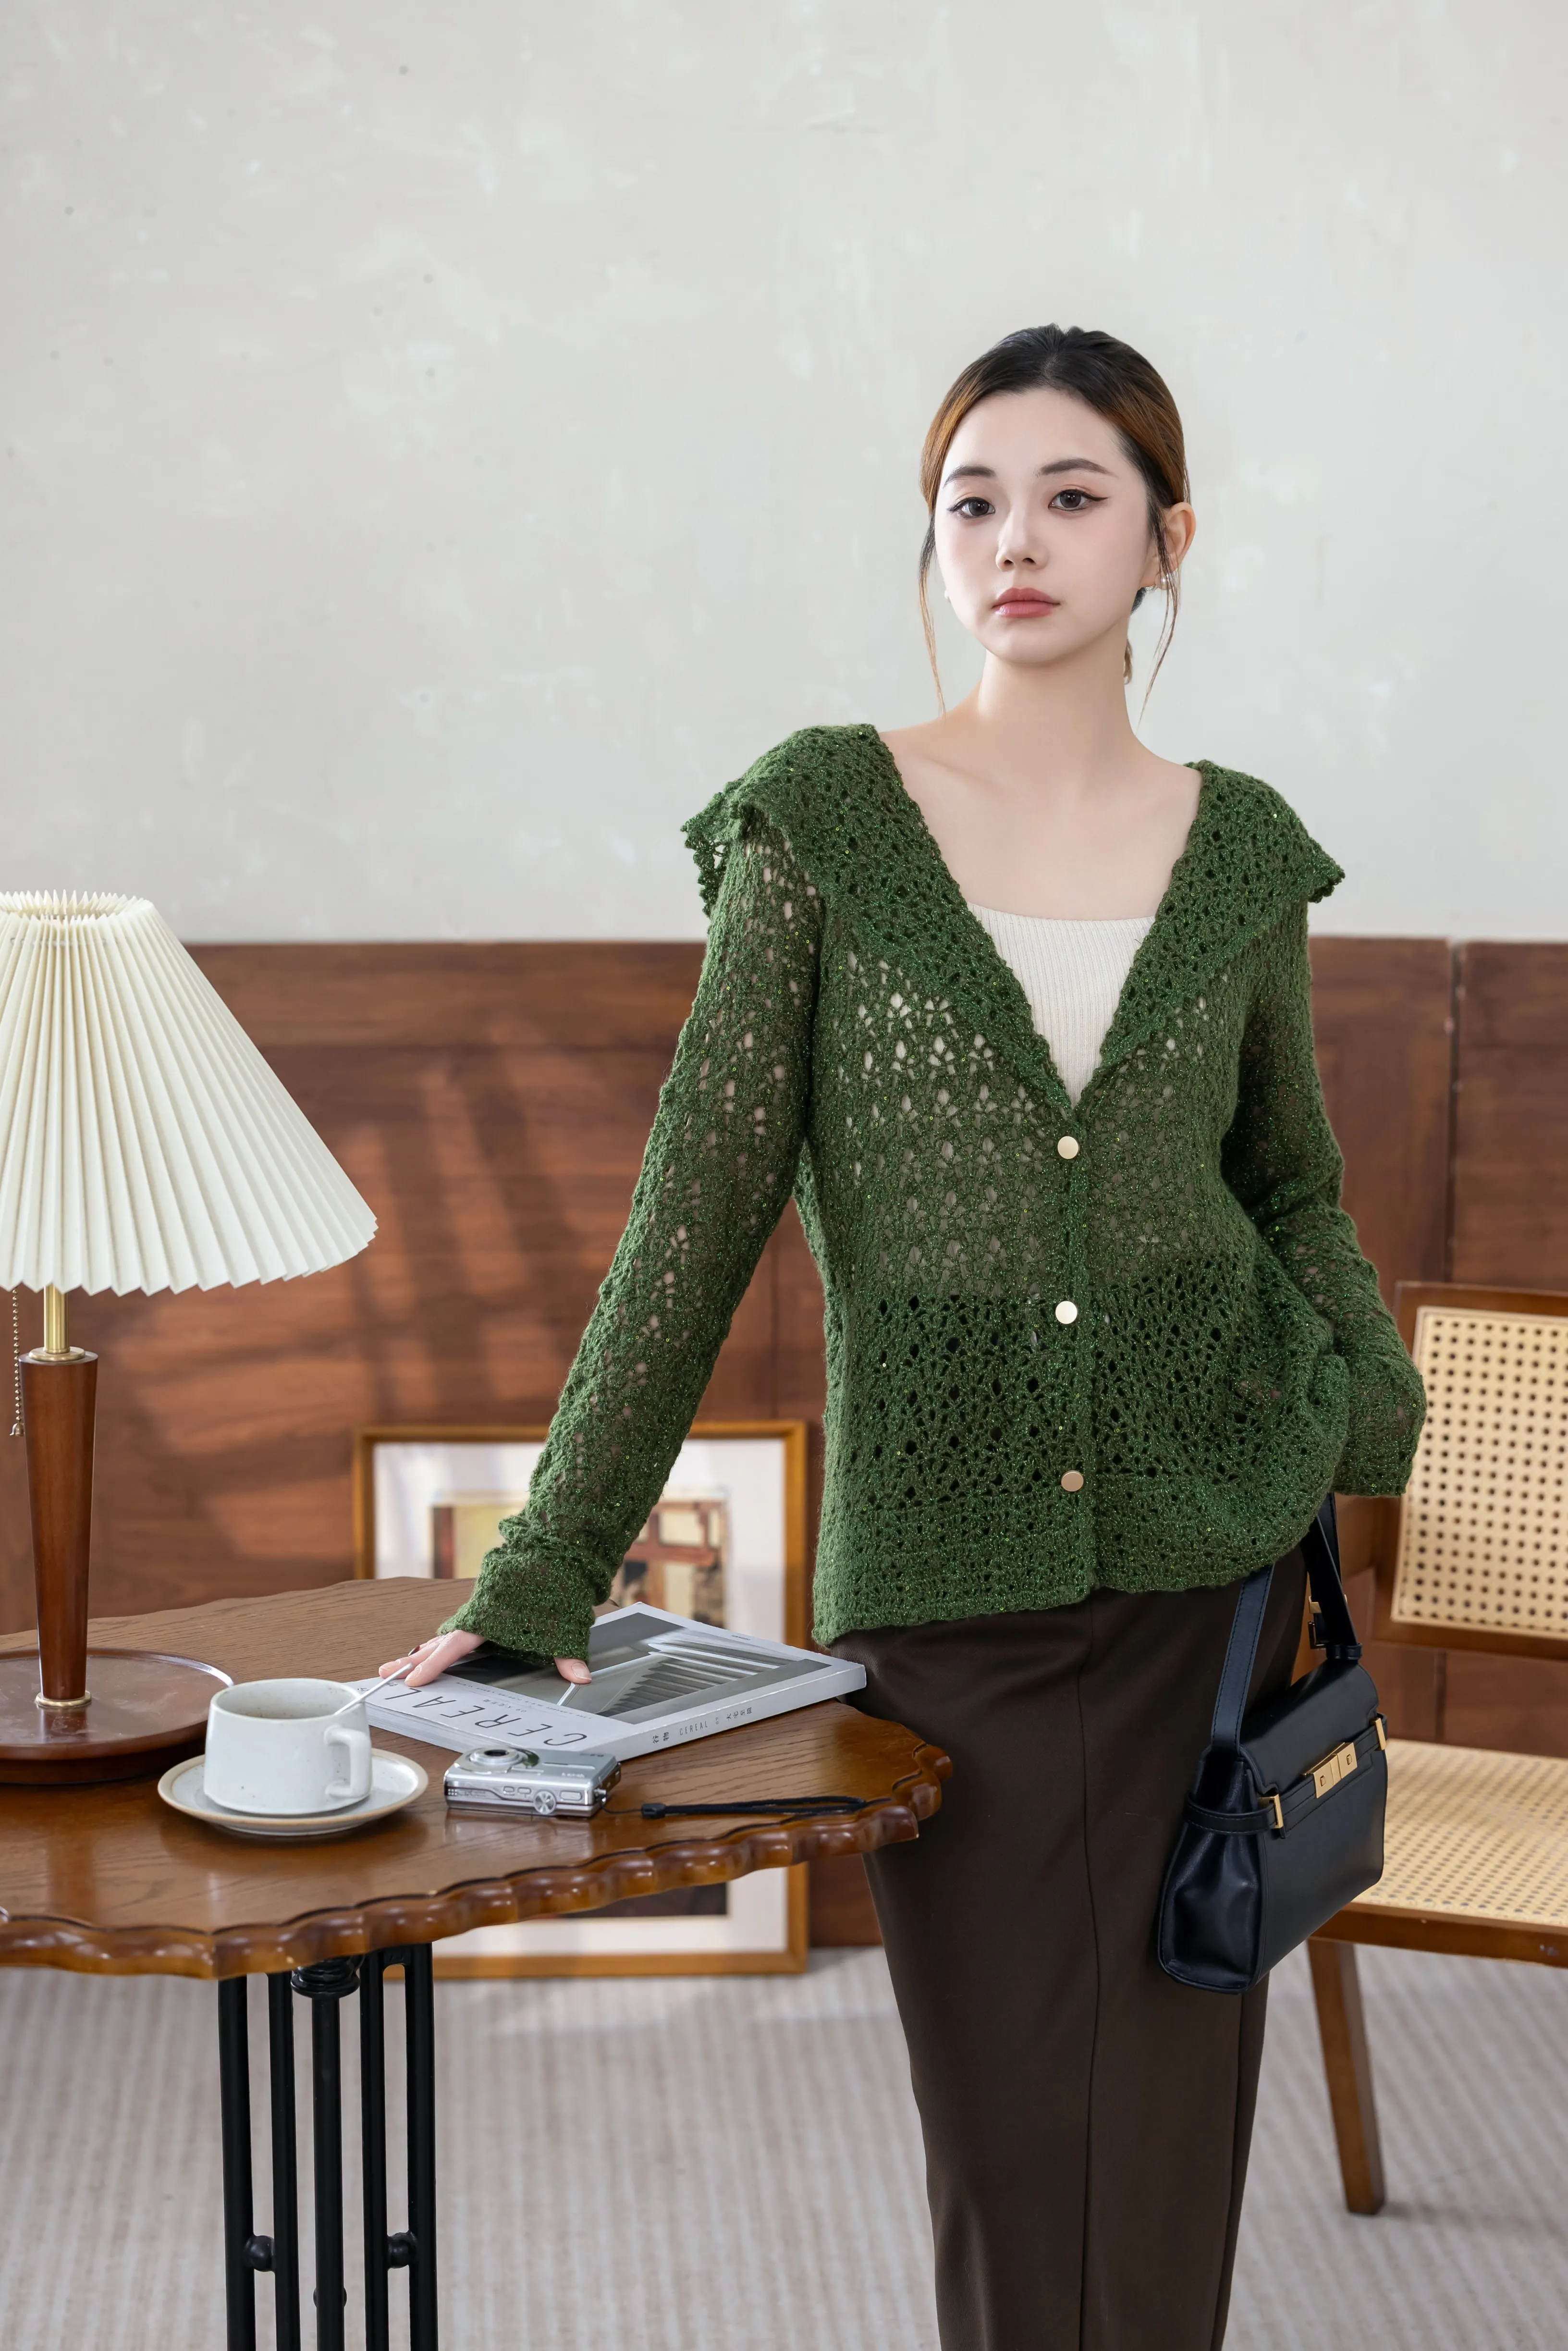
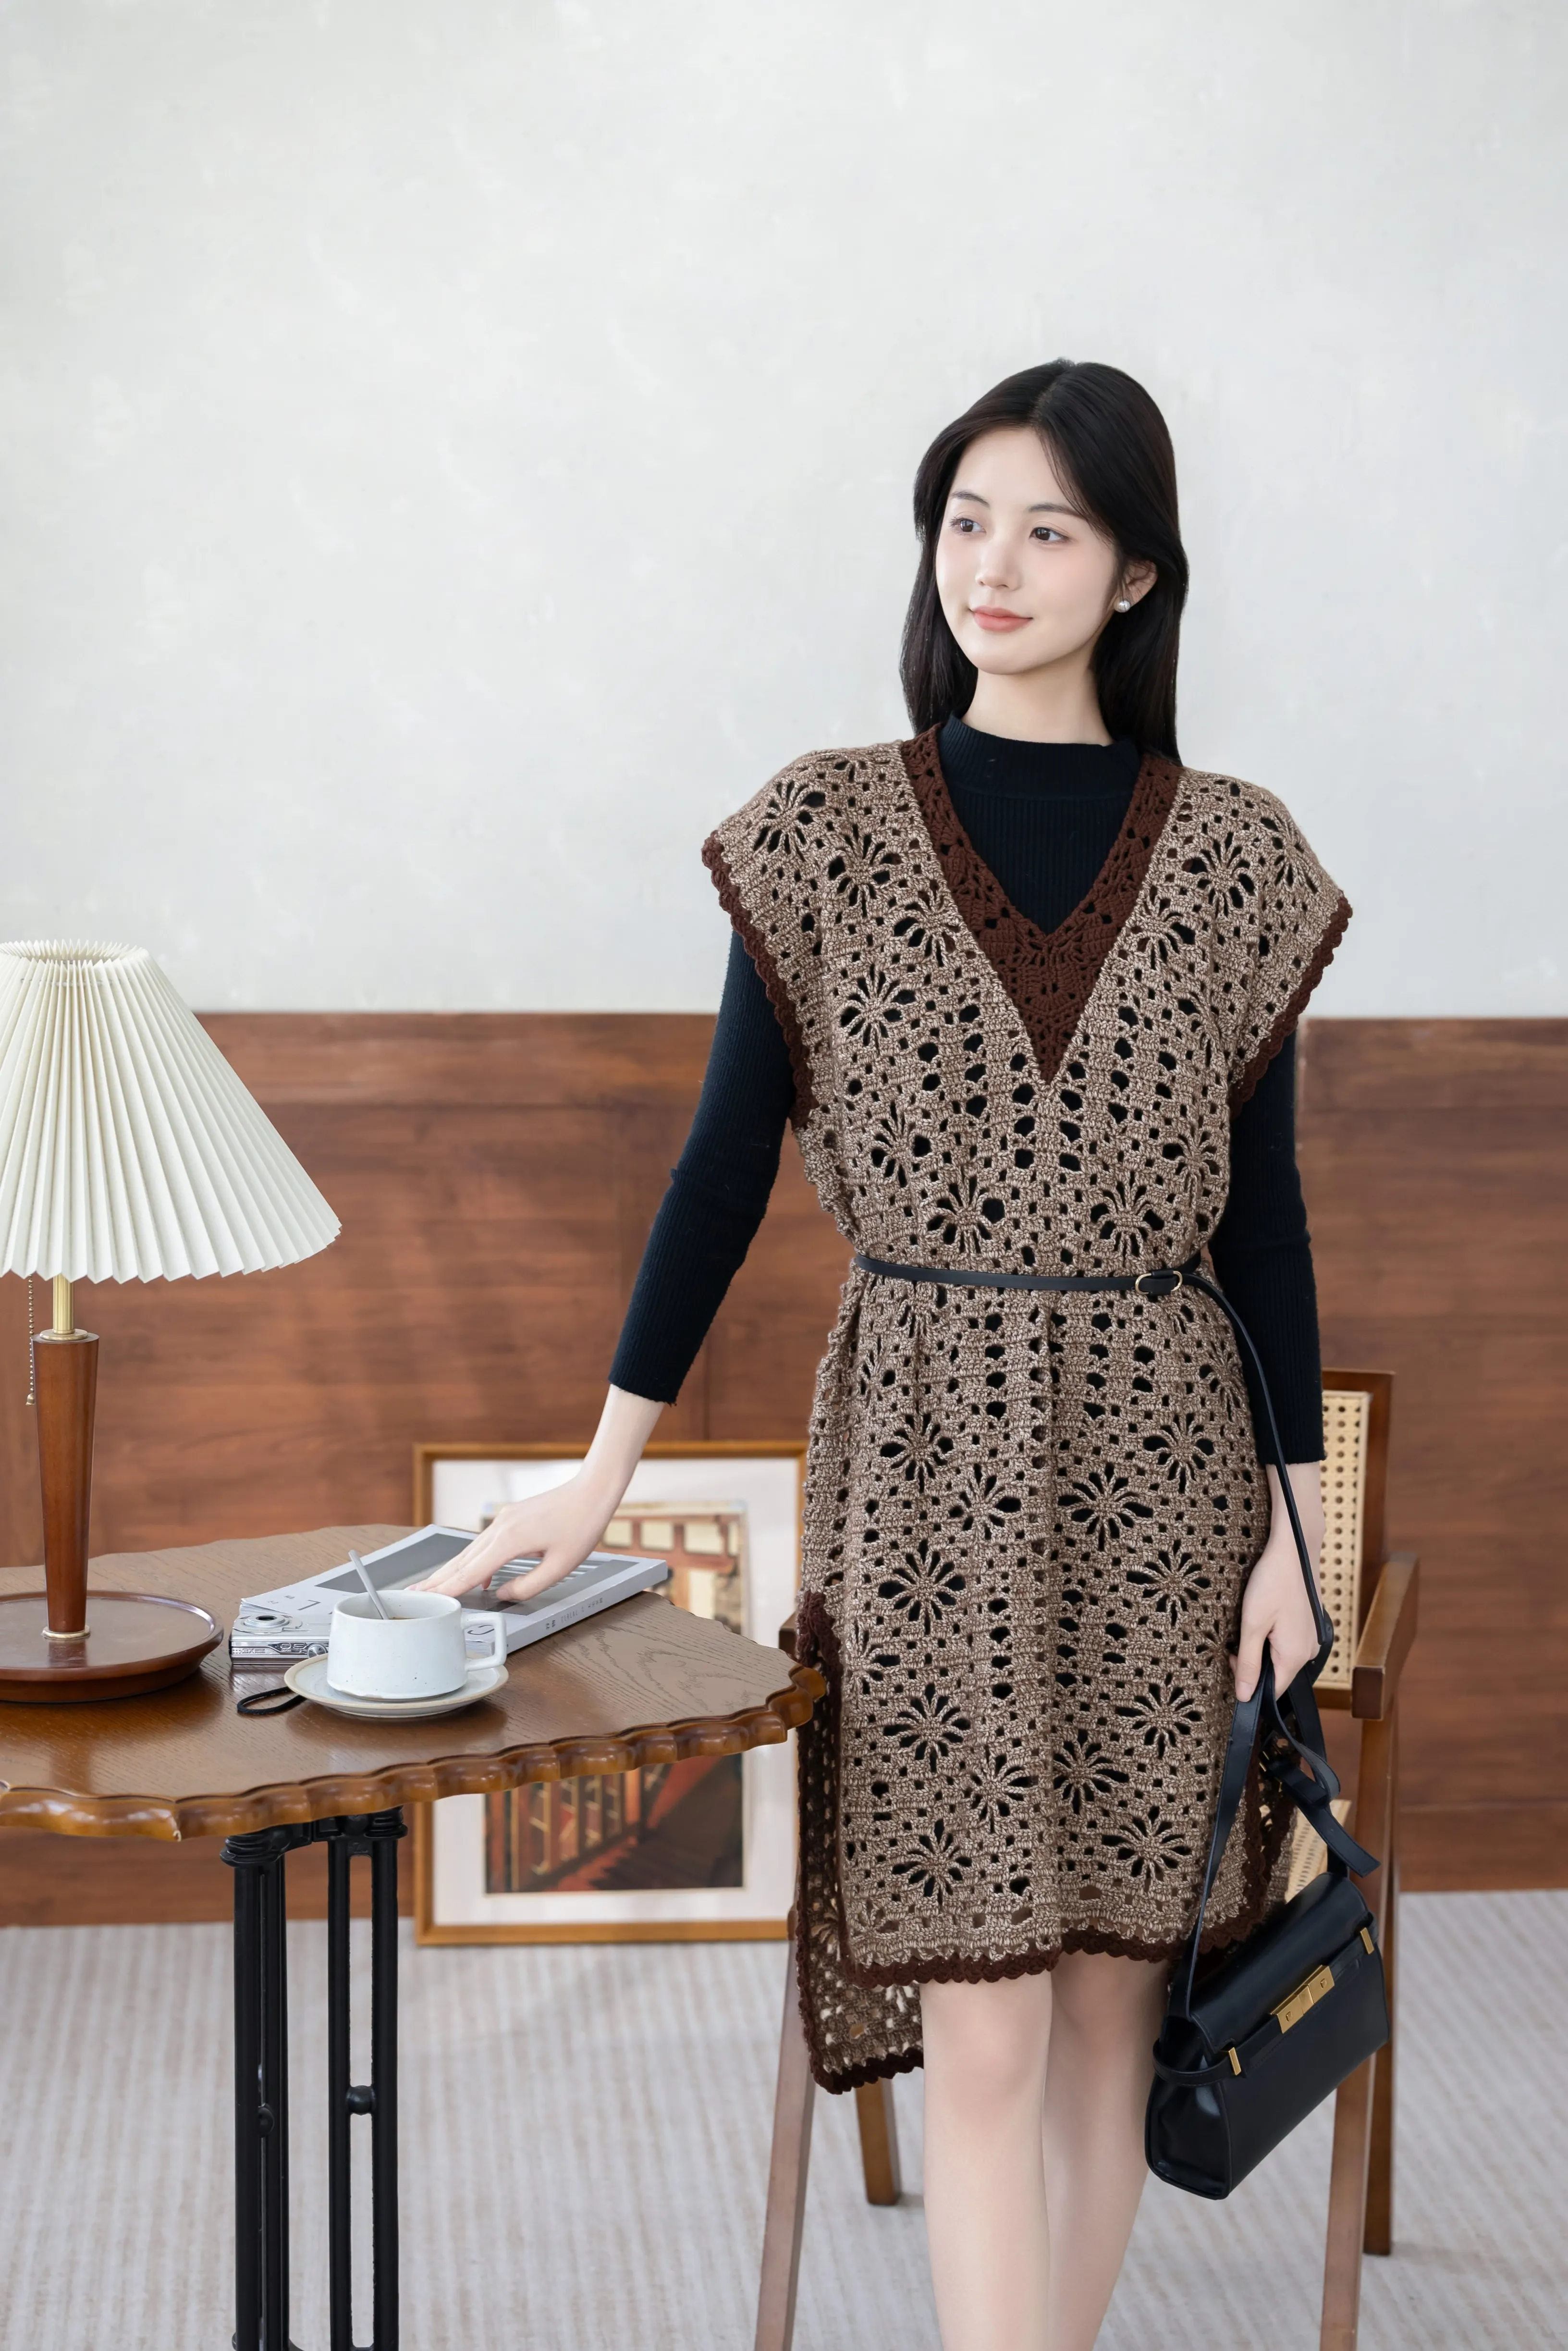
Linen Style
Zen Blue Style
Iceberg Green Style
Whispering Blue Style
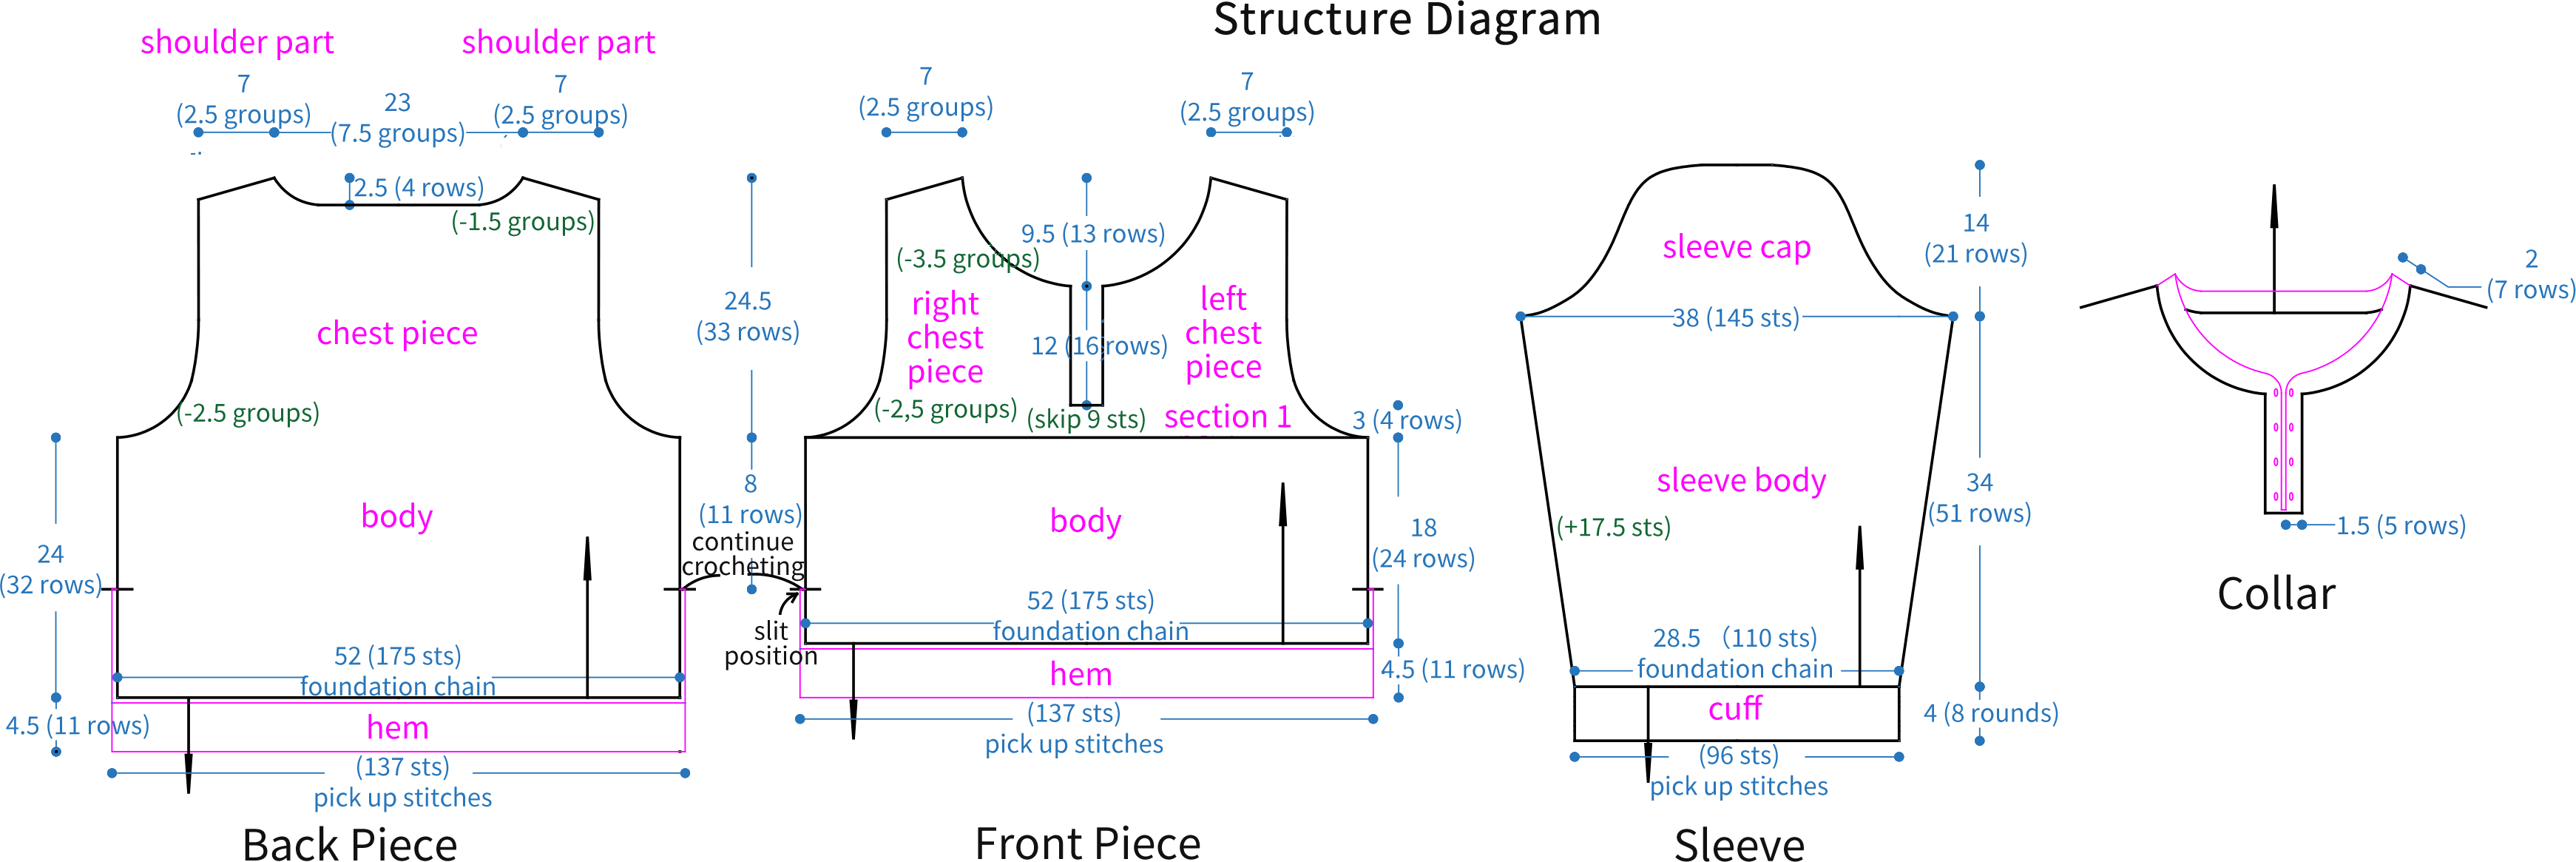
This garment divides into several parts: back piece, front piece, sleeves, joining, collar, cuffs, hem, and ties.
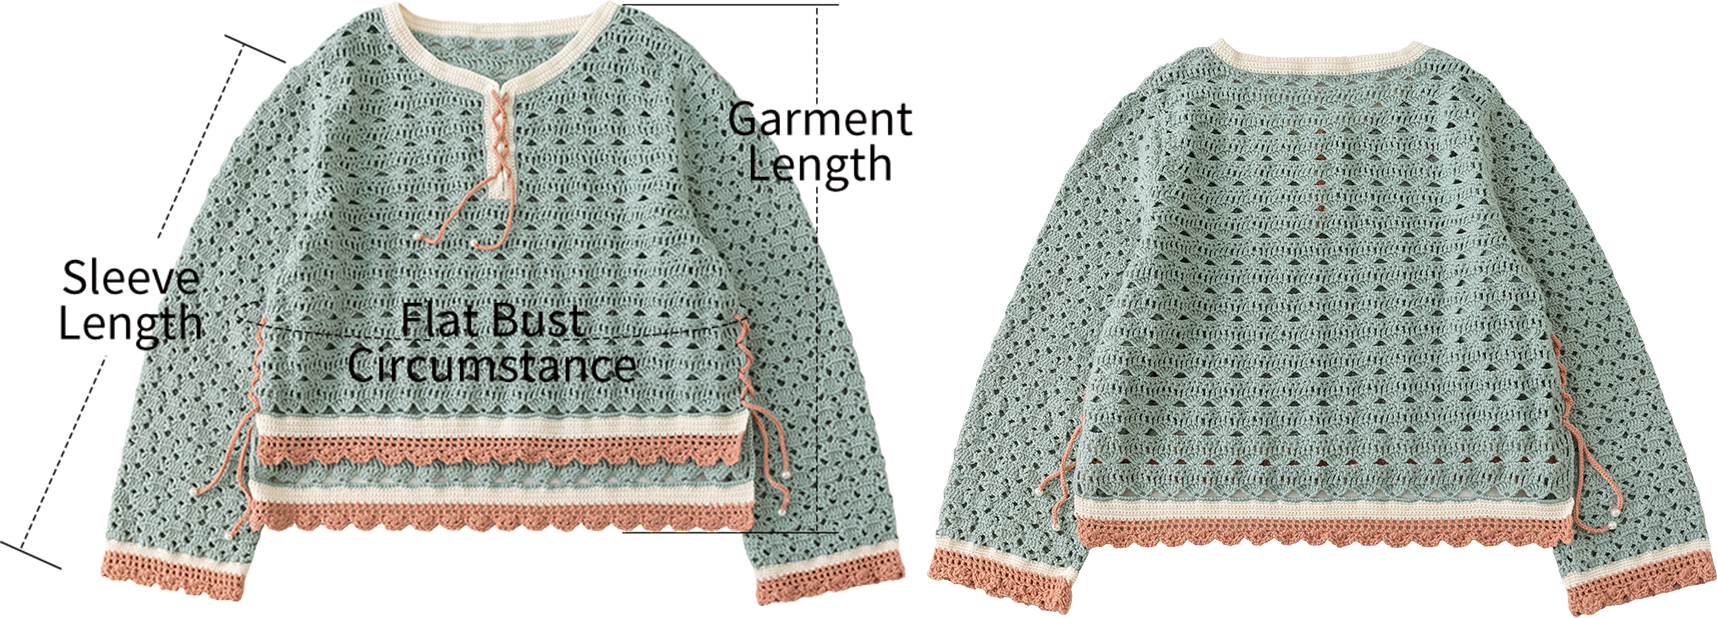
| Unit: cm | Flat Bust Circumstance | Garment Length | Sleeve Length |
| Small Size | 104 | 53 | 52 |
The handcrafted measurements may have an error of 1 to 2 cm.
Due to variations in individual tension, the size of the sample is for reference only.
Materials: Morandi 4#
Tools:2.50 mm Crochet Hook
Chart Key









 or
or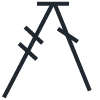

Note: 1. This pattern is making in Chinese crochet pattern terms, and the stitch name is written using American terminology. All measurements in charts are in cm.


| Overall Color Scheme | |||||
| Part | Iceberg Green Style | Zen Blue Style | Linen Style | Whispering Blue Style | |
| Front and Back Piece | 28#Iceberg Green | 26#Zen Blue | 08#Linen | 33#Whispering Blue | |
| Sleeve Body & Sleeve Cap & Joining | 28#Iceberg Green | 26#Zen Blue | 08#Linen | 33#Whispering Blue | |
| Cuff | Rounds 1-4 | 27#Antique White | 01#Whisper White | 10#Aragon | 07#Provincial Blue |
| Rounds 5-8 | 02#Cameo Brown | 03#Mauve Mist | 04#Praline | 44#Glacier gray | |
| Collar | Round 1 | 28#Iceberg Green | 26#Zen Blue | 08#Linen | 33#Whispering Blue |
| Remaining Rounds | 27#Antique White | 01#Whisper White | 10#Aragon | 07#Provincial Blue | |
| Hem | Round 1 | 28#Iceberg Green | 26#Zen Blue | 08#Linen | 33#Whispering Blue |
| Rows 2-7 | 27#Antique White | 01#Whisper White | 10#Aragon | 07#Provincial Blue | |
| Rows 8-11 | 02#Cameo Brown | 03#Mauve Mist | 04#Praline | 44#Glacier gray | |
| Ties | 02#Cameo Brown | 03#Mauve Mist | 04#Praline | 44#Glacier gray | |
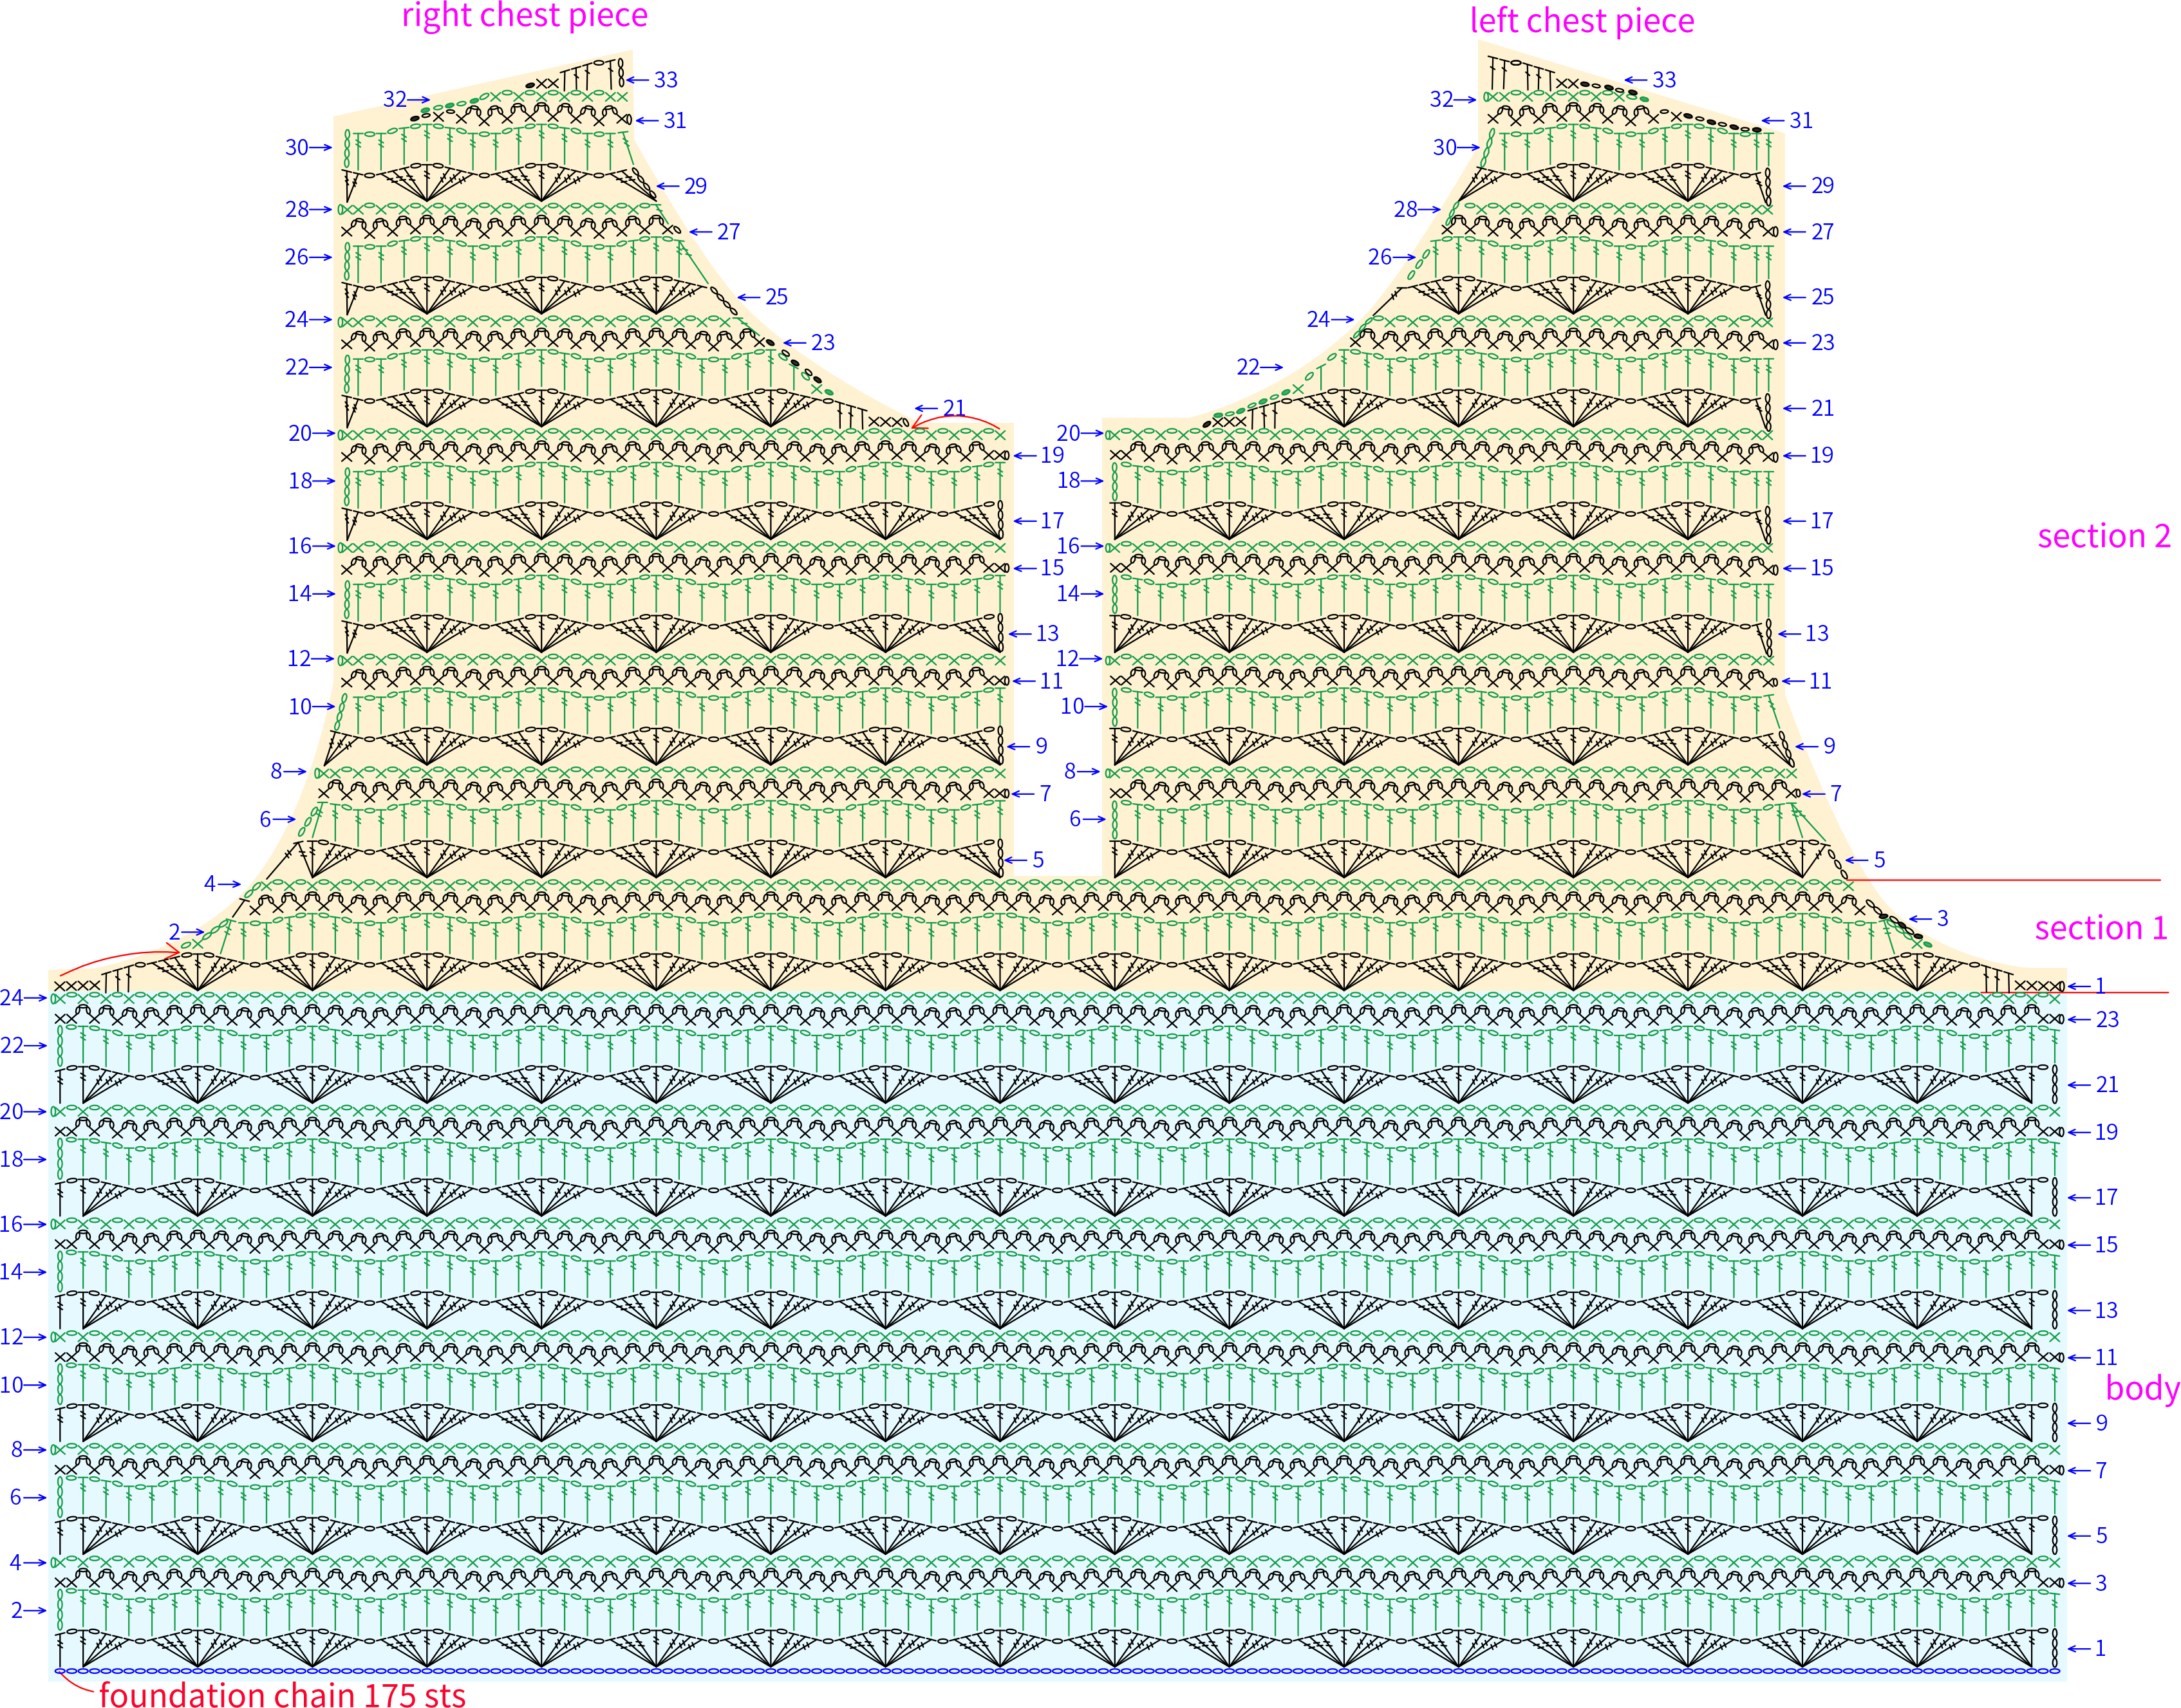
Part 1 Back Piece A 00' 41''
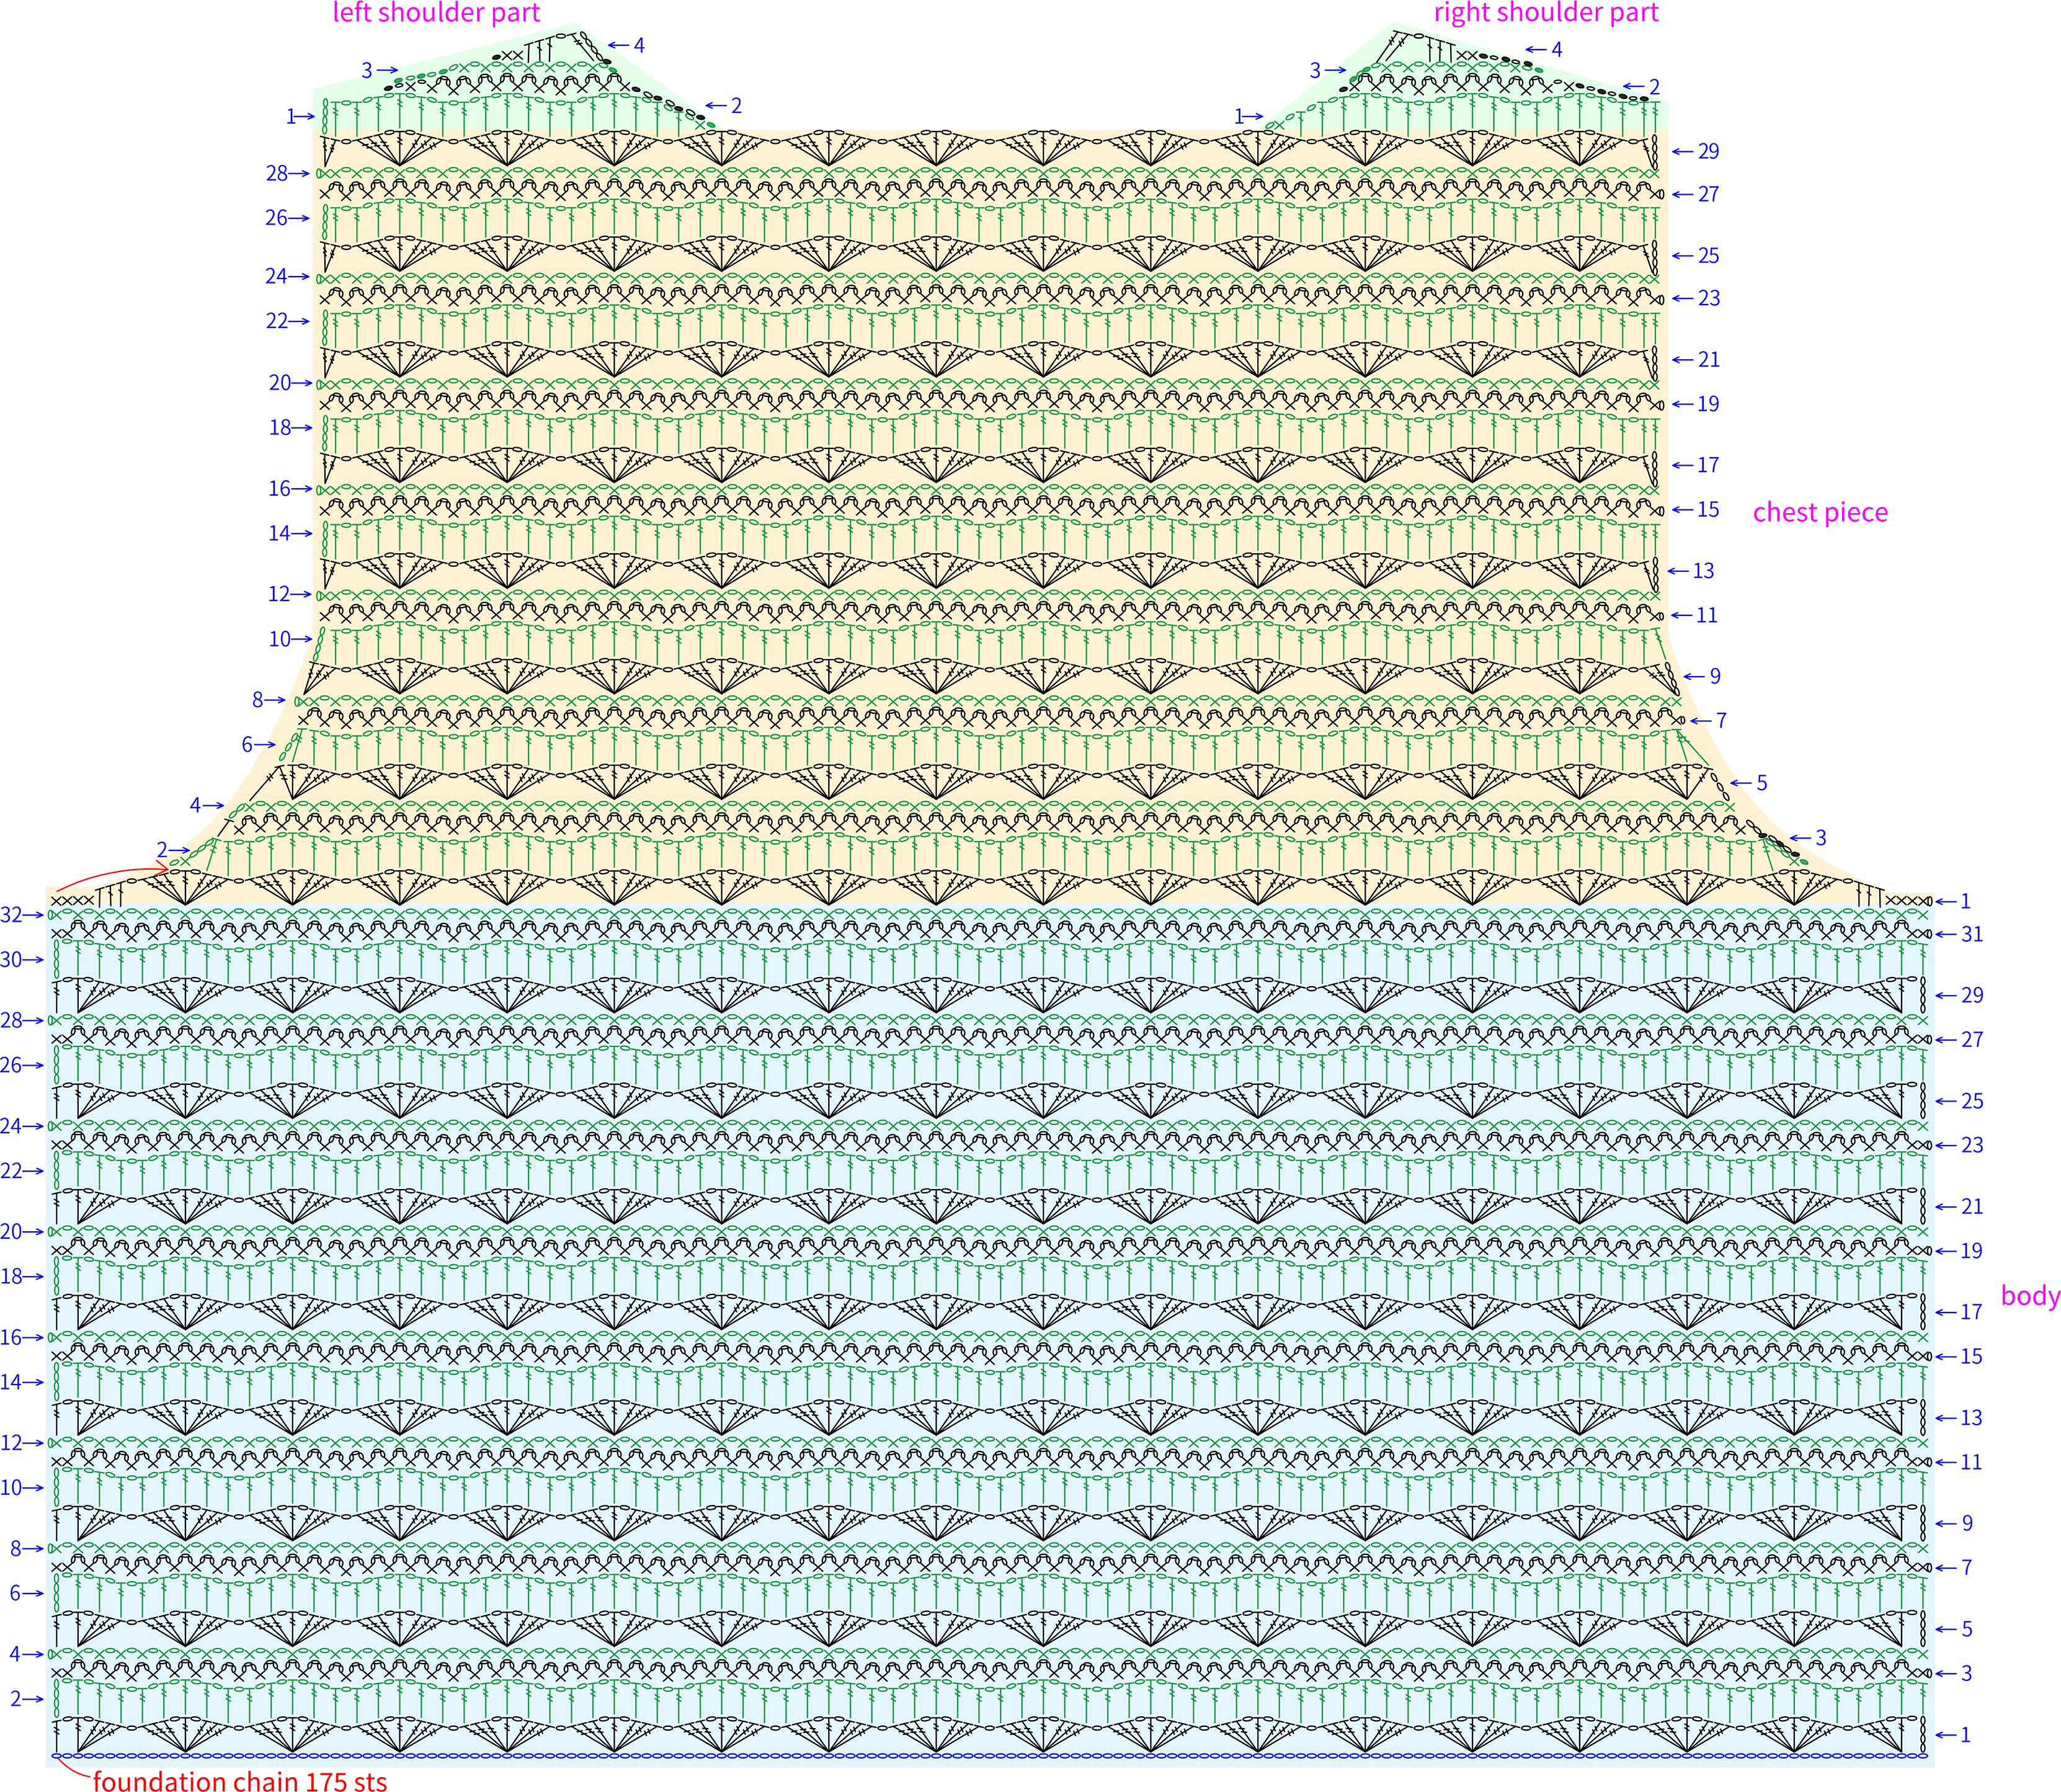
The back piece is divided into the body, the chest piece, and the shoulder-parts. Please refer to the video demonstration for specifics.
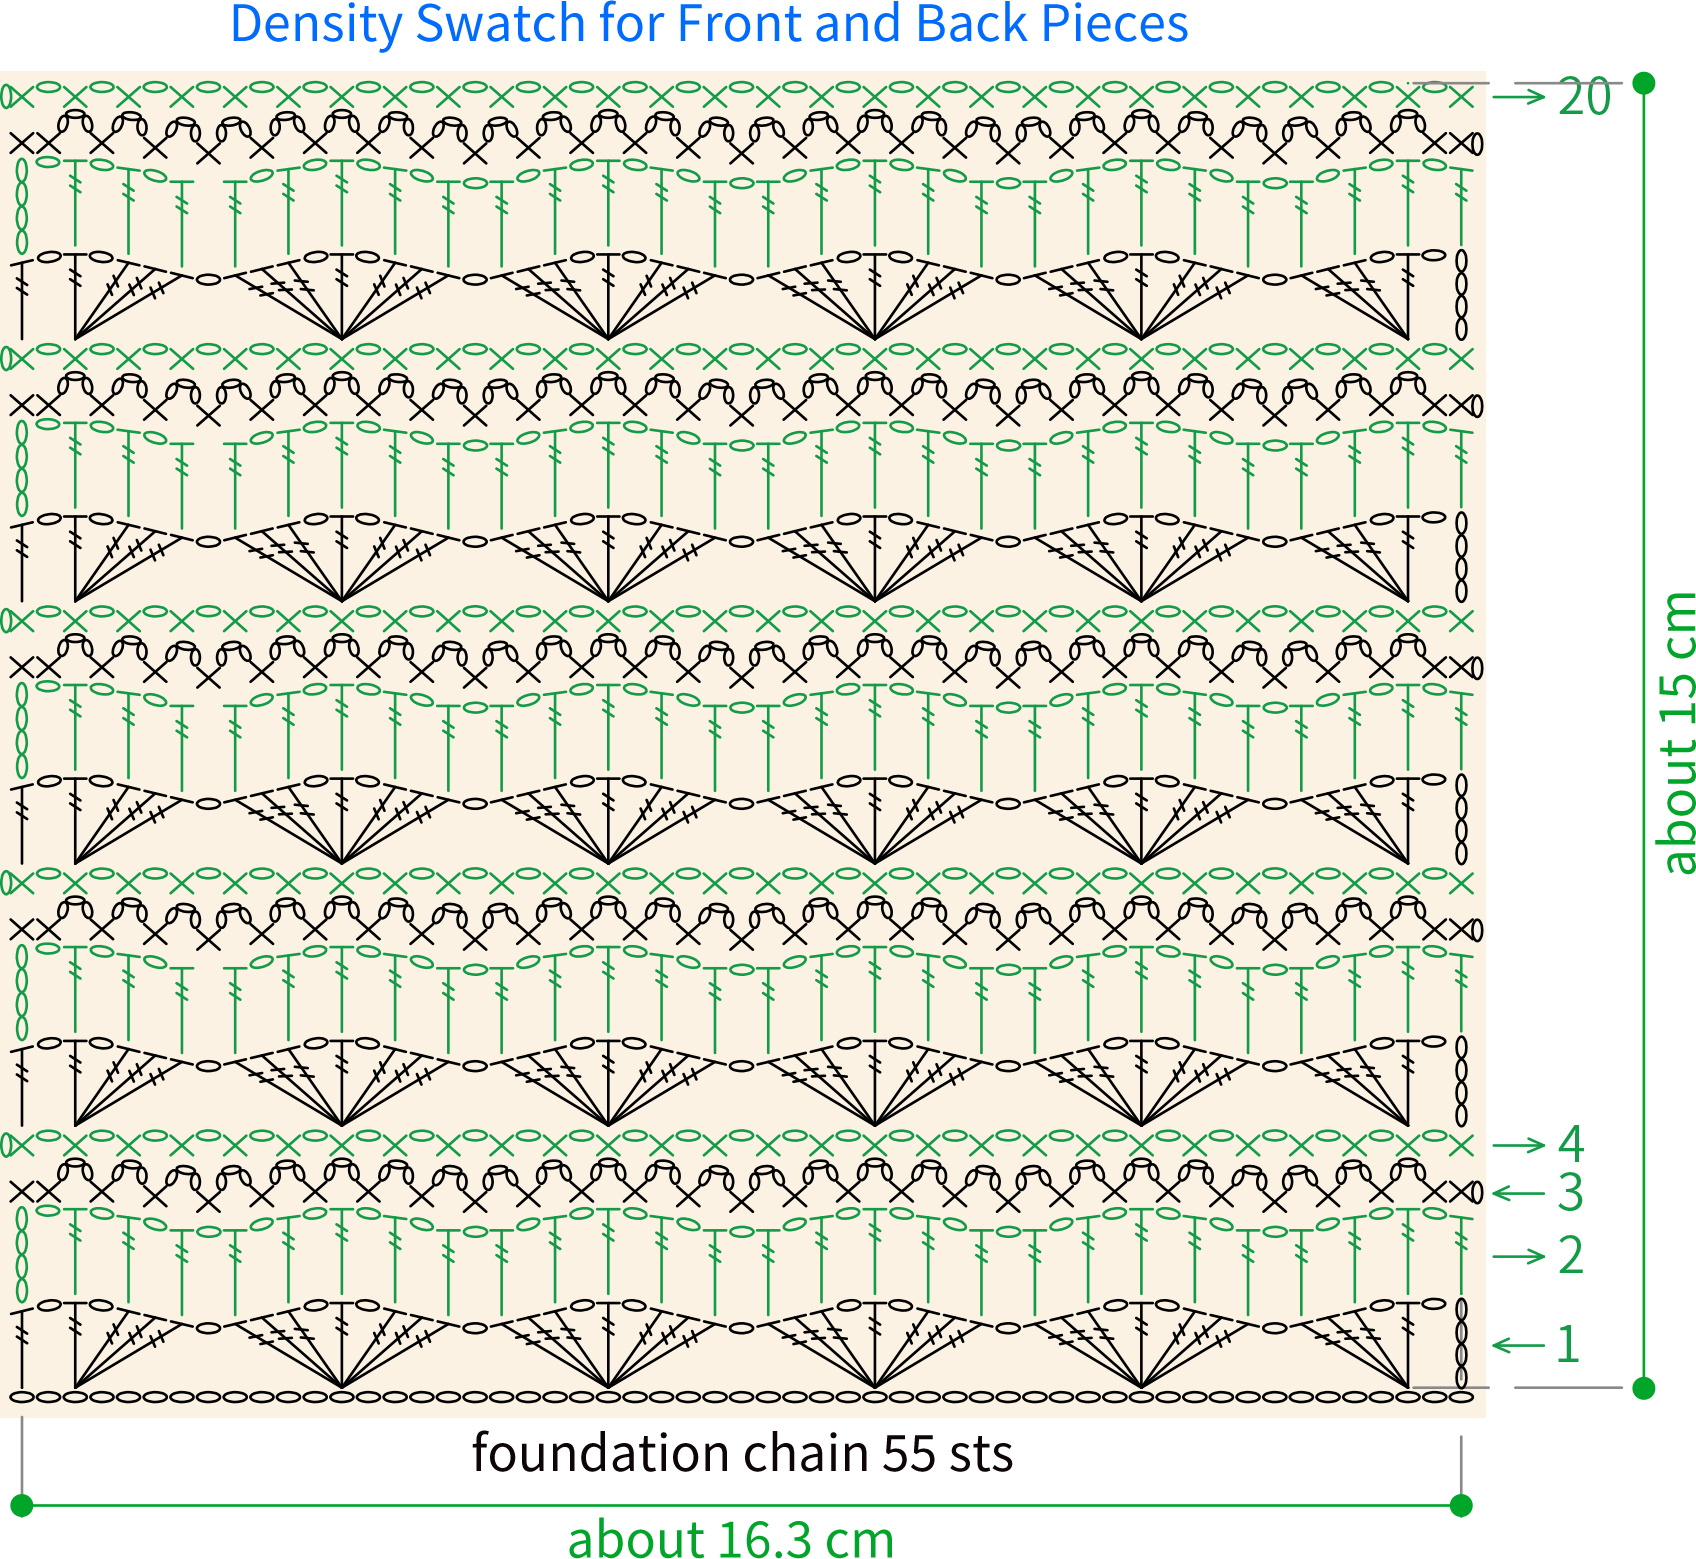
Note: After completing the fourth row of the body, you can measure the height of the fabric (about 3cm) and the width of the foundation chain (it should match the size indicated in the structure diagram for the foundation chain). If there's a significant difference, you'll need to adjust your tension and re-crochet to avoid affecting the finished measurement.
Part 2 Front Piece B 25' 47''
The front piece starts with the foundation chain and is crocheted back and forth, dividing into the body and chest piece. Please refer to the video demonstration for specifics.
Part 3 Sleeve C 27' 16''
Divide into sleeve body and sleeve cap parts, please refer to the video demonstration for details.
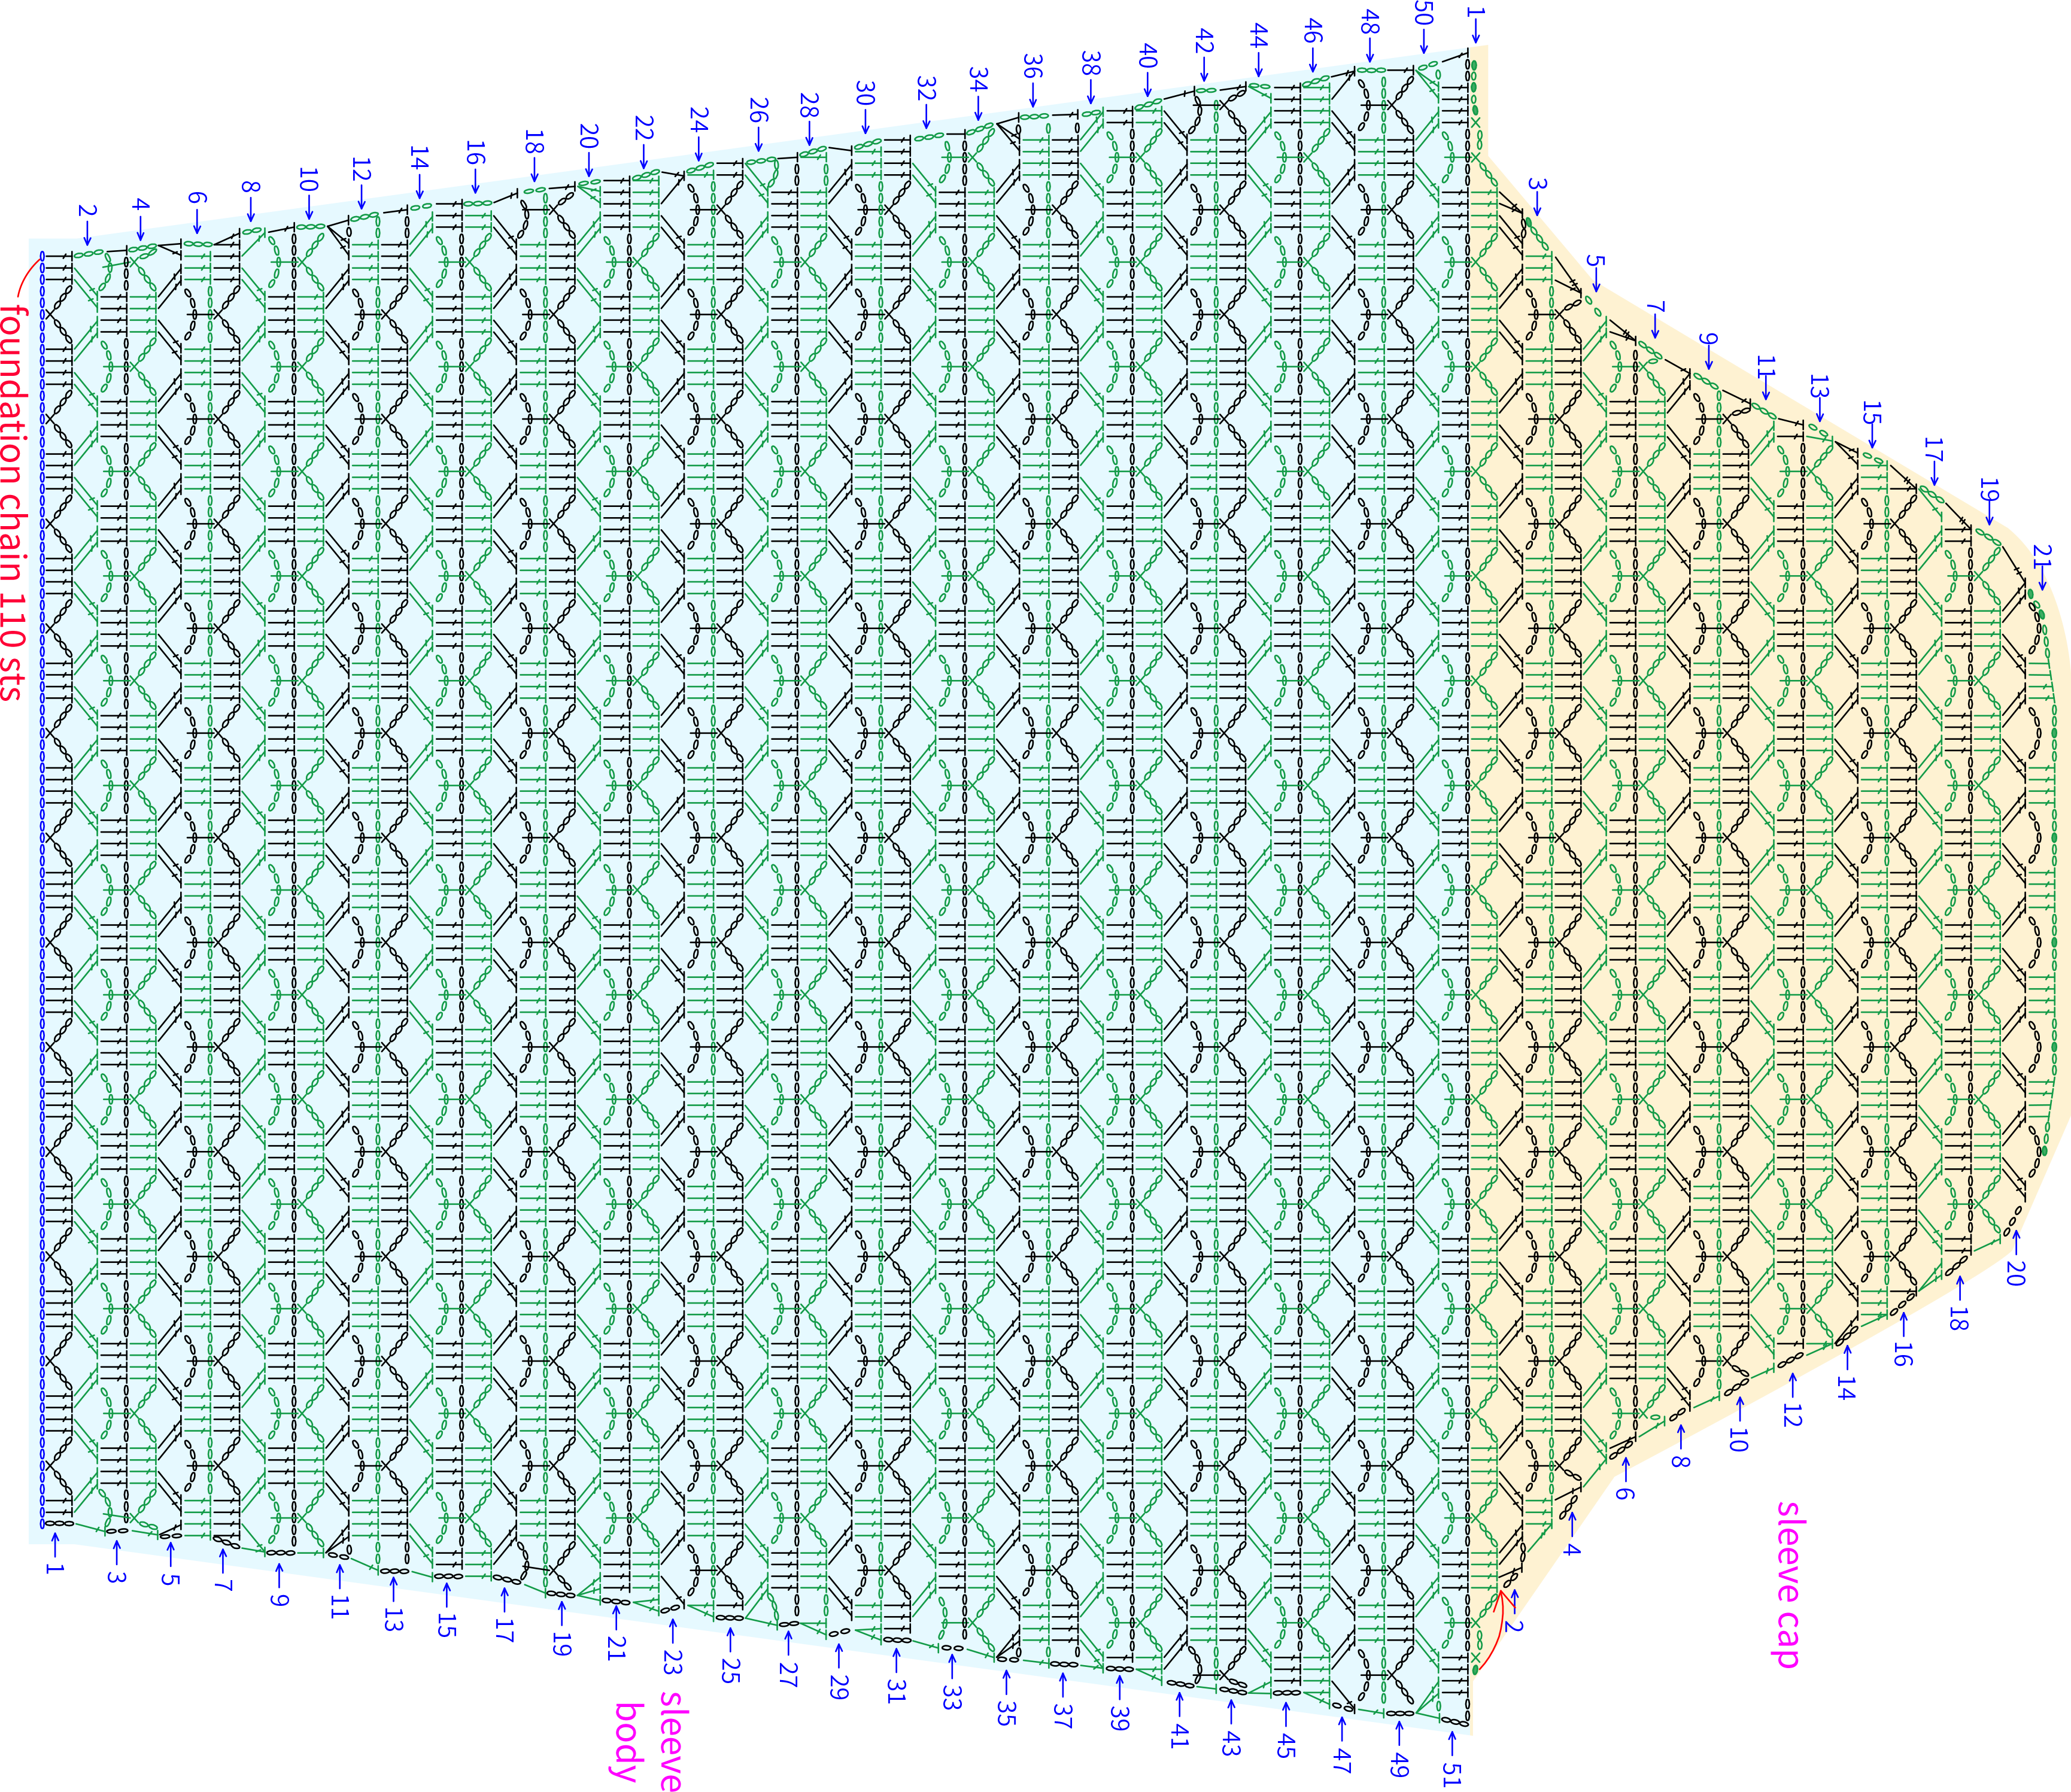
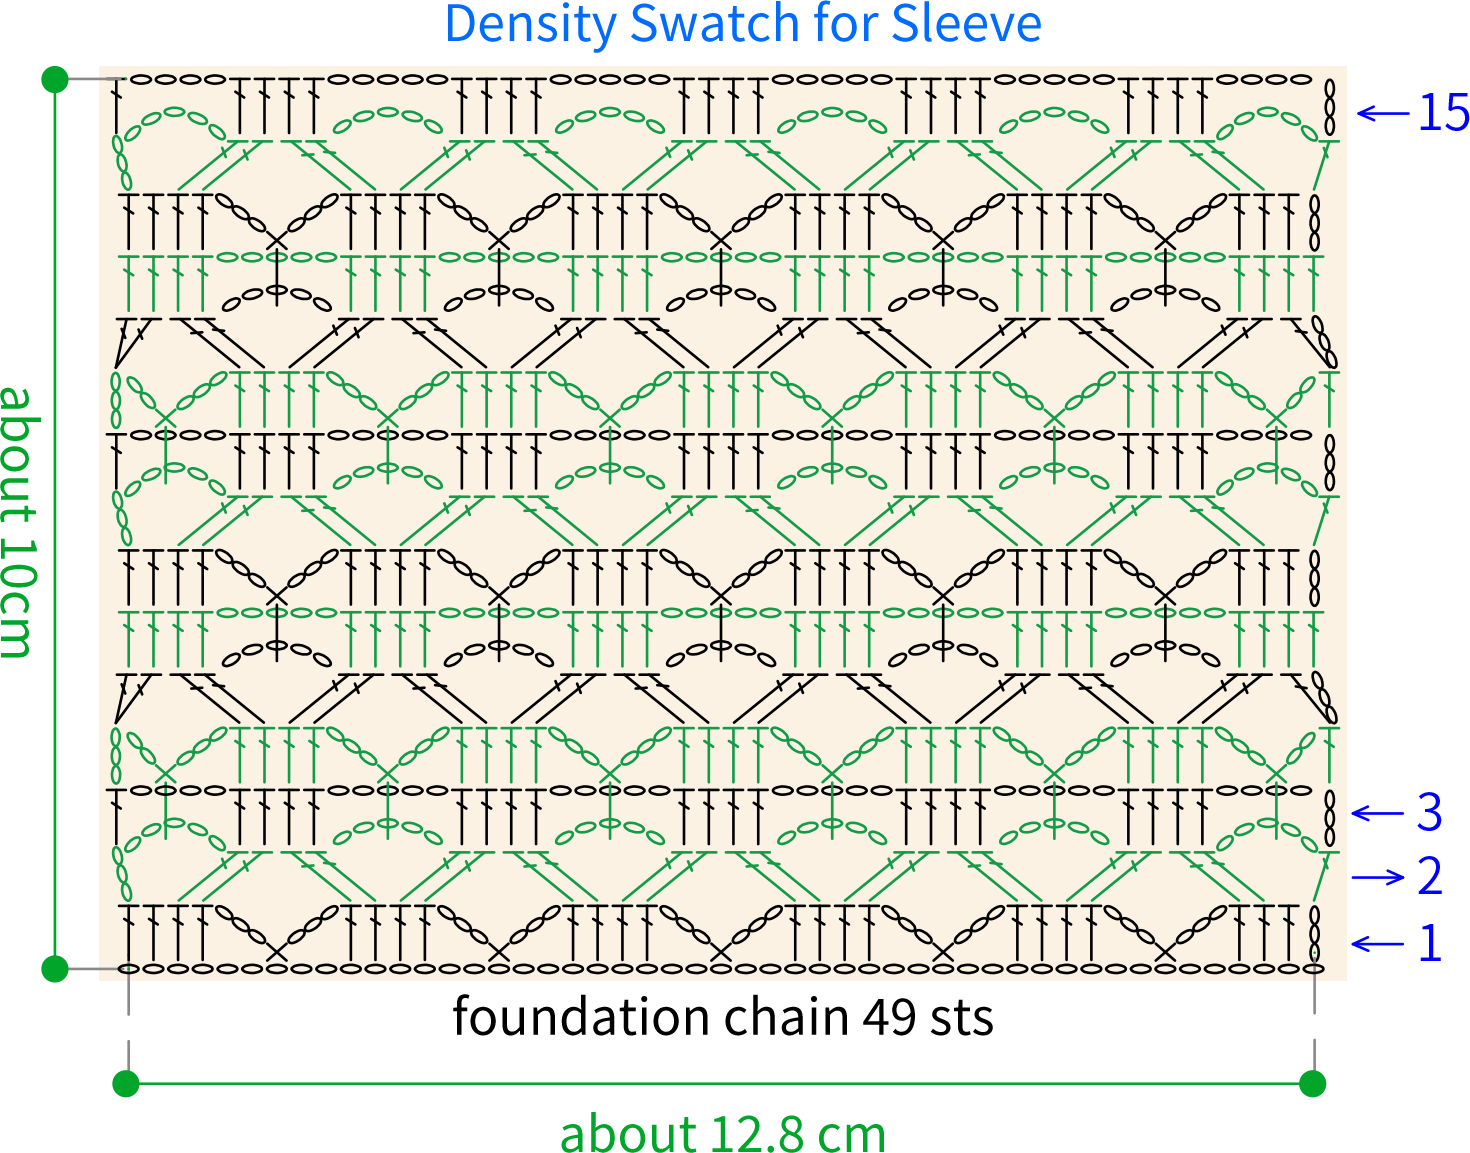
Note: After completing the 4th row of the sleeve body, the fabric height should be about 3cm, and the width at of the foundation chain should be roughly consistent with the dimensions marked on the structure diagram. If there is a significant difference, you need to adjust your tension and re-crochet to avoid affecting the finished measurement.
Part 4 Joining D 36' 33''
First, do the shoulder joining, then join the front and back pieces according to the structure diagram, paying attention to reserving the slits on both sides. Finally, connect the sleeves. All joiningare done on the wrong side by hooking into the corresponding edges on both sides and working single crochets, with a chain of 3 as a bridge between them. The specific joining method can be adjusted according to preference. For details, please refer to the video demonstration.
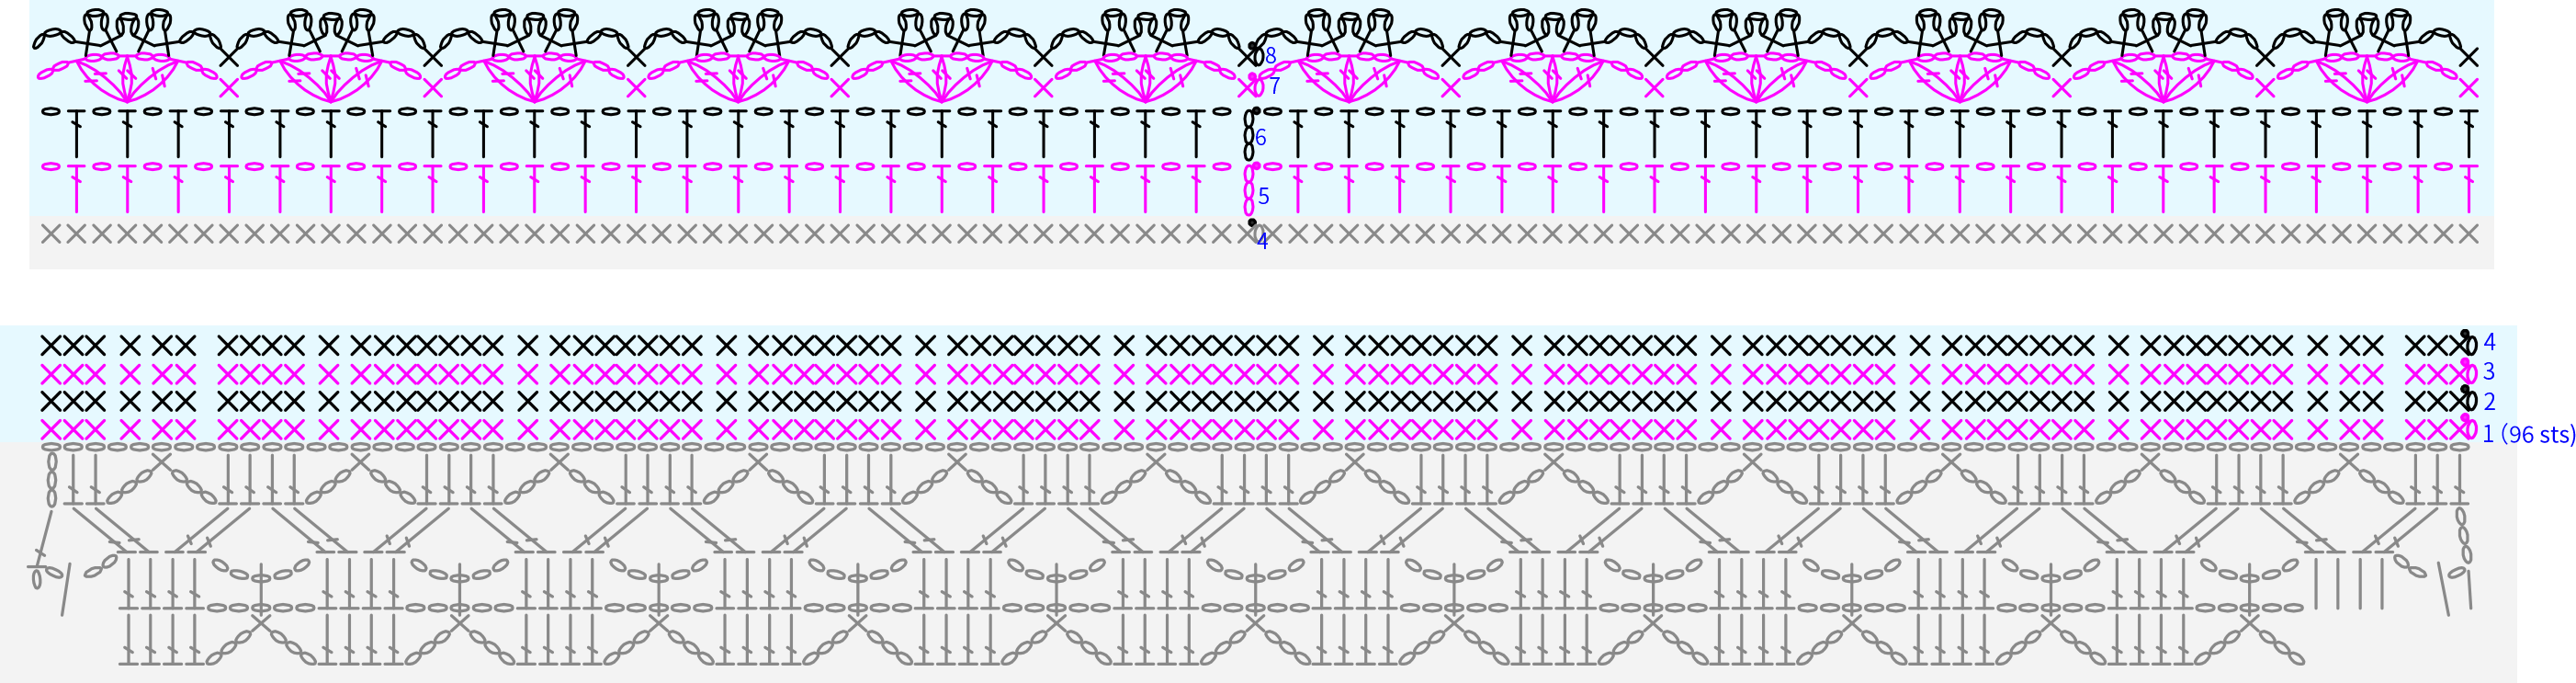
Part 5 Cuff E 44' 55''
The cuffs are crocheted in rounds counterclockwise starting from the foundation chain of the sleeve body. Please refer to the video demonstration for details.
Part 6 Collar F 53' 53''
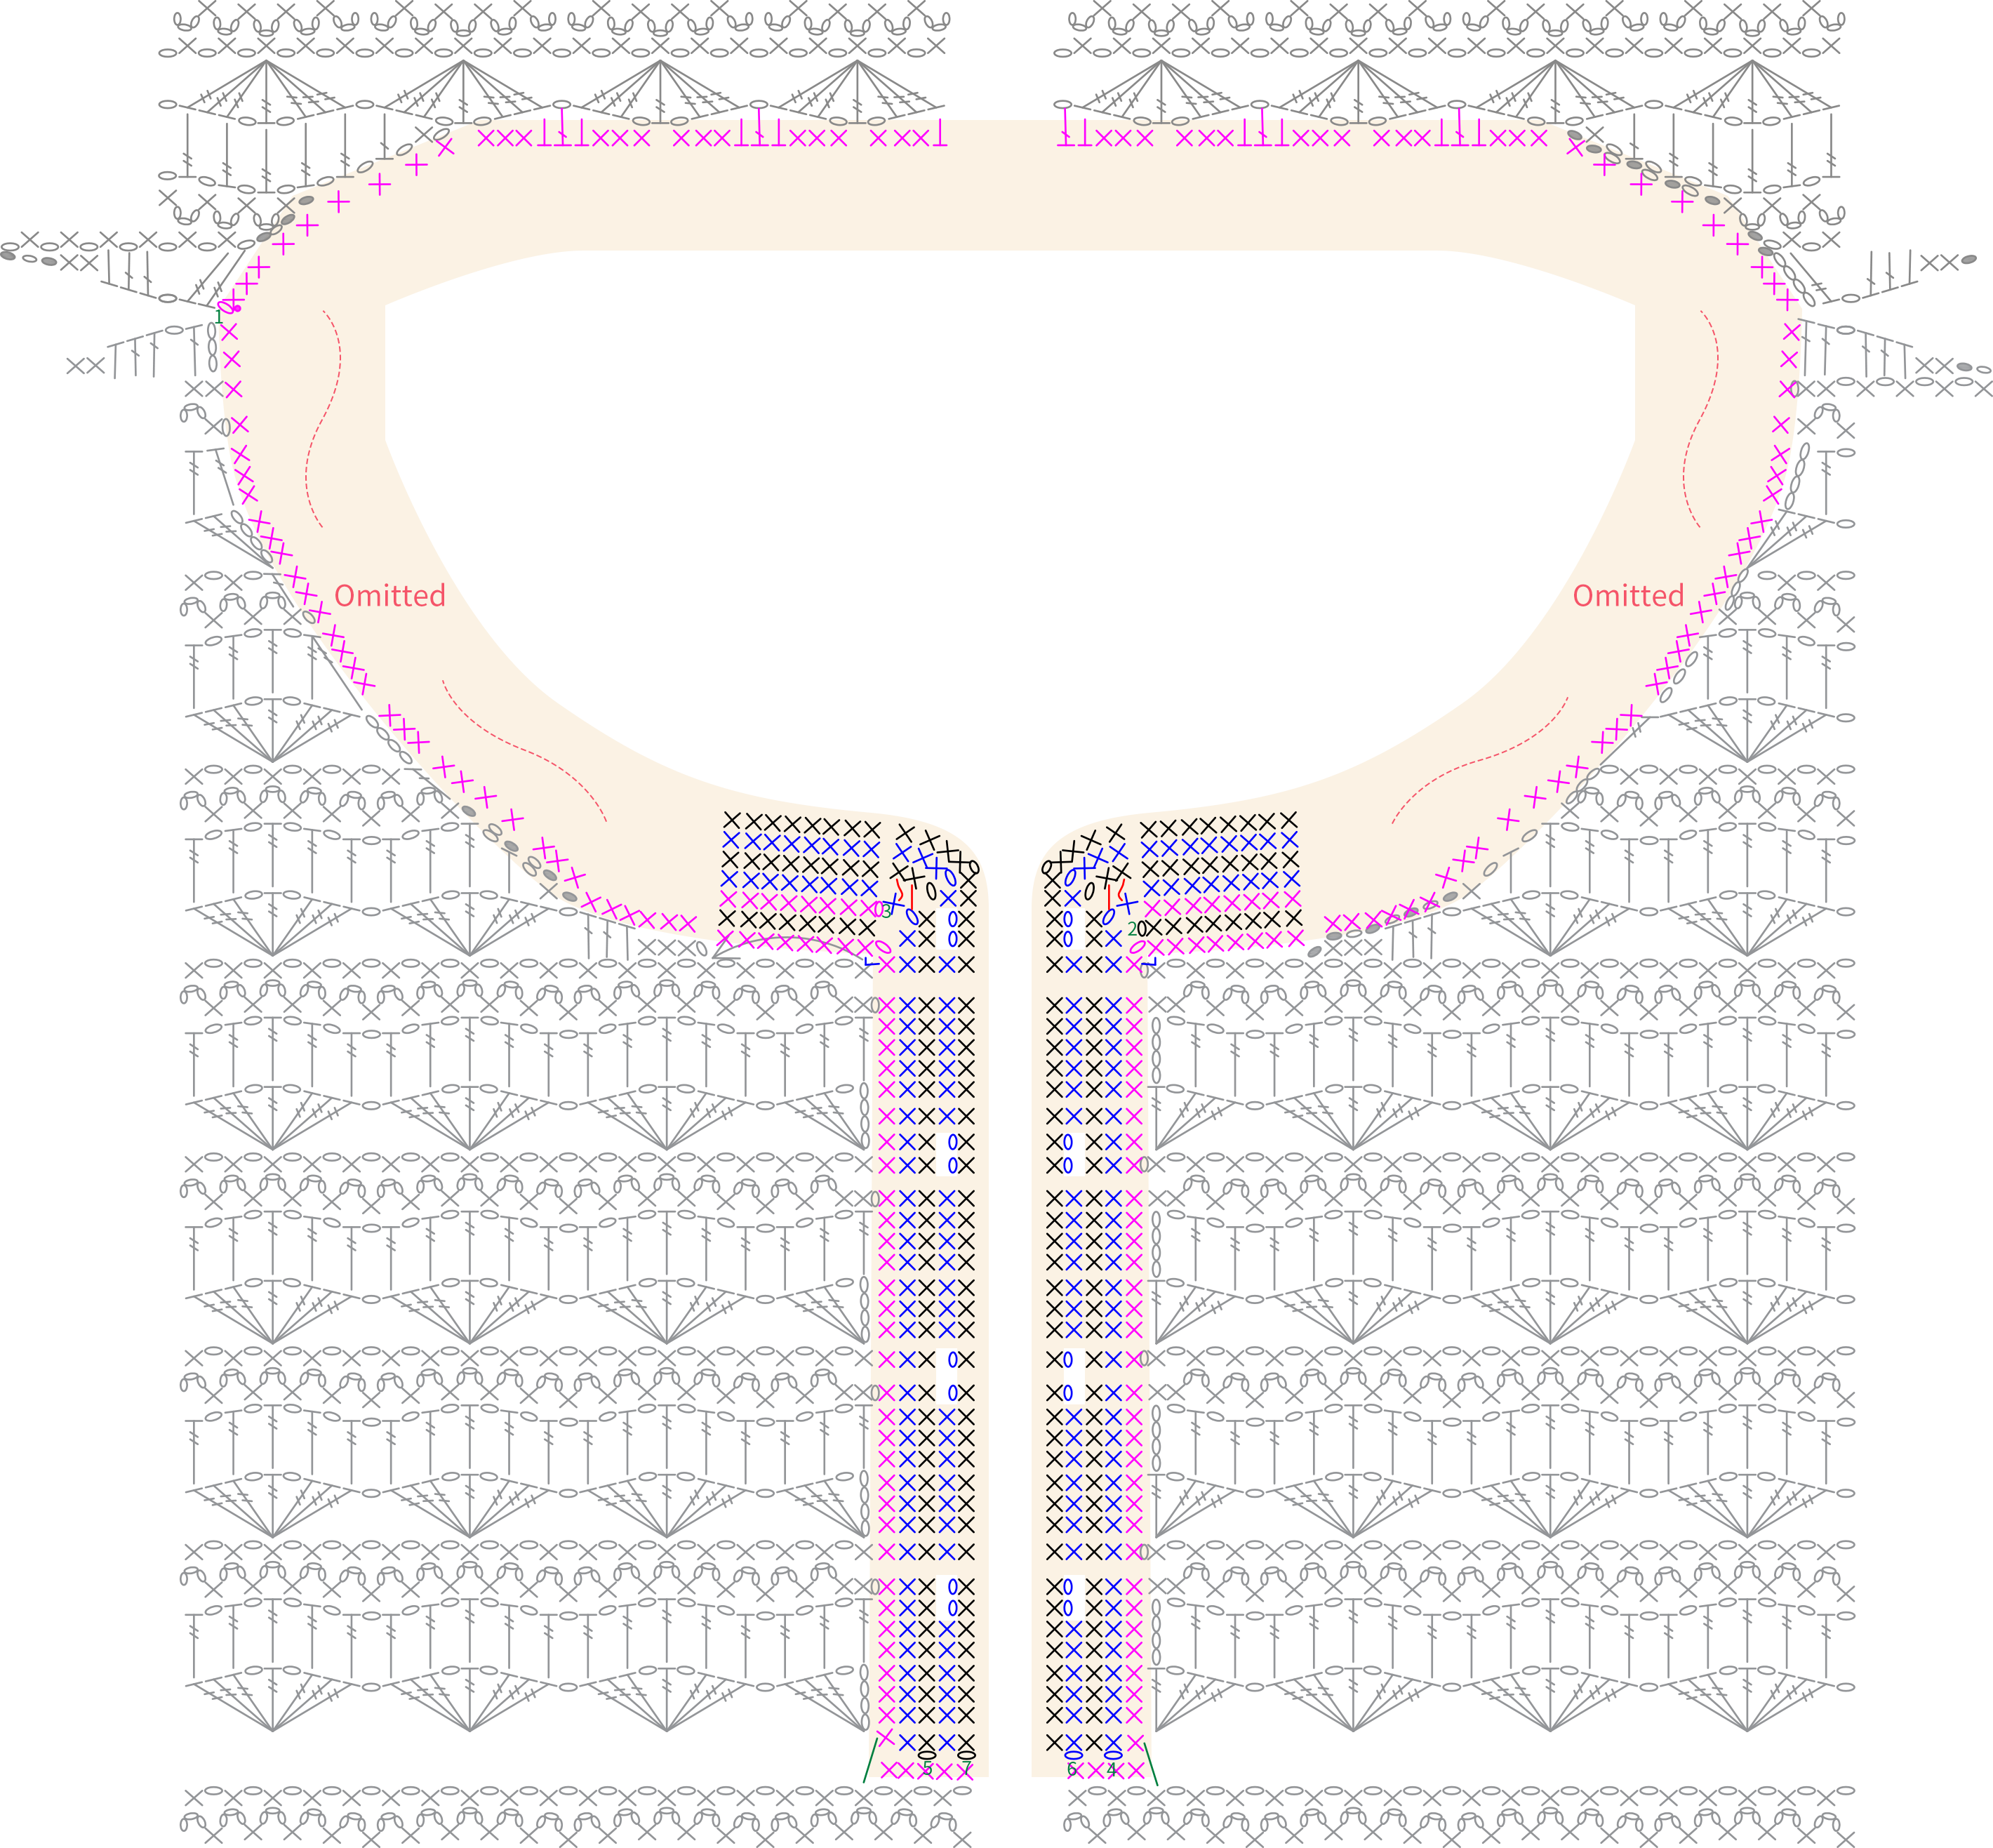
The collar is first crocheted in rounds along the neckline of the front and back pieces, then worked back and forth in the decreasing sections, and finally crocheted back and forth throughout. Please refer to the video demonstration for specifics.
Note: The insertion position for the first round of single crochets on the collar can be adjusted according to the actual situation, just make sure that the fabric is flat and beautiful after completion.
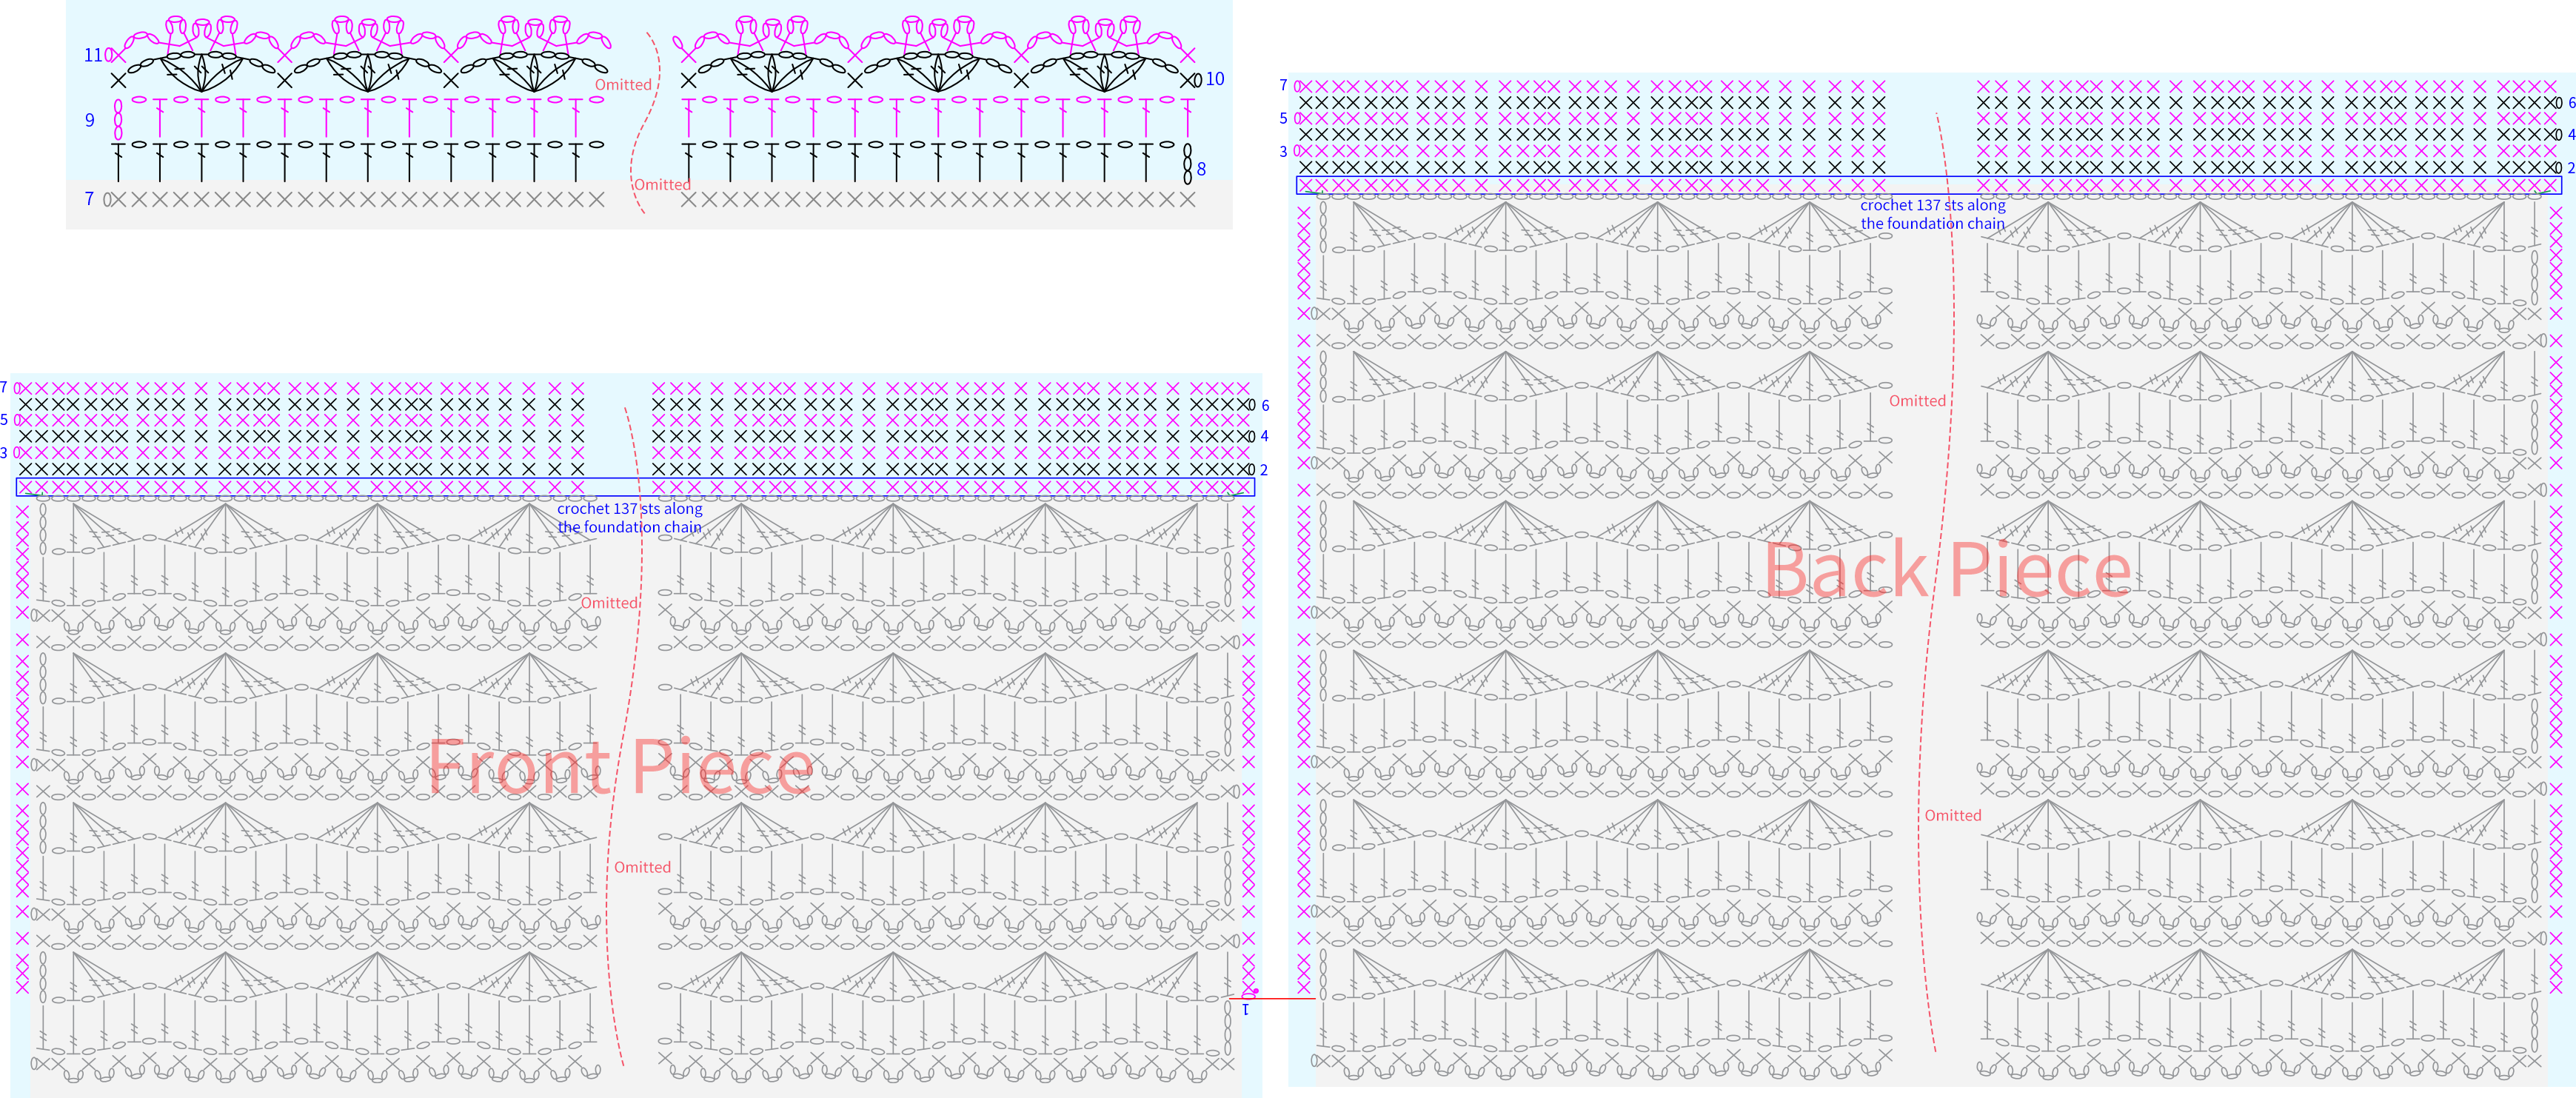
Part 7 Hem G 67' 41''
First, crochet around the foundation chain of the hem in the front and back pieces and the unconnected side seams. Then, work back and forth separately on the foundation chain of the front and back pieces. For specific instructions, please refer to the video demonstration.
Part 8 Tie H 68' 36''
First, crochet the rope, then add the pearls, and finally thread at the corresponding positions. Please refer to the video demonstration for specifics.
Note: There are a total of 3 ties, the length of the rope is about 52cm, and the length can be adjusted according to preference. Leave a 20cm tail at the end.