Clothes
Wilderness
Project preview
See the finished project
Pattern format
Instructions
Watch and follow
Video tutorial
| Style | Yarn | Color |
|---|---|---|
| Black | Morandi 4# | 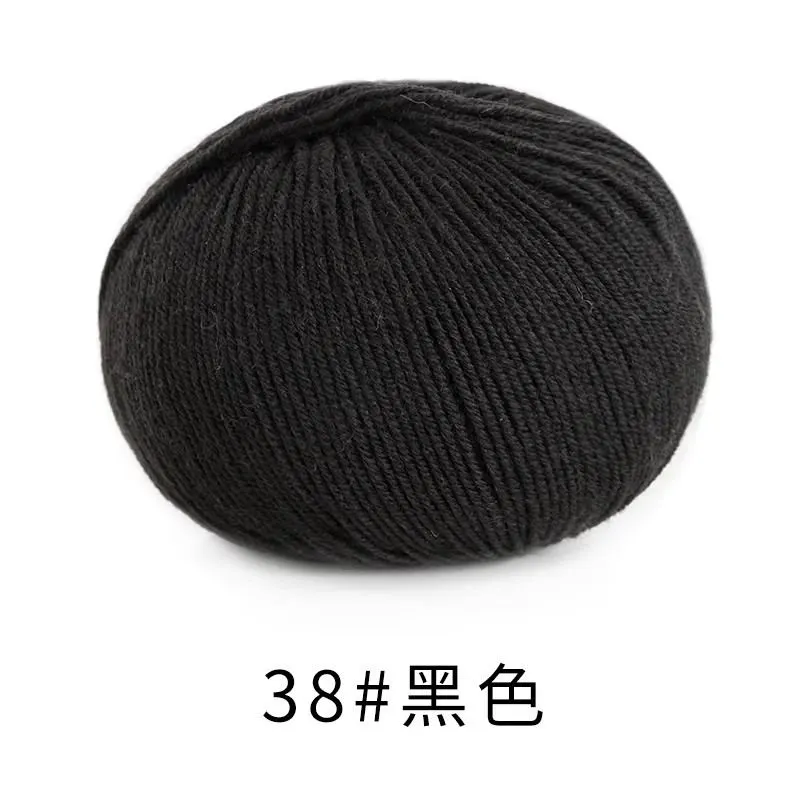 38#Black x 2 38#Black x 2 |
| Monet Impression |  22#Pinetree Moon x 4 22#Pinetree Moon x 4 | |
| Green | Morandi 4# |  17#Avocado Green x 2 17#Avocado Green x 2 |
| Monet Impression |  26#Spring Steep x 4 26#Spring Steep x 4 | |
| White | Morandi 4# | 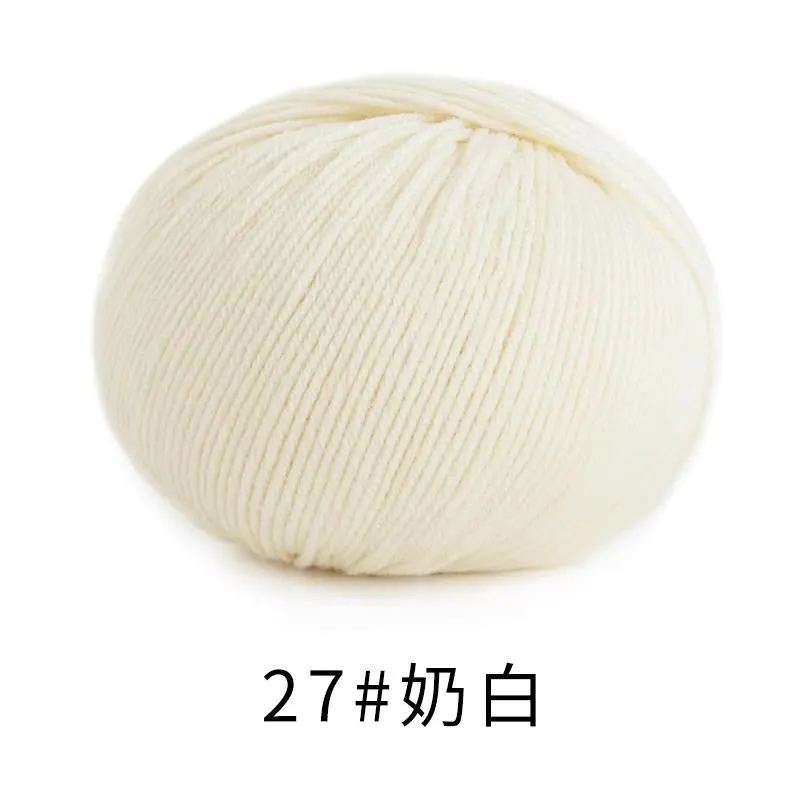 27#Antique White x 2 27#Antique White x 2 |
| Monet Impression | 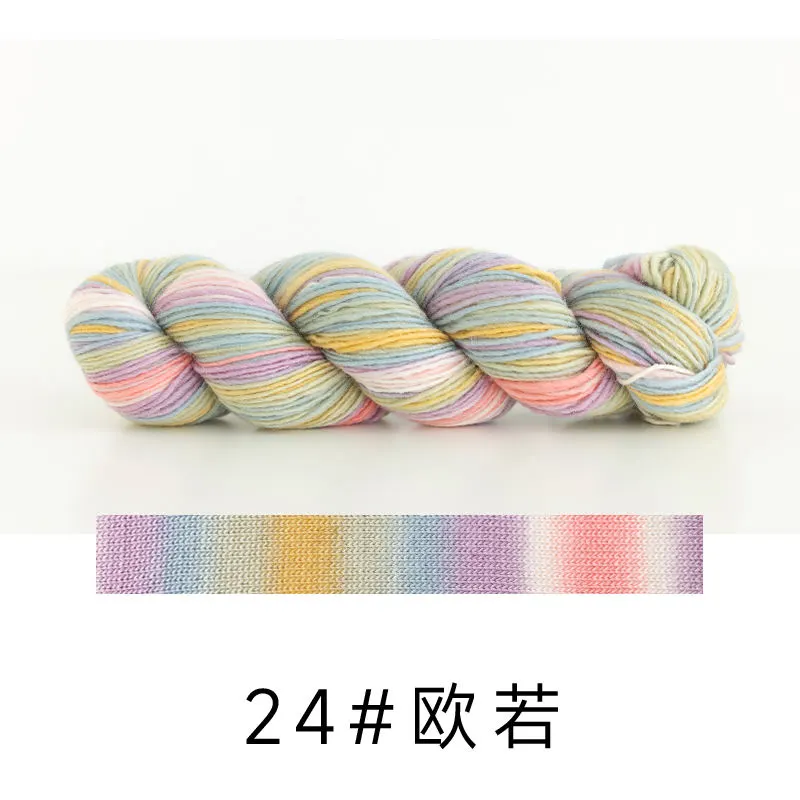 24#Aurora x 4 24#Aurora x 4 |
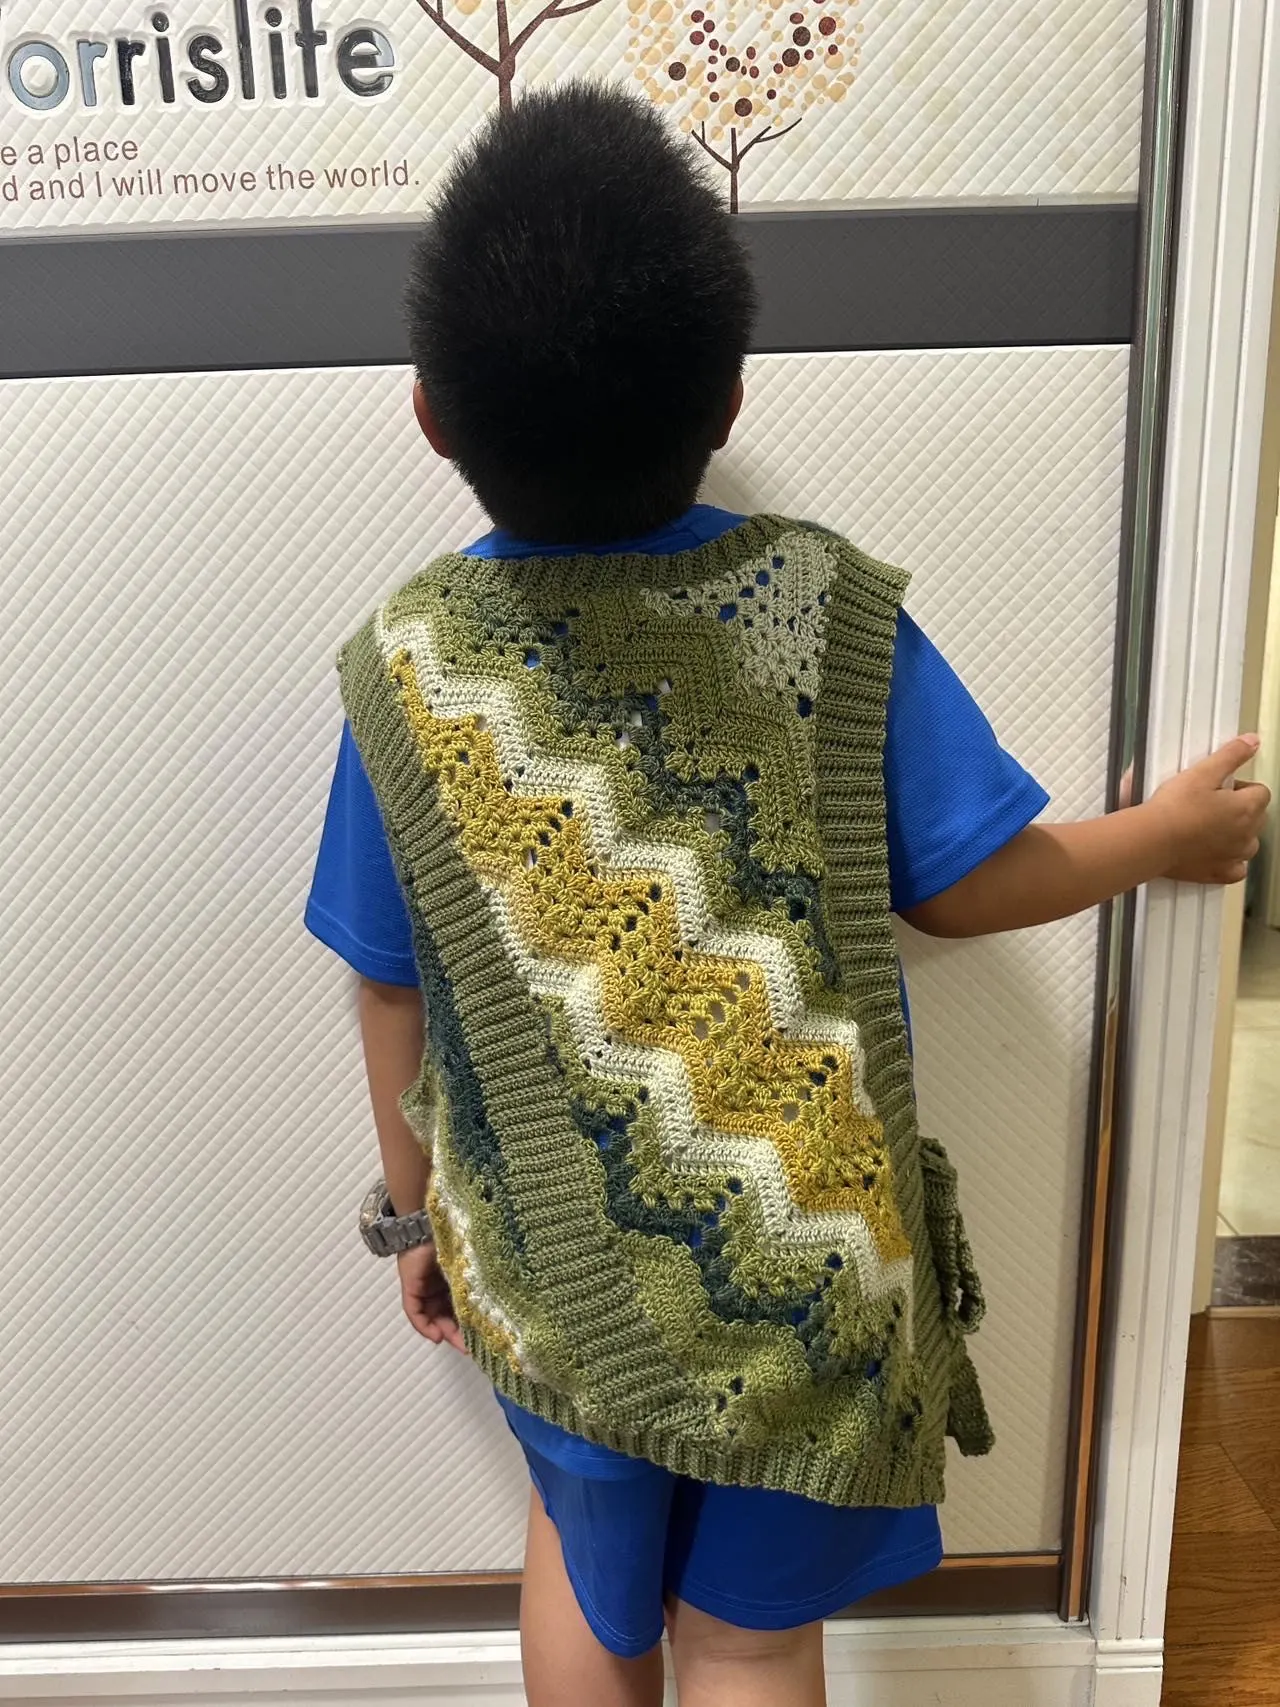
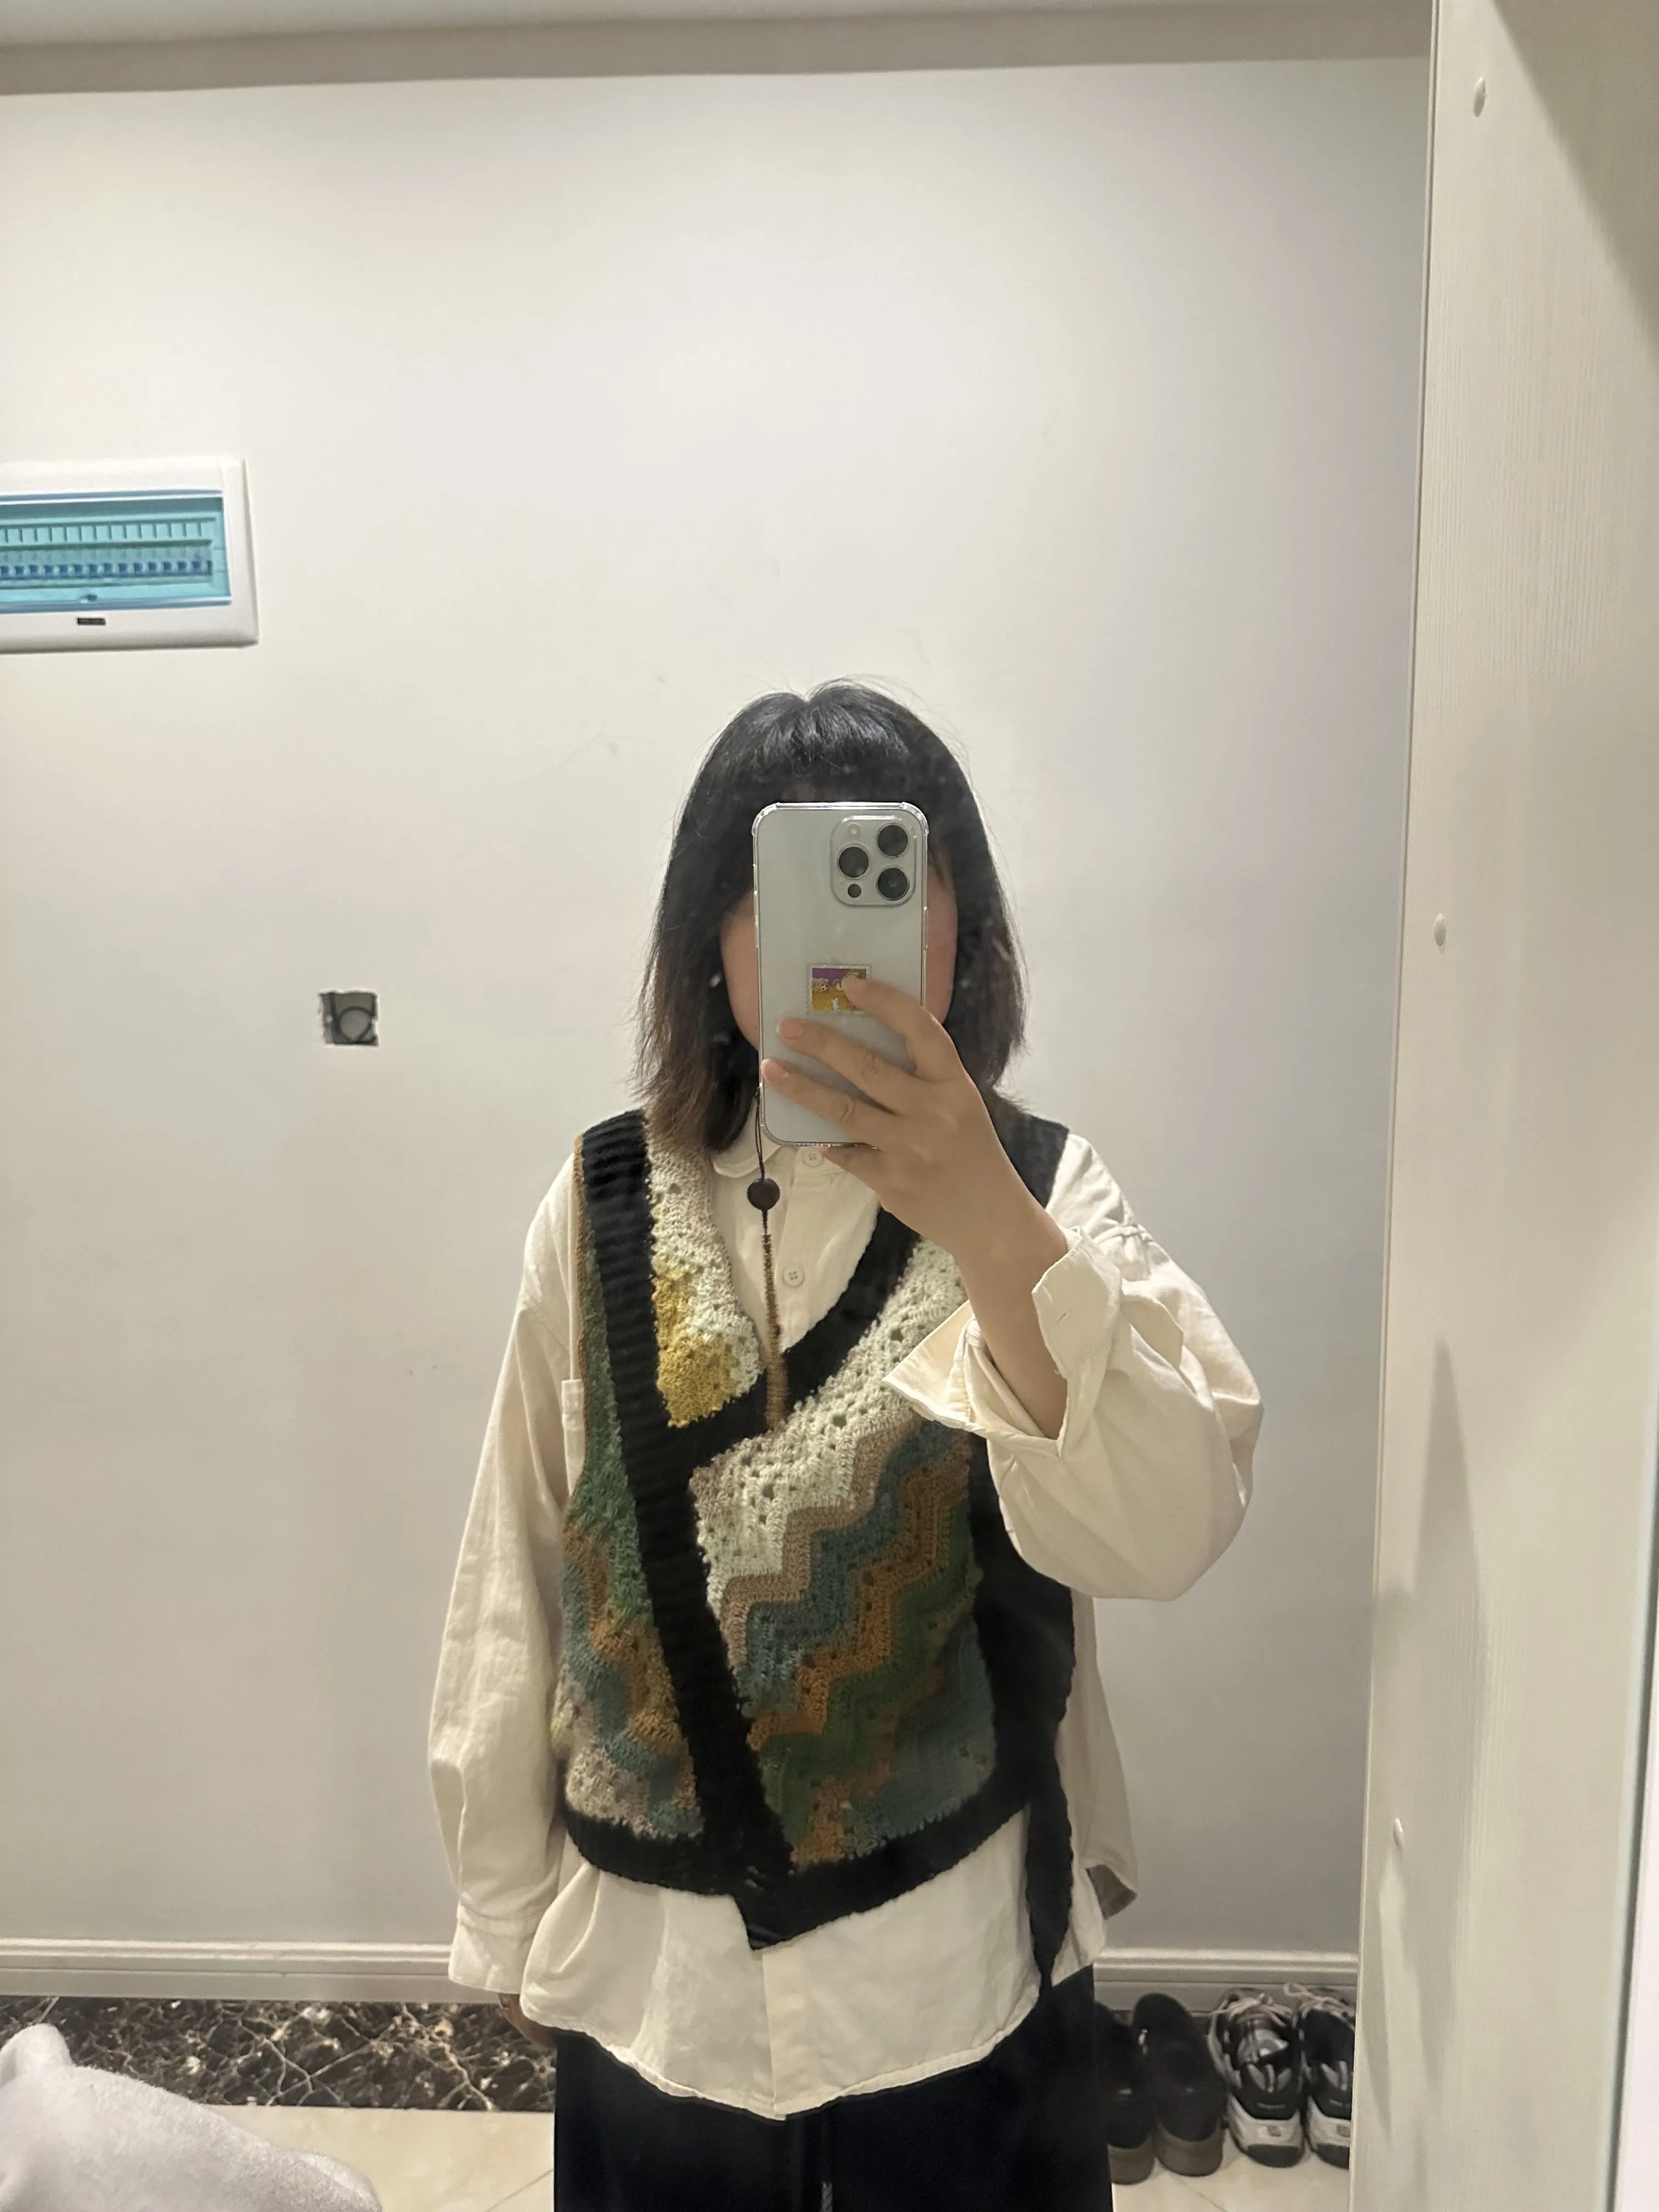
This vest consists of the main part, connections, edging, and ties. First, crochet the main part, then move on to the edging, and finally complete the ties.
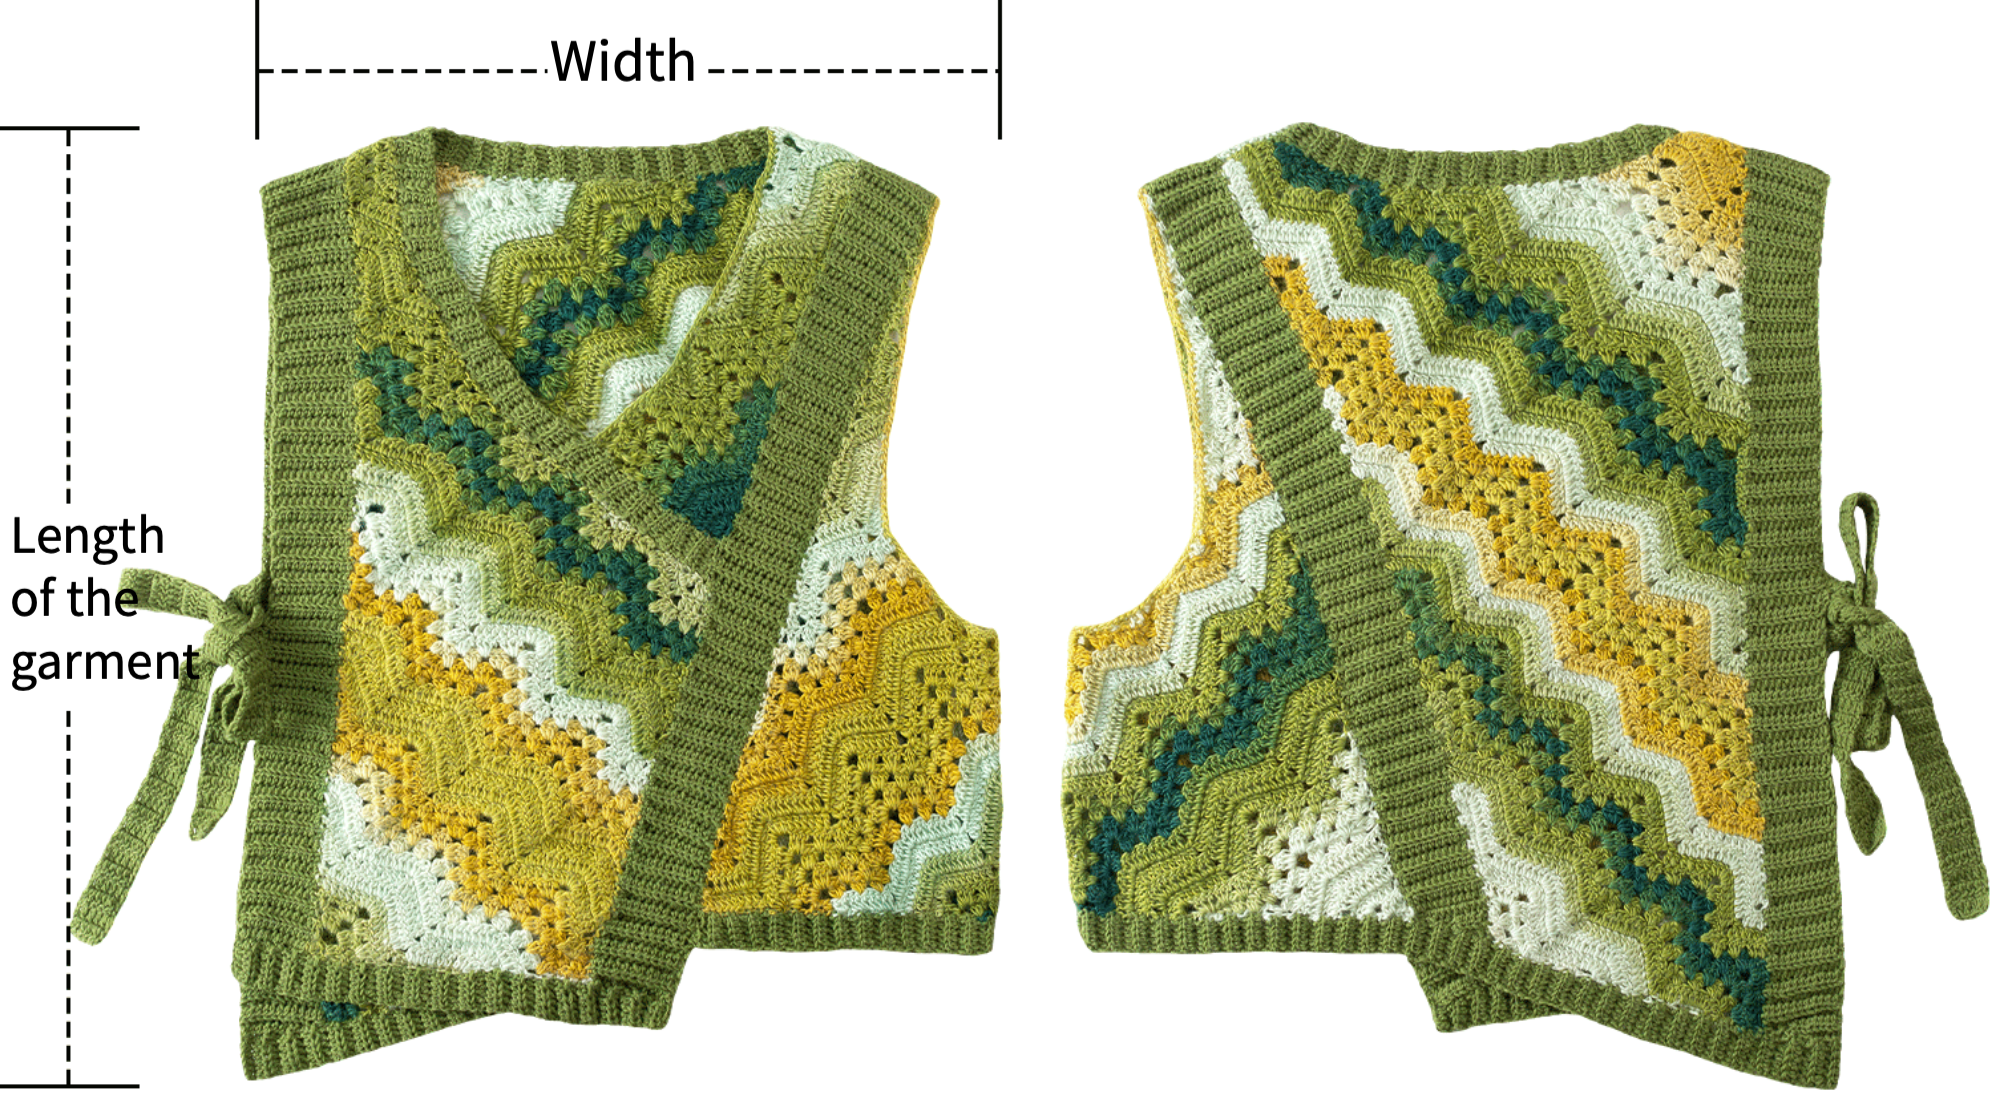
| Size | Length of the garment | Width |
| Small | 54.5cm | 45cm |
Note: Hand-measured, with a margin of error of 1-2 cm.
Since everyone's tension is different, the sample size is for reference only.
Yarn: Susan's Family Monet Impression, Morandi 4#.
Tools: 3.50mm regular crochet hook or 3.60mm Susan's Family crochet hook.
Note: The main part and armhole edging are crocheted with Monet Impression, while the rest is crocheted with Morandi 4#.

The tutorial demonstrates with the large size as an example; for other sizes, please refer to the corresponding diagrams.
Structure Diagram
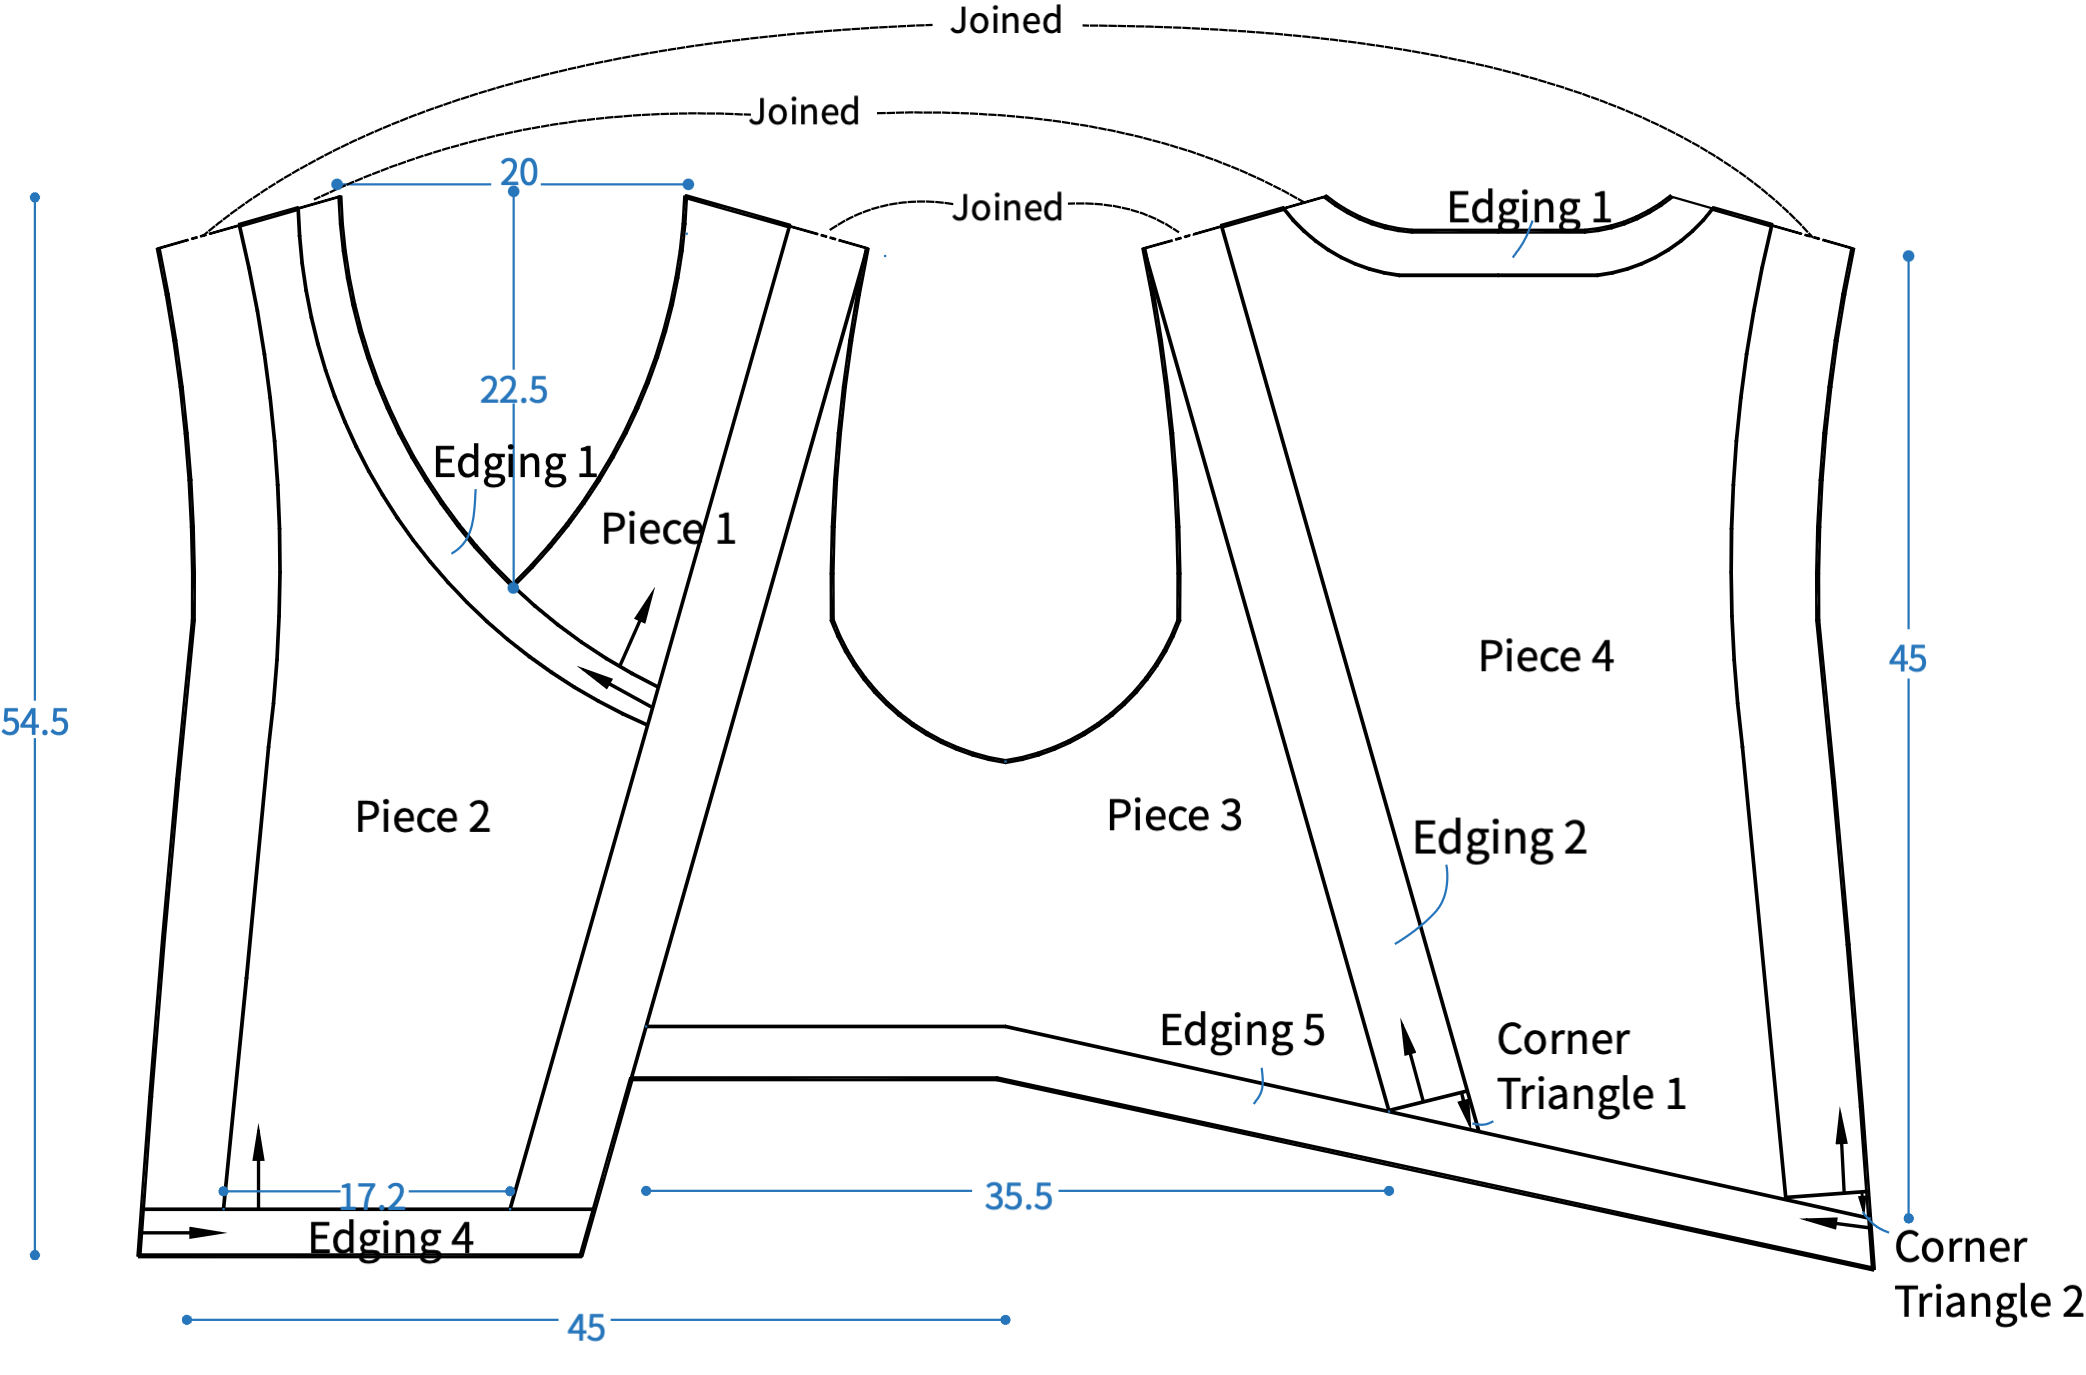
Chart Key





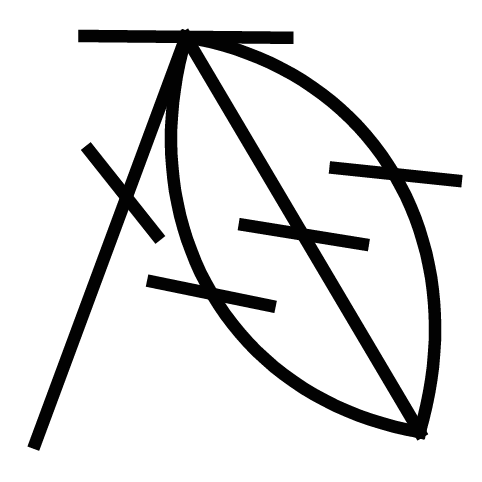







Note:
This pattern is making in Chinese crochet pattern terms, and the stitch name is written using American terminology. All measurements in charts are in cm.

Gauge Swatch
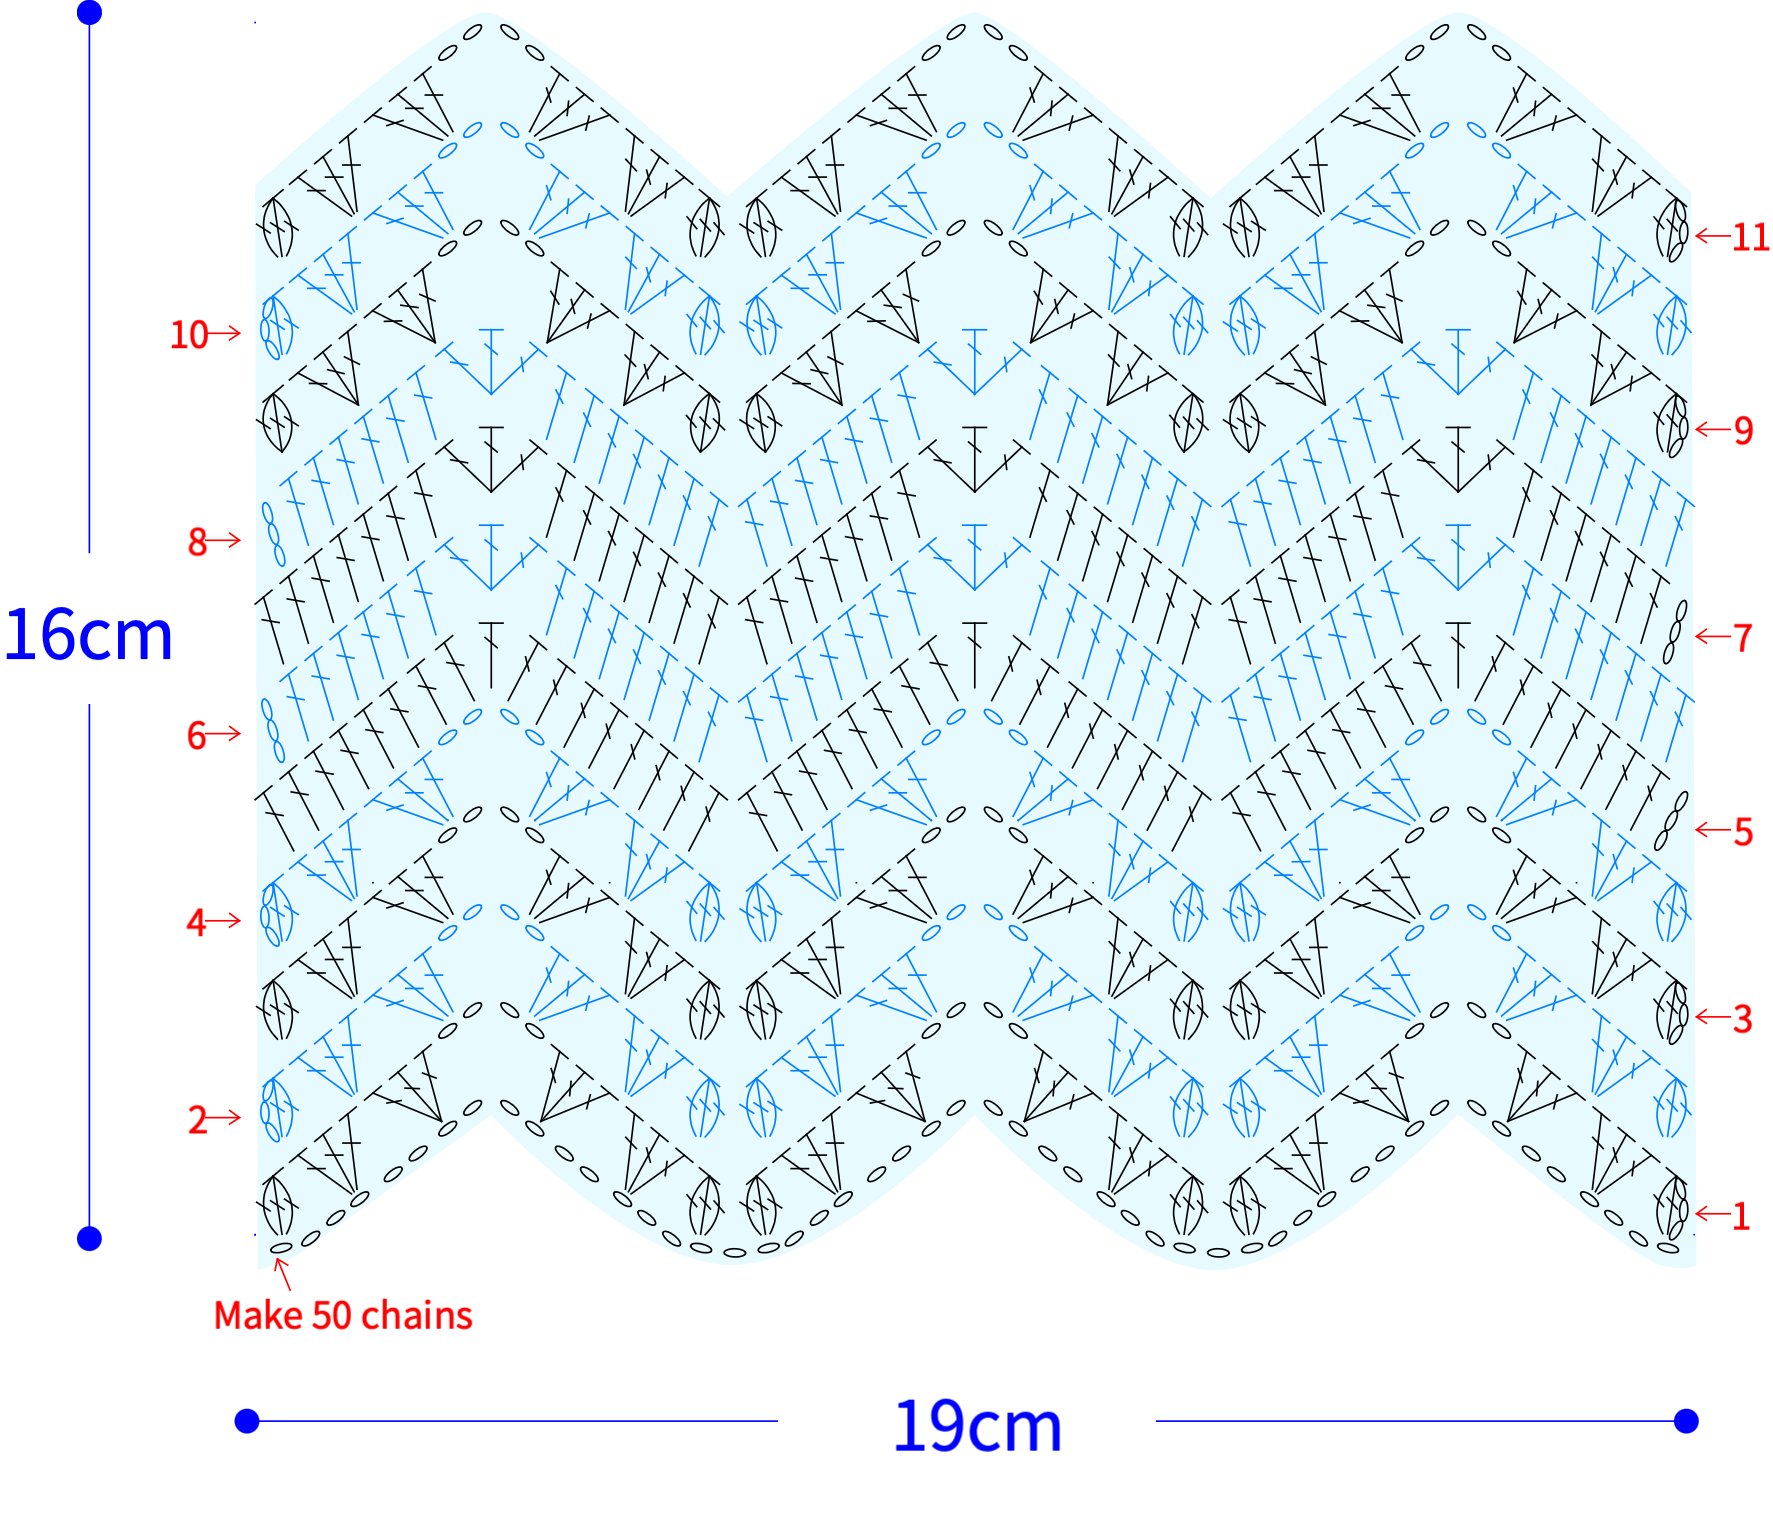
Note: Before crocheting, you can make a gauge swatch first and compare it with the pattern measurements. If they don't match, adjust your tension and crochet again.
PART 1 Main PartA 00' 55''
The main part is divided into Piece 1 to 4, all worked with chain cast-on and crocheting in rows. After completing Piece 1, crochet the edging along the left side. Please refer to the video demonstration for details.
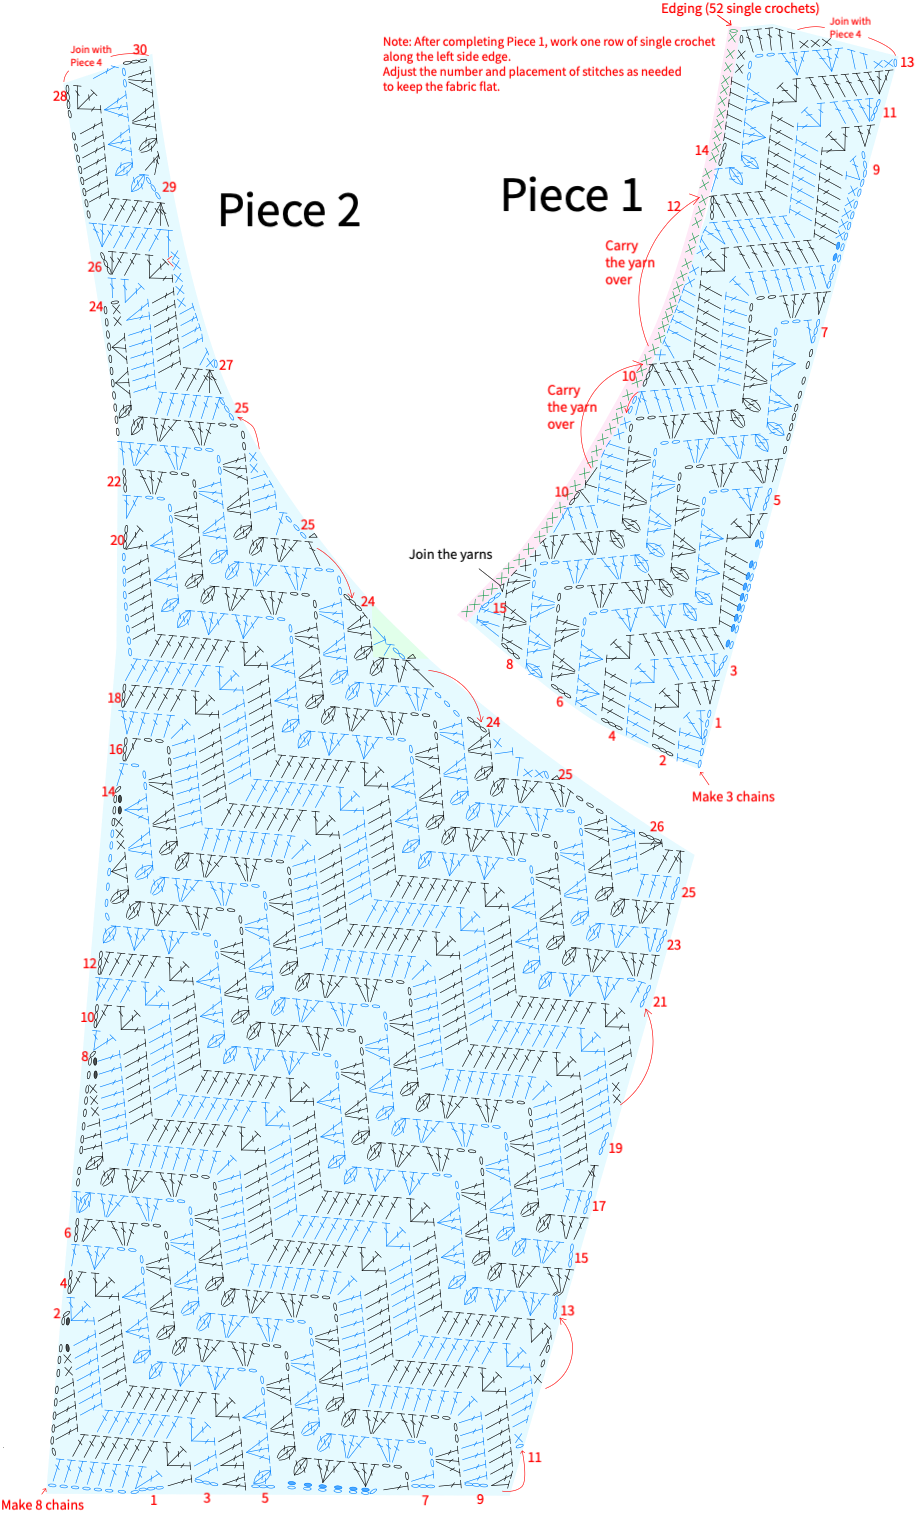
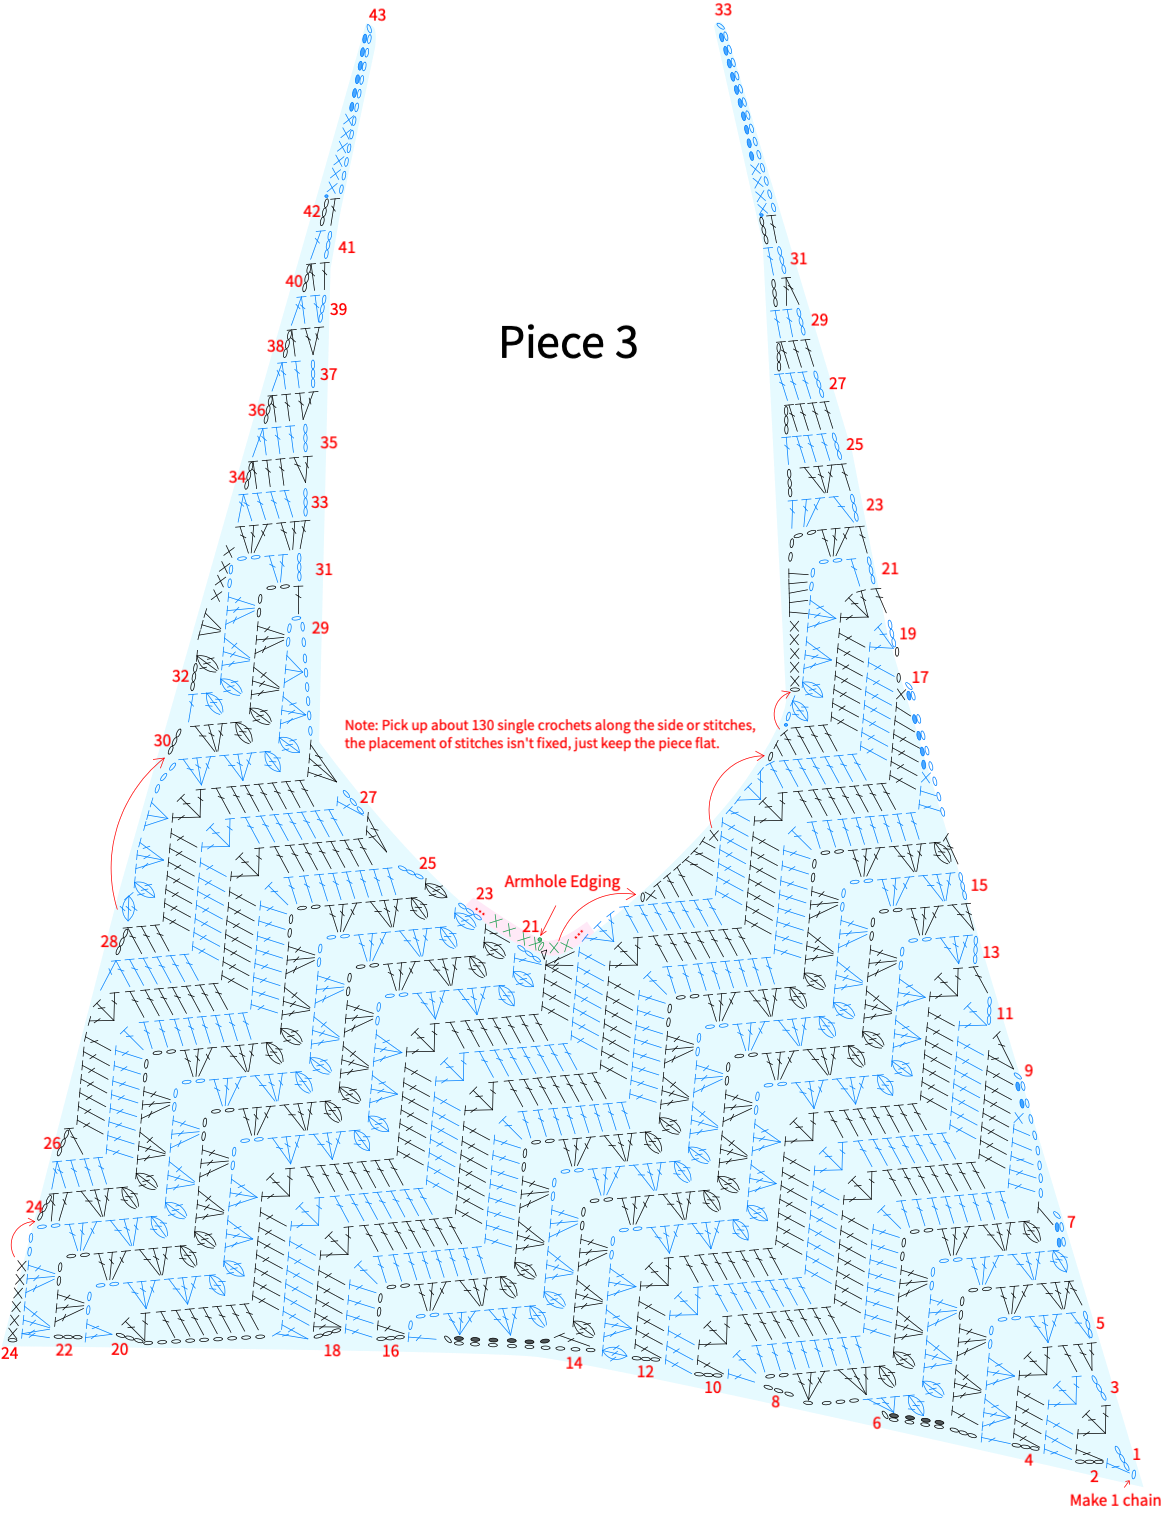
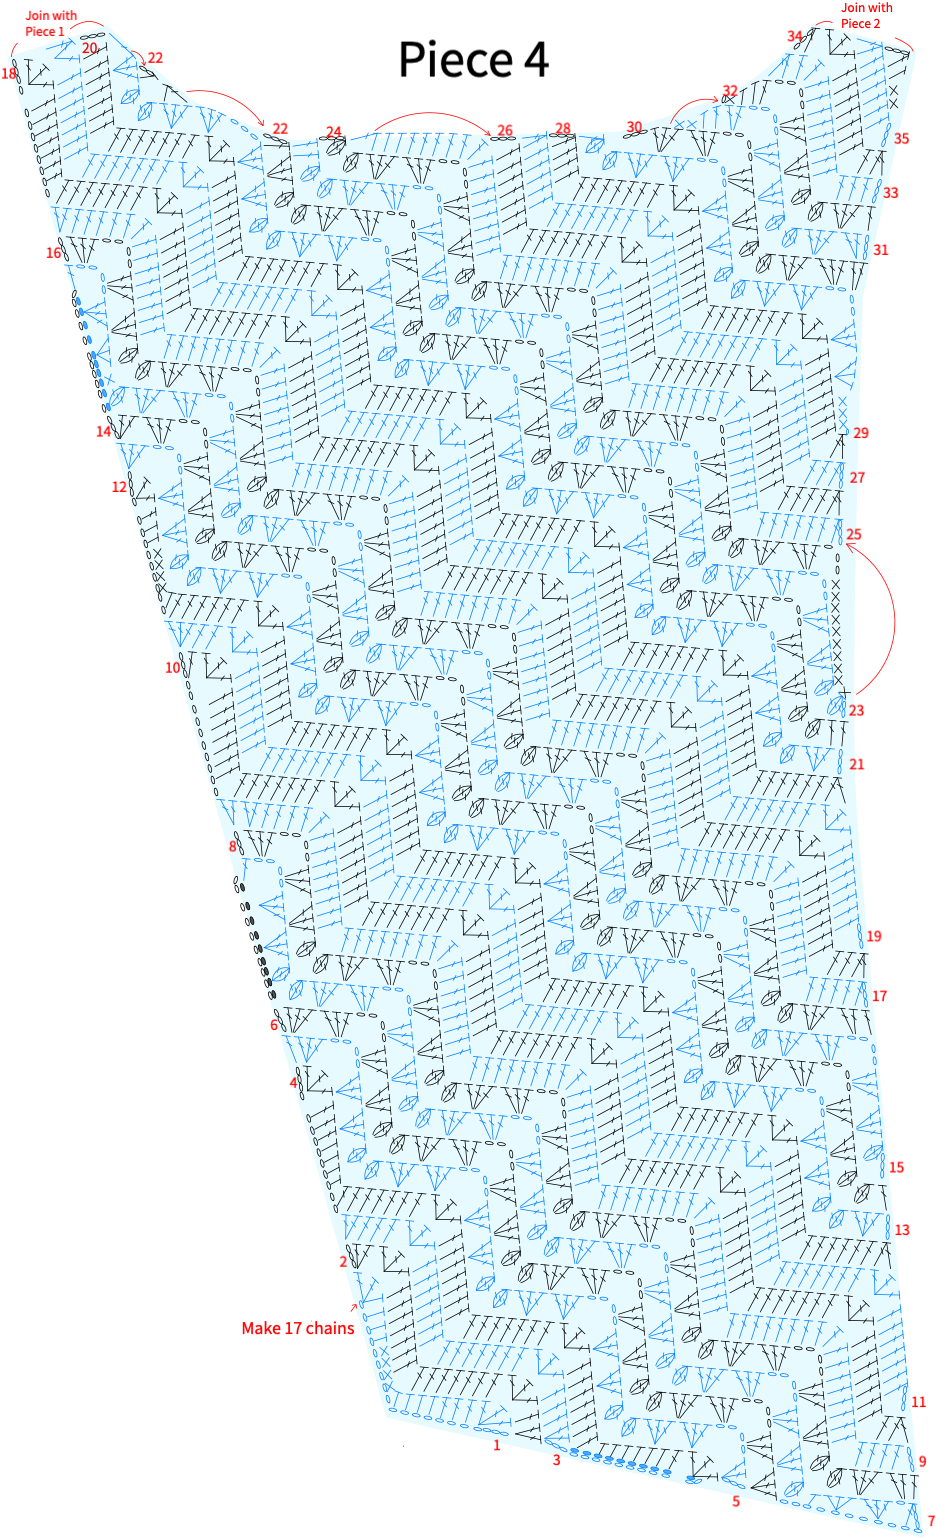
PART 2 Joining and EdgingB 54' 09''
First, partially connect Pieces 1, 2, and 4, then add the edging. The edging consists of Edging 1 through Edging 5 and armhole edging. Edging 1 to Edging 5 are all crocheted in rows, connecting the pieces as you go. Finally, crochet the armhole edging. For details, please refer to the video demonstration.
Note: 1. Joining is marked at the corresponding position in the main part diagram. 2. Each row must be joined with a slip stitch to the fabric piece; the slip stitch position is for reference only—you should find the appropriate spot on the fabric to ensure the piece remains flat after crocheting. 3. The horizontal line below the stitch in the diagram indicates crocheting through the back loop. 4. The armhole edging is worked after completing Edging 1 to 5, along the armhole formed after connecting the right Piece 3; pick up stitches along the armhole edge and side, then crochet one round of single crochet—refer to the video demonstration for details.
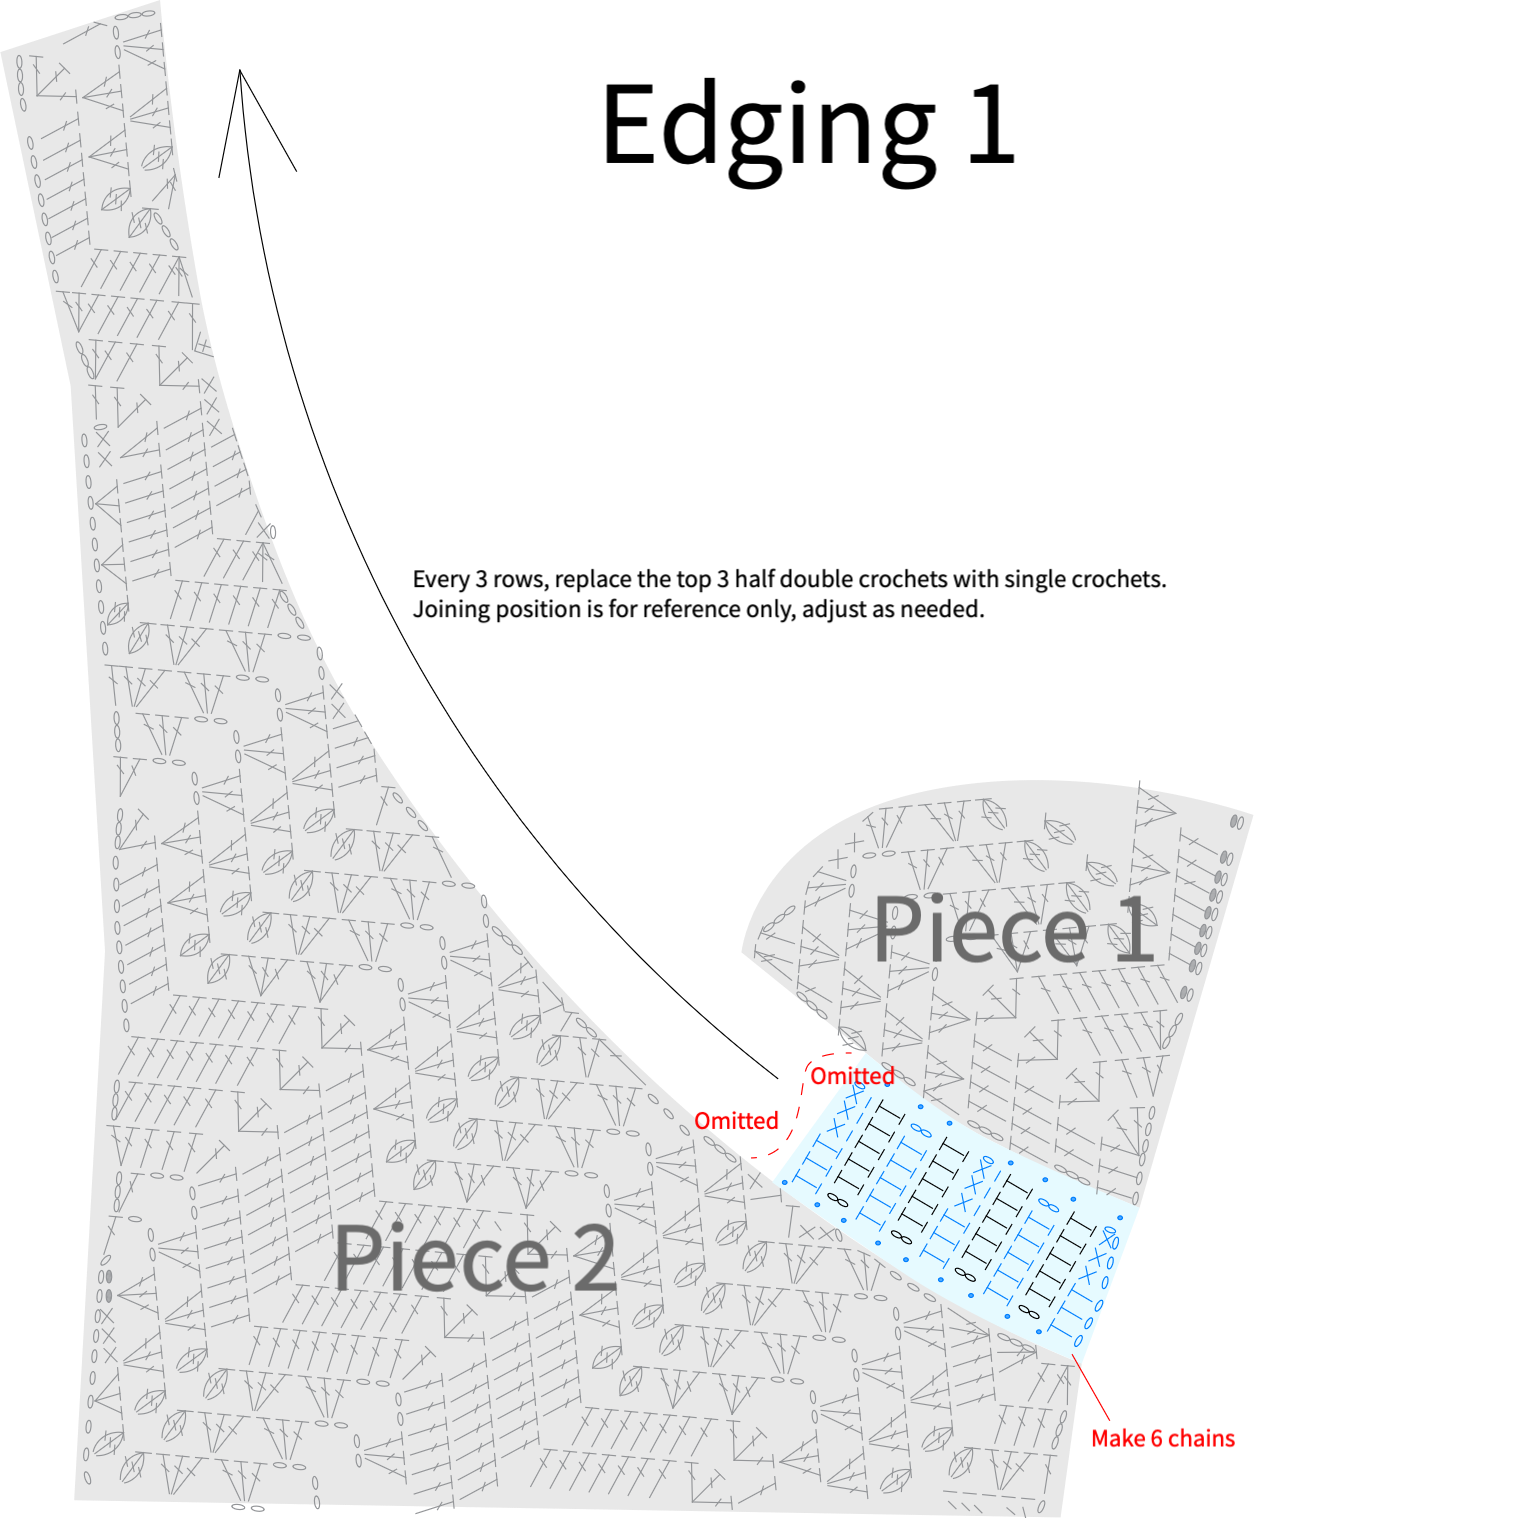
Note: Edging 1 is crocheted along the upper right side of Piece 2 to the connection point between Piece 4 and Piece 1. While crocheting, join Piece 2 and Piece 1 at the same time. After completing the connection with Piece 1, only connect the side near Piece 2. Once all edging is done, join with a slip stitch to the remaining part of Piece 1. For details, please refer to the video demonstration.
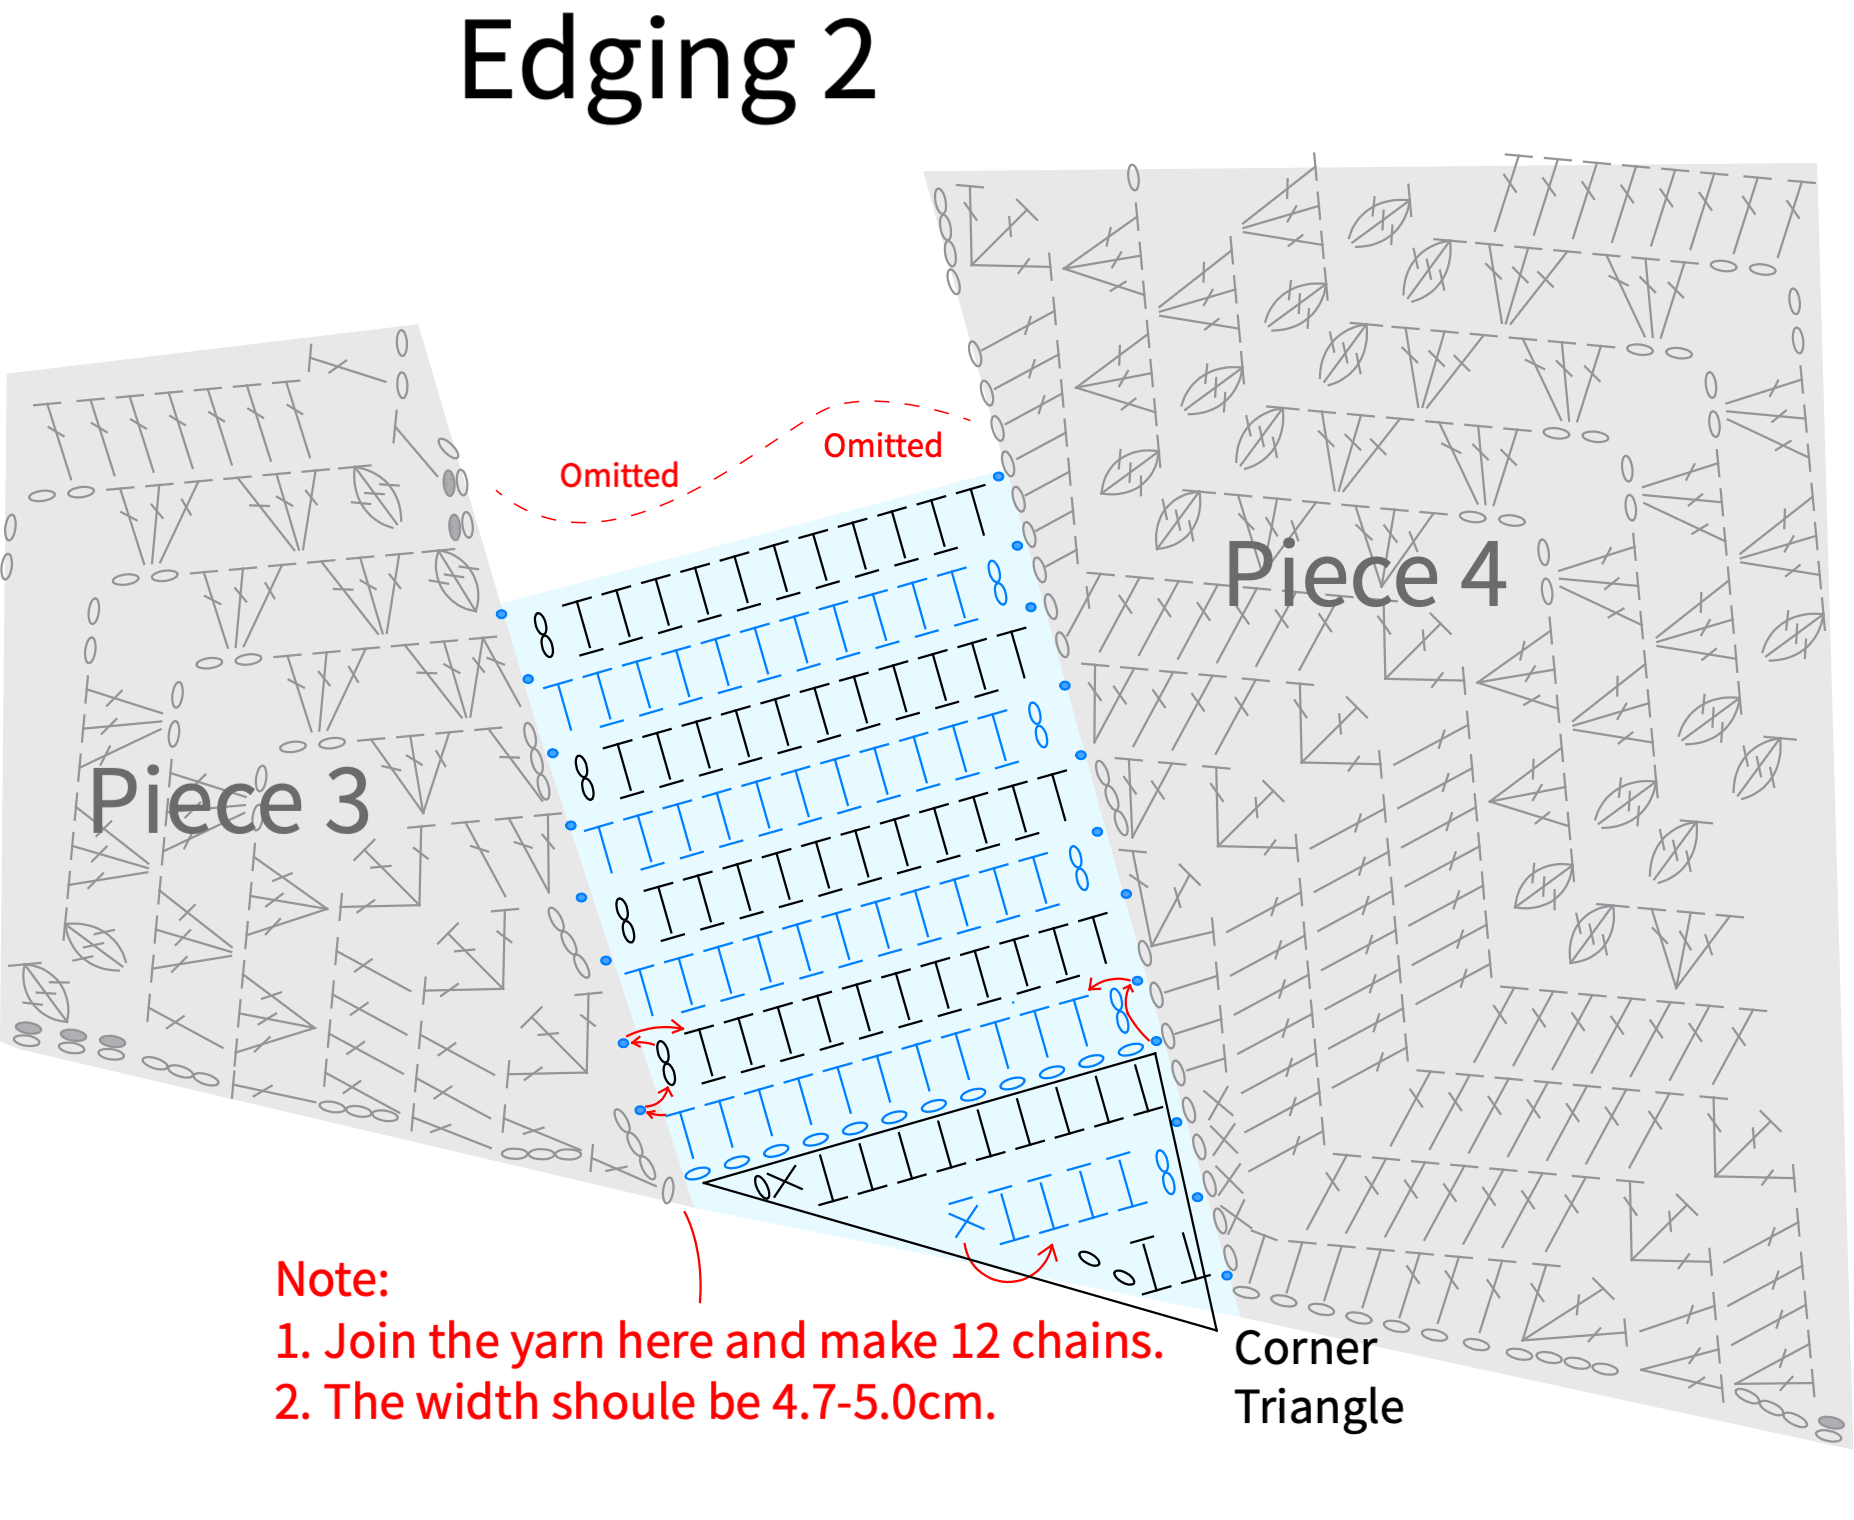
Note: Edging 2 is crocheted along both sides of Piece 3, while simultaneously connecting to the lower right corner of Piece 2 along Piece 4. Make sure the armhole formed with Piece 3 remains roughly symmetrical as you work. For details, please refer to the video demonstration.
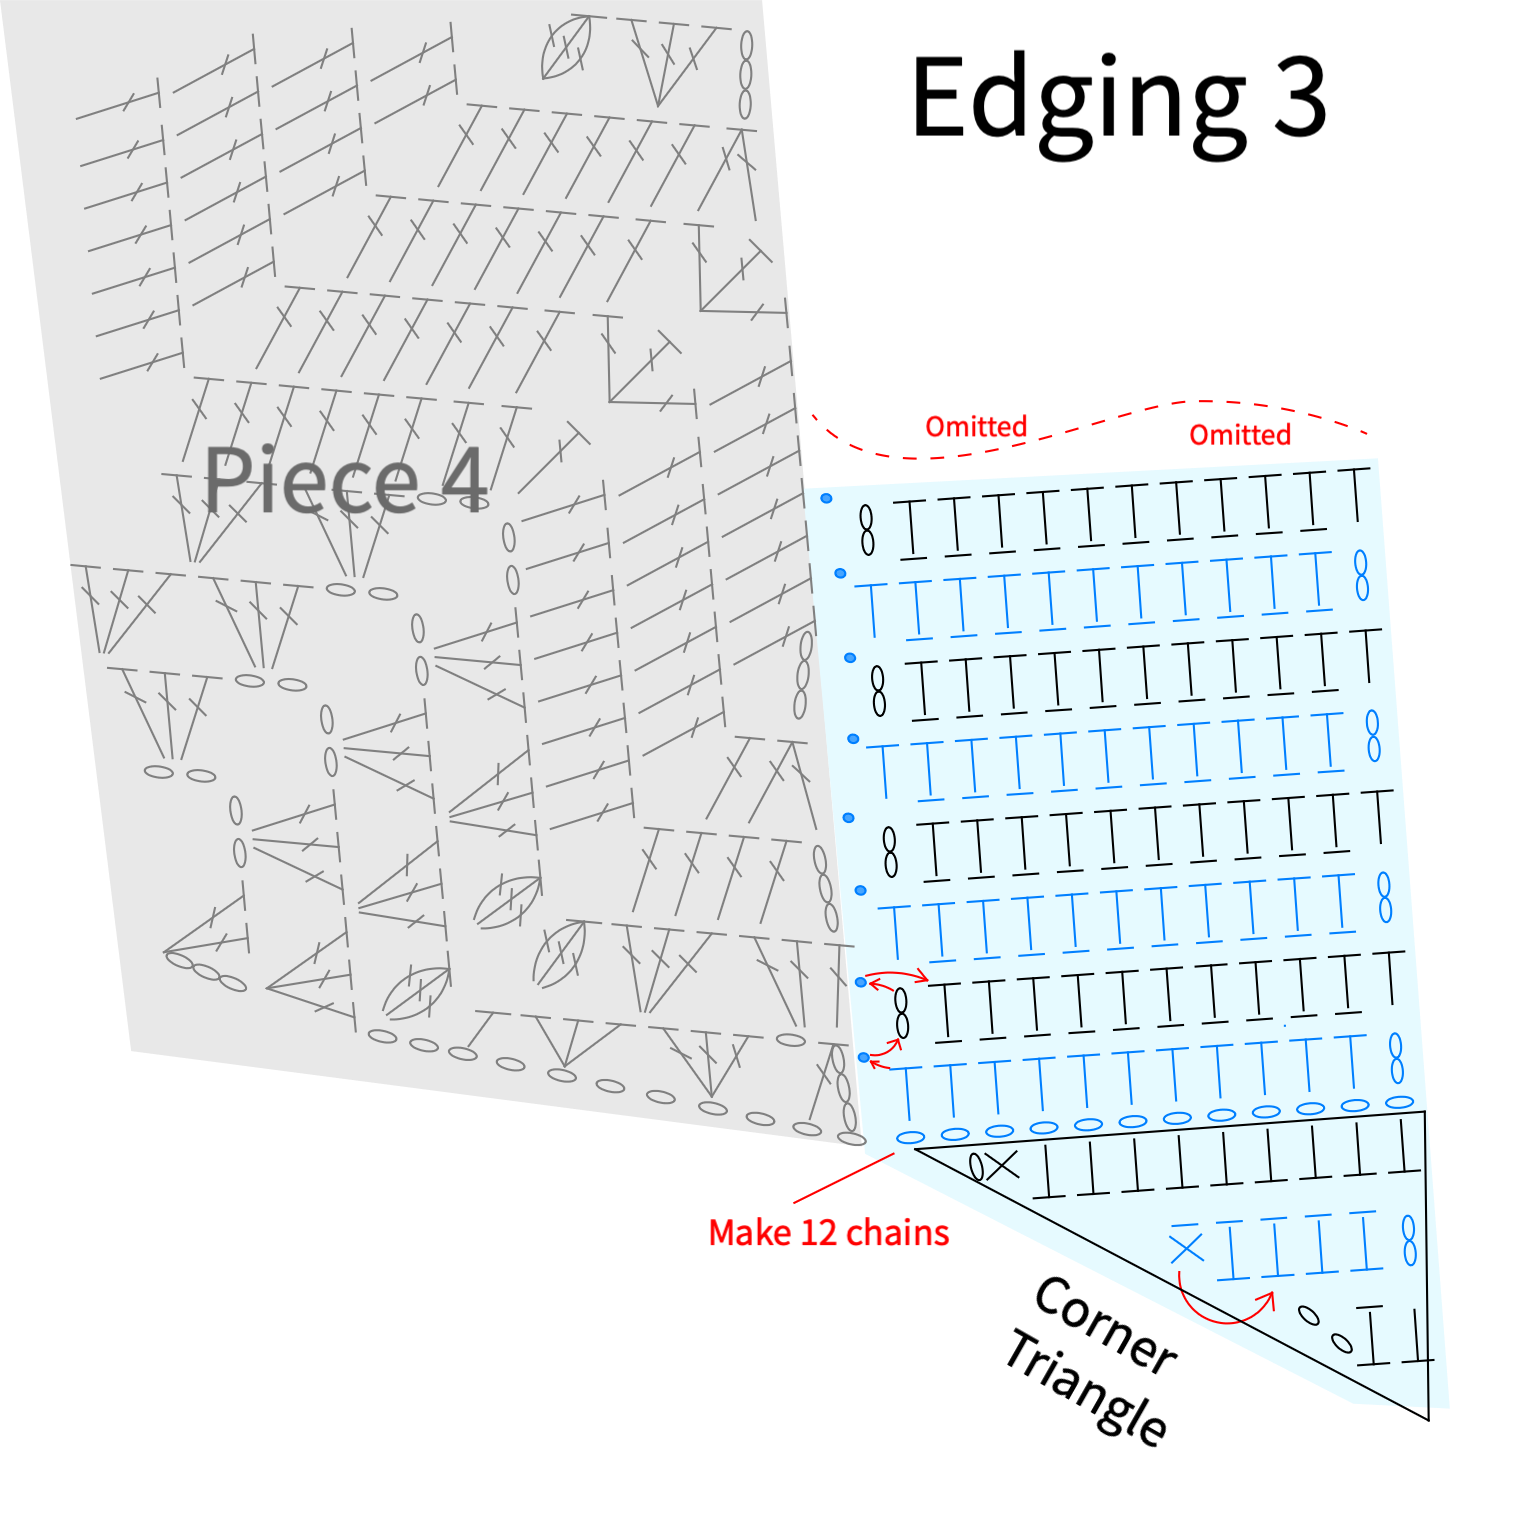
Note: Edging 3 is worked along the connection between Piece 2 and Piece 4, similar to Edging 2. With Piece 4 facing up, start from the bottom right corner of Piece 4 and crochet all the way to the bottom left corner of Piece 2. After completing, you'll need to add a corner triangle piece at the starting point. For details, please refer to the video demonstration.
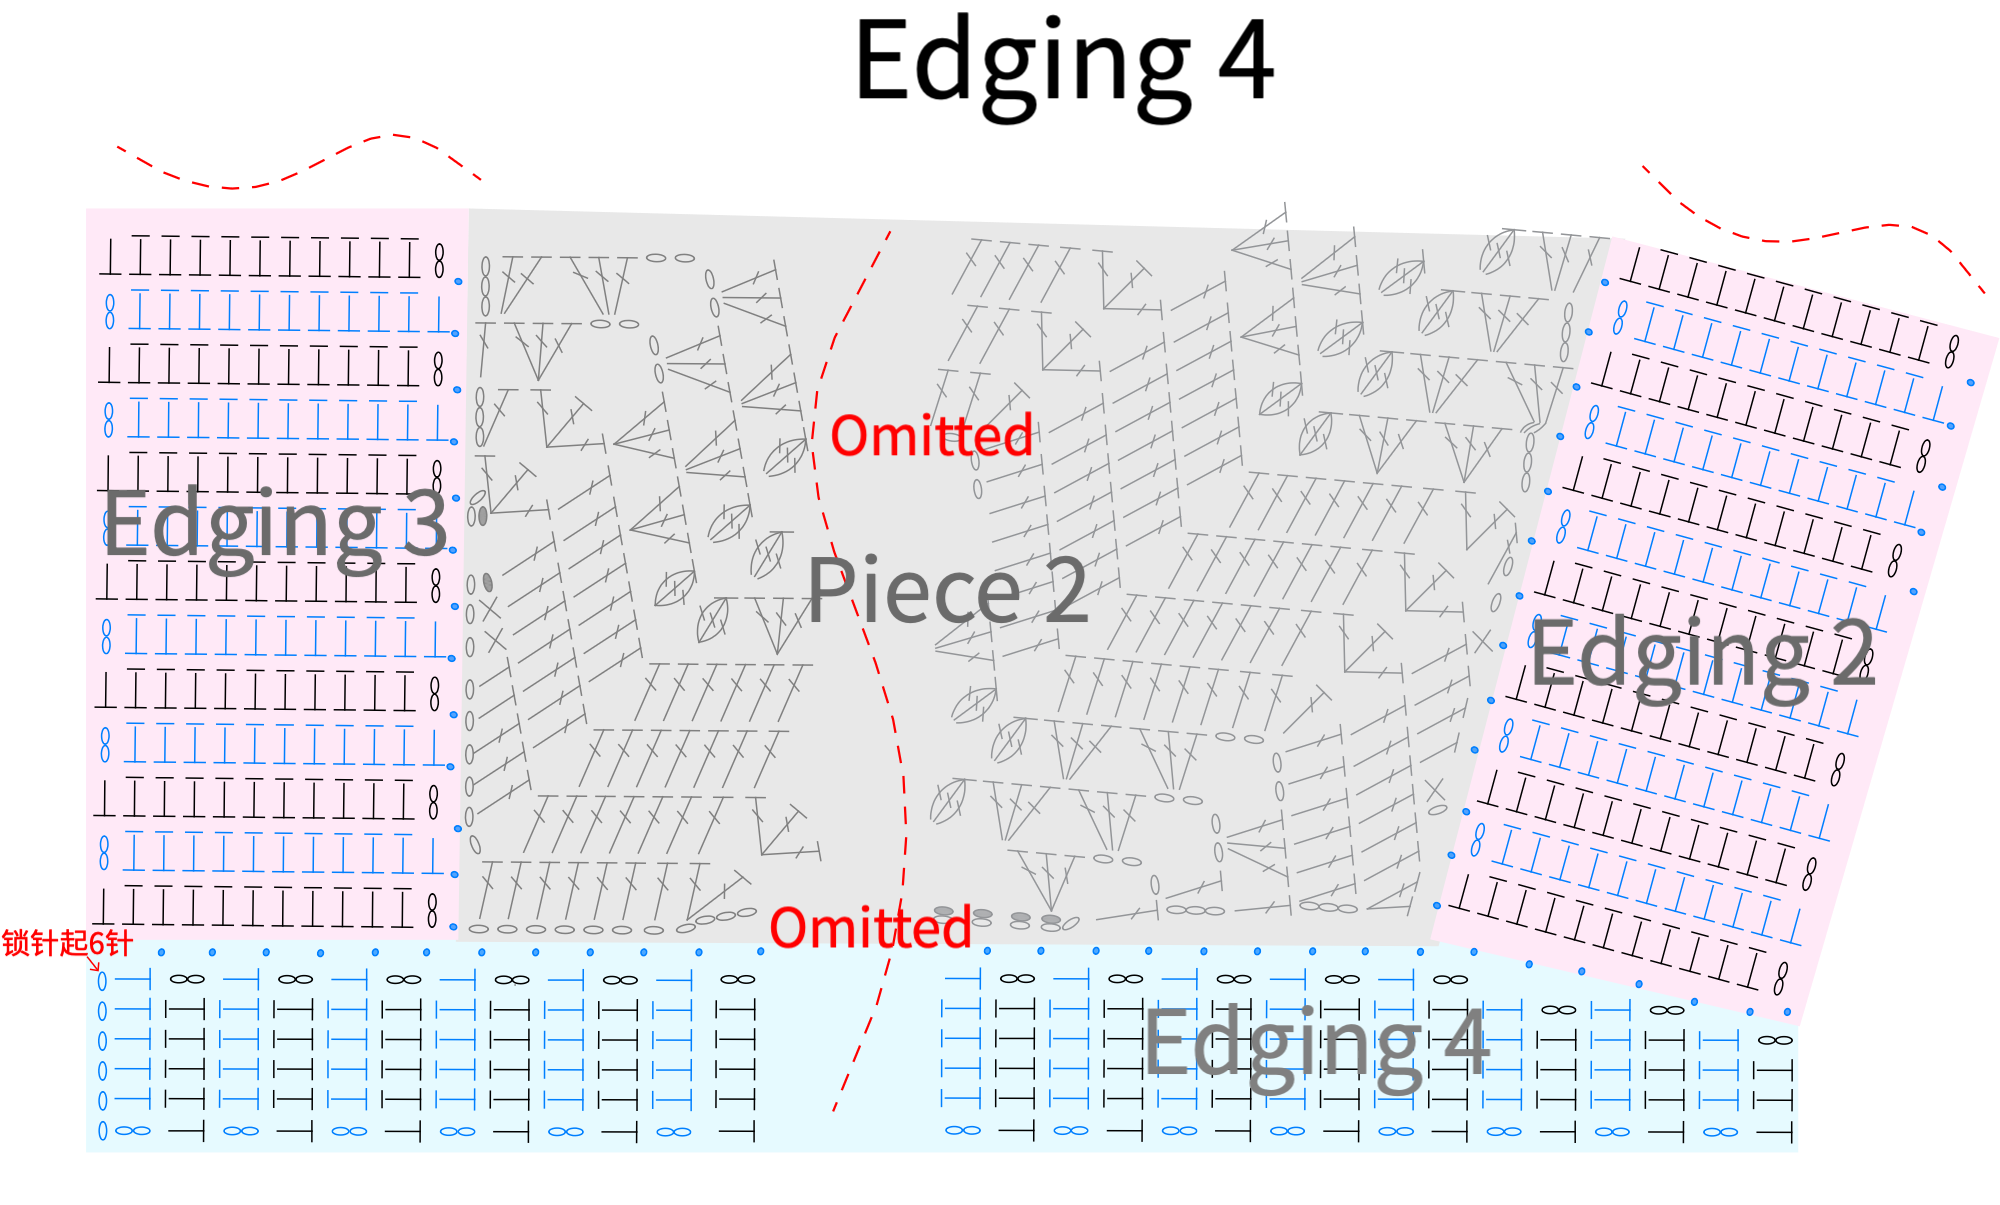
Note: Edging 4 is crocheted from left to right along the bottom of Edging 3, Piece 2, and Edging 3, with the join only close to the side of the piece. Please refer to the video demonstration for details.
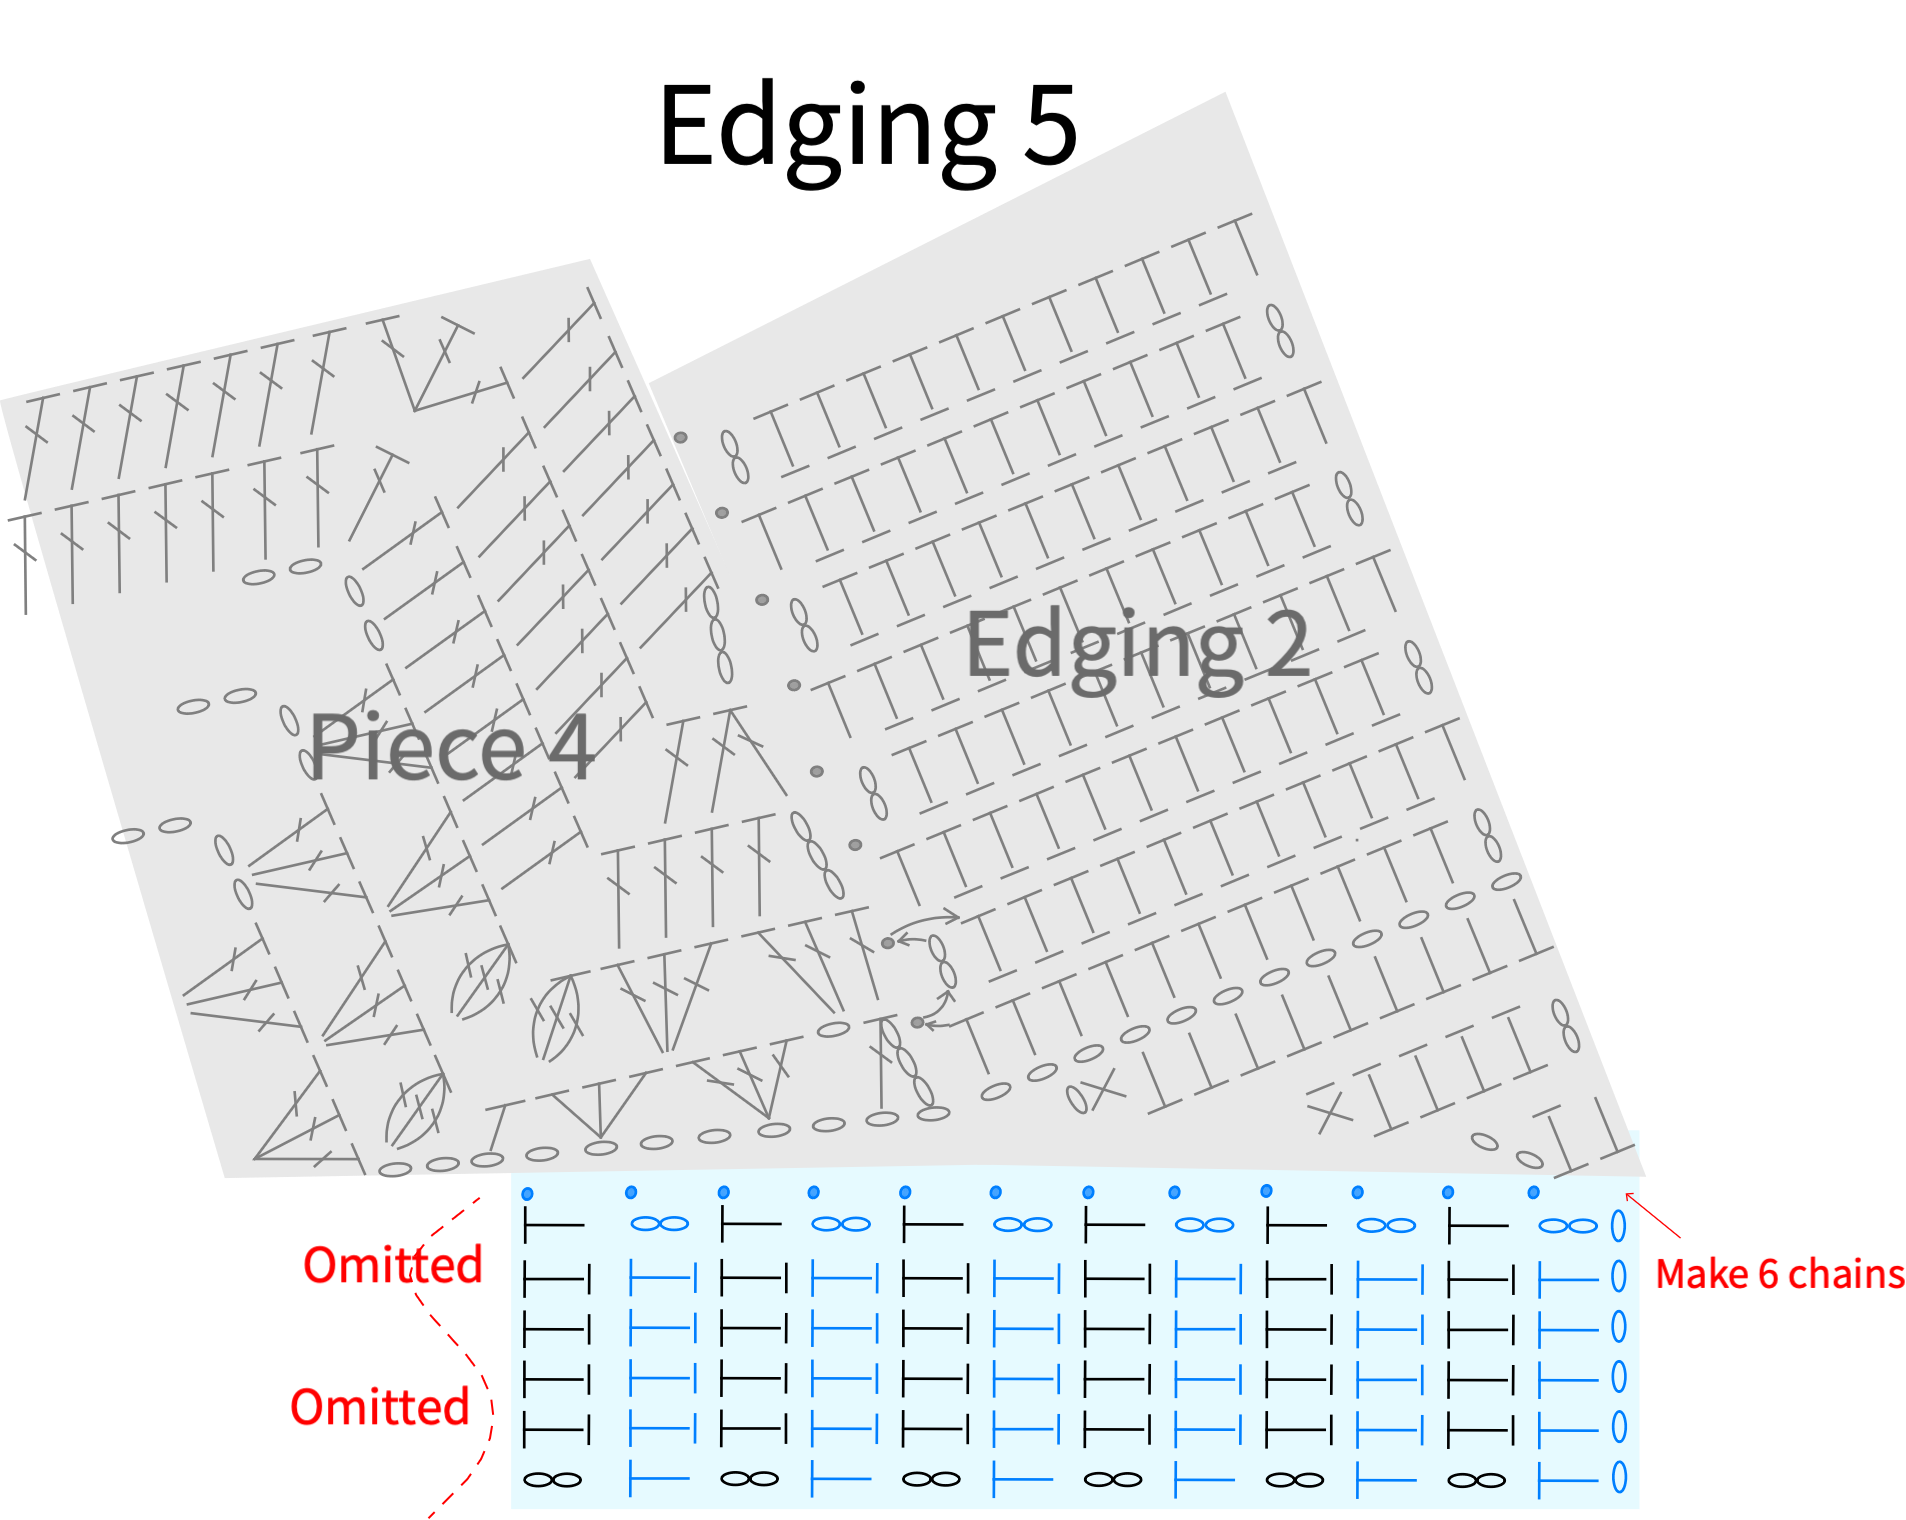
Note: Edging 5 is crocheted from the lower right corner of Edging 2 along the bottom edge of the piece to the lower left corner of Piece 3, then joined with a slip stitch to overlap with Edging 2. For details, please refer to the video demonstration.
PART 3 TiesC 79' 48''
There are 2 ties, crocheted the same way using chain stitches to start, crocheting in rows. Once completed, sew them onto the corresponding positions. For details, please refer to the video demonstration.
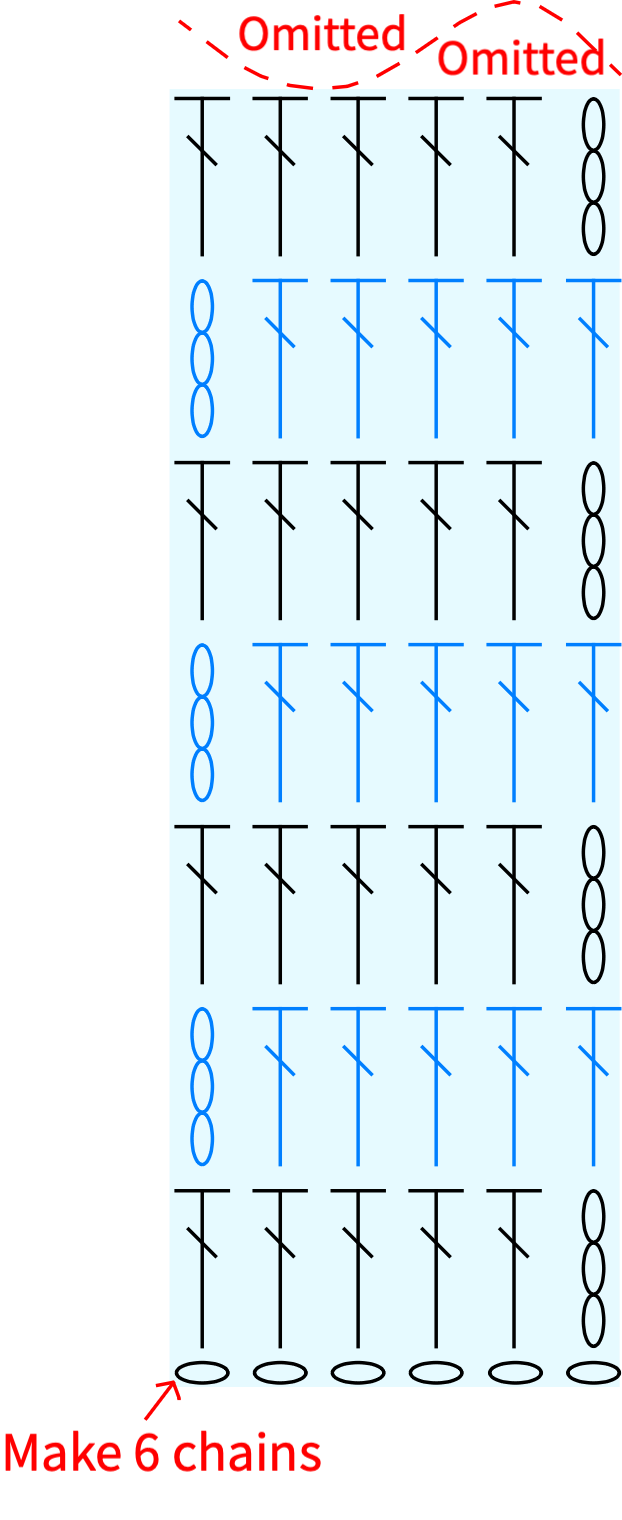
Note: After leaving a tail of about 20cm, crochet a strap about 45cm long. Once done, sew the strap to the corresponding position. You can attach it to the middle of the left side edge of the vest, or adjust it according to your preference.
Made by the community